Keith Black
-
Posts
6,703 -
Joined
-
Last visited
Content Type
Profiles
Forums
Gallery
Events
Everything posted by Keith Black
-
 Happy New Year to you and yours, Eberhard.
 -
I don't bother counting down anymore as I'm fast asleep long before midnight.
-
MC, welcome to MSW. Glad to have you aboard.
-
Thank you, Keith I do wish we could select two emojis in response to a post.
-
I can see doing the fiddle part of bending and rolling and getting sub assemblies made and ready to attach to the main assembly but hitting the exact mark necessary for alignment with parts that small is a bit mind boggling. Chris has to have either a very steady hand or a very good rest.
-
Thank you, Rick and a Happy New Year to you.
-
John, welcome to MSW. Glad to have you aboard.
-
Thank you, Steve. Thank you, Eric. The one hole stanchions were spares from the Tennessee, they're this close to feeling right. Thank you, Paul. Berry certainly had the face for imagining him being Engel. That gave me a hearty laugh, Tom.
-
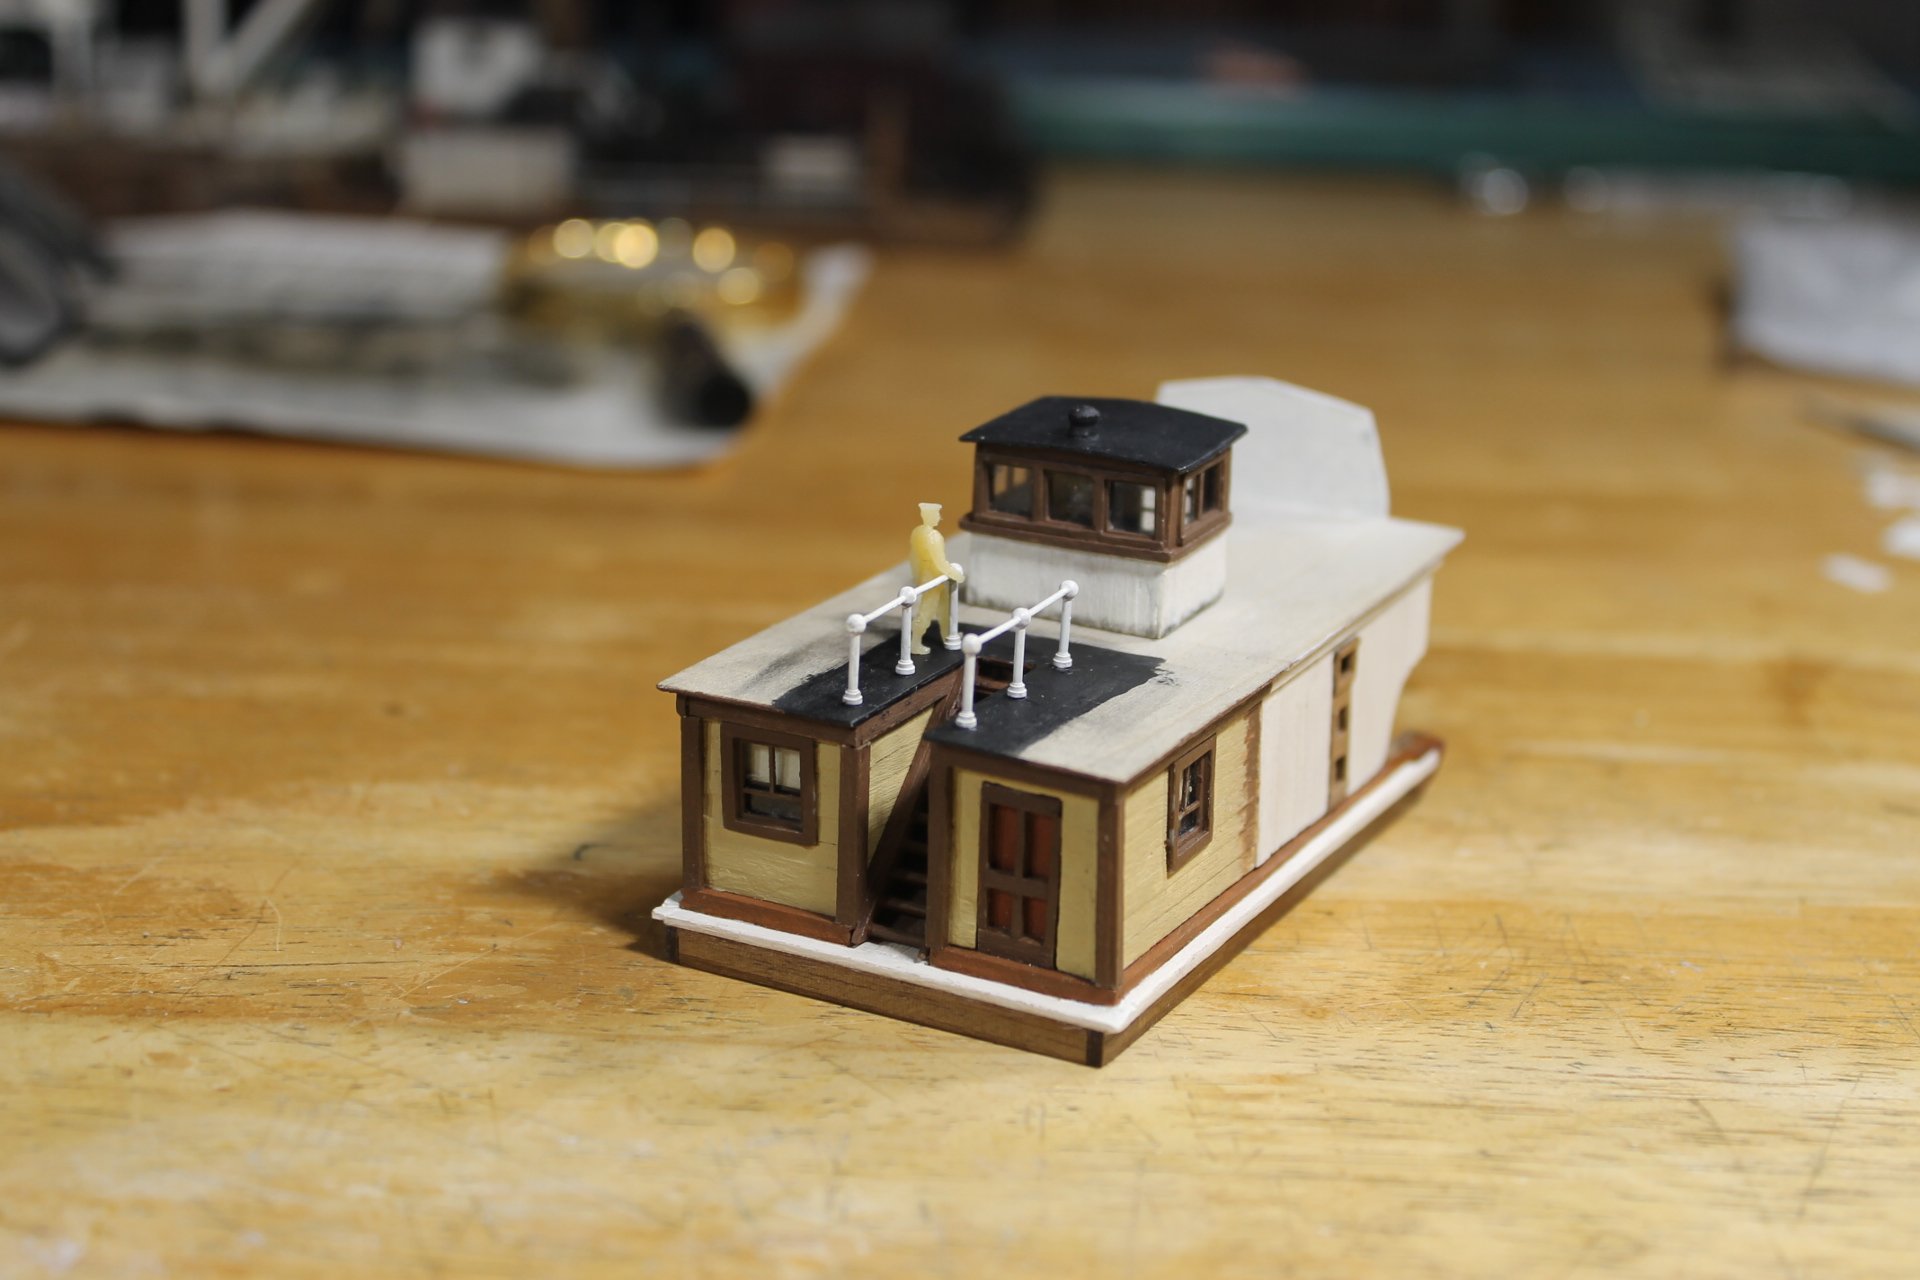
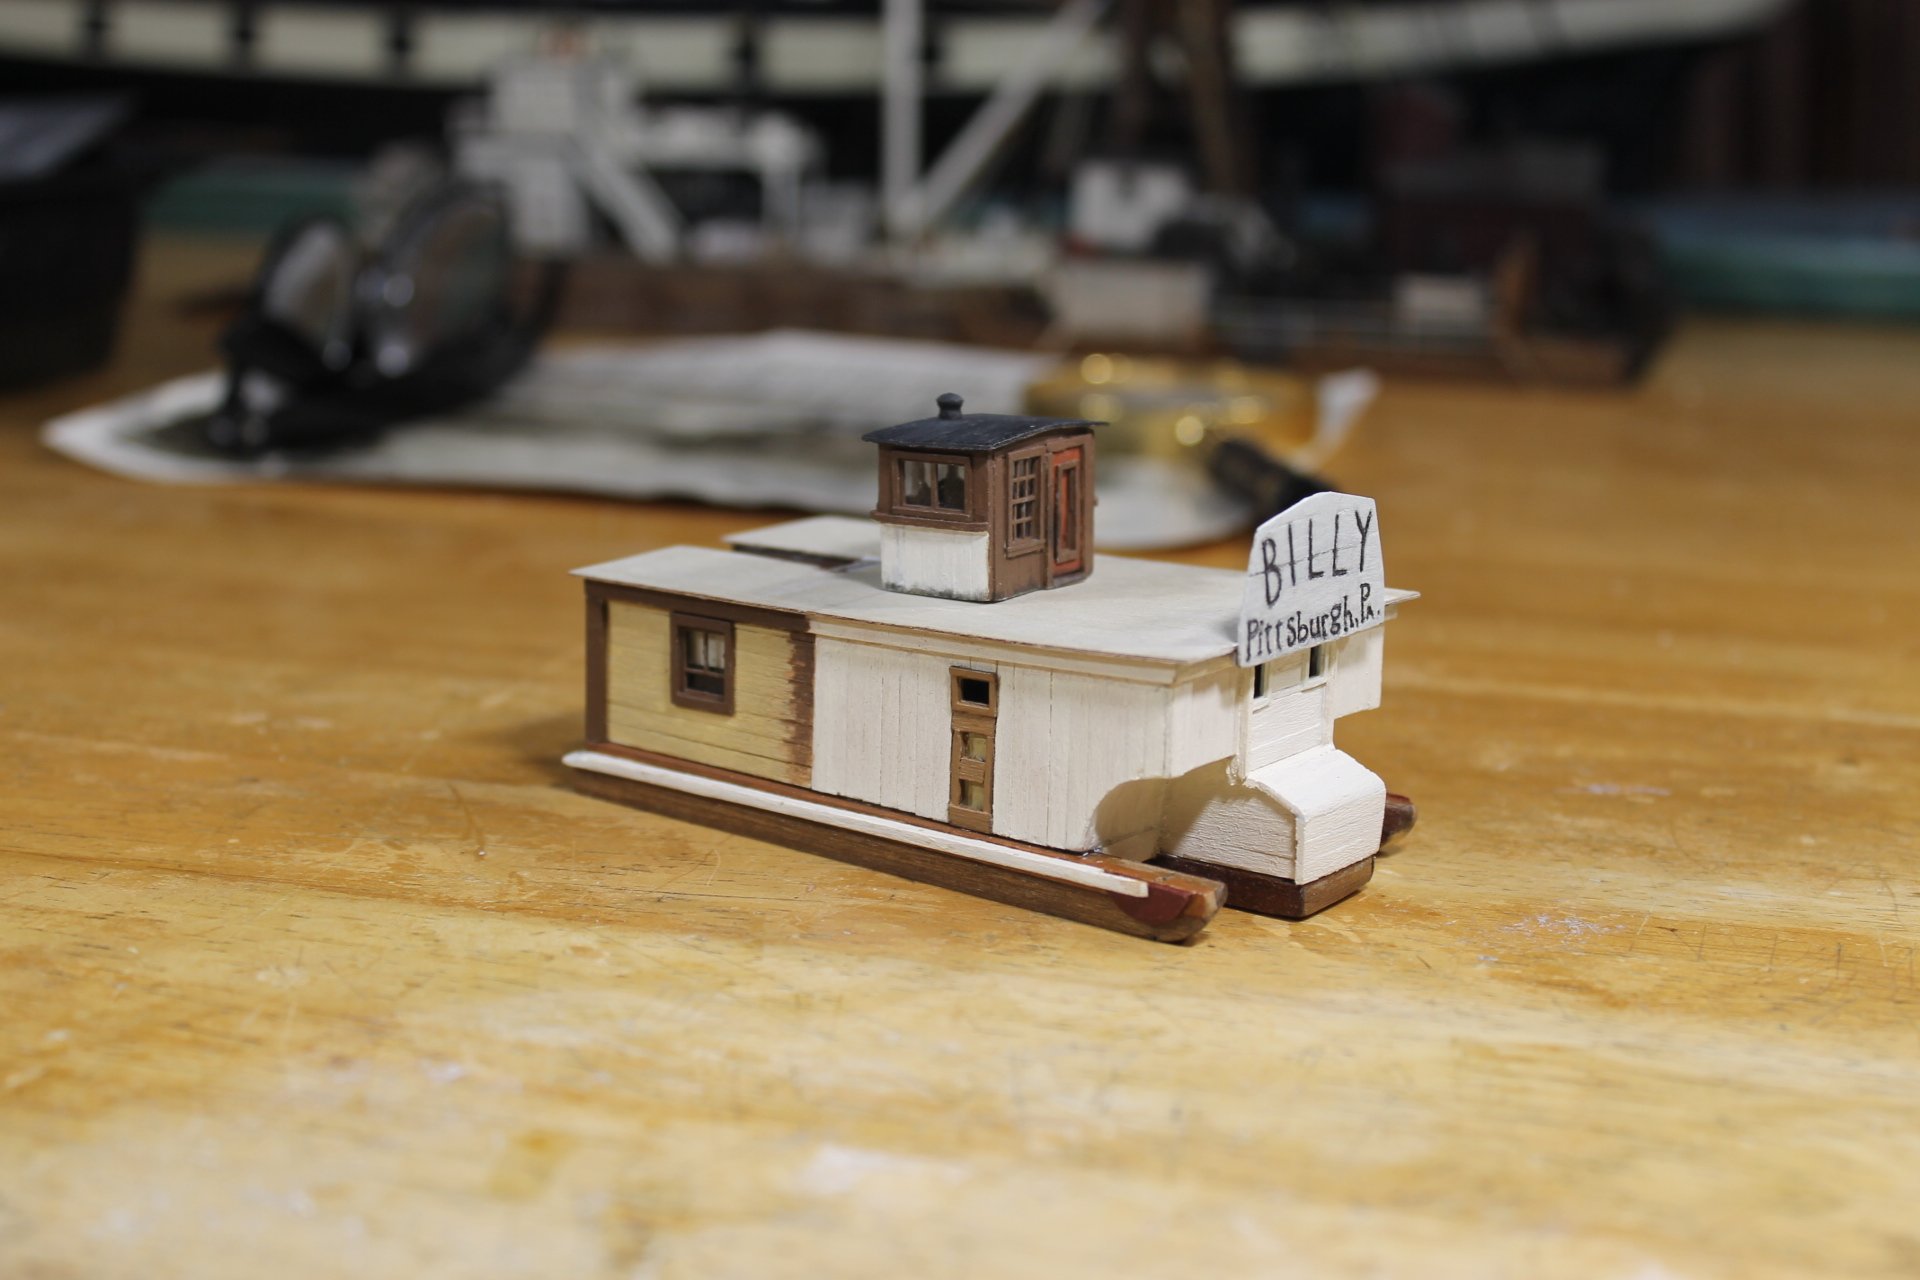
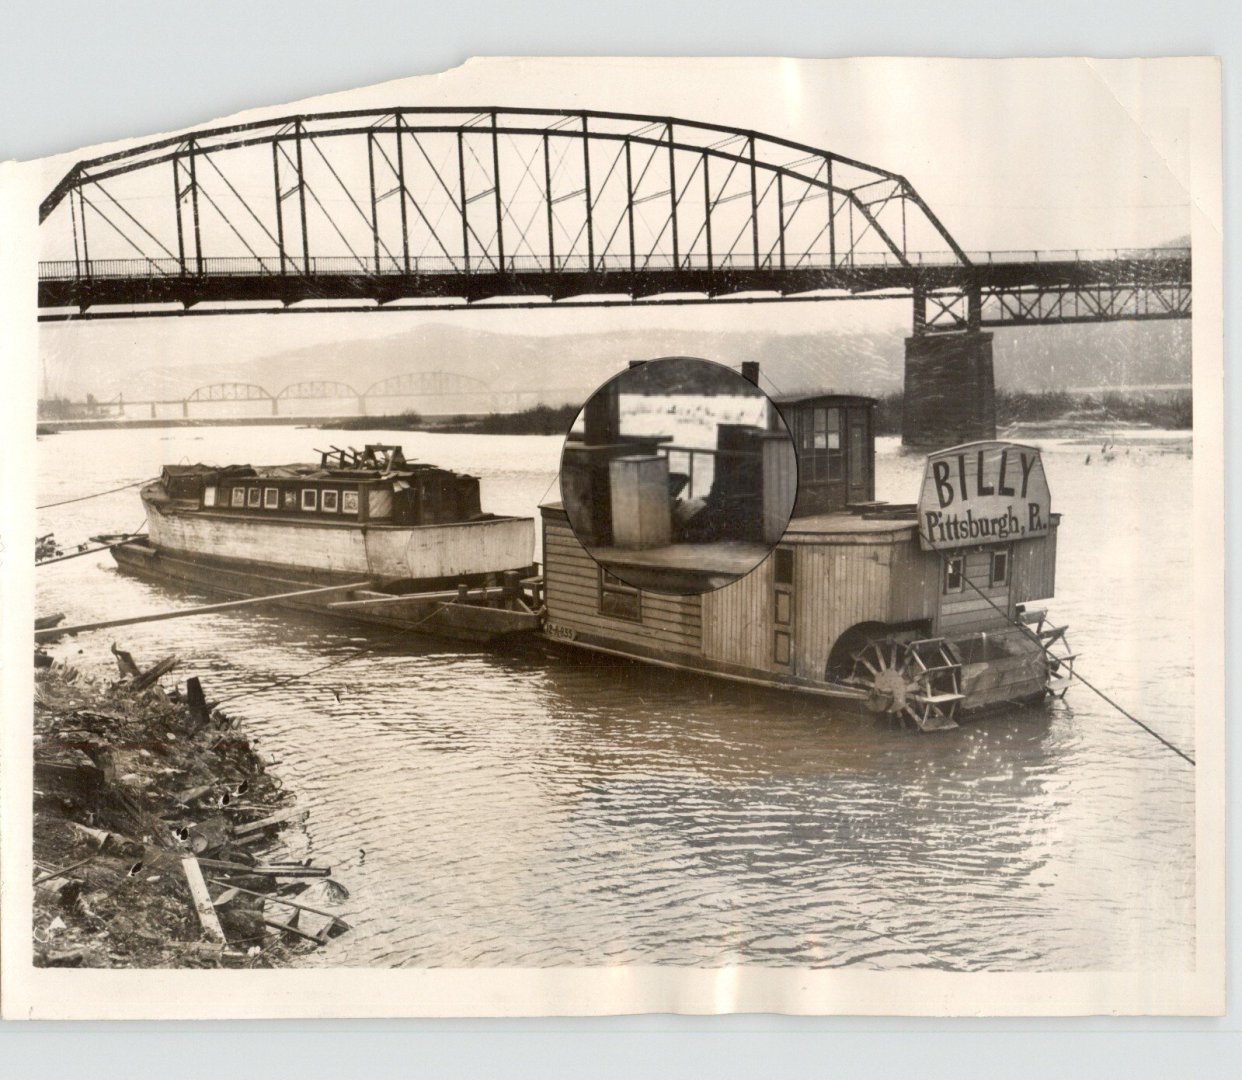
Thank you to everyone for the likes and for your kind comments. I've got stair railings 2.0 done. I made 1.0 from wood and they looked more fence than rail. 2.0 is a bit elaborate for Billy but looking at the press photo the railings are one of the few items that don't look like they came off the bottom of the junk pile. Admittedly 2.0 is much more elaborate than what's pictured but it looks ten times better that 1.0. There very well could be a 3.0, we'll see. I'm holding auditions for someone to portray A. O. Engel. In normal viewing the railings don't poke you in the eye like the photos do. Thank you guys every so much for your support and for being part of the journey. Keith


-
Cutters, Choppers, Guillotines, Slicers
Keith Black replied to MintGum's topic in Modeling tools and Workshop Equipment
I have the RP miter cutter and I'm quite pleased with it. https://umm-usa.com/onlinestore/tools-supplies-cutting-cutr-mitre-cutter-p-11167.html?sort=2a&search_in_description=0&keywords=rp cutter -
Post #14 Post #2 and #11 Post #9 Post #17
-
Thank you very much, John. The paddle wheels will be the same diameter as a US penny, 0.70" and 0.30" wide. I've built the wheels in my mind countless times, we're getting close to seeing how it goes for real.
-
One should never use tap water, Steve. Lightly moisten the Q-Tip in your mouth and then gently swab. Ole fashioned spit is the best cleaner but it's slow going. One can only work up so much spit in a sitting.
-
That's absolutely amazing, Steve.
-
I did, Keith and I hope your's was as equally grand. Thank you, Eric. When you and Tom made the observation of a center stairway I fretted about the 'how to' of it, I'm glad that part of Billy's build is in the rearview mirror.
-
That's really neat, Eric.
-
Merry Christmas and Happy New Year, Dave.
-
Thank you very much, Geordie. Happy Holidays.
-
Thank you, Ken. I tried matching the hues in the black and white photo to colors I have in my acrylic craft paint stash. If the colors match The Pennsylvania Railroad color scheme is purely an accident. Thank you and Happy Holidays.
-
Thank you, James and a Merry Christmas and Happy New Year to you and yours. Thank you, Phil. Happy Holidays;. Thank you kindly, John. Happy Holidays;. Thank you, Eberhard. Happy Holidays;. Thank you, Bob. Happy Holidays. Thank you very much, Tom. It was kinda fiddly but I'm pleased with the way they turned out. Happy Holidays;. Thank you, Pat. Happy Holidays;.
-
Thank you, Chris and a Merry Christmas and a Happy New Year to you and yours.
-
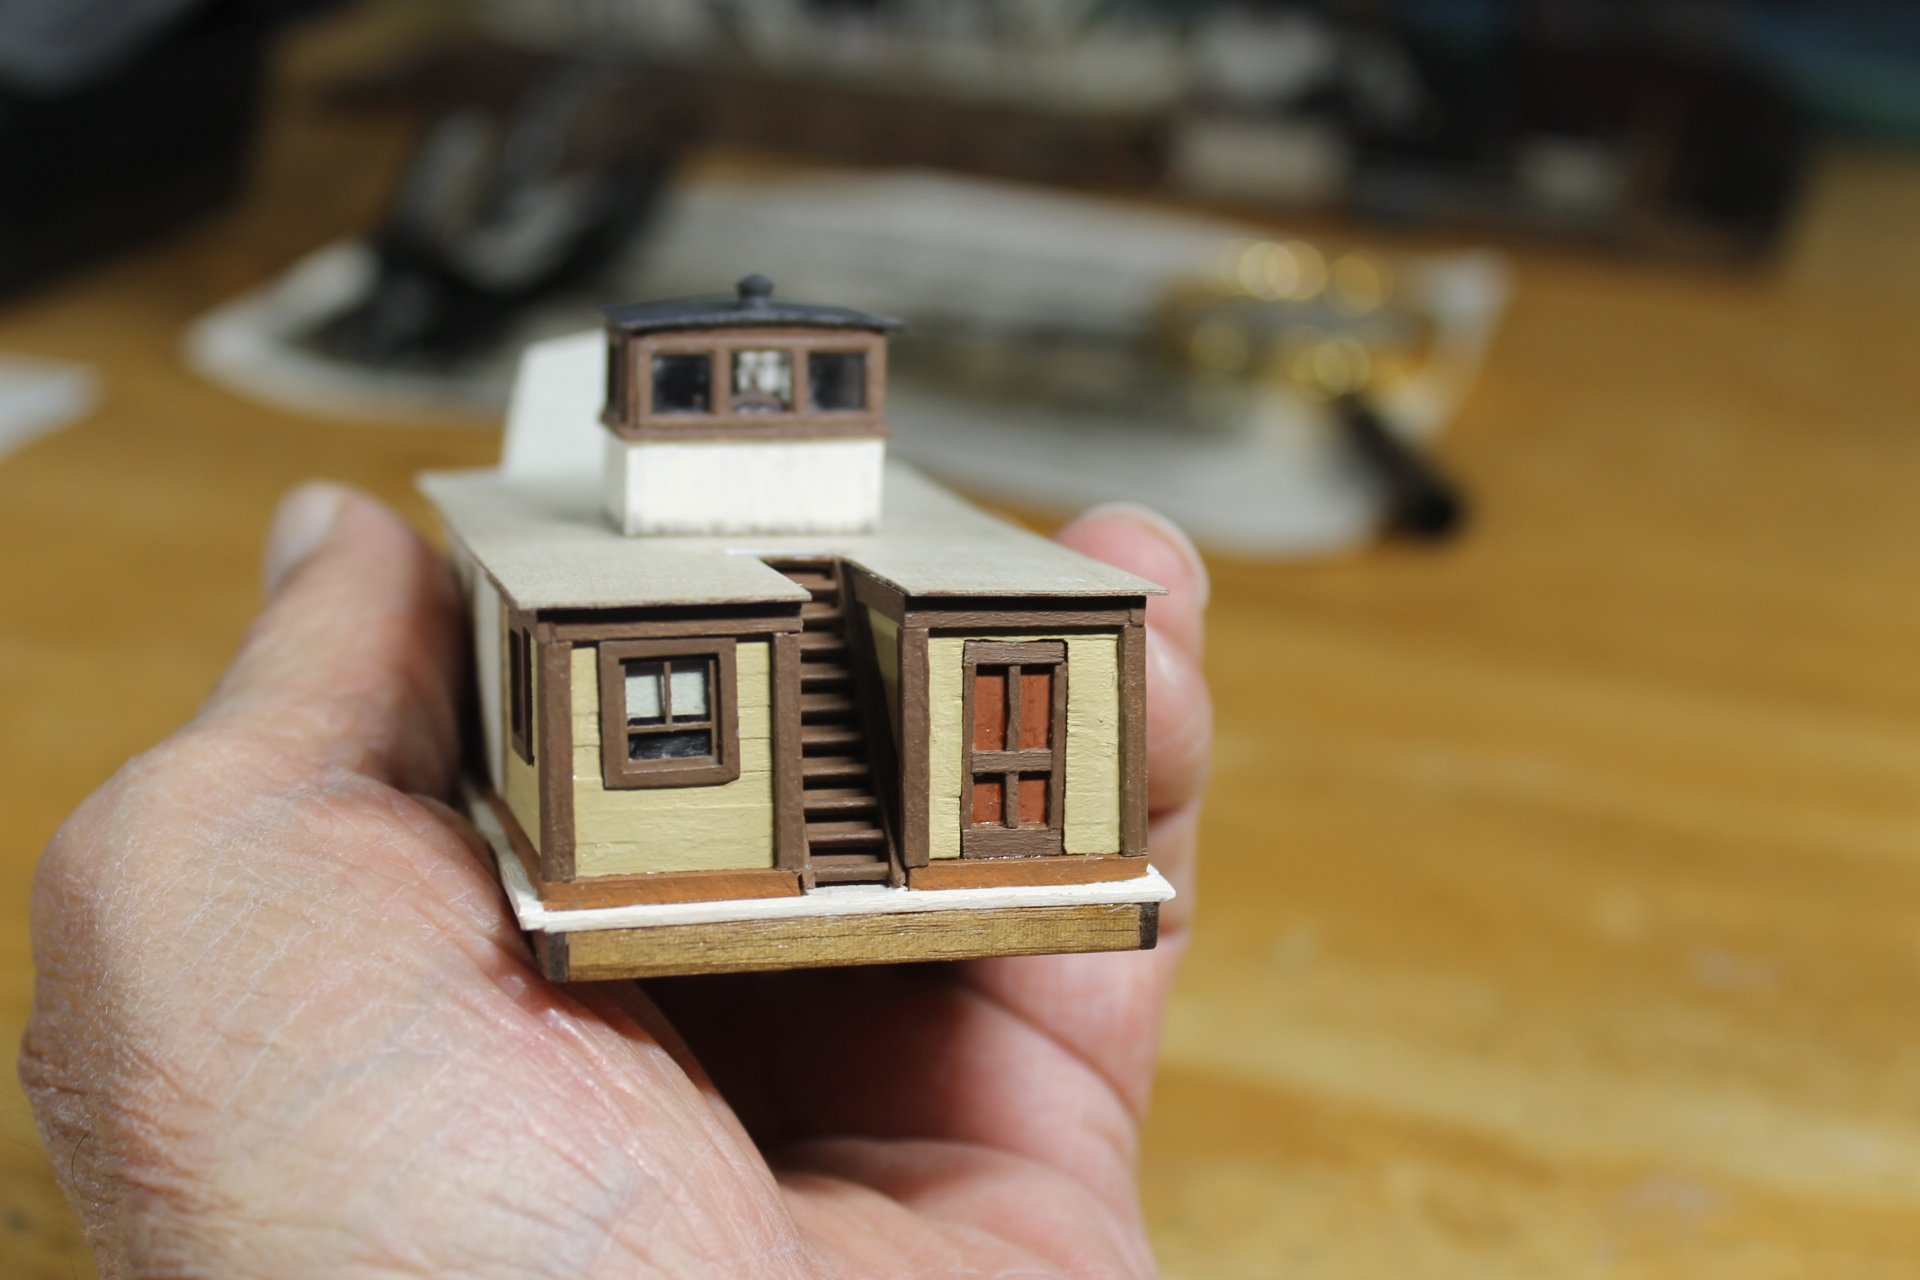
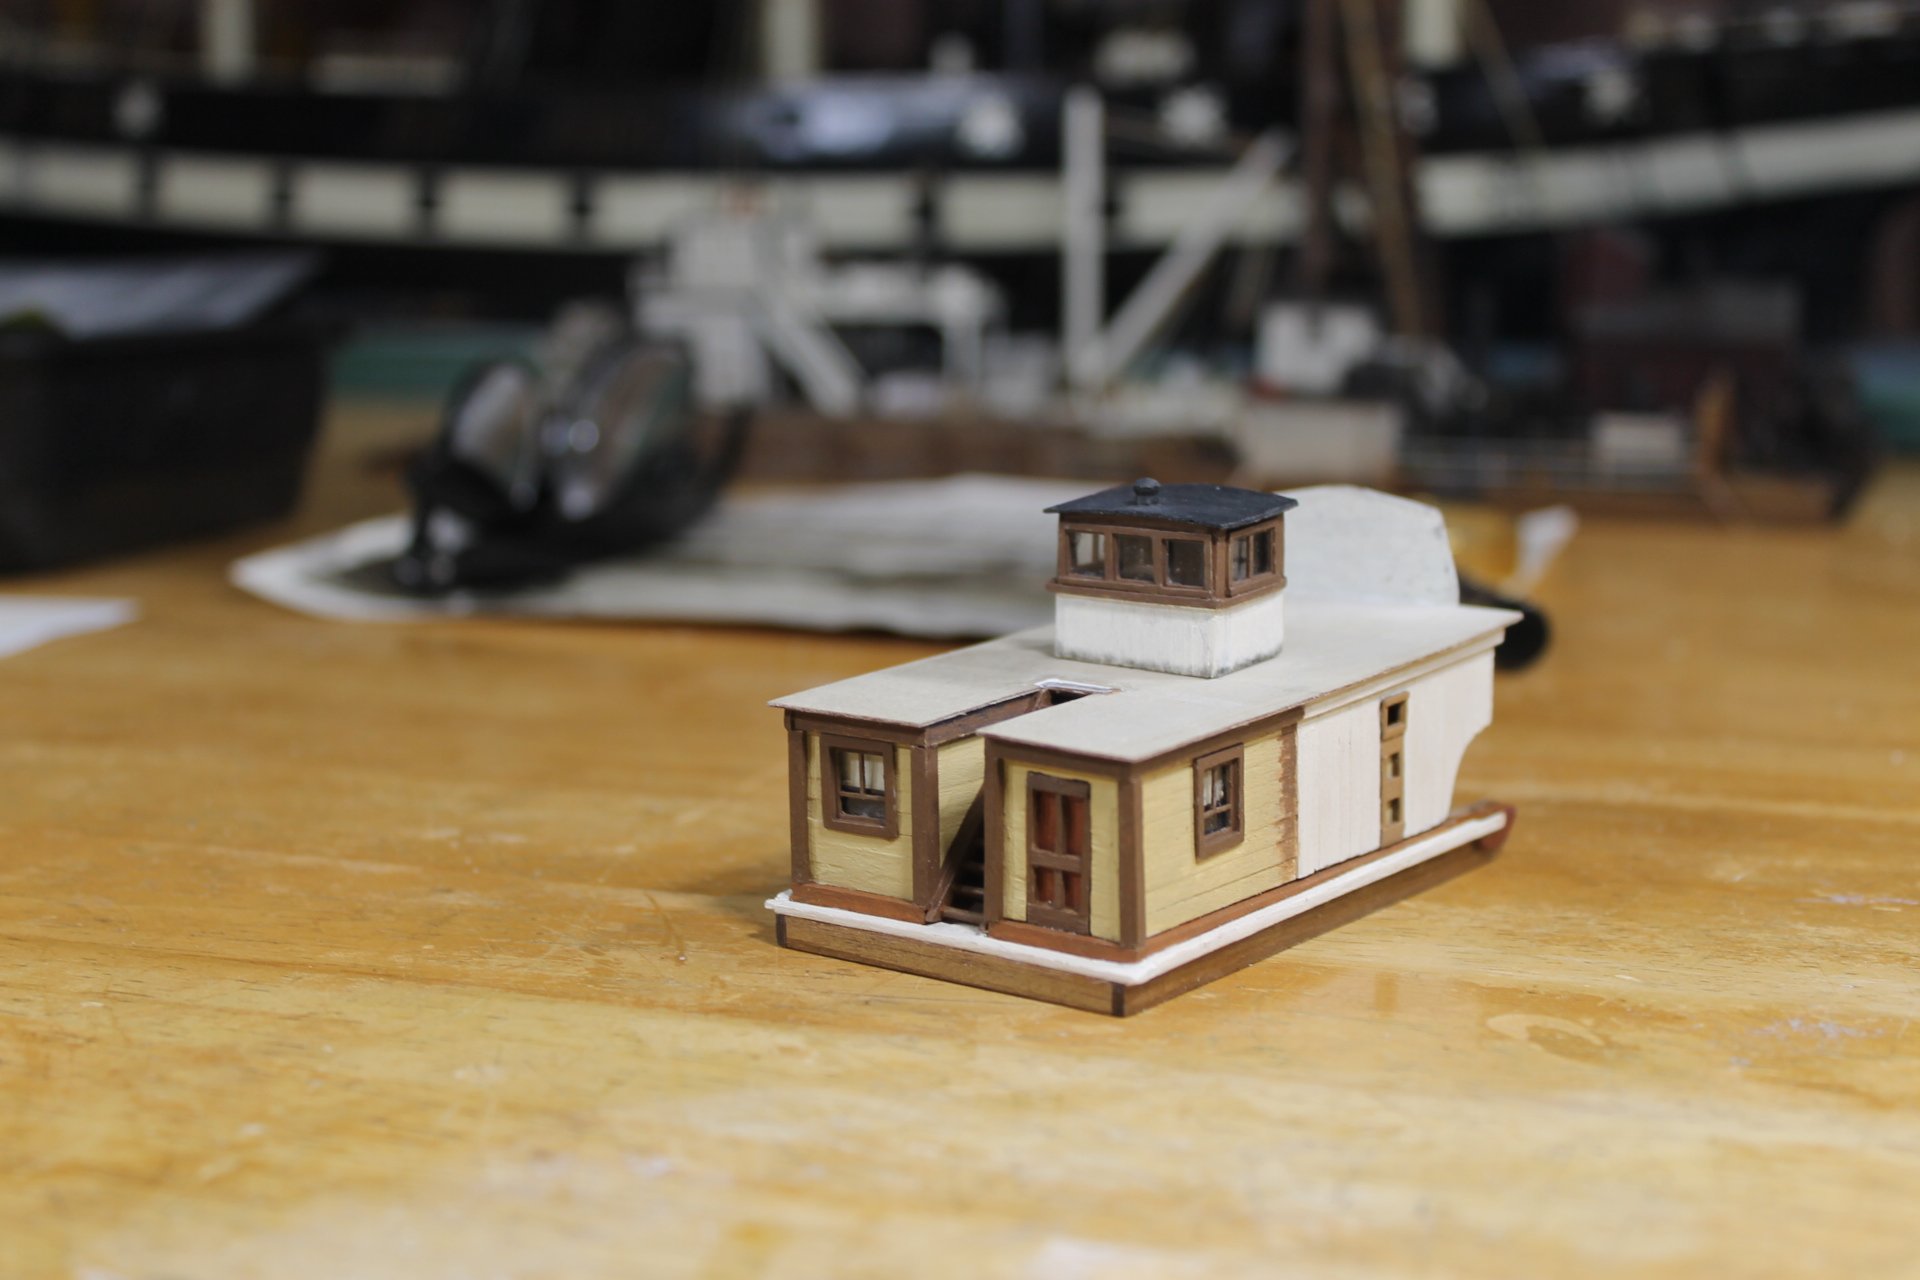
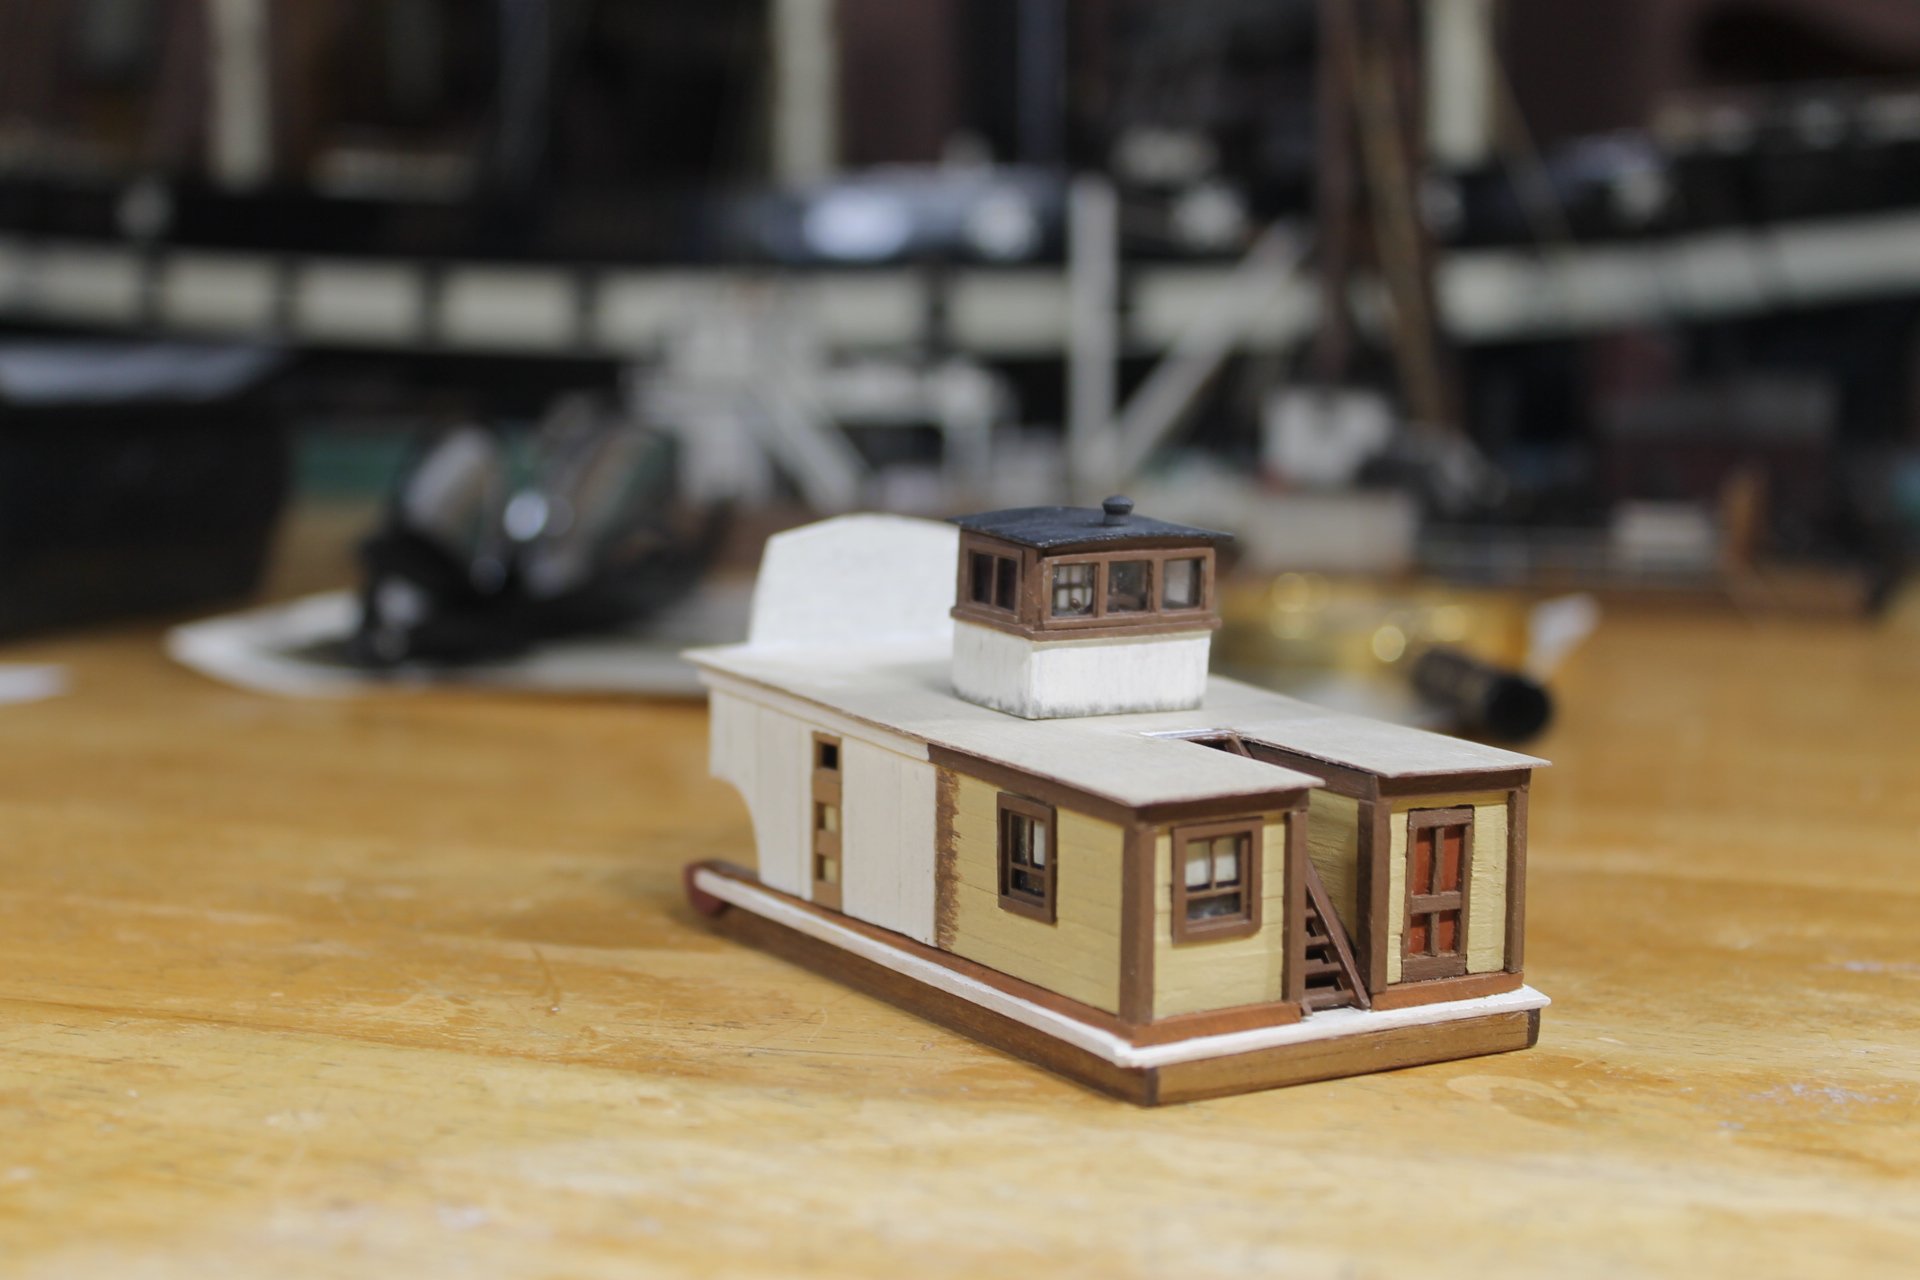
Thank you to each of you for your likes and your comments, I've been looking forward to when I could hold Billy in the palm of my hand. I don't think display space is going to be an issue. Finishing the bow took me longer than I anticipated. Everything you see is attached. I wanted to paint the boiler deck so bad........patience self. Eric, Tom, and anyone else who saw in their minds a center located stairs, is this what you where thinking? Thank you to everyone for your support and for following along. And very special Christmas wish for good health and happiness during the holidays and the coming new year. Merry Christmas my dear friends, God Bless. Keith


-
Thank you and a Merry Christmas and a Happy New Year to you and yours, LJP