Keith Black
-
Posts
6,705 -
Joined
-
Last visited
Content Type
Profiles
Forums
Gallery
Events
Everything posted by Keith Black
-
 Alexa, welcome to MSW. Glad to have you aboard.
 -
removing ca glued rigging
Keith Black replied to Lost and Confused's topic in Masting, rigging and sails
If you don't enjoy tying clove hitches like some folks I know there's the weaving method which I used and like a lot. -
Gareth, welcome to MSW. Love your humor, you'll fit right in. Glad to have you aboard.
-
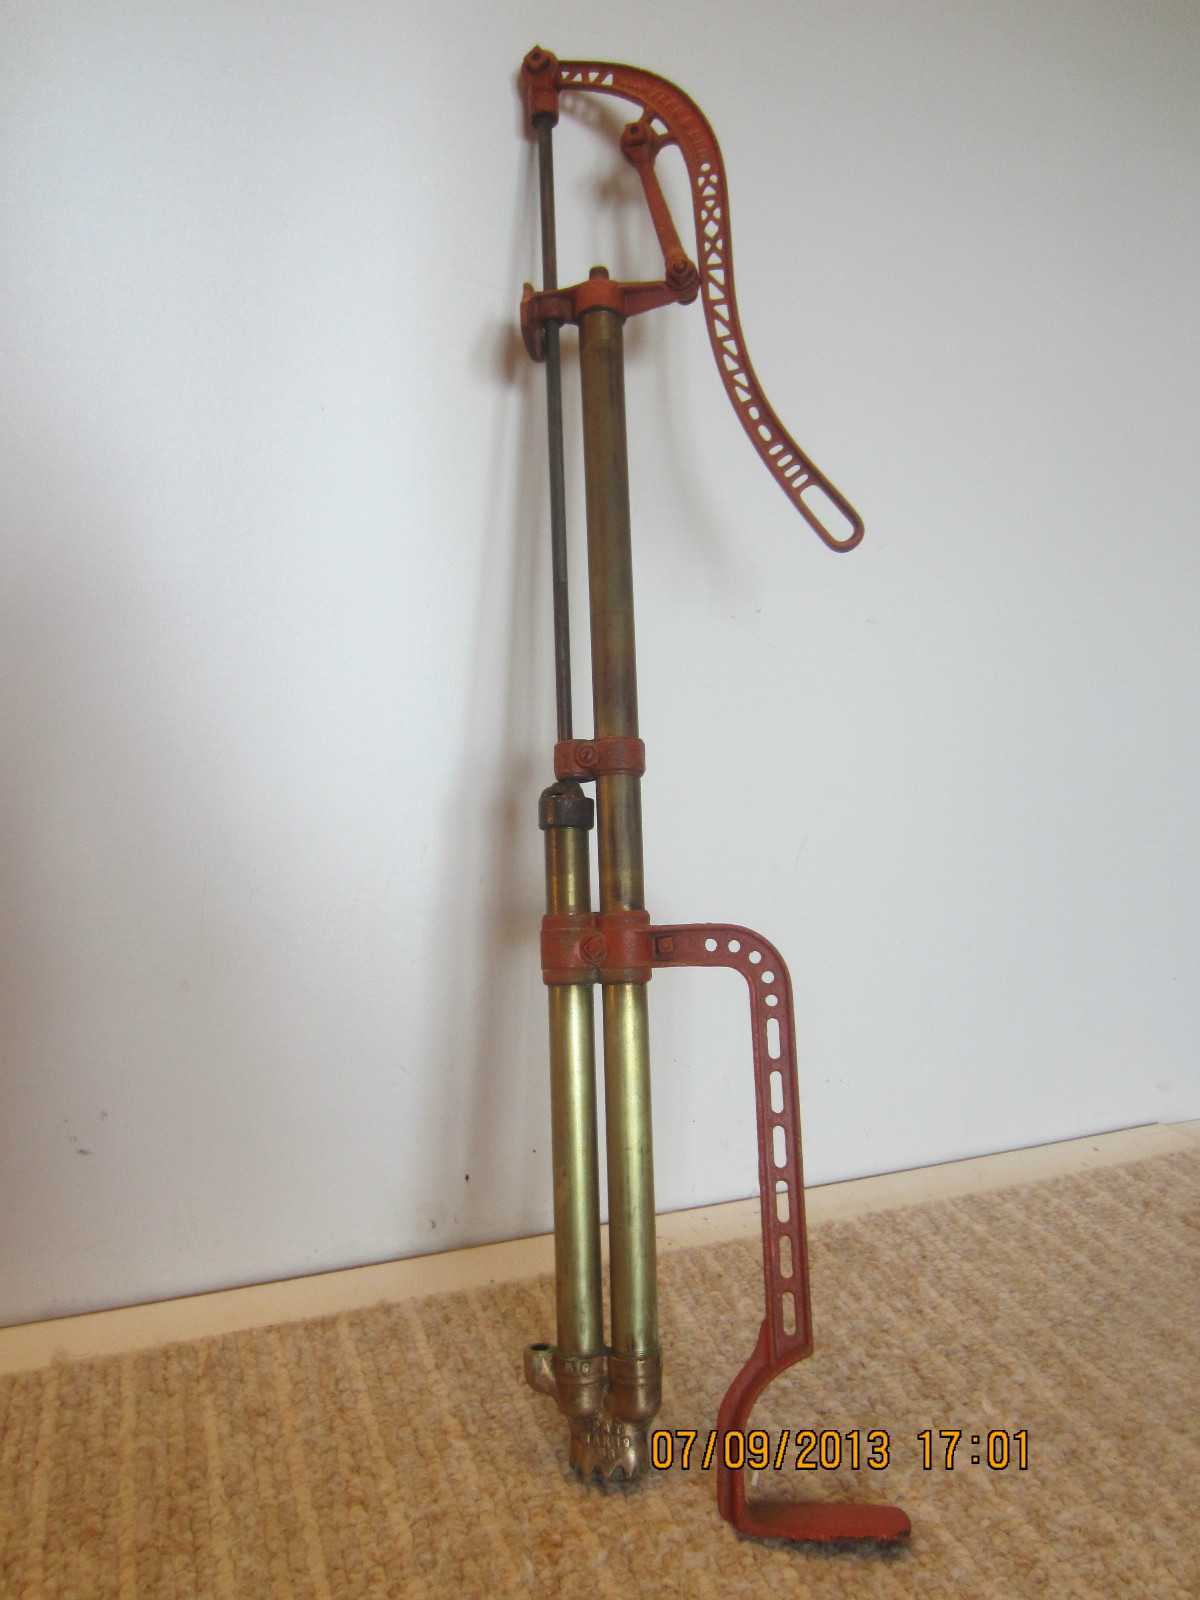
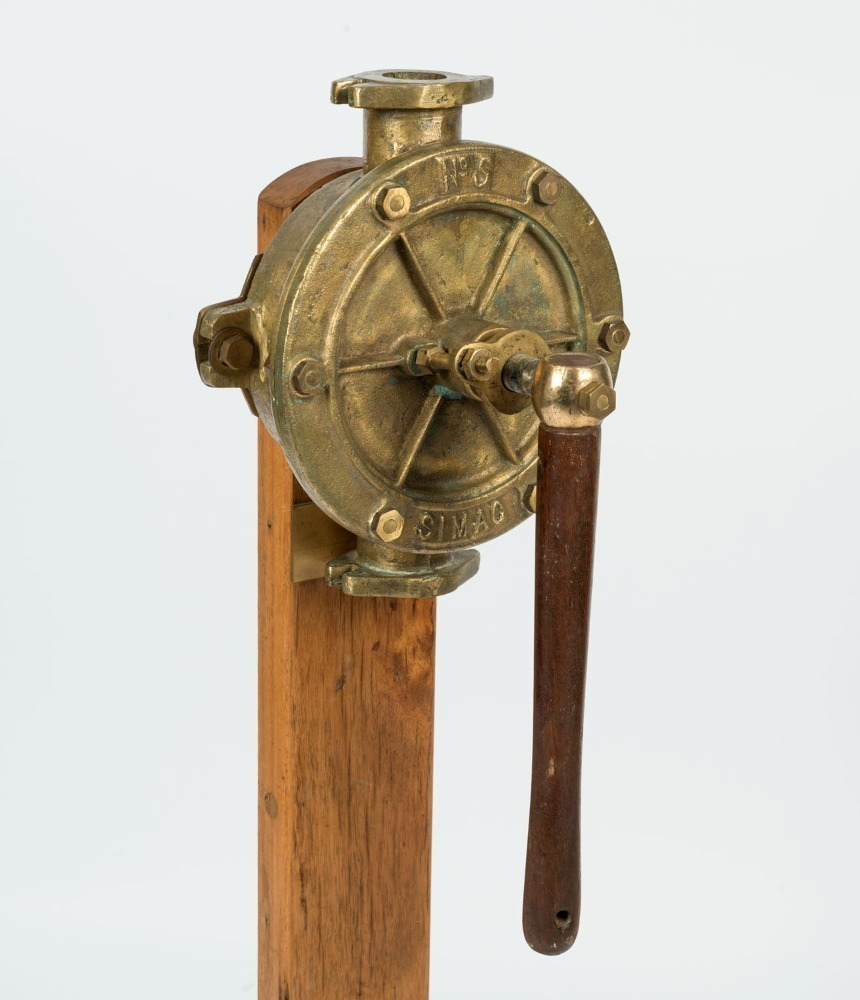
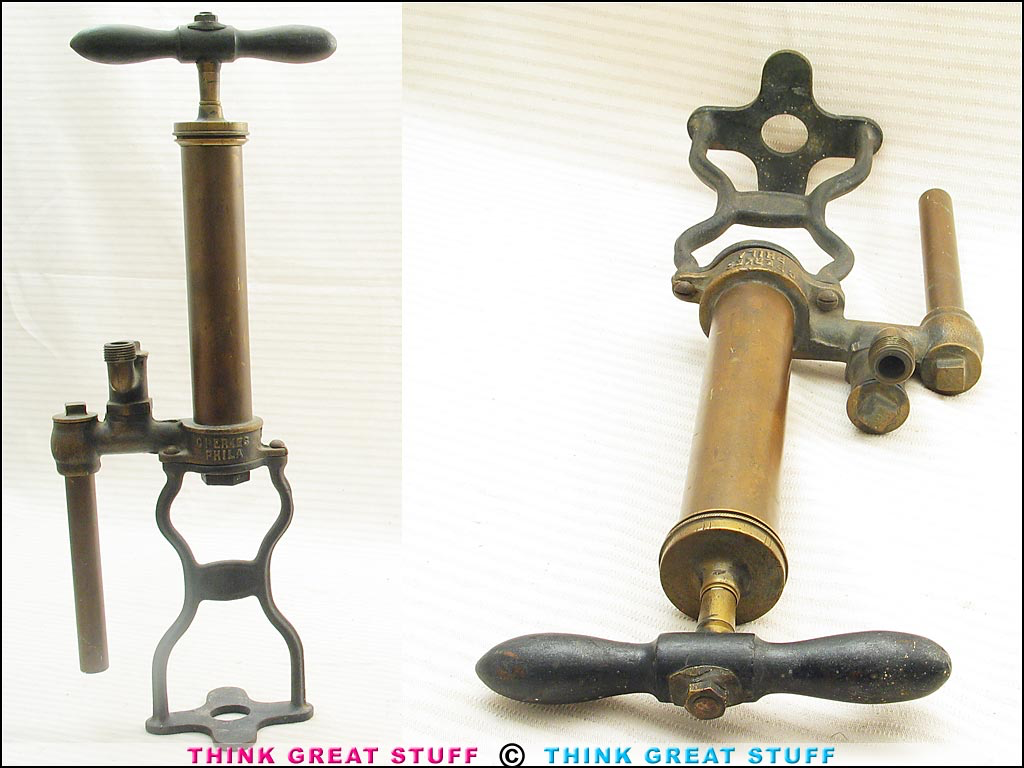
More examples of small hand operated 1900's bilge pumps.

-
1:192, WOW! I'm now following along but I need to go back through the whole log as I'm anxious to see how you've met the challenges of working at that scale. Thank you very much, Rick.
-
Mikj, welcome to MSW. Glad to have you aboard.
-
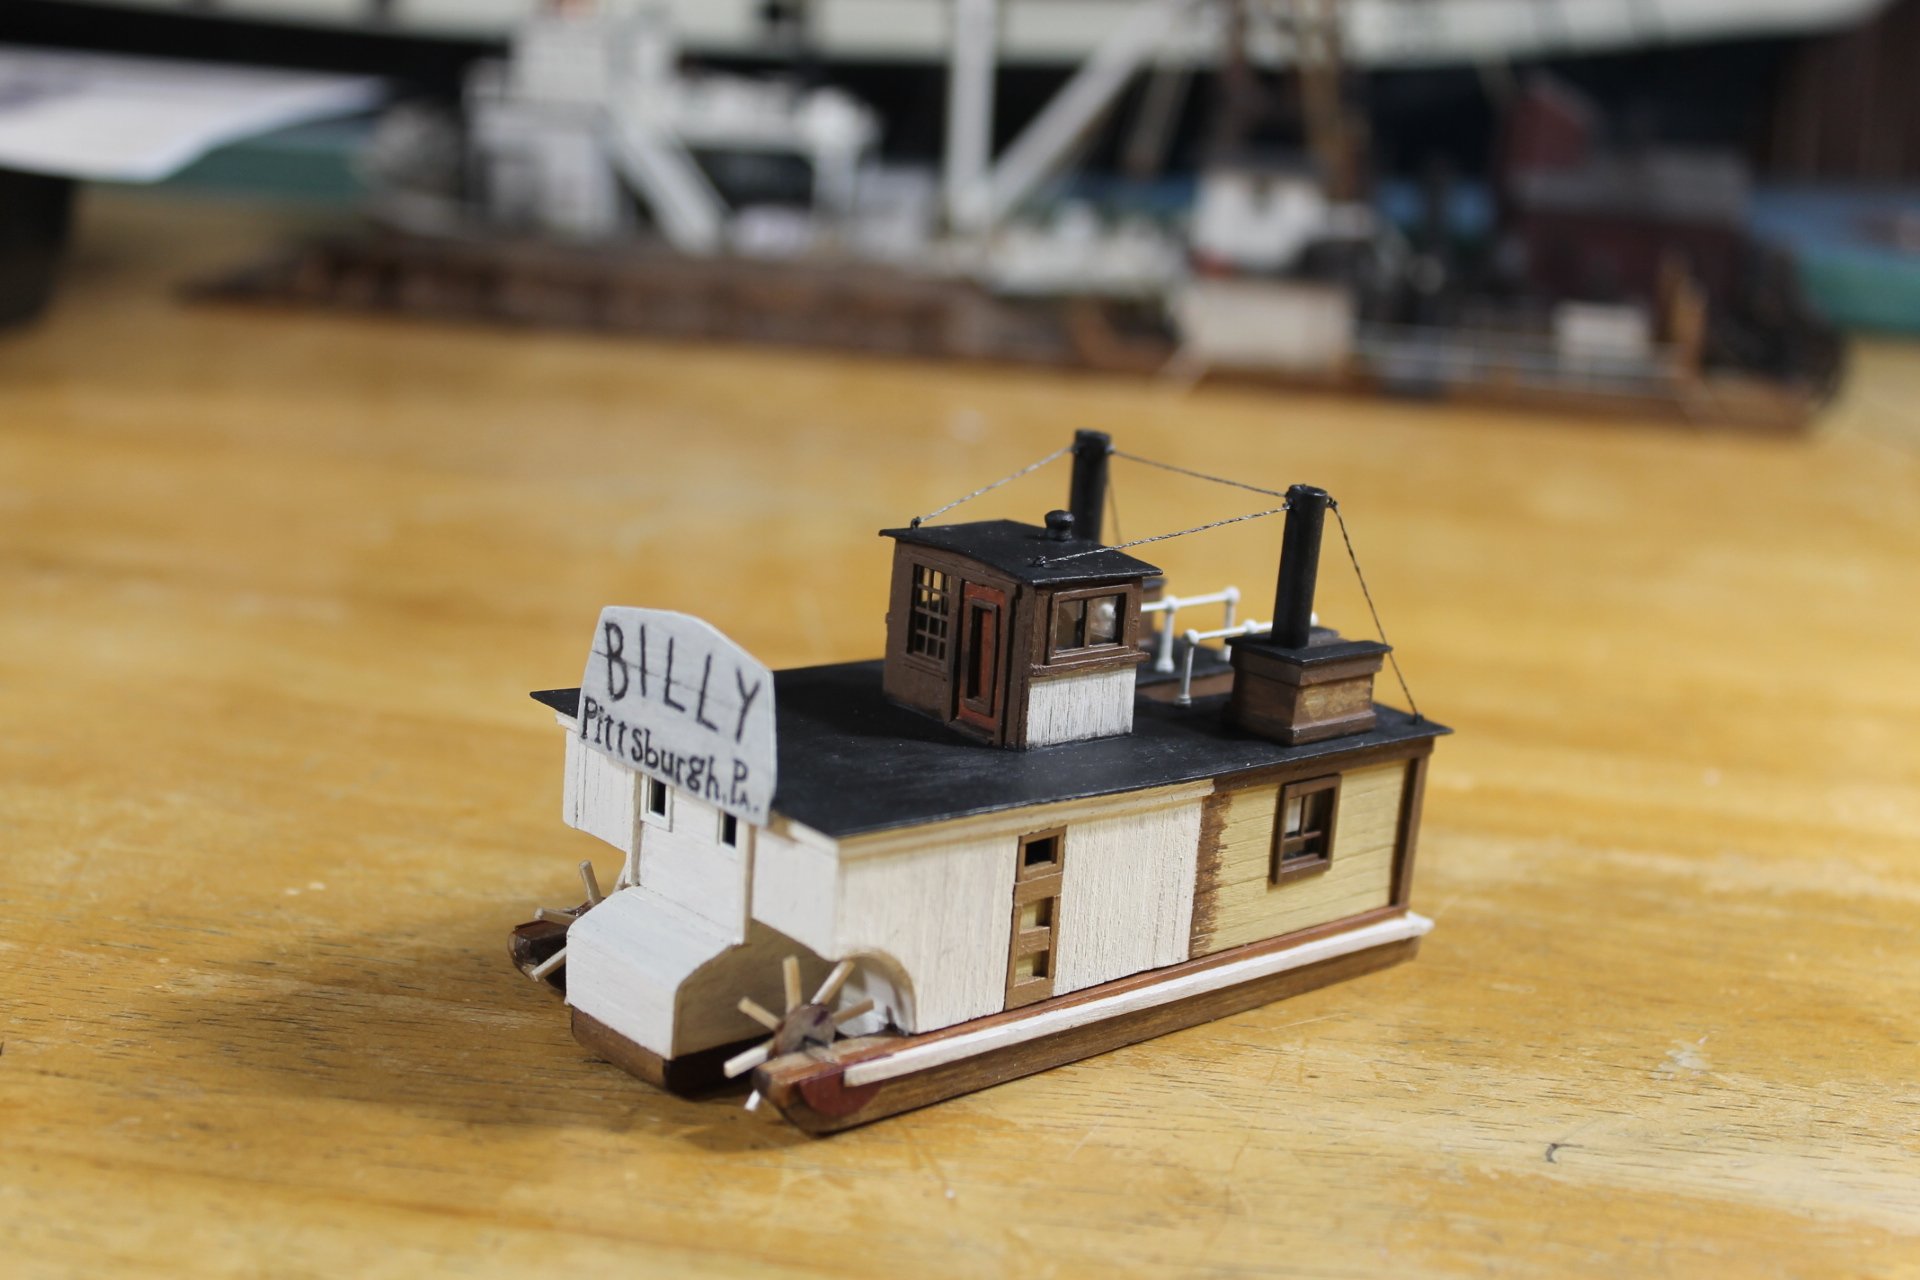
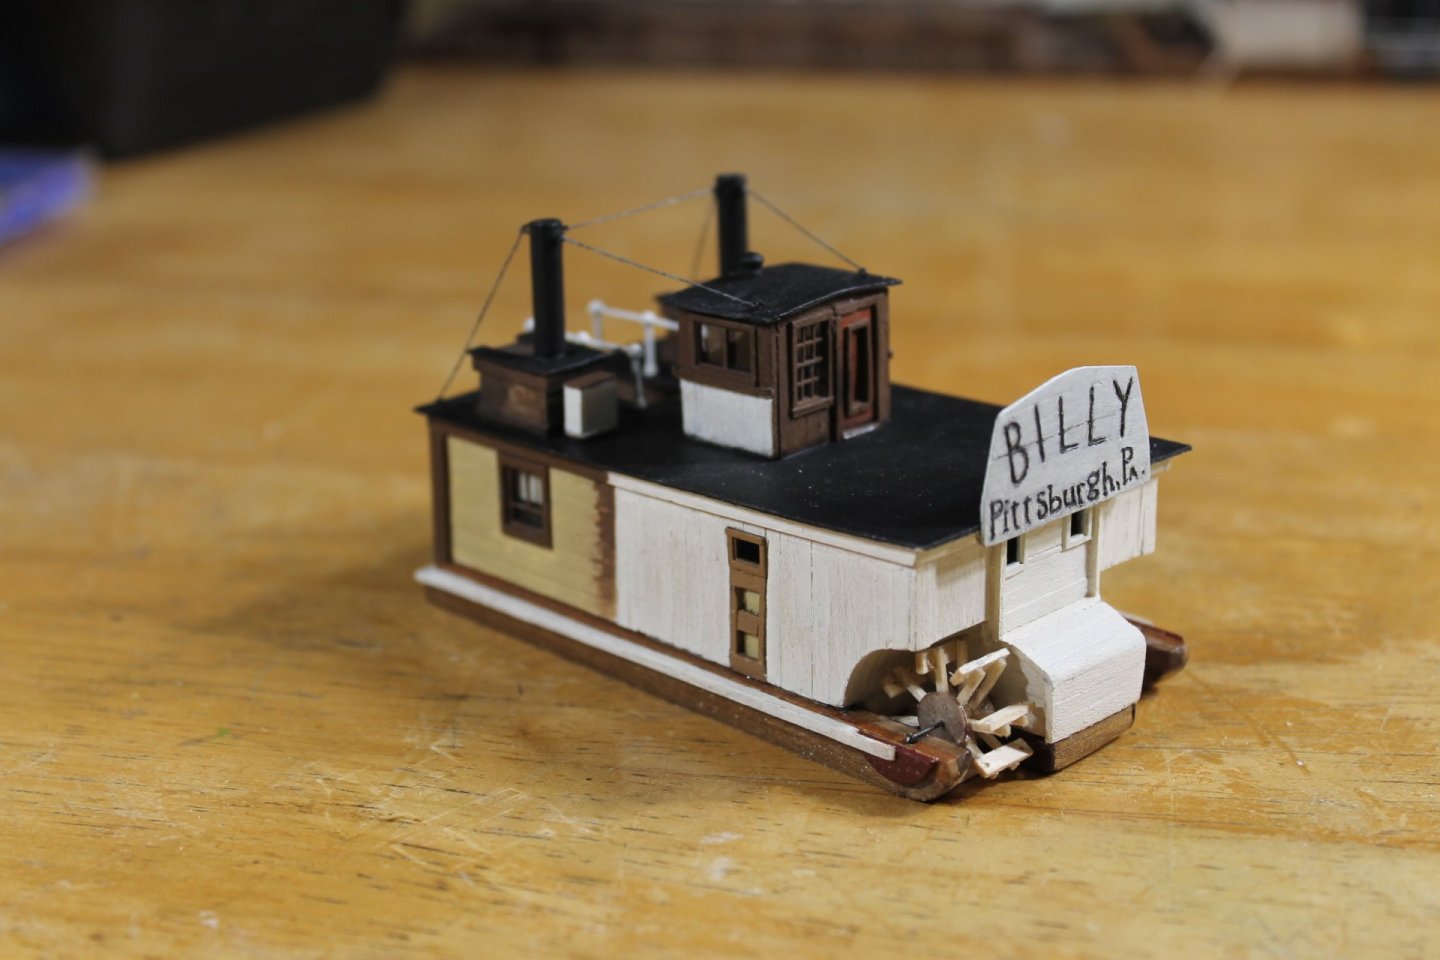
Billy has buckets on the port side! I still need to make the rim frame. I'll choose between thread, wood, or wire depending on which looks the best. The holes are drilled in the outside edges of the buckets and I tested pulling thread through them and that works just fine. I was able to use basswood for the buckets. The two hub assemblies are joined with a 0.088" piece of dowel acting as the outside axel cut to 0.10" length and drilled through the center with a 0.025 drill. An outside axel is necessary because the wheels can not be tipped into place. The wheel has to be placed into position and the inside axel (22 GA wire) run through an eye (pillow block) and then through the wheels outside axel. I wish I could say I made an incredible jig to aid in attaching the buckets to the spokes but nope, fiddly fingertip work as per my usual. The wheel is very raw and needs lots of work before paint. I also need to go ahead and weather the wheel arches because on the wheel is installed reaching in to weather will be impossible. The starboard hubs are assembled and ready for the buckets. I won't be able to get back to serious building till Thursday. Thank you guys for your support and for following along. Keith
-
She looks so cool, John. Those lights are an impressive touch.
-
Very nice detail work on the pilothouse, LJP.
-
Thank you, Tom. It's just a matter of following the templet. I've worked at this scale for so many years that fiddly is the norm and my ole fingers don't know any better.
-
A neat way to run line to a belay pin is to remove the belay pin, run the line through the belay pin hole, insert the belay pin and then wrap. This makes the line taut and allows the line to be wrapped around the belay pin with ease.
- 359 replies
-
- 2
-

-

-
- Flying Fish
- Model Shipways
- (and 1 more)
-
Thank you, Bob. I don't want to build at a larger scale, I want to work on a larger model, i.e., the Tennessee and let my fingers breath. Thank you, James Thank you, John. What scale are you considering moving to? Thank you kindly, John.
-
They look great next to each other and the placement is perfect. Larger in the fore and smaller in the background giving a sense of visual diminishing scale. 👍
-
I'm sorry you've got to put a stop to her, Bob. Instead of immediately jumping into Vasa why don't you kickback in your easy chair for at least a couple of days and watch TV and take lots of naps.
- 73 replies
-
- 6
-
-
- Steam Cutter
- Harriet Lane
- (and 2 more)
-
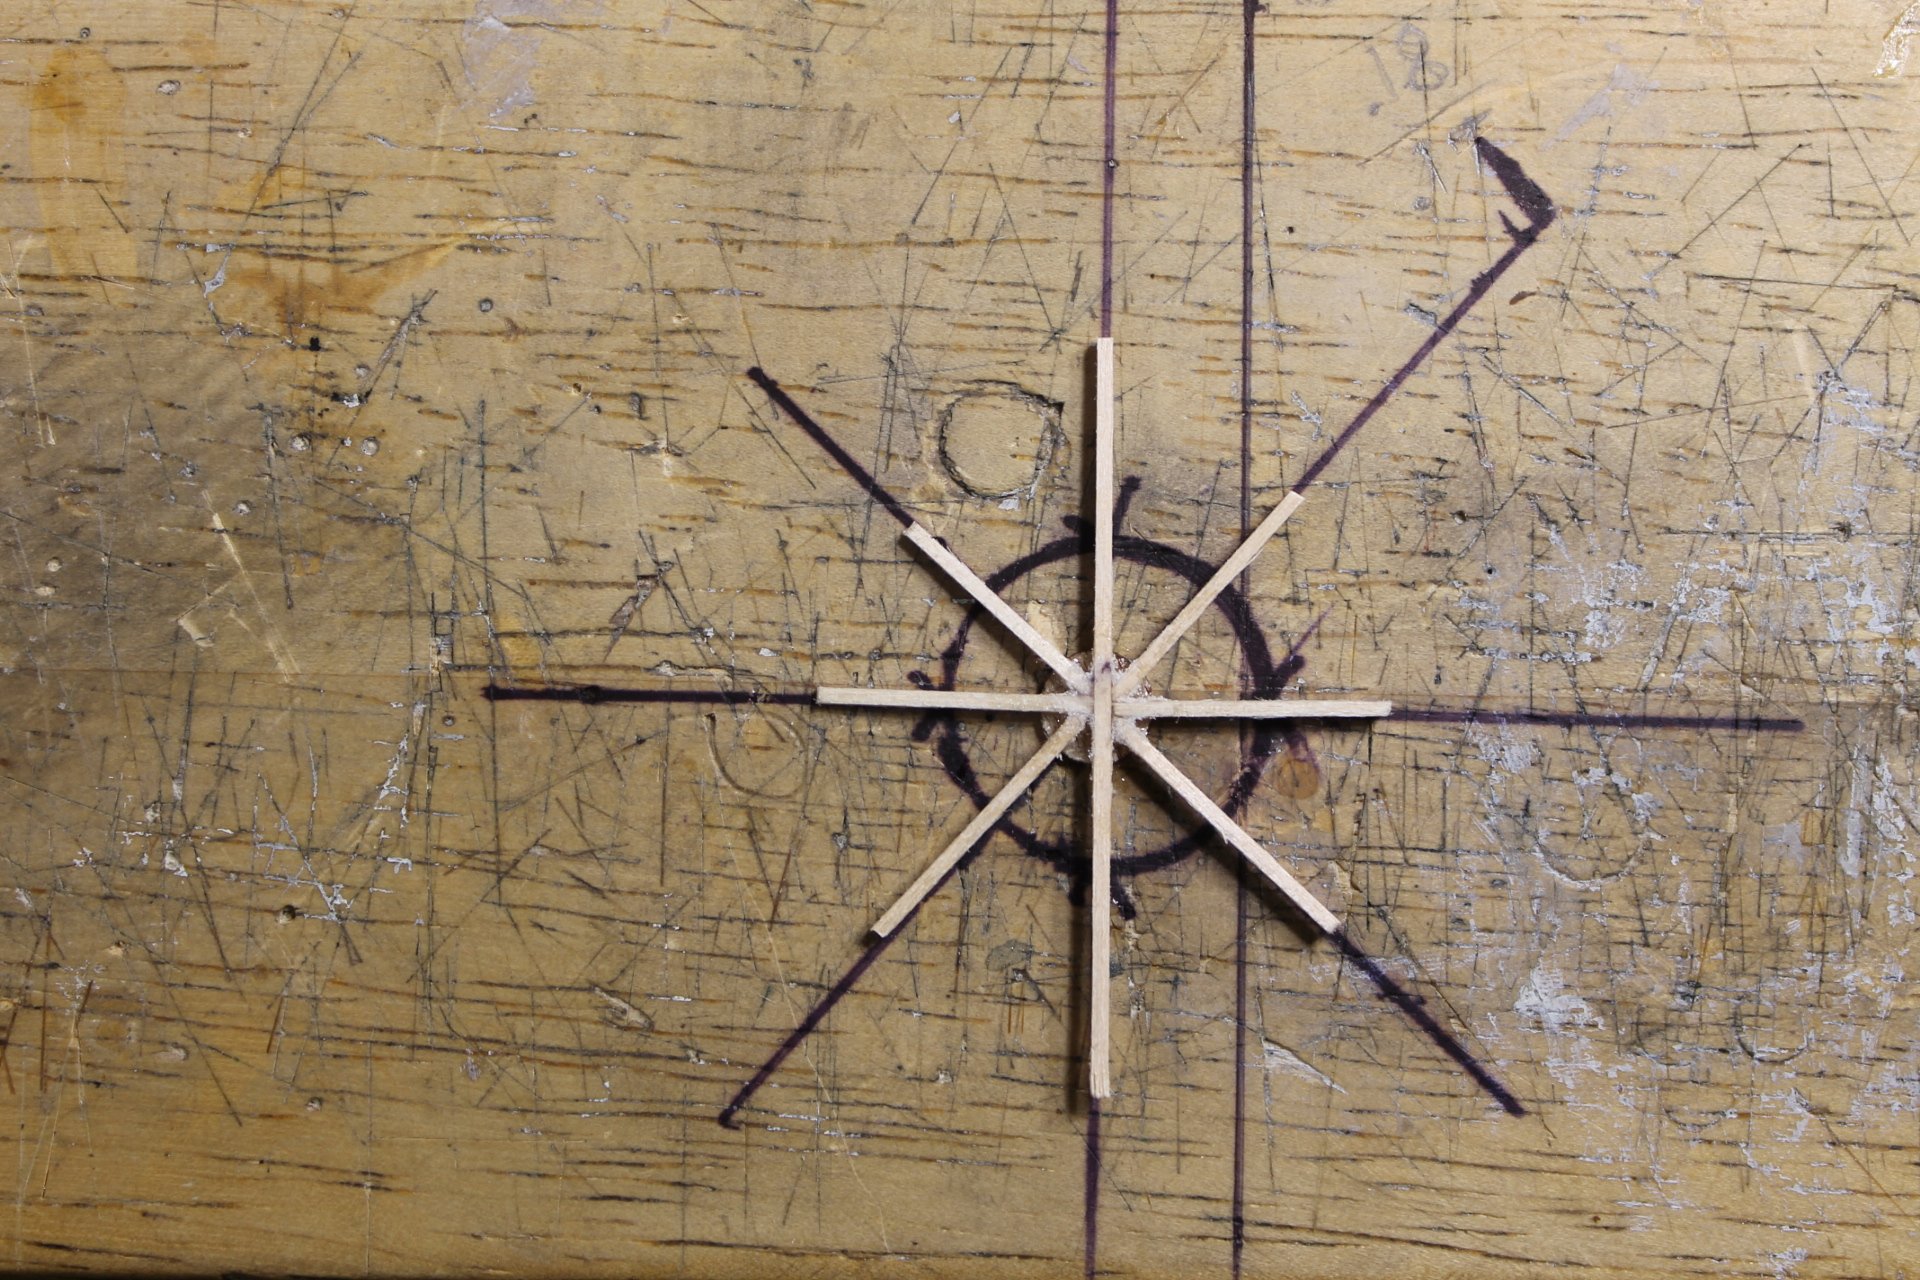
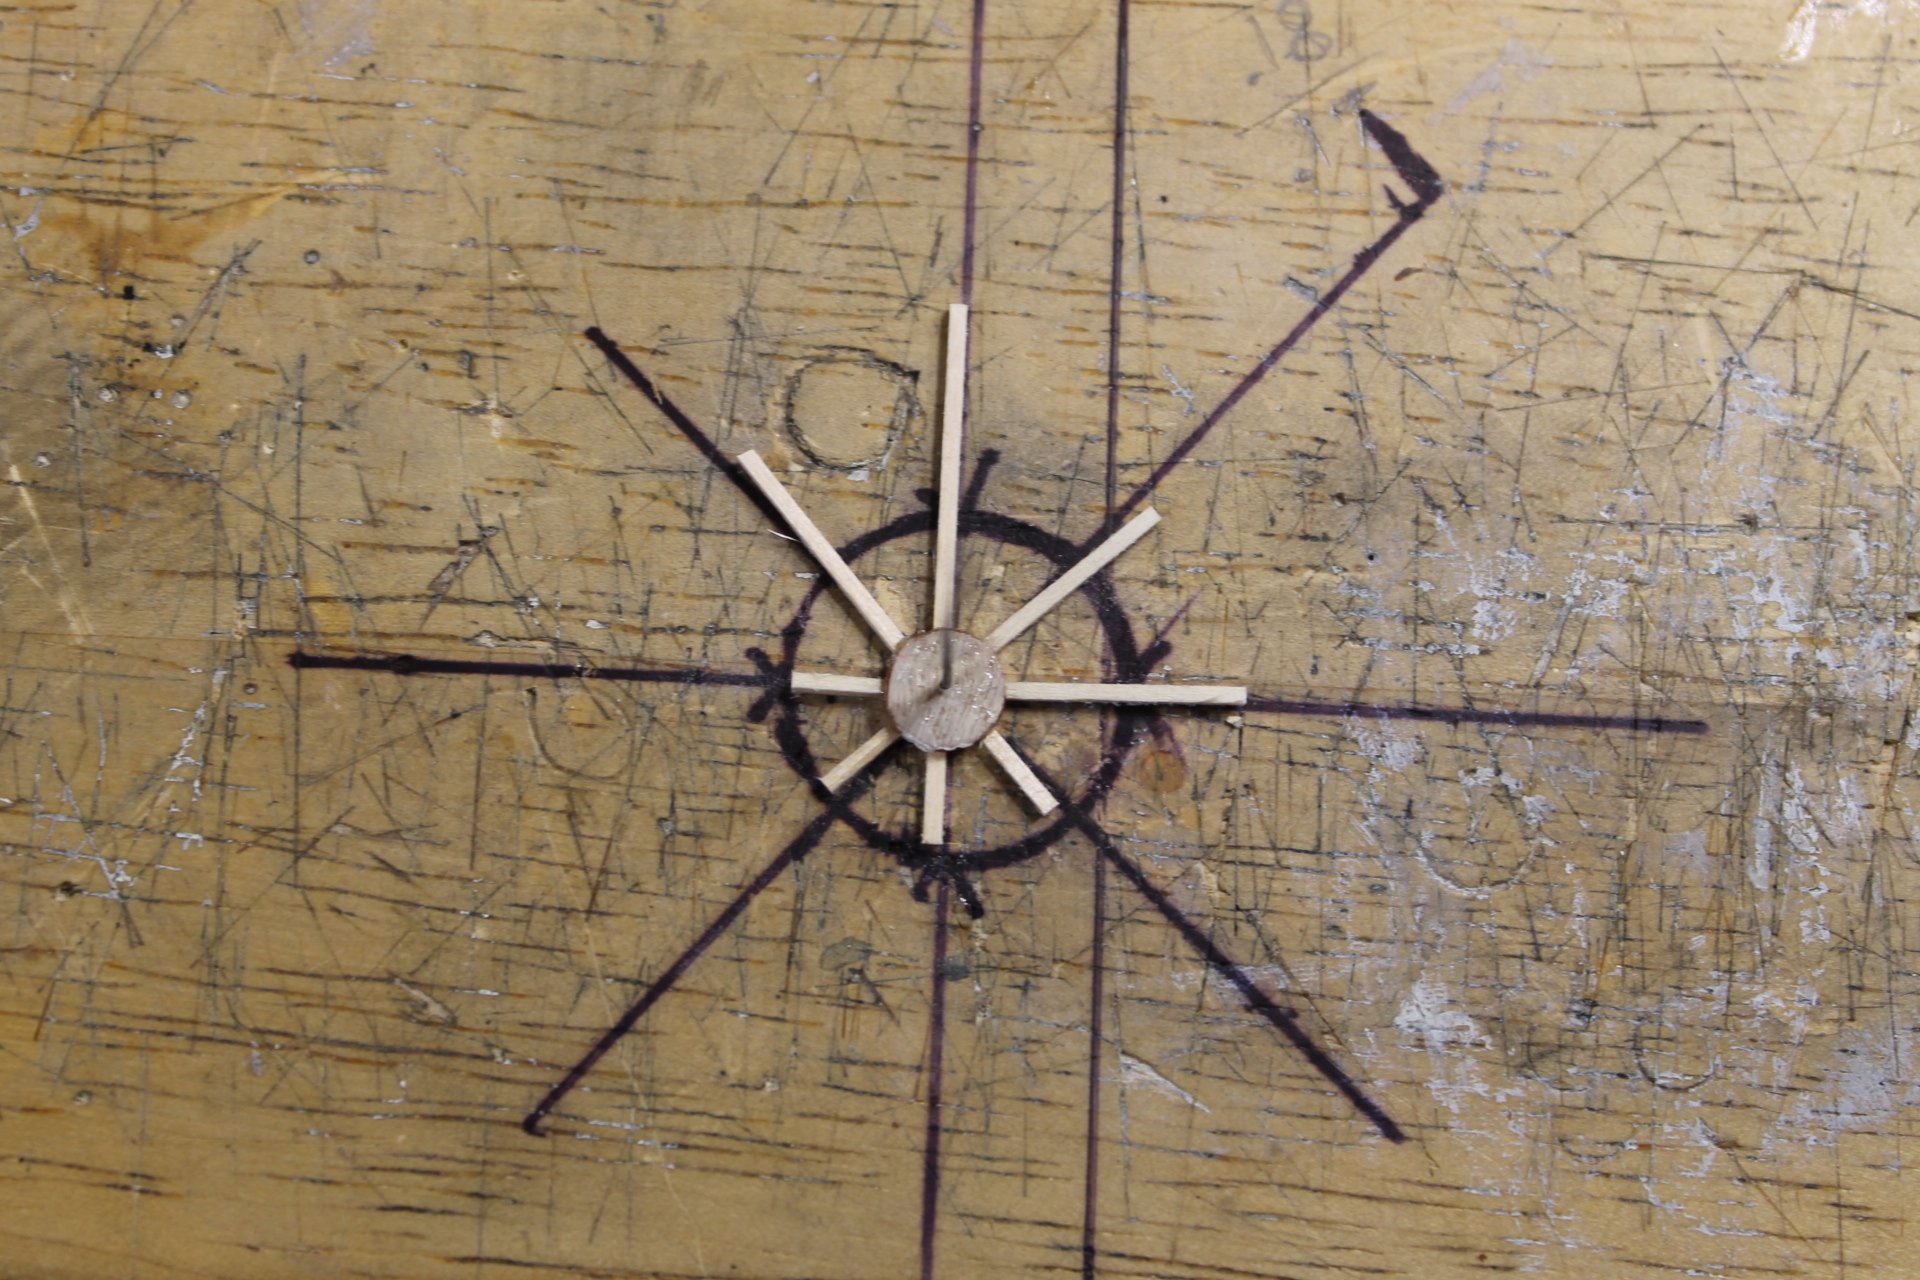
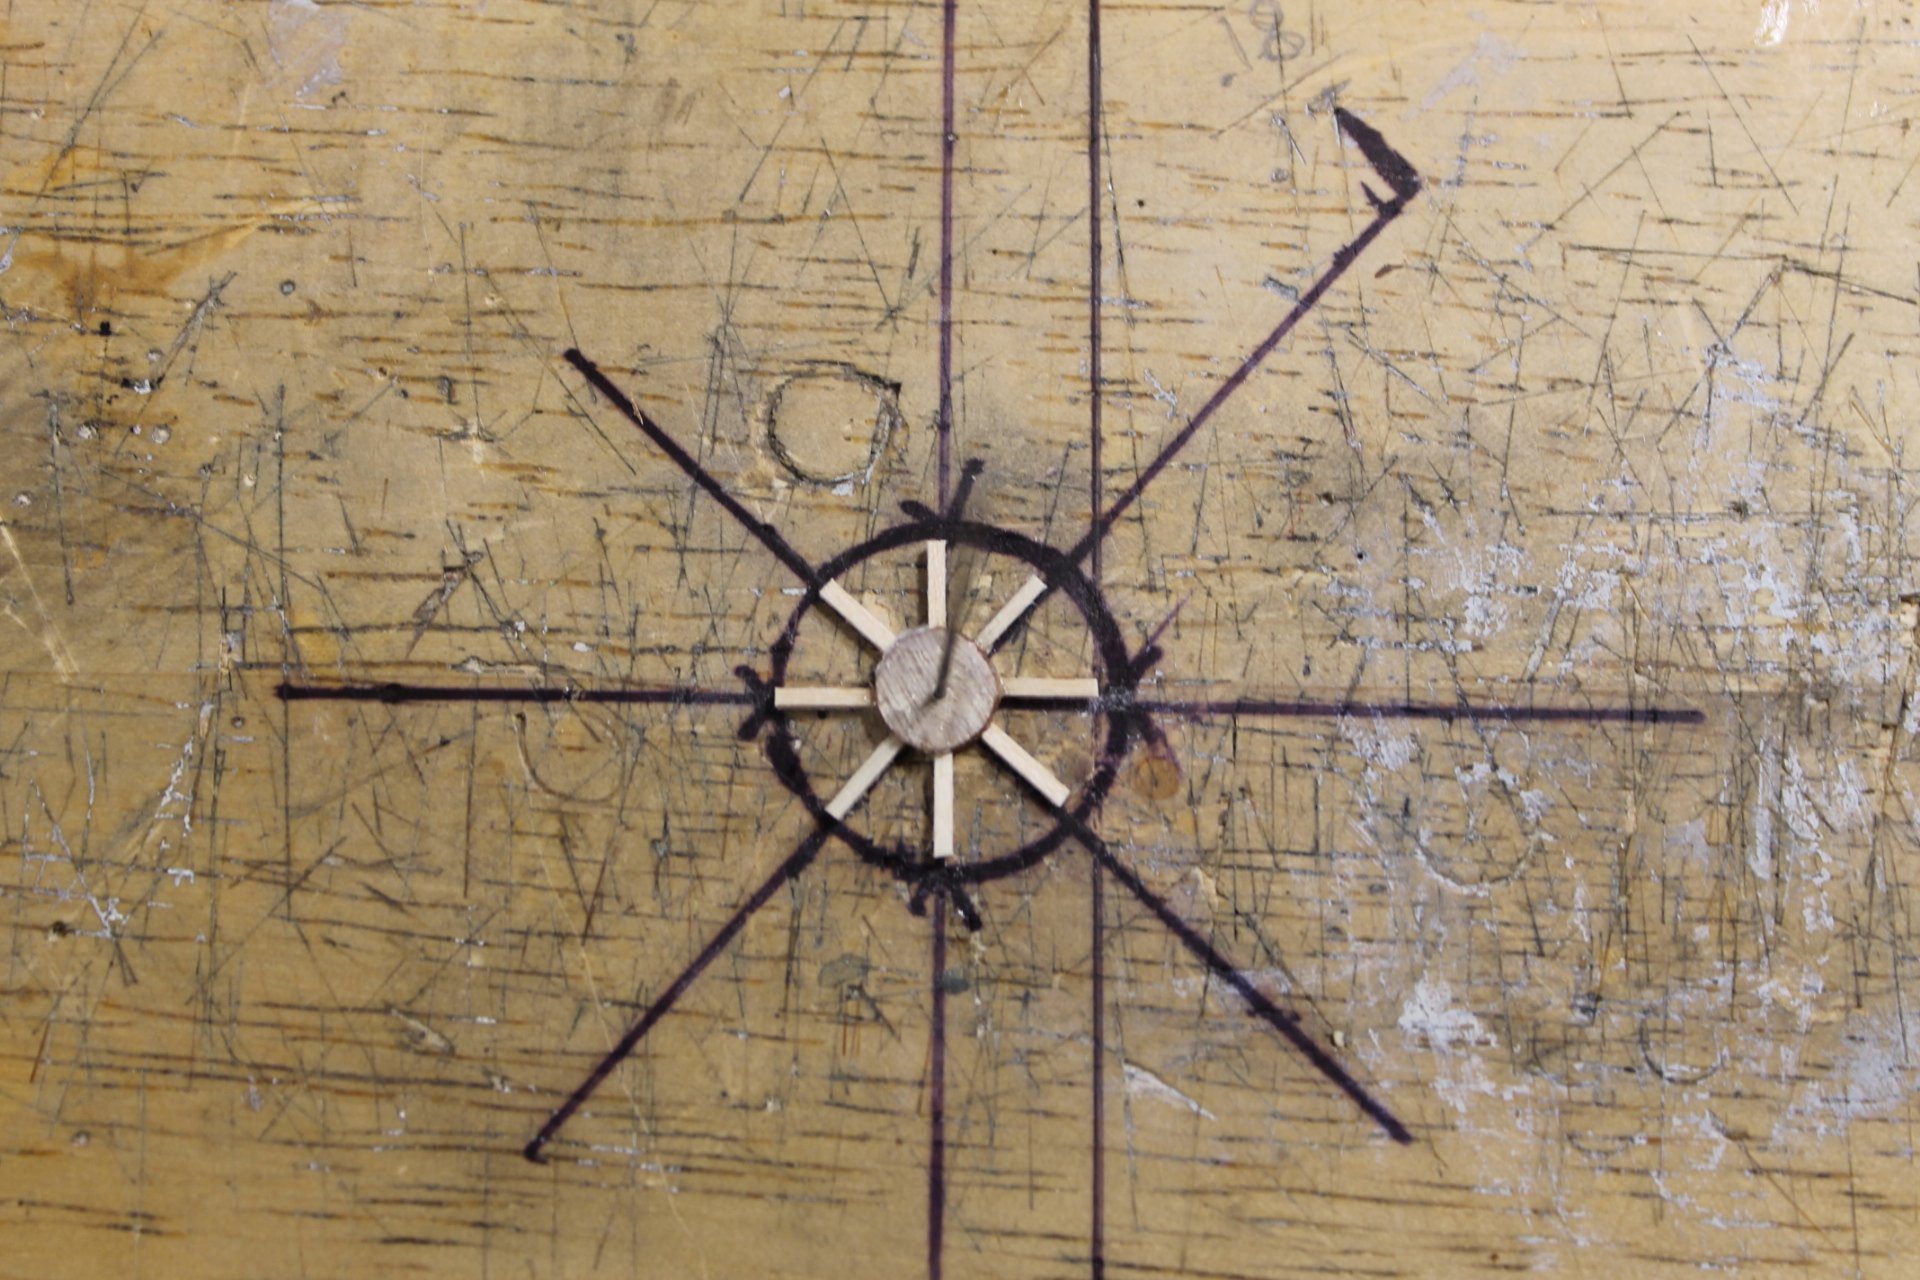
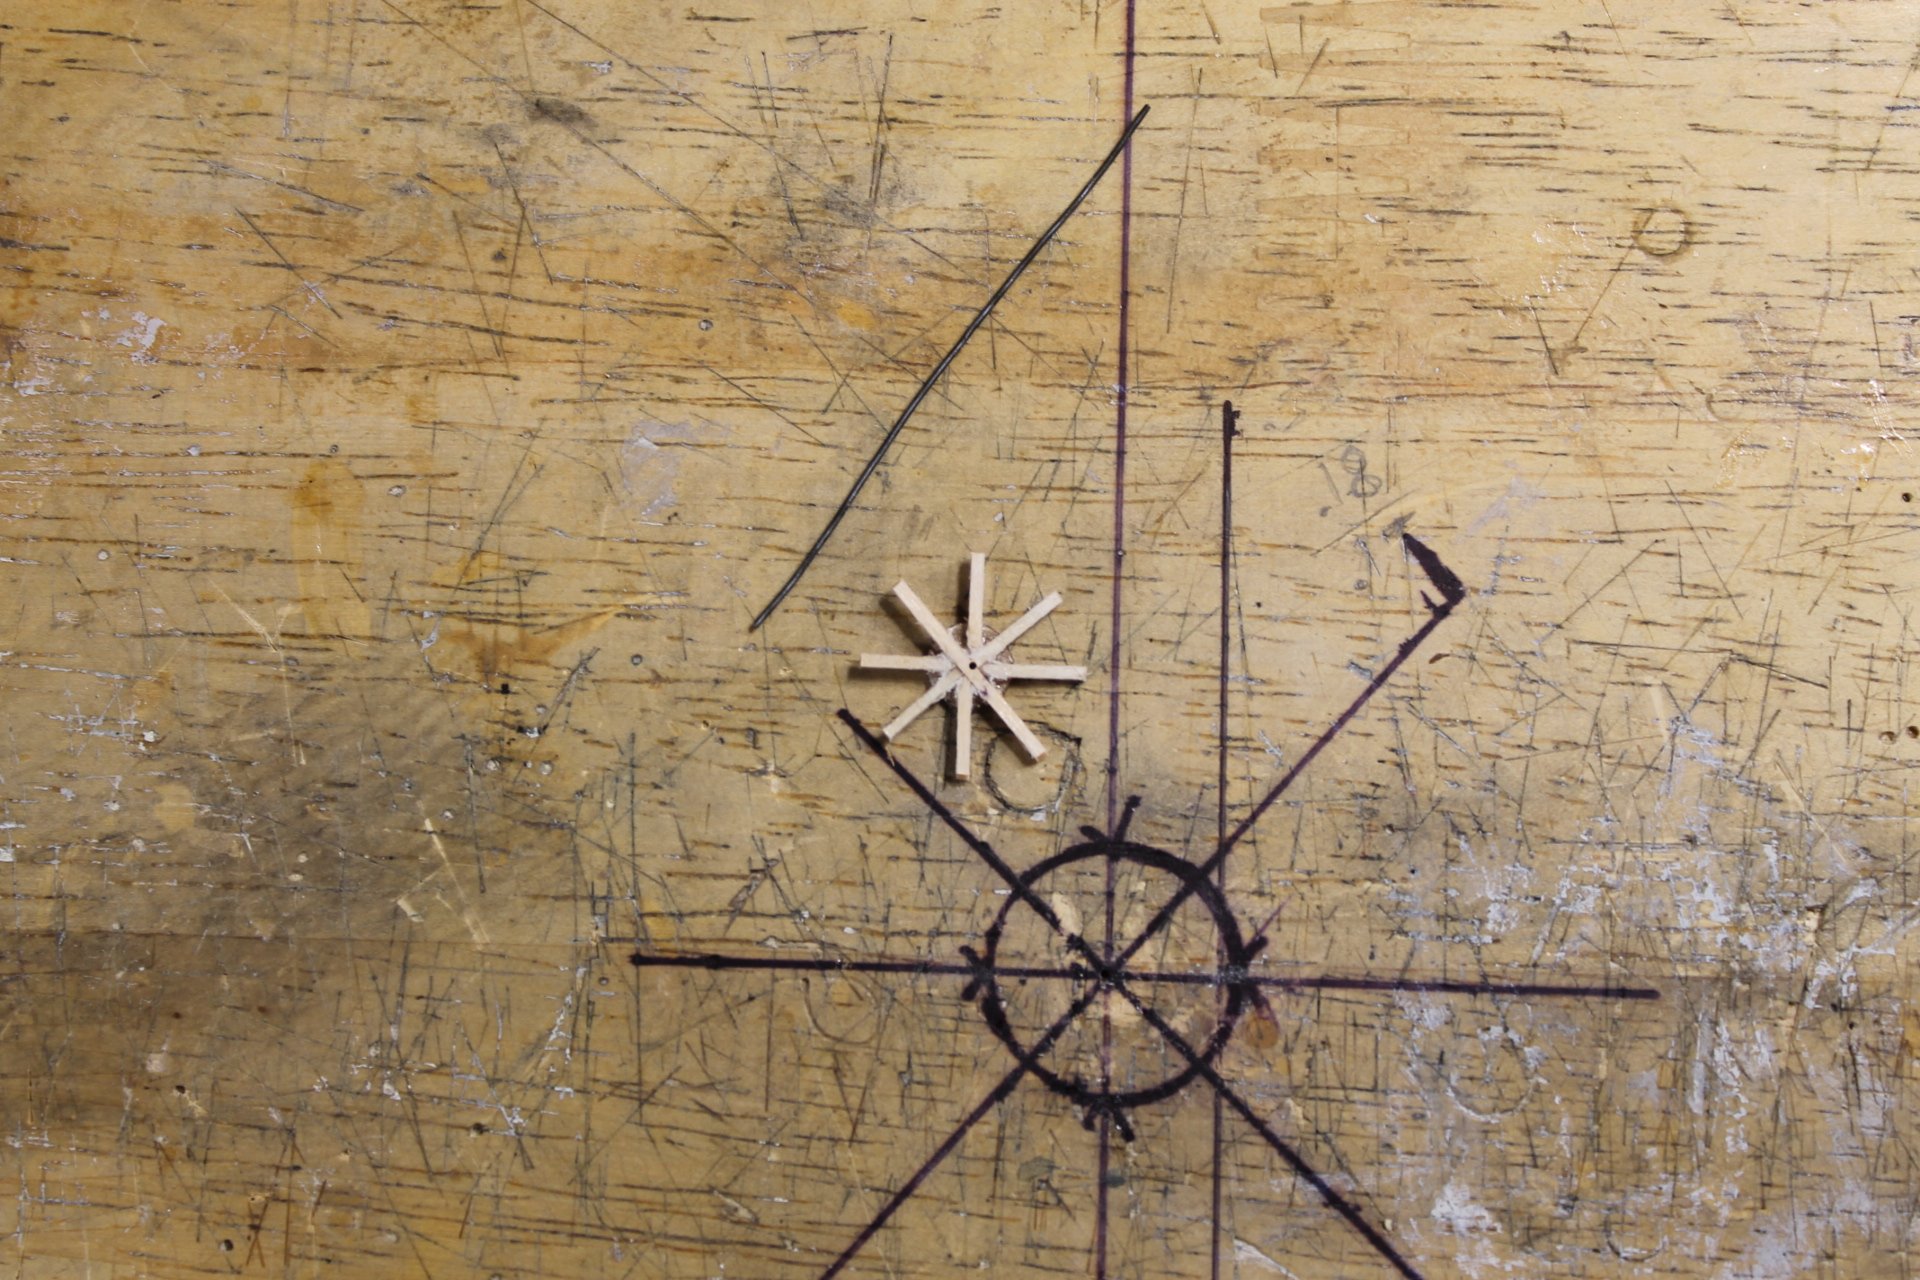
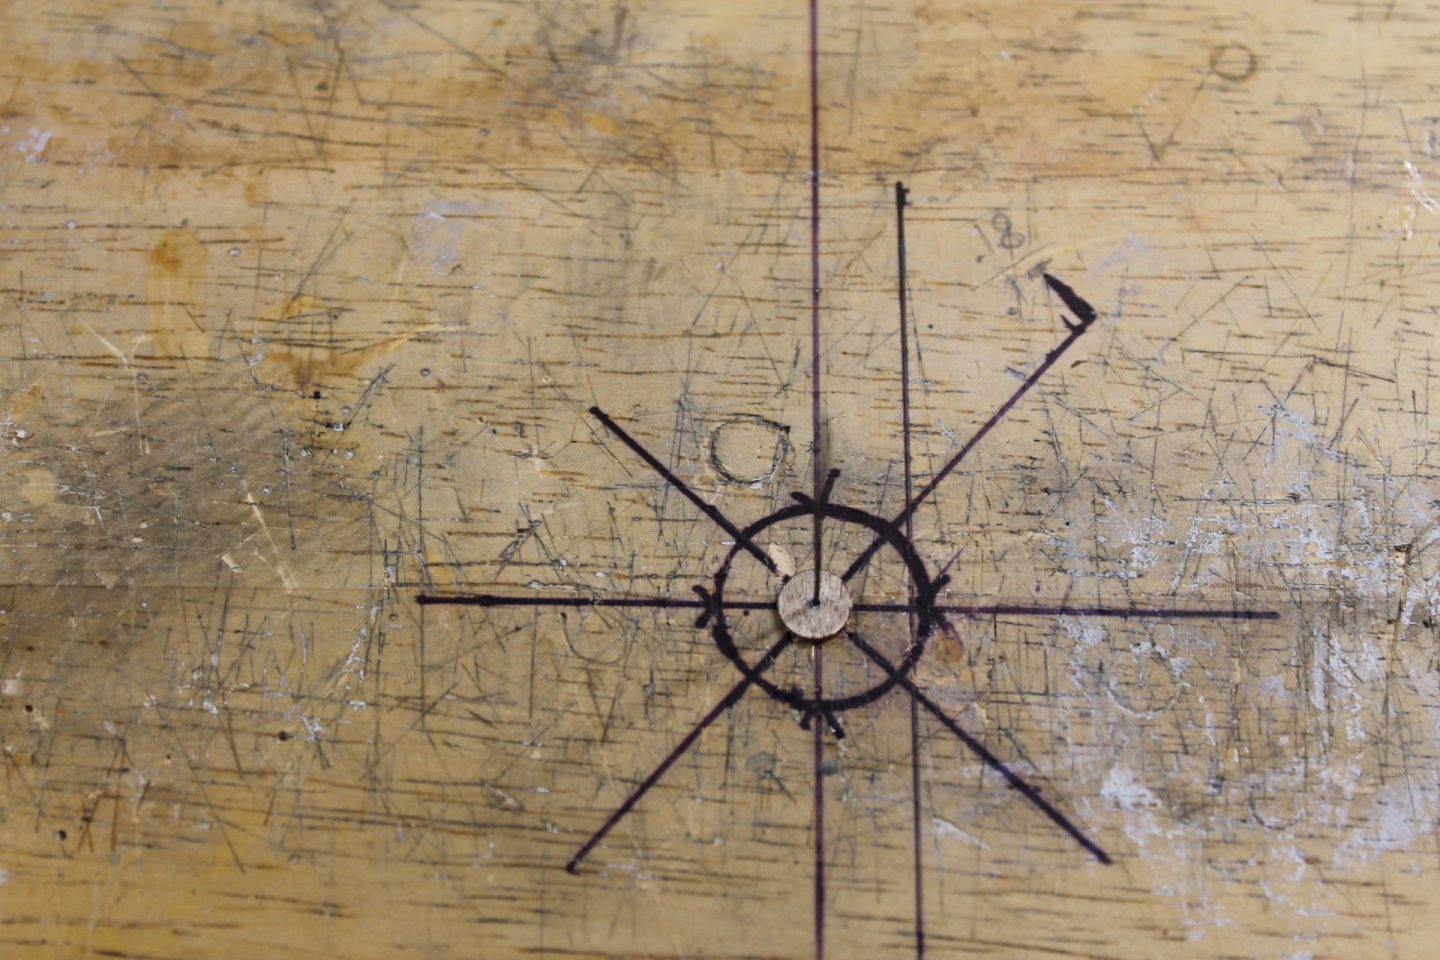
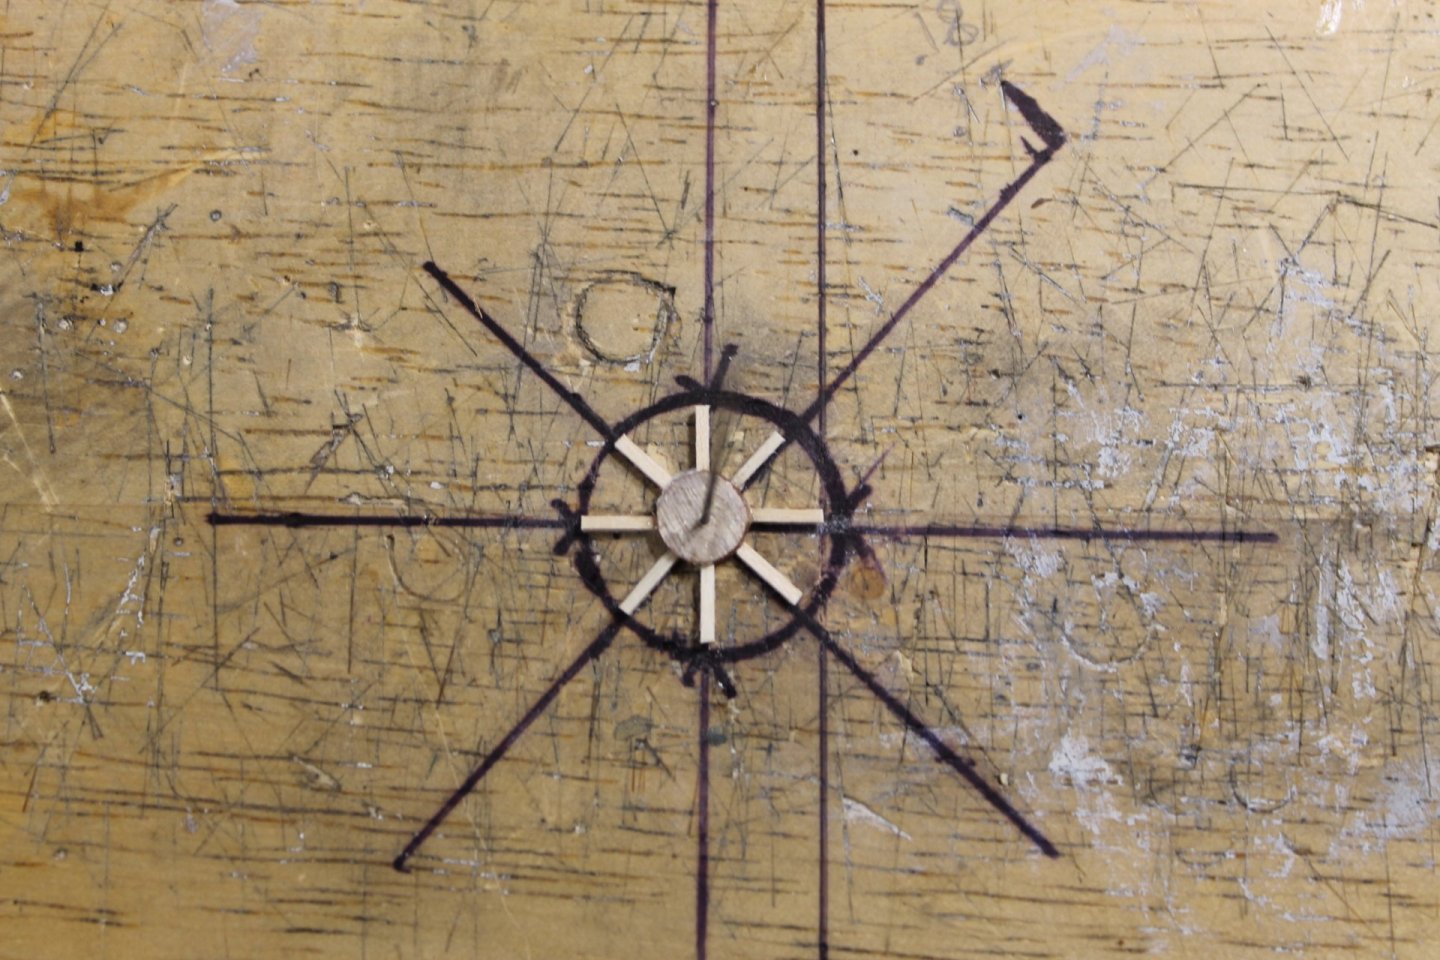
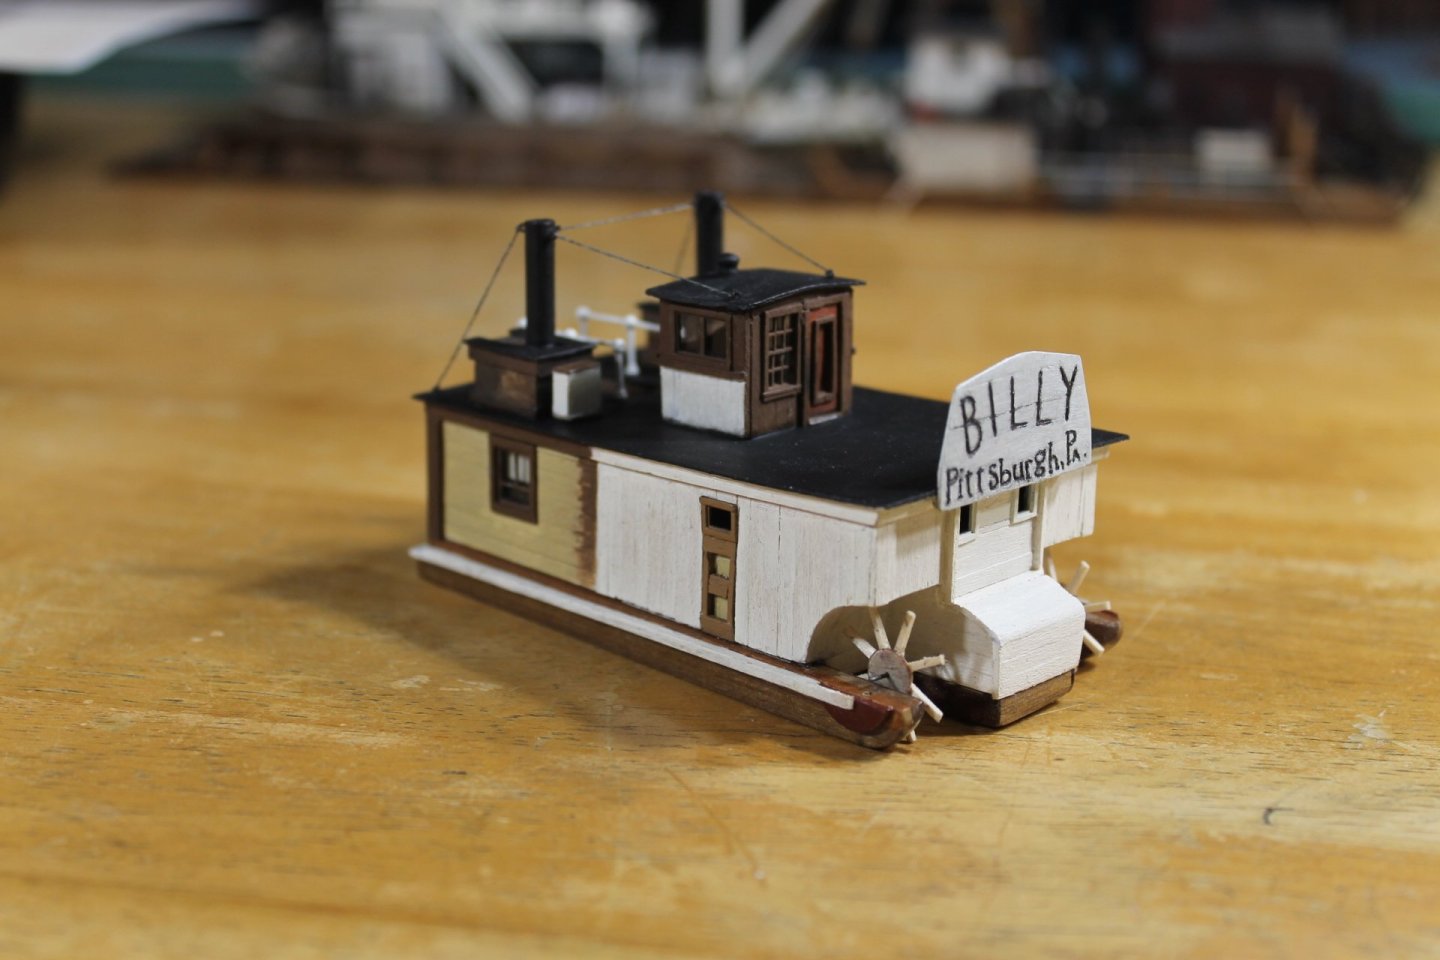
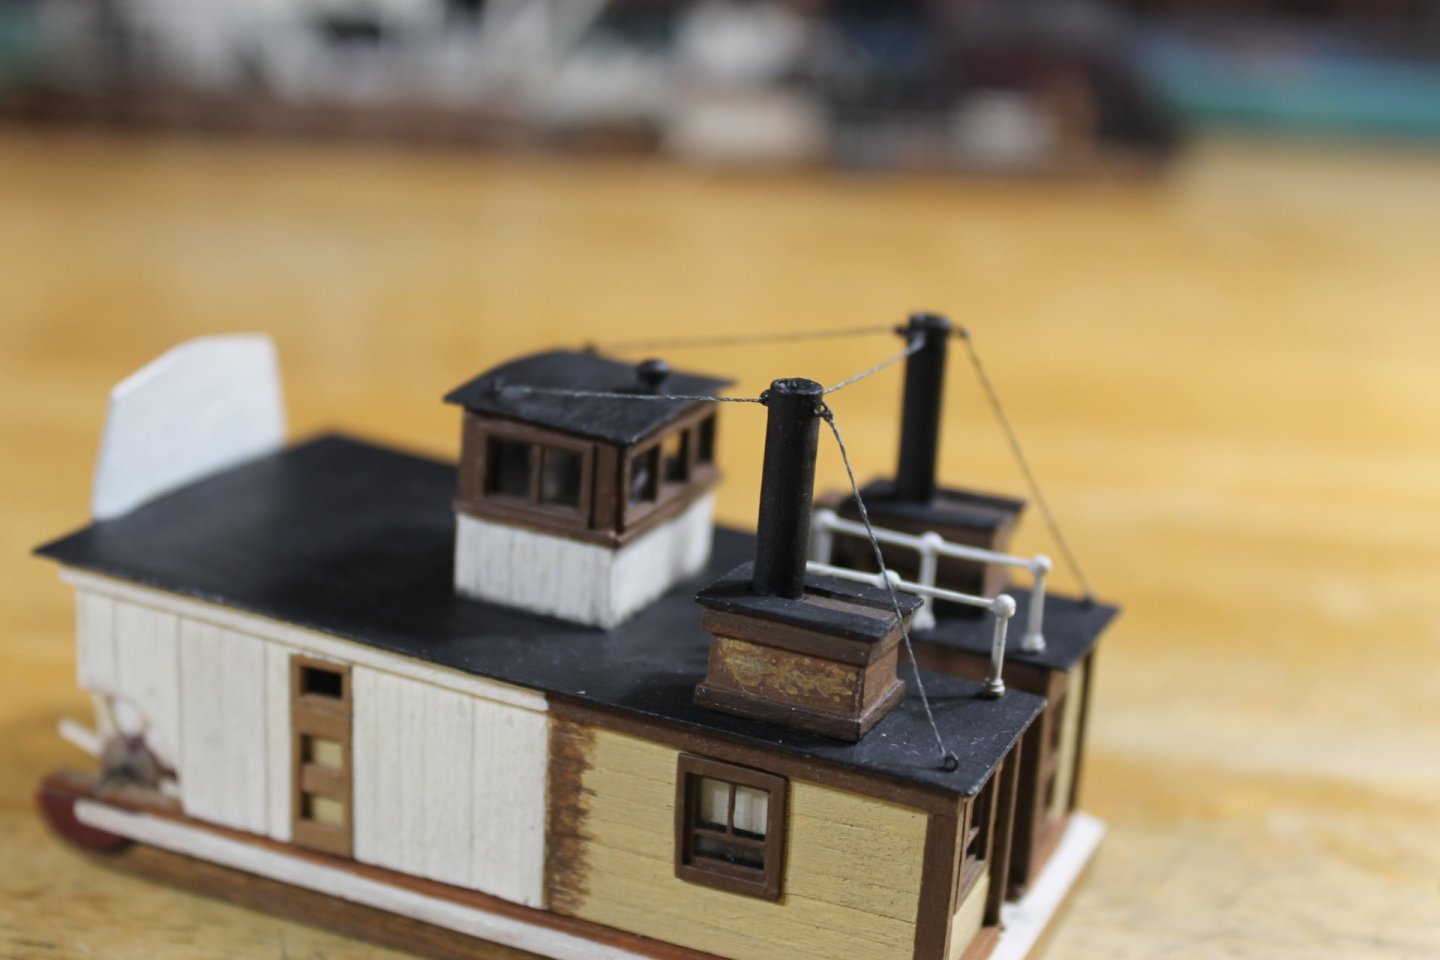
Thank you to everyone for the likes and the comments. The original Billy's wheels were twelve spoked, because of the small amount of gluing area I can only make eight spoke wheels. Using eight spoke wheels on waterline models is easier to fit than twelve spokes so the eight spoke wheels work out well. The hubs are 0.26" in diameter and are cut from 1/64 inch birch ply with a hole punch. As close to the hubs center as possible a hole is drilled. My working templet is drawn on my worktable with the same size hole drilled at the center point. All corresponding work is done in relationship the worktable hole so if the hub hole is a little off center it won't matter other than looks. To the right of the main vertical line is the cutoff line for the spoke lengths. From the worktable hole center tom the cutoff line is 0.35" for a 0.70" total spoke length. The first step is to place a 24 GA piece of wire through the hub into the worktable center hole and then the hub is glued (CA) on one edge to the worktable. All the 0.037" basswood spokes are glued to the hub. The hub and spoke assembly is freed from the worktable and both sides sanded to remove excess CA. The worktable center is scraped clean with an X-Acto chisel blade. The next step is to pin the hub and spoke assembly the the worktable center hole where it rotates freely and the each spoke is rotated into position at the cutoff line and trimmed to length with an X-Acto chisel blade. All spokes cut to length. This completes this part of the process which is pretty easy peasy. Making and attaching the buckets will be the hard part. I think I'll have to make the buckets from the 1/64 inch ply because a hole has to be drilled at each end to make the outside edge brace. The most desirable would be to use 0.10" x 0.037" basswood for the buckets but holes drilled close the edge of basswood have a tendency to breakout even when CA is applied to the edge before drilling. Even though thinner the ply allows holes to be drilled close to the edge without breakout. A little peak at what Billy is gonna look like with wheels with just one hub and spoke assembly in place, very exciting to get to this point. And a look at the dummy stack stays after applying "my" gunmetal acrylic craft paint mixture of silver and wrought iron. I don't know if one can tell if it looks like gunmetal but It doesn't look like Christmas tree lights anymore. Every now and then a sparkle of the silver metallic thread can be seen which looks like when the sun glints off metal. Thank you for your support and for being part of the journey. Keith


-
I dare say you probably drilled a straighter line than done in real life. Mark.
-
The Harriet Lane is looking great, Bob but more importantly is your health. Praying for your full recovery.
- 73 replies
-
- 4
-

-
-
- Steam Cutter
- Harriet Lane
- (and 2 more)
-
Isn't a little mismatched paint part of the overall weathering effect?
-
Thanks, John. I've got a couple of frames completed testing my procedure. It has gone well and I'm confident we'll see Billy with paddlewheels in the not too distant future. My process is no different than yours or anyone else, just smaller scale. Thank you, Ken.
-
Pretty work, very nice, Mark.
-
Thank you very much, John. I wish you were here to help me with these wheels.
-
Thank you,Keith. I missed pilot Keith's message, I need to go back though your Erebus log. I'd love to do a gun metal wash..........what material/paint would I use? Birchwood Casey would just make look black, I think? I've got some wrought iron craft paint I think I'll whip up a thin wash and test it on some scrape thread. Thank you. Bob. I really like the way the metallic thread resembles stranded cable, I think it looks more so than braided but I can see where it could resemble braided cable as well. Ahh, another use, thanks, Bob.