HOLIDAY DONATION DRIVE - SUPPORT MSW - DO YOUR PART TO KEEP THIS GREAT FORUM GOING! (83 donations so far out of 49,000 members - C'mon guys!)
×


Paddy
-
Posts
371 -
Joined
-
Last visited
Content Type
Profiles
Forums
Gallery
Events
Everything posted by Paddy
-
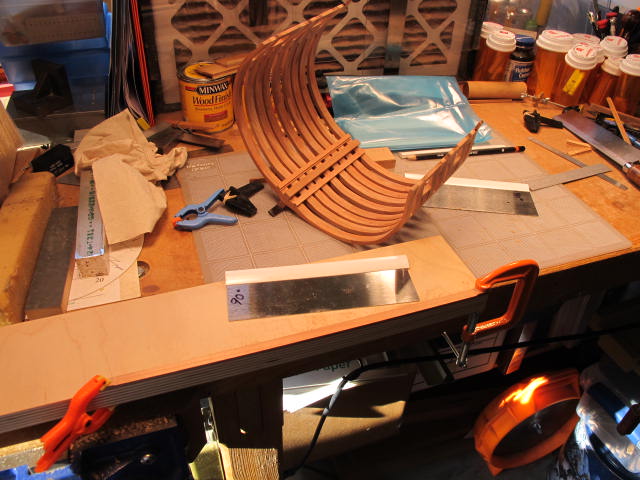
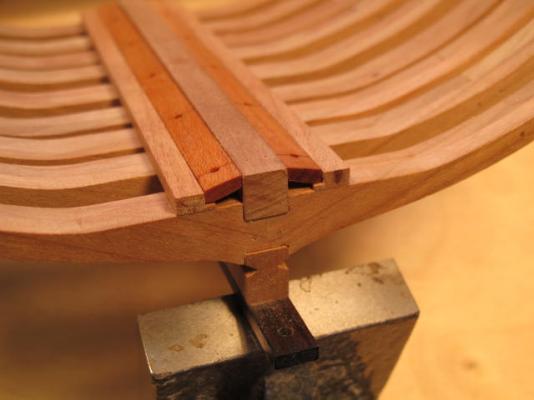
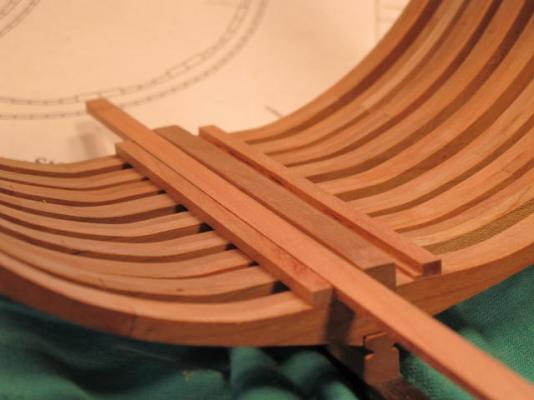
 When I lay the 3/8 of an inch plank across that area there is a gap between the bottom of the frame and plank.
 -
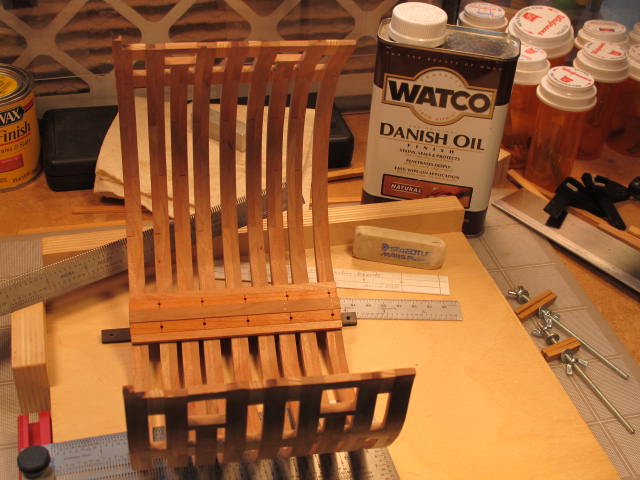
The limber boards are installed but not permanently should I decide to change them. I did make two applications of Danish Oil natural so I could see how the plank end seams would look. Any comments or suggestions are more than welcome. I’ll start trying now how to form the garboard strake into the concave section next to the keel. Is this a case requiring the soaking of the cherry in boiling water and clamping to a form?

-
Thanks for taking a look Rusty.
-
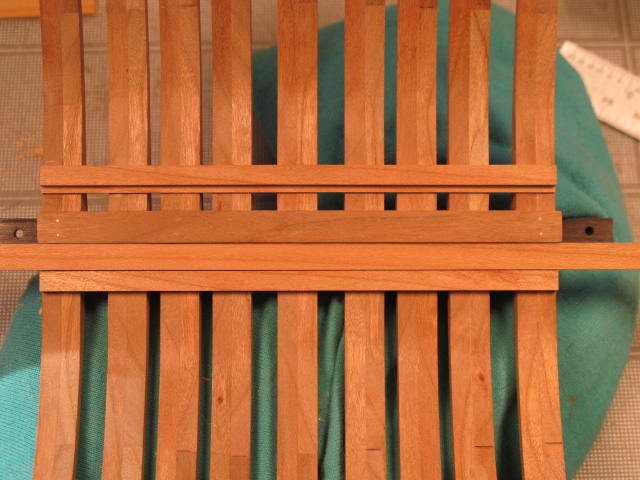
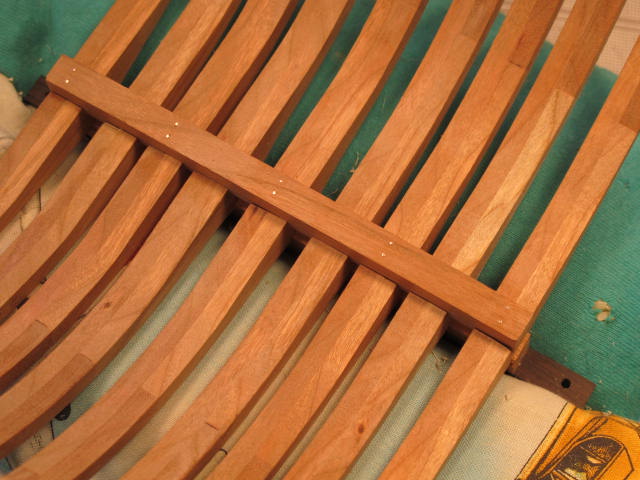
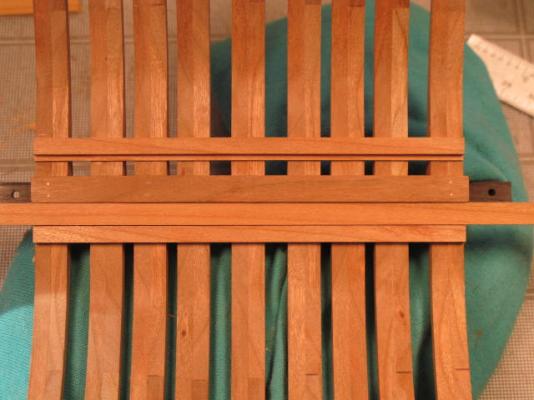
Hope I’m not smothering all of you with my minutia but here is what I arrived at to cut the bevel into the limber board. My second idea this morning didn’t work out so out came the trusty scraper blades. After marking some limit lines on the rectangular beam I cut to fit in the limber board trough I clamped it down and began to plane away. Taking even pressure light cuts along the length of the beam and checking the limit lines often the bevel was soon formed and consistent from end to end. I was indeed pleased with the way it went. Yes, the keelson is curved but the limber board is not.

-
Thank you very much Ron. I agree with you whole heartedly. What a great bunch of talented folks to have the privilege to learn from and from such a great collection of countries too. I appreciate very much being a member of MSW.
-
Thanks for all of that Antony. You are spot on about the learning process. Was sitting in the bunker until a few minutes ago doing a study on the limber strakes, and plans when the penny dropped on another way to attack the limber boards. Now, I must put on my lubber's cap and mow the lawn ....... but getting back to the shop will speed the mowing so I can try the new approach.
-
Rusty, Looking through you finish pictures this morning I noticed that you have staggered the limber board access holes from port to starboard. Don’t know if you found documentation to support that but I do know that I like it very much. Again, a beautiful presentation and subject.
-
Thanks Rusty and Grant. Yes, only one so far but then I'm just starting.
-
Grant, Those really are fine brackets showing excellant craftsmanship.
-
Outstanding Rusty. Well done!
-
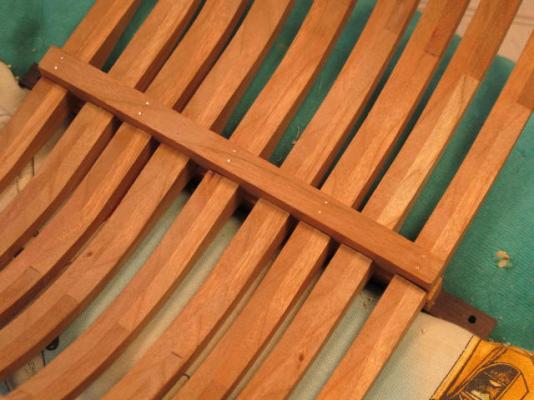
Installing the limber strakes now. While the glue is curing on the last limber strake I’ve started fitting a limber board. The fitting is a bit tedious. Have already thrown one in the trash bin.

-
She’s really looking grand Bob. Love those guns, and tackle.
-
Antony, thanks for taking the time to post that for us. On further searching of ” Sailing Man of War” for ‘Bolt’ information, I quote…….. “It was consider good practice to bore out the timber on either side, to a depth and diameter of the head and rove. Once the bolt was fastened the remaining space was filled with some form of caulking, and faired off with the faces of the timber.” (See page 61 in Bolts section.) So, thanks to Peter Goodwin too I do believe he has given us a supporting answer. I need to learn to expect more for his book and at least look at the index. Egg on my face and a mess in my nest again! Going to start taking the book to the shop with me. I can sure fair off the bolt with the face of the timber but may have to skip the caulking bit.
-
Thanks for that Mark and Antony. Looks like I may have a 50-50 chance either way I decide. Thanks Antony, great on the photo and I look forward to your post.
-
Acrylic over oil based stain?
Paddy replied to Paddy's topic in Painting, finishing and weathering products and techniques
Thanks for all the input. I am now reconsidering. Think I'll test using artist oils over the Minwax stain and see what happens. Have some on hand I have never used and always wanted o give the artist oils a try. BTW, its not for the Triton X-section project. -
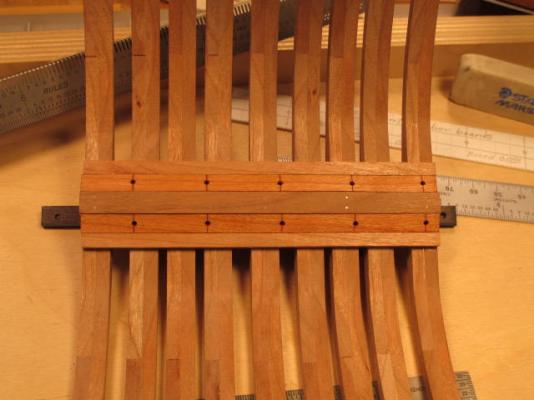
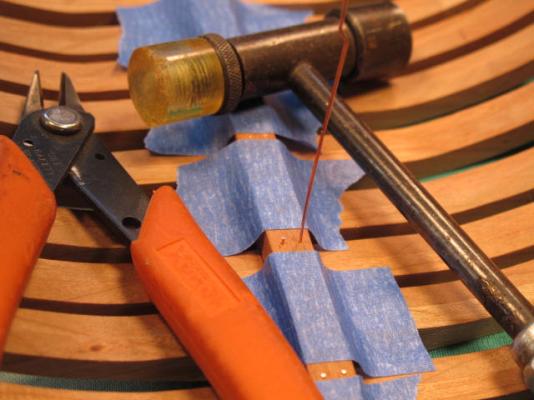
Attempted my first detail bit today? Installed the simulated copper bolts that tie the keelson to the keel. I decided to leave them just a little proud of the keelson but if anyone knows that they should be flush with the top of the keelson please let me know. It’s not too late to file them down at this point.
-
That's good to hear Bob as I have a set from the Lumberyard also, cannon and carriages, that I'm planning on using.
-
Outstanding work Mark. Beautiful!
-
Bob and Pete, Thanks very much gents. Your encouragement is really appreciated. Just reading my "Sailing Man of War 1650 ~ 1850" book, under the Keelson Assembly section, and see that there were copper bolts through the keelson into the keel at ever other timber floor before the 1800s. So, I’ll do that next, just have to decide what size. Seems they ran from 2” down to 1” except for the Victory which had 2 ½” bolts. Thanks again for taking a look and your input.
-
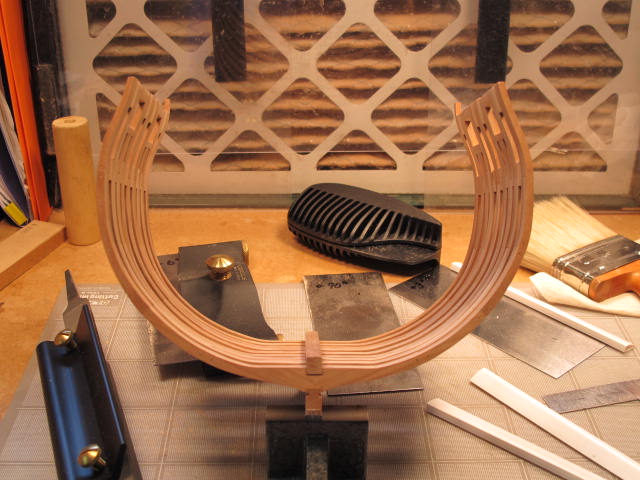
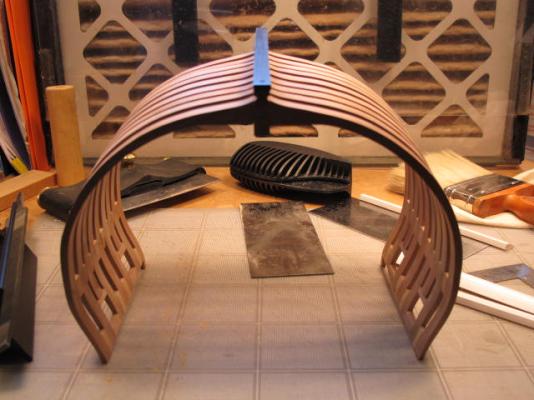
You’re very welcome Antony. I have now arrived at the time to move forward to the next step. My framing is far from perfect but I think I’ve reach the point of diminishing returns. There are a few low spots on a couple of the interior frames on the inside but I do believe those will be taken care of when planking and ceilings are installed. Fingers crossed....... we’ll see. I have installed the keelson and will now decide what process to start next. I do have a few logs I can study that should get me on my way here.


-
Very nice work Bob. Like the idea too of using boxwood to replace some of the parts. The metal work and pins are also top drawer.
-
Hi Don, Nice to hear from you. Yes, the clamps are very useful. An idea I got from someone else. Hope your enjoying your Onedia project.
-
Hi Marius, Thanks for that. Your doing some fine work.
-
Thanks for that. Yes, the scrapers can be flexed although in this case I use them one-handed and do not flex them wanting a straight across cut while leveling out the frames. I think the following will answer most of your questions. Super-hard milled scrappers - http://www.leevalley.com/US/wood/page.aspx?p=32670&cat=1,310,41069 For sharpening I use a Veritas® variable burnisher – http://www.leevalley.com/US/wood/page.aspx?p=32633&cat=1,310,41070&ap=1 but, you could use something like the Veritas® carbide burnisher which are not as expensive – http://www.leevalley.com/US/wood/page.aspx?p=32643&cat=1,310,41070&ap=1 For re-sharping or putting a 90 degree edge back on the scrapers I use the following file holder Veritas® Jointer/Edger – http://www.leevalley.com/US/wood/page.aspx?p=32631&cat=1,43072,43089,32631 and an eight inch mill file. The above items make it easy for an amateur like me to get an acceptable job I think. All in all a bit of an investment but I originally purchased these items for other shop projects, read that before model ships, but when I started milling my own wood I began using them to remove burn marks caused by the thickness sander and bringing the wood to a closer thickness dimension. Thinking about that is when I heard the penny drop. I apologize if I got a bit windy on you Antony but there you have it. P.S. This is not an advertisement. The links have some good info about the items and can give the looker the confidence that he or she can use these wonderful tools that the old master woodworkers used and now they're almost forgotten. Love'um!
-
Thanks for that Pete. I have been using your technique for checking for low points. The scrappers reach across all the frames so able to use them as my straight edge too. Something I started out not excited about and dreading I'm now enjoying. Using three scrappers now with edges of ninety, five and ten degrees gives me a selection of how much wood is being removed. The ninety removes the least stock and the ten the most out of the three. Anyway, thanks again for taking a look and your input. Always a big help.