HOLIDAY DONATION DRIVE - SUPPORT MSW - DO YOUR PART TO KEEP THIS GREAT FORUM GOING! (89 donations so far out of 49,000 members - C'mon guys!)
×


rwiederrich
-
Posts
5,518 -
Joined
-
Last visited
Content Type
Profiles
Forums
Gallery
Events
Everything posted by rwiederrich
-
GrandpaPhil….. I join you in your anticipation. As I get closer to her final days in the shipyard....I must be reminded that I still have plenty to do. An entire fourth mast needs to be installed and rigged. I didn't get in the yard time I had hoped this past weekend...due to a shed build(Now I need to add shelves) and some honey-do things namely repairing the hot tub for the admiral. As soon as I can recall the shipyard workers and establish a work schedule......I pray I will be finishing up the mizzen backstays and stay sails....then on to that last mast and its sails...and the finish line(what a sad day that will be). Thanks for your fine comments and encouragement. Rob
- 1,208 replies
-
- 5
-

-
- great republic
- clipper
- (and 1 more)
-
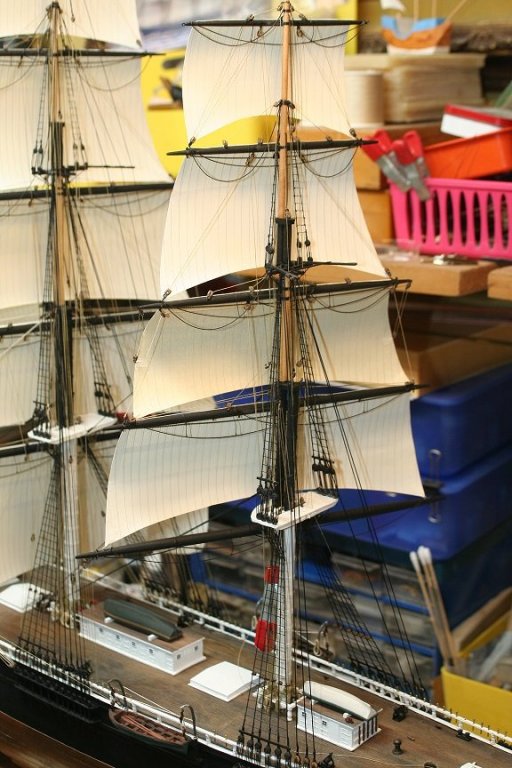
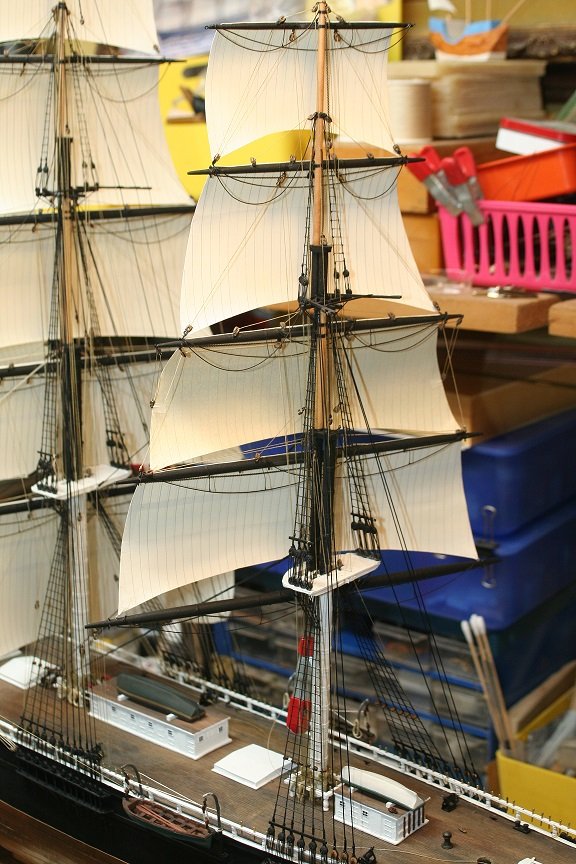
Thank you very much. Even in this scale I am trying to include every major rigging element. I did omit the boom yard blocks for cleanness. I was not fully aware of what she'd look like with a full set of sails (Minus the stunsails))…..can't wait to see her with her spanker mast and its remaining sails. I think I have 6 or 7 more sails left to complete the plan. Again... thanks for the fine comments and encouragement. Rob
- 1,208 replies
-
- 3
-
-
- great republic
- clipper
- (and 1 more)
-
From my research... she didn't receive her skysails until she was rebuilt...she needed them to compensate for the diminished sail plan from her original design...which I attempted to replicate. Thanks for your kind words and encouragement. Rob
- 1,208 replies
-
- 1
-
-
- great republic
- clipper
- (and 1 more)
-
Thanks Druxey....the power is in the large number of sails put on these vessels... Rob
- 1,208 replies
-
- 2
-
-
- great republic
- clipper
- (and 1 more)
-
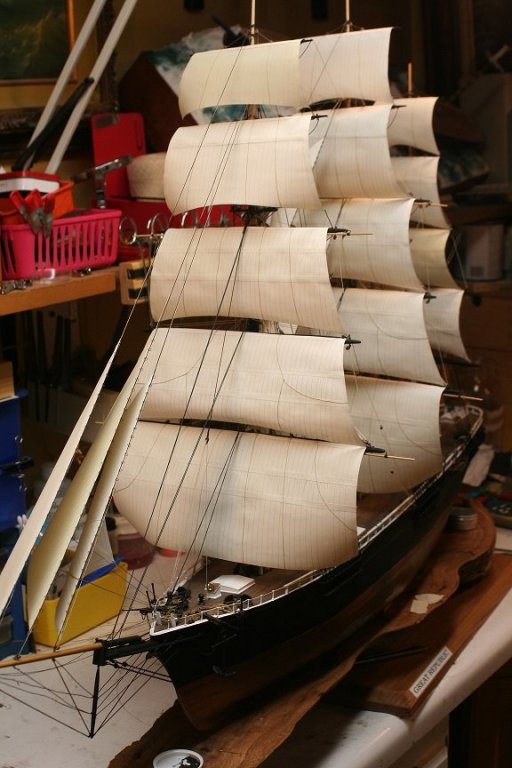
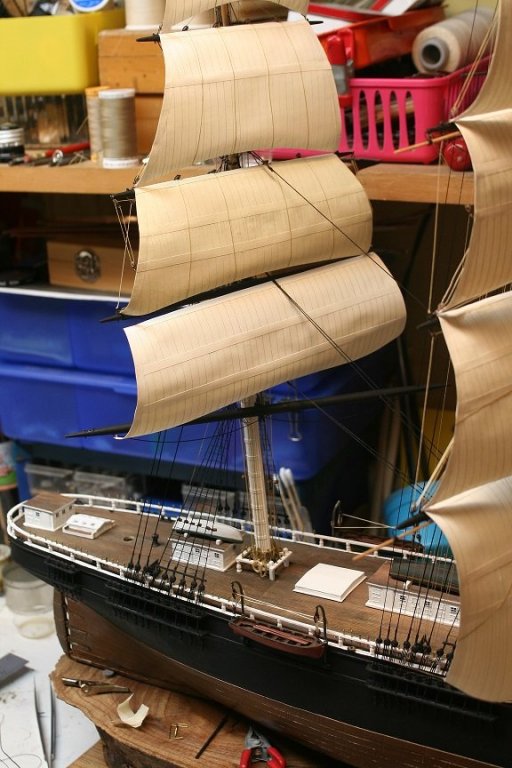
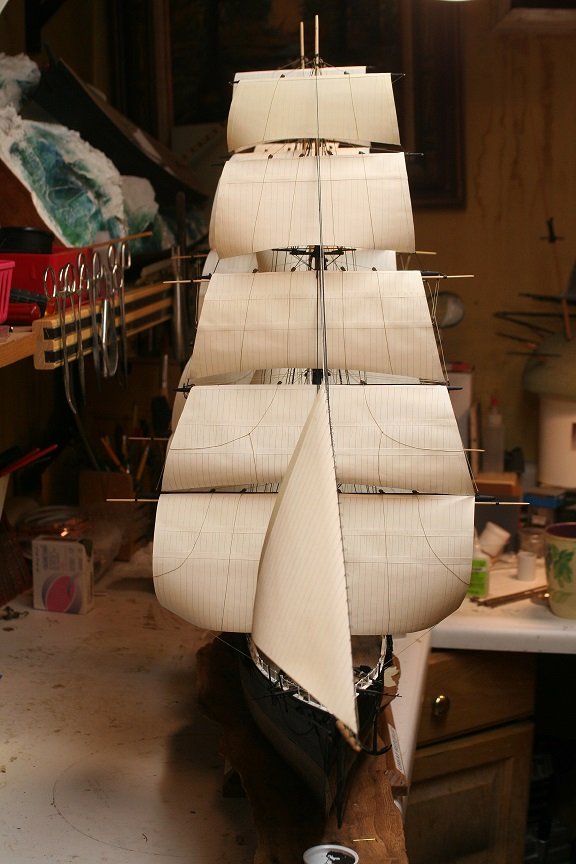
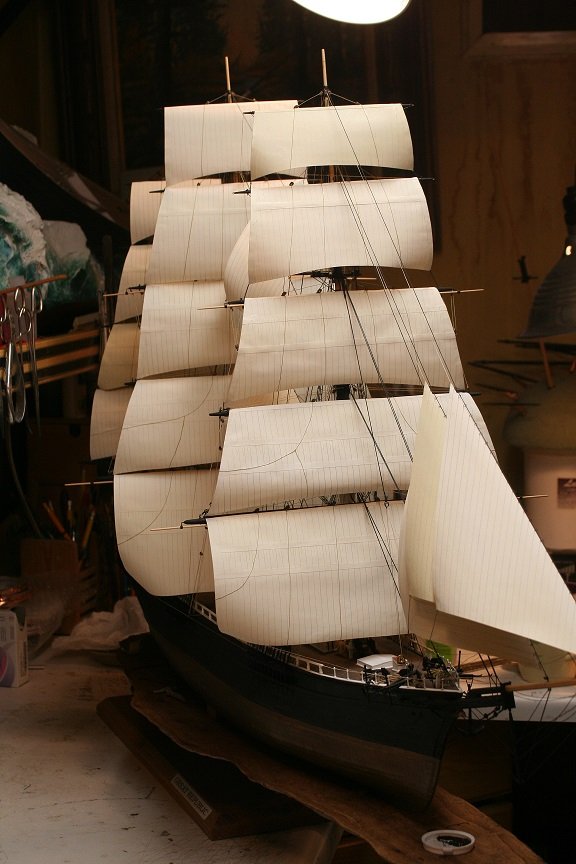
Thanks Bob....After building the yards for the Glory of the Seas...without sails(Not mounted yet)...I realized, the largest clipper ever built had to have her sails set...for the sails of a clipper are as impressive as her hull....for in reality...it is her enormous expanse of sails that makes her so Iconic. A clipper spreading full sails in open water must have been a thrill to witness. I can only hope my attempt can, slightly, if possible...create the same feeling. Thanks for your fine comments and compliments Bob...I really do appreciate it...very much. and I appreciate all the likes from my fellow modelers. Rob
- 1,208 replies
-
- 3
-
-
- great republic
- clipper
- (and 1 more)
-
From these views she looks ginormous..and active. Thanks for the fine comment. Rob
- 1,208 replies
-
- 2
-
-
- great republic
- clipper
- (and 1 more)
-
You're doing a fabulous job with the PE Popeye.... All those micro bends and stuff....... Your Arizona is looking smart.... Luv it. No one burns for uttering curses....my friend...just for rejecting J.C. That's all together another subject for another forum. Rob
-
Hoping to spend some time on the GR today....before..I wanted to take some updated images of her currently. Rob


- 1,208 replies
-
- 8
-
-
- great republic
- clipper
- (and 1 more)
-
My oh my....Nic I pray your recovery is swift and at a minimal discomfort and your return to the shipyard is with new vigor and energy. Rob
-
Their problem was all they had was *some* Red oxide and *some* white Oxide primer and by mixing them they had enough to prime the sub)Pink)....planning to paint the entire Sea Tiger grey...but, the Japanese navy attacked them before they did paint over the pink. Rob
-
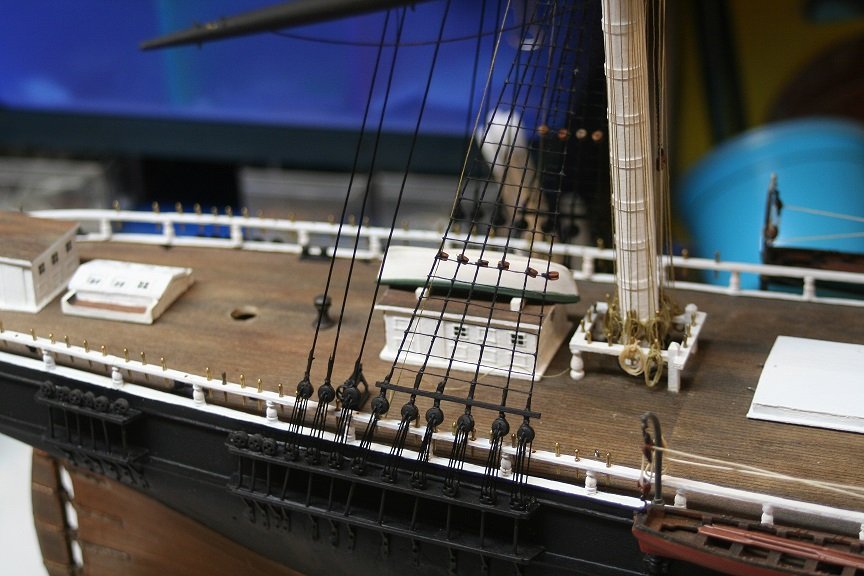
Systems work for me....techniques can be regulated and specialized for particulars. Once I develop a *system* I run with it...and up to this point I have had no major *redos*..cept the original stunsail booms...got an upgrade. I fell victim to my pain and had to shake myself clean of it and just redo it all...the right way..without pain being a contributor. And it paid off...so much nicer and accurate. I'm all good now...thanks for the fine comments and encouragement. Now I will add some stay sails..before I finish off the backstays. The mainsail will follow all this work. I'm sorry I'm not as descriptive of my labors as was EdT...I'll answer any questions though.... Rob
- 1,208 replies
-
- 3
-
-
- great republic
- clipper
- (and 1 more)
-
The build thus far is looking very nice Nic...clean and crisp painting..not to mention the fine rail work. Keep -er coming. Rob
-
Sweet work Nic...was hoping you'd post something......
- 356 replies
-
- 4
-
-
- red jacket
- finished
- (and 1 more)
-
I really didn't spend as much time as I would have liked, but I have to get ready for this weekend's big fence building party for some critters my daughter is wanting to house at my place. About 1/2 an acre of fences and gates and a custom chicken coop to boot. Here is an overall view of today's work. Slow going these days. Rob
- 1,208 replies
-
- 7
-
-
- great republic
- clipper
- (and 1 more)
-
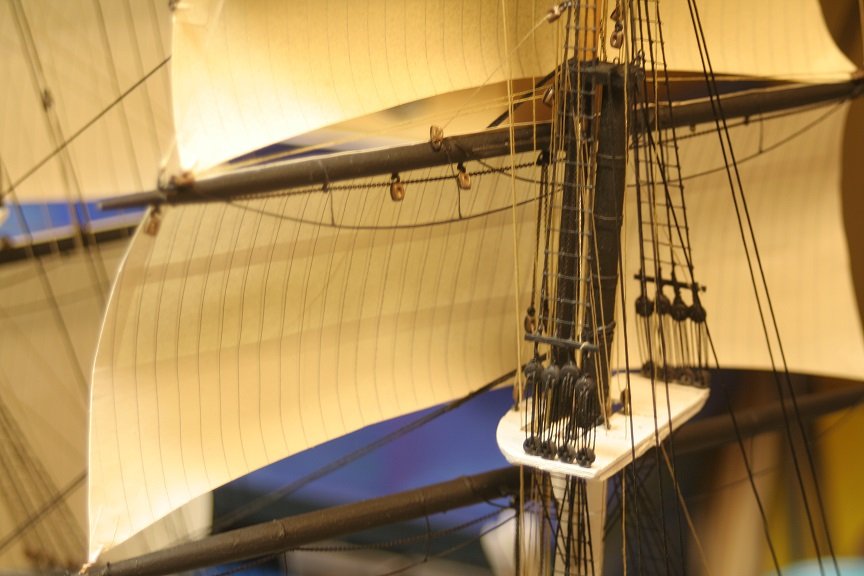
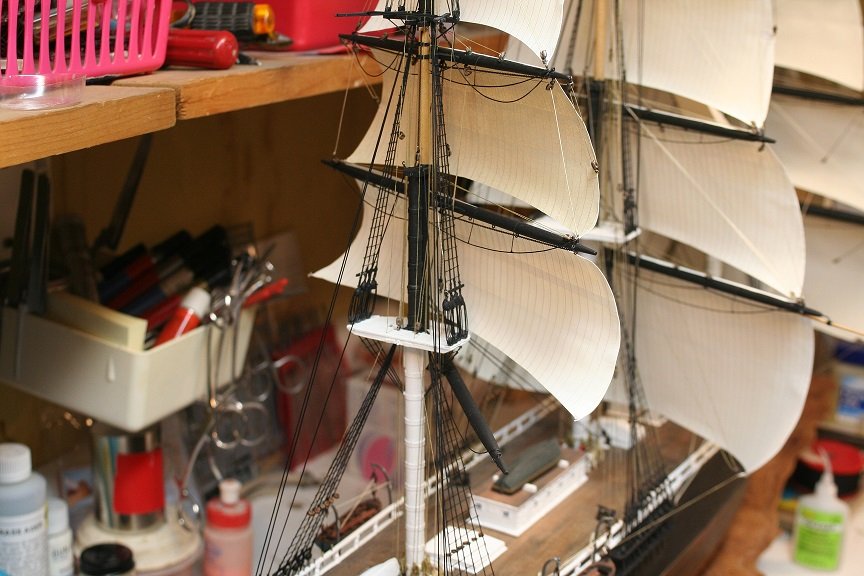
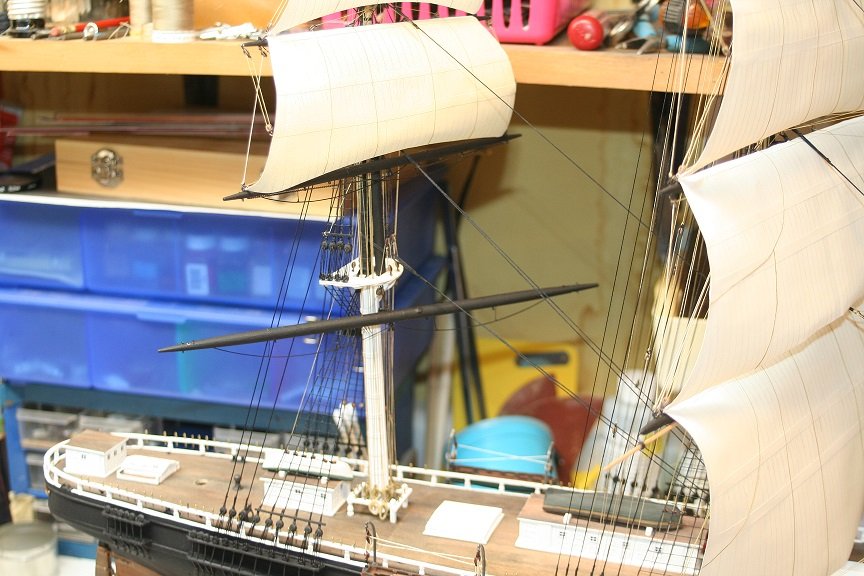
Now I added the buntline blocks and some clew blocks and the blocks for the downhauls. Rob
- 1,208 replies
-
- 6
-
-
- great republic
- clipper
- (and 1 more)
-
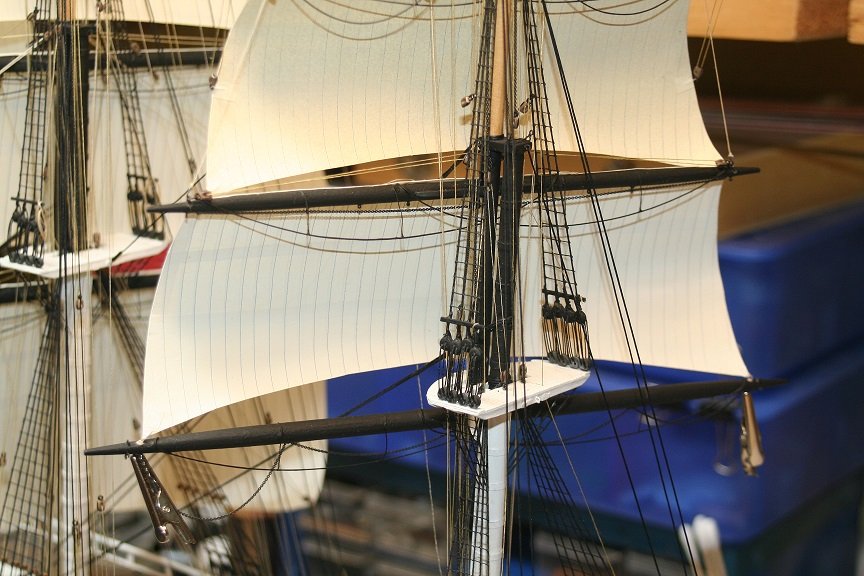
Spent a bit of time working on the lower topsail of the mizzen. got the buntlines on and the sail mounted.
- 1,208 replies
-
- 5
-
-
- great republic
- clipper
- (and 1 more)
-
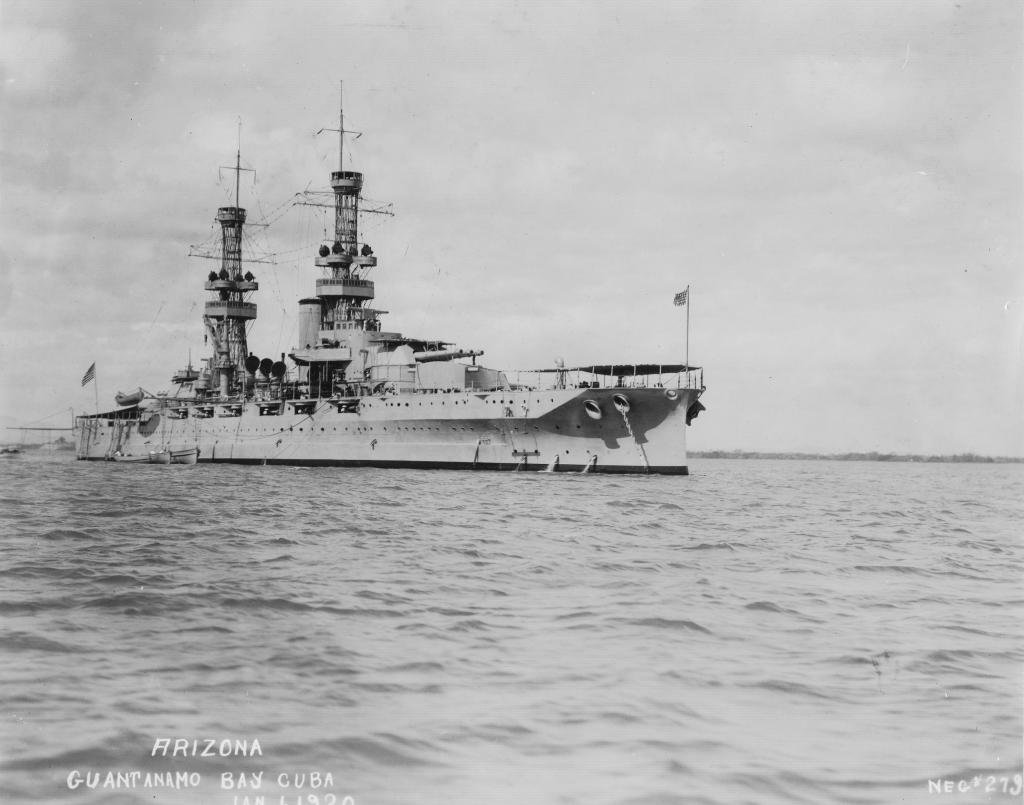
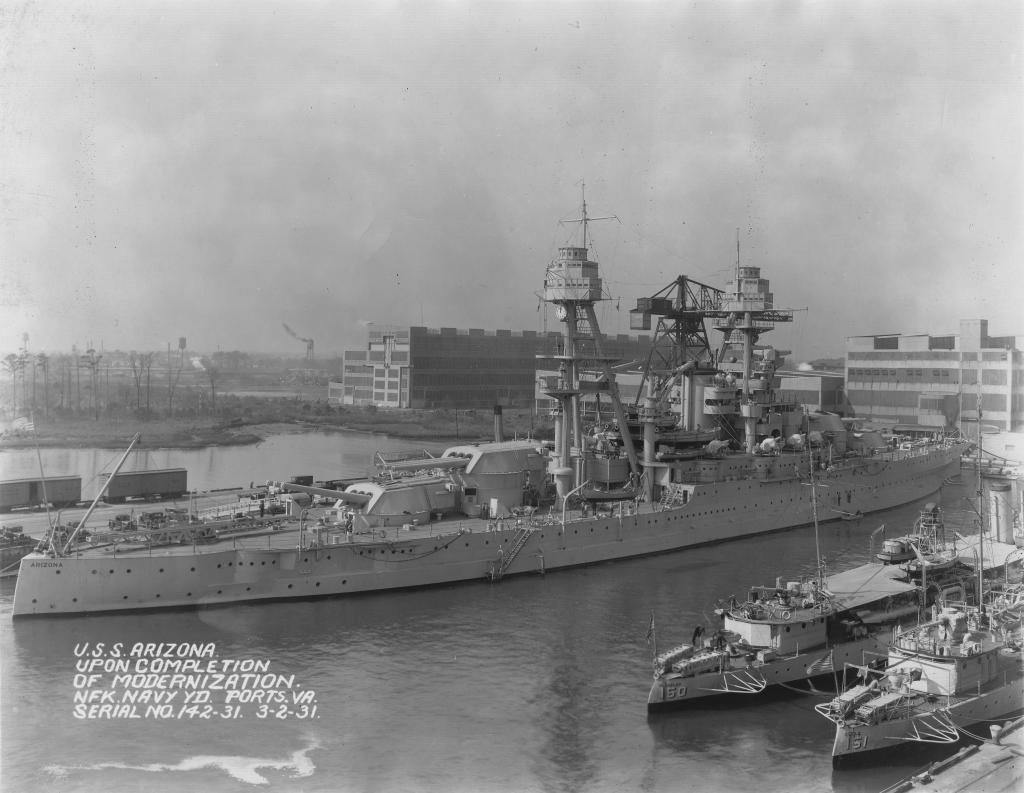
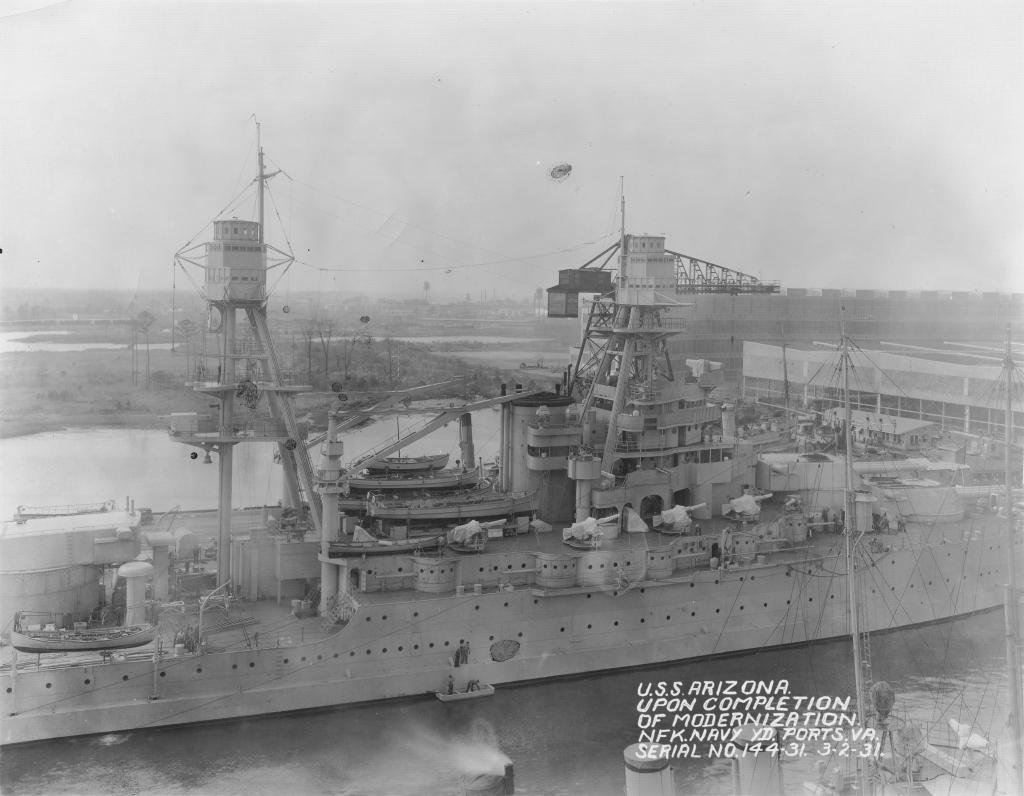
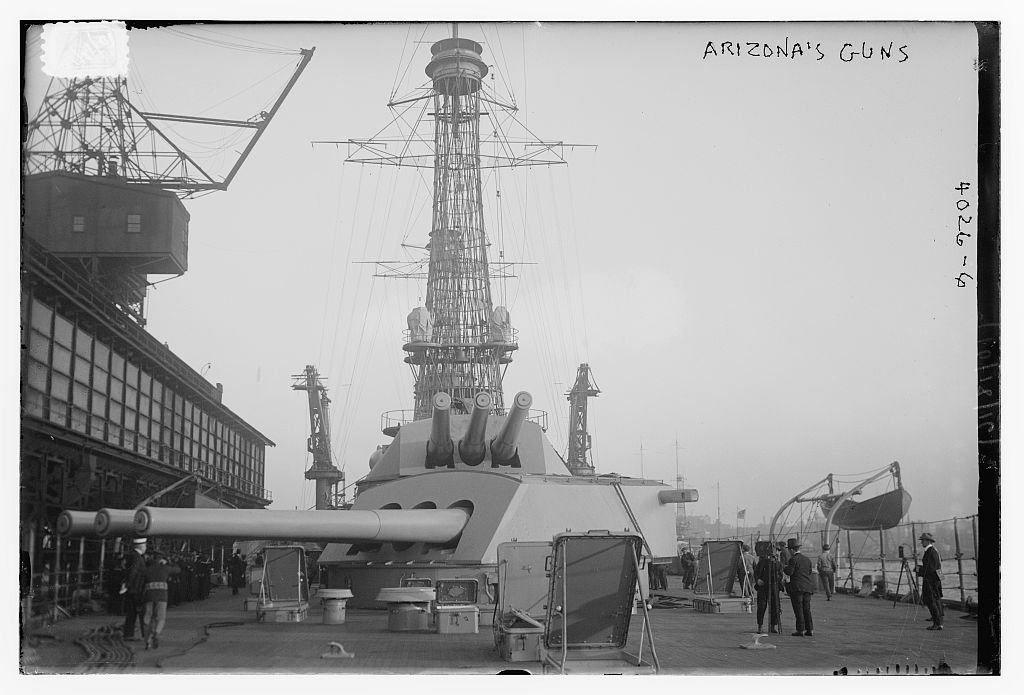
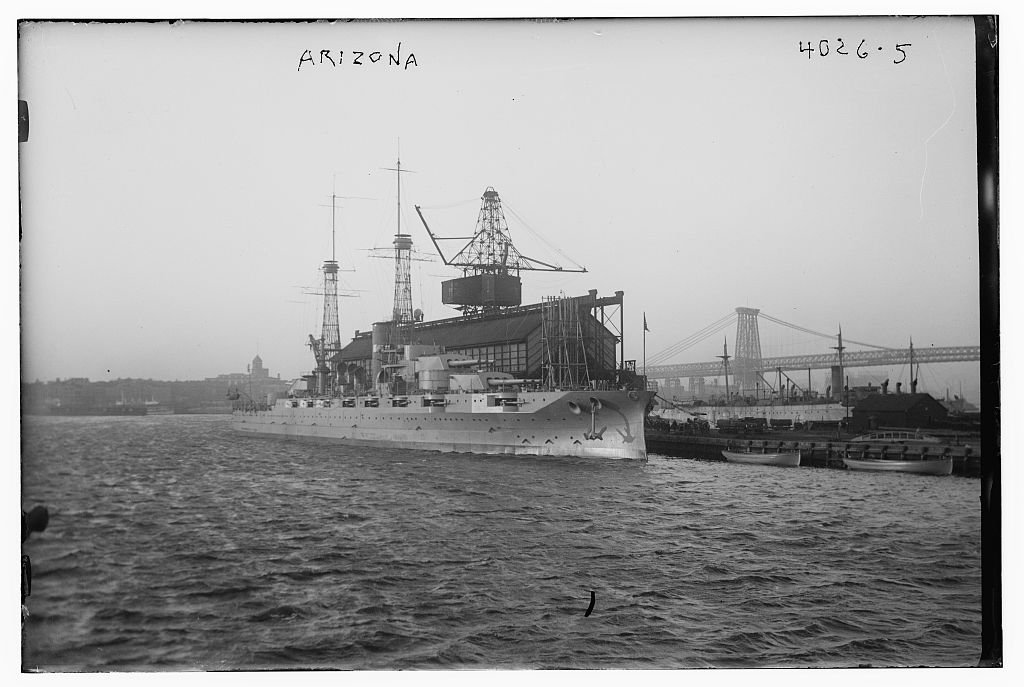
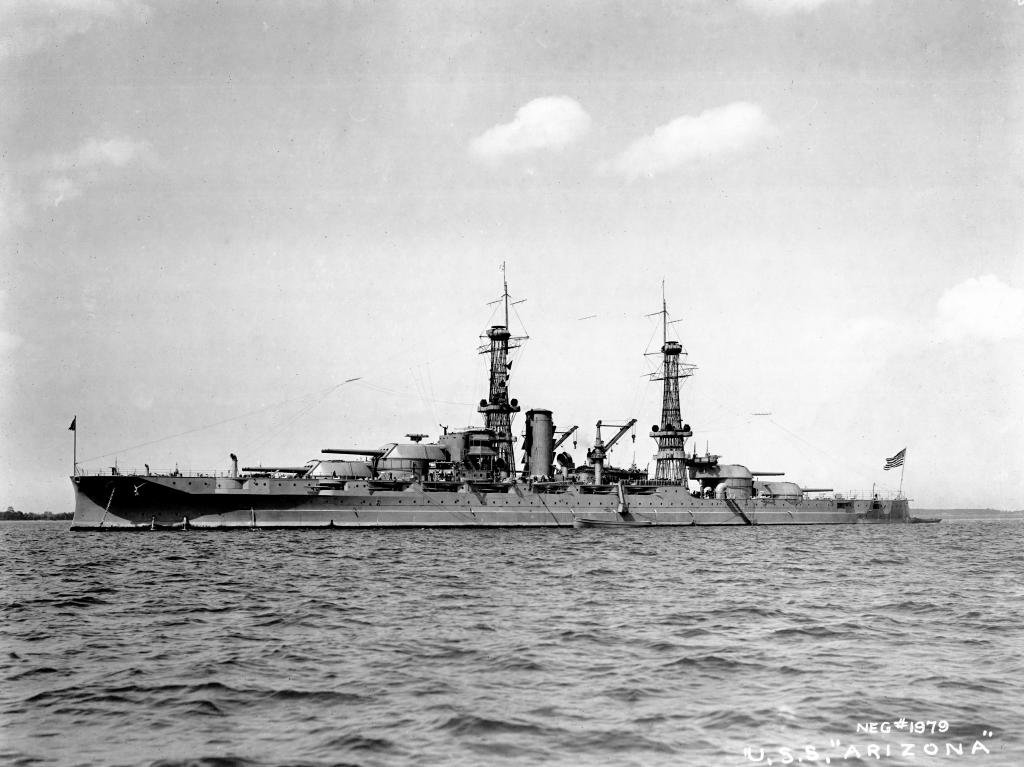
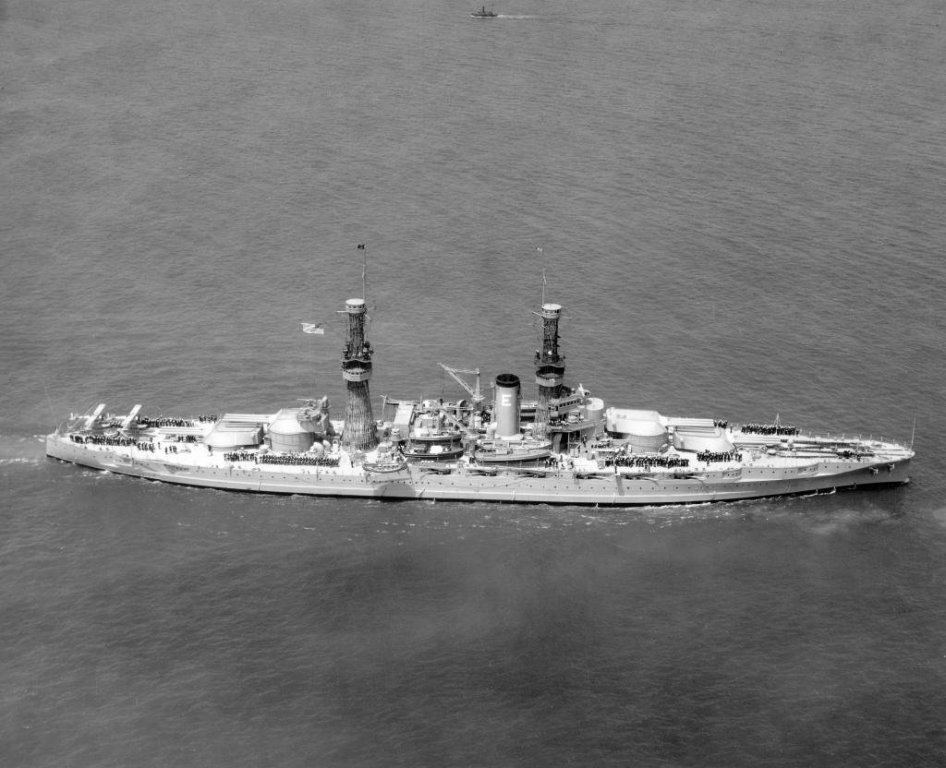
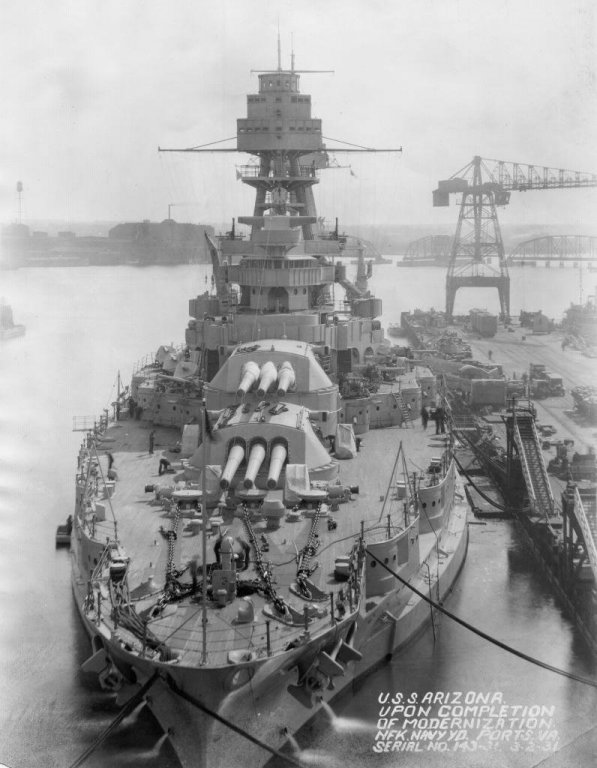
I noticed that the model of the Arizona doesn't have the addition of the armor belt as is seen on the Pennsylvania. I wonder if the modernization of these capital ships did not include this mod at that time and so therefor the model doesn't depict it? I have some amazing pics of the Arizona when she was being dismantled where she lay after the attack. Not sure if they will help. It is also amazing that the 12 14" guns in their triple turrets did not move independently of one another...all three guns moved as one unit. Great subject Dennis and you're doing a magnificent job....love the Arizona. I built her several times myself. Rob
-
Dennis I also found this closeup of her forward turrets...before modernization. My brother is sending me a photo of the Pennsylvania(sister to the Arizona) and inscribed on the back is information from a crew member who was on her during the attack on Dec 7th... Another of the Pennsylvania in color.
_drydocked_in_an_Advanced_Base_Sectional_Dock_at_the_Pacific_c1944.thumb.jpg.4f0e965de1886acf32f2cf6670483c1f.jpg)
-
I have a bunch of images of the Arizona for you....if they can help. Some before her modernization and some just after. Rob


-
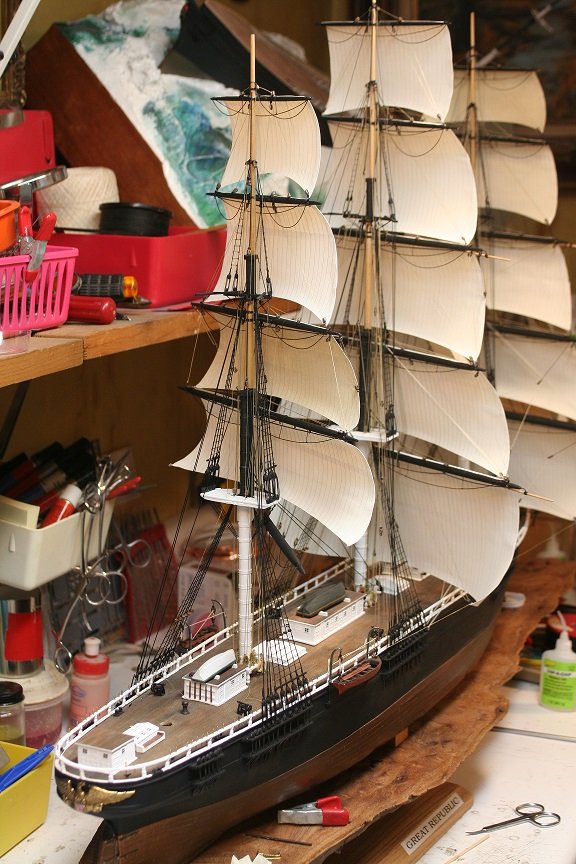
I am needing to begin the install of the next sail the lower topsail. I made it, but still need to add the buntlines. Here it is simply posing in place. Once mounted, I will then add the buntline blocks and the reef points. I wanted to begin adding the final sails of the mizzen before I finished up the backstays, because it is easier to grapple with these lines and the lifts and their purchased....before the last backstays are installed. It is a delicate juggle between one task and another. Always being mindful of systematic progress. I hate redos. Rob

- 1,208 replies
-
- 13
-
-
- great republic
- clipper
- (and 1 more)
-
Spent a little time this evening working on some mizzen backstays and the topgallant stay. About half done... Rob

- 1,208 replies
-
- 5
-
-
- great republic
- clipper
- (and 1 more)
-
Very clean work. I have a bunch of those metal stanchions with the end pins. I have never used them, but they do appear to be stable and quite uniform...I might give them a try on the McKay..when the time comes. Looks very good. Are those ventilator holes drilled along the house roof edge? Rob
-
Your mastery of construction is amazing and if any small detail has been overlooked I am not aware of it. Your attention to every detail escapes description. I am a fan. Rob

_drydocked_in_an_Advanced_Base_Sectional_Dock_at_the_Pacific_c1944.jpg.3d31014aa5dd32310cea157d542f38e7.jpg)