HOLIDAY DONATION DRIVE - SUPPORT MSW - DO YOUR PART TO KEEP THIS GREAT FORUM GOING! (89 donations so far out of 49,000 members - C'mon guys!)
×


rwiederrich
-
Posts
5,518 -
Joined
-
Last visited
Content Type
Profiles
Forums
Gallery
Events
Everything posted by rwiederrich
-
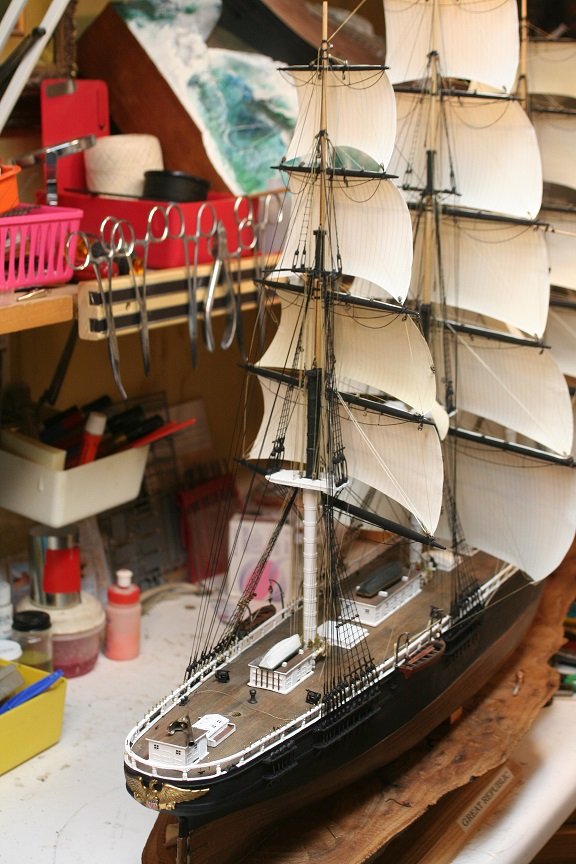
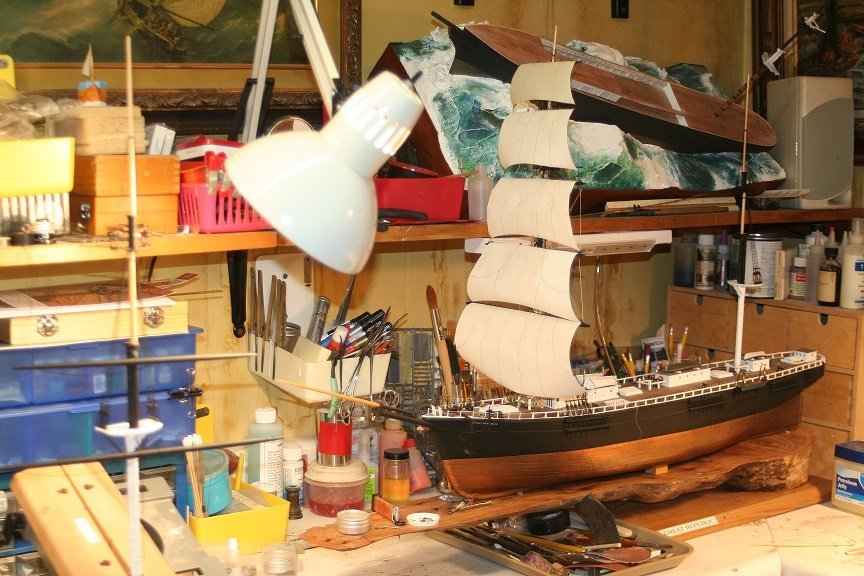
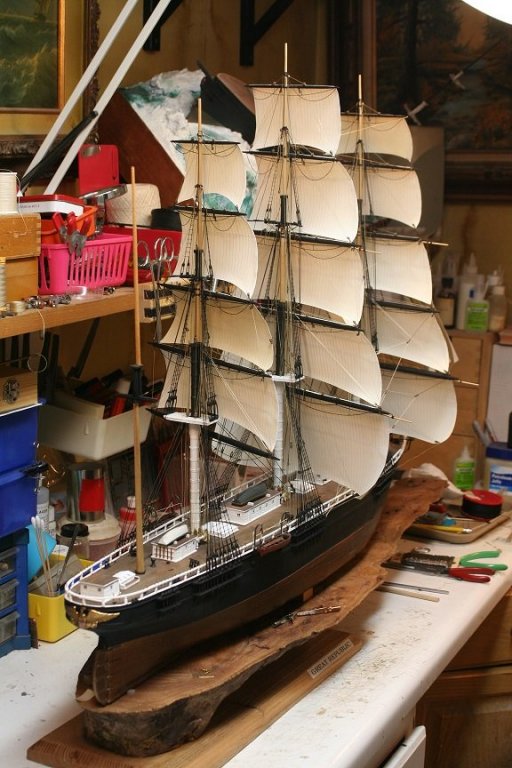
Zigg…..I've set her aside till I finish the Great Republic. I really wanted to see how I could tackle open sea water...I had already done the Ferreira on a still backwater. I have done further research on the McKay and I need to redo some windows on the main cabin. Like the GR the McKay had a forward and aft weatherdeck with a gangway that passed over the mid deck with her bulwarks so sailors could easily pass from one deck to the next without going up and down access ladders. I really want to finish her because she will rigged with only heavy weather sails. A powerful impression. Being lured by the dramatic, I wanted viewers to see what big waves might have looked like with a clipper being tossed in them. Not your average model mounting. Here she is on the shelf behind the Great Republic.
-
It's been a while since I posted last...sorry for the delay...but I have been tackling some summer jobs, like finishing building the chicken coop and running fence in my lower pasture. The admiral has required my time ashore to be fully engaged in these tasks...not to mention finishing up the front porch decking. Thanks for hanging in there friends.....summer tasks seam to rob me of any time needed to work on the Great Republic. Rob
- 1,208 replies
-
- 6
-

-
- great republic
- clipper
- (and 1 more)
-
Yeah....when I was developing my system...I built a pounce wheel....but the *Puncture* looking holes just looked ridiculous. Plus the indentations are not actually holes but nail heads...recessed from hammering. To simulate this required an ample amount of ingenuity. The reason why I used a press. Great job. Rob
- 133 replies
-
- 1
-
-
- cutty sark
- mantua
- (and 3 more)
-
You're doing a wonderful job. You're almost done.... I couldn't get my head around the nearly 2000 copper plates that were needed for my scratch built Great Republic...so I created my own system, by using copper tape cut into 8" strips and run through a clothes press roller that I modified for the purpose. With a wire mesh gauge and some drywall sanding mesh paper I was able to emboss the nail imprints and plate seams onto the strip, all in one simple pass through the press.. Then all I did was affix them...fast and easy compared to the tedium of single plate work. I also loathed the final shiny copper color...and since the Gr was not covered with copper but with the yellow *muntz* metal plates....I chose to paint over my copper plates with a metallic paint that represented the muntz metal after it has oxidized. It turns a metallic *brown*...instead of the typical greenish wash you see from weathers copper. The Cutty Sark was also coppered in *Muntz* metal NOT copper. When new the muntz metal was quite *Yellow*….more like brass. Here is a pic of my copper strips..ready to be applied to the hull.

- 133 replies
-
- 5
-
-
- cutty sark
- mantua
- (and 3 more)
-
A vary handsome model....and in card...wonderful. Your clear attention to clean gluing and crisp folds is quite telling of your skill. Love it..... and I'm sure it will be loved by the Admiral and will find a place of honor. Rob
-
What a following
-
Cutty Sark by NenadM
rwiederrich replied to NenadM's topic in - Build logs for subjects built 1851 - 1900
I was with you when you began this log...you've overcome many obstacles and recovered very well. It is very rewarding to know you are building her for your own personal enjoyment...that is the most important thing. Keep up the great work. Thanks for your fine comments as well. Rob- 4,152 replies
-
- 4
-
-
- cutty sark
- tehnodidakta
- (and 1 more)
-
Cutty Sark by NenadM
rwiederrich replied to NenadM's topic in - Build logs for subjects built 1851 - 1900
I don't recall, if you are aware, but some of the images you posted are of the Ferreira... and when the Portuguese got a hold of the Cutty Sark they did some serious mods....like adding that access on the aft poop deck house by the helm. (To name just one of many) Are you going to model her with all the mods or are you staying true to her original configuration? Rob- 4,152 replies
-
- 2
-
-
- cutty sark
- tehnodidakta
- (and 1 more)
-
What an impressive lighthouse...beautiful. Great job on the card model......love lighthouses and yours in wonderful. Rob
-
Shipyard work soothes the soul..... Can't wait to see how you affix the bowsprit. Rob
- 356 replies
-
- 1
-
-
- red jacket
- finished
- (and 1 more)
-
I only hope the detail remains in those older injection molds. My issue is with the shiny nylon thread currently being used...instead of the nicer older thread that was probably made from cotton or hemp. Rob
-
So good to see you at the shipyard Nic....super progress too. She is a beautiful clipper. Rob
-
My original intent was to use several 1/96 hulls to make the hull of the Great Republic....however, the jump from 1/96 to 1/128 was significant enough, doing so would be more problematic then building her from scratch....and the two hulls are significantly different amidships and at the stern. If I built the Republic in 1/96 compared to my Cutty/ Swordfish/Seawitch...in that scale she would be nearly a foot and a half longer and much larger. In any case, in 1/128..she is slightly larger then the others....NOT to scale. I used a Cutty hull for my Glory of the Seas hull, as well as my Donald McKay....in the latter case the hull is submerged, so no errors are seen...and I completely rebuilt the gunwales and deck to replicate that of the McKay. As far as the Revell rigging line....their older line found in their older kits is very fine IMO and THAT is the rigging line that is so hard to get. the modern version provides a nylon thread...unsuitable. the older thread rigging is more hemp or cotton. Thanks for all your fine comments and compliments. Rob
- 1,208 replies
-
- 3
-
-
- great republic
- clipper
- (and 1 more)
-
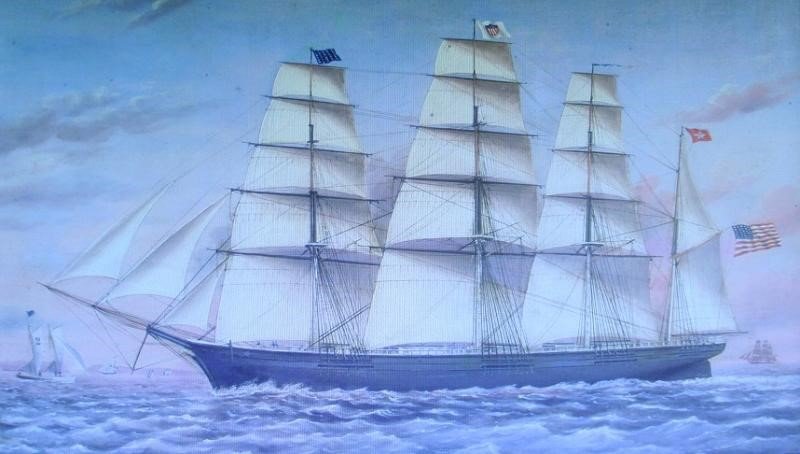
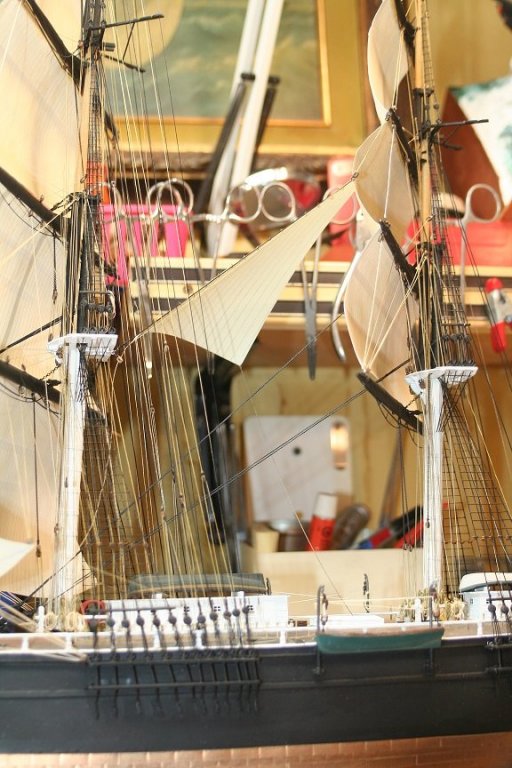
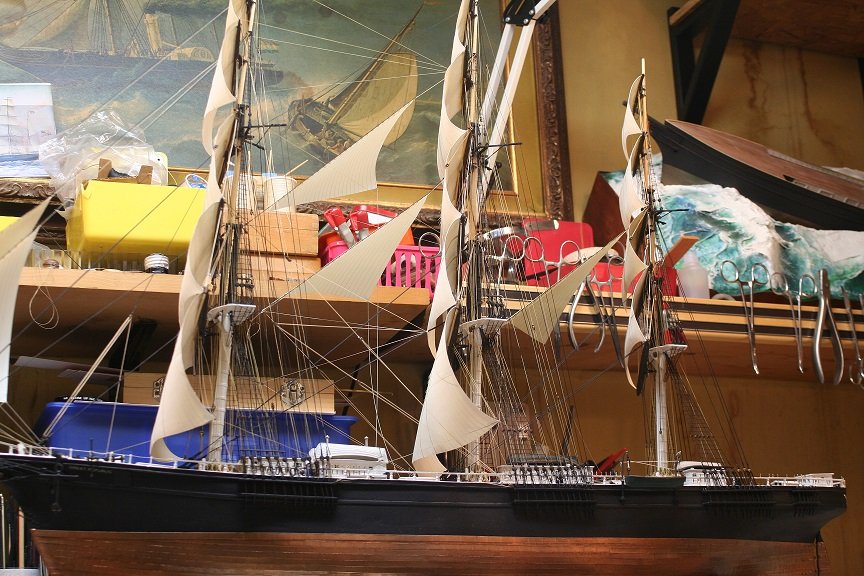
The mizzen braces fall back to the spanker mast..instead of running forward to the main mast...note the painting. I will be changing some of the rigging as seen in this painting, however, this portion is correct from other sources. Sorry for any confusion.
- 1,208 replies
-
- 3
-
-
- great republic
- clipper
- (and 1 more)
-
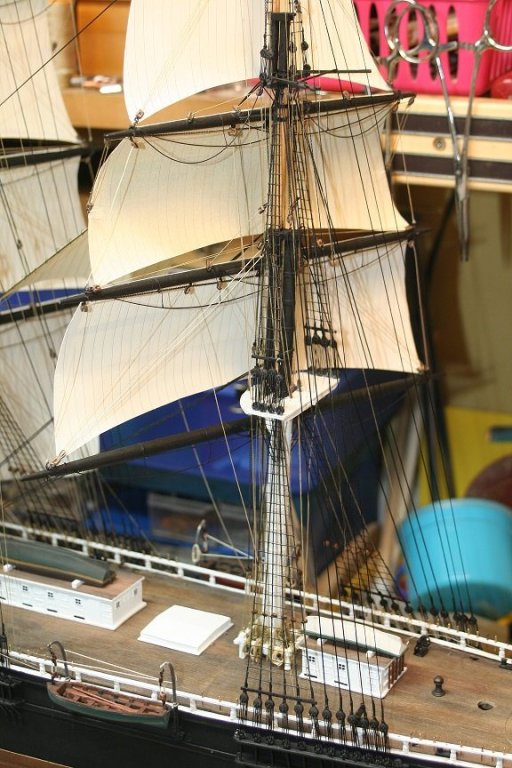
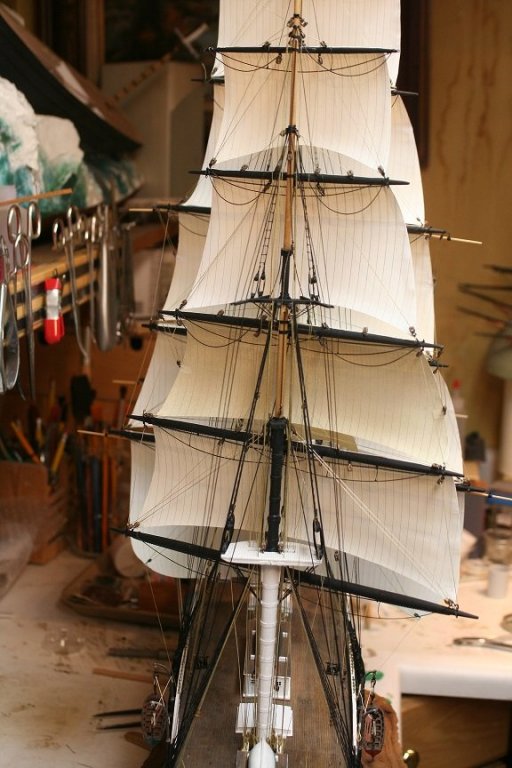
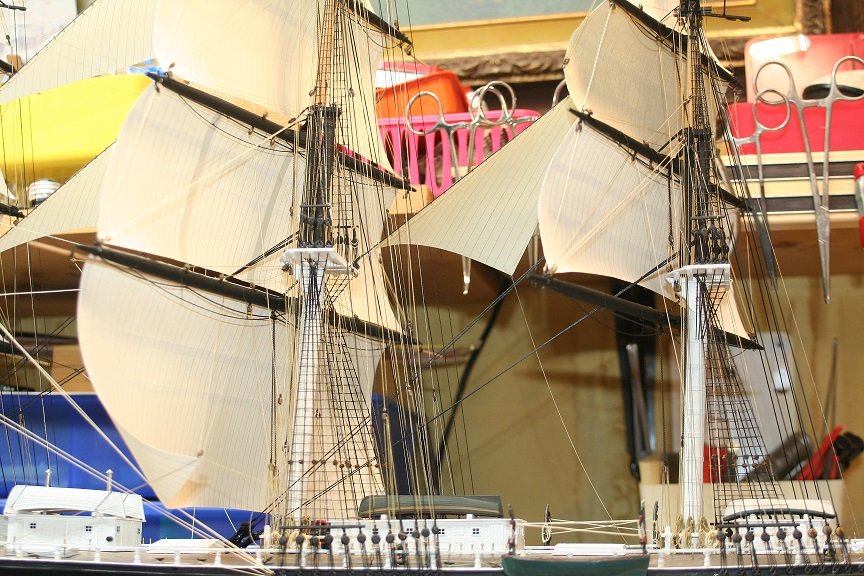
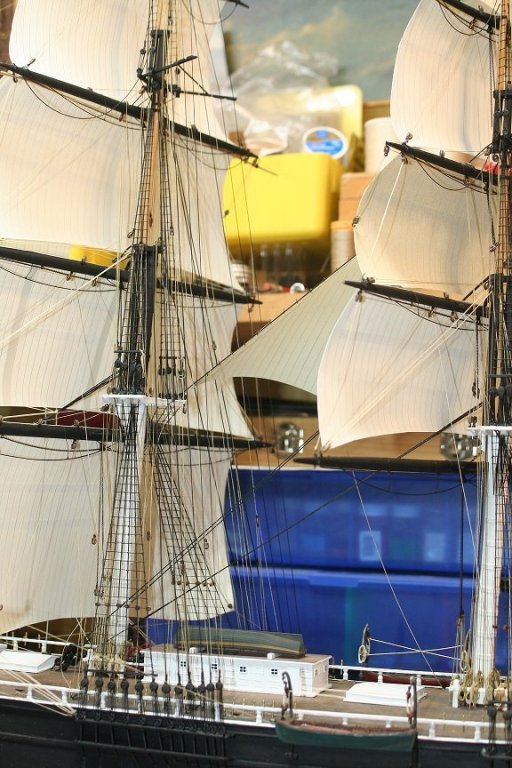
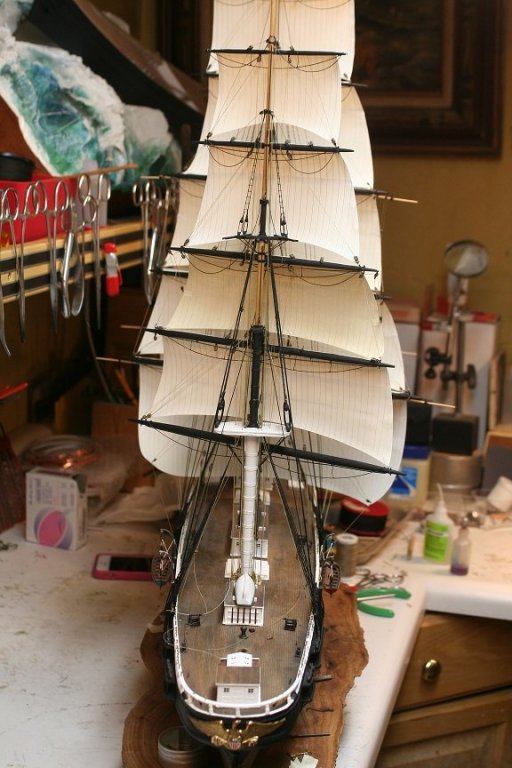
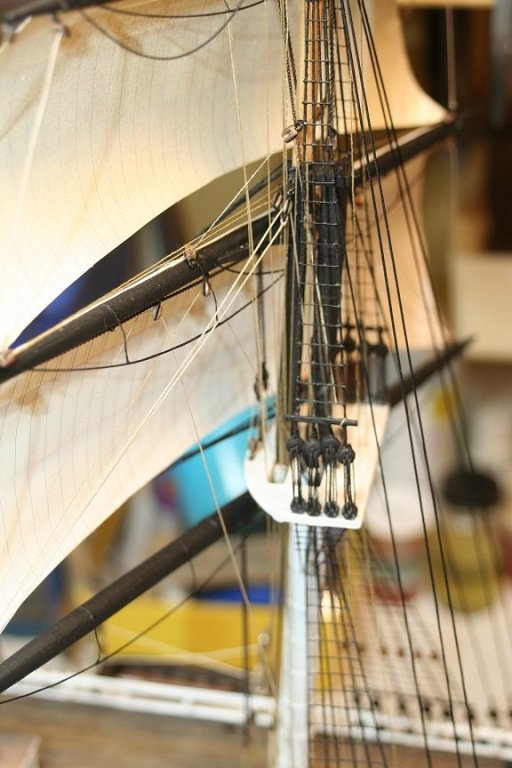
After that patience builder...I proceeded to finish up all the remaining mizzen backstays....and the topgallant stay. Some of the images will show some additions of the port main royal and topgallant braces and their inevitable run to their fairleads and to pins. The mizzen will become a web of lines from the mainmast...however unlike most 3 masters...the mizzen braces do not run forward to the main mast for belaying...they run aft to the spanker mast. Lots of little things added along the way. Rob


- 1,208 replies
-
- 12
-
-
- great republic
- clipper
- (and 1 more)
-
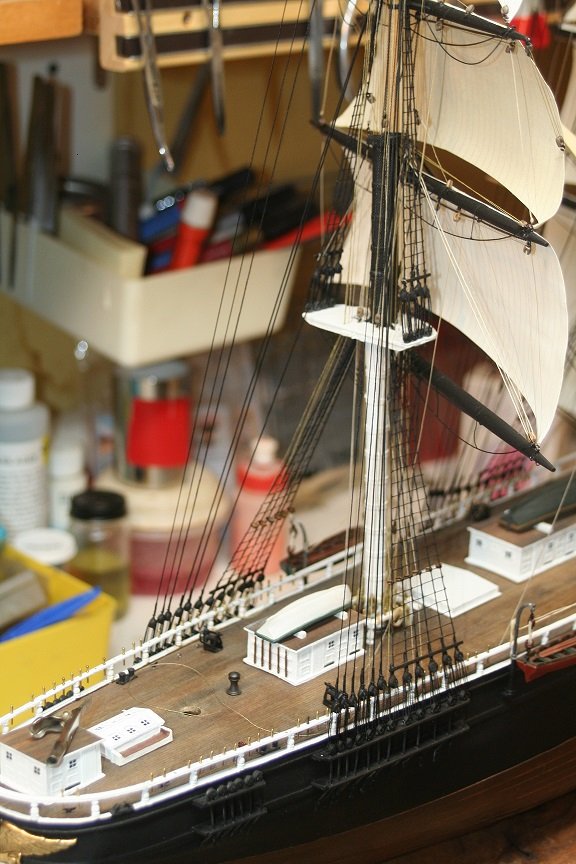
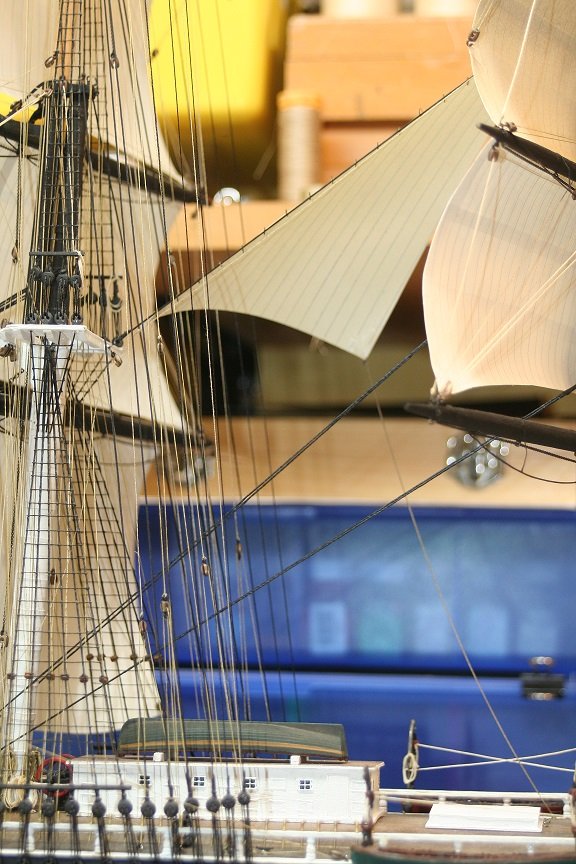
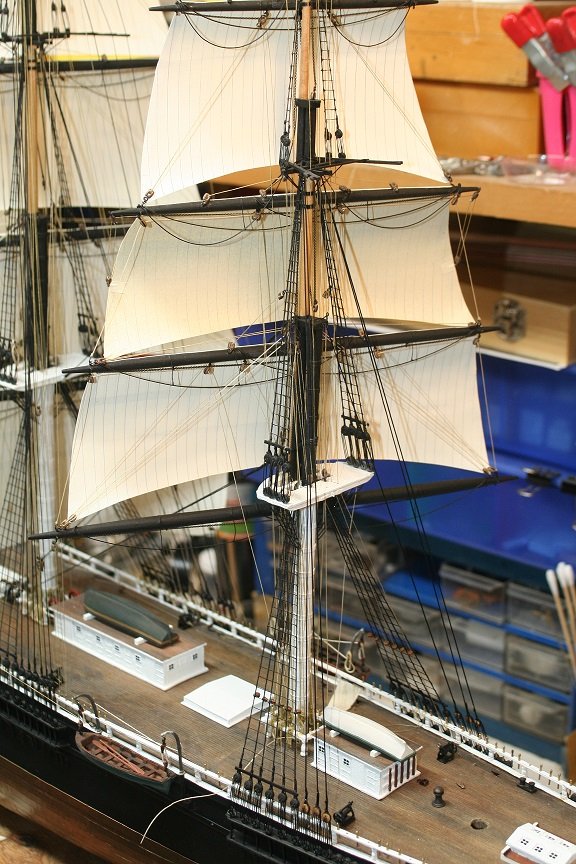
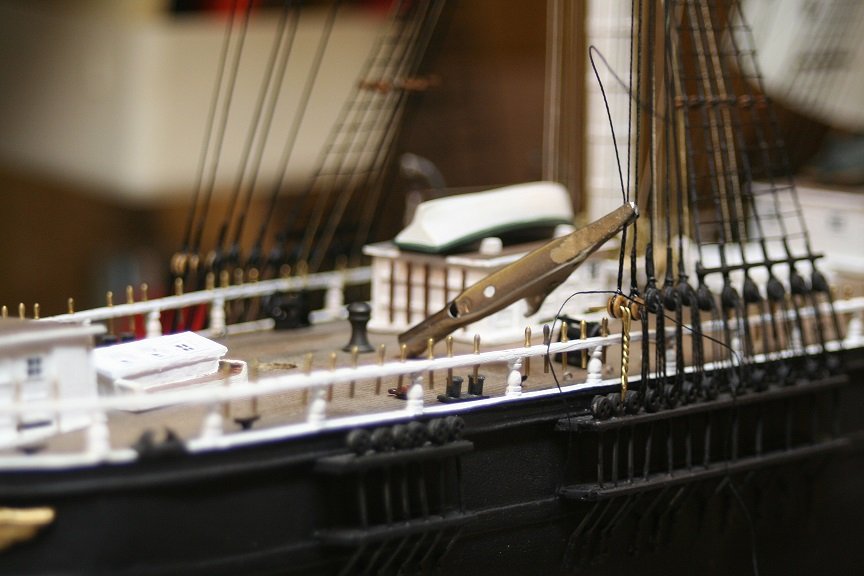
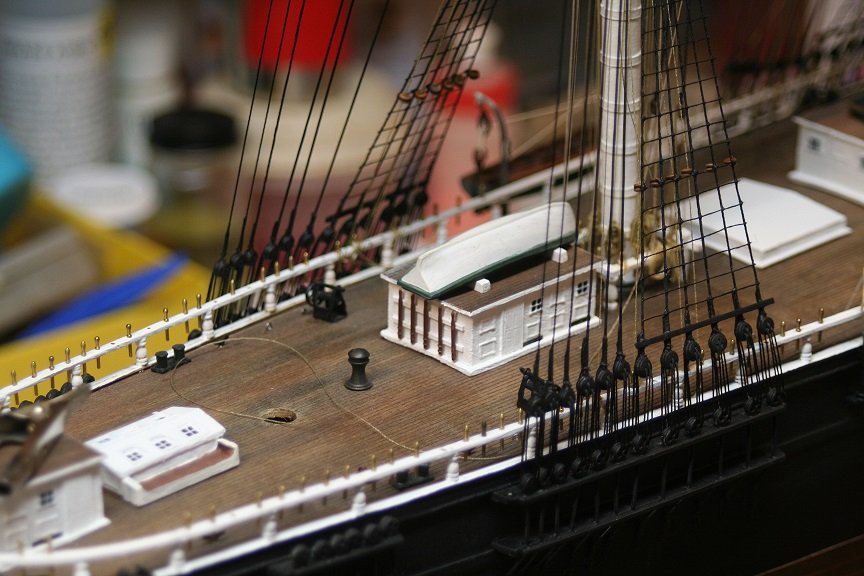
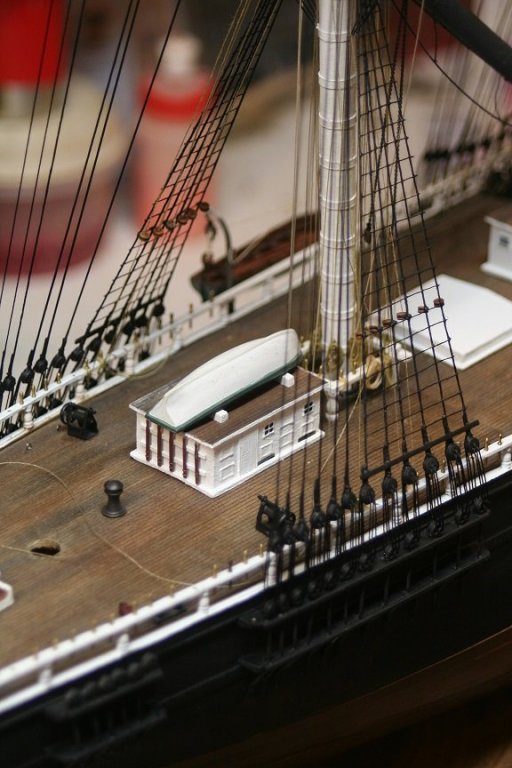
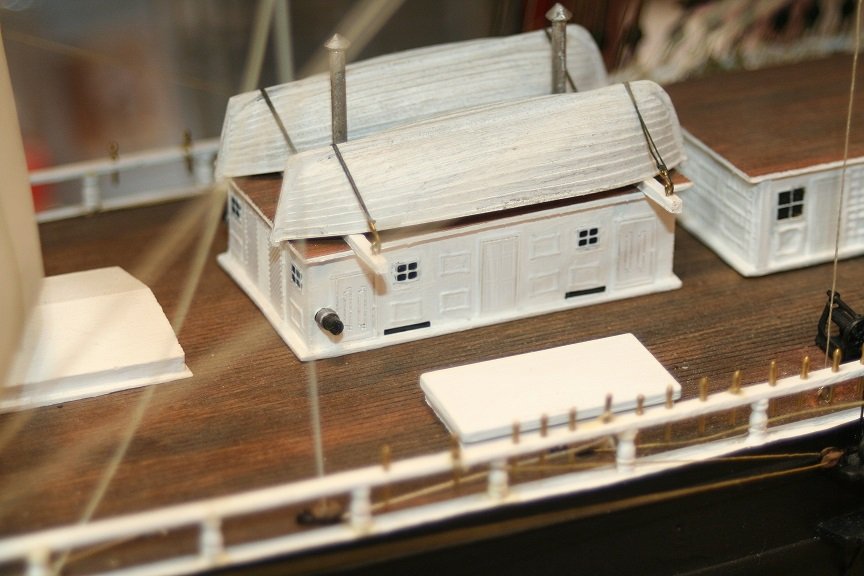
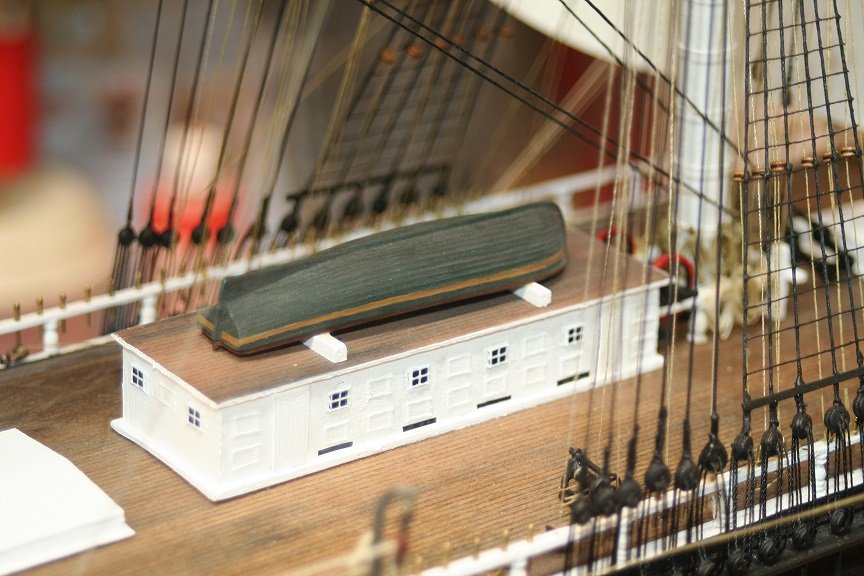
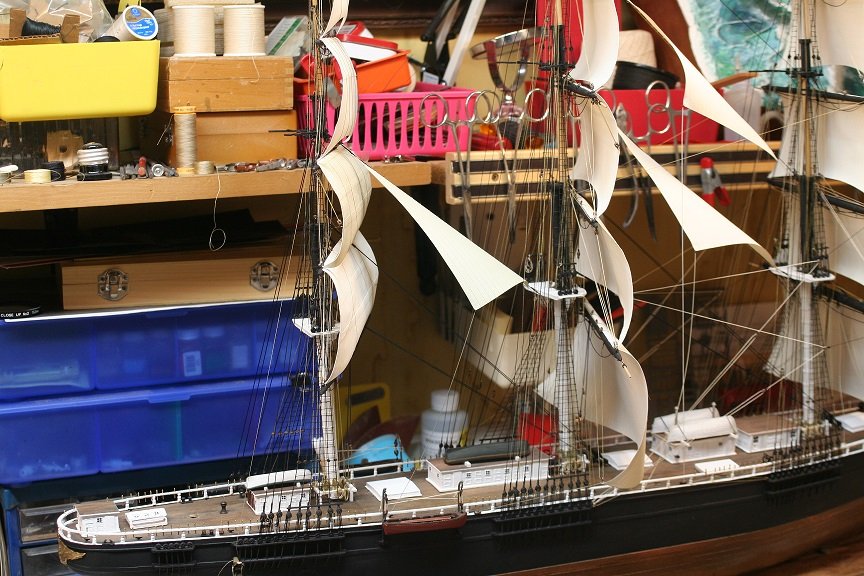
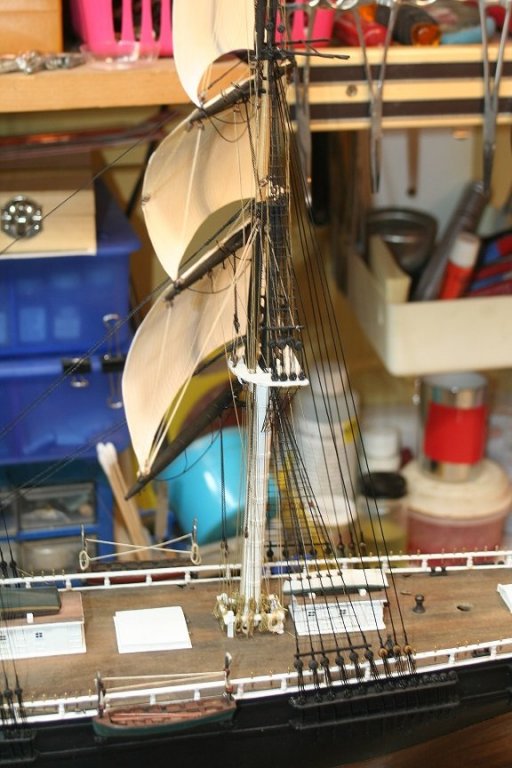
Spent a little time finishing up some task. One..before things got totally out of control and internal access was going to be completely denied.....I opted to stress myself out to the max and install the glass ventilators that were installed along the cabin exterior walls. A new an ingenious way to ventilate the cabins with fresh outside air without introducing outside elements...such as wind and water. Here are a couple images of those little rascals....the black bands along the cabin lower edge..under the windows.
- 1,208 replies
-
- 9
-
-
- great republic
- clipper
- (and 1 more)
-
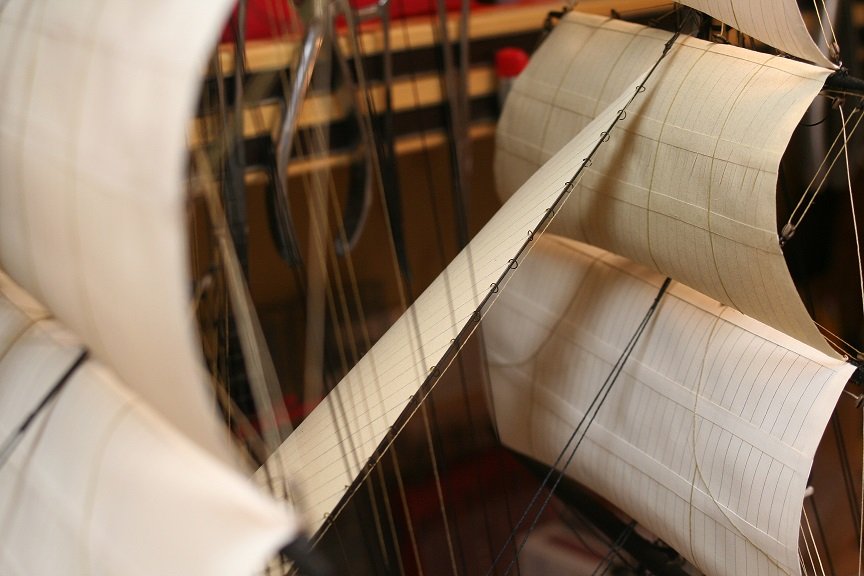
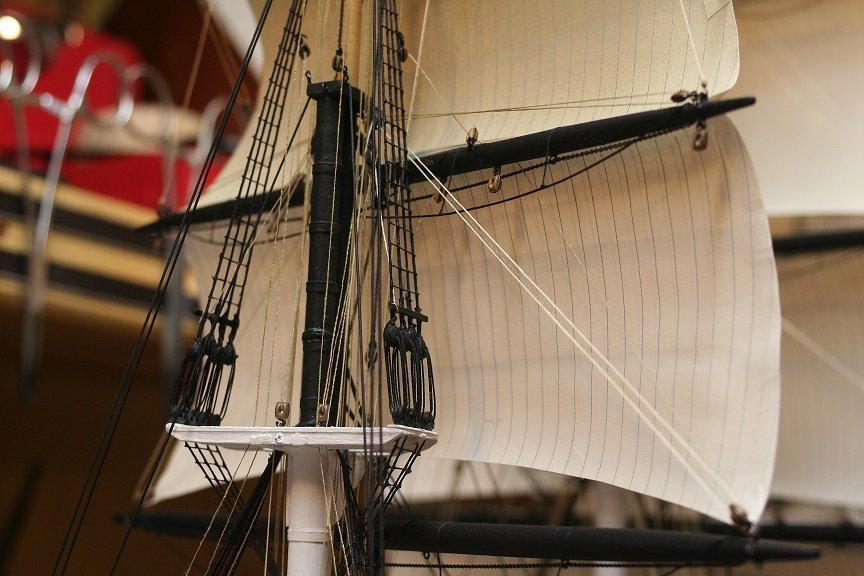
Grandpa......when you are ready to glue the sail...simply lay a bead along the edge of the sail that will be against the yard....then press it firm and then apply mini alligator clips to hold it...and don't forget to use a support stick pressing out from the mast to hold the sail out from the mast. when it dries it will naturally want to billow away from the mast. The glued point must be slightly on top of the yard..NOT on the face of the yard. you want the sail to appear to billow away from the yard not simply fall down. I've done paper sails on many of my builds and it is such a forgiving material and when done right can be quite convincing. that paint preserves the paper and adds to their longevity. One note: when cutting out your sails, make them slightly larger, length wise, then normal...the curve you will induce will shorted the sail and it will then not fit against the lower yard and you will have over exposed sheet lines. Natural sail canvas stretches slightly, and if you cut the sails to the exact length, then billow them,,,they will be short. The process is as much illusion as it is anything else. It's called *Forced Perspective*. Thanks for the fine comments and compliments. Rob
- 1,208 replies
-
- 3
-
-
- great republic
- clipper
- (and 1 more)
-
Thanks Pat...I did indeed experiment with lashing and all kinds of extremely difficult methods...but when I finally conceded that this scale is just too small for such details....and breaking more work then I was actually creating....I threw in the towel. Plus the strong desire to provide a good solid point for the billowing sails to start their billow...took precedence. Lashed experiments hung from the yard, limply...even though I was going to secure the sail to the bottom yard...everything was just too loose....uncontrolled for my liking....and trying to *lash* paper sails is a near impossible task I'd wish on no one. So I opted to insult the purists among us and hoping they would not snitch on me, ran with my glued on paper sails. Things of a grammar school craft class. I do appreciate the fine compliments..... Rob
- 1,208 replies
-
- 5
-
-
- great republic
- clipper
- (and 1 more)
-
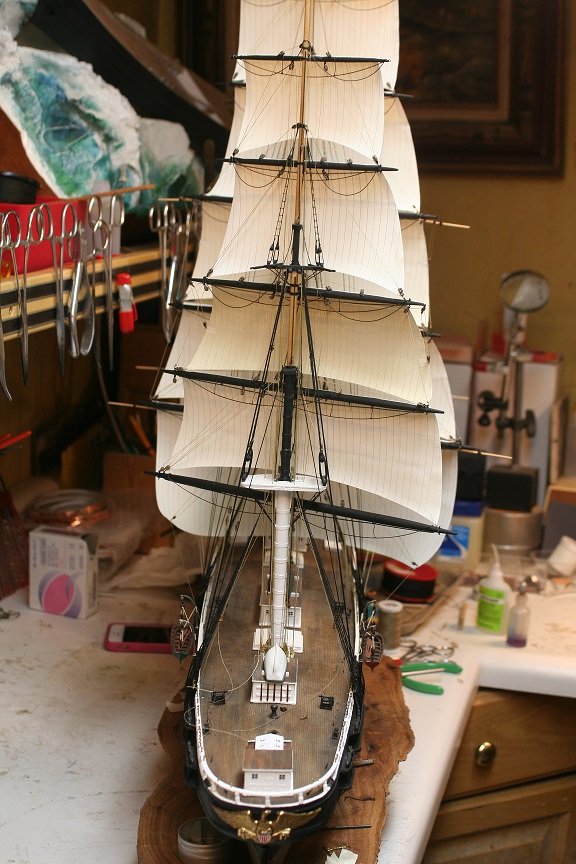
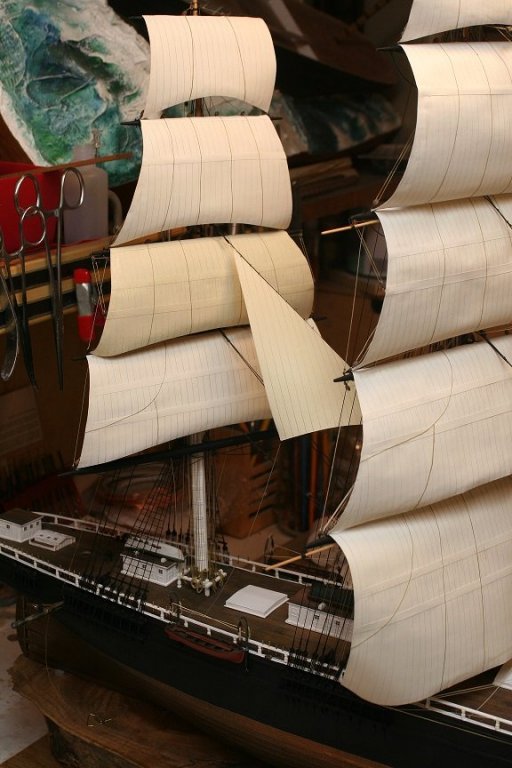
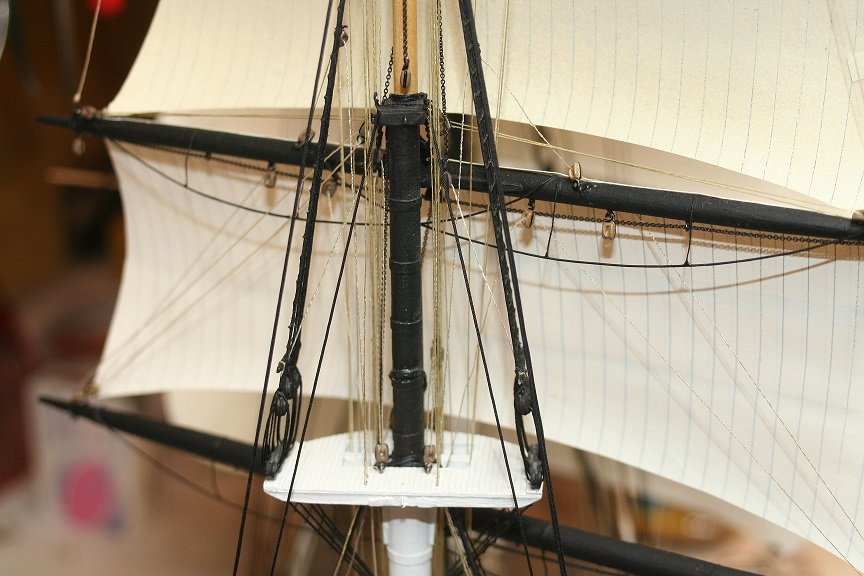
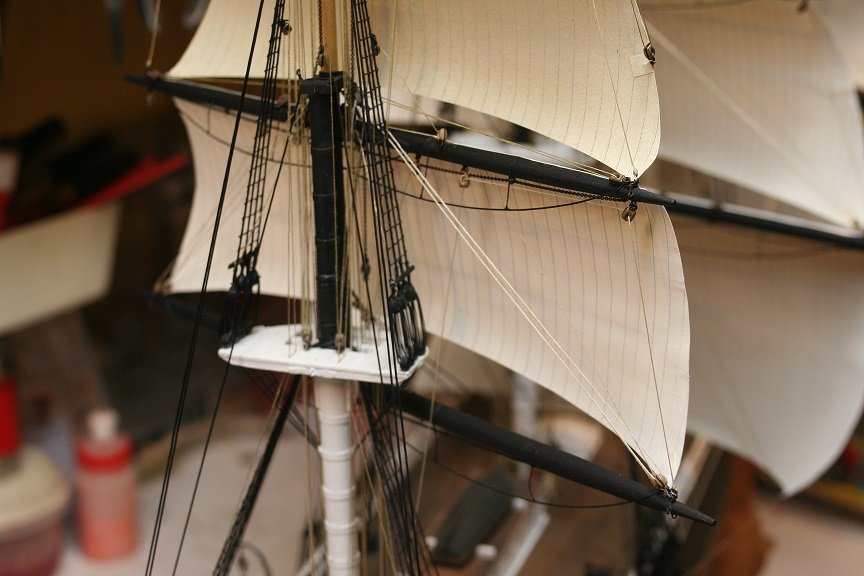
Next are a bunch of pics I took of the sail mounted with the lifts and downhauls run along with their blocks. Rob


- 1,208 replies
-
- 12
-
-
- great republic
- clipper
- (and 1 more)
-
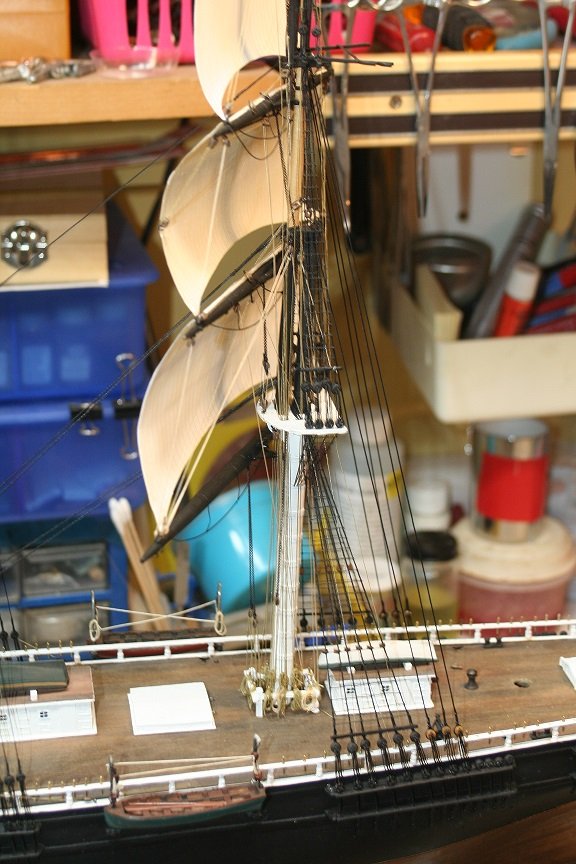
I then focused on the mizzen top stay sail...had to make that and here is a pic of the Hanks being added. Rob

- 1,208 replies
-
- 9
-
-
- great republic
- clipper
- (and 1 more)
-
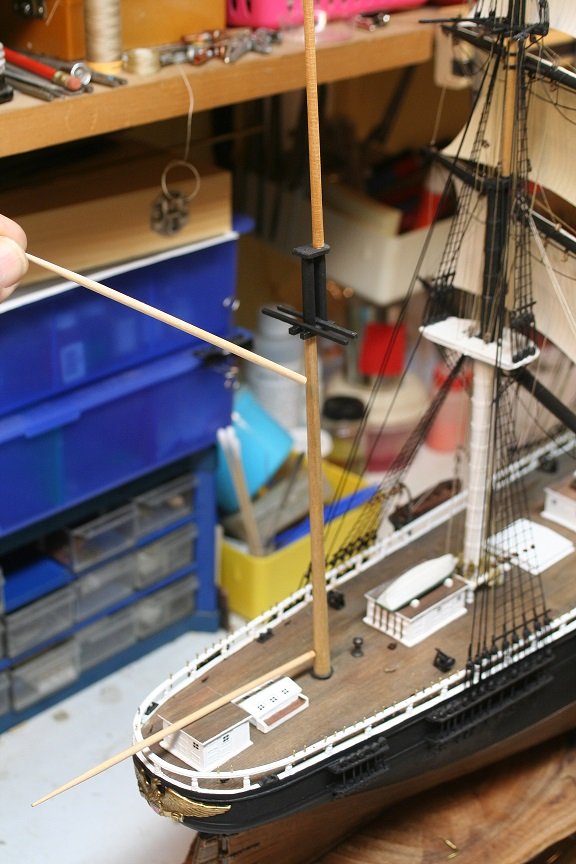
Tinkered on a couple of things tonight. I just mocked up the spanker and its booms for reference...

- 1,208 replies
-
- 8
-
-
- great republic
- clipper
- (and 1 more)
-
It would be nice to say I used gaskets attached to the jackstays....but...to retain sanity and keeping this under a 10 year build....I simply used wood glue and used mini alligator clips to hold the drying sail to the yard. What one can't see, ...."Can't see it from my house", as my father-n-law used to say works. The sails are pre-formed at the contact point....so they pull away from the yard as if they are full of a stiff breeze. Rob(Sorry I can't provide you with a more impressive..realistic...method...other than glue)
- 1,208 replies
-
- 4
-
-
- great republic
- clipper
- (and 1 more)
-
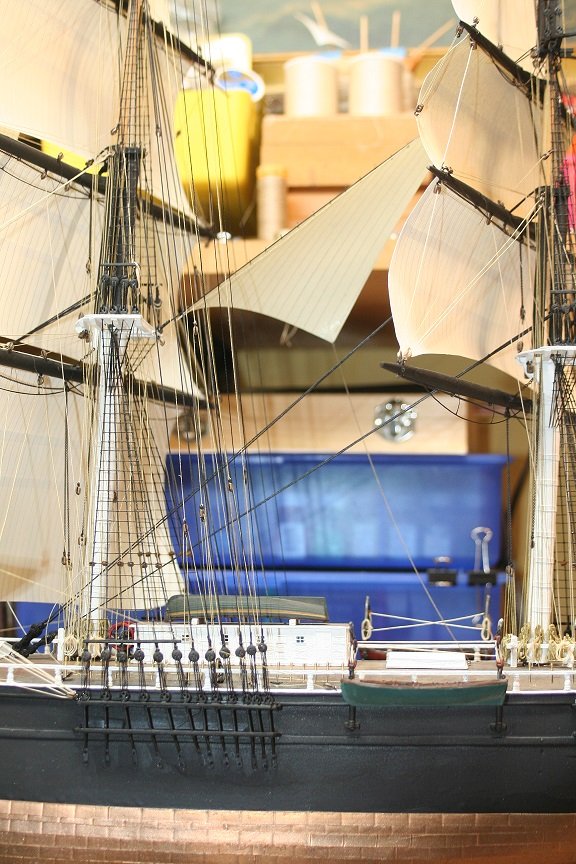
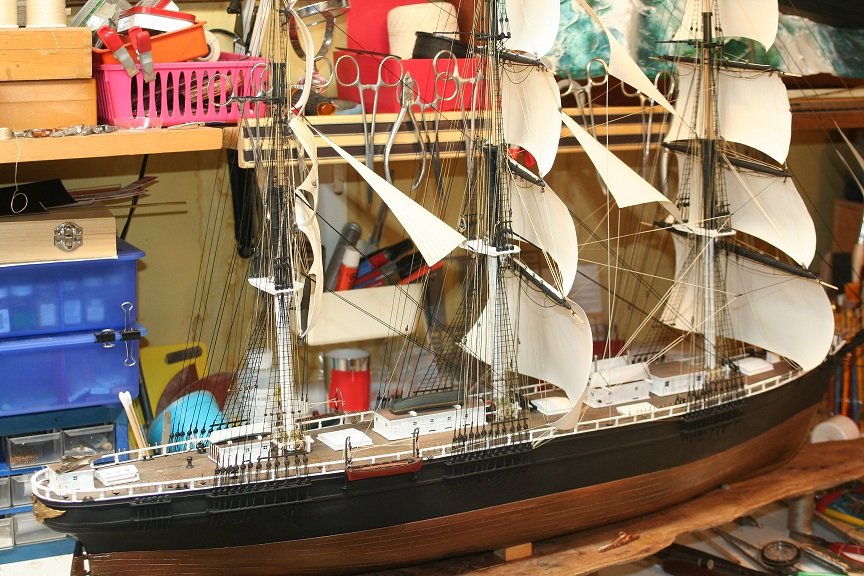
The more I think about it...I might consider leaving off the mizzen main course of the crossjack. Thinking this through it became evident that many clippers in moderate weather refrained from setting this sail...and if it isn't set, then more main mizzen mast and deck detail can be seen from this particular area. I would still set the top and topgallant stay sails...along with the sails for the spanker mast. This move will provide sufficient viewing of the deck details unencumbered by sail and still be an accurate representation of a typical sail arrangement. MMMMMM...... Rob
- 1,208 replies
-
- 13
-
-
- great republic
- clipper
- (and 1 more)
-
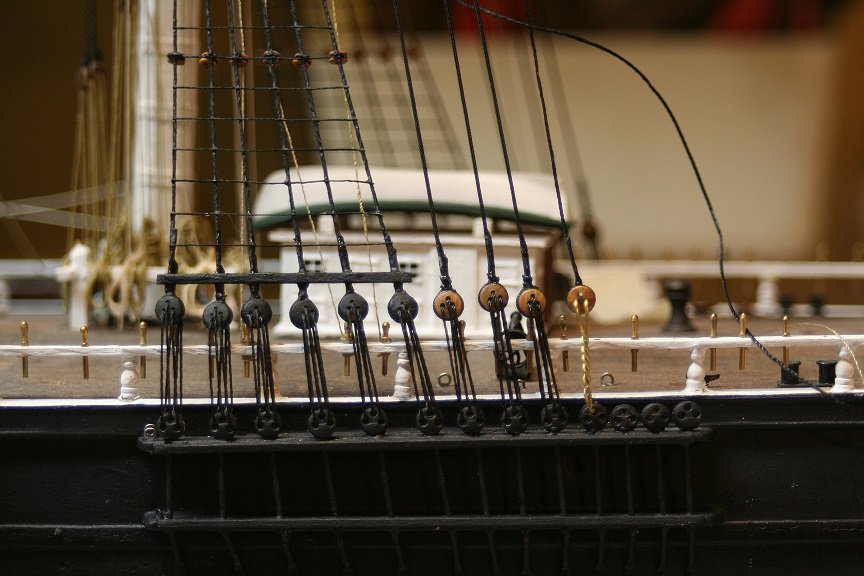
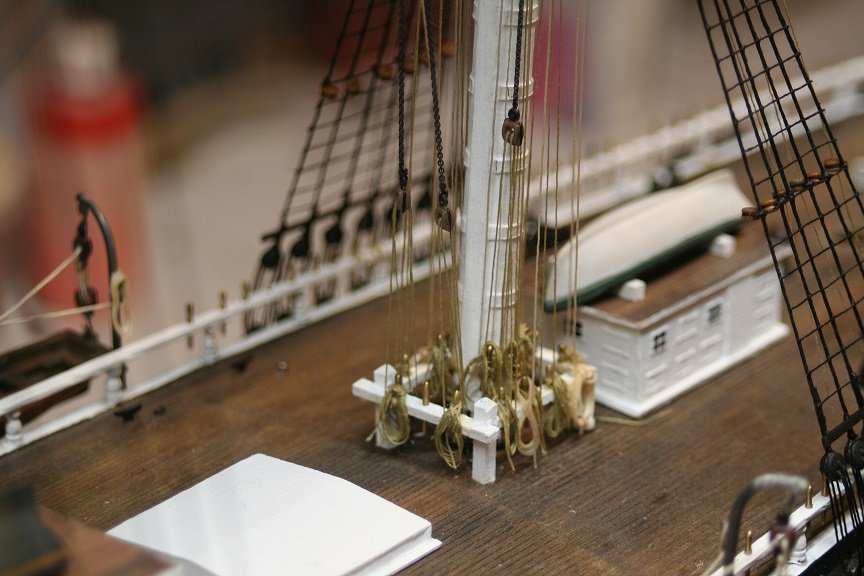
I spent a bit of time finishing up the lower topsail clews and sheets and downhauls.

- 1,208 replies
-
- 11
-
-
- great republic
- clipper
- (and 1 more)