HOLIDAY DONATION DRIVE - SUPPORT MSW - DO YOUR PART TO KEEP THIS GREAT FORUM GOING! (83 donations so far out of 49,000 members - C'mon guys!)
×


rwiederrich
-
Posts
5,518 -
Joined
-
Last visited
Content Type
Profiles
Forums
Gallery
Events
Everything posted by rwiederrich
-
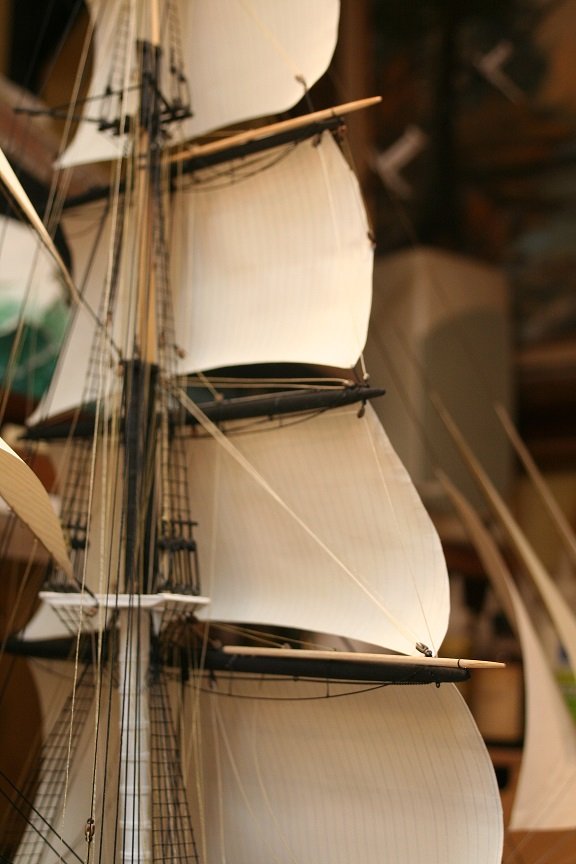
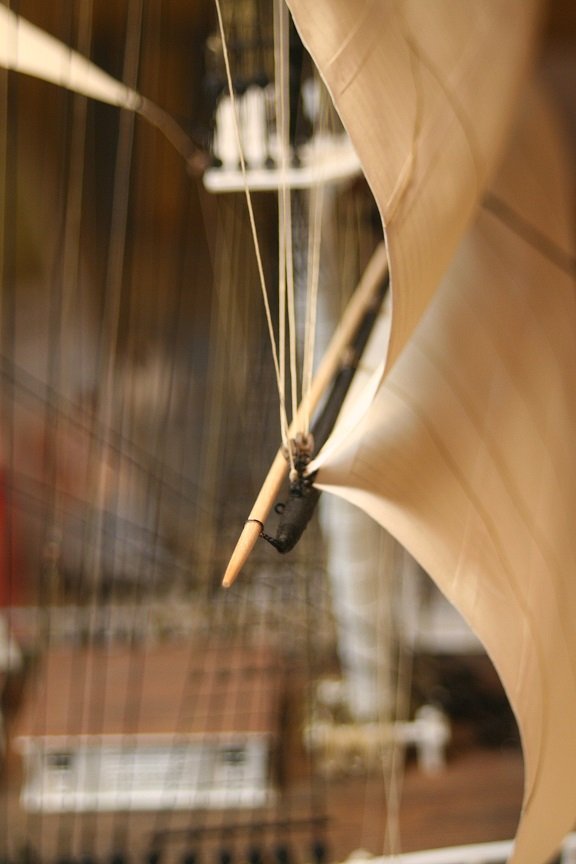
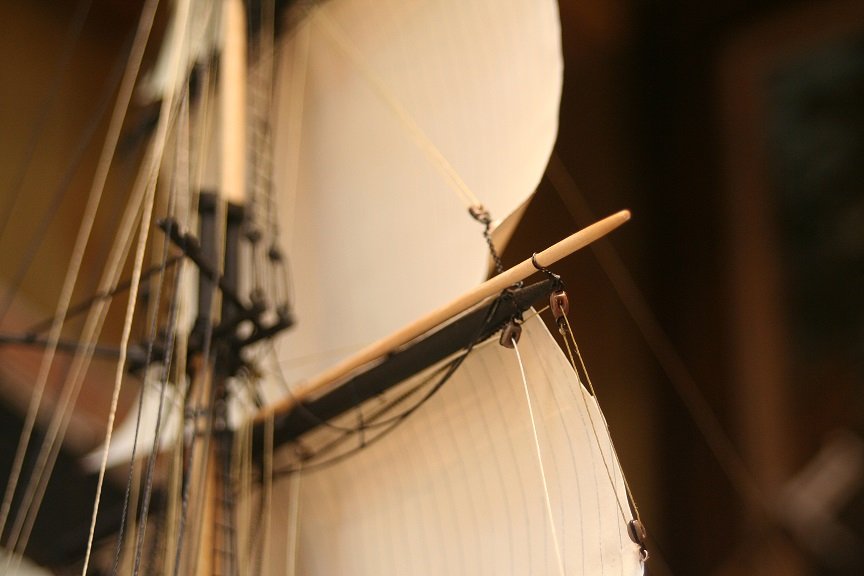
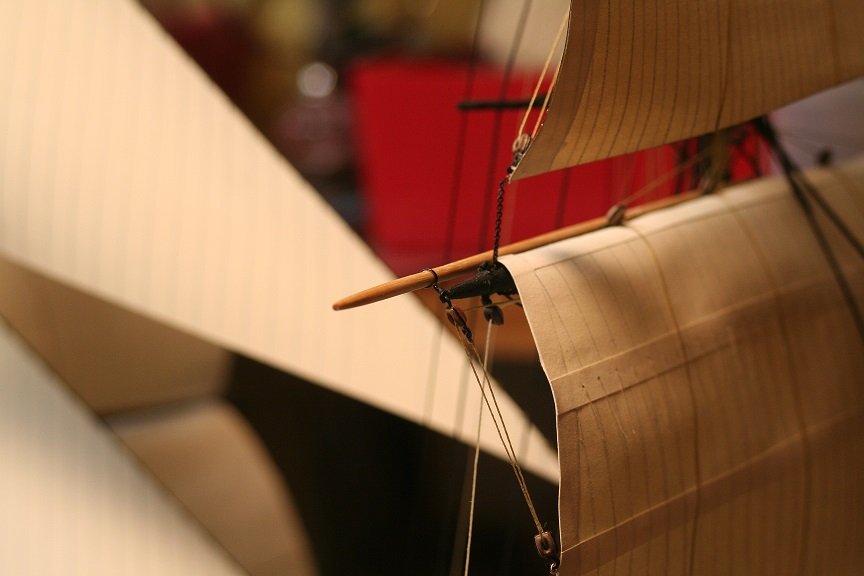
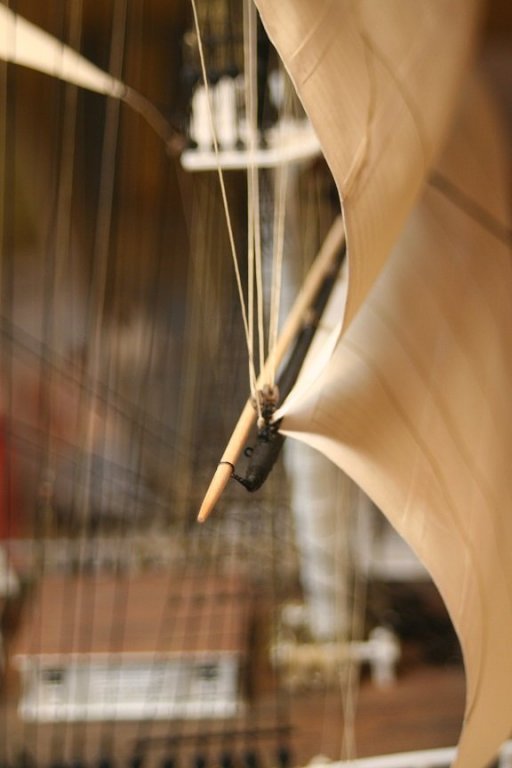
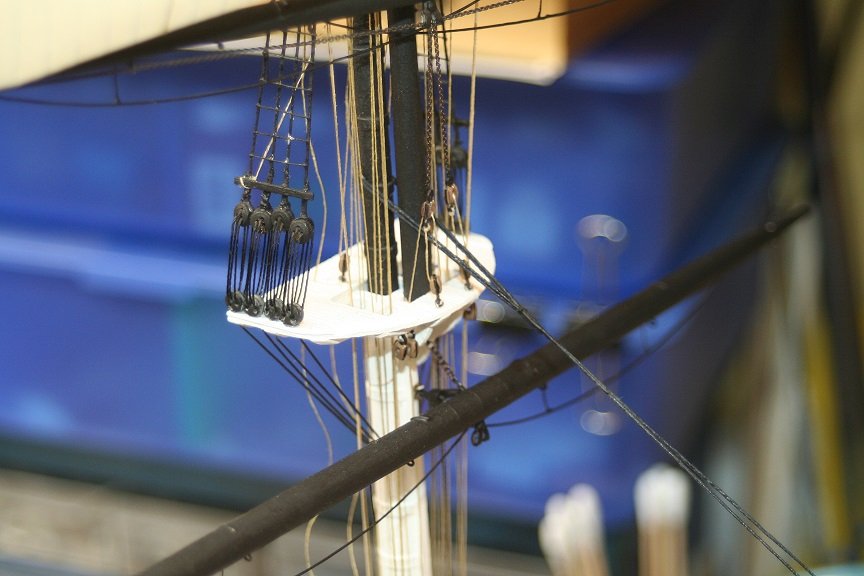
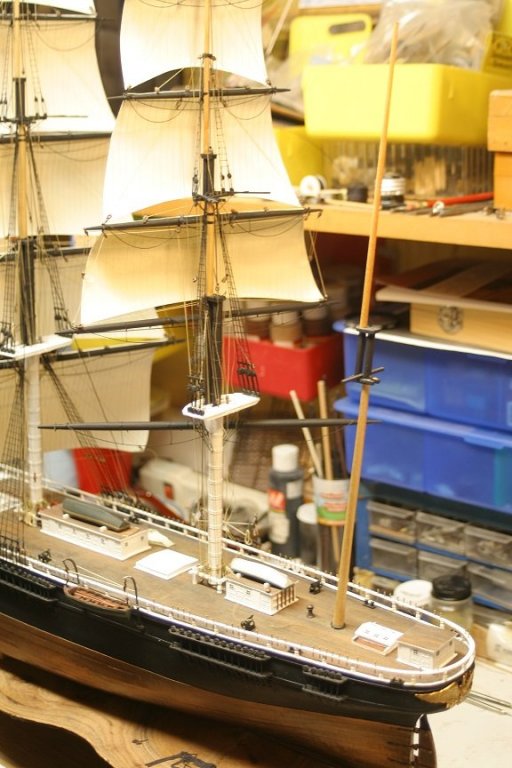
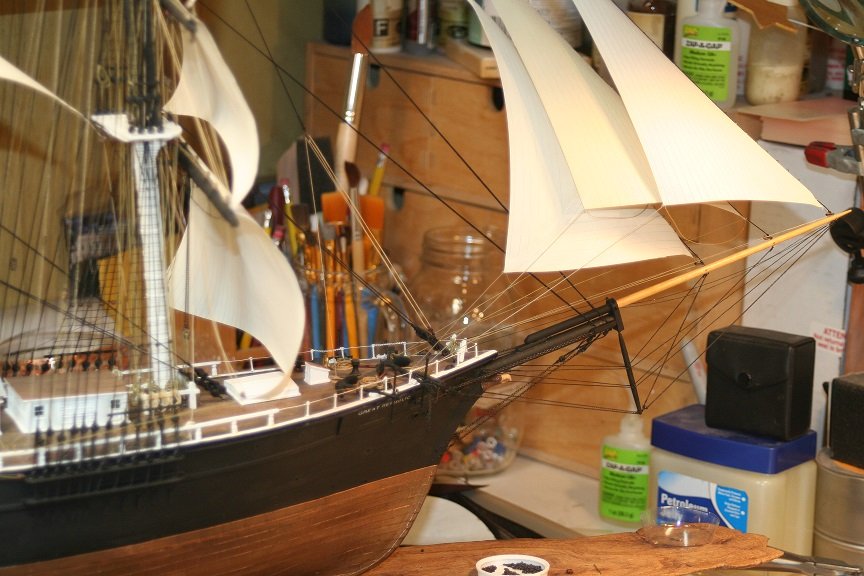
Ove the weekend I spent time pondering and researching my actions. Many examples of models show the stunsail booms resting on top and abaft the yard...in such a similar fashion as I have represented. However....it appears that typically it was clippers not heavy cargo carriers that followed them that carried the stunsail...to aid in the latitudes where mild winds were expected. The Great Republic did indeed carry stunsails in her rebuilt design....but only a minor mention of them can be found in describing her original build. So what I've decided to do is attempt to remove, refurbish the ironworks and reduce general diameter of the booms and then sling them from underneath the yard to help defuse any confusion and produce a more practical solution A models representation is not always the proper representation of actual practices....and I want to at least use a logical approach, if nothing else. I hope removal of them does little damage......and that...can be easily repaired without much scaring. Thanks to all who pointed this out to me. Rob(More to follow)
- 1,208 replies
-
- 3
-

-
- great republic
- clipper
- (and 1 more)
-
Several ways were apparently tried..Some hung below the yard, some were above the yard..but what I have researched these were on top and slightly reversed out of the way of the sail. But...I'm up for reversals if anyone knows better. Rob
- 1,208 replies
-
- 3
-
-
- great republic
- clipper
- (and 1 more)
-
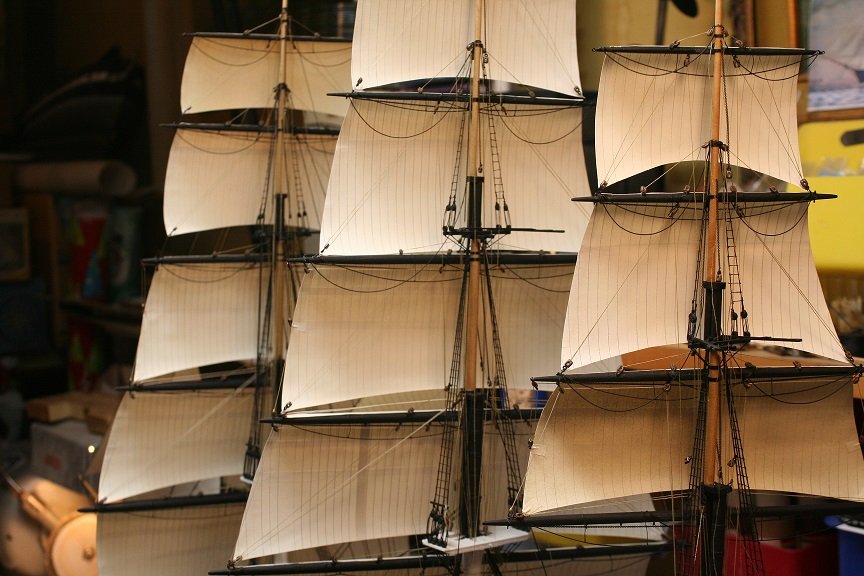
After some further research and discussion with some informed friends...I opted to add sunsail booms to the main yards and the upper topsail yards. Lots more work to do but its a beginning. Rob


- 1,208 replies
-
- 11
-
-
- great republic
- clipper
- (and 1 more)
-
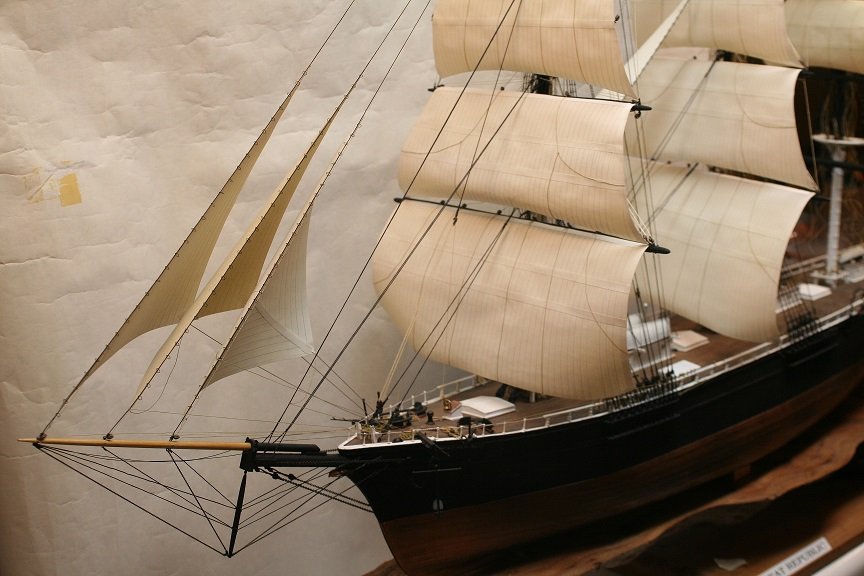
Still suffering from an extremely sore arm..but I managed to wrestle through some minor items today. I rigged the mizen lower stays first... Here is some pics.
- 1,208 replies
-
- 10
-
-
- great republic
- clipper
- (and 1 more)
-
It took me twice as long to make sure the lines didn't foul one another as I reran them down the mast to the belay pins. Everything has to follow a set sequence or I will risk twisting and crossing future lines. Shrouds are next...but I can choose to finish the main mast backstays first, being cautious not to over stress the mast without counter acting with the top main stays. Its a puzzle from here on out. Here are a few other images. Rob
- 1,208 replies
-
- 14
-
-
- great republic
- clipper
- (and 1 more)
-
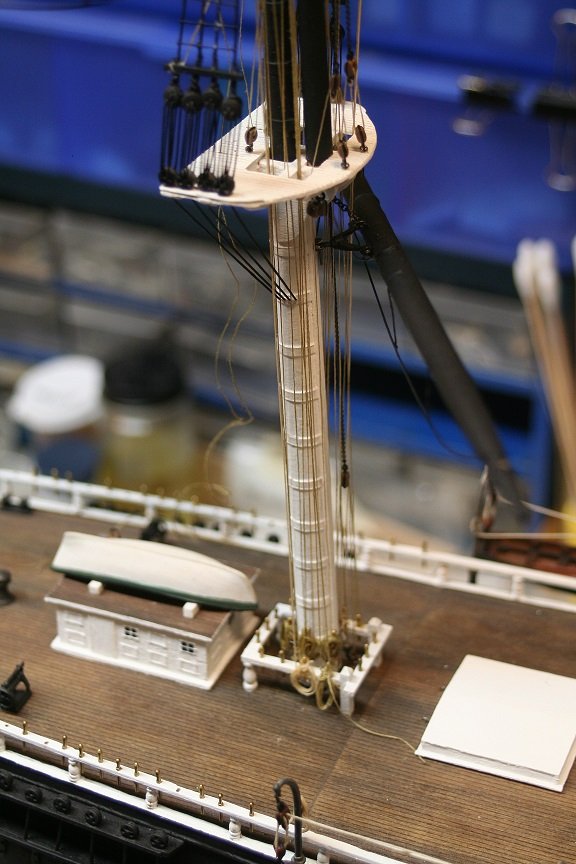
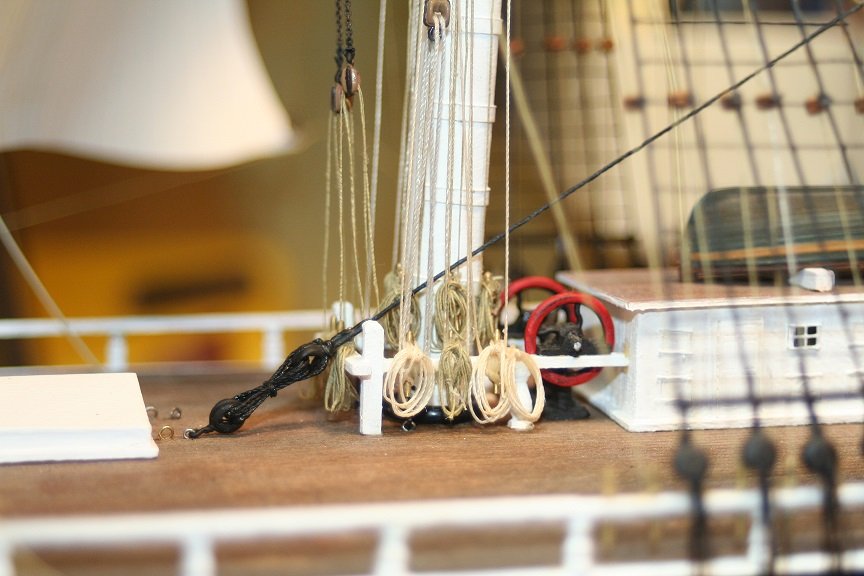
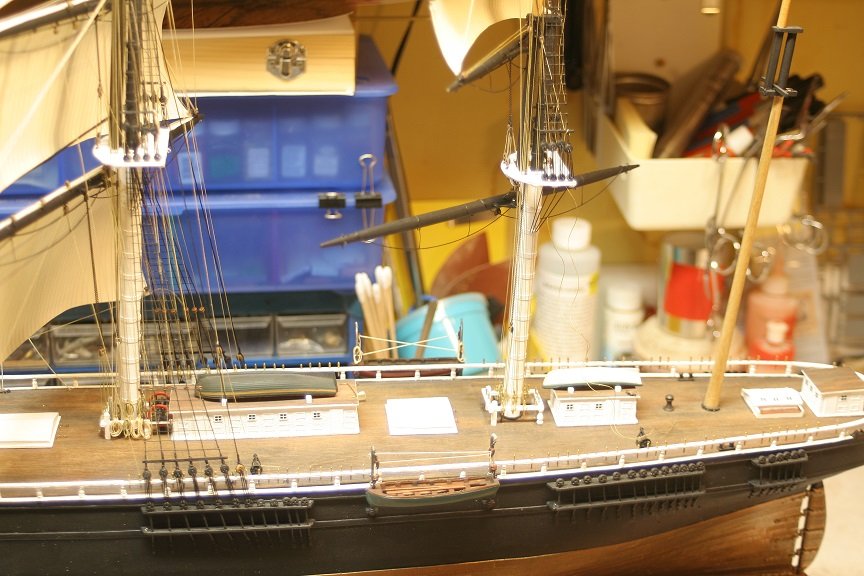
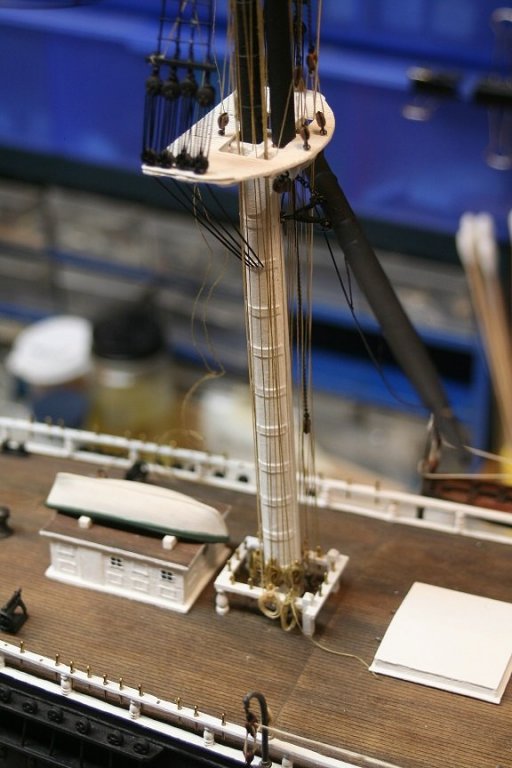
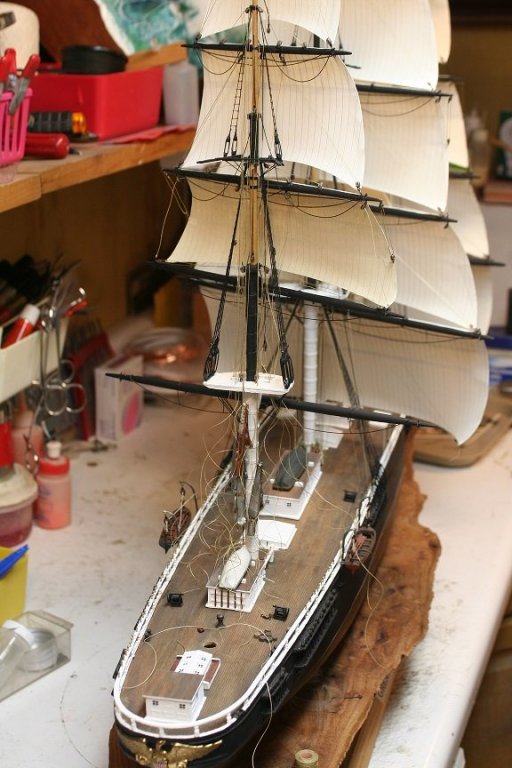
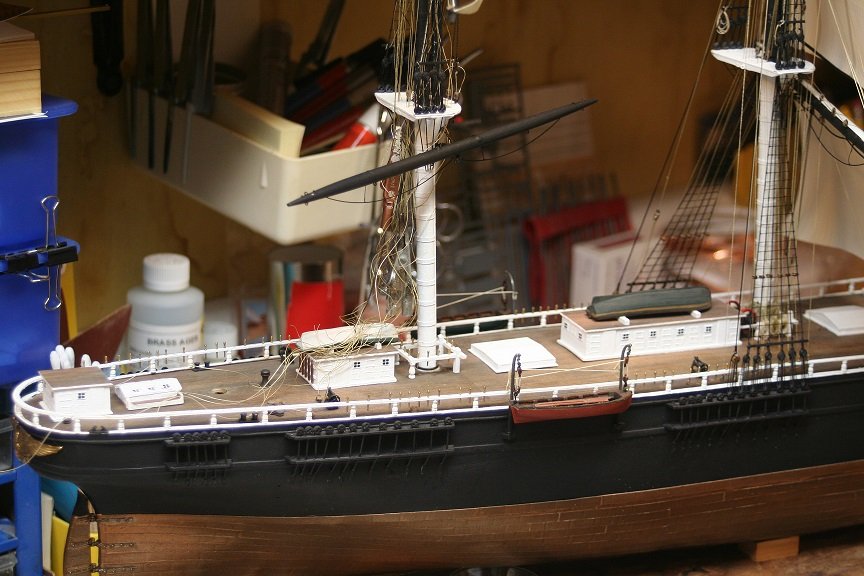
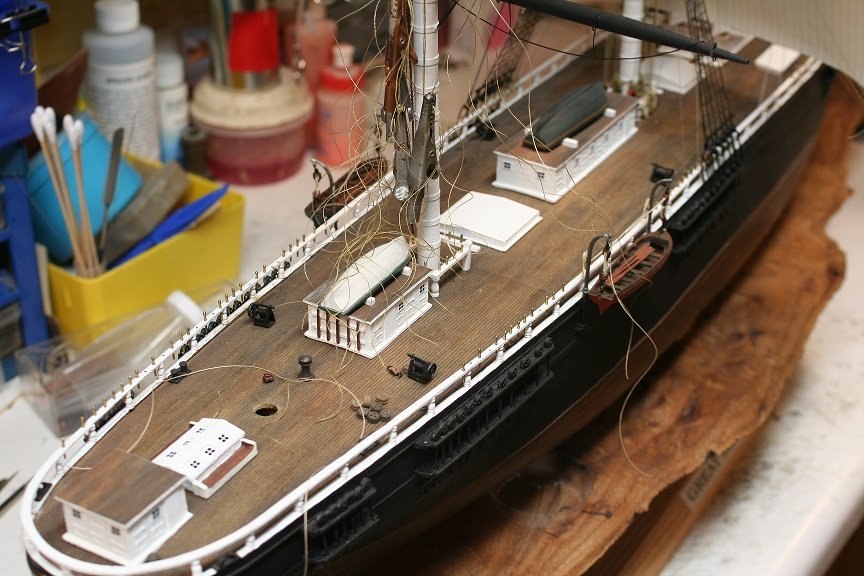
Thanks everyone for the fine advice and sympathies. I'm working to get better and fully recover...still not there. Residual pain and dumbness linger and the DR says it will work itself out but nerve impingement can be tediously slow to fully recover. I did spend some time working on the GR..belaying and rerunning the lines that I had previously run for the sails and yards. Finishing with the rope coils before I proceed to the shrouds and ratlines. I made and added further eye bolts and rings to receive blocks about the model. here is where I left off.

- 1,208 replies
-
- 6
-
-
- great republic
- clipper
- (and 1 more)
-
Wonderful Ed...just stunning. Balancing tension on stays and braces is a tricky business. Well done. Rob(Right behind you)
- 3,618 replies
-
- 3
-
-
- young america
- clipper
- (and 1 more)
-
Amazing...just amazing. Rob
-
MONTAÑES by Amalio
rwiederrich replied to Amalio's topic in - Build logs for subjects built 1751 - 1800
It boggles the mind to think much of this extremely fine work gets covered up or at least completely unnoticed by overlapping extremely detailed joinery that gets covered up by even more overlapping extremely well crafted joinery. If this model ever gets a mast head or any kind of rigging it will surely be a wonder to behold. Rob -
Coming along nicely for sure. Love the attention to detail in the hull construction. Love clippers..nice to see yours progressing so well. I'll be following. Rob
-
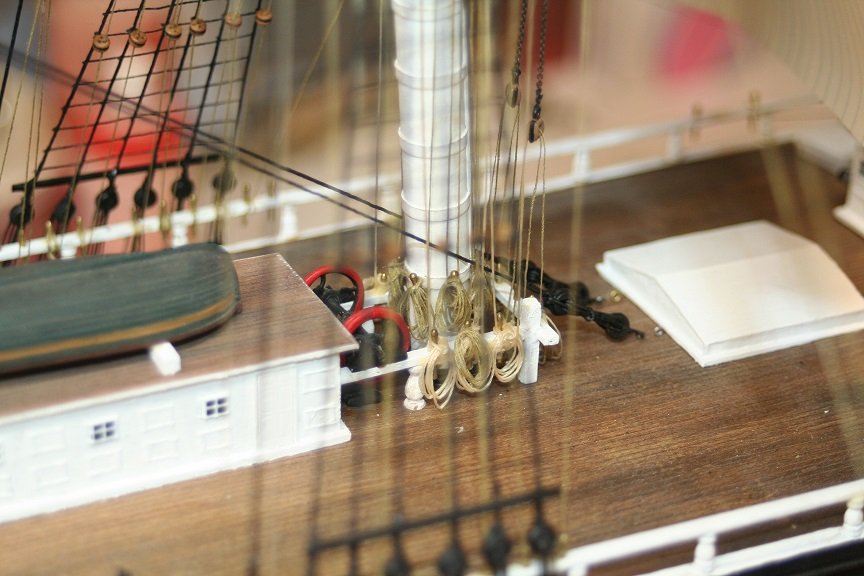
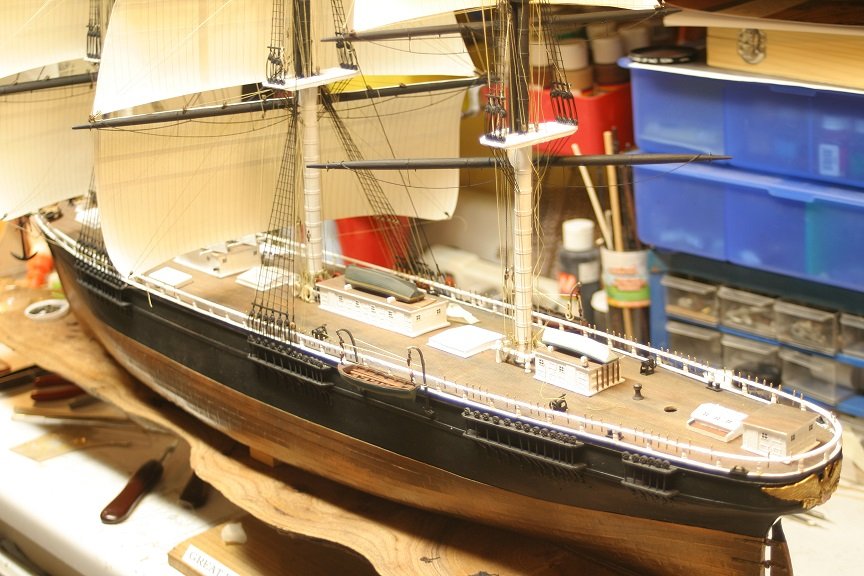
Thanks everyone...I appreciate the concern. My DR does not want to administer a cortisone shot at this time because the pain is not localized and therefore we are going to proceed with my chiropractic care as prescribed. I have far less pain in my back and shoulder, but the remnant pain is persistent. Not having full strength and control in my left arm I still am not seriously working on the GR. I did, however, drill out more holes for the rail pins and set the belay pins..and located and drilled out eyebolt locations for the mainsail brace blocks. Took some pics of the general state of the build thus far. Rob

- 1,208 replies
-
- 13
-
-
- great republic
- clipper
- (and 1 more)
-
fascinating exchange of opinions. One can only draw from their experiences, and my 47 years of building models afforded me the pleasure of adding to my experiences, cars, trains, tanks modern war vessels, plains(fixed winged and rotary), motorcycles, houses and ships. I've built in nearly every era.. and have set every *Kind* in dioramas. (static and animated). As a modeler, when trying to exhibit a particular theme or technique, I give it special attention and venue of exposure. If I were attenuating an emphasis on minuet accurate details, such as treenails, and all manner of specific joinery, I would expose these details and provide the greatest exposure(which emphasizes and reveals my true skill and knowledge)(IT IS MY INTENTION TO EXPOSE THESE ASPECTS). Therefore, I use the most accurate grains and shades of wooden material to *emphasize* this. If my goal is to represent accuracy in rigging....I do the same. IMV so many things must be taken into account, by the builder, as to what they intend to emphasize...if anything. Un painted vessels intend to emphasize the construction of a vessel being modeled...is it accurate...so far as the construction is concerned, because that is the emphasis. Carvers of wood to create reliefs generally do not paint them.....again...for the same reasons. A well planked hull of respectable wood selection will be planked tightly and cleanly...oiled or varnished to show off the craftsman's skill...but is that *Accurate*? Most hulls on real vessels were planked with steamed planks of sizable means(4~6" thick), treenailed and most assuredly with gaps between the planks. Would that be acceptable for a modeler? Probably not...but then again the vessel would then be caulked with various hemp materials and then tar/pitch filled for a sealant. Topped off by a generous viscus coat of preservative paint. All applied to make the vessel sound and *Leak proof* Sea worthy. Copious amounts of paint were applied to protect the vessel from the harsh salt water and air. Accuracy of paint hue is less historical then the application of it. IMV. With all this being said...if I built my historically accurate model from scrap coffee can lids, and left it unpainted, I would surely get some criticism. However, if I painted it, covering all the plastic and glue residue, one might think nothing of the models construction material and focus on the models skillfully executed accuracy(a shameful self promoting pun). Coming to the close of my self bloviating point. I enjoy all ship models..for I see within them the builders intent. I personally paint all my models...my line of reasoning, is because ships sailed in water...water is caustic and thus ships were painted to protect them from this element. In the cases where vessels were not painted...they lasted long enough for the owner to build another....and if he valued his time and money...he painted the next one. I deeply respect all my fellow modelers, for they are a discriminating bunch of awesome folks. Rob
-
Not sure of this arrangement. Do the lazyjacks raise the jib up to the outer stay? You have the jib furled to the bowsprit via the downhaul....? Very peculiar rigging...... Rob
-
What is this type of rig called.
rwiederrich replied to BANYAN's topic in Masting, rigging and sails
Glad...the transitional form has found root and *Steamer Rig* is firmly acceptable. My own research, though limited, points to an evolutionary transition from standard sail *types* to what will become standard *steam* types. Smooth sailing. Rob -
What is this type of rig called.
rwiederrich replied to BANYAN's topic in Masting, rigging and sails
Pat...well researched. I for one appreciate your time and attention to the matter. In my library I have a book called, The Lore Of Ships, edited by Sam Svensson 1966, reprinted in 1998. And it is a wealth of sail rigging plans and lists a significant list of vessel types. Your vessel mimics a two topsail schooner sail plan. Or what is called a modified *Jackass Bark*. It also has a drawing of your exact winch you made. Pretty exhaustive valuum on the subject of rigging and nearly every aspect of ship fittings. Rob -
Exactly. I'm not finished with them..I still need to add the inner bumper(Yard) and finalize the oars and secure them and the boats properly. Rob
- 1,208 replies
-
- 3
-
-
- great republic
- clipper
- (and 1 more)
-
Yes Bob...Briefly, back on post #403 or page 14. Almost an after thought...I was gearing up for masting details(Finish them). Thanks for the fine compliment. I really just throw stuff together...but the recognition is very appreciated. Rob
- 1,208 replies
-
- 3
-
-
- great republic
- clipper
- (and 1 more)
-
I sure hope so...I've had to take 4 days off work and near daily DR appointments. I'm hopeful for sure......but I need all my fingers working to do the fine rigging that is needed coming up. Thanks for the fine condolences and encouragement. Rob
- 1,208 replies
-
- 3
-
-
- great republic
- clipper
- (and 1 more)
-
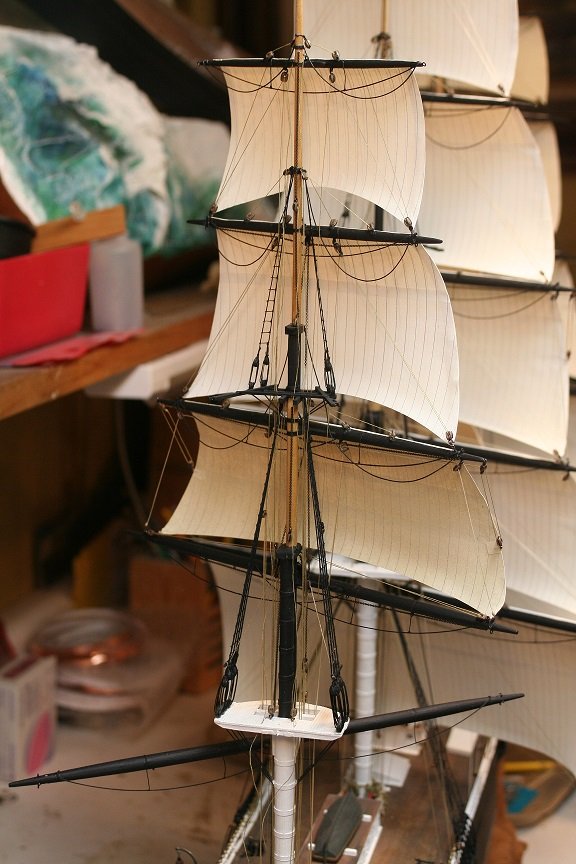
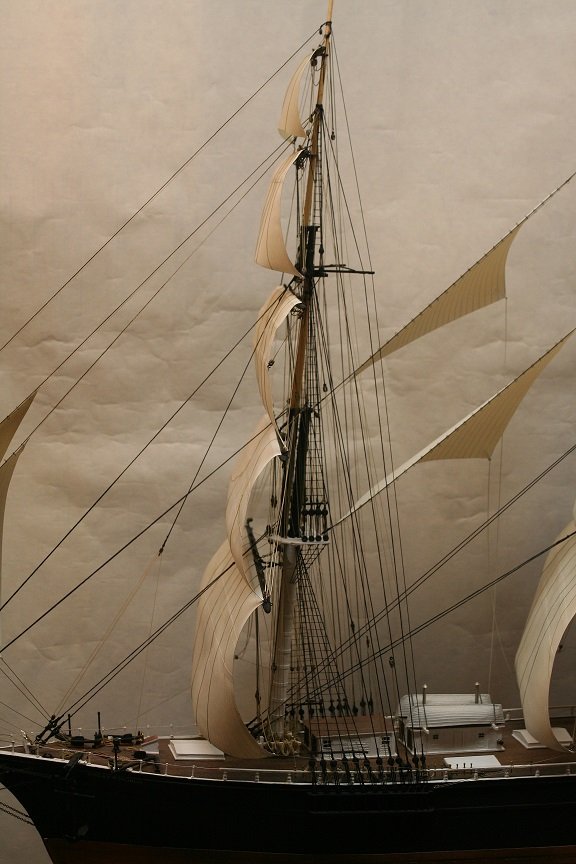
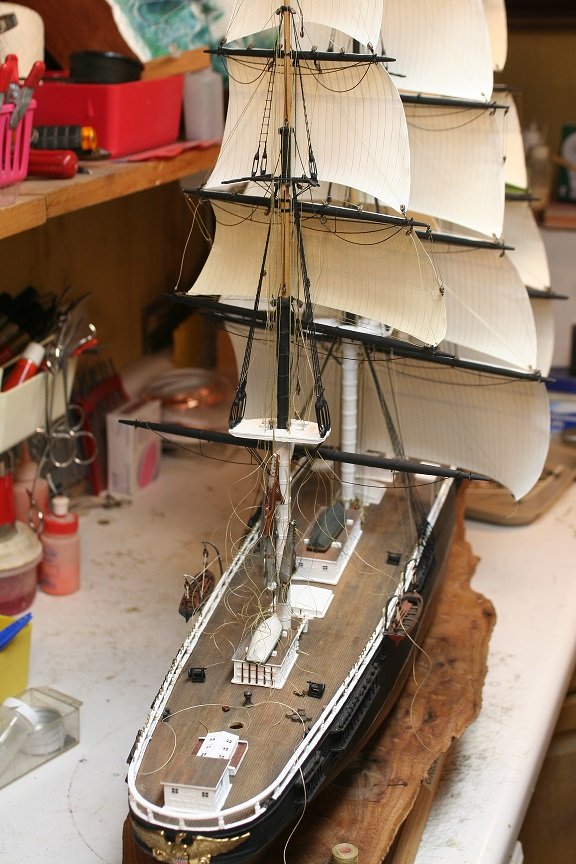
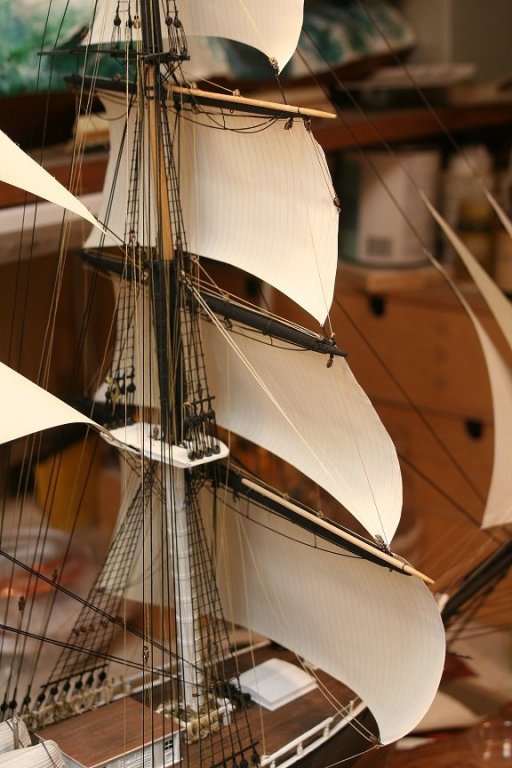
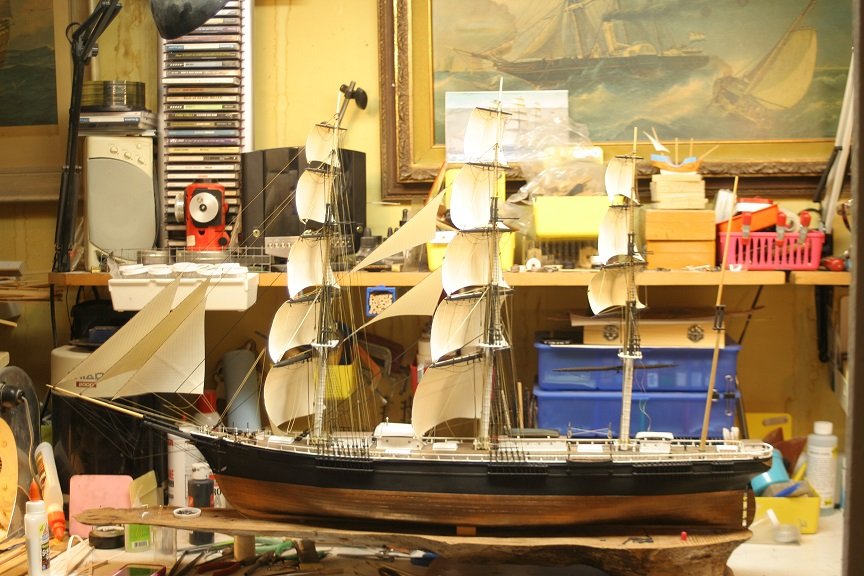
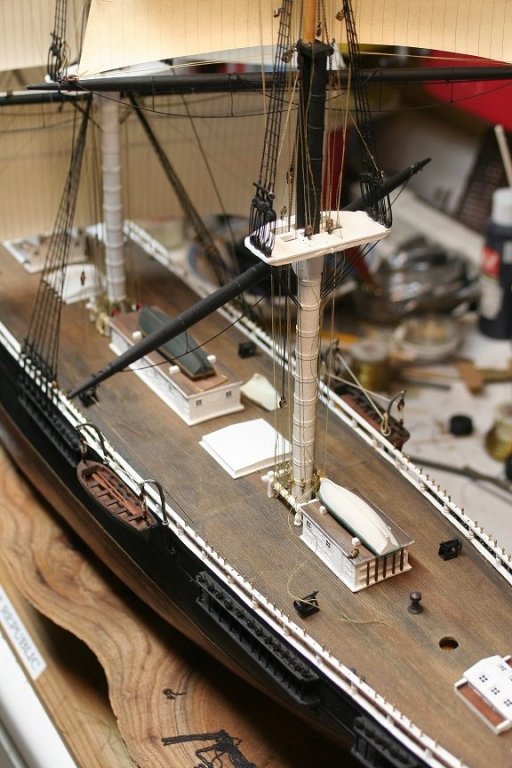
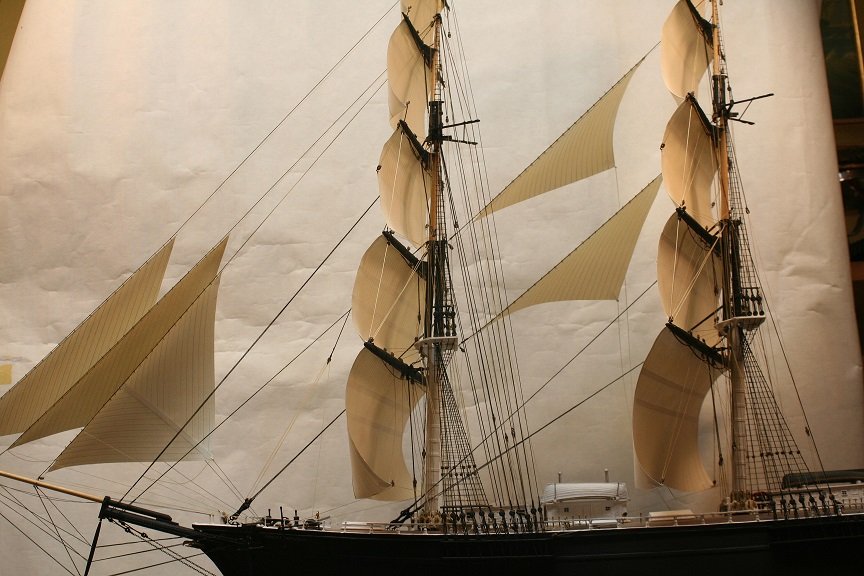
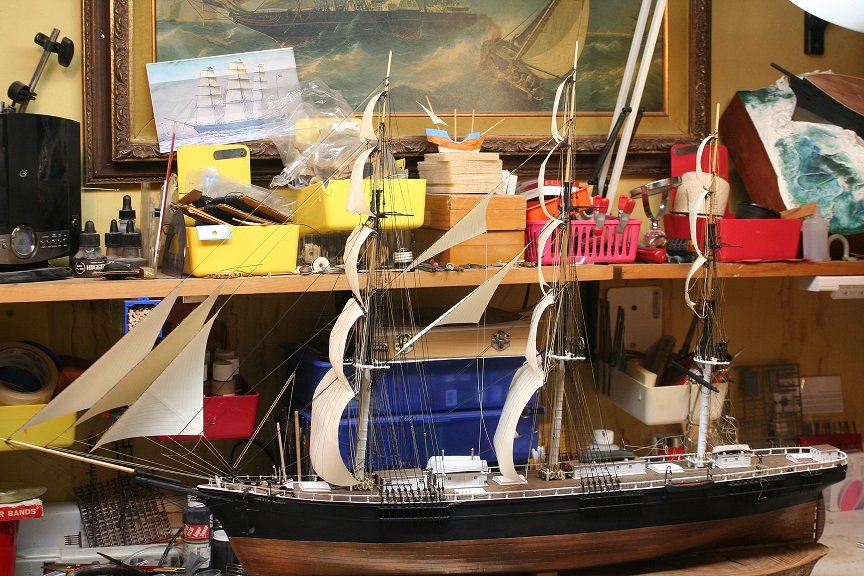
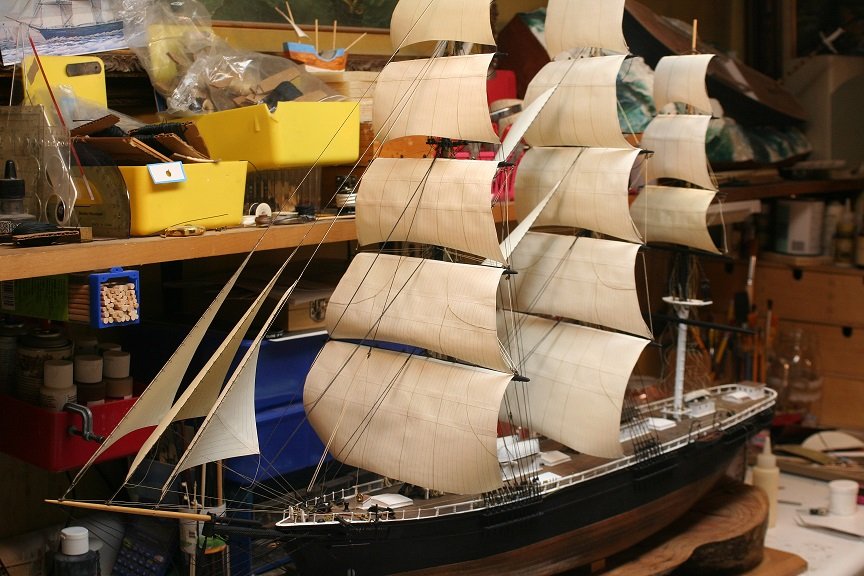
Pulling back to see the three masts stepped and finally getting to look more like a clipper. Just couldn't do any more work..with an extremely painful left arm and numb hand. Hope to get back at full speed ahead soon. Rob
- 1,208 replies
-
- 12
-
-
- great republic
- clipper
- (and 1 more)
-
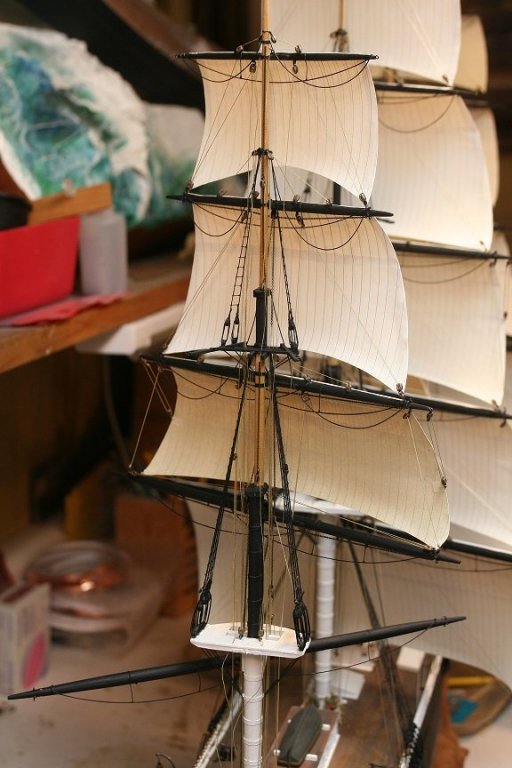
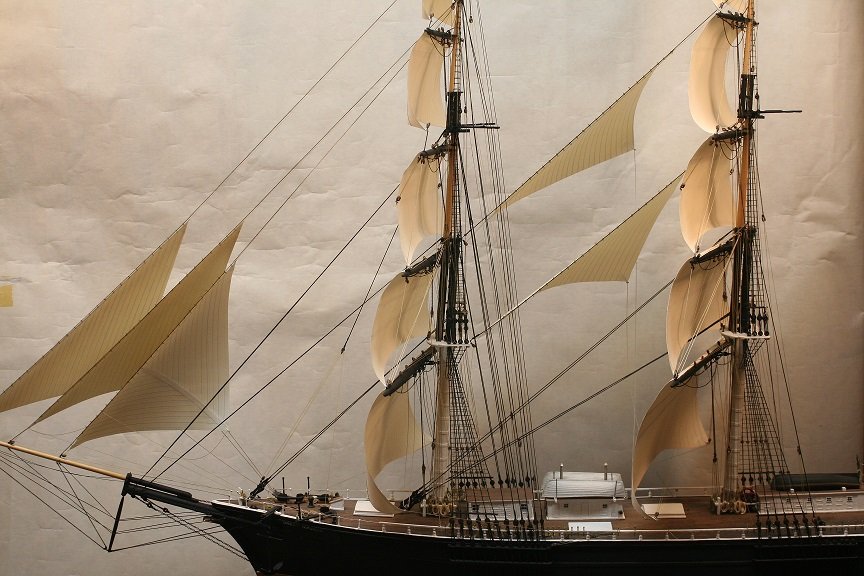
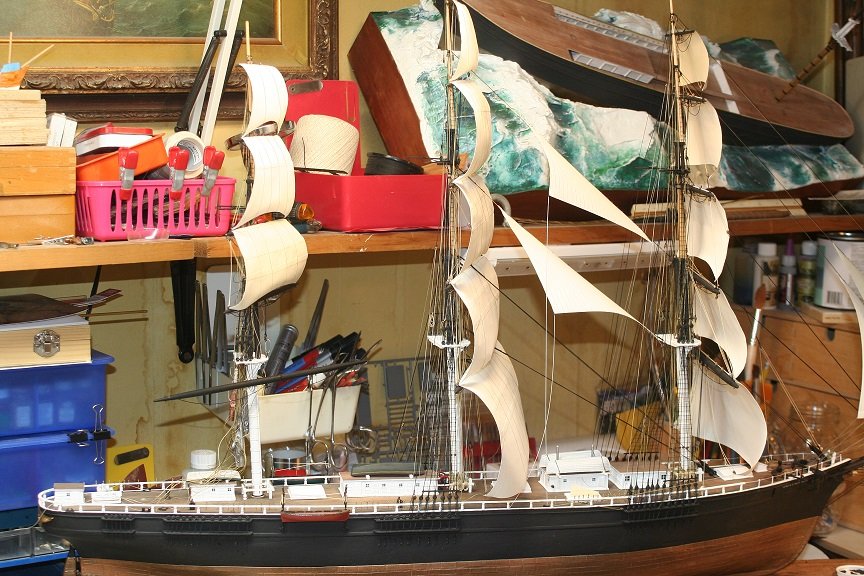
Well it has been 2 weeks and I am just as miserable. My left arm is painful and my left hand is numb. The DR's say we are making progress. and I should be experiencing some relief. Waiting for that day...... I just couldn't just sit around and whimpering in pain, so I opted to finish up the last additions to the mizzen prior to stepping it in the model. The lower topsail and main course are left off for ease of addition of the shrouds and ratlines...as I've done for the other masts. Here are some pics of todays meager doings.
- 1,208 replies
-
- 9
-
-
- great republic
- clipper
- (and 1 more)
-
Dan......just finished reviewing your log... and boy oh boy, what a beautiful ship...great job dividing her too. Makes for a great history lesson as well. Rob
- 238 replies
-
- 5
-
-
- leviathan
- troop ship
- (and 2 more)
-
HMCSS Victoria 1855 by BANYAN - 1:72
rwiederrich replied to BANYAN's topic in - Build logs for subjects built 1851 - 1900
Well executed. Rob- 1,013 replies
-
- 4
-
-
- gun dispatch vessel
- victoria
- (and 2 more)
-
Fantastic work.. Rob
-
Sorry I haven't replied...I hurt my back last week and I'm in serious pain. Been to the Med Doctor and the Chiropractor every other day. I really messed things up. Be back at the DR's again on Monday. I hope to get back to the GR very soon....Just don't have any mobility in my left arm or neck. Clear sailing, everyone and thanks for the likes. Rob