HOLIDAY DONATION DRIVE - SUPPORT MSW - DO YOUR PART TO KEEP THIS GREAT FORUM GOING! (83 donations so far out of 49,000 members - C'mon guys!)
×


rwiederrich
-
Posts
5,518 -
Joined
-
Last visited
Content Type
Profiles
Forums
Gallery
Events
Everything posted by rwiederrich
-
Well Dan... in this scale, tying clove hitches would have been extremely impractical as well as the door to insanity. I chose to pre-cut lengths of black string... dab a small drop of white glue on each shroud....then, with holding both ends of the black thread, I press the ratline against the glued shrouds...rolling slightly to incorporate the glue....then level and release to dry. I then cut off each remainder with a surgical scalpel and tweezer and touch up any shiny glue residue with black paint. I have an extremely gifted eye for both level and distance. Pretty easy for me....possibly not so much for others. Thanks for noticing and your fine comment. Rob
- 1,208 replies
-
- 3
-

-
- great republic
- clipper
- (and 1 more)
-
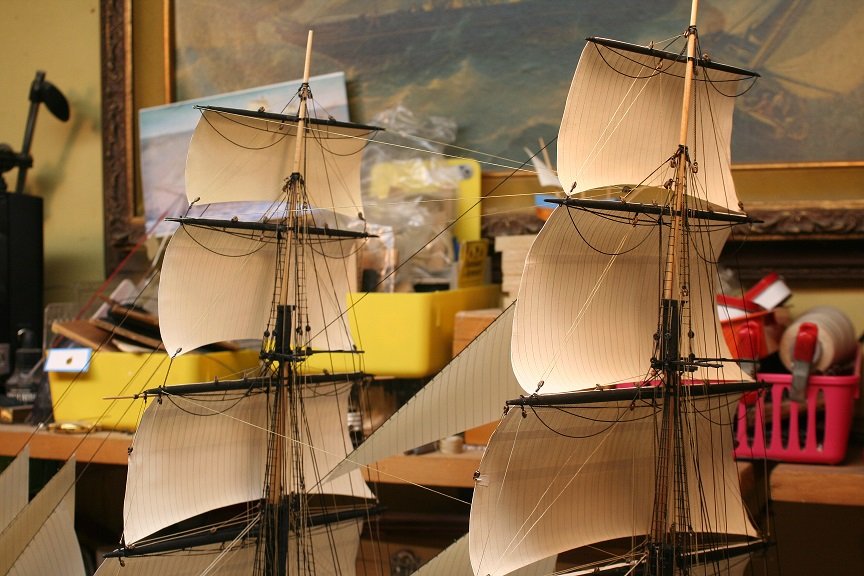
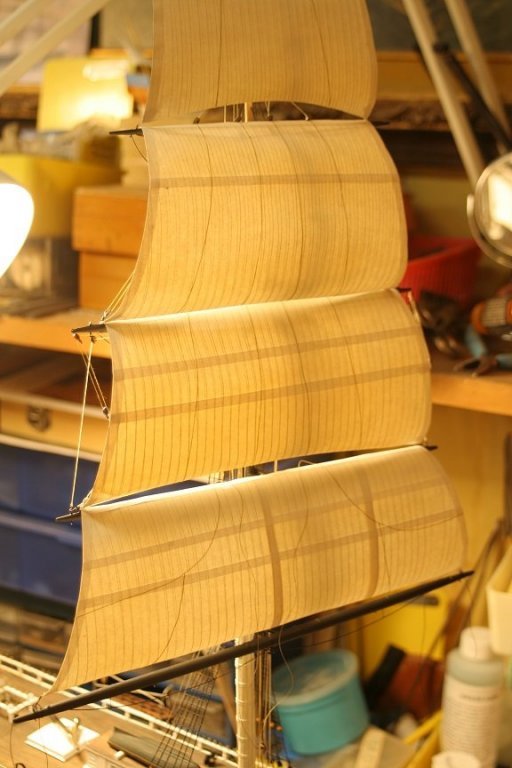
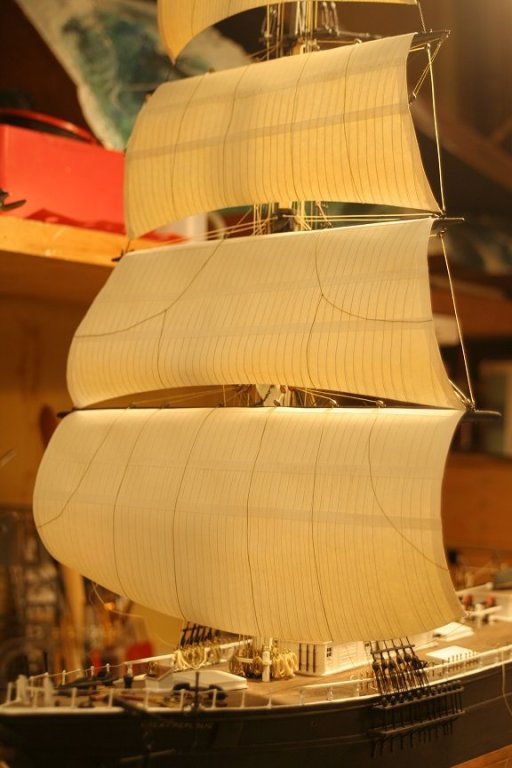
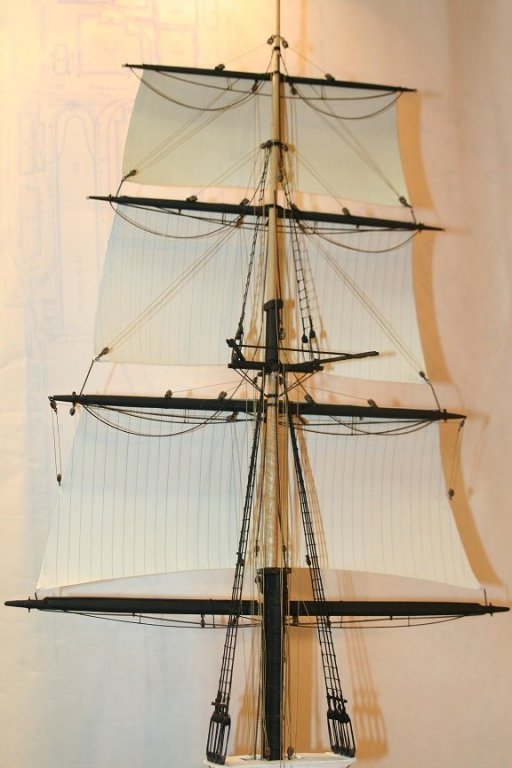
I knew when I got the plans that this model needed the full Monty of sails to bring her true self alive. I had done paper sails before, never in this scale and in this number. But clippers are known for their massive amount of canvas and since she has a spanker mast(more sails), I was compelled. Thanks for the very fine comments and greetings Rob...… Maranatha.
- 1,208 replies
-
- 3
-
-
- great republic
- clipper
- (and 1 more)
-
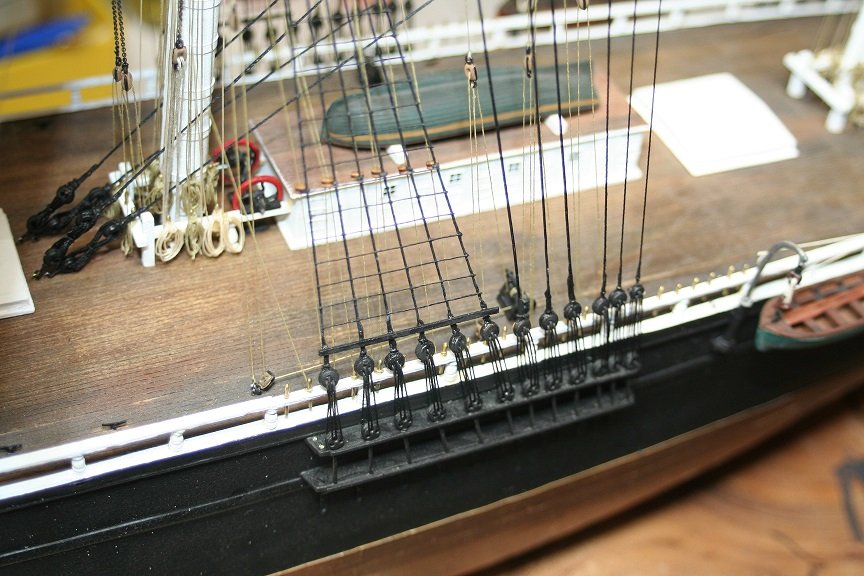
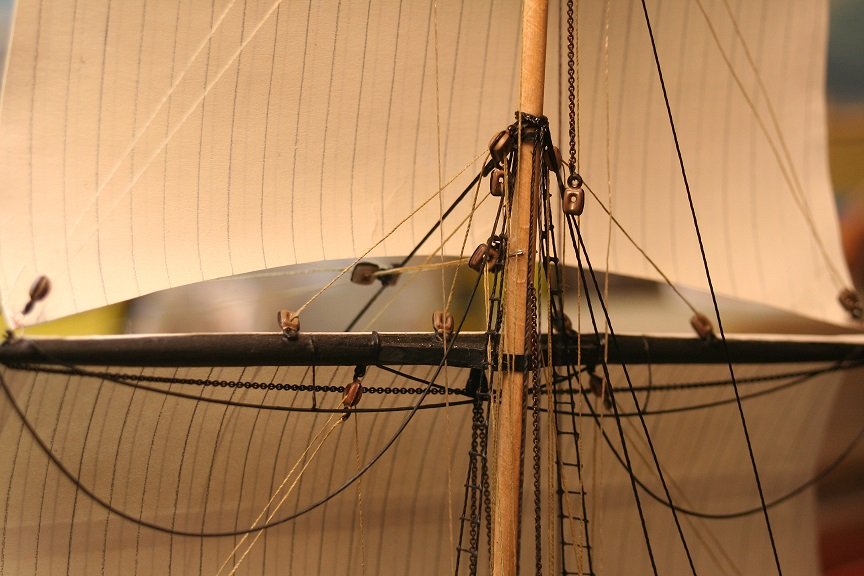
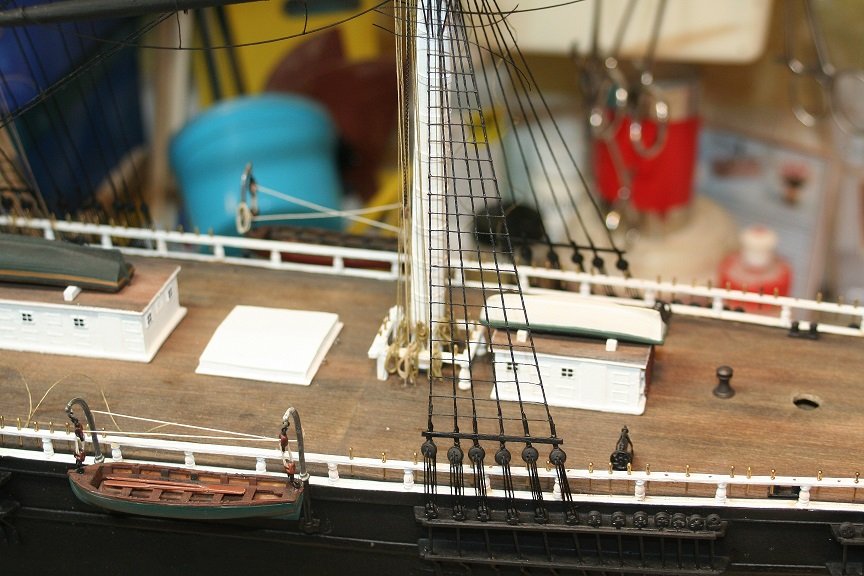
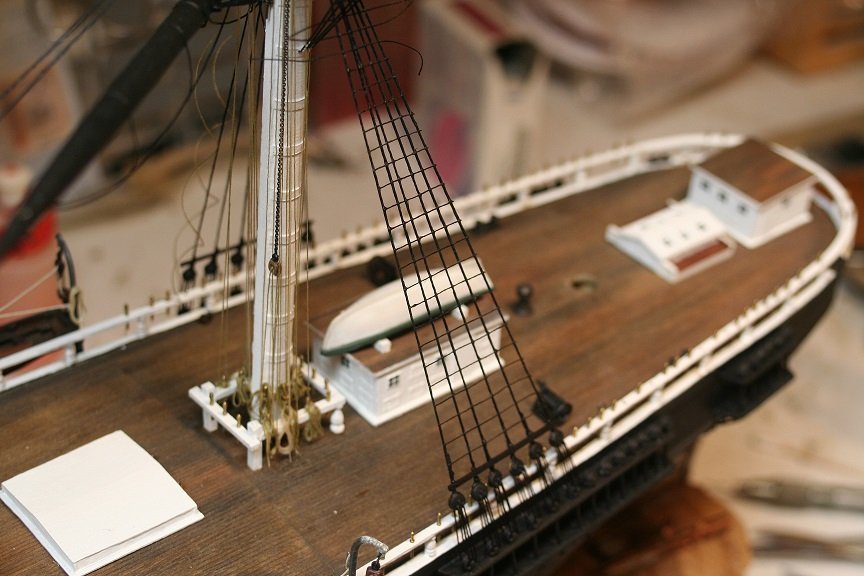
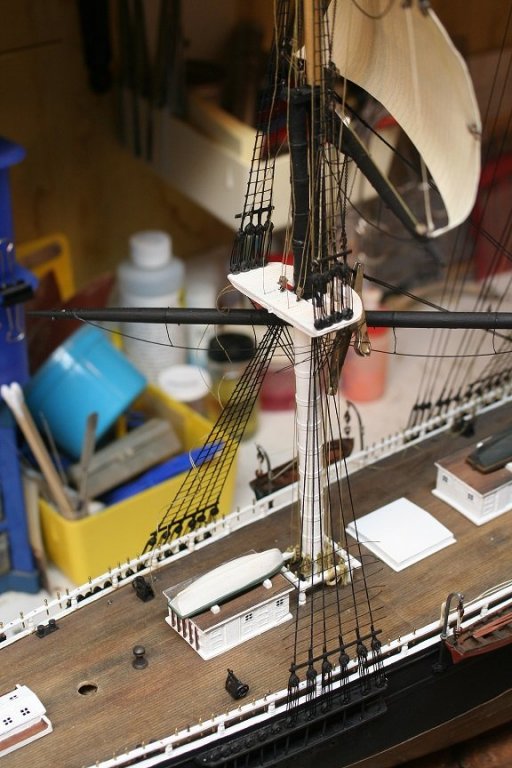
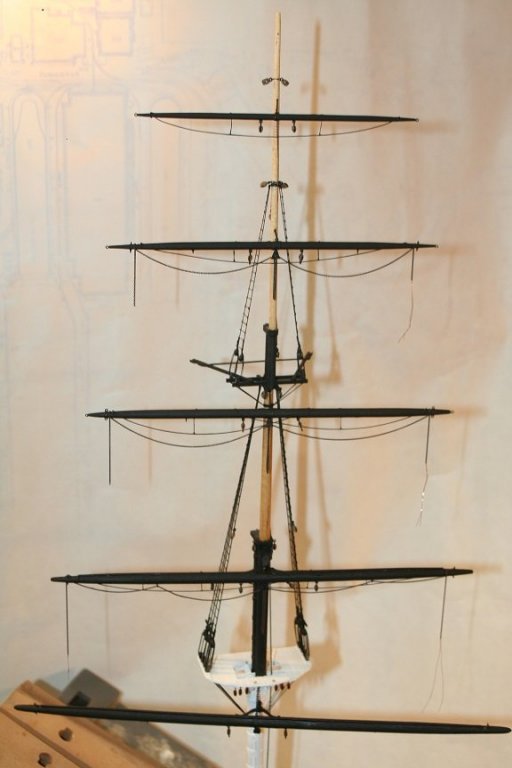
Some deck work and control work... The upper topsail braces are installed too....they are simple....not like the lower and main braces as they come along. I installed the purchases as the braces come down through the tops and run through a deck block and off to the winch. Rob

- 1,208 replies
-
- 13
-
-
- great republic
- clipper
- (and 1 more)
-
Spent some time today working on the fore mast royal and topgallant braces and all the blocks and belay points.....here are some pics of the progress.

- 1,208 replies
-
- 9
-
-
- great republic
- clipper
- (and 1 more)
-
Now that I am doing some braces and lots of blocks and belaying..the scale is becoming vary evident....tight, tight, tight spaces for sure. Rob
- 1,208 replies
-
- 2
-
-
- great republic
- clipper
- (and 1 more)
-
Dan....thanks for the fine comments and for peaking in.....I appreciate it. Rob
- 1,208 replies
-
- 1
-
-
- great republic
- clipper
- (and 1 more)
-
I wouldn't say you were wrong. Different techniques require different situations...scale and modelers ability to name a few. Not to mention trying to furl a sail on a yard is tough OFF the mast...let alone being brave enough to attempt it on a mounted yard. I agree that adding furled sails and their associated blocks and rigging to the yard prior to the yard being installed makes the greatest sence...as in ease and less damage induced. On the other hand, my latest clipper it was far easier to install the billowed sails to the fixed yards, while the mast was off the model. A perfect example of how techniques and ability contribute to what we conclude is the *easiest*. Sometimes we are not even talking about the same thing. A mounted furled sail in NOT the same animal as a mounted billowed sail. Rob
-
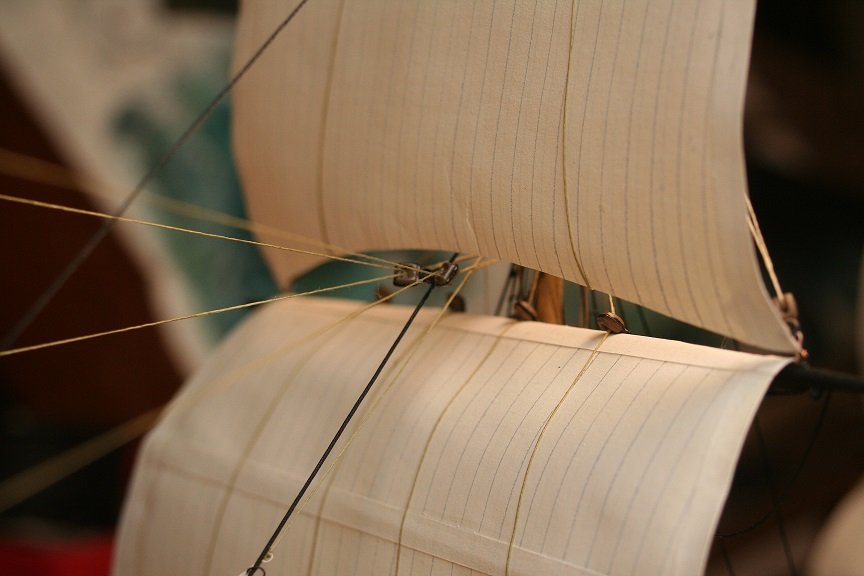
I shot the jibs to show off their many hanks holding the sails to the stays. I'll rig the first mizzen backstay then work my way of and begin adding the topgallant stay and so forth...always balancing the rigging...not to stress or warp the timbers. Lots more to go...but I can see the end of the tunnel.....about a half a year away...... Rob
- 1,208 replies
-
- 10
-
-
- great republic
- clipper
- (and 1 more)
-
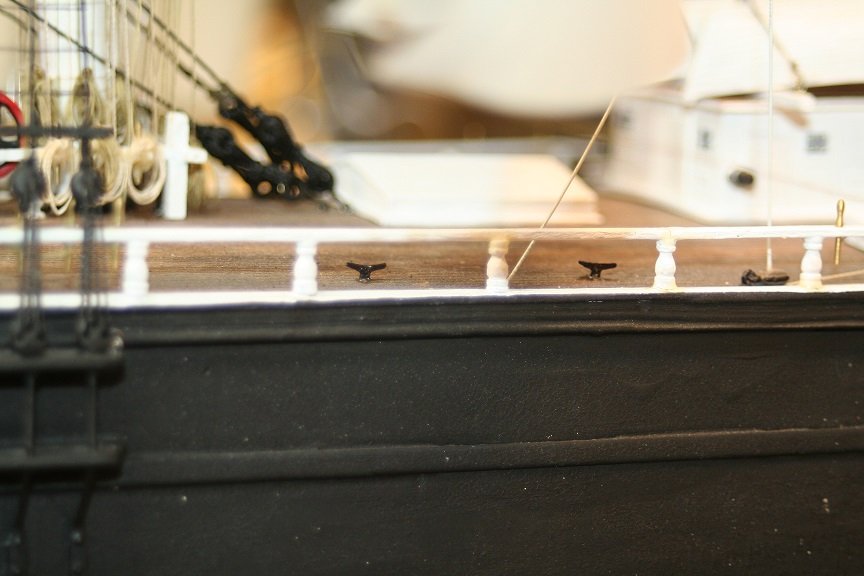
While glue was drying I began to fashion the first of many 4mm cleats that the braces will belay to.
- 1,208 replies
-
- 9
-
-
- great republic
- clipper
- (and 1 more)
-
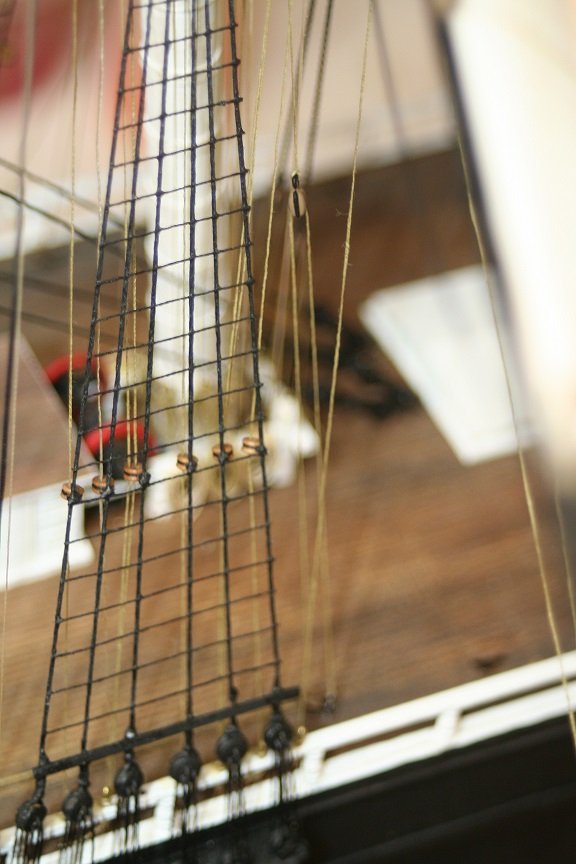
Worked on the mizzen ratlines tonight..here are some pics. Finished the port now I'm working on the starboard side.... Rob(these boogers take a lot of time)
- 1,208 replies
-
- 7
-
-
- great republic
- clipper
- (and 1 more)
-
Oh yeah...I have most of my hands function back....enough to finally do some fine work. I was going mad...not getting in any shipyard time because of this injury. I'll get about 5 hours in tonight...so the riggers are gonna get some new orders tonight. Rob
- 1,208 replies
-
- 4
-
-
- great republic
- clipper
- (and 1 more)
-
Oh my....what wonderful workmanship.... Be it rope or wood work...you have superbly mastered the art of model ship building. I'm working in a much smaller scale...(1/128) and if I could pull off such attention to detail....it would be a miracle. Love your work. Rob
- 306 replies
-
- 3
-
-
- schooner
- la jacinthe
- (and 1 more)
-
I agree completely. The rigging is not the where for all of the model and if the sails are placed appropriately... there will be ample rigging to admire besides. IMHV, the rigging and the sails compliment one another...and to view all the *extra* rigging provided by the sails...the rigging freak will have a hey day. Again..thanks for following along and for your fine comments. Rob
- 1,208 replies
-
- 6
-
-
- great republic
- clipper
- (and 1 more)
-
Thank you very much. I concluded that a sailing ship....a clipper ship.... had two major distinct elements...one, her sleek hull design and her massive array of sails. If the former was tackled with as much skill as I could muster...then the latter had to employ at least as much skill...and with a greater aptitude of convincing. Sails IMHV have to not only be in scale, but must somehow exude an emotion of action....motion....life. I do truly feel that any *masterful* expressions I may have expressed were namely focused on using simple paper for the sails...no tricks or skillful seamstress abilities were required. The same stuff used on the rest of the build....paint, string, wire(clues) and will. Any fearless, ambitious modeler can add sails to any model....if they approach it systematically and do as much work off the model. The end result will not only enhance their hull wood work...but really complete the model by providing the main element of a sailing ship....her sails. Again....thanks for the fine humbling compliments. Rob
- 1,208 replies
-
- 5
-
-
- great republic
- clipper
- (and 1 more)
-
Finished up the mizzen shrouds. Didn't take long. Now onto the ratlines. Rob
- 1,208 replies
-
- 13
-
-
- great republic
- clipper
- (and 1 more)
-
Exactly! In my case, I removed each mast from the ship and rigged the sails off ship....Kinda the same principle as rigging the sail on the yard prior to installing the yard to the mast. It just dawned on me, that scale has a lot to do with what technique one may employ as well. Rob
-
What a fun and fanciful subject to incase in a wonderful bottle...... Beautiful subject and execution of it...... Rob
- 52 replies
-
- 2
-
-
- jack sparrow
- pirate
- (and 2 more)
-
MONTAÑES by Amalio
rwiederrich replied to Amalio's topic in - Build logs for subjects built 1751 - 1800
Masterful work...just wonderful. Rob -
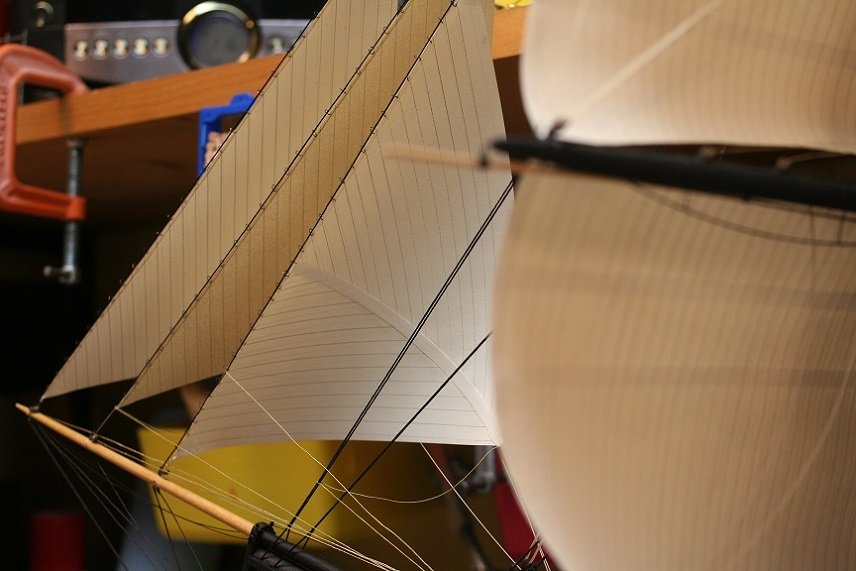
Every application can have a different process.... in your application of furled sails...I agree. Adding the sails and its associated blocks to the yards prior to fixing to the mast is a preferred method. Easy, repeatable and efficient. However, in my application, I required the sails to be billowed and that billow needed to originate at the sails origin...where it is bent to the yard at the jackstay. Not to hang limplessly as in drying or in a doldrum, but naturally as if in a stiff breeze. My technique, required the yard to be firmly fixed to the yard so the sail, when positioned properly, could then be supported and glued in its correct attitude. A vary hard thing to do if the sail was first bent to the un- mounted yard. Rob
-
I don't know...On my current build of the Clipper Great Republic...I preferred to install all the yards on the mast first..then rigged all the blocks and then installed the sails. I found it actually easier then rigging the yard prior to install. The main benefit was once the yard was installed I could glue the sail at the right billowed angle...supporting it from the mast. Rob
-
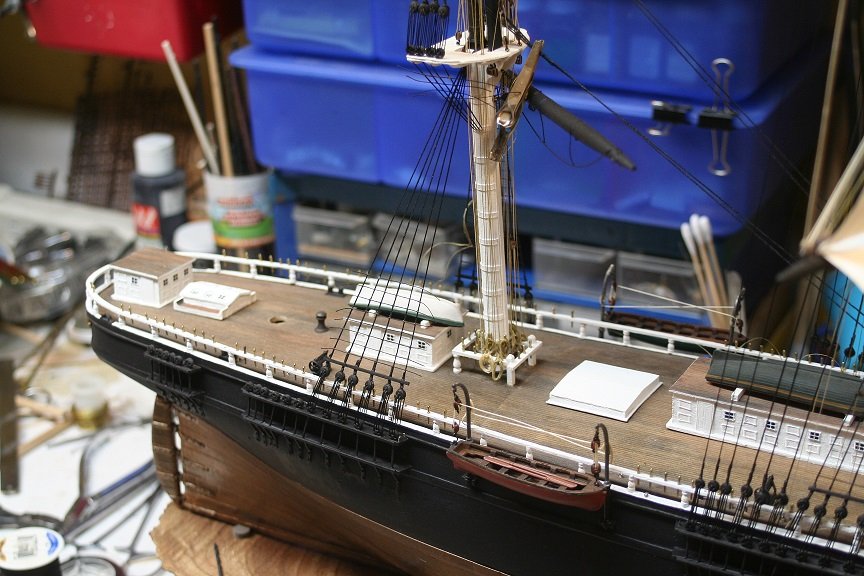
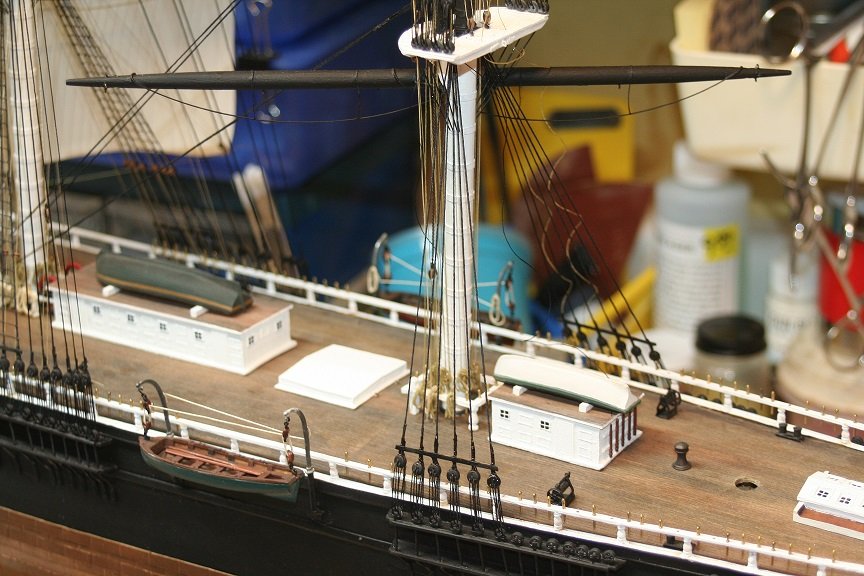
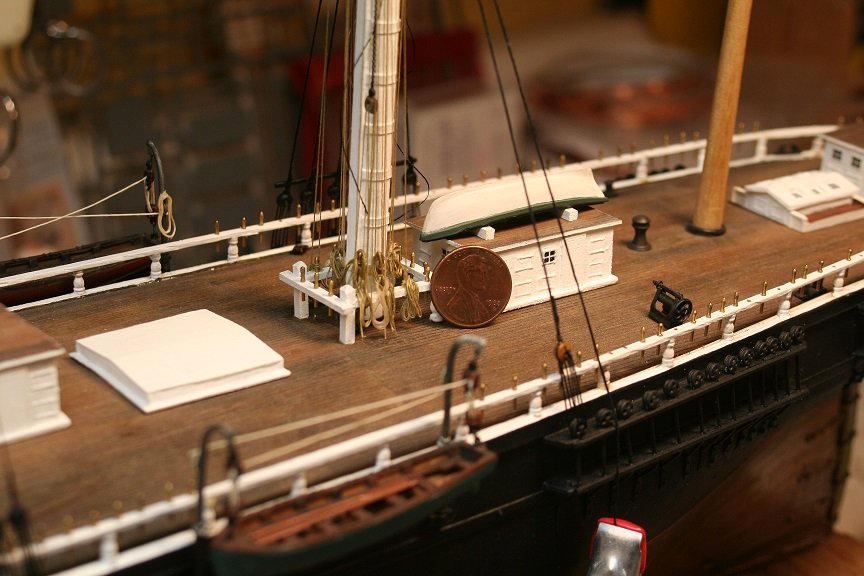
Just so everyone knows the scale I'm working in..here is a simple comparison....I places a penny next to the aft house and mizzen fife rail. Rob
- 1,208 replies
-
- 12
-
-
- great republic
- clipper
- (and 1 more)
-
I also finished adding the main royal stay as well(not pictured). Once I get the port mizzen shrouds finished...I'll get to ratlining all the shrouds .... Lots of work done on this wet and rainy day.... Rob
- 1,208 replies
-
- 6
-
-
- great republic
- clipper
- (and 1 more)