HOLIDAY DONATION DRIVE - SUPPORT MSW - DO YOUR PART TO KEEP THIS GREAT FORUM GOING! (83 donations so far out of 49,000 members - C'mon guys!)
×


rwiederrich
-
Posts
5,518 -
Joined
-
Last visited
Content Type
Profiles
Forums
Gallery
Events
Everything posted by rwiederrich
-
Tom....what is ship that in your avatar? Looks like a clipper. Rob
-
Brigantine Leon by Beckmann - 1/48
rwiederrich replied to Beckmann's topic in - Build logs for subjects built 1851 - 1900
Beautiful little vessel...and a most wonderful job in presenting her....nice and cleanly done. Rob -
painstaking detail in the extreme.....words cannot describe the emotions induced by your work.... Breathless...…. Rob
-
HMCSS Victoria 1855 by BANYAN - 1:72
rwiederrich replied to BANYAN's topic in - Build logs for subjects built 1851 - 1900
Interesting jig to make those straps. Lots of prep work and tooling. Fun. Rob- 1,013 replies
-
- 5
-

-
- gun dispatch vessel
- victoria
- (and 2 more)
-
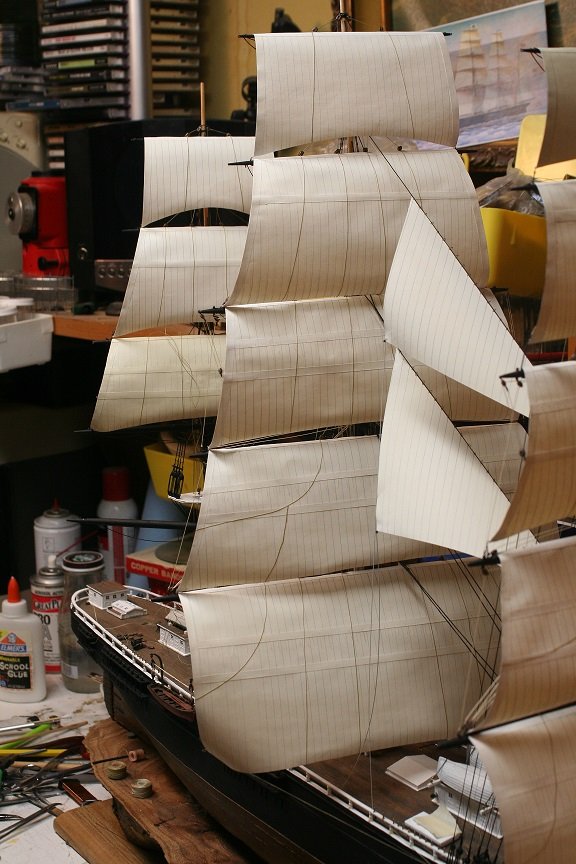
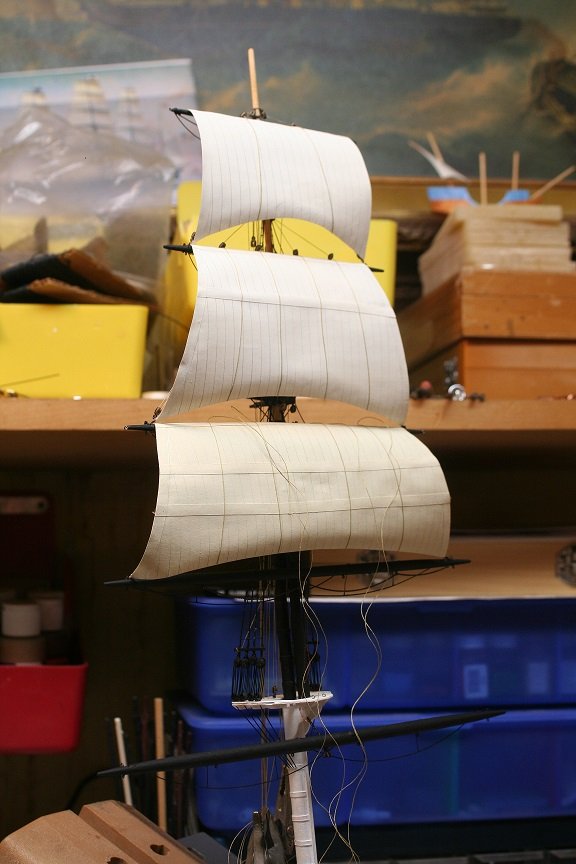
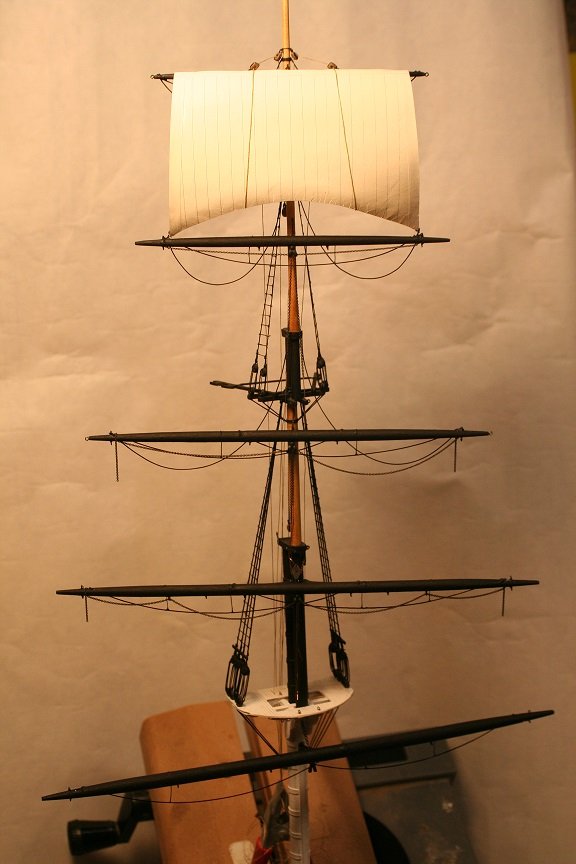
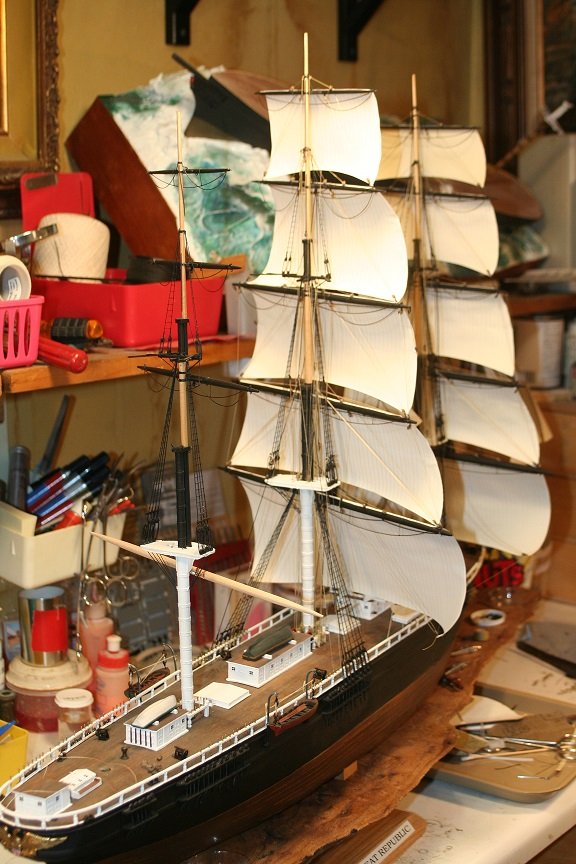
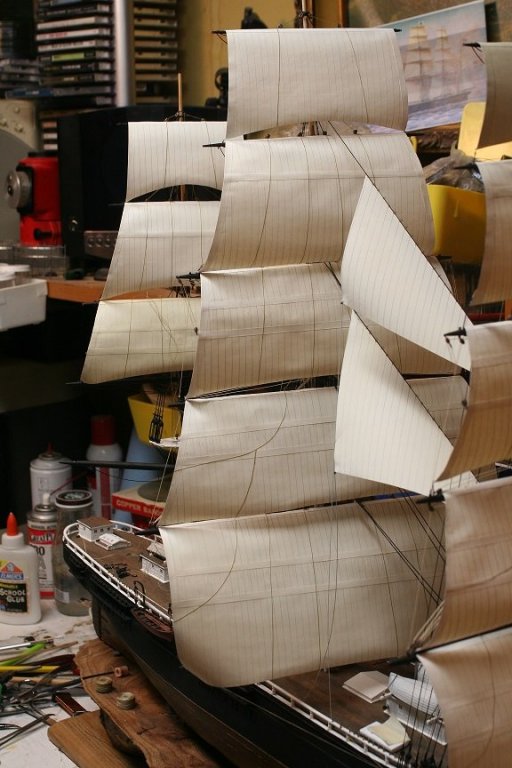
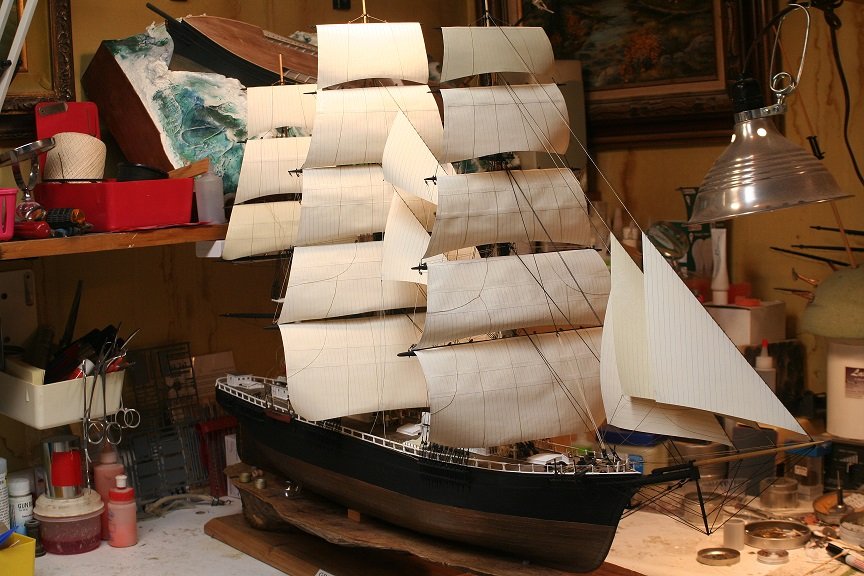
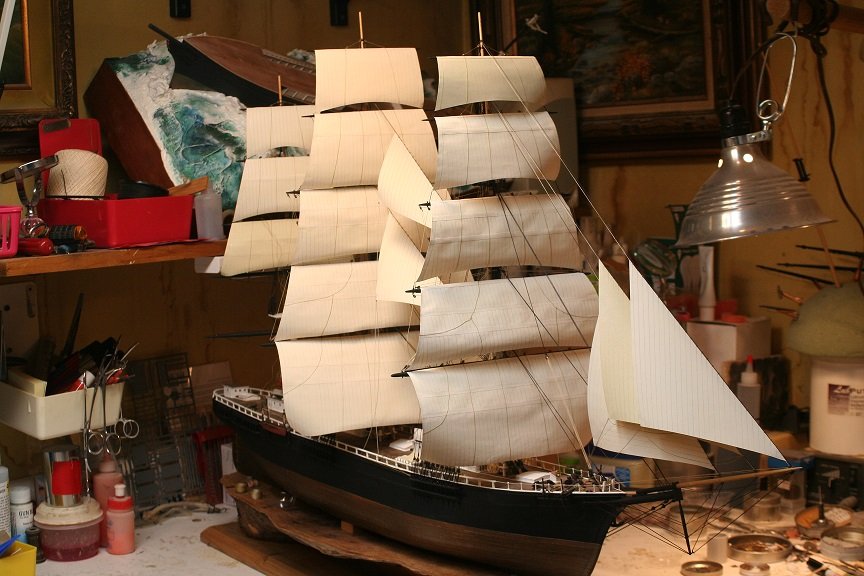
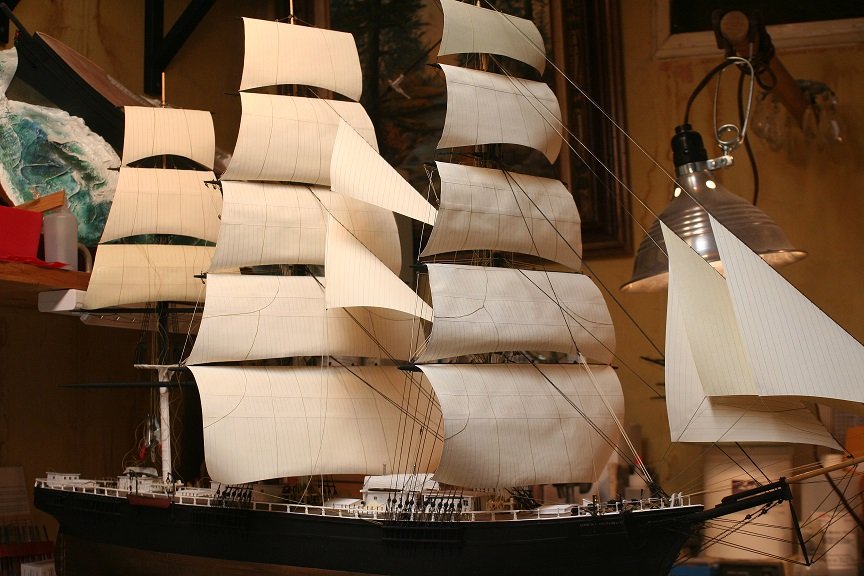
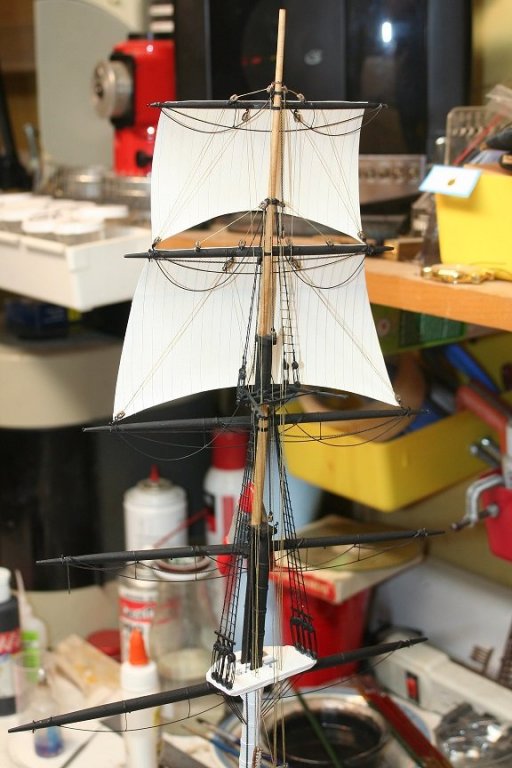
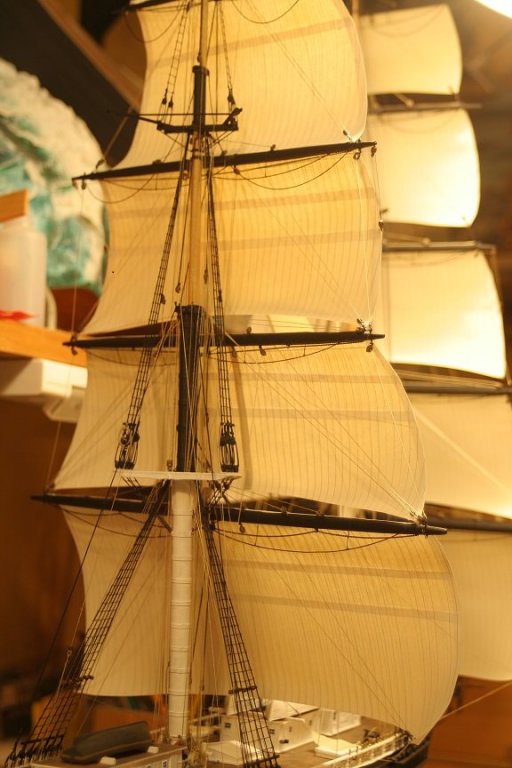
Still have buntlines and their blocks to instal and plenty more stuff to add...but I posted the mizzen on the model.....she's looking like a clipper all right. Rob


- 1,208 replies
-
- 16
-
-
- great republic
- clipper
- (and 1 more)
-
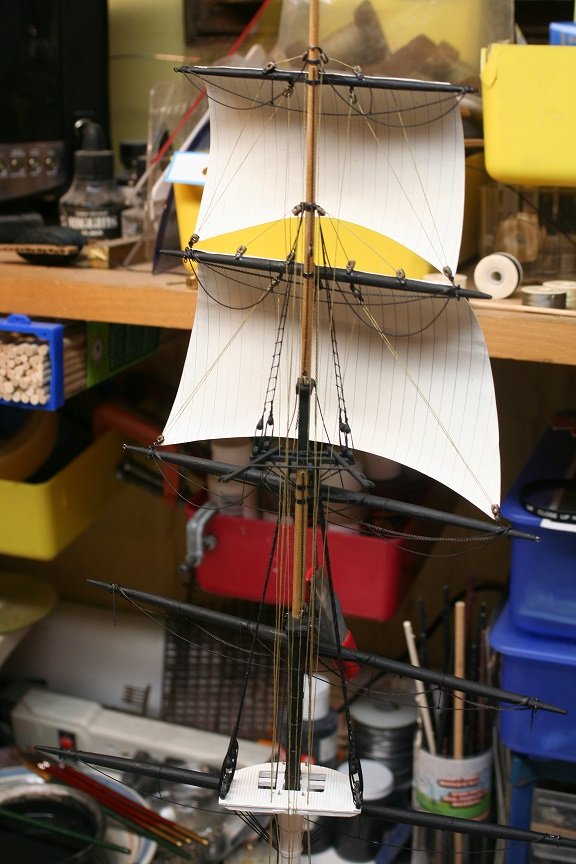
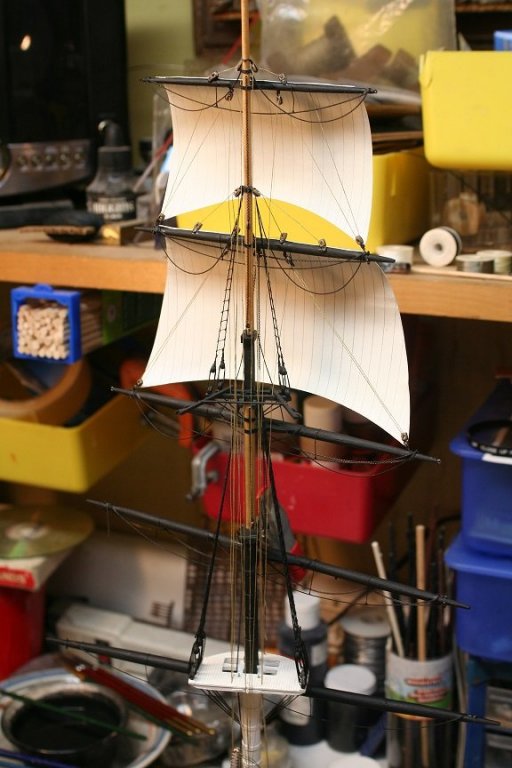
Spent some time today working on the upper topsail install..lots more work to do but, I'm moving along. Rob


- 1,208 replies
-
- 10
-
-
- great republic
- clipper
- (and 1 more)
-
Now I've secure the sheets to the sail and am finishing up with rigging details and buntlines. Rob


- 1,208 replies
-
- 11
-
-
- great republic
- clipper
- (and 1 more)
-
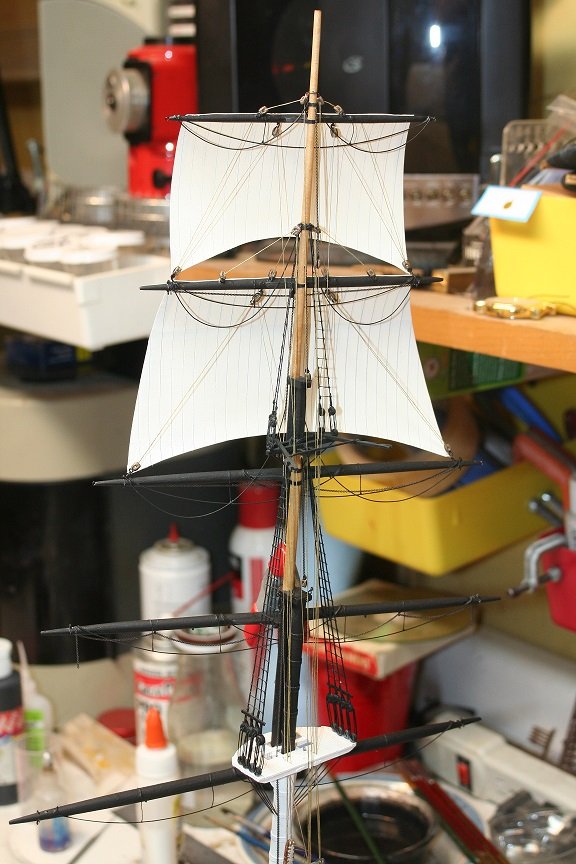
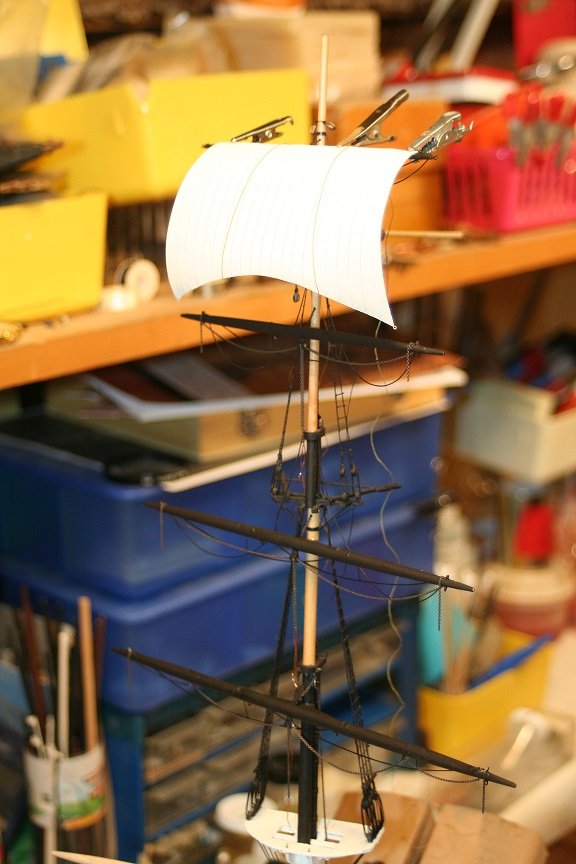
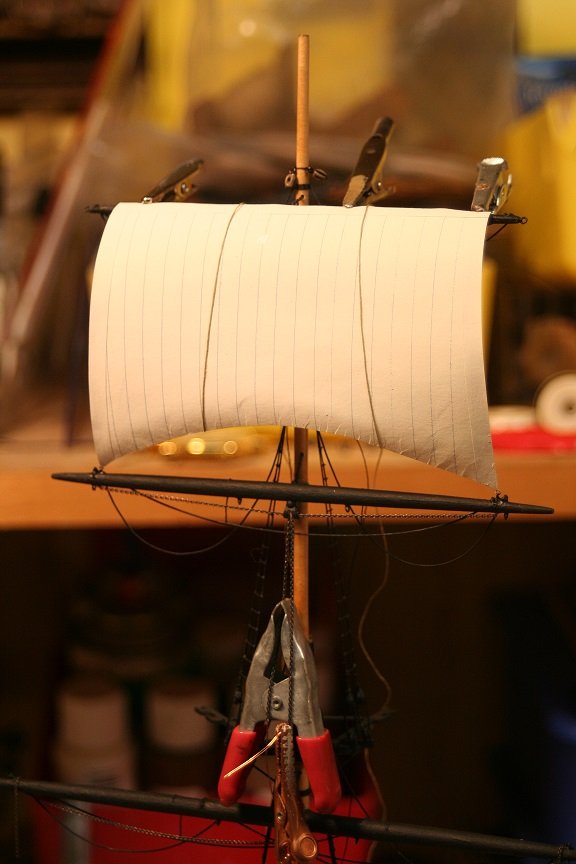
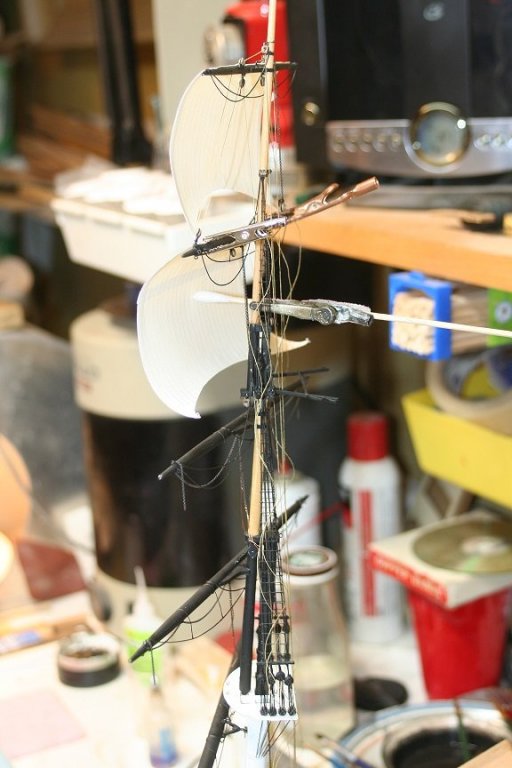
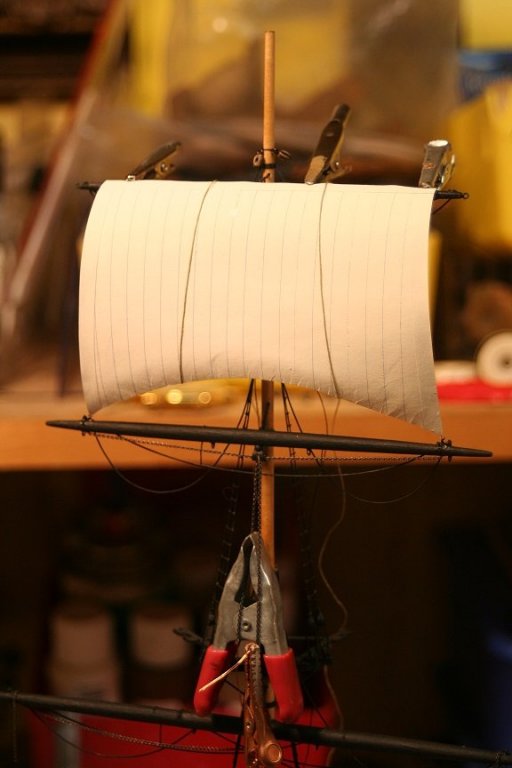
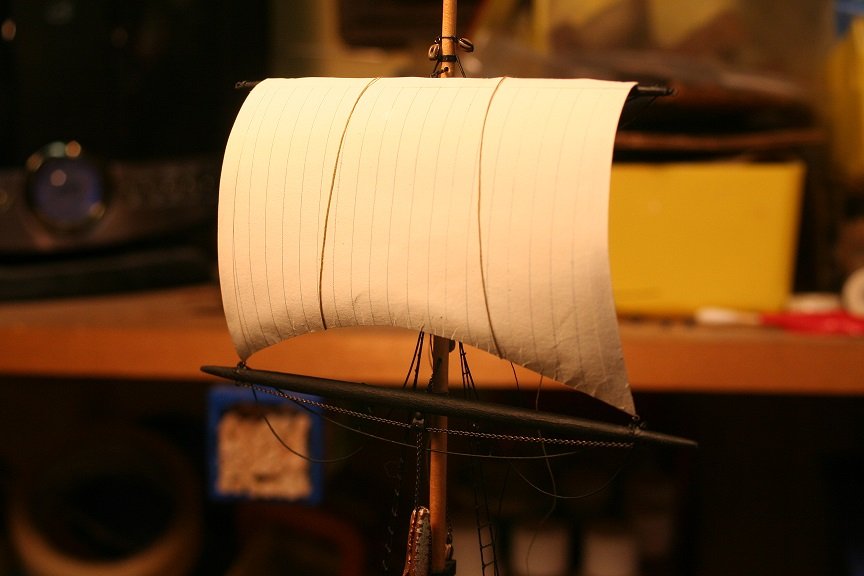
Spent a bit of time today working on the topgallant sail and its rigging. This image I just glued the sail to the yard and am supporting it till it dries. Rob
- 1,208 replies
-
- 6
-
-
- great republic
- clipper
- (and 1 more)
-
I'm more of a hack then fast....but thanks for the compliment. I've learned what details can be avoided or masked with other detail.... Rob
- 1,208 replies
-
- 4
-
-
- great republic
- clipper
- (and 1 more)
-
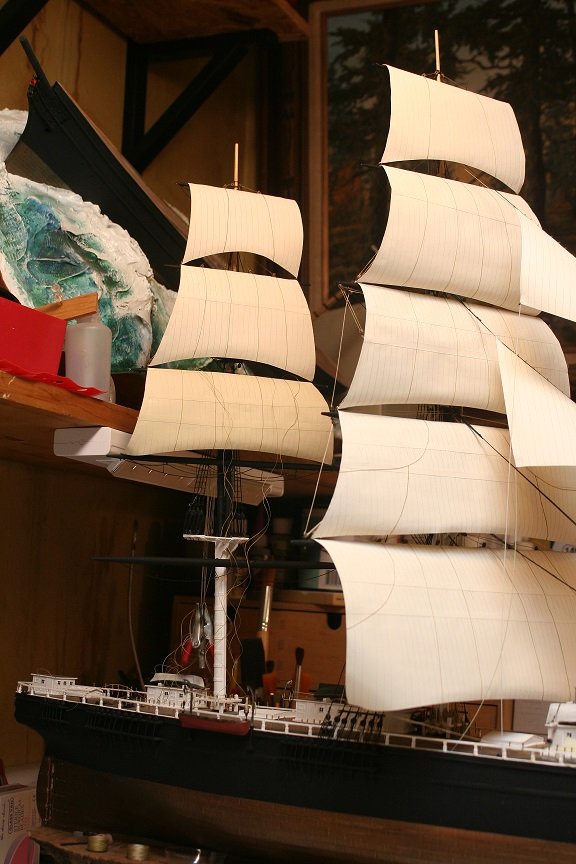
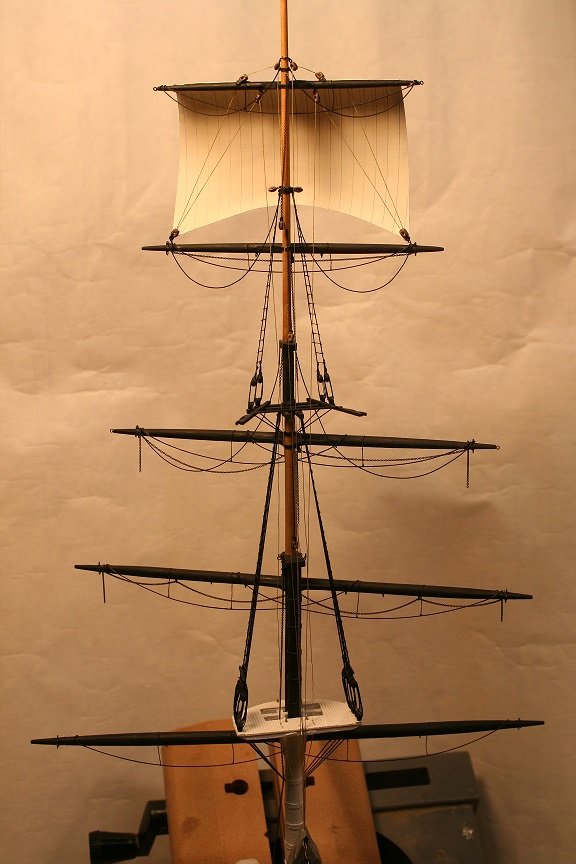
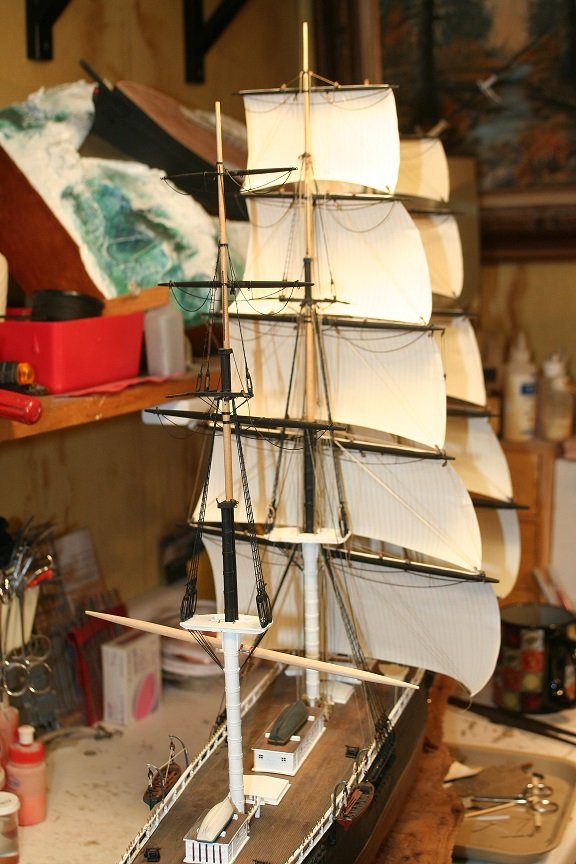
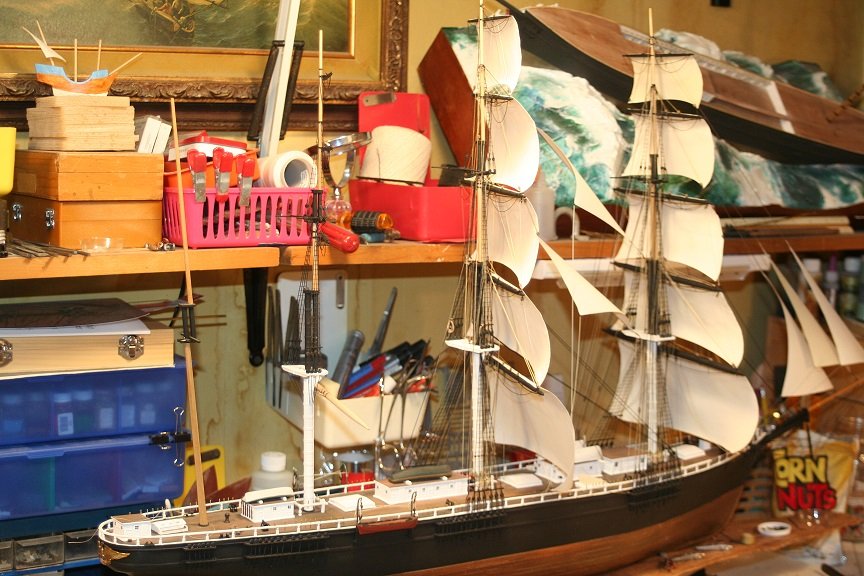
Some more images of the state currently. Hoping to spend more time tomorrow. Rob


- 1,208 replies
-
- 9
-
-
- great republic
- clipper
- (and 1 more)
-
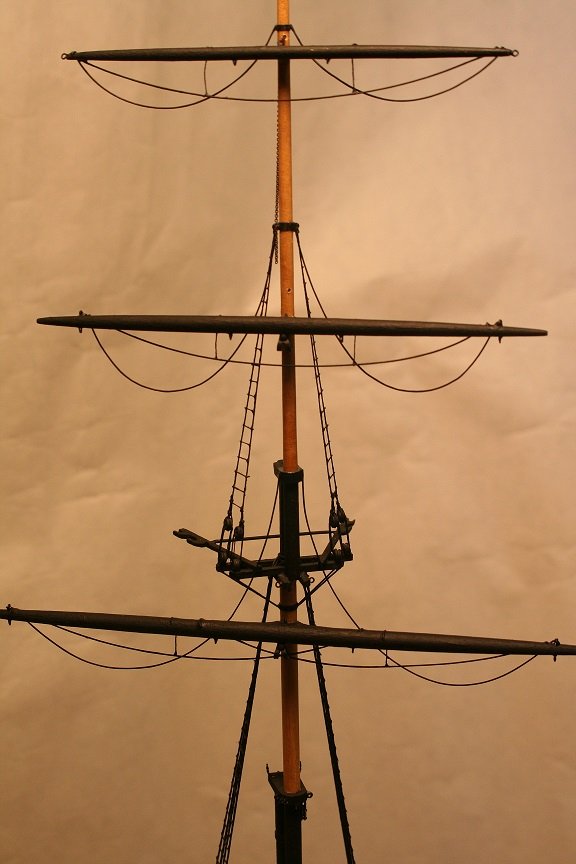
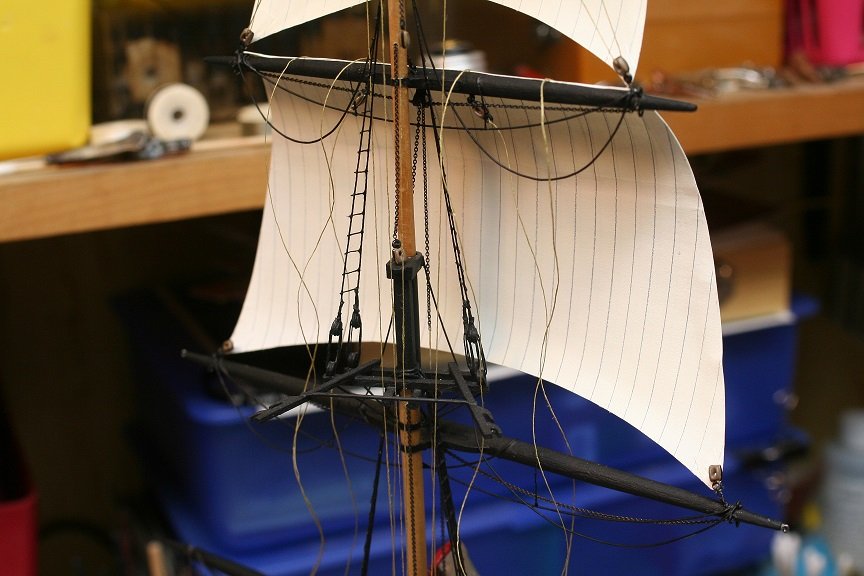
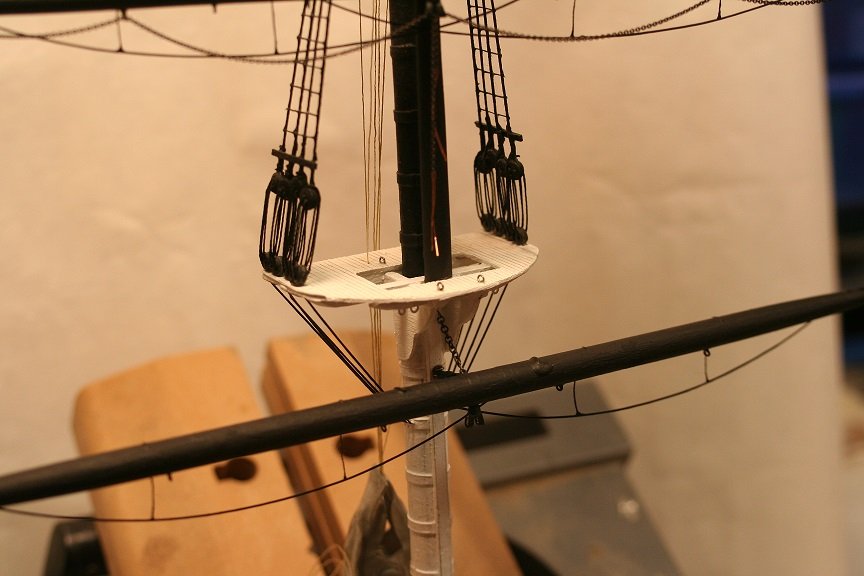
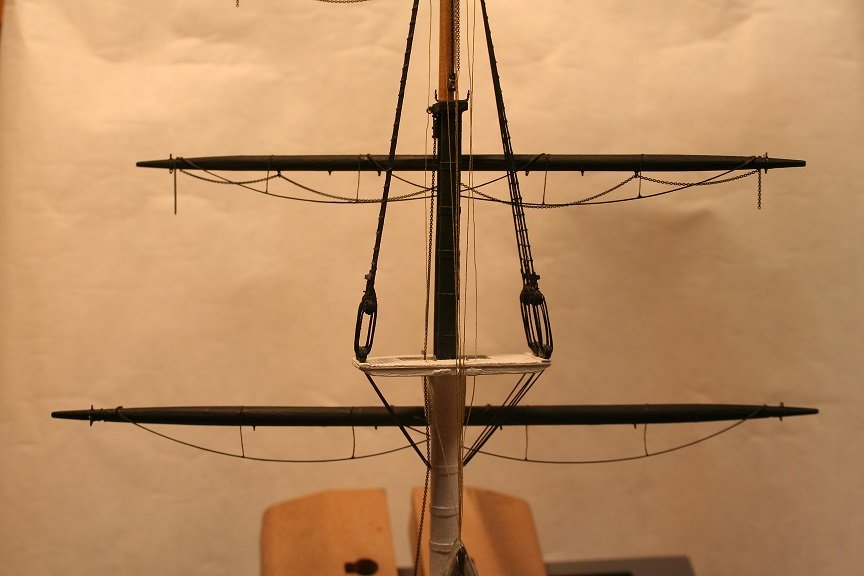
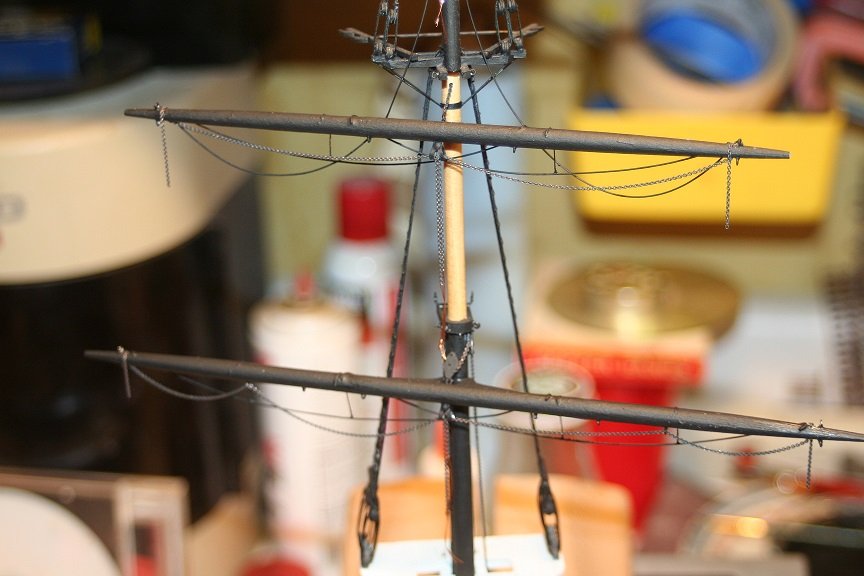
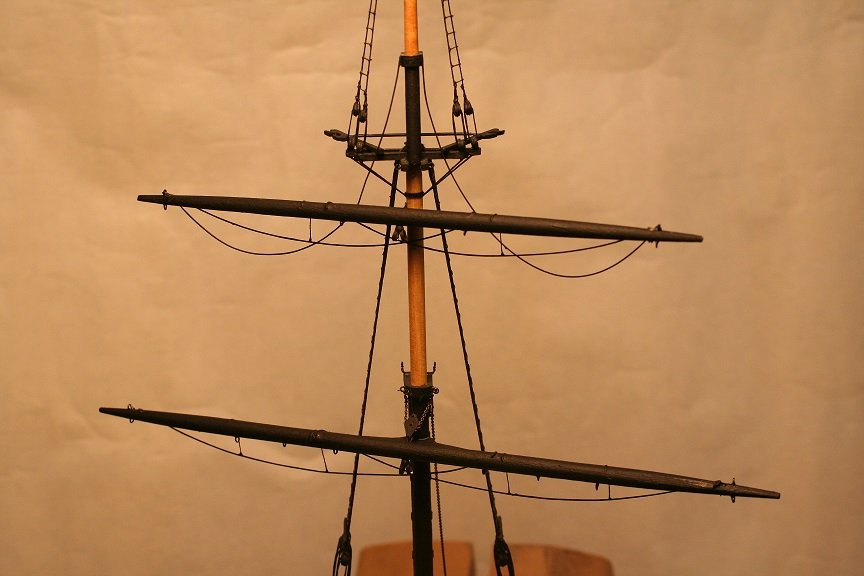
I also spent some time finishing up the addition of the foot ropes and addition of all the eye bolts for the mizzen main yard(crossjack).
- 1,208 replies
-
- 8
-
-
- great republic
- clipper
- (and 1 more)
-
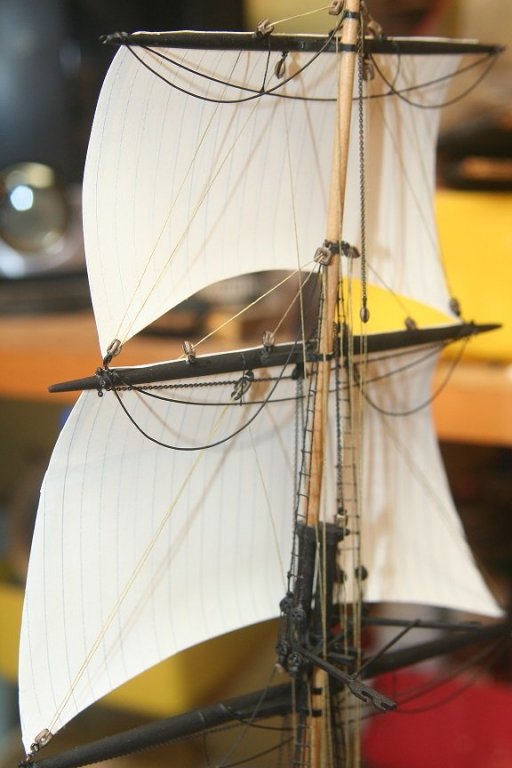
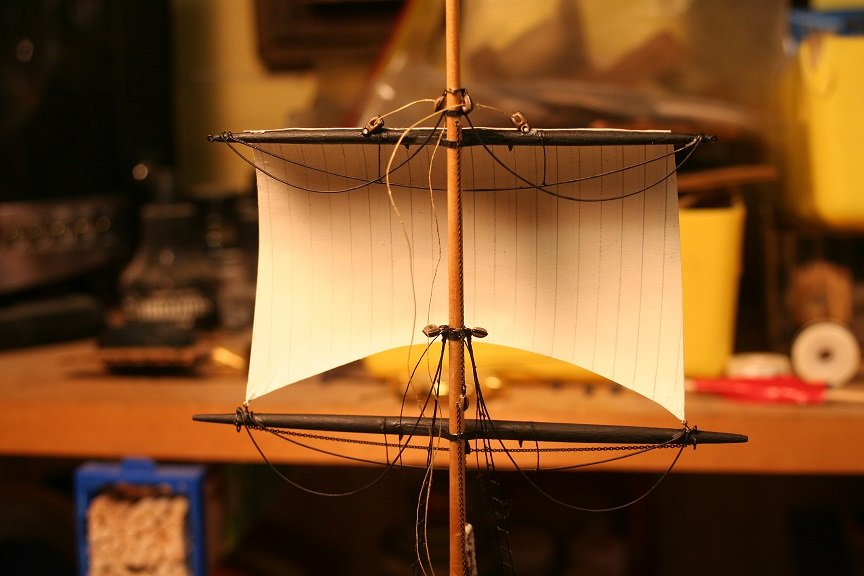
Worked a bit on finishing up the royals rigging.
- 1,208 replies
-
- 6
-
-
- great republic
- clipper
- (and 1 more)
-
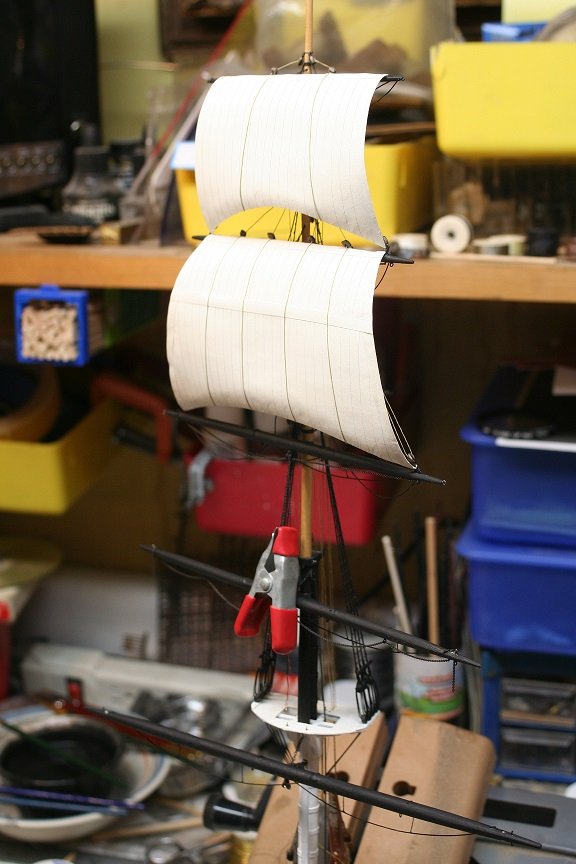
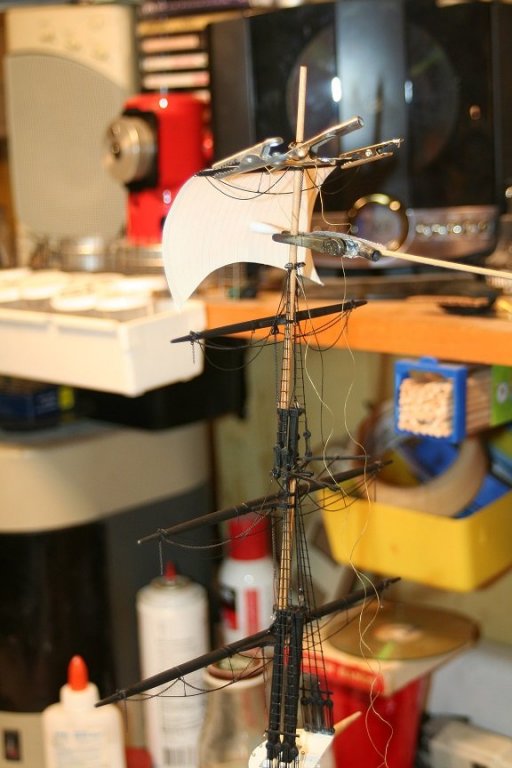
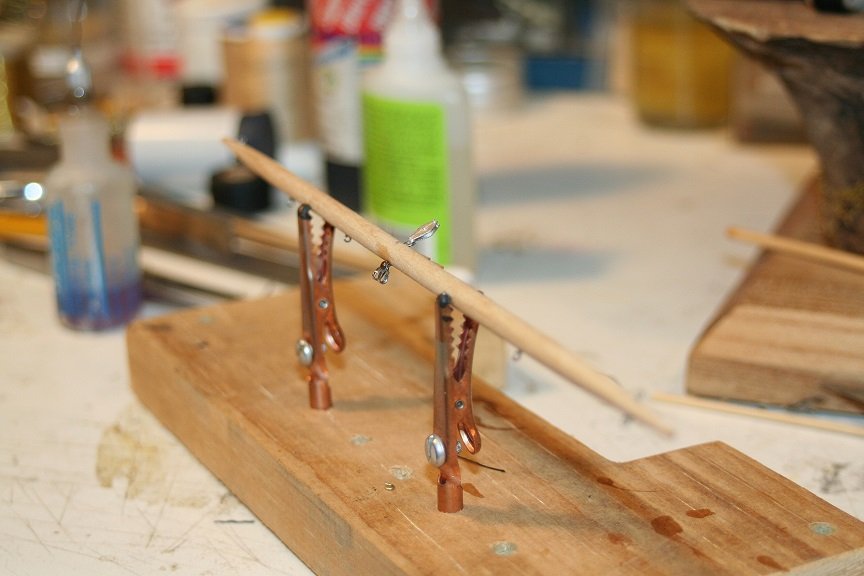
Now onto the royal and its rigging. I used the smallest alligator clips I could find for this work...their just over an inch long. Just can't have that much weight hanging on things...but I still need good clamping. Rob

- 1,208 replies
-
- 8
-
-
- great republic
- clipper
- (and 1 more)
-
Spent some time today on the royal sail of the mizzen. Lots left...ie...clew lines and the addition of more blocks for the main mast braces. Slowly but surely..I'm working down the mast beginning with the sheet lines(chain). Rob
- 1,208 replies
-
- 10
-
-
- great republic
- clipper
- (and 1 more)
-
Thanks for the fine comments Popeye...I appreciate your kindness. Oh, I miss stuff for sure...that is why I give a new set of eyes a pass days after I finished something...knowing full well I forgot something. Rob
- 1,208 replies
-
- 3
-
-
- great republic
- clipper
- (and 1 more)
-
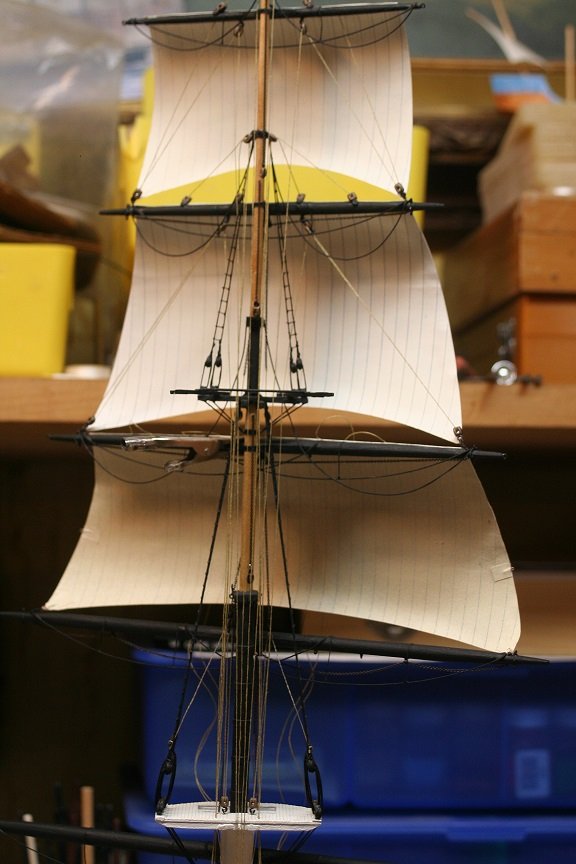
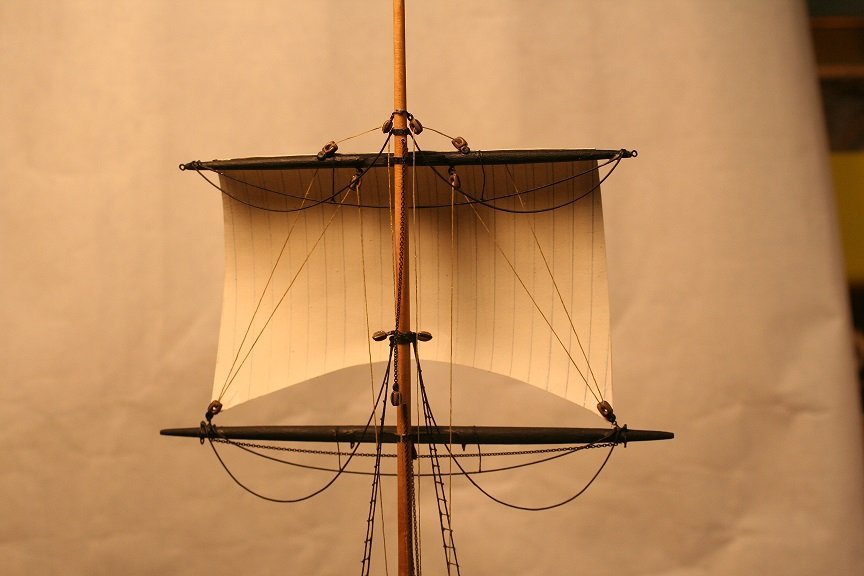
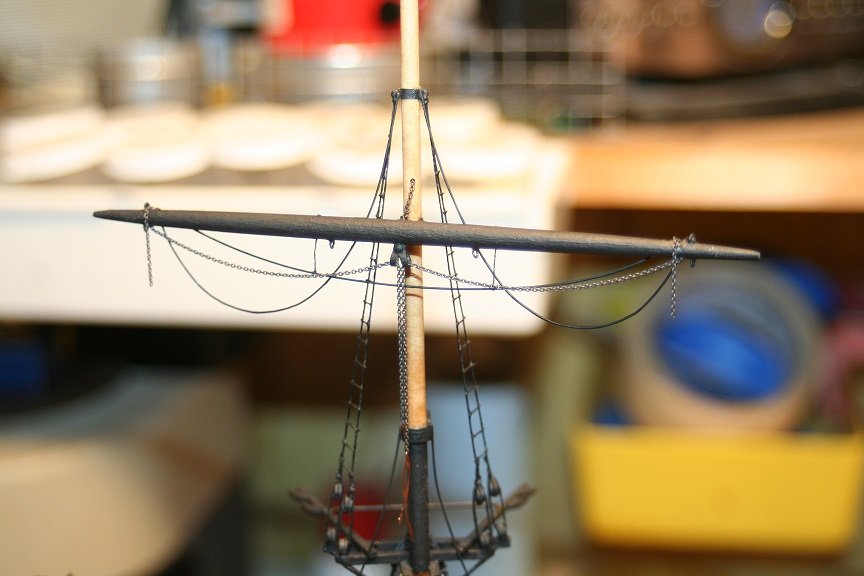
Still need to add brace blocks to the rigging for the foremast and mizzen topgallant/royal yards to the main mast(for both afix to the mainmast)....and I'm figuring out the process and location of all those blocks found on the mizzen for the main topgallant.royal yards. I hate having to reach within the spidary web of rigging to add a block I overlooked(Damage is just on the horizon if that happens) I enjoy the light transparency these sails naturally produce. Exposing the reef bands and extruded panels. Rob
- 1,208 replies
-
- 7
-
-
- great republic
- clipper
- (and 1 more)
-
Spent some time today working on the lower topsail yard and fixing its haul chain rigging. Still need to add sheet chains and the chain haulyard to the upper topsail yard.


- 1,208 replies
-
- 4
-
-
- great republic
- clipper
- (and 1 more)
-
I believe that can be considered a true statement. Even the tedium of fabricating rope coils can be pleasantly improved upon. Not sure about ratline thought........ Rob
- 1,208 replies
-
- 2
-
-
- great republic
- clipper
- (and 1 more)
-
Going back and seeing how I performed certain processes I realize how differently I proceeded. Even repetitions were modified and I changed sequences from one mast to the next...without consciously knowing I had altered a sequence. I suppose the process evolved and I made it easier for myself. Rob
- 1,208 replies
-
- 3
-
-
- great republic
- clipper
- (and 1 more)
-
No....not at all. I consider myself nearing the end..because I'm closer to it then the beginning..since the spanker mast has no square sails to set. Still have to configure and add all the braces and their blocks and pennants. Not to mention any an all details i previously overlooked. Rob
- 1,208 replies
-
- 3
-
-
- great republic
- clipper
- (and 1 more)
-
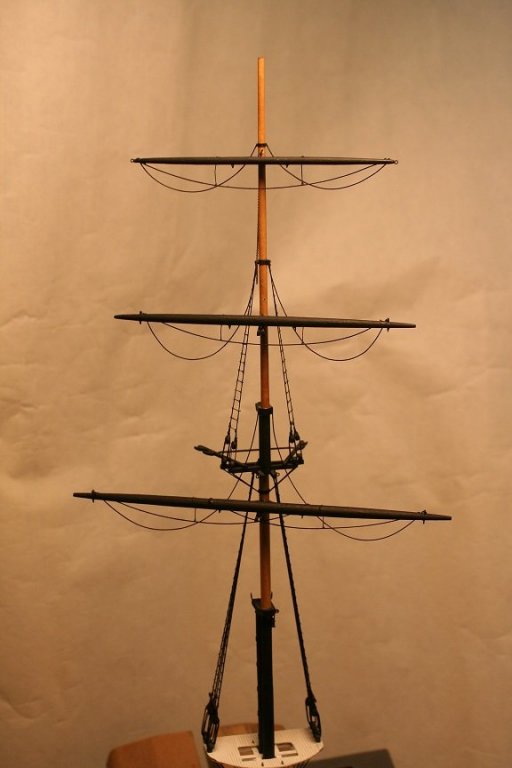
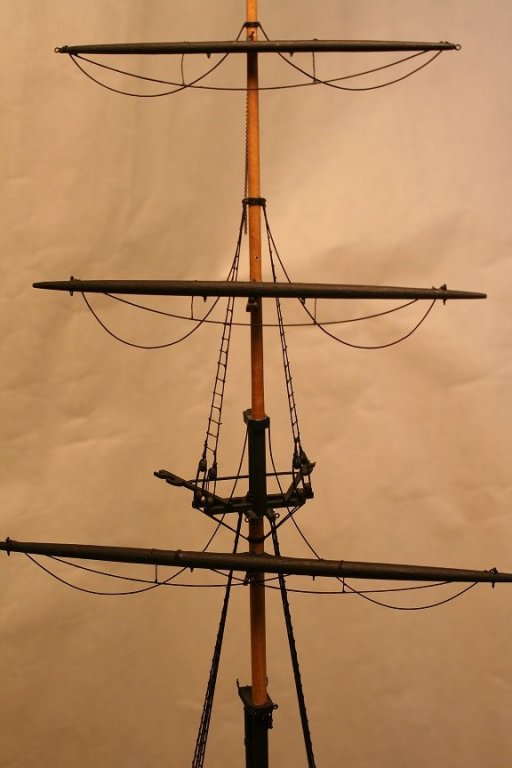
I dry fit the mast against the others to see how I'm progressing. Rob


- 1,208 replies
-
- 8
-
-
- great republic
- clipper
- (and 1 more)
-
Need to finish up the foot ropes and stirrups after I added the gin block and all the eye bolts needed for blocks and sheet control eyes.
- 1,208 replies
-
- 7
-
-
- great republic
- clipper
- (and 1 more)
-
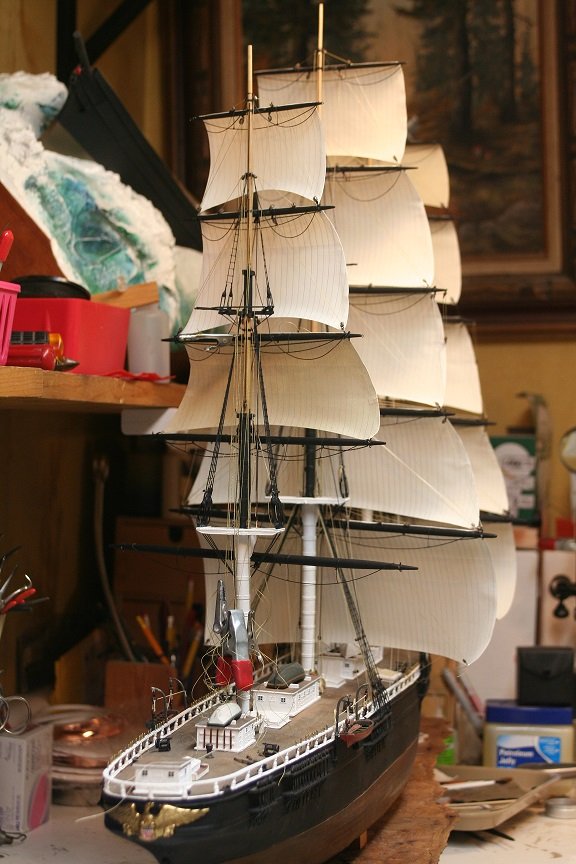
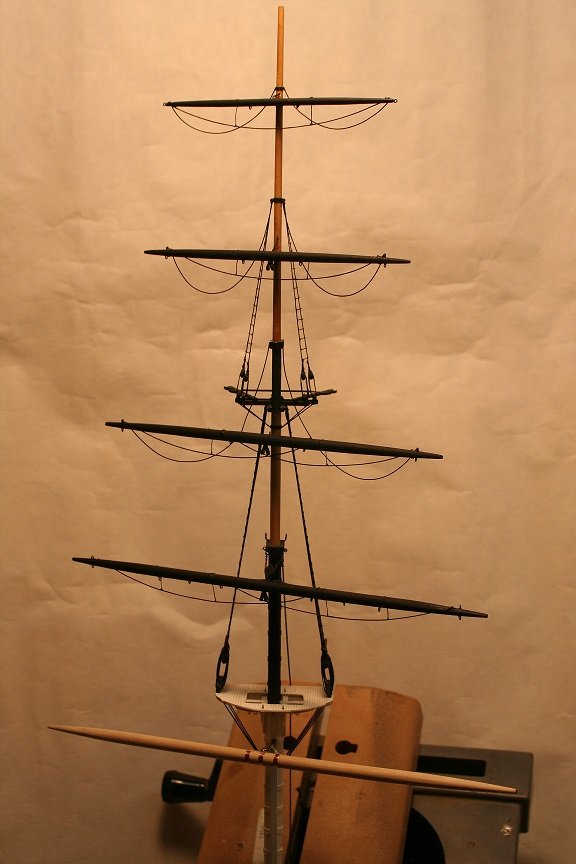
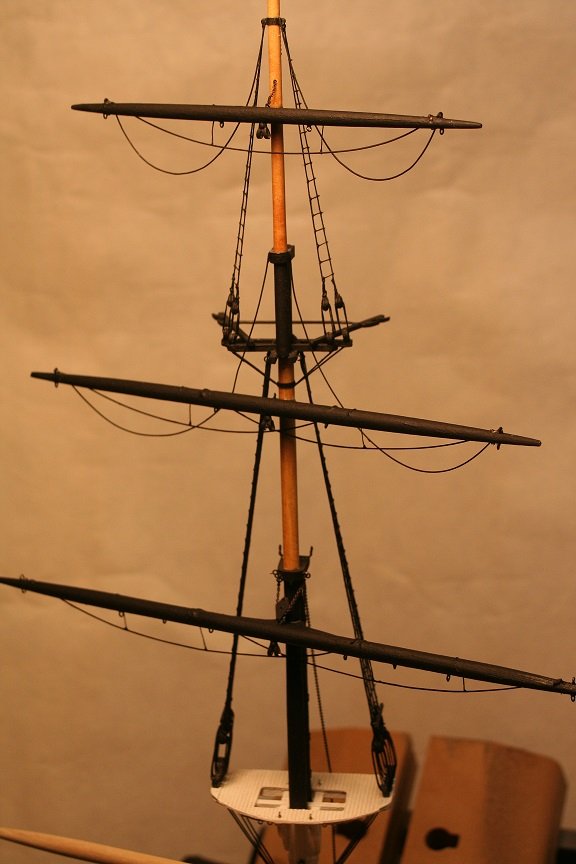
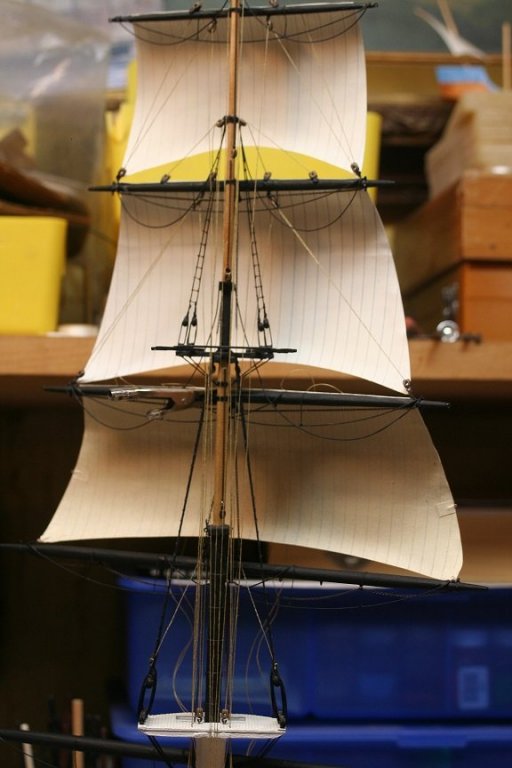
Spent some time working on the GR today. Trying to finish up the Mizzen. I worked on the royal and topgallant earlier and I finished up the basics of the topsail yard...now working on the topsail yard with its gin block lift rig. Here are a few images.
- 1,208 replies
-
- 8
-
-
- great republic
- clipper
- (and 1 more)
-
Scott..that sounds fantastic...love to watch that come together. Rob
- 1,208 replies
-
- 2
-
-
- great republic
- clipper
- (and 1 more)