Check out our new MSW Sponsor Innocraftsman
×


rwiederrich
-
Posts
5,504 -
Joined
-
Last visited
Content Type
Profiles
Forums
Gallery
Events
Everything posted by rwiederrich
-
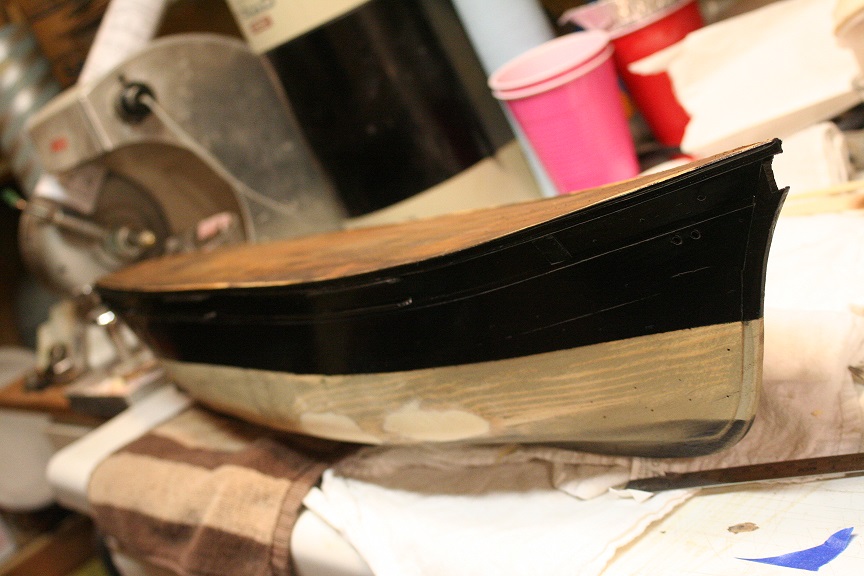
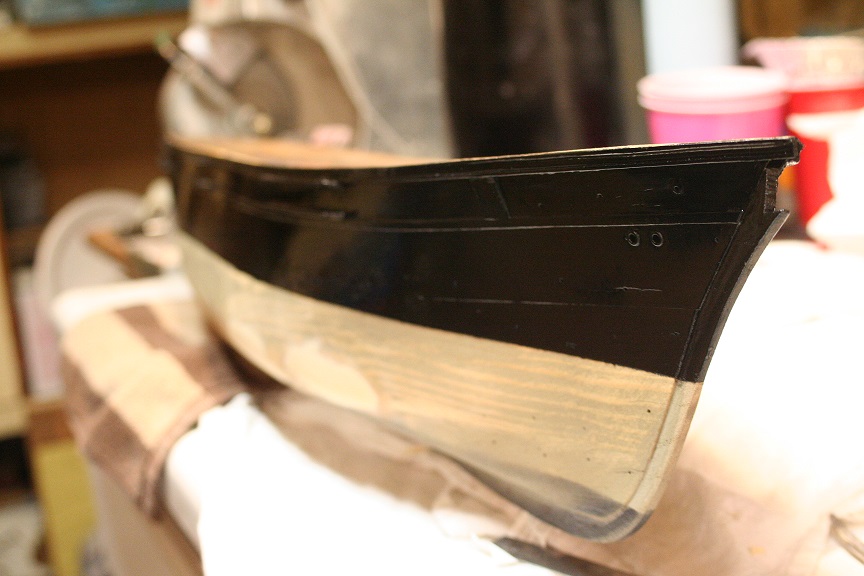
Did a bit more work on the GR. Added the chainplates hull detail like howes holes and anchor skids. And painted gloss black.


- 1,208 replies
-
- 9
-

-
- great republic
- clipper
- (and 1 more)
-
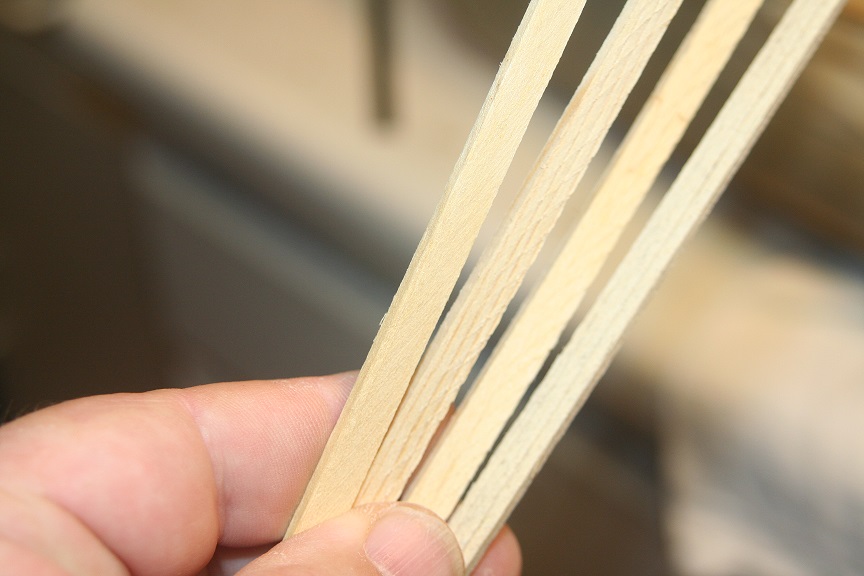
I need to plane these 3ft long 1/4" X 1/16" strips down a bit so I can make the channels.
- 1,208 replies
-
- 2
-
-
- great republic
- clipper
- (and 1 more)
-
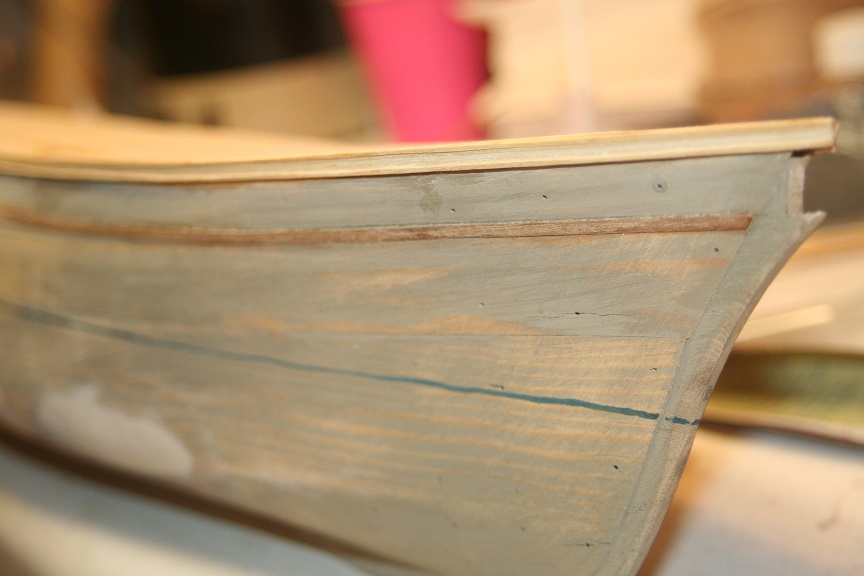
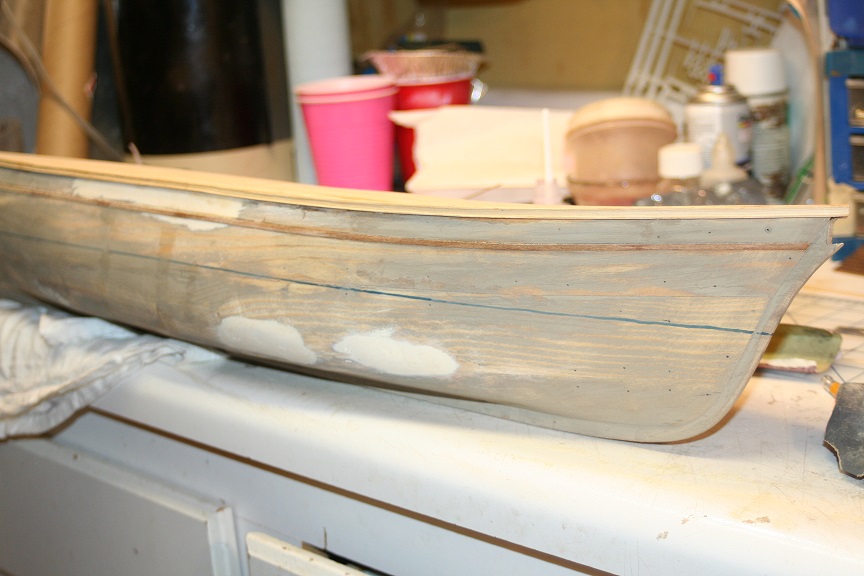
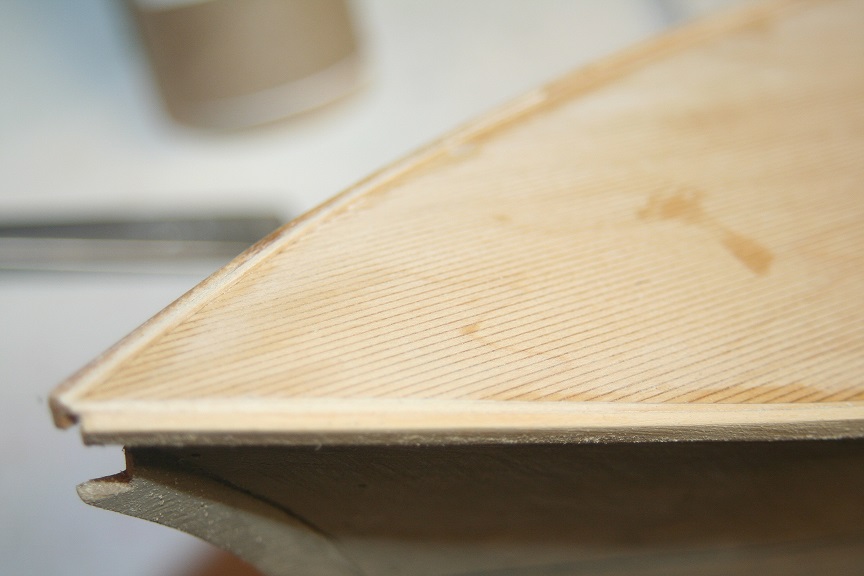
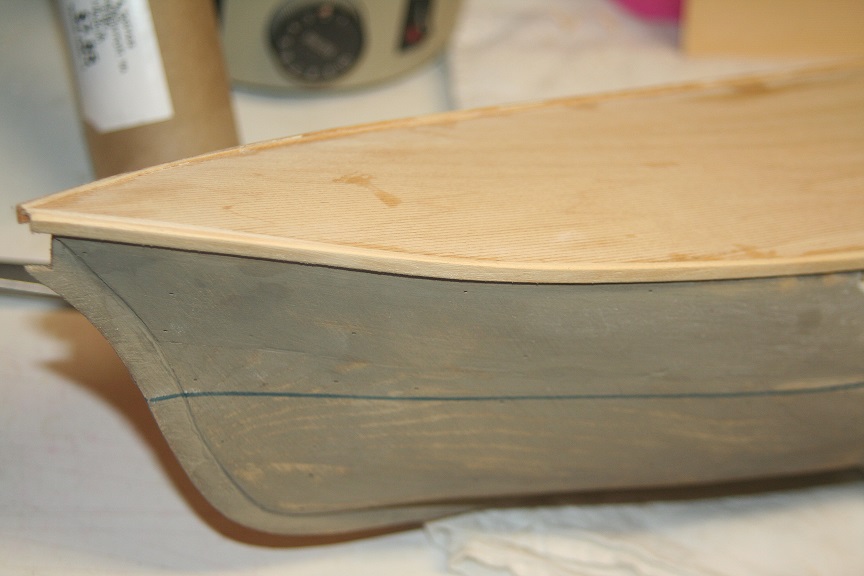
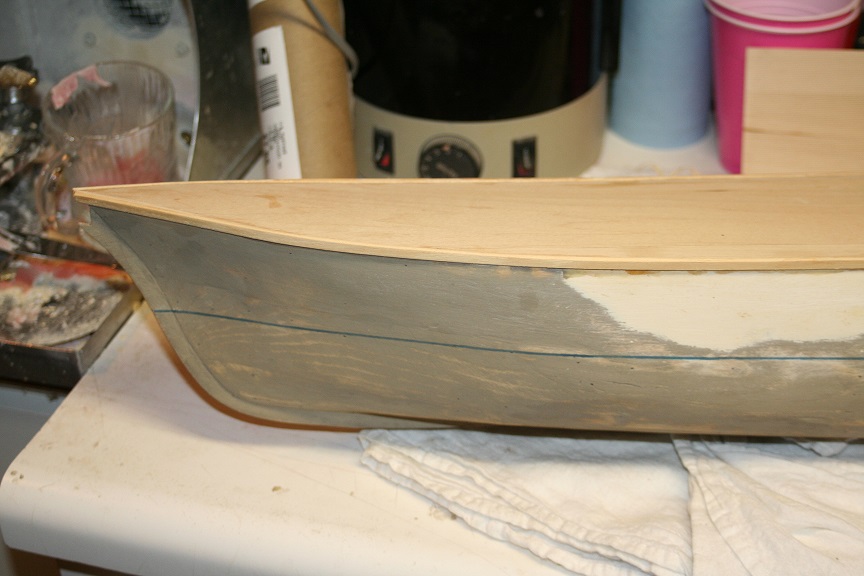
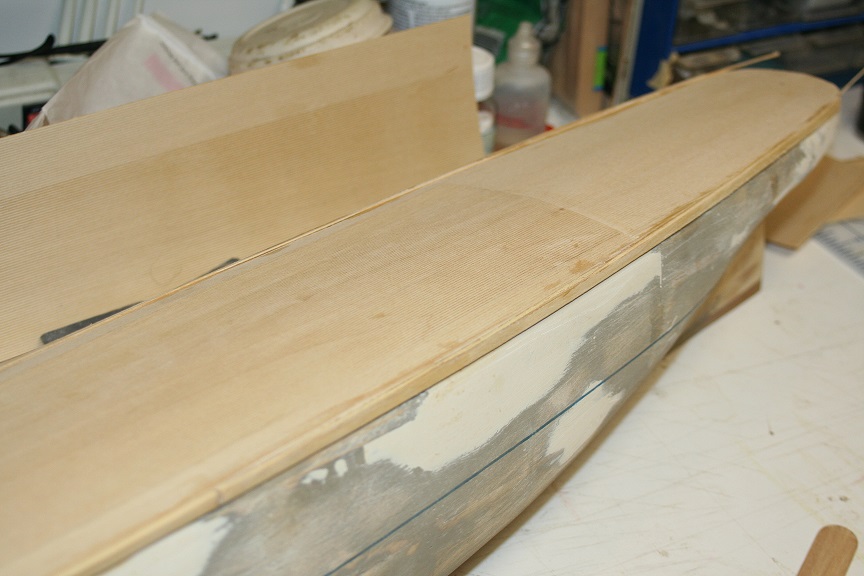
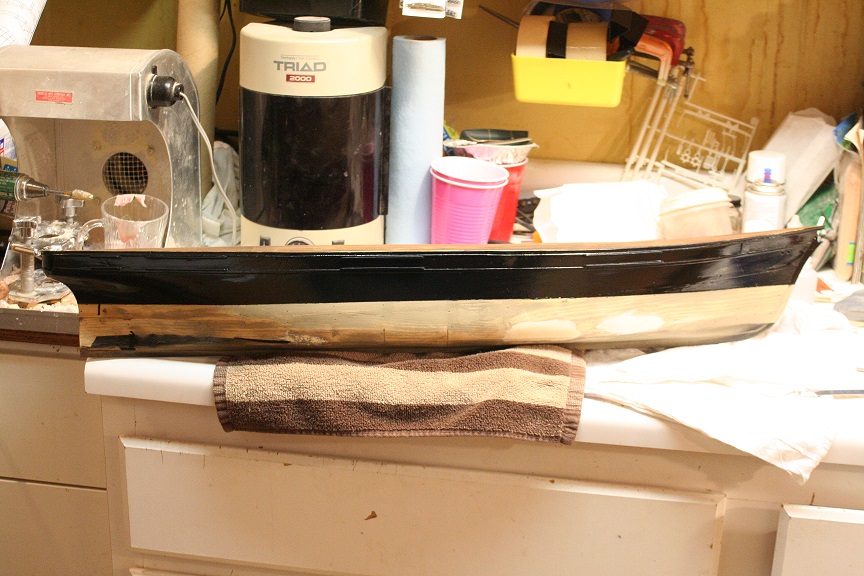
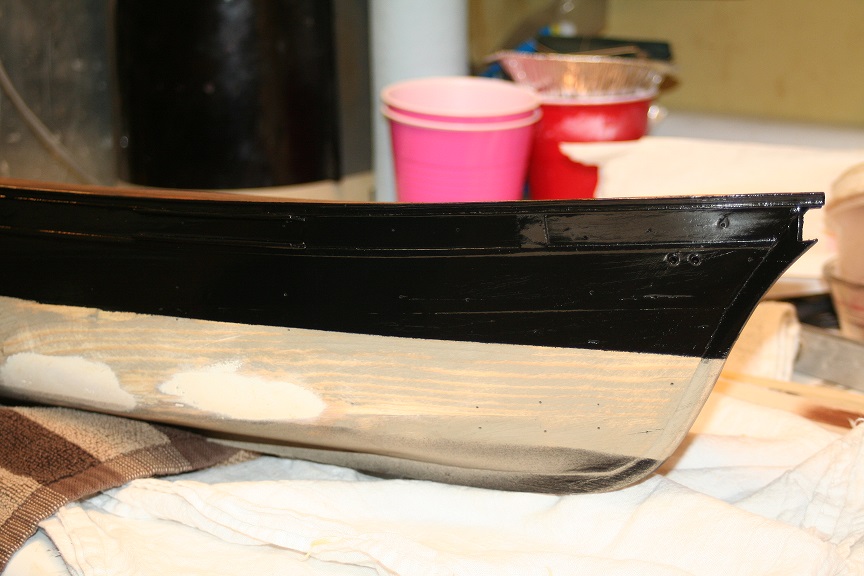
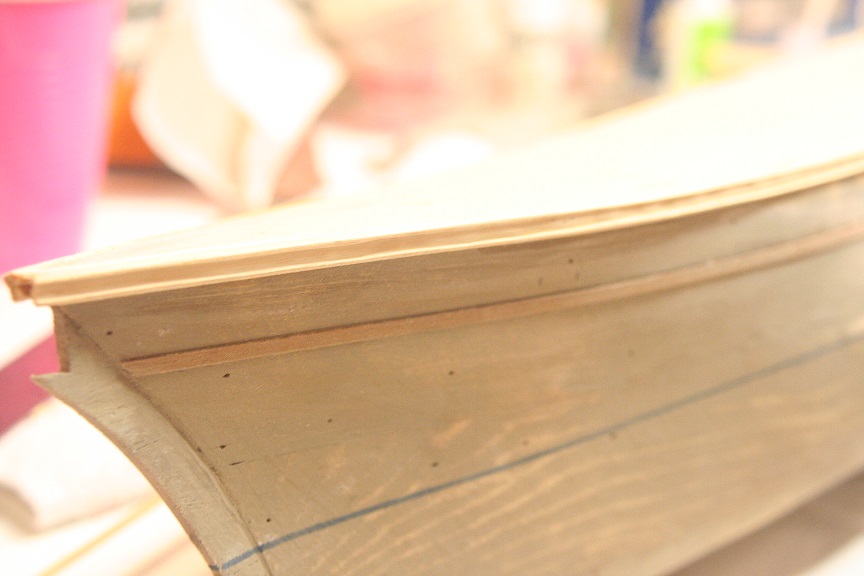
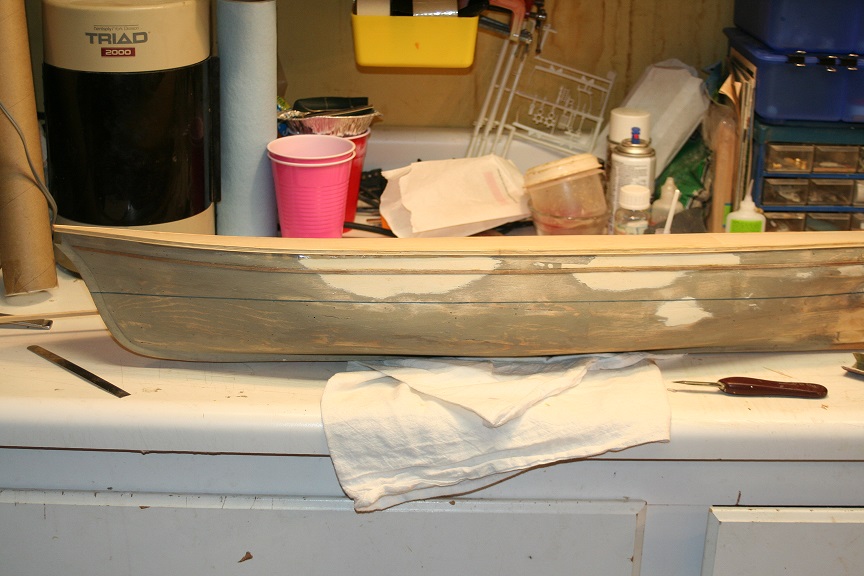
Spent some time today working on the trim and planksheer. I cut and trimmed the inner portion of the edge trim/rail base.
- 1,208 replies
-
- 7
-
-
- great republic
- clipper
- (and 1 more)
-
For the edification of onlookers. One bit of uncovered inconsistency. I'm not sure this can be considered by some as a real inconsistency...because far too many reputable contributors agree. It concerns the rig design of the Great Republic. I have concluded and with much concurrence from Crothers and others, that she was Forbes rigged...and all records indicate this to a degree(because Forbes was the predecessor to Howes design). However, I came across excerpts from a letter from Forbes himself claiming that he was friends of McKay and that he was present during Great Republic's building and at her launching....and that he claimed unequivocally that she was NOT rigged with his double topsail design, but with Howes design. Interesting However, first hand, eyewitness accounts disagree with this claim. From what I'm forced to gather, it appears that she was rigged with the Forbes design, but it was modified(probably why Forbes denied she was carrying his design). Still utilizing the longer then normal doubling of lower and topmast but with the lower topsail yard mobile on the forward portion of the lower mast. Not as Forbes originally designed with the topmast aft of the main mast. This revelation doesn't change how I am going to proceed. It does, however bring mystery to the validity of the Forbes letter....or....validation that the Great Republic double top sail design was a hybrid of sorts. For the true Howes design connects the entire lower edge of the top topsail to the lower topsails jackstay. this is quite not the case for the GR rig. Research can put you into the mind of whom or what you are researching...which makes the journey all the more exciting. Fair seas, Rob
- 1,208 replies
-
- 4
-
-
- great republic
- clipper
- (and 1 more)
-
Well there you go........
-
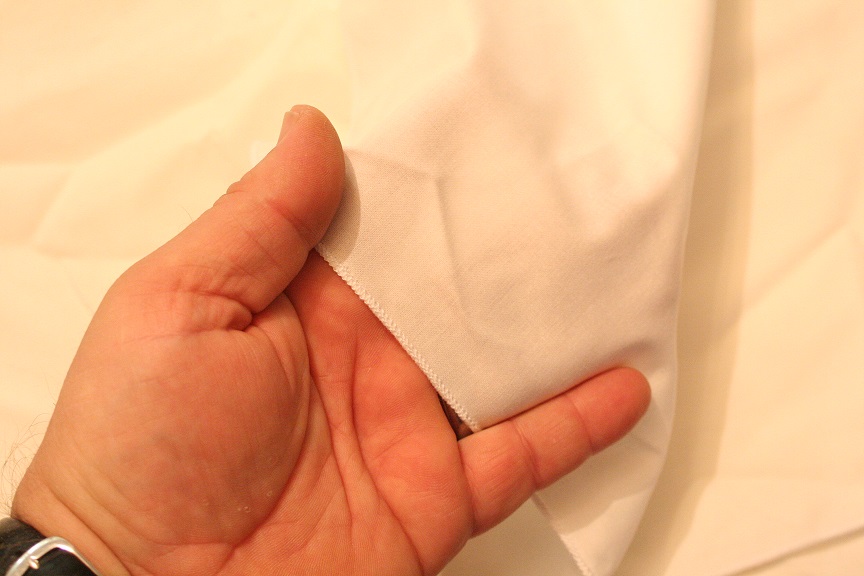
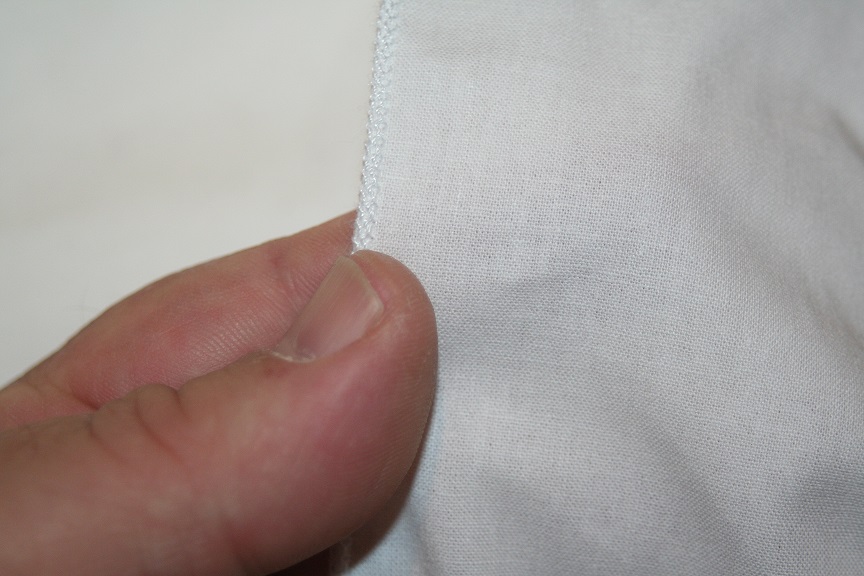
I've had this problem for as long as I have been modeling.....40 years. Recently I have found a material that is promising...I still need to find the manufacturer. It is used in nuclear clean applications and it is lint free..very small tight weave. Ill post an image of it. I'm sending a sample to a fellow in Australia who needs it....he is stuck with silk span. It is too transparent for realism. Rob
-
Miami-vice crab-n-fishin boat....yeah. Nice look..clean and sharp as a tack. Rob
-
Mid 18th Century glass
rwiederrich replied to Mark P's topic in Building, Framing, Planking and plating a ships hull and deck
I've seen windows in very old monasteries in Germany that had this type of spun glass in the pains. The cut off or nib(butzen) was placed in a lower or upper corner to provide the larges unobstructed view. I have even seen windows with the defect right in the middle adding to the decoration. Fascinating. Rob -
Magnificational......... I love the indescribably microscopic modeler........ Love it. Rob
-
Well bumbling.......is my way of getting it done. Far too many extremely skilled modelers on these pages make my attempts seam almost comical. Yes..defective. Meaning the tape is so thin that it easily can wrinkle on the white backing....and making things worse is when removing the tape from that backing, the tape is rendered useless for the purpose I am using it for....coppering the hull of model ships. I suppose the tape sold through reportable model houses is slightly thicker, thus removal of the copper foil tape from its backing is relatively a non destructive procedure. This new tape I purchased, nearly is destroyed when removing it from its paper backing. Sooooooo...I thought it through and decided to leave the backing and use contact cement to secure the tape with its backing to the hull......still thinner then the commercial copper sold for coppering model hulls. I will use the slightly thicker model copper for the keel and such but as I mentioned..everything is getting a light coat of metallic paint anyway...to seal things up....and weatherize. Rob
- 1,208 replies
-
- 2
-
-
- great republic
- clipper
- (and 1 more)
-
Fantastic job Nils...just fantastic. Can I ask you were you procure your port holes from? Rob
- 2,625 replies
-
- 5
-
-
- kaiser wilhelm der grosse
- passenger steamer
- (and 1 more)
-
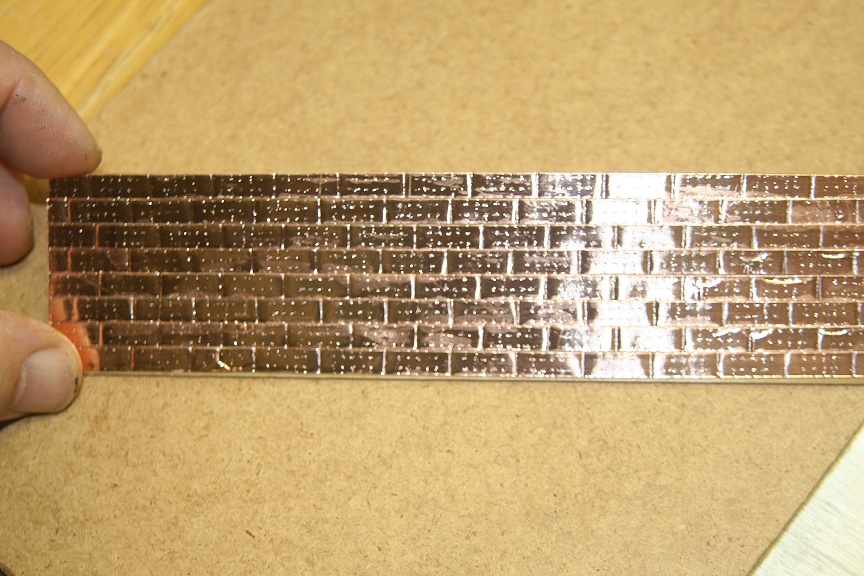
It didn't take me long to enjoy the expeditious method of creating the plates. One by one at this scale is an arduous task. Fast and fabulous is my motto. Rob
-
This new copper tape is thinner then the original I've had for years...so it pressed less against the sand screen and I reduced it as well to make those indentations even smaller....now, mere suggestions...really. I think I like them too and.... fast. Every step I have expedited. The metallic paint does two fold..... subduing the brightness and aging the copper and by covering any exposed *white* backing. Only problem is avoiding defective tape..prior to pressing and I have lots of tape...so that will be negated.. Thanks for your fine comments. Rob(Just a bumbling modeler throwing it together with spitballs and tape)
- 1,208 replies
-
- 2
-
-
- great republic
- clipper
- (and 1 more)
-
I suppose you could, however the paint is not entirely covering the copper....simply nocking off the bright shean.....Plus the paint seals the cracks between rows. The copper looks nearly like what munz metal looks like after it has seen salt water. It's no longer *Yellow*, but almost brownish metallicy. I can cut and press 7" long strips in no time...and gluing them on the hull is nearly as fast. Just what I like. I'm glad I tackled the coppering issue before hand and worked out the bugs now. I'll finish up the trim around the deck...add the planksheer and channels and fit the 3 hawse holes..then mask off the hull. Rob(Hack modeler at work)
- 1,208 replies
-
- 2
-
-
- great republic
- clipper
- (and 1 more)
-
Outstanding craftsmanship. Rob
-
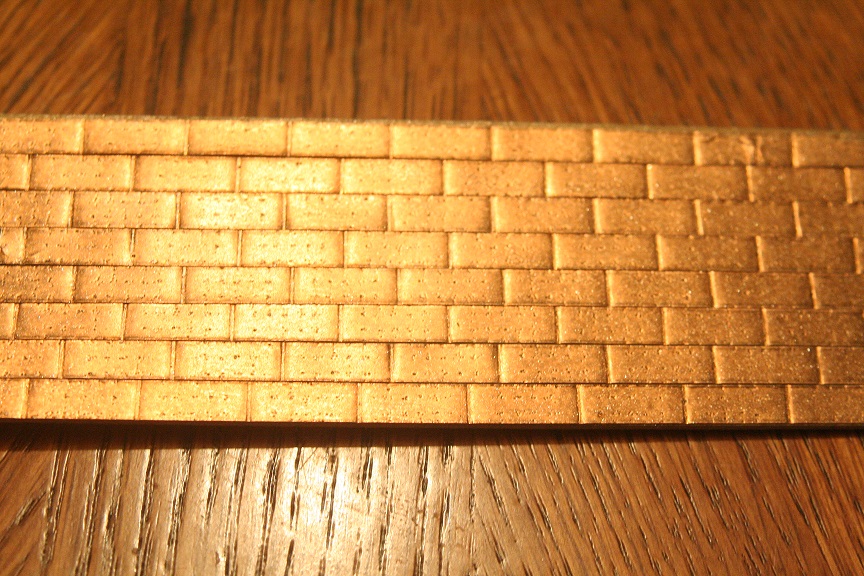
Using the new shiny plate...I assembled a bit to see the detail impressed with my roller. These are 5mmX 9mm plates. I laid this 2"x7" plank in about 1 minute. Removal of the copper from the backing wrecked the imprint and even rippled it beyond repair... so I simply applied contact cement to the plank and the back of the copper...I then sprayed it with a light coat of metallic paint to tone down the brightness and add weathering, as what the yellow metal looks like after exposure to sea water. Here is a before and after the paint treatment. Rob
- 1,208 replies
-
- 5
-
-
- great republic
- clipper
- (and 1 more)
-
Brian...may what method you used to fare your bulkheads and to keep them contoured to each other? Rob
-
Again..thanks for your frankness. Interesting enough...the new copper I received in the mail yesterday is much brighter copper...almost yellowcopperish........kinda. Not orangey copper. Anyway... when pressed the nail marks are significantly lighter and when the plates are pressed in place they soften even further. the only problem I'm having with the new copper tape is wrinkles that appear when you pull off the backing. I'll have to work through THAT issue when I get to that stage of the build. Just between you and me...( )Riiiight...I've been experimenting with a roll press that you can simply roll over the hull after you have painted the copper bottom and it impresses a (representation) of a copper plate system into the uncured paint. It's Technique sensitive....cuz you have to impress the embossing at the right time on the drying paint. More to come on that later. Rob
- 1,208 replies
-
- 1
-
-
- great republic
- clipper
- (and 1 more)
-
Brian..what do you think of the final pressed plates with the minor nail impressions..using the wire and sanding mesh? It is my habit to use untypical building methods....I'm not so precise with extreme details like found on others magnificent POF builds. I'm more of a hack builder...skip unnecessary steps and processes....cover up blemishes with any thing that does the job...and then as with the original...Paint the heck out of it to seal and protect from the elements....in my case the elements are ME. I appreciate your opinion. Rob
- 1,208 replies
-
- 2
-
-
- great republic
- clipper
- (and 1 more)