rwiederrich
-
Posts
5,520 -
Joined
-
Last visited
Content Type
Profiles
Forums
Gallery
Events
Everything posted by rwiederrich
-
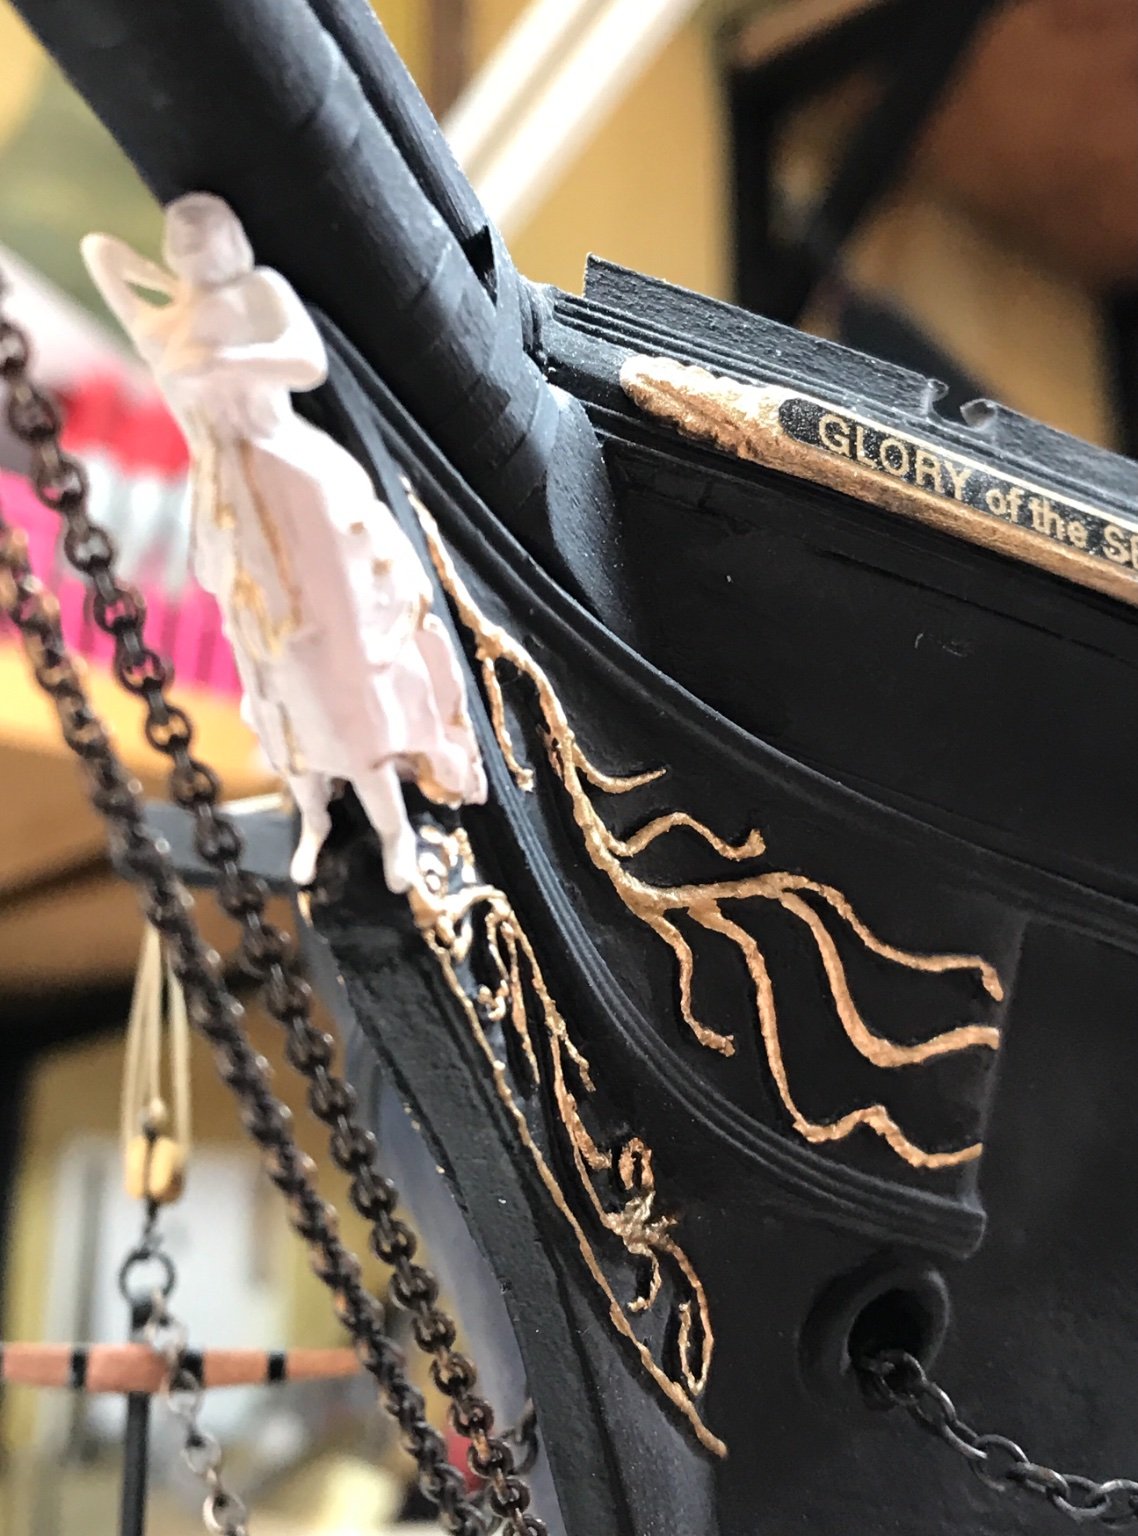
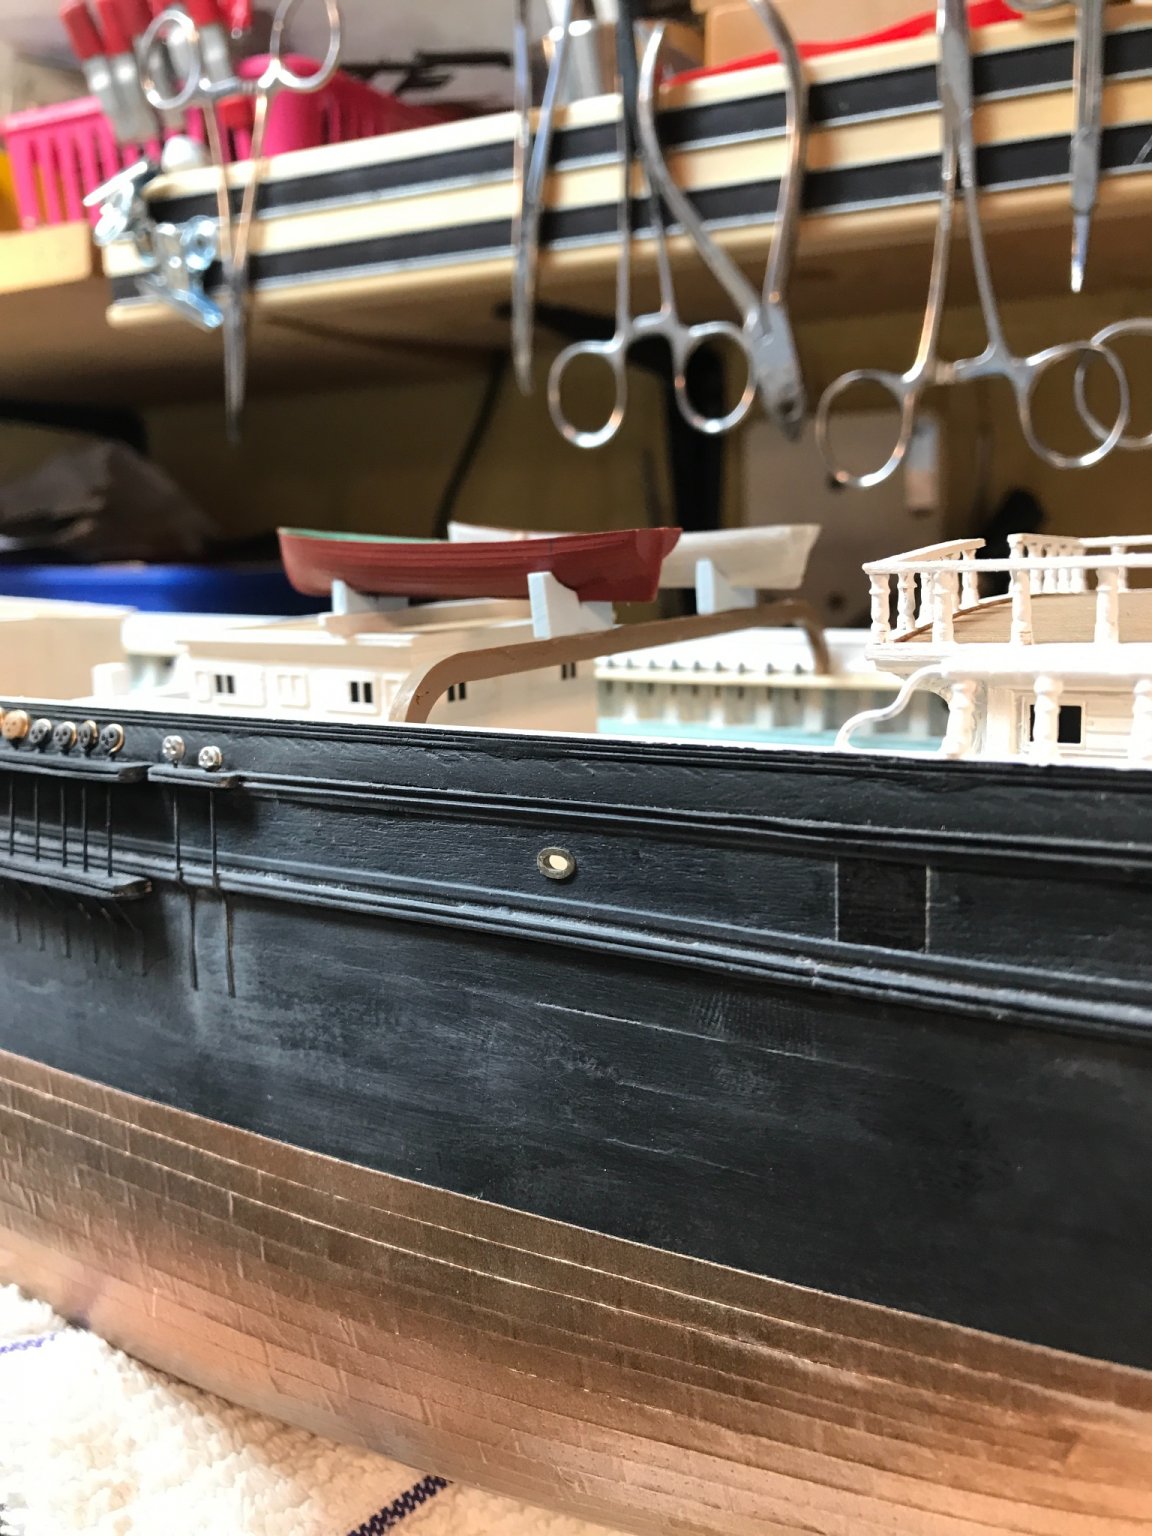
The hull was intentionally weathered to look like that. Similar to what she looked like in her SanFran image. Rob
- 3,560 replies
-
- 1
-

-
- clipper
- hull model
- (and 2 more)
-
Great job and likeness. I don’t even think mine could pull off that well. Rob

-
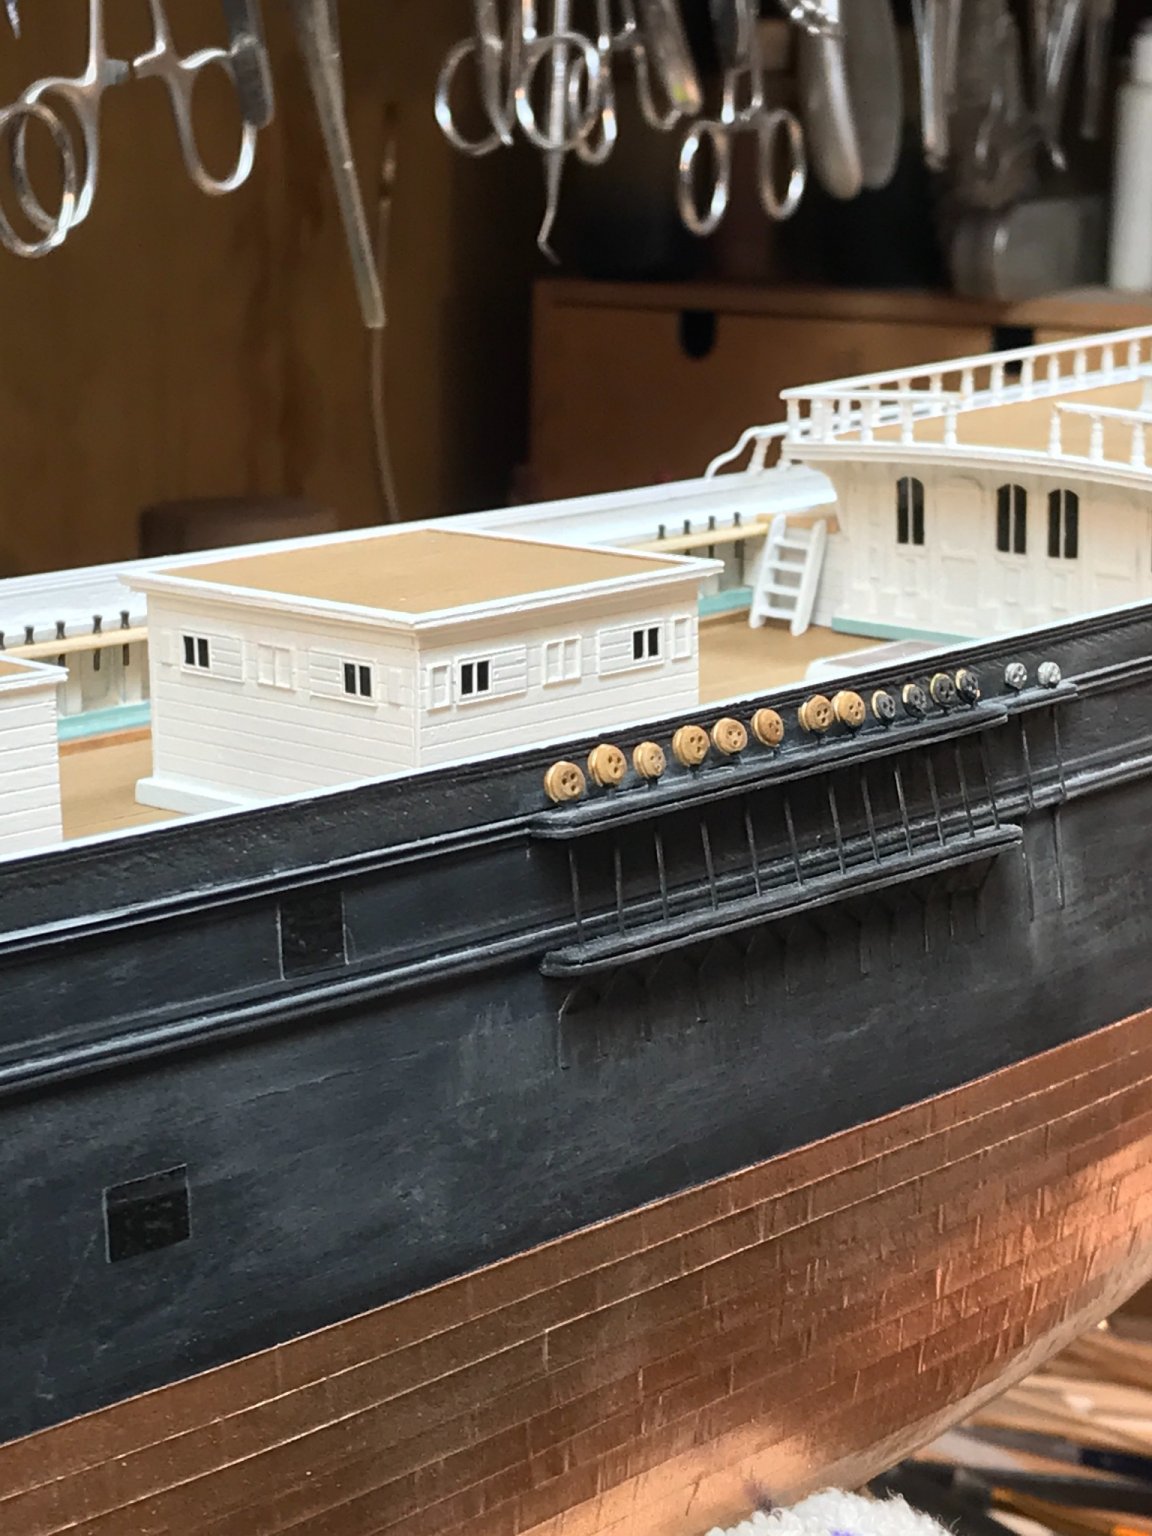
The boat skids actually have a metal strip running on their outer/upper edge. I tried to replicate it the best I could. Thanks for noticing. Rob
-
I worked a bit on tithe boat skids and painted some stuff. Rob


- 3,560 replies
-
- 6
-
-
- clipper
- hull model
- (and 2 more)
-
Did a bit of work on the boat skids. Rob
-
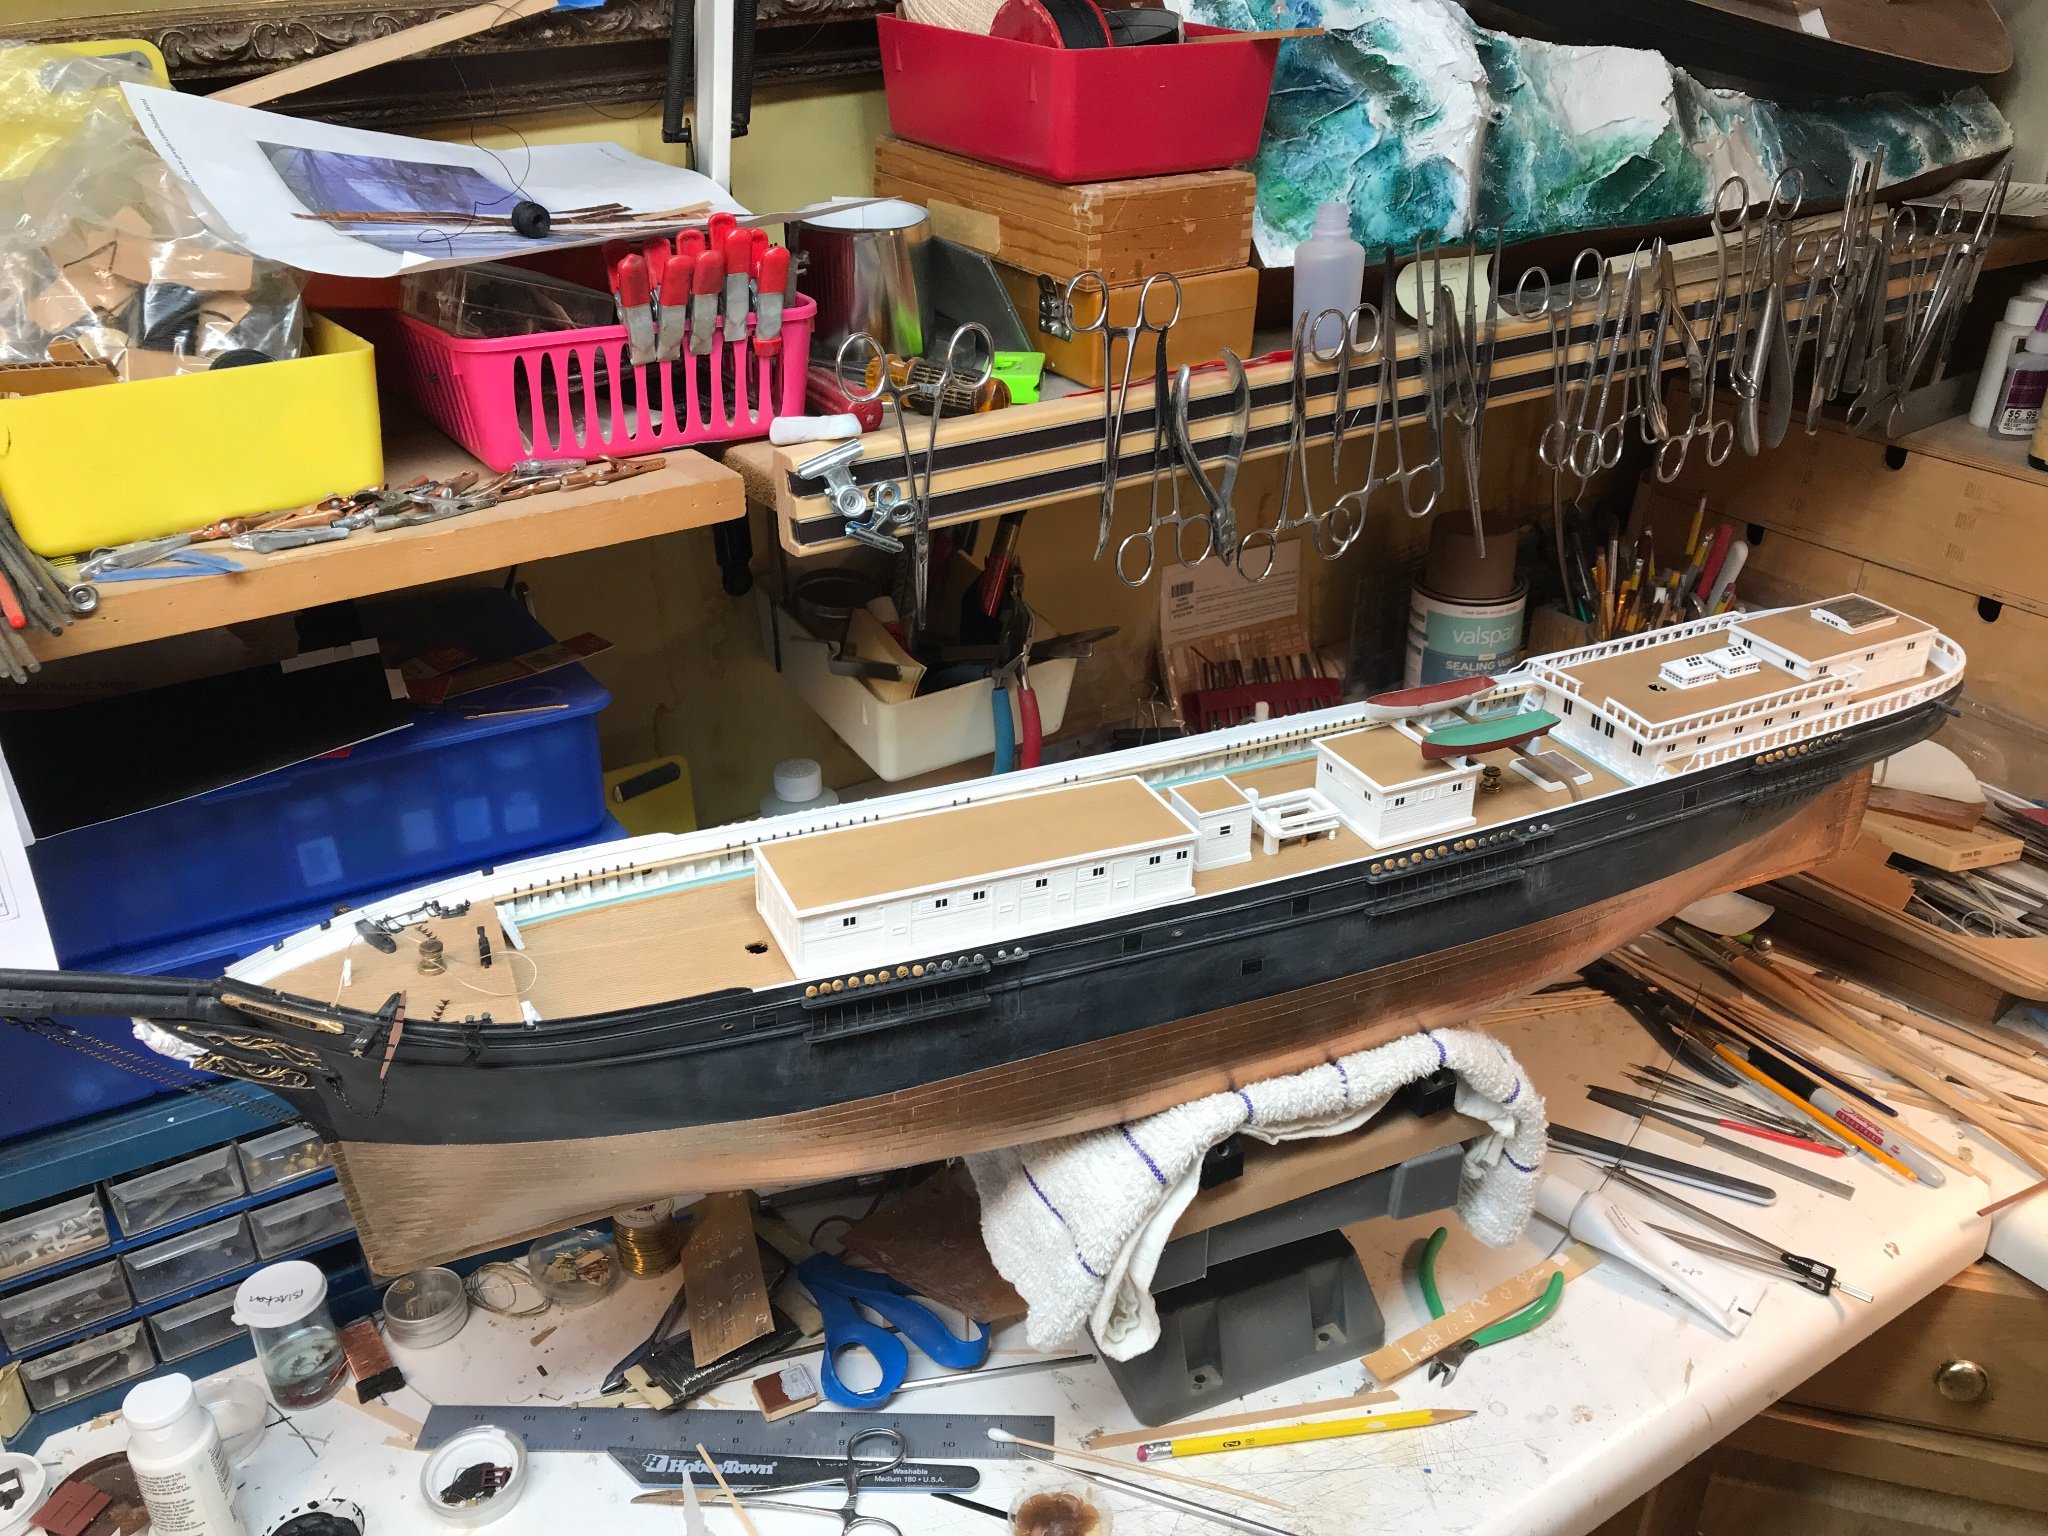
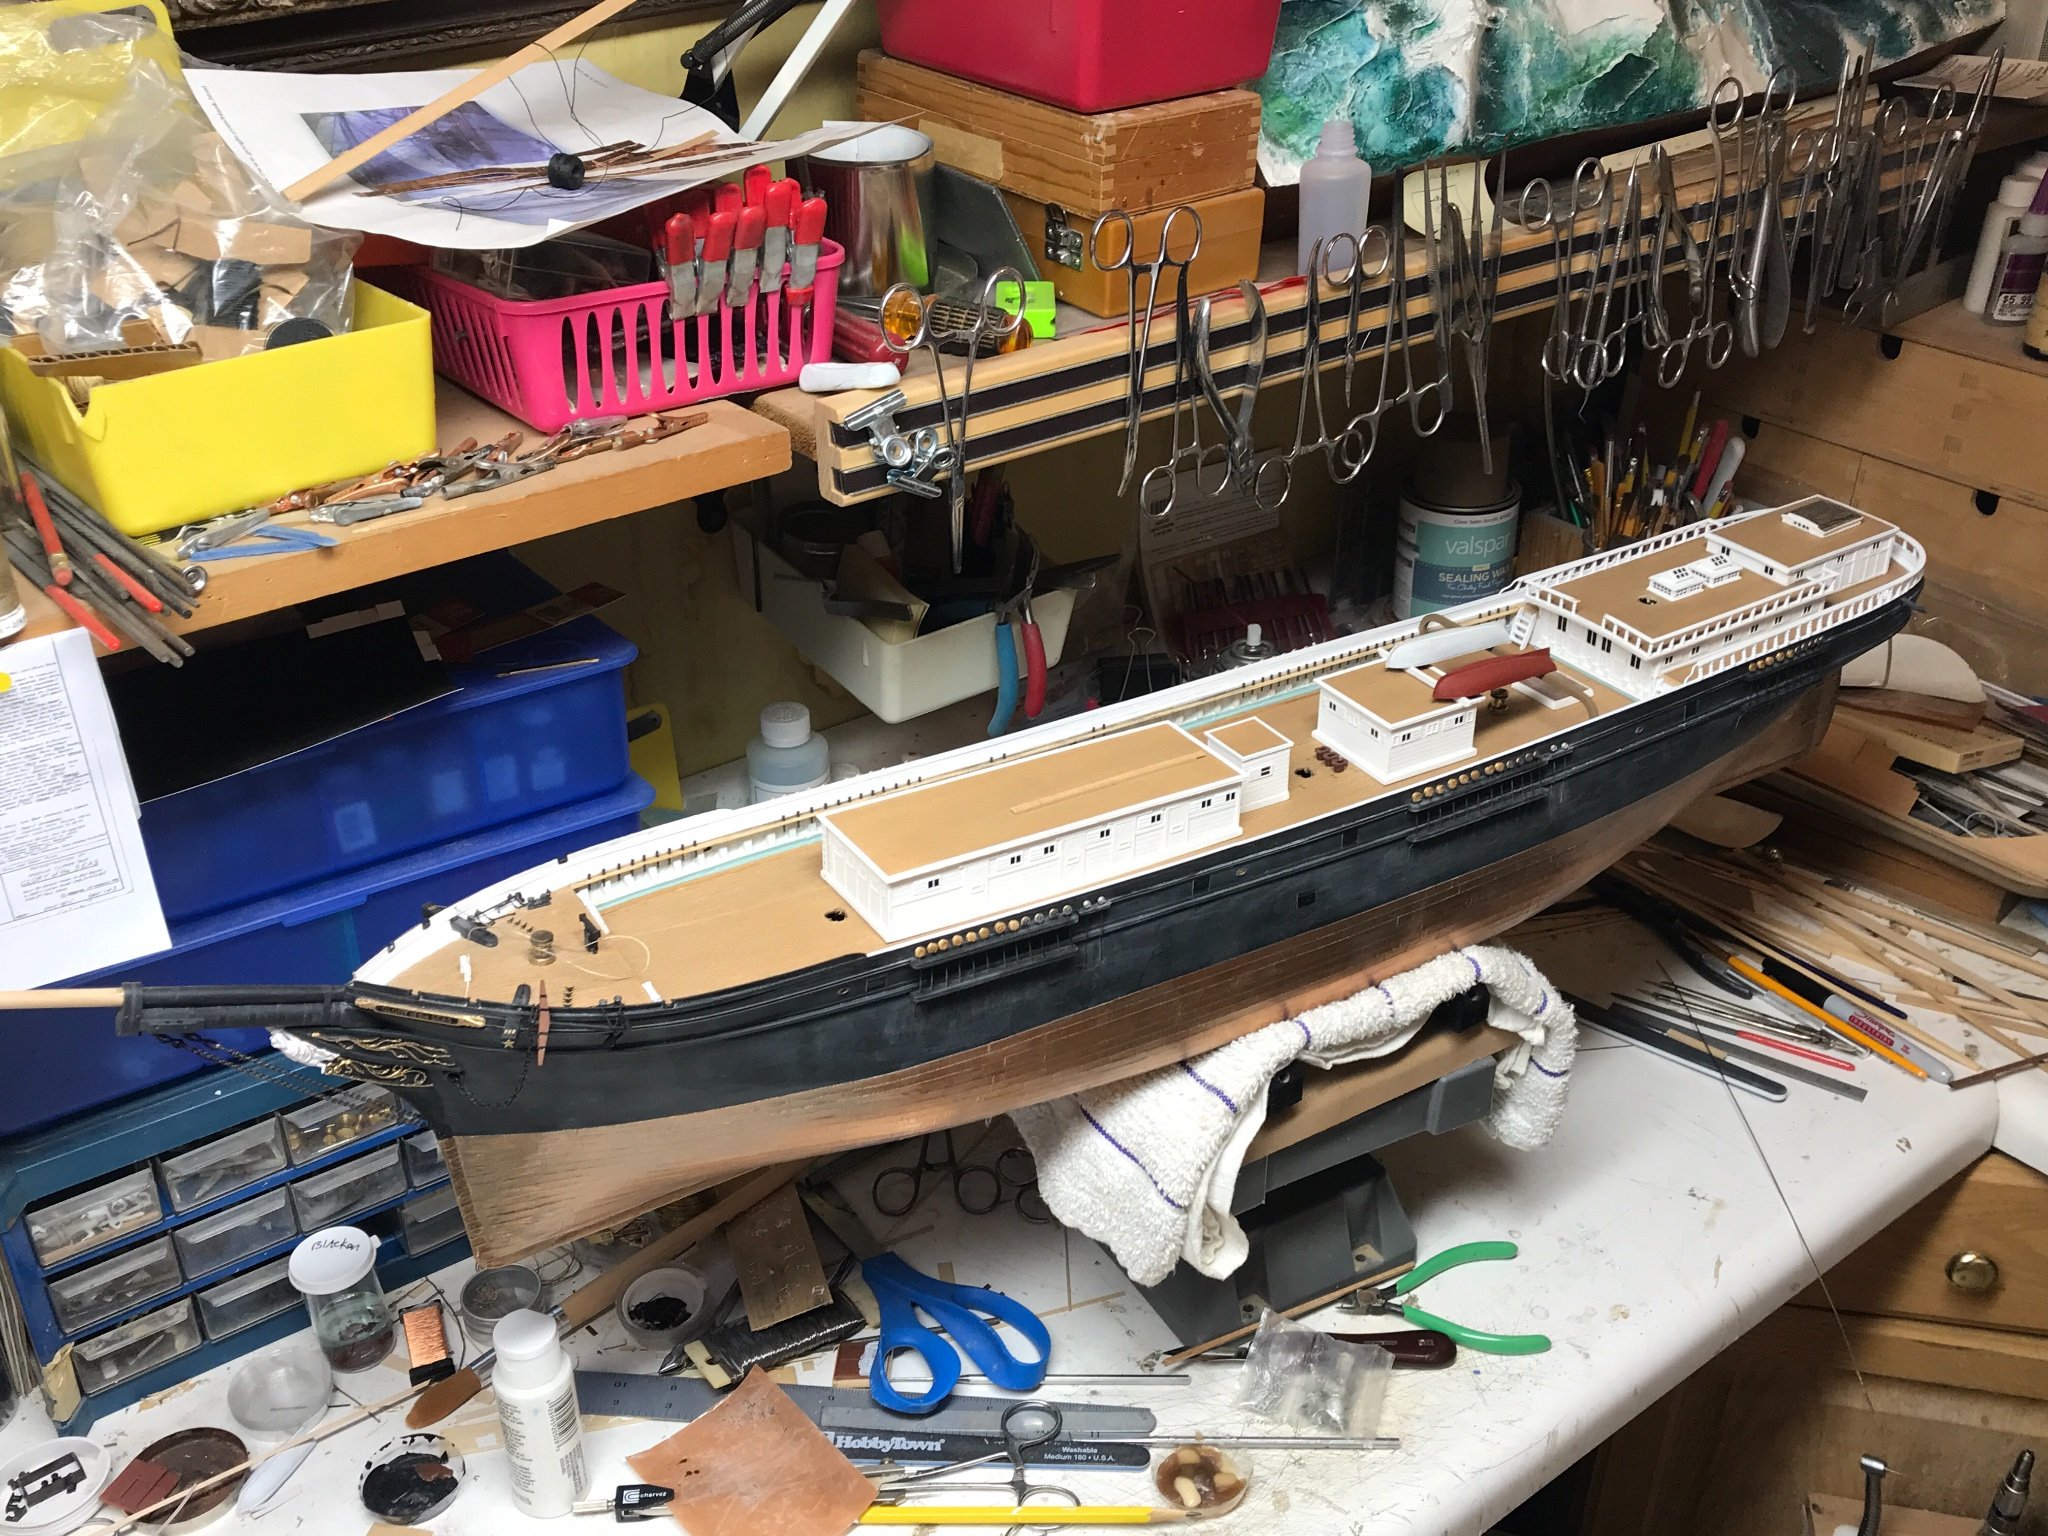
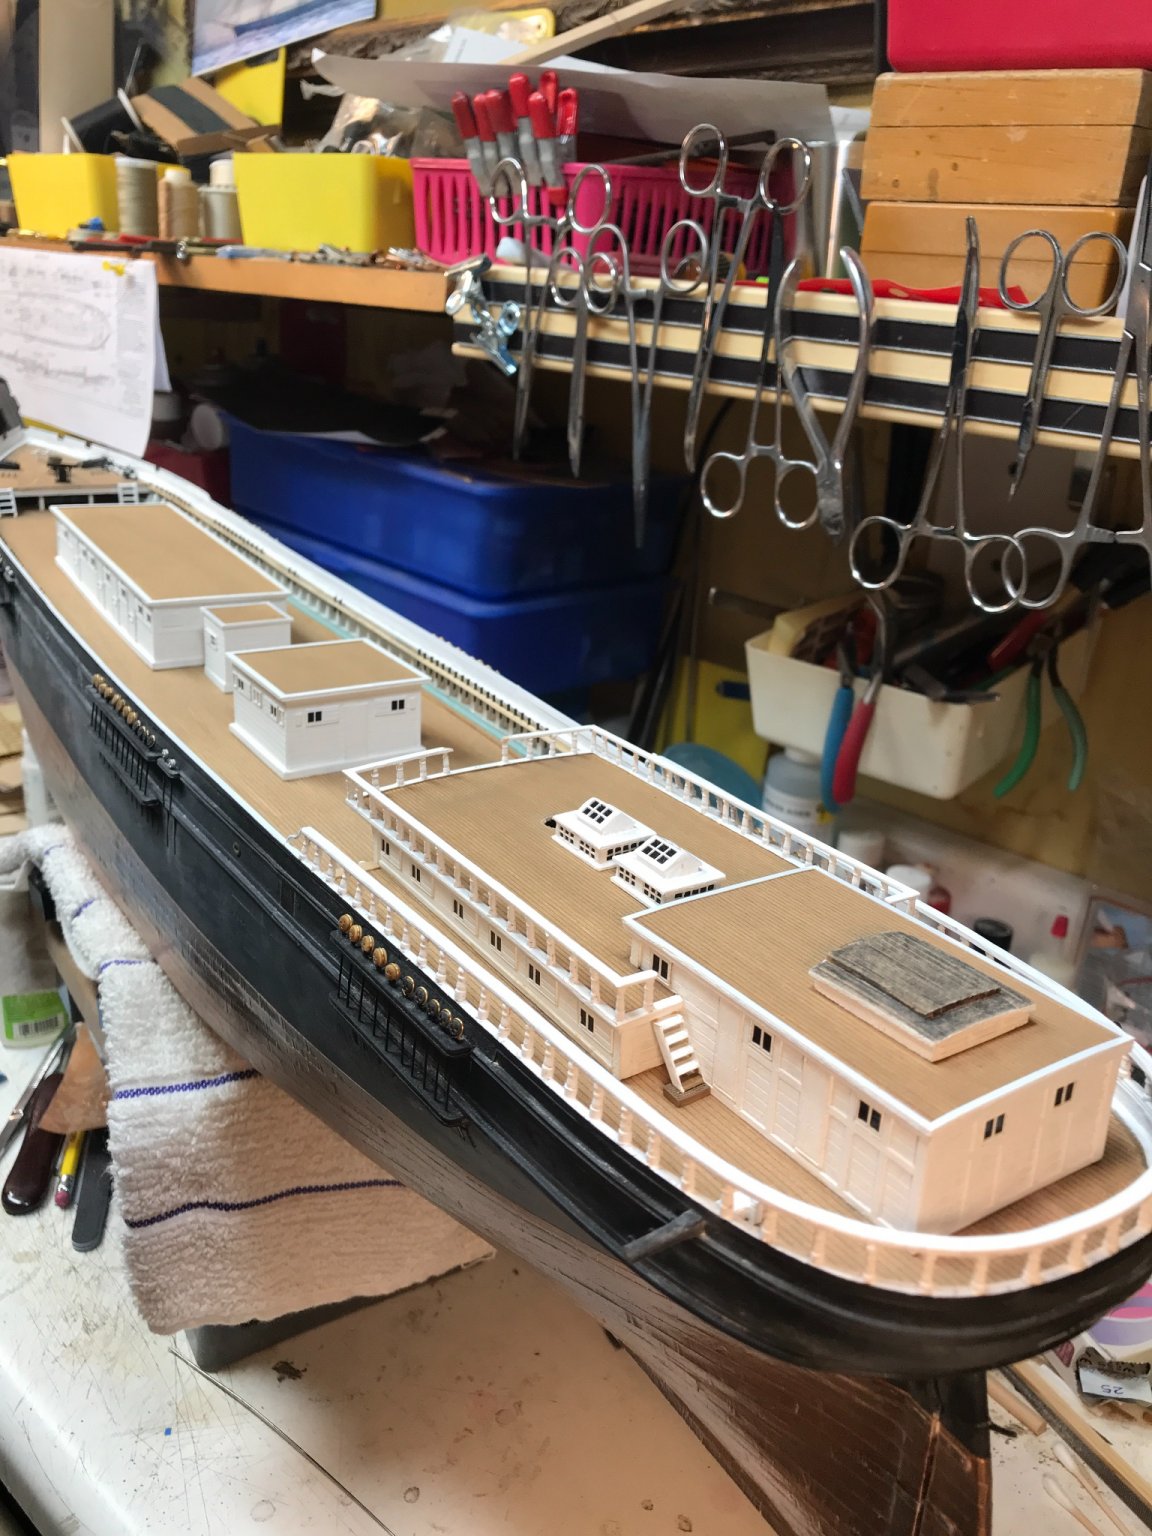
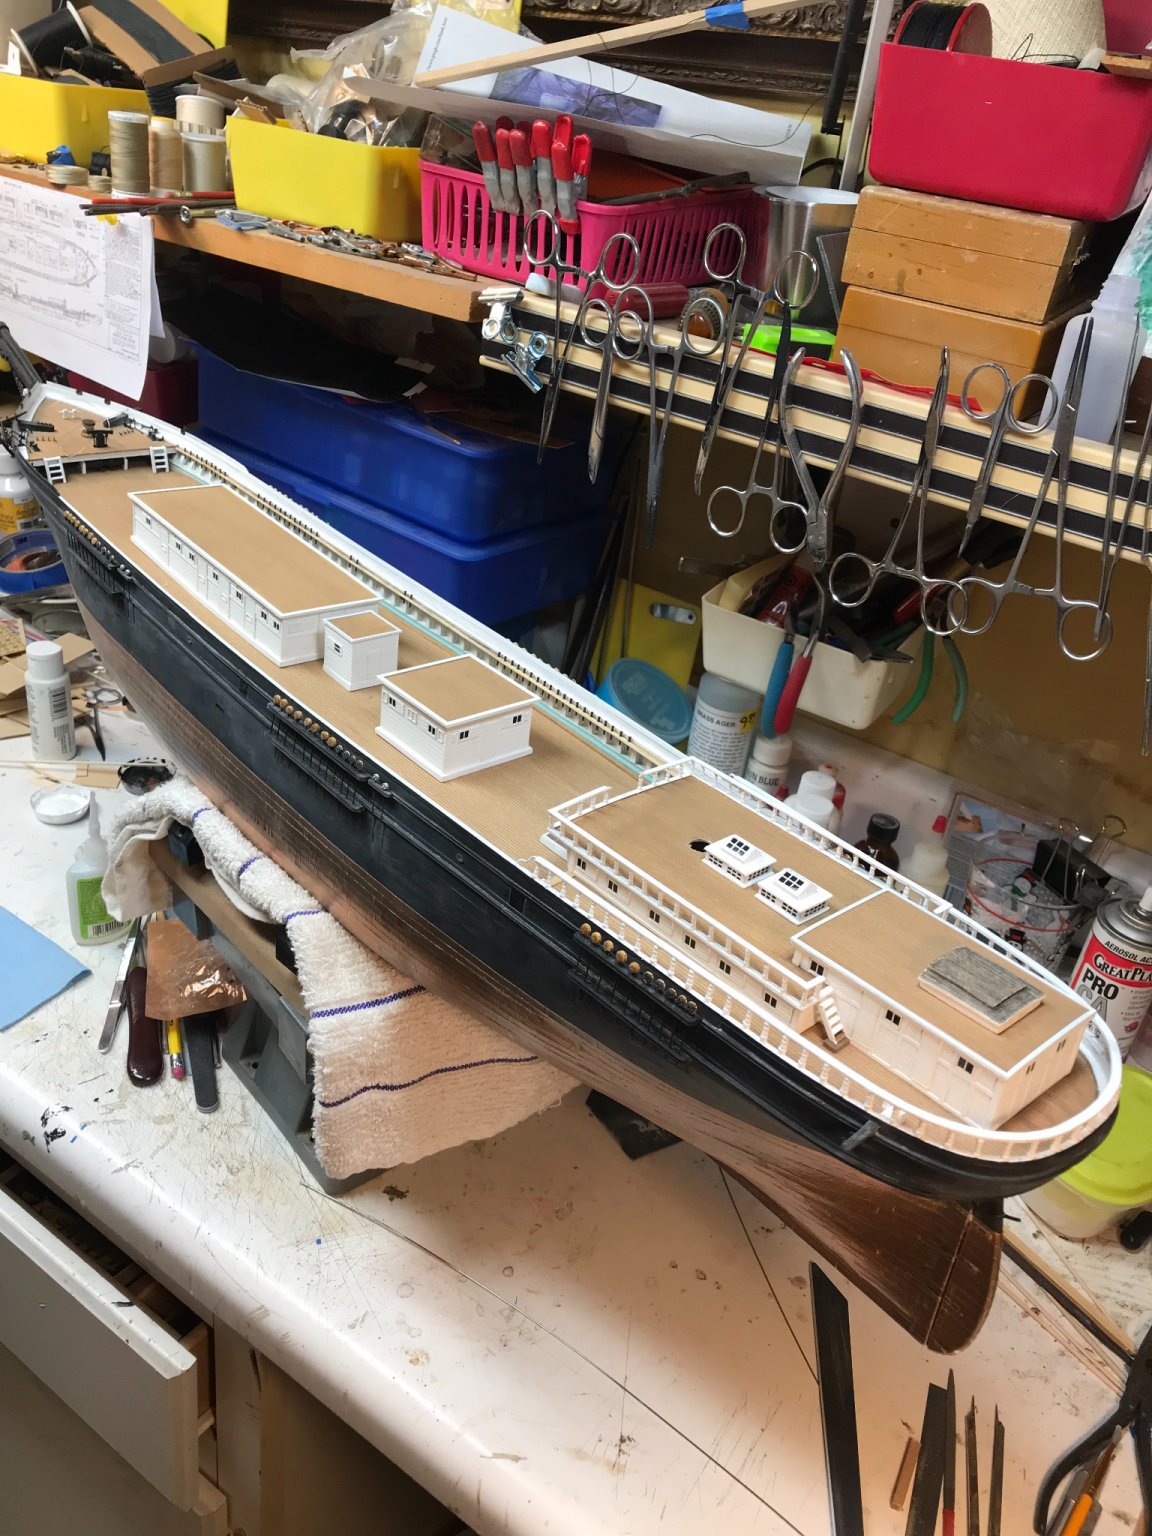
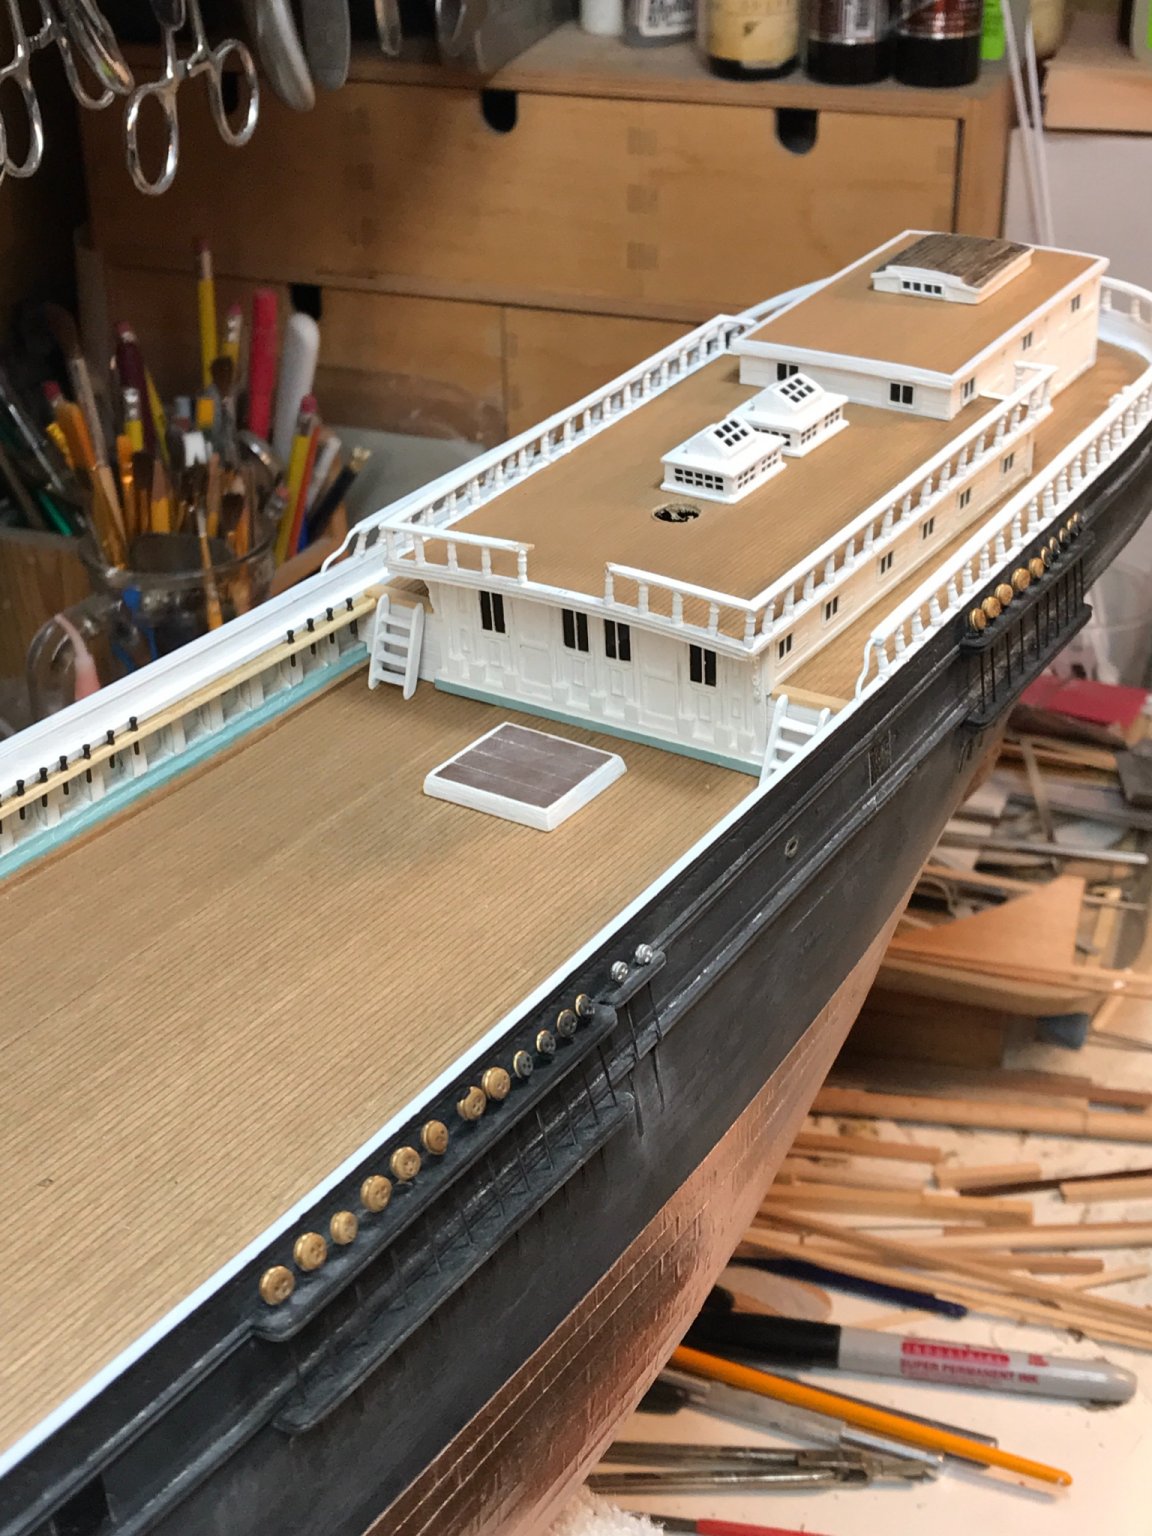
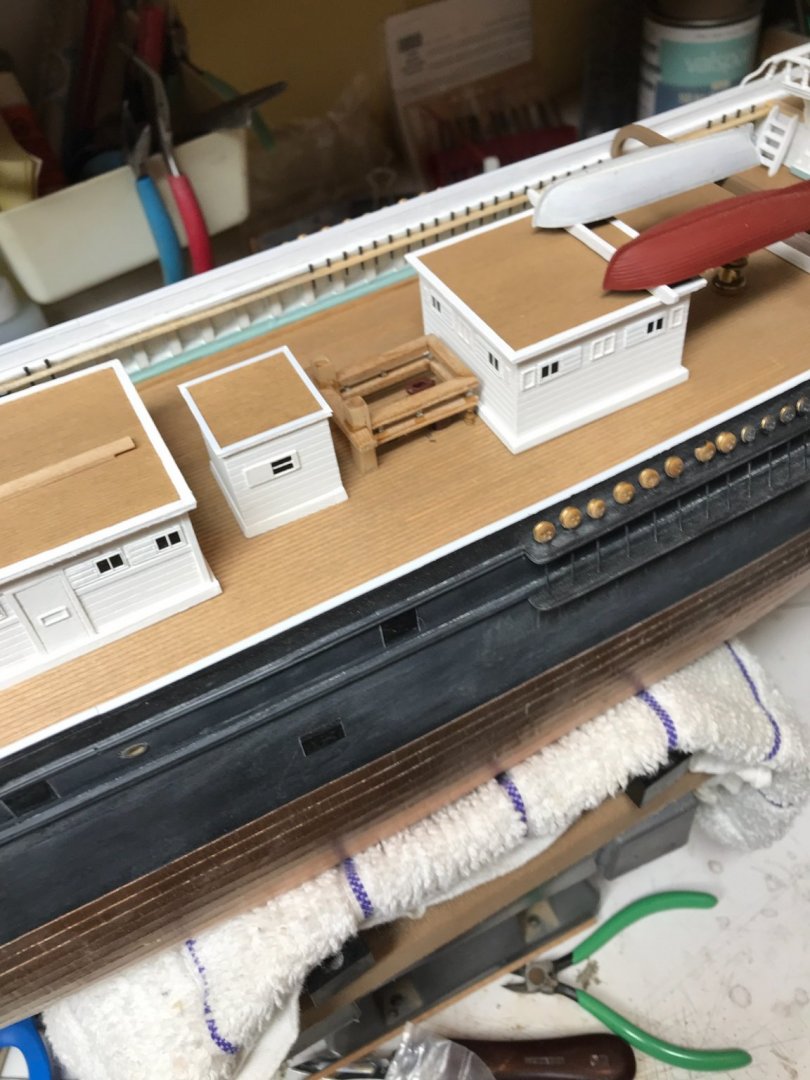
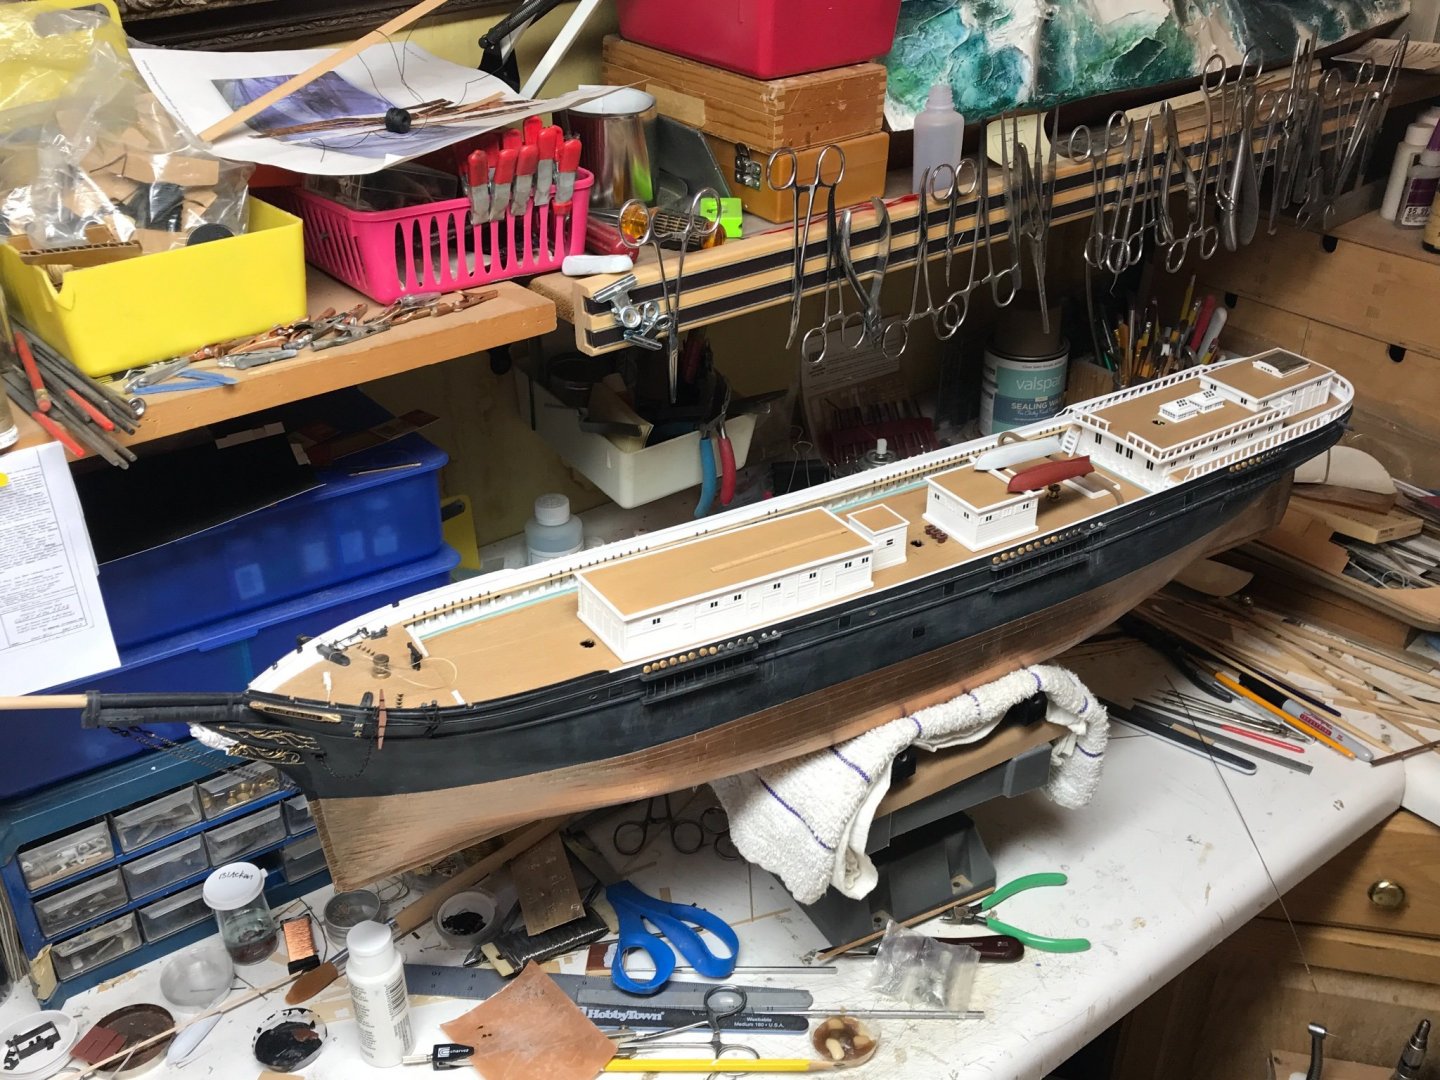
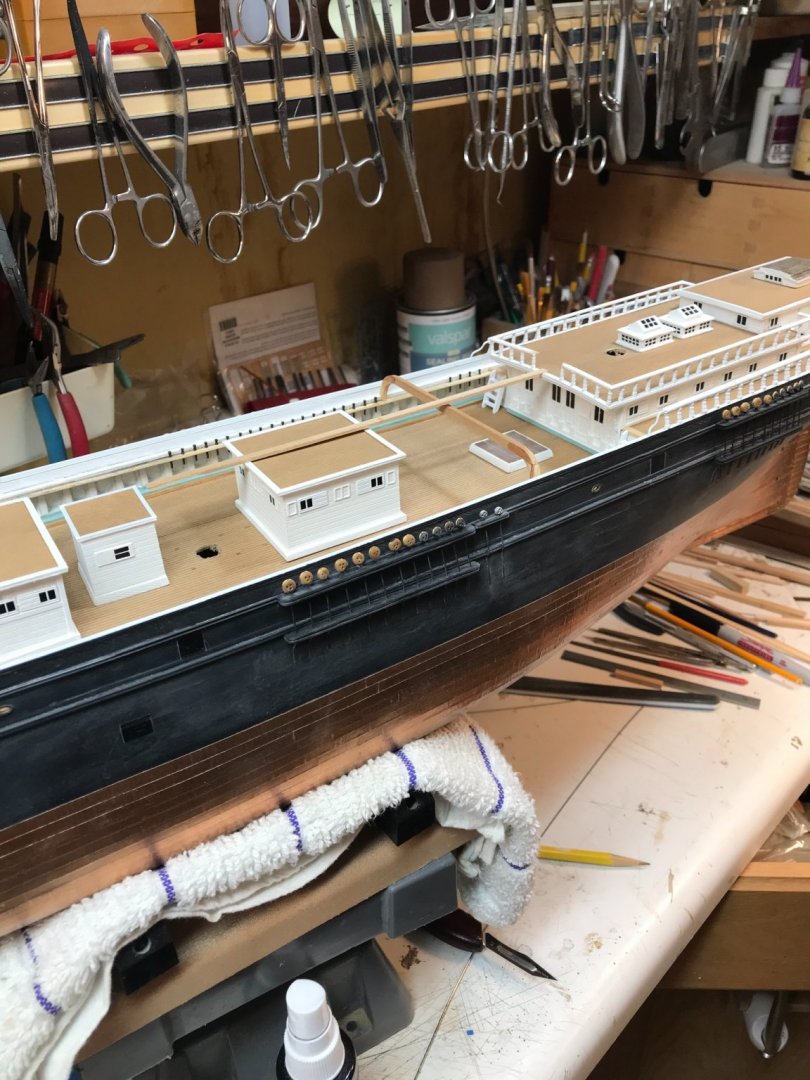
Man...I got to looking at my Glory and I realized how far I've actually come. I have a few more items to finish up and paint on the overhead skid and main fife rail and I will then begin securing all the items to the deck. Once I have all the houses and furniture glued down, I can then add the catwalk(The boats will stay off during this process....cuz along with greater easy of working the catwalk...I will be finishing out the boats with paint and canvas covers...prior to their install on the skids. Sitting back and looking at my progress....for the most part, I'm getting closer to getting to the stage of making the composite masts. Of course I still need to make the foremast fife rail and the forward access/hatchway before that time....but overall, I've come a long way. What a thrill. I'm still working out her display arrangement....I'm thinking of casting a large cleat to use as the base or pedestal to rest her on. Something really cool. Oh well...there is still plenty of time for making a final decision on her mounting. Rob
- 3,560 replies
-
- 2
-
-
- clipper
- hull model
- (and 2 more)
-
So we are curvilinear, you and I. Simply put, we fall within the parameters of what could have been the actual curve of Glory's stern. Reassuring indeed...cuz I wasn't planning on cutting out and remaking it if I hadn't made the grade. If I had actually made the grade. Fantastic study and continual research Vlad. Your contribution on the subject is well received and fully appreciated. Rob
-
I couldn’t get a good pic from right on top. I’m either too far to the left or right, which shows shadows and optical distortions Here is the best I have. Rob
- 3,560 replies
-
- 3
-
-
- clipper
- hull model
- (and 2 more)
-
Let me get this straight< You want a pic from the stern....looking down on the stern or aft from water level? What in particular are you looking for...Deck structures, or hull structures? Rob
-
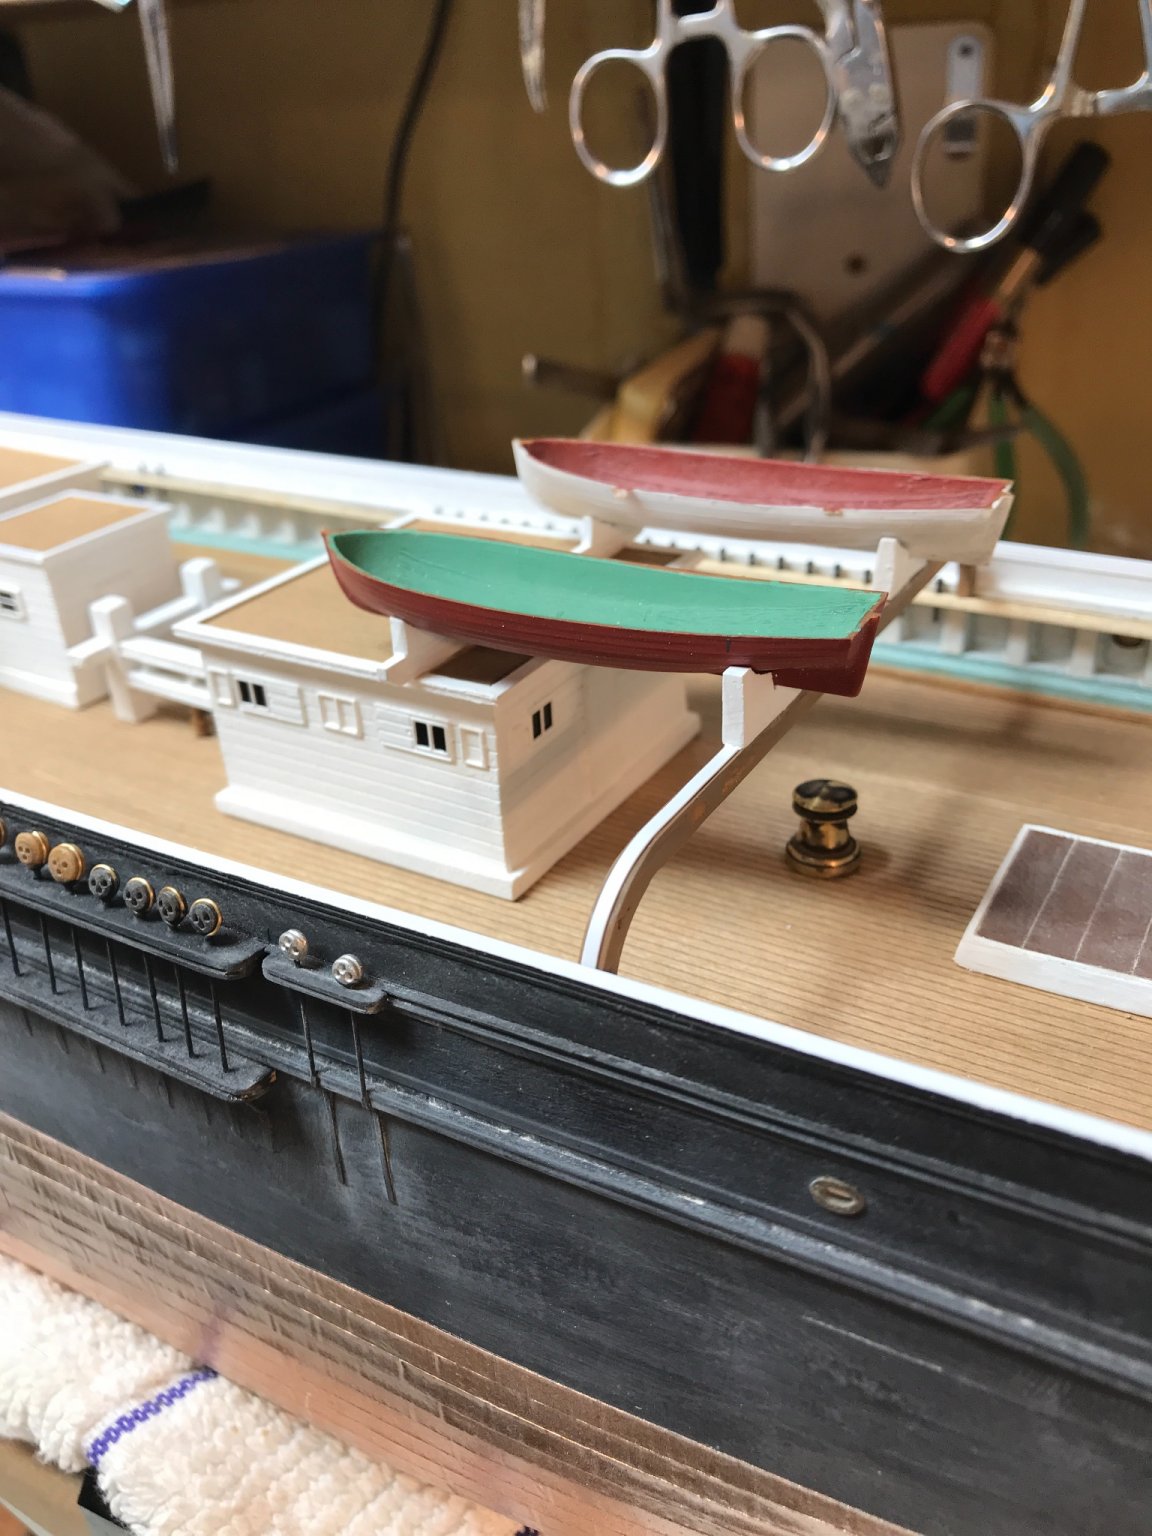
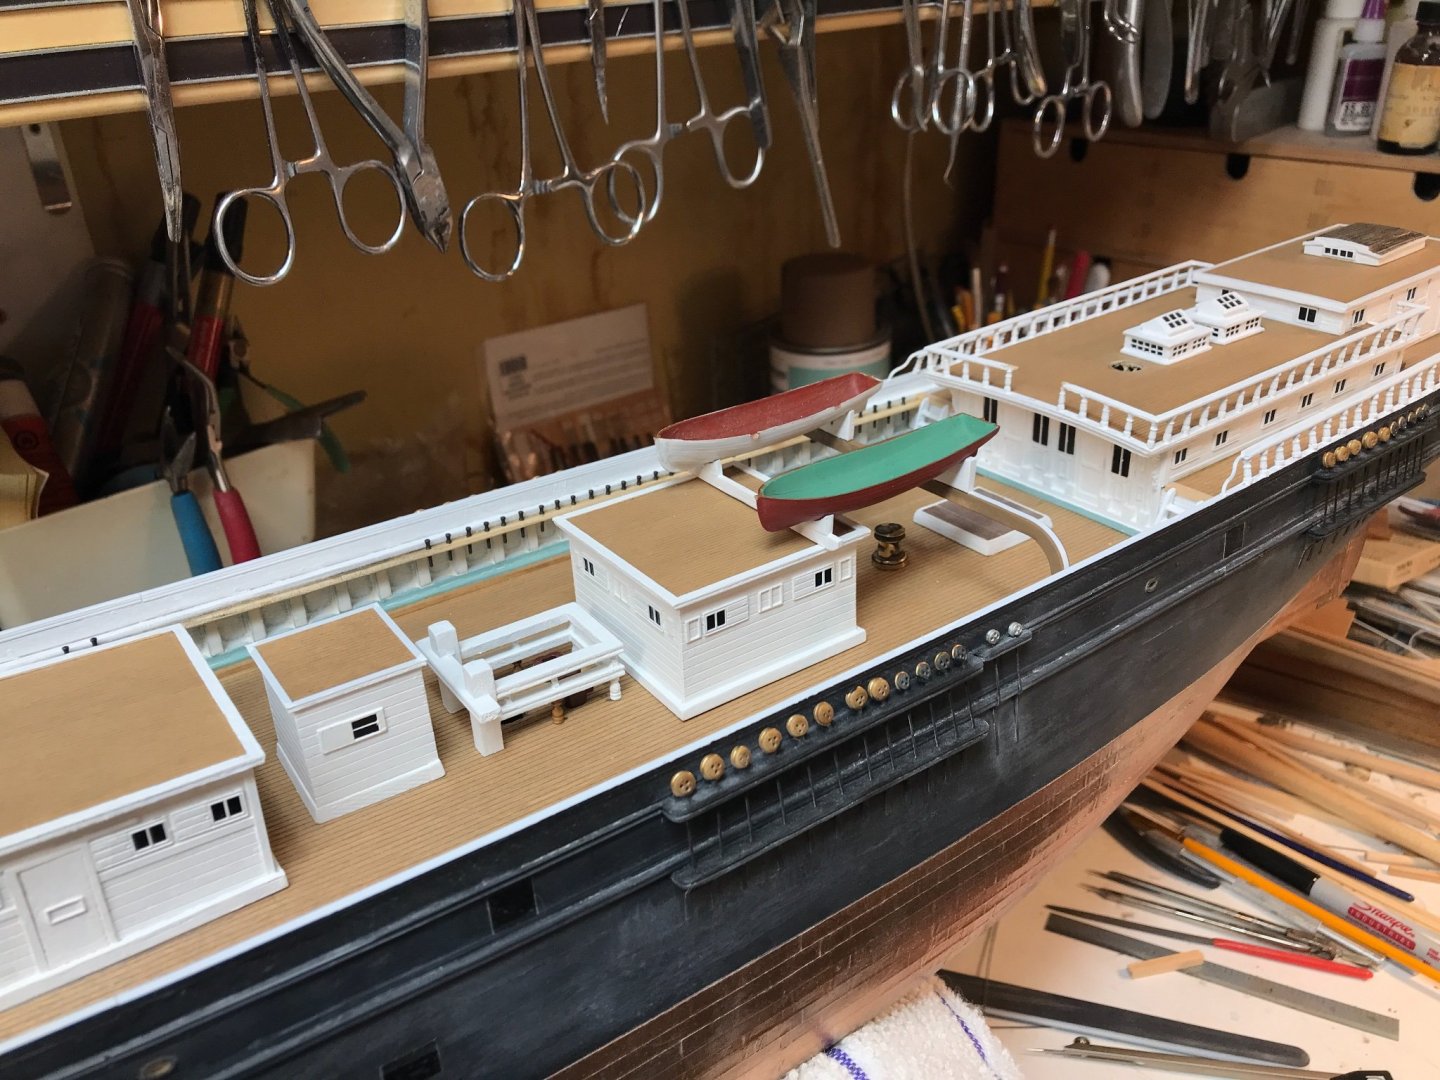
I have yet to install the pumps and wheels, but it will be tight for sure. Long way before I get to the rigging...still so much more to do till then.. Rob
-
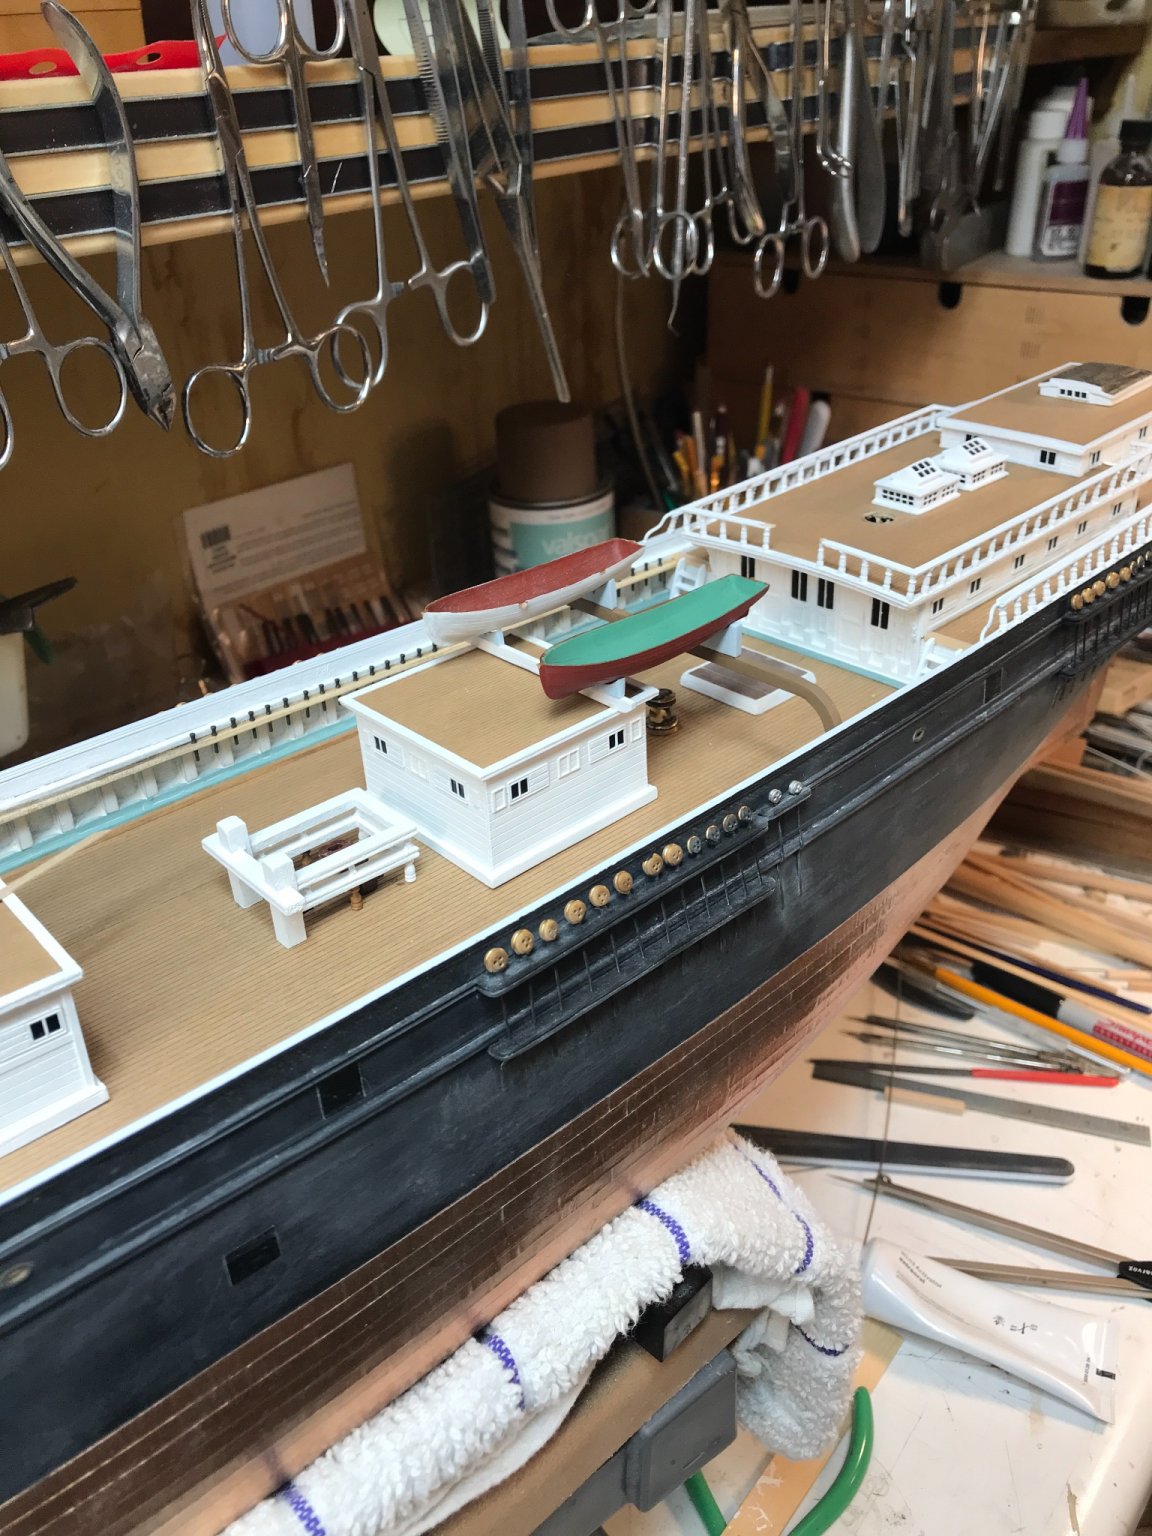
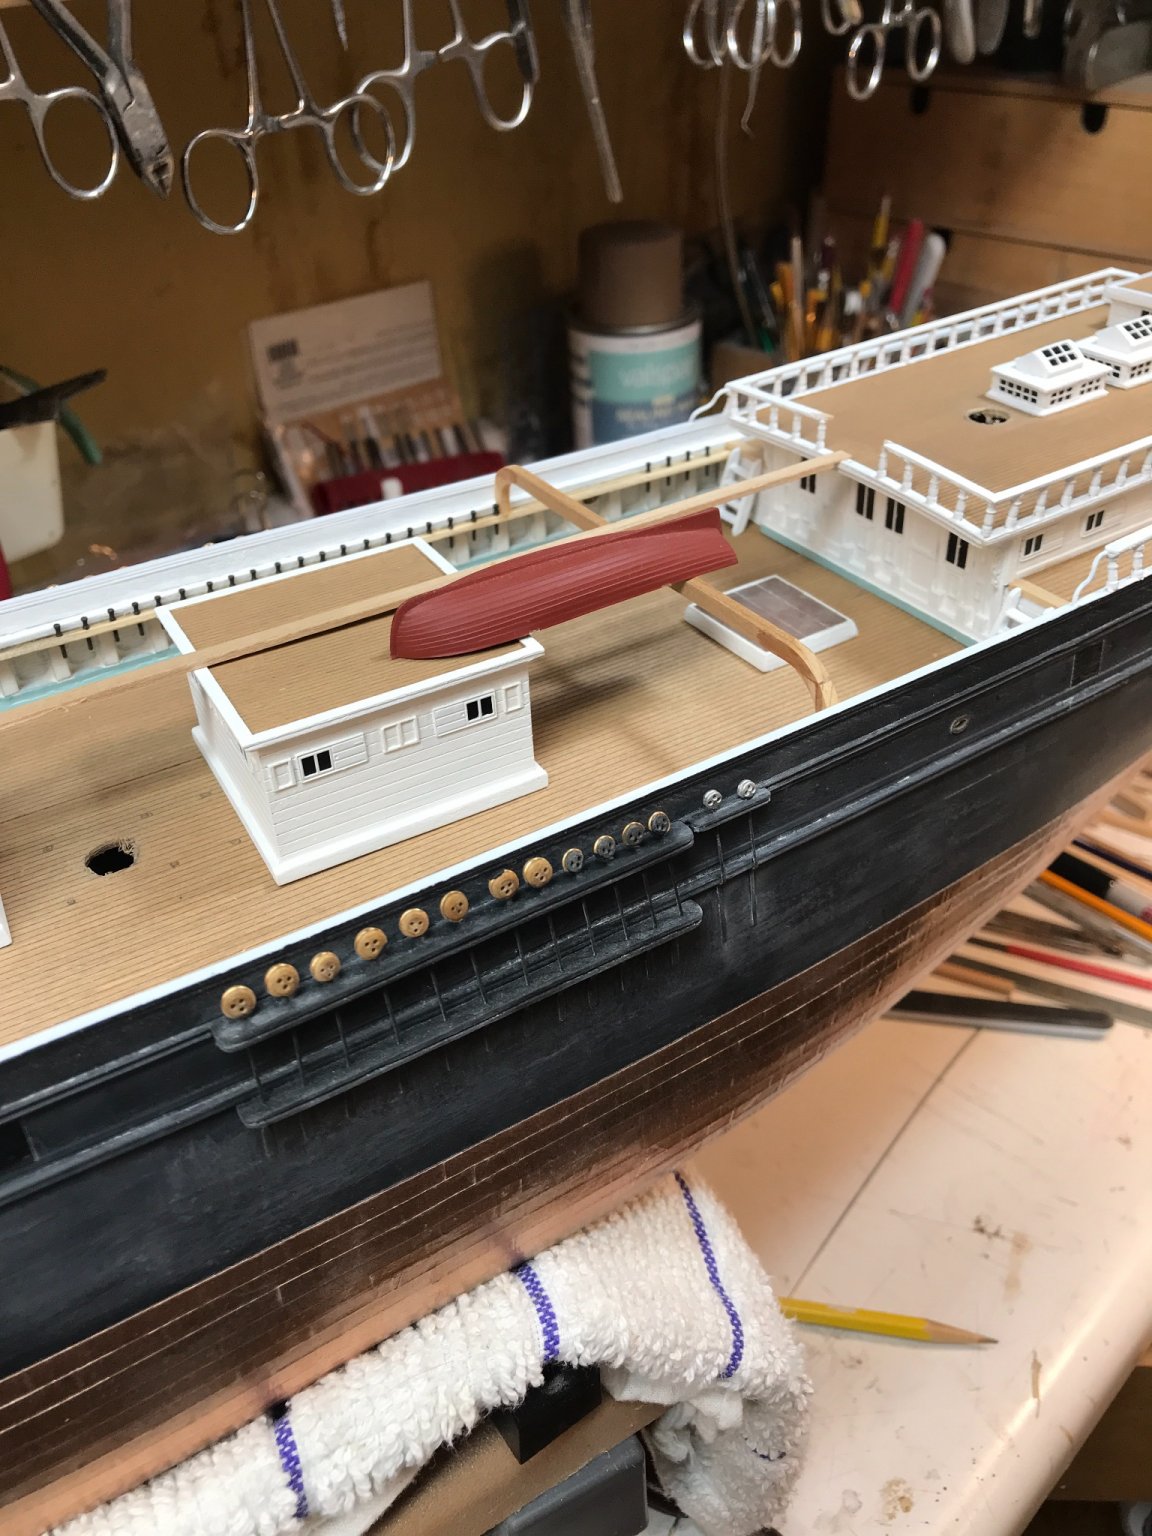
Thanks Vlad. The boats will be mounted upright in their boat chocks mounted on the skids and canvas covered. Like the picture...minus the boy. Rigging is still a long ways off...building the composite lower mast will precede that.... Rob
-
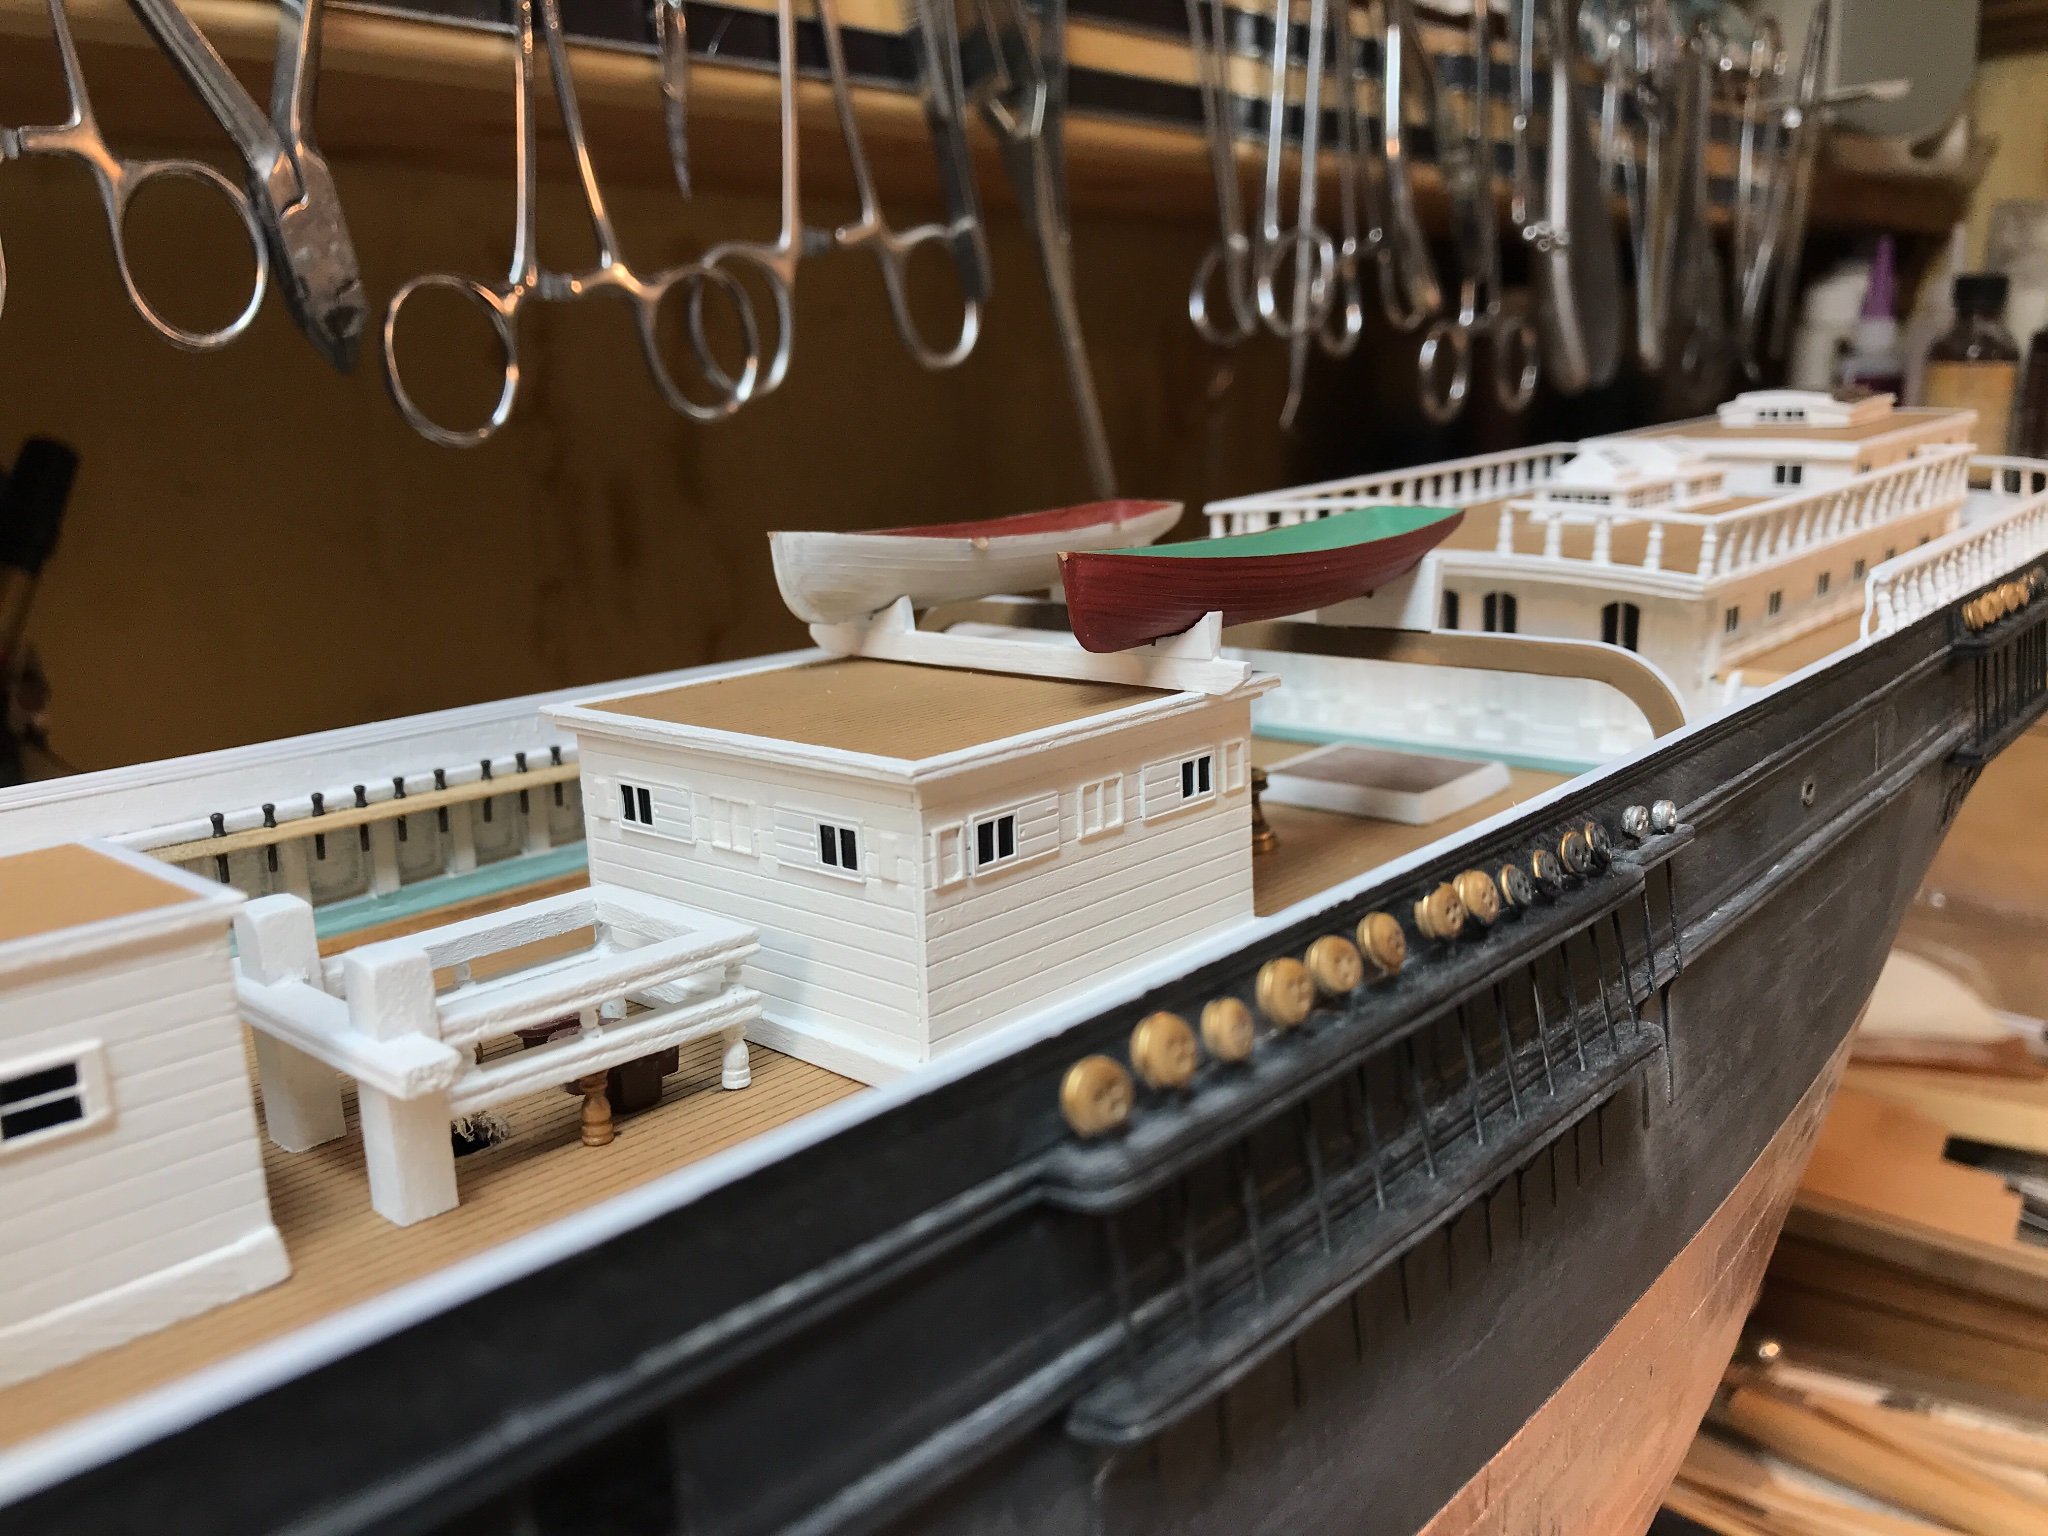
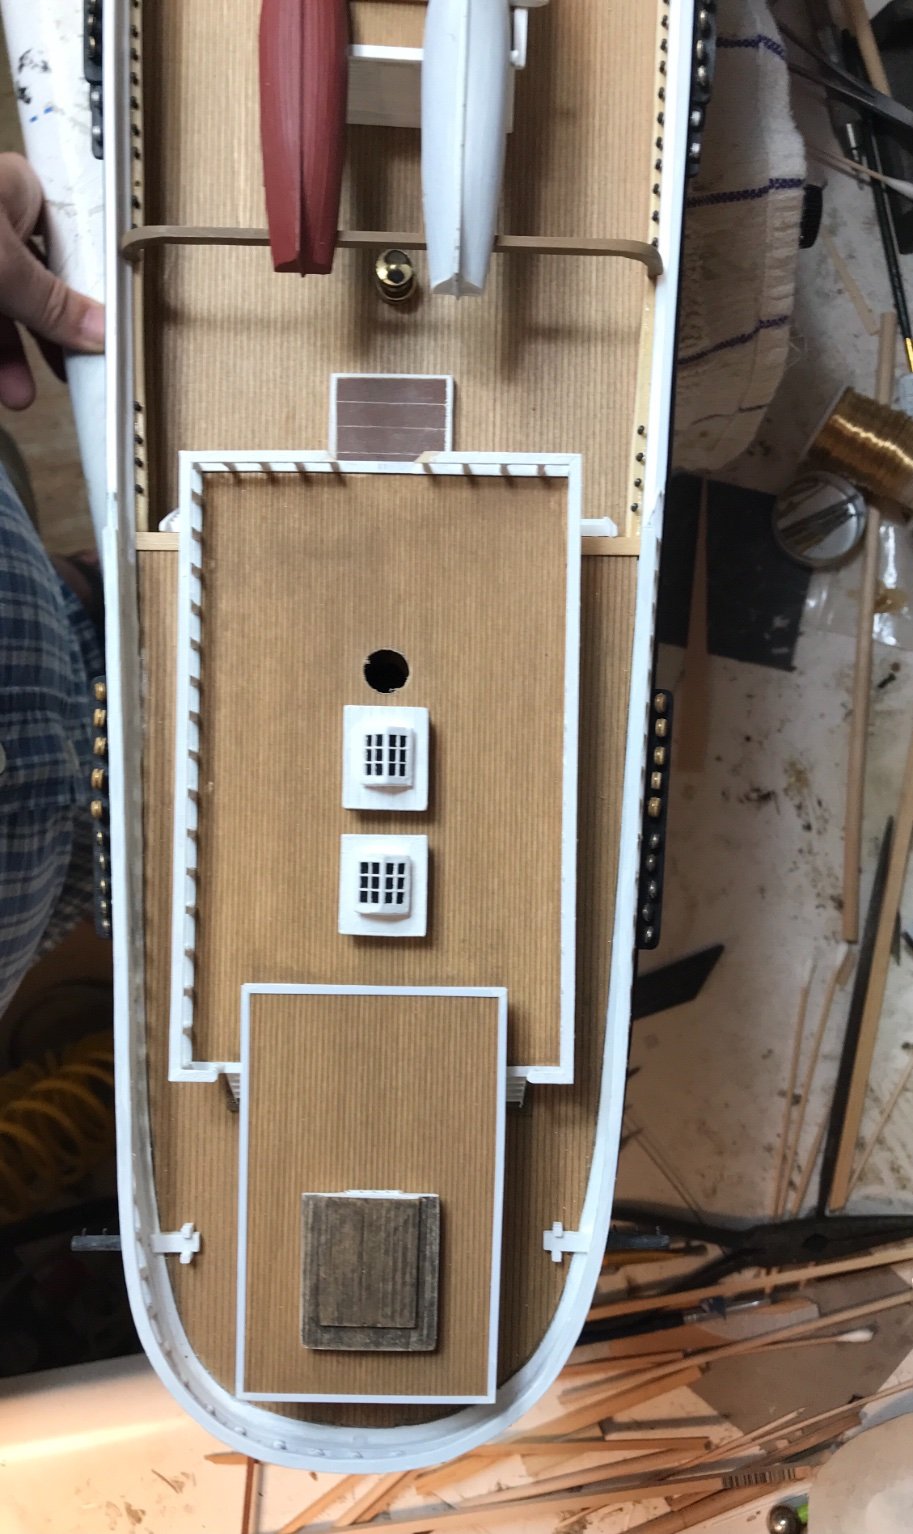
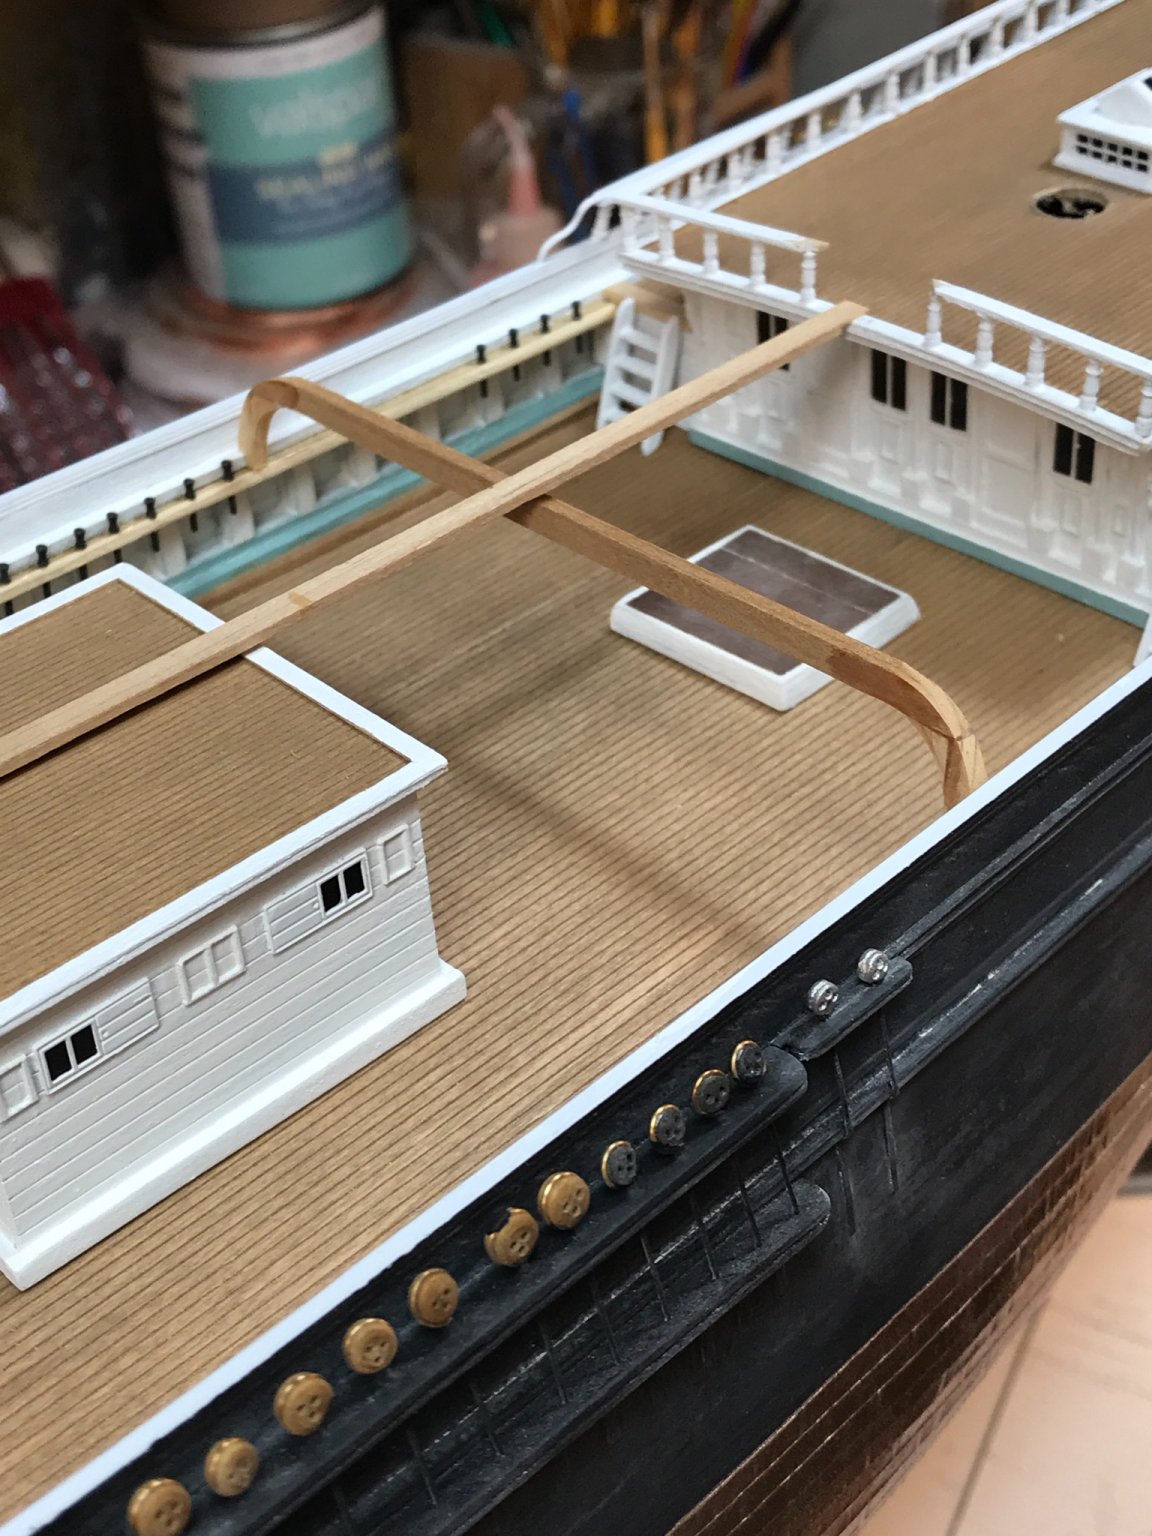
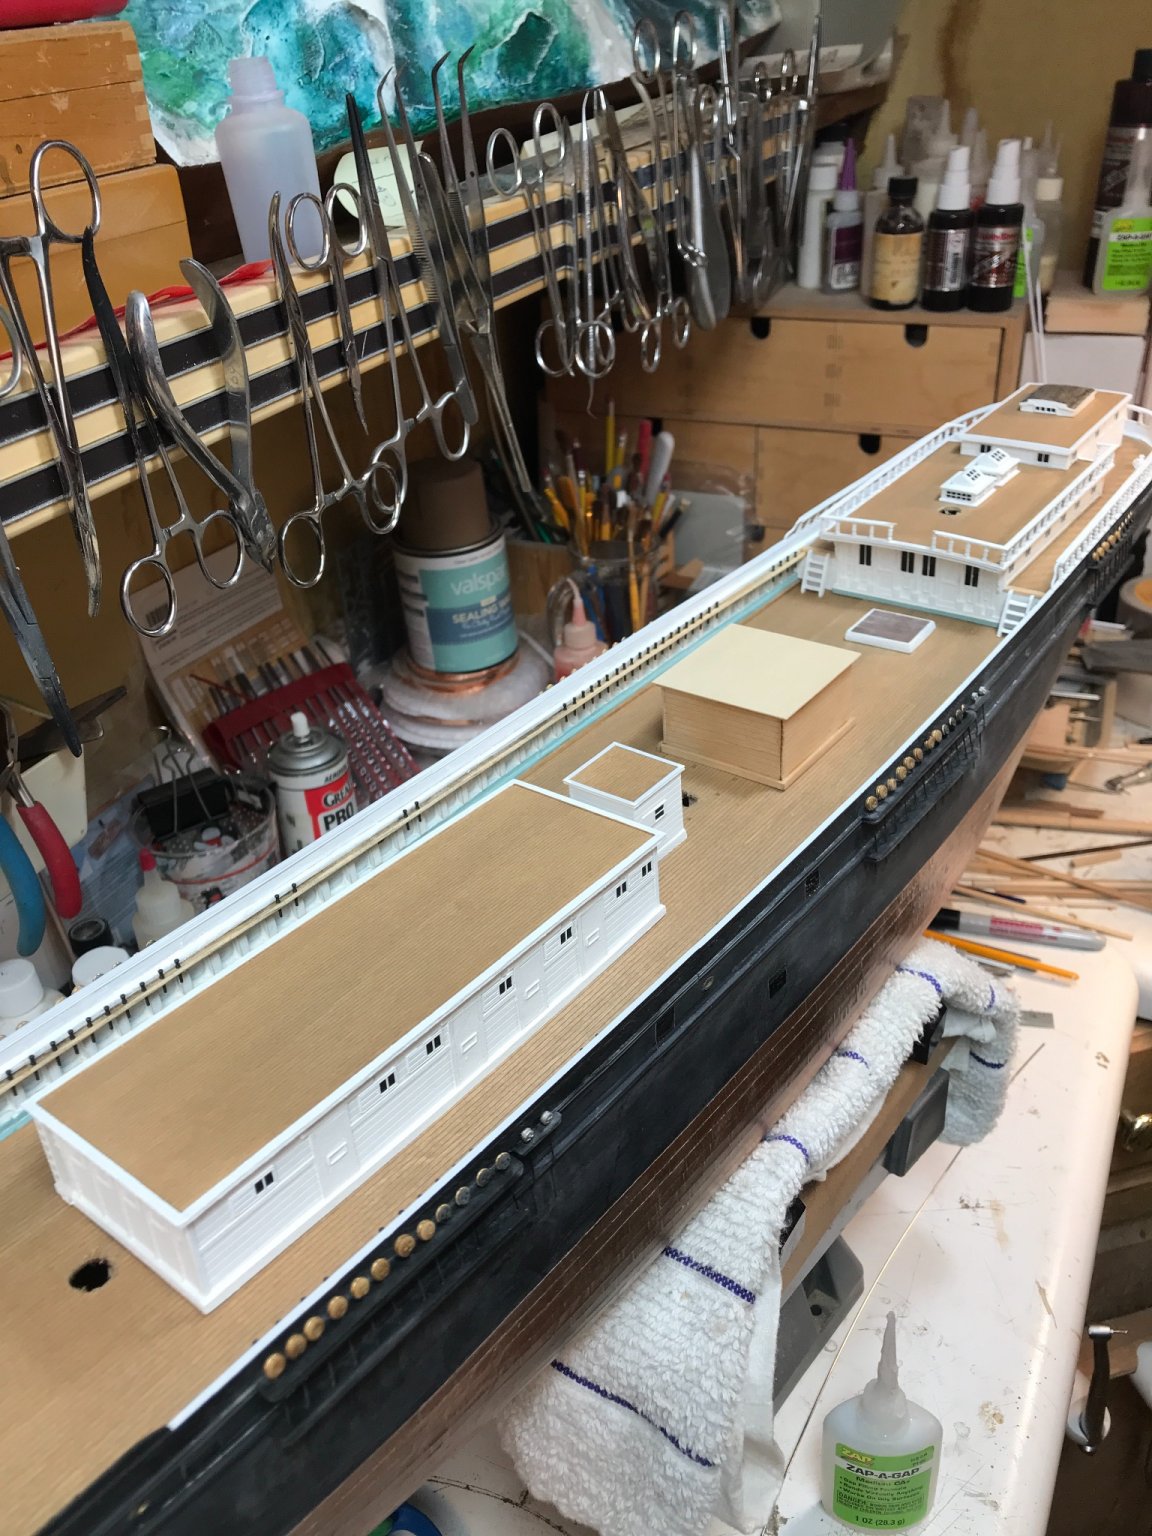
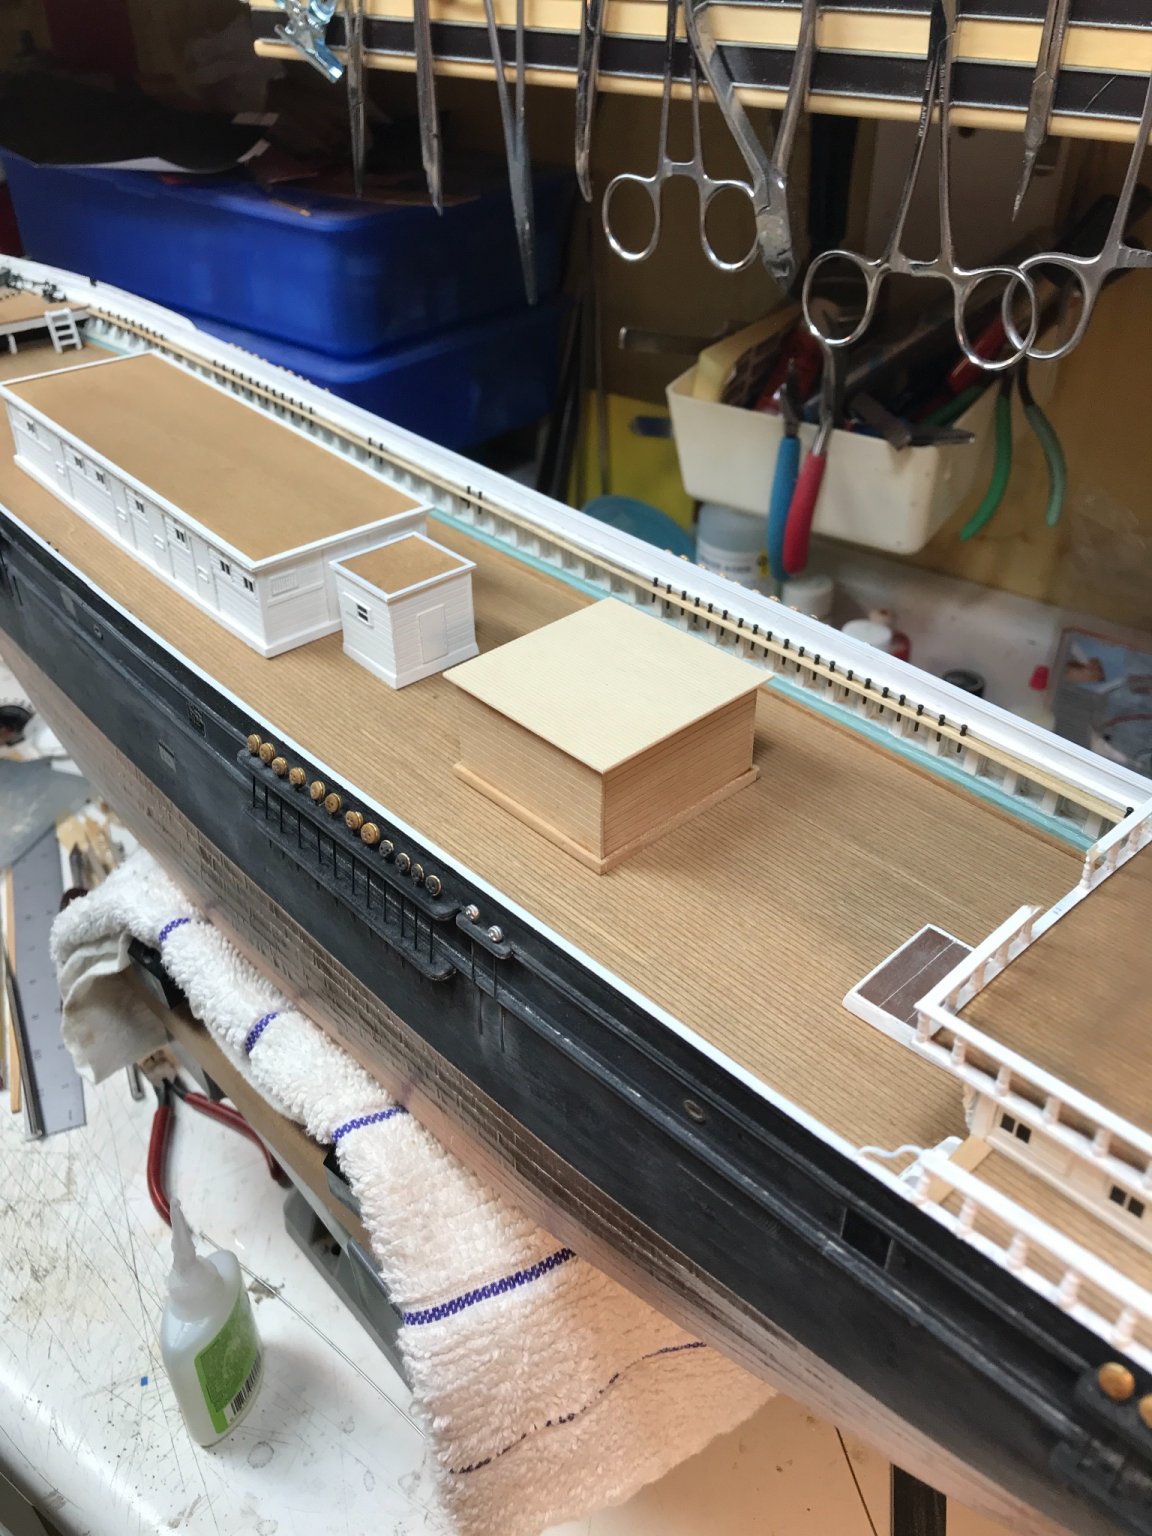
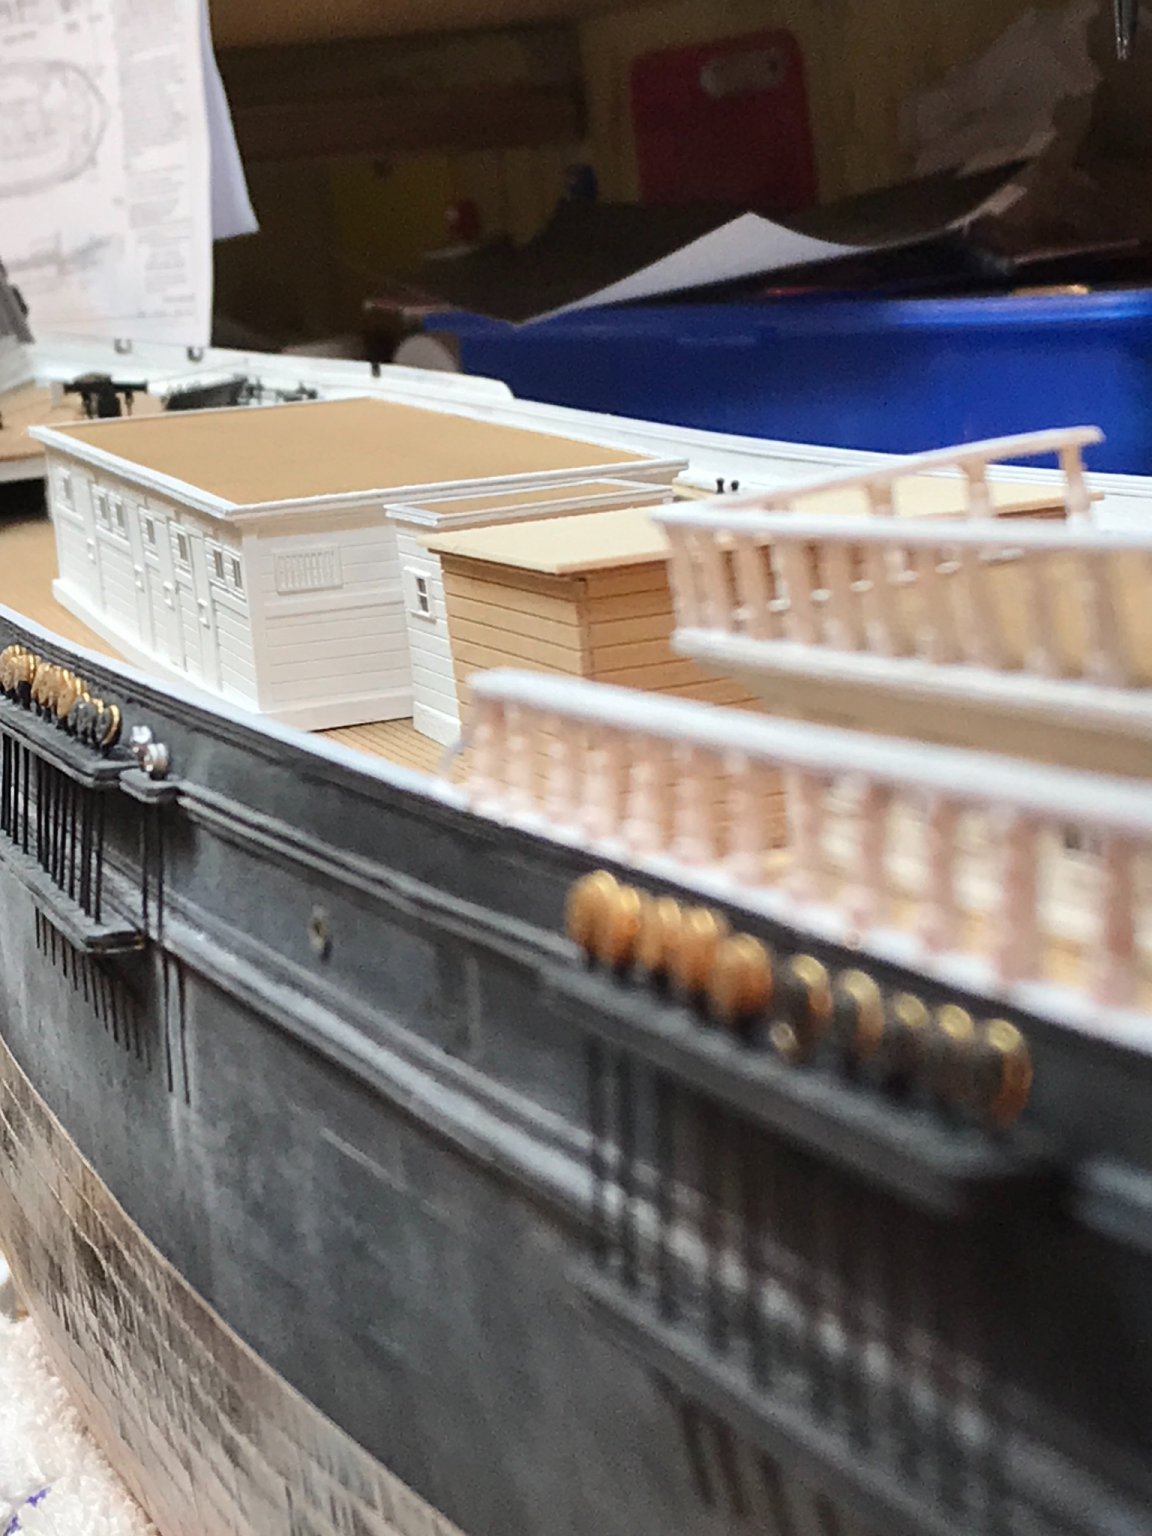
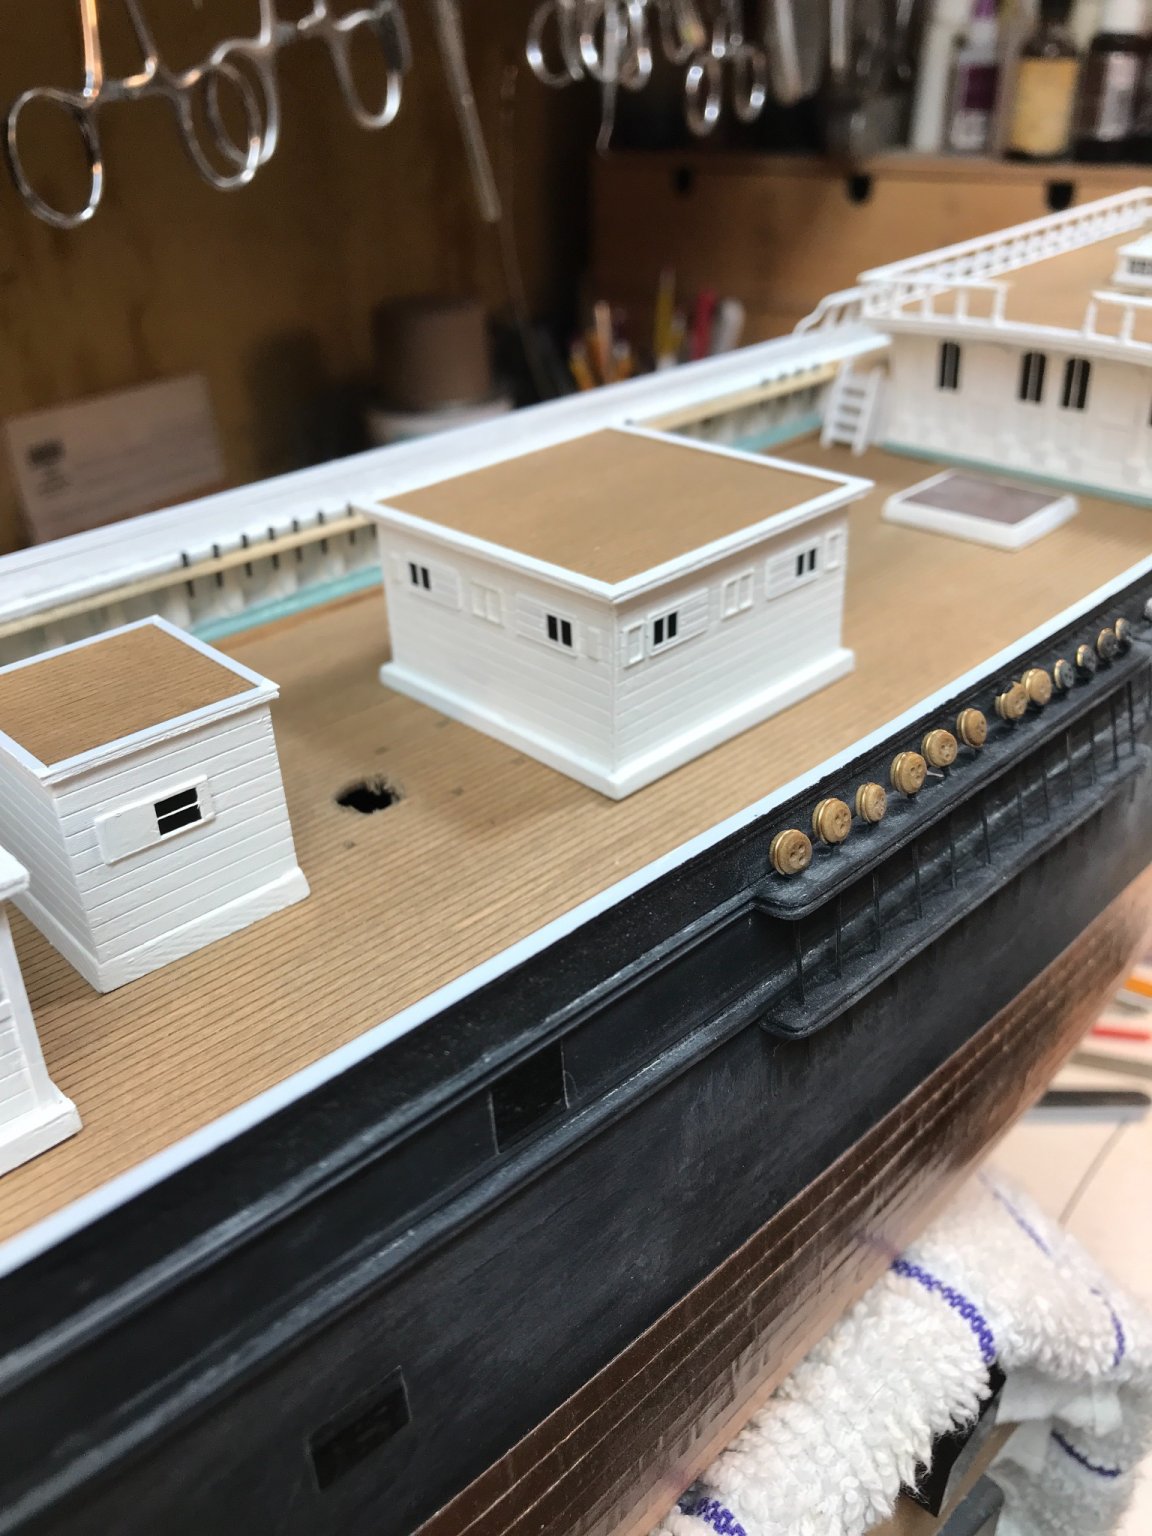
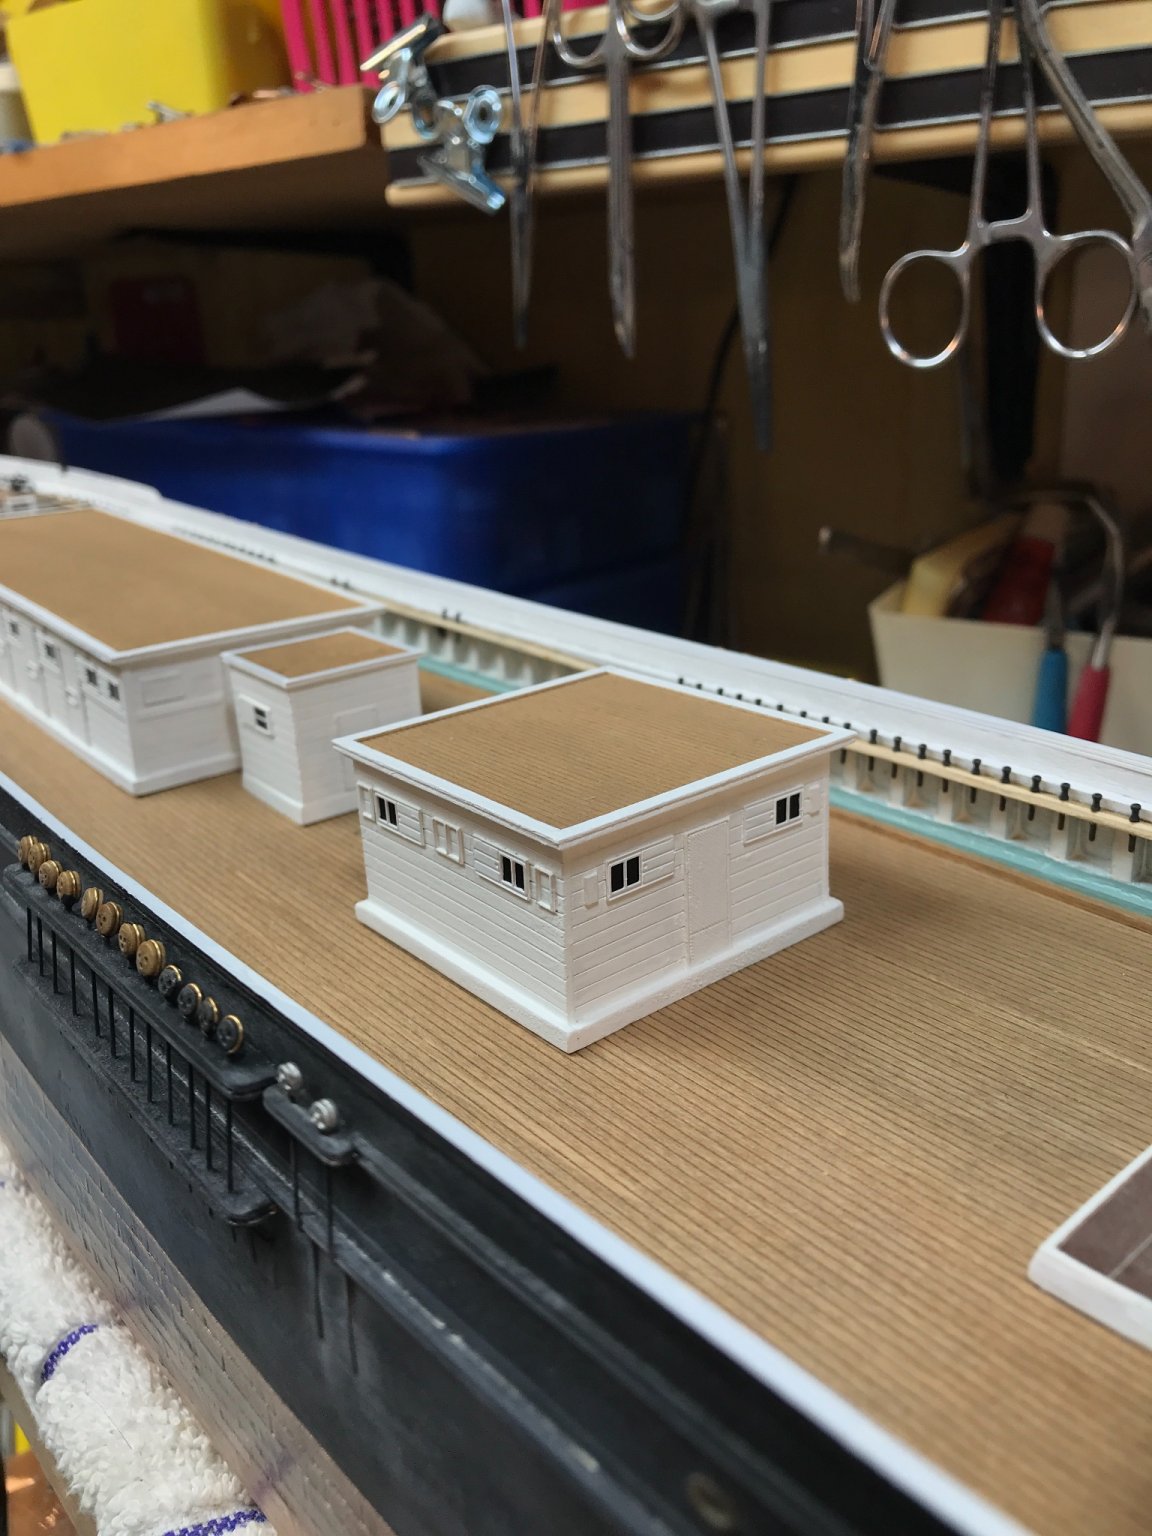
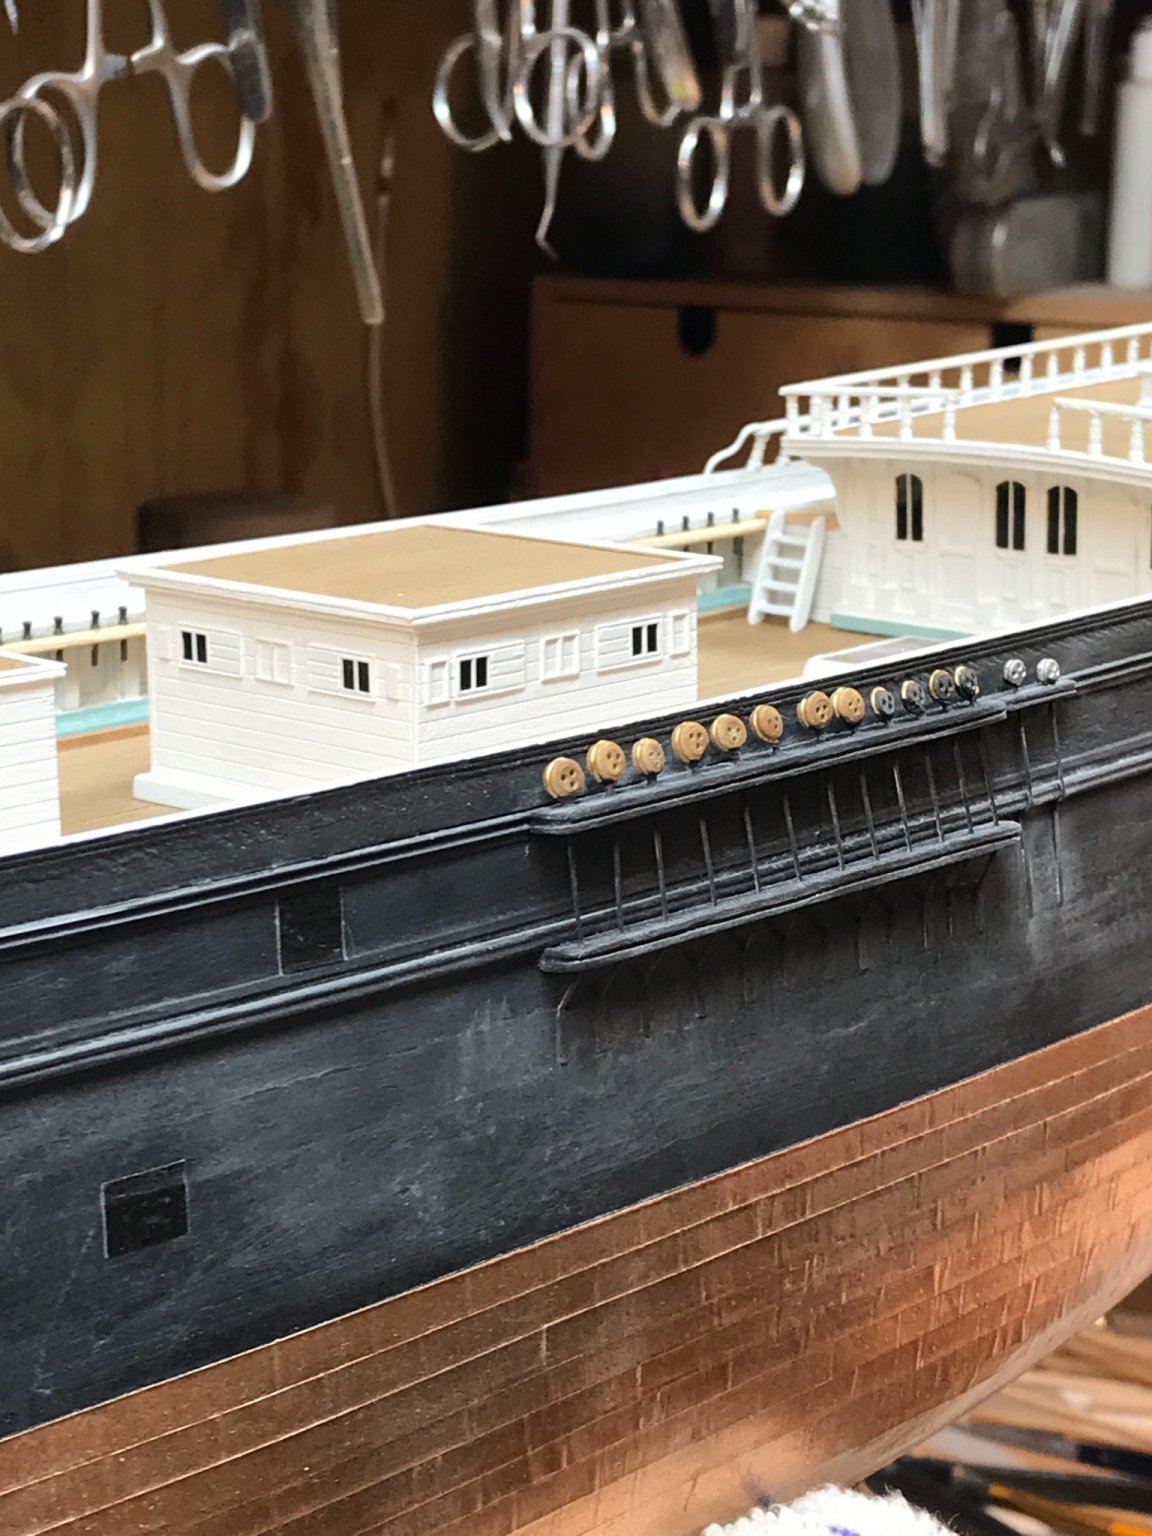
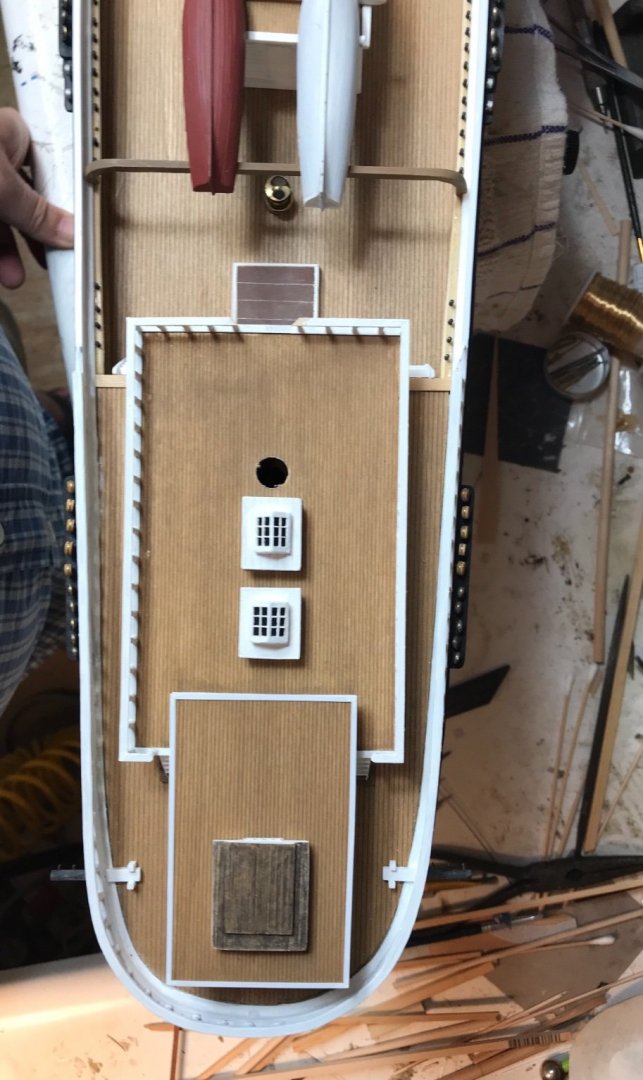
While I was constructing these features, it became clear that the aft overhead skid, acts as a skid for the boats as well as support for the cat walk that is over and resting on it. It wasn't clear at first how these elements would interact and interface with one another. But it is obvious to me now. It is also obvious that the cat walk is much longer then one would suspect from trying to figure it out from the limited images we have. It is hidden between the boats, so it really is *invisible*. How it attaches to the boys house will be left up to my engineering, artistic license, since the forward boat skid needs to be accommodated. I suspect a small step over was created to prevent accidental tripping on the roof as boys/men negotiated around these roof structures. It will be clean and cohesive. Trying to draw from Mikes original drawings was helpful, but still proved to be problematic as far as some dimensions were concerned. Sheer crowding and known structural dimensions limited actual, logical locations for structures. Regardless of any corroboration of disinformation, I was able to *fit* everything necessary to fulfill the deck plan of Glory during her heydays. Enjoy, Rob
-
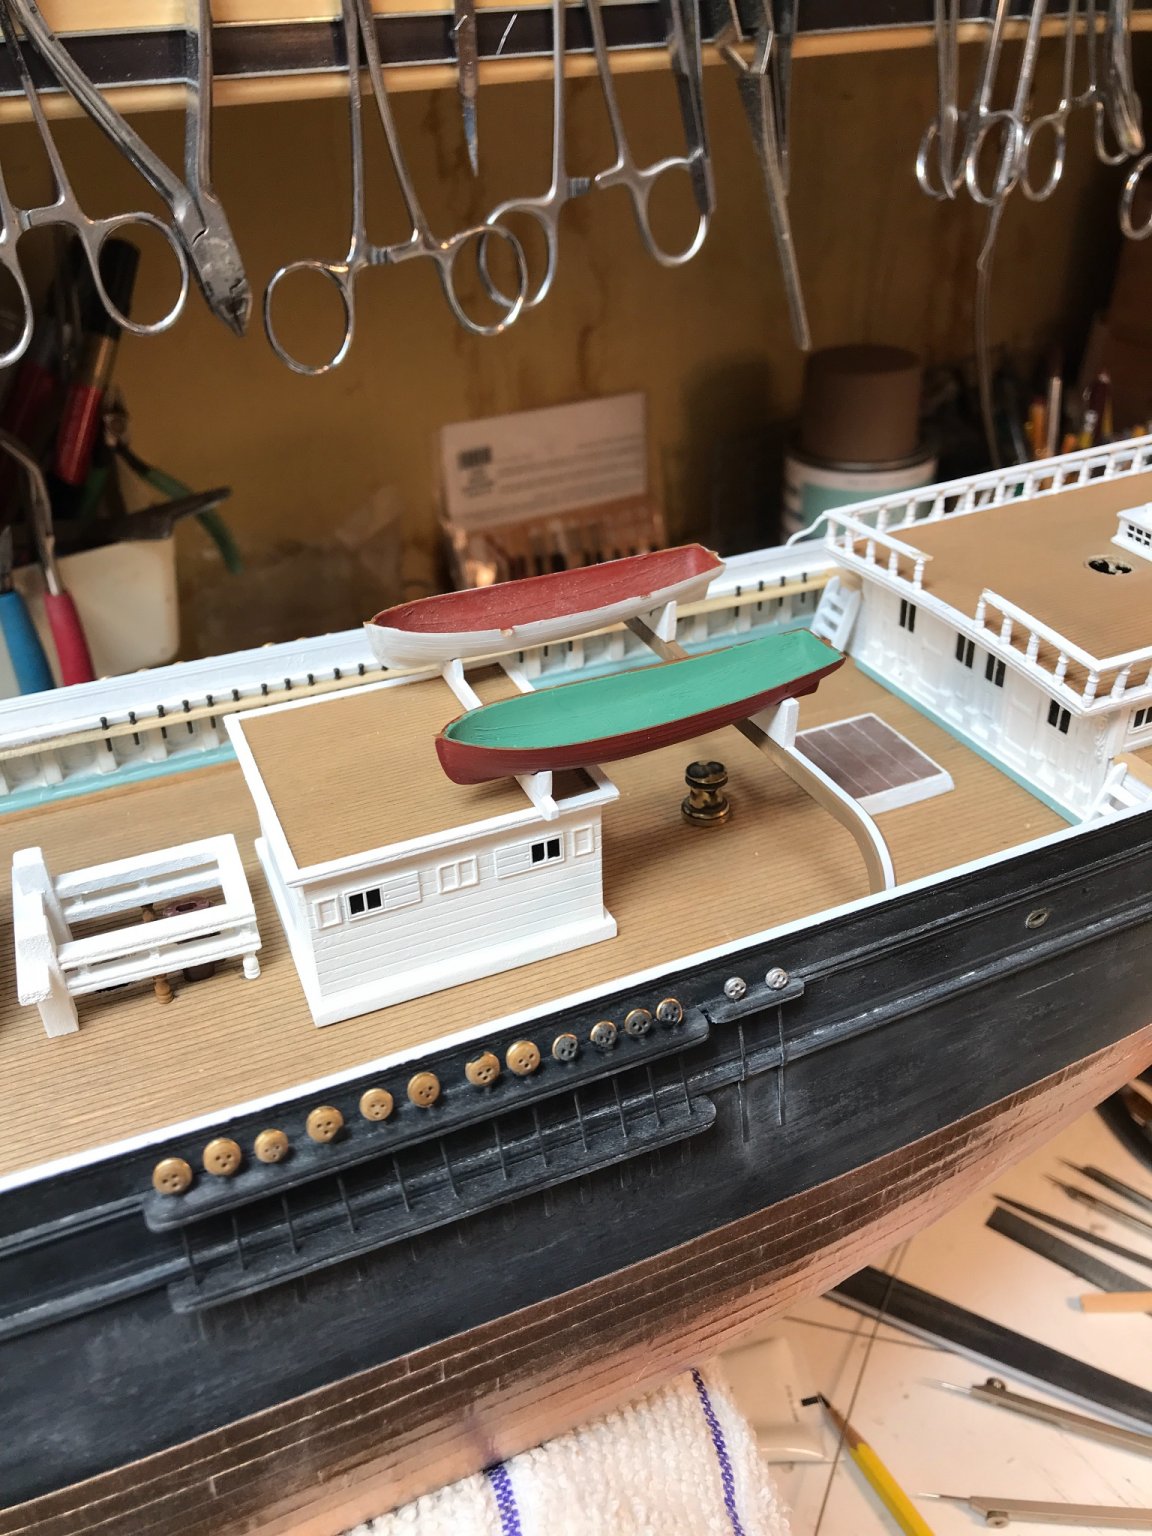
I test placed the main pin rail or fife rail for perspective. Boy the deck is getting crowded. Ron
- 3,560 replies
-
- 3
-
-
- clipper
- hull model
- (and 2 more)
-
I still have to place the turned supports on the pump side. Drill out for pins too. The trick is making the boys house roof level with the carriage house so the cat walk is level to the deck. The large skid needs to fit under the cat walk and still support the boats level. Lots to juggle. Rob
-
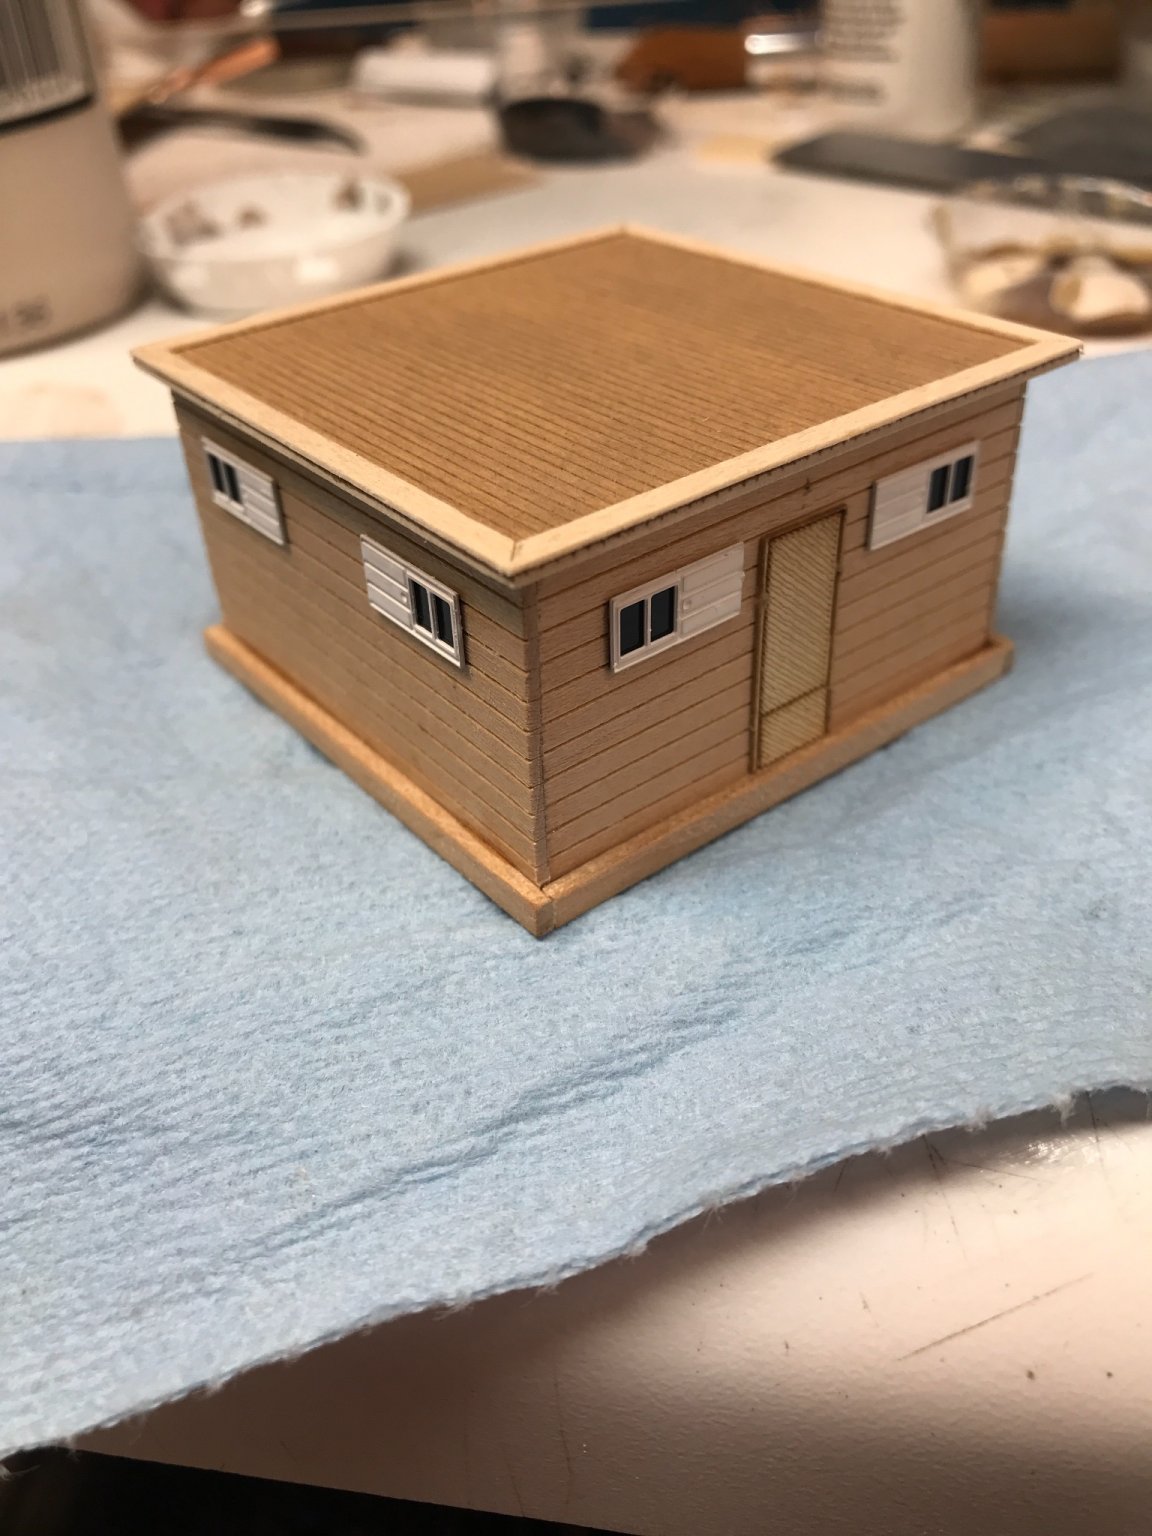
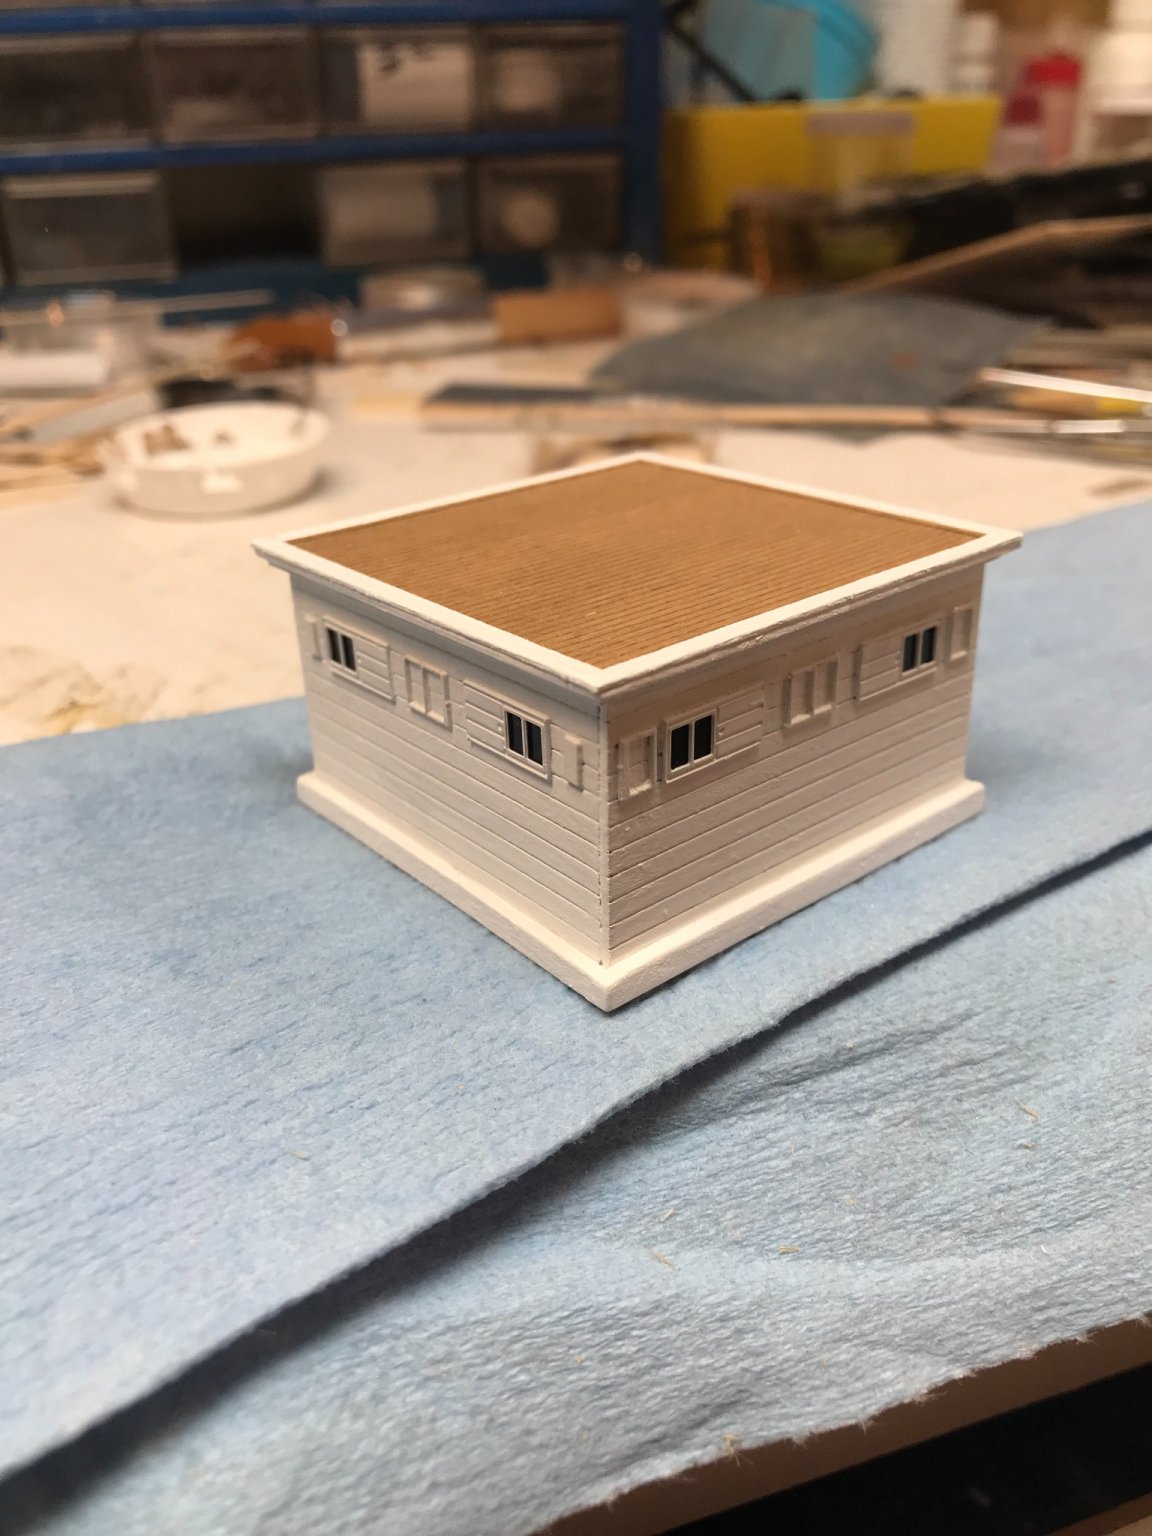
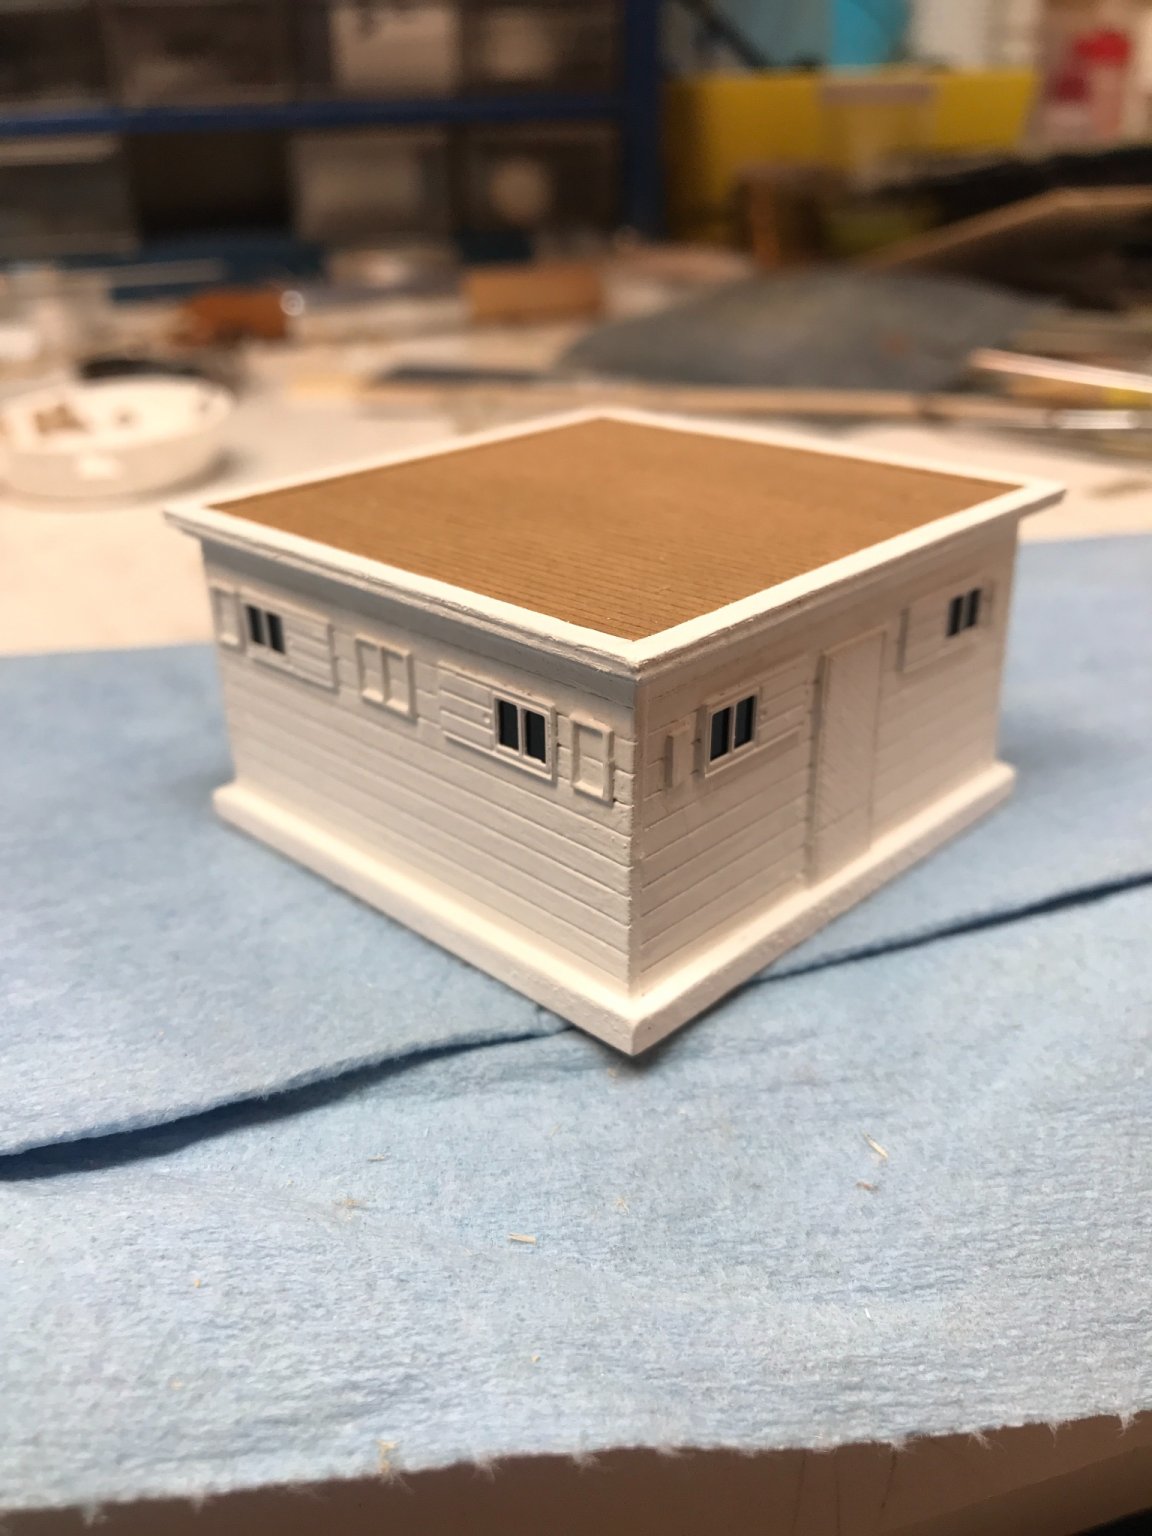
They are meant to be shutters, slider or swing. It is not clear what kind Glory had. Artistic license prevails. Rob
-
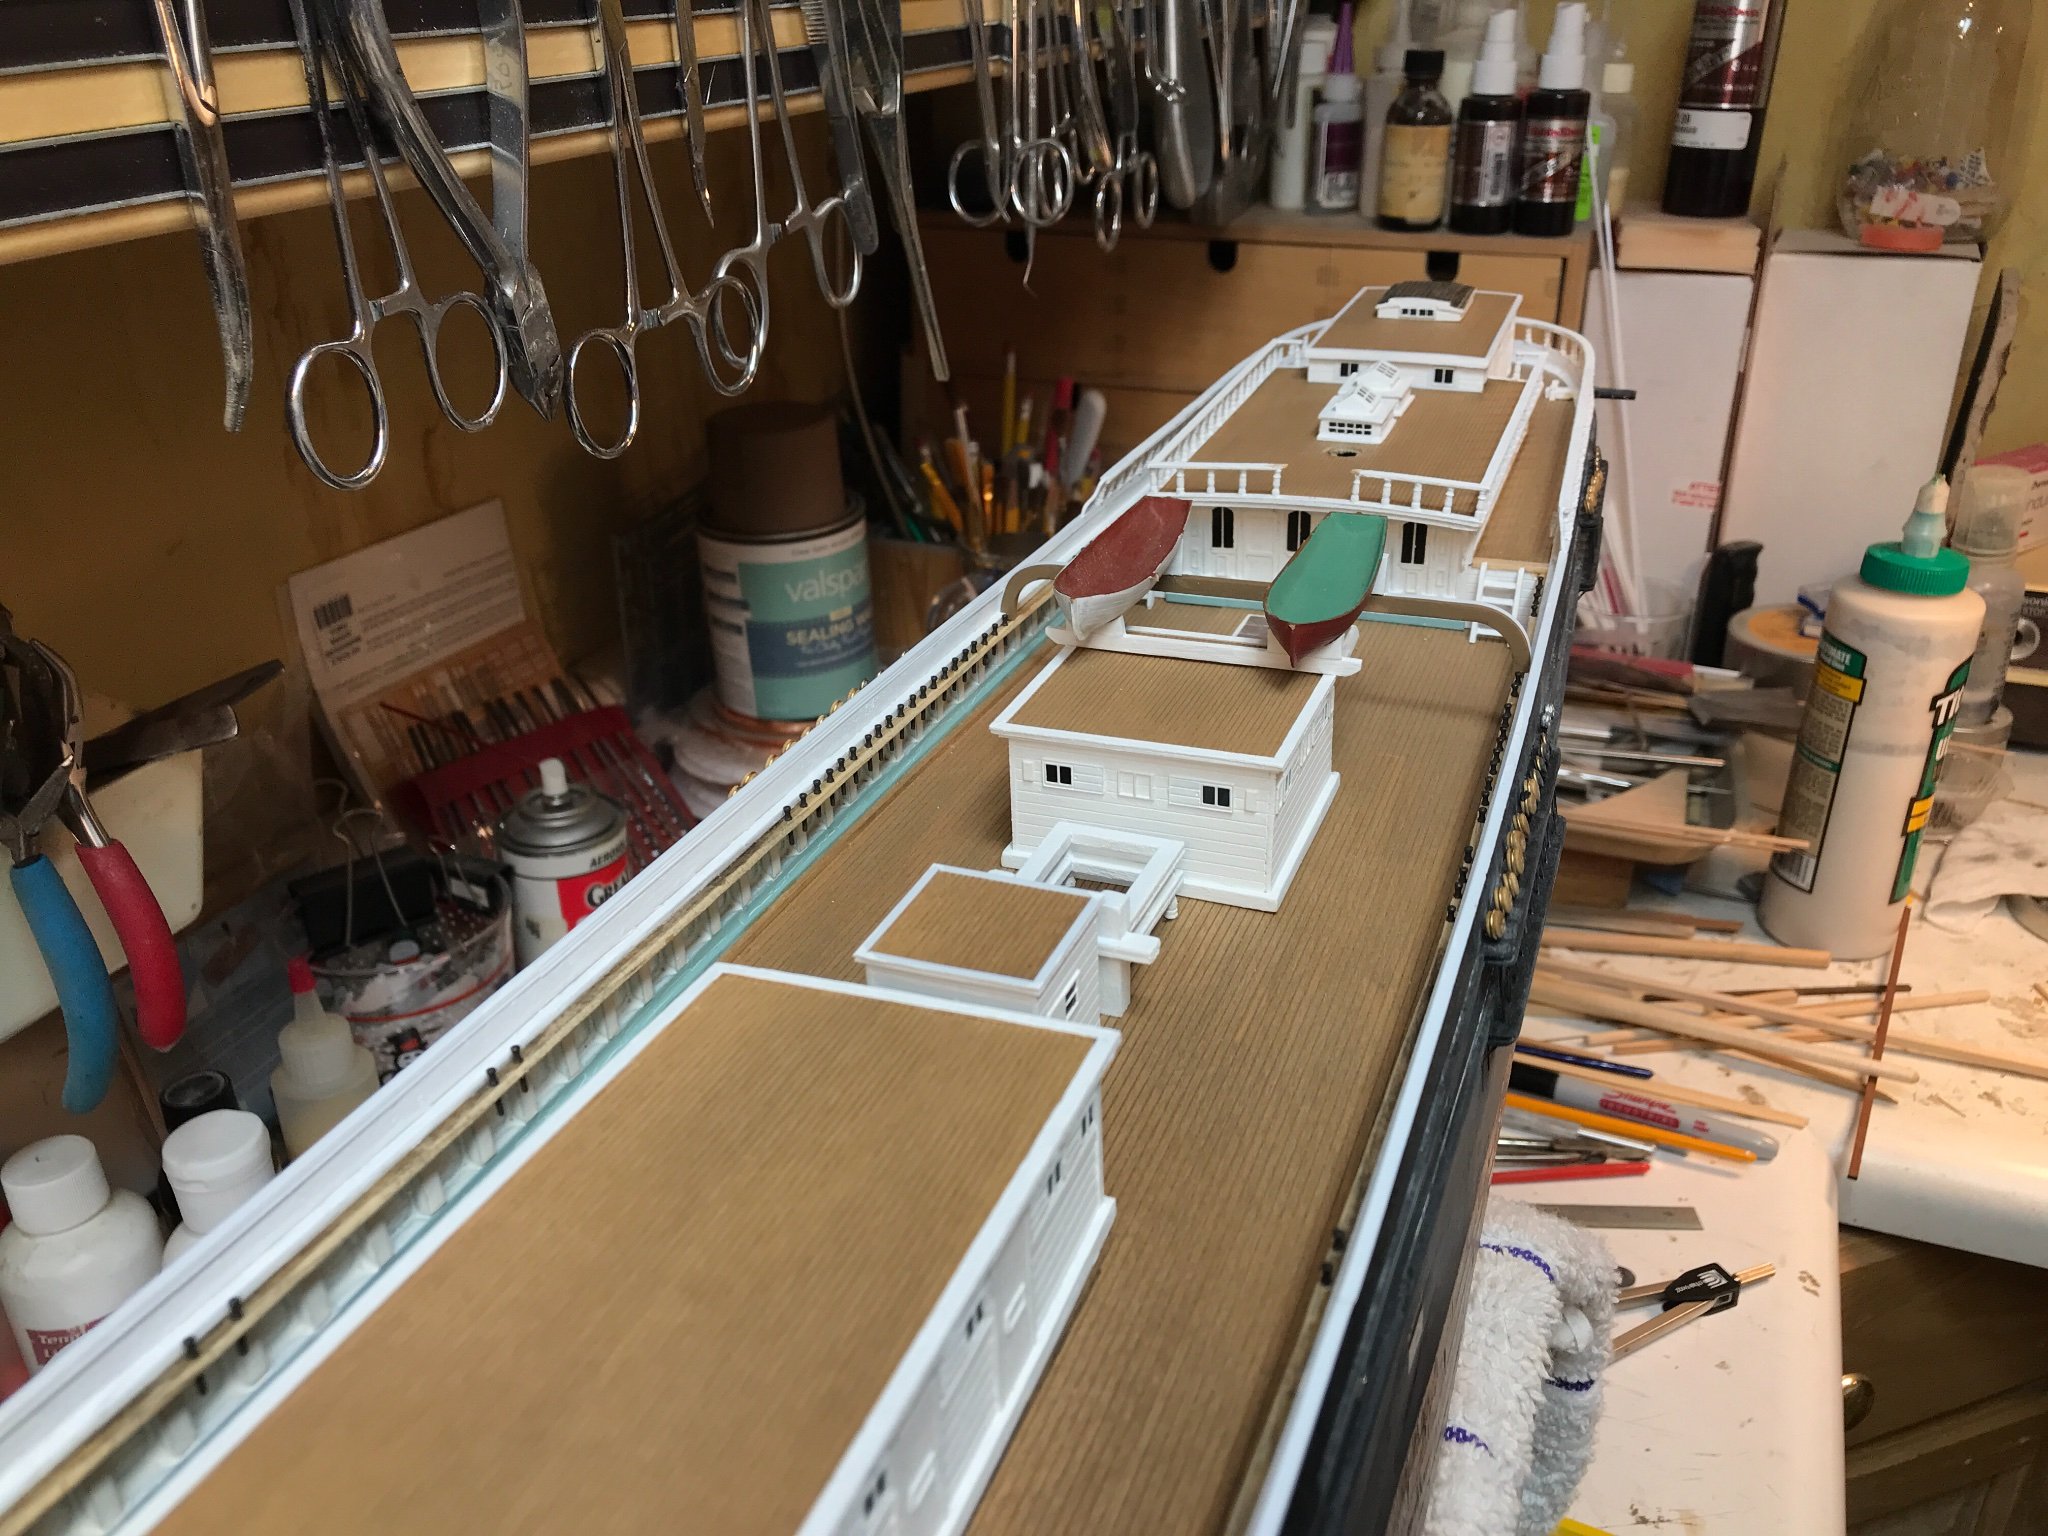
I began to build the main fife rail and another over head shot. Rob
- 3,560 replies
-
- 4
-
-
- clipper
- hull model
- (and 2 more)
-
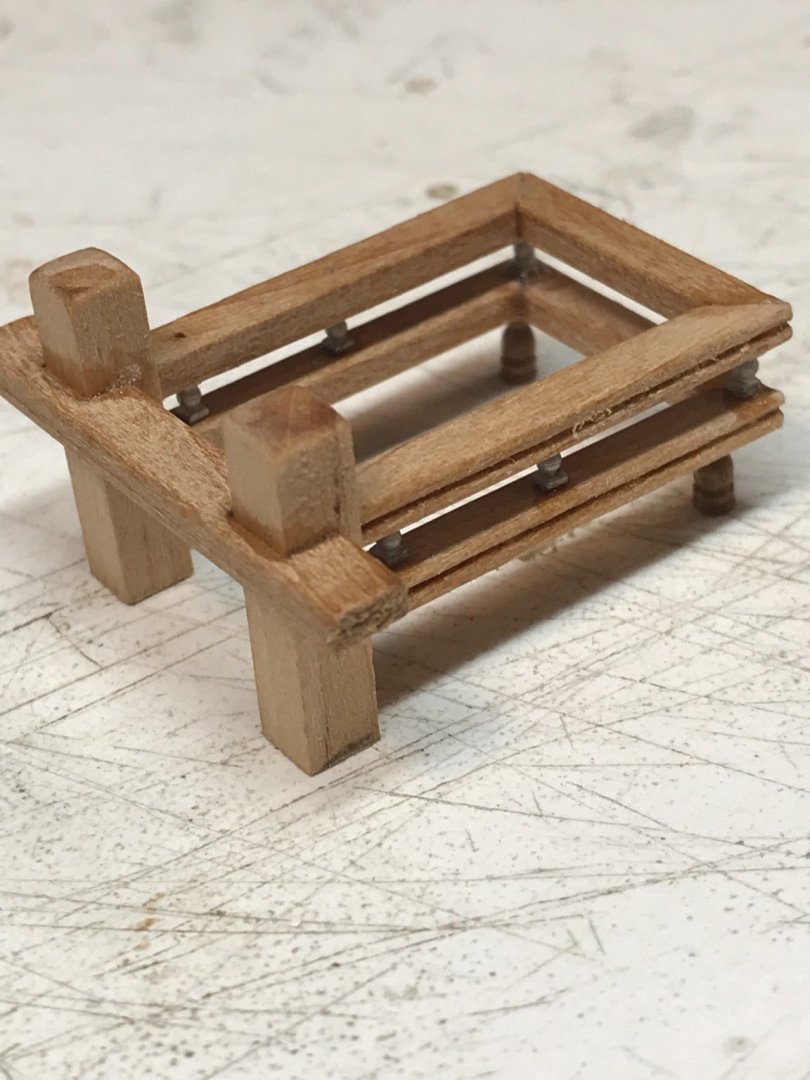
I have a collection of model railroad building construction supplies. I just modify stuff to work and I used scale lumber for tiny stuff. Rob
-
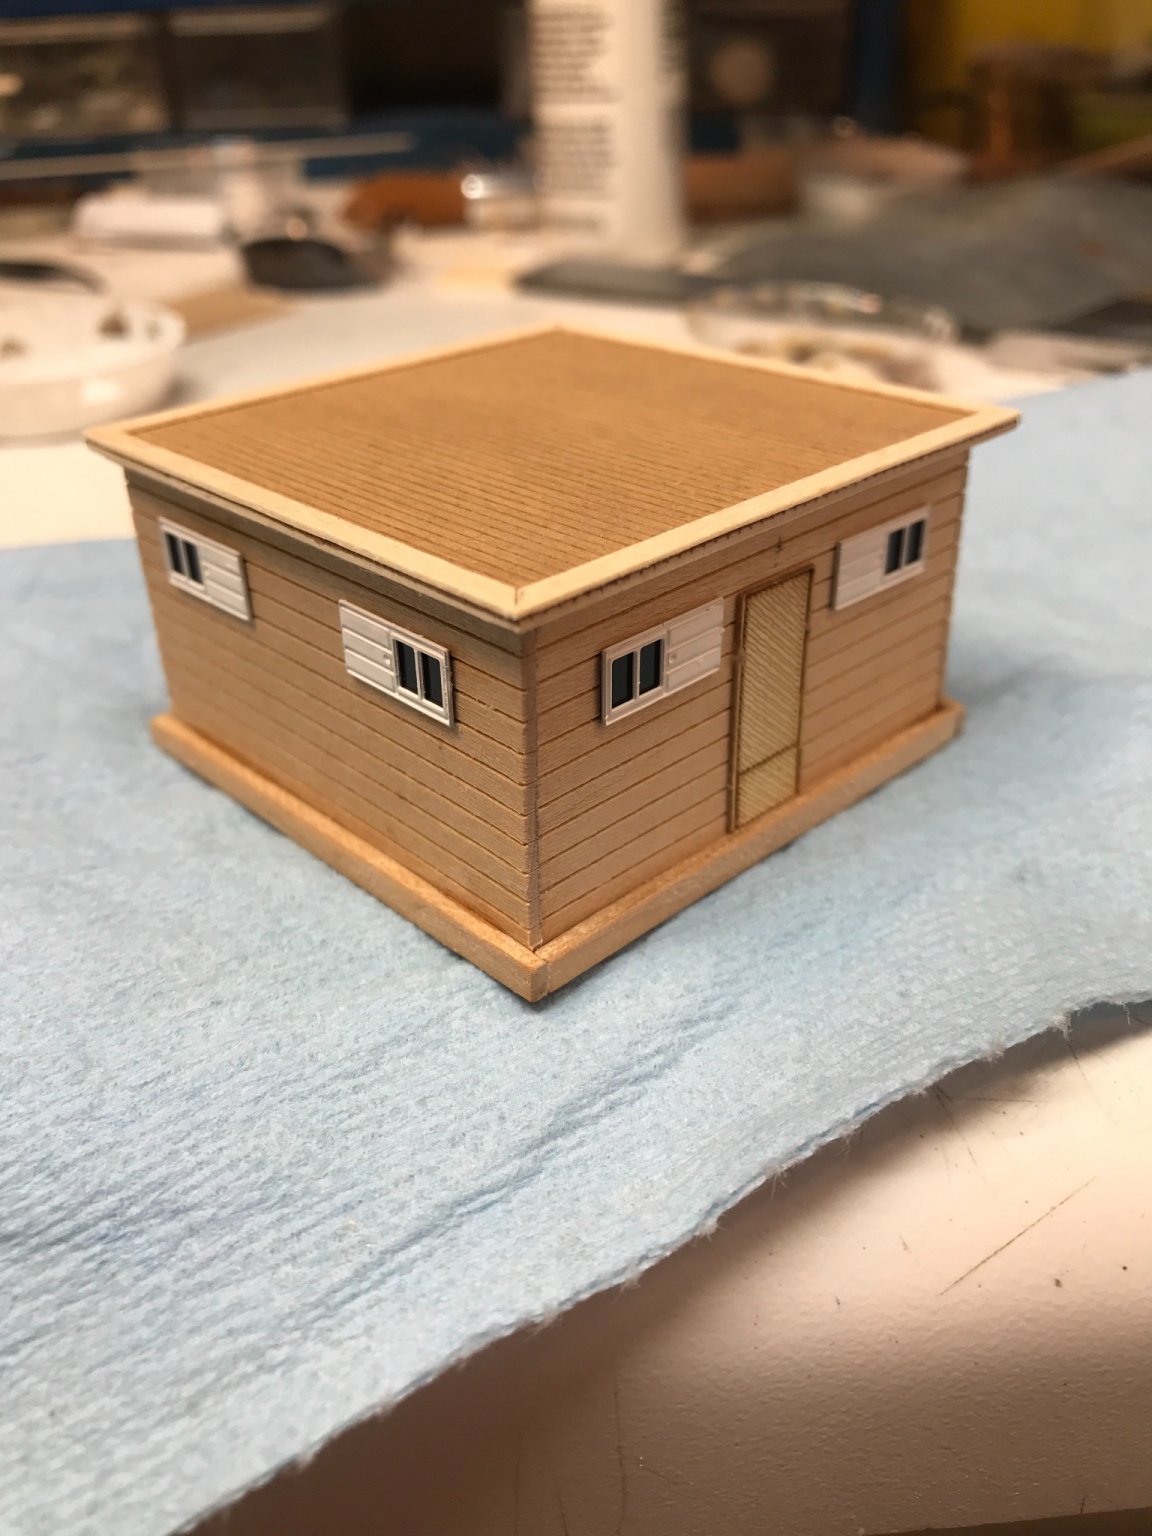
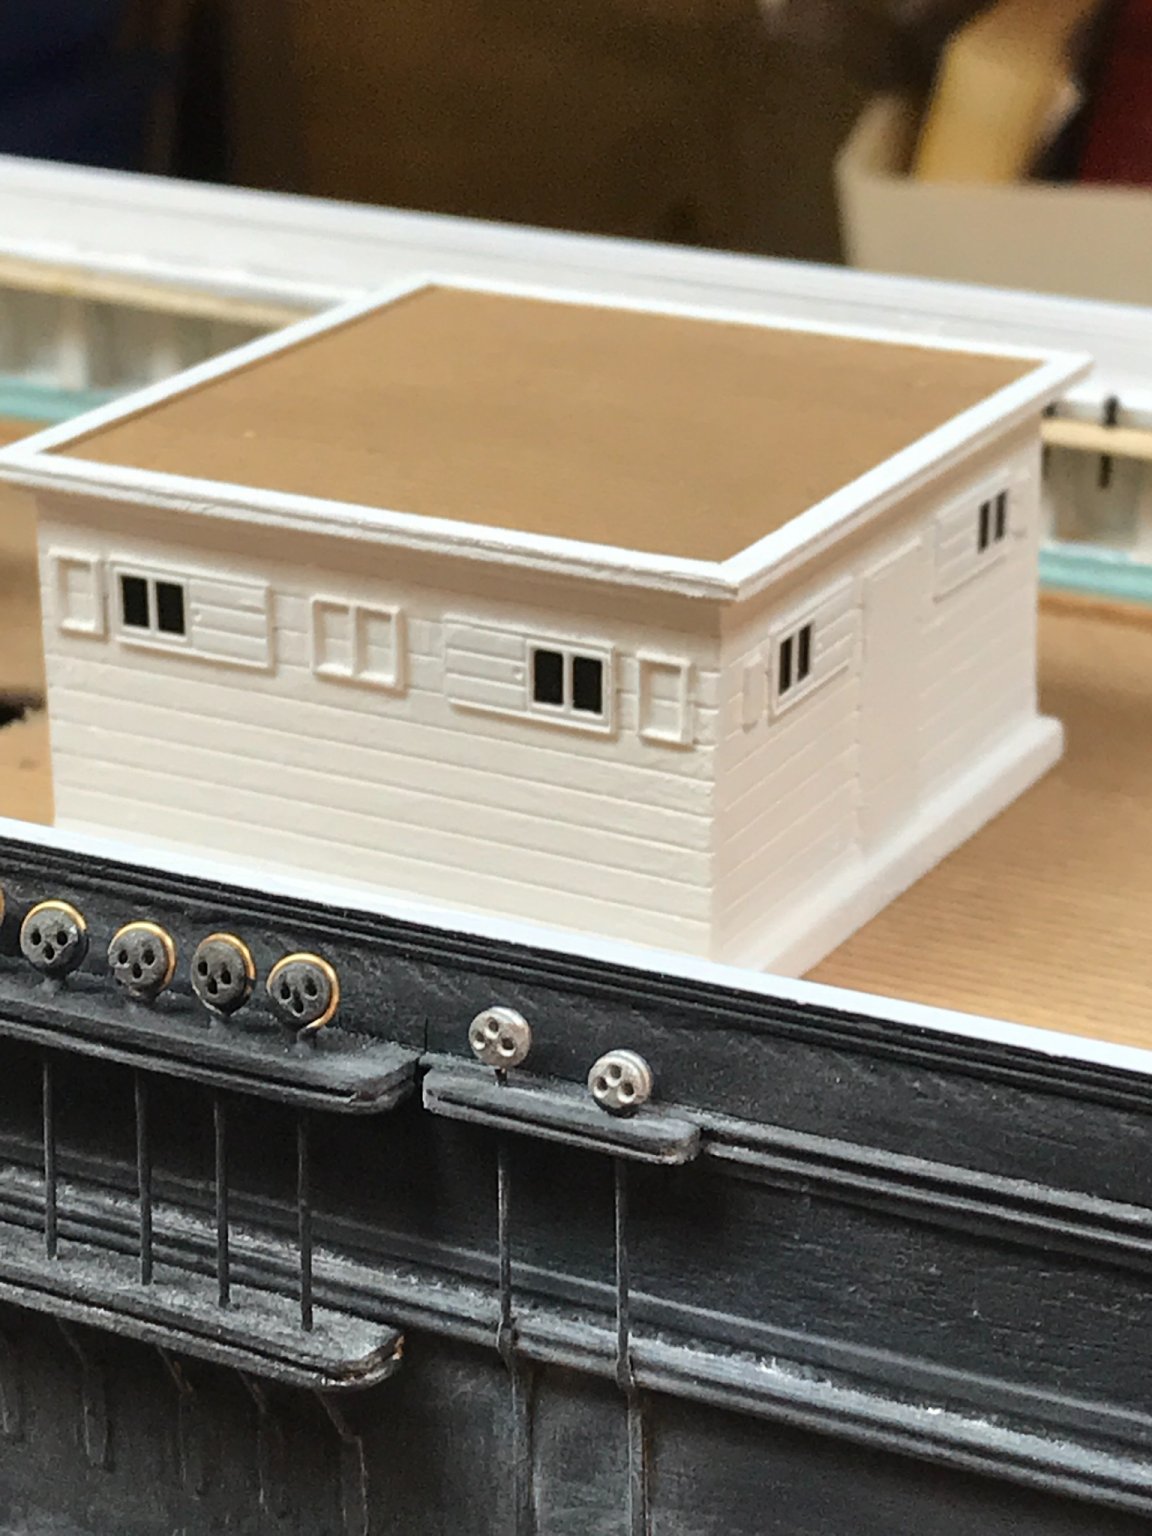
I wanted to say that the boys house is smaller and shorter too
-
Actually the boys house is smaller. It’s 16x16 not 18
-
Started the aft skid. It has to be just lower then the catwalk, but tall enough to be even with the forward skid on the boy house. Rob


- 3,560 replies
-
- 6
-
-
- clipper
- hull model
- (and 2 more)
-
“Issues”……. You mean artistic accommodation 😏. I will correct the forward carriage house stanchions, since they are the obvious glaring issues. The only thing that will dampen my enthusiasm is………is……….give me a minute…… Rob
- 3,560 replies
-
- 3
-
-

-
- clipper
- hull model
- (and 2 more)
-
Yep I noticed the moment I finished it. How did that happen? Well the carriage house roof slightly curved and would you know it the flat bottom stanchions followed the curve. Did I see this yep. I have thought about it long and hard and I will correct the front ones on the right side(facing the the house) only. Why? because they are the most offensive. Slightly leaning outward, following the roof curve. I know the front row consists of 9 stanchions. That was after her boys house and cat walk was removed. When these items were in use I calculated 4 per side as I have demonstrated. Thanks for being bold to point this out openly, but I was aware of it as it occurred, but I also know that some details will be lost or even obscured by other details, such as rigging, masts and yards. Rob
- 3,560 replies
-
- 1
-
-
- clipper
- hull model
- (and 2 more)