rwiederrich
-
Posts
5,520 -
Joined
-
Last visited
Content Type
Profiles
Forums
Gallery
Events
Everything posted by rwiederrich
-
I’m out of state this weekend so very little to report. Maybe when I return tonight I’ll do a bit of work. Rob
- 3,560 replies
-
- 1
-

-
- clipper
- hull model
- (and 2 more)
-
Oh…..I’ll tell ya if you are becoming a rivet counter. This is my second Glory build and I started it with the intention of seeking aid from other sets of eyeballs. You’re all 😊 Rob
- 3,560 replies
-
- 1
-

-
- clipper
- hull model
- (and 2 more)
-
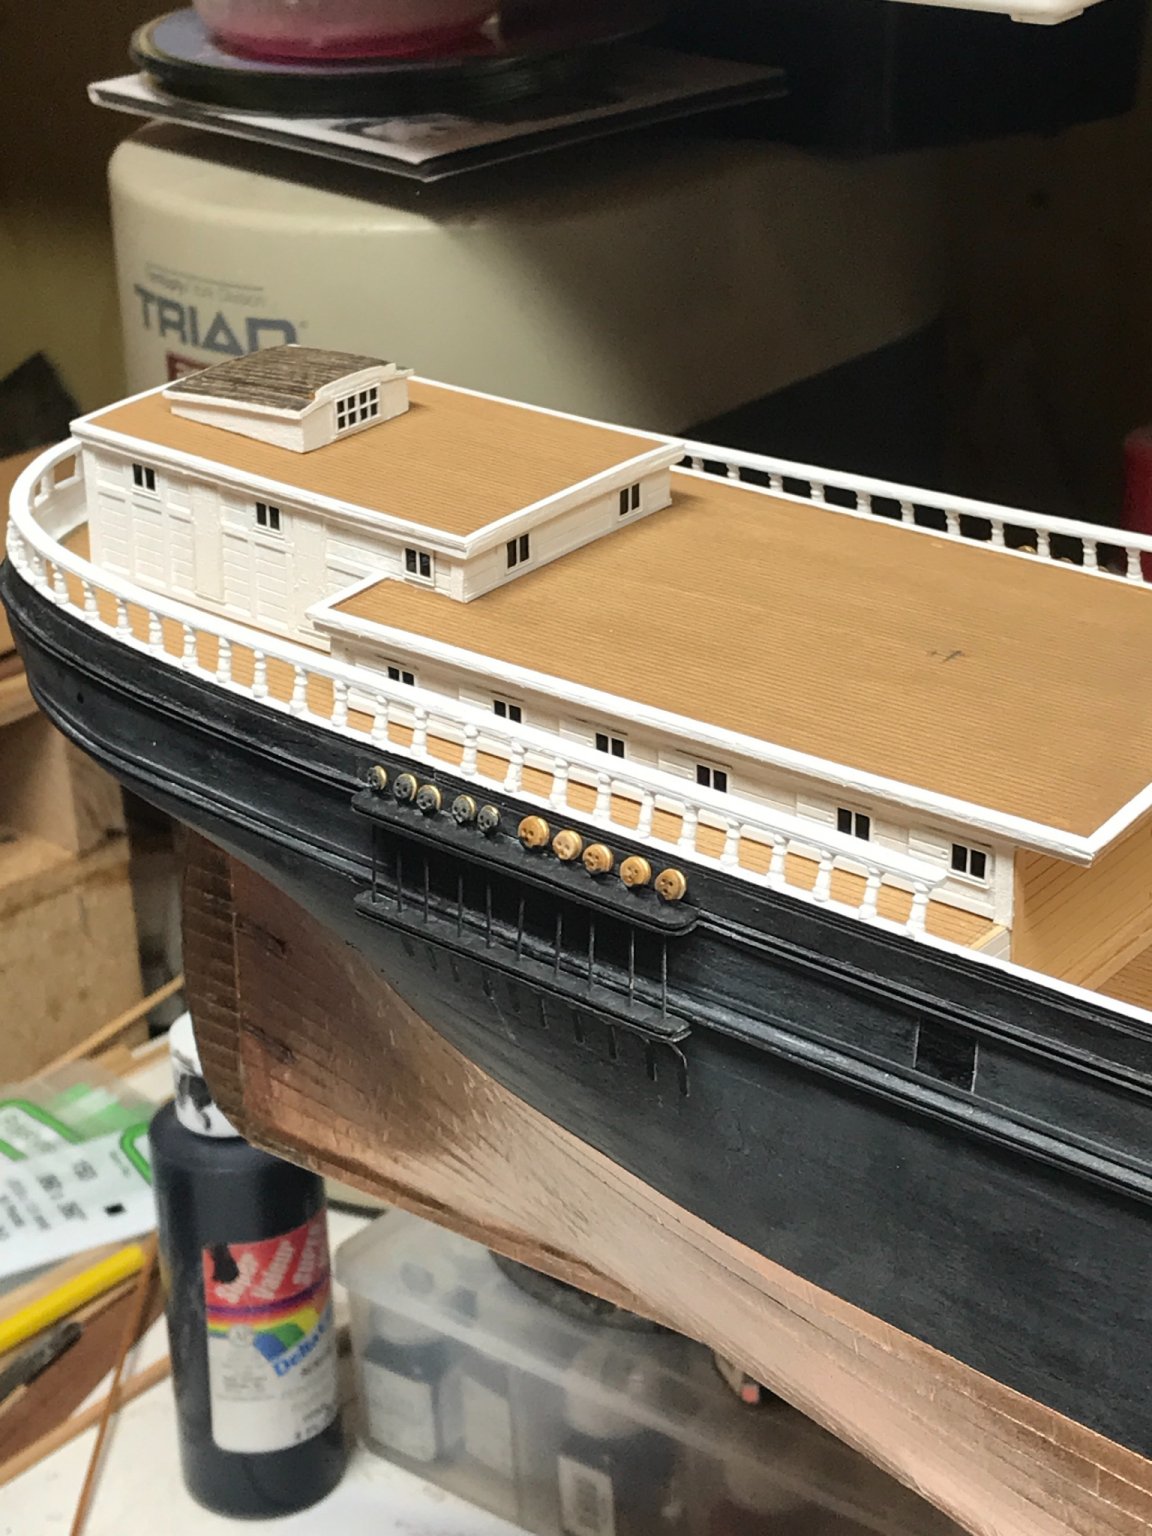
I hope he has something for the lower rail, that is the one he removed and they are shorter fatter stanchions. I think my rail stanchions are about 3/16”ish If I remember. And 1/4” for the roof stanchions. Rob
-
Amazing job. How big is it…..is it scaled? I know what you are up against. Rob
-
I really felt I was going to change it originally. Your input was the “stuff” needed. Thanks for keeping me true to her Glory……… Rob
- 3,560 replies
-
- 1
-
-
- clipper
- hull model
- (and 2 more)
-
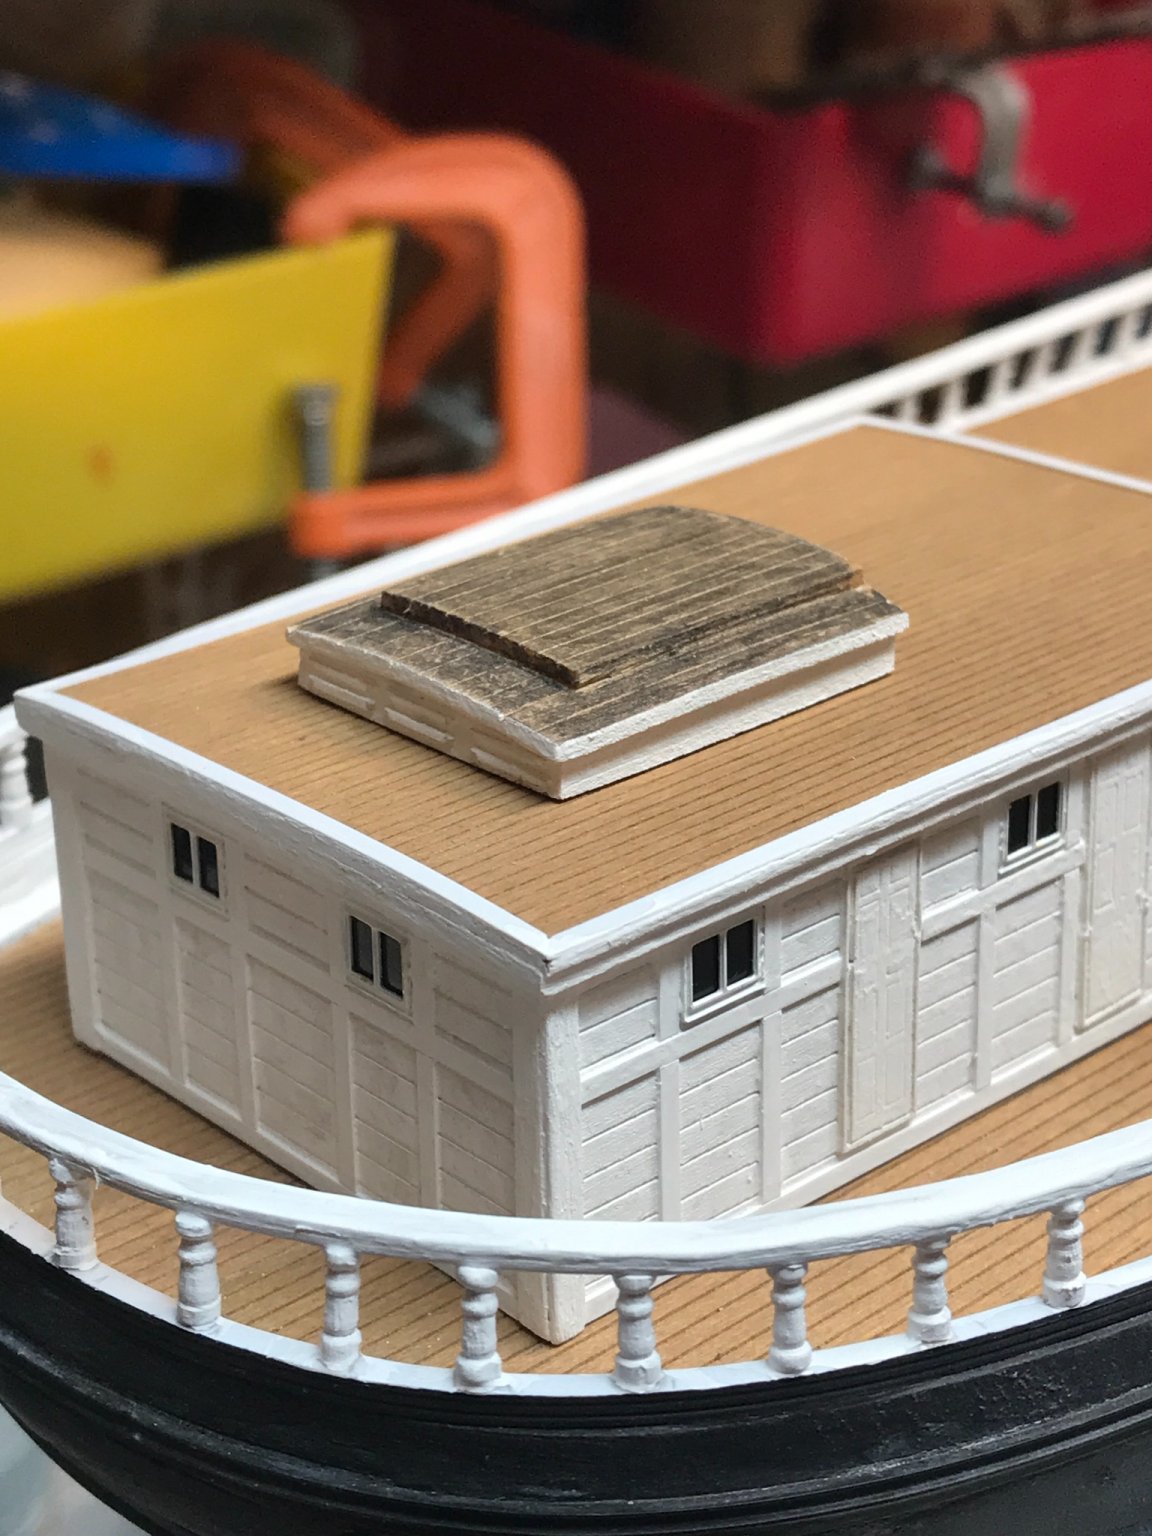
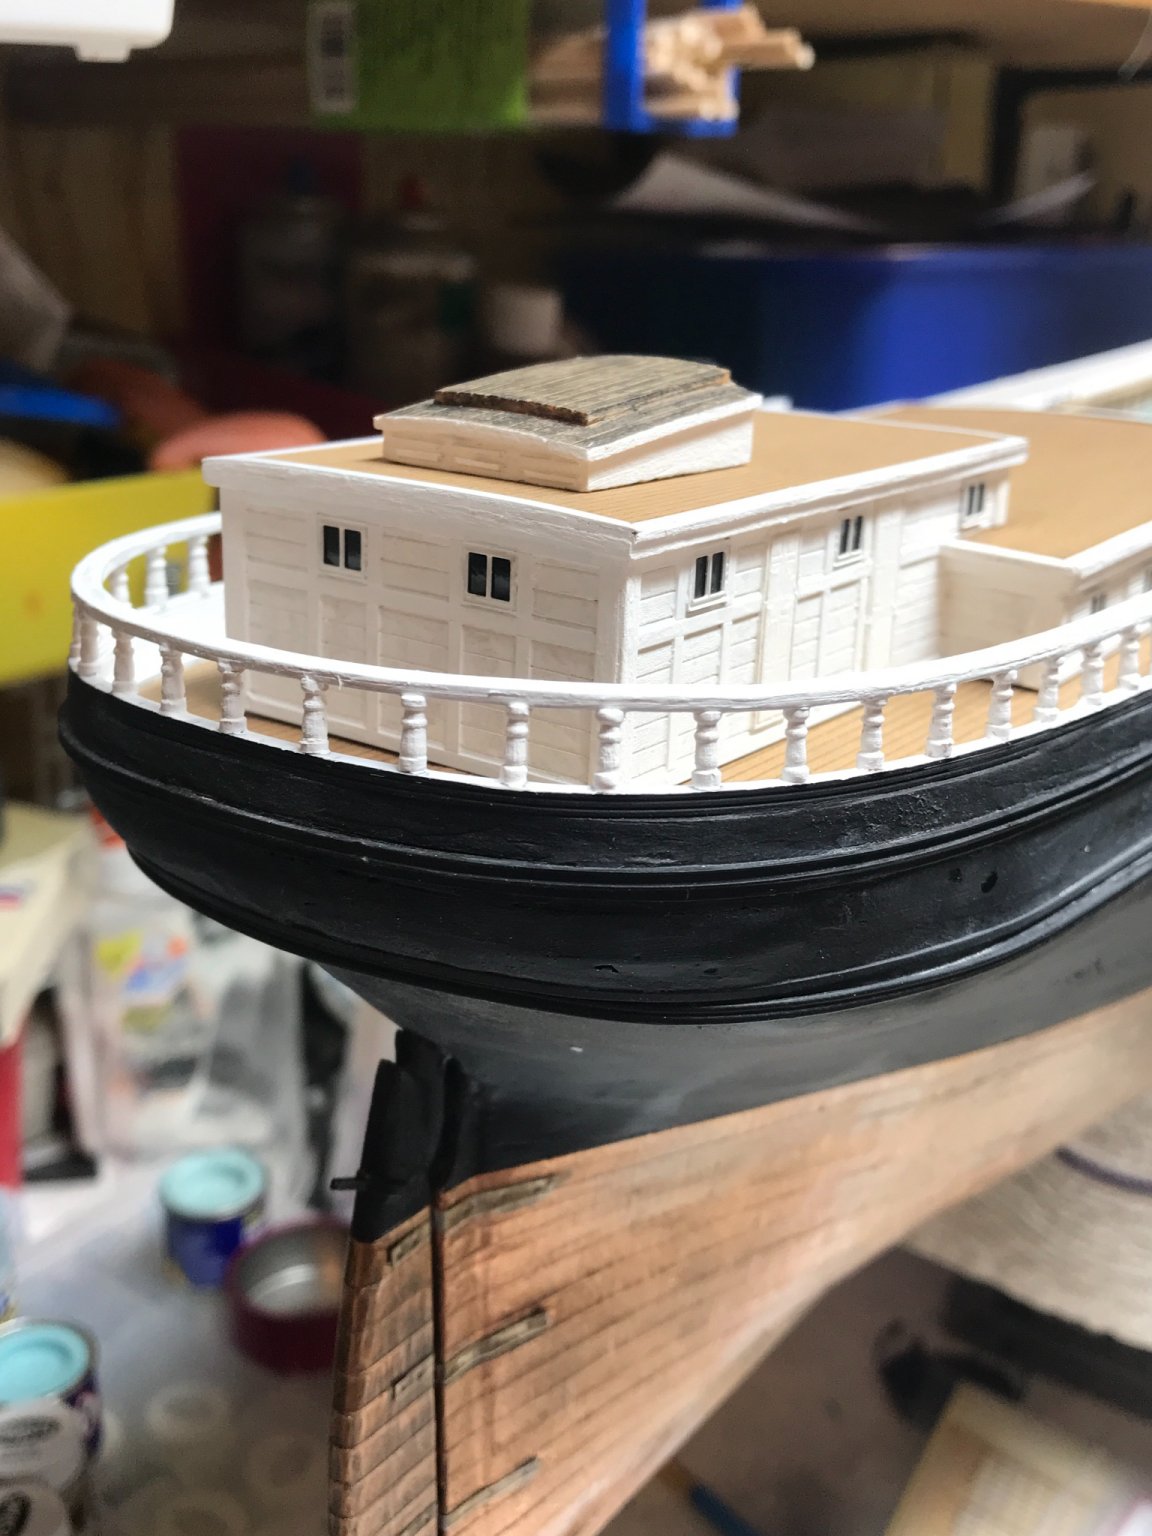
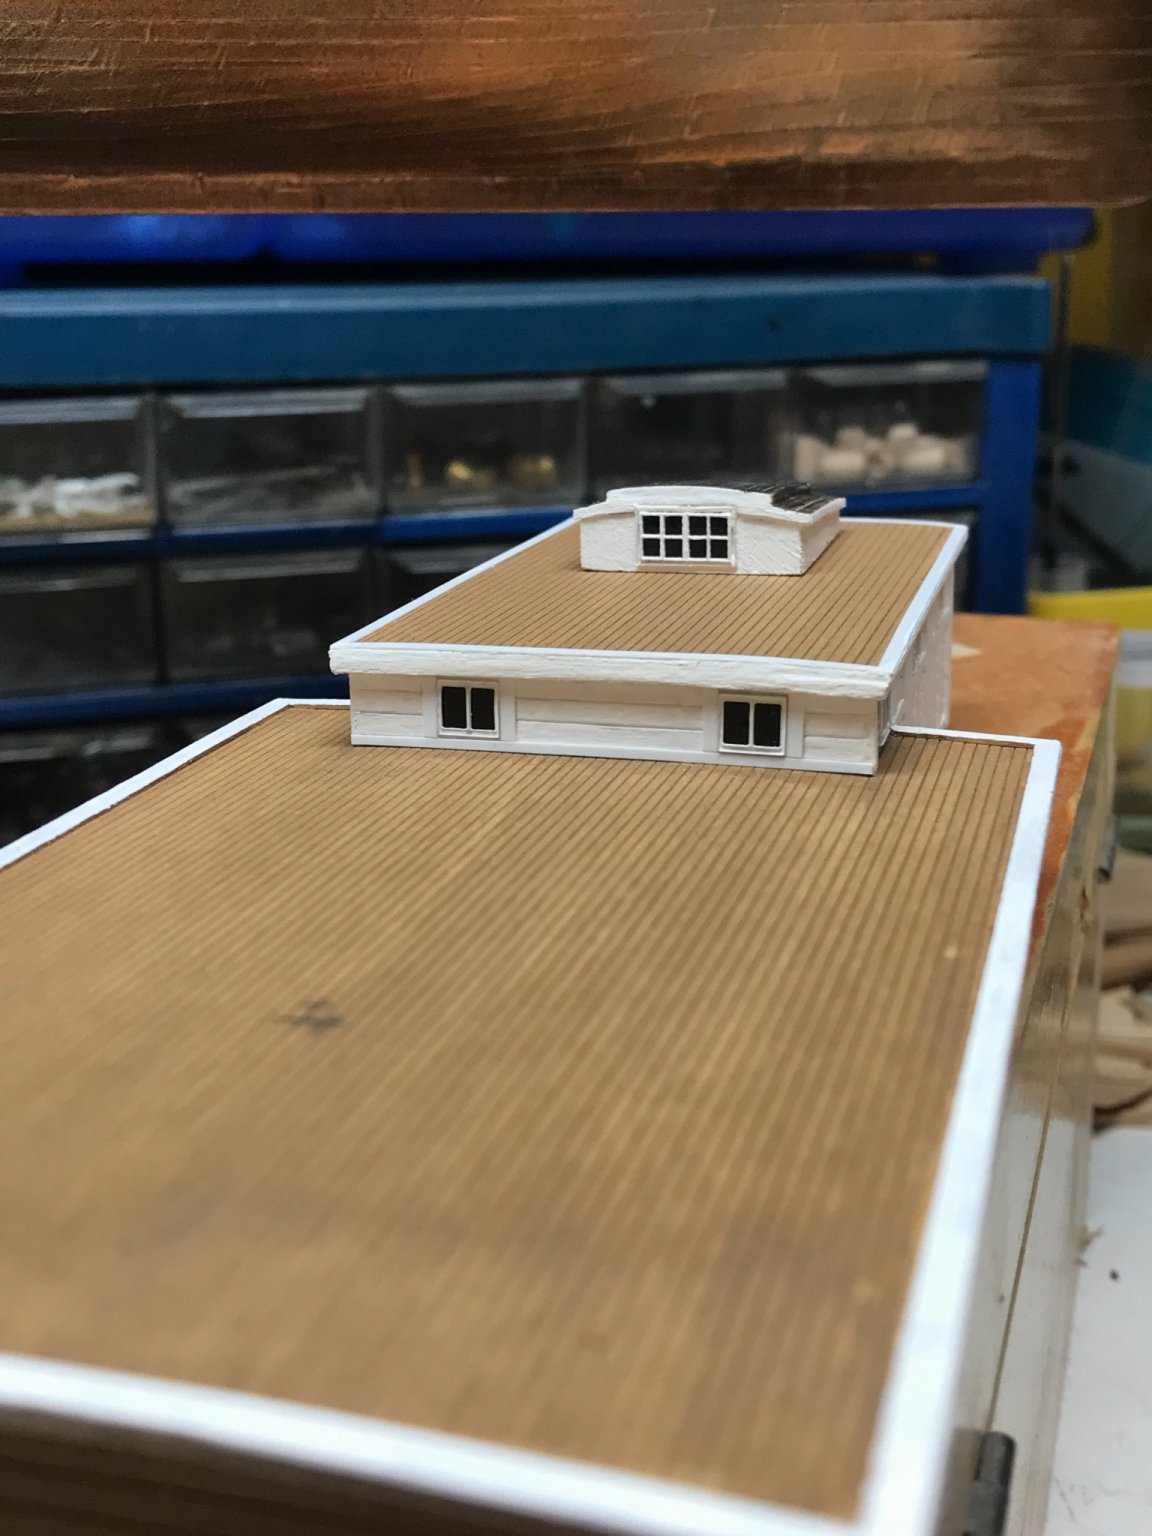
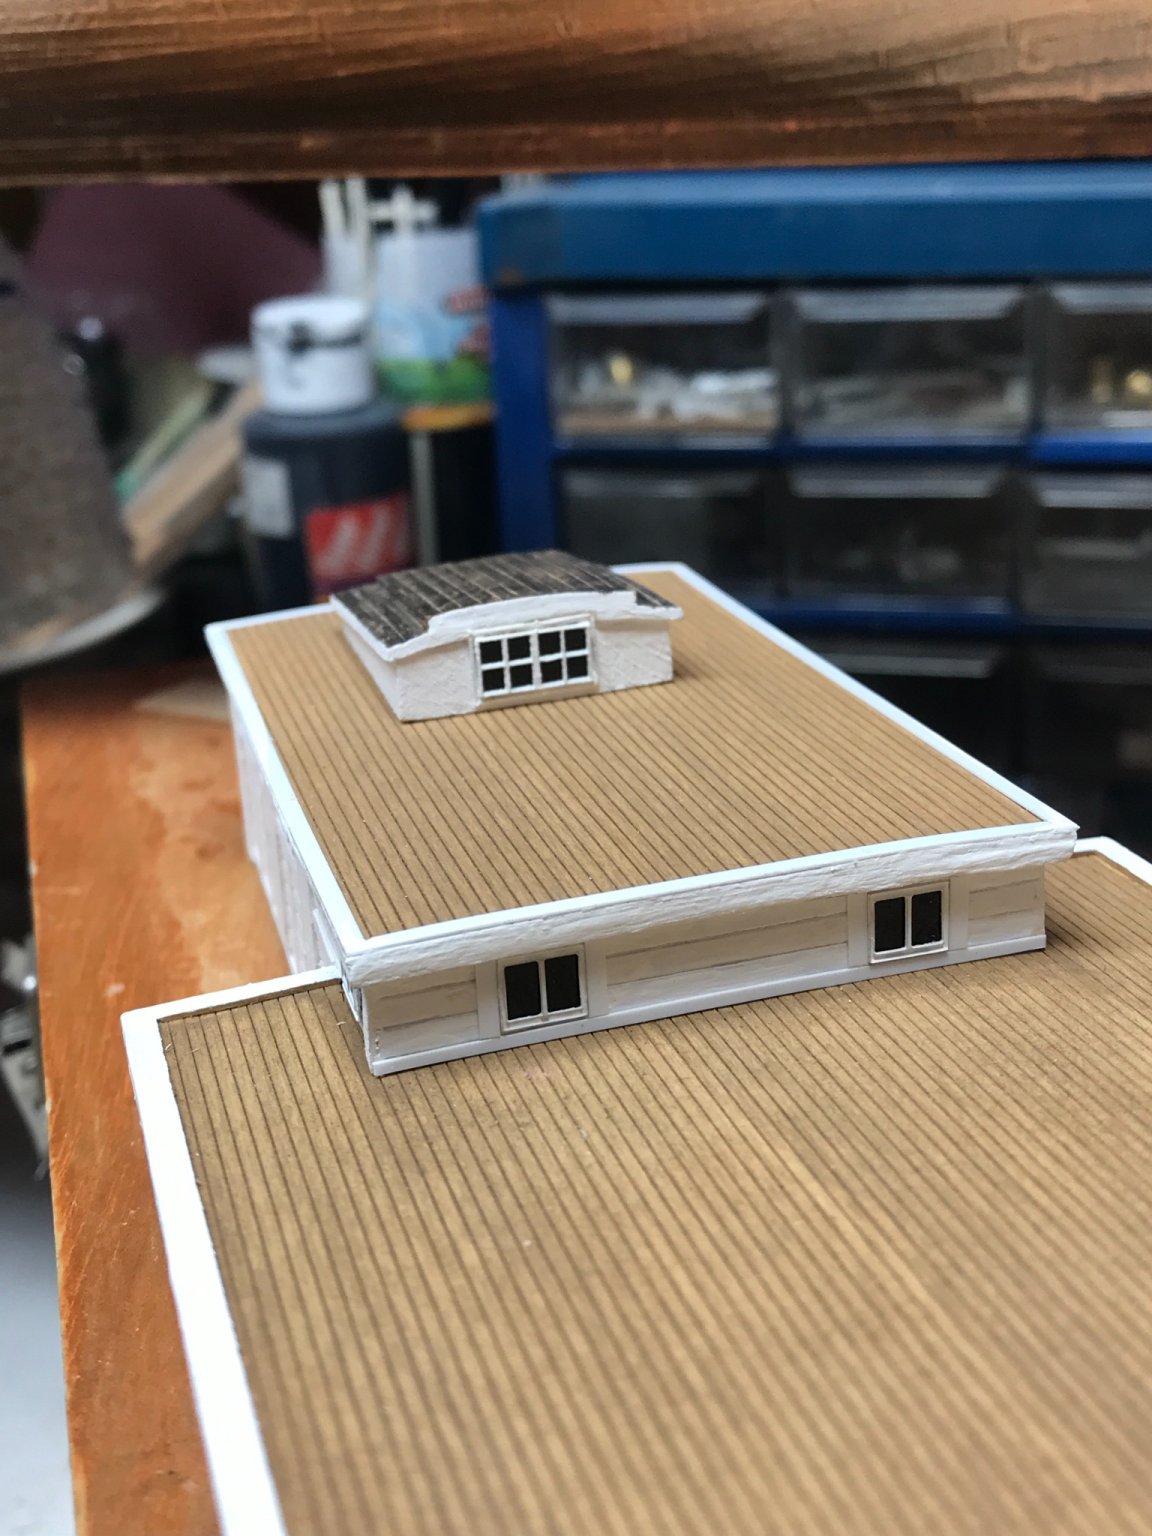
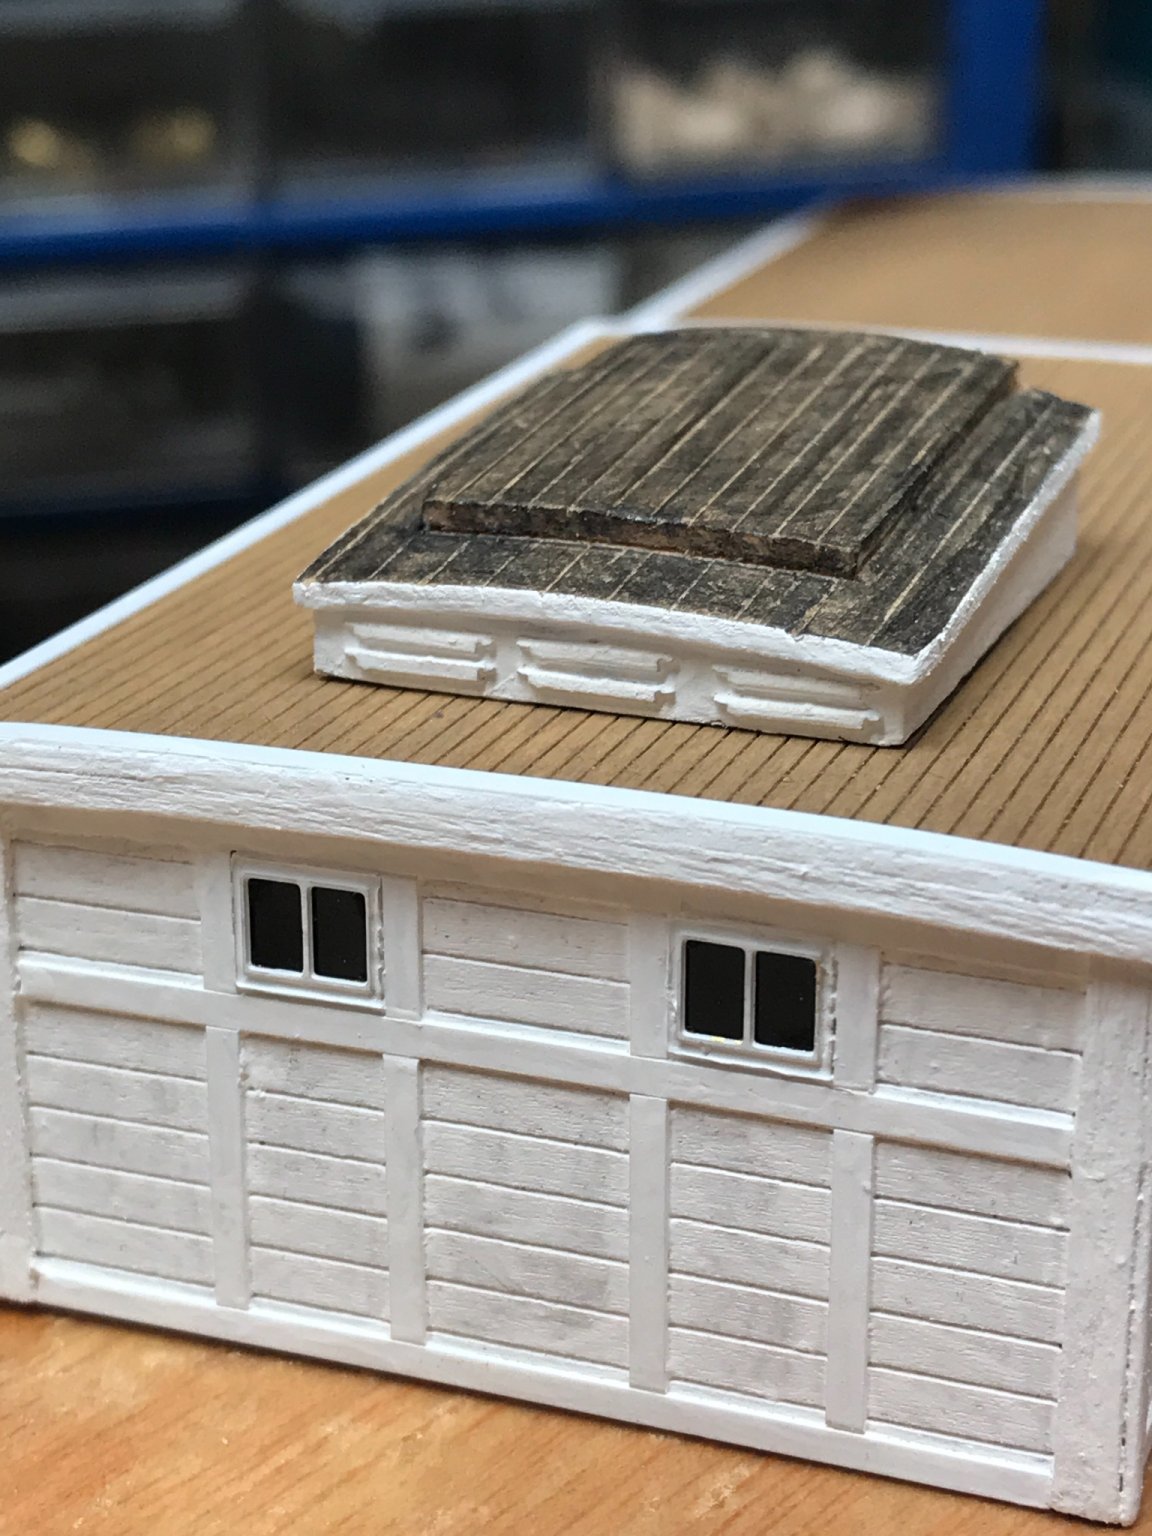
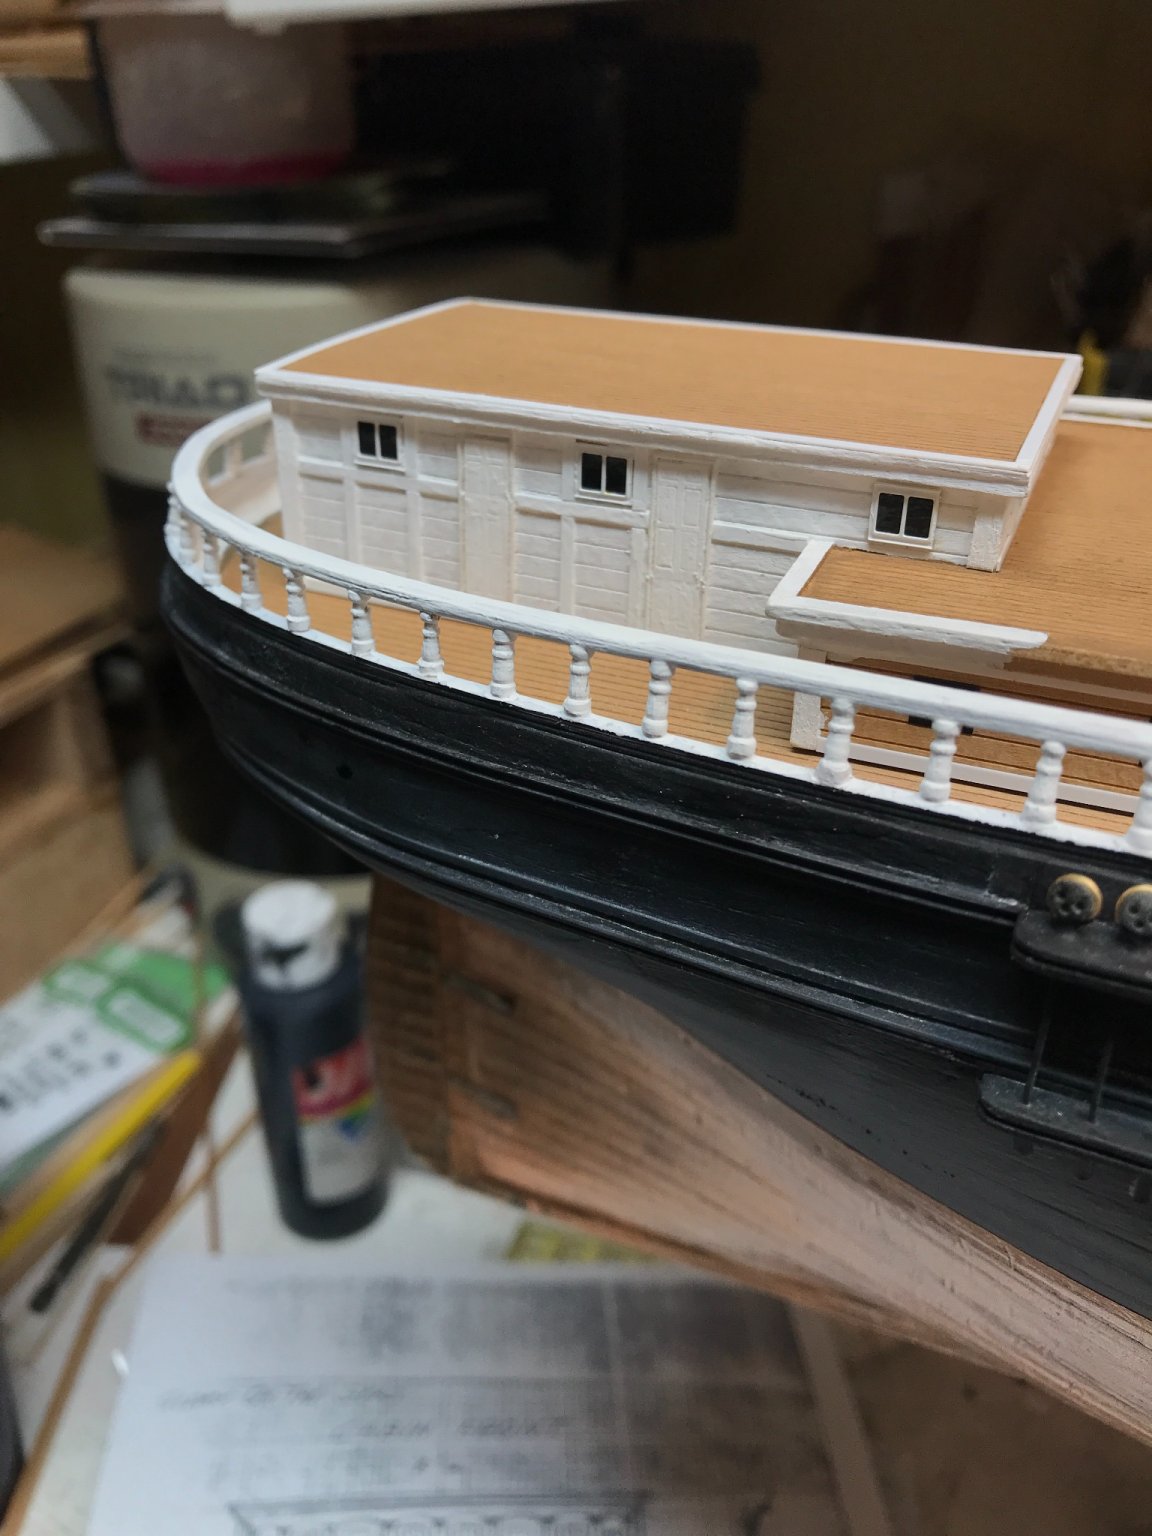
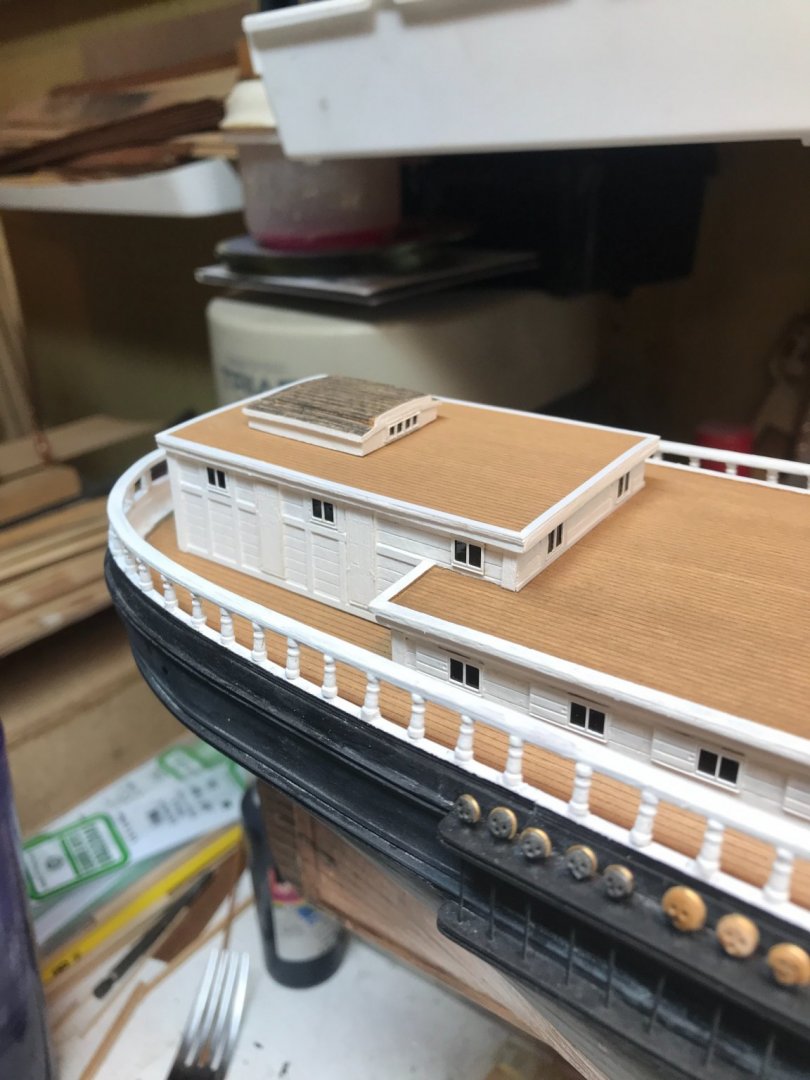
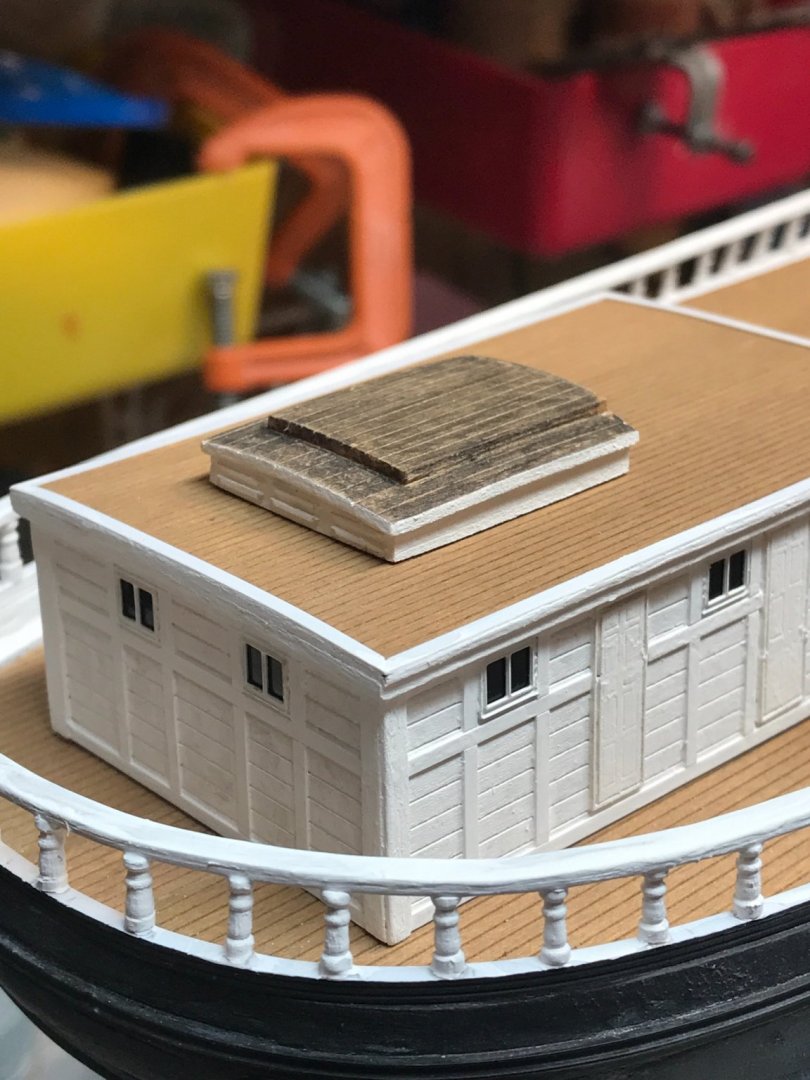
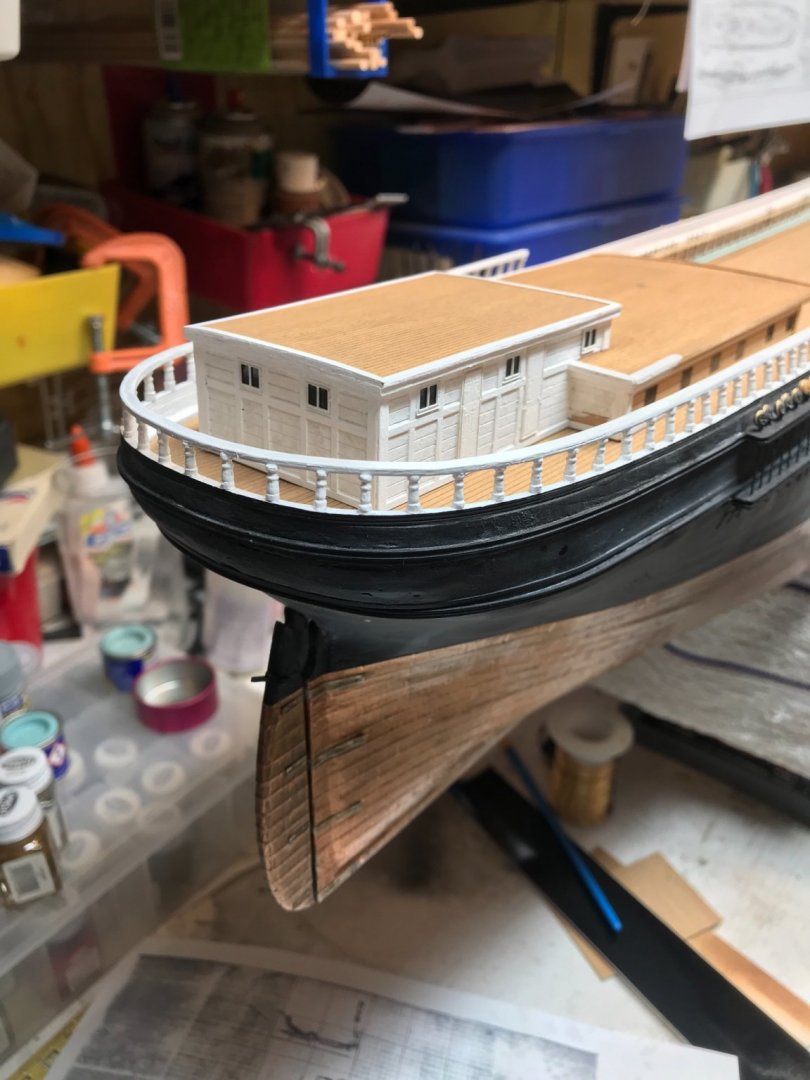
I remade the helm vent cupola. I began on the front. I’m making the windows off model and setting up the pillar caps. Rob


- 3,560 replies
-
- 8
-
-
- clipper
- hull model
- (and 2 more)
-
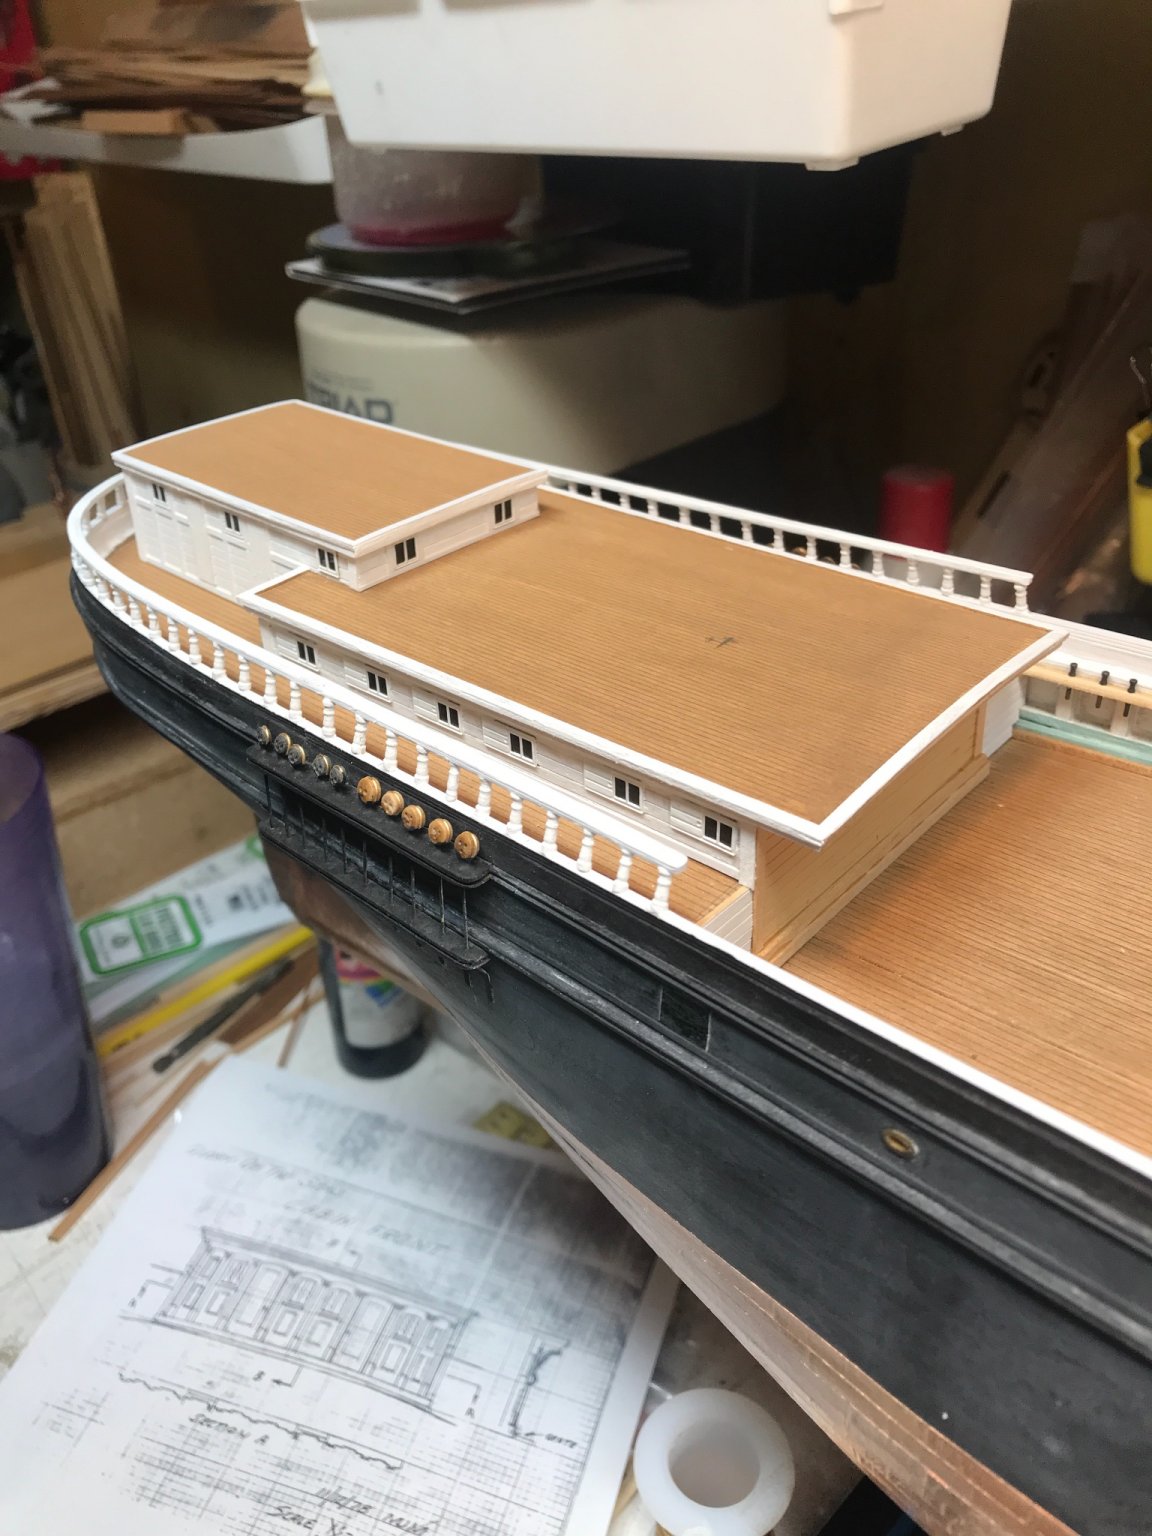
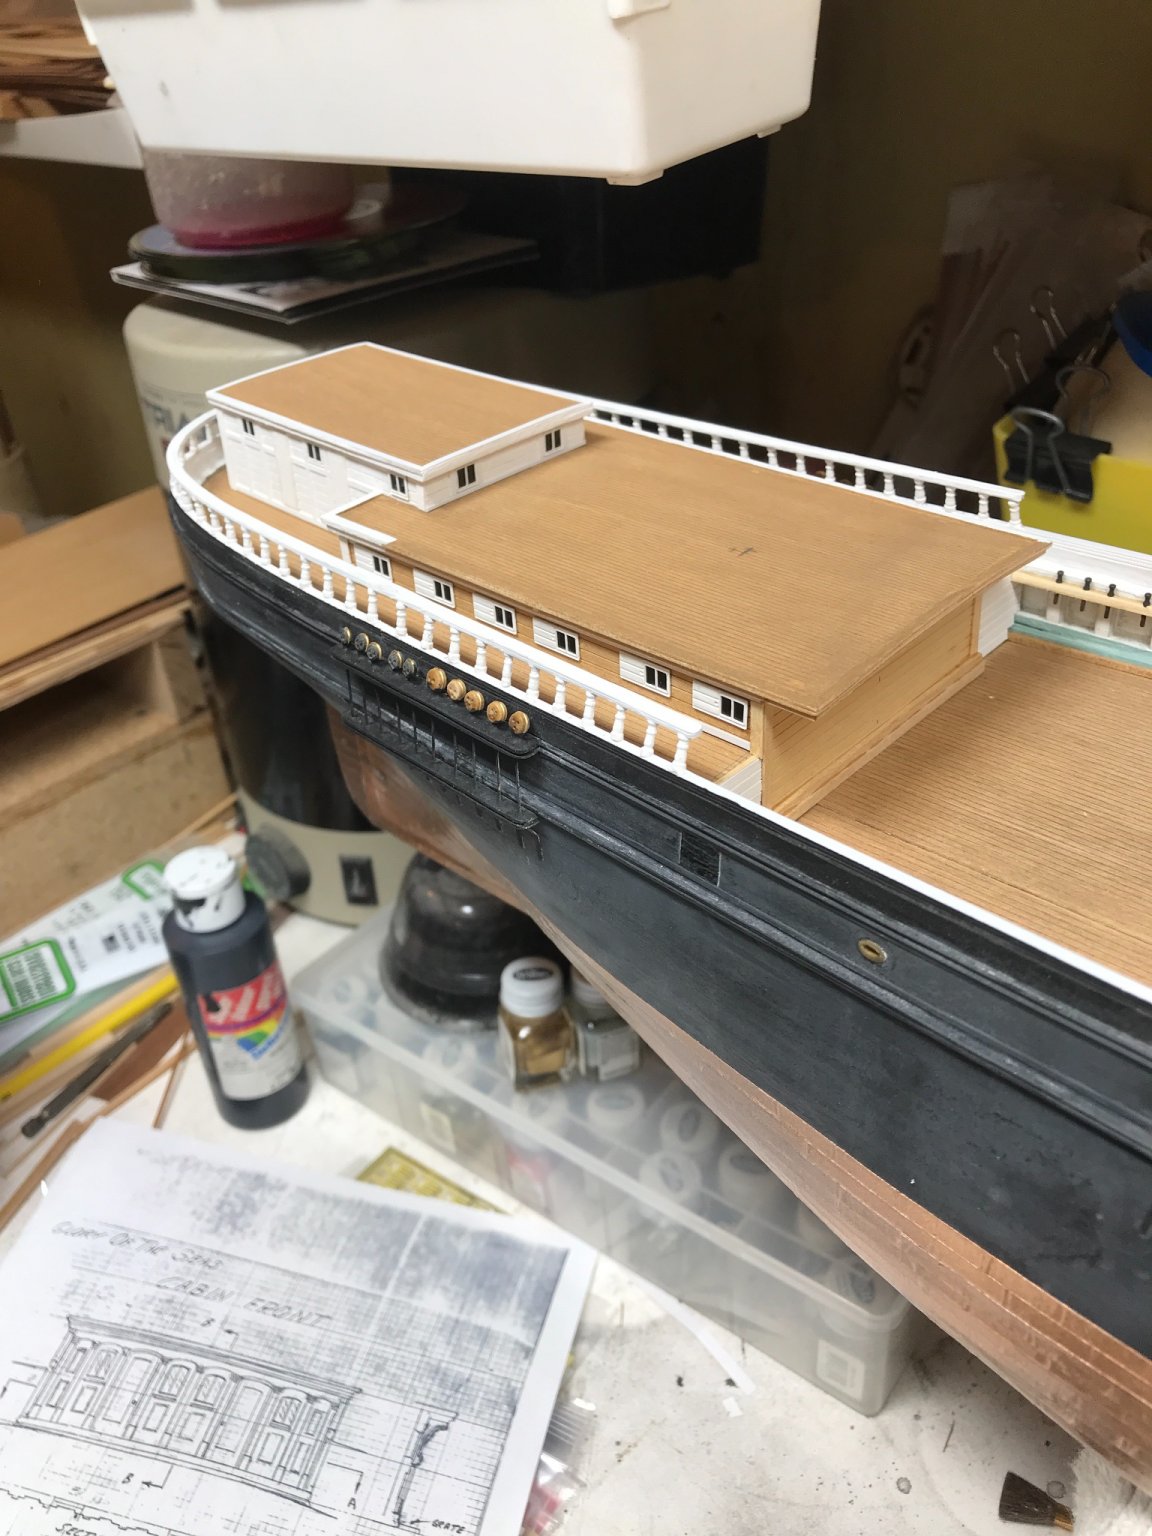
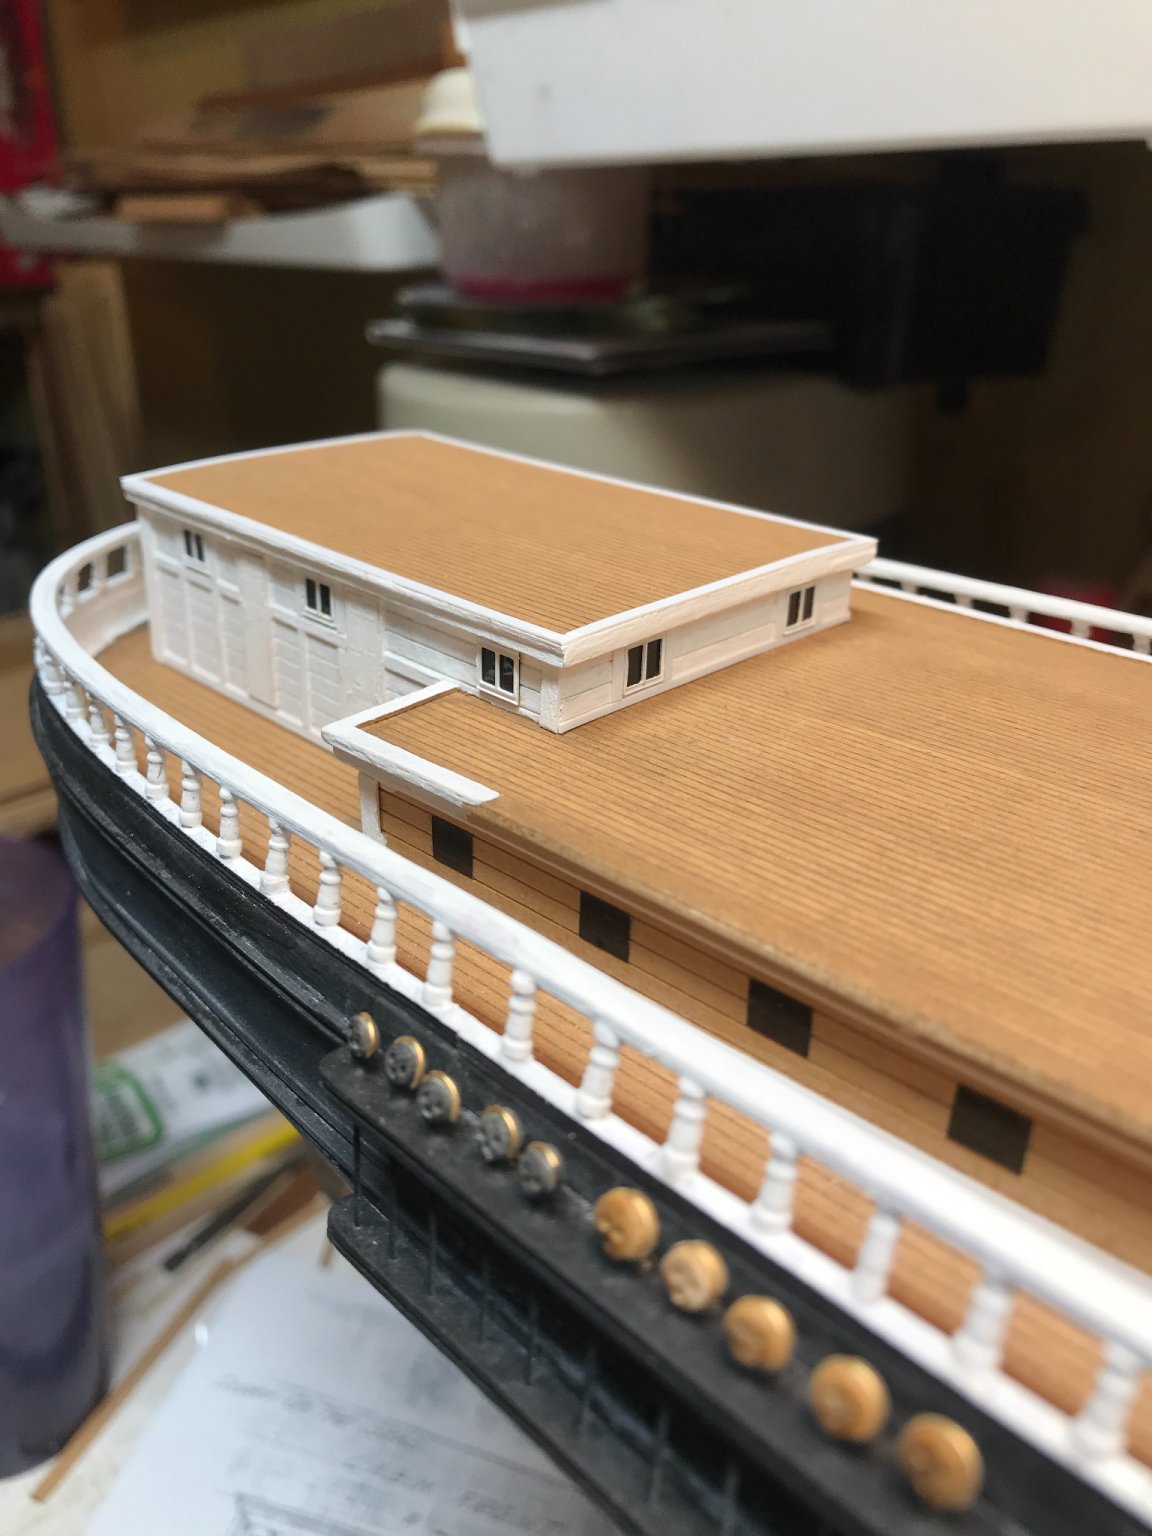
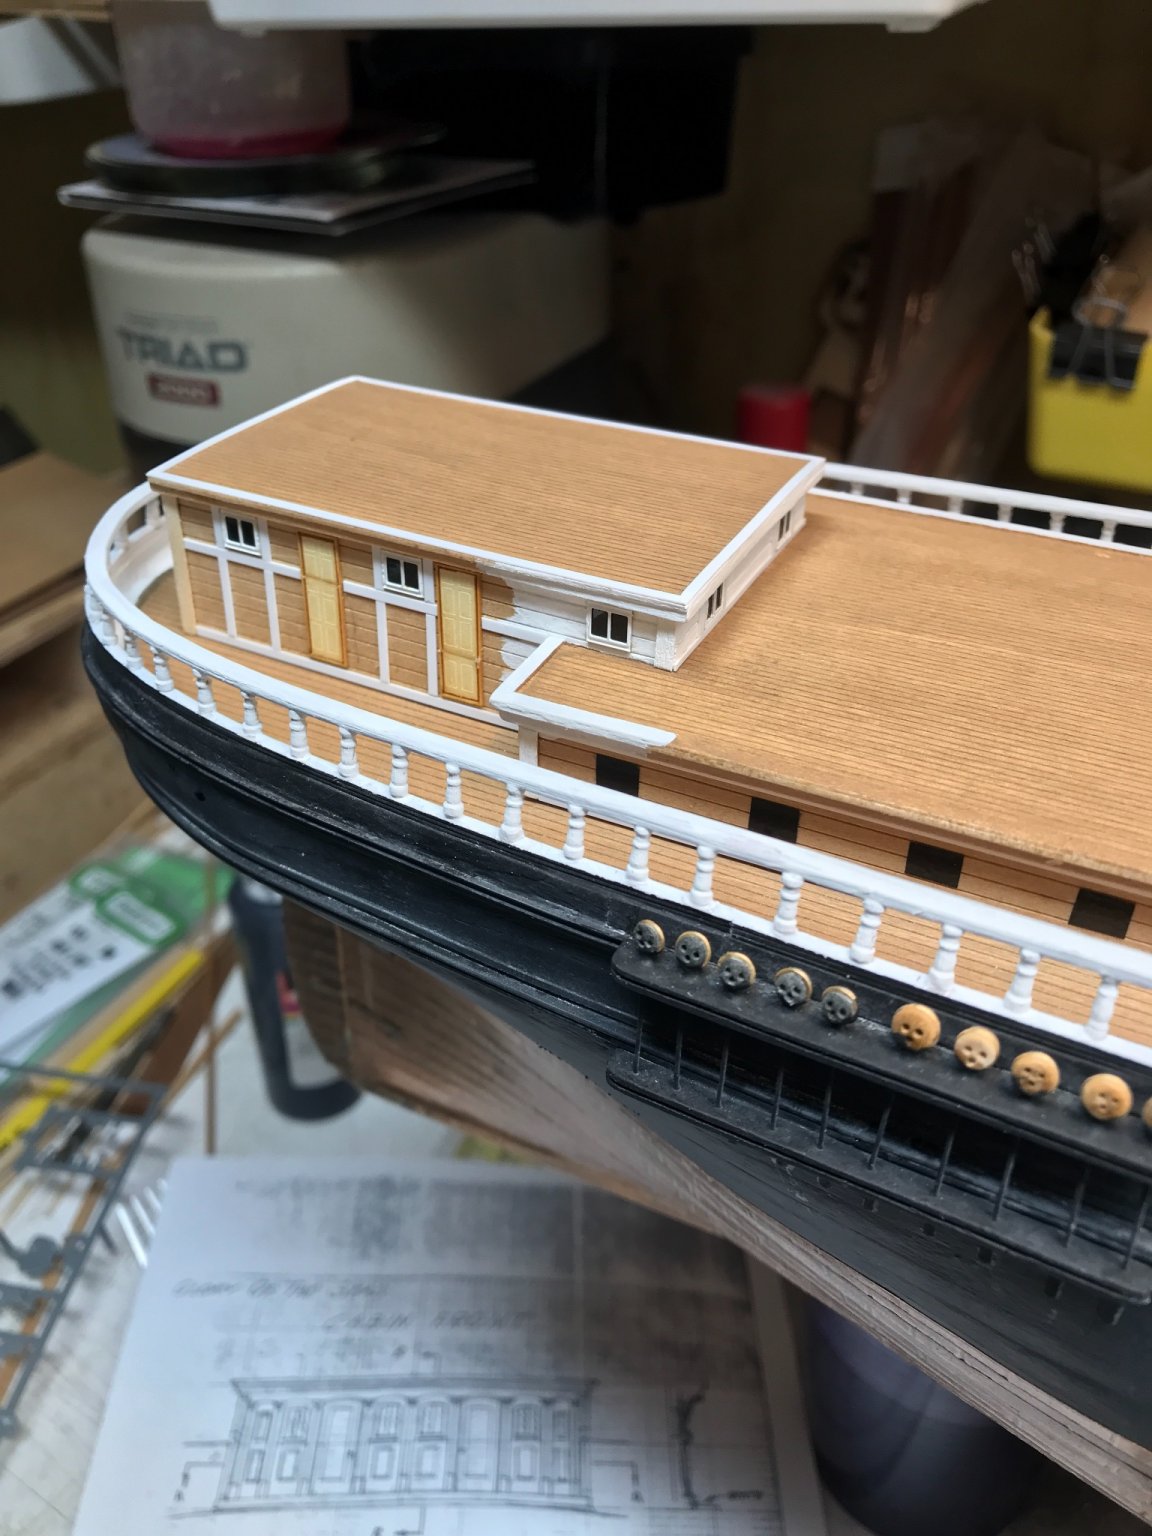
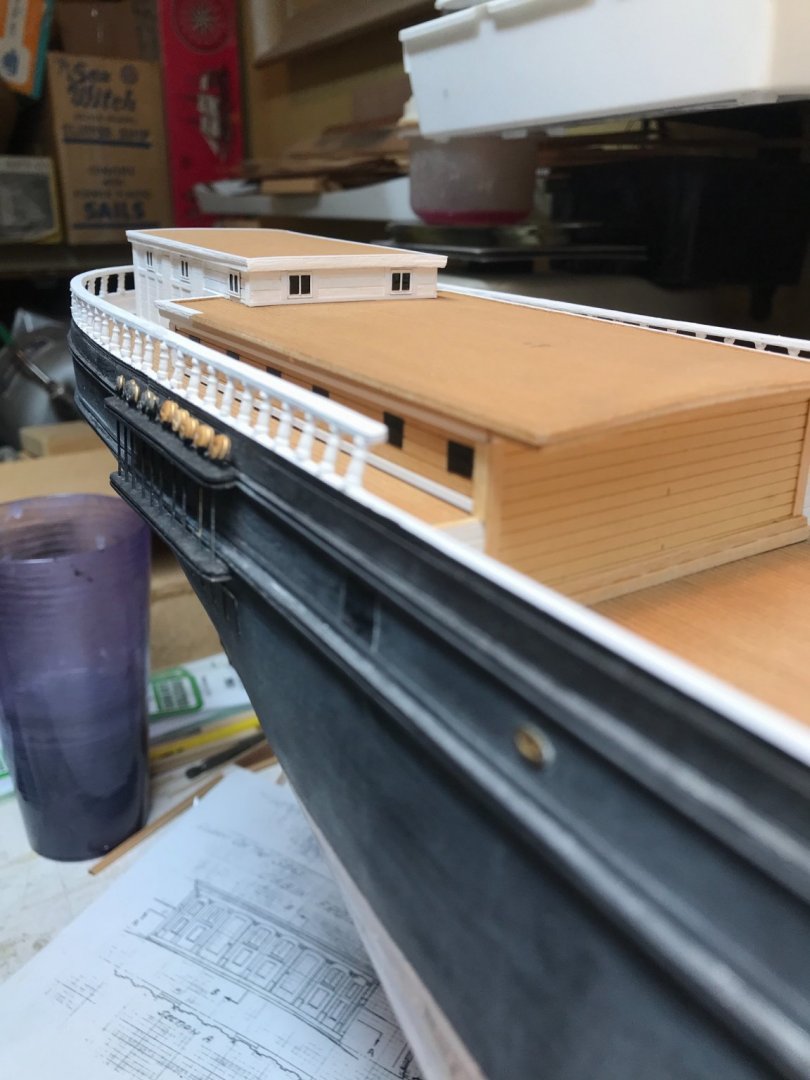
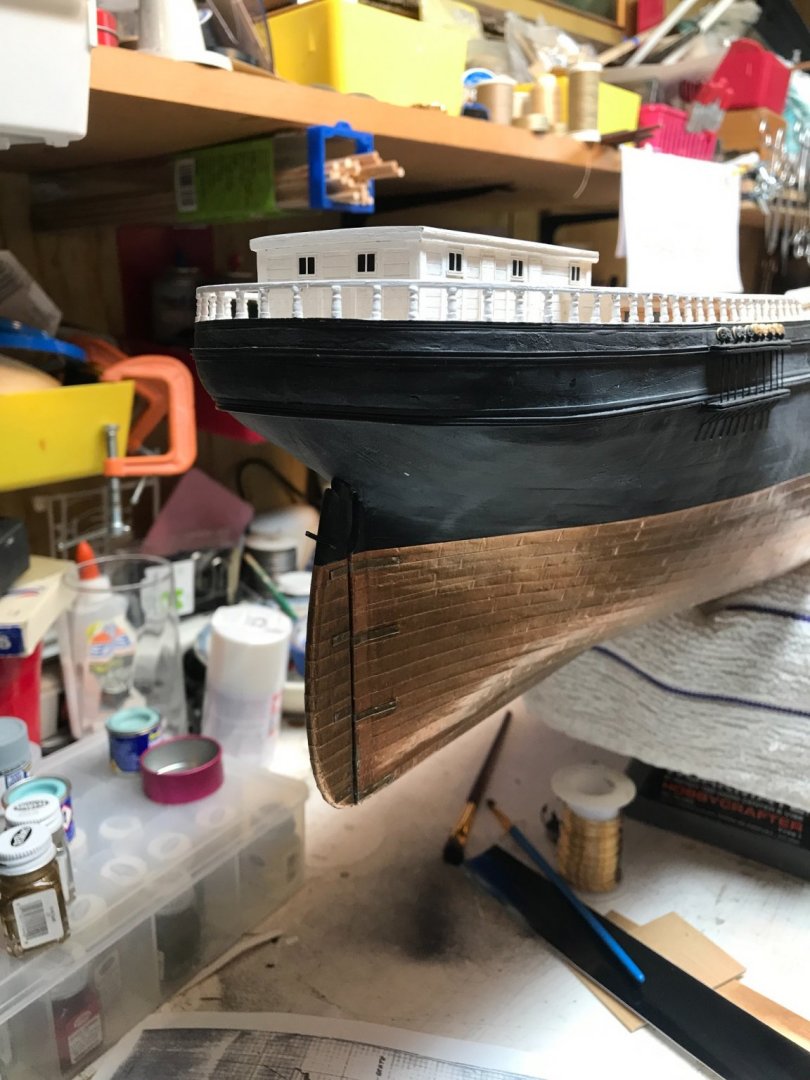
Bang! Ripped the rail down…..that took a lot of guts. But I know you will feel better with more accurate stanchions. Carriage house looks fantastic! Rob
-
Interesting..it could be a small square depicted by raised paneling...then again its right edge is quite obscure. What I find wonderful. is the closed bit on the rail. Thanks for pointing out these wonderful items. Rob
-
Rich...I knew when I posted these images....I would receive the critiques describing the exact issue you brought up. I knew it when I finished making it, it was too tall in the front. That is why I didn't glue it down to the helm roof yet.😎 Knowing full well I would need to remove material and redo the window/vent opening. I wanted to see if I could slip it past...since very few folks are truly aware of these details. This cupula is pretty small....an inch by 3/4 ish. The louvers on the aft end were a bear to make and I will NOT be remaking those. I made the window the size I did, by using material I already had on hand(I see it was too large)...not really knowing what the door or access really looks like. So a window is just as viable as any other covering for that open space. However, with that said, I might make the mod a louvered door instead...since nobody probably looked out through it anyway. You got me...but I knew it was coming. Rob
-
Thanks Vlad. Yes the scale is pretty small...but I can and do make mistakes...and correcting them seams to be a daily even for me now. but that is the process if I want to be as accurate as I can make her. Rob
-
Thanks Rich. I appreciate the confidence. Im doing the best I can and sadly I make lots of mistakes in scale and recreation. But I’m betting Vlad and I are still closer to the original then any other historical model. Thanks to fine research by yourself and of course Mike. Rob
-
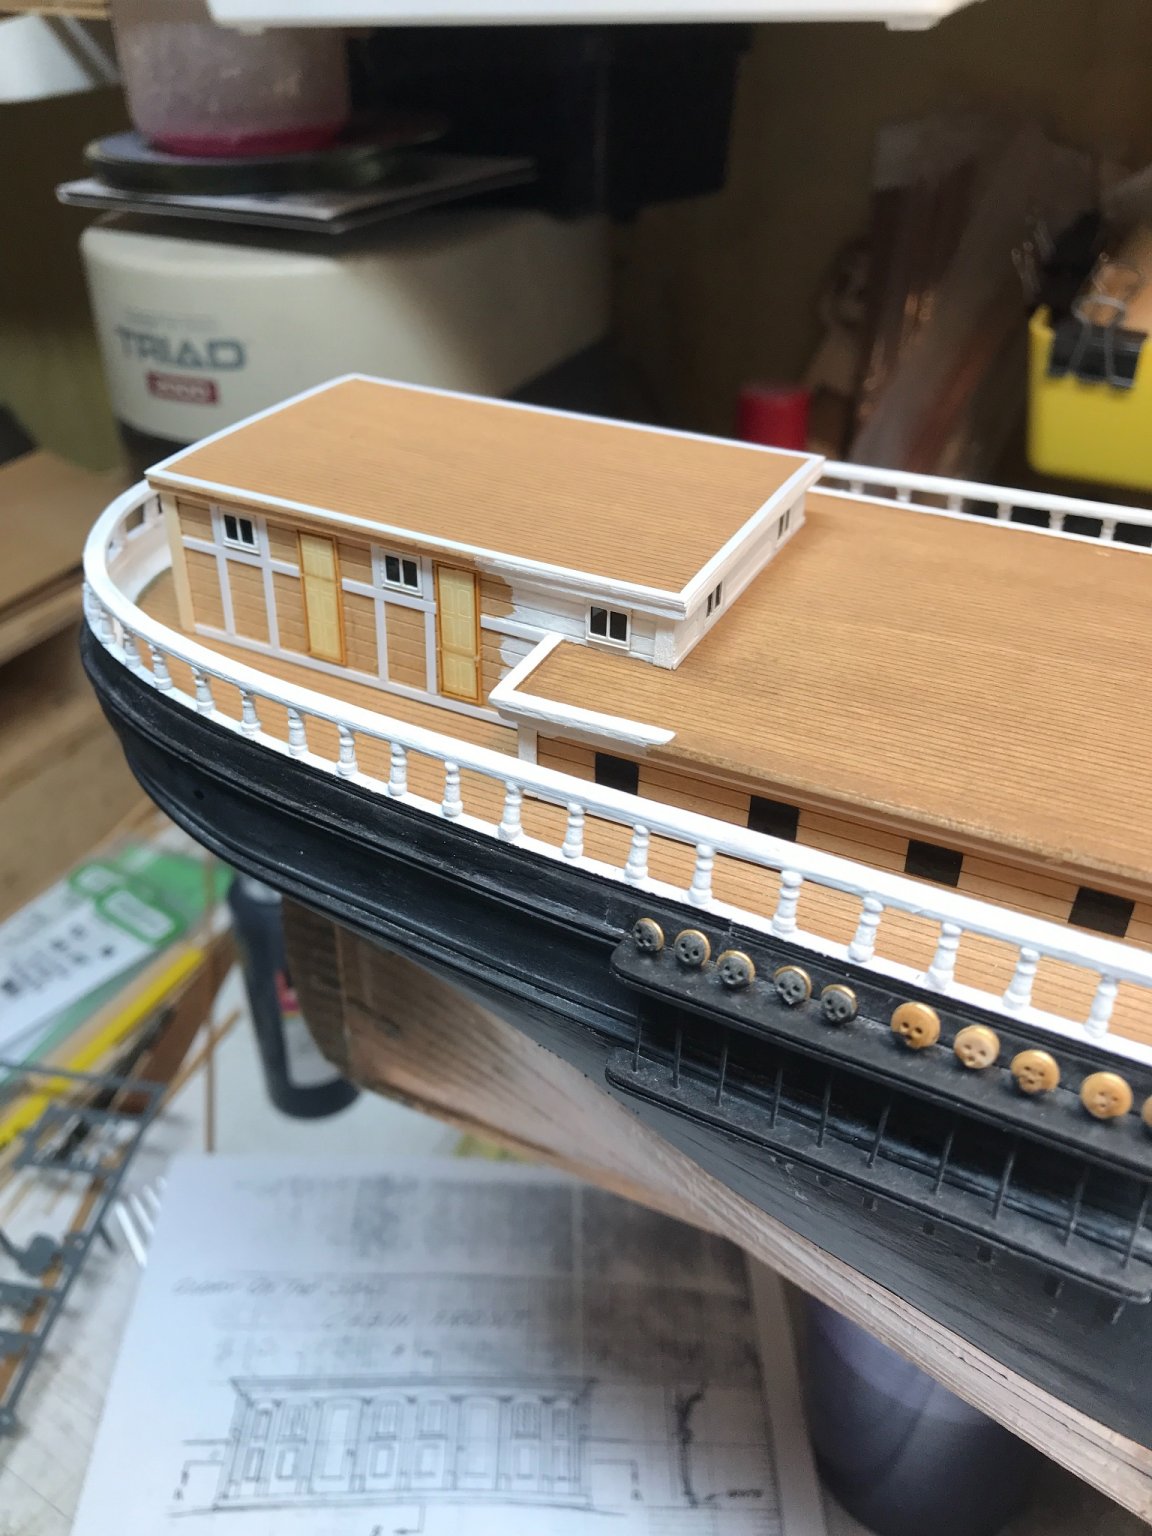
The front of the cabin will be last to do Rob
-
There you go Vlad....if you like it then that is the direction you should go. Clean and simple is prudent. I like that you are venturing out of the wood world into styrene. Much can be made nicely with it. Can't wait of more pics. 8 hours of work....I only wish.......... Rob
-
Yeah....I edited them to some degree as well. I suspect they are involved in the leadership or management of the processing ship and or canary business. They surely are not common workers who process the fish....... Great close up..that will be of great value. Rob
-
I have to say...my chick is tough...she just trudges along. Dental issues can bring the toughest herculean man to his knees. I hope your wife finds relief and a long term corrective plan. Short term if that is all that is available will do....I'm sure. The older we get the more stuff falls off or breaks.....sheesh..... Good thing I have an eternal security plan.... I finished up and delivered my wife's Unilateral RPD and now I can focus on Glory for a bit...... Rob
-
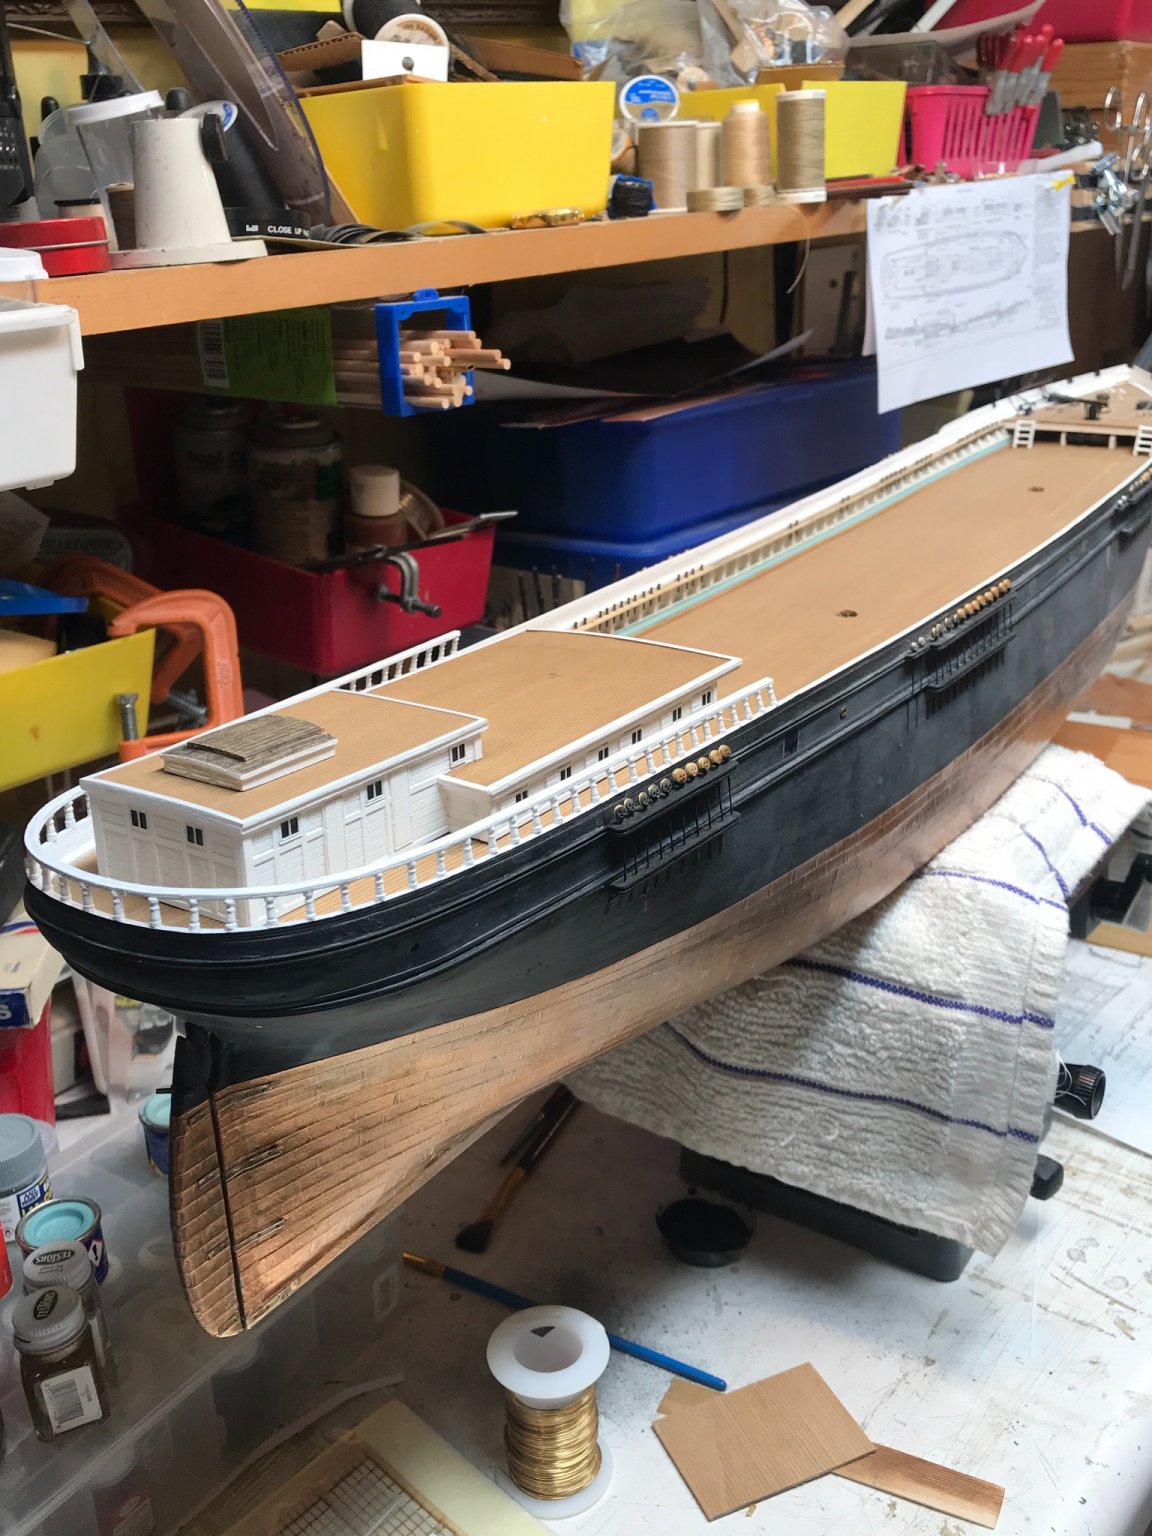
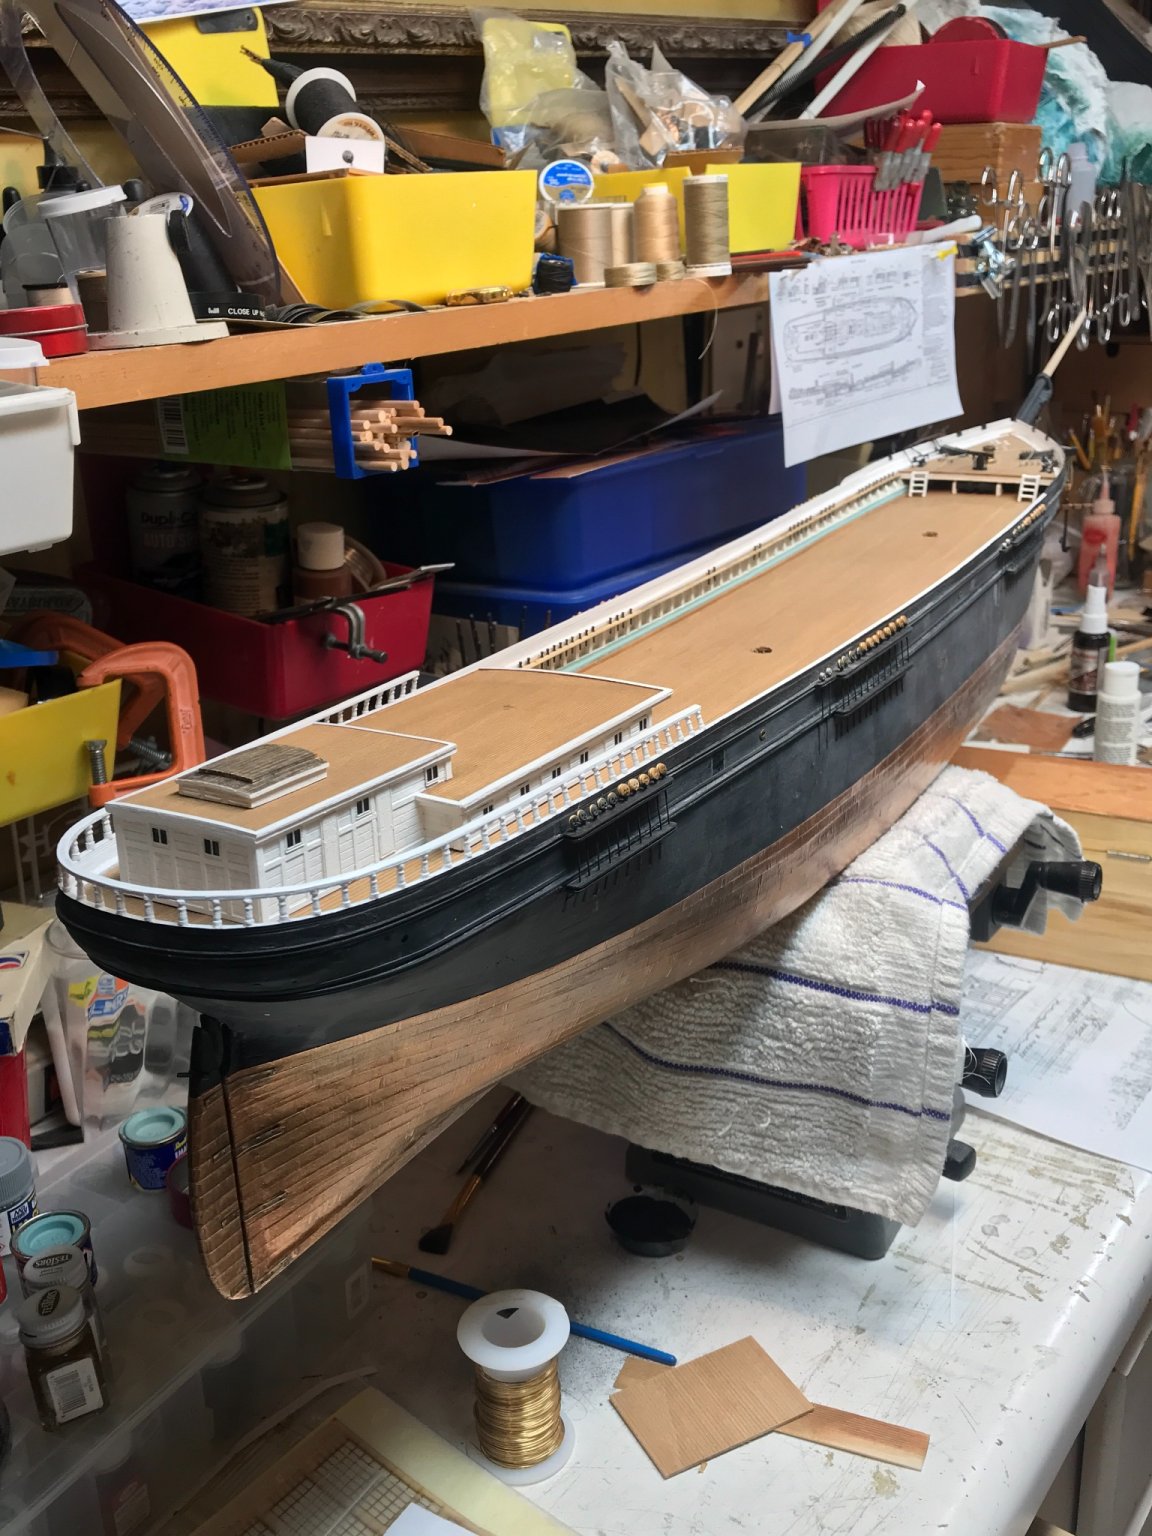
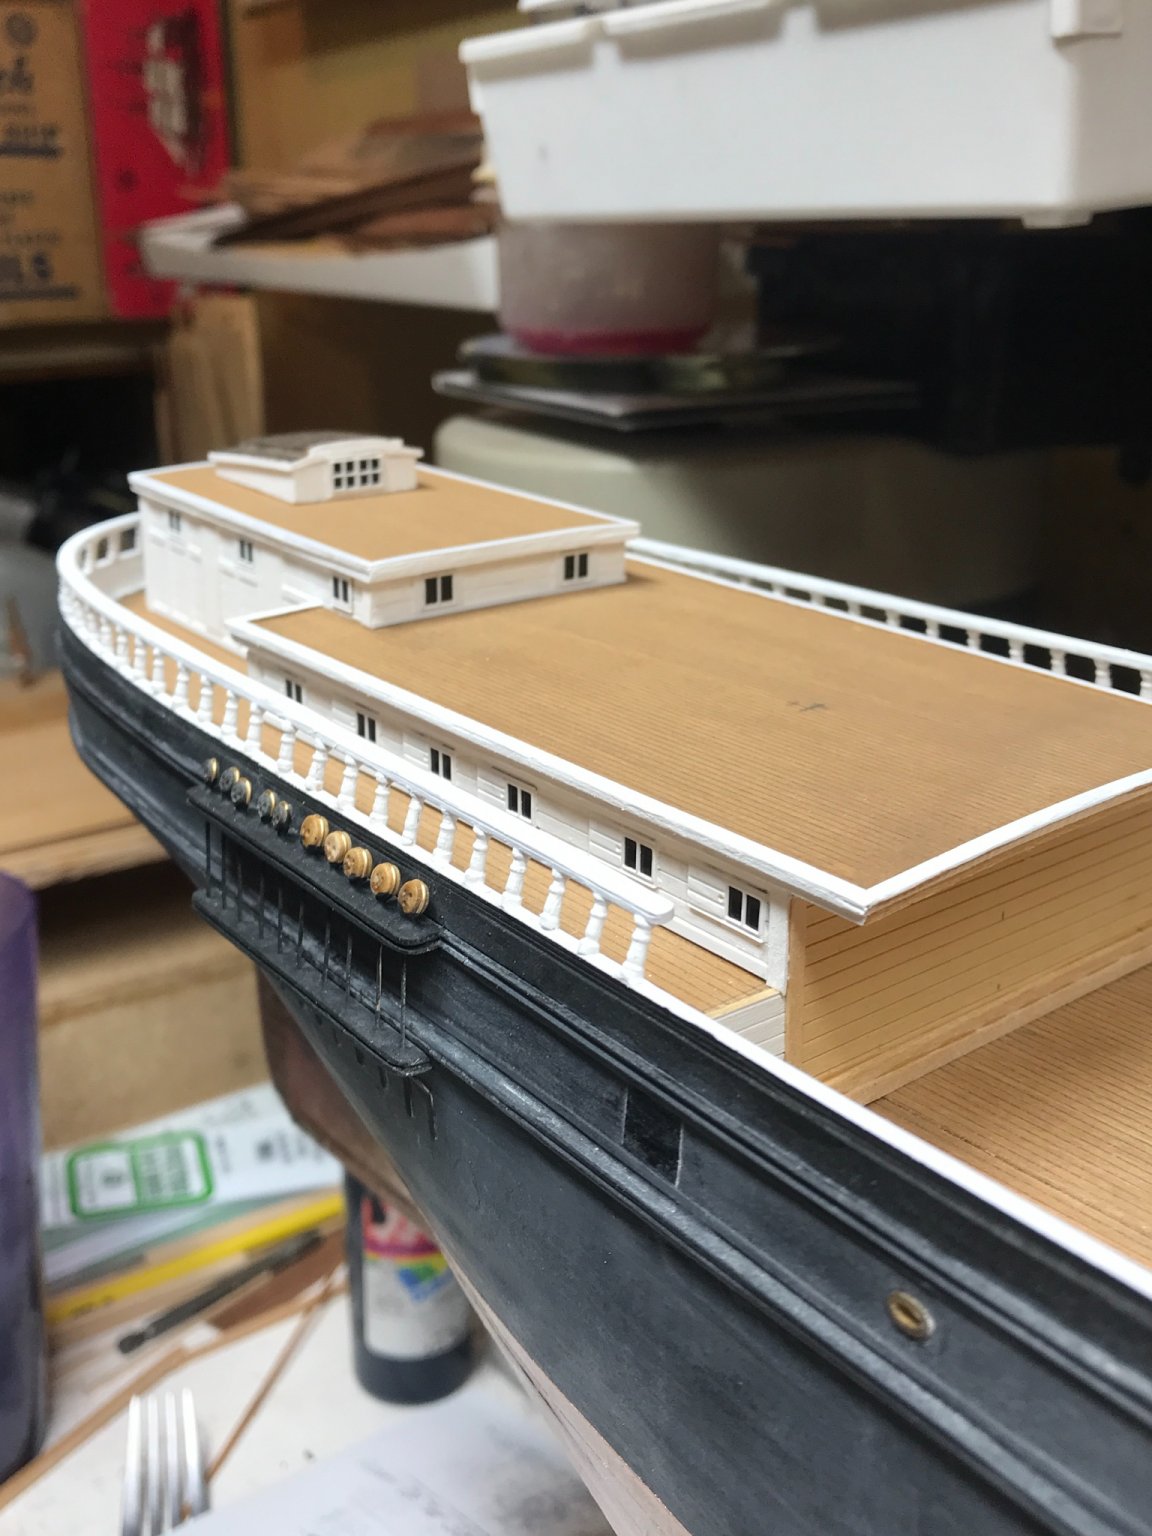
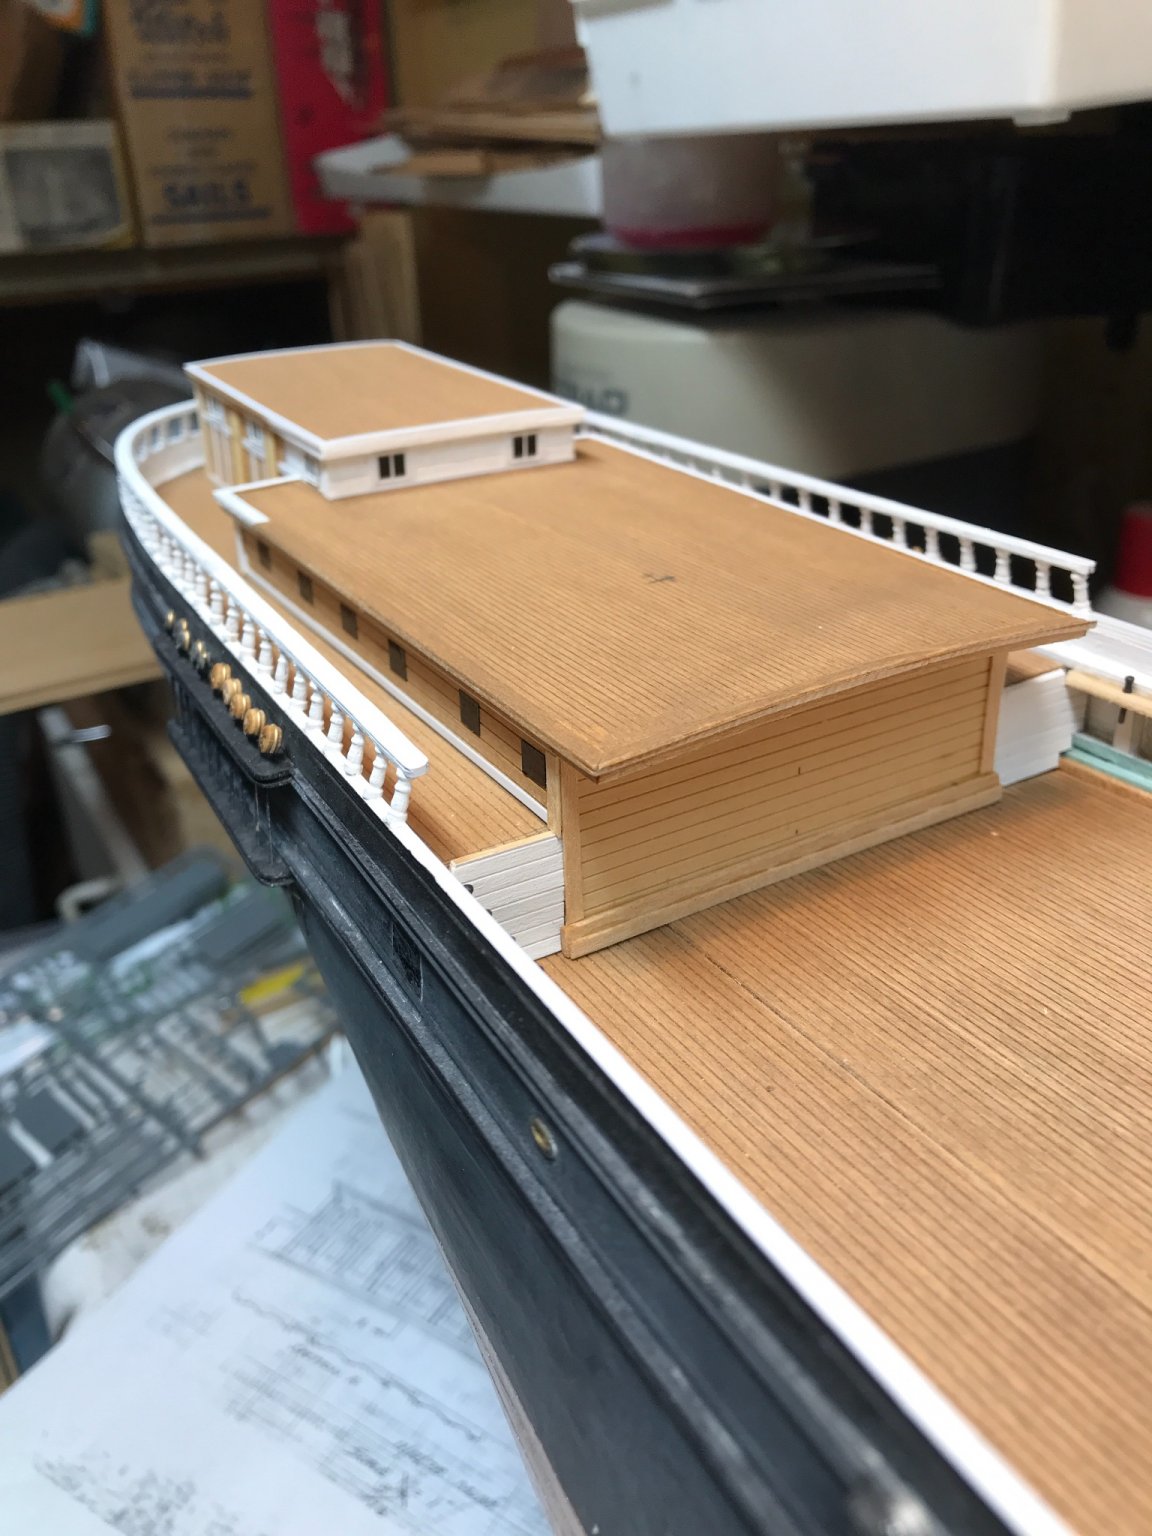
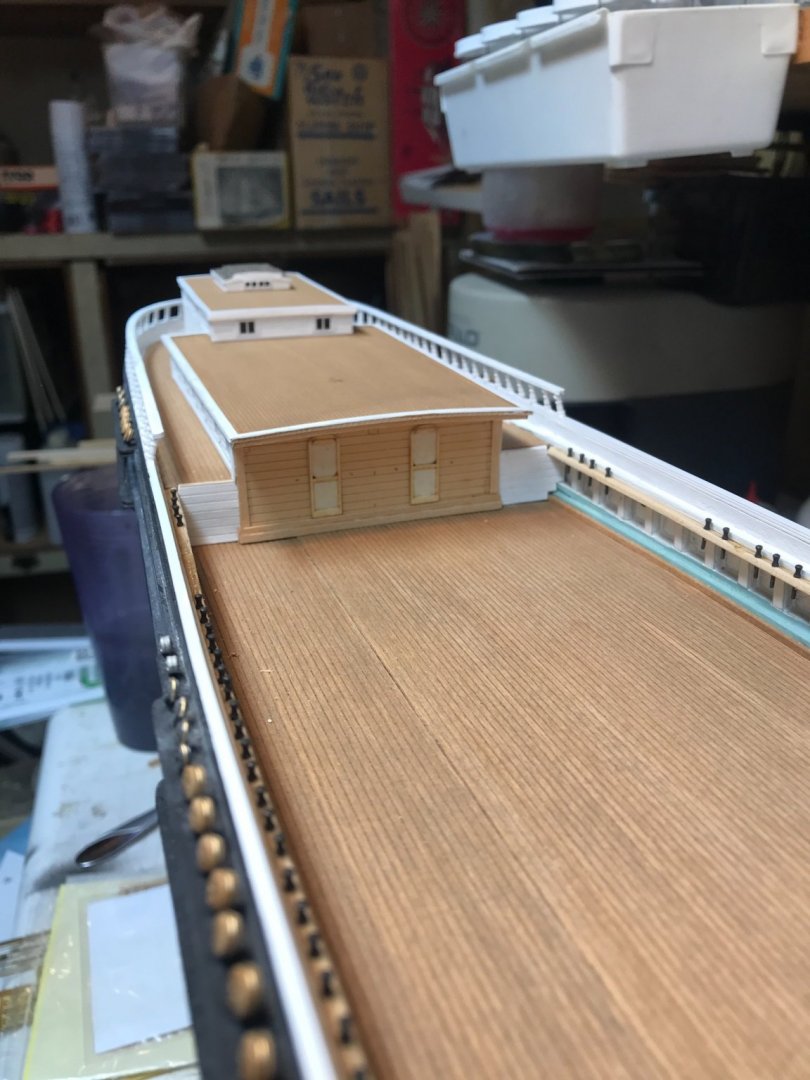
Few more pics as I get to the main cabin windows Rob


- 3,560 replies
-
- 3
-
-
- clipper
- hull model
- (and 2 more)
-
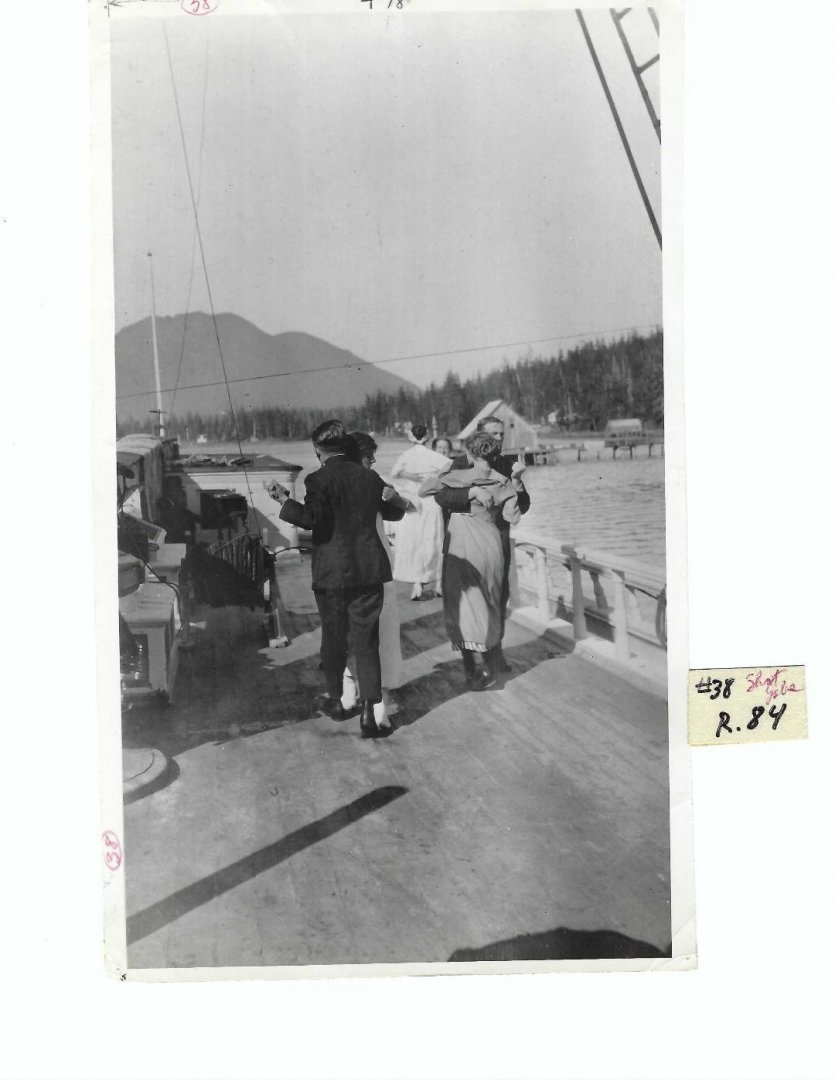
Upon further analysis....I think I am seeing a ghost, or a phantom image. this image from Mike surely shows that a man is freely standing/sitting behind the aft skylight. Rob
- 3,560 replies
-
- 1
-
-
- clipper
- hull model
- (and 2 more)
-
No...I don't think it is any part of the old entry into the aft parlor. The new construction is clean and architecturally rectangular. To leave a portion of the old makes no sense. It is either an extension of the aft skylight or a makeshift structure added by the canary mod crew. Maybe Mike might have more *Hidden* images of this area. If I can't figure it out or justify it...I'm leaving it off. Rob
-
Yeah....my goal(when I get there), is to replicate those skylights as close as possible. Rest is good, but my rest is making my wife a unilateral Removable partial denture to replace a tooth she had extracted. I hope to get that done tonight so I can resume my work on the carriage/helm house. Rob
-
Mike emailed me these yesterday. This is the best picture of the aft skylights I have seen and if you review other images, you will se a structure between the aft skylight and the wheelhouse extension. Rob
-
Rich, As I investigate further, it appears the structure atop the helm is indeed a vent cupula. As I've shown in photos the aft end tapers and the aft wall is louvered. The image here shows clearly that there is built into the front a window, or louvered hatch that opens. Opened during mild hot weather for good breezy ventilation and to be closed when bad weather is afoot. Being louvered you still get ample air movement, without water entry. A curtain is present in the forward window, surely demonstrating that the forward portion of the addition is considered an access way to the lower salon regularly traveled by passengers...hence the second door forward on the cabin, separating the working helm from the trimmed and dressed passageway. Rob

- 3,560 replies
-
- 1
-
-
- clipper
- hull model
- (and 2 more)