HOLIDAY DONATION DRIVE - SUPPORT MSW - DO YOUR PART TO KEEP THIS GREAT FORUM GOING! (Only 44 donations so far out of 49,000 members - C'mon guys!)
×


Richardjjs
-
Posts
70 -
Joined
-
Last visited
Content Type
Profiles
Forums
Gallery
Events
Everything posted by Richardjjs
-
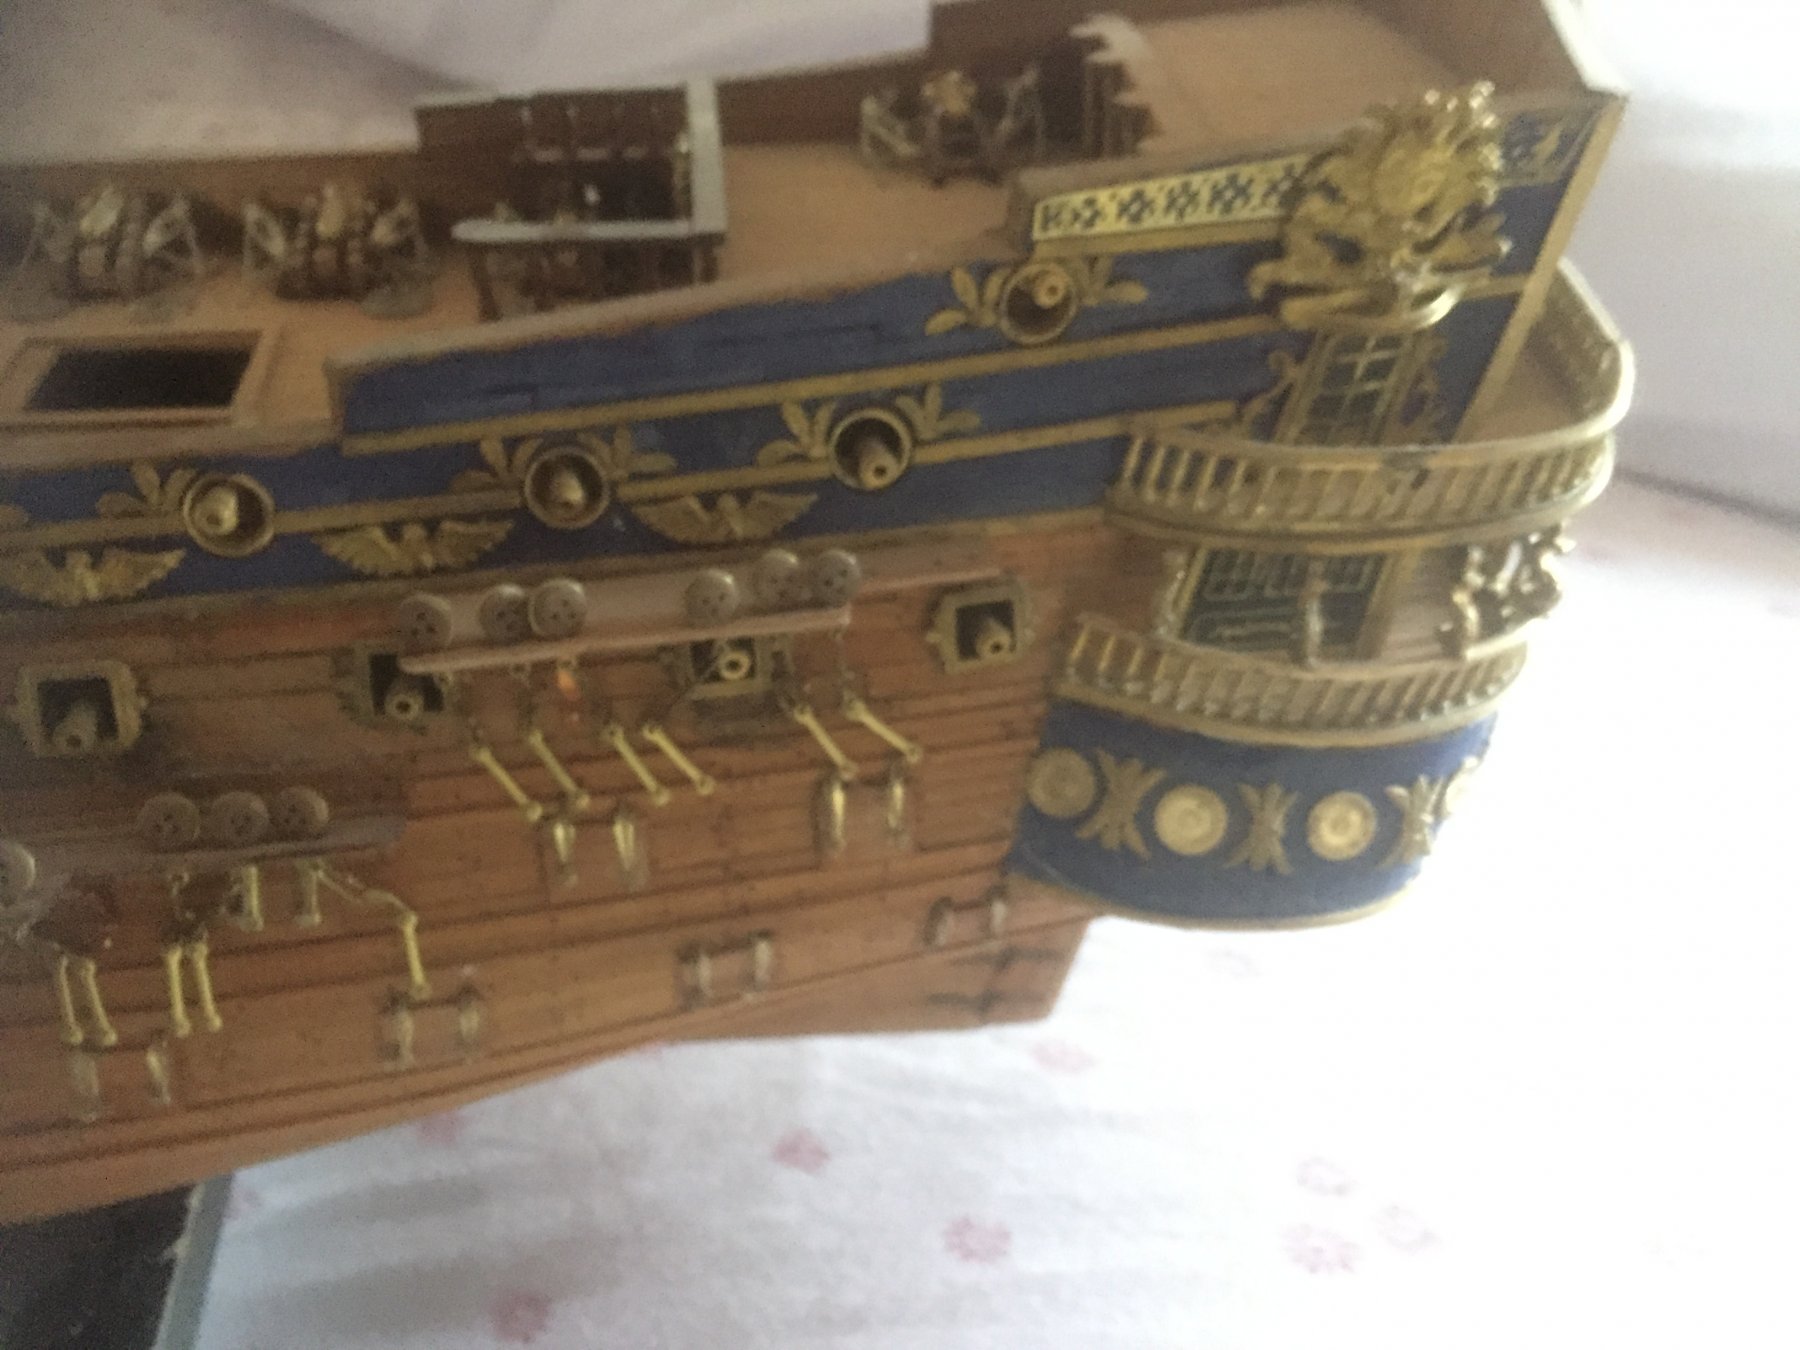
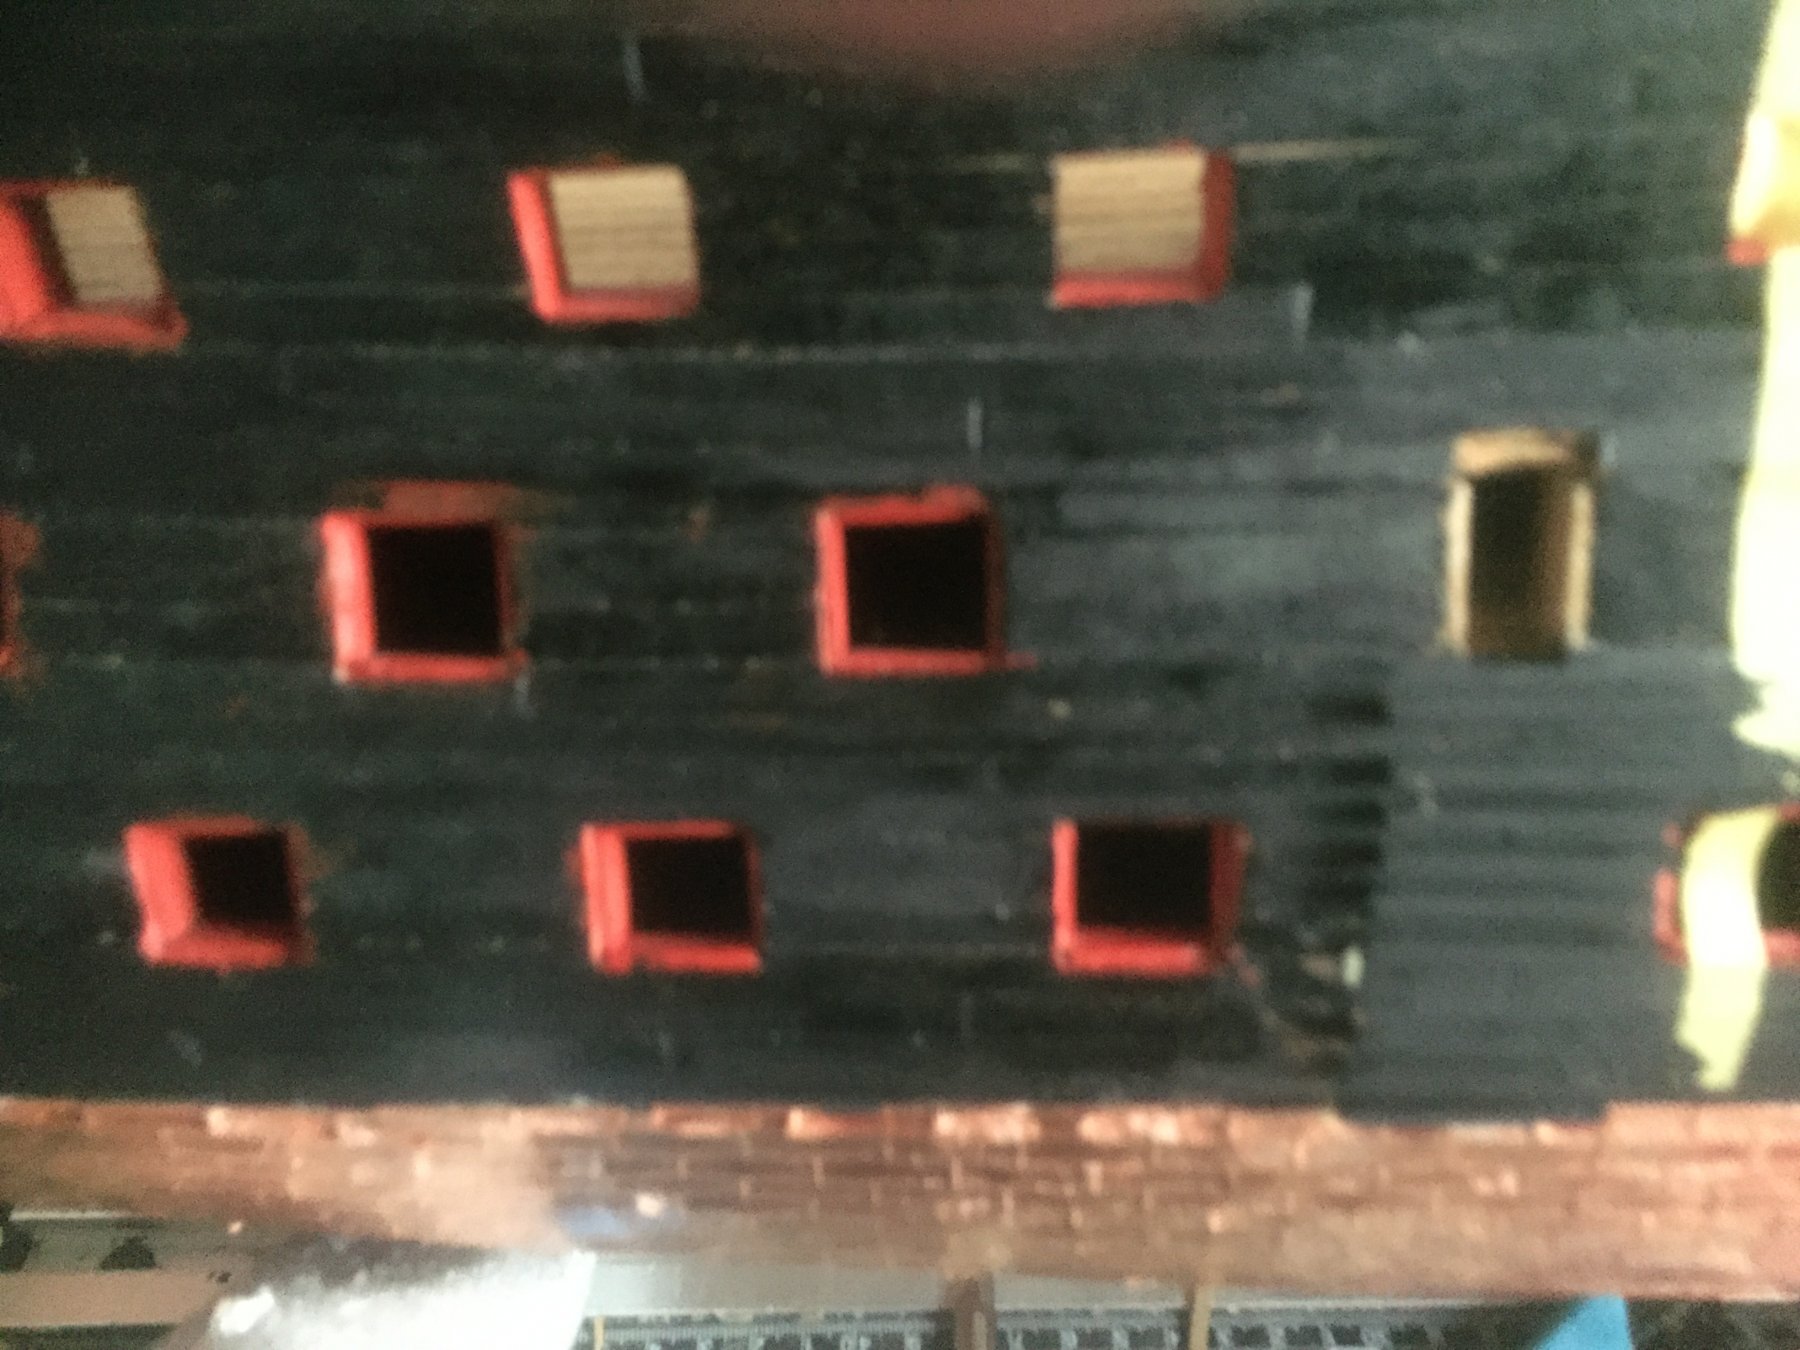
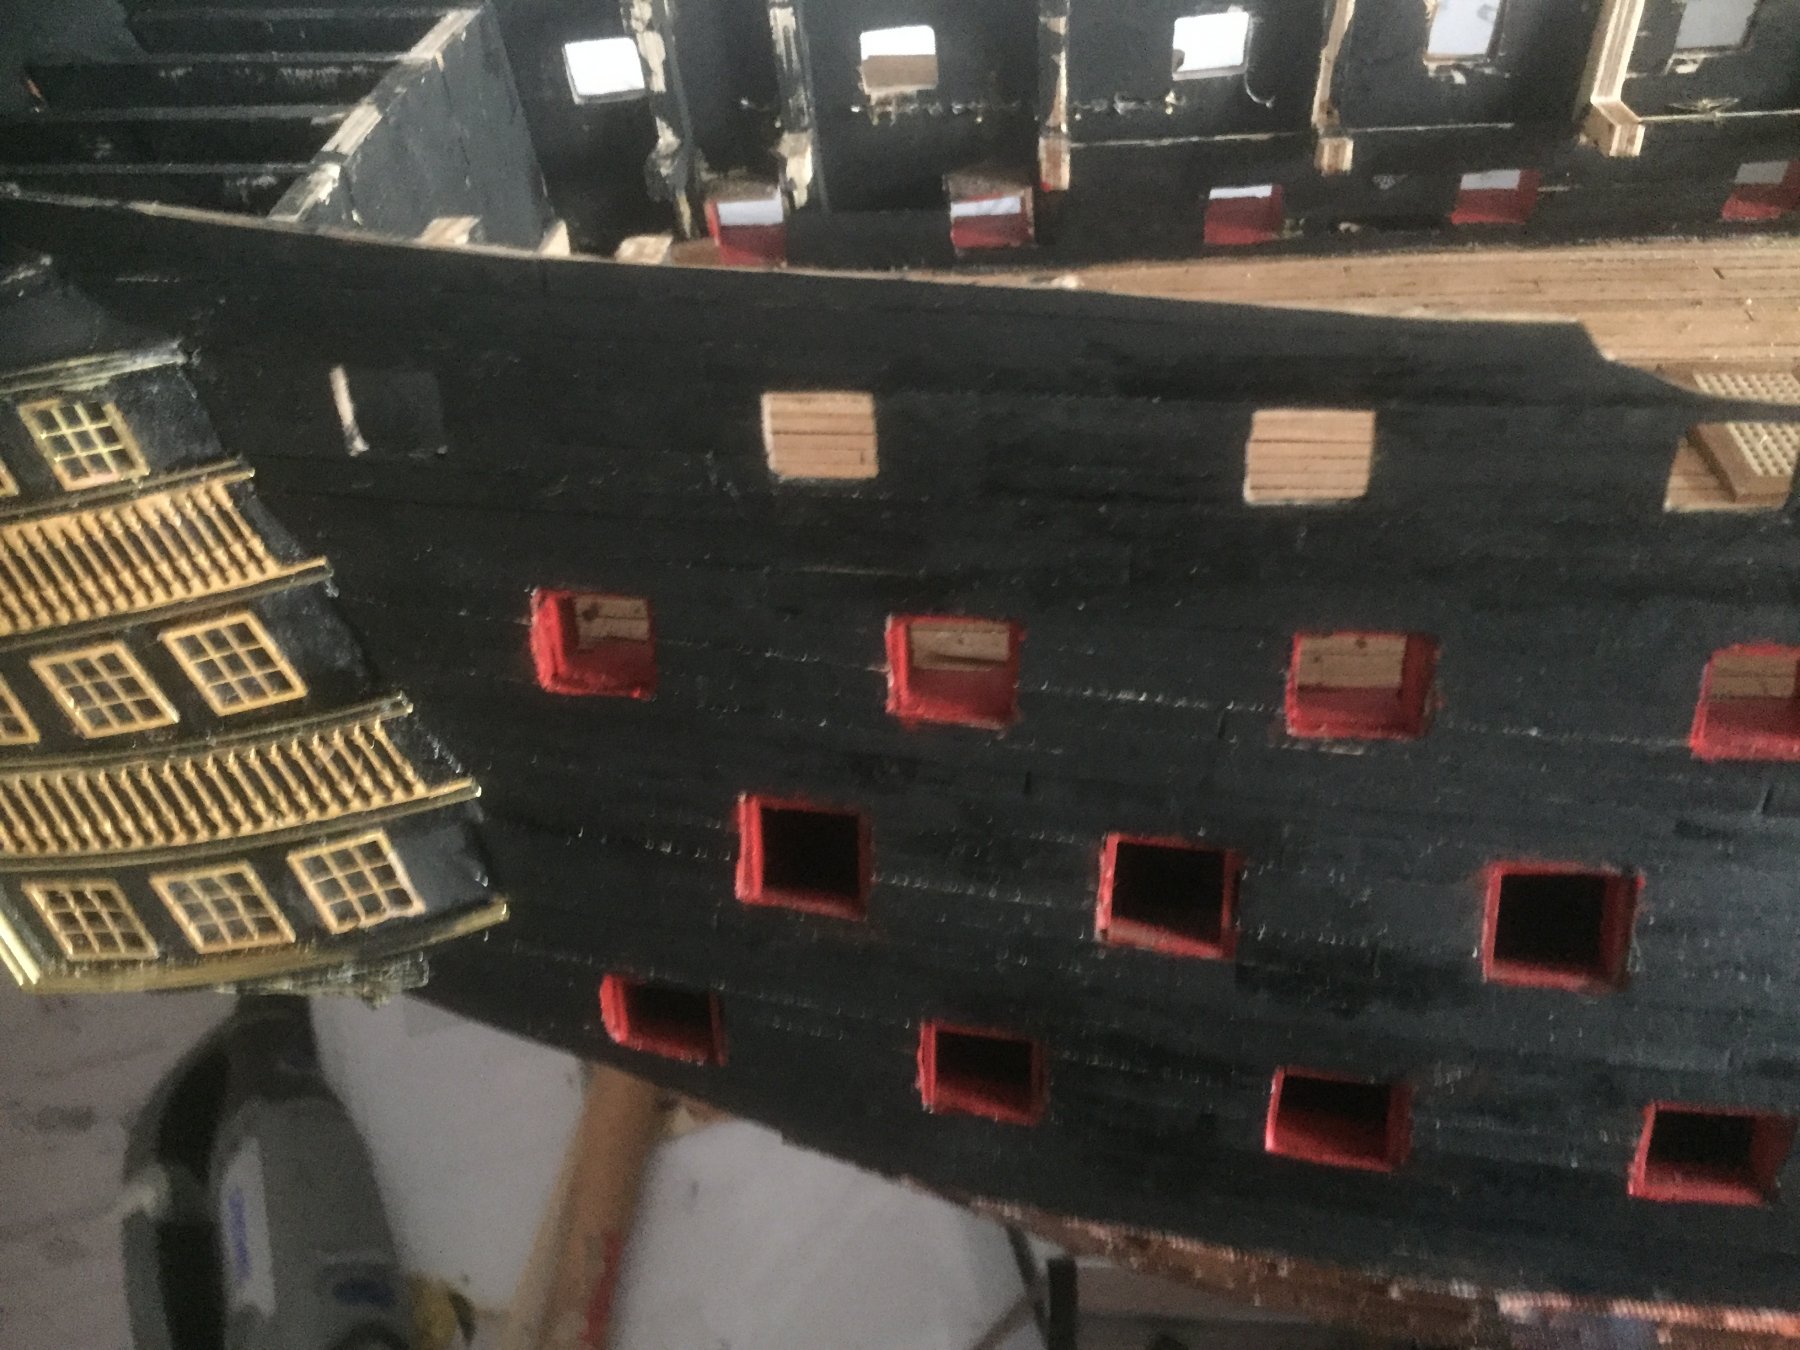
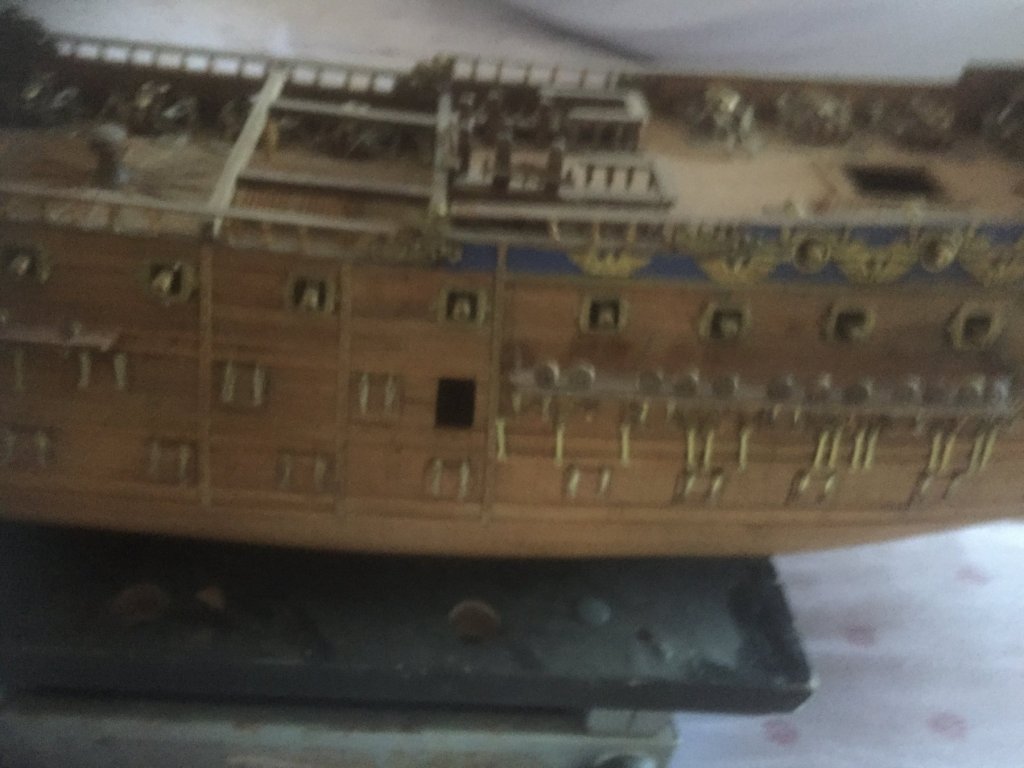
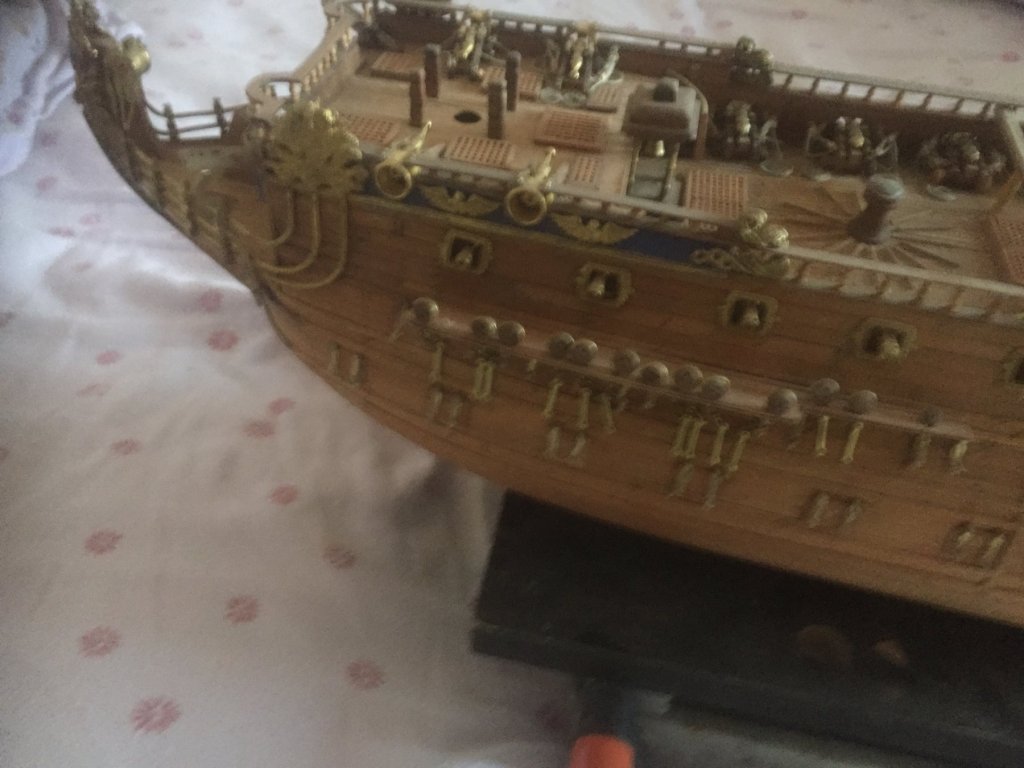
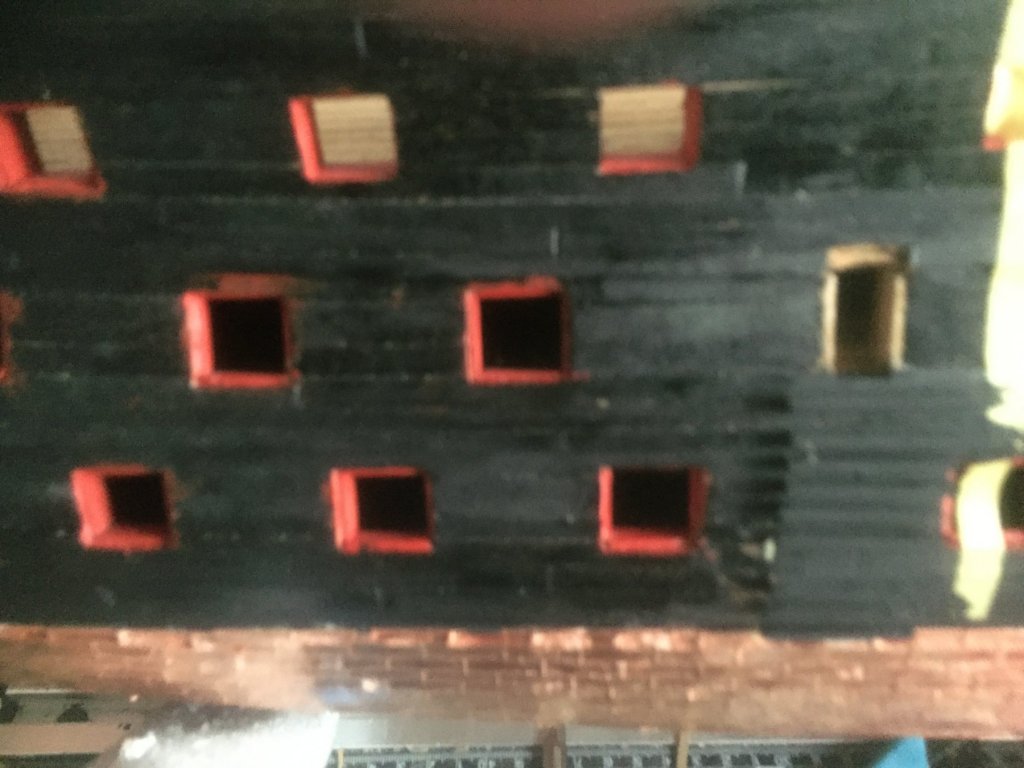
Have always found that using a bees wax block does a number of things. Makes the rope lie properly with no fluffing. Make the rope easier to handle and gives it protection against aging But yes Caldercraft parts do not seem as good as I would have expected. The one thing that I am really annoyed about is the finish of the Quarter Galleries and Stern decoration. Apparently you have to Paint the black rectangles between the windows. Not impressed with a model that costs nearly 1000.00
- 527 replies
-
- 1
-

-
- caldercraft
- victory
- (and 1 more)
-
This photo makes me want to strip the planking of and restarting. Bertus work is so clean THis is why I decided to paint it (My Victory from 35-40 years ago was not painted
-
When you said you replaced all your blocks and Ropes Why was that and what did you use I must admit the holes in the 2 and 3 hole blocks are not all lined up and it does show
-
This photo makes me want to strip the planking of and restarting. As does the work Bertus THis is why I decided to paint it (My Victory from 35-40 years ago was not painted
-
This photo makes me want to strip the planking of and restarting. THis is why I decided to paint it (My Victory from 35-40 years ago was not painted) Photos dated april 1992 Actually not as good as I thought . 07011202.PDF 07011201.PDF
-
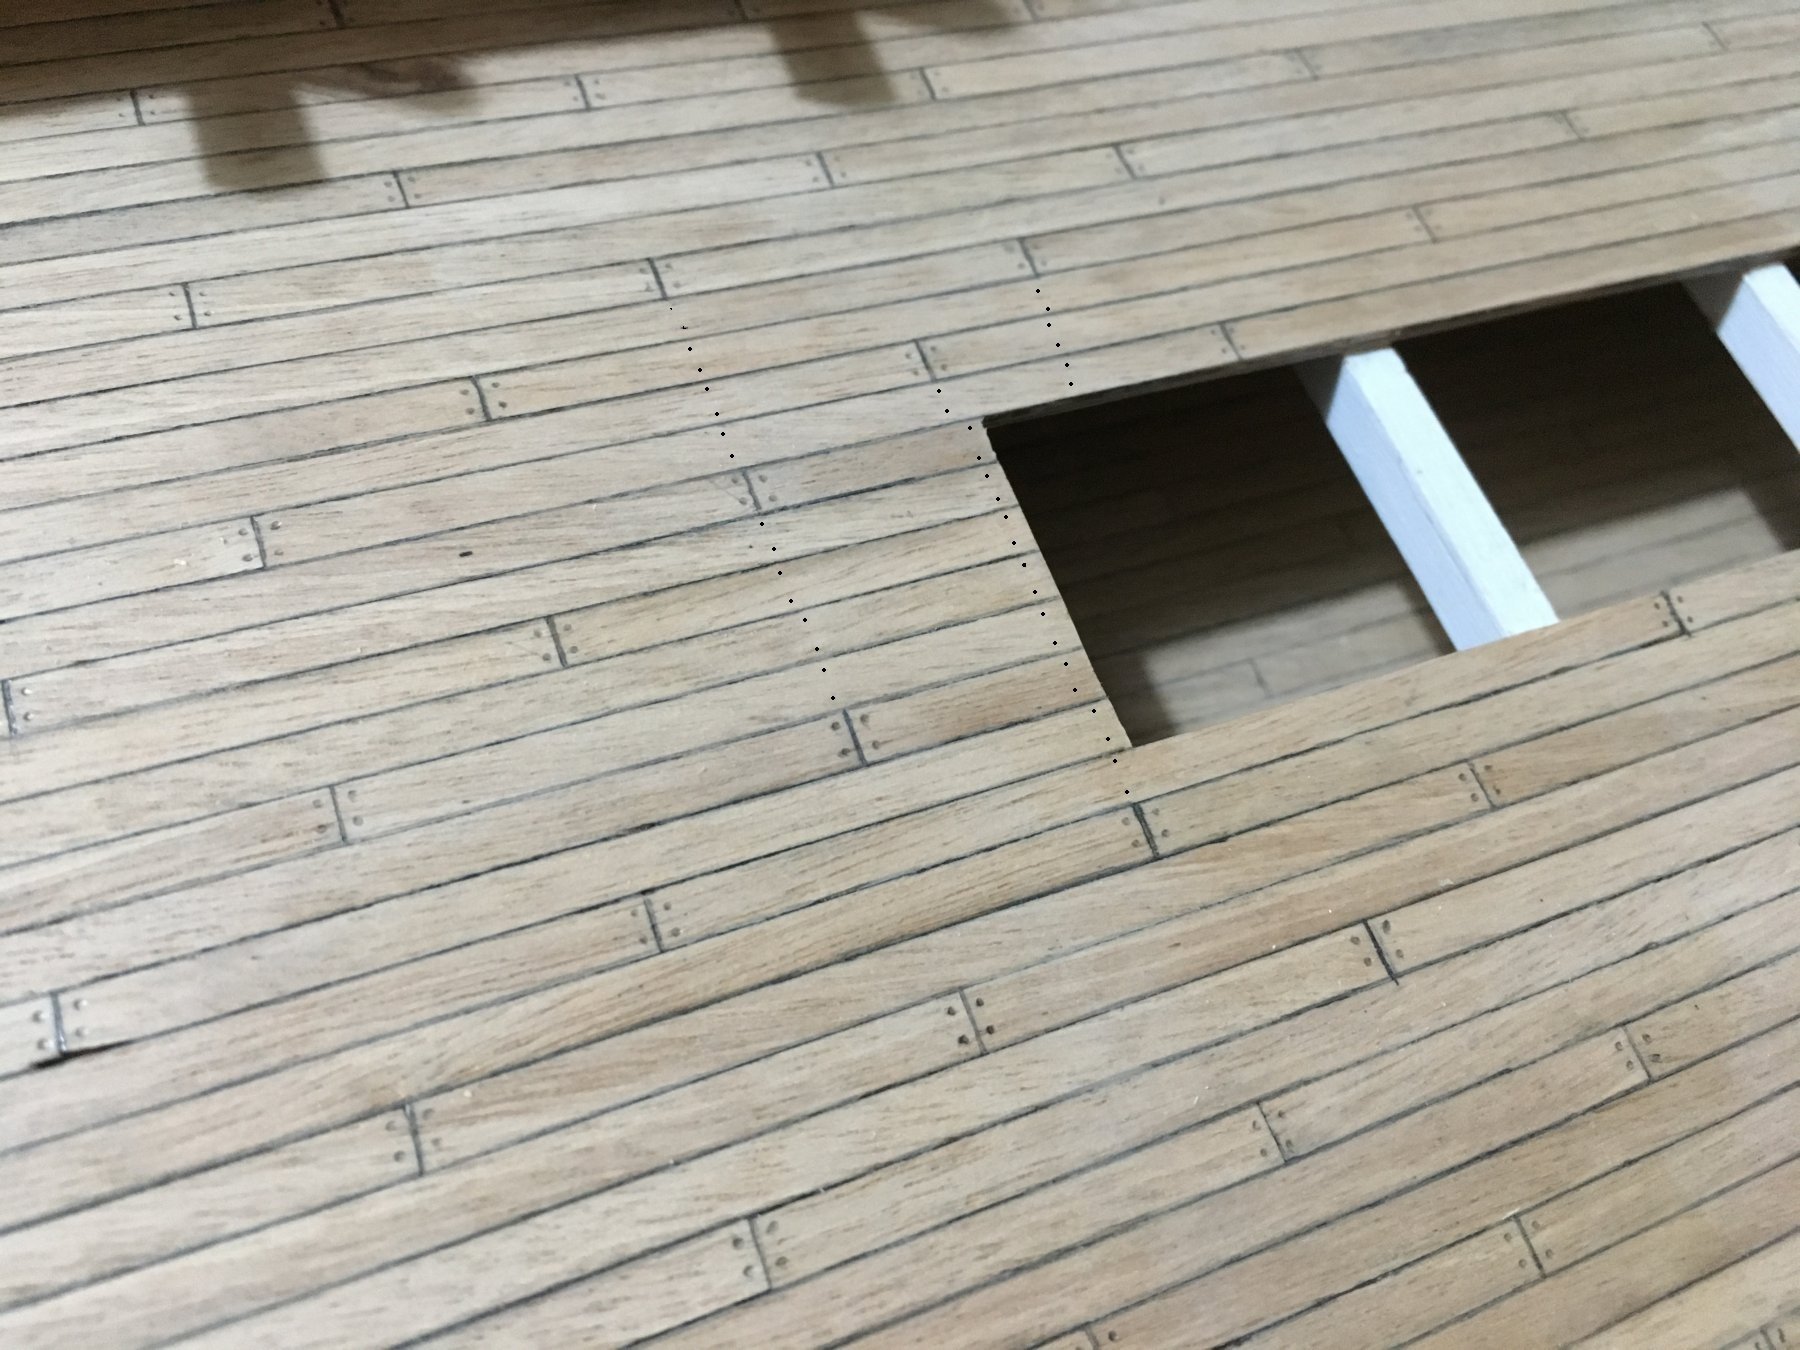
Your wood work is so much tidier and neater than mine Are you using Caldercraft's wood Think if you are going to add treenails they should be correct ie at least across the plank ends (Not sure about over the deck beams this might be too much Again look at that actual picture of Victory the tree nails hardly shoe Often its a matter of what looks right In Anatomy of Nelson's Ships Longridge talks about lifting the fore copper slightly higher as it looks right GREAT WORK
- 527 replies
-
- 2
-
-
- caldercraft
- victory
- (and 1 more)
-
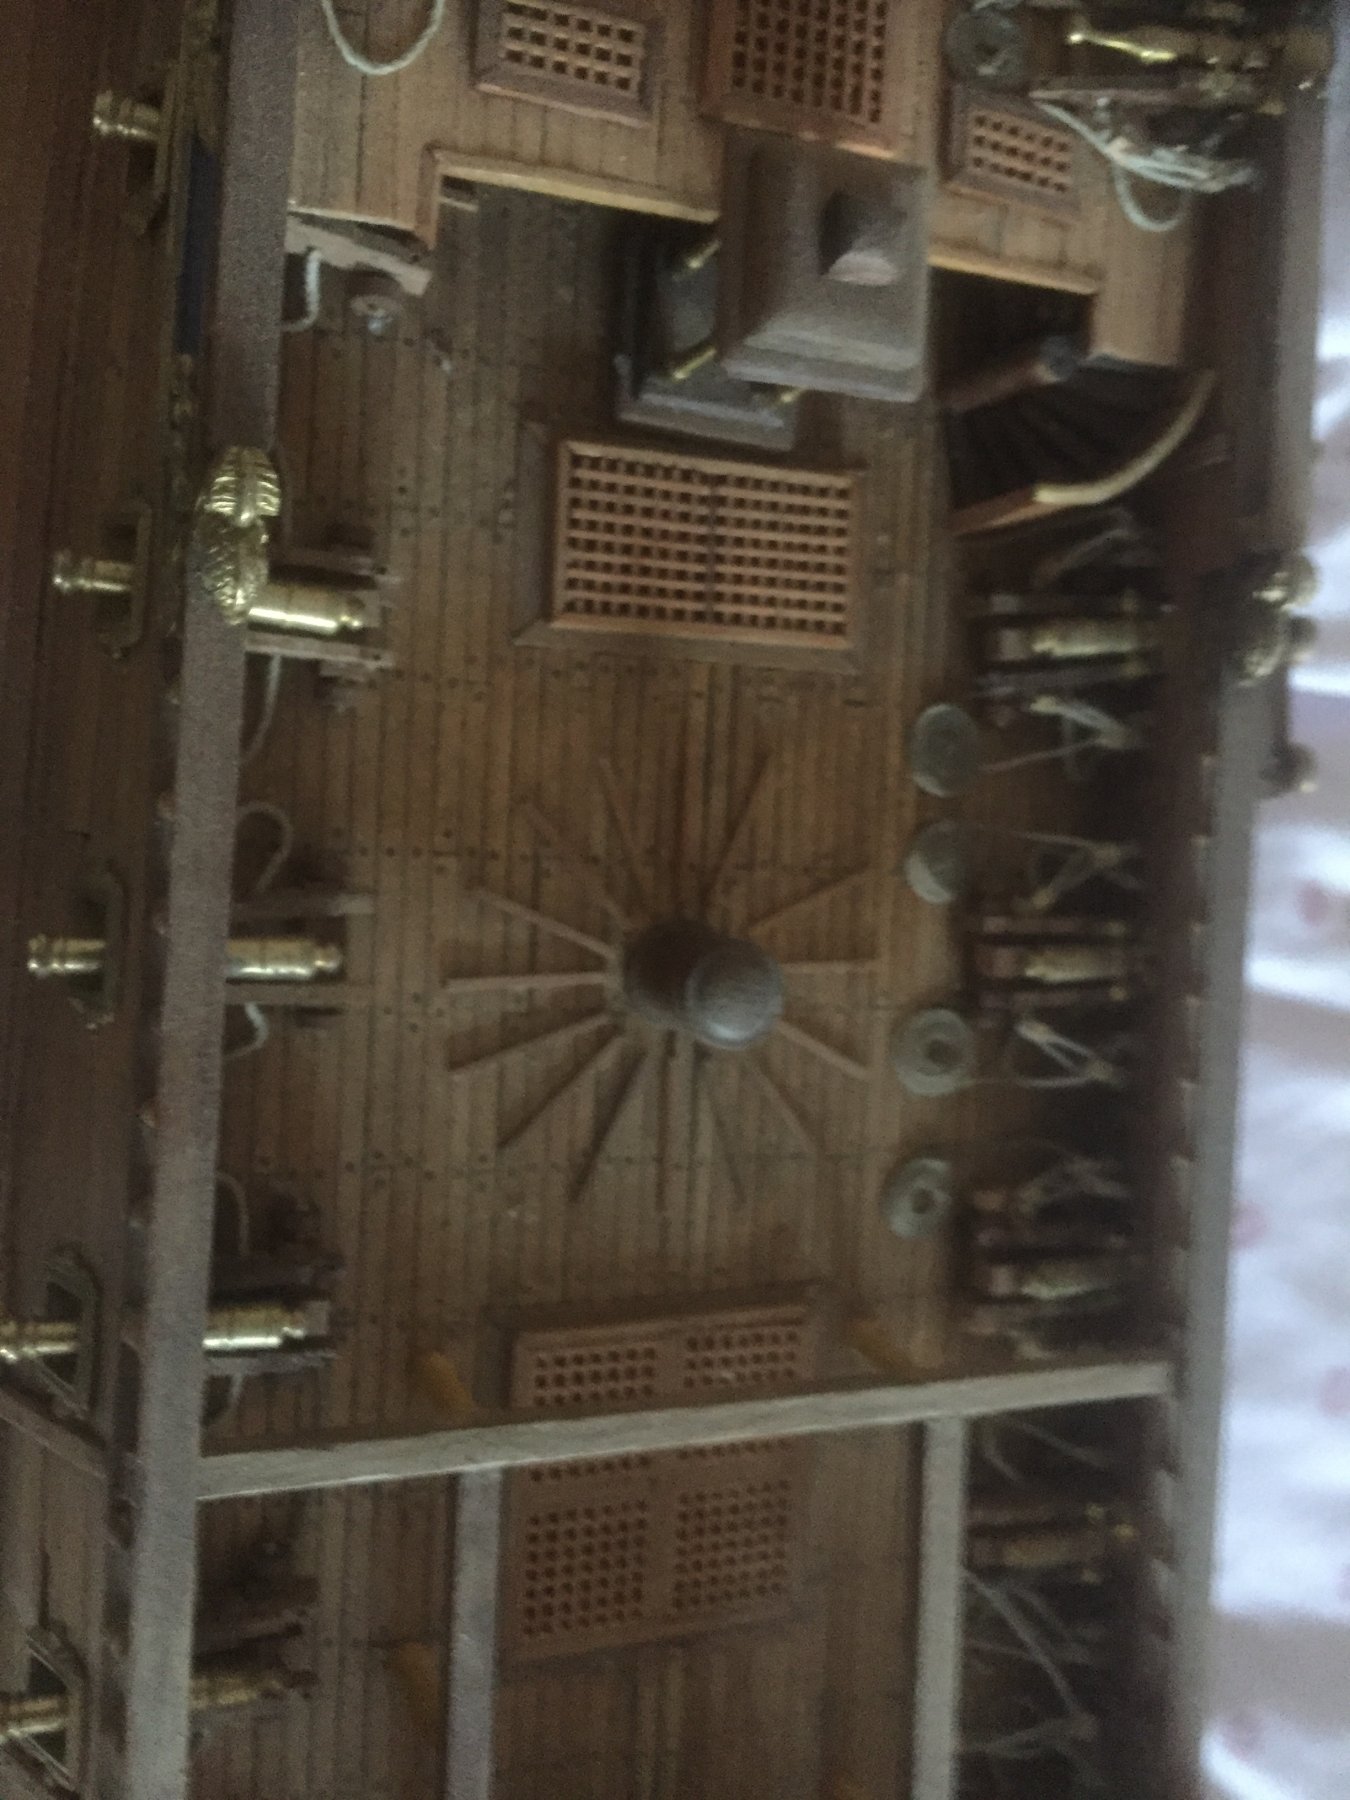
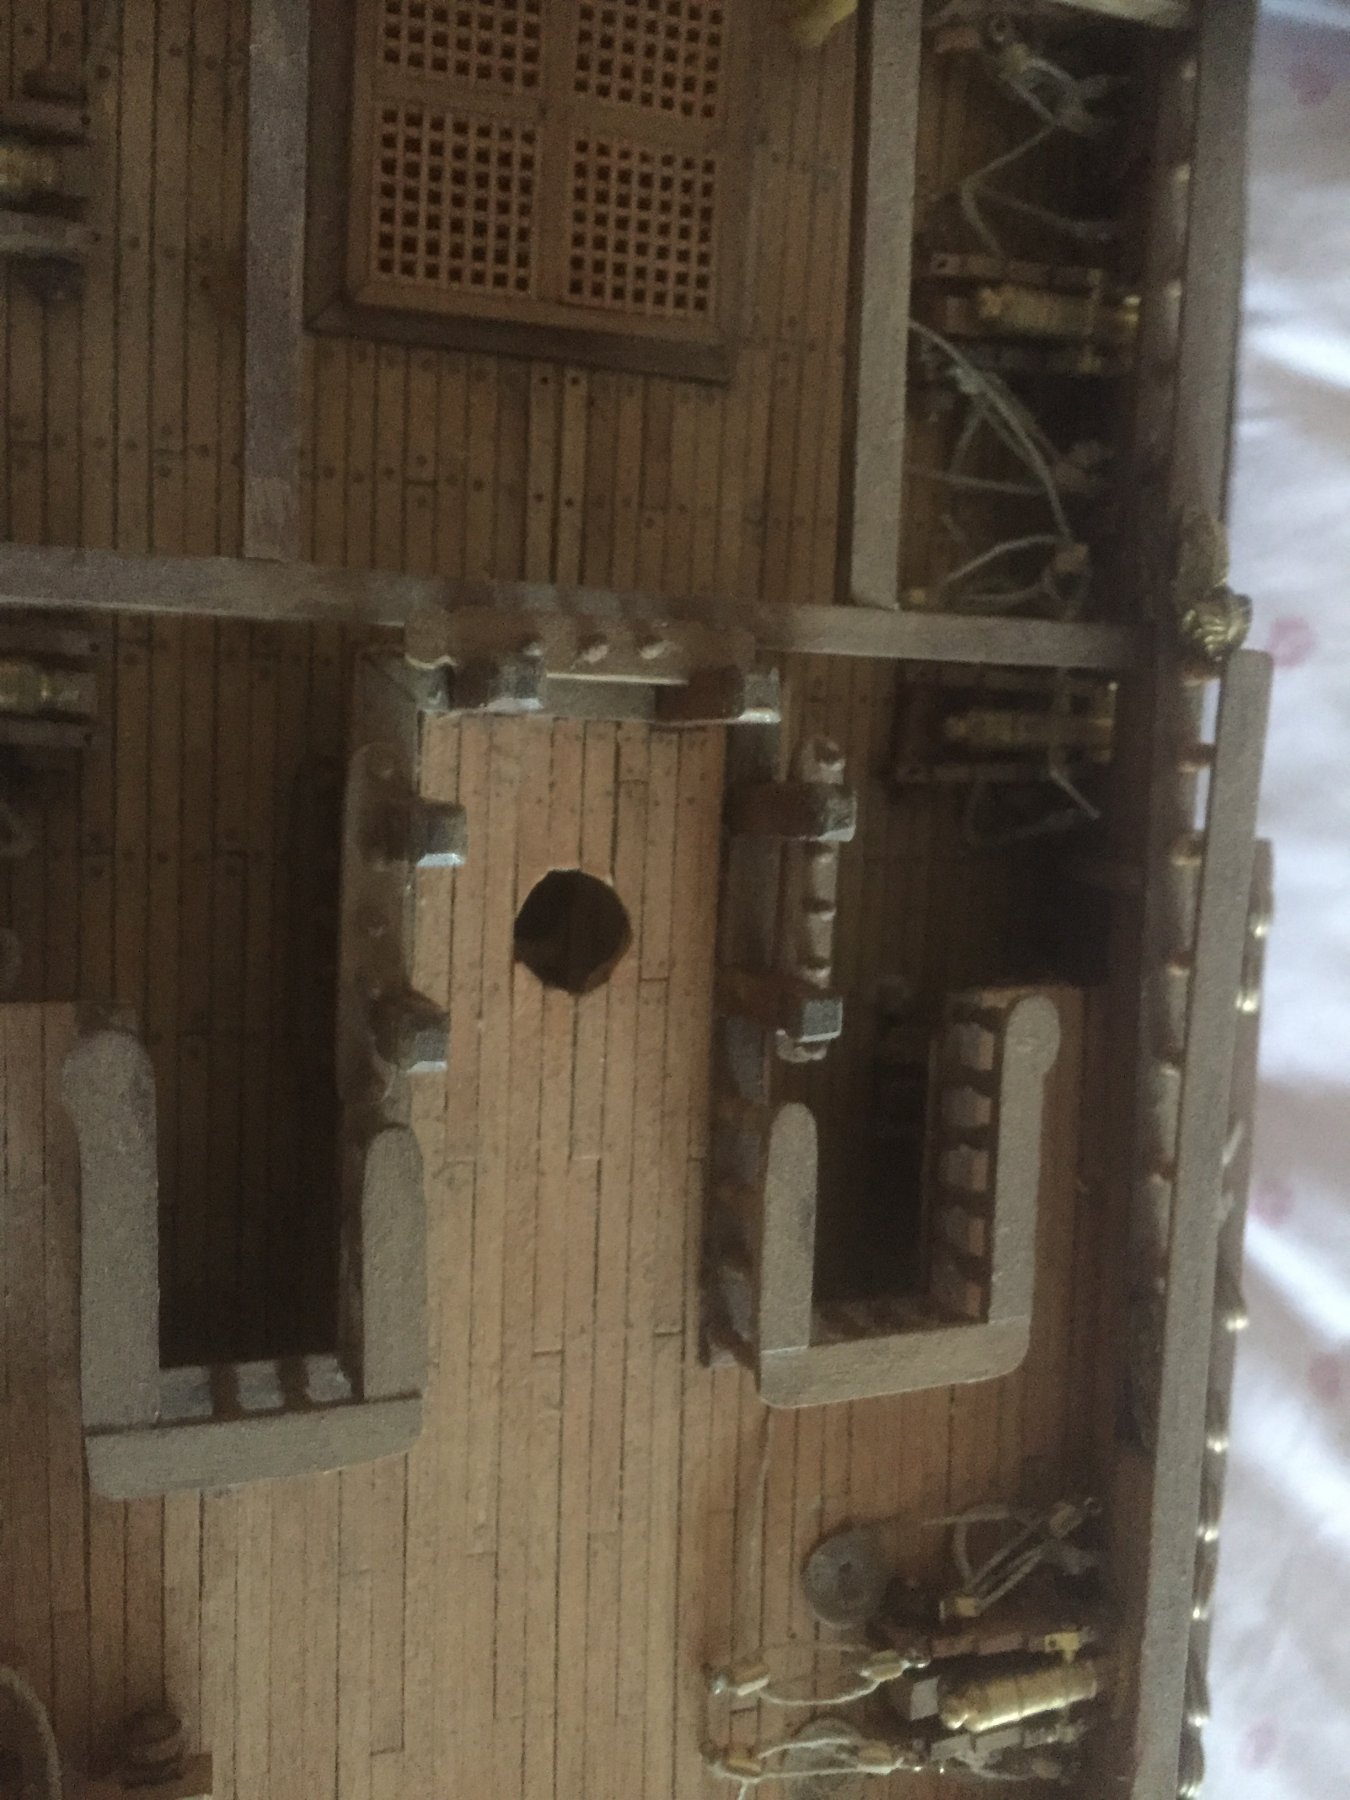
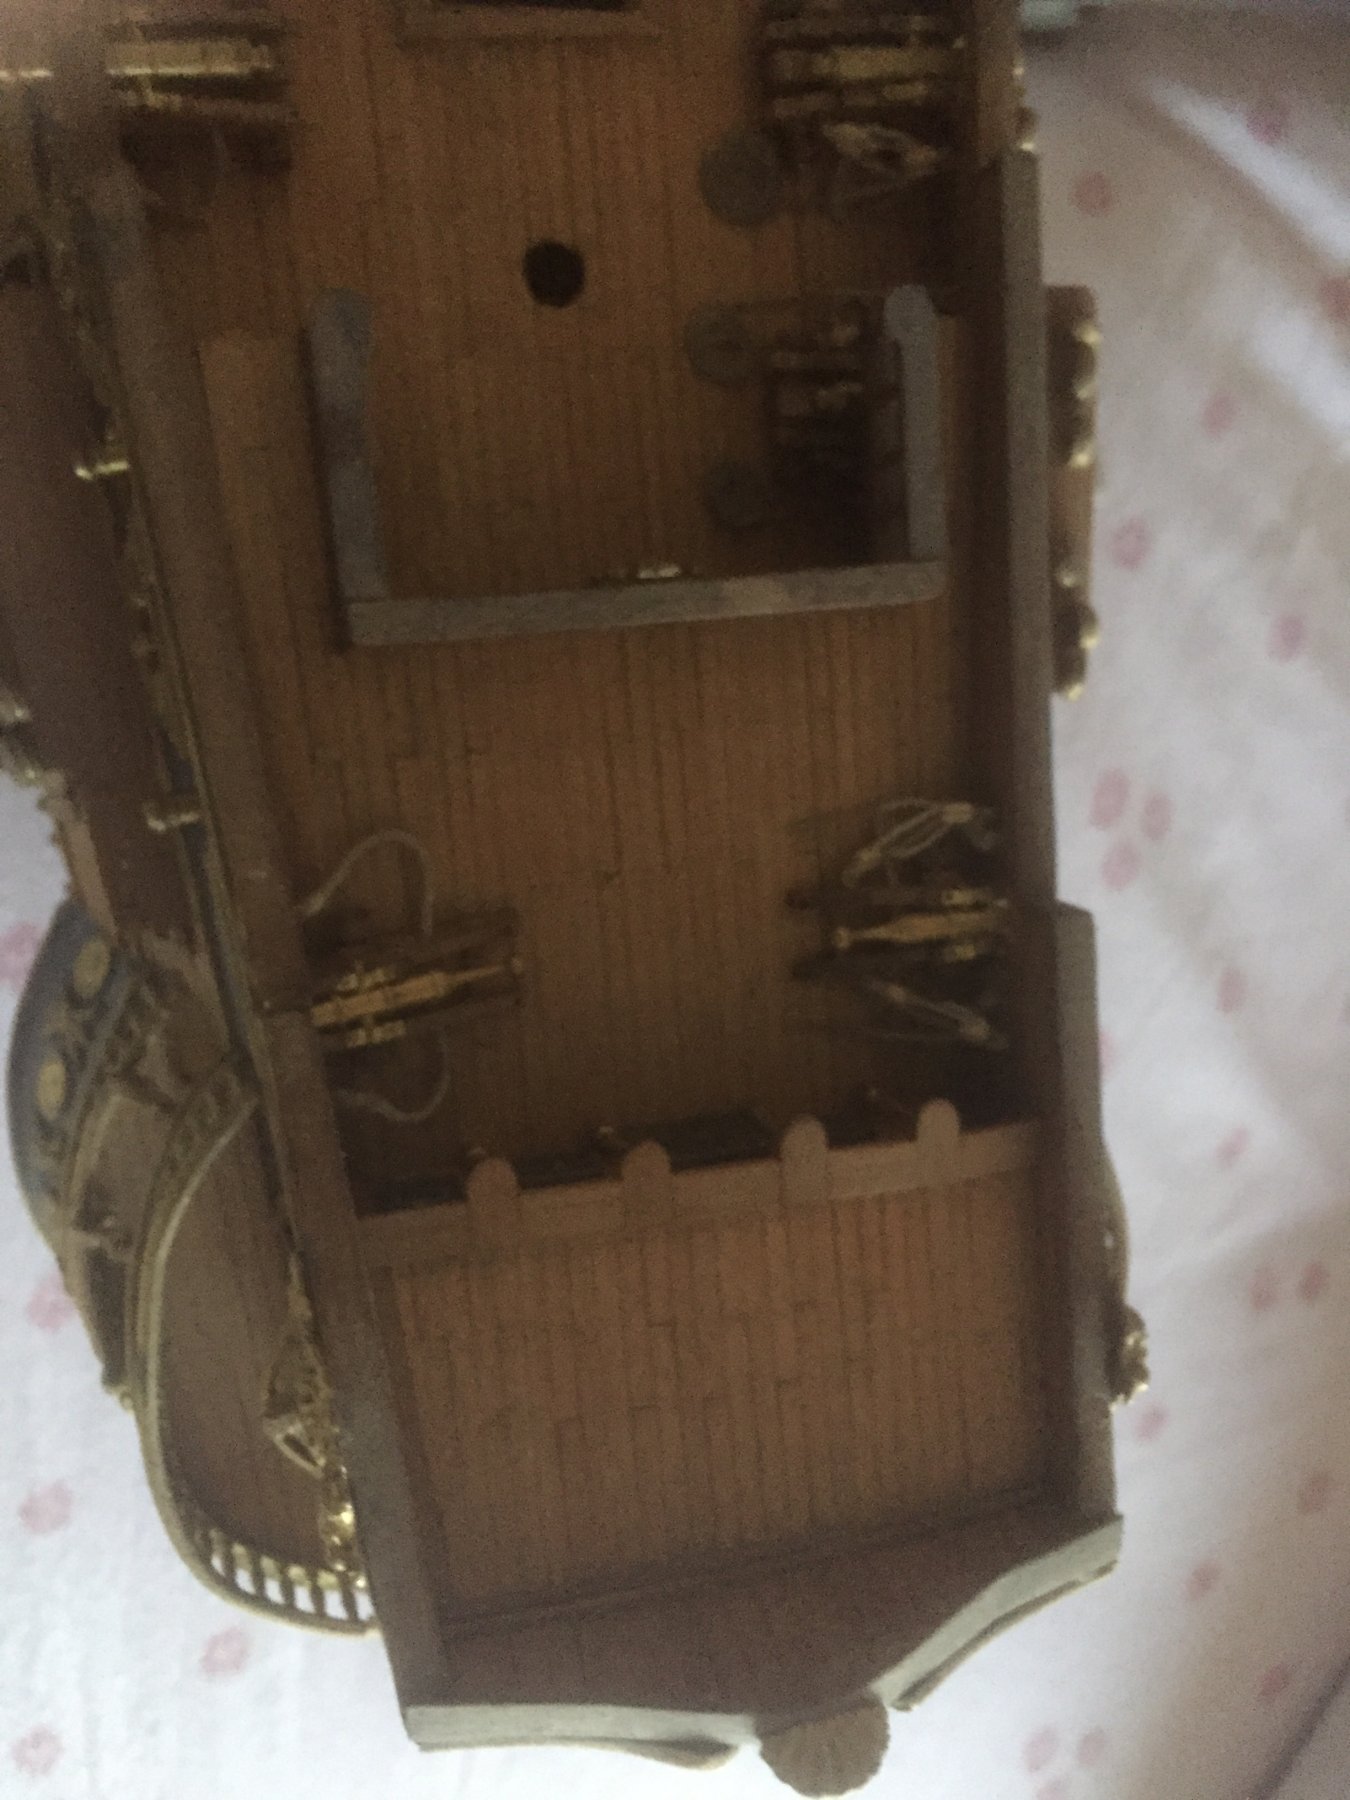
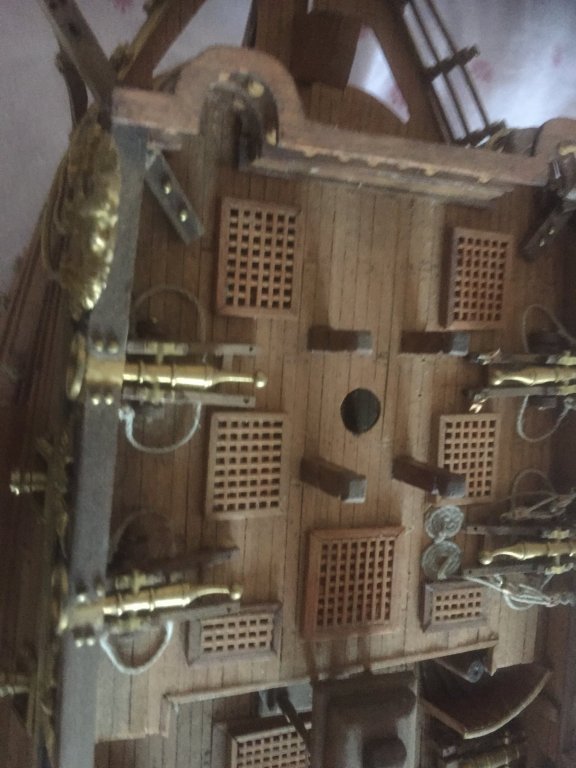
Victory's Guns On board ship cannons become Guns (Apparently) There are three main ways to rig the guns with tackle In the Instructions the Guns are secured with roved tackle ie lashed round with the Main tackle being well secured. Strictly speaking the Barrel should also be lashed up to the ship's side. And the main tackle Lashed However I believe that should the gun be run out it would not be roved as this would prevent the gun being used. The short tackle from the gun to the ship's side would be short and a further tack with 2 double blocks would be at full extent. The main tackle would be loose the allow the gun to recoil As the gun was fired the rear tackle would be tightened to allow the gun to be reloaded. FINALLY. All references to the side tackle show a single block at the Gun and a double block at the ships side - Seems like Caldercraft got it wrong here Has anybody any ideas about mongraming the Barrels. Will add photos as I proceed
- 527 replies
-
- 1
-
-
- caldercraft
- victory
- (and 1 more)
-
I remember that's where I got the information from Historic Ship Modelling. Its how I did my Victory many years ago I do think that Tree nails make the deck come alive BUT if you look at an earlier post of the actual picture Victory Tree nails you can hardly see them because the whole decking has been Holystoned over many Centuries. Would have been interesting to see how it looked when built and 50 years later in Nelson' time Interesting information Thanks
-
Have suggested to Caldercraft that they cut this part at 90 degrees so its easier to bend
- 527 replies
-
- 1
-
-
- caldercraft
- victory
- (and 1 more)
-
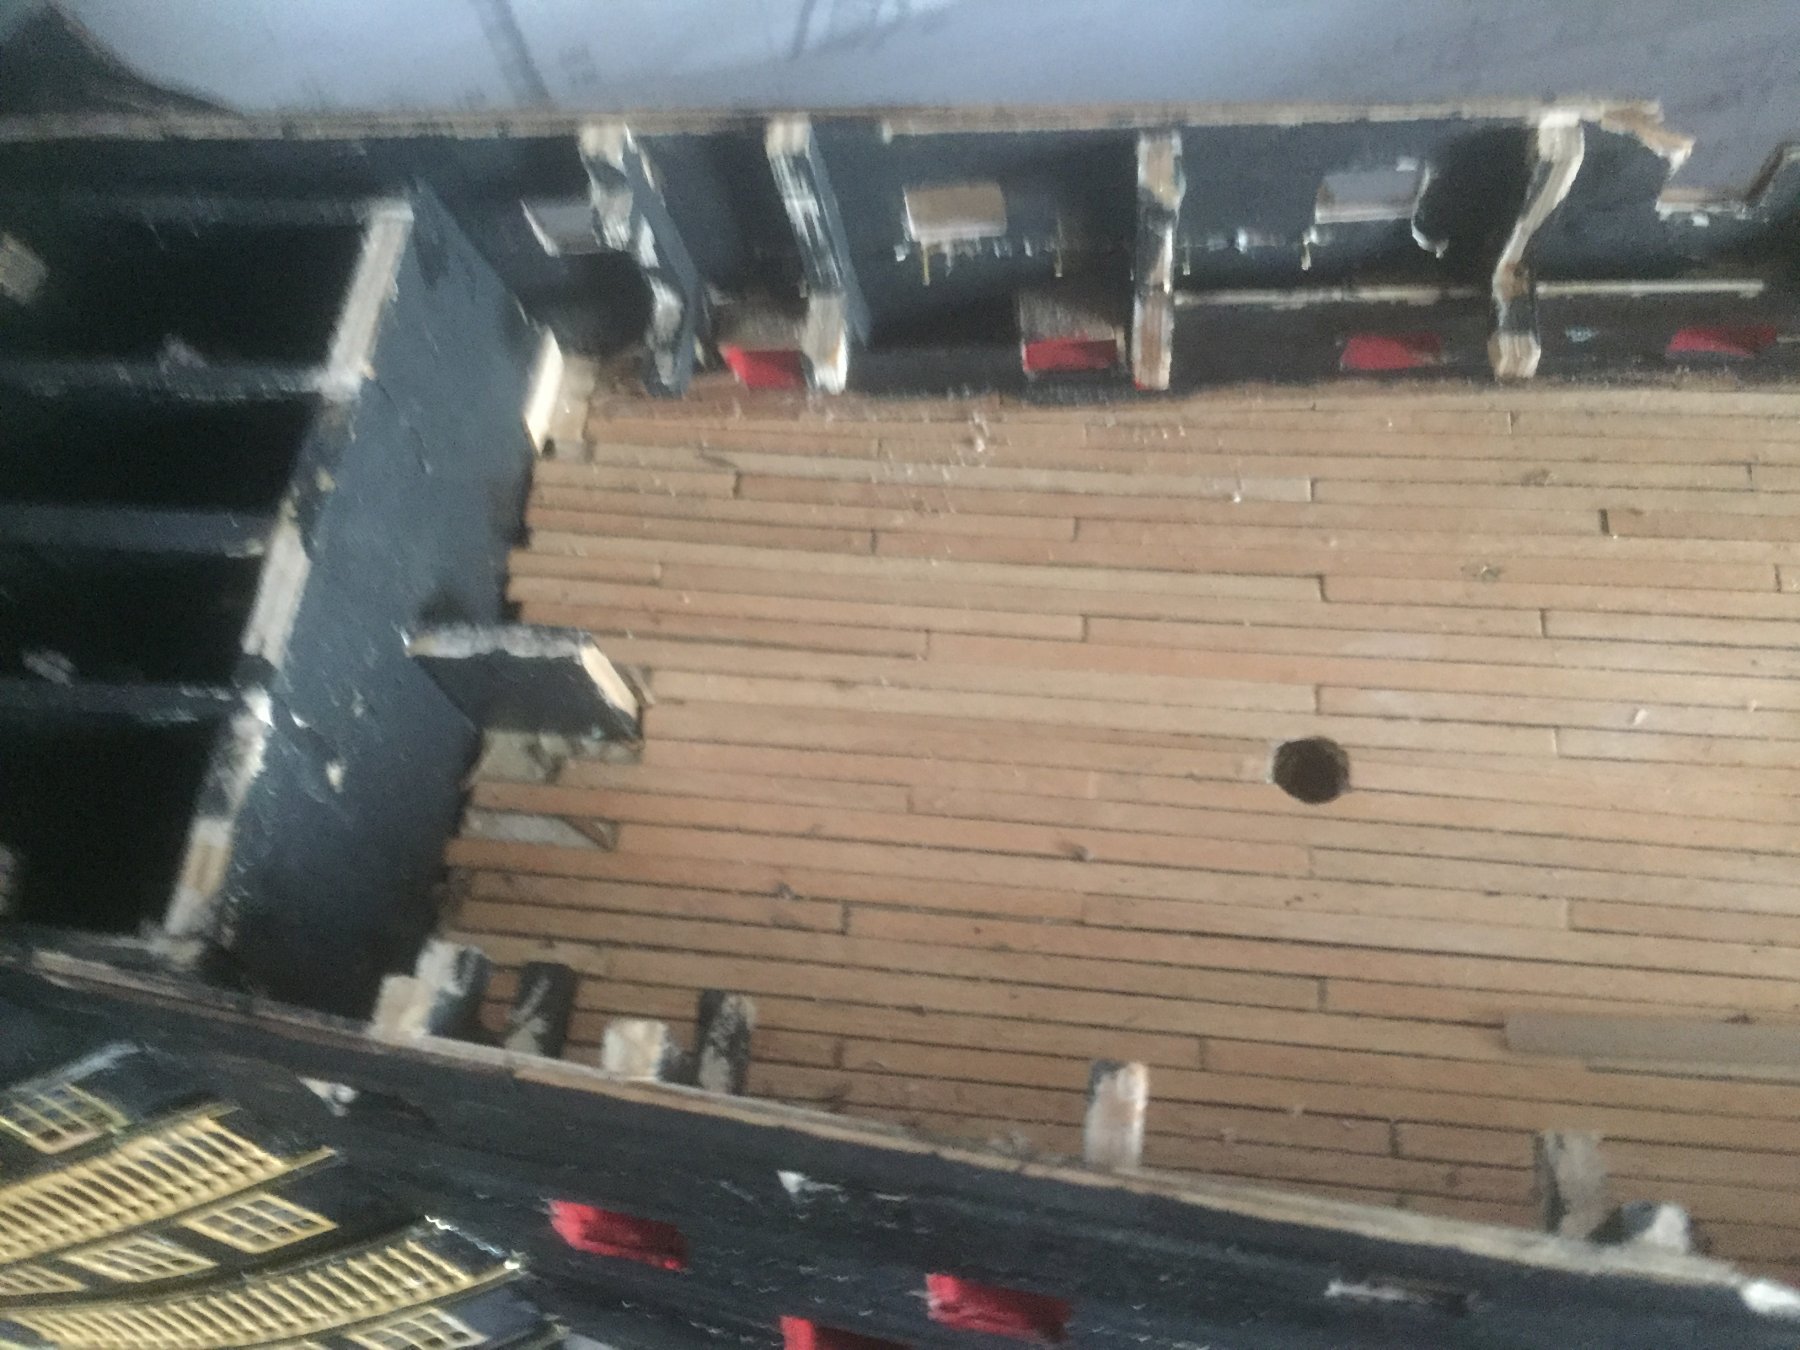
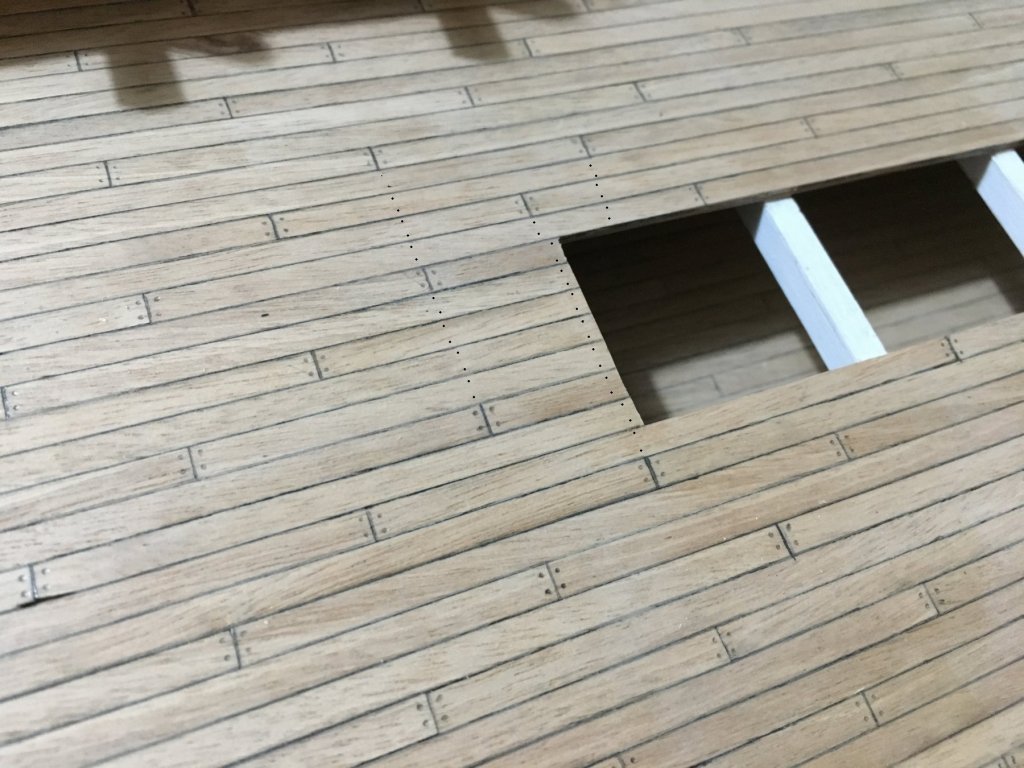
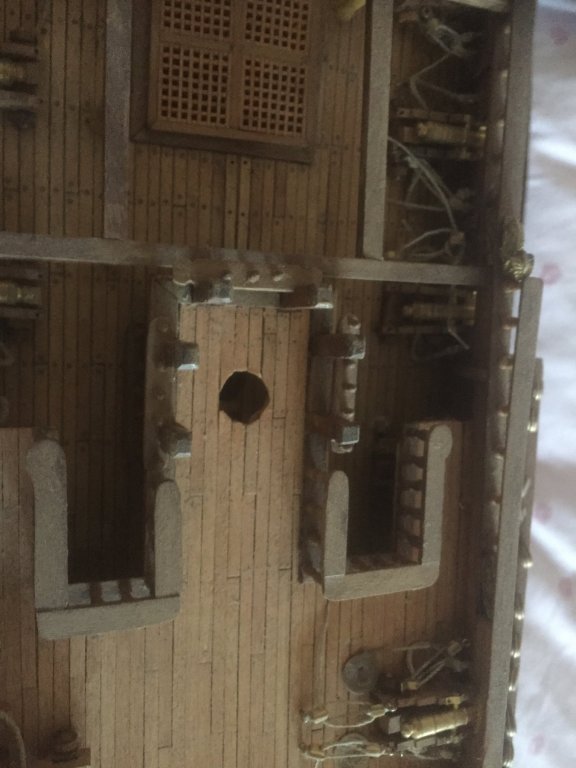
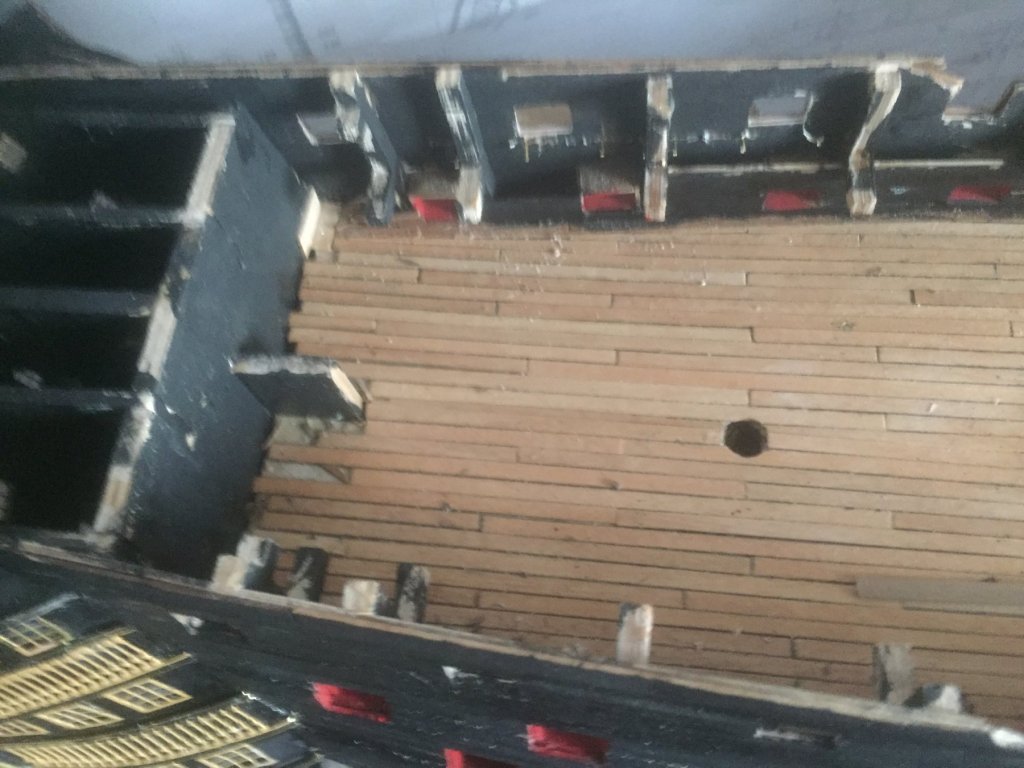
Hoping this shows up OK. Will look much better in reality as I did this in Paint Of course the hatch comings need adding before the tre nails are added at the end of the planks. (really not happy with my Victory!!)
- 527 replies
-
- 6
-
-
- caldercraft
- victory
- (and 1 more)
-
Looking at Bertu's decking. The treenails really make the deck come alive so I think I will look at doing my Victory. Presume you used a pencil. I will run mine across the deck to see what it looks like
- 527 replies
-
- 2
-
-
- caldercraft
- victory
- (and 1 more)
-
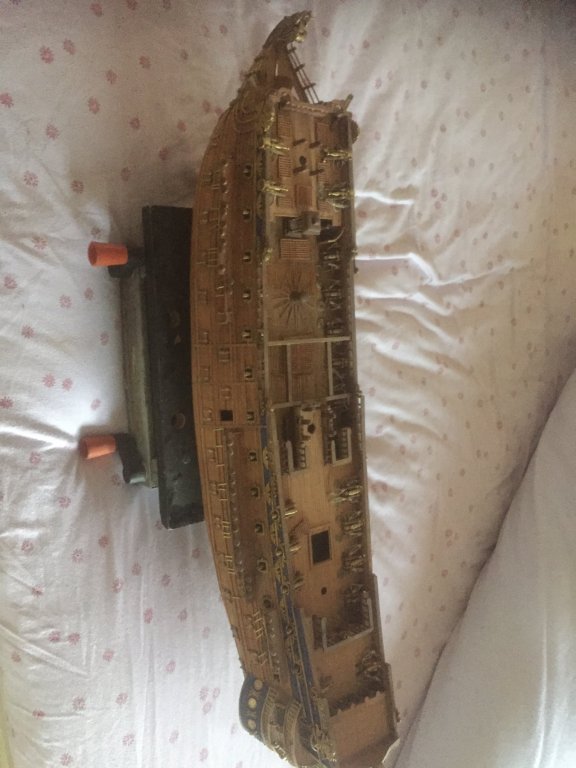
Really sorry about this didn't explain myself properly (or carefully) One thing that winds me up is when people make superb jobs of their build and get basic things wrong. In this case I was WRONG!! Its often difficult to explain what you mean I build a Panart 1:78 Victory about 40 years and a San Felipe about 20 years ago (have enclosed some pictures) and was very impressed by the quality of the wood - in particular the solid wood fittings like the gun carriages. So did not paint either model As you may know the fittings like the gun carriages are walnut ply on the Caldercraft so I decided to paint the model. Quite frankly its the worse thing I ever did as much of the detail is now hidden. (it also hides up a few errors which I am not happy with) I have joggled my deck but not as well as Bertu's and have been advised by Caldercraft against treenails as the model is not big enough. (if you look at the actual Picture of the Victory the treenail are hardly visible as the are the same wood as the decking Strictly speaking the treenails should run across the planking at every deck beam but that's a bit of over kill Sorry for the misunderstanding But I did congratulate Bertu on his incredible work Seriously thinking of starting the San Felipe as I am not happy with my Victory (Certainly need to clean it up a bit as Ive not worked on it in a year!!) Obviously Victory is no where near as far built as my SFelipe


- 527 replies
-
- 2
-
-
- caldercraft
- victory
- (and 1 more)
-
Clear plastic for windows comes with the kit The kit does include everything Plans are amongt the best I have seen You will need a decent plan of the bow as instructions for EXACT fixing of Wakes are not good I have post a copy of the old Victory Plans from Mantua somewhere
-
Please Please Please get your joggling correct You have done a superb job of planking the deck and tree nails BUT It should be joggled 4 apart NOT 2 You should get away with the gun deck but Not Quarter Forecastle or Poop Again if you are going to mark the tree nails at least make sure each plank end is accompanied with the corresponding treenails next to each other Nearly all model instructions get this wrong and its a bad error that is easily done properly
-
How are you and your wife John Not seen any news recently Deana and I both know about Old Timers disease with DEana having 6 majoir brain surgery operations to lift her brain off her spine Me well I am just getting OLD!!
-
Has anybody got some decent pictures of the TOP of Victory's quarter gallery I suppose its the Roof. Also the Quarter Gallery Itself Also waiting Amati Victory THanks
-
Can you tell Chris about this new site Perhaps he would be willing to post to it Thanks
-
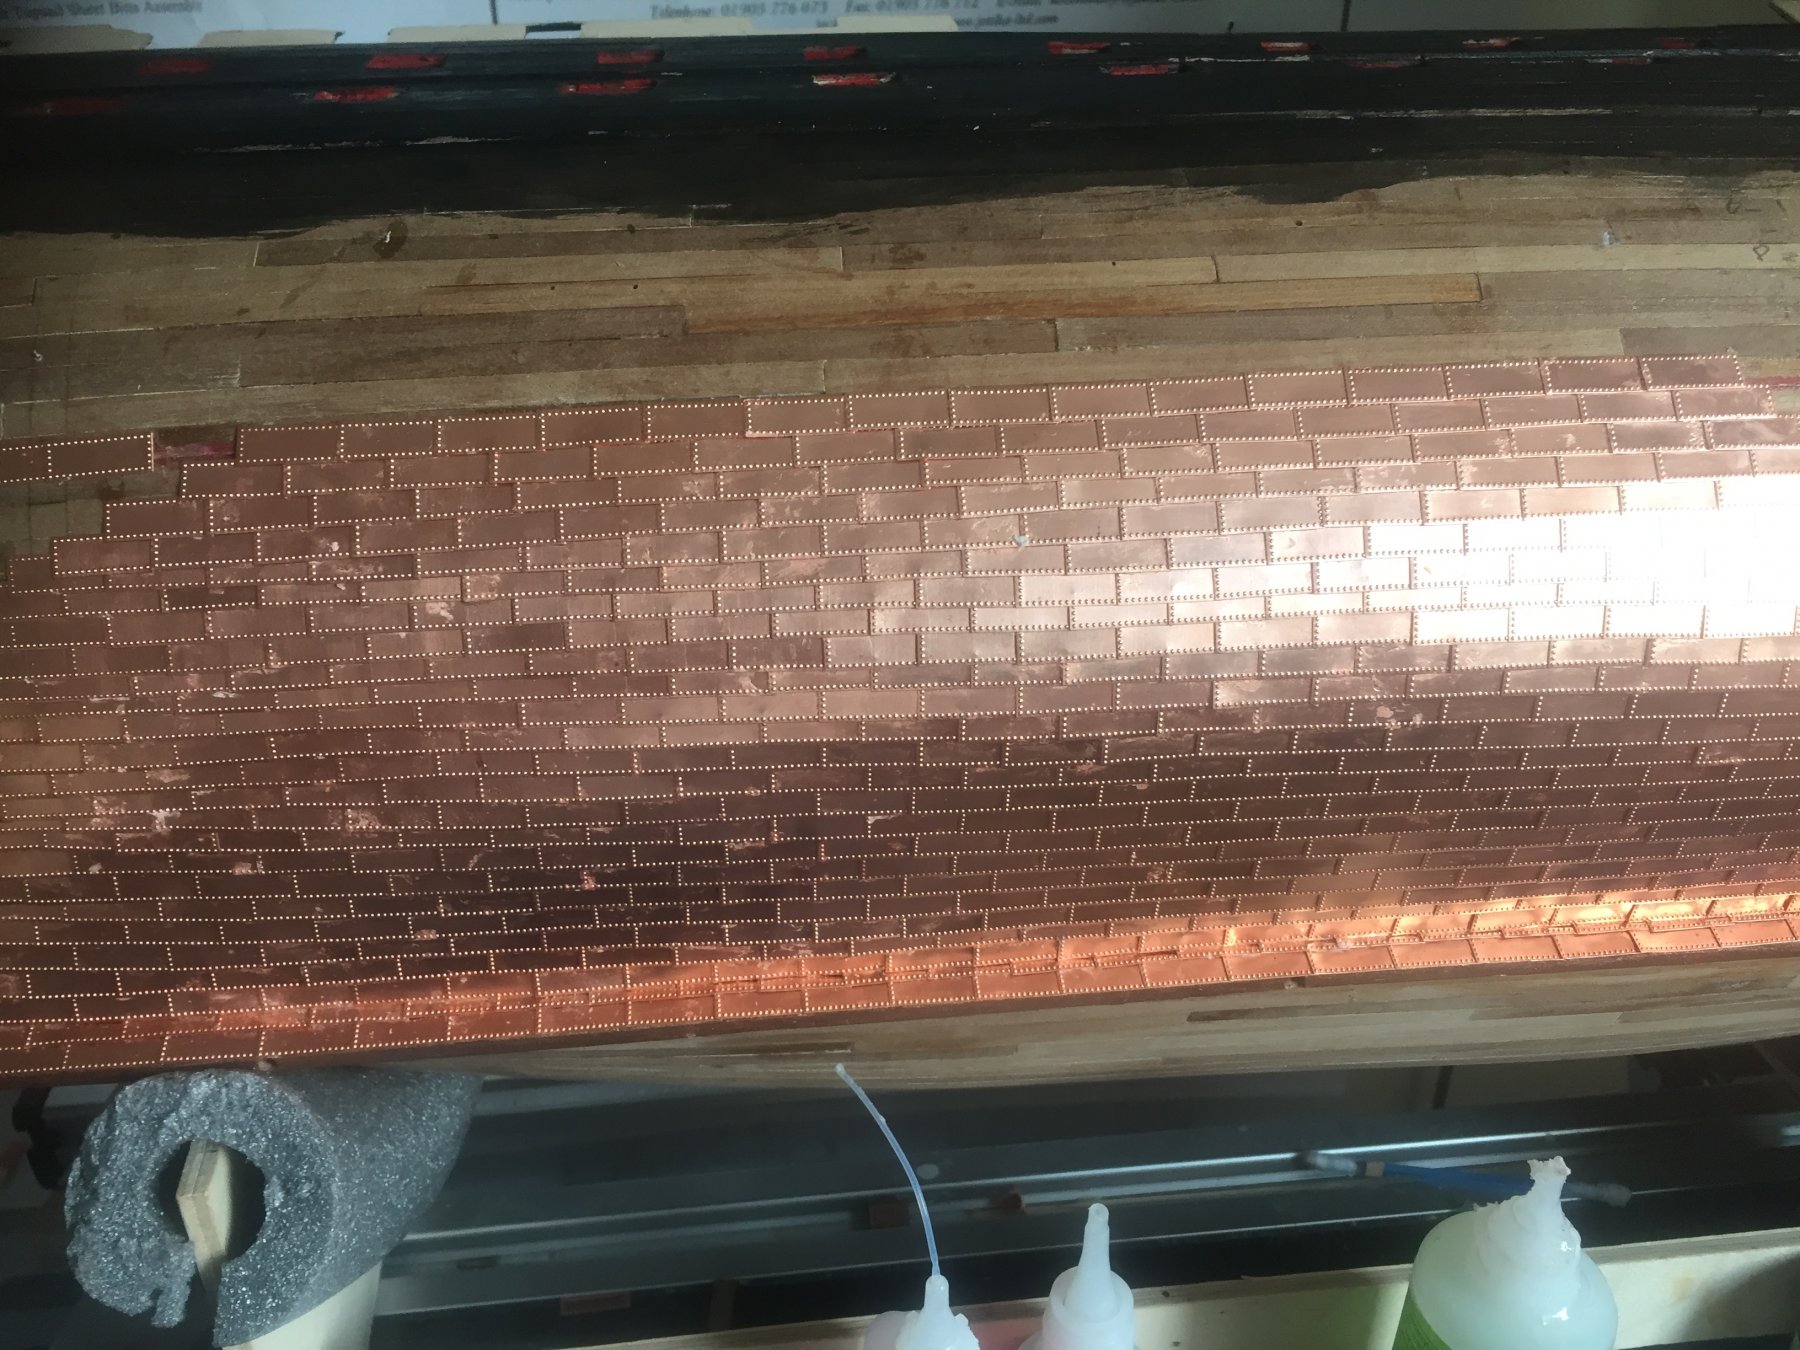
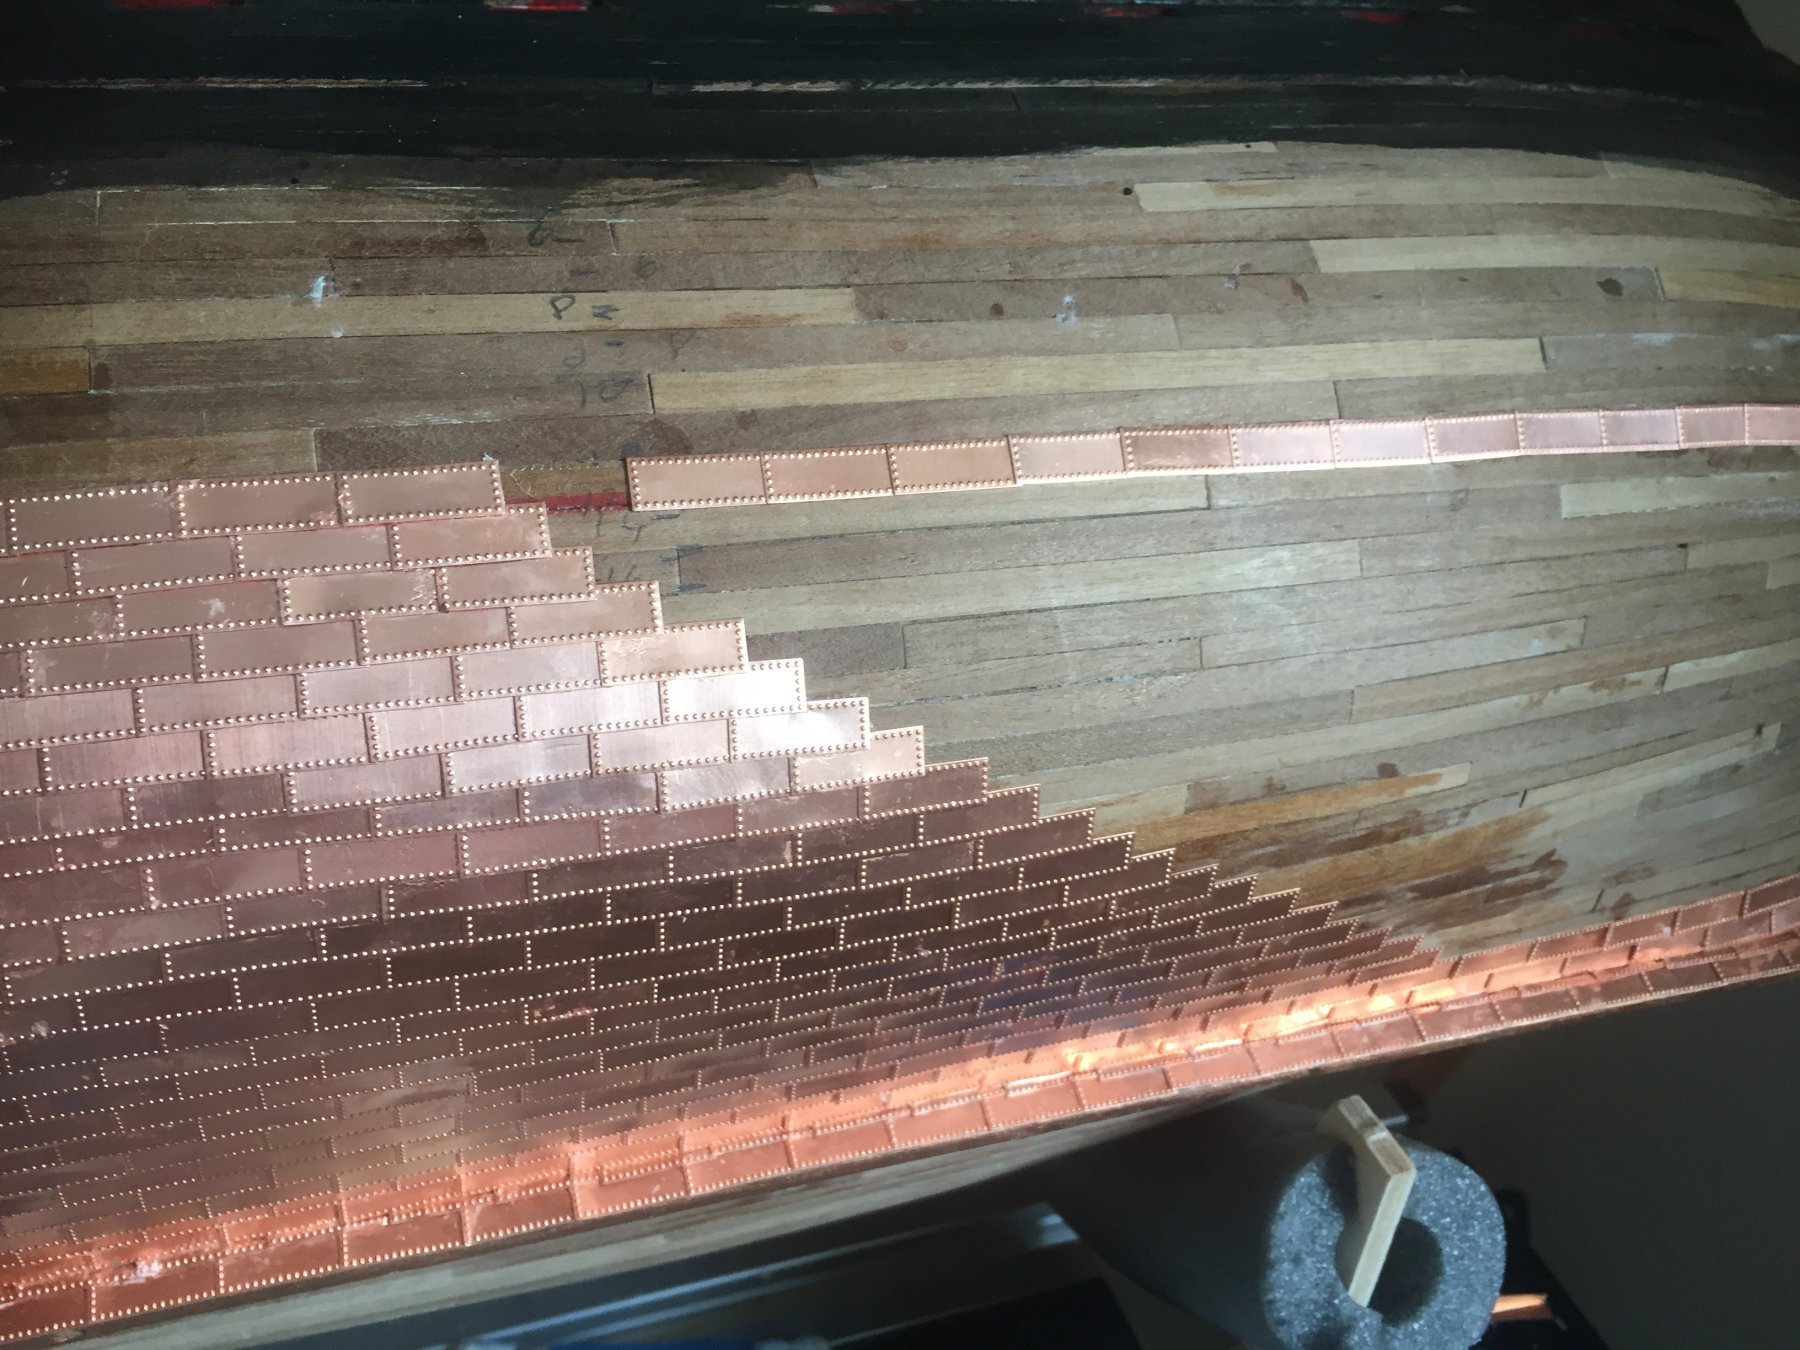
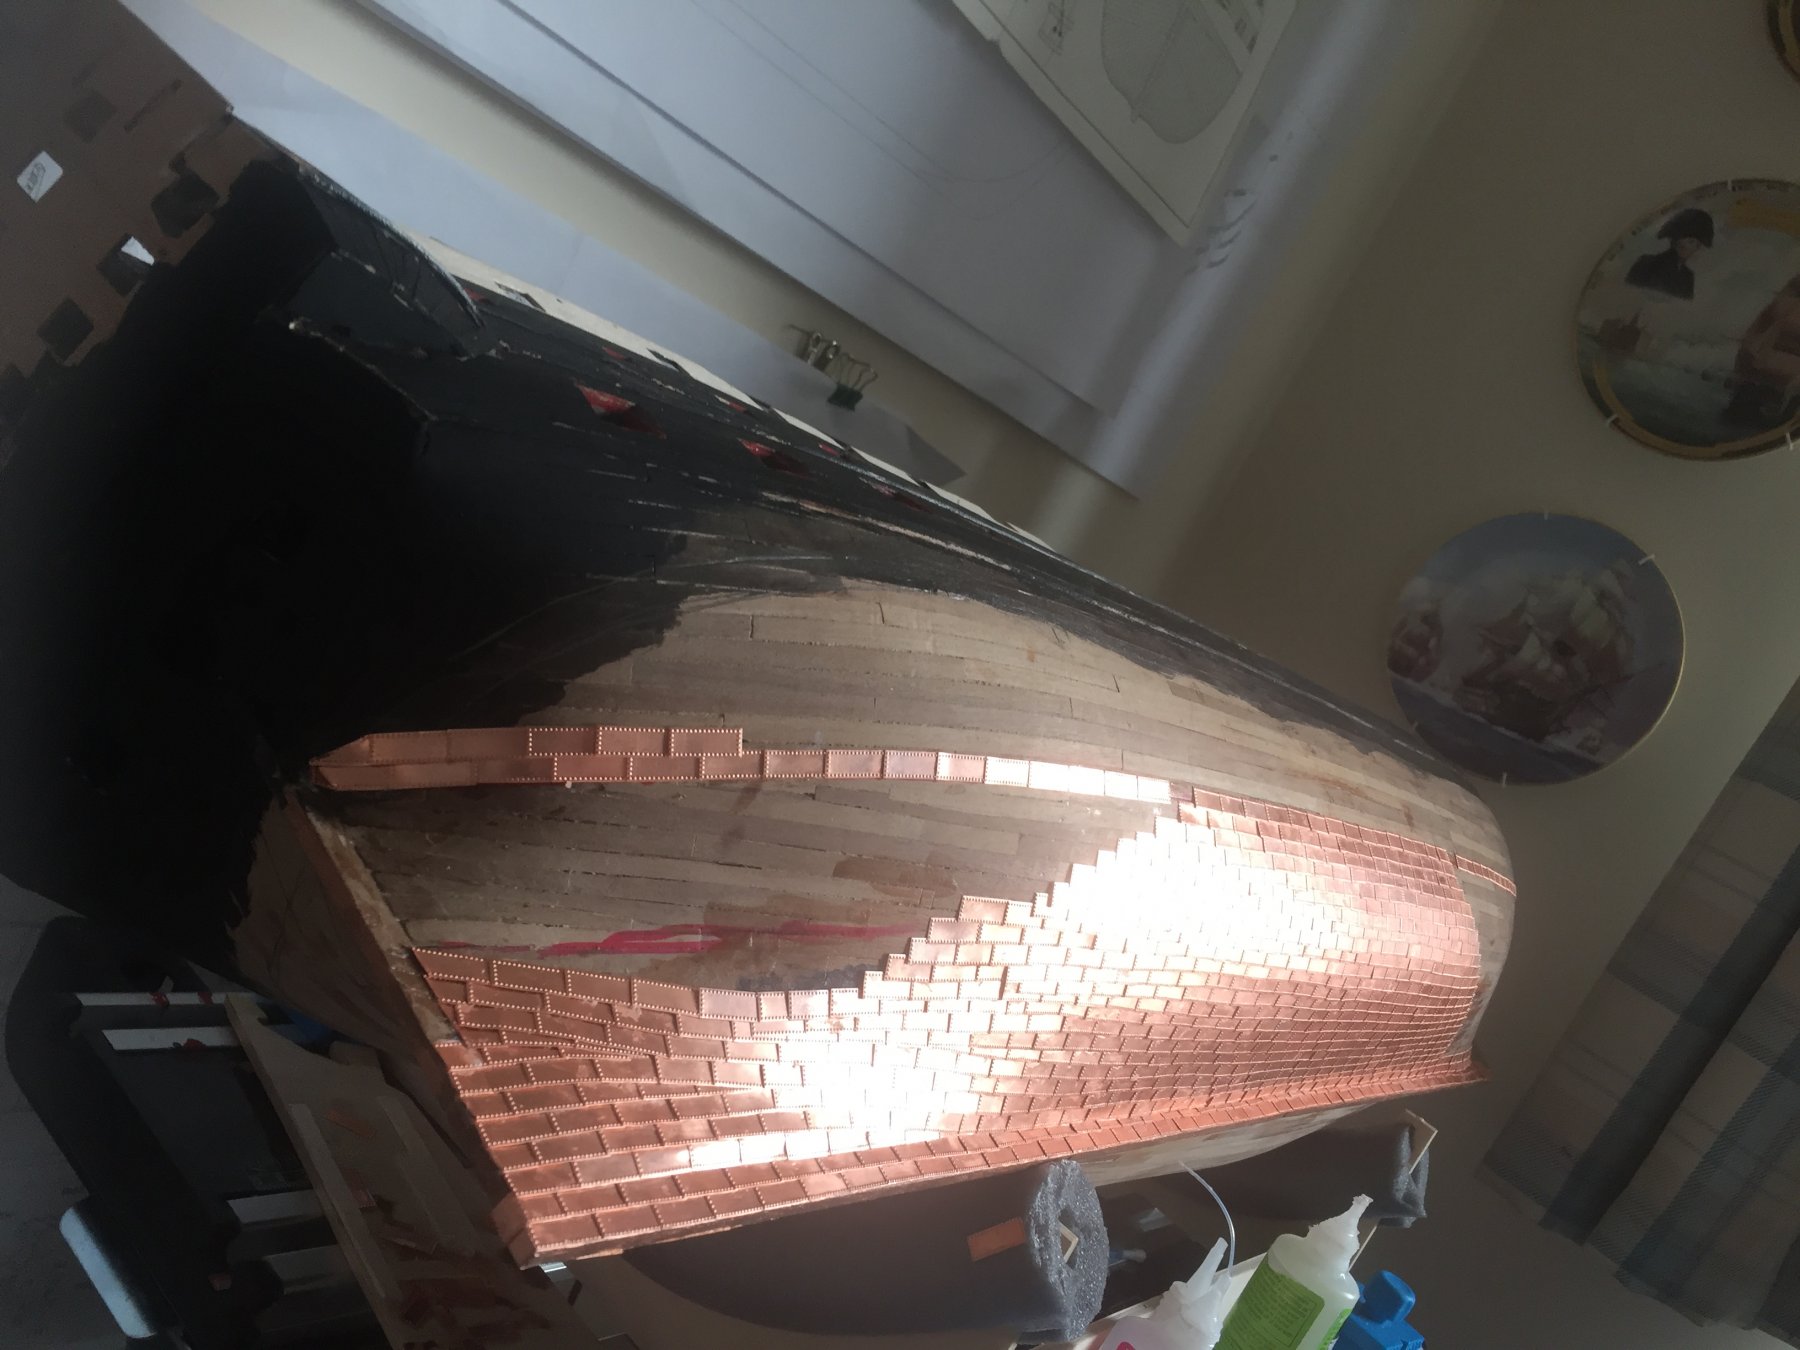
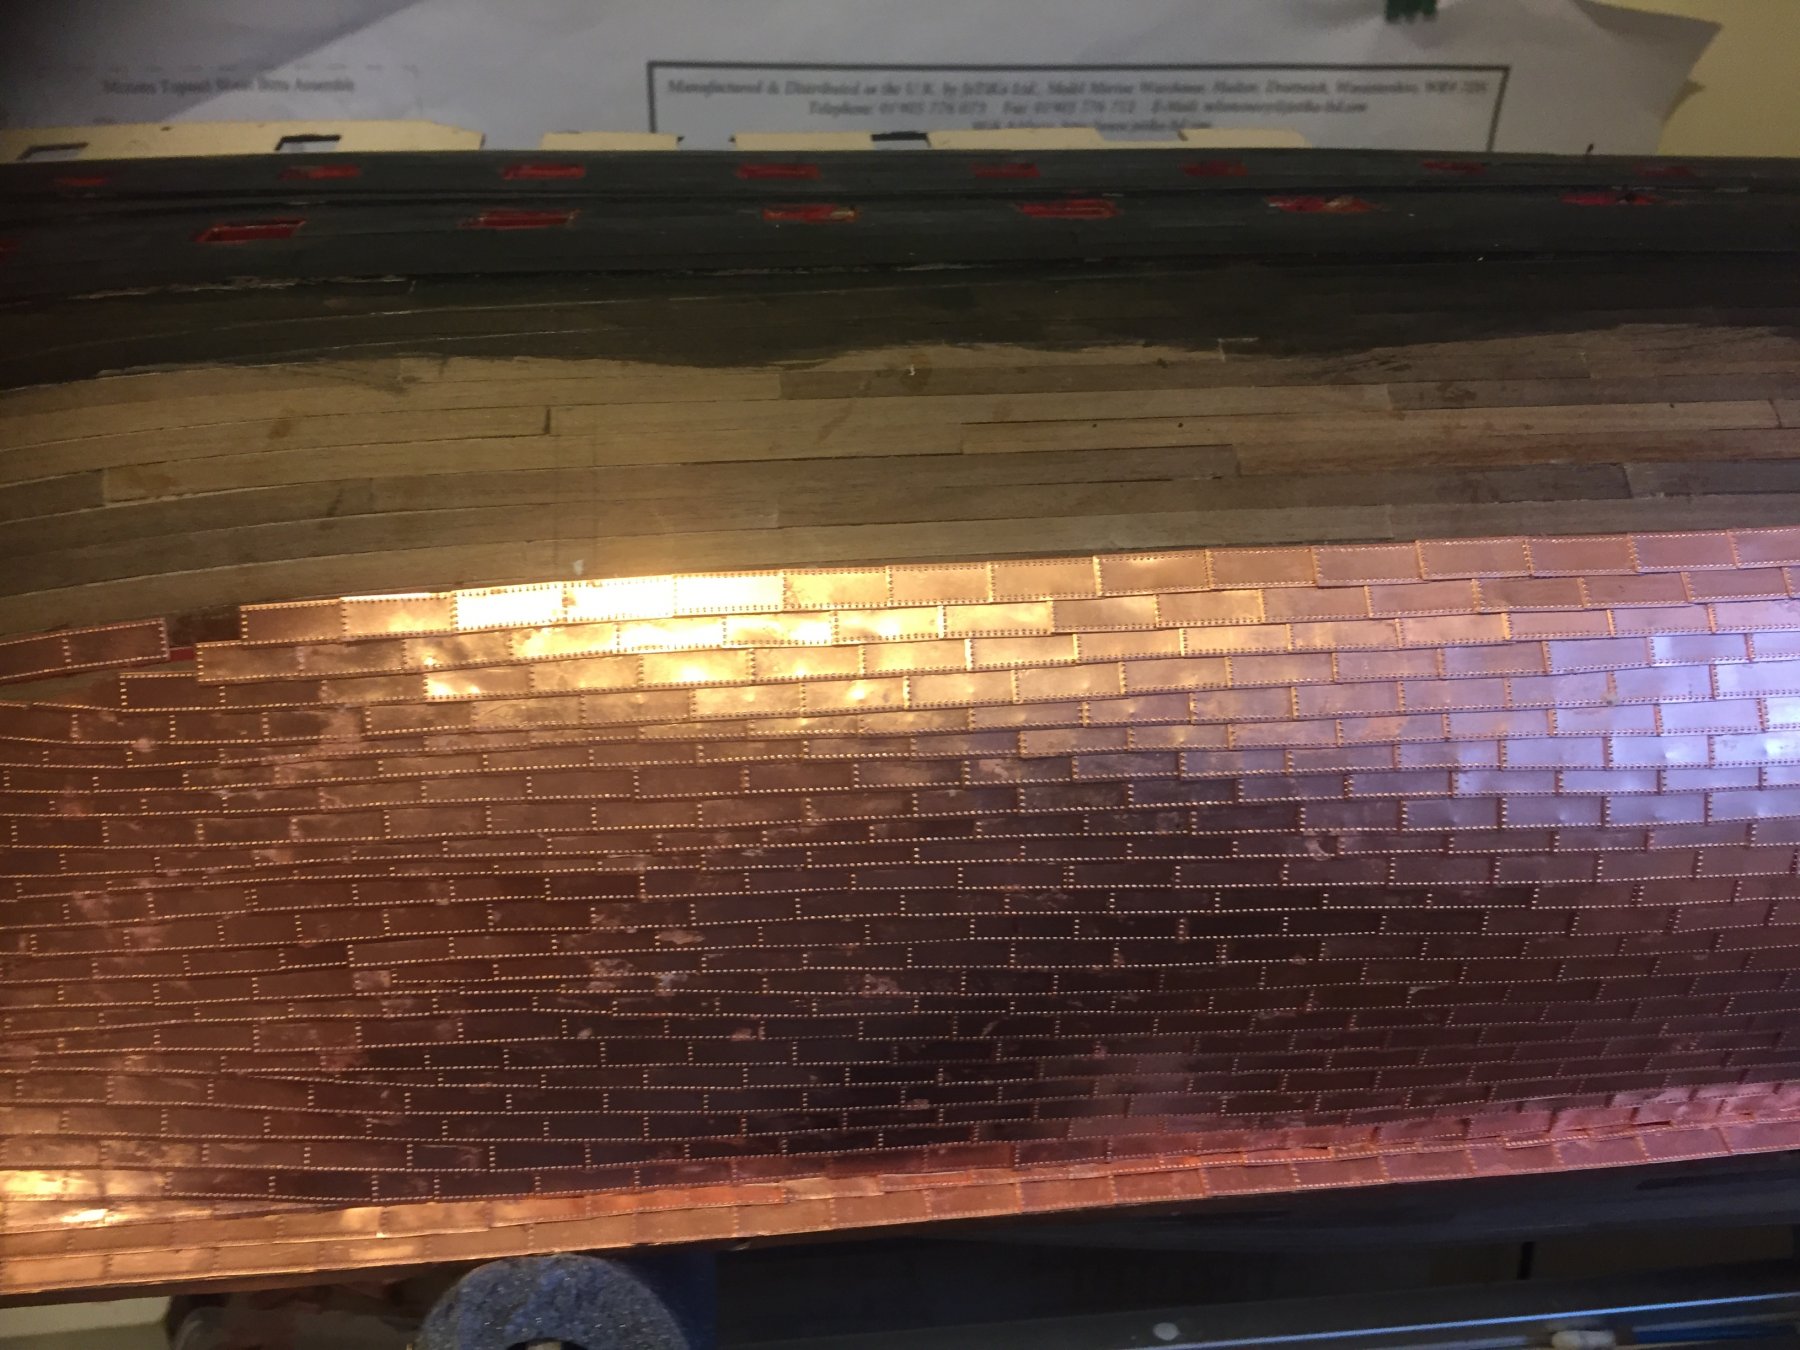
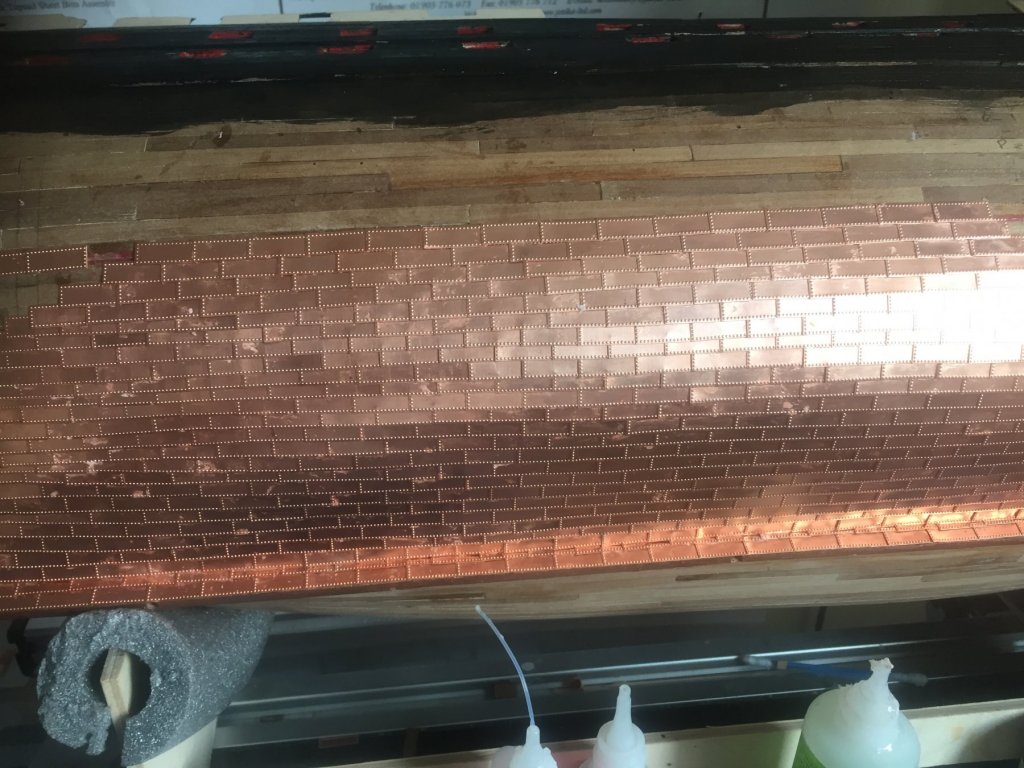
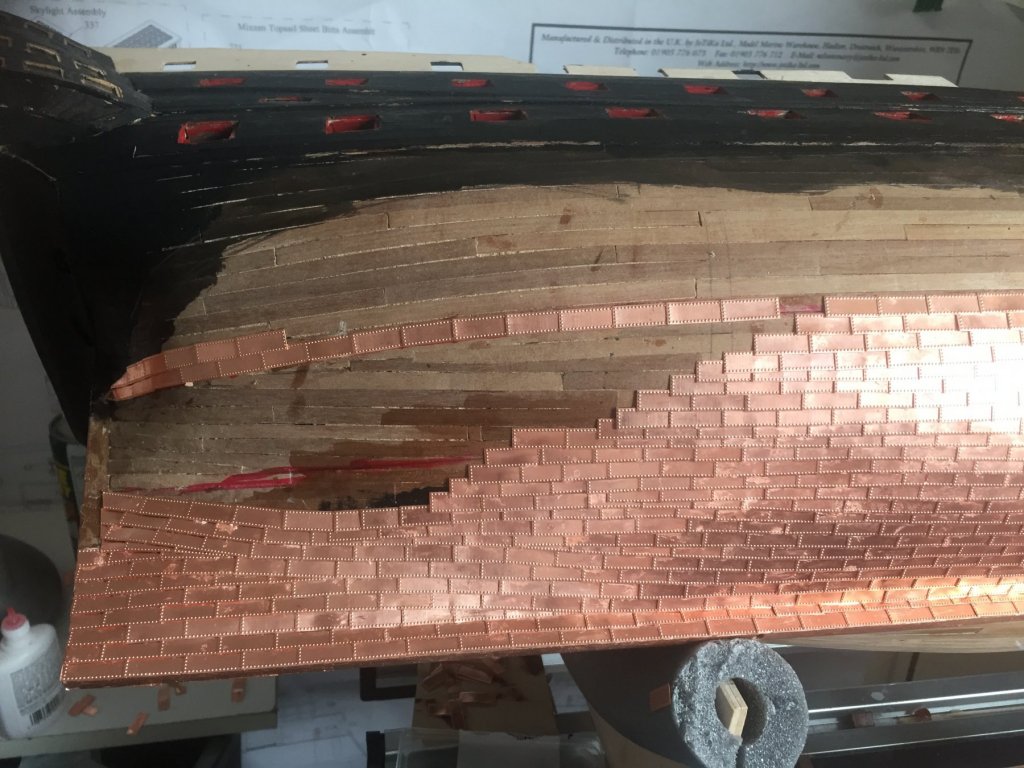
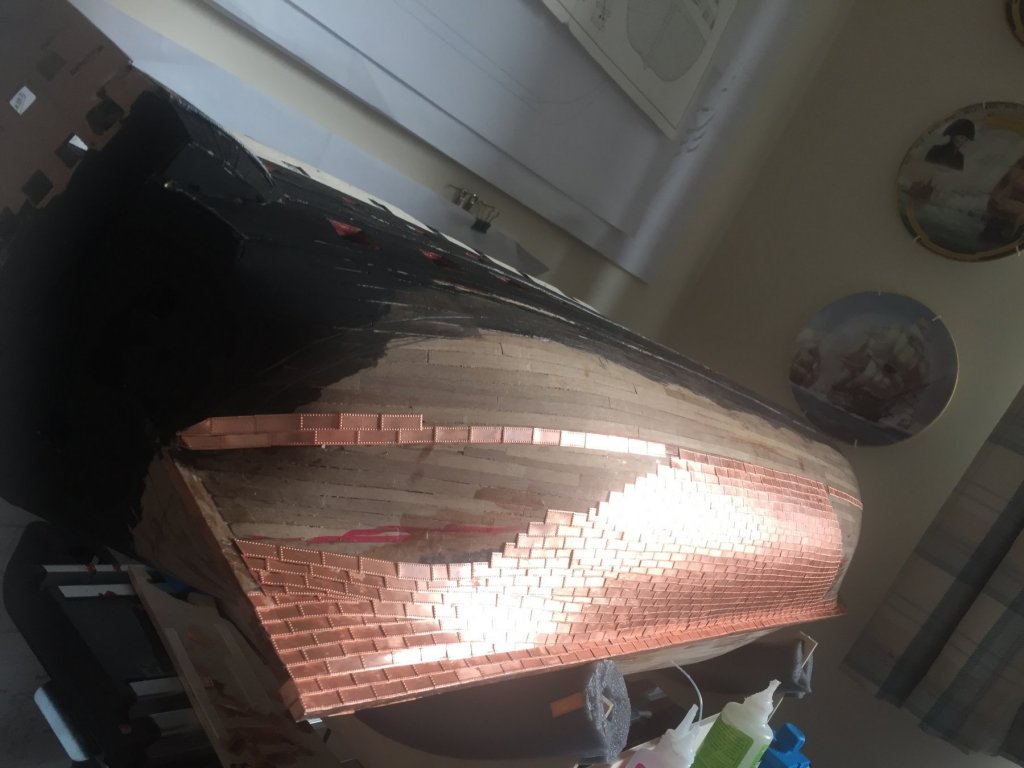
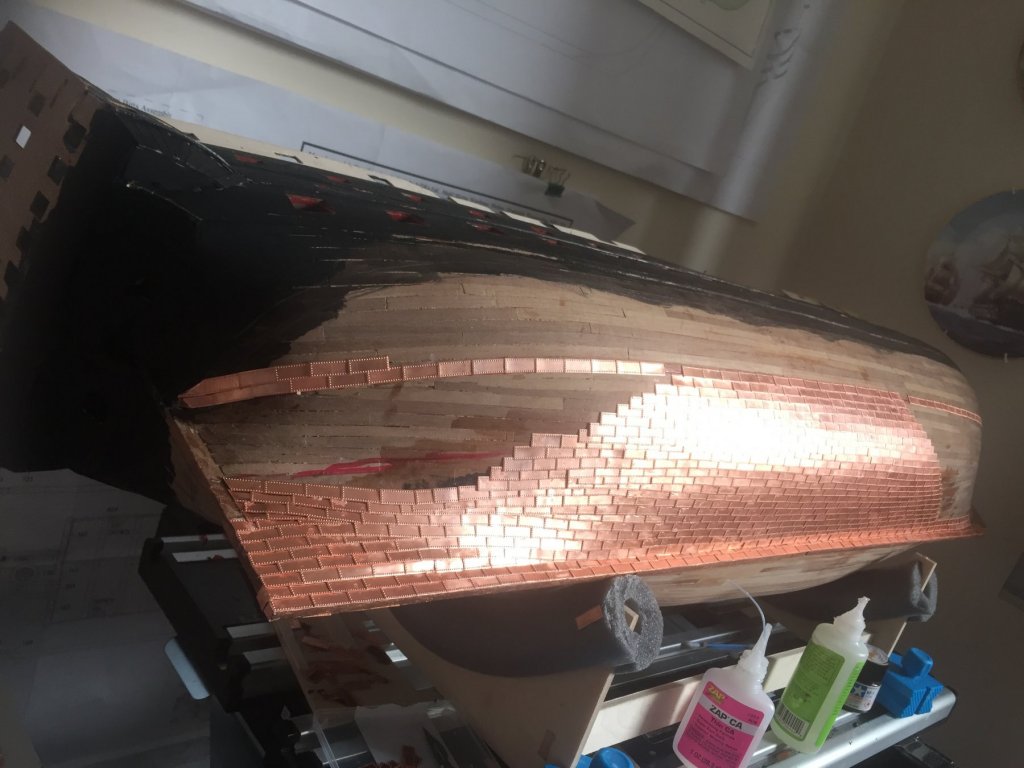
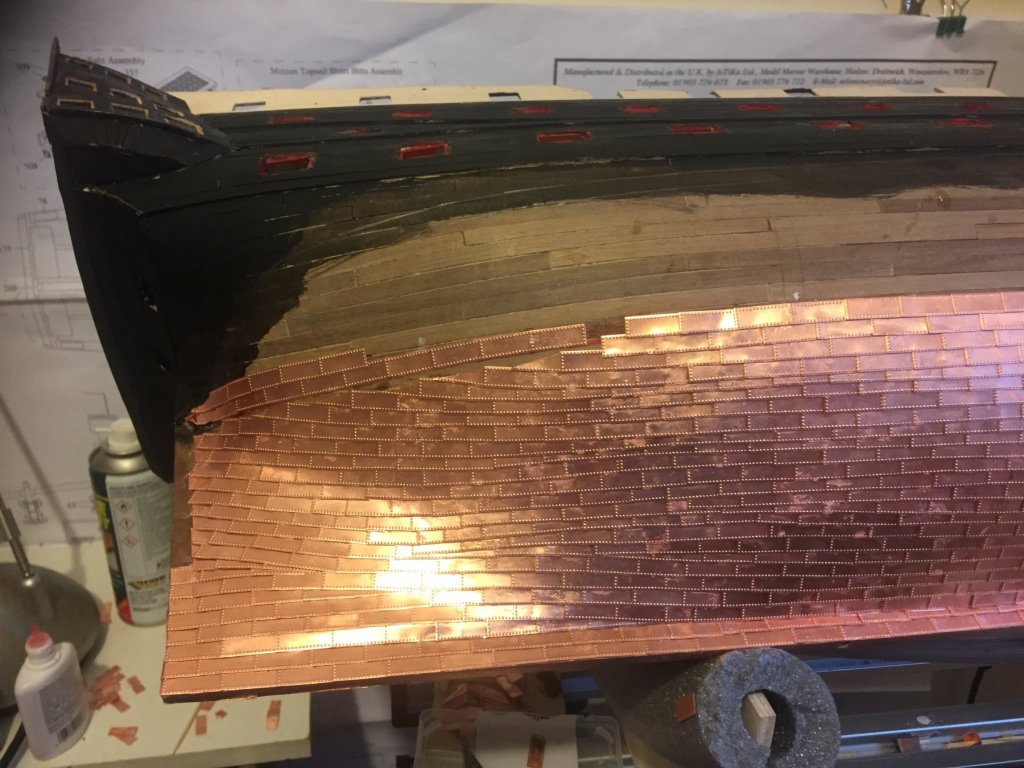
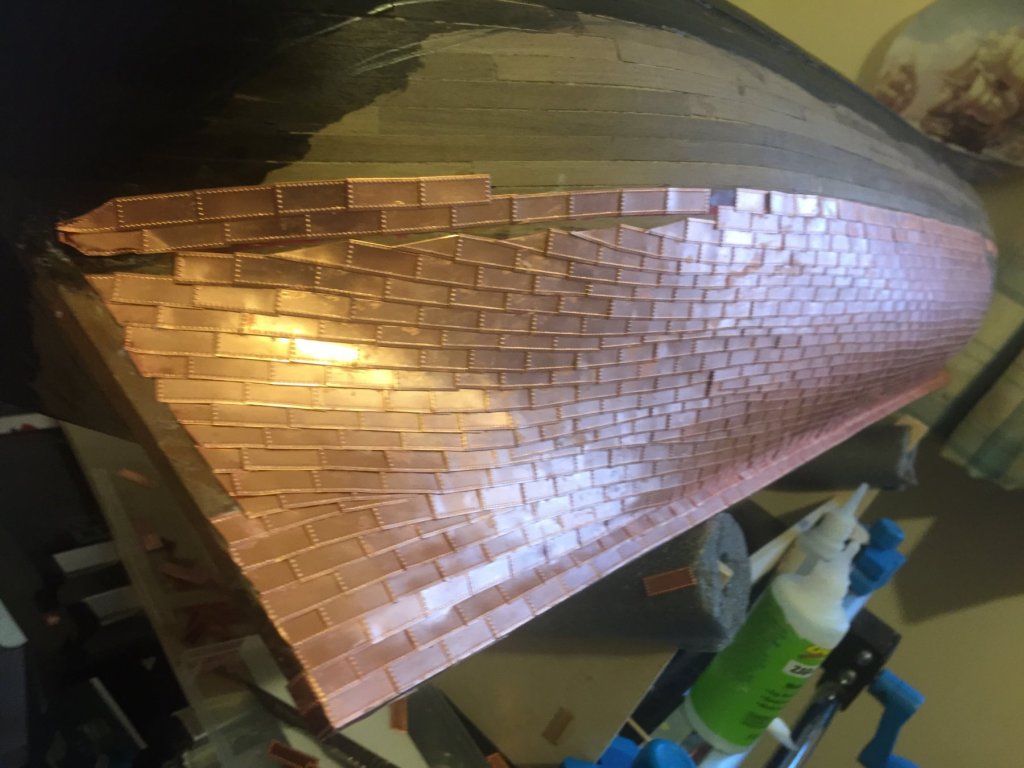
I love the run of the planking That will make the application of the Copper MUCH easier
-
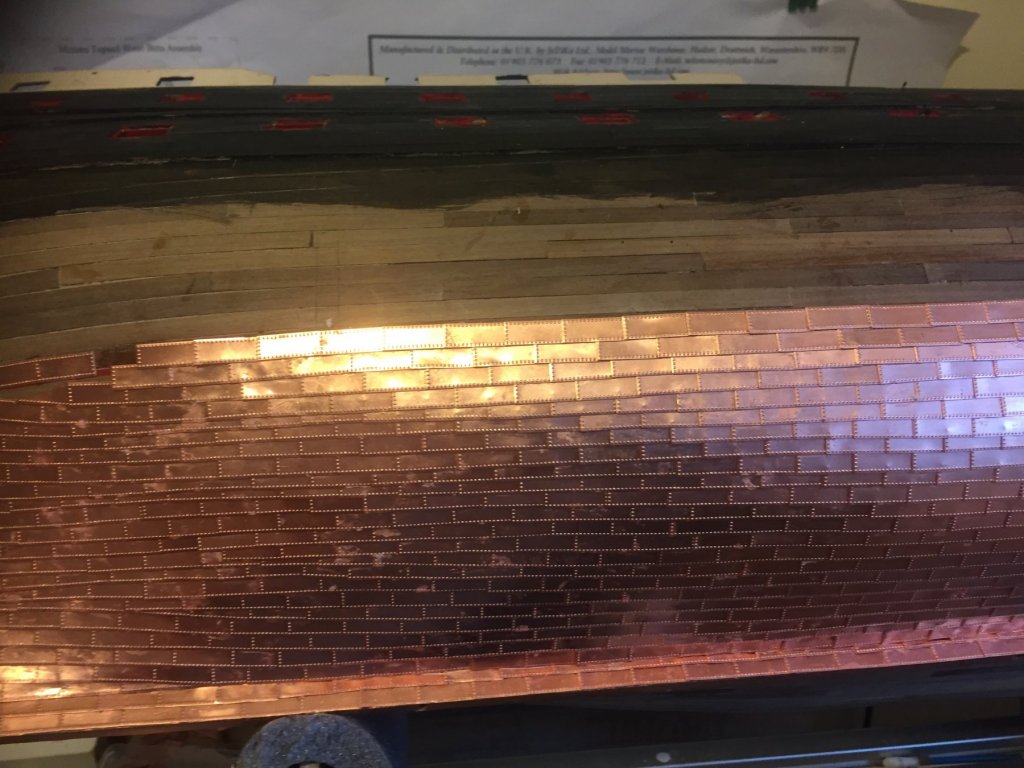
having great diffficulty in working out EXACTLY how Victory had her Copper Plating laid One thing is sure. THey where NOT laid side by side and they where overlapped Certainly the where laid from the stern and the one in front of the previous overlaps it According to LOngridge Navy shipps where laid from the Waterline down and merchant ships from the keel All instructions from the model manufacturers are BAD and dont show the fair run LOngridge again has a reasonable plan which give a fair idea of the run the old 1:84 Mantua VIctory has a superb set of plans which I am using One ctitism of the Caldercraft plans is the lack of a decent plan of the BOws whereas the Mantua is superb So I include some picrures of my cladding to date. Using huge amounts of plates seemd to come up trumps Apparently most of the platting has now been removed from VIctory NOTE I am not happy with the top two stern runs and will correct these today

- 1,319 replies
-
- 4
-
-
- caldercraft
- Victory
- (and 1 more)
-
-
Have just created this page in Facebook Please join and make comments 1:64 Amati HMS Victory Model Builds (Unofficial)
-
Not as heavy as theCaldercraft Victory But there is a lot of waste Material in the Box CANT WEIGHT!!