
HOLIDAY DONATION DRIVE - SUPPORT MSW - DO YOUR PART TO KEEP THIS GREAT FORUM GOING! (Only 44 donations so far out of 49,000 members - C'mon guys!)
×


Richardjjs
-
Posts
70 -
Joined
-
Last visited
Content Type
Profiles
Forums
Gallery
Events
Everything posted by Richardjjs
-
Heh that looks great Thec Copper Plates do not appear to curve as much at the Water line as the model instructions suggest but I feel it looks BETTER like you have done it Also you appear to have put some planking between the Hawse Rails -
- 1,319 replies
-
- 11
-

-
- caldercraft
- Victory
- (and 1 more)
-
MMnn. Shame you didnt look at the way the copper was laid. Starting from the Stern each plate slightly overlapped the one behined it. They where laid like Tiles NOT Bricks. It was laid this way to prevent the sea from tearing of the tiles. While the way you have laid then ie Along the waterline LOOKS right (and better) the tiles dropped towards to keel towards the centre of the ship When I buildt my Victory in the 80's I even used sal almonac to weather the copper. (But did lay the tiles alnong the water line like you have Rest of the ship looksawesome Regards
-
GRATINGS Working on the gratings. On on the Main Deck appears to be longer than the Kit so I am extending it Picture One show a Grating the correct width every other strip. Picture Three shows a coplted grating with a coming attached Picture 4 shows the extension being worked on
-
Fitted the main Deck lines for plankung drawn - split the deck in two to make it wasier to fit Ready linedSpend a lot of ime lining the Upper Deck Gun Ports. I have also used walnut to line the inside bulheads as I felt that the Ply would not look right - a little repairing to do Planked some of the side to see how it looks Should finish this monday Then wv got the port side to do Coming on OK


-
Dont agree Ron If John at caldercraft is to be beleived they are selling between 20 and 30 Victories a MONTH at around 1000 USD. 850 UKP and 920 Euros. This Victory of Chris's is far bigger and as such even if its the same quality will be 15-20% worth more and will get it. I am building a Caldercraft one and would have waited for a 1/64th model as the detail you can get into things like the Gun Carriages will be more impressive Just look at C Nepean Longridges 1:48 scale model (The Anatomy of Nelson's Ships to see what a difference size makes Must admit SElling it in two set would be agreat help (A bit like to original Billings kits 40 years ago) but unlikely to happen
-
Comparison of Victory kit manufacturers
Richardjjs replied to dchrismiller's topic in Wood ship model kits
Superb Instructions BUT Deck planking shows 2 step. THIS IS WRONG and should be 4 step on all but the Poop desk Idea of using pencil for the edges of the planks is as good a way as any on this small scale. Dont forget if you neede to carrry across the deck fixings if you have them on the ends. Will not be marking the nails as they are really small And could do with some plans- 19 replies
-
- 1
-
-
- Victory
- kit manufacturers
- (and 5 more)
-
Comparison of Victory kit manufacturers
Richardjjs replied to dchrismiller's topic in Wood ship model kits
Agree about the Caldercraft one it is superb but finding many silly errors. Gun Ports appear to big but it is nearly 3 times the price (and bigger) Wales poition is hazy - it really needs more info about the stem and stern starting and ending positions Panarts is nearly half the price soif you want to do a lot yourself go for that one Amarti/Victory Models IS being produced 1/64 so will be very big Needs a drawing of the bow before adding parts- 19 replies
-
- 2
-
-
- Victory
- kit manufacturers
- (and 5 more)
-
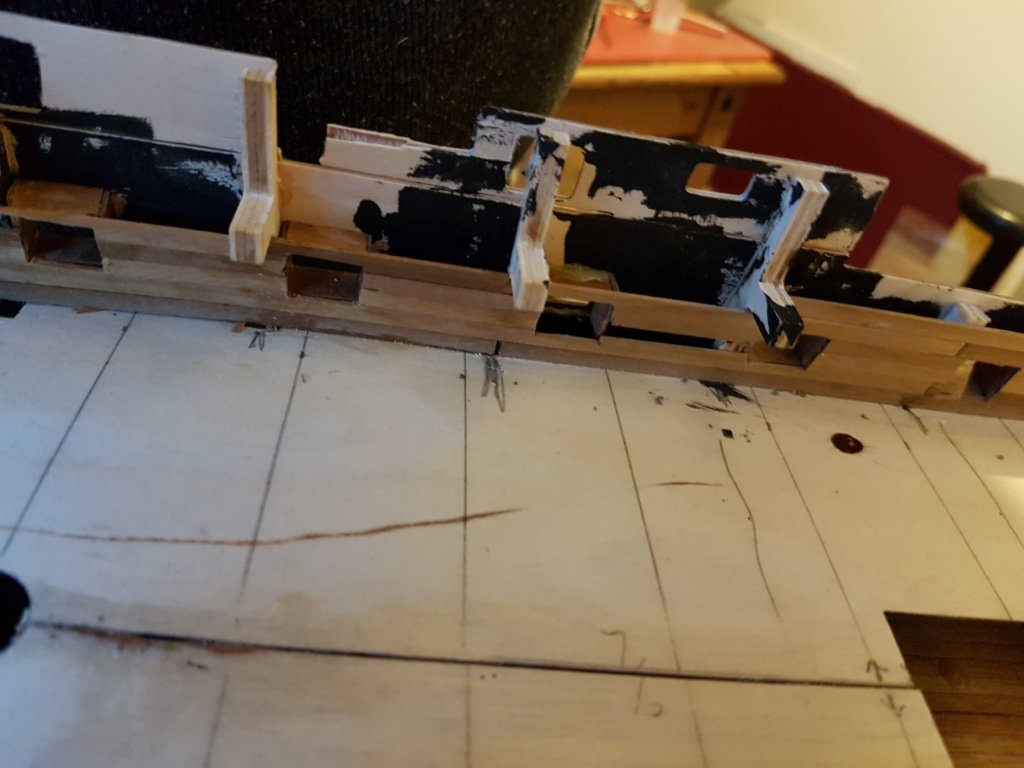
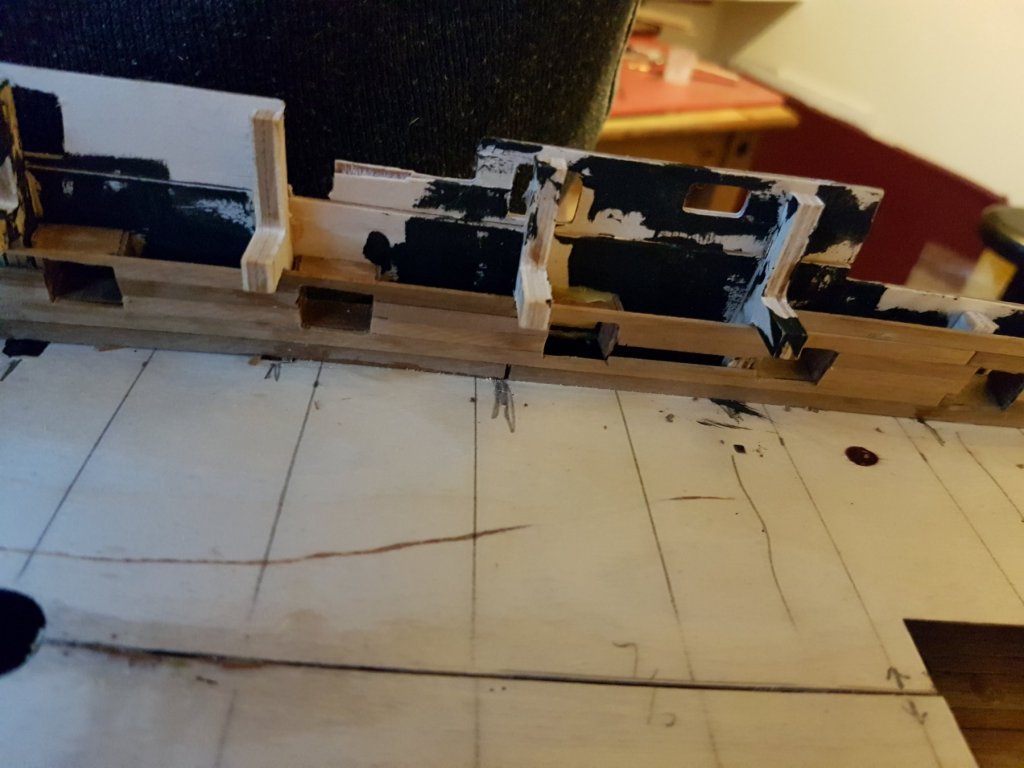
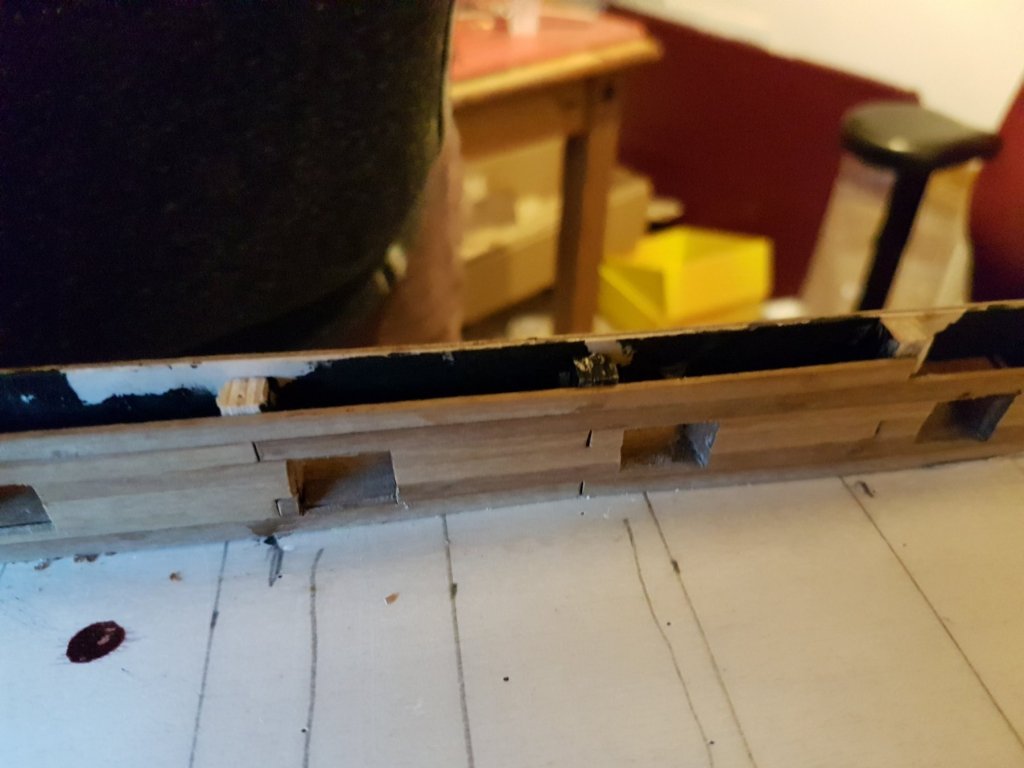
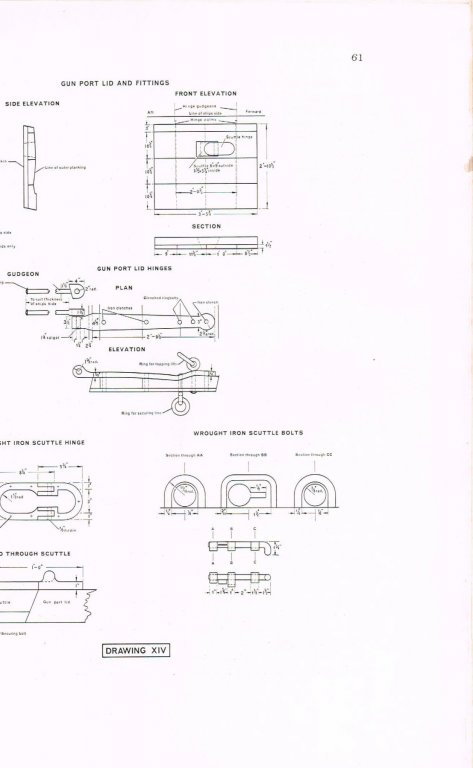
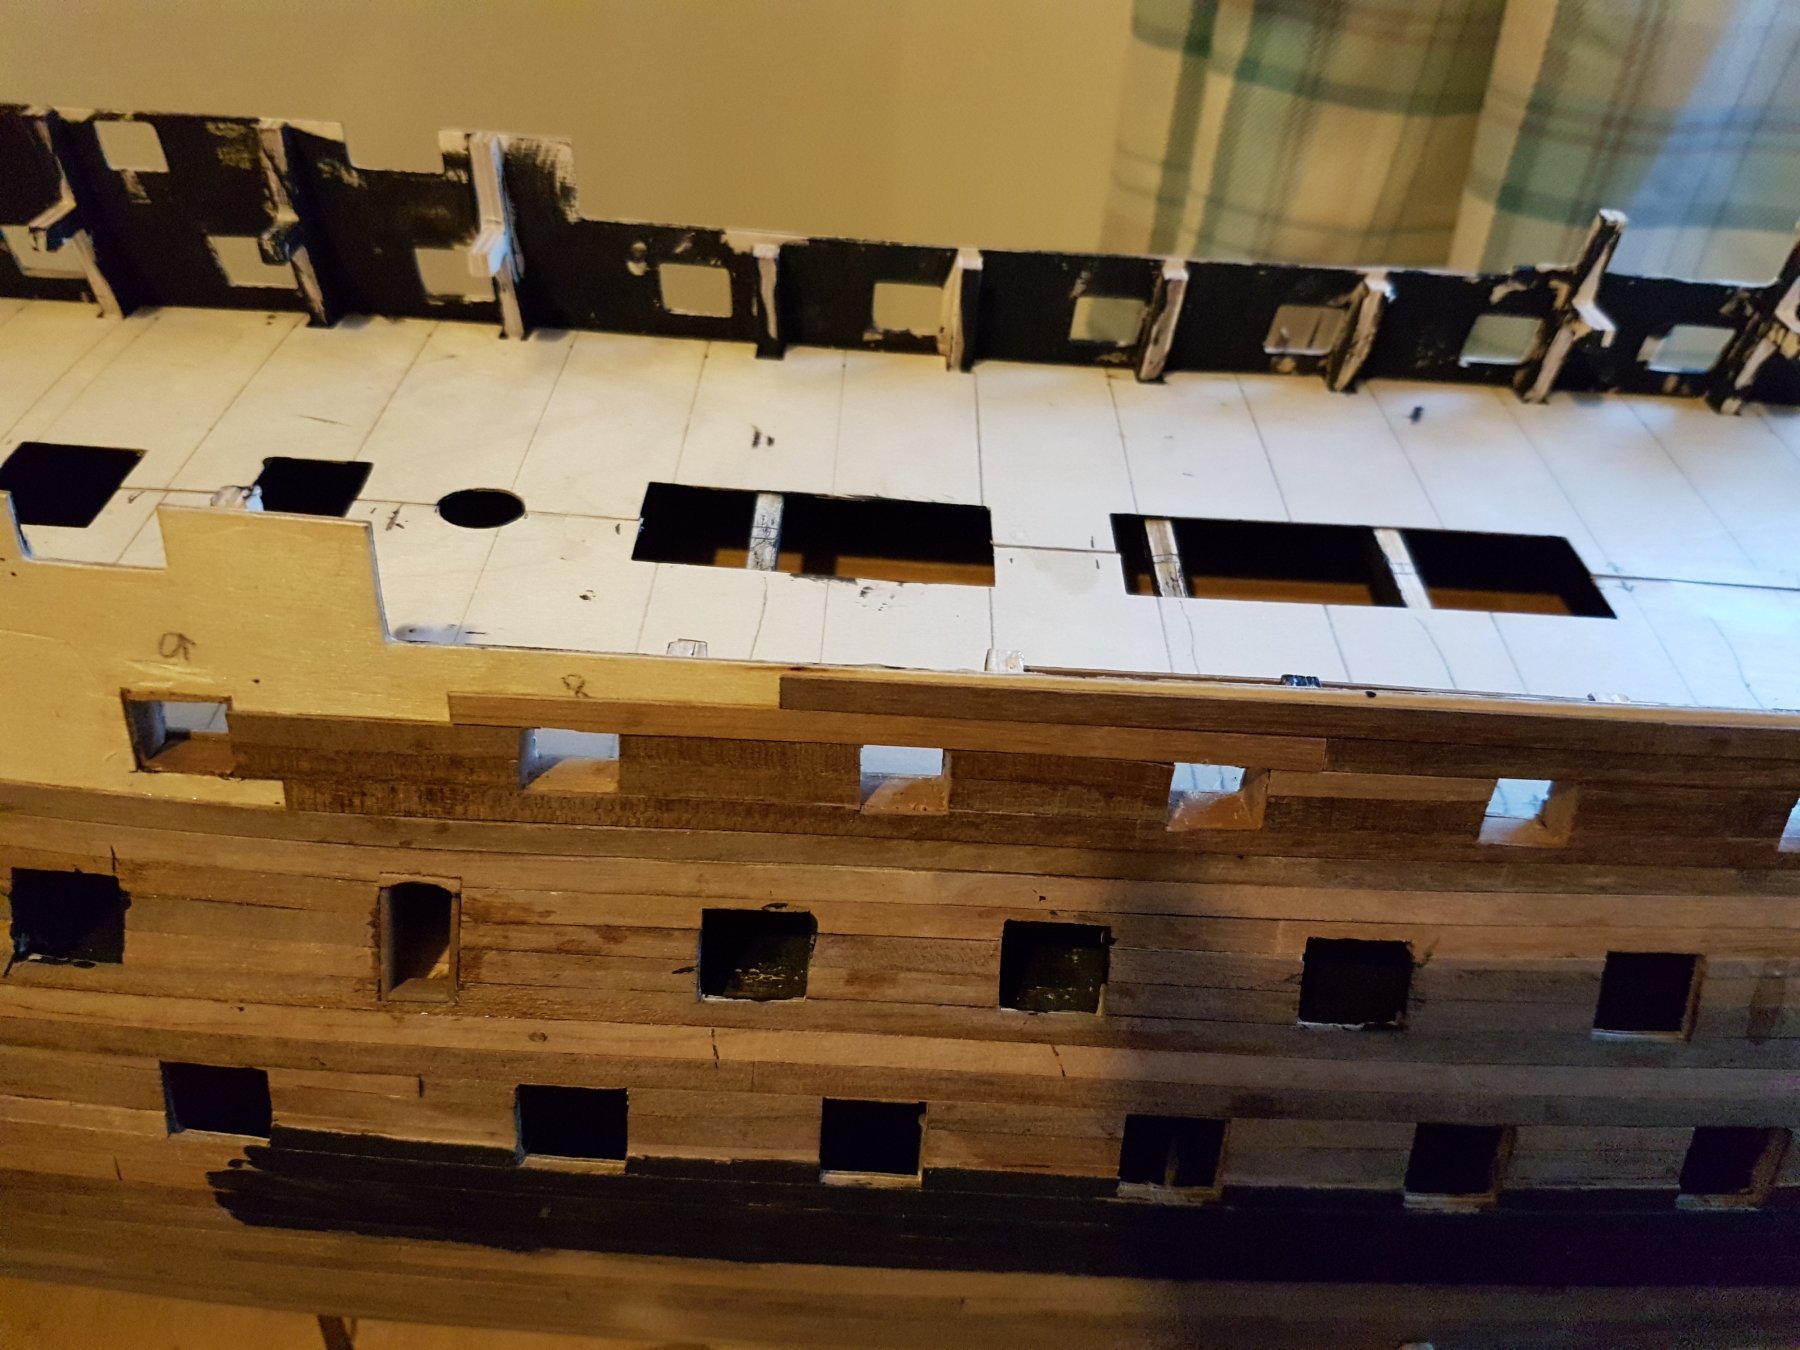
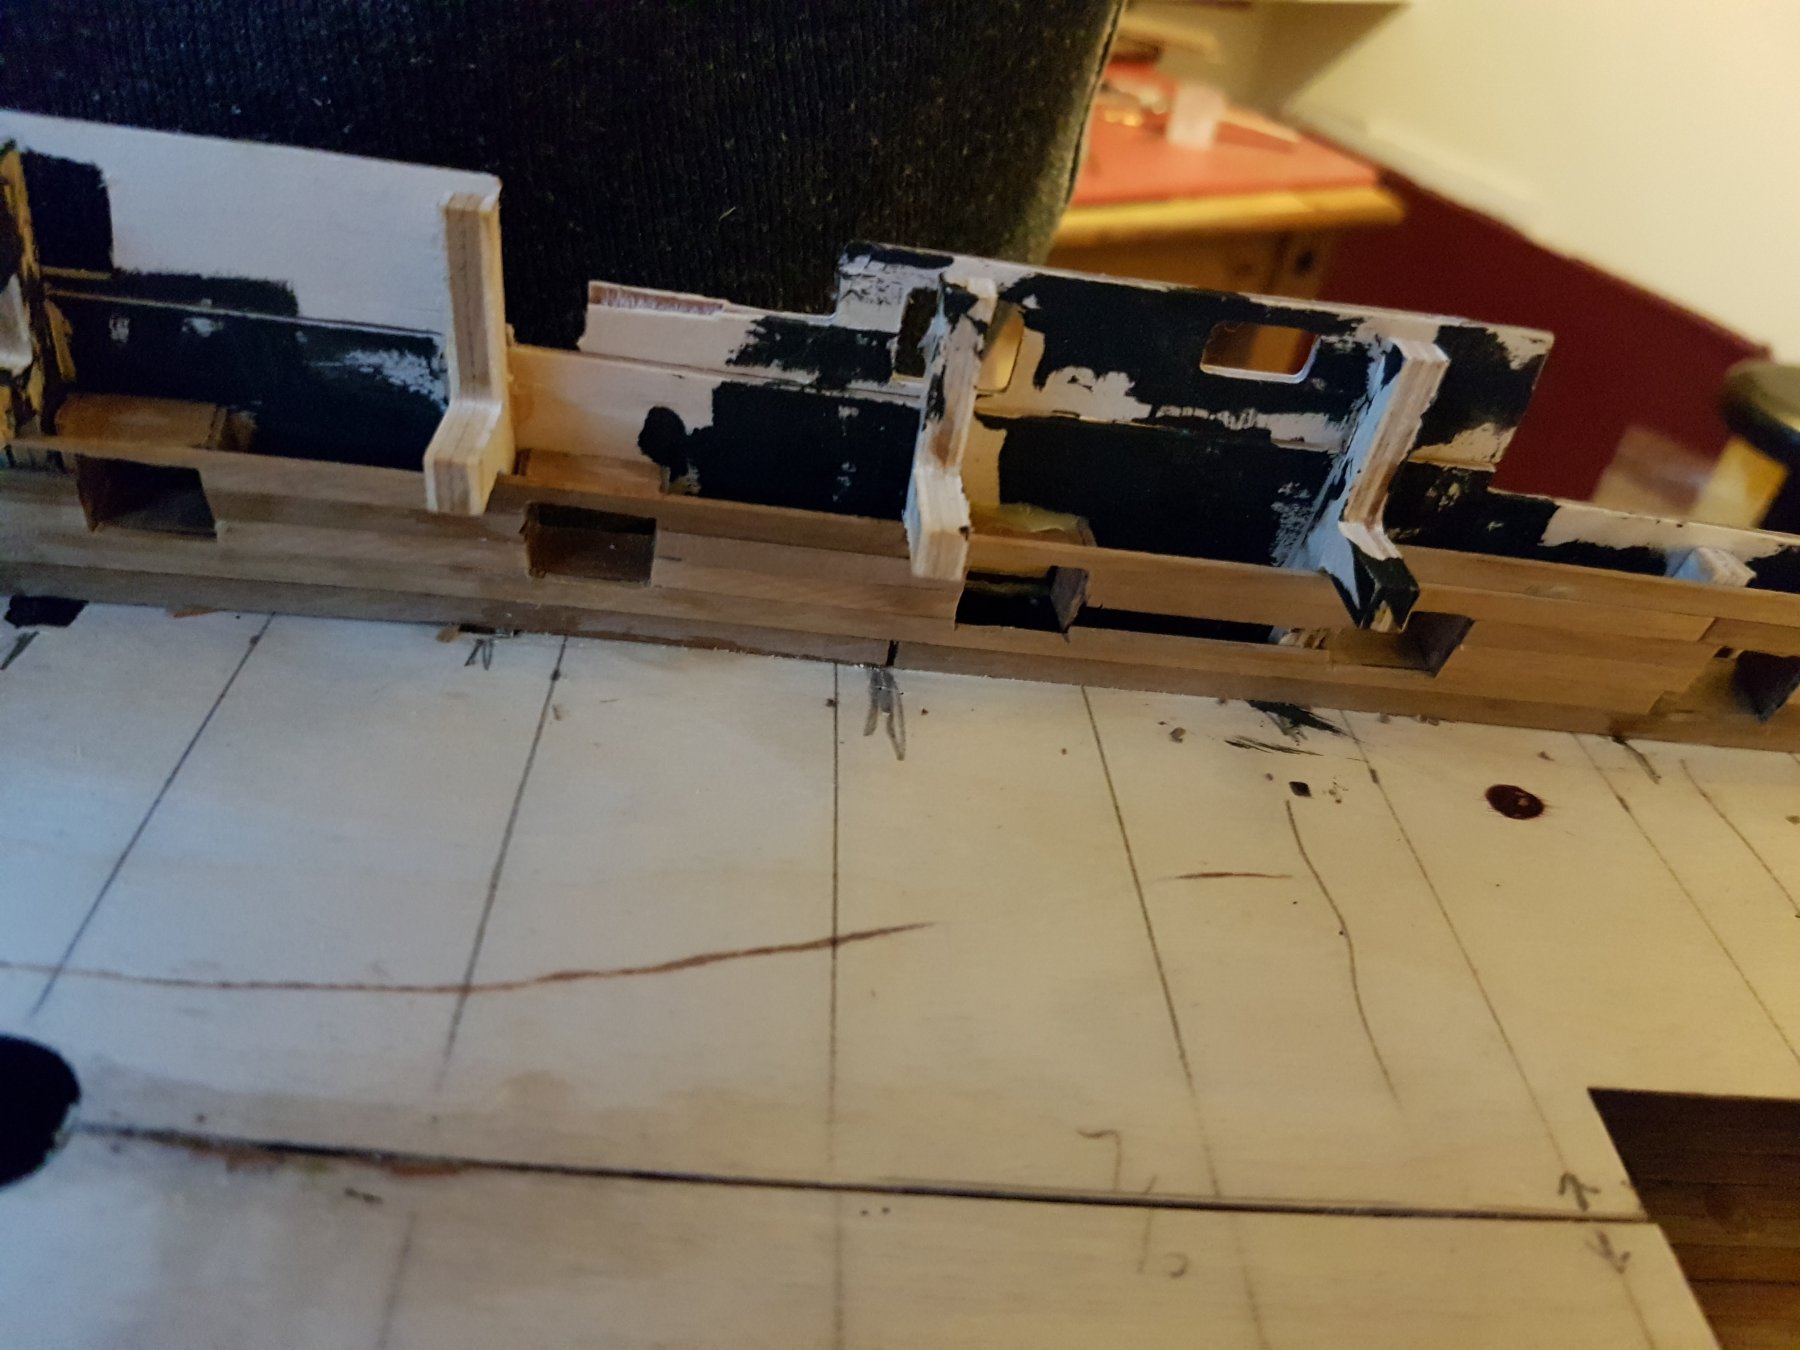
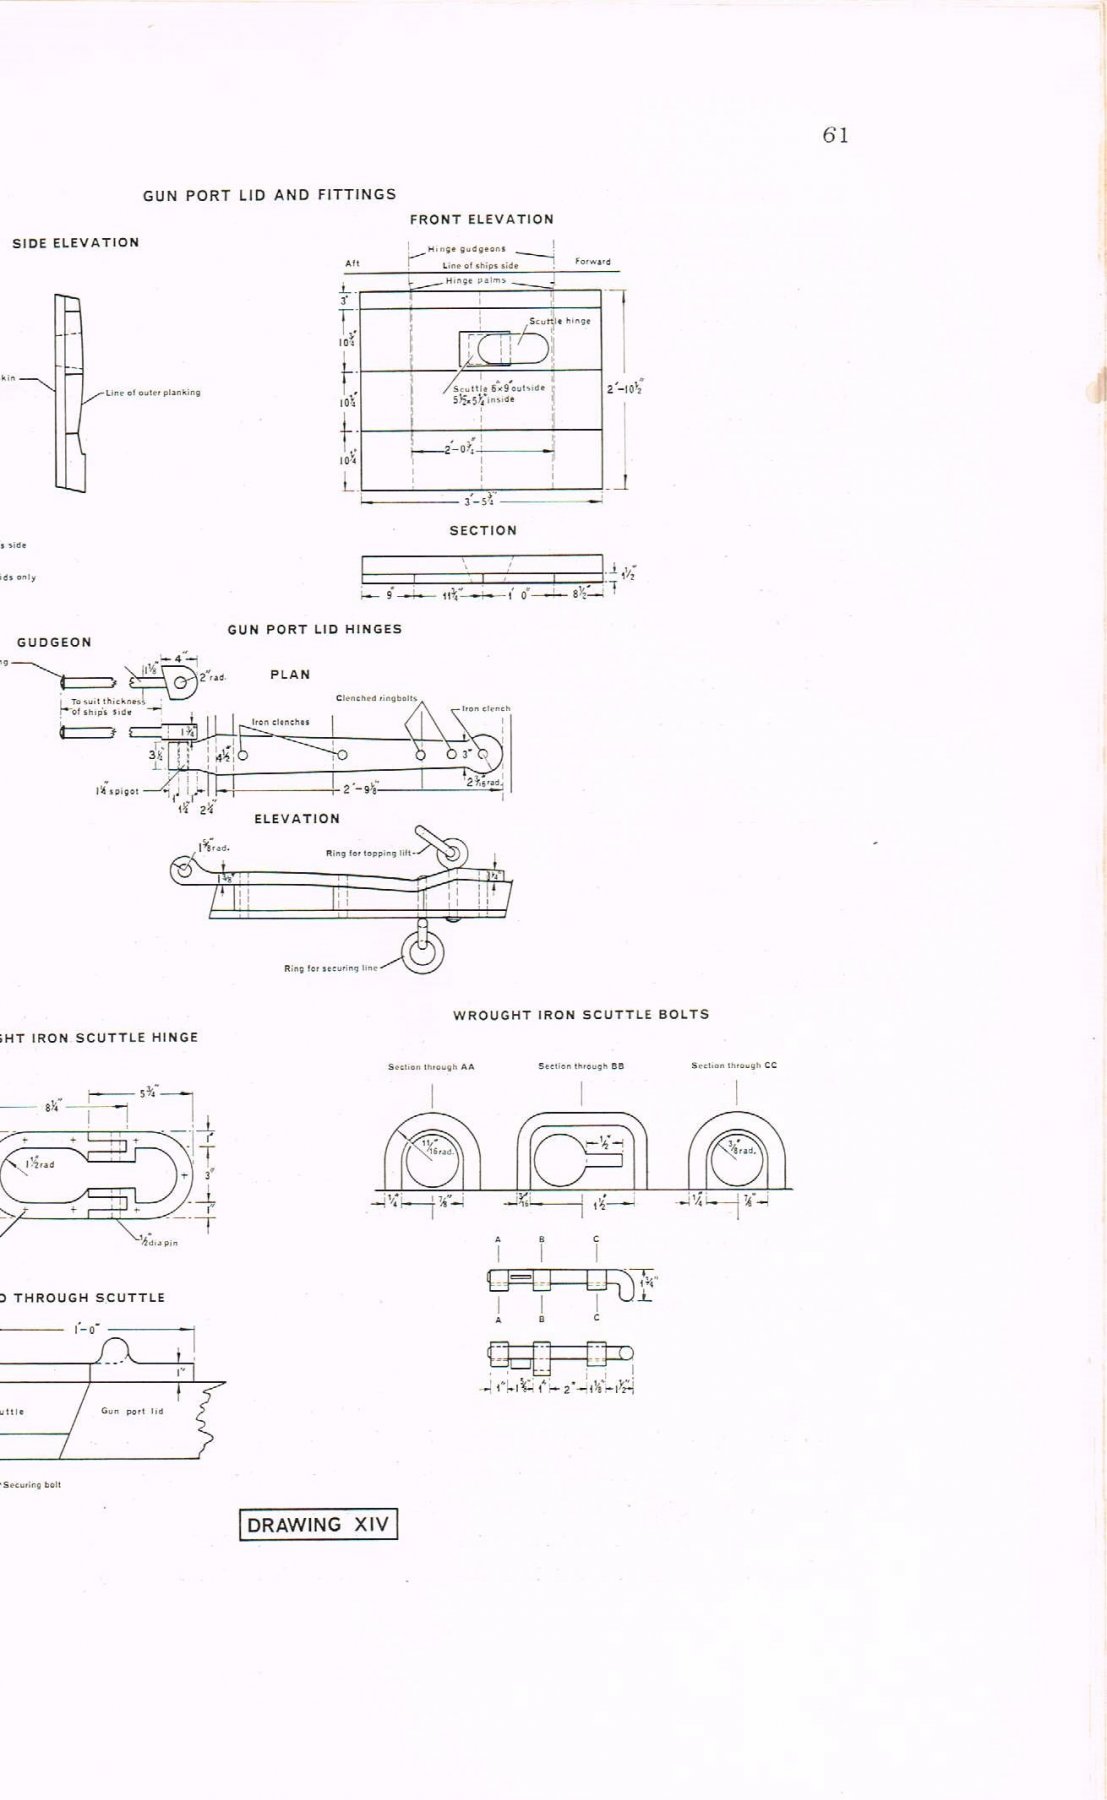
GUN PORTS - HMS Victory Contrary to the Instructions the Caldercraft Victory's Gun Port Lids where two levels of wood Teak width 41.75" x height 34.5" (LOwer Deck - I assume the other lids where slightly smaller The first inner parts made of 4 planks of wood each 1.5" 9", 11.75,12" and 8.5" The Outer was made of 3 Planks width to suit the side of the ship 10.75,10.5 and 10.75 The lower deck lids had small scuttles which could be opened for ventilation of shooting from DRAWING XIV from Retoration and Repair of Victory
-
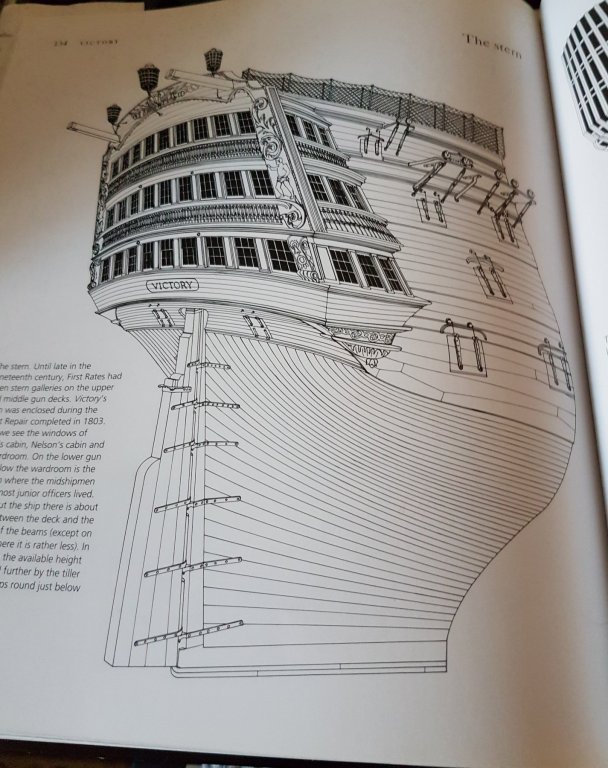
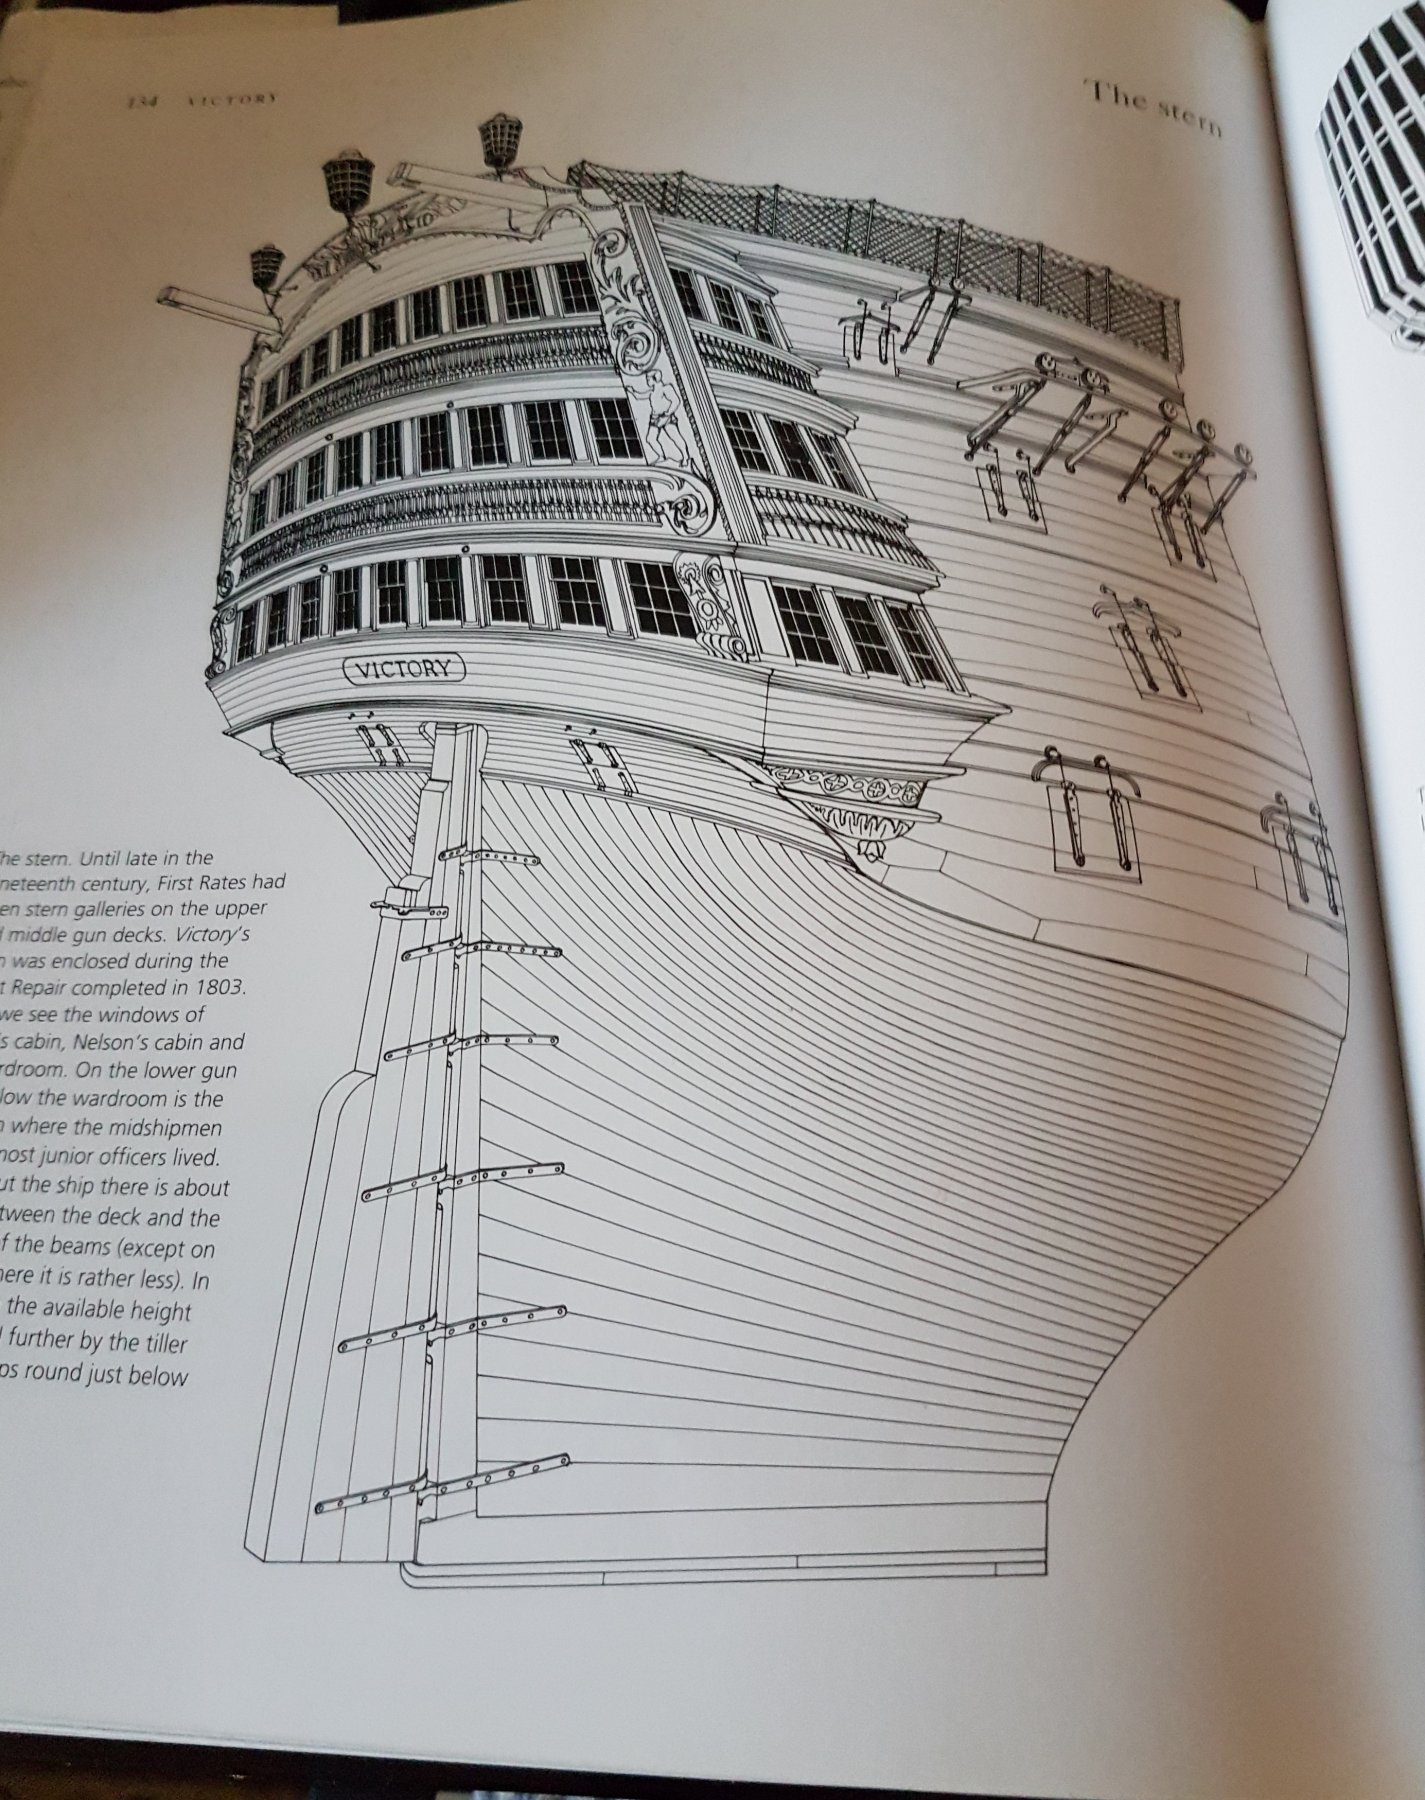
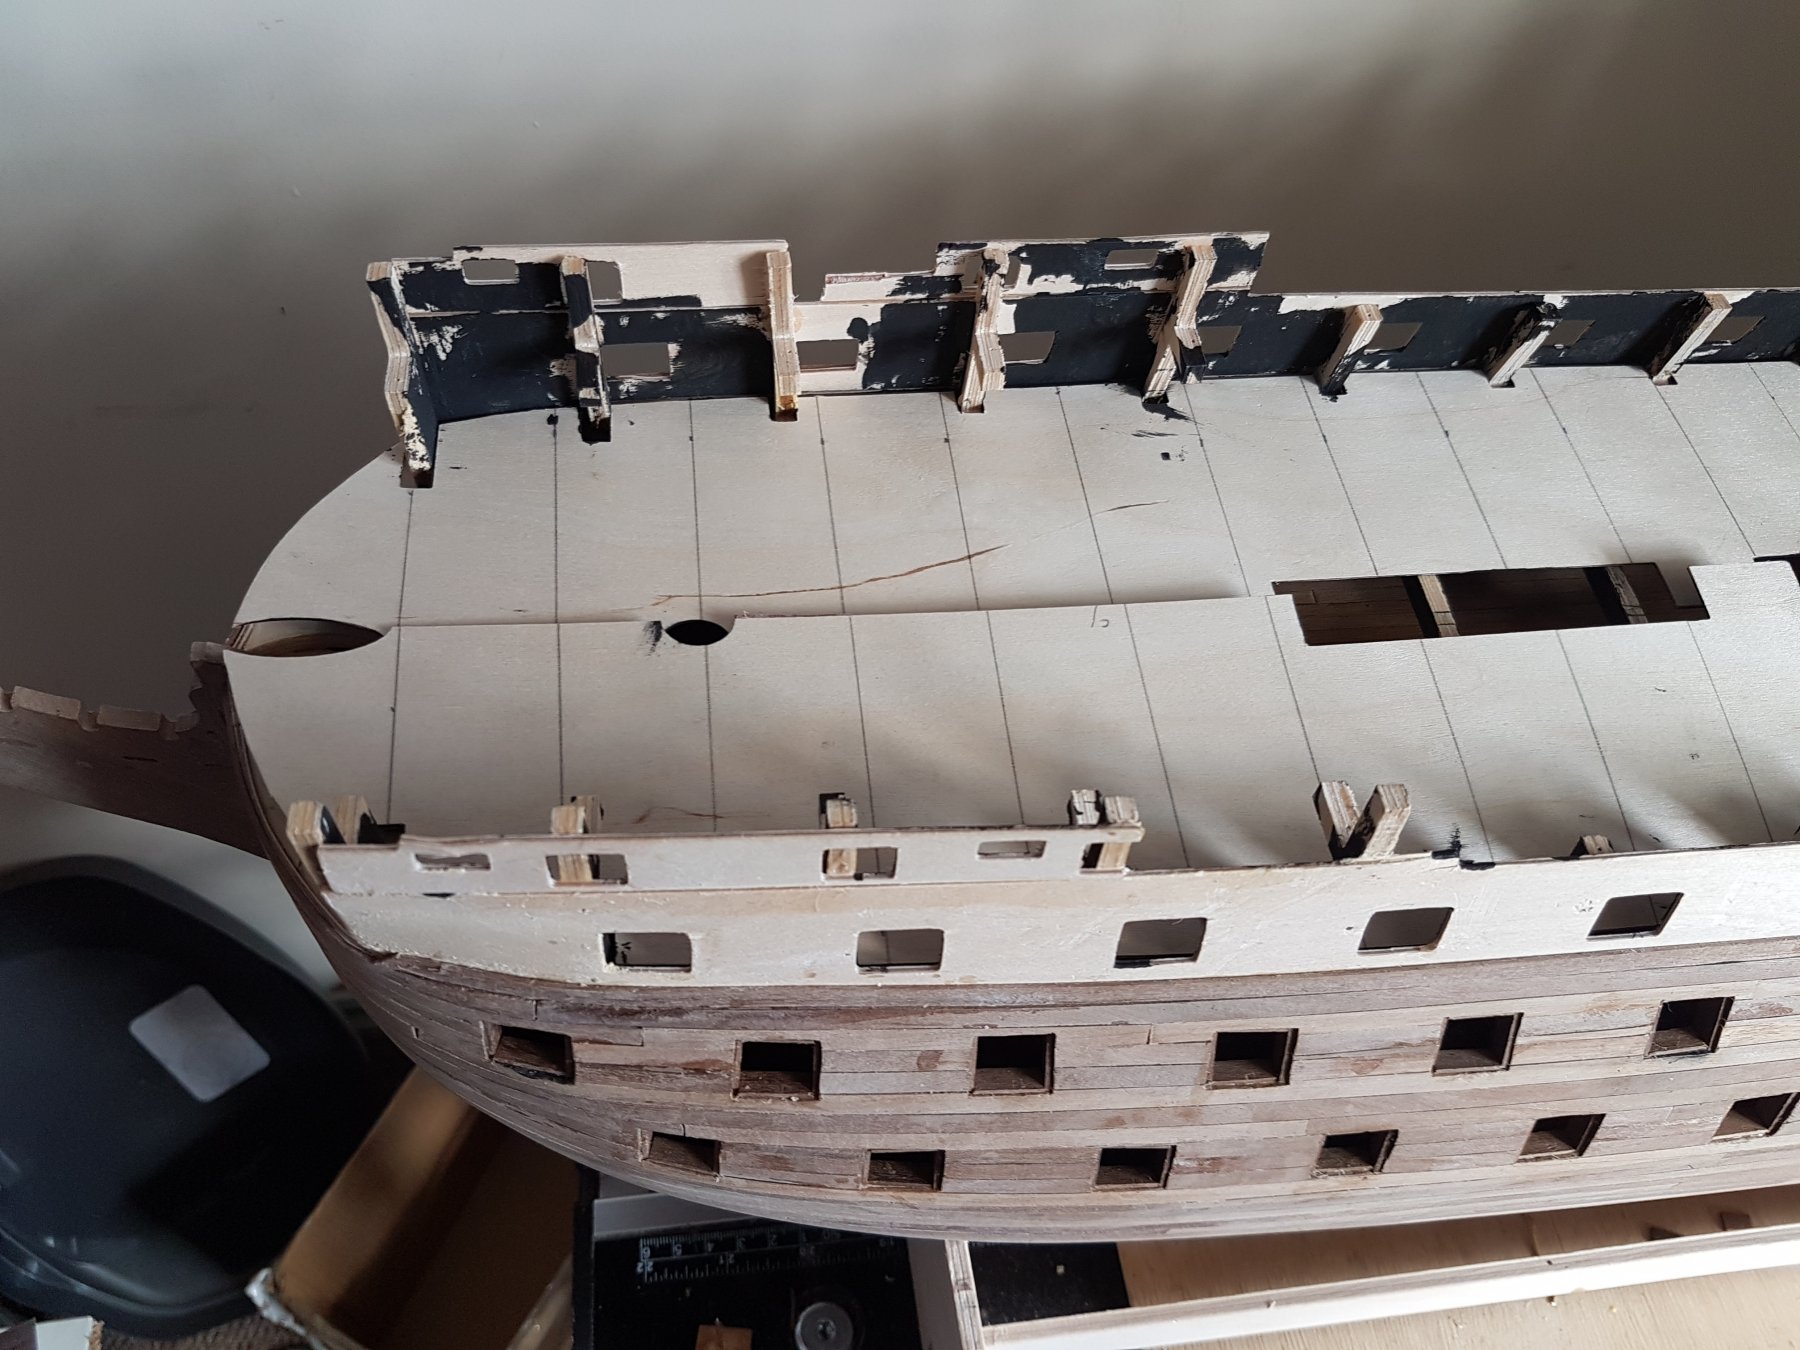
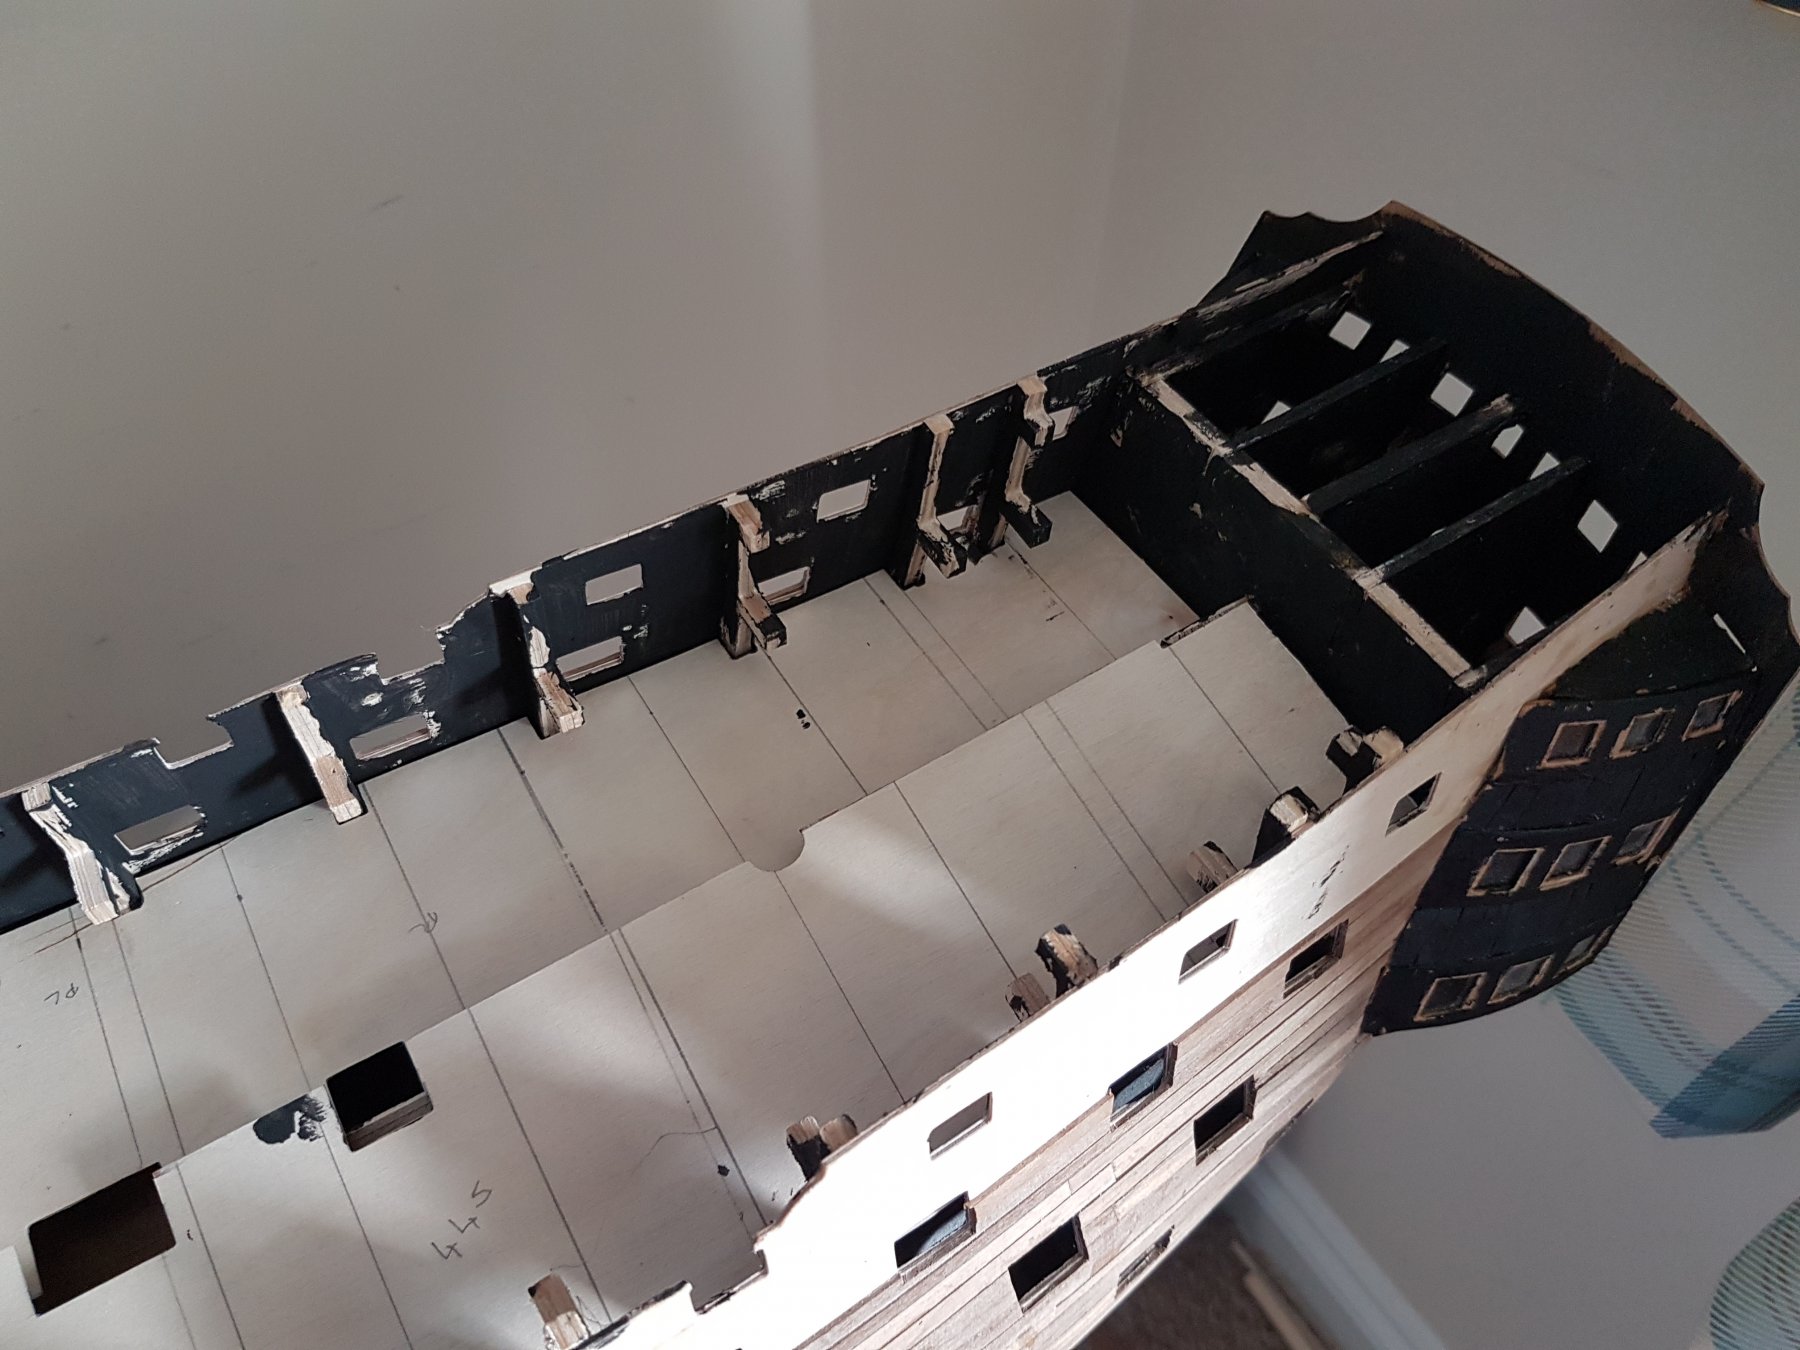
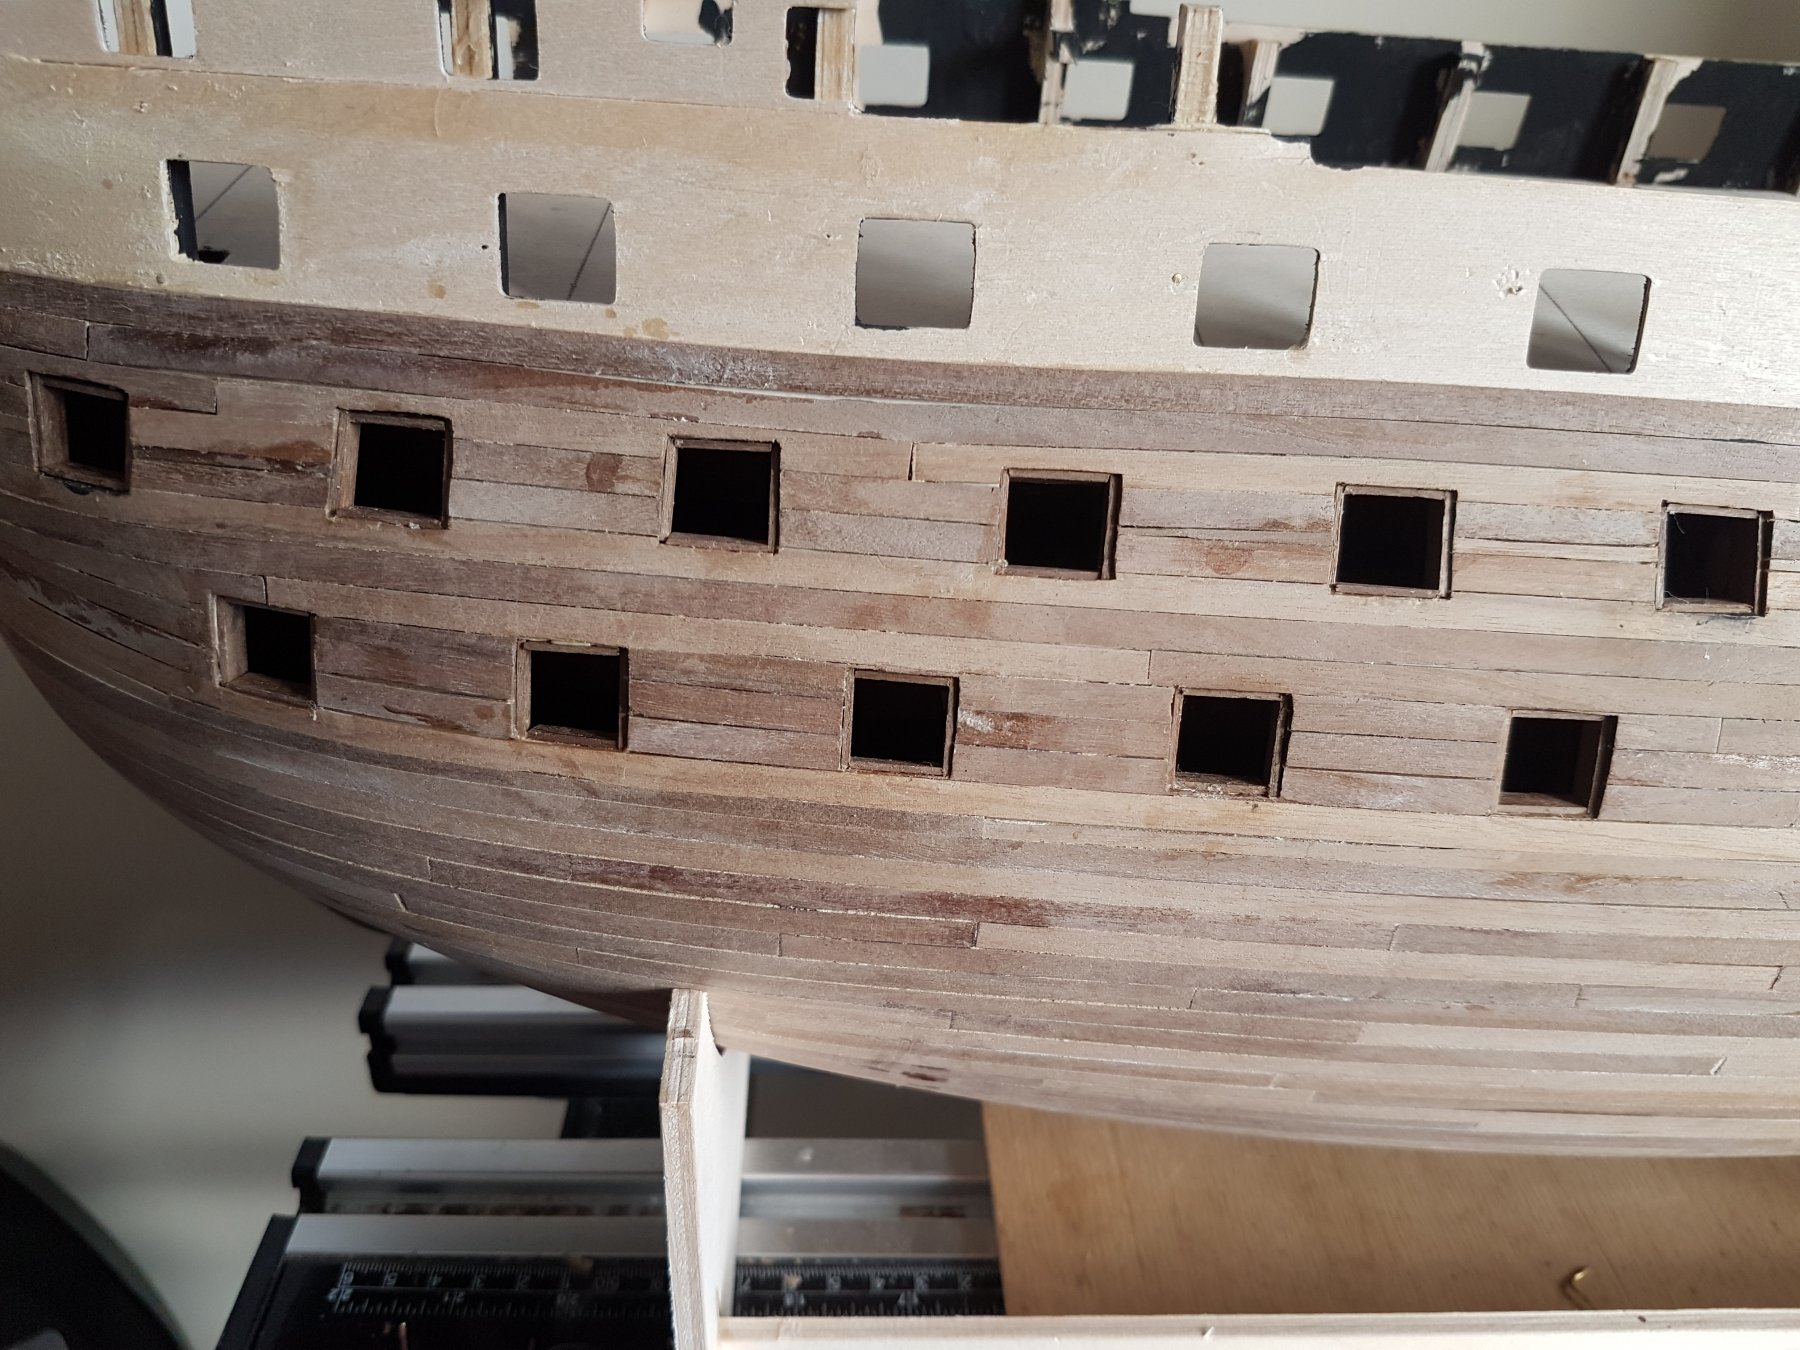
CALDERCRAFT VICTORY GUN WALES A bit disappointed with the instruction. The Wales are quite difficult to place from the plans. It need a view of the bow so you can see where the wales come into the Head. Also at the stern the top and middle Wales come into the stern windows (From the plan but the lower wale actually runs into the curved part of the stern (Where the stern chasers are) Be careful to get the wales the right width as there are 4 pieces of 5mm x 1mm walnut which if you dont narrow slightly on each piece can widen the wale to 20.1-20.2 especially if you dont make allowance for the curve of the tumblehone here the sum of the 4 x 5mm planks can be too wide Also check that your 3 pieces of 3.5 walnut do actualy measure 10.5 as mine where narrow 4 rather than 3.5 end up with top and middle wale nearly 12mm not 10+. JUst in case you missed where it goes the .5 x 4mm walnut strip is fxed above the 4 x 5mm walnut strip of he LOwer Wale - not seen this on any other kit Mine is not quite correct photos follow Photo 1 From HMS Victory Her Construction, Career and Restoration by Alan Magowan (Incredible book) clearly show the lower Wale running into the stern Quarter Photo 2 Shows my Wale runing into the stern Photo 3 Again from Alan Magowans book shows that the side entrance is cut into the Upper wale (and also details the Entrance Head Rail
.thumb.jpg.dc35cd45a694475b0afdcaab72cf0d0e.jpg)
.thumb.jpg.f05cc7a1272ceb791289775c662d3ae7.jpg)
-
That took care of the pictures and books. I’ve now gone through the images and stored over 1400 to use on my build. My attention then turned on how to use the photos and catalogue them. My solution was to take the plans of the decks and scan into images along with a side view. I linked images to their points on the decks, masts, bow, stern, and sides using CorelDraw (Adobe Illustrator will do as well). Decided to colour code my links, green being a view “straight on at that point” and blue being looking up, red is a general view in a particular direction. Arrows indicate the direction of the view. I hope to be able to use this during the final phase of the rigging and deck detail. Here is a sample of the poop and quarter decks and masts. When I click on one of my links the image comes up in my case with the Microsoft Picture Viewer. I haven’t used all the images in this reference but enough that I can make a quick click and see any part of the outer hull or decks at just about any location. Of course the next was to order the kit. I decided to order from Rick Sousha, from The Modeler’s Workshop in Montreal. Rick is the official distributor of Jotika models for Canada and I have been totally satisfied with his service. He is a great person to deal with and I know he sends orders all over North America. Rick ordered the kit from Jotika and it took about six weeks to arrive. Jotika did not have any in stop so I had to wait until they built a few new kits. I was actually pleased with this because I knew that my kit was ‘fresh’ from the factory. The day it arrived the postal carrier was very pleased that I came out to help her carry it to the door. As everyone indicates on their reviews, it is a big and heavy package. I concluded from other accounts that counting the items was very important when the model arrived. It took a couple days and I did find one item missing from ‘extras’ that I had ordered. That was solved by a local supplier so I was off to the building stage. The kit is awesome and I am truly impressed. It goes together like the plans suggest. What I want to show you at this stage are the modifications I decided to build into the model before I mounted the gun patterns on the sides. I was a bit torn by the two lower gun decks being outfitted with cannon dummy barrels and decided to try to something different. Initially phoned Jotika and talked about putting guns in with carriages etc. but found out they do not produce the scaled carriages for the 24 and 12 pdr guns. The plans suggest painting the dummy barrel strips and the area inside a matte black. Not much will be seen once the gun port lids and openings have been completed so painting the area black made sense. But, not for me – no black paint. Decided to try to ‘fake’ the interior by mounting an image of a gun carriage and the inside of the gun deck onto the dummy barrel strips. As there will be very little of the interior showing it was full computer imaging ahead. I know all the purists will not be pleased with this but, what the heck. It’s my model and I’m really having a blast putting these extras into play. I also decided that the gun decks should have flickering LED lamps . I must also thank Pompey (another MSW member) for his assistance. You can see Pompey’s lighting solutions for HMS Victory on this build at http://modelshipworld.com/index.php?/topic/2415-hms-victory-by-pompey-caldercraft-172-1805/ Yes is a total weight of 15kg butthere is about 2 kg of waste on the frames. Maybe they should remove the frames on export kits but it does ensure there is no damage.Also you know if any parts are missing
- 295 replies
-
- 2
-
-
- victory
- caldercraft
- (and 1 more)
-
Copper was laid from the stern first so the one in "front" of it overlapped the one behined it (This stopped the forward motion of ship ripping the plate of) And as you say the upper edge over lapped the lower edge of the plate below it> Most models I have seen just lay the plates next to each other Similarly many models show 2 bit planking which is not correct.
-
MOrning fellow model builders I am Richard born in LOndon 70 years ago , First model was the Airfix Spitfire !! Have been MOdelling and in the modelling trade for most of my life. Worked at the old Beaties high Holborn shortly after they took over the Bassett LOwke shop in the 60's and bought C Napean Longridges book The Anatomy of Nelson's Ships and bought a Billings kit (NOt a good kit even then) Buult a Panart Victory that was valued by the National maritime Musem at 5000 (Having sold it for 2 at Christies Took 3 1/2 years and was, although I say it myself, AWESOME Used the Brass sheet at the stern whch I should have replaced After my afrat into Distributing Computer Games by Van I set up a Model Radio Controlled Aircfraft business selling lits and parts for model aircraft Industry all over the UK Mainland When that failed I became an IT specialist developing software and only returned to modelling and patrt built a Panart San Felipe (Photos enclosed) Recentlt started selling Euromodels, Caldercraft and Mantua kits on lins as a bit of a hobby but I am disappointed with volumes so wil probably pull the plug on that I am now building a Caldercraft Victory and have set up a different blog for this Regards Richard


-
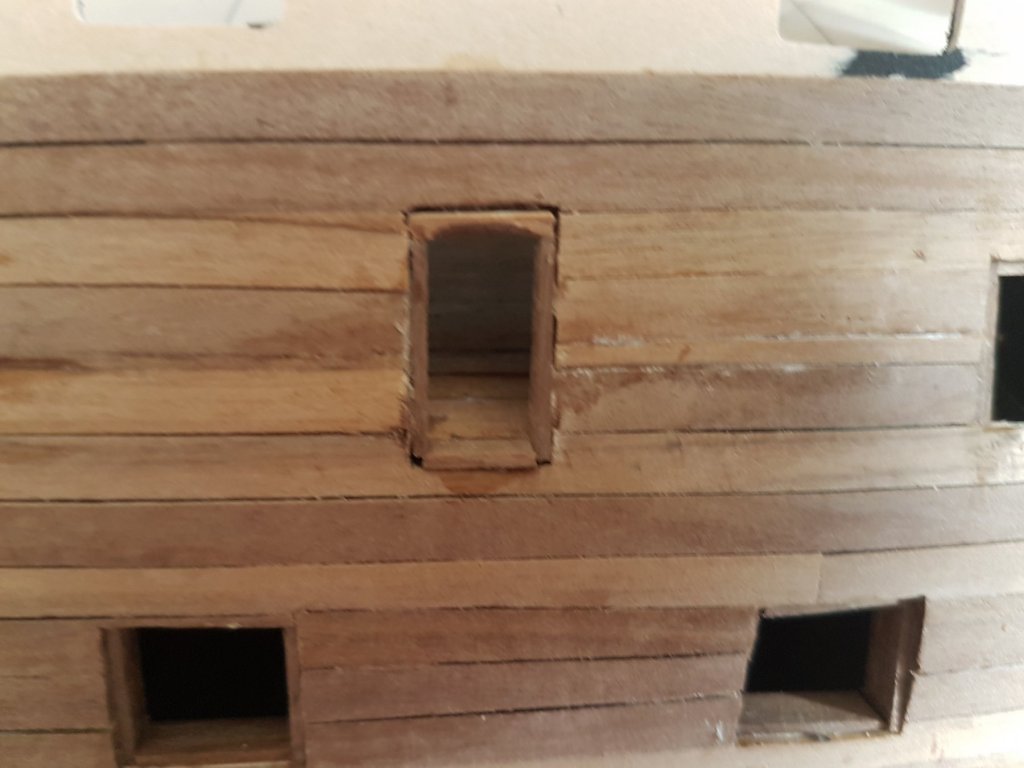
I use a scalpel to cut the gunport. Replacing it regularly. Also make sure its square by using one of the Gun Port lids attached to a small nail to ensute its square
-
Agree with Welfalck Frames and Beams are where the Planking or Decking is attached so sencibly THREE frames for planking and three beams for decking BUT what about battle damage that would just make the ship seaworthy Have always tried to get it correct and right but all of a sudden how do you sincibly created Anchor Stocking on any thing less than 1:48th
-
Thanks Did intend to add some here they are. Still looking for the first photos sure I have backups some where First hard disc failute in 35 years !! (As and IT Programmer
-
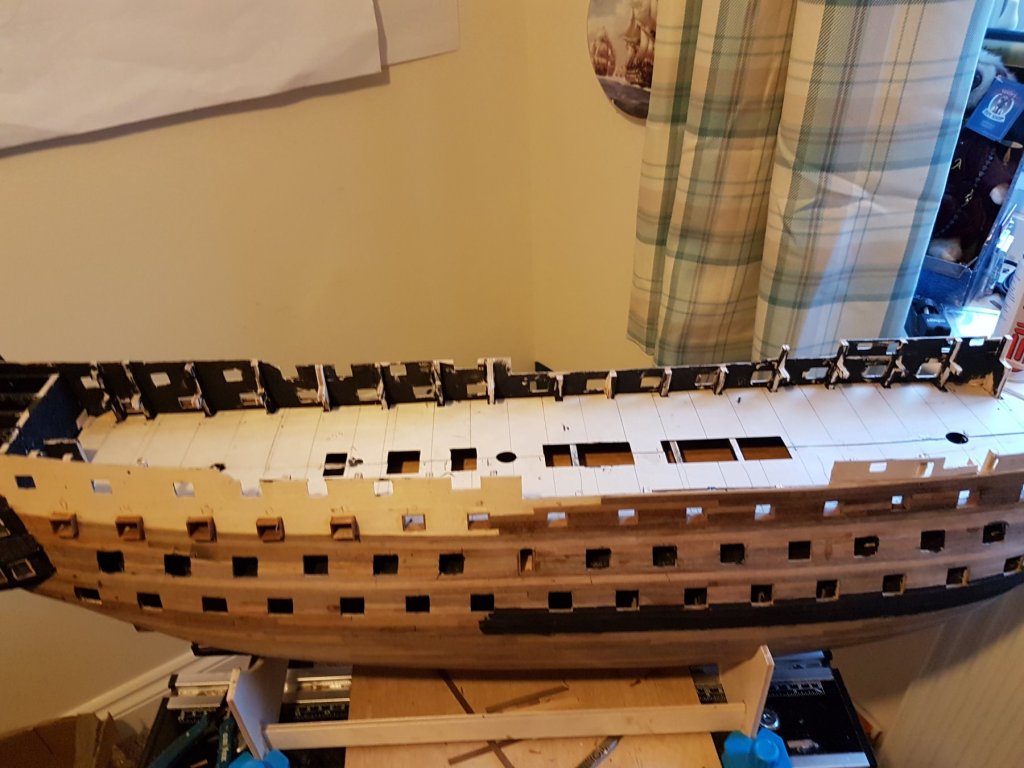
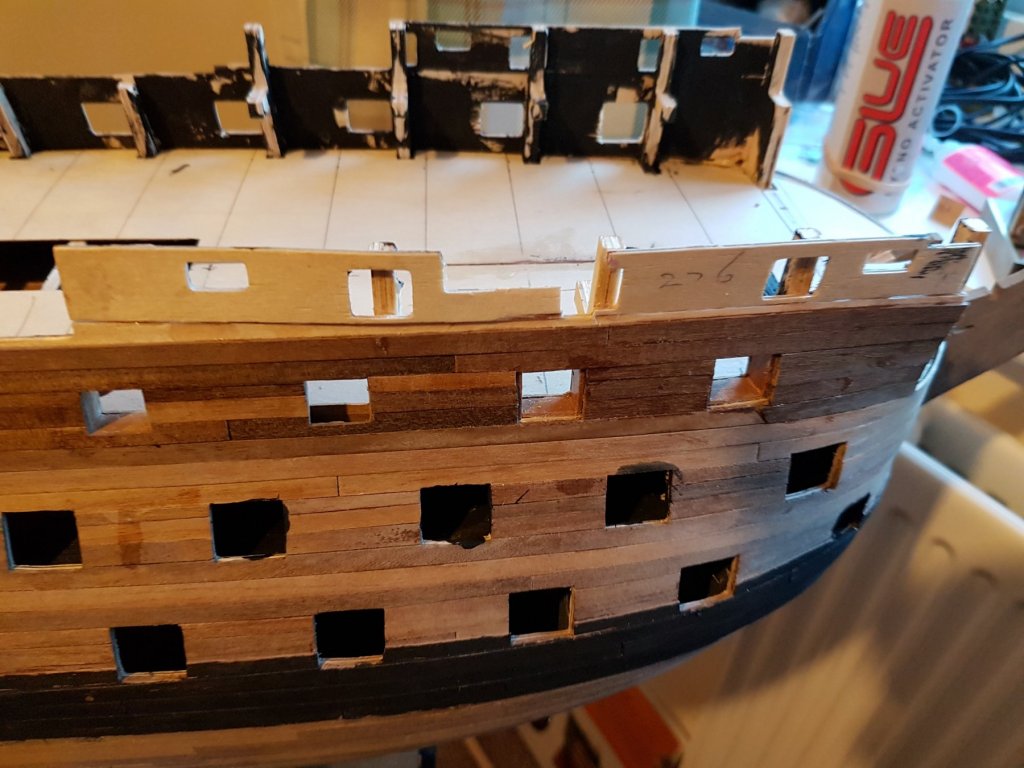
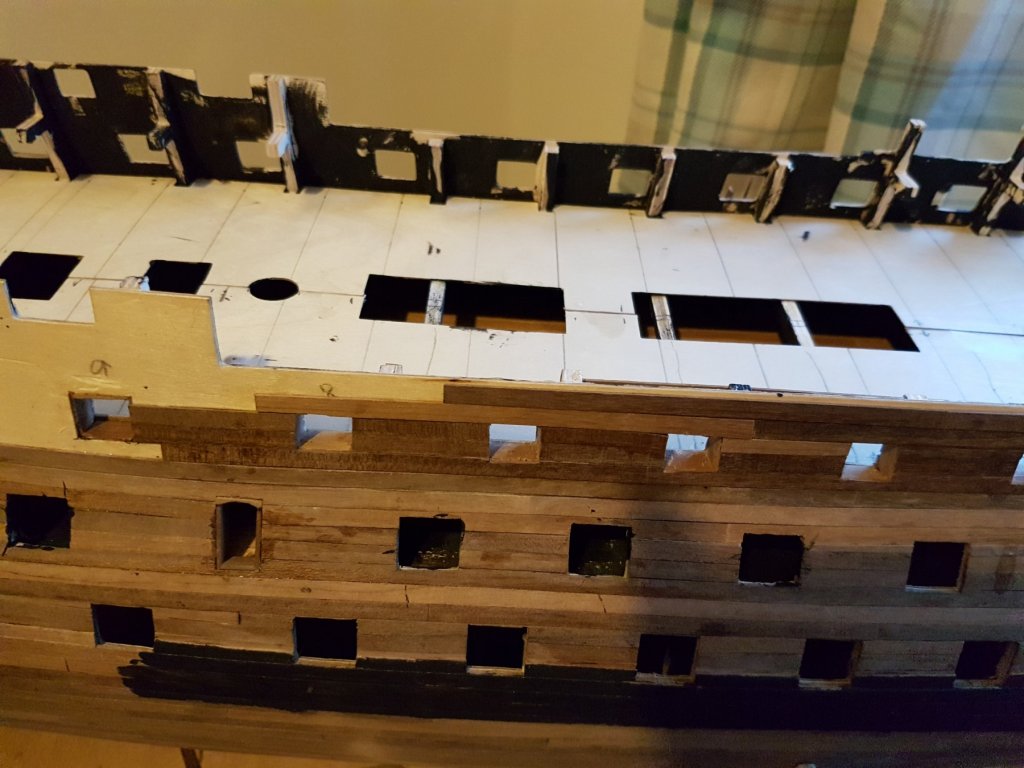
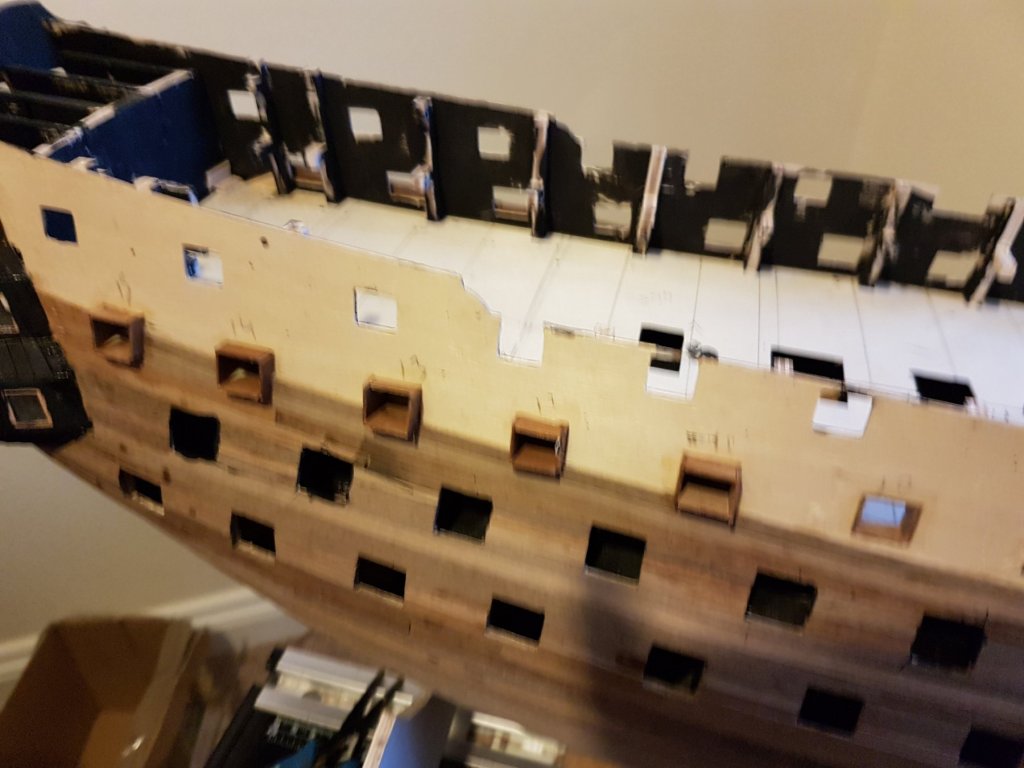
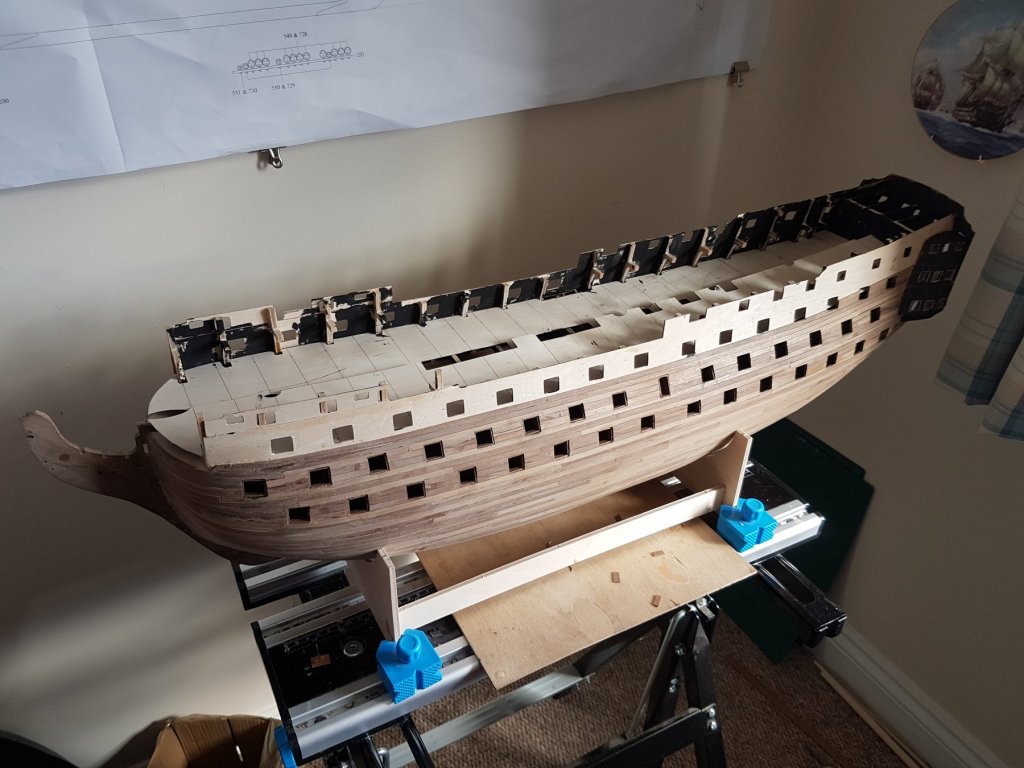
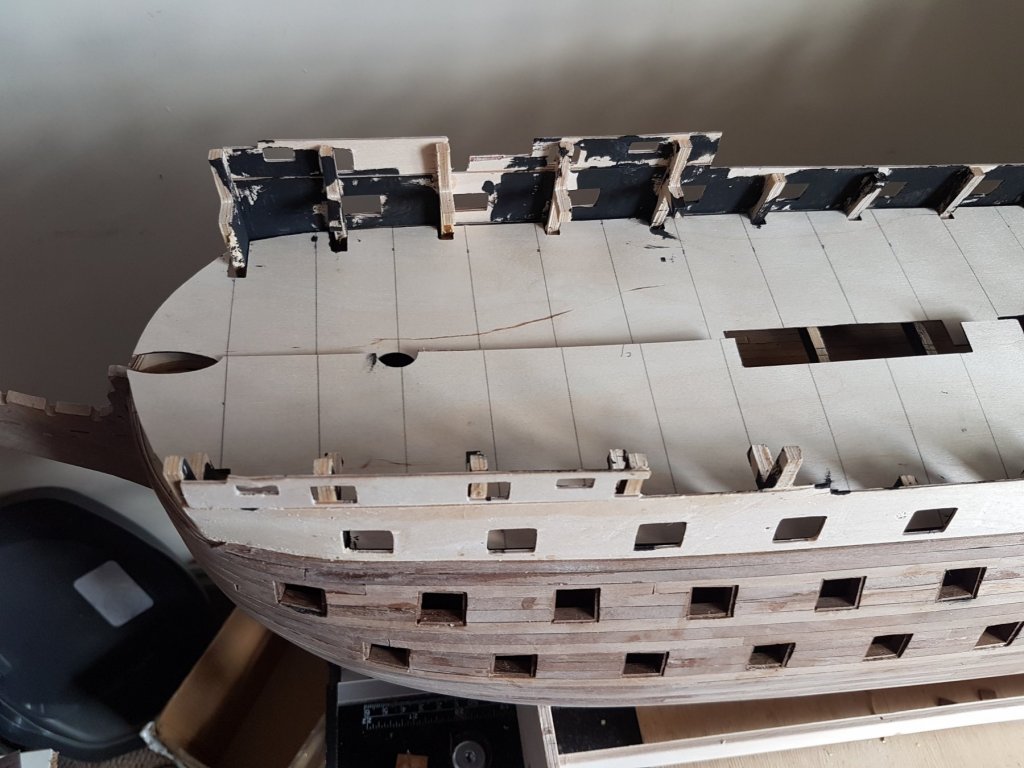
Bought my Victory just before Christmas from the proceeds of a house sale. Did a lot of work a few photos but lost them when Hard Drive went down (I was a computer progammer before retiring always took backups just didnt do i often enough) So unless i can recover then will start from where I am now Have finished first planking and the lowerpart of the second planking. On the two models I have previously completed I planked the hull with scale 5" Planks and on both used tree nails No decent pictures of my Panart Victory from 35 years ago (Valued at £5000 by National Maritime Museum). On the Panart San Felipe i did the same (1 Picture added here will add a seperate blog for this later with photos - its been put on the back burner for now) 1 think i think needs adding is that it is easier to cut the BEFORE adding the Hul Frames mark the Frames and Keel joint across the joint so you know when its lined up other wise you might get the keel out of line 1. Hull with first planks done and most of the hull second planks done. Using uper Gle for second planking mmmmm not sure!! 2 and 3 Main DEck ready to fit - lines are 1.25 inches to lay 4 butt plankin - must make sure the buts end where the deck beams are 4. Gun Ports lines with 1mm to allow for the gun ports to close 5. Caldercraft say to line the Entrance port. Tried to find a picture as the top of the frame is shaped and is NOT painted 6. Stern windows - The incredible etched frames with complete this (Wonder when no bets being taken) 7. Main Entrance - From HMS Victory First Rate 1765 by Jonathan Eastland and Iain Ballantyne - Note the Carving of the Head Rail It amazing how the photos show up even little discrepancies I purchased tis Stand from B&Q (UK) it tilts and lifts special offer 34.00 UKP


.thumb.jpg.ba8b9e2c817ed338c43a8a06ad5fcf54.jpg)
-
He new to this Forum - in fact the whole Modelshipwrightworld This build is going beyond the call of duty - fantastic Had the same problem with my Caldercraft Victory - not happy with the hull was quoted 200 UKP (Including discount) for the parts i needed. DEcided to press ahead hopefully the Plates and Paint will hide the slight blemishes Have just started a new Blogg on it Dont forget Anatomy of Nelsons SHip by C Nepalm LOngridge


.jpg.279c6e9ae164311ef465afdaa046f92a.jpg)
.jpg.be4fdfcdf60c3faae12eab15b9e8578c.jpg)


.jpg.5484aa5ab20e8accbb1e3d877e2347bb.jpg)