king derelict
-
Posts
3,294 -
Joined
-
Last visited
Content Type
Profiles
Forums
Gallery
Events
Everything posted by king derelict
-
Thank you very much Andy. This is a whole new world of products and some of the WS foliage and grass variants were a bit of a wrestle to get looking right. I'm pretty much staying with the fine turf, bushes, briars and fine leaf foliage with some foliage clumps and coarse turf acting as low scrub and small bushes. I am amazed at what can be done with a railway layout. Some beautiful work out there. Thanks for the encouragement Alan
-
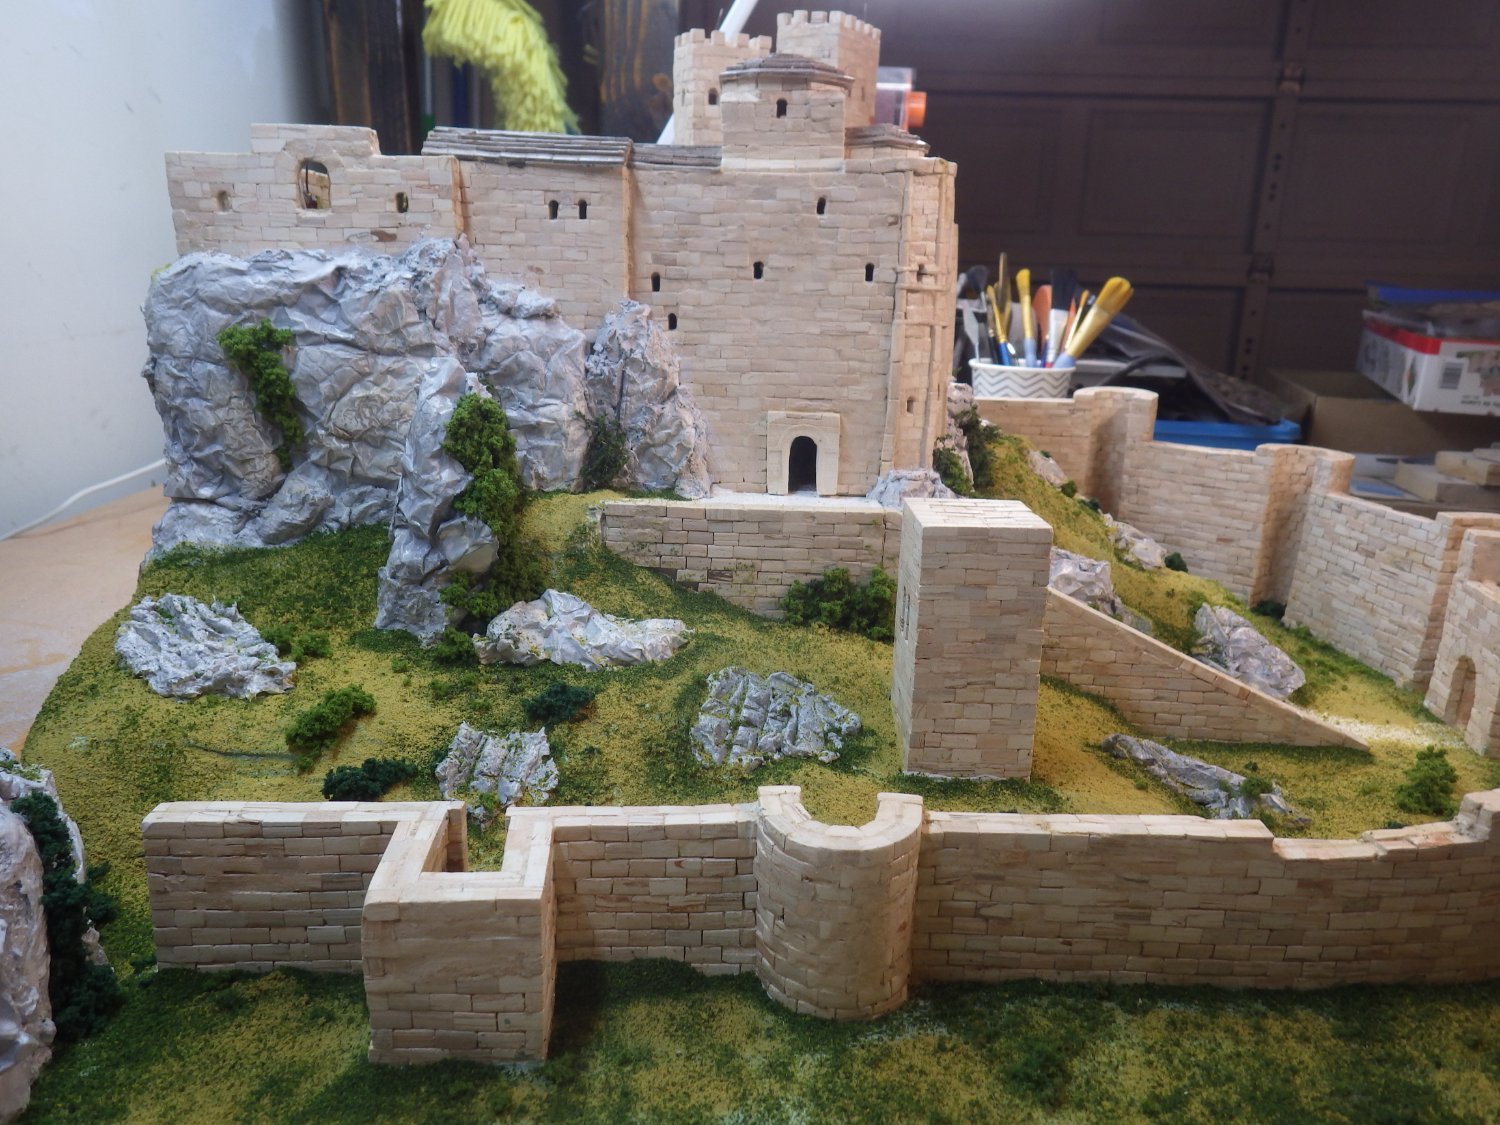
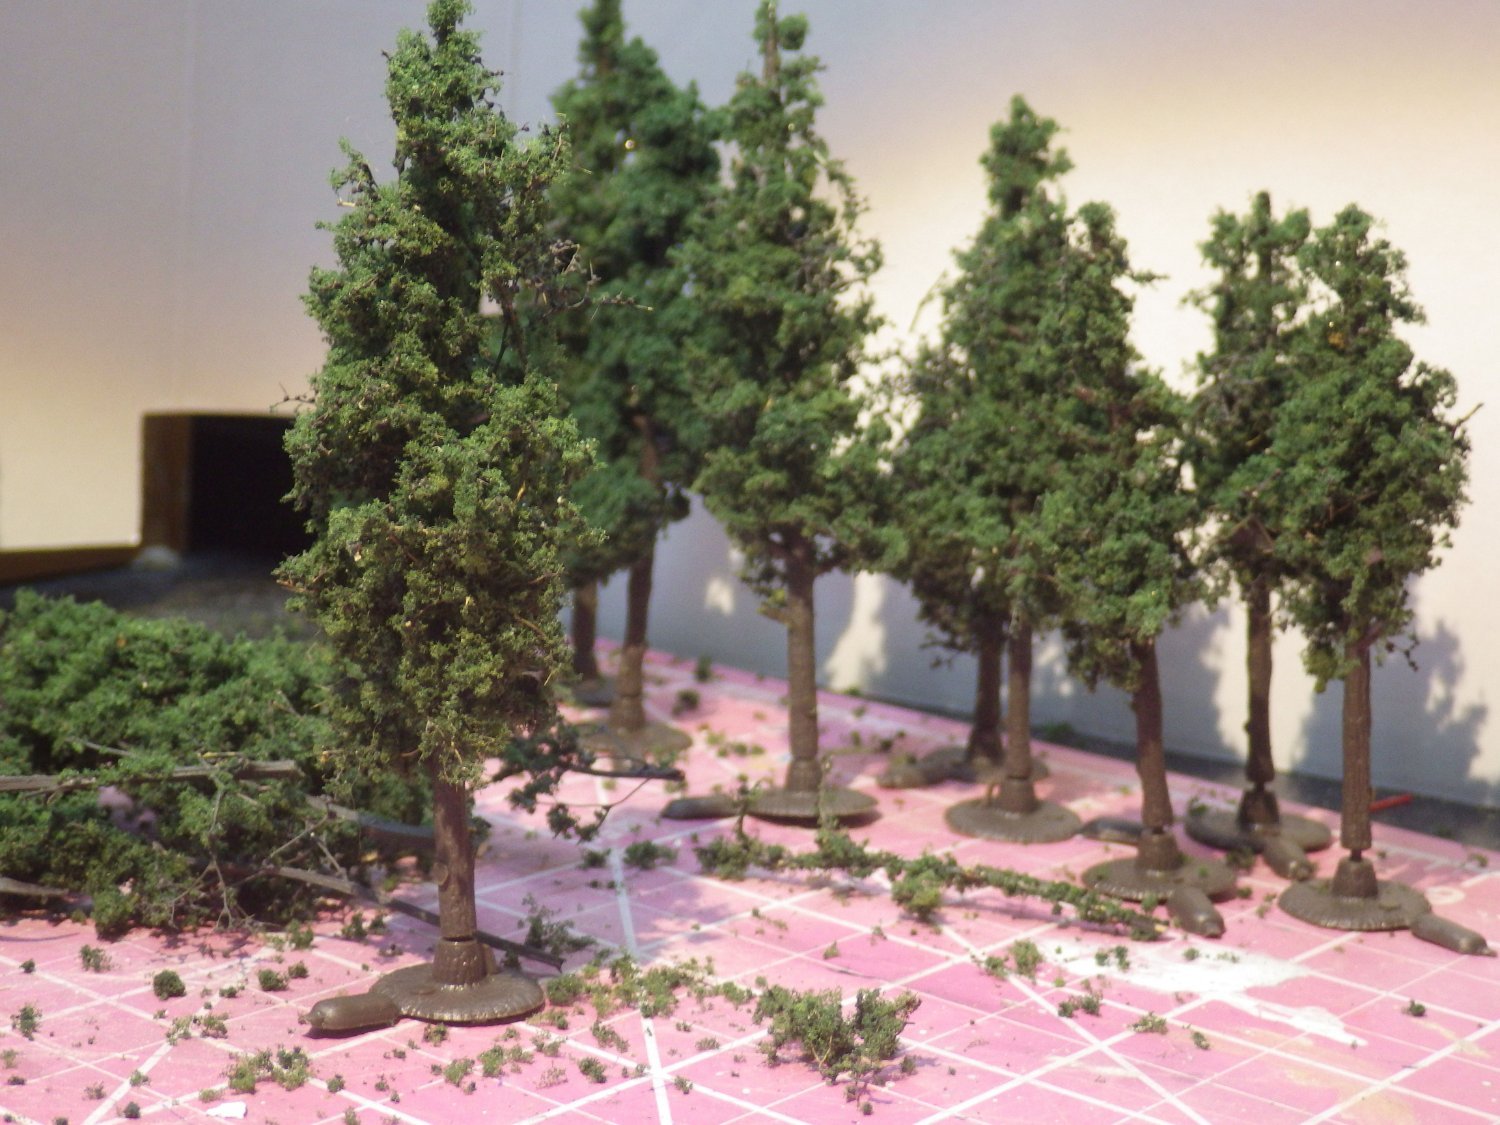
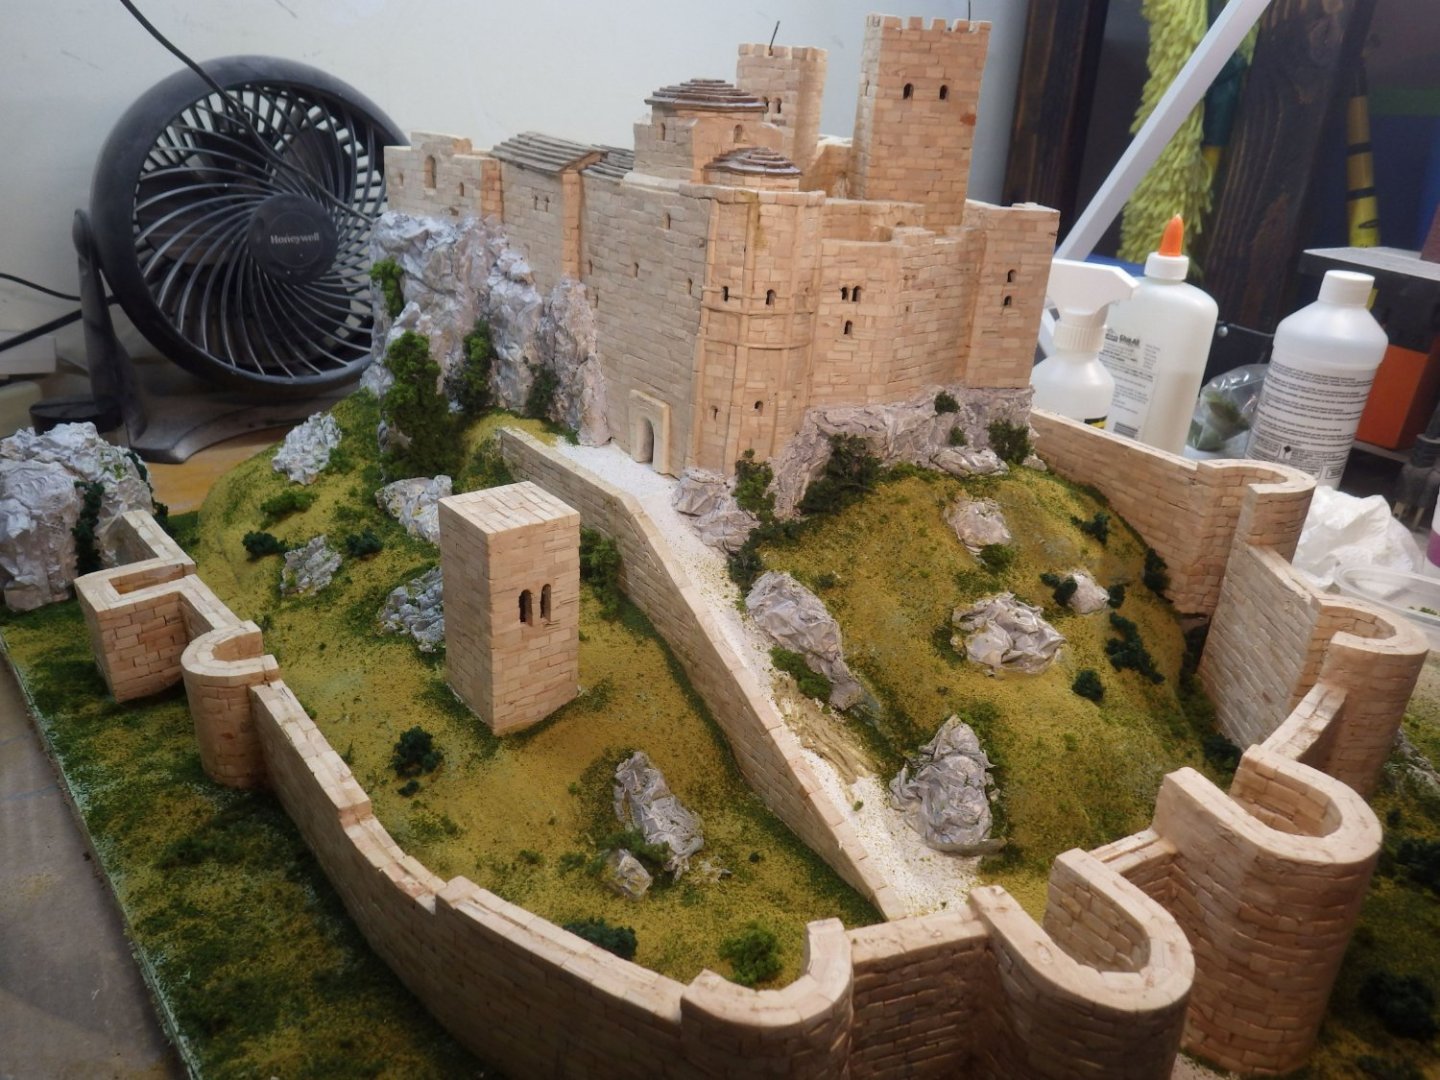
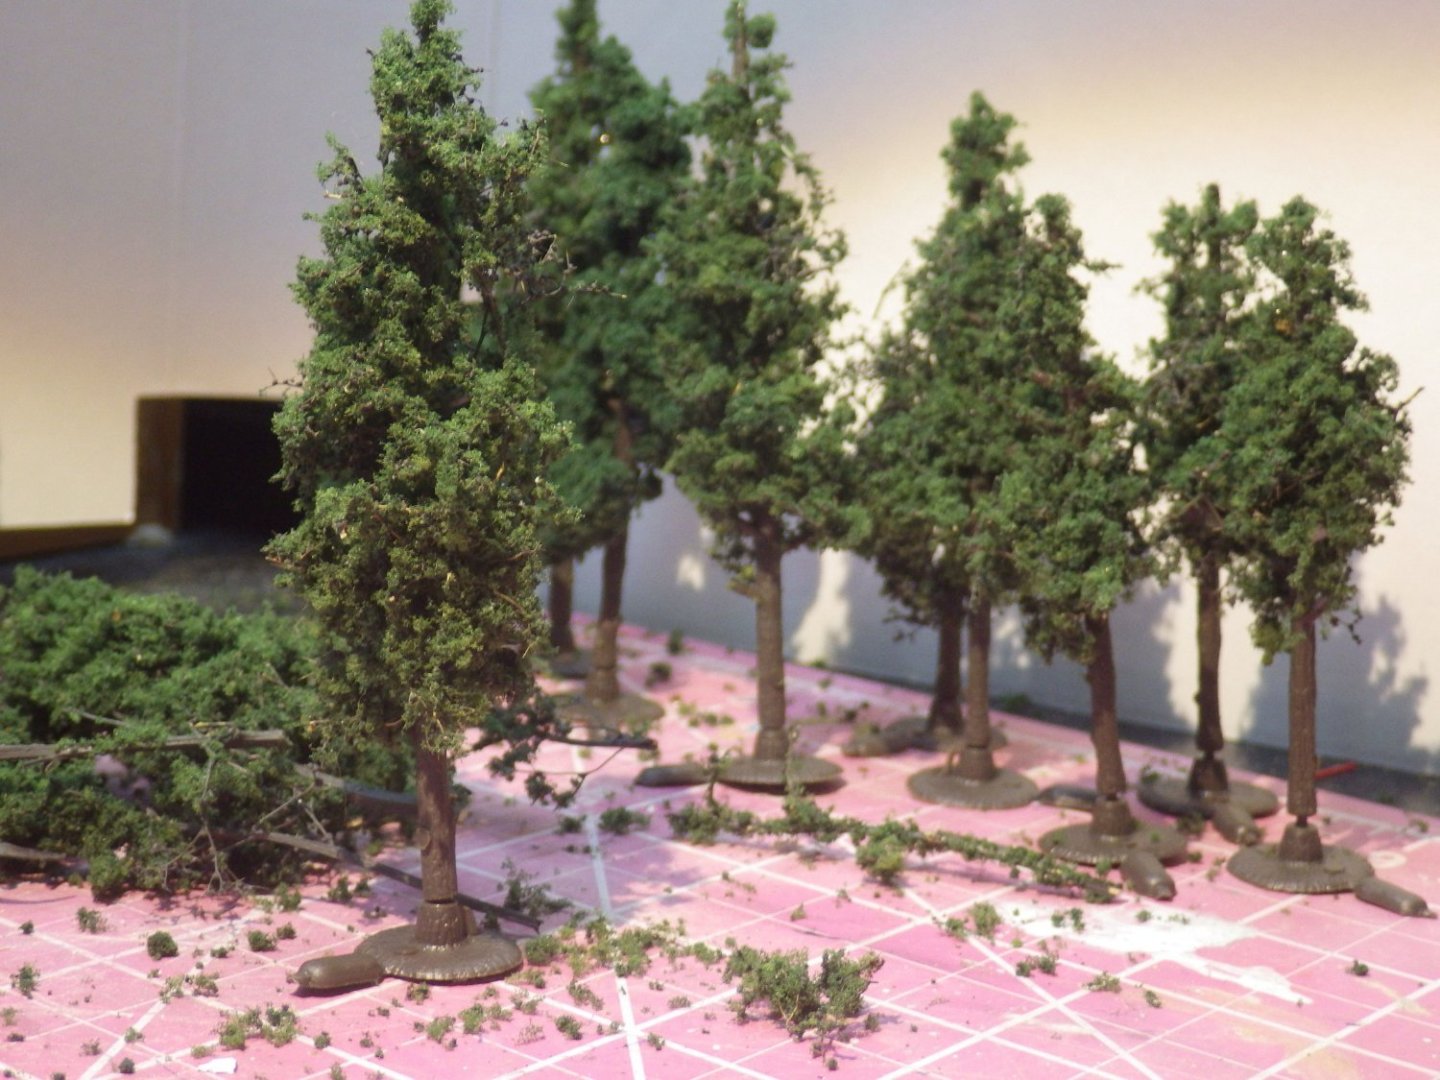
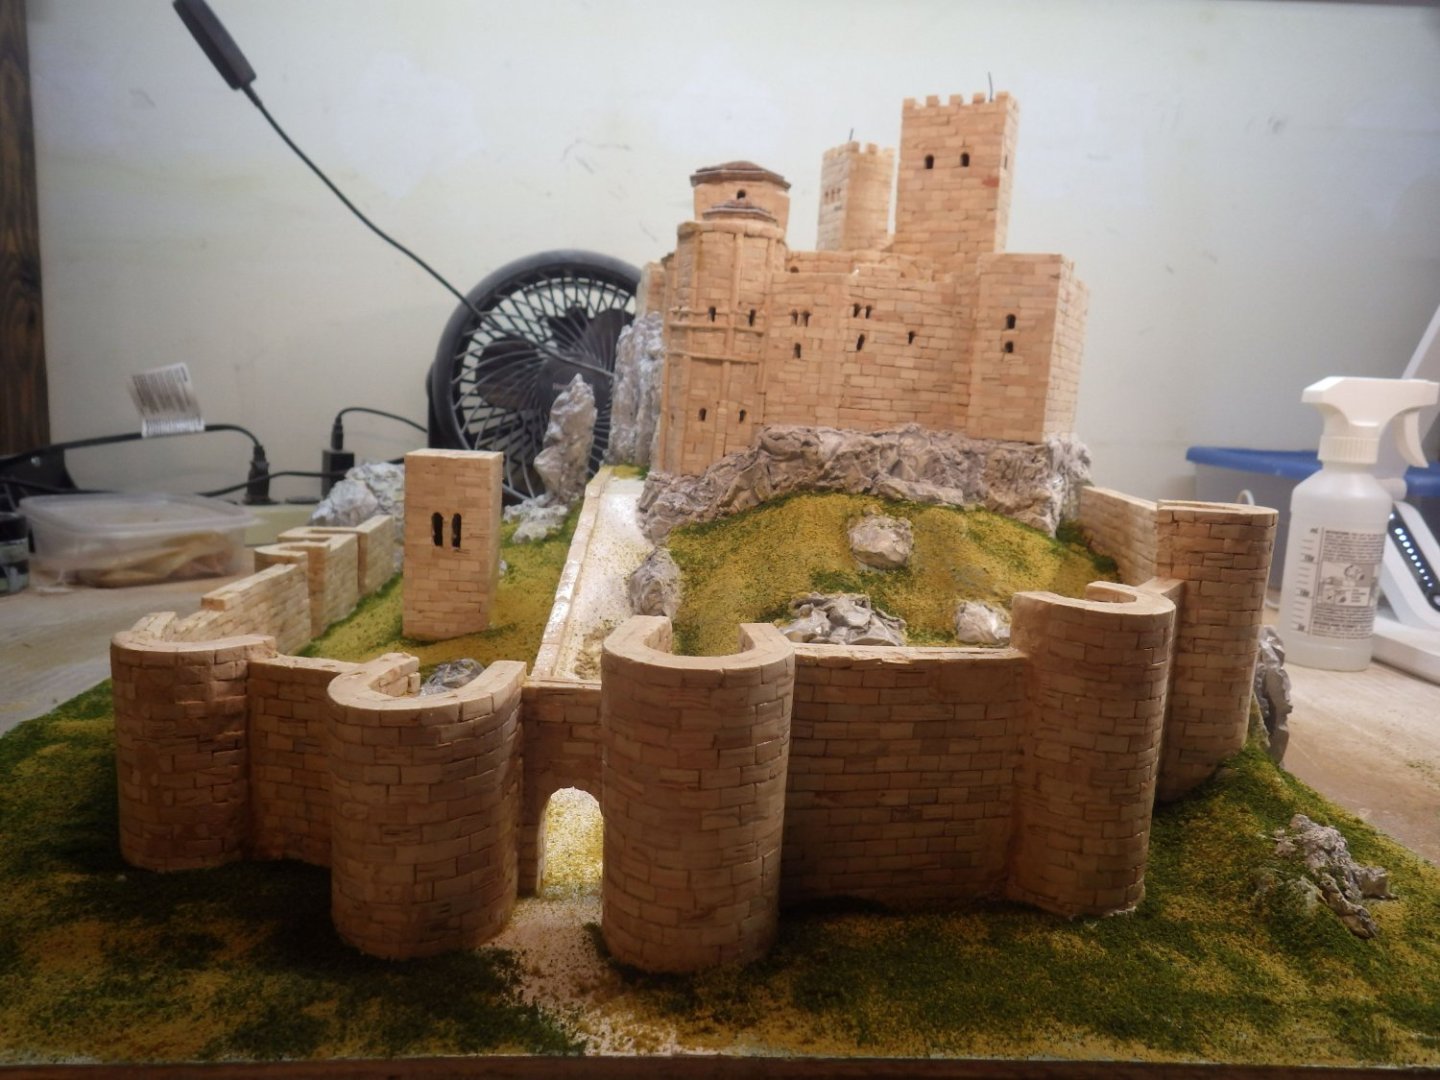
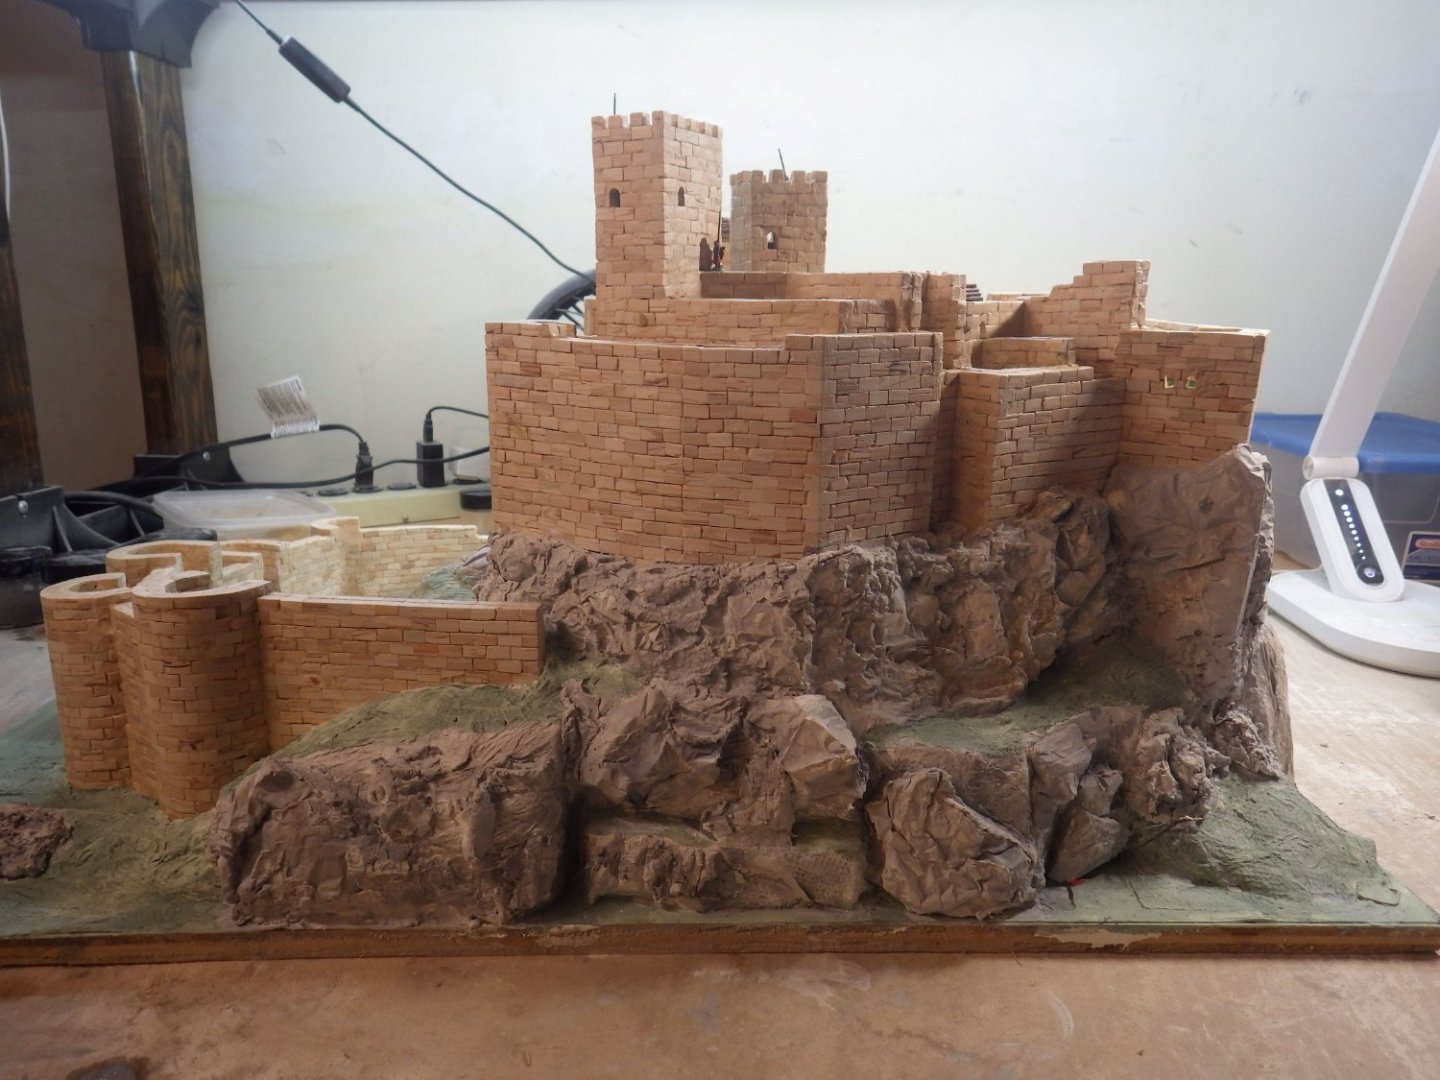
I added some of the Woodland Scenics coarse turf and found it difficult to work with. It doesn't seem to shake out onto the model. It seems to need to be sprinkled between fingers and then there is a tendency to ball up. I wonder if it works better on larger scale models. For me it looks like small bushes rather than coarse turf. So I was happy enough with teh small amount that got added but I decided not to use any more and moved onto WS bushes and briars to build up the vegetation on the cliffs and rocks. Its quite fun to do this but I am nervous about overdoing it. This looks about right looking at photos of the real thing. To add the bushes I used full strength white glue and then a coat of the scenic glue once everything was in place The rocks at extreme left look a bit stark so they may get worked over. I moved off the model and started working on trees. The first ten have been made from WS pine armatures and initially dark green foliage clumps but I found them hard to work with to get a conifer shape so I moved onto conifer green fine leaf foliage. Its a bit unpredictable but there are some nice effects and its possible to get bare branches in amongst the foliage. The stands are temporary bases while the glue dries. They will be added to the base by punching a hole into the foam blocks. These will get a coat to scenic glue and then I'll start building up that side of the model Thanks for looking in, all the great comments and help. Alan

- 462 replies
-
- 13
-

-

-
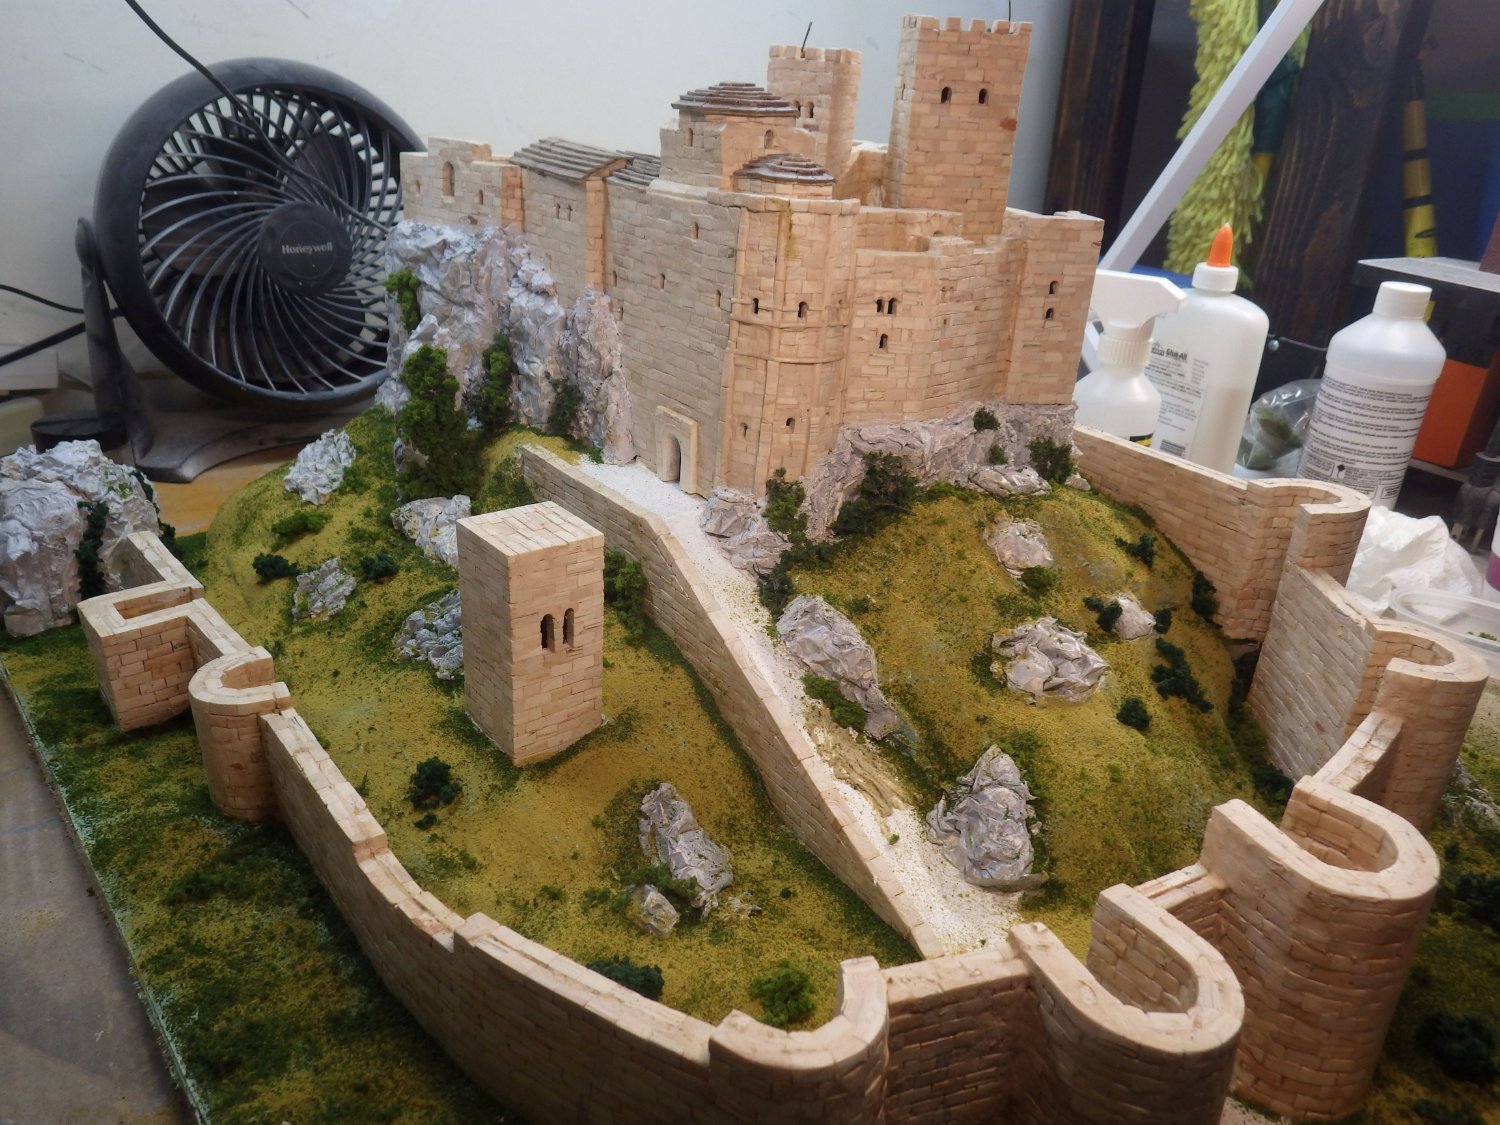
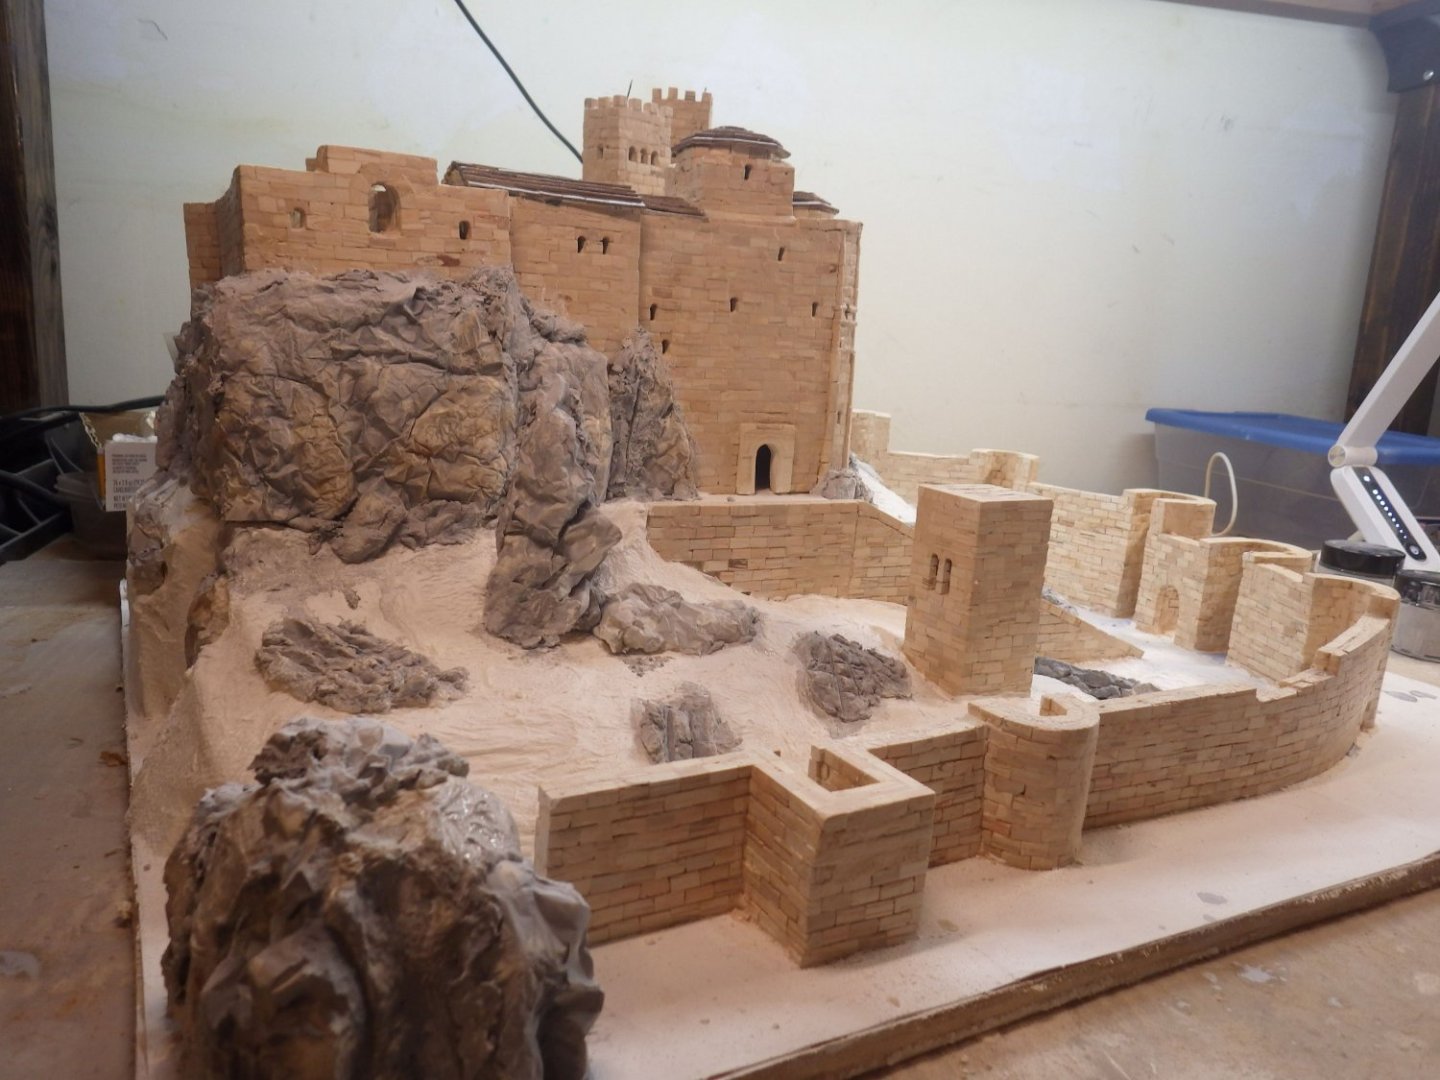
The base is 24 x 26 inches and 16 inches high
-
You are right about the price of plexiglass Craig. I don't trust myself to cut sheets of plexiglass accurately so I get them precut from TAP Plastics (a great resource and very efficient). I went to their website last night to check the price of a set of 3/16 sheets to build a case - $120 roughly! I'm going to do it though. Although my cats are pretty good I have invested too much time in this one to be happy about coming home to find someone has pulled all the foliage off the model. It seems that there are lot of people who can't look at something without using their fingers. Finding a place to display it is going to be interesting. I wandered around with the tape measure earlier and found that the two candidate spots are actually too small. I've seen photos showing display cases built into a thrift store coffee table which is interesting but my woodworing skills are horrible so I'm not sure I can pull that off.. Its getting close to needing an answer though Alan
-
Thank you EG A lot of the credit goes to all the help I've had from you all. Youtube is a great resource but this is a massive topic with so many ways of making a great landscape that its hard to navigate Many Thanks Alan
-
Thanks Andrew I'm replacing the stone dust all over the garage with bits of scenic foliage😄 Alan
-
Thank you OC. Still a lot of detail to work up but I think its getting there. Alan
-
Thank you Jack Your tips and suggestions help a lot Many Thanks Alan
-
Thank you very much Andy That is a very helpful tip. I'll try the diluted alcohol spray as I move onto the next layer of turf and weeds. Alan
-
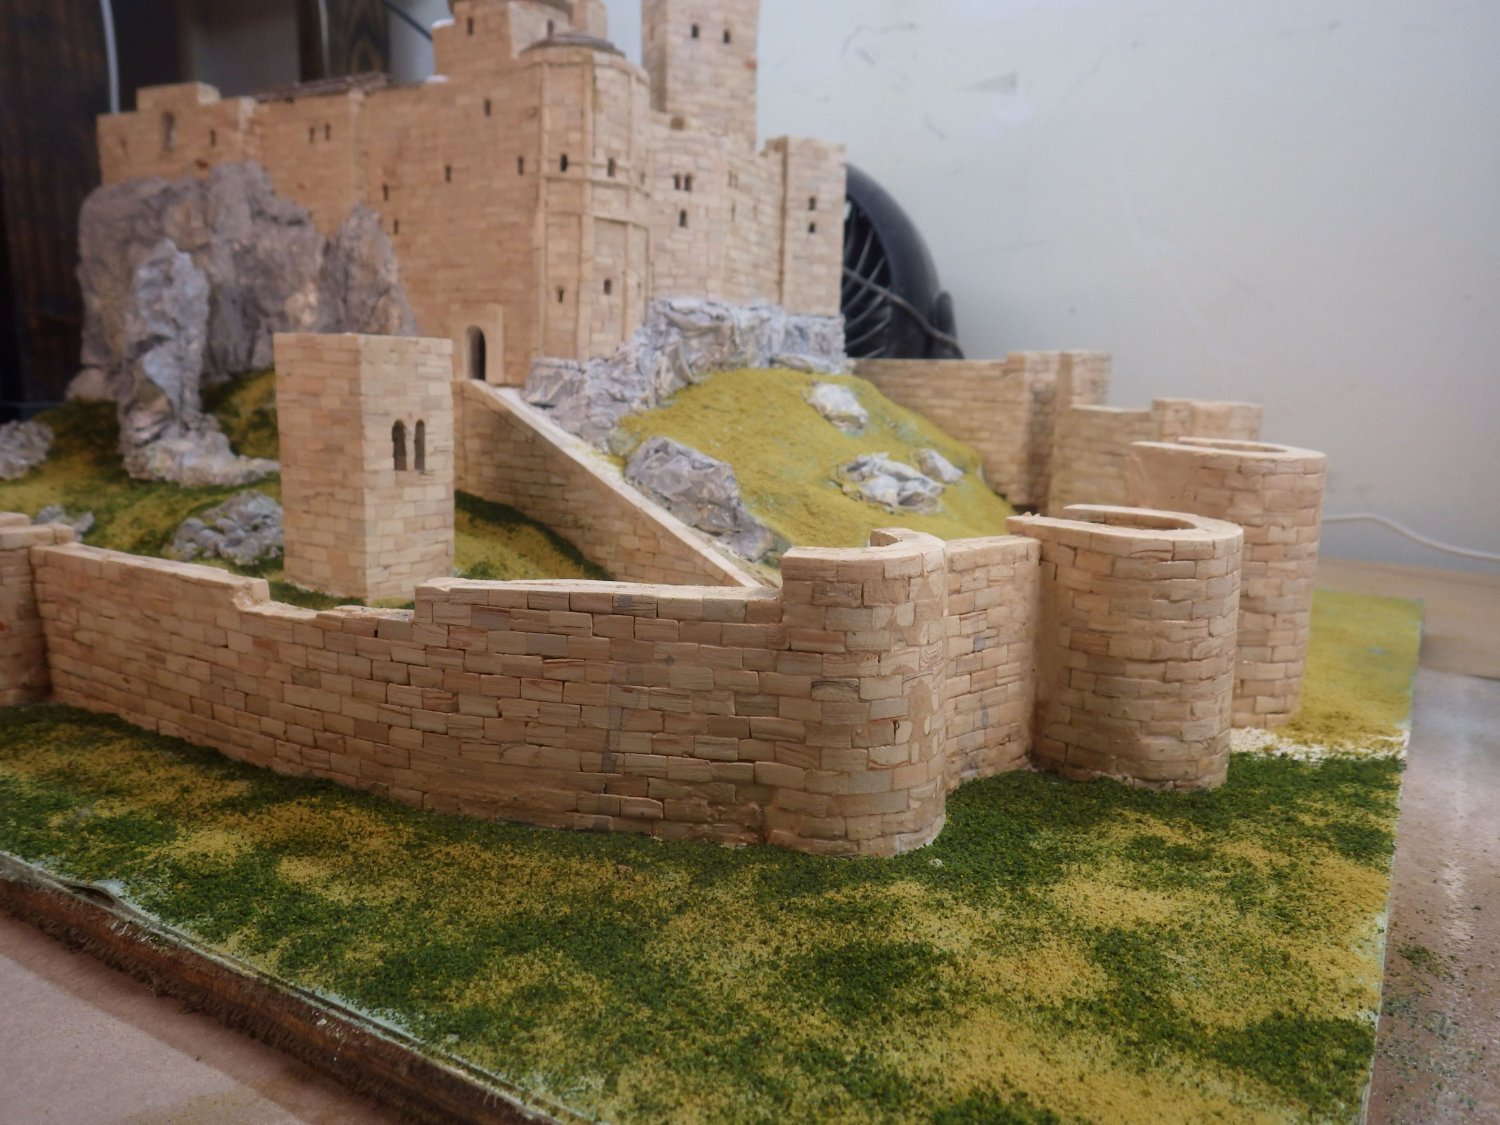
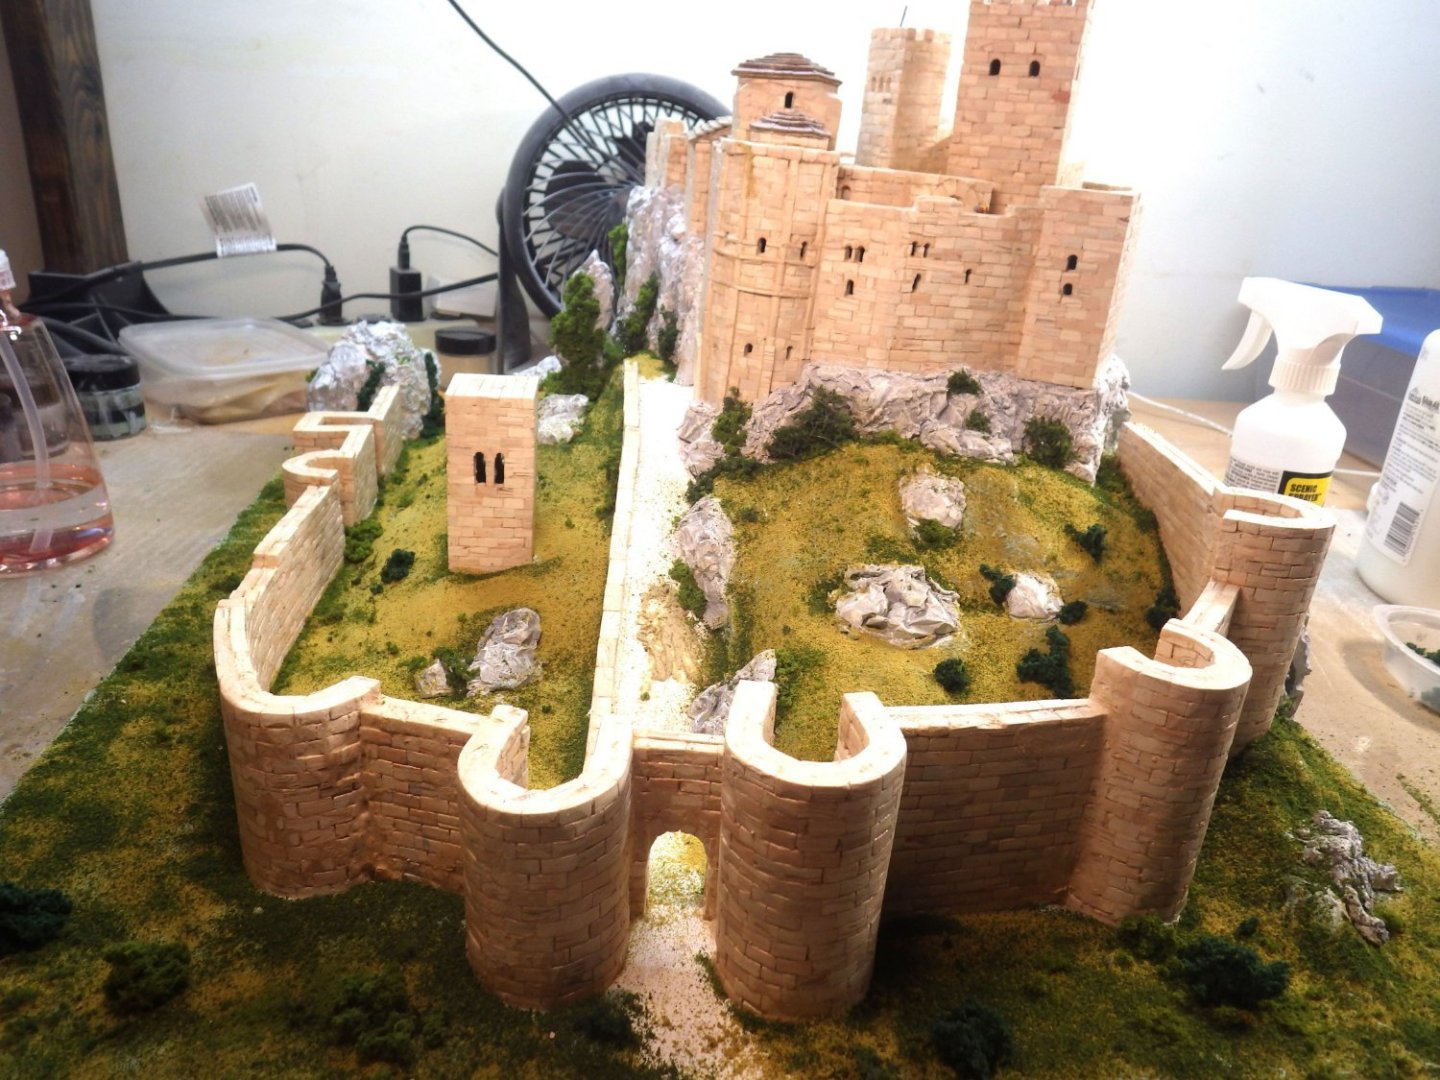
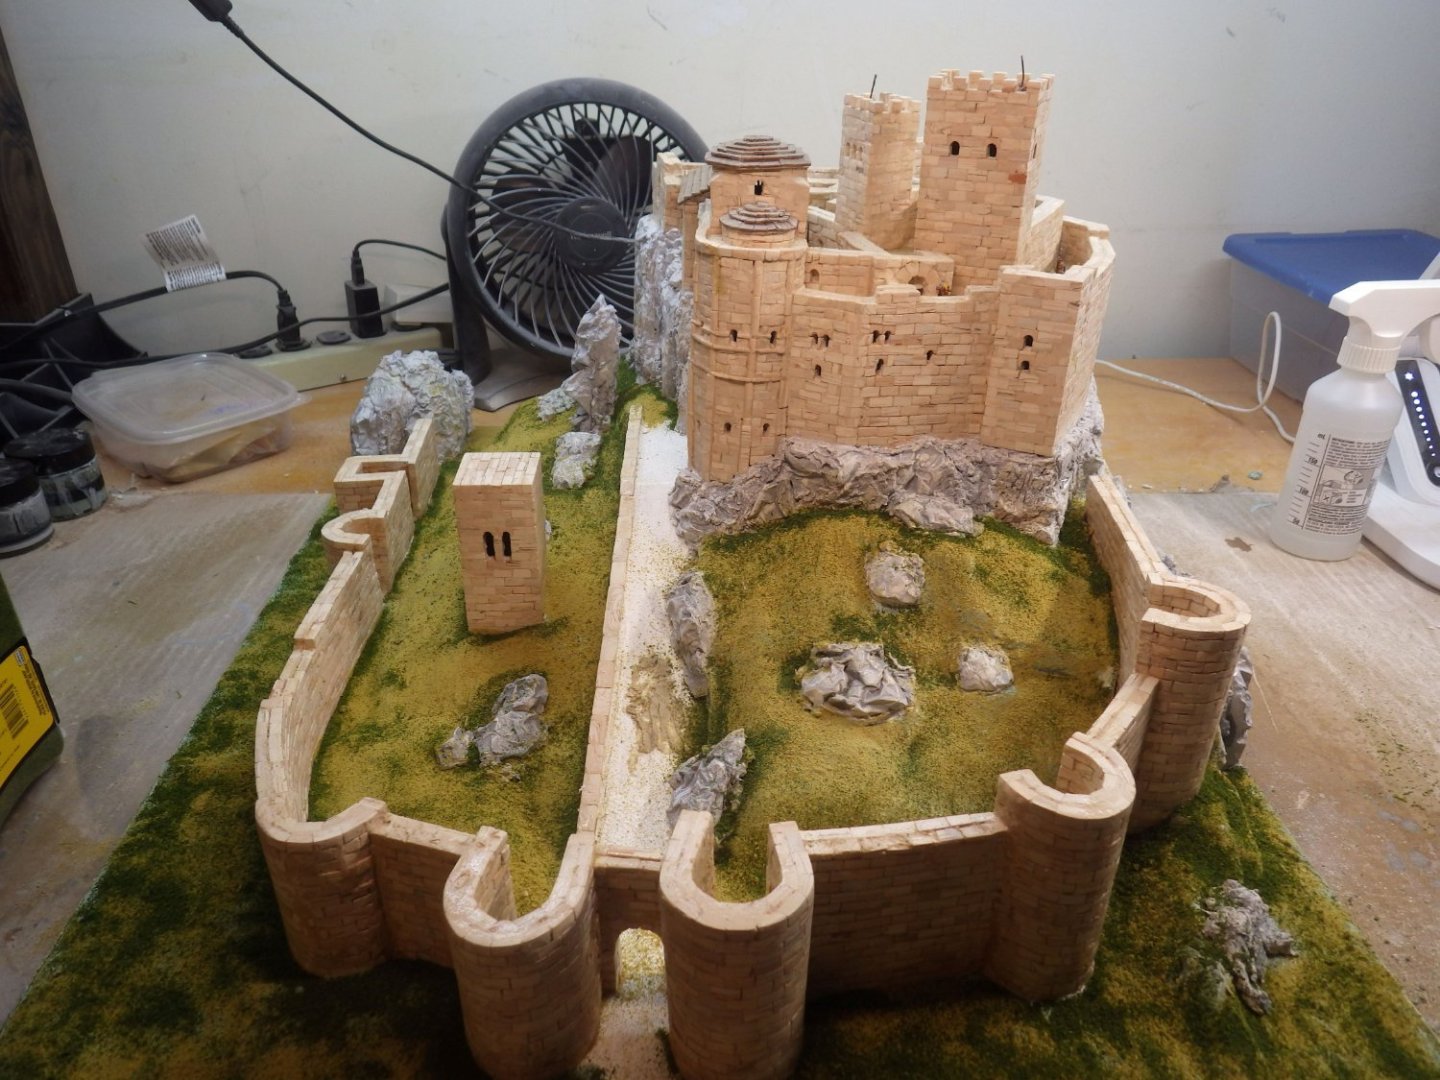
After experimenting off the model I started with the grass. I used a bottle of Woodland Scenics scenic cement for the work so far. It dries matte and can be sprayed or painted. Working on a small area at a time I painted on a coat of it and then started adding grass. I found I didn't like the shaker bottle to dispense the grass. I was getting too much and over too large an area. What seems to work for me is taking an amount of the grass from the bottle on an appropriate artists palette knife and then adding it to the model by tapping the edge of the palette knife. That gave me far more control of how much and where I was placing the stuff. I started with WS fine yellow turf and when I was happy with what I had applied I gave it a sprayed coat of the WS scenic cement. Then I added WS fine blended turf using the palette knives again. They were great for getting the grass under the walls where it might be wetter and shadier. This shows the yellow and blended turf in the foreground and the yellow only further back\ The same treatment was given to the next section I have some WS light green coarse turf which will be the next layer. I think that will break up the texture a bit and also take some of the starkness out of the blended turf. Its a bit dark for my liking. I'm learning as I go here but so far its taking shape. Then bushes and trees and some gravelly areas I think I will run out of the WS glue before finishing so I will be switching to diluted white glue although I have also read that diluted matte medium works well too so I may try that both need a few drops of dish soap to aid dispersal. Thank you all for looking in, for the comments and likes. Alan


- 462 replies
-
- 12
-
-
-
Thank you very much Ken - and you are exactly right Alan
-
I see what you mean about all those wheels. I look forward to seeing them building up the diorama alan
-
Beautiful work Jav. The paintwork is excellent Alan
-
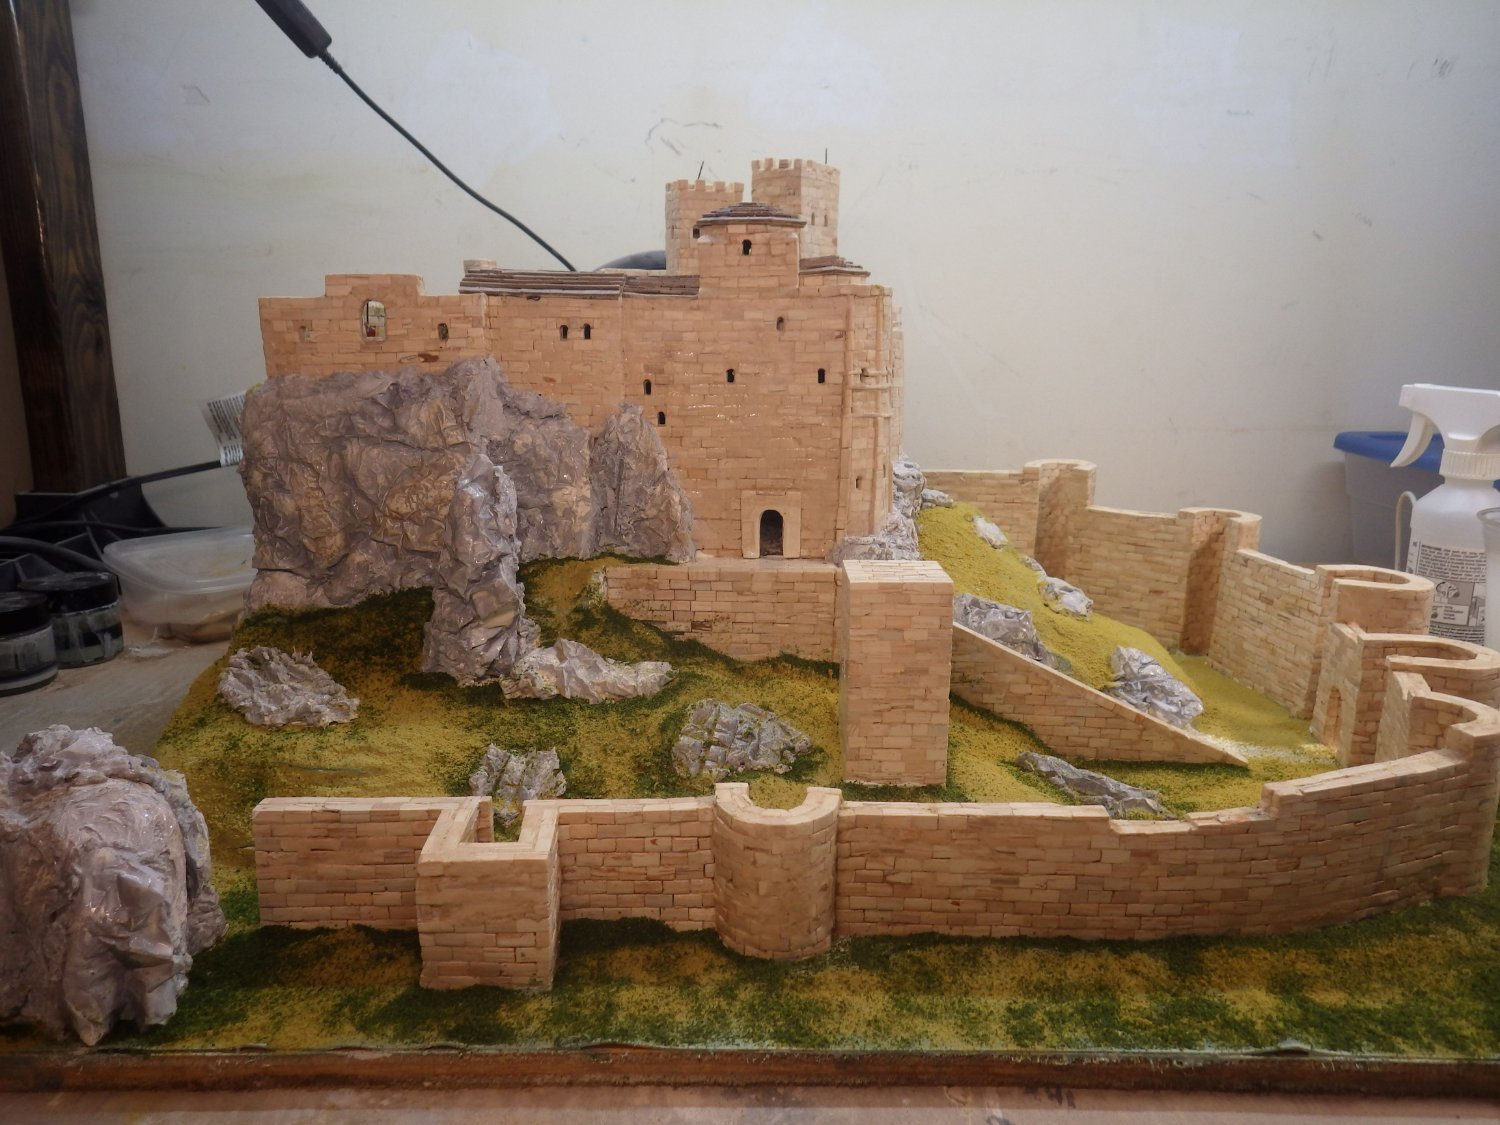
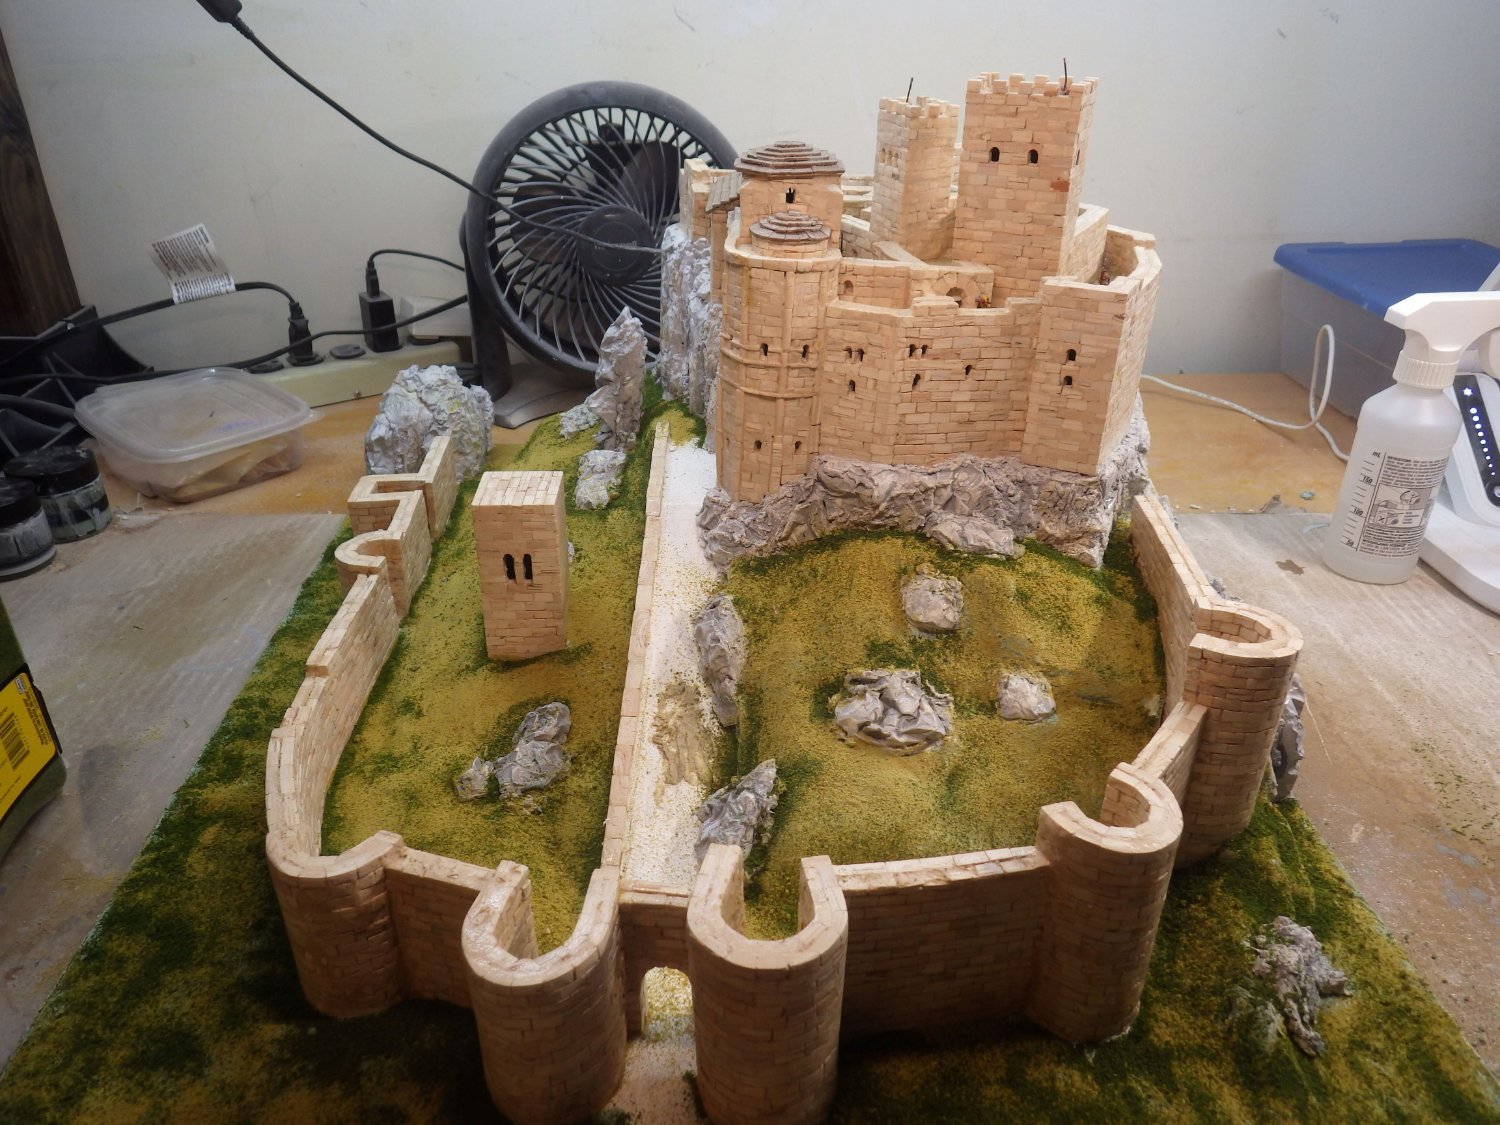
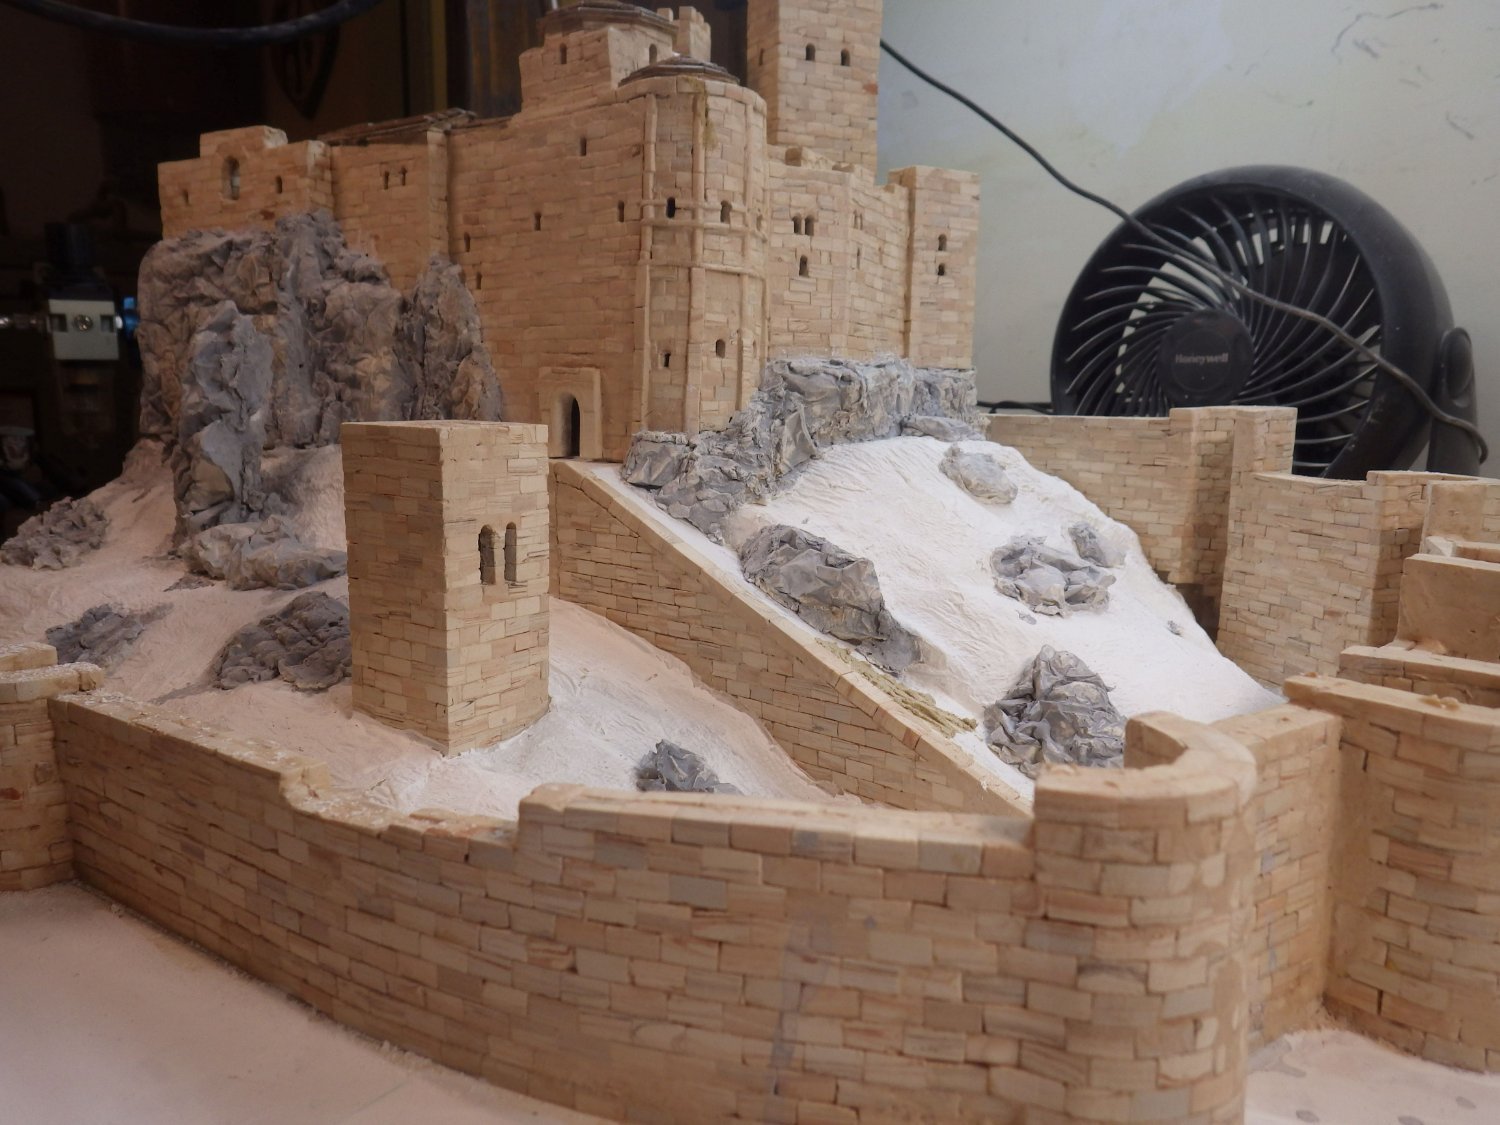
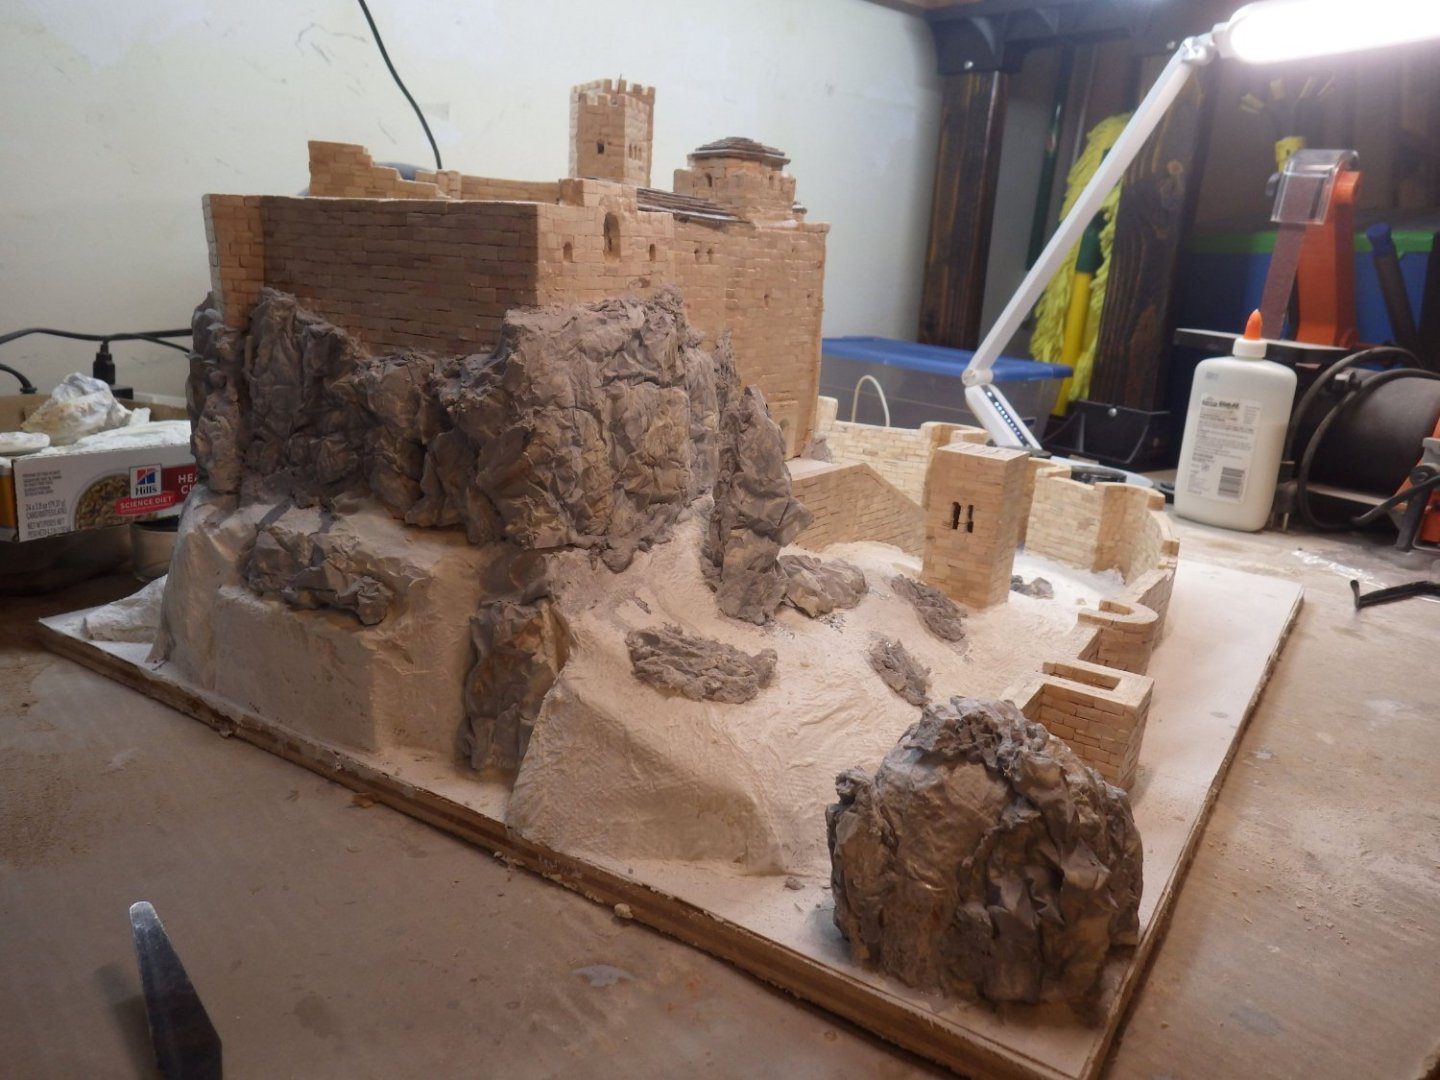
I experimented with basic background colours for the grass areas. These will be predominantly covered in dry grass with greener shades where there is more shade or water. I decided on a green grey mix for the base and added some dry grass to assess the effect I think that is going to work so I painted in all the grass areas. Its dried a bit greener than I expected but from a distance it looks quite good without going further. At least its an indication of what the finished model may look like I added a few more rocks and found that I had forgotten the cliffs at the back corner so they were built up and painted. Trees and bushes get added to the back side so I kept the lower cliffs fairly simple. Ready to add grass I think Thanks for looking in, all the comments and helpful tips and likes Alan


- 462 replies
-
- 14
-
-
-
Thank you very much Mike. The landscaping is a fun exercise after all the brickwork. The model is going to 26"L x 24" W and 16 " high. And its heavy. I'm rather puzzled wondering where to display it. Alan
-
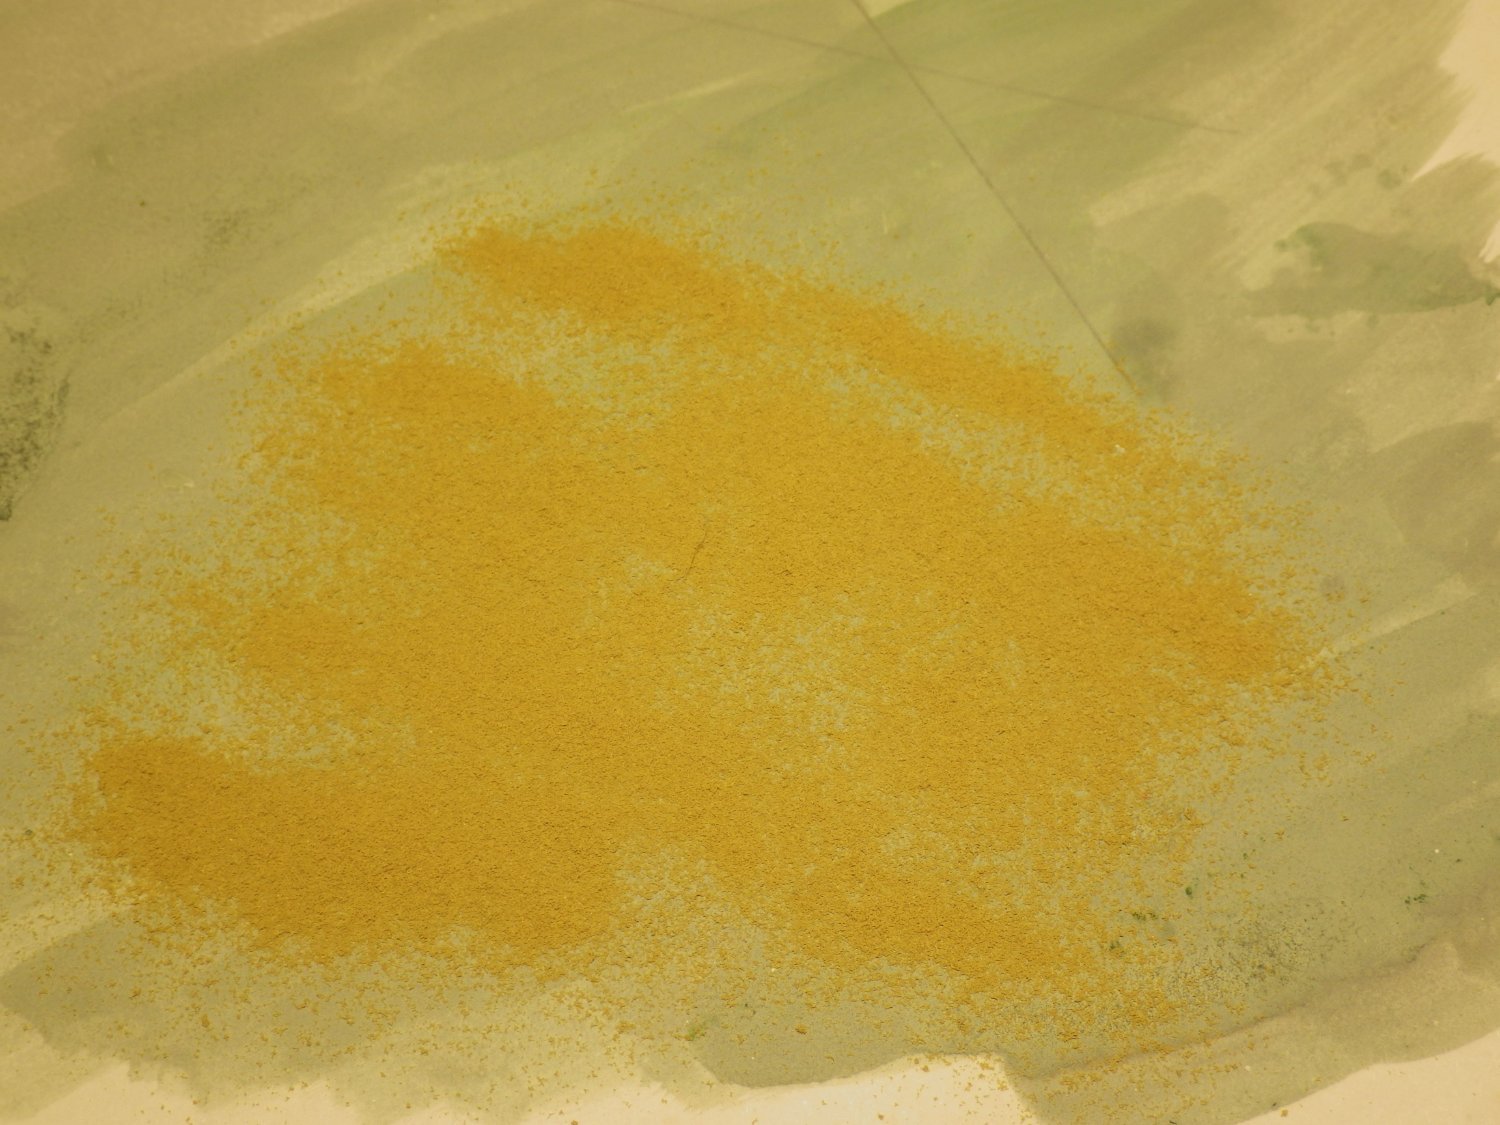
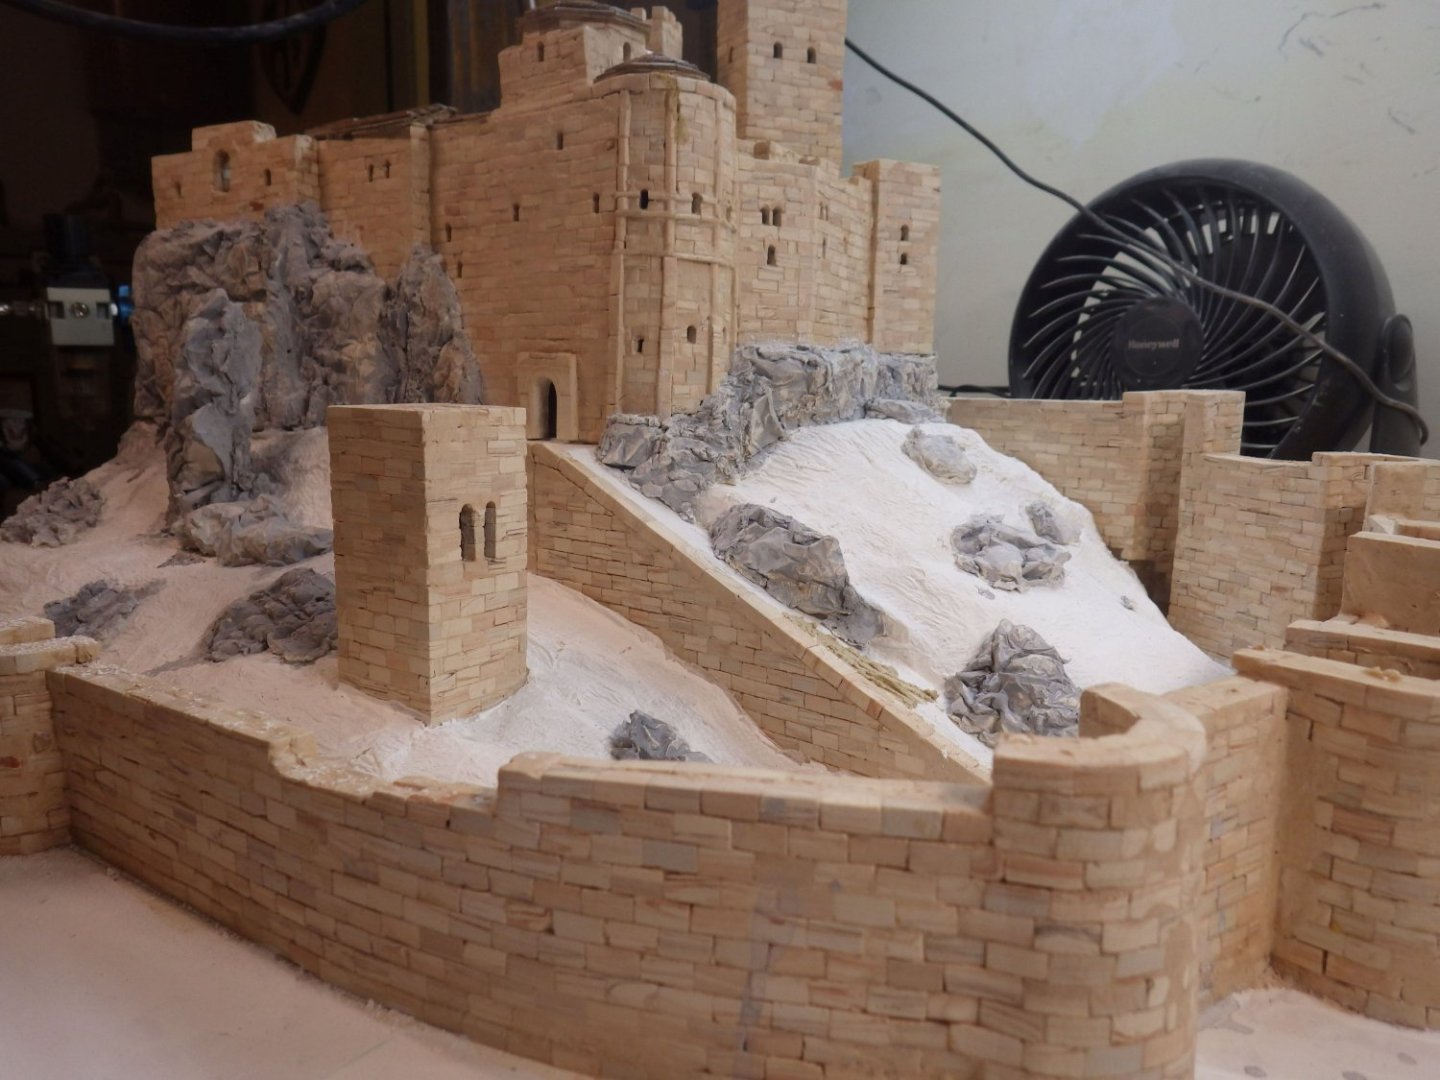
Thank you very much OC. I was a bit nervous about the quantity of cliffs that needed to be worked but I'm really pleased with the result. Using Sculptamold as the material to glue all the cast cliffs into place worked much better than using straight plaster. I think I will need some bare patches amongst the grass. I'm thinking some of the Mig saand effect might be worth trying. It can be buried under the grass if it doesn't work. Alan
-
Thank you very much EG. I made some trials and ended up with green - grey. It seems to have dried a bit greener than I planned but I think it will still work under the grass. Alan
-
Great recovery Craig. Skill to obtain a deep gloss on a car intimidates me alan
-
Thank you Jack. I appreciate the help with the scenery Alan
-
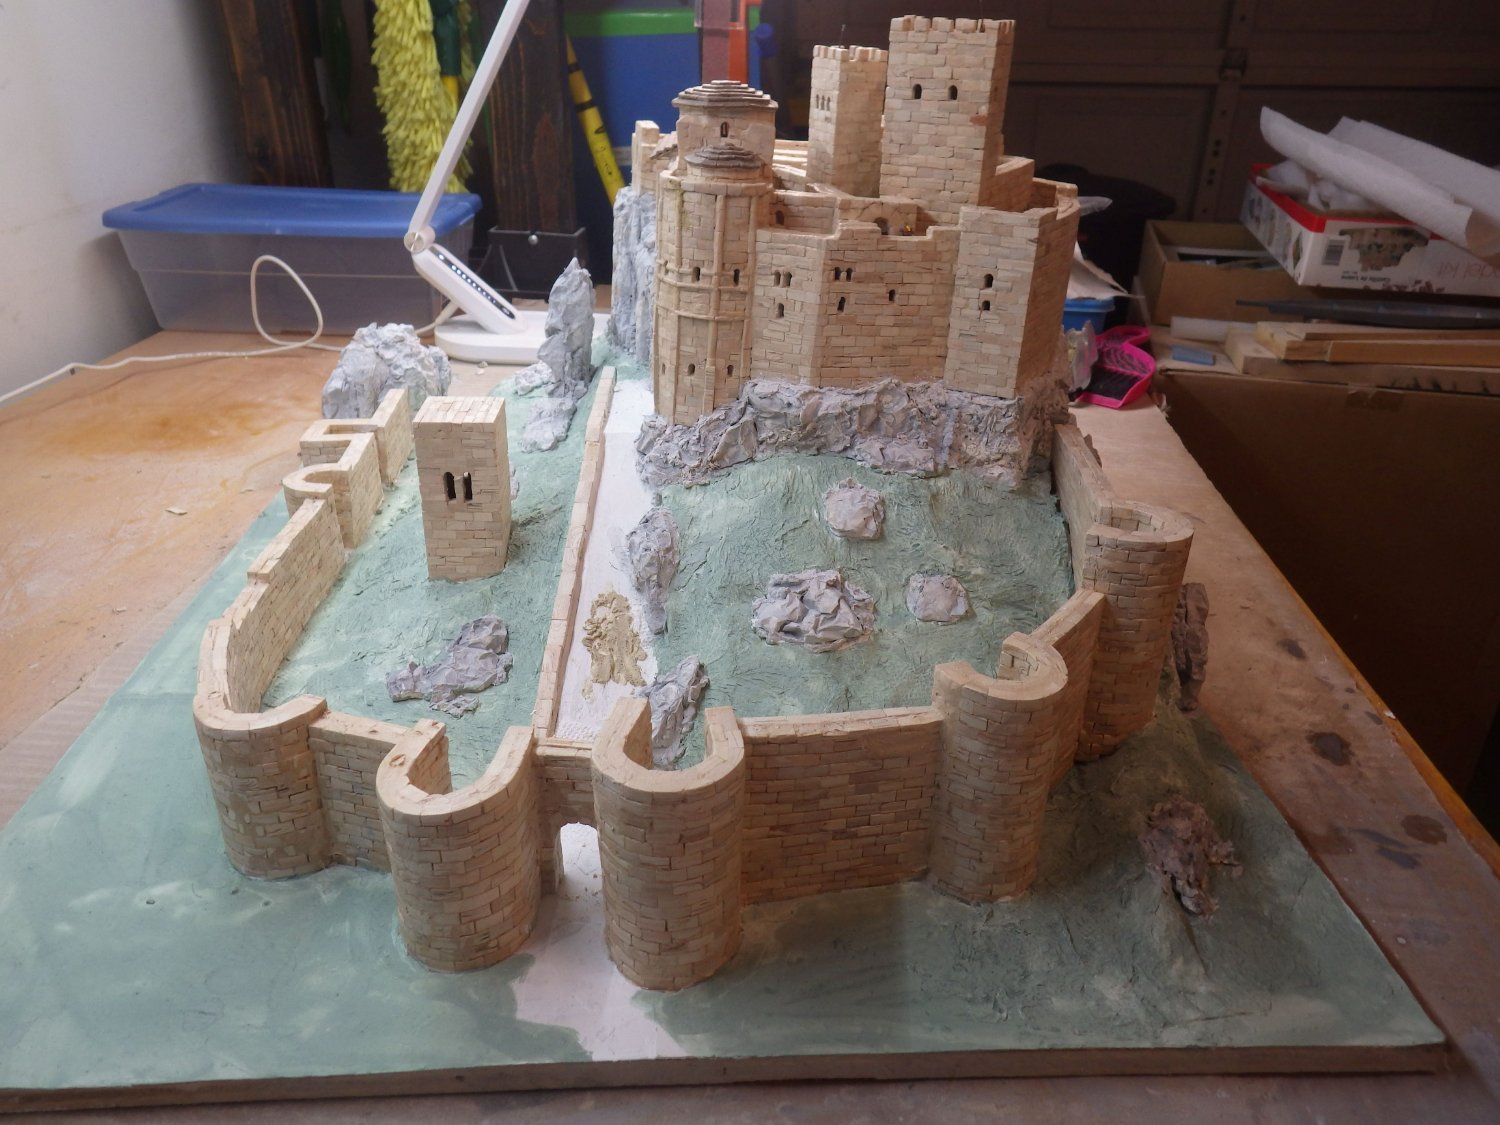
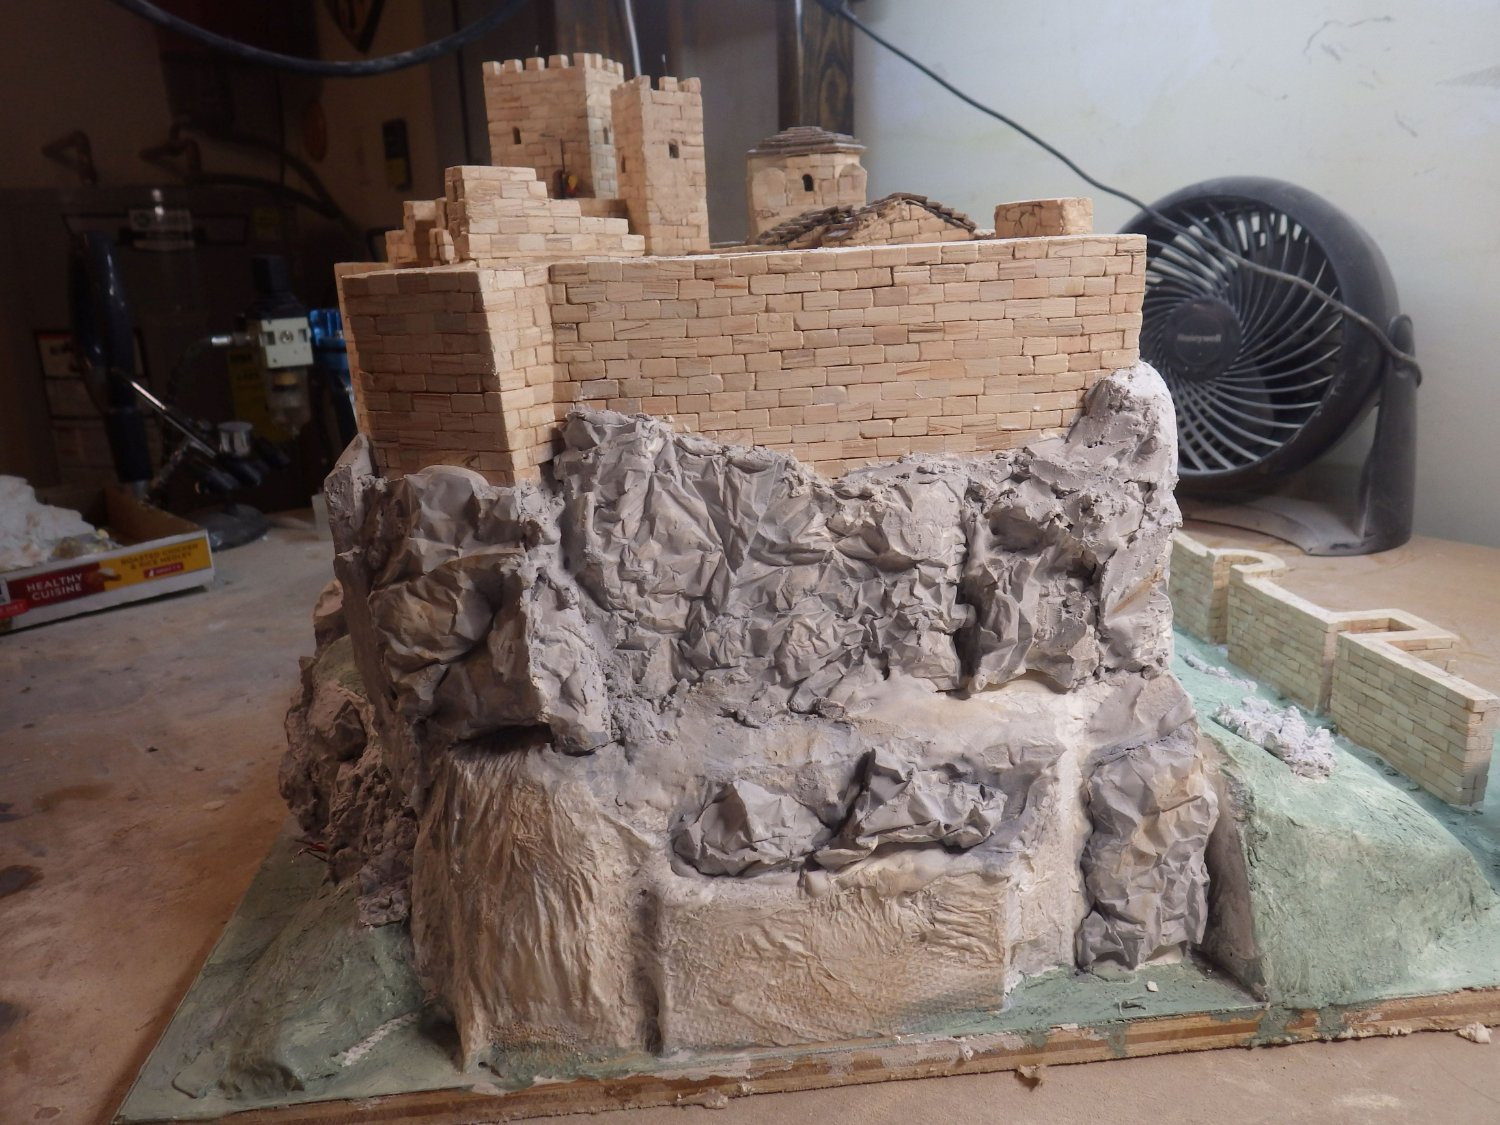
Work intruded so I had less time than I wanted to move on with the landscape. I was pleased with the results of the experiments on the plaster rock faces so I mixed up some large jars of light grey and dark grey washes and worked on the rocks and cliff faces. I was a bit restrained with the brown accents, only added a very small amount of the beige and then washing it into the greys. Tomorrow I will add a base colour to the areas to be grassed. I am still think of what to use for the ramp and path. The kit shows using broken tiles embedded in plaster but that's not how the real thing looks. It looks more like gravel and I also need to add a few shallow steps. I have some gravel like material which I may add to the Mig terrain material and see how that works out. Figures will need to be added before then. I think that I will need a case to display this safely so I need to finalise the lighting lead out and order the acrylic sheets. This is going to be a heavy piece of work. Thank you all for looking in, the encouragement and helpful comments and likes Alan
- 462 replies
-
- 13
-
-
-
Thank you Ken I'm thinking of painting the whole area to be grassed prior to adding the grass in case I get any thin areas. I'm trying to decide between a very light grey (to compliment teh rocks) or a khaki / beige (or even a grey warmed up with a bit of beige) Thanks for the help Alan
-
Thank you Craig. This bit is really fun too. I watched a bunch of (mostly railway enthusiasts) landscaping and its a whole new world. Some fantastic stuff and as usual another big rabbit hole to go down. Alan
-
Thank you very much Waitoa. It feels like its all coming together. The landscaping is a whole new adventure Alan
-
Thank you for the kid comments Andrew I think the colour scheme will work for the model as a whole. I plan to aim for something like the lighter stones. I can always add a darker wash later if it looks necessary. I have a whole wilderness of grasses, brambles, bushes and creepers to throw at an imperfections. From the drone video there is quite a lot of growth on the rock faces and there is a wood around one side. I'm hope 70 tree armatures will cover that. Alan
-
Thank you Andy. I think I have some matte medium; I'll hunt it out. Alan