king derelict
-
Posts
3,294 -
Joined
-
Last visited
Content Type
Profiles
Forums
Gallery
Events
Everything posted by king derelict
-
I'm thinking its heat effects and the striations are caused by varying metal thicknesses and structural memebers. Its a whole new aircraft for me so I have no idea what the back end looks like inside so this may be totally wrong. Interesting airvraft and I'm looking forward to the build. Alan
-
P-51D Mustang by CDW - FINISHED - Dragon - 1:32 Scale
king derelict replied to CDW's topic in Non-ship/categorised builds
A beautiful model Craig. Congratulations. The finish is superb. I'm starting to think about attempting a metal finish after seeing your results. Alan -
Looking very nice Jack Alan
-
A masterful build. That is such a beautiful delicate model. It crosses the line into art. I think I would end up with a bundle of broken wood and string. Absolutely excellent Alan
-
That looks very nice and neat Jack. Some lovely detail there. This is a new AFV to me so its great to learn about it. Alan
-
I’m sorry to hear about the loss of a pet. That’s the hardest part of having them. Hopefully you have a stack of great memories. The dio just keeps getting better as the figures get added. The Rifles are really nicely posed. Fit my Sharpe images perfectly. alan
-
Very nice Jacket. I like the shading on the clothes alan
-
Looking forward to seeing it
-
As always the figures look terrific. Beautiful painting sir. It seems to me that there are two areas where figures fail in scenes; probably due to their relative inflexibility. Dead figures don’t slump into that final relaxation and it’s difficult to crowd the figures together. I think you have resolved both issues masterfully. The smoke generator is intriguing Great work Alan
-
Great work Jack. I know how you feel about the vision. I am using +3.5 lenses and am constantly having to lift them to find stuff on the workbench. Alan
-
A beautiful model. Well done Dan Alan
-
Amazing. That’s going to look realistically crowded alan
-
Came out very well Jack. I really like the base too Alan
-
It’s lovely to see the figures again. They really are terrific. The smoke is tricky, the breech smoke looks great in the first picture but not so impressive from the other side. I’m sort of following along here because I have sea spray in my future and I think smoke and spray are extremely difficult things to model. It’s probably easier modeling a cannon battery firing than the delicate musket smoke Alan
-
Thank you Mike. I was a bit nervous of the Mirage kits but they are really quite nice with decent detail. I wish they made a short forecastle version but I suppose it impacts the tooling and costs. I have the four ships that they make, some have PE for railings others not. The White Ensign PE is good for the later bridges and different radar lanterns but quite a bit of it won’t get used. Alan
-
Thank you very much OC. It sometimes feels like I’m learning all over again. The razor saw is a very useful tool, I’d be breaking the fine parts everywhere without it. Alan
-
Lovely cockpit Dan. Great work Alan
-
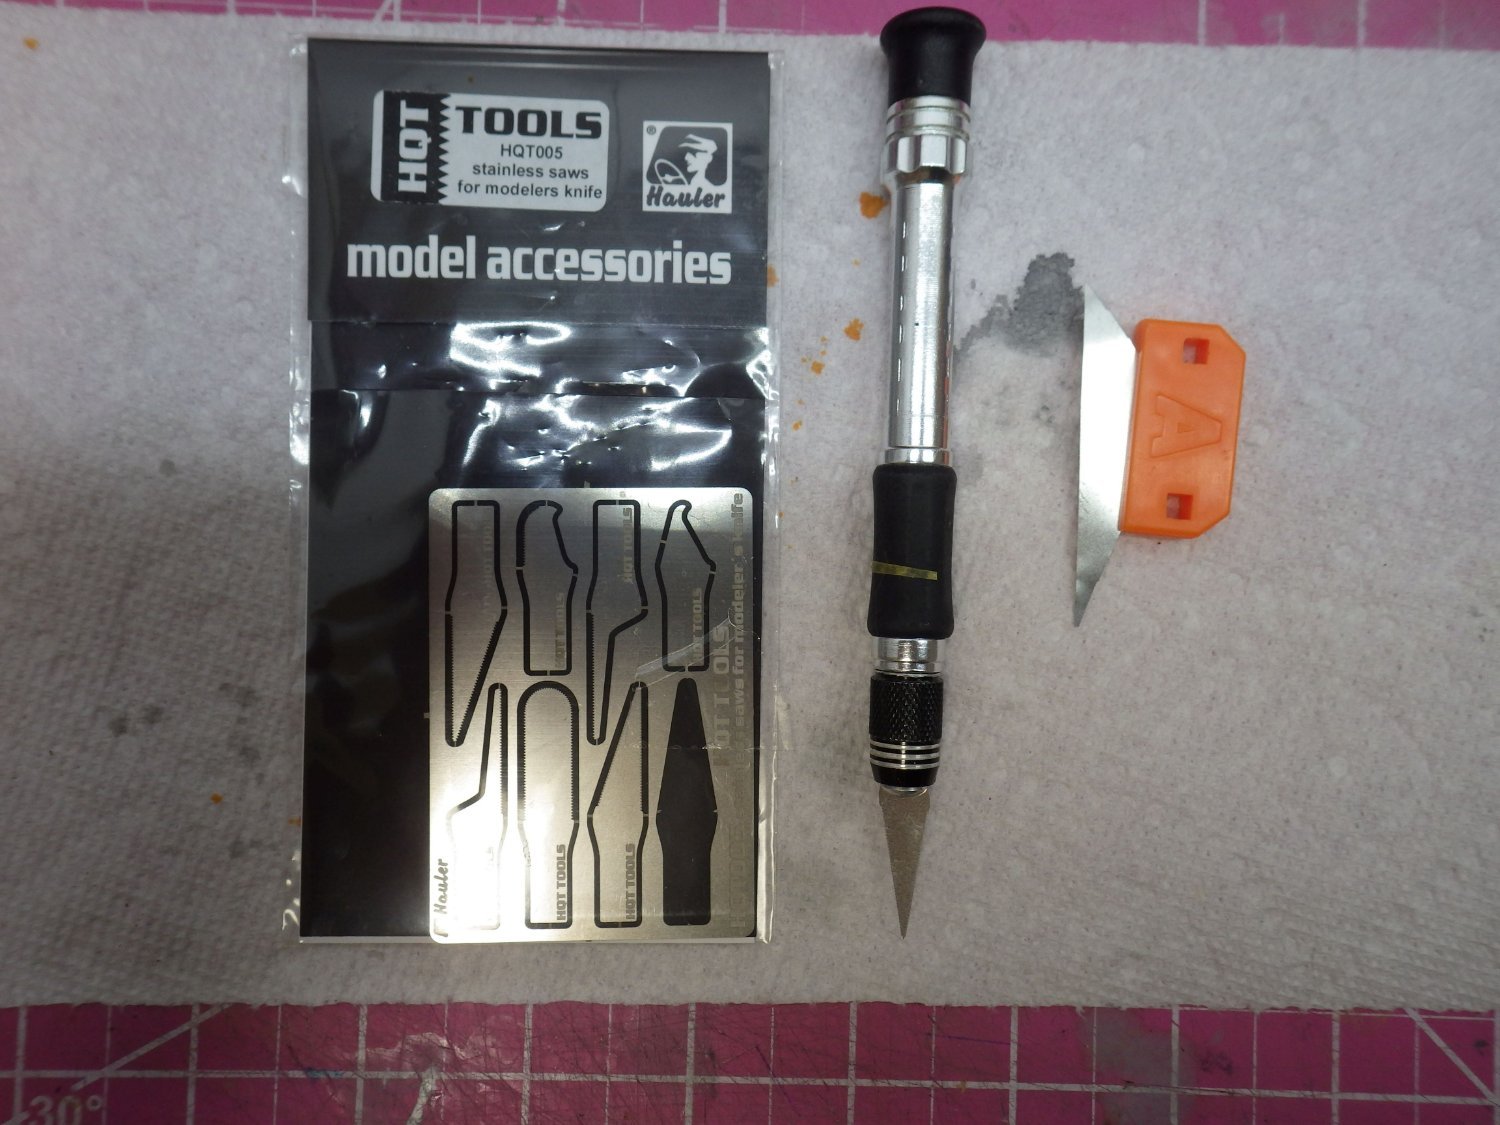
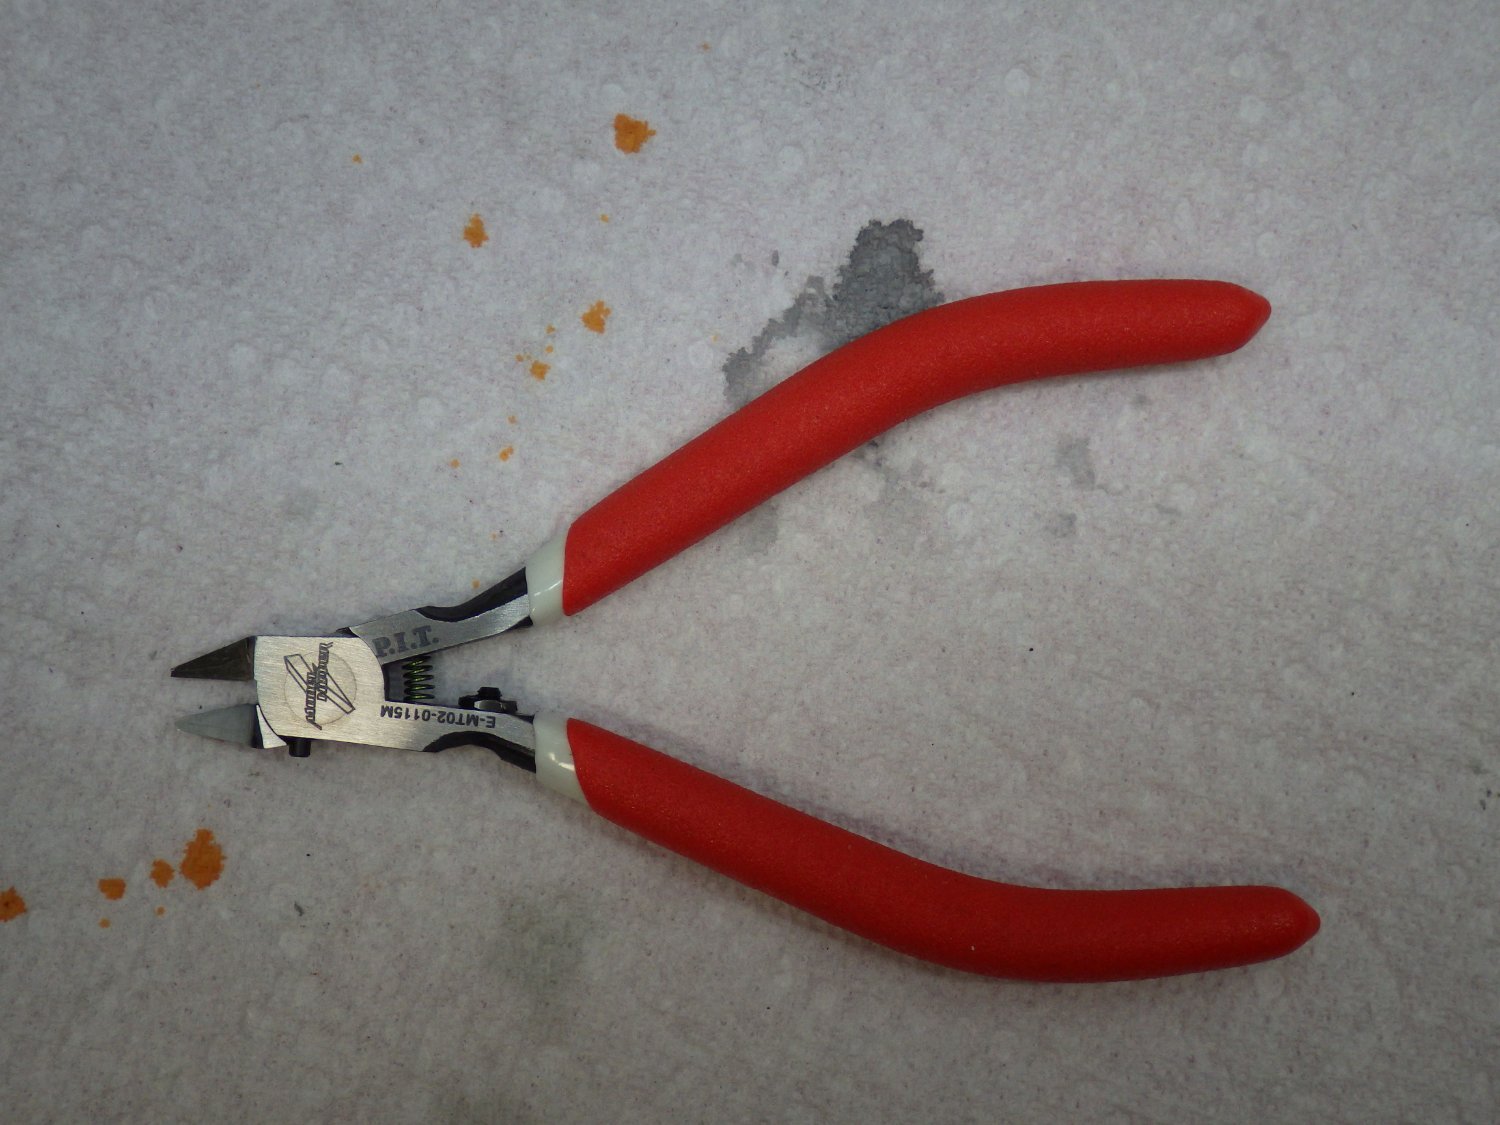
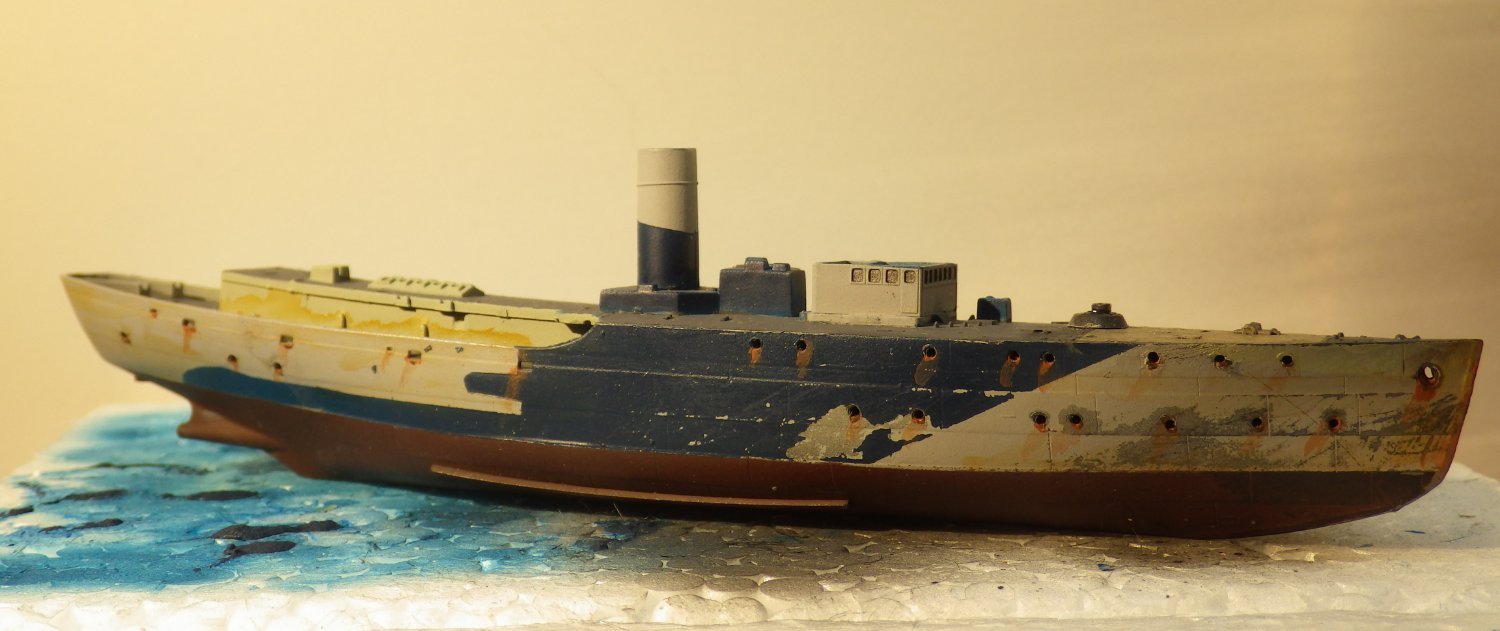
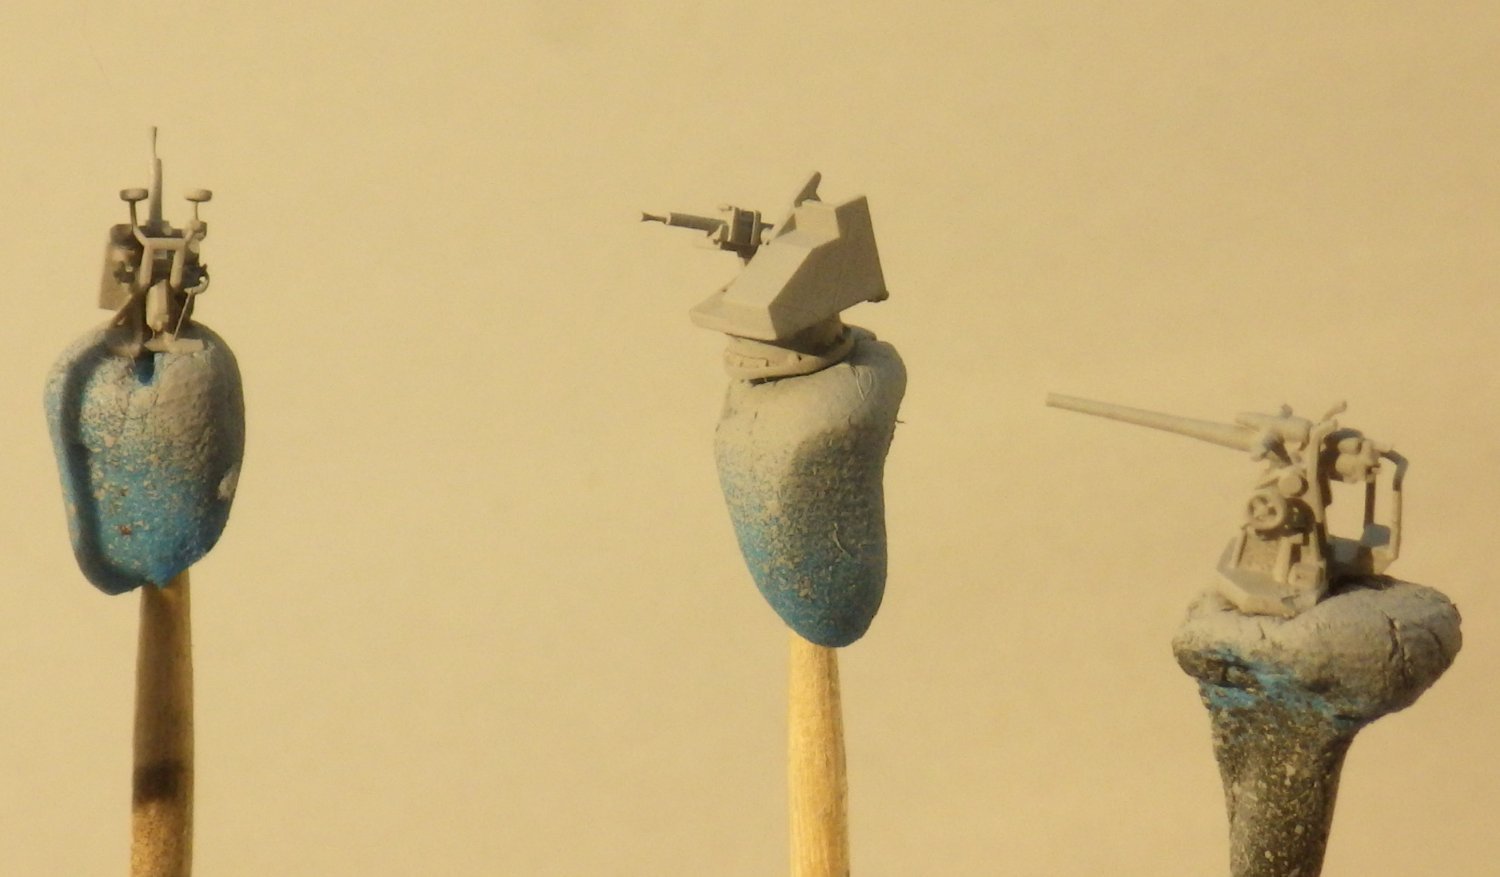
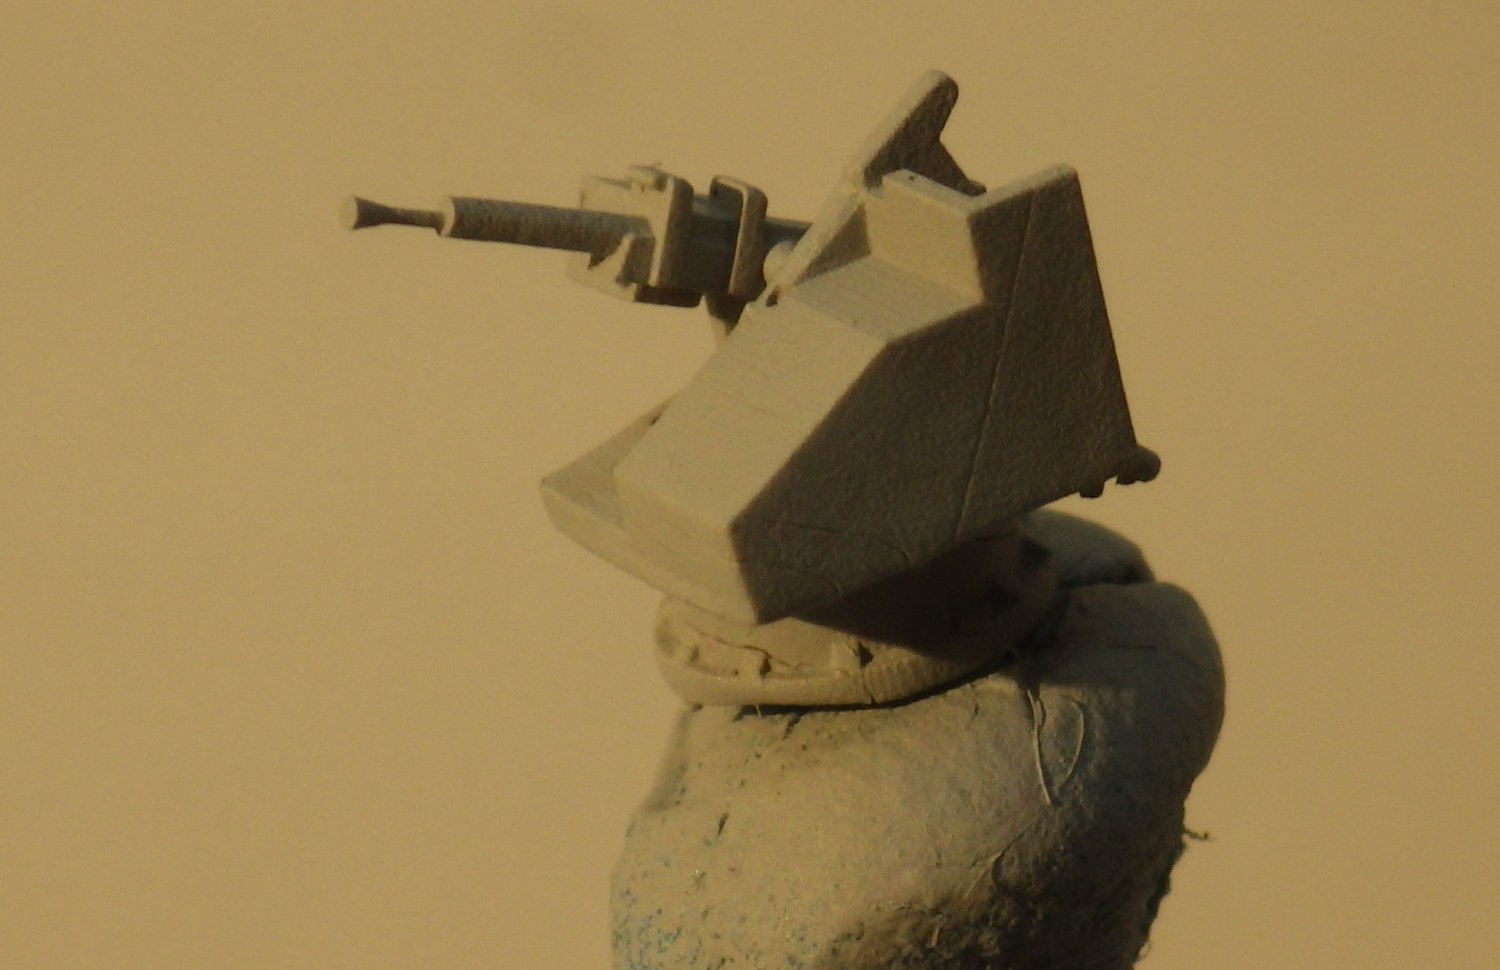
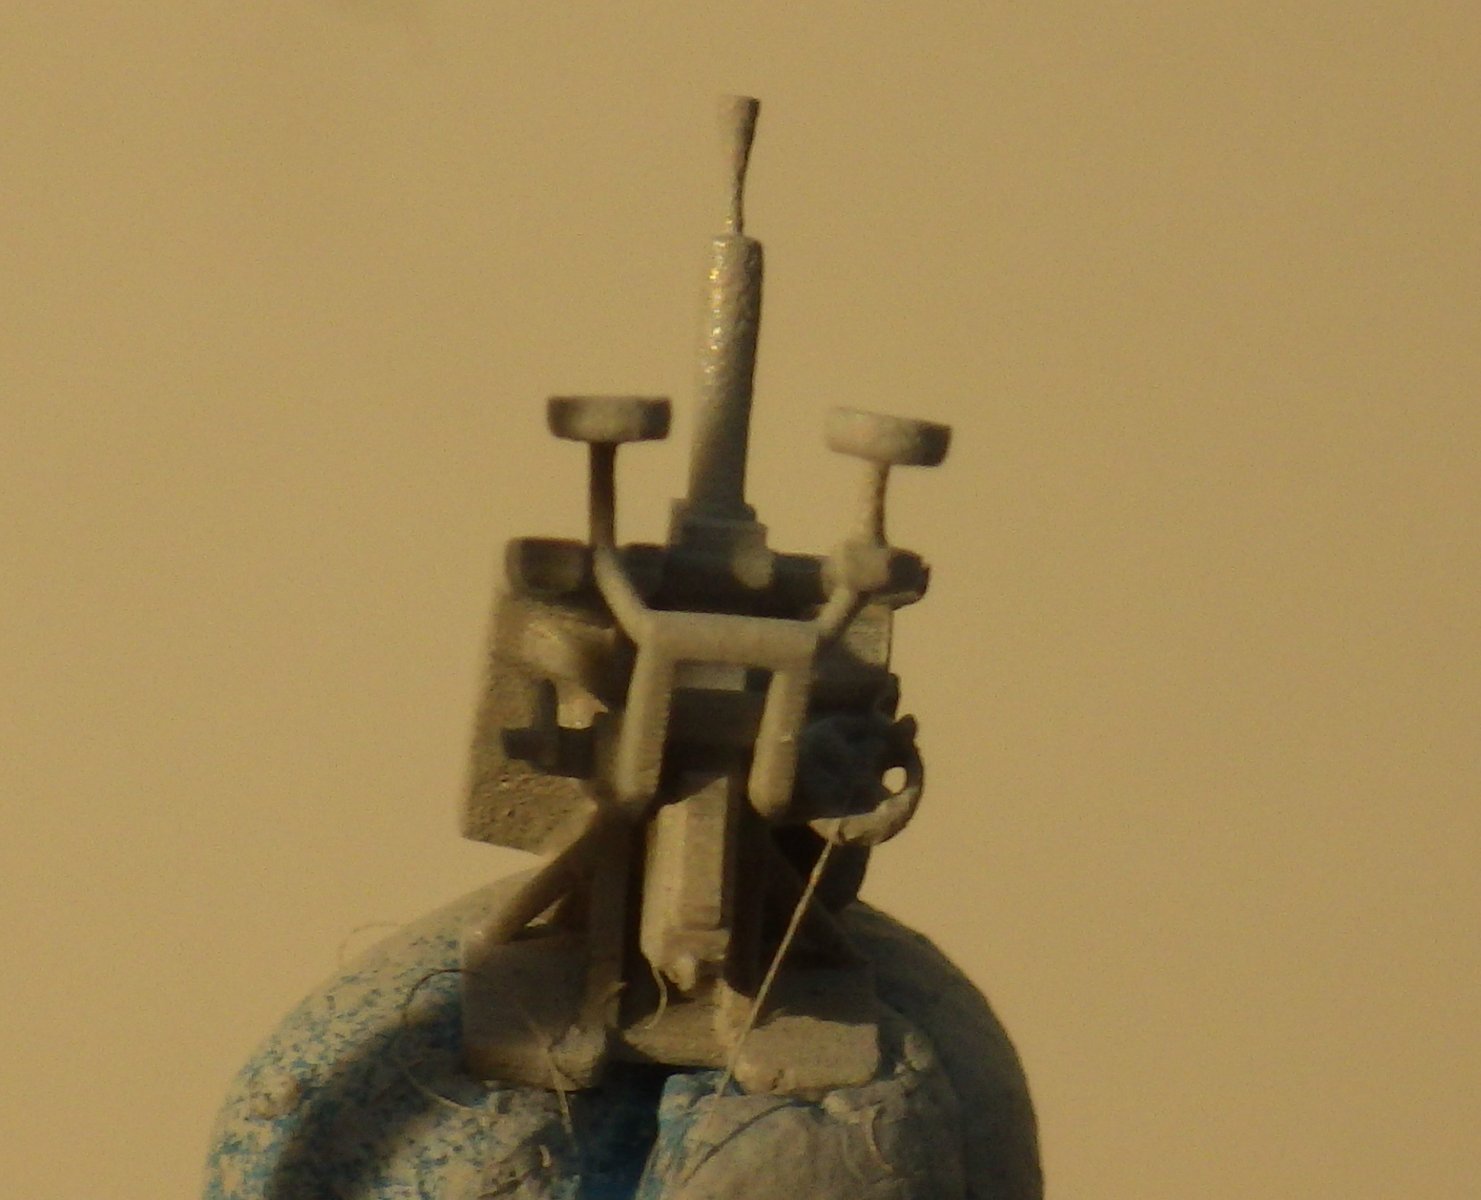
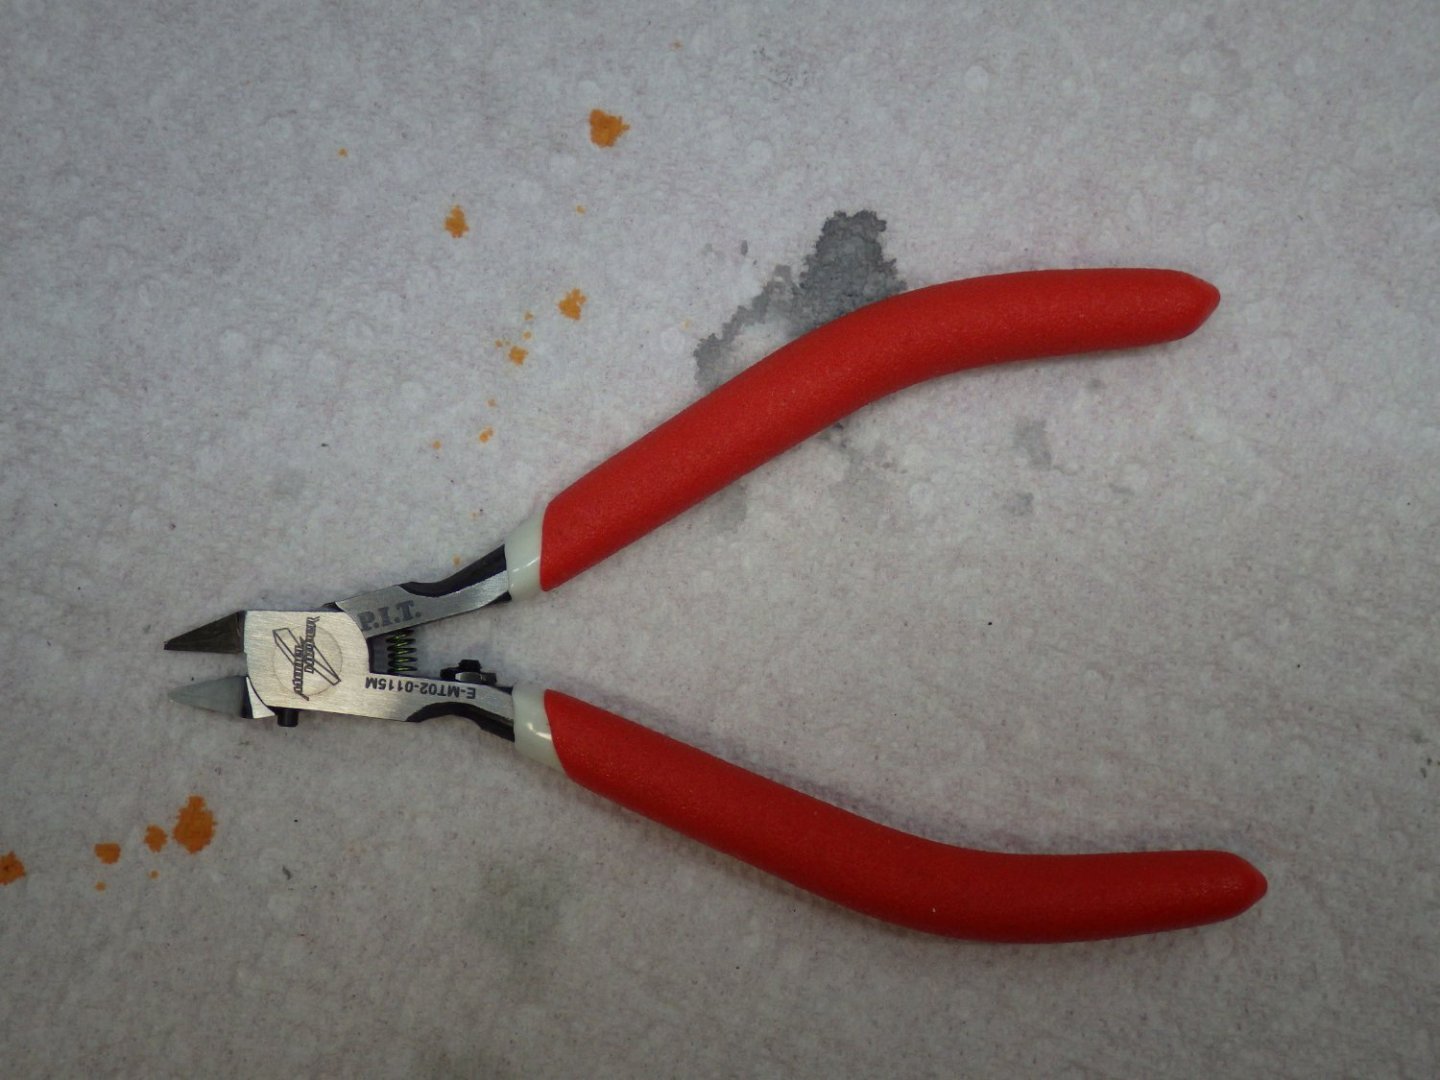
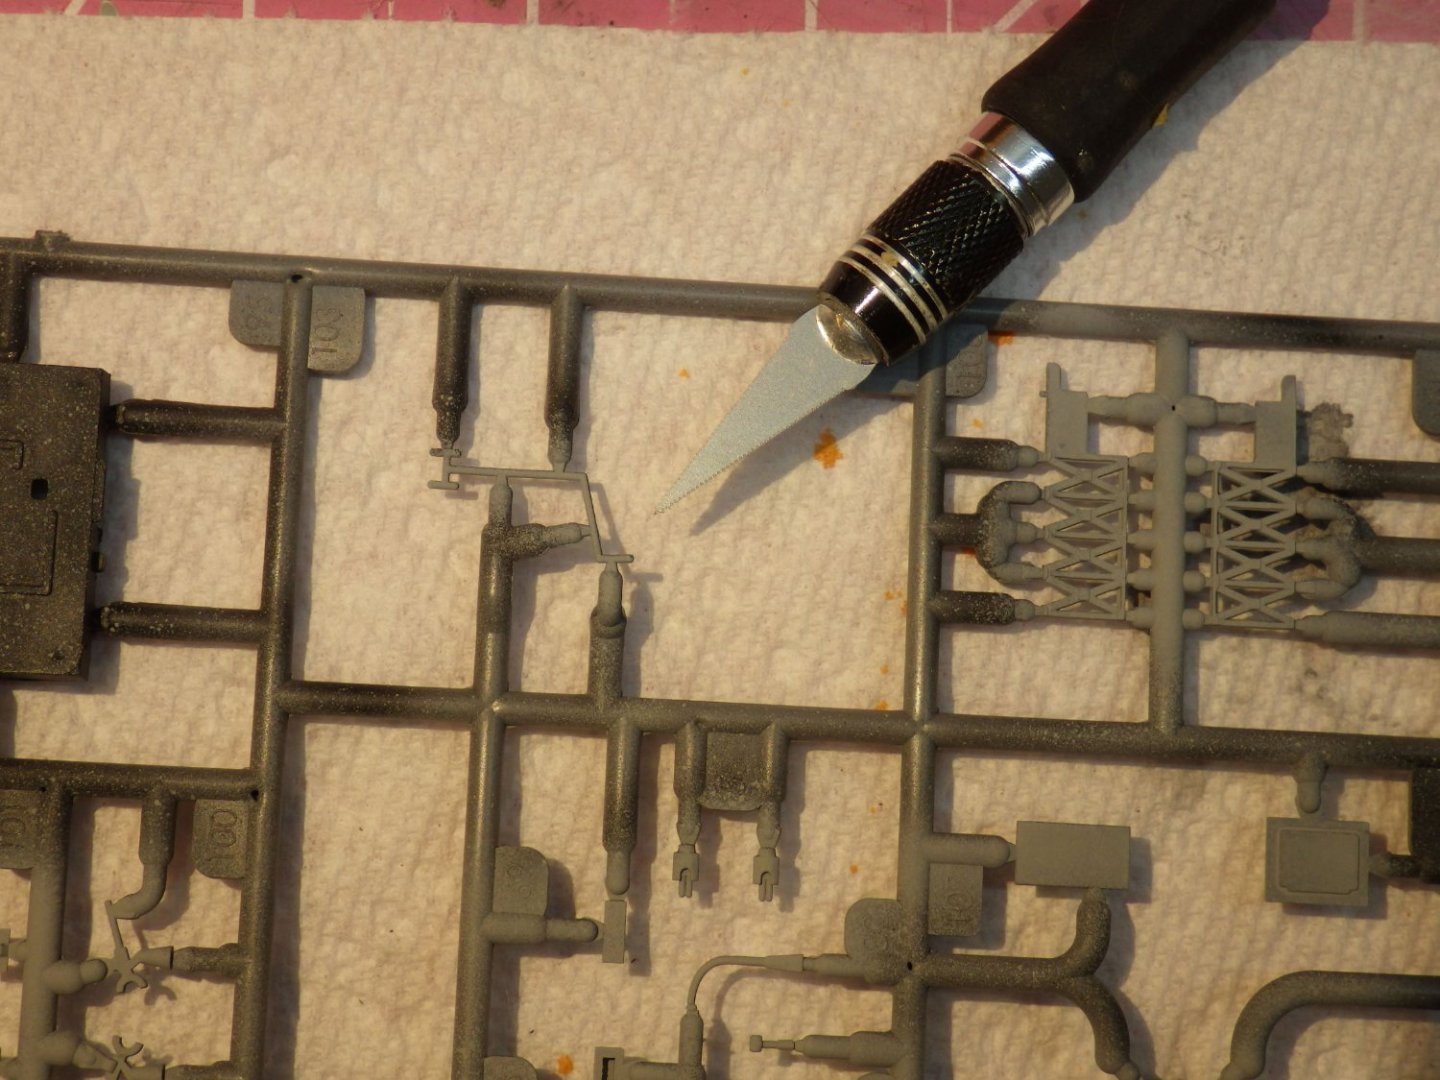
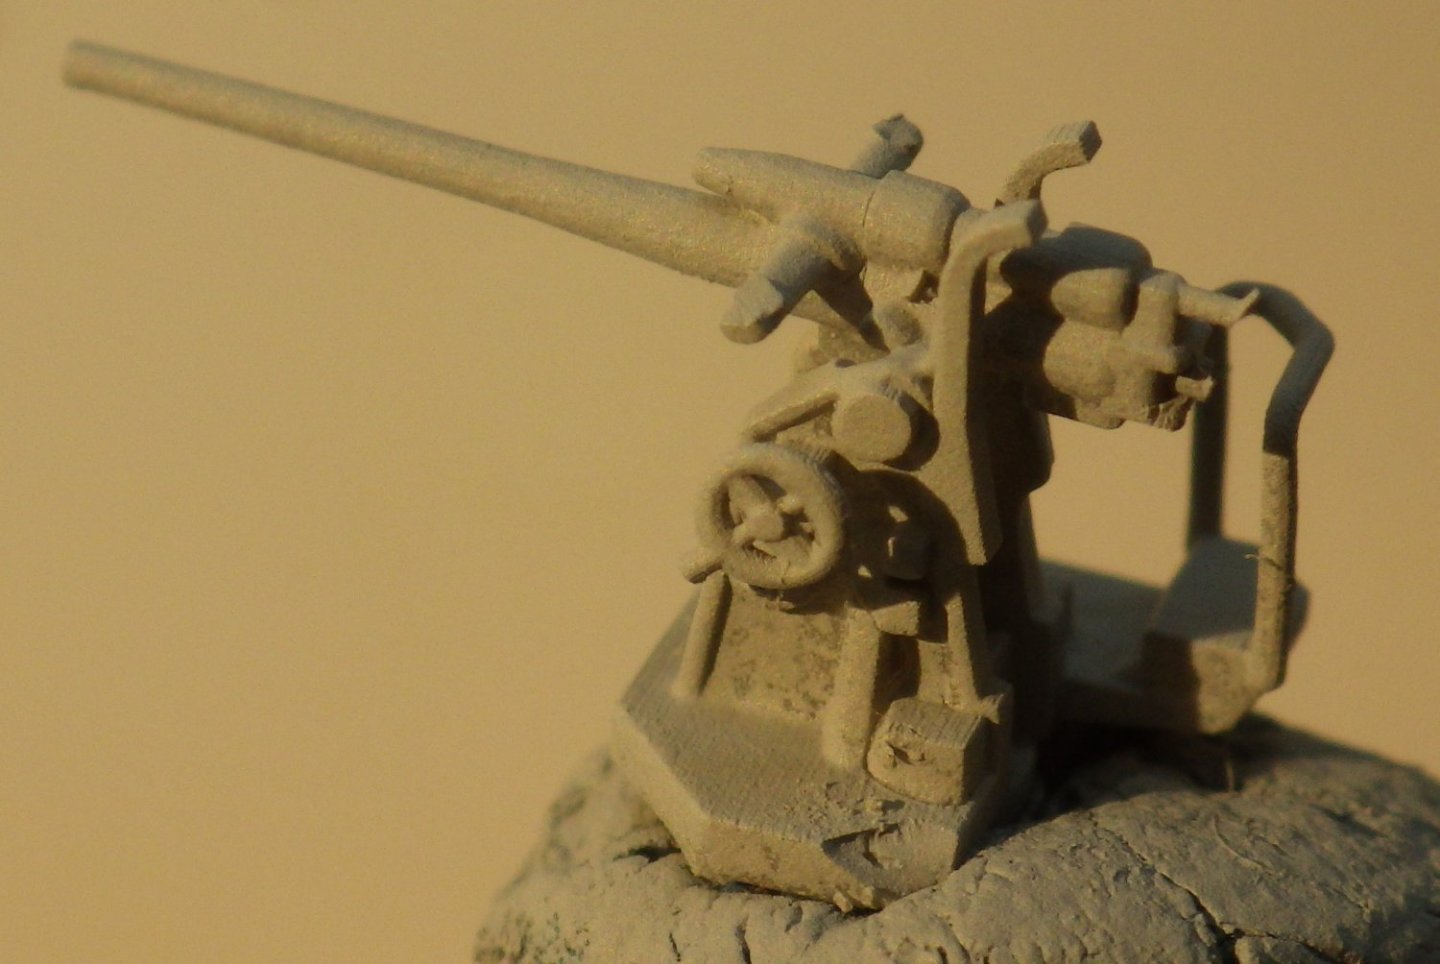
Work resumed its busy schedule and long hours so no progress was made last week. Then on Tuesday we managed to set fire to the back of the test cell and now I have a ten day rest period while the welders get busy. No damage to the engine or crew thankfully. I've been starting to work on the details. I'm starting to like the Mirage kit; the plastic is quite robust even in the thin sections and the detail is nice. Removing the parts is a bit of a challenge. See the galley chimney in the fret below I decided to keep the kit plastic mast and yardarm, its better than the 2D PE offering. I made two investments to help ease the thin parts off the sprues. A decent razor saw replaces the nasty thing ay right. The teeth are too large and it really drags at the plastic increasing the risk of breaking the part. The new ones are very smooth and cut quickly A fine nipper has also been a great help I also dipped my toes into the world of resin aftermarket parts. The kit 4 inch gun is actually quite good. The 2 pounder is okay and the 20mm Oerlikons are reasonable but I decided to get resin replacements for the 4inch gun and the 2pdr These make the Oerlikons look clumsy so I ordered some resin parts to use there too. These are all Black Cat parts and I think its going to be hard to go back to PE after seeing these. Naturally the aftermarket stuff reduces the cost of the kit to a small part of the whole experience. After priming and adding the light grey to the guns I finished weathering the hull. I have also painted the PE structures in light grey and I think I am at the point of being able to add them to the hull and start building up teh detail. Thanks for looking in and the likes Alan


-
This is a superb scene Richard. The landscape especially the hedges is so realistic and the Archer blends into the scene and the story instead of dominating it. Great Work Alan
-
The second planking finish looks very nice. Alan
-
Wow Andy; that looks really good. It shows the Wellington off beautifully. The variation in the grass colouring stops it looking like artificial turf. Alan
-
P-51D Mustang by CDW - FINISHED - Dragon - 1:32 Scale
king derelict replied to CDW's topic in Non-ship/categorised builds
Yup, I was at Home Depot this weekend buying mulch, fertiliser and new plants for the rabbits to eat. Alan -
Yes, I had great times on the farm as a kid. Of course nowadays Health and Safety doesn’t let you jump from the top of the bales into the loose straw.
-
Brilliant recovery alan
-
That would look great if you can pull it off. Would it be easier where there are troops in line and the smoke can be distributed across the row. Maybe then you could sneak a small yellow led into the smoke. Do you have some unpainted figures to try it on? great idea alan