king derelict
-
Posts
3,294 -
Joined
-
Last visited
Content Type
Profiles
Forums
Gallery
Events
Everything posted by king derelict
-
Thank you very much Mike The landscape work was a lot of fun and turned out better than I expected. Alan
-
Thank you very much OC. The figure painting has gone better this time - learning to build up in washes Alan
-
Wow what a beautiful miniature. I’m sure you will create fantastic renditions too. alan
-
1966 Buick Riviera by CDW - FINISHED - AMT - 1:25 Scale
king derelict replied to CDW's topic in Non-ship/categorised builds
Excellent work Craig. That’s a real head turner. The chrome really makes it pop and the paint has a lovely depth. alan -
What a great subject. I'll be following with interest. Always liked seaplanes Alan
-
Beautiful work. These cars came out very nicely Alan
-
Beautiful finish Dan. The details really look great alan
-
Triumph 3HW by Tim Moore - Italeri - 1/9
king derelict replied to Tim Moore's topic in Non-ship/categorised builds
Looking forward to seeing a great model come together alan -
1966 Buick Riviera by CDW - FINISHED - AMT - 1:25 Scale
king derelict replied to CDW's topic in Non-ship/categorised builds
Thanks Craig Blackening the tip of the scalpel blade is a good idea. I must remember that. Alan -
1966 Buick Riviera by CDW - FINISHED - AMT - 1:25 Scale
king derelict replied to CDW's topic in Non-ship/categorised builds
Lovely work with the metal foil. That looks very difficult to get a neat finish alan -
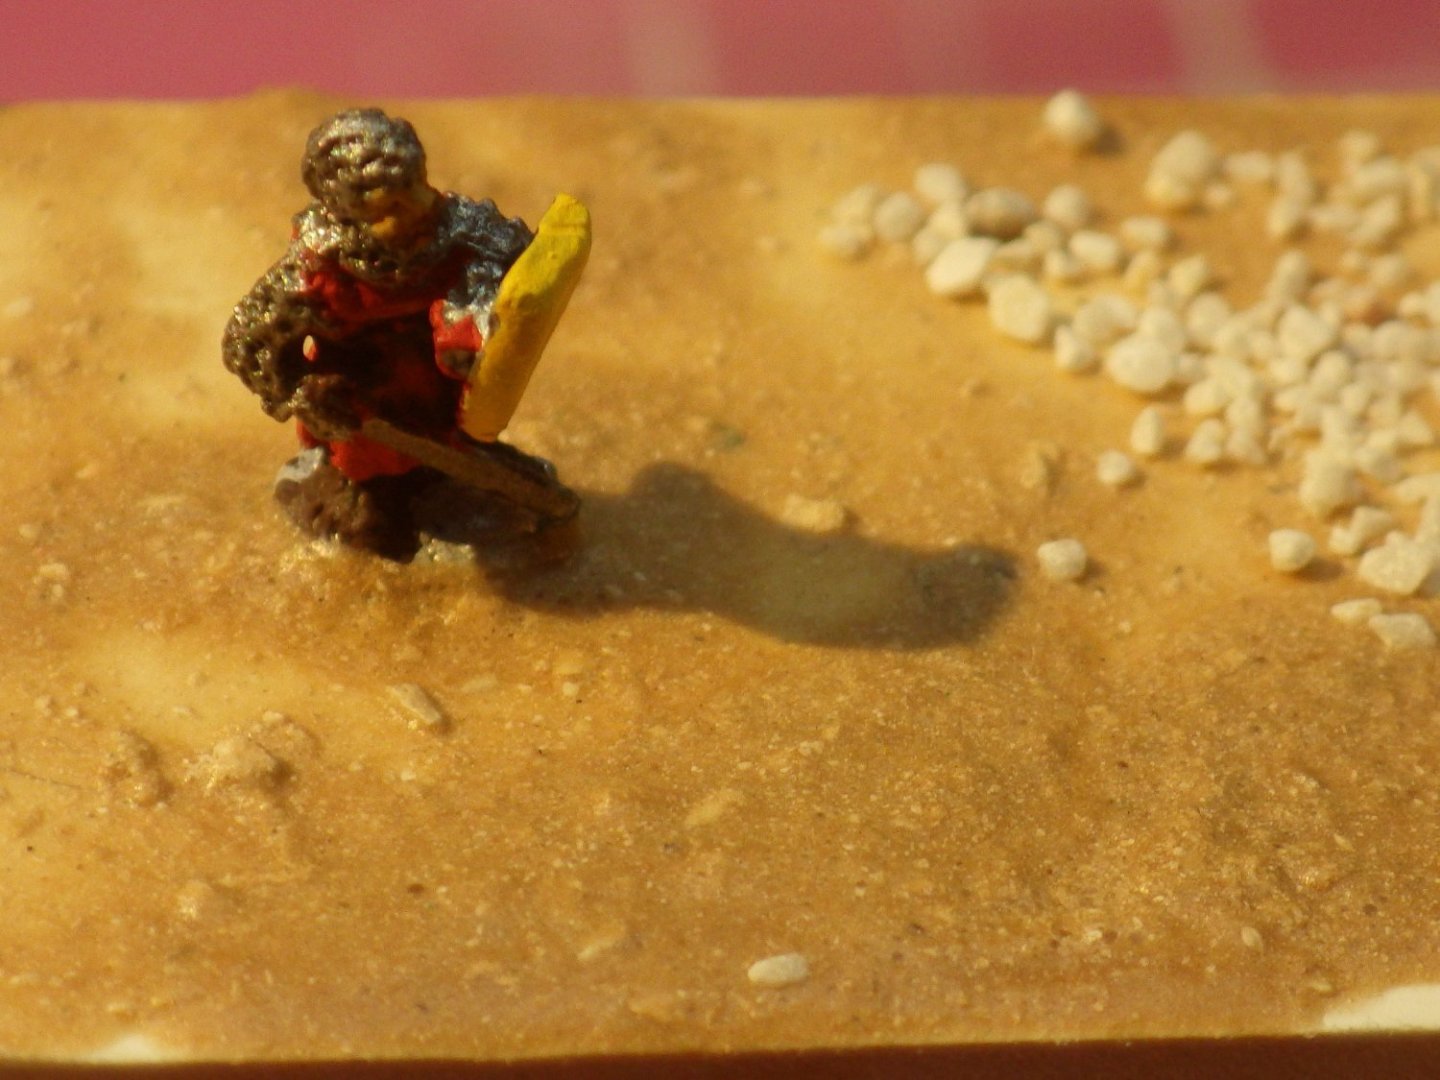
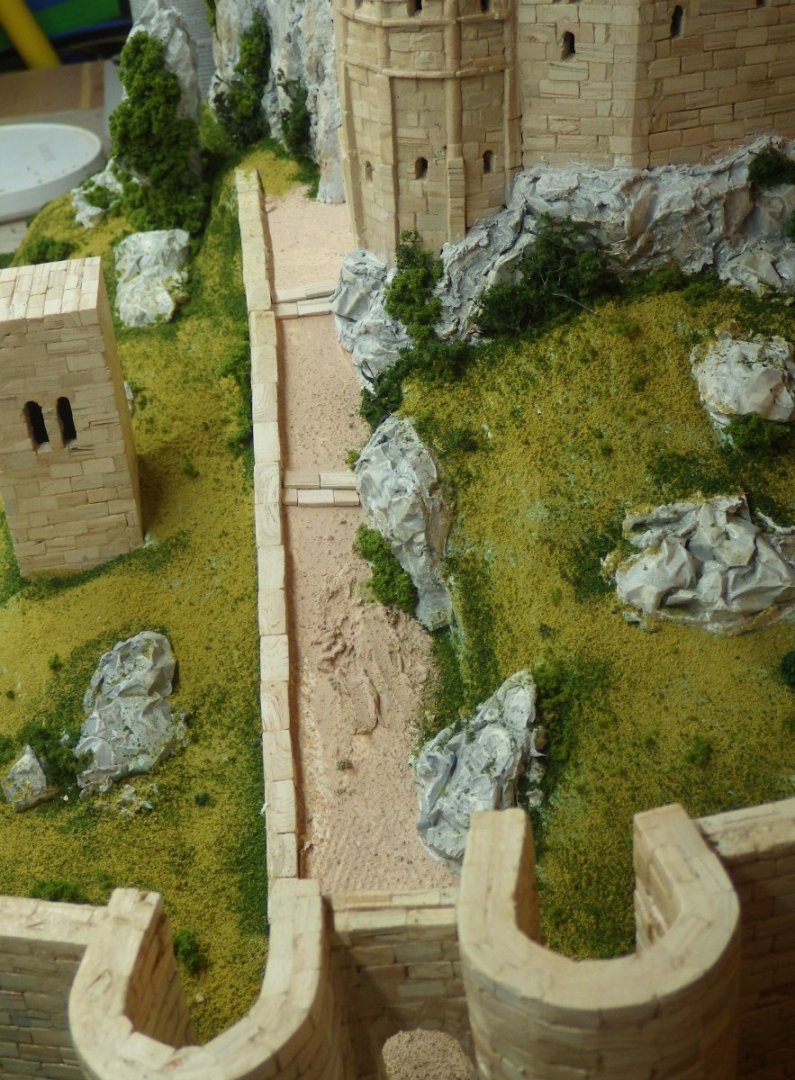
I airbrushed the grey primer onto the figures. I am amazed how much detail Pendraken get into their 10mm figures I like the matte medium and sanding dust for the path way. It also makes a good layer to embed the figures into Aedes Ars provided a small bag of fine particles which looked like they might work to add some texture to the path. They look quite good to the eye but teh photo shows them to be far too big for gravel. I may use a bit elsewhere or at the edges of the path. I made up a "sand" colour mix from craft acrylics and painted it on as a base for the path; its a bit pink but I think it will work under the matte medium mix. I also added the shallow steps seen in the drone video of the real thing. TAP Plastic have already shipped the custom cut plexiglass for the display case. Arriving next Monday Thanks for looking in and all the likes and comments Alan
- 462 replies
-
- 14
-

-

-
Thank you, I am scared of overdoing it so I think thia will be as far as I go Alan
-
Tiger 1 by Javlin - RFM - 1/35 - Early Version
king derelict replied to Javlin's topic in Non-ship/categorised builds
Can't beat "Won't get Fooled Again" The interior detail is fantastic. Its going to make a superb model Alan -
I like the cling film to help make the wheel ruts Alan
-
Nice job on the aircraft Mike. alan
-
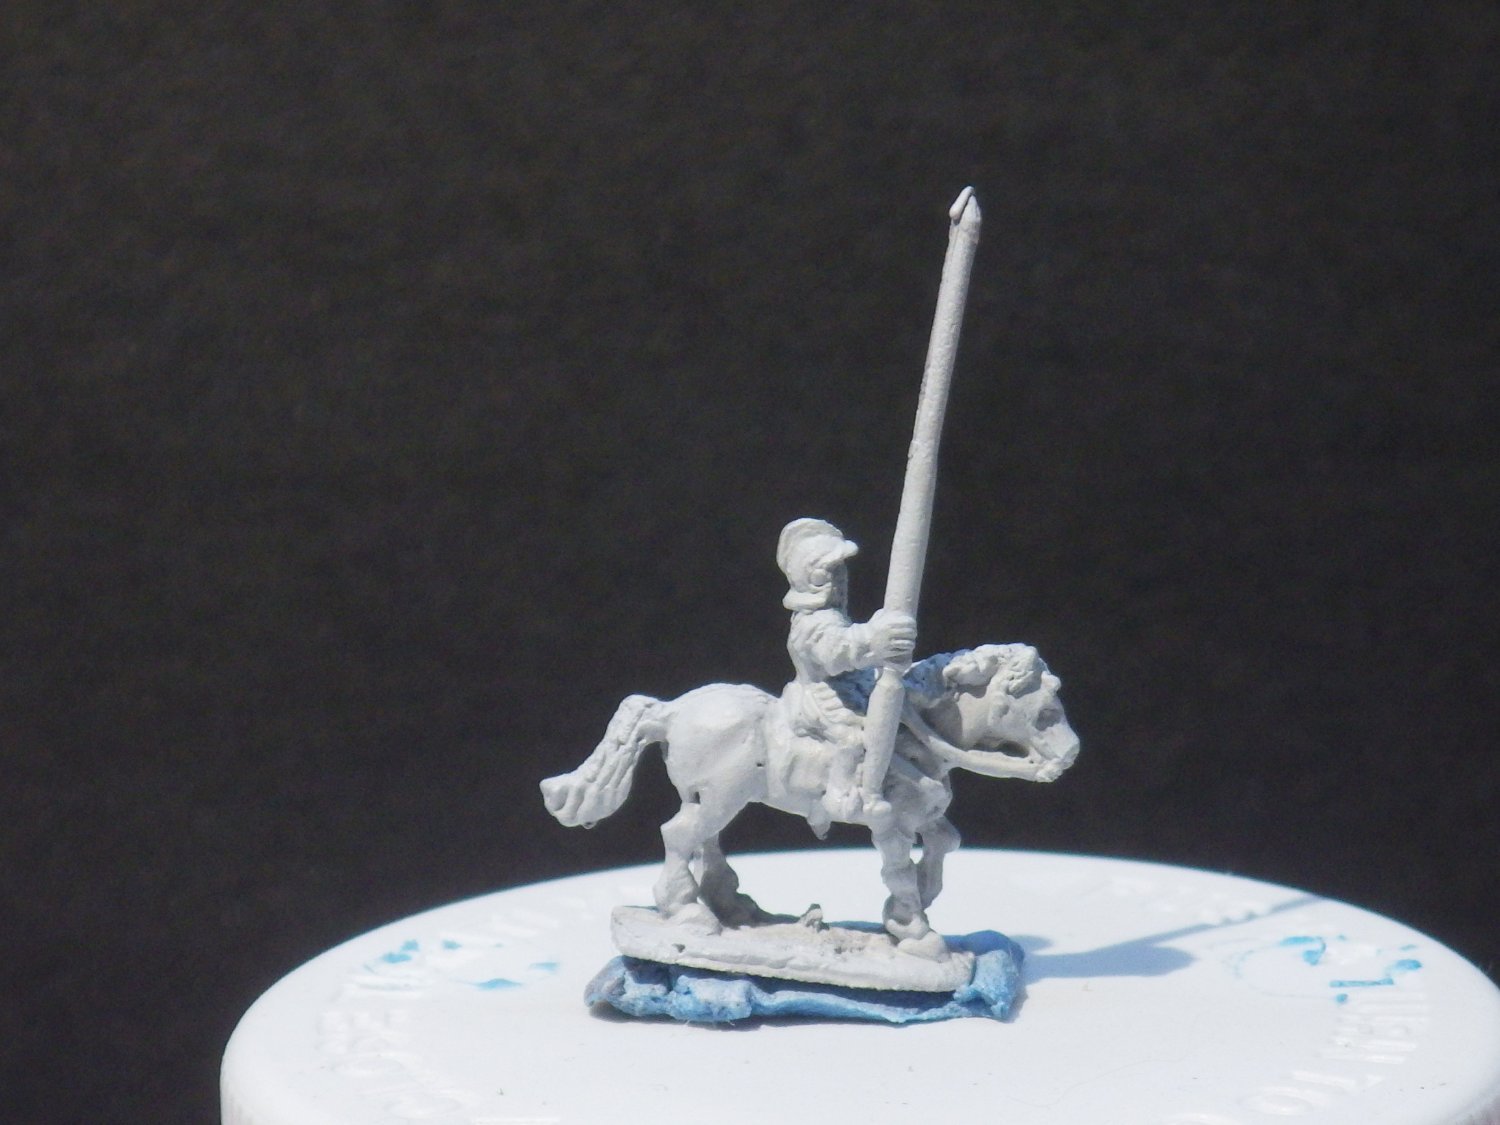
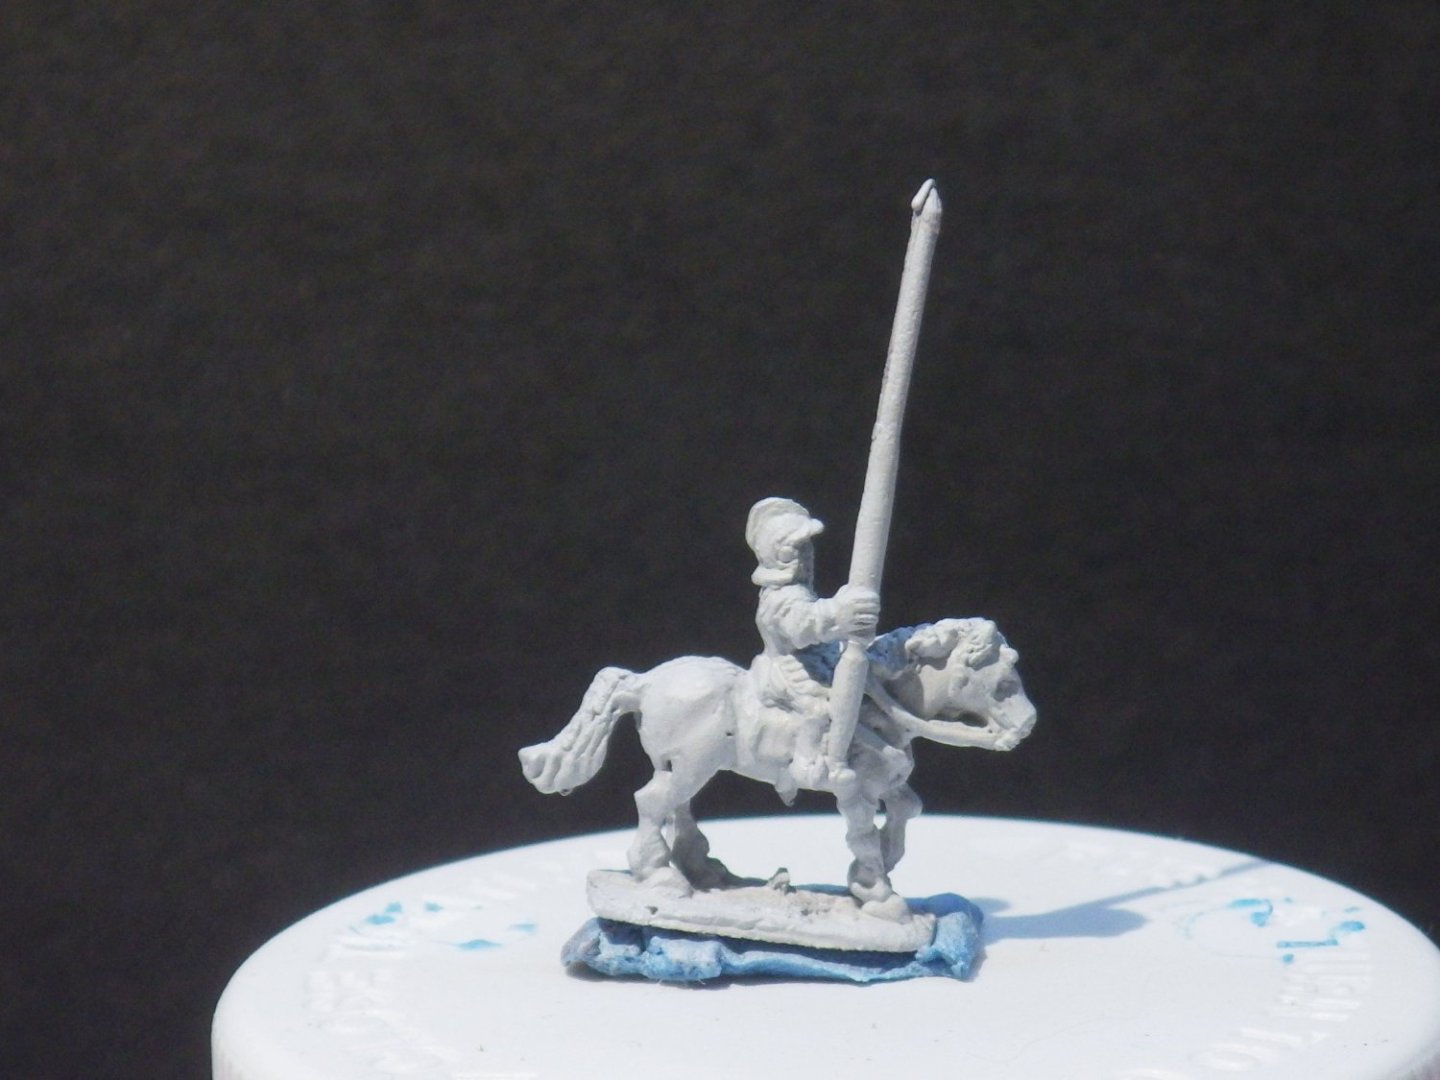
Not much to report today. I experimented with options for the path to the tower. A mix of matte mod podge and the stone block dust looks very promising. I’m waiting for a test piece to dry. i selected some mounted figures and gave them a shot of Mr Metal Primer. Once that’s dry I will airbrush them with a light coat of Vallejo grey acrylic primer. I find that makes the details easier to see I just ordered the cut sheets of plexiglass for the display case from TAP plastics. They estimate that will weigh about 13 lbs. The $37 shipping from California bites a bit. I’m working with 3/16 inch sheets. I find 1/8 inch is too flexible at this size. I can’t believe this is entering the final stages Thanks for looking in and all the likes and comments Alan
-
Thank you very much OC. This has been a huge learning experience but I’m happy with the results and I thoroughly enjoyed the work. I would use landscapes in more of the models because they are fun and interesting but it just exacerbates the display / storage problem. alan
-
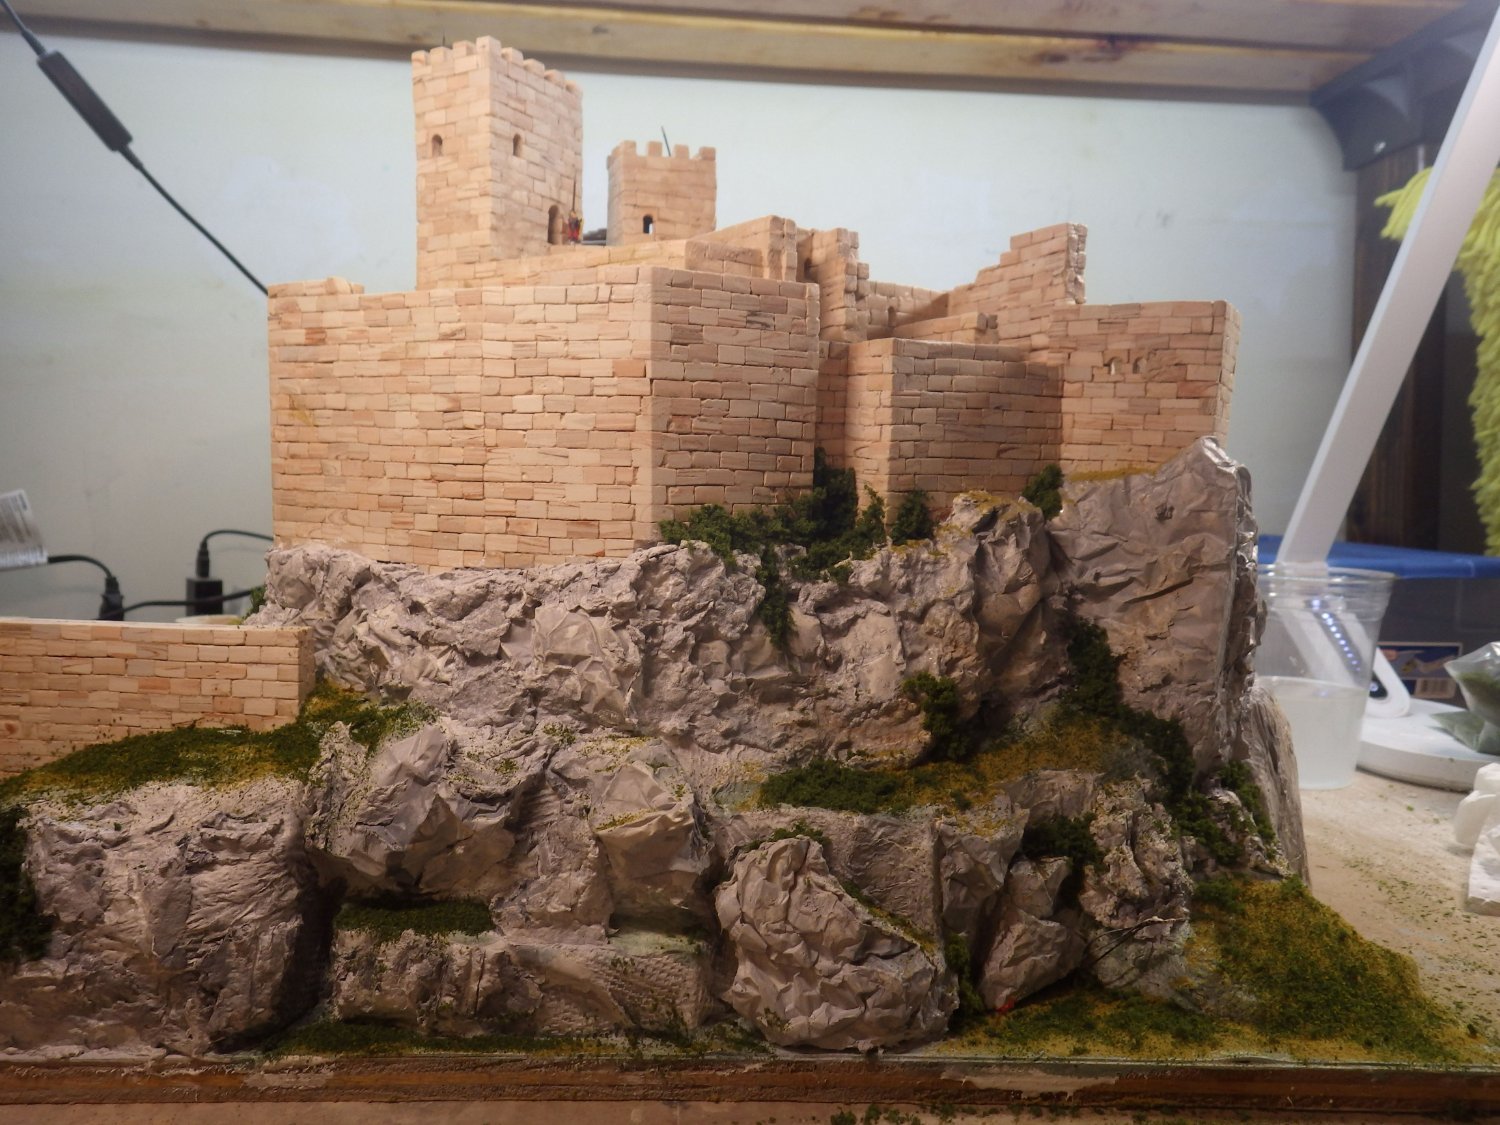
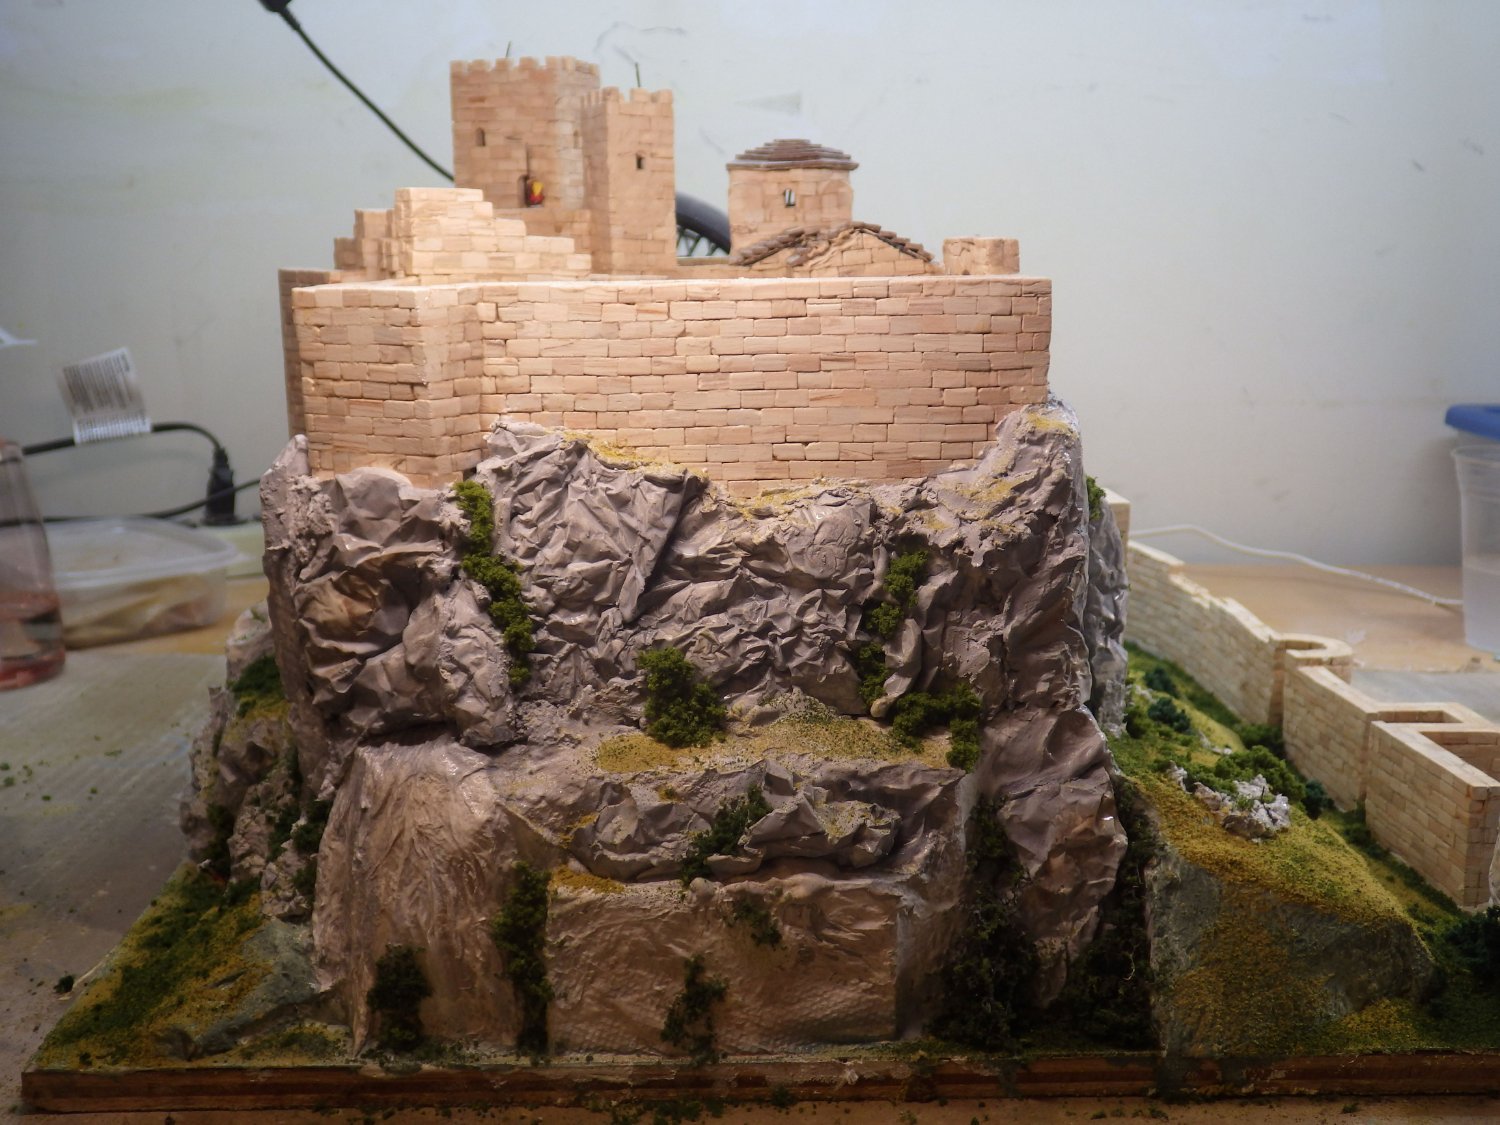
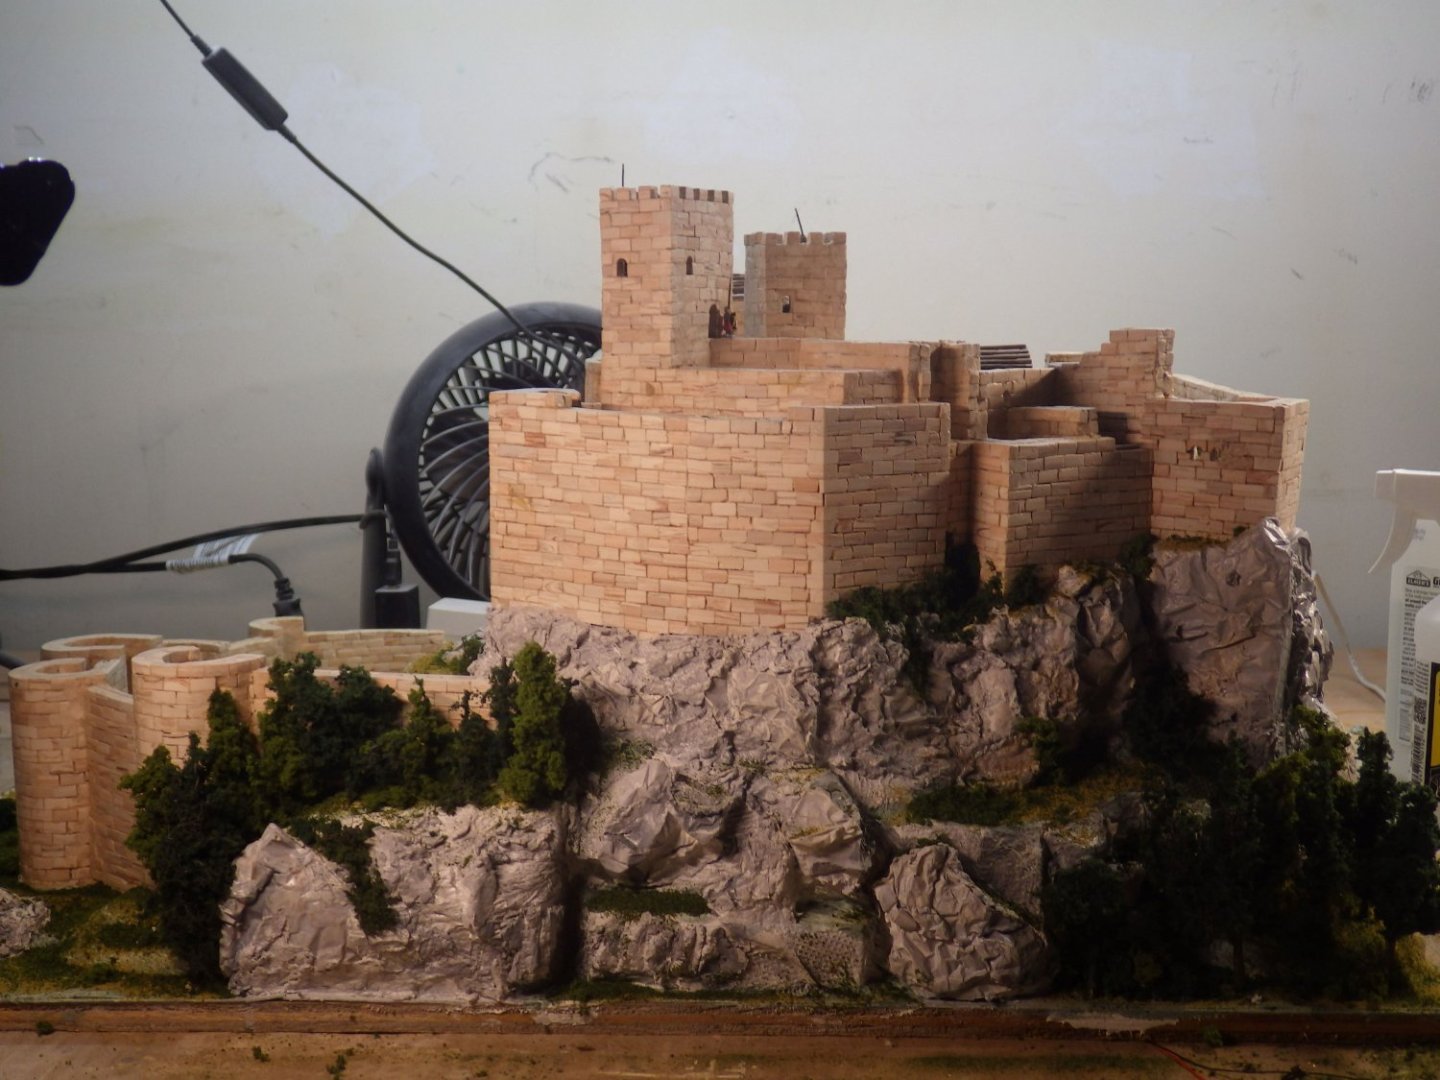
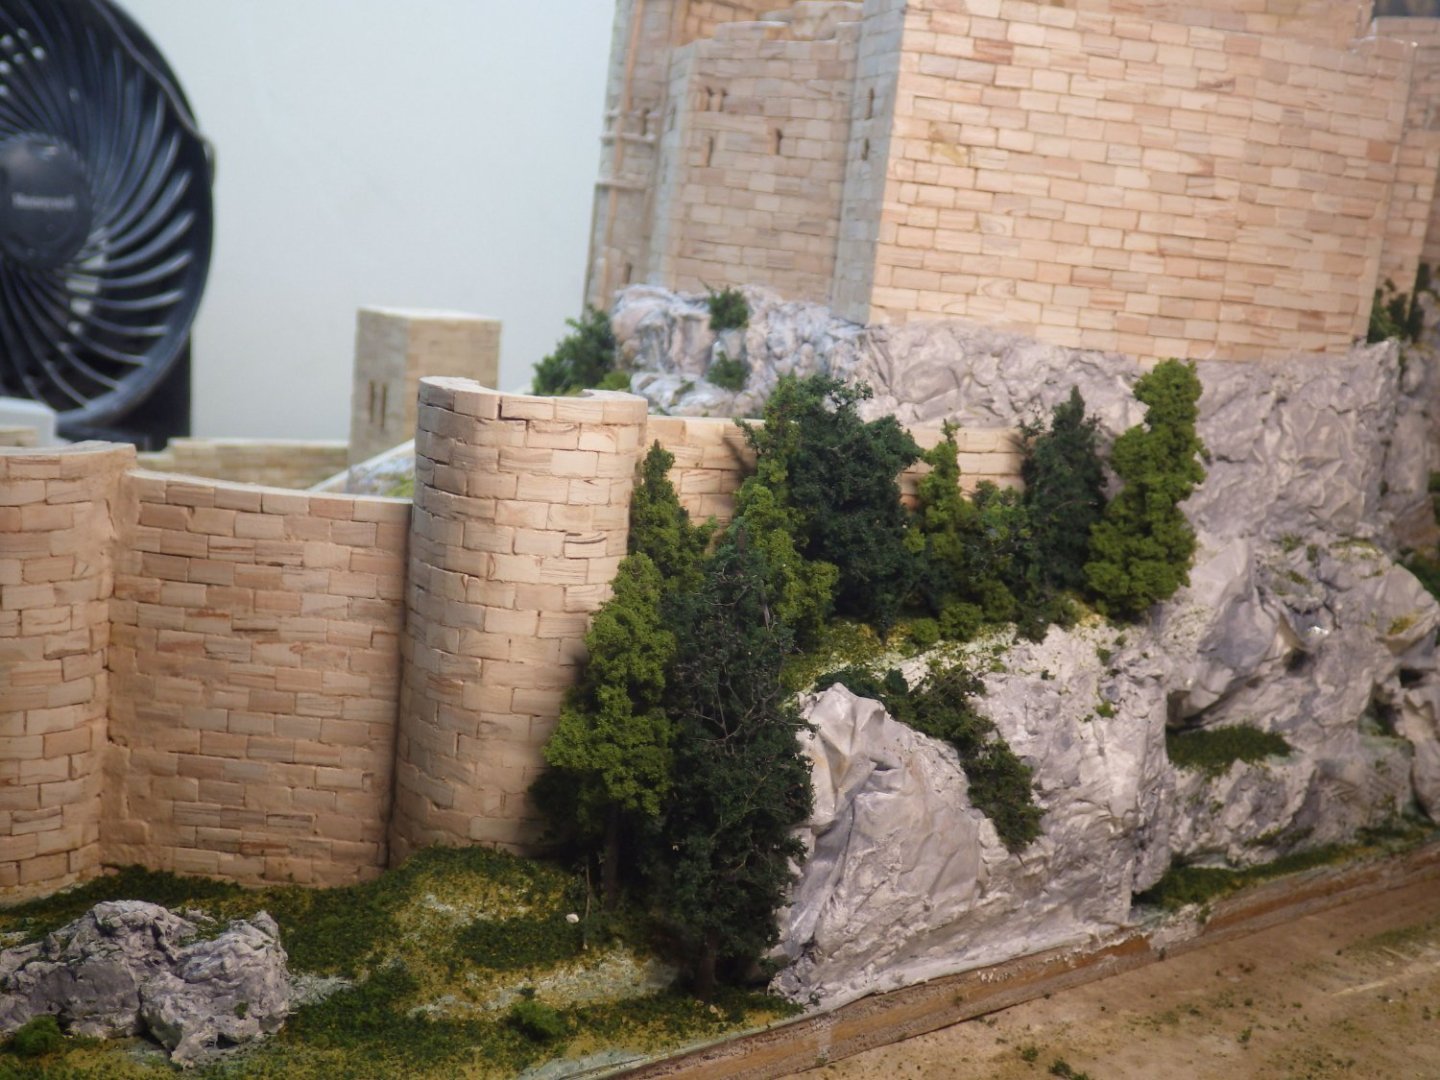
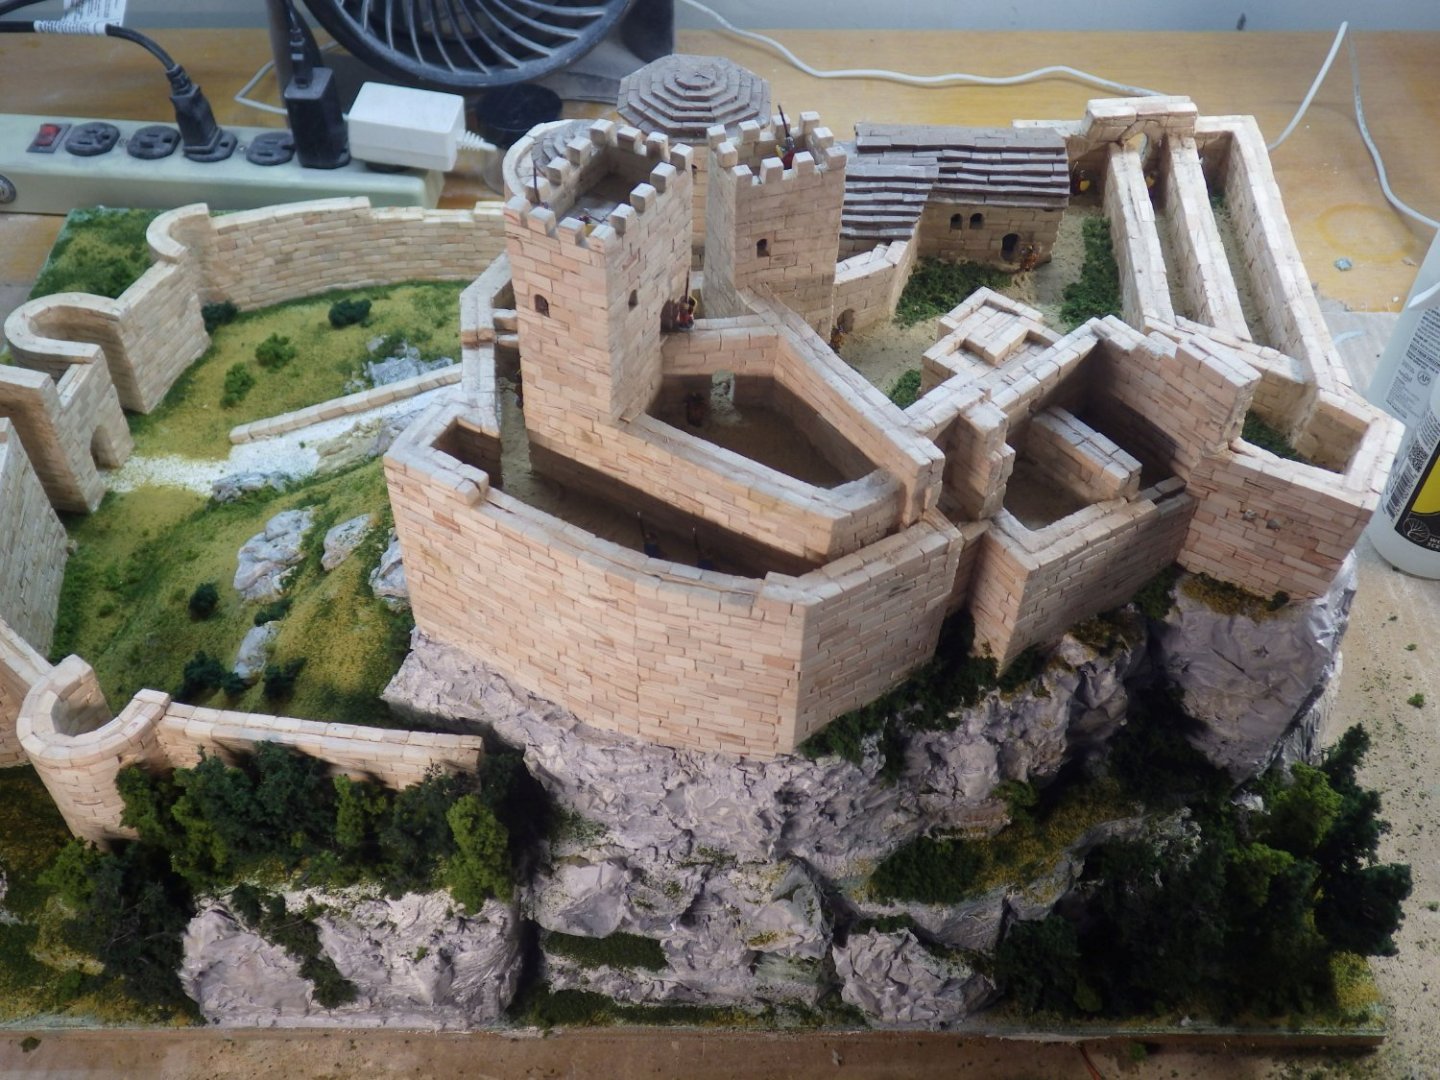
I added the vegetation to the other two sides. Then I started adding the trees. The trees are created from Woodland Scenic armatures for pine trees using the smallest sizes. Even then I cut some down and I feel I may be stretching things a bit in terms of scale. They do occupy the space I was aiming at based on the drone video so I am going to call it good. The foliage is created by painting the armature with WS tacky glue. and then dipping the tree in foliage then shaping the foliage to suit. Its wonderfully messy; the foliage much prefers to stick to the tiny residue on your fingers instead of the ample coating on the armature. It then sticks to the tweezers and finally falls off as you install the tree on the model. I initially used the conifer green fine leaf material but later switched to the coarse turf and bushes which are a lighter green which broke up the uniform dark green. In retrospect I should have added an inch onto the baseboard to allow a belt of trees to completely line the one side of the model but at the start I was rather slavishly following the kit and made the baseboard the size of the cardboard base pieces. Which brings me to something that puzzles me with the Aedes Ars kits. The kit provides card bases and the instructions show the model built on these bases but I cannot see how the finished model would be adequately supported. This is now seriously heavy. I toyed with adding trees to the ledge at right but I think it looks better without doing that. It seems that there is a serious issue with deciding when you have done enough. Now I am back off the model with a number of miniature riders to paint and add to the pathway. Then the path can be completed and I can build the display case After working on this I am very much in awe of railway modellers and the various Waterloo and other battle recreators (the superb LHS from @Old Collingwood for example) creating much more complex and larger dioramas. I found this to be fun but it is quite challenging and quite overwhelming at times Thank you all for looking in, the likes and all the support Alan


- 462 replies
-
- 17
-
-
-
I was surprised when I measured it. Even in real life it seems to be imposing😄 Alan
-
I'm looking forward to seeing this take shape. Its going to be a great showcase for the Wimpy. Alan
-
Thanks OC I think washes will help pull some of the elements together. I'm also thinking that I need to work out when to stop. I see a terrible tendancy to keep piling additional bits on. Alan
-
Thank you for the reference Jack. He made some beautiful landscapes. And all without the extensive materials and supplies we now have available. I guess in a way most of the commercially available stuff is a convenience and time saving instead of sourcing / making the lanscape materials yourself. I'm gradually getting the hang of the WS products and learning to only work on a very small area at a time. Alan
-
1966 Buick Riviera by CDW - FINISHED - AMT - 1:25 Scale
king derelict replied to CDW's topic in Non-ship/categorised builds
Building up a really deep gloss. Beautiful alan -
I’ve found the Vallejo putty to be not so easy to work with. I squeeze a bit out onto something like an old credit card and pick a small amount up on the point of a cocktail stick and work it into gaps. It limits the spread of the stuff great job on an old kit alan