king derelict
-
Posts
3,293 -
Joined
-
Last visited
Content Type
Profiles
Forums
Gallery
Events
Everything posted by king derelict
-
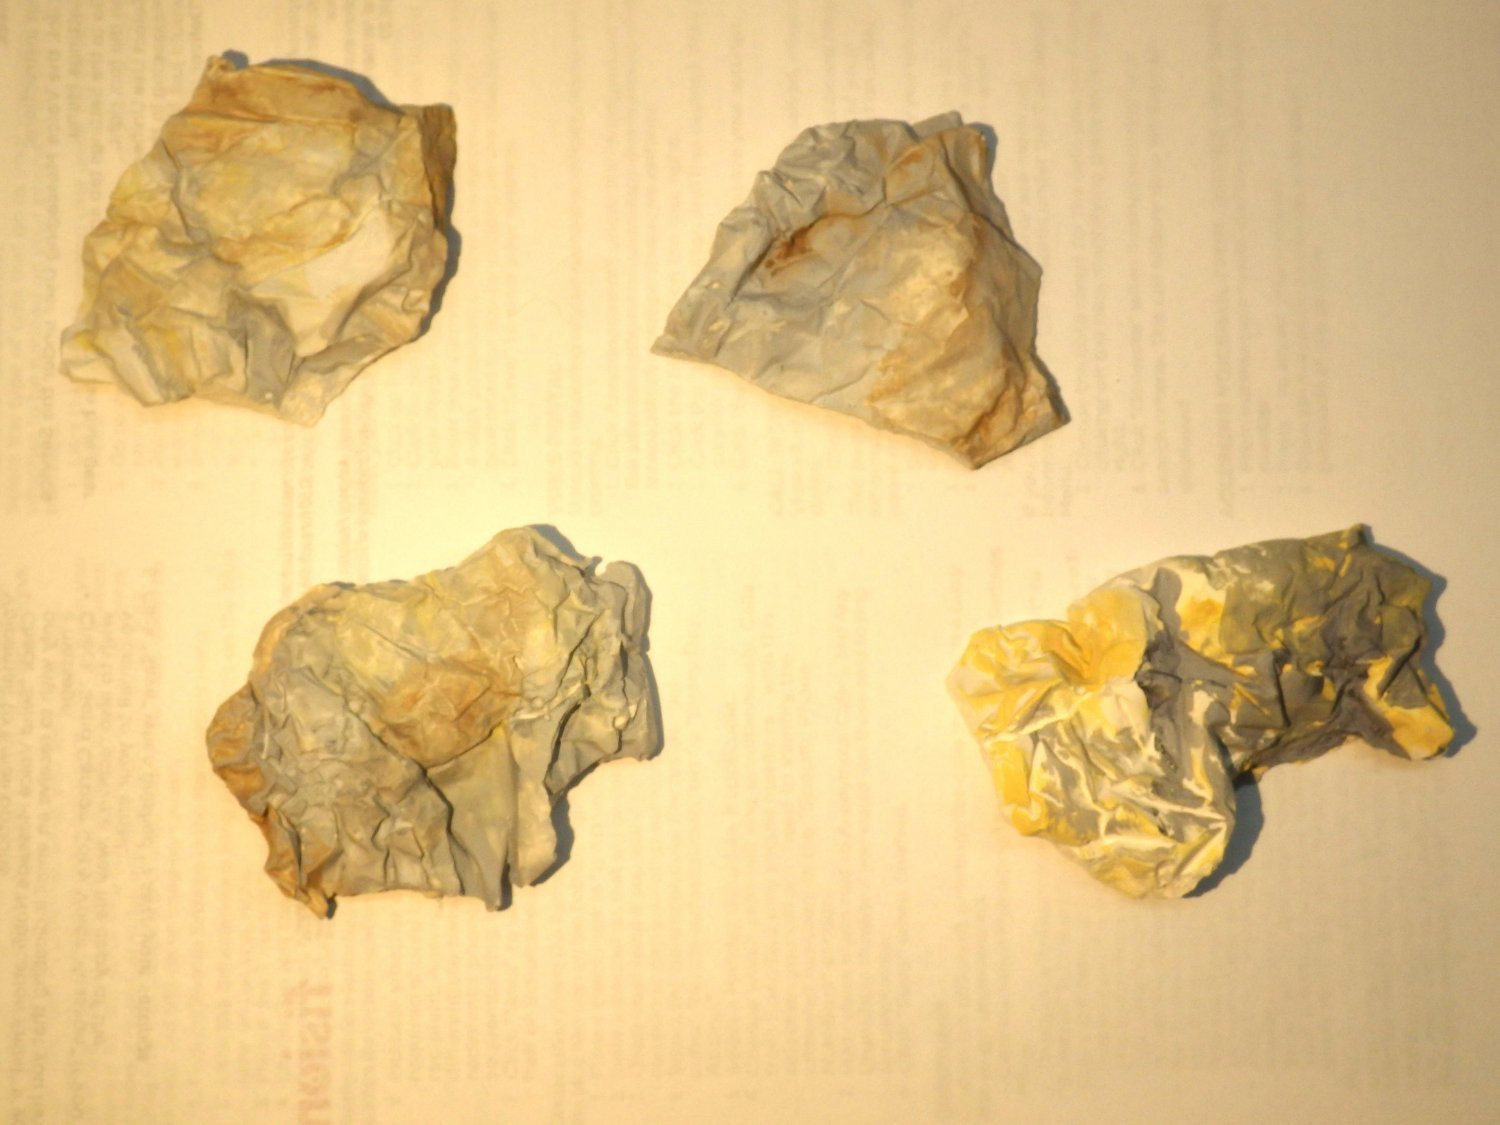
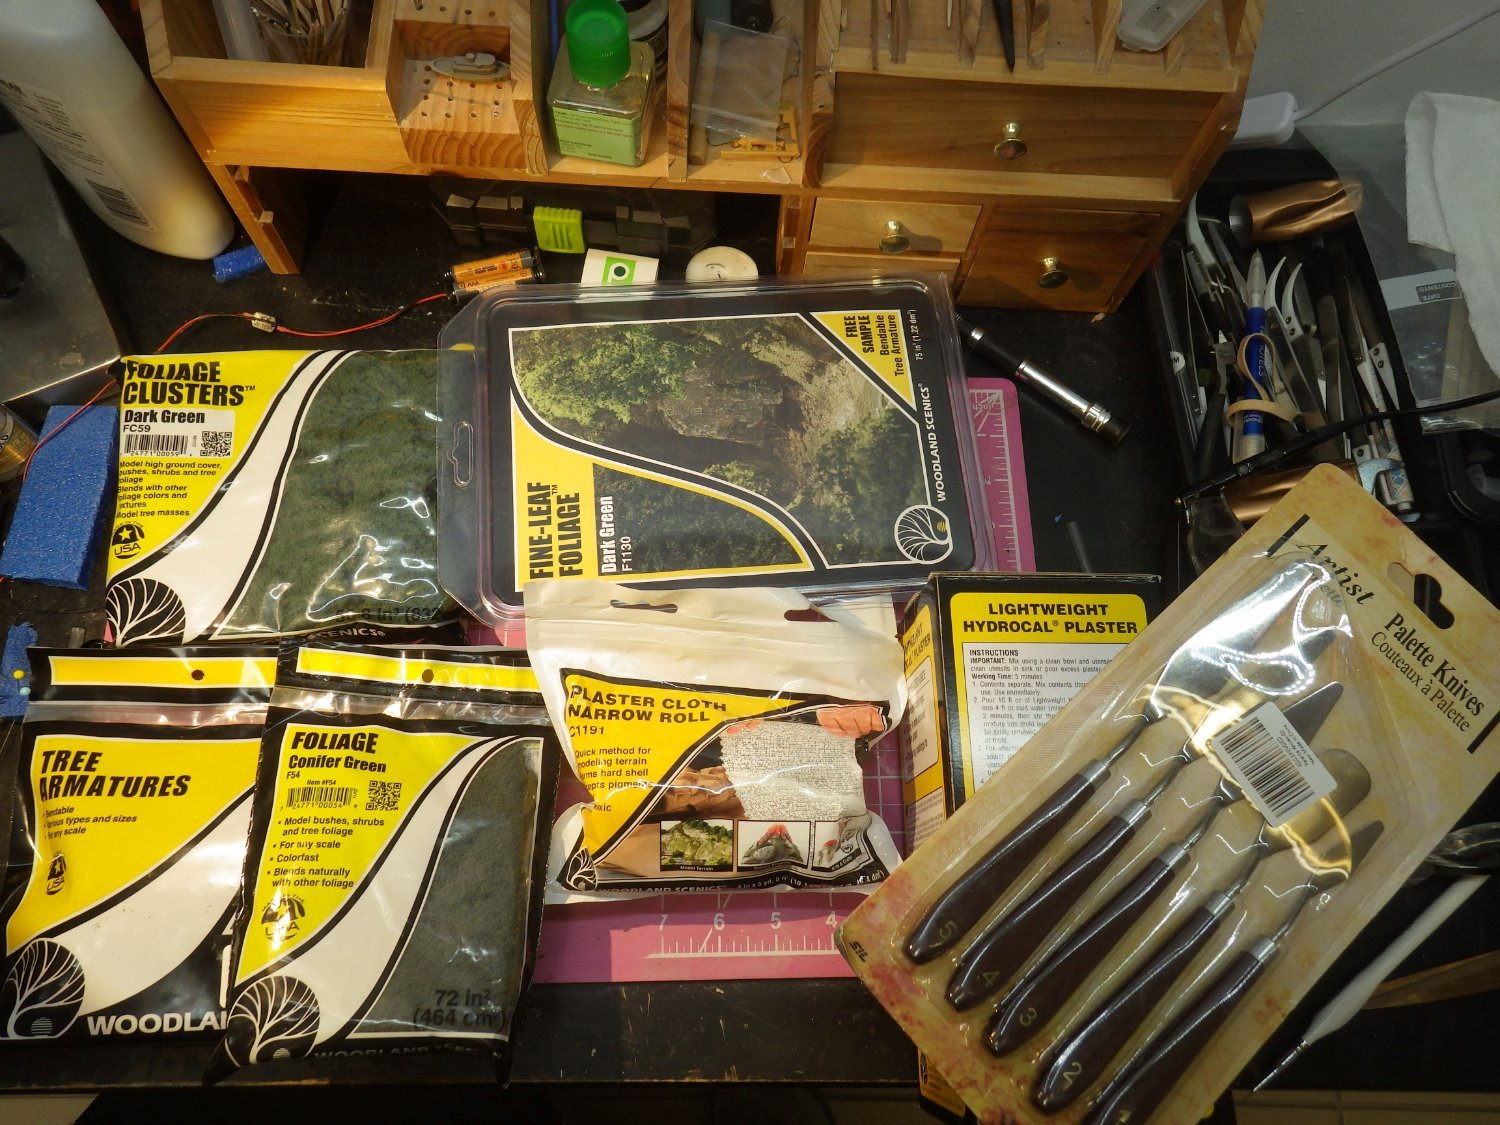
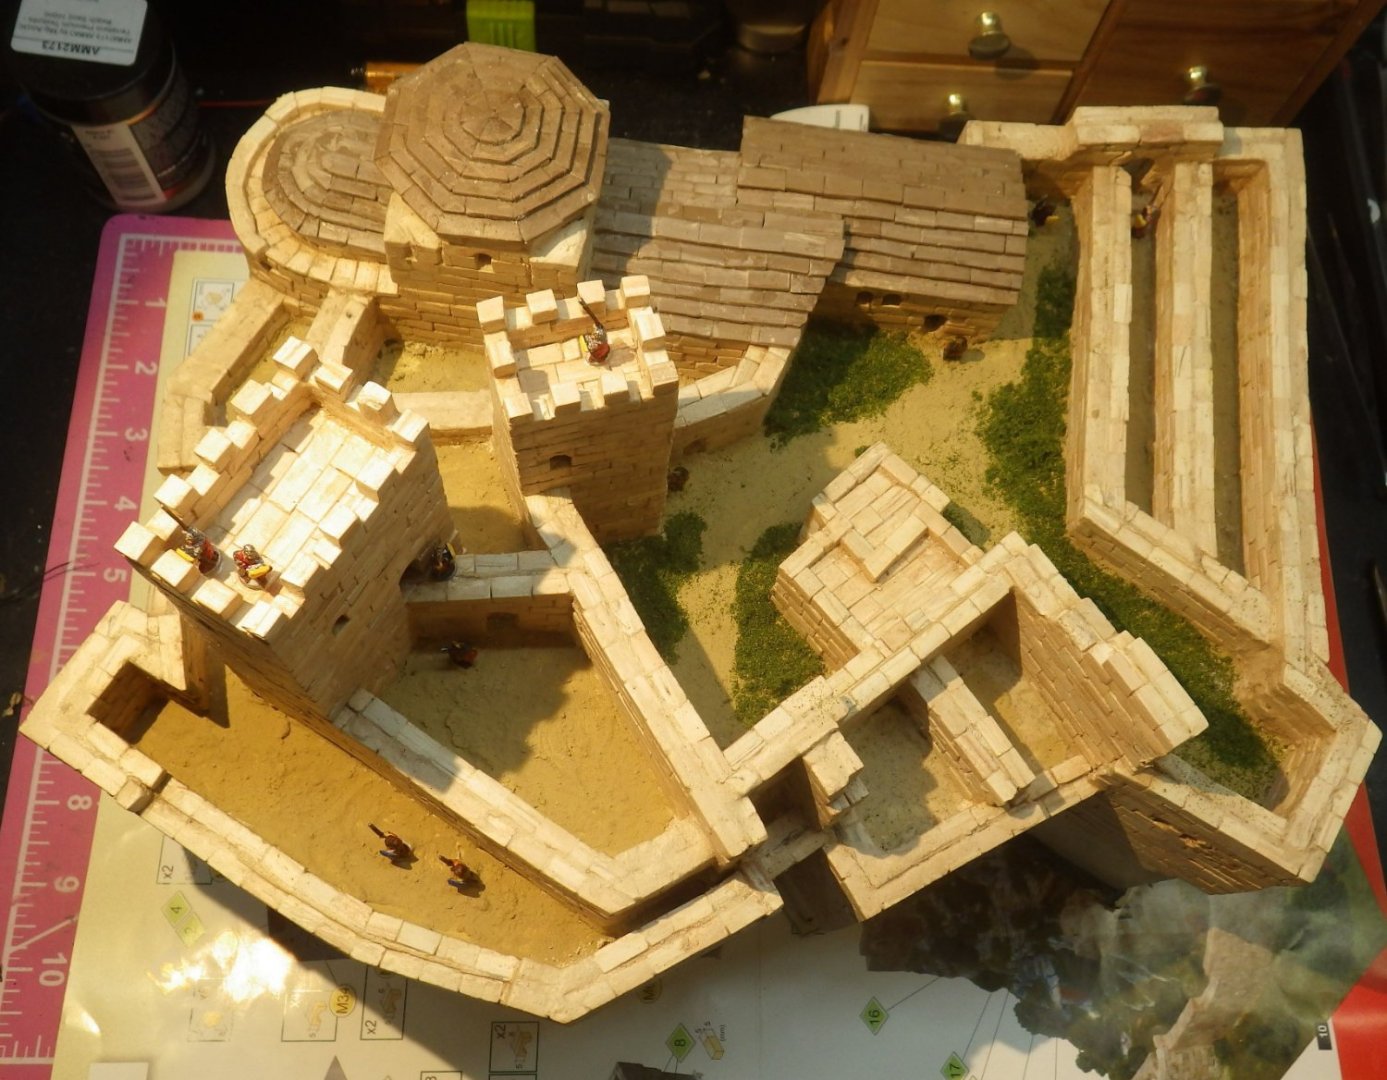
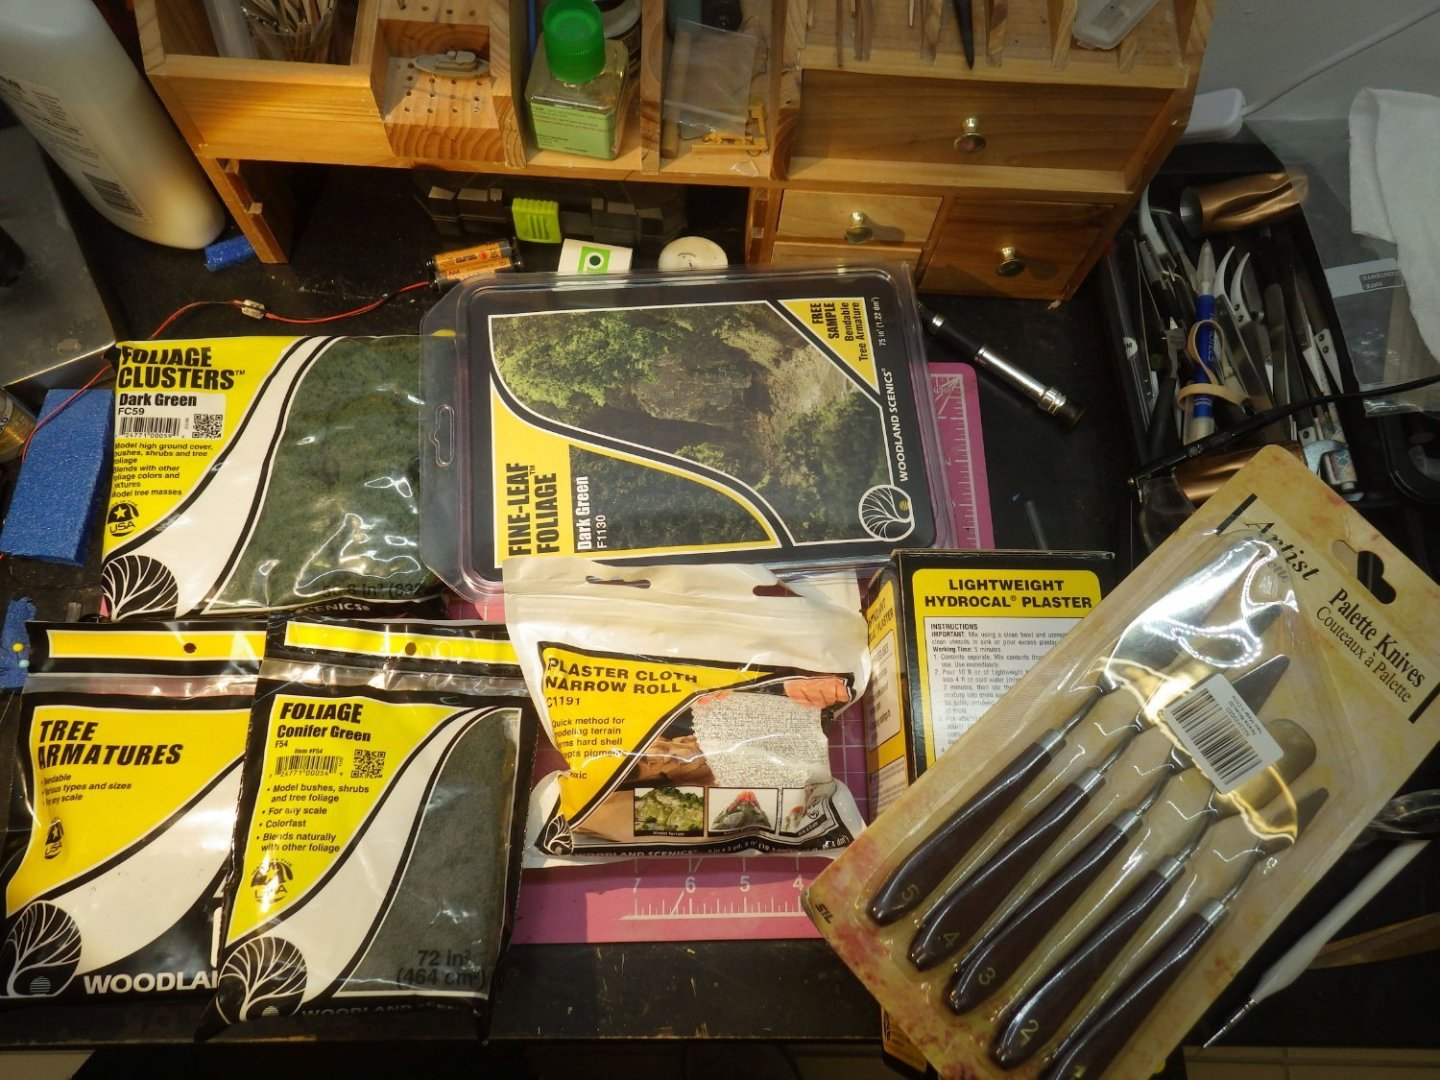
A day of experimentation. I came back from the dentist to find a package from Woodland Scenics so I think I have everything I need to add grass, bushes and trees. \ I want to pint the cliffs first and get a grey wash on the ground before starting the turf so I used a handful of surplus plaster rocks to experiment using craft acrylic paints. I've learnt that very weak washes work best with maybe a darker wash in the crevices. I added a light touch of beige and yellow for mineralisation in the rock and ended up with results as below. Bottom right is an early effort and is horrible. Too much pigmentation. The two on the left are I think a reasonable attempt at limestone. I welcome thoughts on changes Many thanks for the advice, comments and likes Alan

-
Thank you very much EG. I'll be using your (and Jacks) suggestions Alan
-
Thanks OC. I'm a bit concerned about getting a shine from the glue. I will experiment with the diluted white glue but the spray can may be another option Thanks again Alan
-
Thank you very much Jack. I'll stick with water as the diluting agent and the dish soap is a good tip too. Hopefully I will get started in the next few days. Alan
-
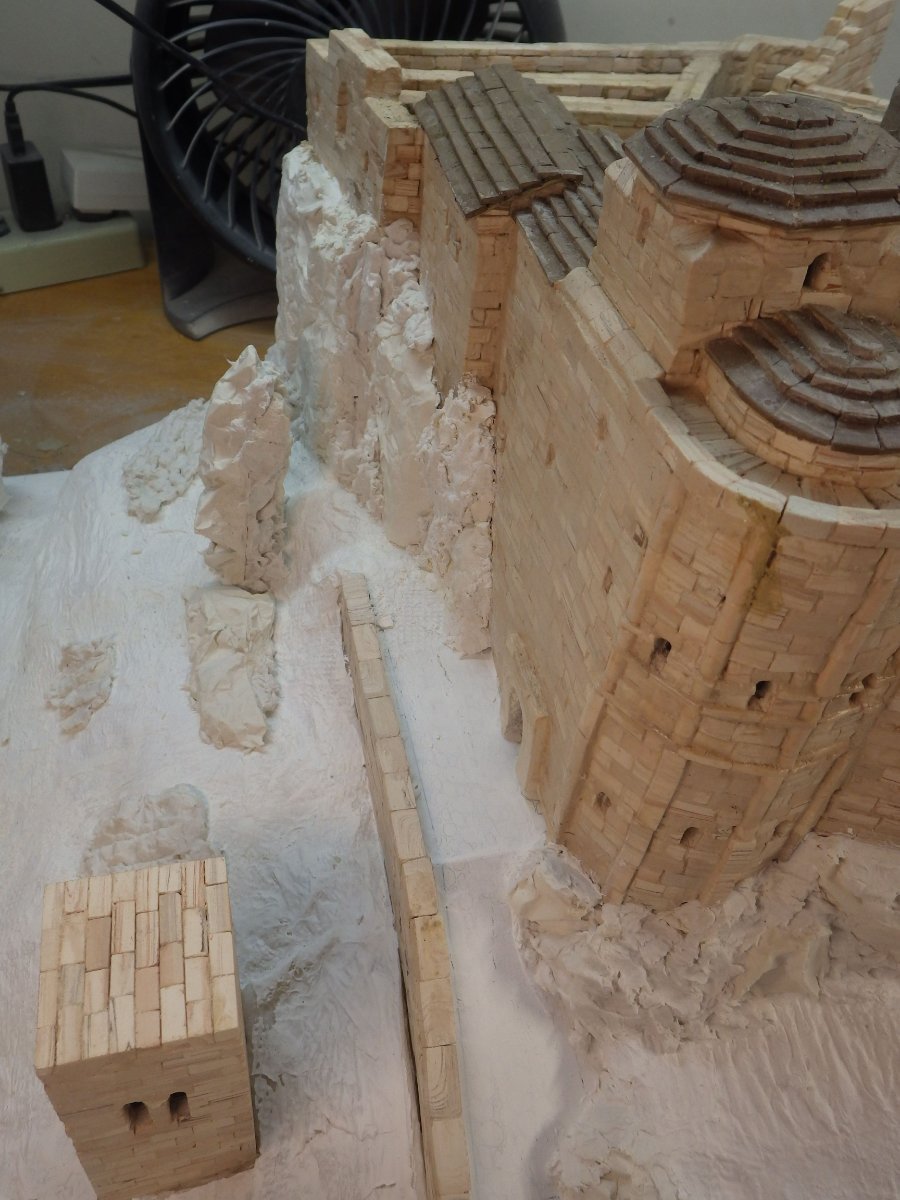
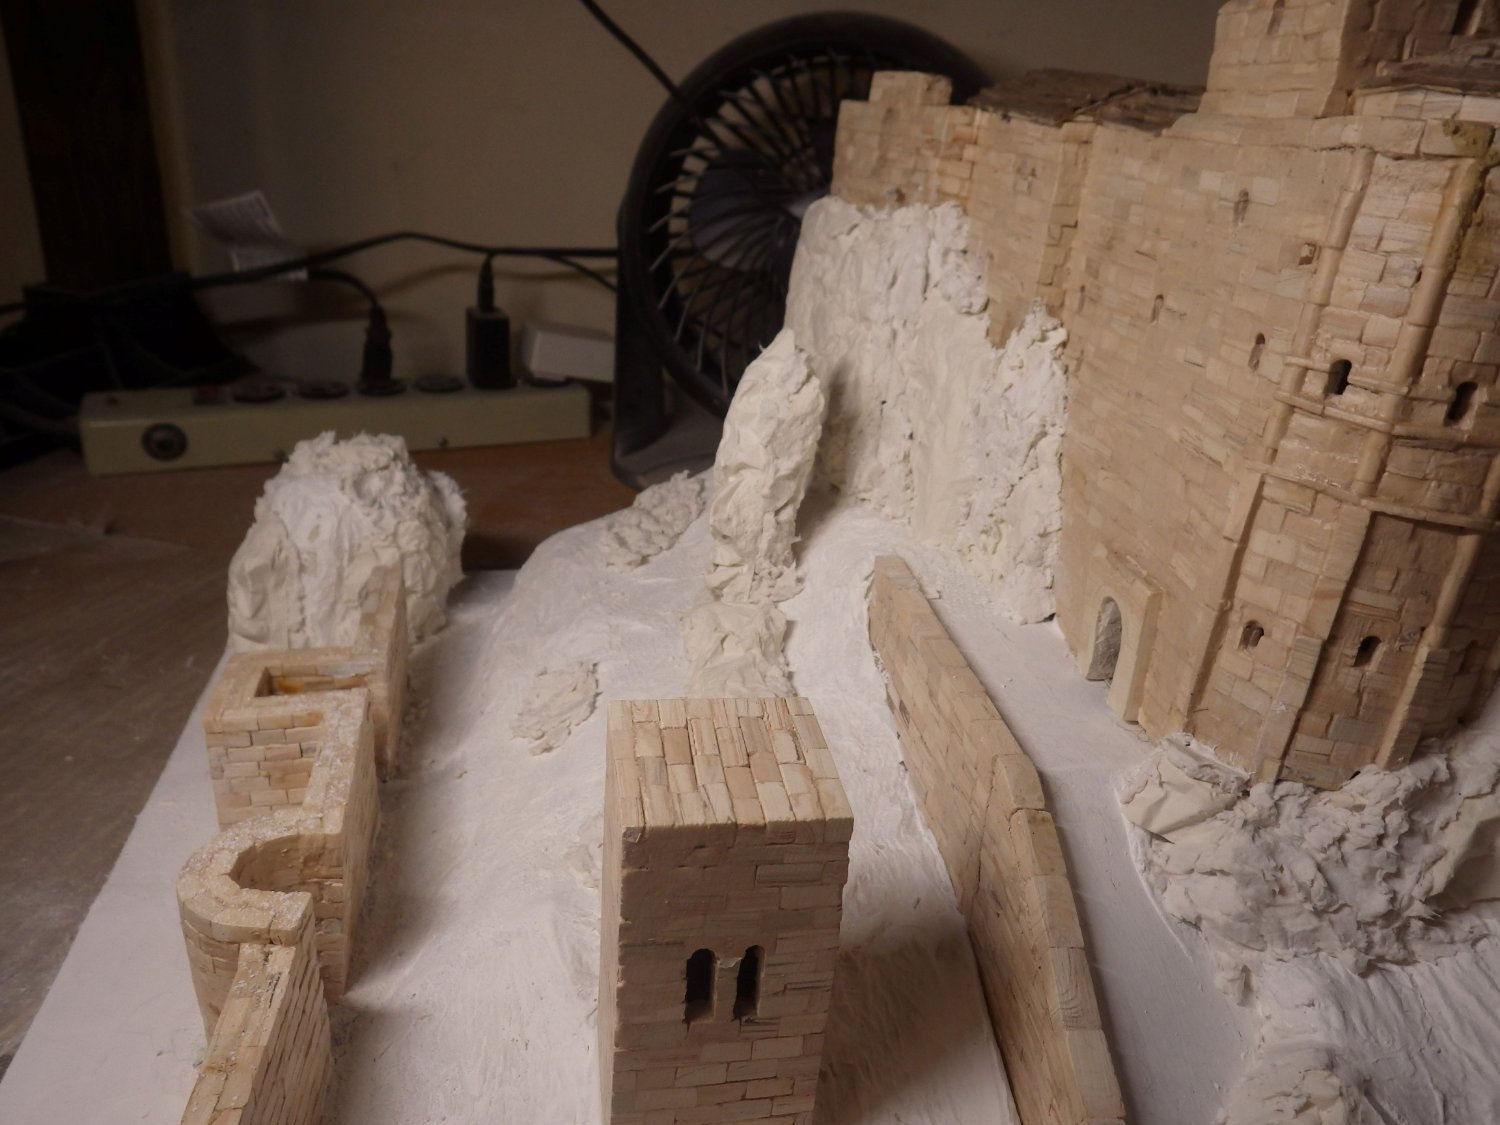
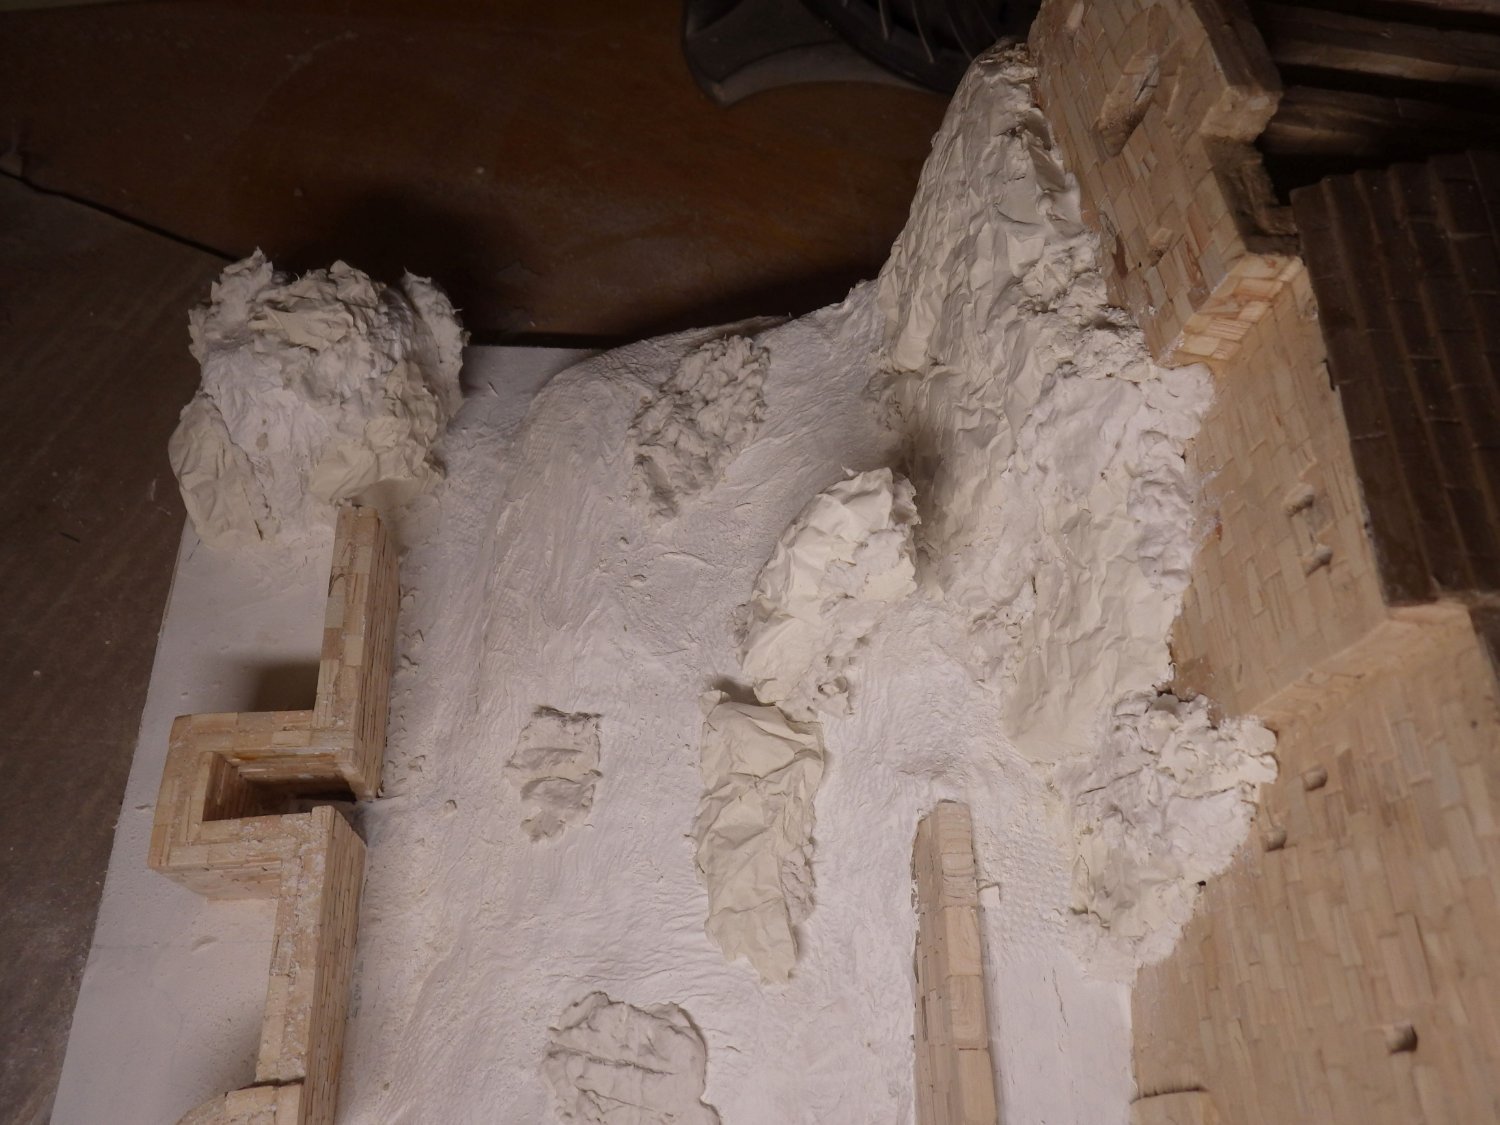
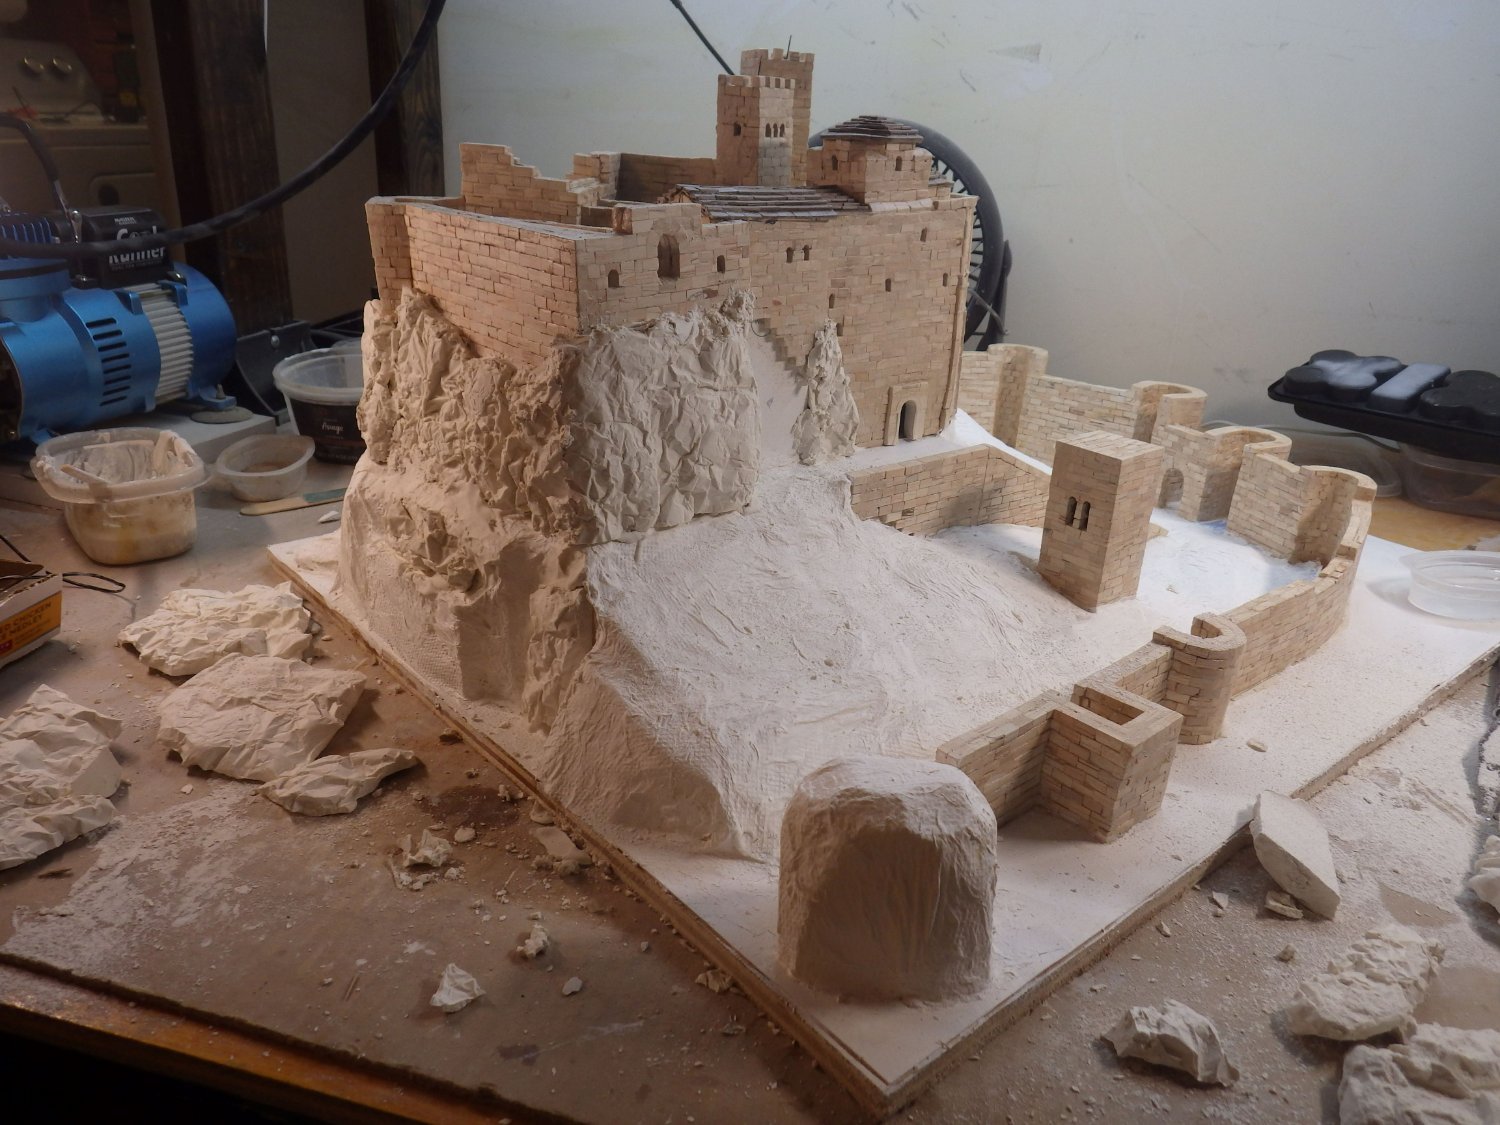
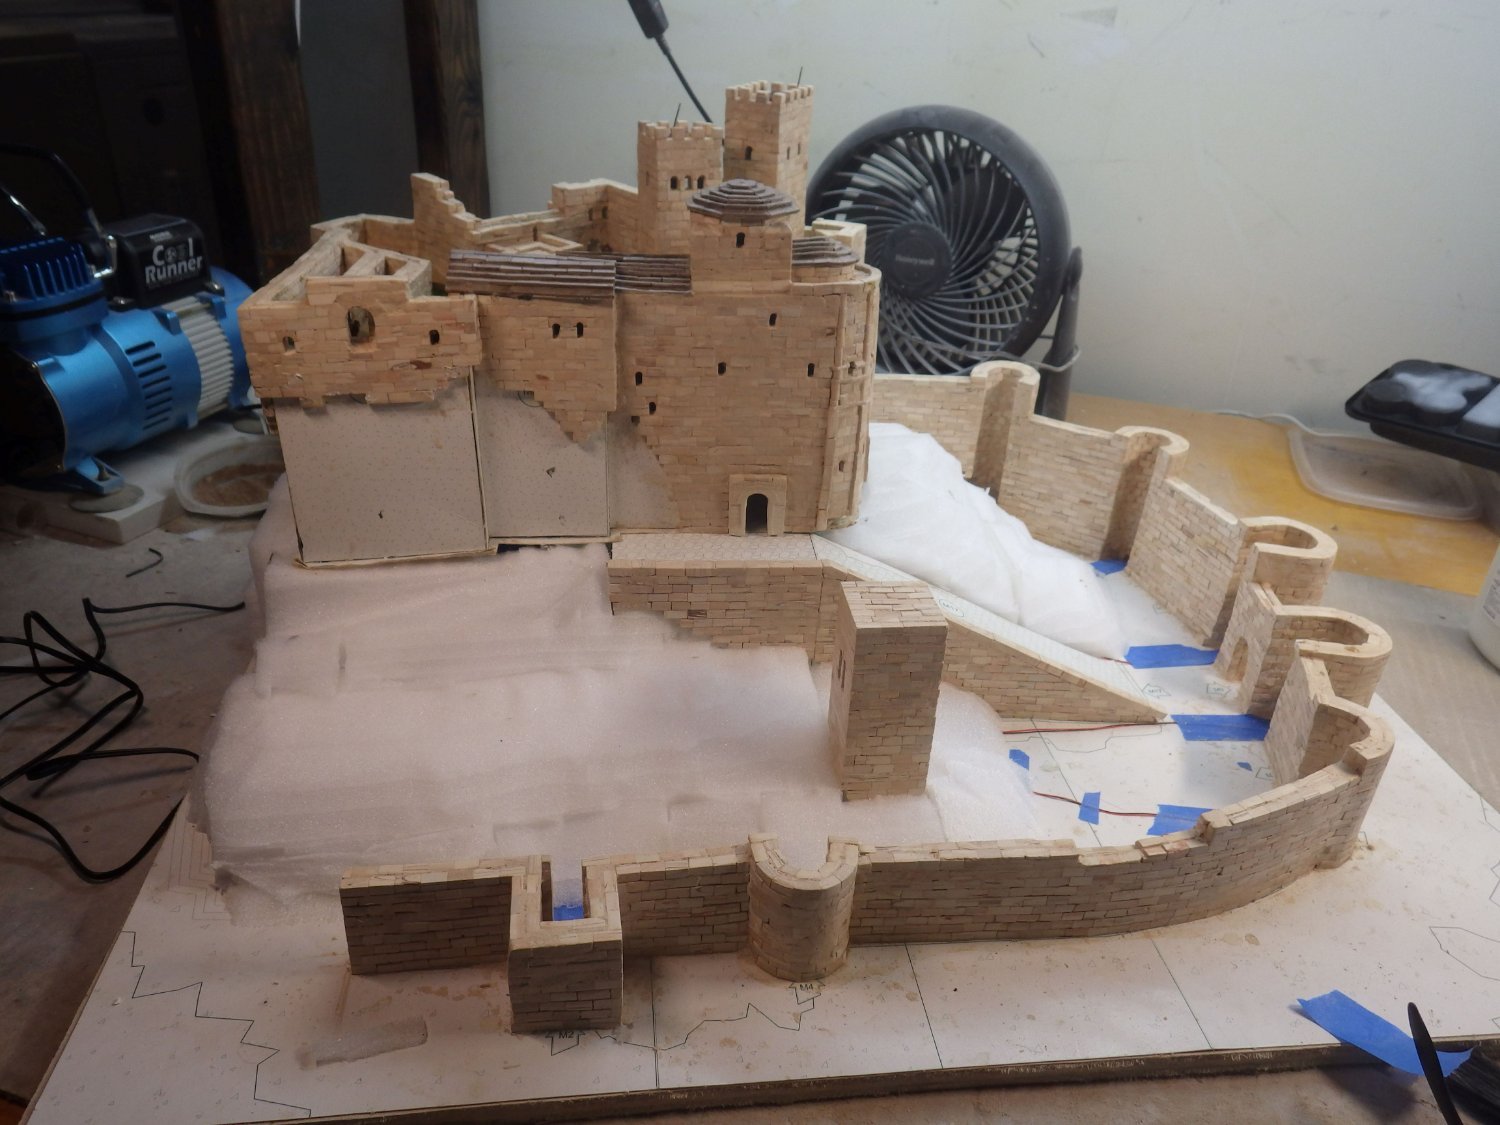
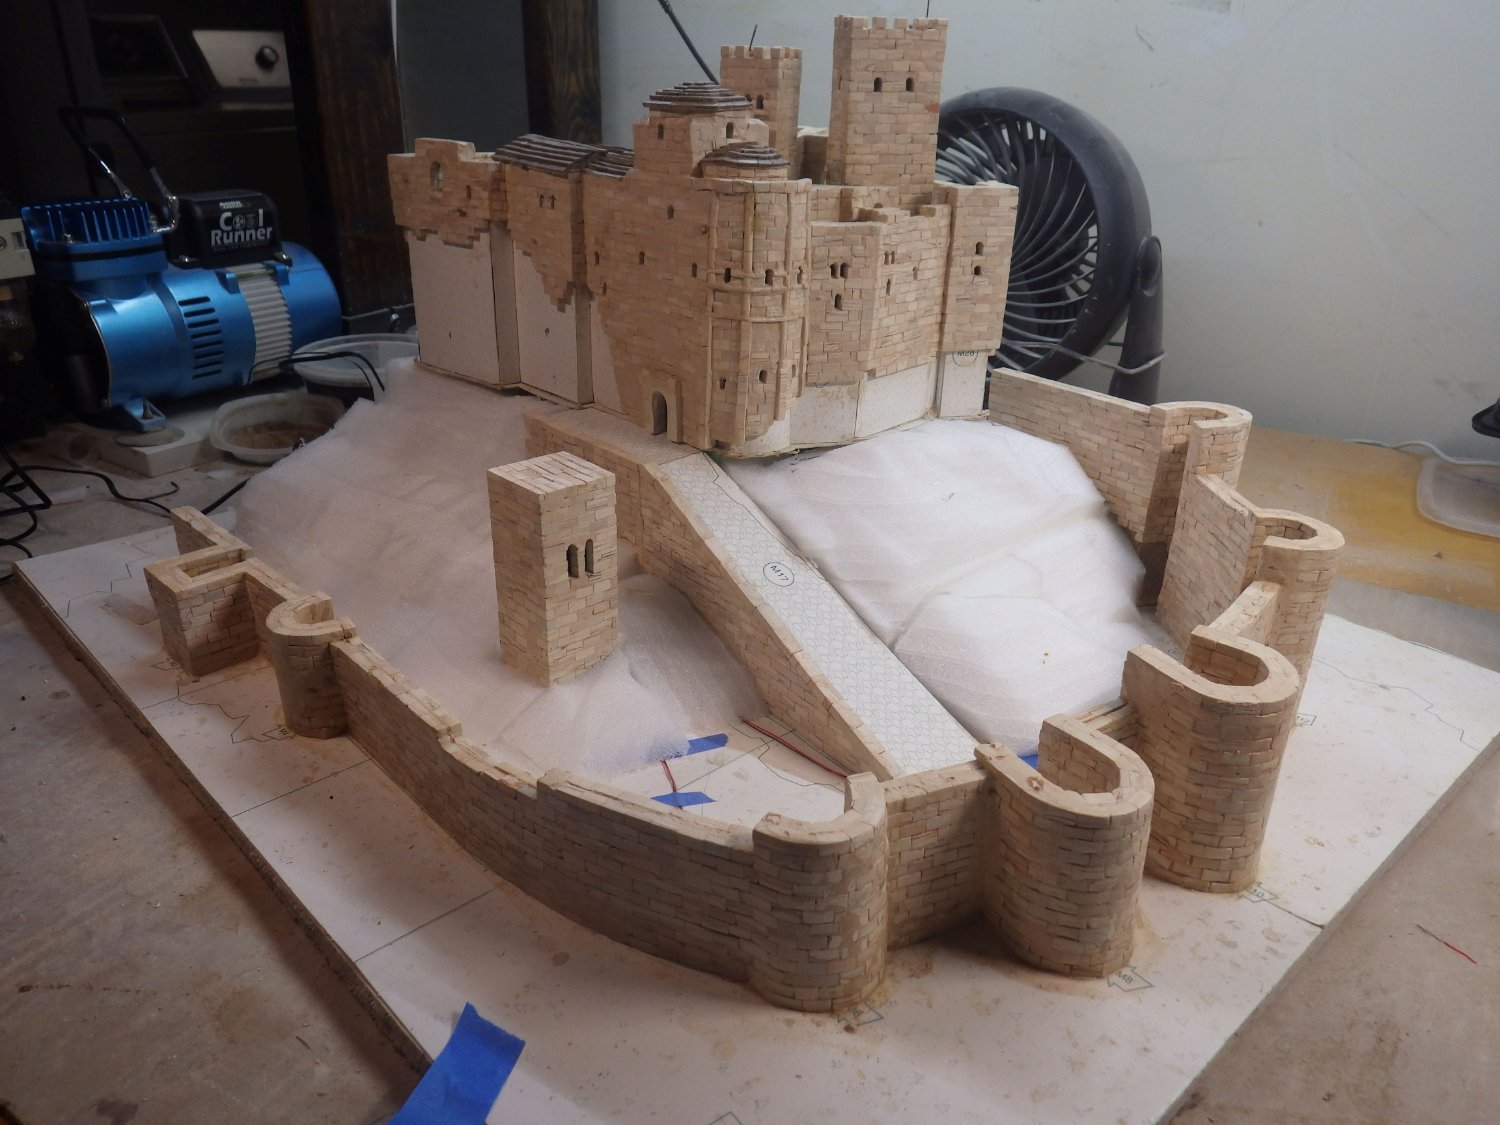
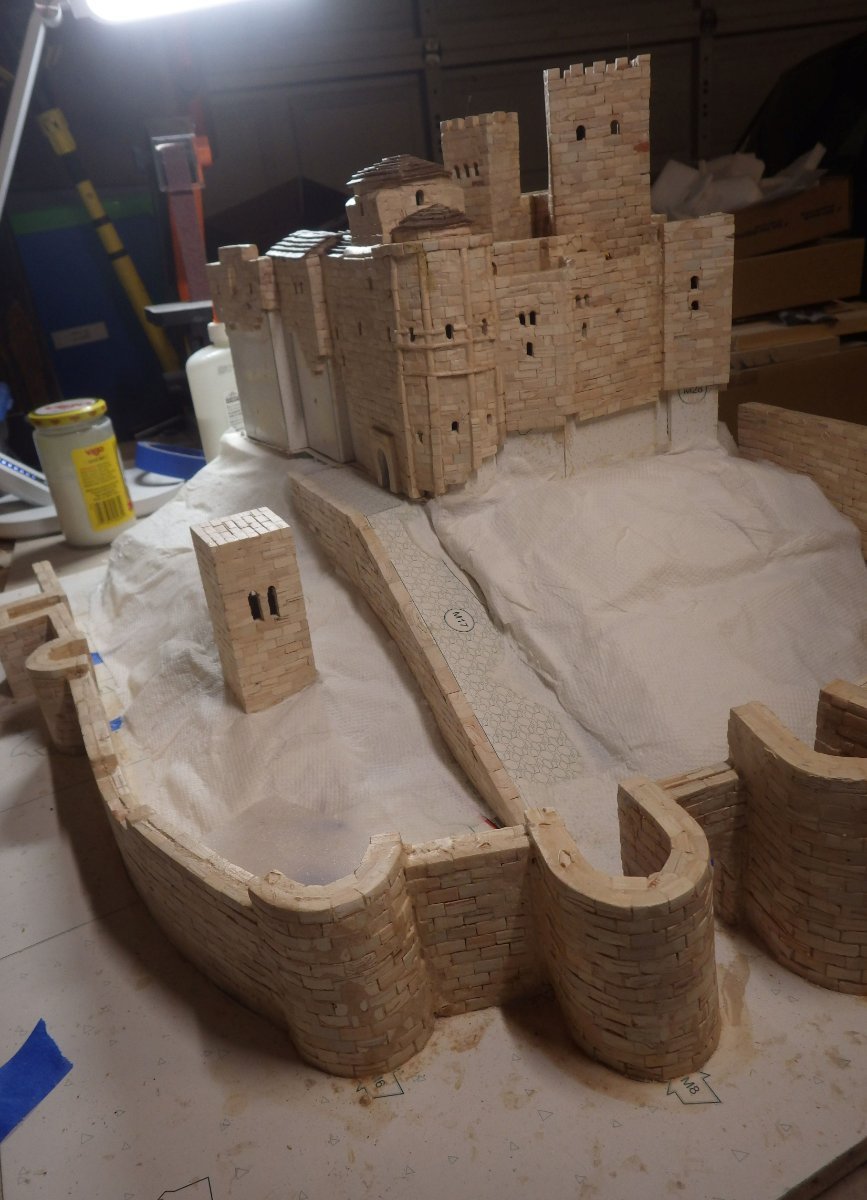
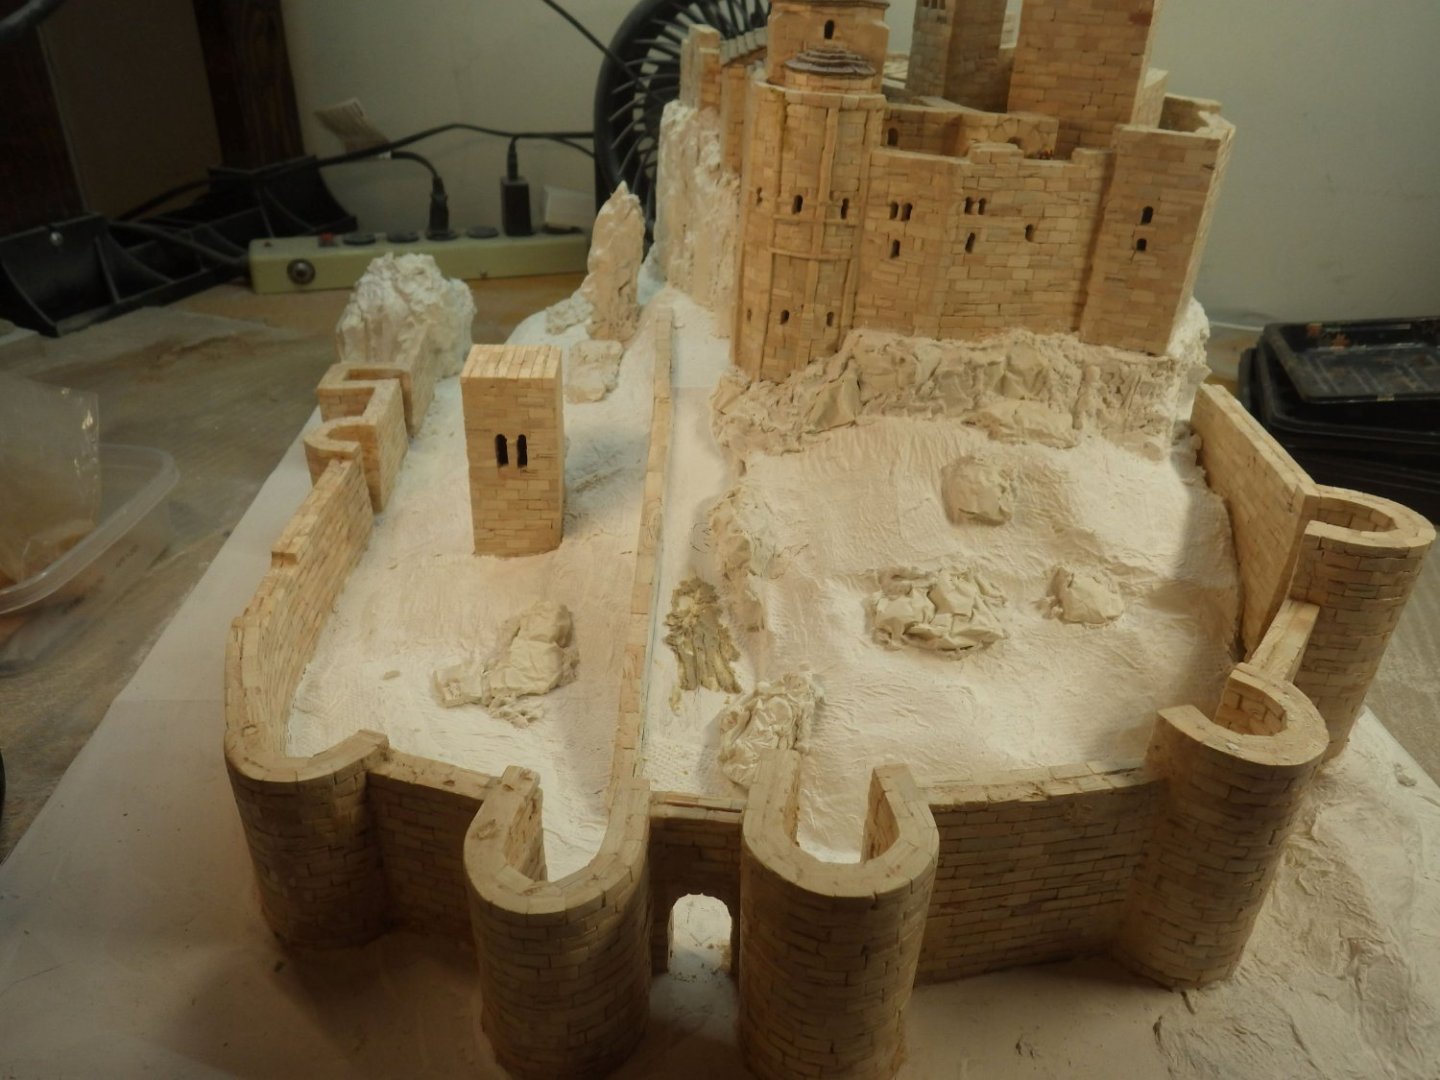
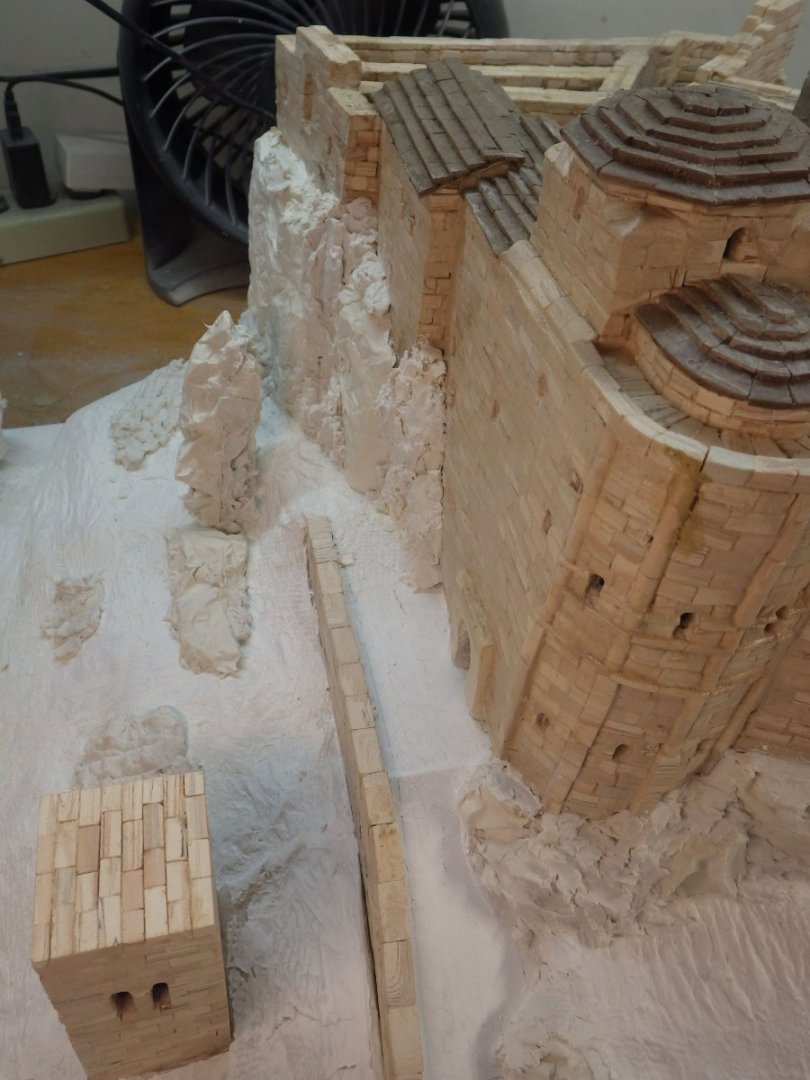
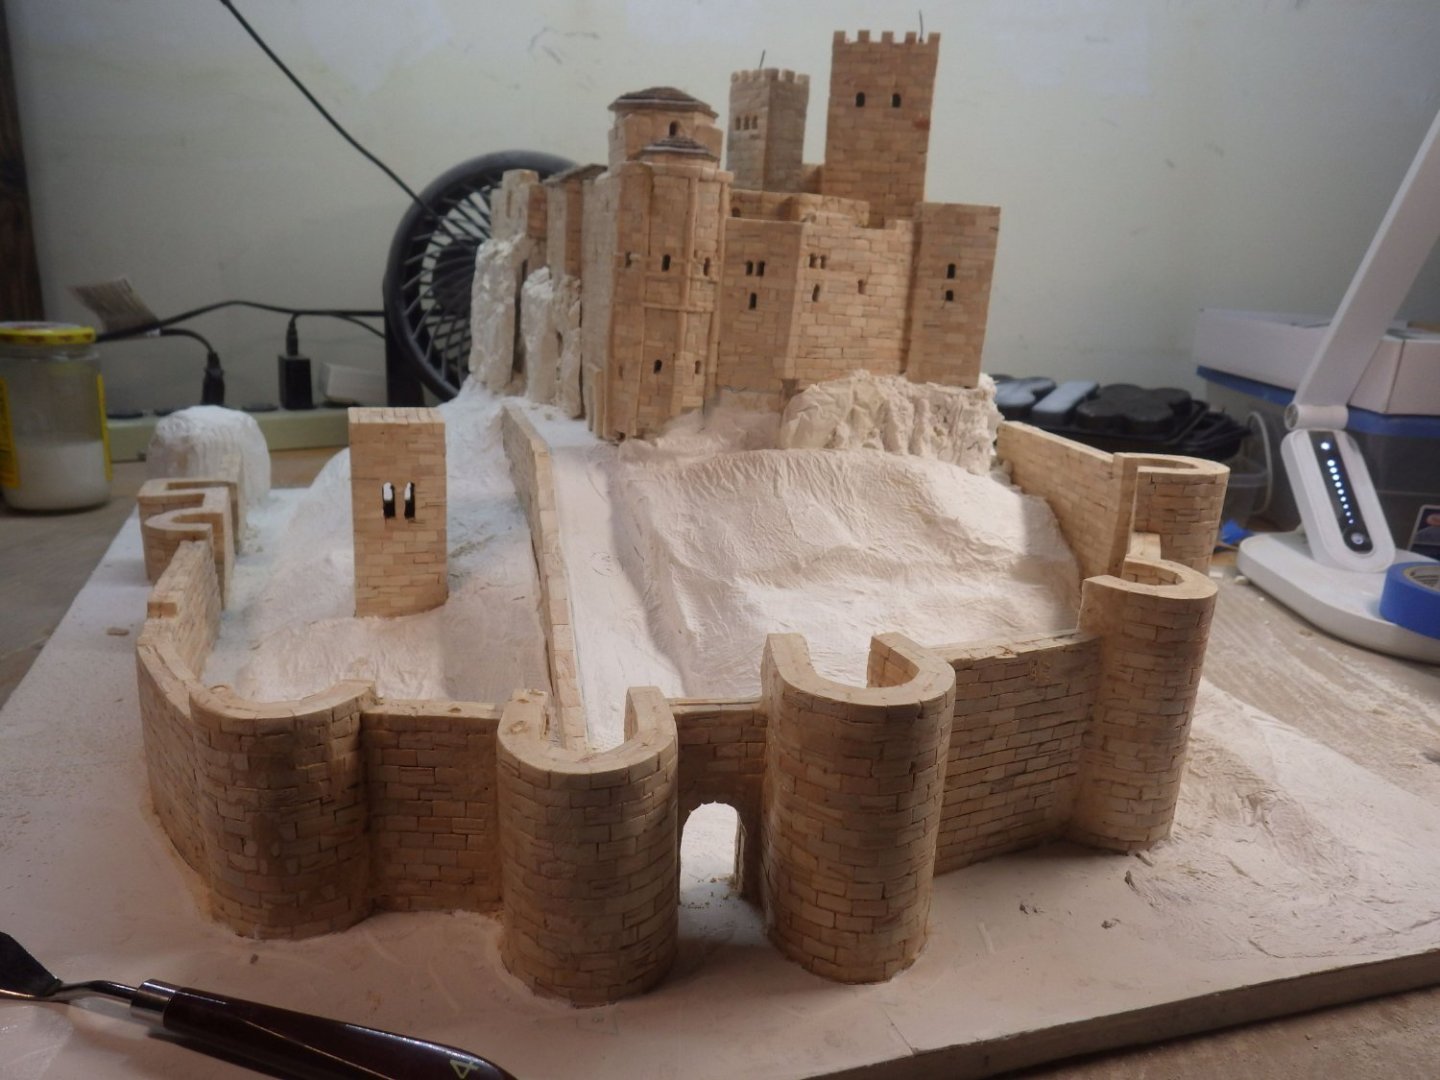
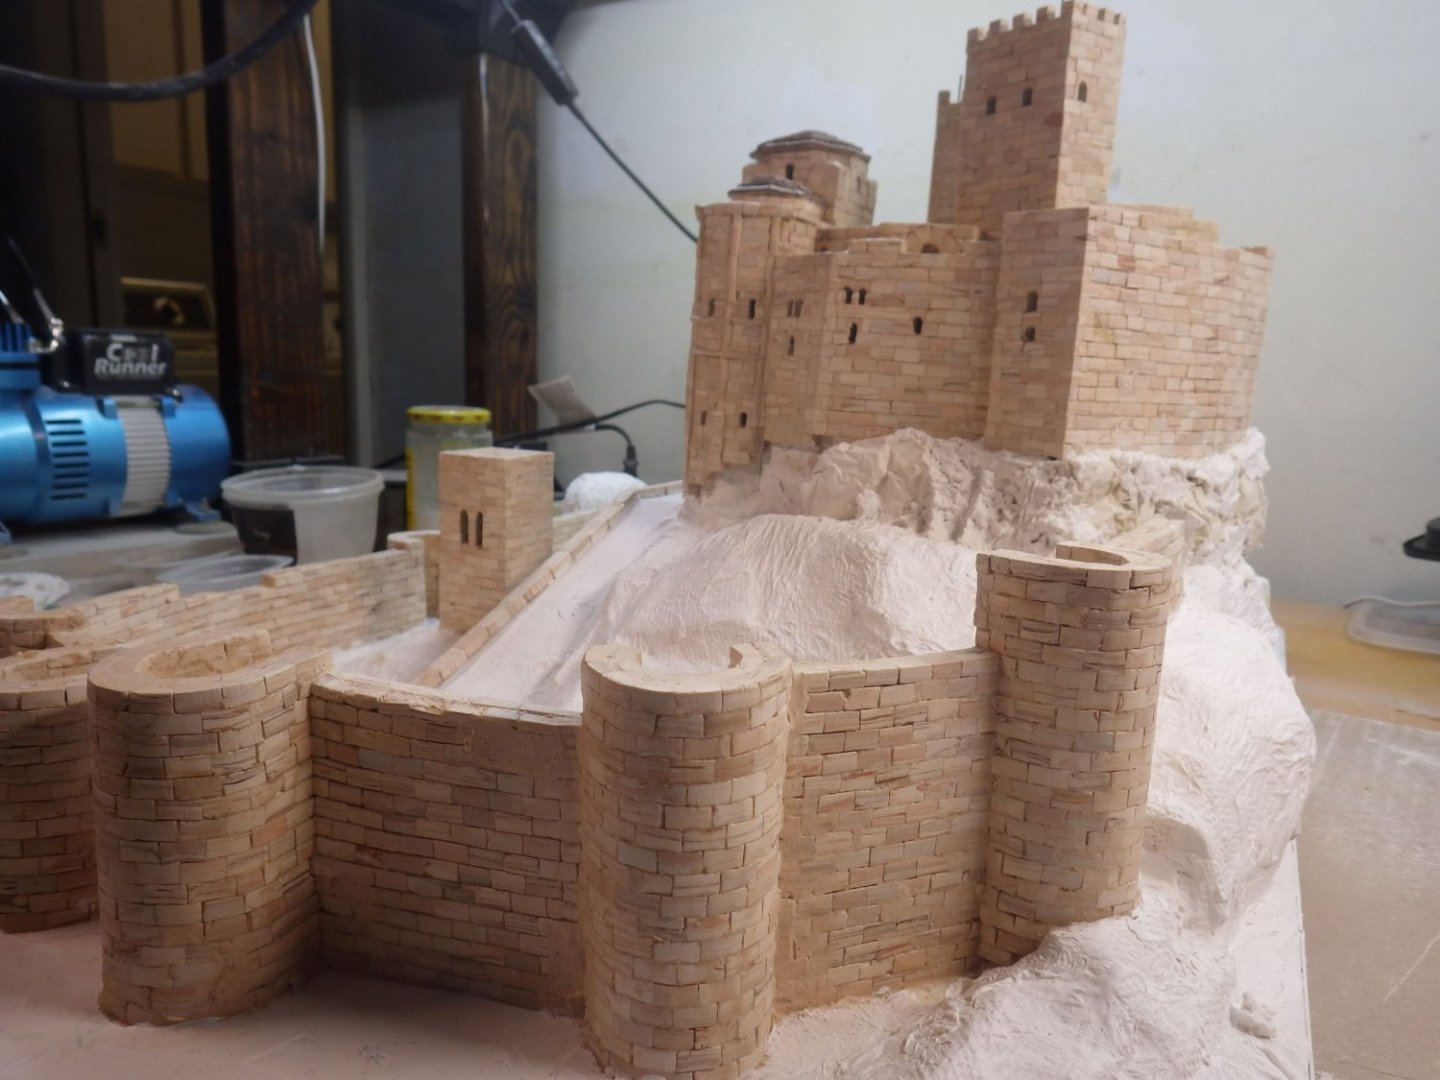
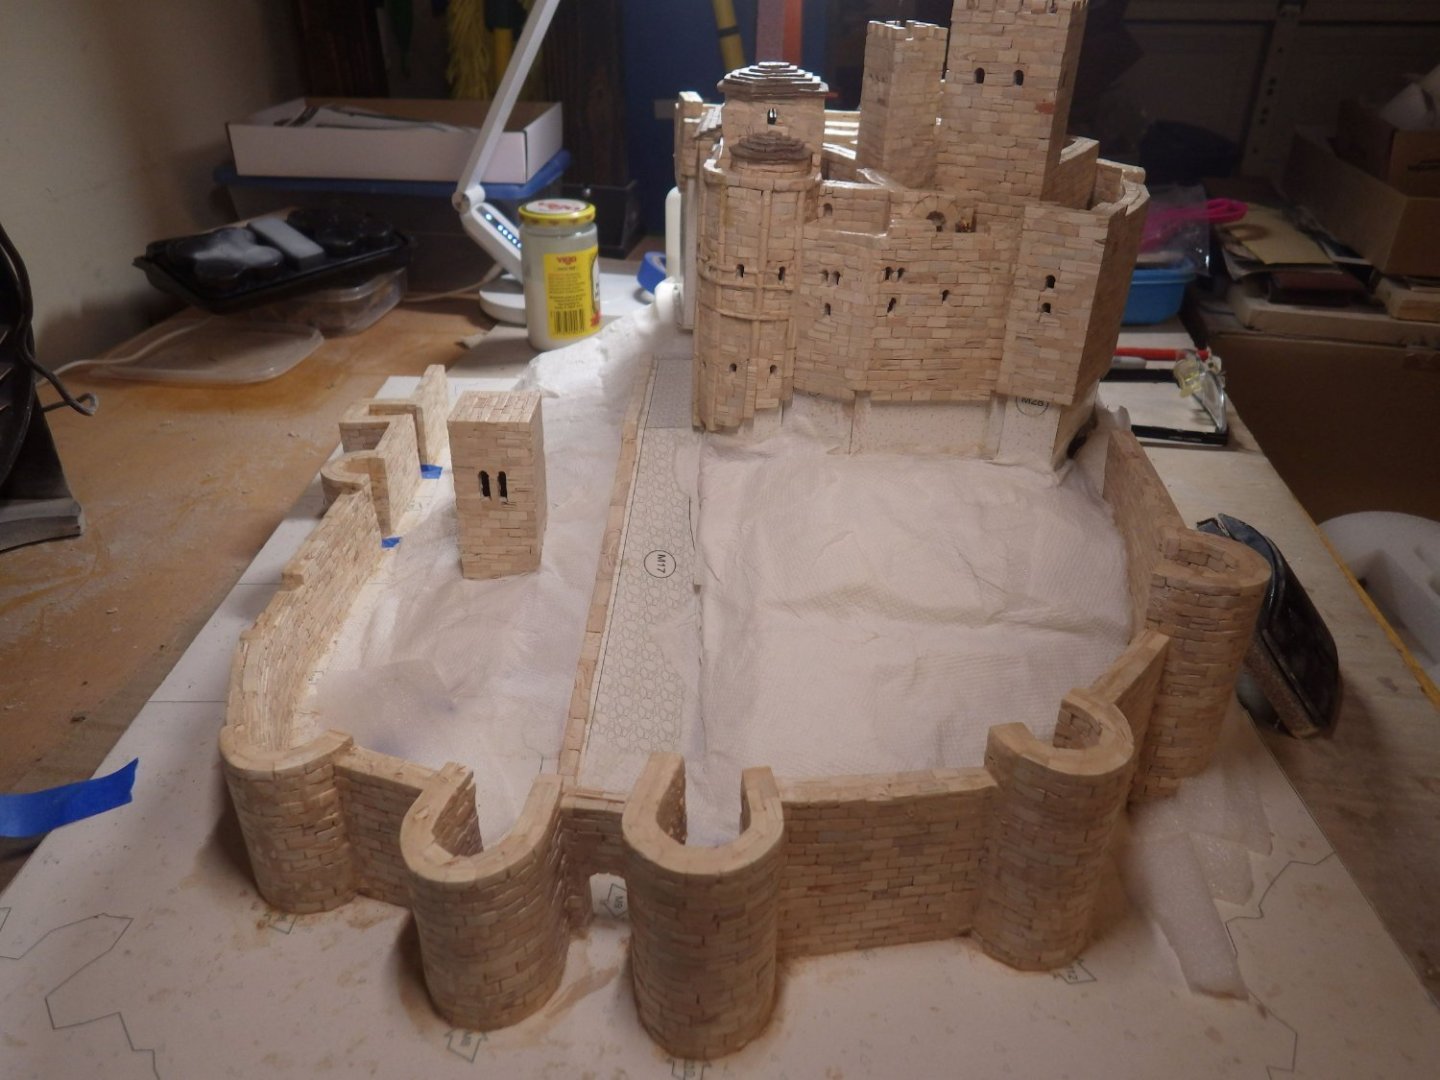
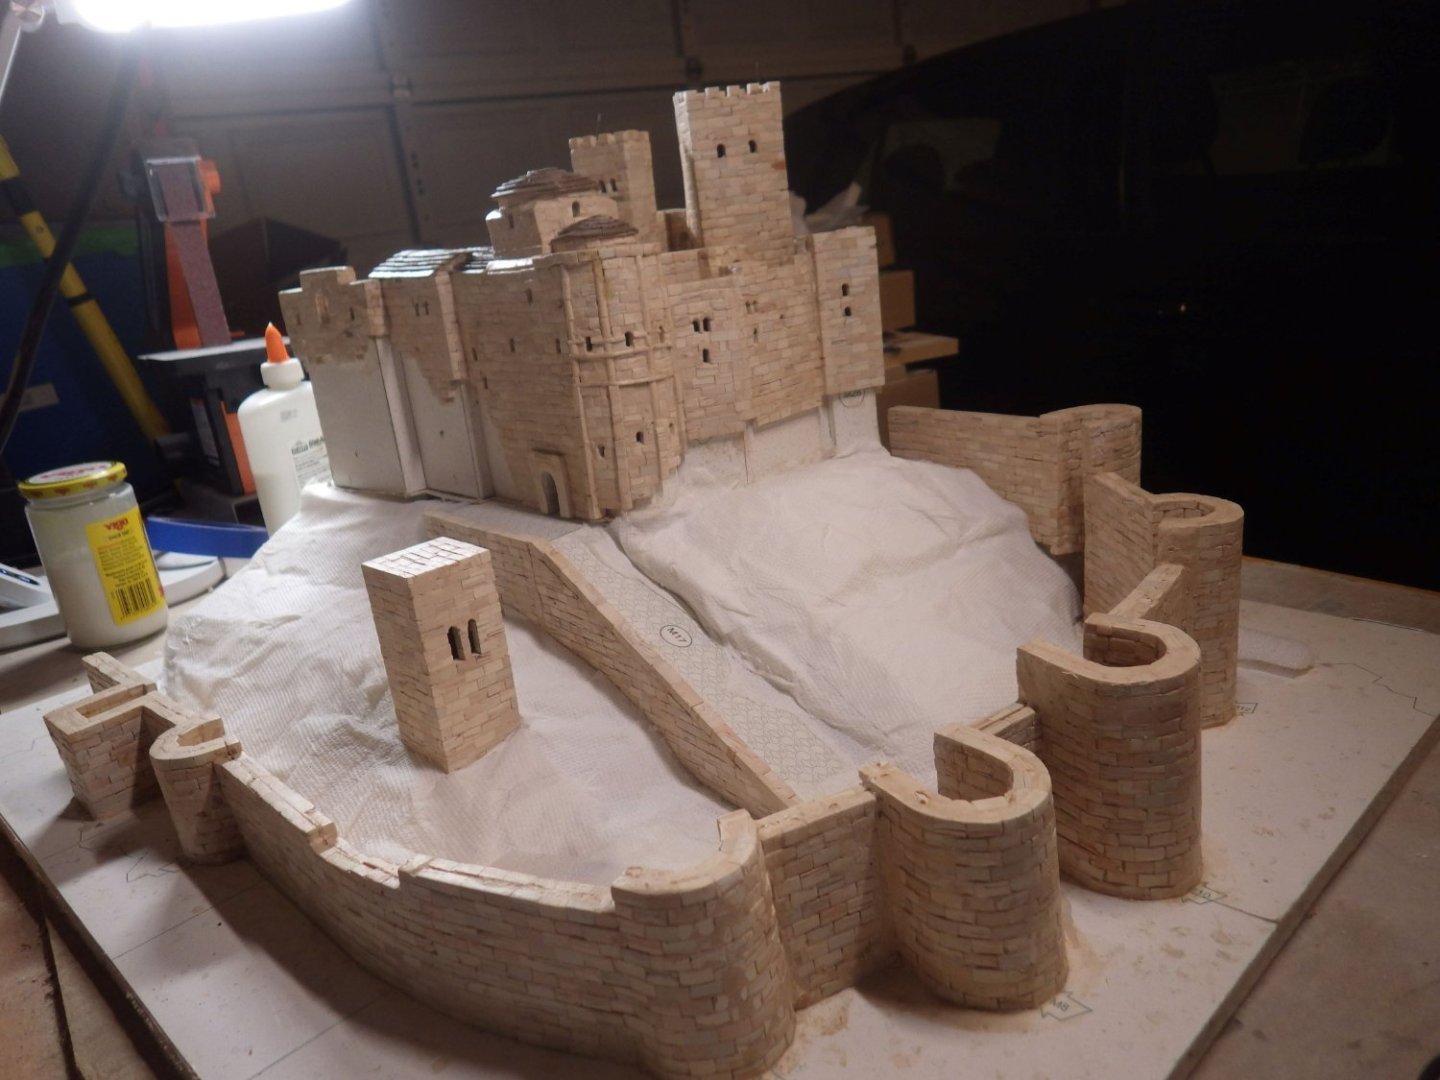
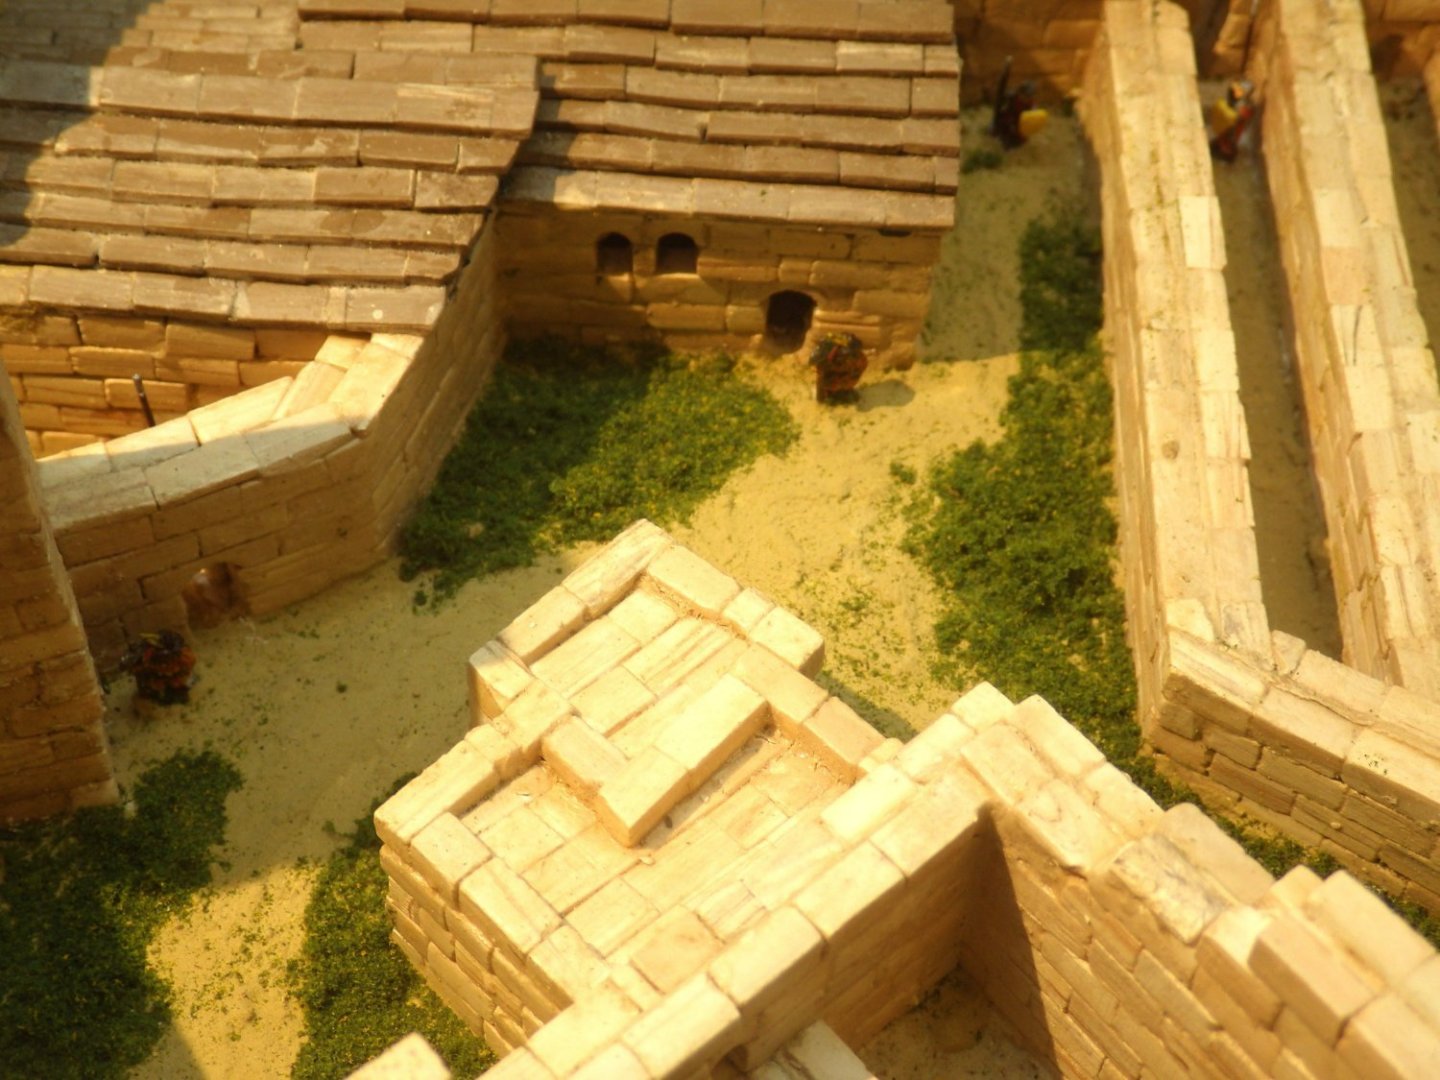
I finished adding the rock faces and blending them into the landscape with the Scupltamold. I have to work with small batches because the setting time is very short; I only seem to get about ten minutes before it becomes too difficult to work. I added the spur and the rock plug that are featured in the drone video. The rock plug is a bit too close to the end of the wall but I don't have any more depth on the baseboard. Cliff effects were added to this too. Finally rocks were added to the slopes and the edge of the pathway roughly in line with the real landscape. This will be left to dry for a day. Work calls tomorrow and the Woodland Scenic parcel should arrive then too. I think the next task will be to add the grass. I have the Woodland Scenics fine yellow grass for the majority of the landscape with some green added in shady areas. This will be a new experience for me. I have used the material on small areas and brushed adhesive on to the base. This time I'm thinking about using a spray bottle loaded with what seems to be commonly called "scenic glue". Woodland Scenics make their own but I have also read that the same adhesive can be arrived at by diluting white glue with four parts water or four parts alcohol (isopropyl variety rather than the maple bourbon). Does anyone have any experiences or preferences with these varieties. It also seems that once applied the grass should be sprayed with the scenic glue to bed it down. The alcohol based variant is claimed to have better wetting and penetrating power. Some tests are going to be necessary. I am going to need to be fairly careful with these next steps. I don't think I dare invert the model to get rid of excess loose turf. It would use this years and next years allowance of bad language if the towers parted company with the base Thank you all fotr looking in and all the comments Alan


- 462 replies
-
- 13
-

-

-
Thank you very much OC. This feels like the fun bit after all the brick work. I'm still a bit nervous about it though Alan
-
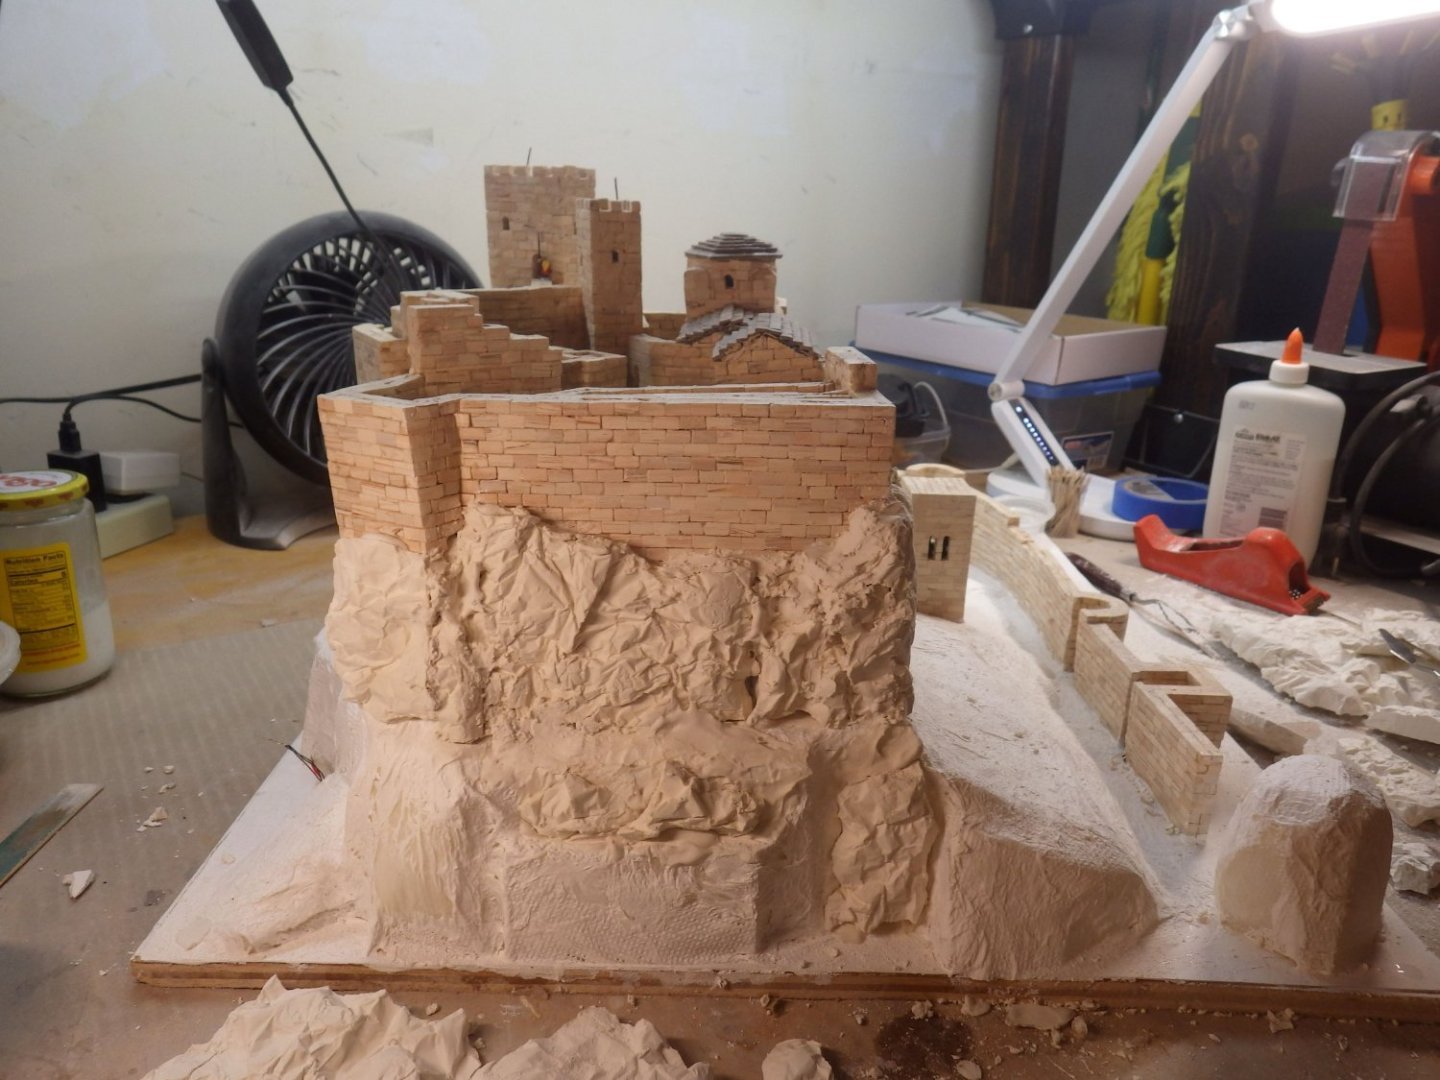
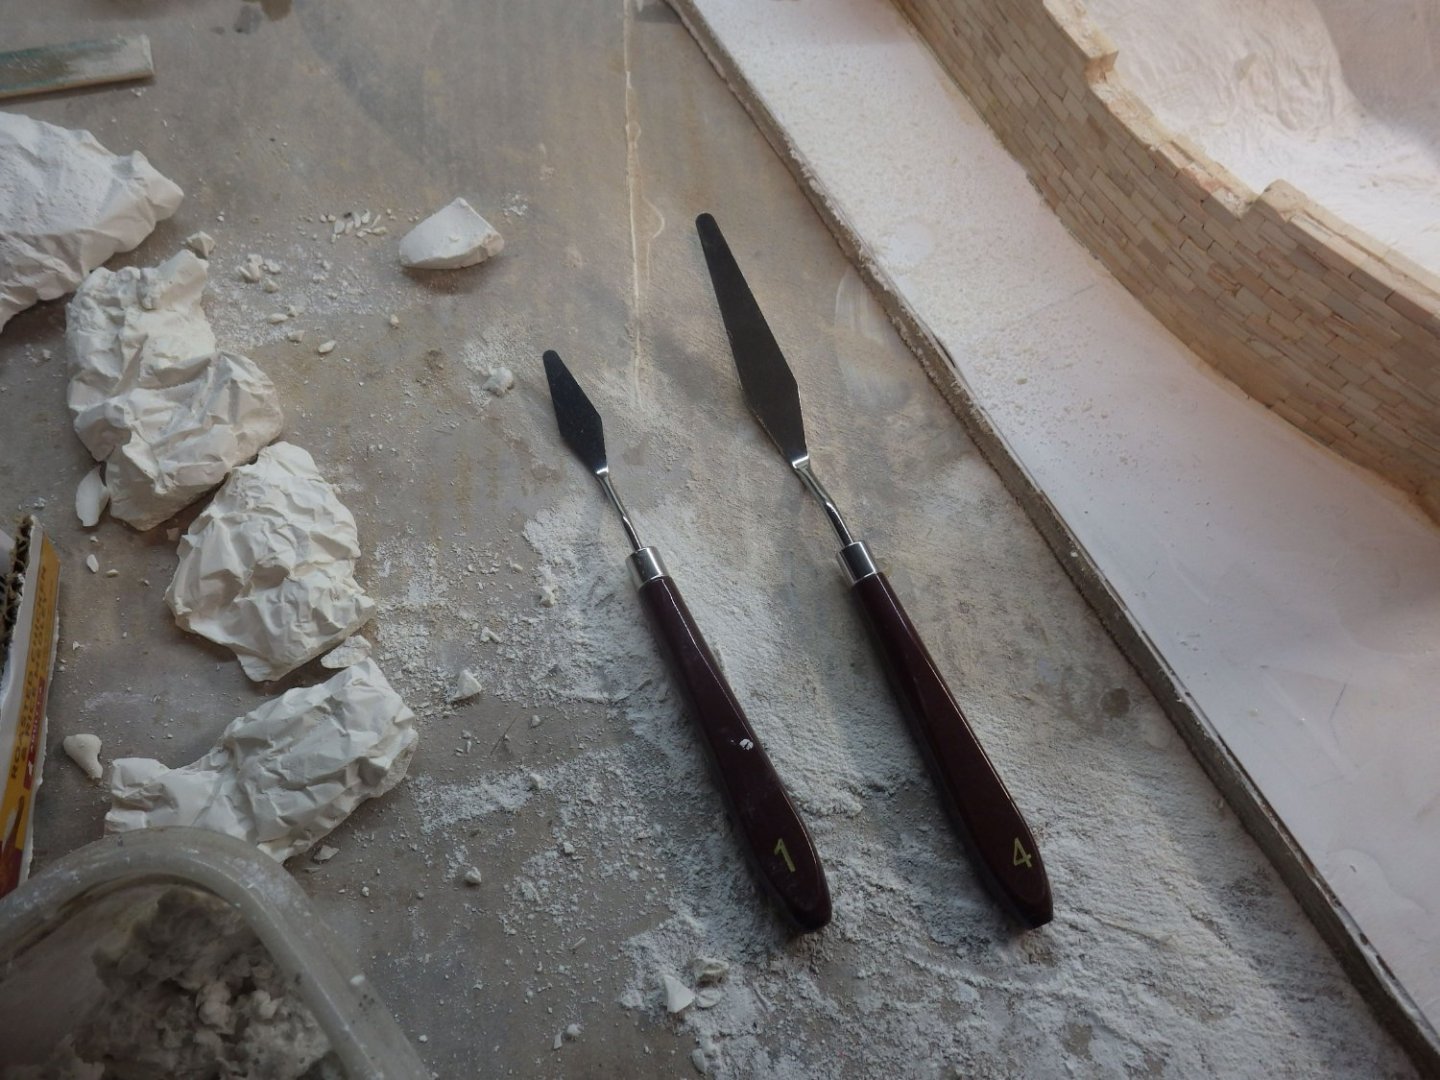
The landscaping continues. The lay up of kitchen towels soaked in diluted white glue was completed but the pattern of the towels was too visible so I added a layer of toilet paper which also had the advantage that it could be moved around with the brush to create undulations and contours in the basic shapes. Once dry I gave it a coat of gesso to give it a good surface for adding plaster or paint. I had made a series of rock face formations using plaster of Paris and crumpled kitchen foil which turned out quite nicely. I have started building up teh cliff faces with them. I am using Sculptamold to stick them to the formers and also to fill in and blend the pieces. \ The cheap artists palette knives are working really well. I'm glad I bought them I had originally planned to do the grass effects and then add the boulders to the hillsides but I think that is going to look a bit artificial and the boulders will look too separate so I will add them as part of this current activity. I will try to mask them while the grass is being added. Another shipment of Woodlands Scenics is expected shortly I'm also trying to decide on the base colour for the areas beyond the cliffs. I plan to use yellow grass and thinking a light grey base might work better than tan or brown. Darker green bushes will also be added and the limestone rocks will rise out of the grass Thanks for looking in, all the likes and comments. Its starting to feel like I'm actually achieving something. Alan

- 462 replies
-
- 15
-
-
-
Thankfully the severe thunderstorm here never materialized and the tornadoes avoided us. Just torrential rain for a while. alan
-
That sounds thoroughly nasty Jack. A recipe for a lot of flooding. I hope you are staying safe, dry and warm alan
-
Thank you very much OC Its a big learning experience and I hope I don’t fall at the last hurdle alan
-
Thank you EG, you provided some great advice. per the BBC As of Tuesday evening, more than 500,000 households in the eastern US, from Florida to New York State were without electricity. Dozens of counties in Florida have declared a state of emergency, where overnight storms have blown roofs off homes and knocked down power lines. Twelve tornadoes were reported across Florida, Alabama and Georgia by early Tuesday, causing significant damage and, in some areas, prompting search and rescue operations. In Houston County, Alabama, an 81-year-old woman was reportedly killed after a tornado ripped through the area, destroying mobile homes and RVs. One person was killed in Claremont, North Carolina, officials said, after a powerful storm moved through a mobile home park. I thought this was the time of year when we sat back and watched everyone else’s weather but it’s proving pretty inclusive this year alan
-
Thanks Craig This bit is a major relief after months of gluing tiny blocks to other tiny blocks. I have trees to make too. The back of the castle is heavily wooded under the cliffs. A lot of learning but thankfully there are some great experts here to help Lots of wind. Just got a tornado watch alert until 11pm. Sounds like there is nasty weather all over right now. Alan
-
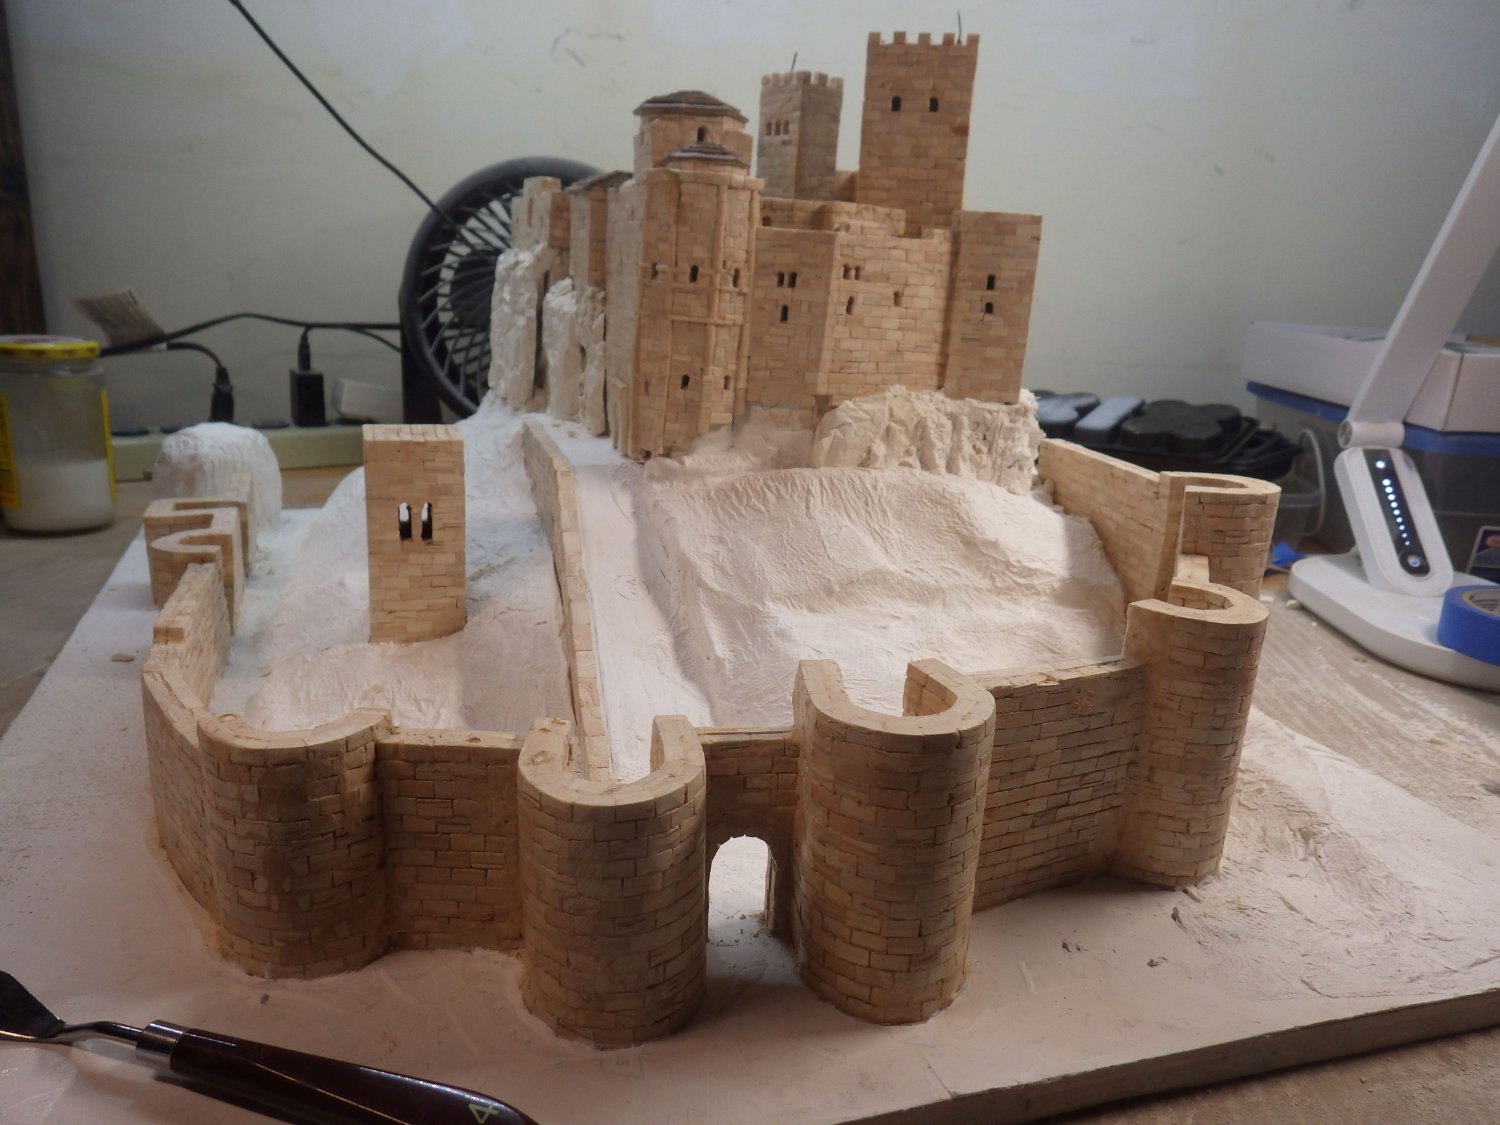
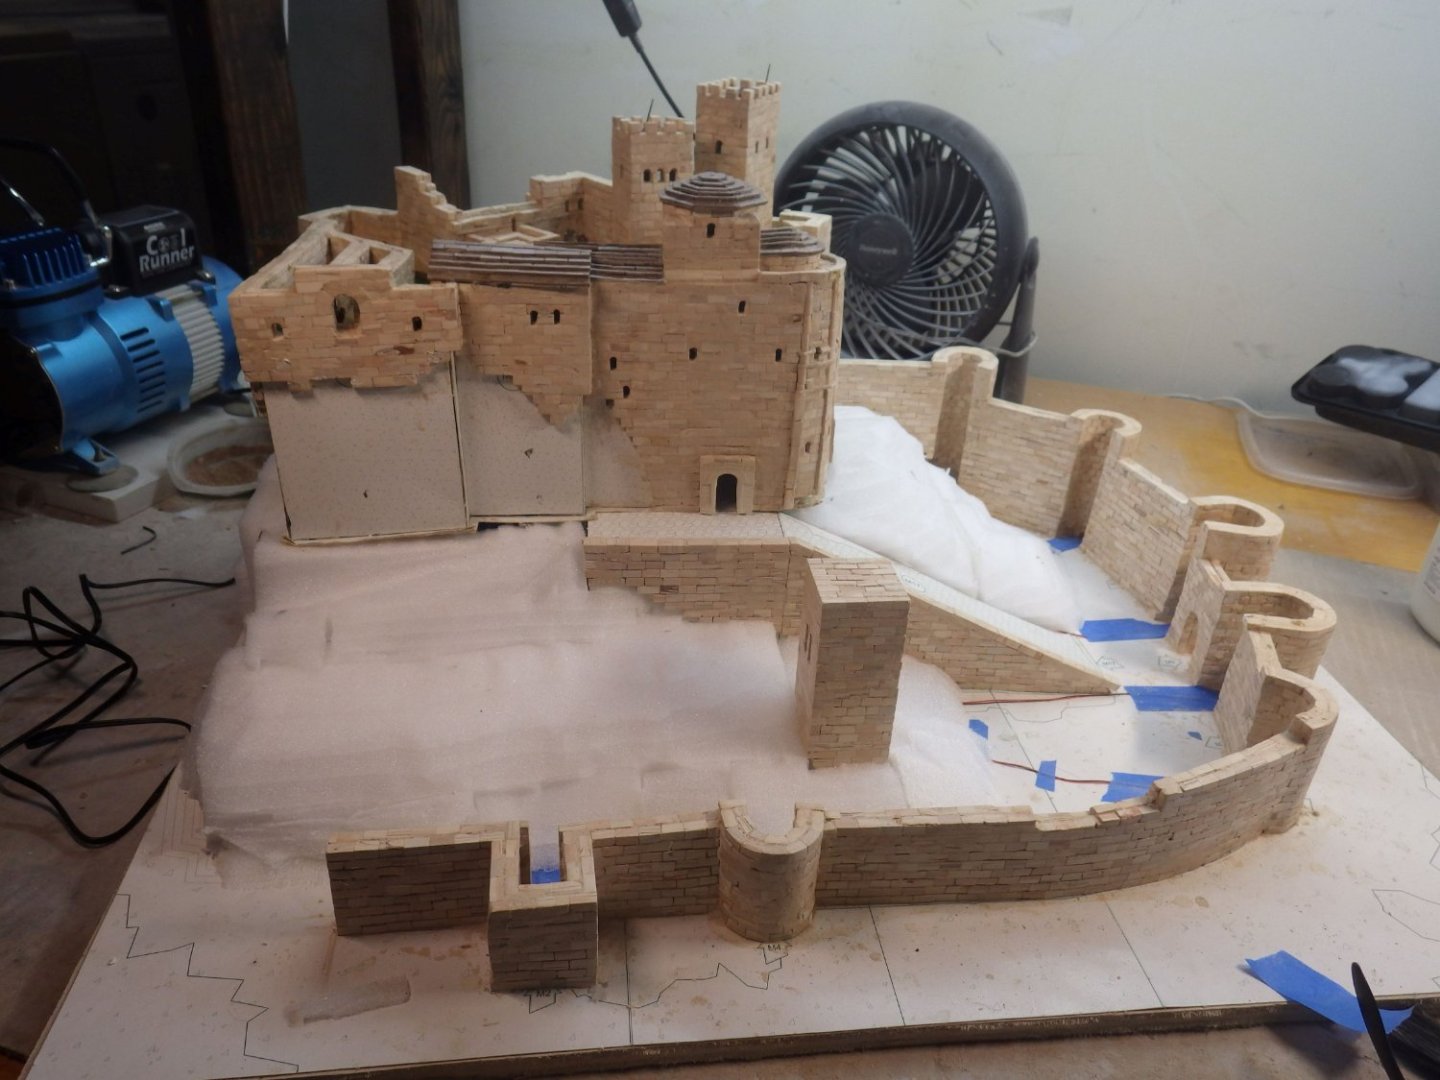
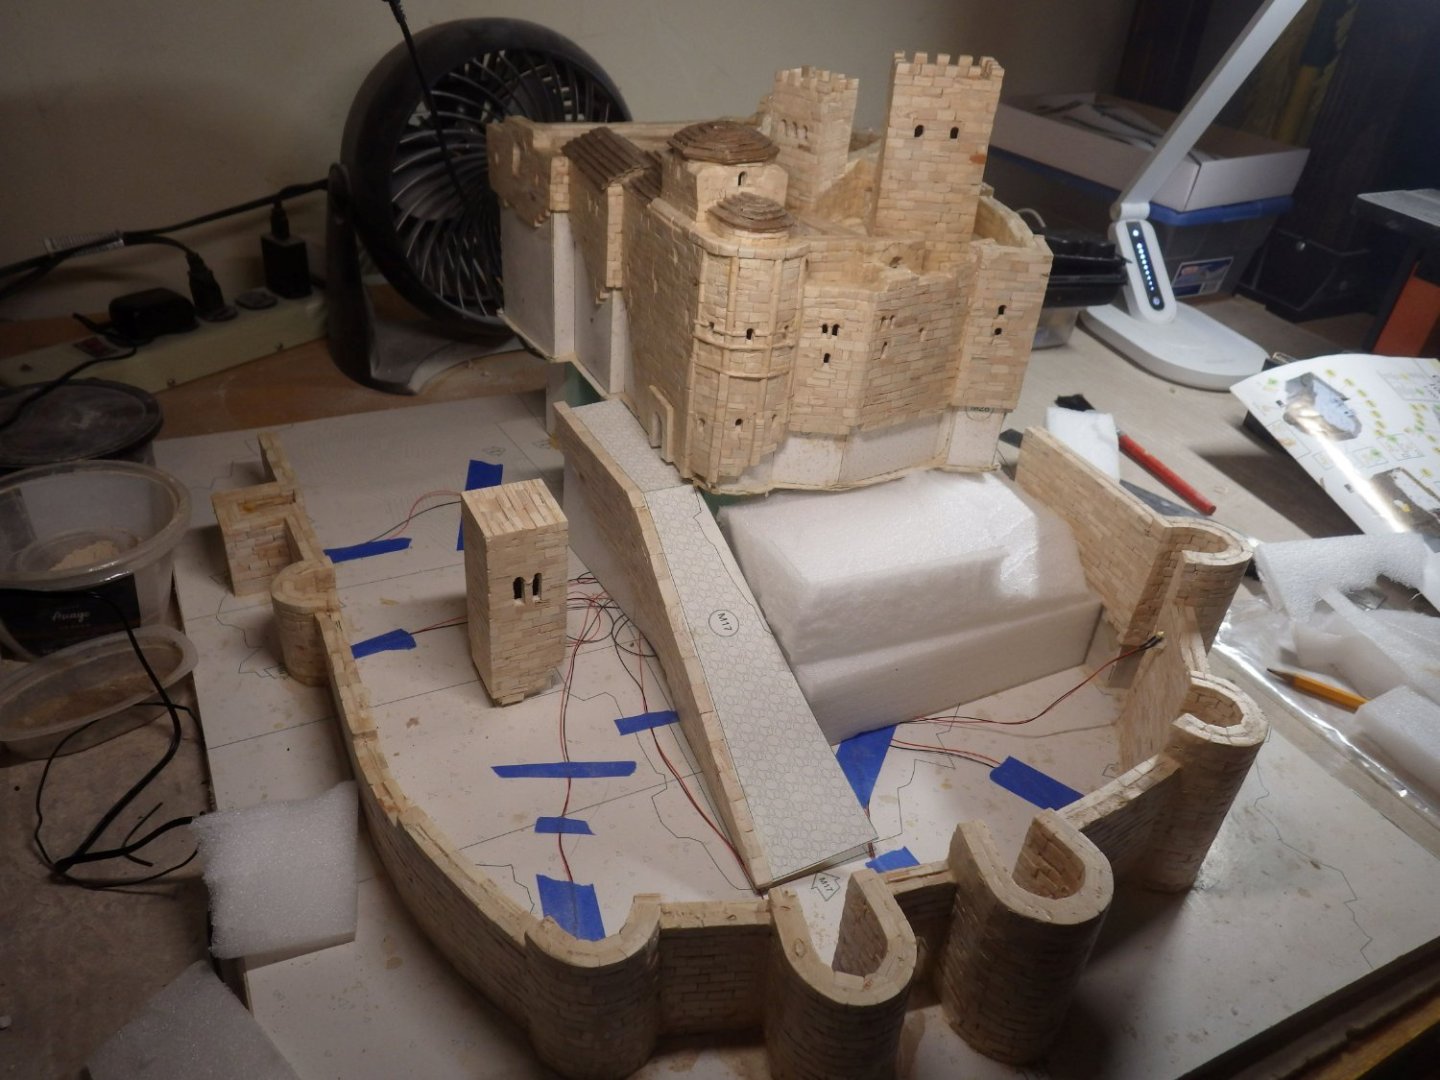
Apart from some residual tiredness I seem to be back to normal. But we have seven people off sick from our test team so its chaotic at work. Real Life - aleays something. Anyway I have used the foam blocks to rough out the basic scenery. The hot wire cutter was a great investment. It is quick and great for cutting curves. Much better than teh kitchen knife I used to borrow on these occasions. The use of the foam blocks for the landscape solved another problem. When it came time to add the towers to the base I found that excessive (or clumsy) handling had resulted in the card base becoming soft and prone to distortion. This meant that the card and foam supports were sinking into the base and causing the towers to lean. It didn't look like a good long term assembly either. I cut the foam blocks that surround the towers such that they fit under the walls and provide support all round the perimeter of the towers. It feels a lot more solid now Now I am adding layers of paper towel soaked in diluted white glue to smooth and refine the surface. The next step will be a coating of artists medium to provide a uniform surface for the various landscaping effects. Then I plan to use cast plaster rock faces to fill in the cliffs around the walls. Several boulders and rock faces will be added to the hillsides. The overall effect is an interpretation of the actual landscape. The basic design of the kit on a flat baseboard instead of a slope means that some compromises are necessary. I don't expect to get much sympathy for this but the current cold spell in Florida (the cats are demanding the heating switched on) means the white glue is taking ages to dry so I'm having to move a bit slower than expected. Thanks for all the likes and comments Alan


- 462 replies
-
- 14
-
-
-
Andrew You are right. They have been getting really affectionate in recent evenings but I've realised its been getting cold here - and I'm warm Alan
-
I'm sure it will be terrific when its finished but there is no deadline. Enjoy it when you can and we will be happy to go along. Life has an annoying habit of throwing in far too many distractions. MEanwhile its always good to get your comments and ideas Alan
-
Gosh Craig; This is really excellent. The chrome and paint job really gives it presence. Alan
-
Dan The dressed up landing gear looks very good. It makes the gear look much more than sticks alan
-
Thank you very much OC. I think the scenery needed to complete this is going to be a real master class. The good thing is I have plenty of supplies to experiment with. Its also starting to feel like its getting time to work out where I am going to pit it when completed. The cats vetoed me using the shelf that their bed sits on! And after I gave them smoked salmon for Christmas too! Alan
-
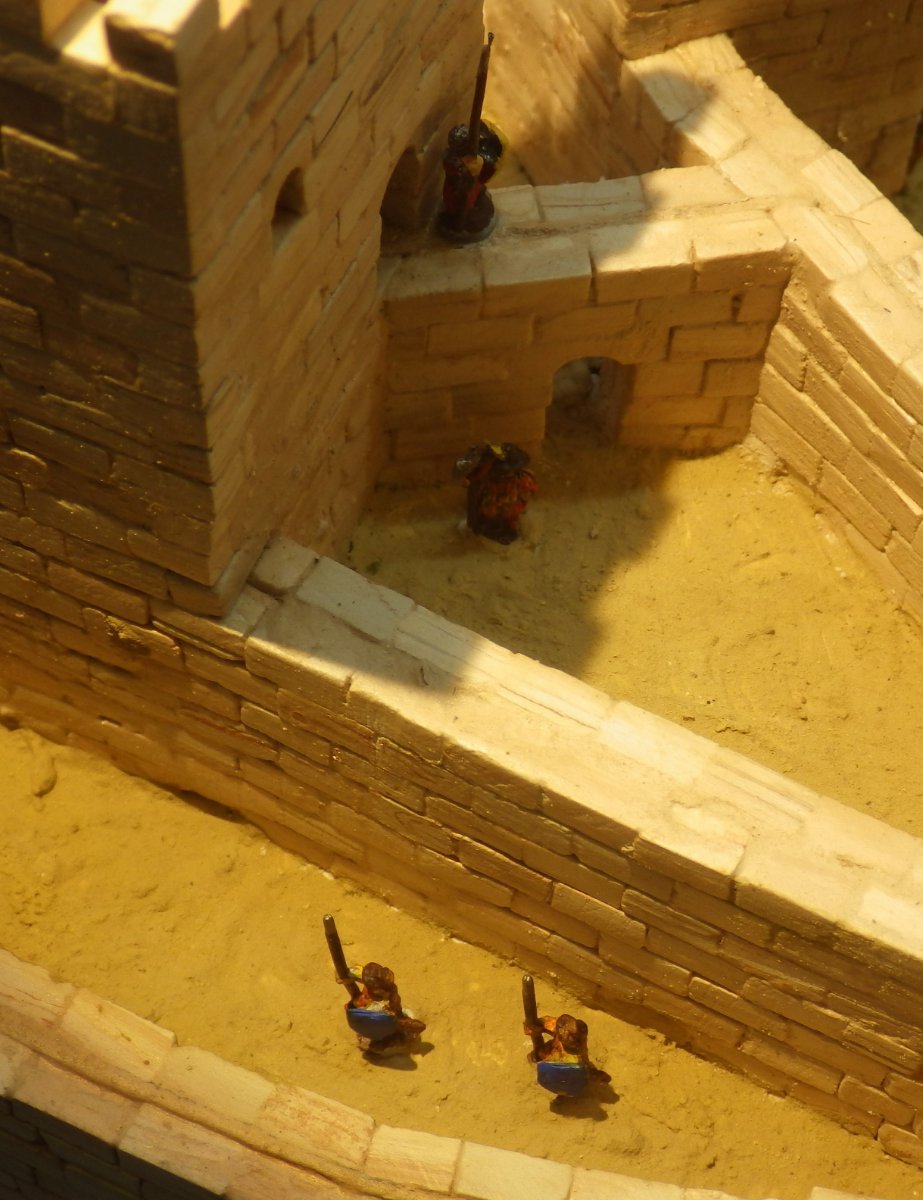
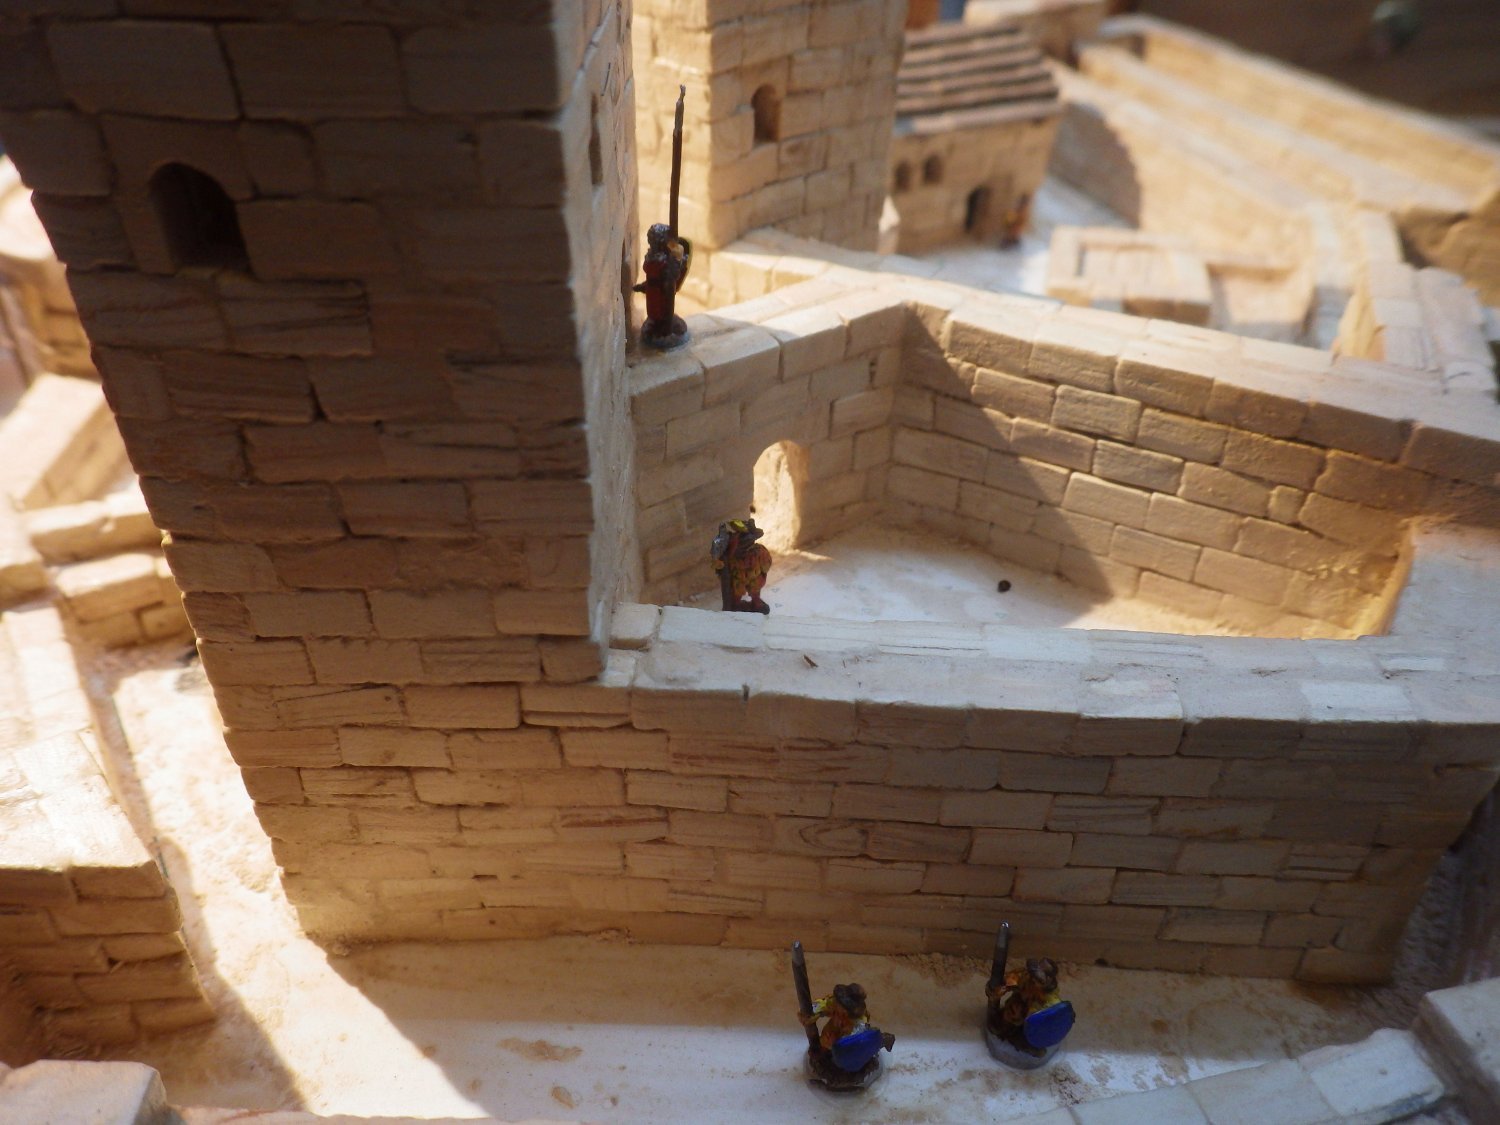
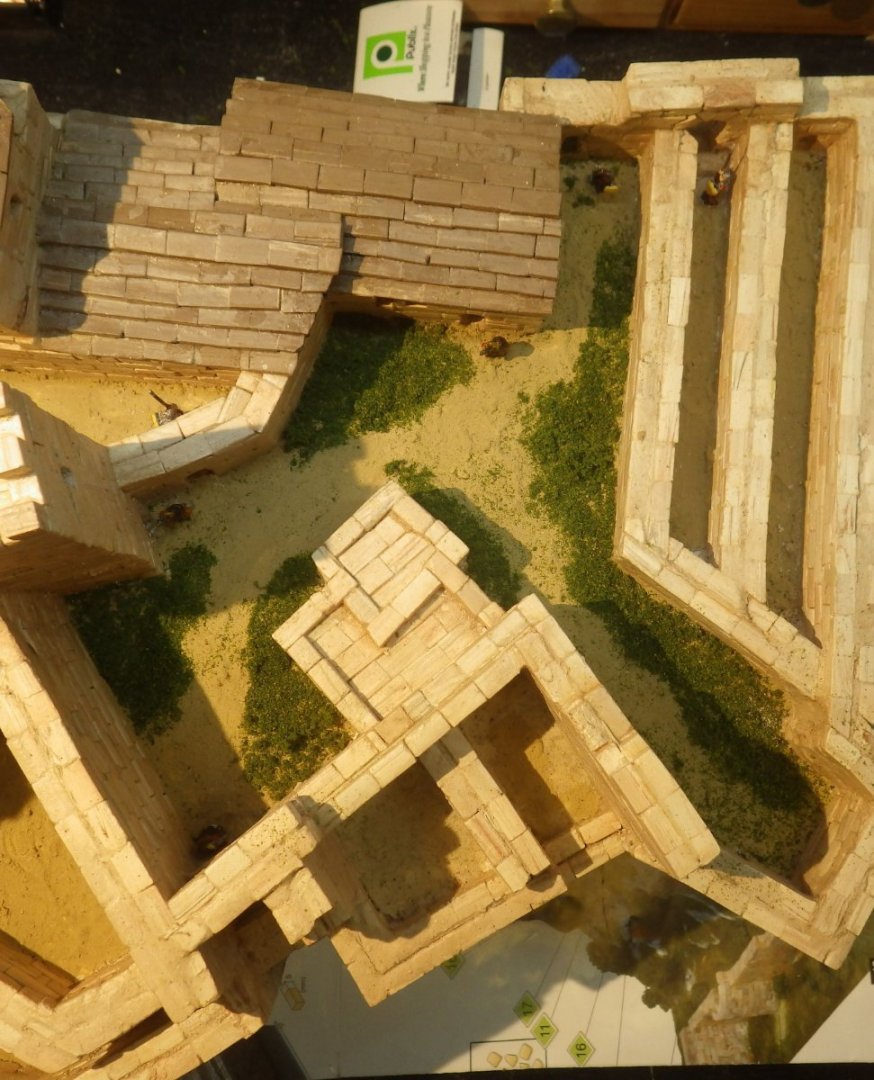
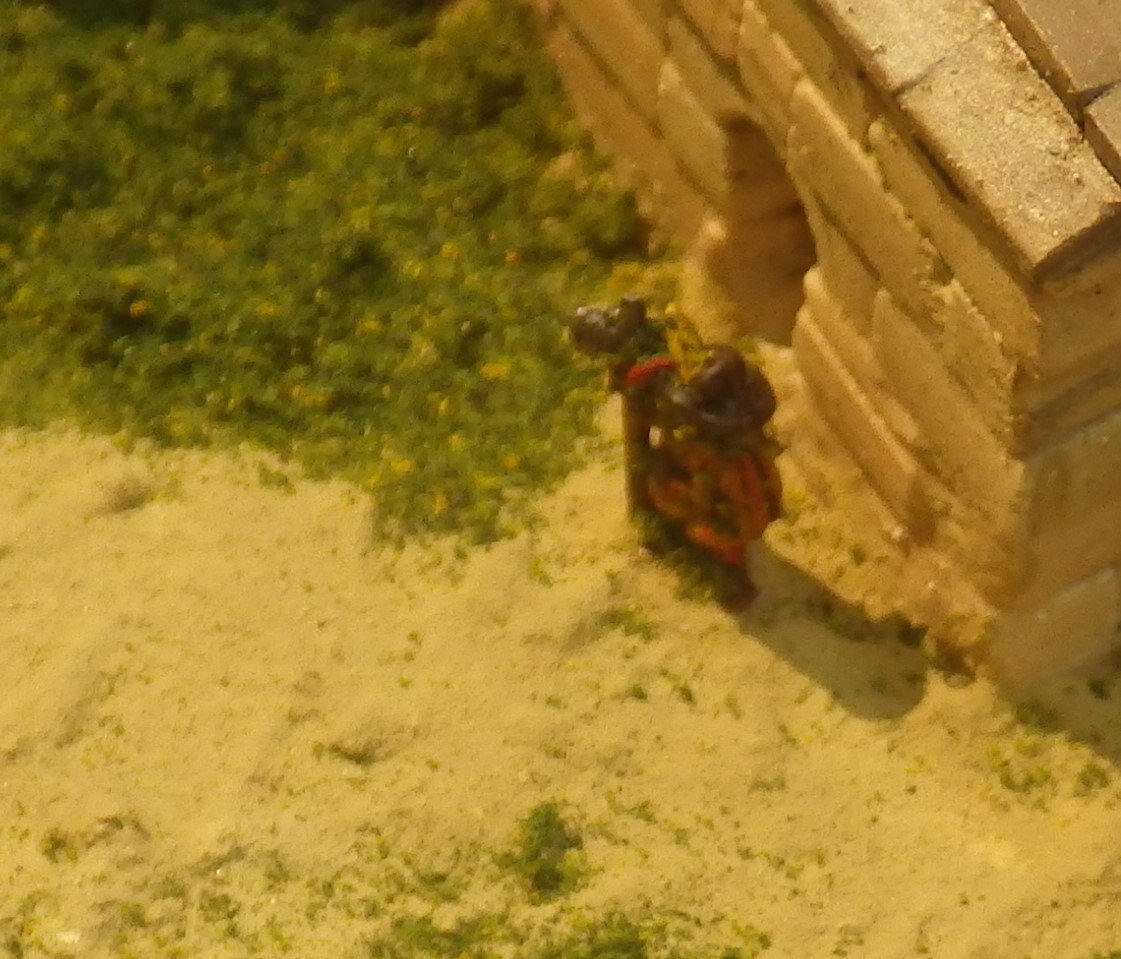
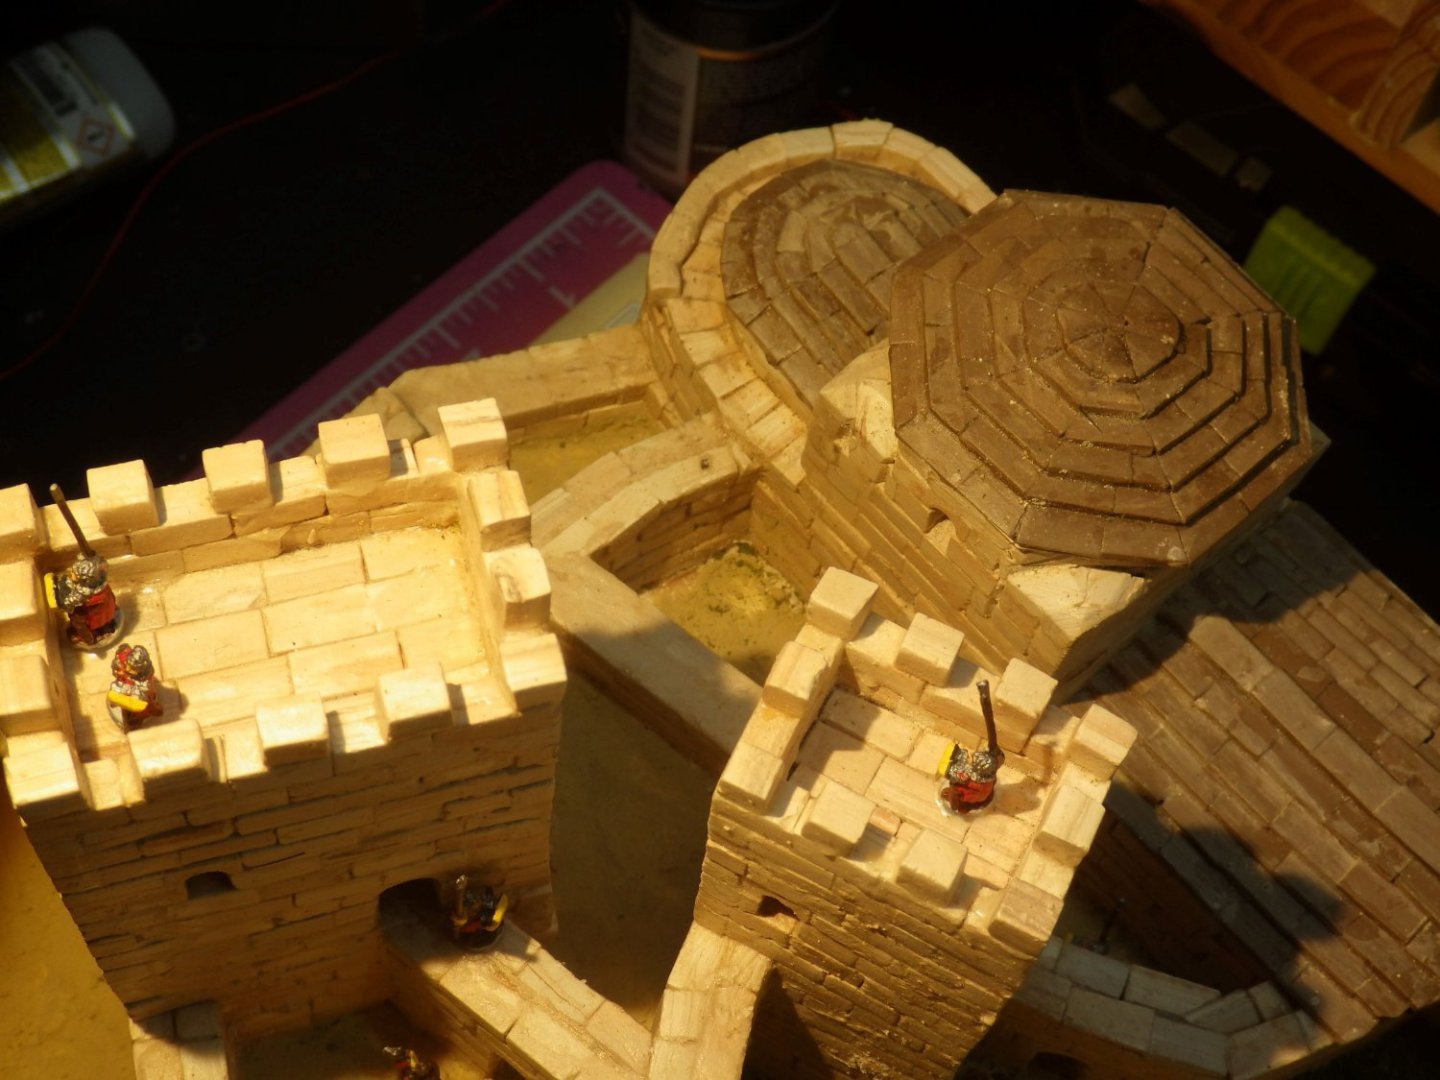
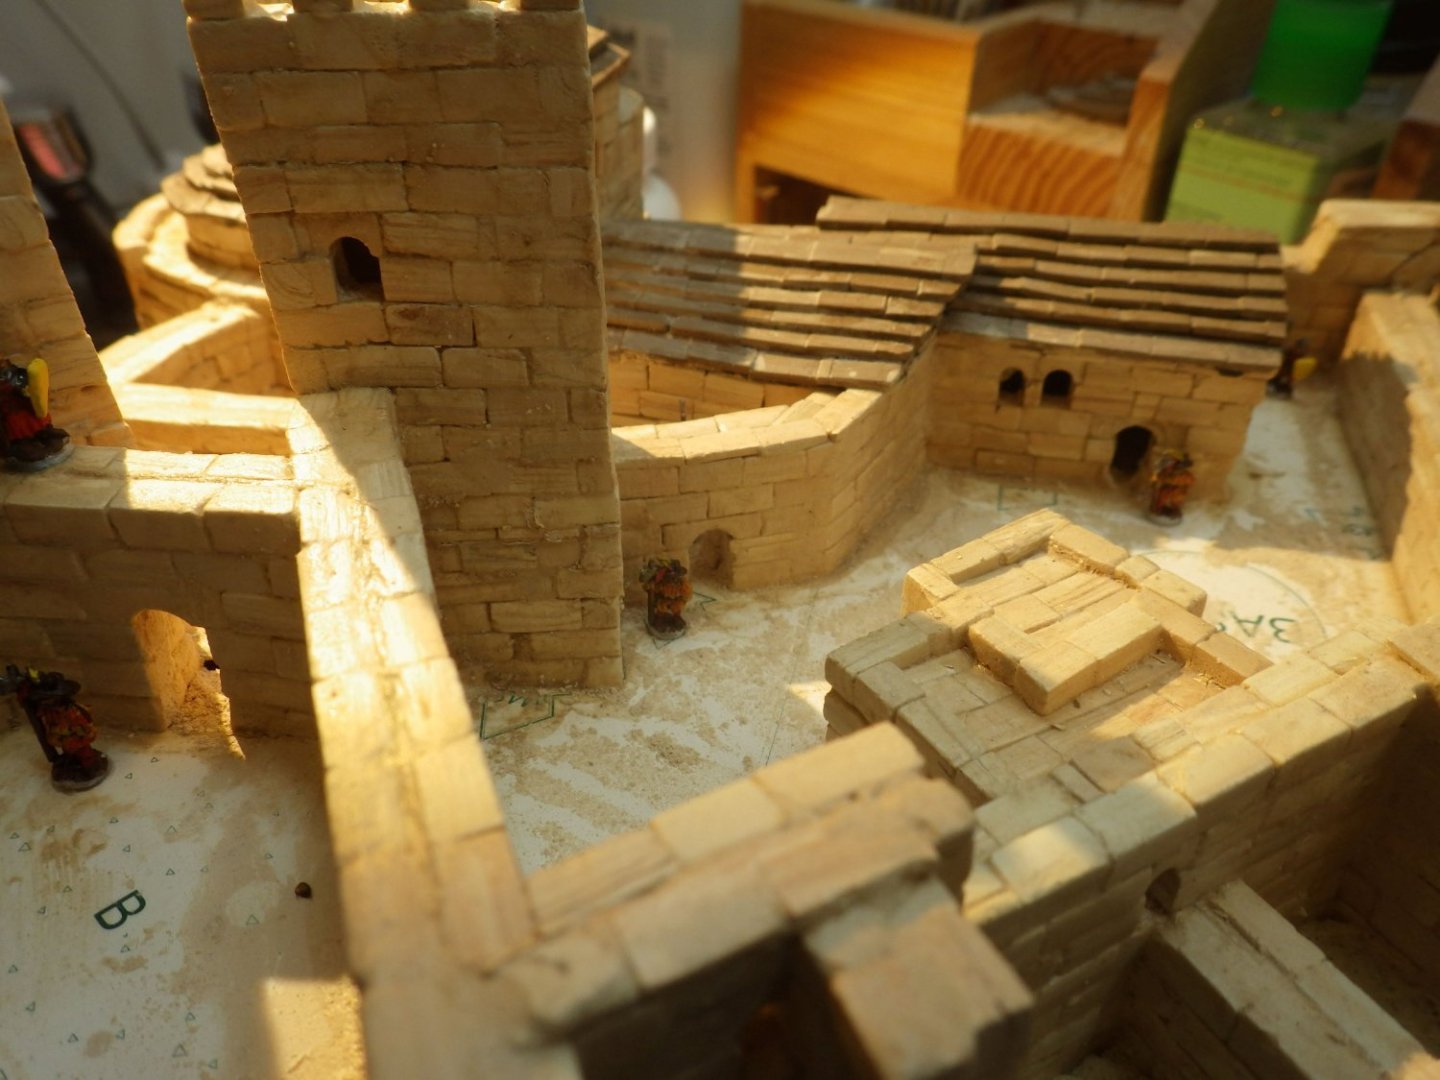
Today brought a little more progress. I used a mix of the Mig Ammo Terraform texture (beach sand) with craft acrylic paint (khaki). The Mig texture goes a lot further than I expected and it does break up the flat look that paint alone would give. The colour approximates to the ground in the real castle. I then added the Woodland Scenic green blend turf in the areas that it appears on the drone flights. I'm not sure if I have overdone it and may need to thin the green turf out a bit. I'm also considering adding a bit in some of the other courtyards. The drone flights only show it in the areas I have added it but to my mind it leaves the rest of the model looking a bit bare. I needn't have worried about the painting of the figures. They are sort of lost on the tower but they do give a bit of scale Once I adjust the grass to my liking the tower will be ready to glue to the supports on the main base and the build up of the landscape can start. Thanks for looking in and all the likes Alan


- 462 replies
-
- 14
-
-
Thank you OC, It's nice to be messing around with the castle again - especially as it isn't stacking little blocks up. Woodland Scenic makes an amazing range of goodies.. Alan
-
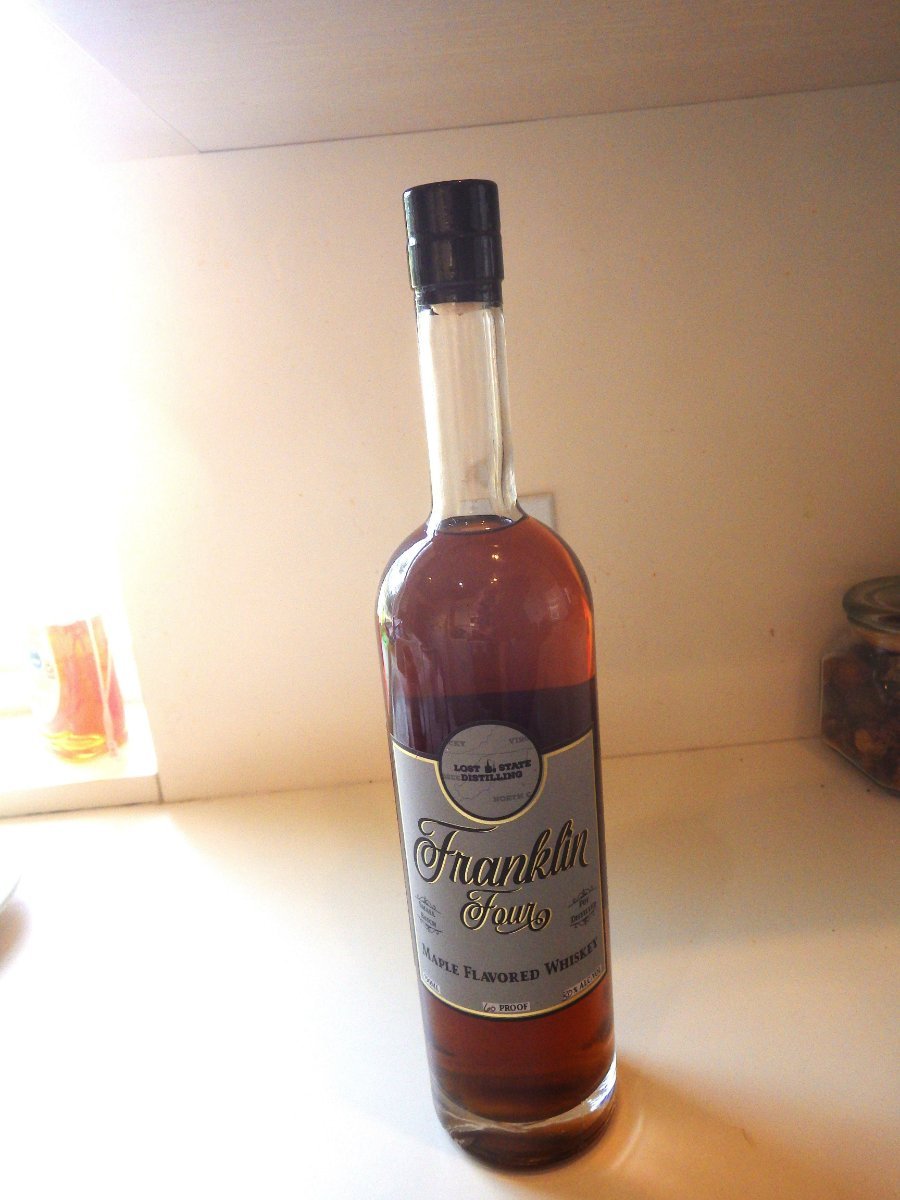
I'm back albeit in a rather lethargic sort of way. The covid hung around much longer than I expected and although the symptoms were more annoying than life threatening I still seem to get really tired easily and find it difficult to work up any motivation. However coffee is starting to taste better so there is much to be grateful for. I spent most of yesterday staring at the model trying to remember what I was doing before I went to Europe While I was away a parcel of Woodland Scenic goodies came from the nice people at Mega Hobbies and should get me started on the landscapes. I think the end result will be a blend of the techniques suggested by @Egilman, @Canute , @Jack12477 and others. Many thanks for the help I reviewed the painted miniatures and touch up a few and I think they are as good as I can get them. I tried the Agrax Earth wash (thanks @Old Collingwood) and I like how its shaded and added to the shadows. Its toned down the yellow tunics a bit too. I played around with the hot wire cutter. It does a good job as long as you don't expect accuracy but its great for removing material and shaping hills. I have a lot extruded polystyrene so I think this will be used to block out the basic shapes. Hydrocal and plaster bandages will be used to achieve the final shapes. I had a bit of an experiment with one side of the tower and I think it will work. I'm endlessly rerunning the drone footage of the surrounding landscape. The Aedes Ars guide has now made it to the bin. The main towers are only sat in place while I was fiddling with the foam. I need to finish the ground and add the figures before hooking up the lighting and gluing it in place. A few of the figures have made it to the towers. Better photos tomorrow I hope My Spanish friend who kindly sent me the Loarre Castle kit a few years back was thoughtful enough to send something restorative for Christmas this year. A bottle of Franklin Four Maple Bourbon. It looks like a great covid antidote. Its great to be back. I hope everyone had a great Christmas and a belated Happy New Year to all. Alan


- 462 replies
-
- 12
-
-
Very nice work on the name board Alan
-
The paint has a lovely deep shine. It’s a shame about the metal foil Alan
-
Have great Christmas Ken. Alan
-
A safe and happy Christmas Dan. I’m looking forward to the continuation in 2024. They have a F104 with the Zero Length Launch rocket attached at the Berlin Gatow museum. I think it would help to have no imagination to fly one alan