king derelict
-
Posts
3,294 -
Joined
-
Last visited
Content Type
Profiles
Forums
Gallery
Events
Everything posted by king derelict
-
My family were all farmers in North Wales; mostly dairy with a few sheep and pigs. I have happy memories of getting tangled up in the barbed wire fences or crawling under them and finding the nettles Alan
-
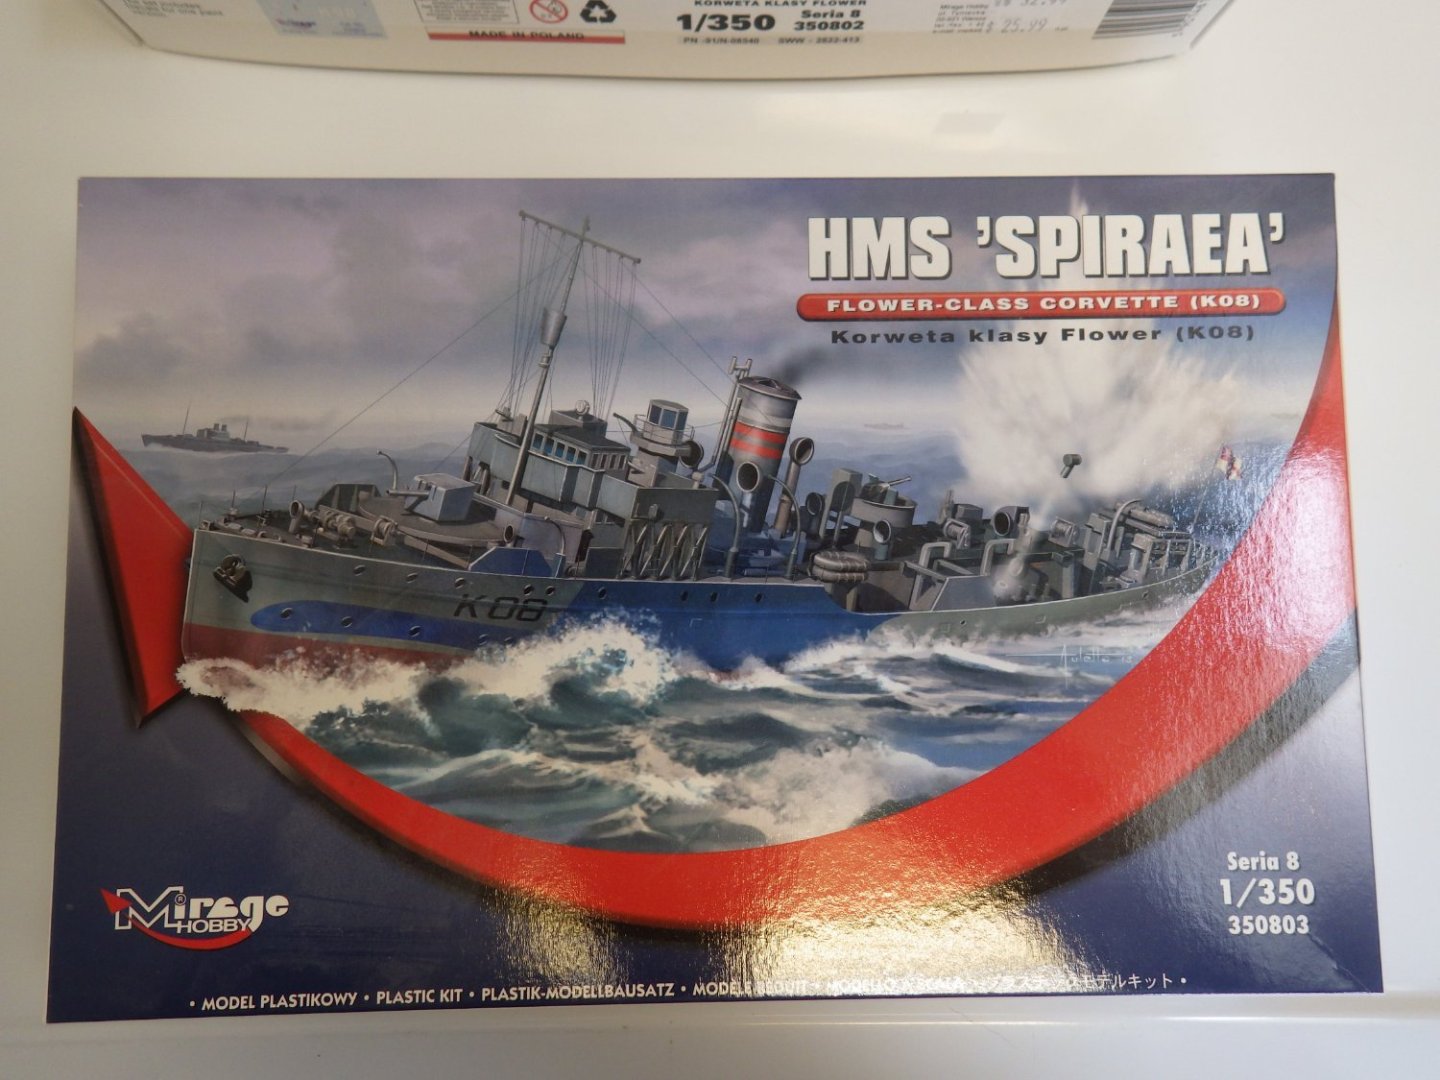
Mike You are right. The tiny parts just represent smaller items as the scale increases. The challenge remains This is just a deviation from my usual 1/700 because I couldn't resist a few more Flower corvettes. Alan
-
The fencing and gate looks great. Alan
-
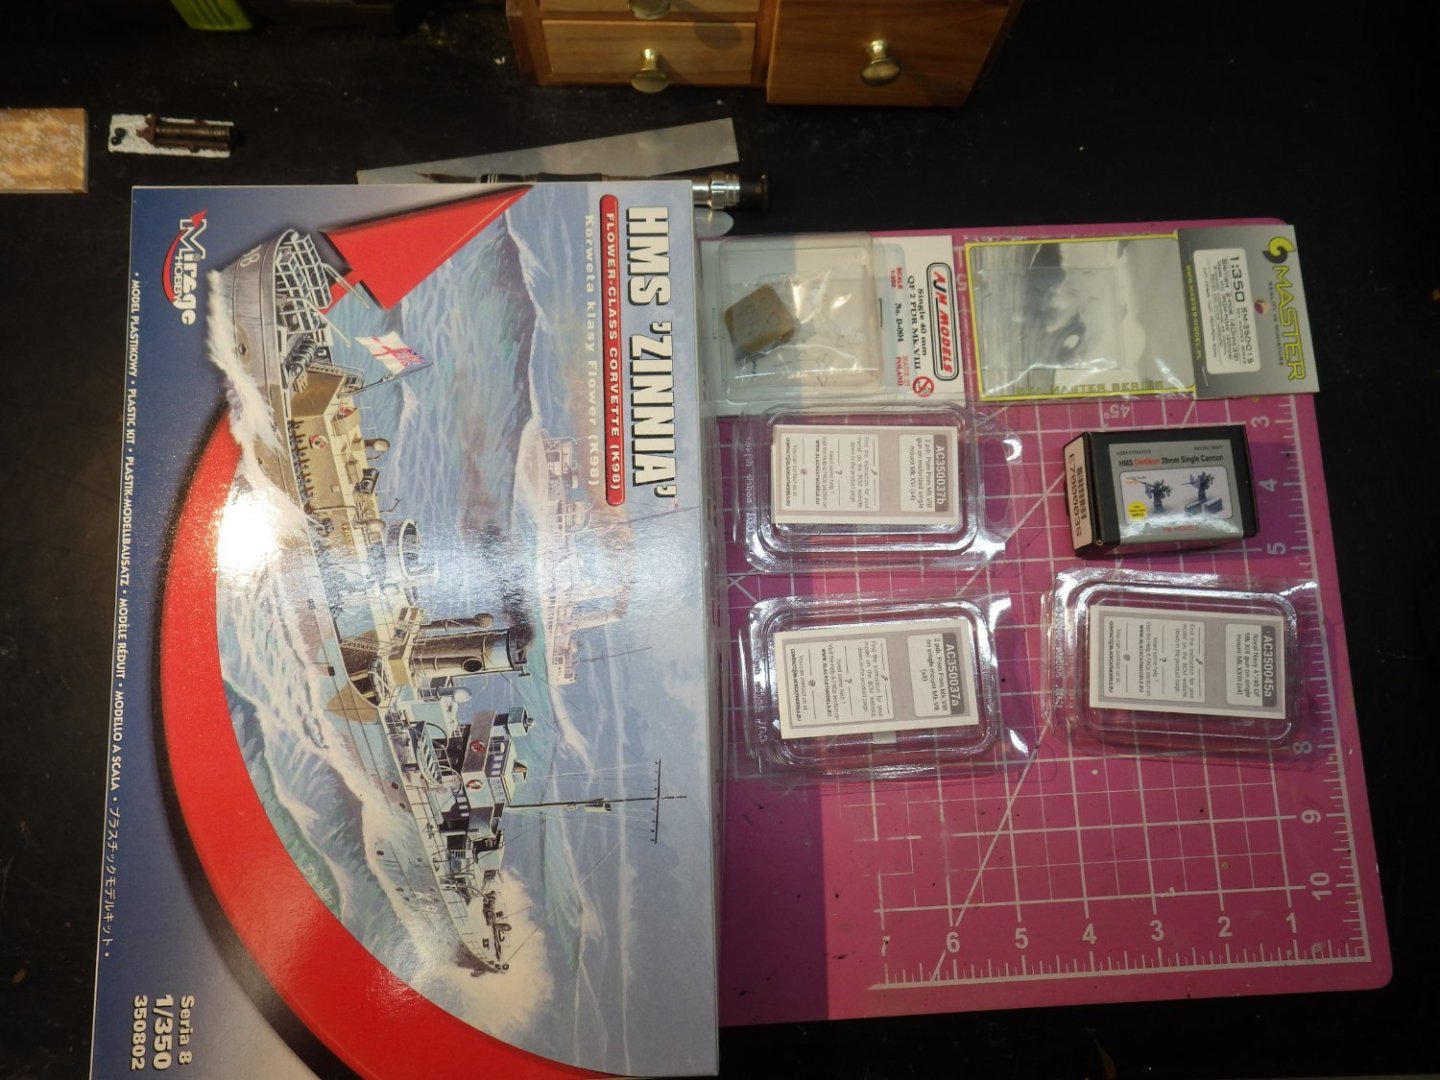
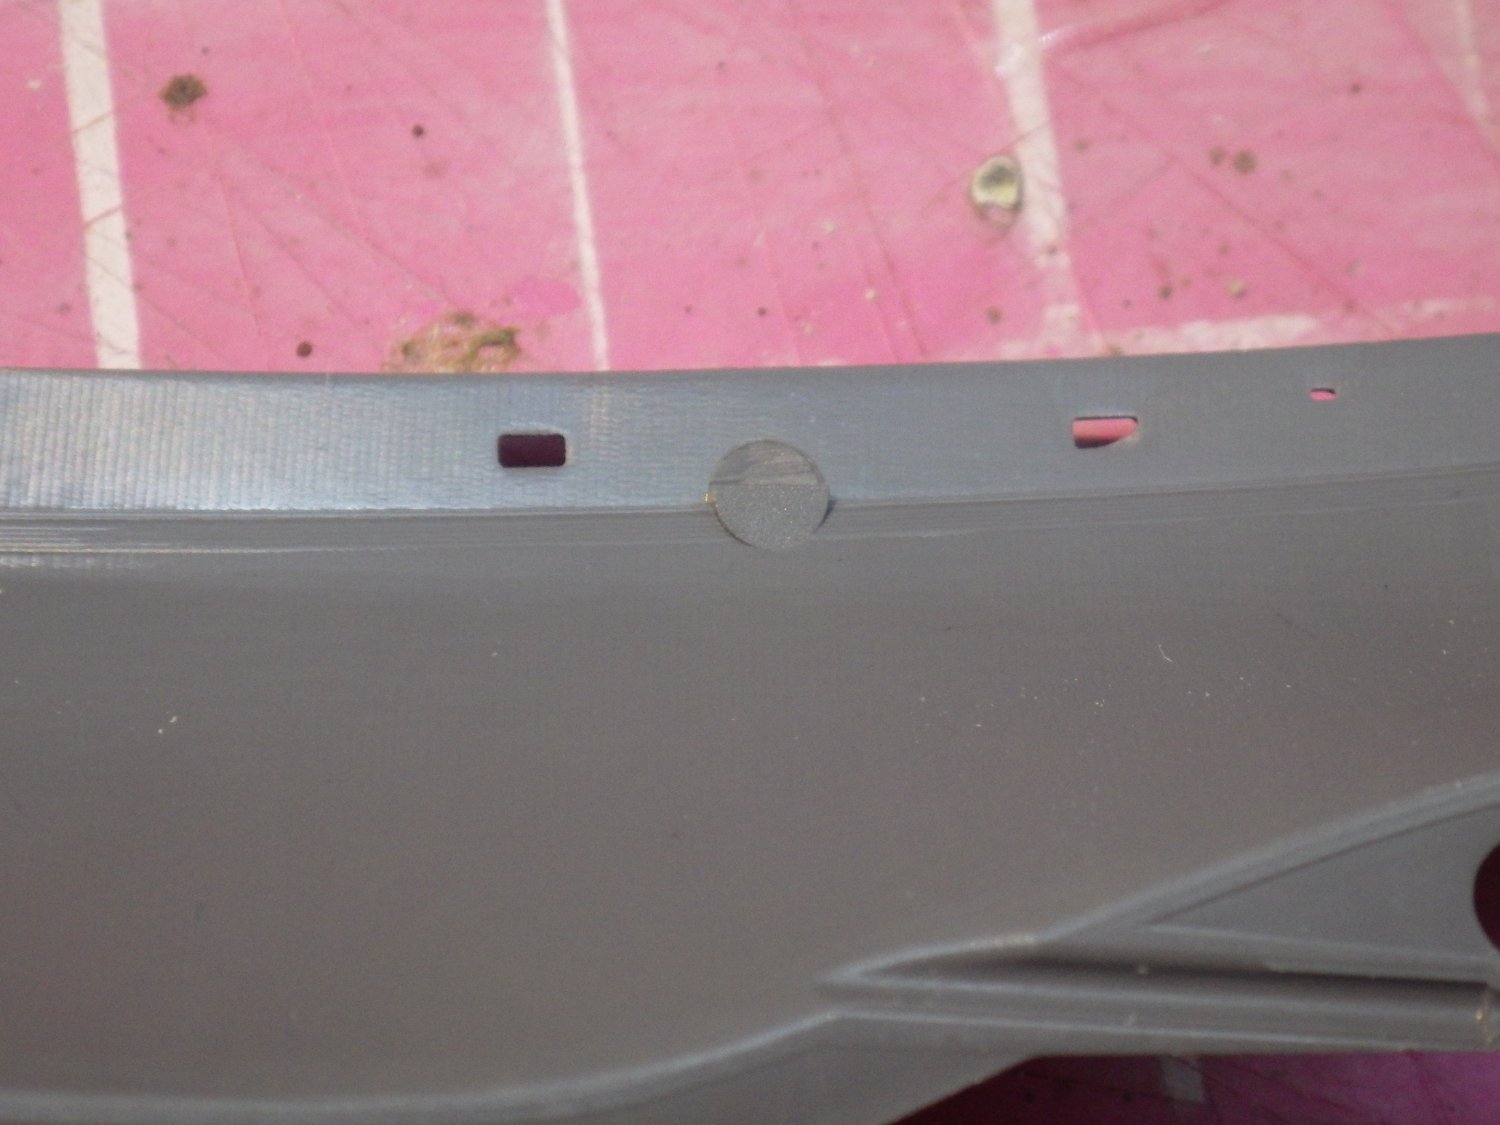
Thank you OC. And now i realise that moving to 1/350 doesn't really make it easier. Its a bigger scale but now you can detail tinier elements. The braces for the venturis are absolutely tiny and there are ready use ammo holders for the 4 inch gun that are ridiculously small. I'm undecided whether to even try them If they escape the tweezers they will be lost forever. Alan.
-
Russian modern armoured vehicles by Baker - ACE - 1/72
king derelict replied to Baker's topic in Non-ship/categorised builds
Very nice work Patrick. The decaled camouflage looks great. Alan -
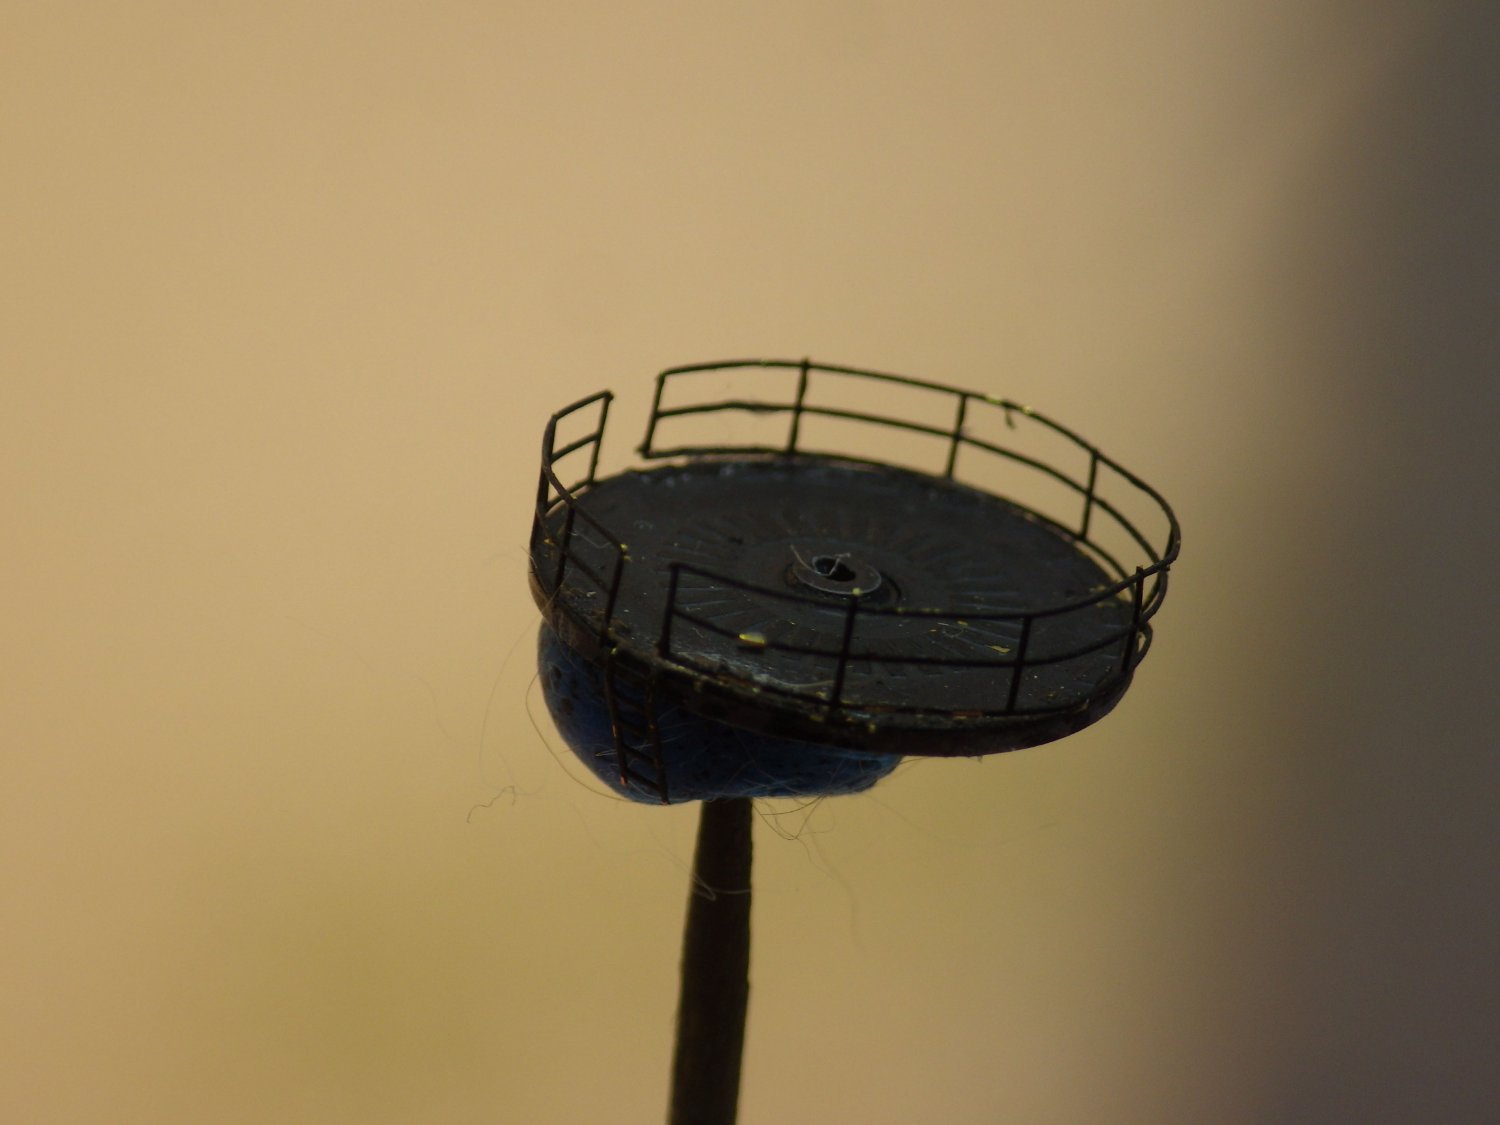
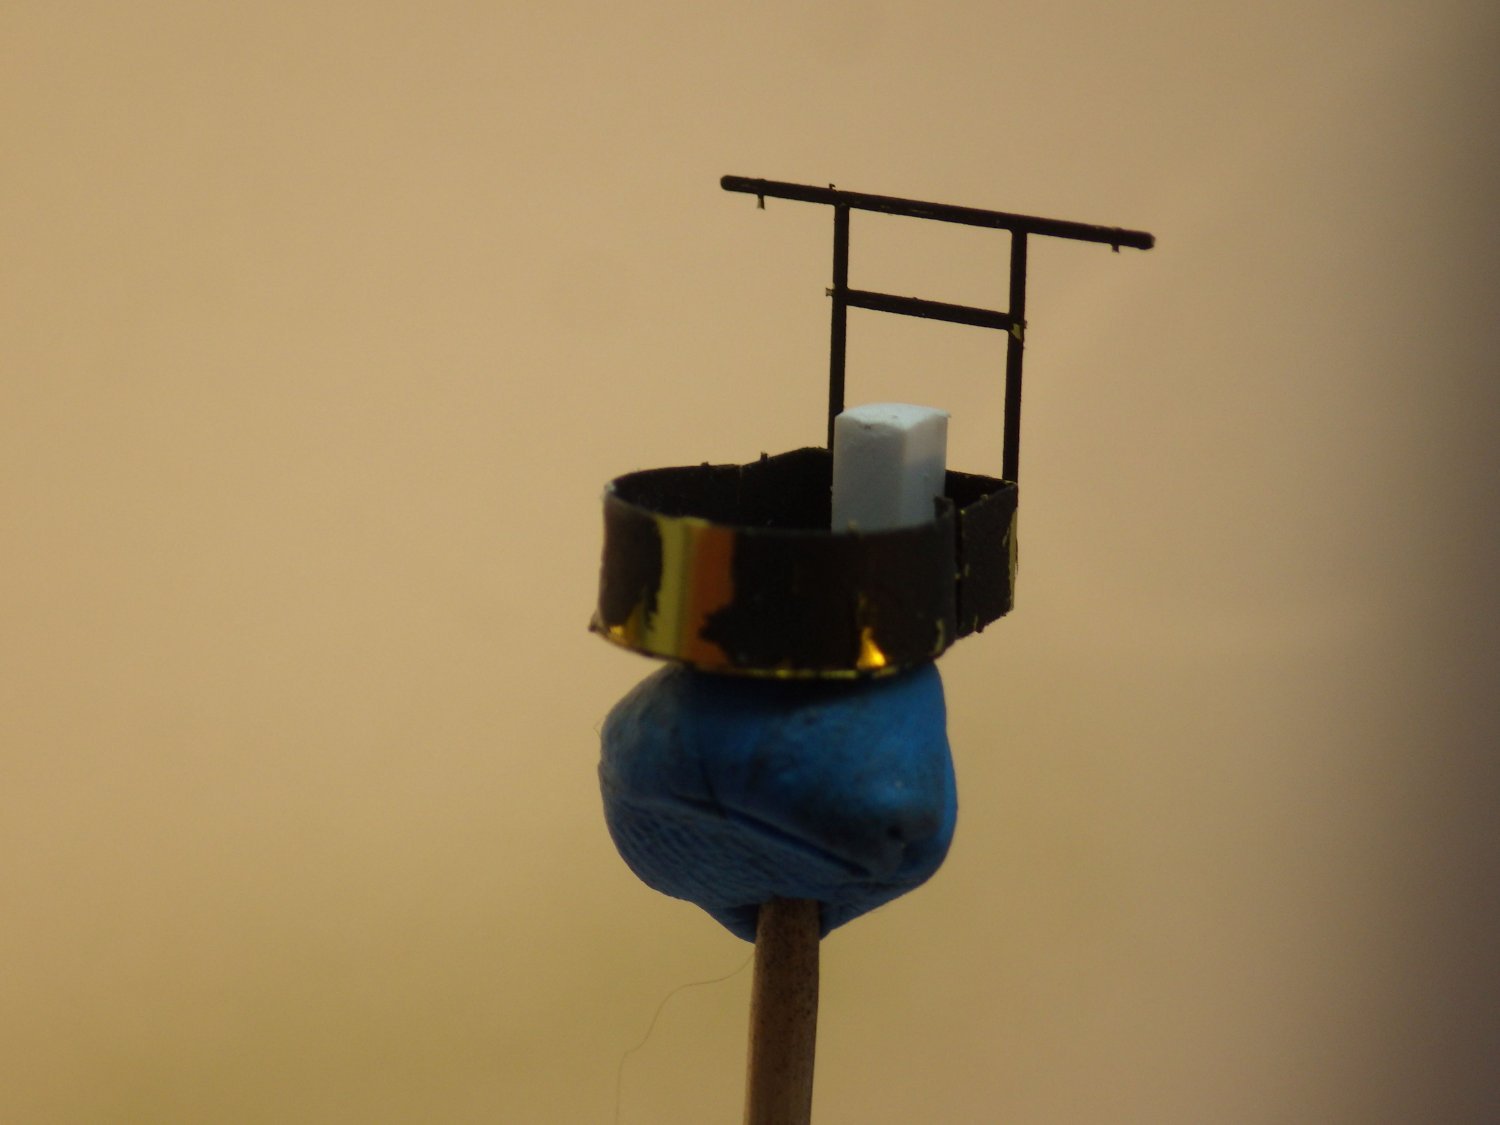
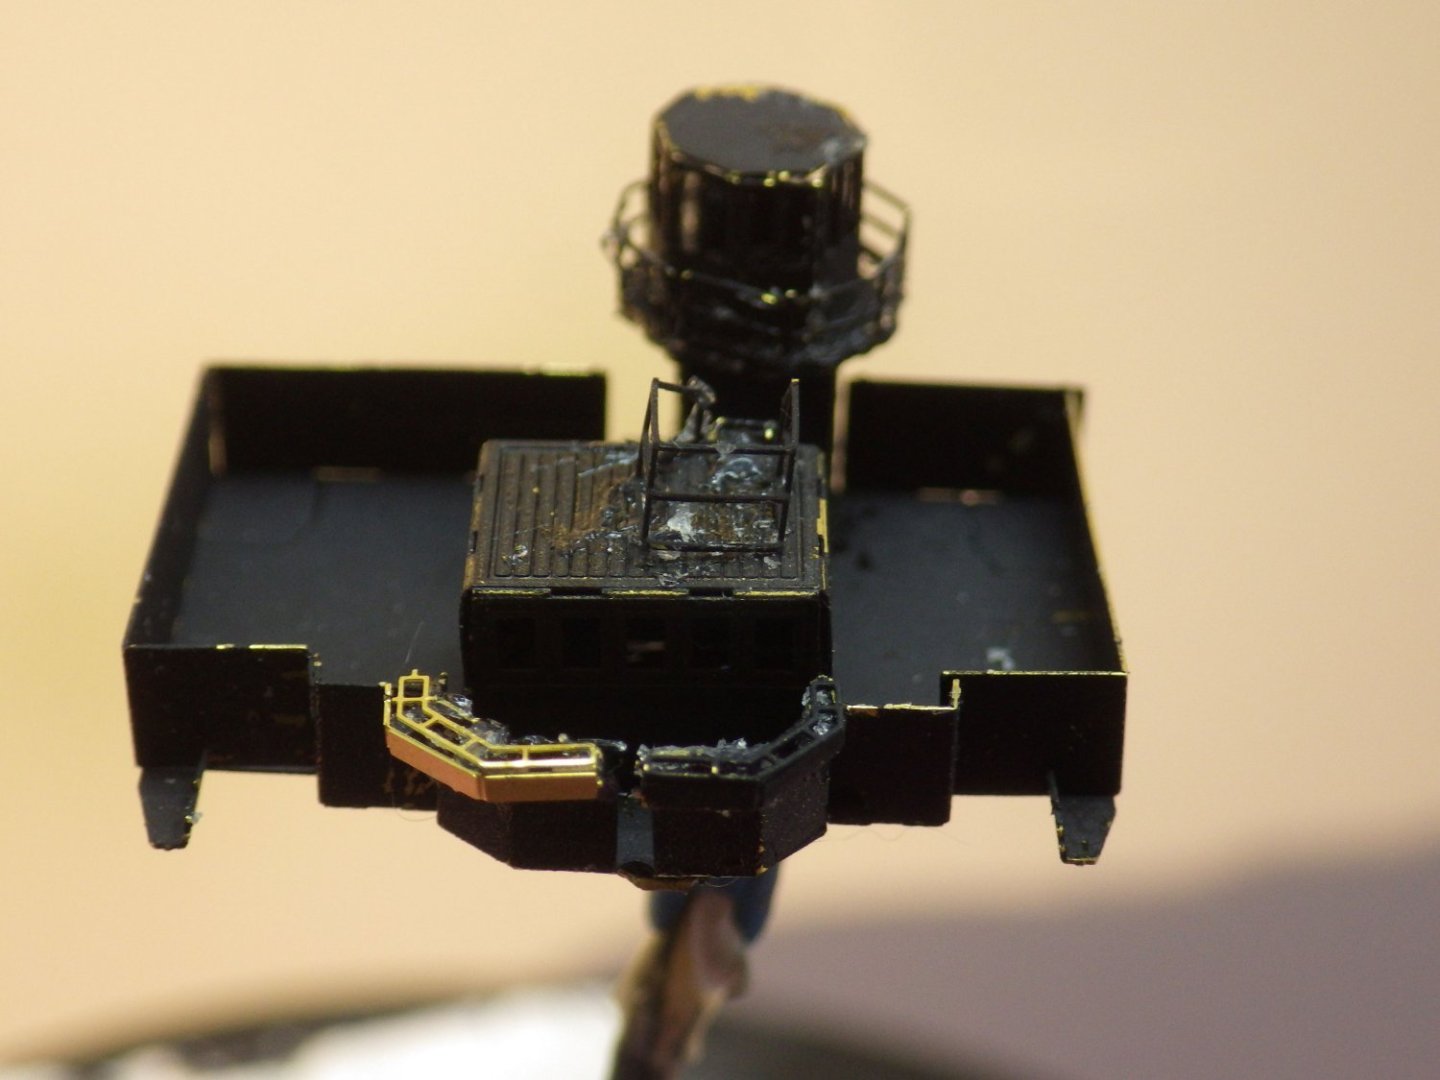
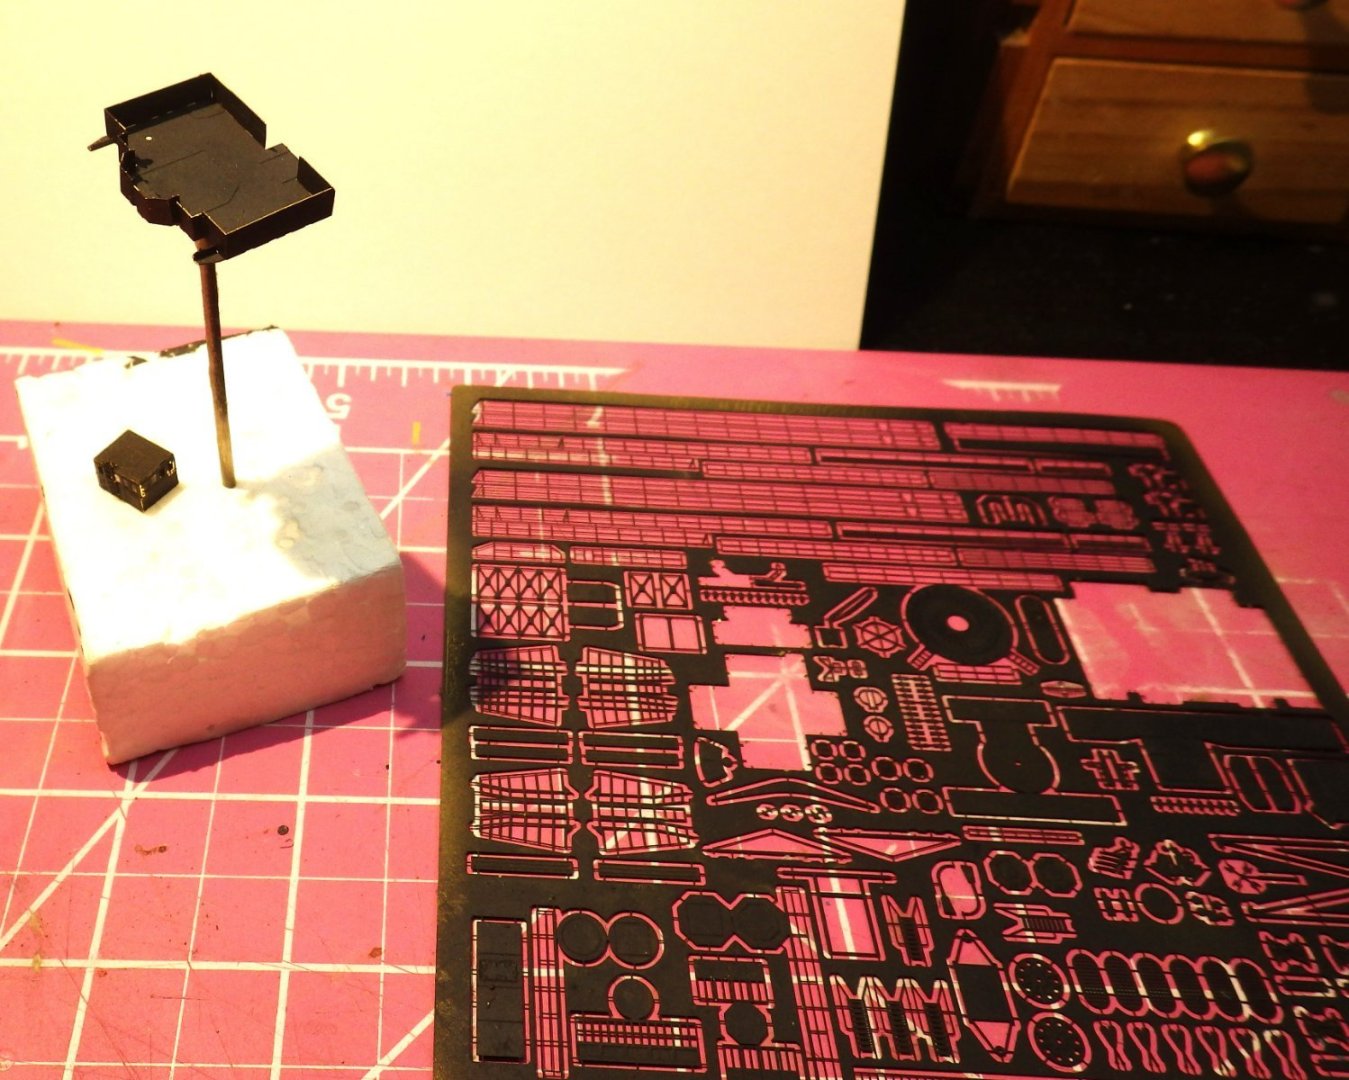
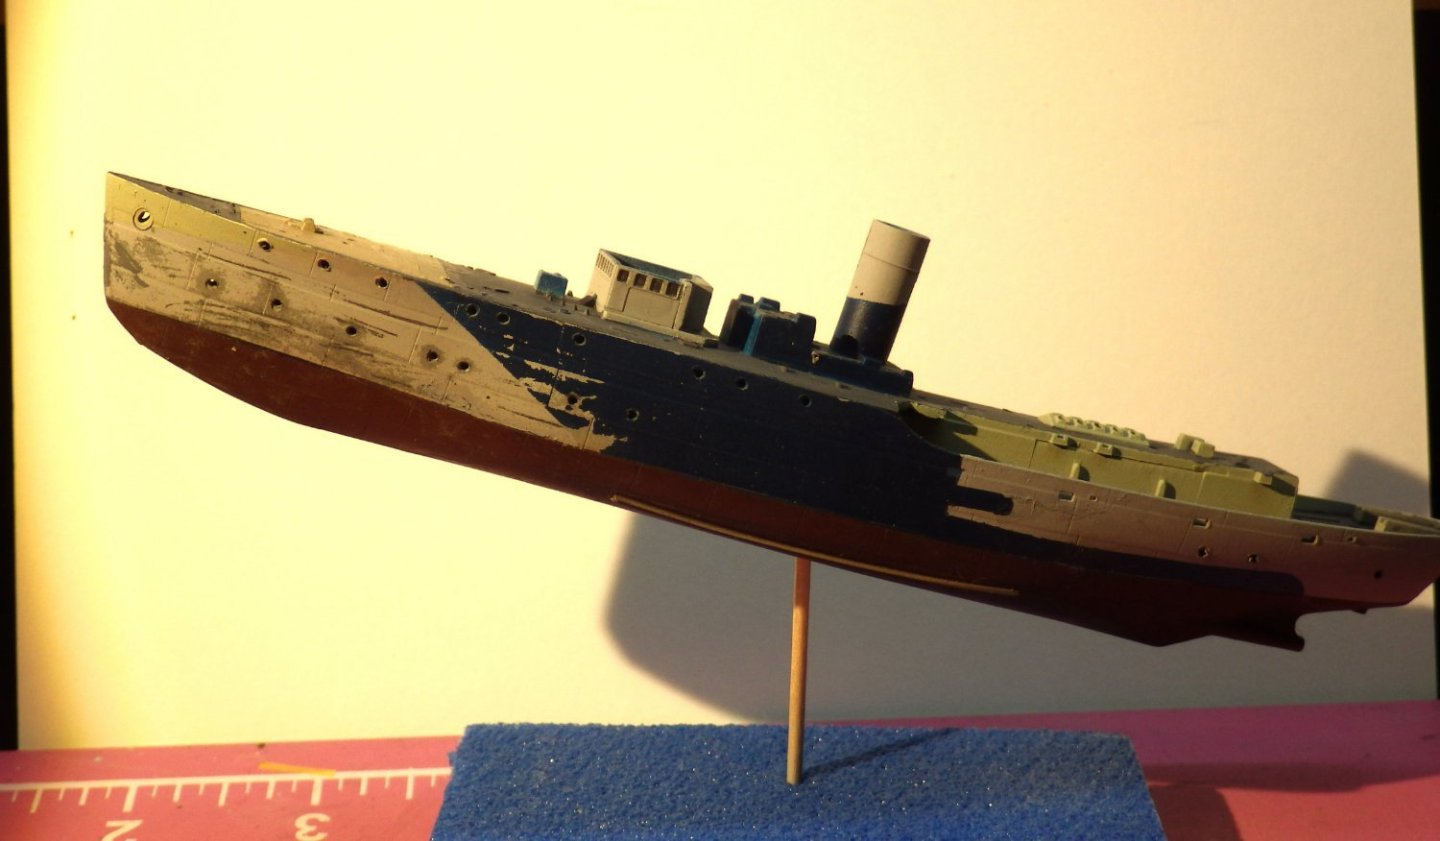
Another day of absenteeism from work and some slow progress building up the major PE structures. The White Ensign set is not one of their best, some of the PE items don't even look like those shown in the instructions but I am slowly muddling through. I never did find the missing venturi so I used one from my second PE set. I don't think Zinnia will need the parts. I have realised that putting the black primer on before making up the parts was a silly idea. The black makes it hard to see the tabs that hold the part in the fret and it obscures the fold lines. It also makes it harder to assemble accurately being all black on black. So the bridge with the early radar lantern and the enclosed compass platform is complete. The replacement venturi is the brass one The 4 inch gun bandstand The 2 pdr gun tub As a bit of light relief I started adding weathering to the hull. I dirtied up the wooden decks and started adding rust at the port holes and scuttles along the hull. More or less complete on one side. I am back on the test site for a twelve hour shift tomorrow and Friday so I don't expect any progress untill teh weekend Thanks for looking in and the likes. Alan


-
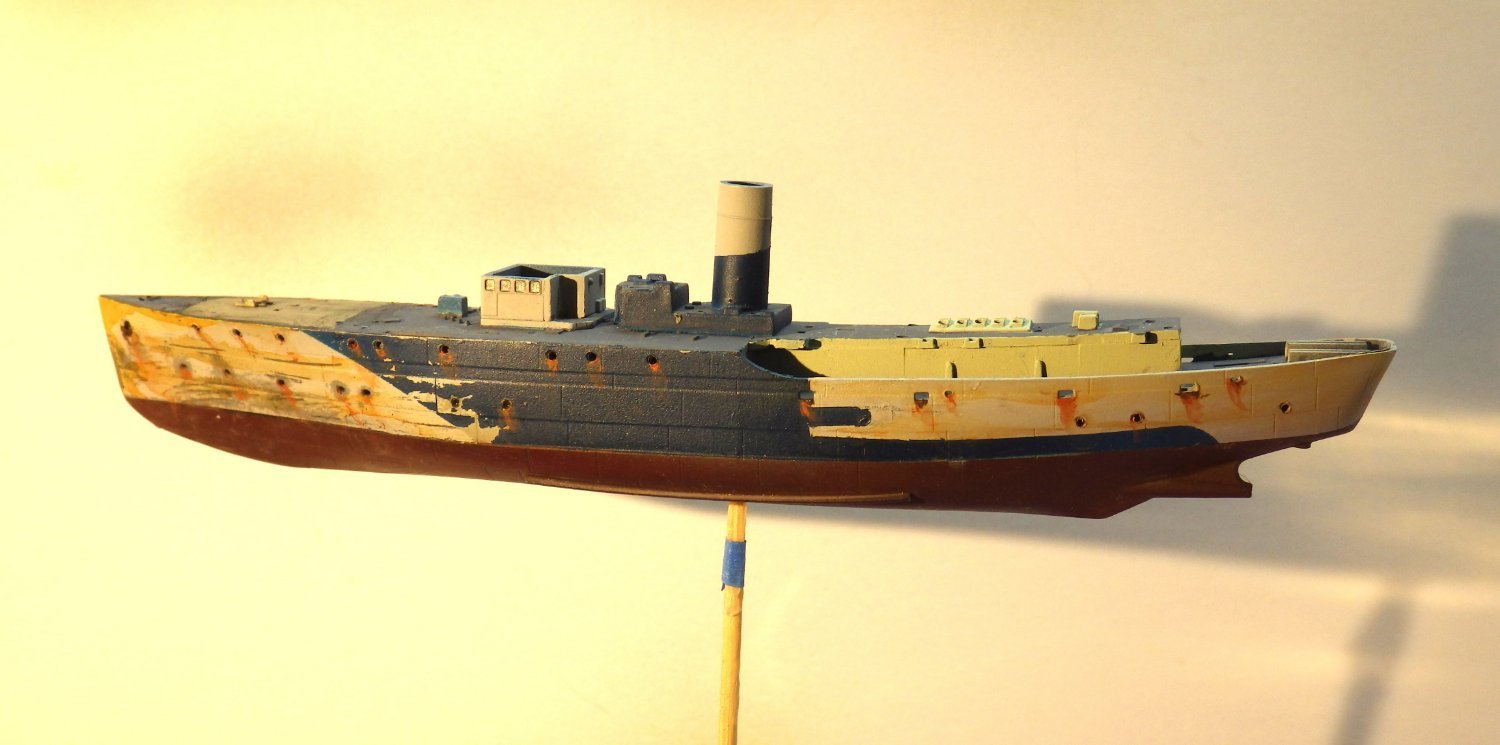
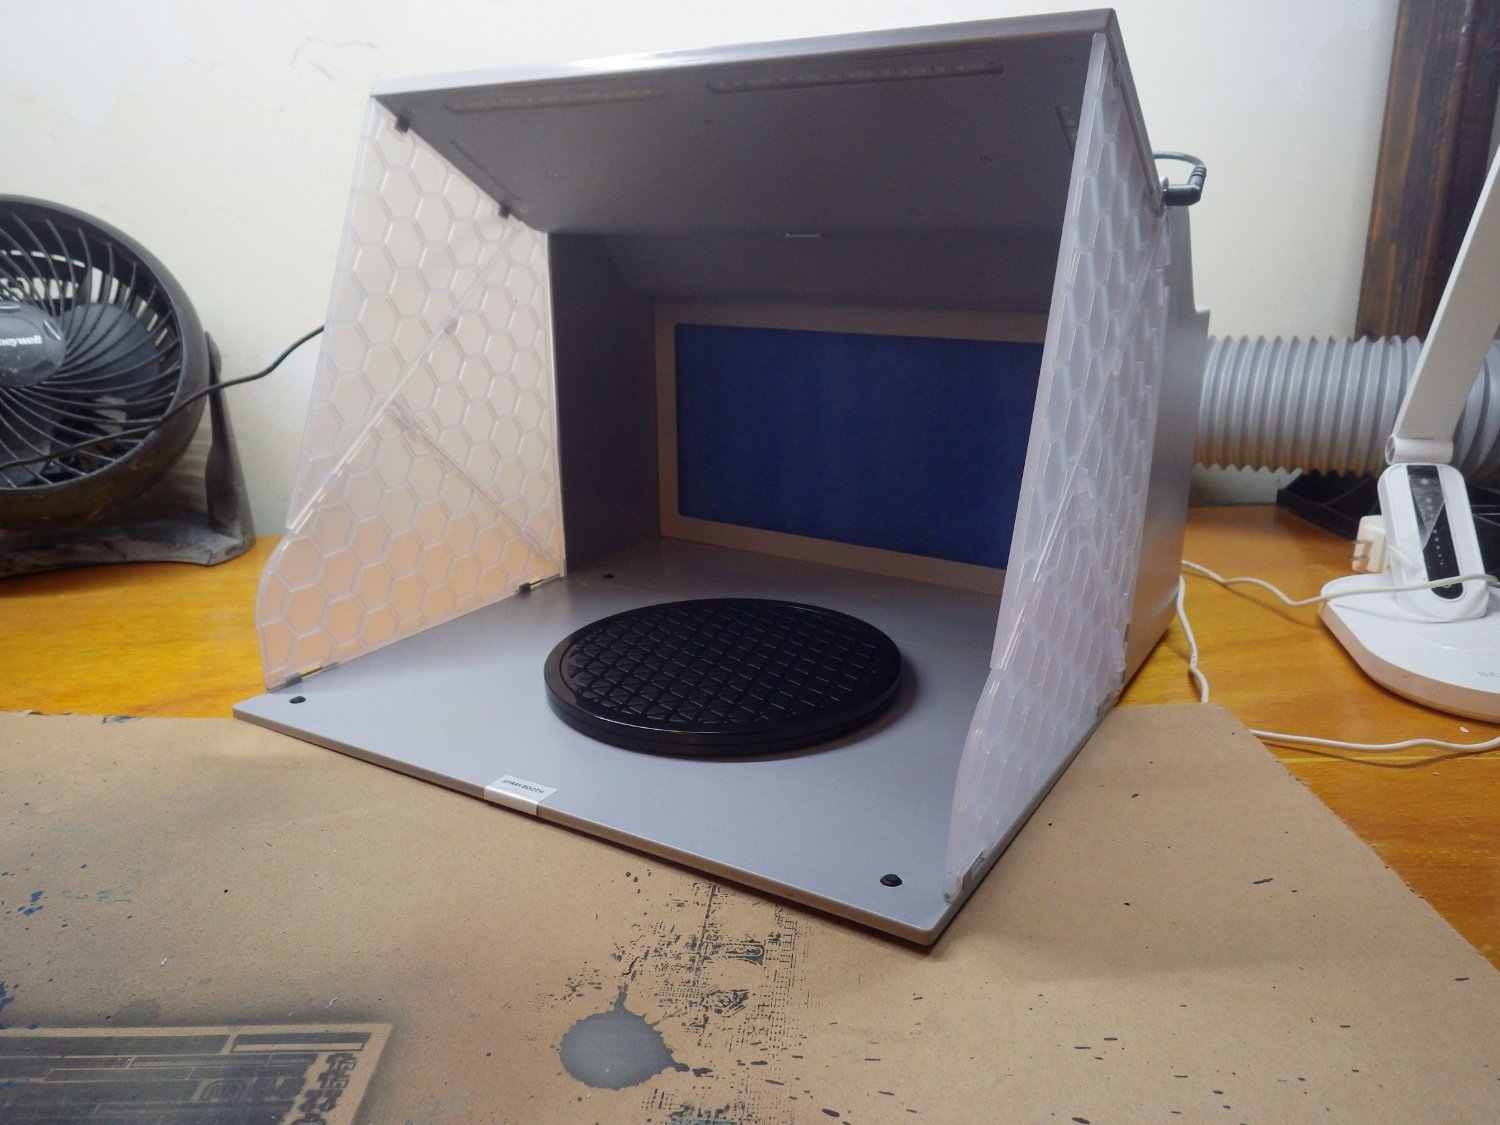
I was excused from the test site today and therefore made a little progress. I started on the PE structures. The White Ensign PE fret looks very good and so far is folding well but for this set the instructions are very vague. I made up the bridge and sonar cabin very happy to be back folding brass, then I dropped the front structure of the bridge and had to virtually disassemble the work bench to find it. Unfortunately in the process of searching for the missing piece I managed to sweep away one of the venturi pieces and after two hours searching I still cannot find it. I have a second set of PE for the other Flowers so I could raid that sheet. I think early Flowers may not have had the venturis. I'm not even sure that Spirea had them. I don't see them in the colour plate of Spirea in the book and they don't show on the box art (highly authorative source!). Actually I haven't found them on many Flower photos online but they do look like a challenge to fit. I may see how I get on with the other side first. The instructions are horrible for this particular area. It looks like there are braces to hold the venturi panels in front of the bridge with the open slots folded back onto the upper edge of the bridge front. The remaining venturi piece can be seen just below the railing As light relief after the PE debacle I decided to see if the chipping fluid would work after multiple layers of paint on top of it and an extended drying period. Actually it worked quite well. Photos of home bound Flowers show them to be very beaten up with huge areas of paint missing. With a stiff toothbrush and a cocktail stick I worked the forward half of the hull over and ended up with some serious scruffiness. I'll be adding rust streaks next. It may be a little excessive but I have seen photos that show much worse. I finally got fed up with my homemade box for spraying and got this. I generally use acrylics but would prefer not to breathe even fumes from them and I would like to try lacquer paints after seeing the results on this forum. The lighting is considerably better with 4 led arrays and the vent fan will make things a bit more comfortable. Thank you for looking in and for the likes Alan


-
Thats an interesting way to apply static grass Andy. I've wanted to give it a try but didn't want to end up with more kit that is infrequently used. This looks a good way round it. The base is looking very nice with the addition of teh grass Alan
-
Thats a great looking kit OC; excellent job so far. I agree with Craig you can definitely achieve great things with the brush. during my online browsing to get educated about thinners I came across several guys doing similar projects by brush and with appropriate brush choice and thinning of the paint got great results. Alan
-
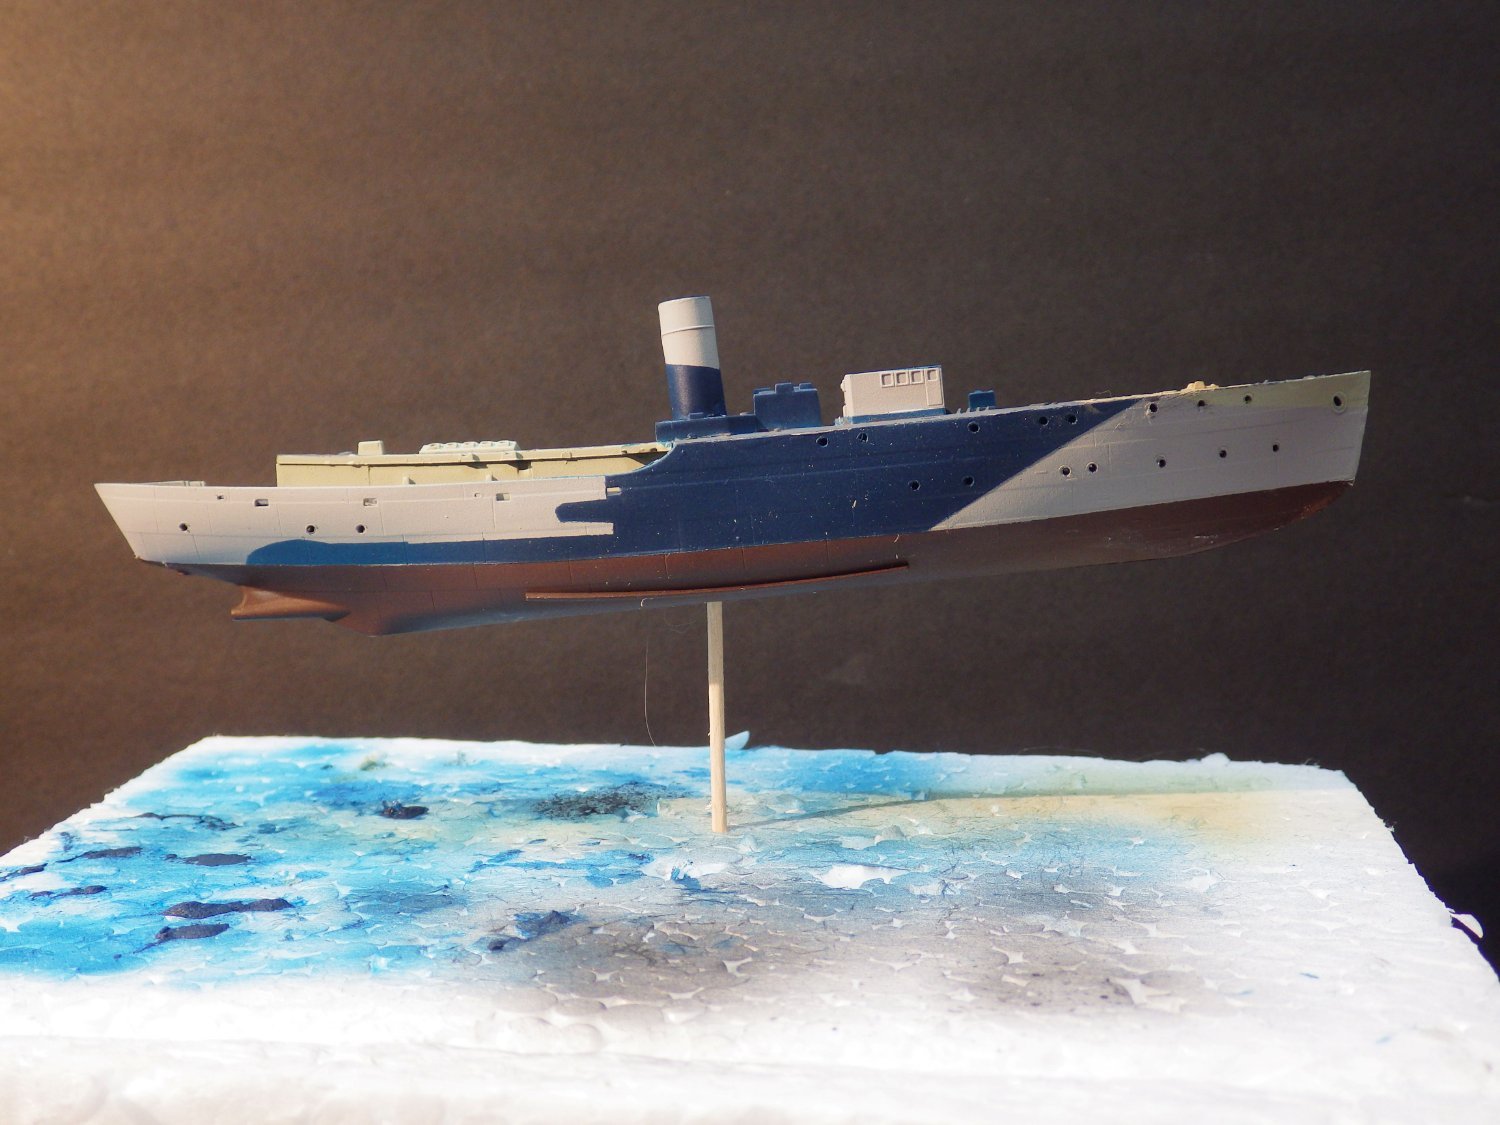
Thank you very much OC. I'm feeling better about it now that it has sat for a bit. I was just so frustrated about the mess I made with my airbrush. I had a quick look this morning and I plan to touch p a few bits and press on. i meant to point out that the blue haze on the light grey at the stern of the first picture (masks removed) is just an artifact of the photos. It was the first thing I checked this morning and its not overspray. Whew Alan
-
Hi Yves I do have a great affection for the Flowers. My uncle was in the RN during the war and served on escorts, mostly East Coast convoys but later up to Iceland. The Cruel Sea is an unforgettable book for me and captures the boredom, misery and dangers of convoy duties in a masterly manner. I hope there will be a few more Flowers from me over time. Alan
-
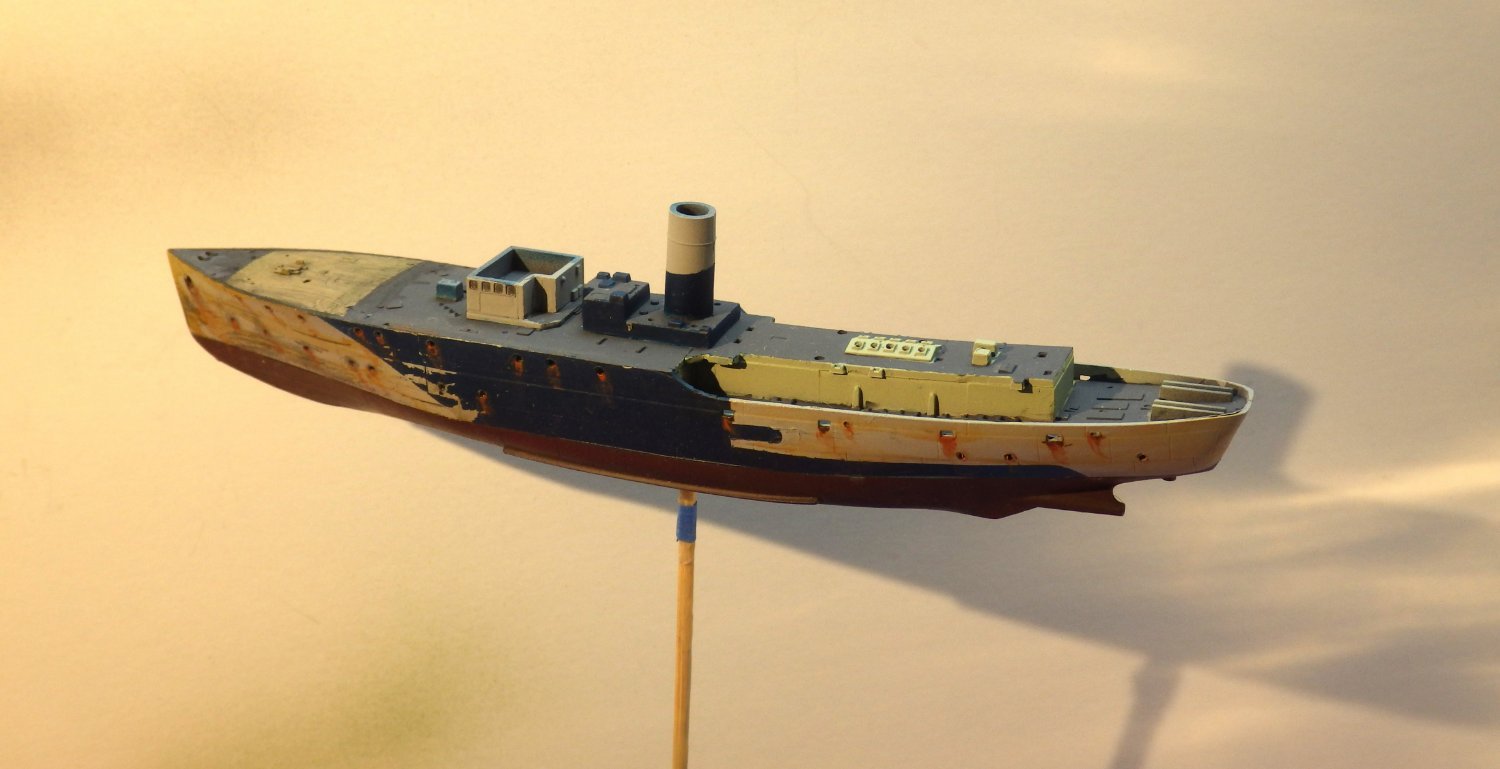
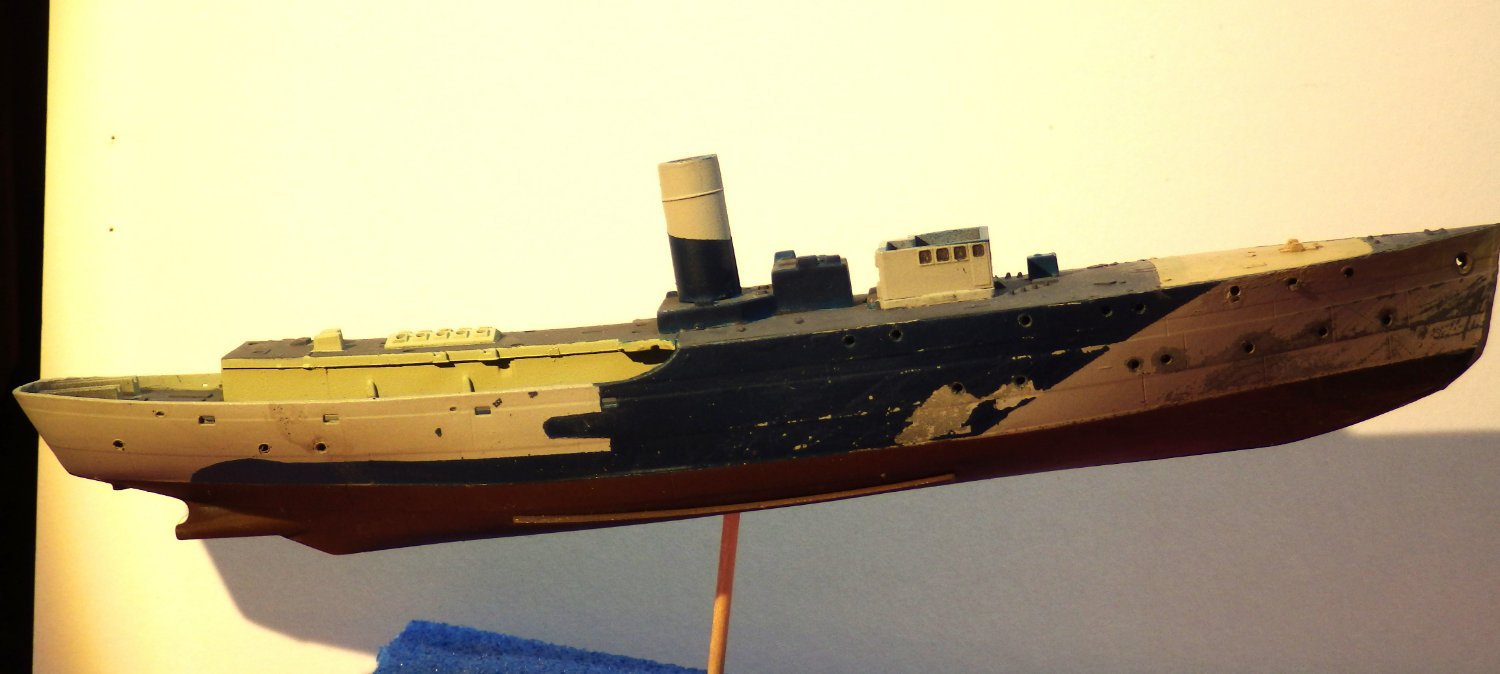
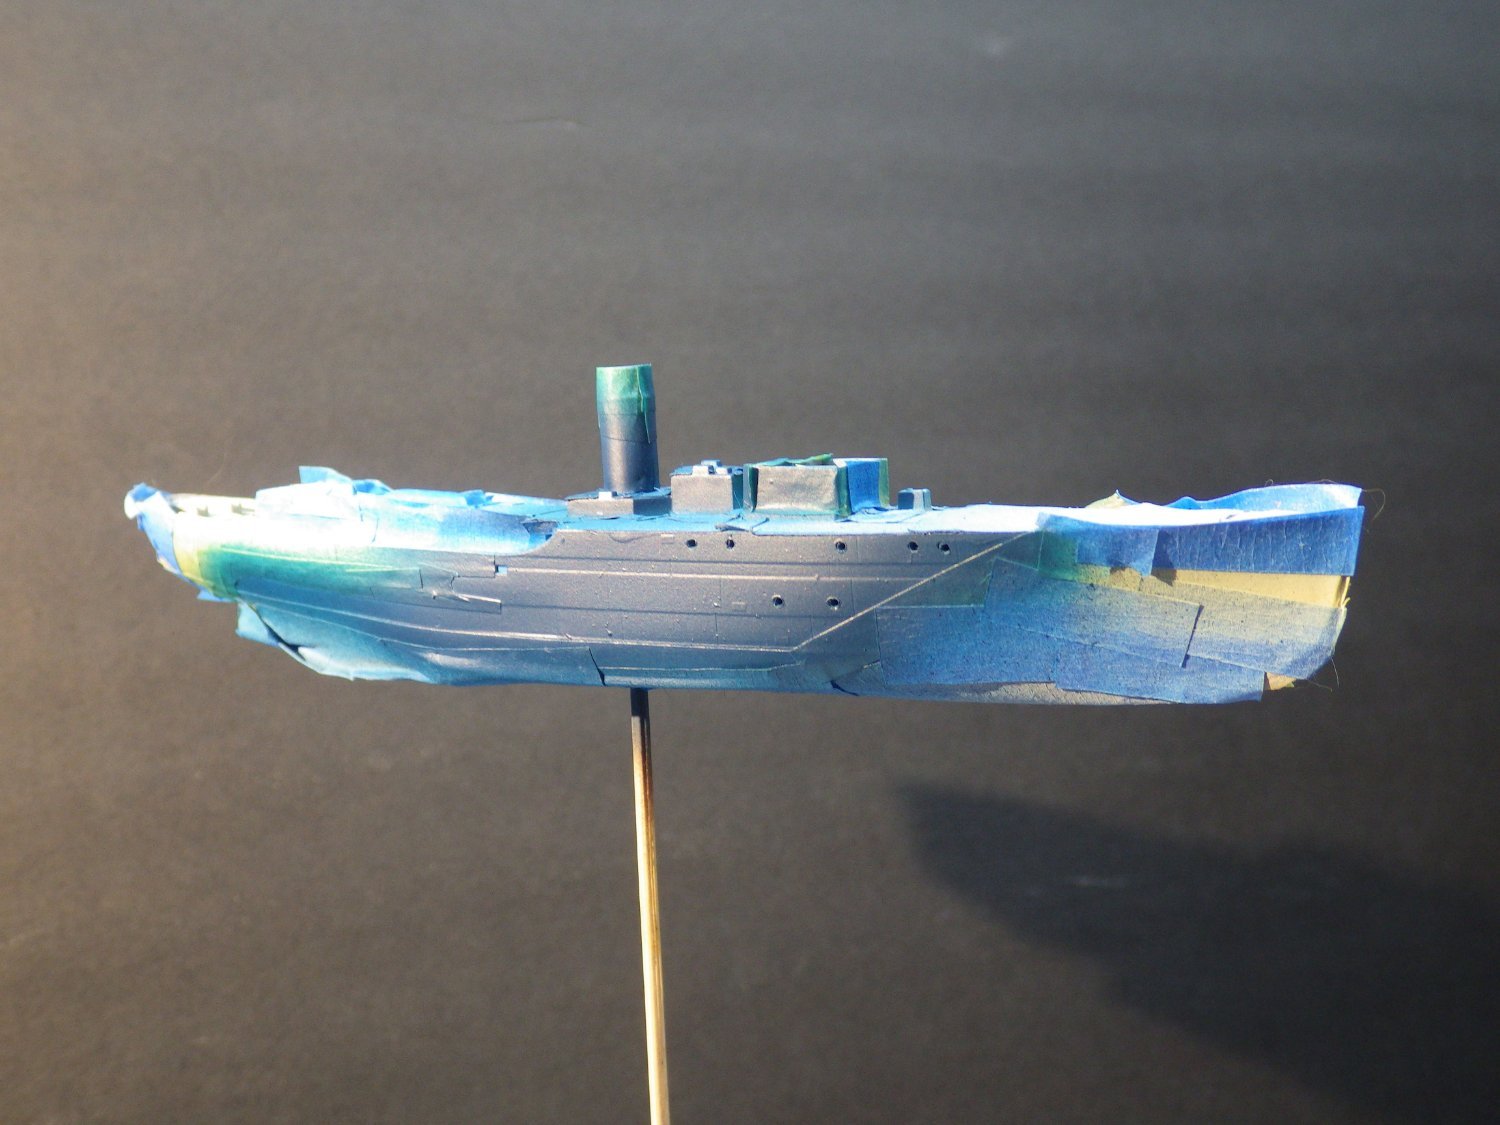
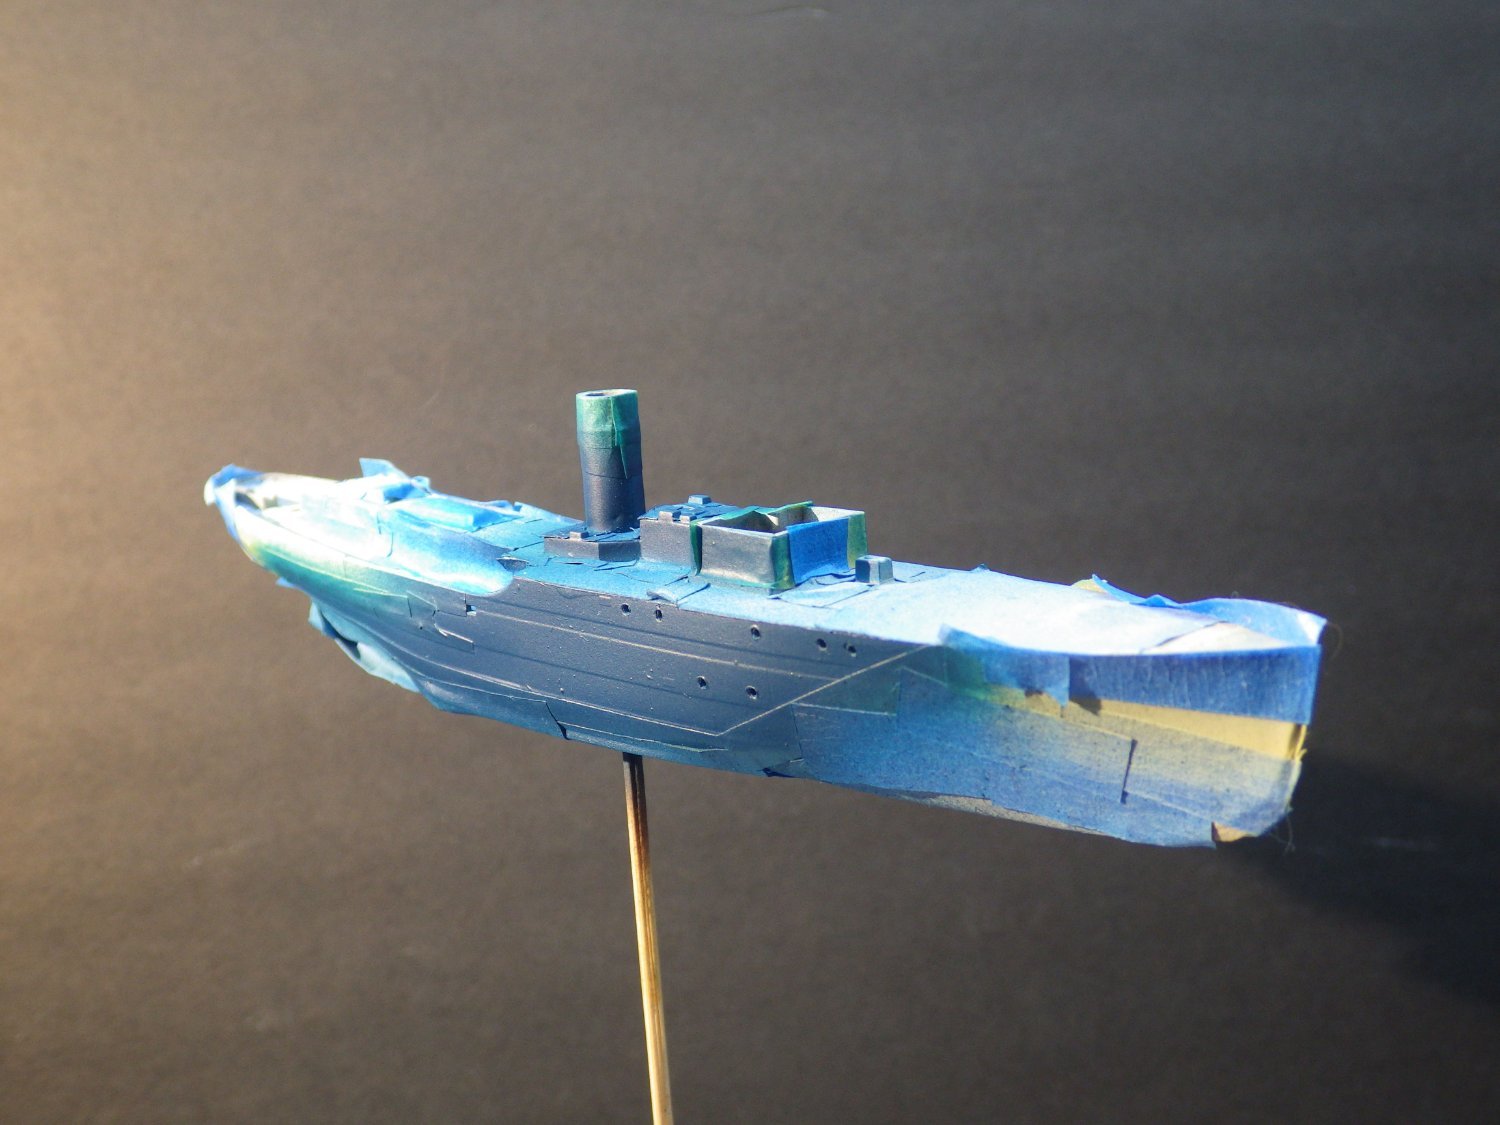
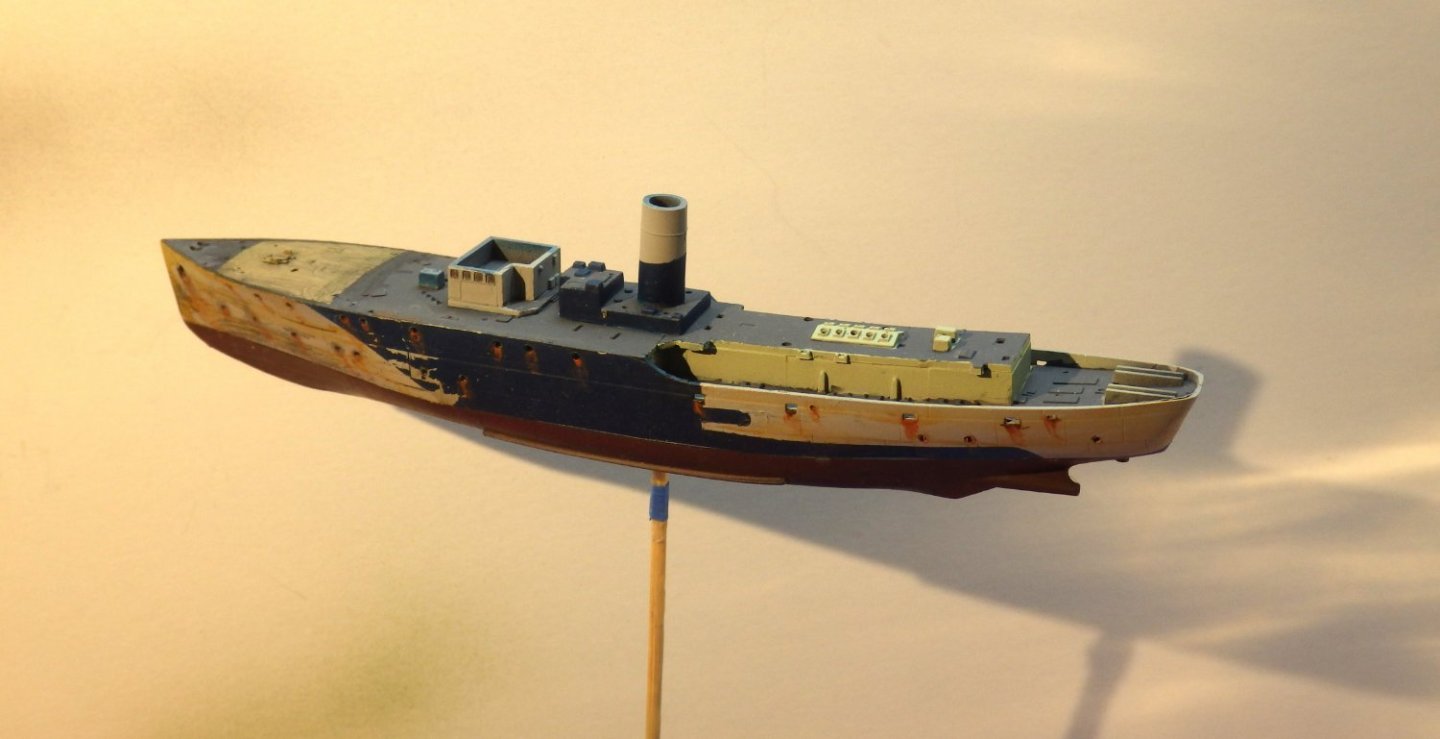
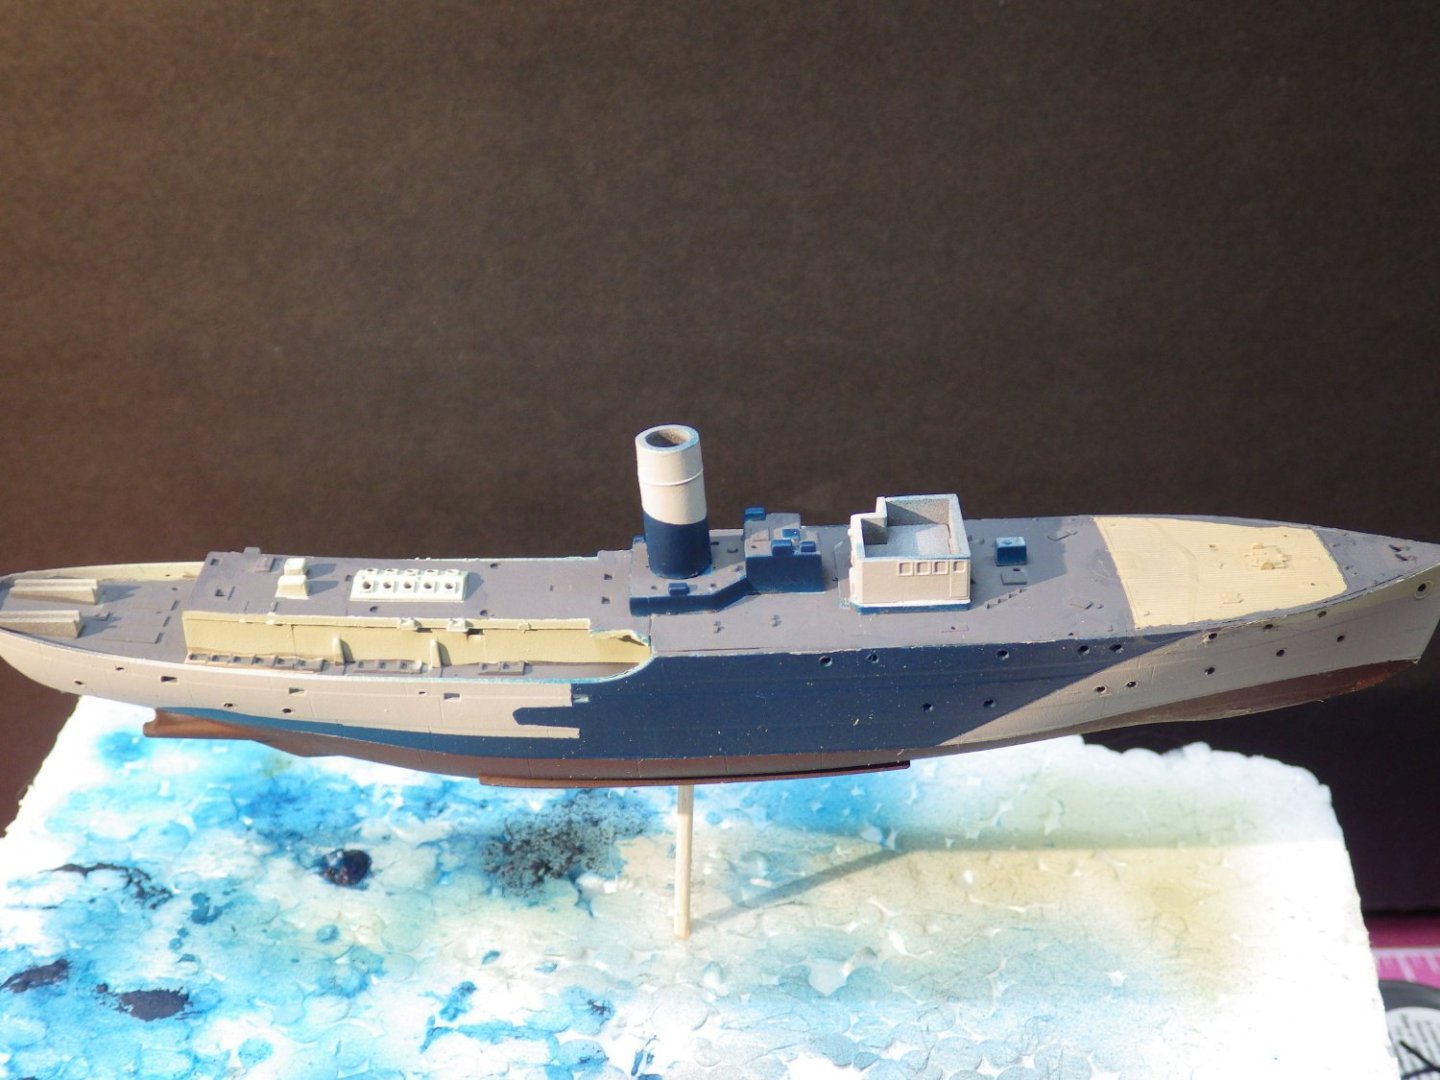
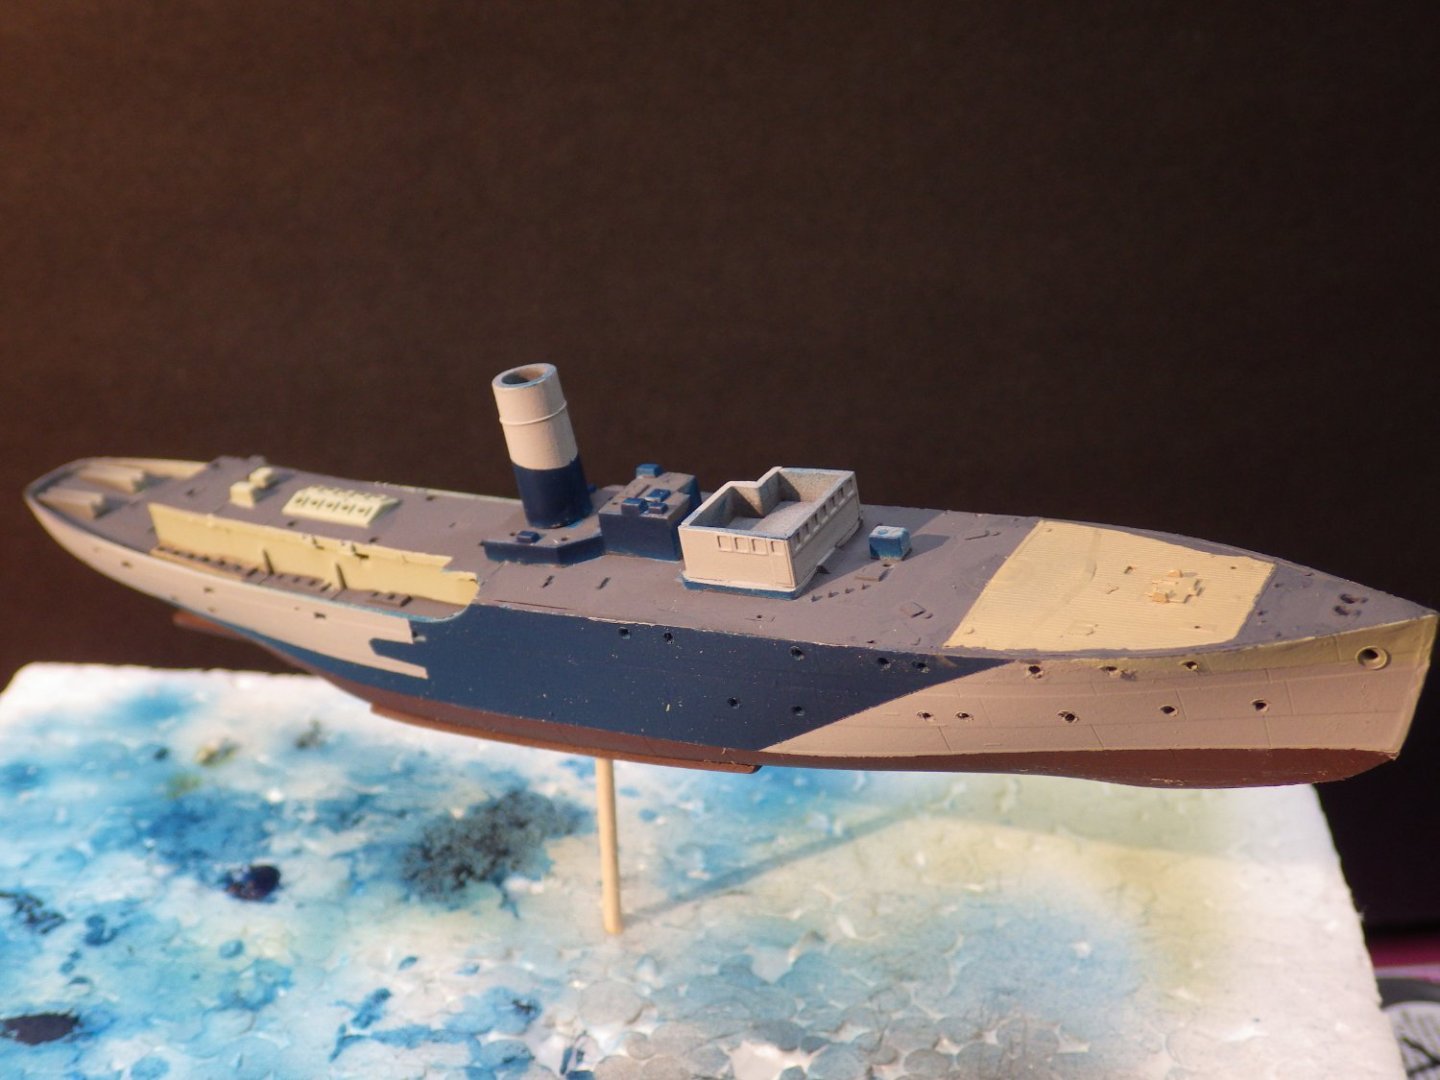
I am afraid things are moving much slower than I hoped. Life at the test stand has got busy again so I am back on the 3pm to midnight routine and that doesn't seem to leave a lot of spare time to work on the model. Little bits have been done here and there. I dug around the paint colours and found that MS4 is actually light grey and MS4A is grey green. I have some Tamiya IJN grey green and that seems to match the paint chips and the colour plate of Spirea in the Flower Corvette book. In the absence of any conflicting information I decided to go with that. The hull and basic superstructure was masked and sprayed with the MS4 and MS4A colours and then masked for the dark blue Pb10. That was when I learnt a useful but annoying lesson about air brushing. So far I have mostly used Tamiya, Vallejo and Mig acrylics and got on quite well with them gradually moving over to Mig for the wider colour range. I've diluted them all with Tamiya acrylic thinner which has uniformly worked well. The Pb10 is part of a set from AK interactive that I acquired somewhere and never used. My first attempt to spray it ended up with spluttering and then nothing. The airbrush cup was full of sludge. I cleaned it out and tried again after shaking the paint some more and wondering if it was too old even though it was unopened. This was no better and attempting a last try I realised that the problem came from adding the thinner. As soon as the thinner went in the paint curdled. The rest of the day was spent cleaning the airbrush and I thought the nozzle was ruined because it was solidly blocked with the sludge and seemed to have set. As a last resort I left it in a cup of alcohol and then poked it with an acupuncture needle and it cleaned up nicely. I rebuilt the airbrush and went back to the Pb10 now diluted with water (thats what it says on the box) and it sprayed on rather wetly but evenly. So now I have learnt about water based and alcohol based acrylics and need to be more careful about how I thin them. The internet seems divided about whether you can use Tamiya thinner with AK acrylics. So somewhere under this mess is a Flower corvette hull After letting it all dry off came the tape. I ws initially unhappy with how this came out but its been sat for a few days and I am beginning to think its worth continuing. I think the issue with the AK paint annoyed me (my fault) and overshadowed what was going on. I'm also conscious that I am feeling a need to rush because of the limited time in the morning and that is spoiling the satisfaction too. I will clean up some of the details in the paint scheme and at least see how the chipping works out before making a decision on whether to strip and try again. I also want to do some basic weathering before adding the mostly PE sections to the hull Next week is supposed to be a quieter week so I hope to get back at this again then. Apologies for the delay. Thanks for looking in and the likes. Alan


-
Second planking looks very nice Alan
-
Great job on the pitot Dan alan
-
An intriguing addition to your diorama alan
-
That is a great book. Sharkey upset a few of the brass with some of his insights as I recall. i just finished Hazard Spectrum by Nate Grey , one of the F-35 test pilots. He devotes quite a lot of his book to flying Harriers with the Fleet Air Arm. Very readable book and quite a guy The Harrier was a great program to work on. The difficulties and limitations but it’s great capabilities made everyone work together in a really positive way Thats a lovely model OC. I have 1/72 Sea Harrier, X-32B and F-35B kits and a plan for a small diorama at some point. If only I could speed up the process a bit Alan
-
Great idea for a diorama. Its going to look very good Alan
-
Great to se you back OC. This is one of my favourite builds Alan
-
The F104 is looking very nice Dan. Congratulations on retirement. You will be amazed how people will fill up your time for you Alan
-
Triumph 3HW by Tim Moore - Italeri - 1/9
king derelict replied to Tim Moore's topic in Non-ship/categorised builds
The spoked wheel is spectacular Alan -
You are a master of seascapes Mike alan
-
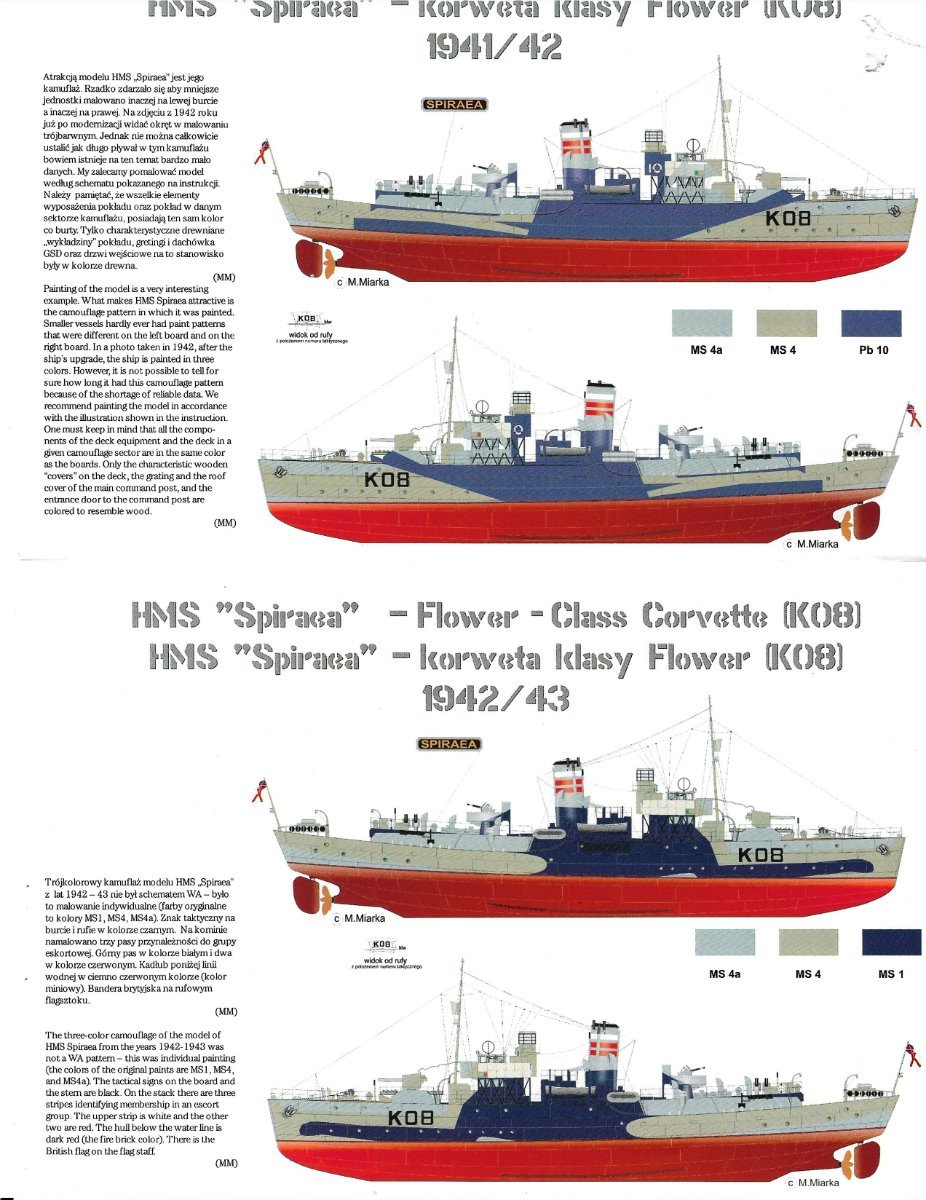
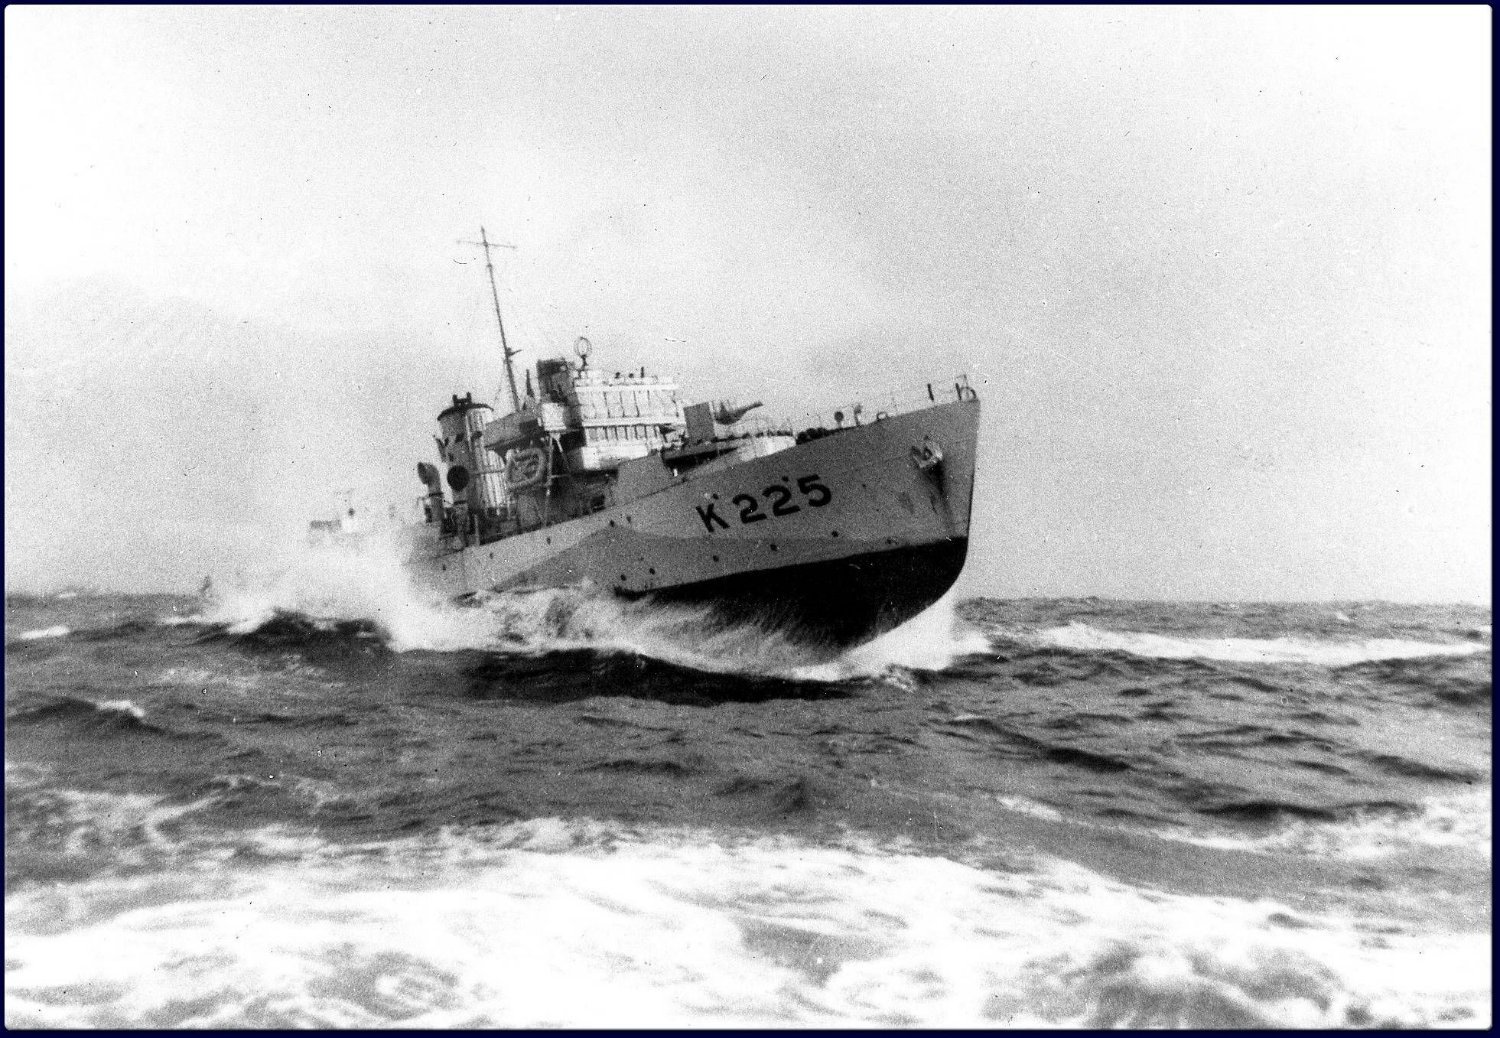
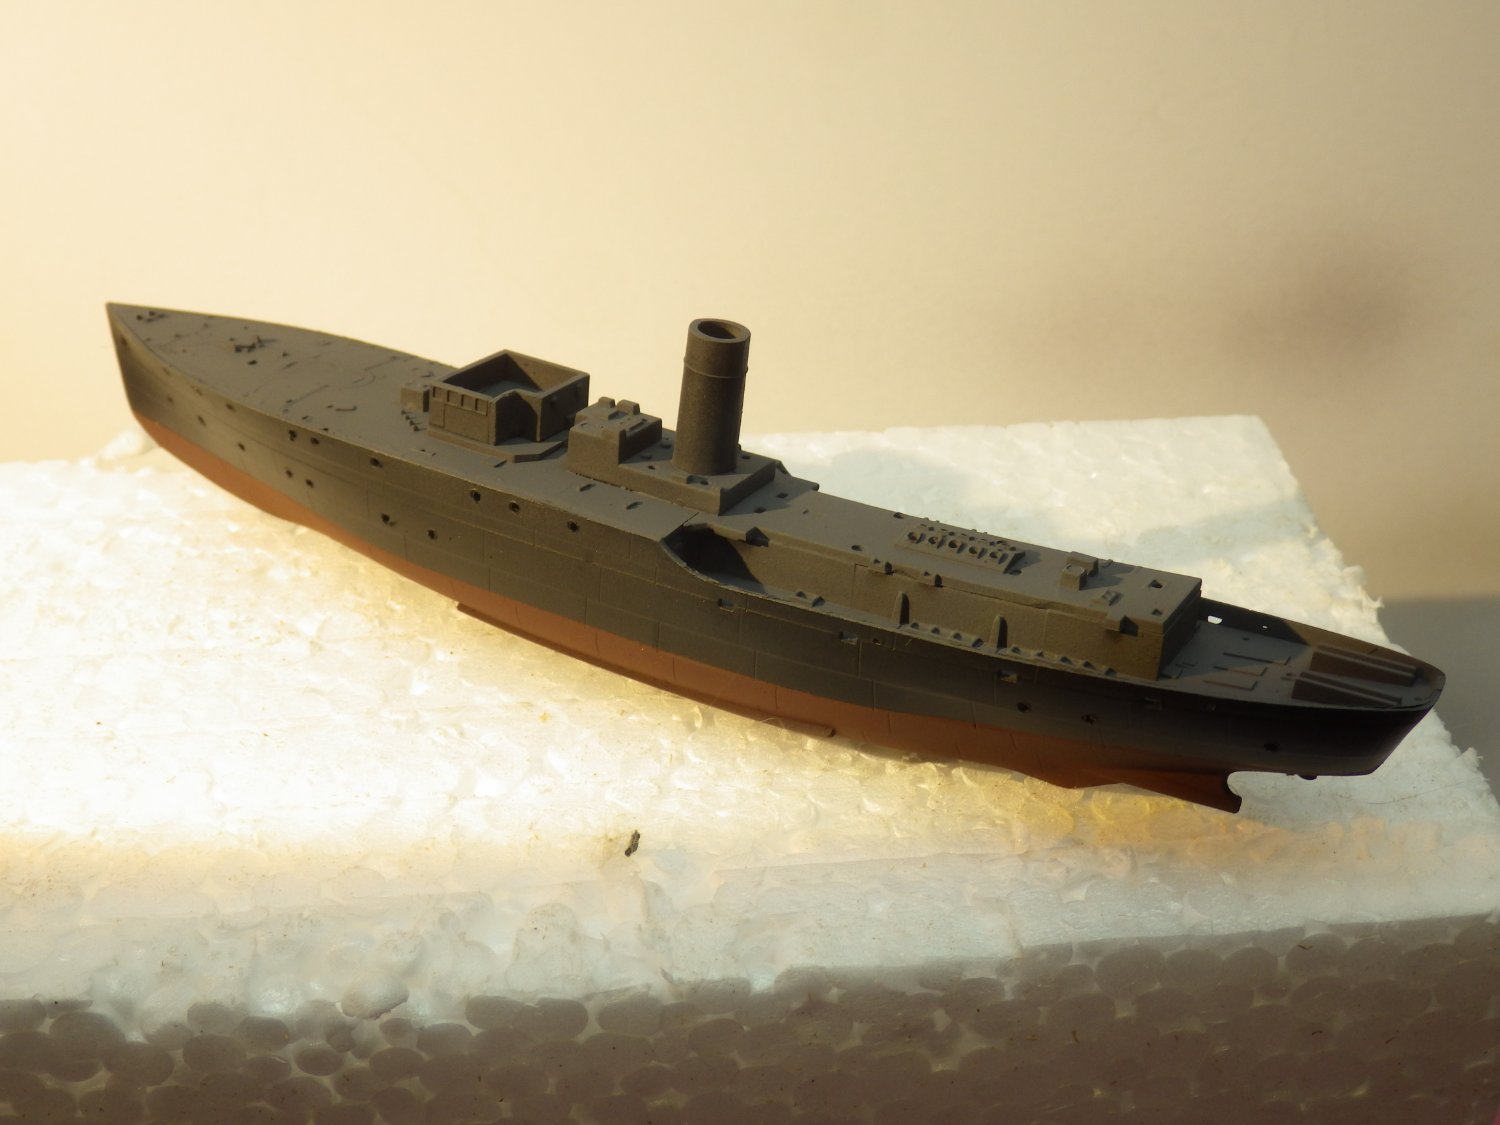
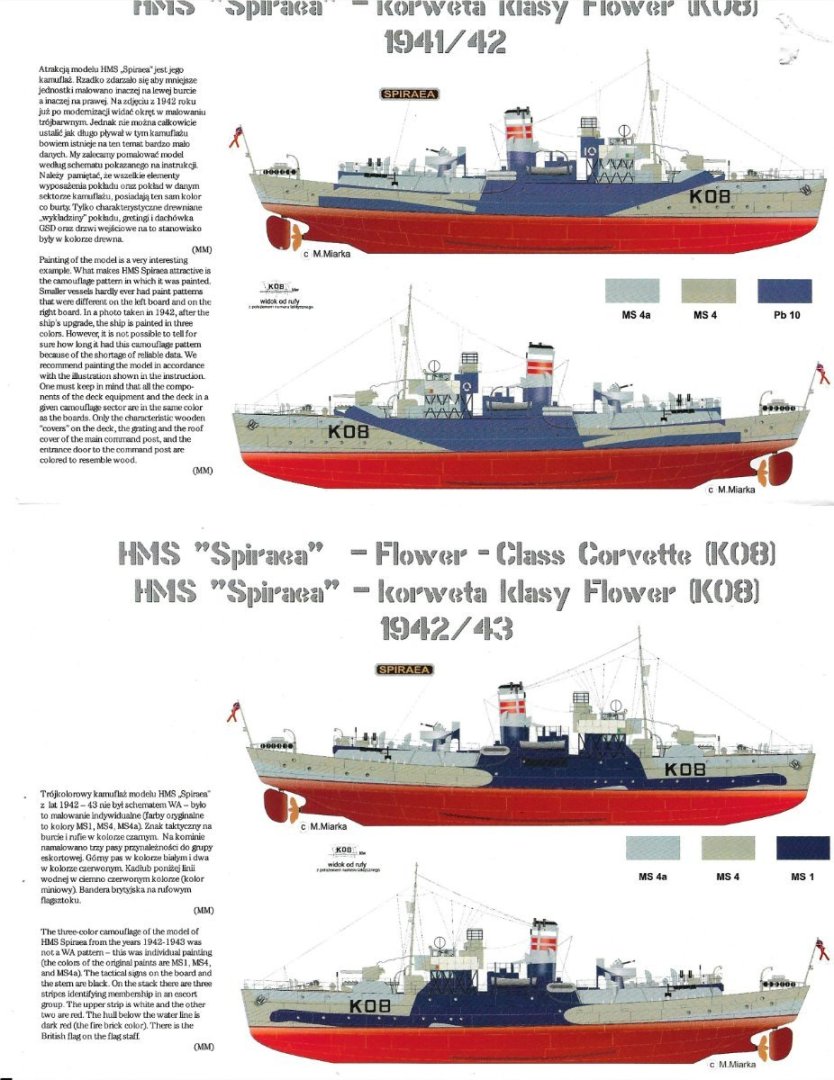
I realised I omitted the link to the wave diorama yesterday. Bing Videos Its an impressive result and some interesting techniques which might be applicable. Not a lot of progress today; mostly spent pondering options. I gave the upper hull a coat of medium grey thinking I might want to chip the hull as part of the weathering. Working at 1/350 might give me a bit more scope for showing a weather beaten and convoy weary escort ship I also seem to have hit my first problem area. The kit provides the paint scheme for Spirea which agrees well with the Flower Class Corvette book I have. I am probably going with the earlier scheme of MS-4, MS-4A and Pb-10. I already have the Pb-10 but I haven't found anyone selling MS-4 or MS-4A. I may have to make up some mixtures which will be a first for me. I need to be careful because I don't think I can paint everything of the same colour at the same time. The MS-4A looks like a light grey with a touch of blue. The MS-4 seems to be a light buff. Some interesting masking ahead Thanks for looking in, comments and likes Alan
-
Thank you OC. It feels like learning all over again. The airbrush is sulking after being ignored for a year. Alan
-
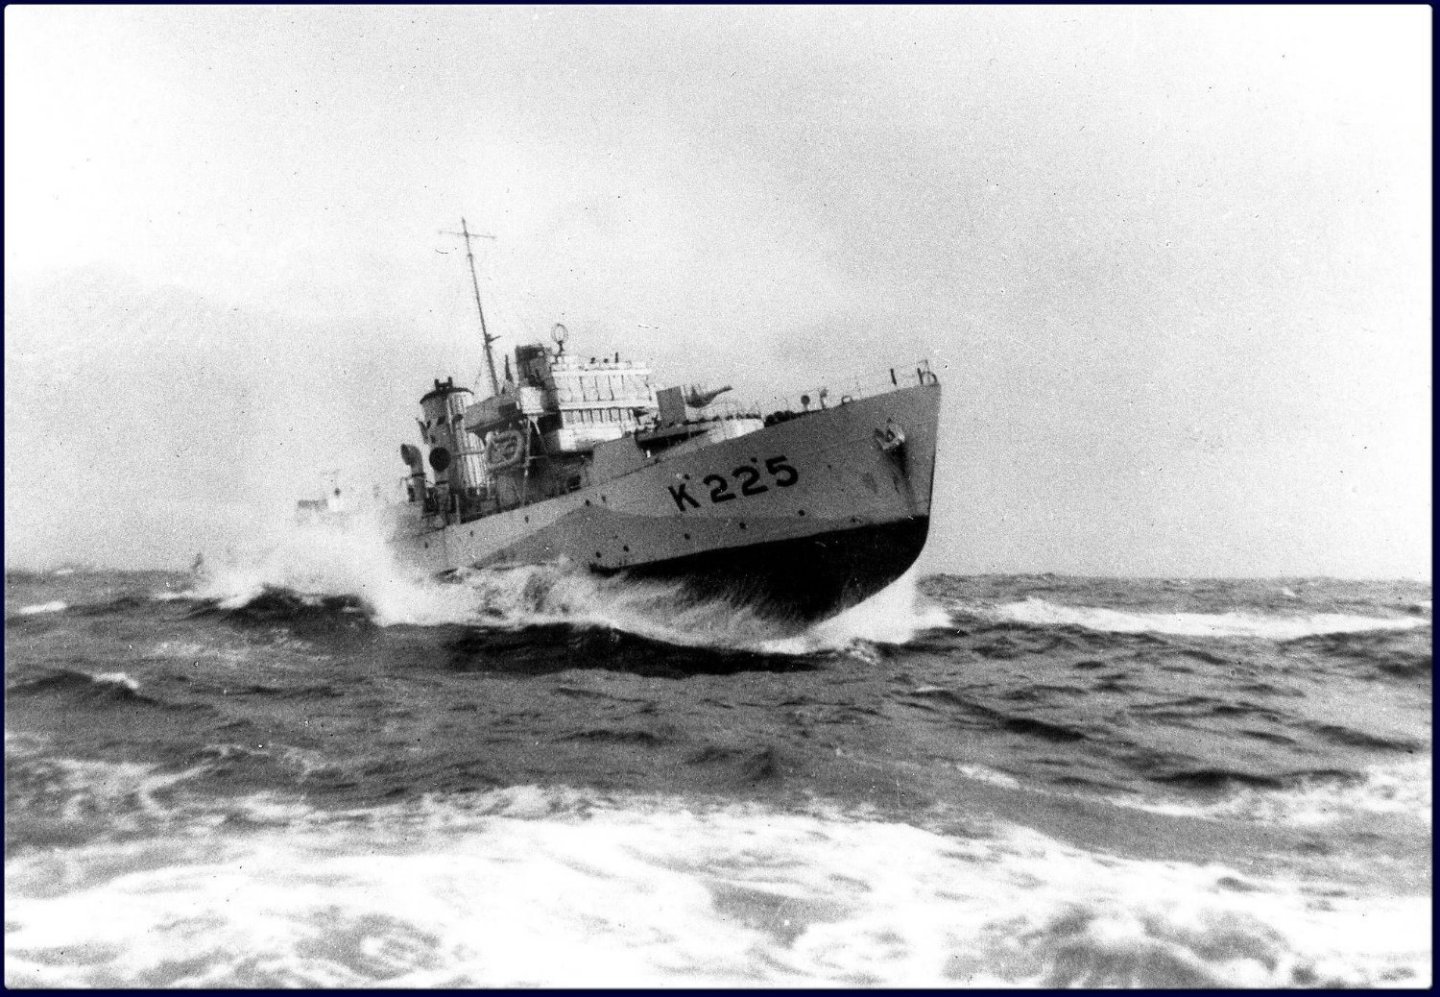
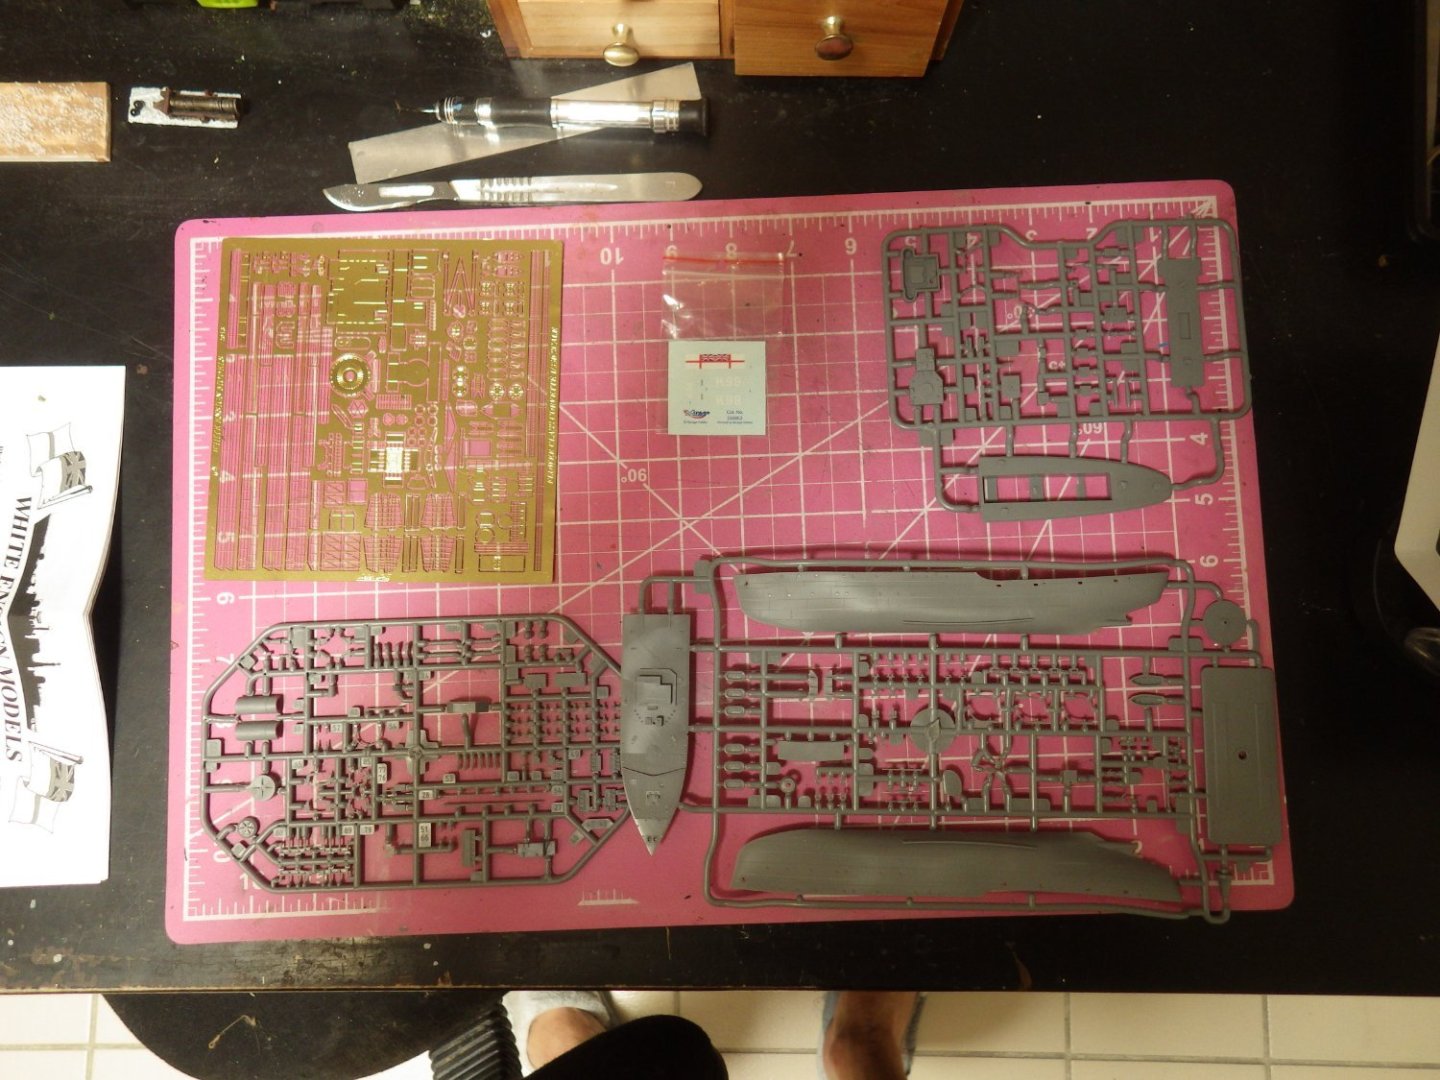
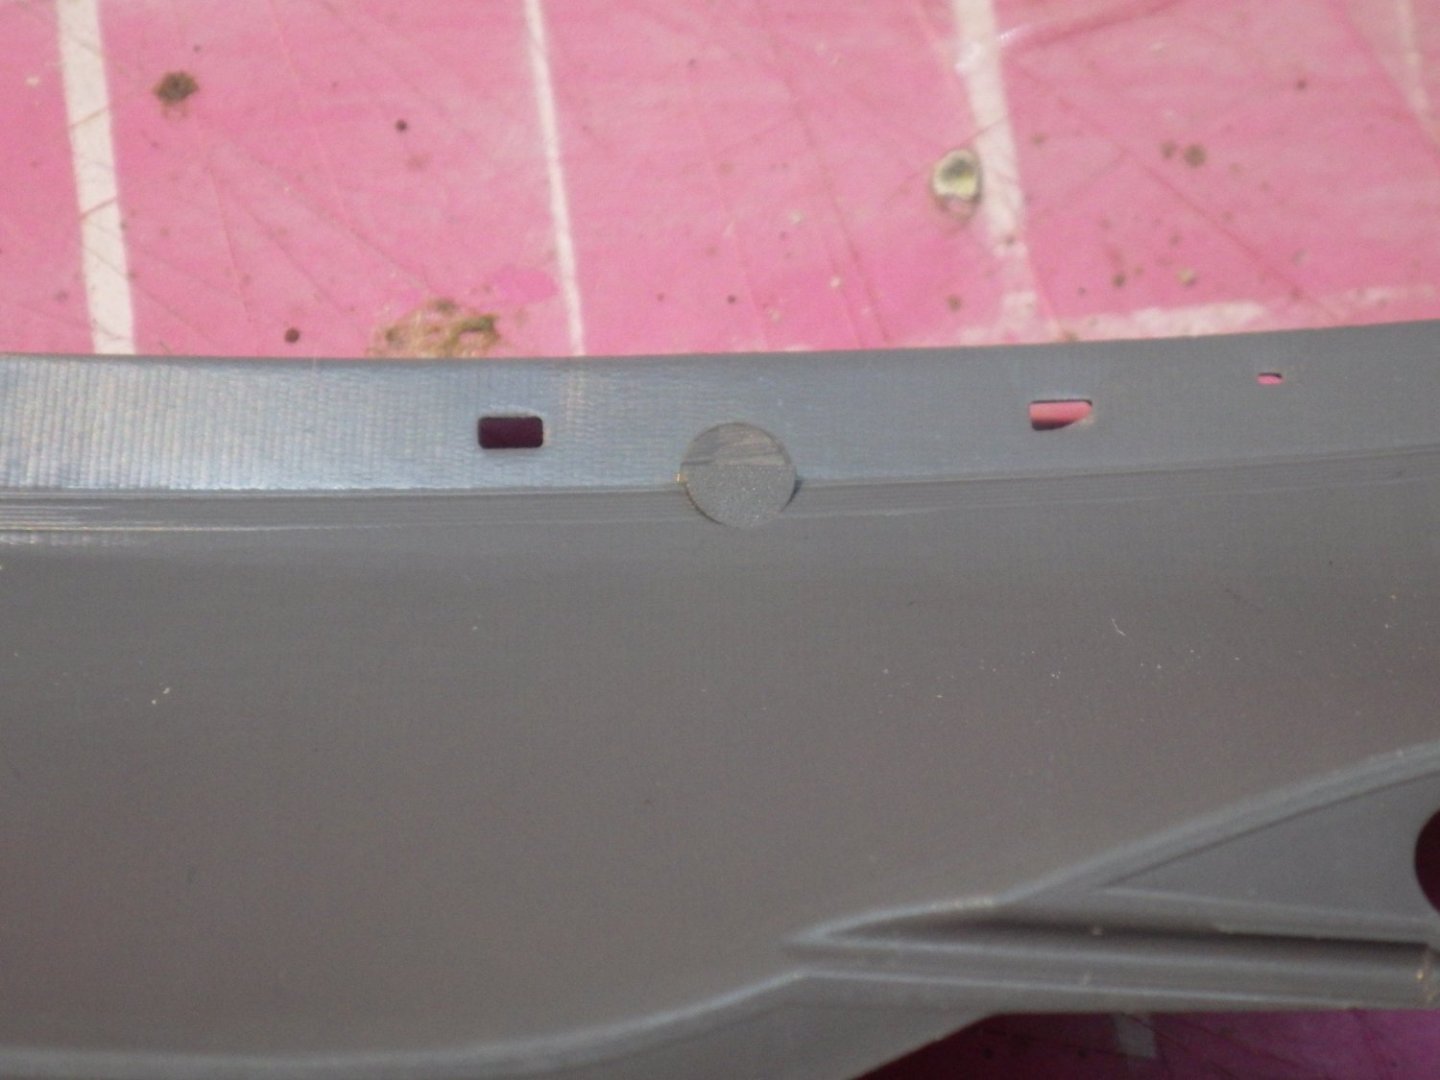
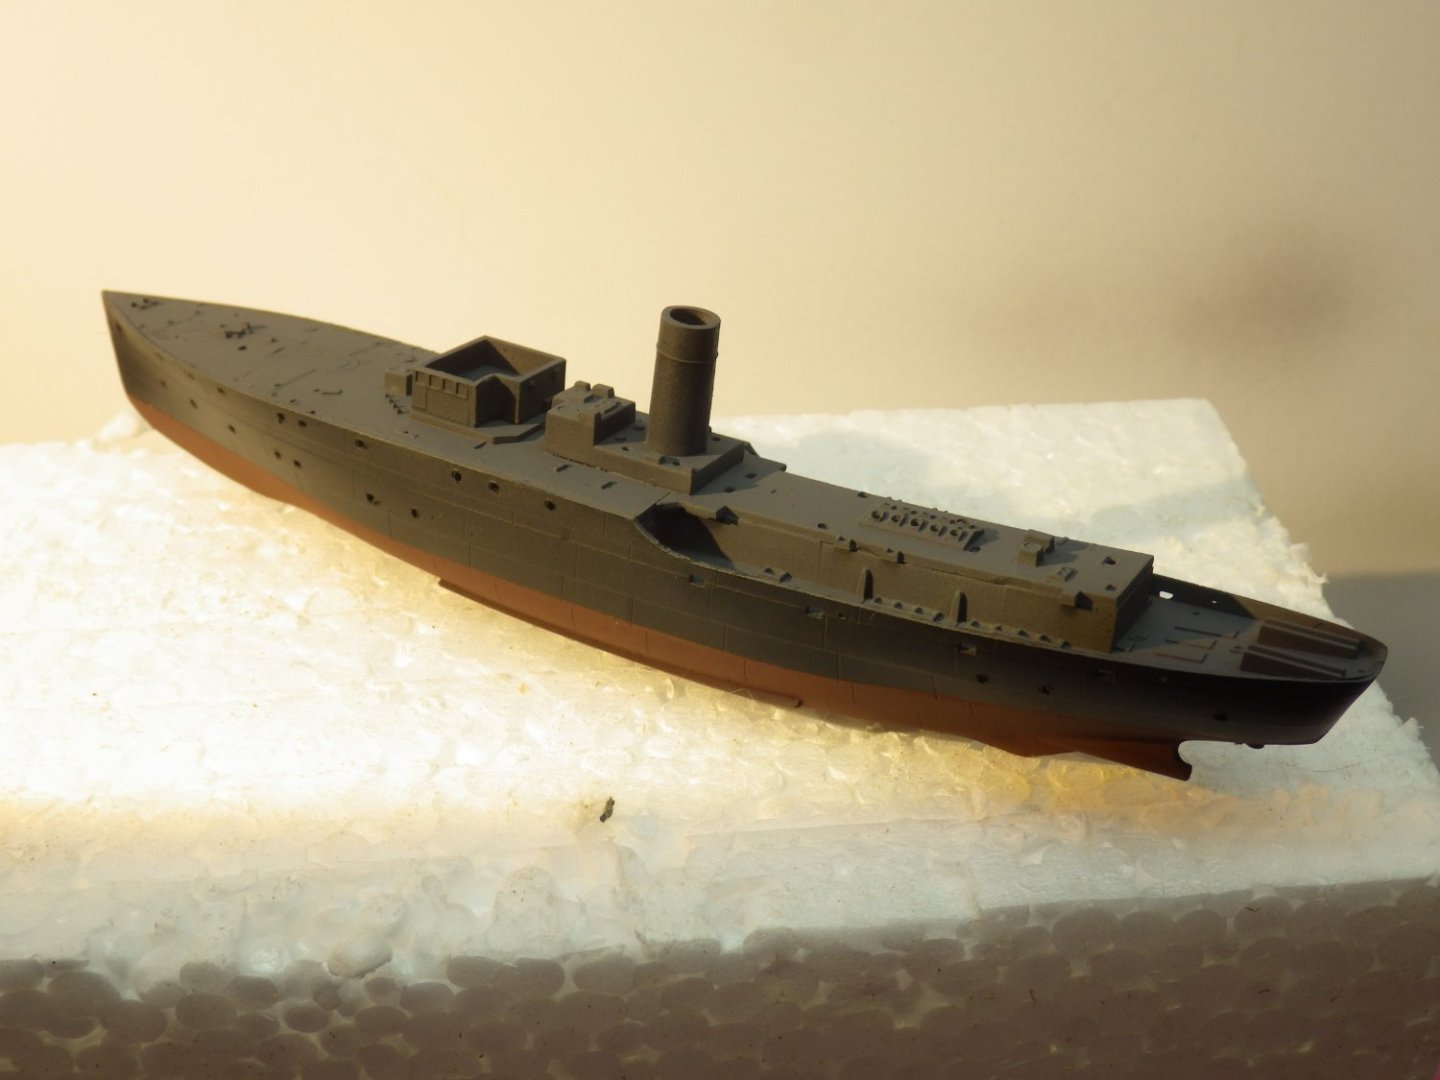
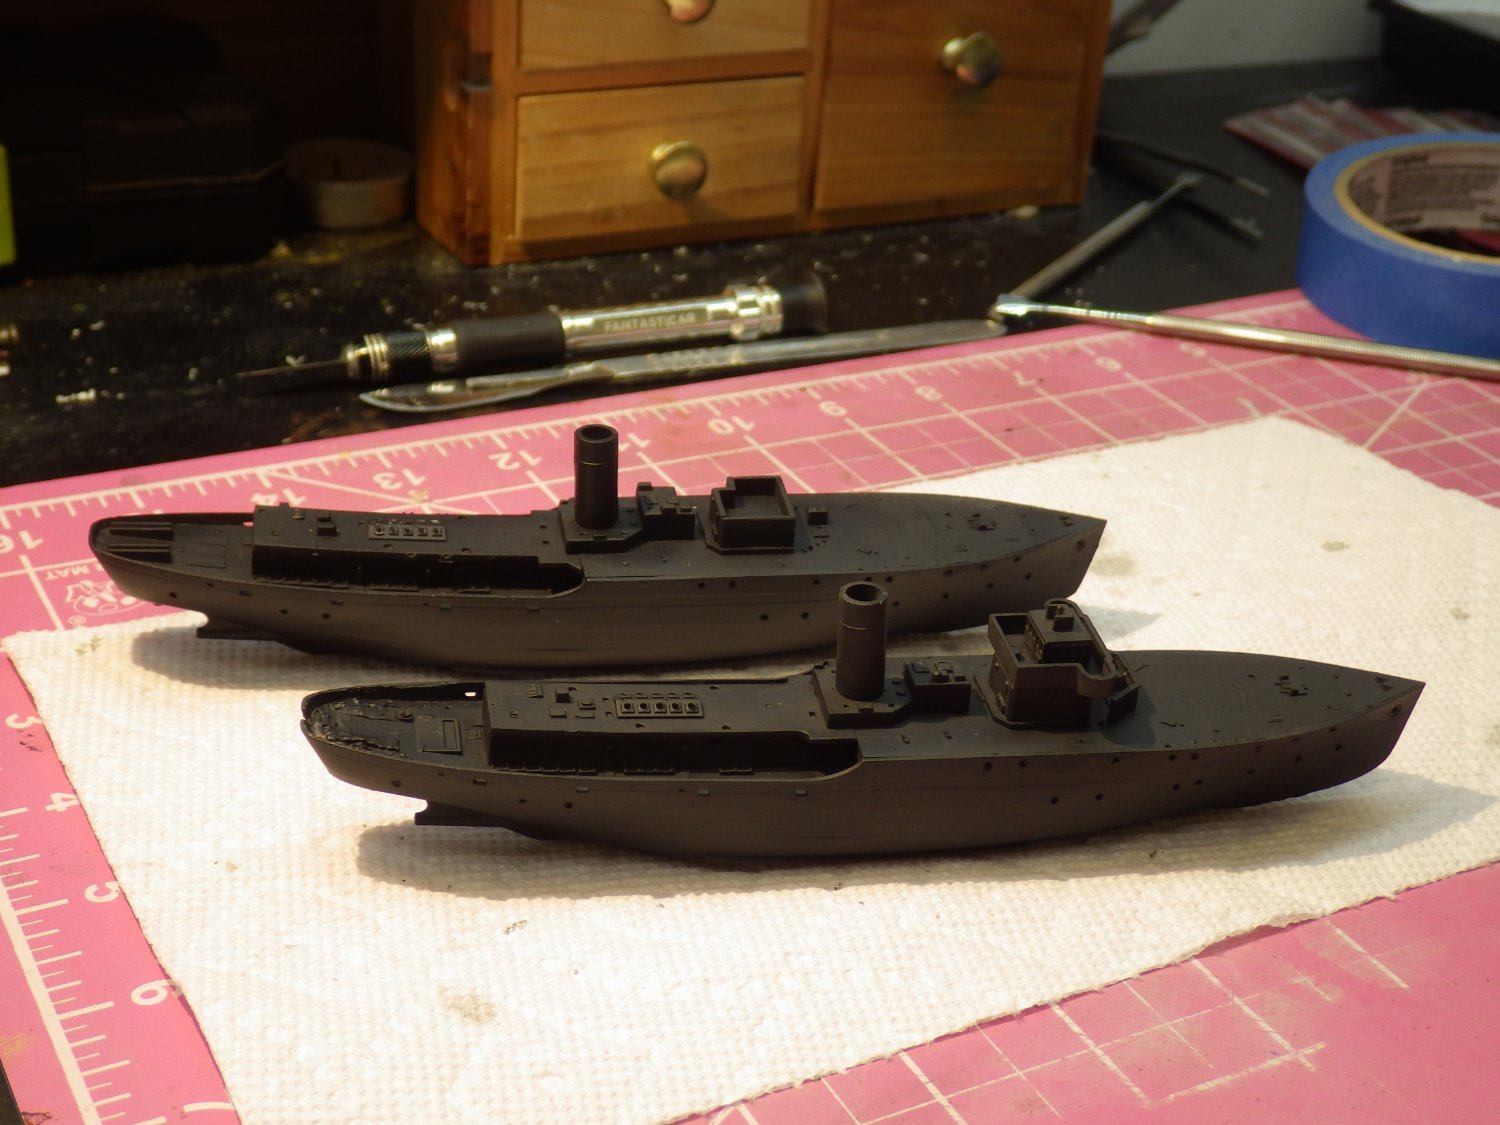
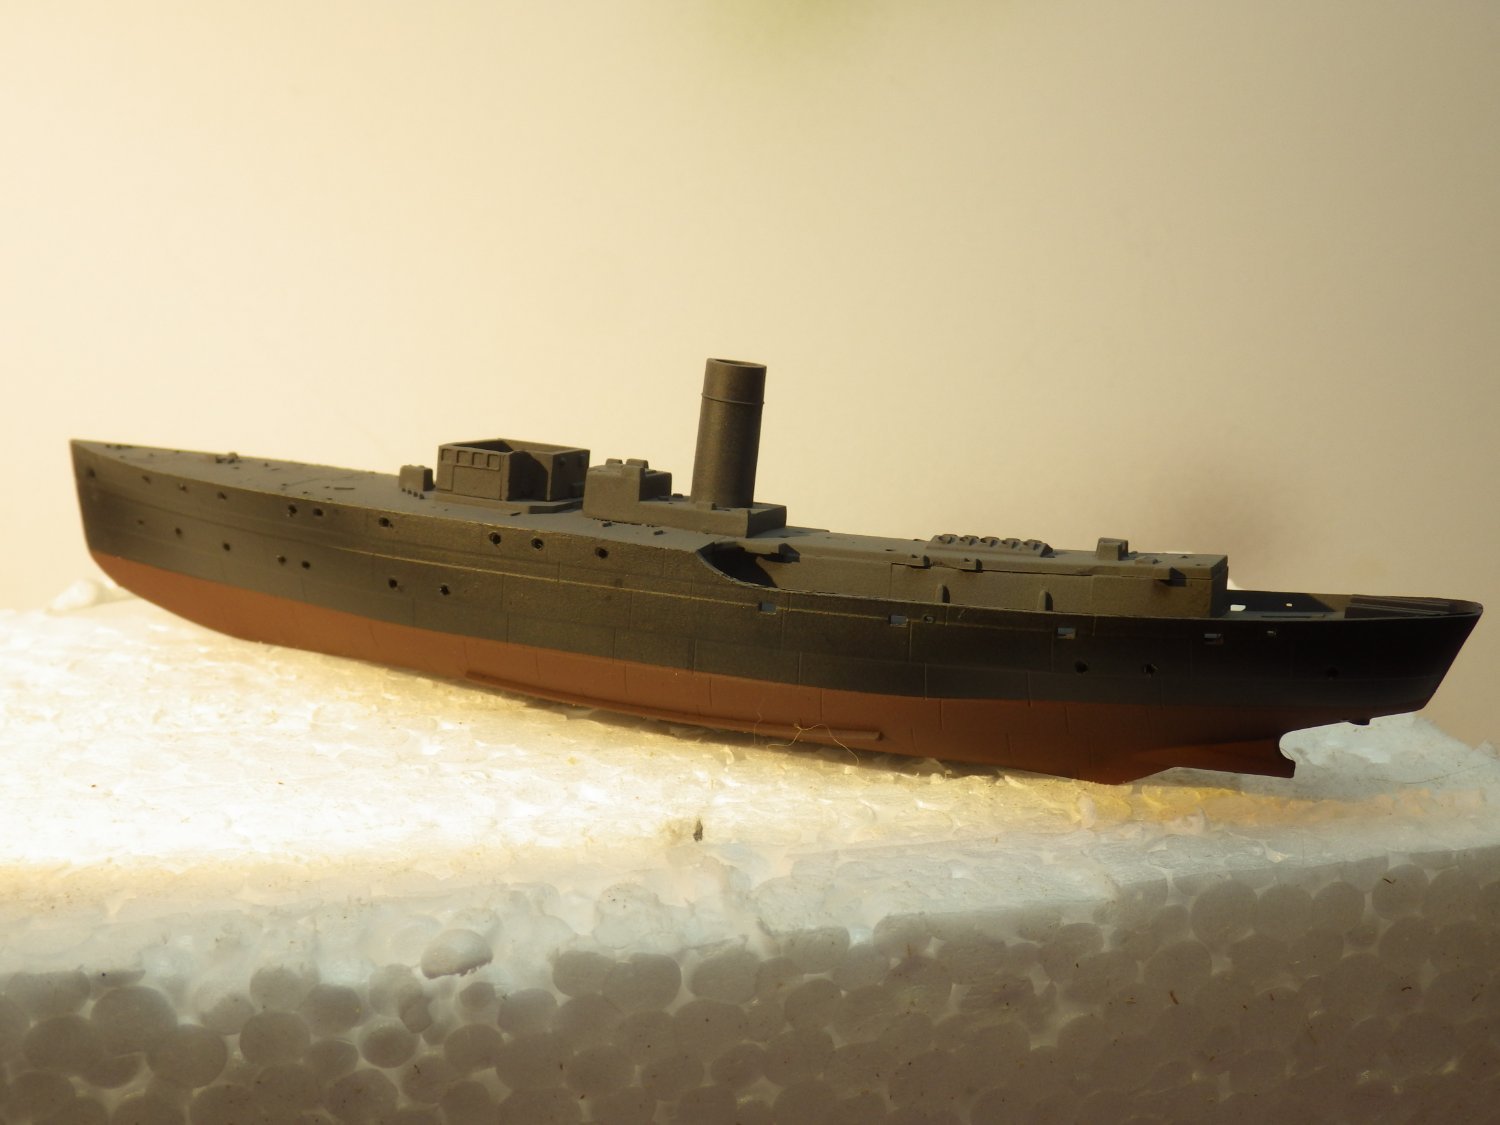
Well, its been a slow start after completing the Loarre castle. Cleaning a years worth of sanding dust off the work bench and pretty much everything else in the garage took some time. Then its been difficult deciding where to start again. I had lots of ideas and several boxes were opened and put away again. I wanted to build a ship but also wanted something relatively short but interesting with some PE to rehabilitate myself. The final choice was the Mirage Flower Class corvettes The initial choice was HMS Zinnia and I got as far as assembling the hull before realising this was a relatively early Flower and didn't have the later style bridge so down came HMS Spirea and I started again. Mirage make four Flower kits and it looks like they all share the same hull but have different decks, superstructure and details. Zinnia was an early Flower but I can't determine whether she should have had a short forecastle or not. I think its just about possible she could have been built to the long forecastle standard. She was commissioned in April 1941 and sunk in August 1941 so she certainly was never refitted The kits look quite good although there are some annoying placements of the sprue gates on the hull halves requiring some clean up before the deck can be fitted. Curiously Zinnias hull was horrible to fit together and adding the aft deck was even worse. Spirea was much better and only a tiny mount of putty was needed to smooth it out. Otherwise there are some lovely delicate details like the galley stove pipe and some clunky parts too. I am planning to use the White Ensign PE set as appropriate and some PE or resin substitutes for the armament. I've been pondering the build order, trying to decide what to assemble before the basic painting (its been a while). I think the replacement PE bridge, radar and gun tub / bandstand will be too delicate to stand a lot of handling so I decided to add the basic plastic superstructure to the deck and paint the hull first and then the deck and then follow with the superstructure and details. I may paint myself into a corner! So, the two hulls ready for primer. Spirea in front. This is my first attempt at 1/350 scale so some new techniques for me. I drilled out the portholes and the engine room ports and opened out the anchor fairleads Then some Mig One Shot black primer From here on I plan to concentrate on Spirea and work Zinnia if there is a pause. Its going to be too hard to get the wrong stuff on the wrong hull otherwise I masked the hull and added the red bilge and then sprayed the decks Next up some serious masking of the deck, paint the wooden deck sections and dip into the PE My ambition for one of the models is a diorama (I can't seem to break the habit - but it will only be a small one - honest) Here is the tease This video has motivated me and I have had the photo in mind since building the 1/48 scale Campanula Thanks for looking in. Alan