HOLIDAY DONATION DRIVE - SUPPORT MSW - DO YOUR PART TO KEEP THIS GREAT FORUM GOING! (Only 24 donations so far out of 49,000 members - C'mon guys!)
×


BobF
-
Posts
175 -
Joined
-
Last visited
Content Type
Profiles
Forums
Gallery
Events
Everything posted by BobF
-
 Jeff - This is my first experience with edge-bending. It might work with basswood, but I'm not so sure about harder woods. Next time the situation comes up, I'm going to do a little experimentation. Bob
 -
Chuck - I'm glad that you like the photos. There's no doubt that basswood can be used when it comes to edge-bending. I'm starting to get the knack of it, but I still buckle one, now and then, when I become a bit too agressive, or I don't use enough clamps. Bob
- 277 replies
-
- 1
-

-
- model shipways
- 18th century longboat
- (and 1 more)
-
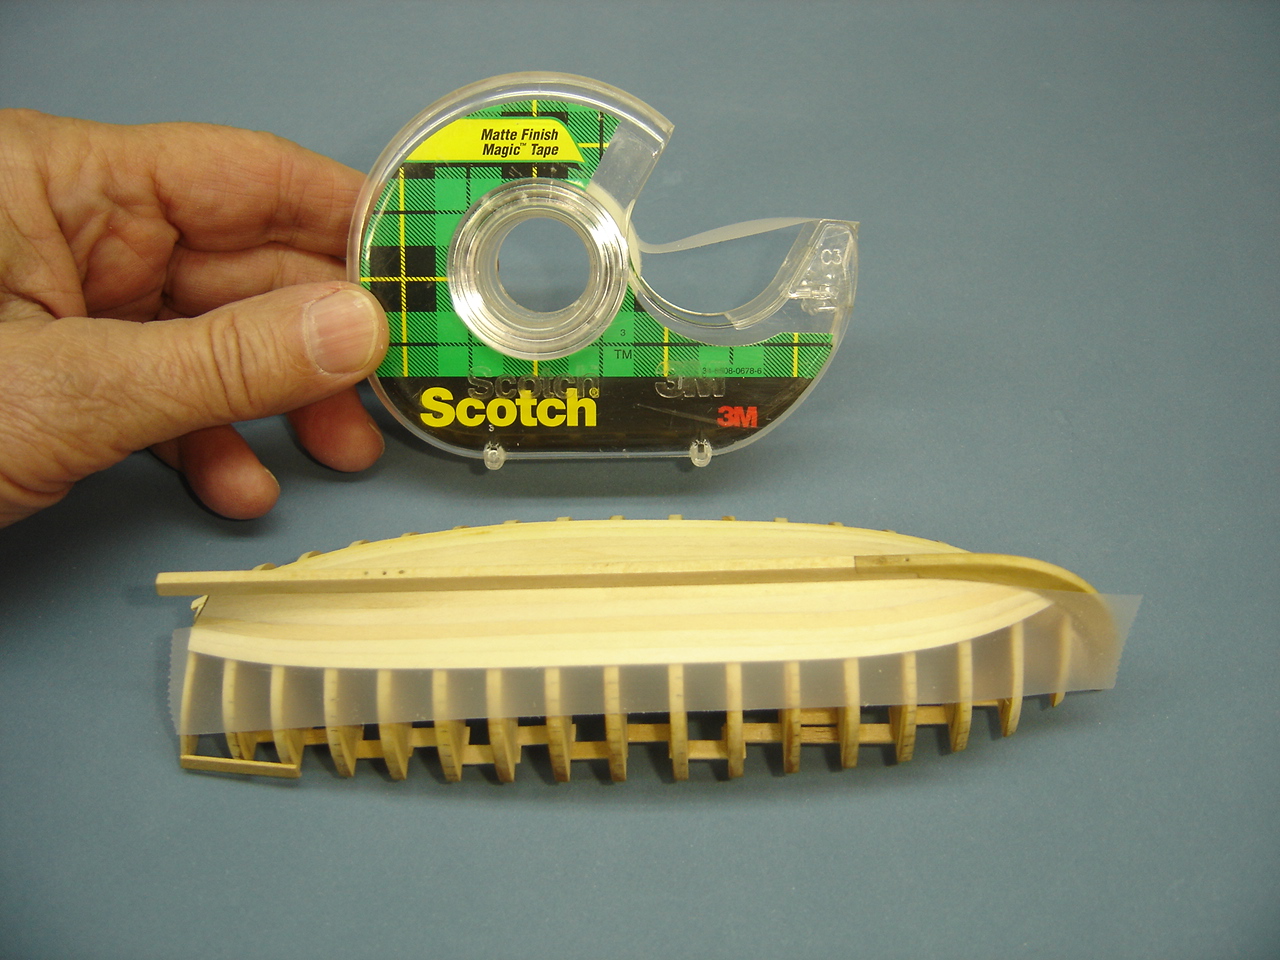
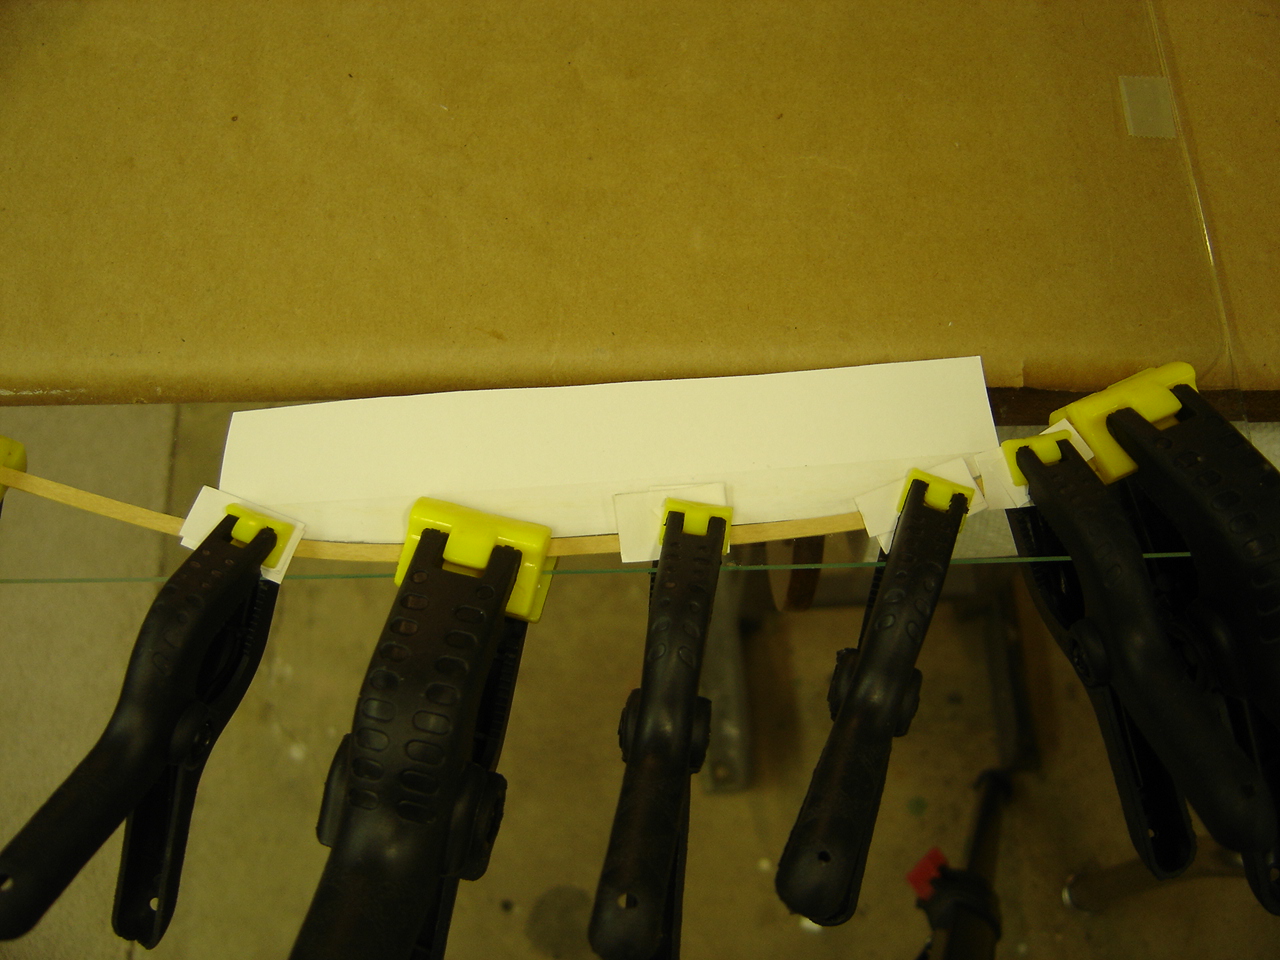
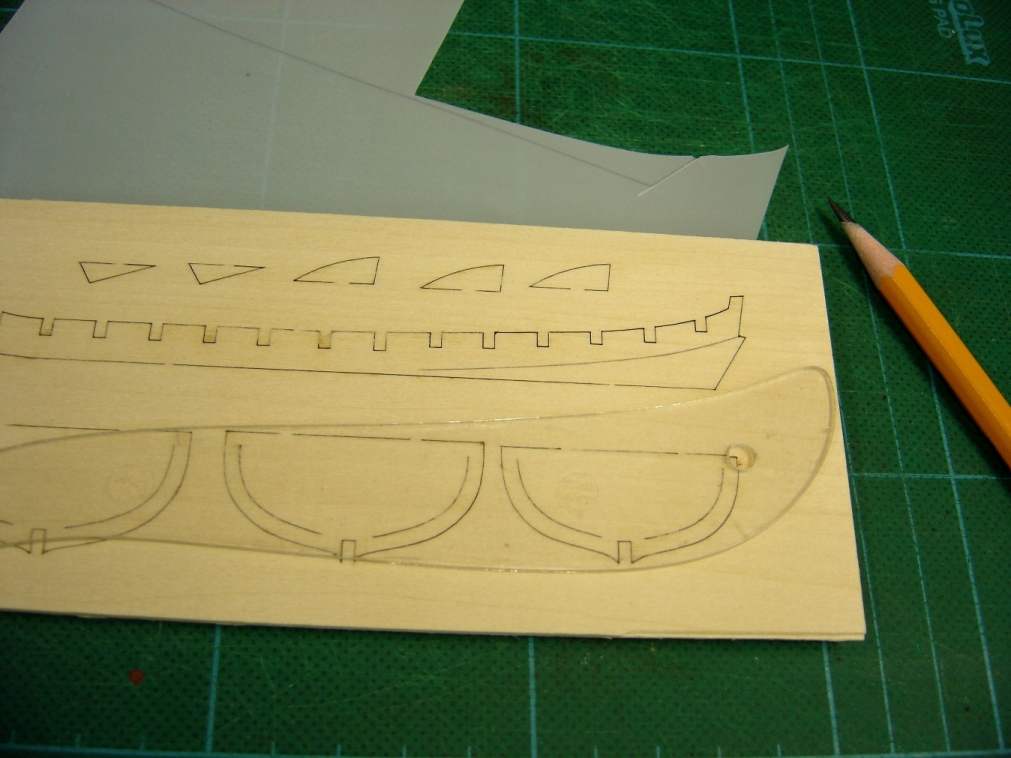
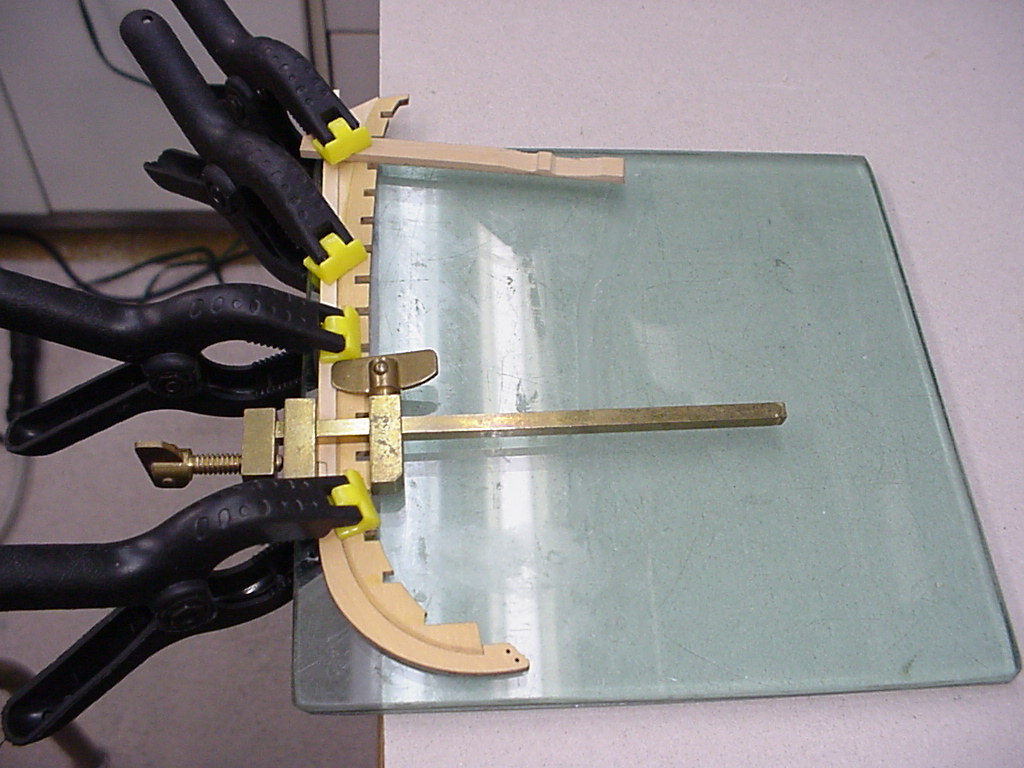
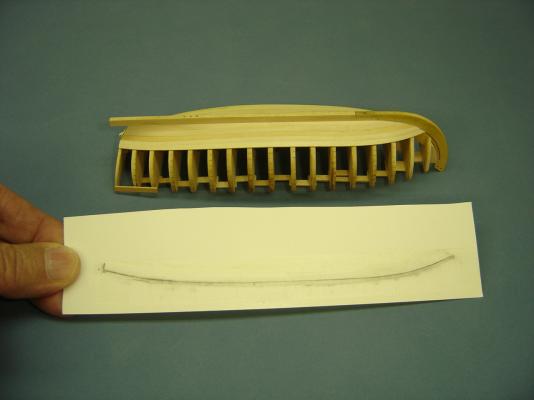
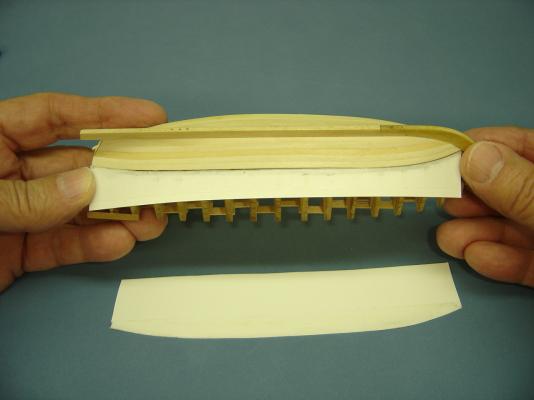
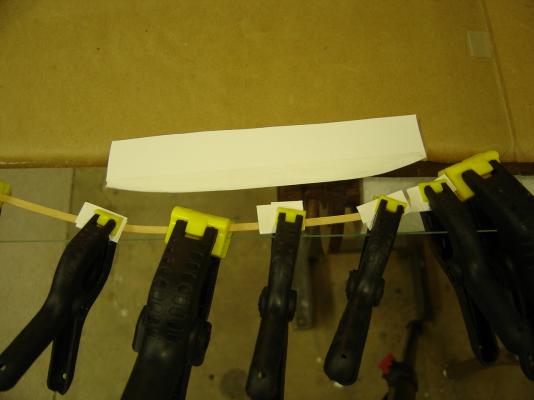
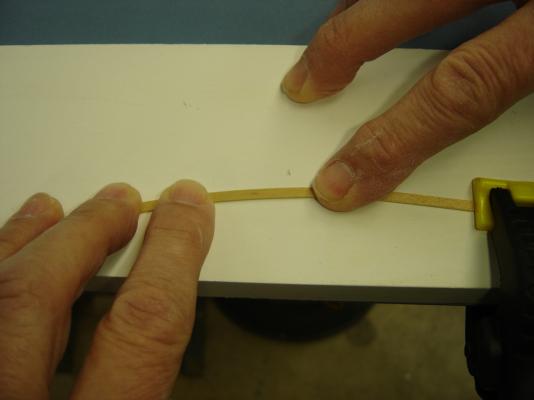
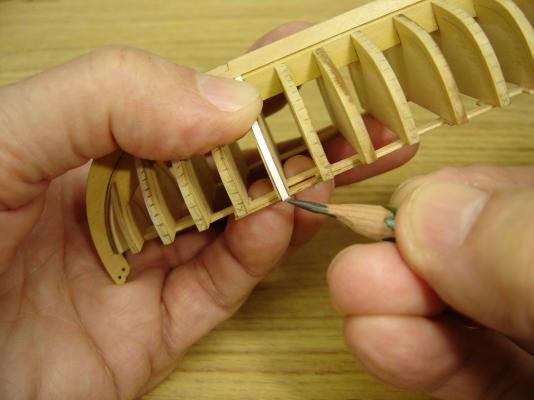
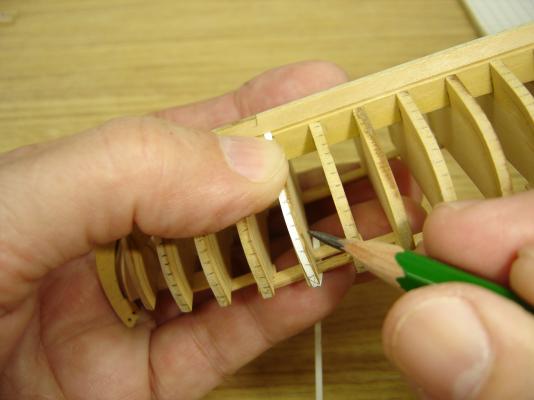
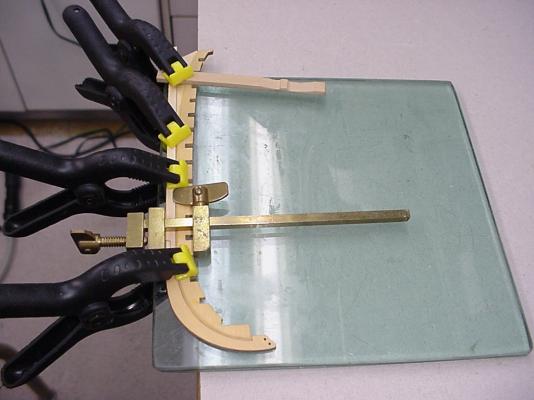
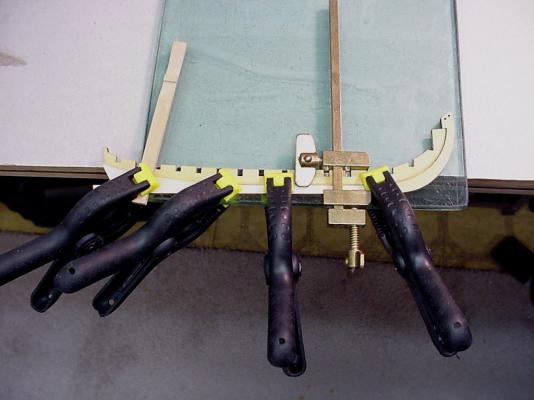
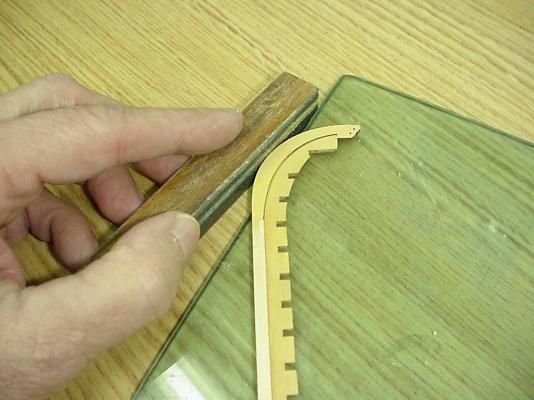
Now that I no longer have to contend with the false keel, and I have a couple of planks glued to the transom, I've decided to change my approach as far as shaping the planks is concerned. You may recall that before gluing a completed plank in place, I used it as a template for the next plank. This procedure, at least, got me in the ballpark. For the rest of the model, I'm going to use the "Magic Tape" method, which works pretty well, especially in a situation where you're trying to run one continuous strake from bow to stern. I understand that some modelers duplicate the edge of the mounted plank by rubbing an impression in the tape, but I've found that a sharp pencil also works. You don't have to press as hard, and since I'm working with basswood, that may be especially important. The template you get from the rubbing may not be perfect, in fact mine rarely are, but they get you pretty close. If I were spiling a plank for a larger model, I'd be using the concave part of the cutout. However, since I'm edge-bending the planks, I'm going to use the convex portion as a guide. The next two photos aren't pretty, but I think you get the idea. The white pieces of paper under the clamps minimize the chance that the clamps will leave impressions in the soft basswood. I'm using a sheet of glass as a base for this procedure because it's perfectly flat, impervious to water, and is quite thin, which allows me to use smaller clamps. As suggested in the instructions, you can dry the plank with a hairdryer, or just leave it for a few hours, while you work on something else. If the plank isn't quite right, I just dampen the area in question, and repeat the procedure.


- 277 replies
-
- 13
-
-
- model shipways
- 18th century longboat
- (and 1 more)
-
Chuck - Preliminary indications are that mine will have a similar situation. I'm counting on the floorboards hiding some of it. As a last resort, I may add some water casks and rope coils. Bob
-
Hey Dan, It's good to see someone newer than myself on MSW. Having seen some photos of your previous models, I'm sure this new project will be a winner. Welcome aboard, mate! BobF
-
With the addition of the fourth plank on each side, it was time to put the transom on. Like my fellow Tri-Club member, Toni, I decided to brace up the piece with two strips of scrap wood, rather than the two planks recommended in the instructions. The tick marks seem to be working out pretty well, so I'm going to continue adding planks from the keel up. As I approach those braces, the transom should be pretty stable, and the bracing will be removed. Anyway, that's my plan. We'll see what happens.


- 277 replies
-
- 8
-
-
- model shipways
- 18th century longboat
- (and 1 more)
-
Ryland, I'm really glad that I could be of some help to you. Not a bad idea, leaving the other garboard strake in while you work on the new one. If you're not sure about something I did, please don't hesitate to contact me. Good luck, mate! Bob
- 277 replies
-
- 3
-
-
- model shipways
- 18th century longboat
- (and 1 more)
-
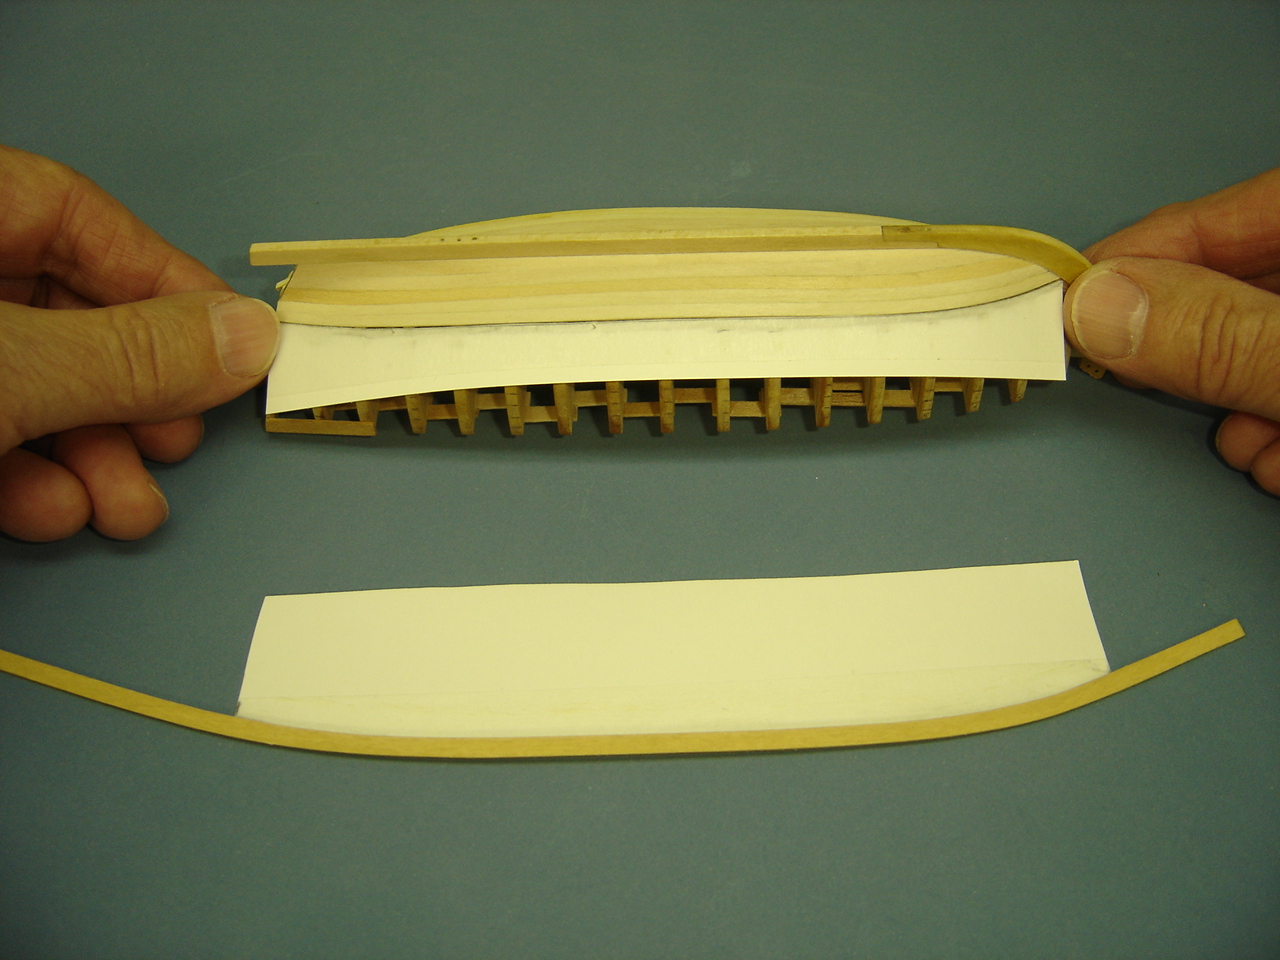
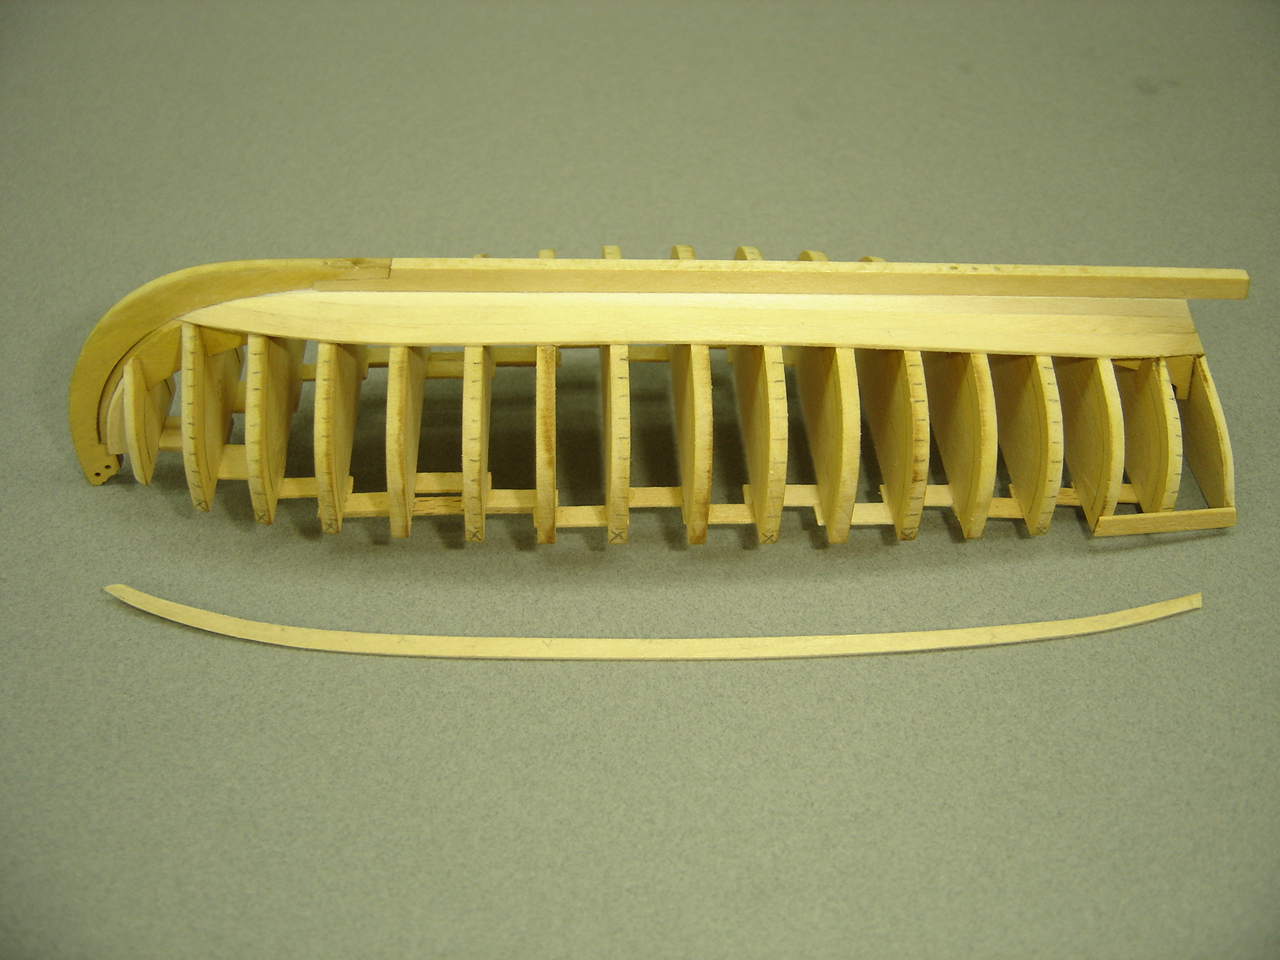
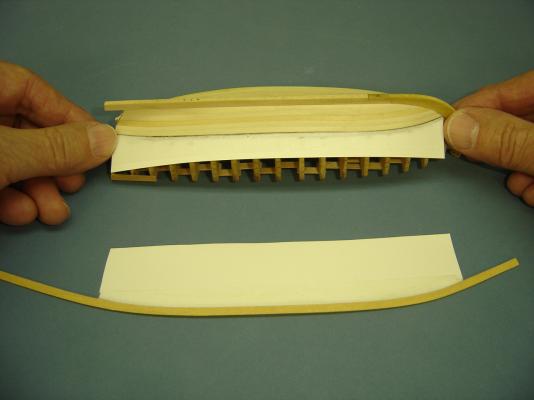
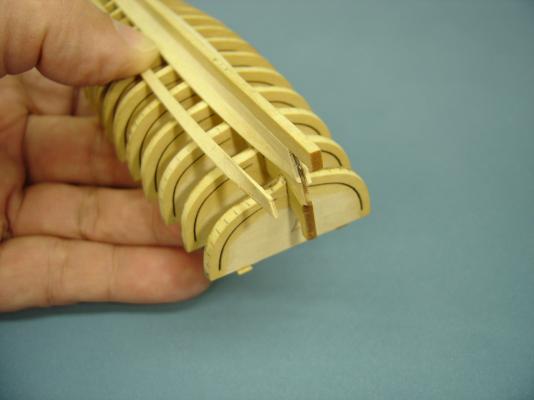
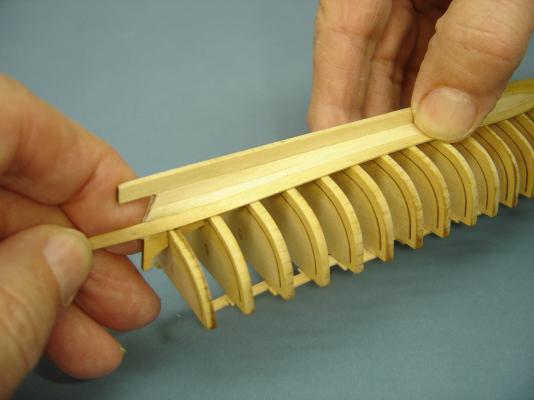
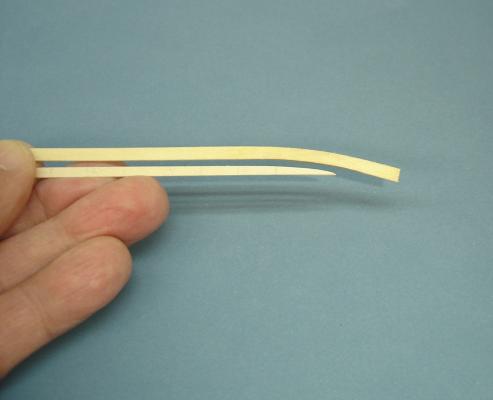
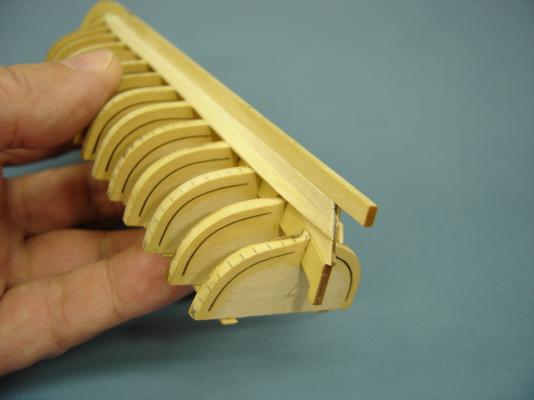
Here are a series of photos of the third plank being worked on. Nothing really different with this strake, other than the fact that it has a much more abrupt twist at the stern. Maybe it's my imagnation, but the curve at the bow also seems to be more pronounced. Anyway, I like to concentrate on shaping the forward end of the plank first, since the stern hasn't given me much of a problem. Once the forward portion fits pretty well, I mark where the plank starts changing shape at the stern, and begin working with it. These photos show that abrupt twist and the final result.


- 277 replies
-
- 13
-
-
- model shipways
- 18th century longboat
- (and 1 more)
-
David - I really like the way you did that transom. The whole model is really looking good! BobF
-
Hi David, I think any flat surface will work, as long as the parts don't get stuck to it. I use that piece of glass a lot. Thanks for the kind words. I see that you are building a Sultana, which is a handsome model. I'll be sure to check it out. Regards, Bob
-
Chuck - I think you're being too hard on yourself. I checked out your model, and it's showing a lot of promise. Hang in there, mate! Bob
-
Hi Bob, After checking out your model, I only hope mine looks half as good! I like the driftwood base. Bob
- 277 replies
-
- 1
-
-
- model shipways
- 18th century longboat
- (and 1 more)
-
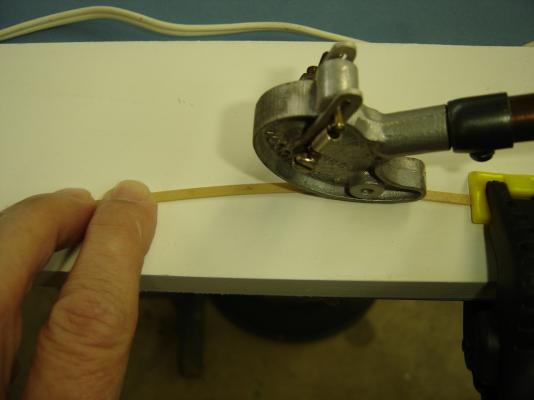
Chuck - I used the wood strips supplied with the kit. The broadstrake was edge bent to match, as closely as possible, the curve of the garboard strake at the bow. I then trimmed the front end of the strip so that I could fit it up against the keel, and eventually into the rabbet. After the garboard strake was mounted on the hull, I had to do some bending, twisting and trimming, so the broadstrake conformed to the frames and rabbet. This is also where the extra width of the strip came in handy. I was able to round out the inner edge a little more by sanding it, so I got a nice fit. I'm currently using a plank bending iron and some clamps to edge bend the strips. I had one crack on me, and another buckled, but I was able to save the strips. They were long enough so that the damaged sections could be removed. I have found that it takes as many as three or four sessions of wetting and bending to get the plank where it should be. I hope I answered your question. If not, please let me know.
- 277 replies
-
- 3
-
-
- model shipways
- 18th century longboat
- (and 1 more)
-
Toni - I'm beginning to see what you mean. I got my hands on a copy of W. E. May's book, "The Boats of Men of War." There's a draught featuring a 23 foot longboat, circa 1758, that lists the principal scantlings, and indicates the shift of butts in the carvel strakes. The hull is planked with what appears to be only 8 strakes! No wonder they used multiple planks in each strake. Thanks for the kind words. Bob
-
I forgot to mention that a new tick strip has to be created for most of the bulkheads, especially as you approach the bow and stern. The bulkhead just ahead of where the garboard strake ends will have one less tick mark (12), and the bulkhead forward of that will have 11 tick marks. At least, that's the way I'm planning it. I have to admit that I looked long and hard at the various longboats being worked on by this group as well as my Tri-Club group, before I laid my first plank. The concept of edge-bending a plank was new to me. I found that the most dificult aspect of forming the garboard strakes was deciding how much taper to give them at the bow. I used a plank bending iron to configure the twist at the stern. Prior to attaching them to the hull, I used them as templates to form the forward end of the first broadstrakes. The instructions are quite explicit about starting the garboard strake just forward of the scarph joint, which is what I did. I was surprised by the amount of curvature that was necessary to bring the next plank around the garboard strake, but it worked out OK. The planks also required quite a bit of bevel at the bow, almost a sharp edge, in order to fit them properly into the rabbet. I'm wondering if I didn't bevel the false keel enough. Hopefully, it won't be visible on the finished model.


- 277 replies
-
- 13
-
-
- model shipways
- 18th century longboat
- (and 1 more)
-
Chuck - You're right. The planks do take some interesting twists and turns ... literally! They definitely aren't straight. I'll be posting something soon. Thanks for your interest. Regards, Bob
-
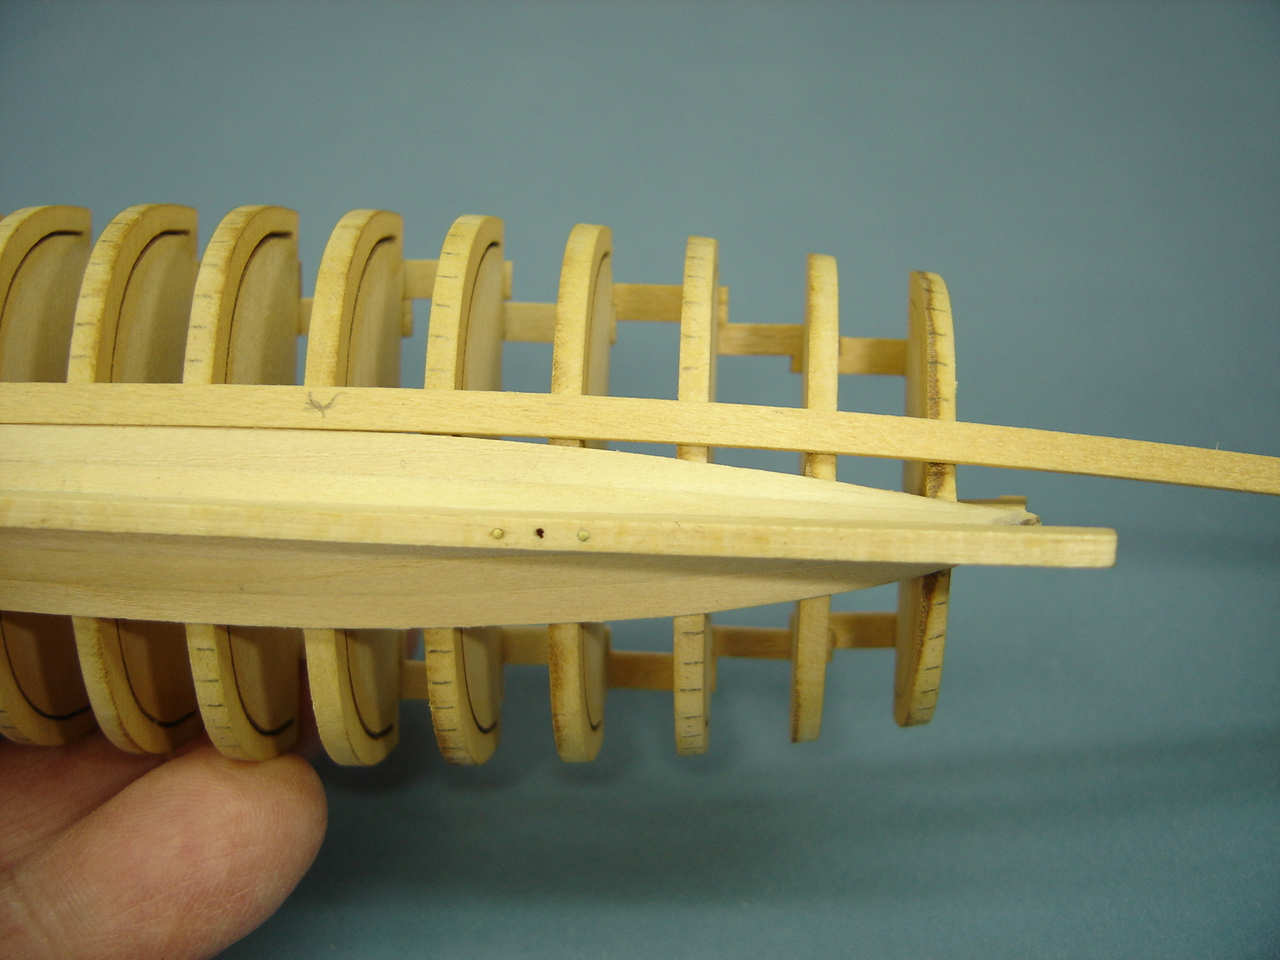
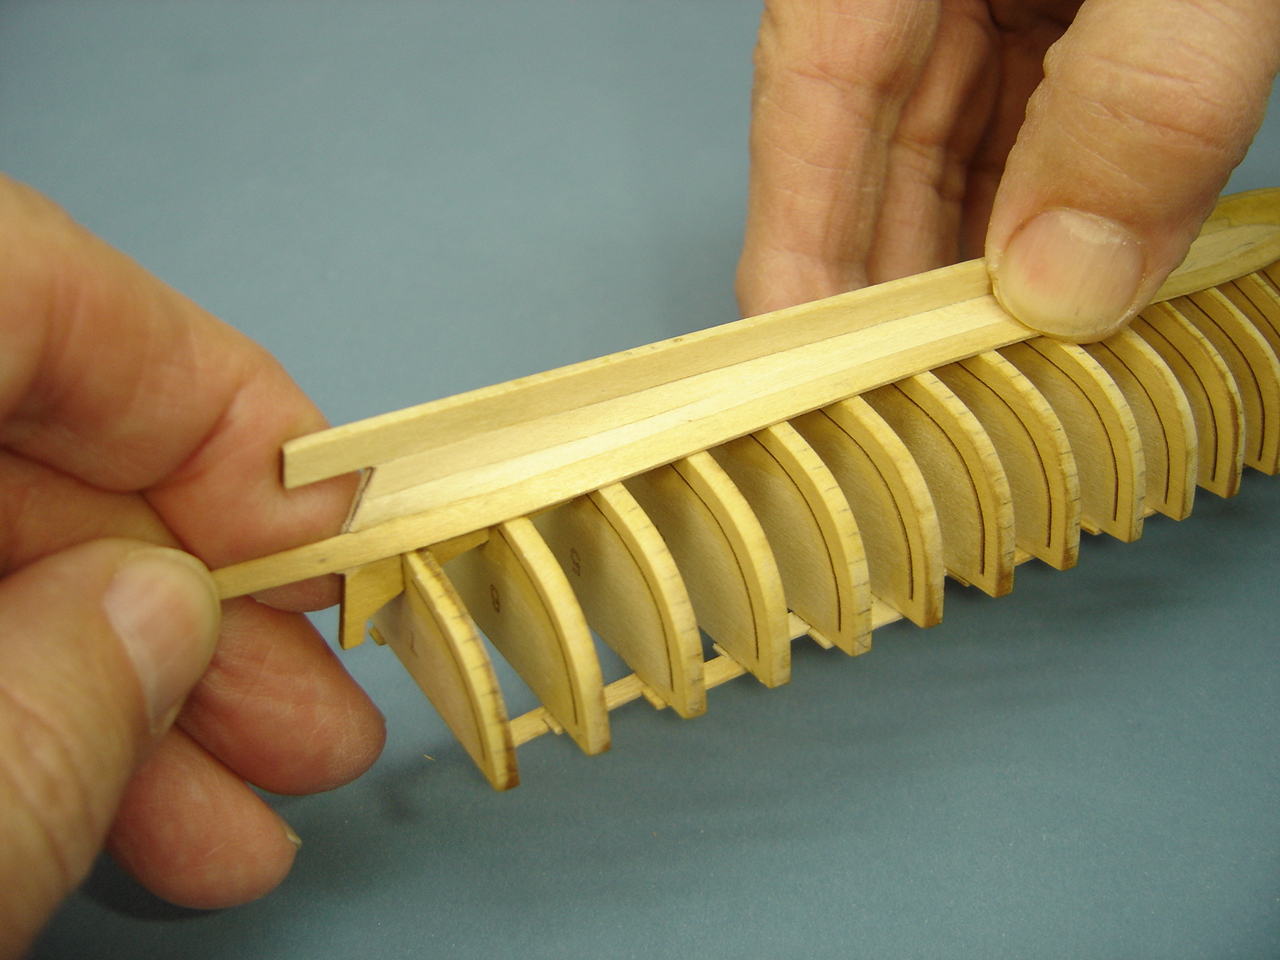
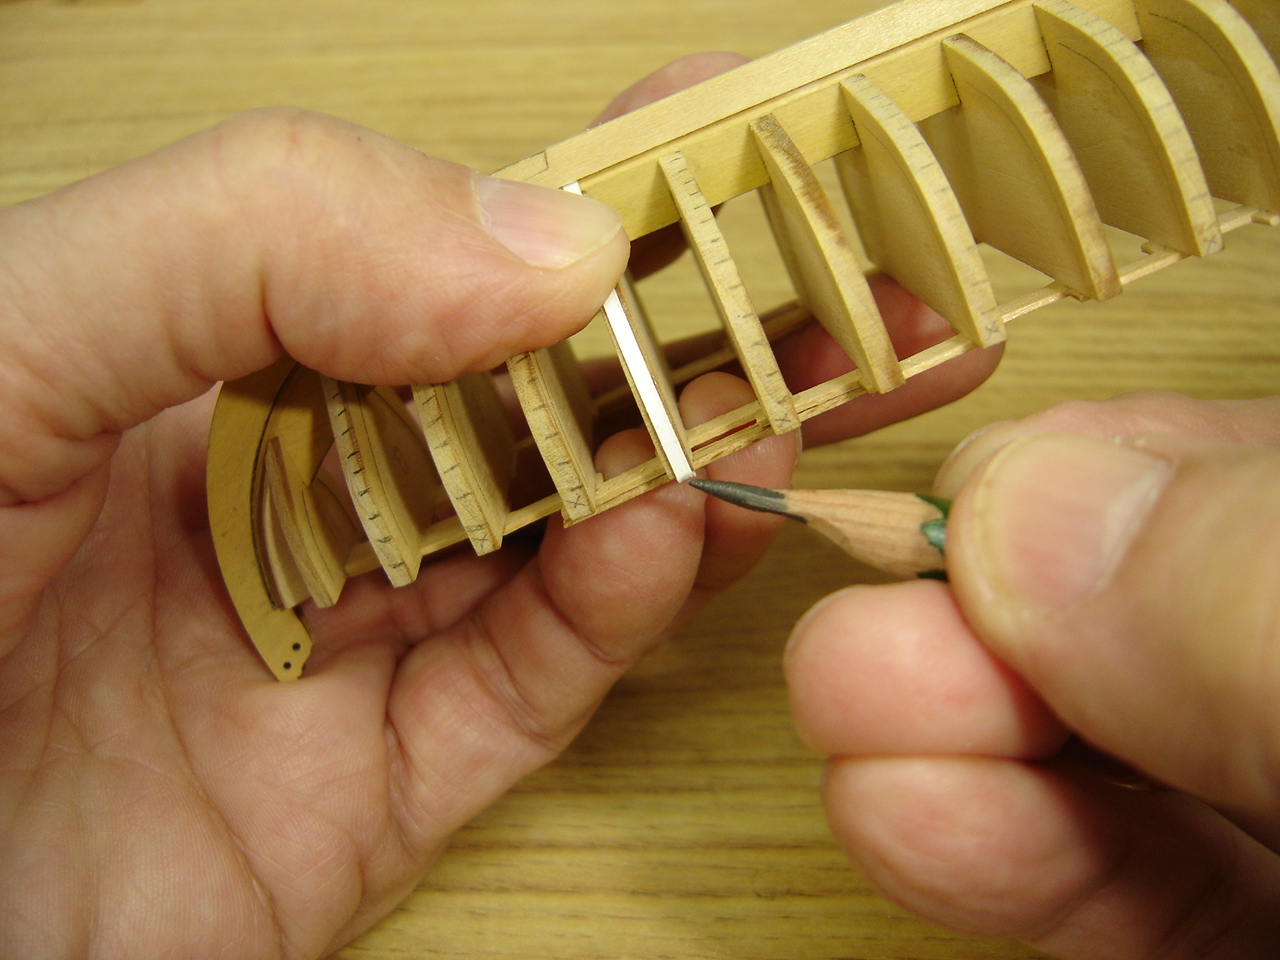
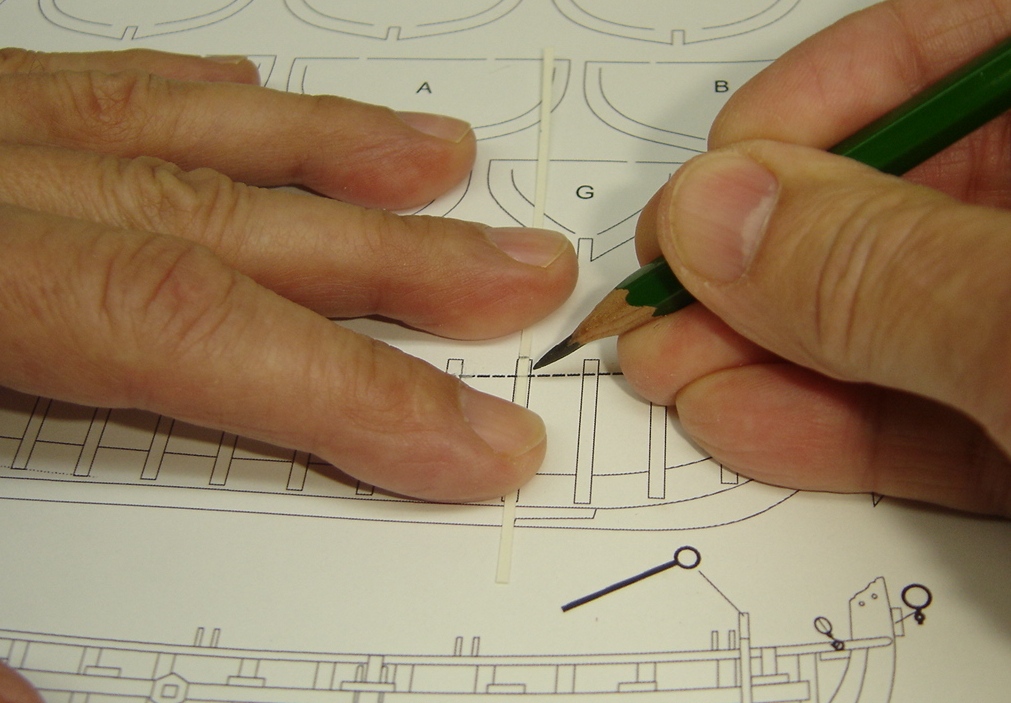
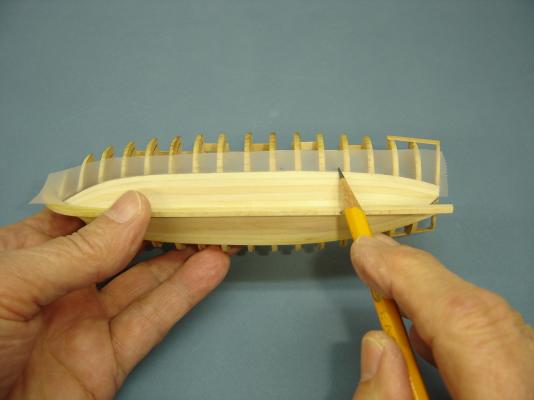
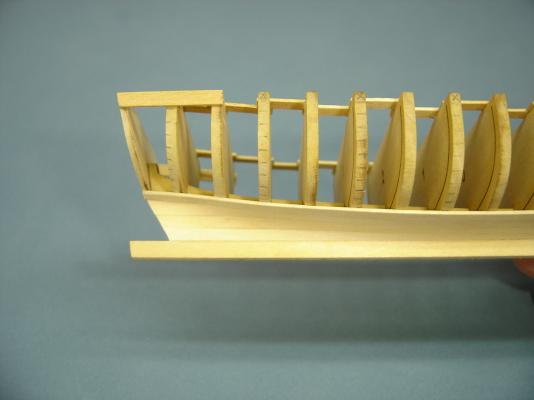
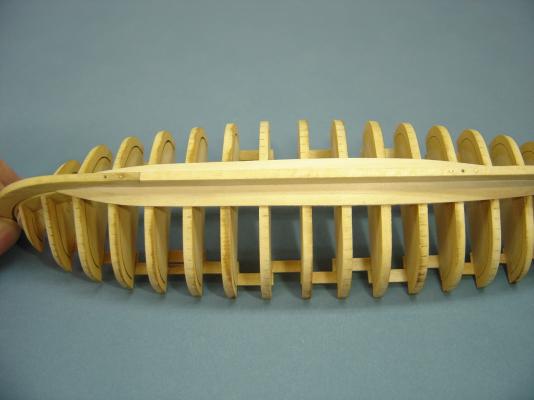
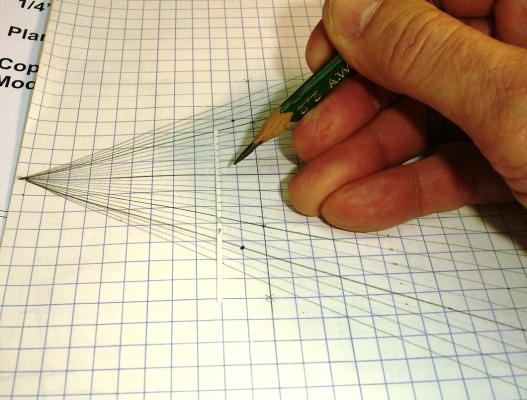
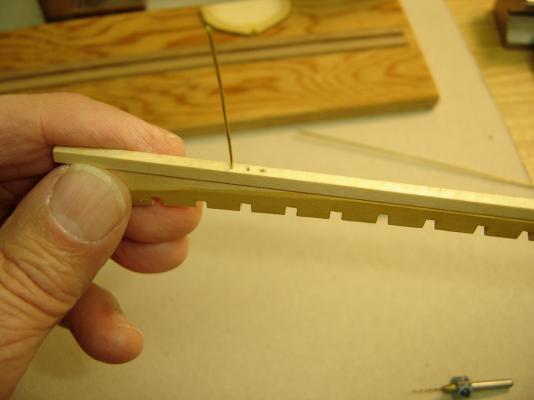
The rest of the bulkheads went on without any problem, and were beveled. I decided to leave the transom off until the garboard strake and first two broadstrakes are attached to the hull. Like Toni, I decided to use the tick-strip method for planking the model. In the photo, the distance from the rabbet to the top of a bulkhead is being marked off. I then located the corresponding bulkhead on the plans, and lined the strip up with the top of that bulkhead. The sheerline was then marked on the strip. The distance between the sheerline and the bottom of the strip was divided into eaqual segments by using what I call a "planking grid." I think it's also referred to as a "diminishing grid." I opted to plank my hull with thirteen strakes per side. I just felt that it would allow for a little more wood on each kit-supplied strip during the spiling process. Hopefully, the reduction of each plank by 1/12th won't be that noticeable. The tick marks were then transfered to the corresponding bulkheads. Planking is next.

- 277 replies
-
- 9
-
-
- model shipways
- 18th century longboat
- (and 1 more)
-
Chuck - I've also turned small ornate flanges on my lathe that can slide over the outer tube. They can be soldered to the base of the tube, although a drop of CA is more than adequate. If they are somewhat snug, nothing at all might be needed since they serve no structural purpose. They just look nice. I may add that touch to my own model. Bob
-
Ben - I've used that mounting technique on two larger models, and it works pretty well. You'd have to turn the case upside down before the model might fall out. Toni - It's good to be aboard! Regards, Bob
-
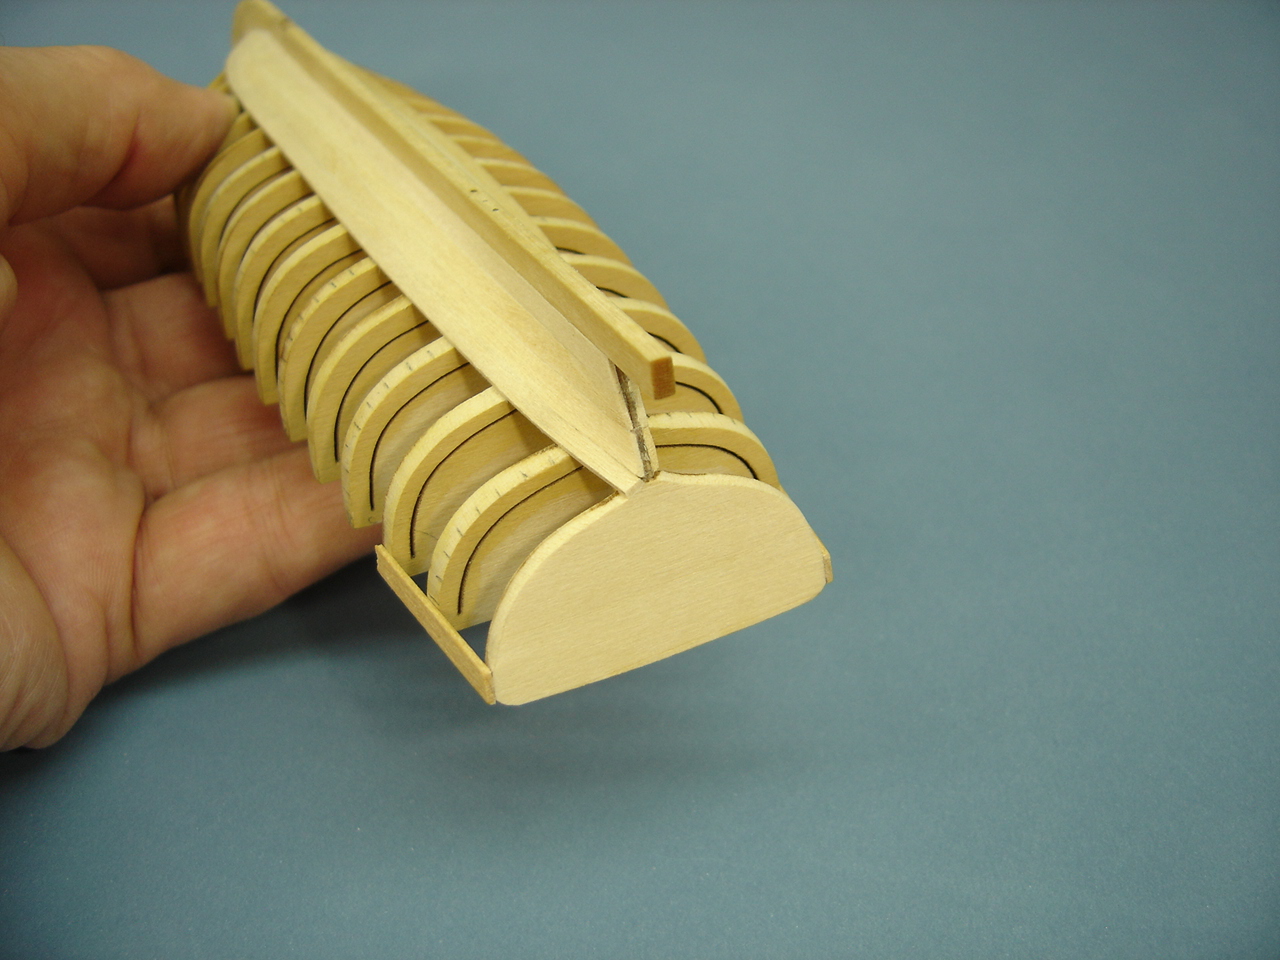
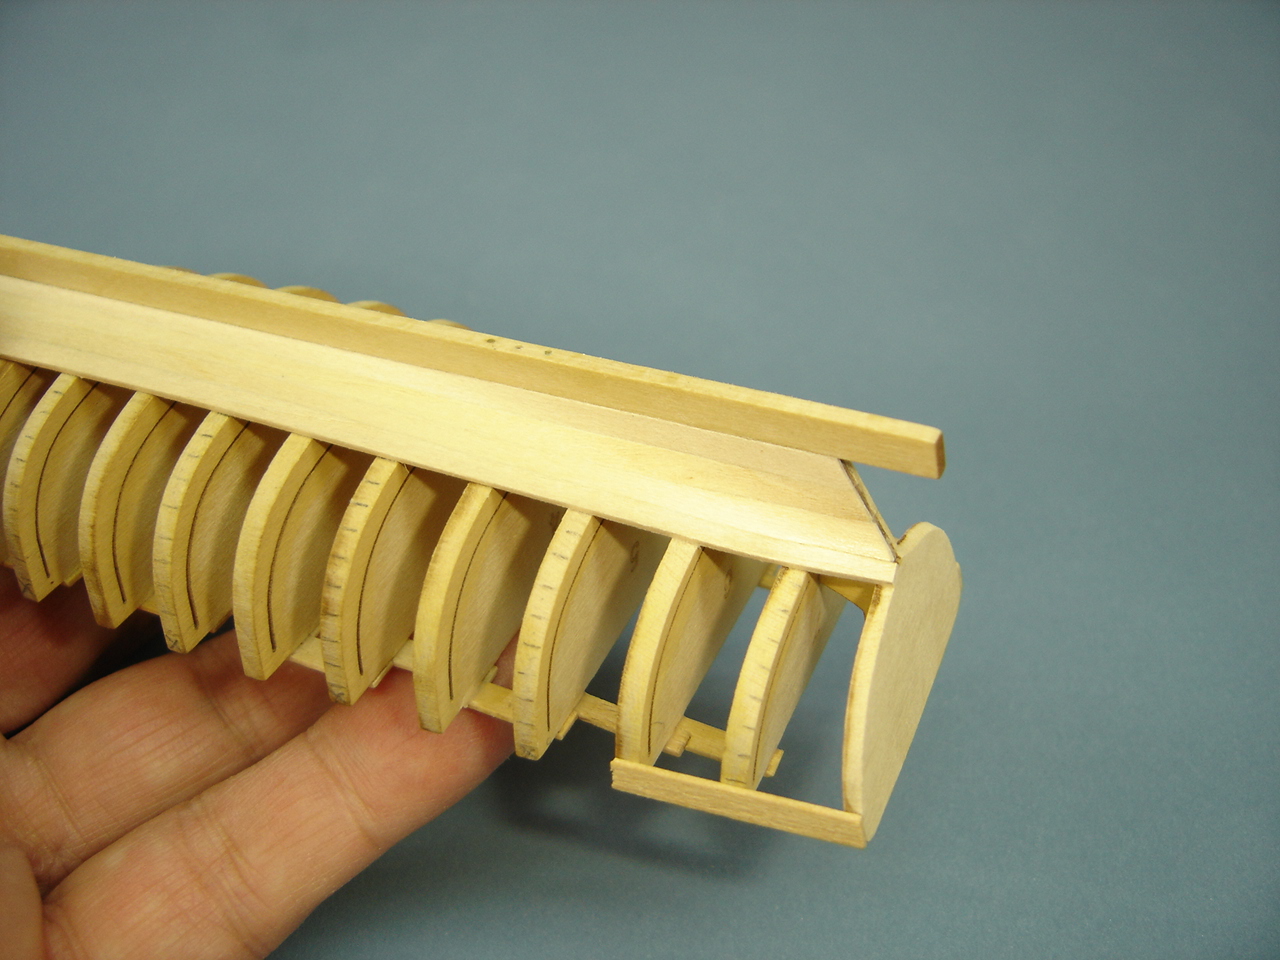
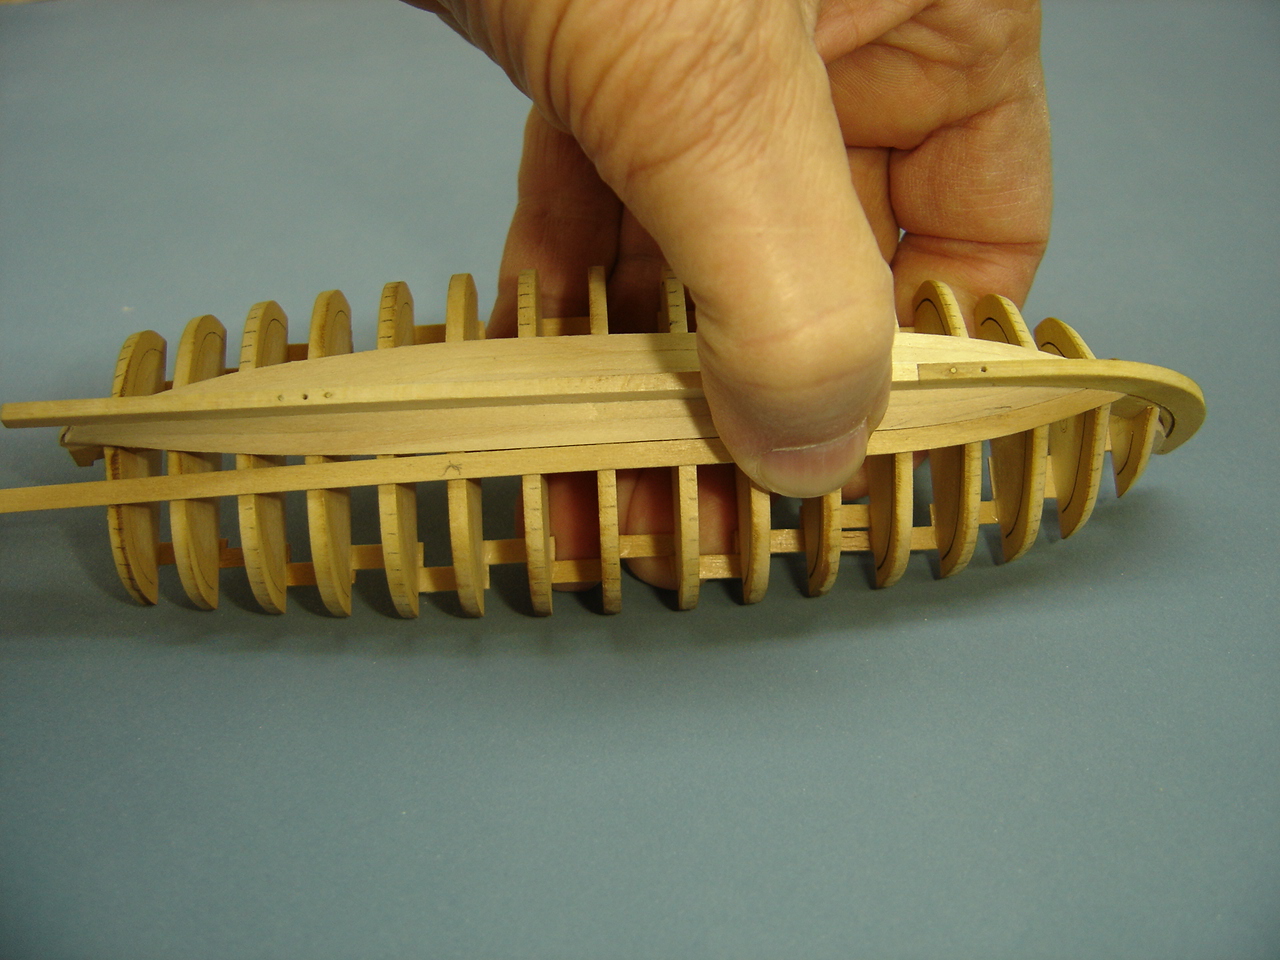
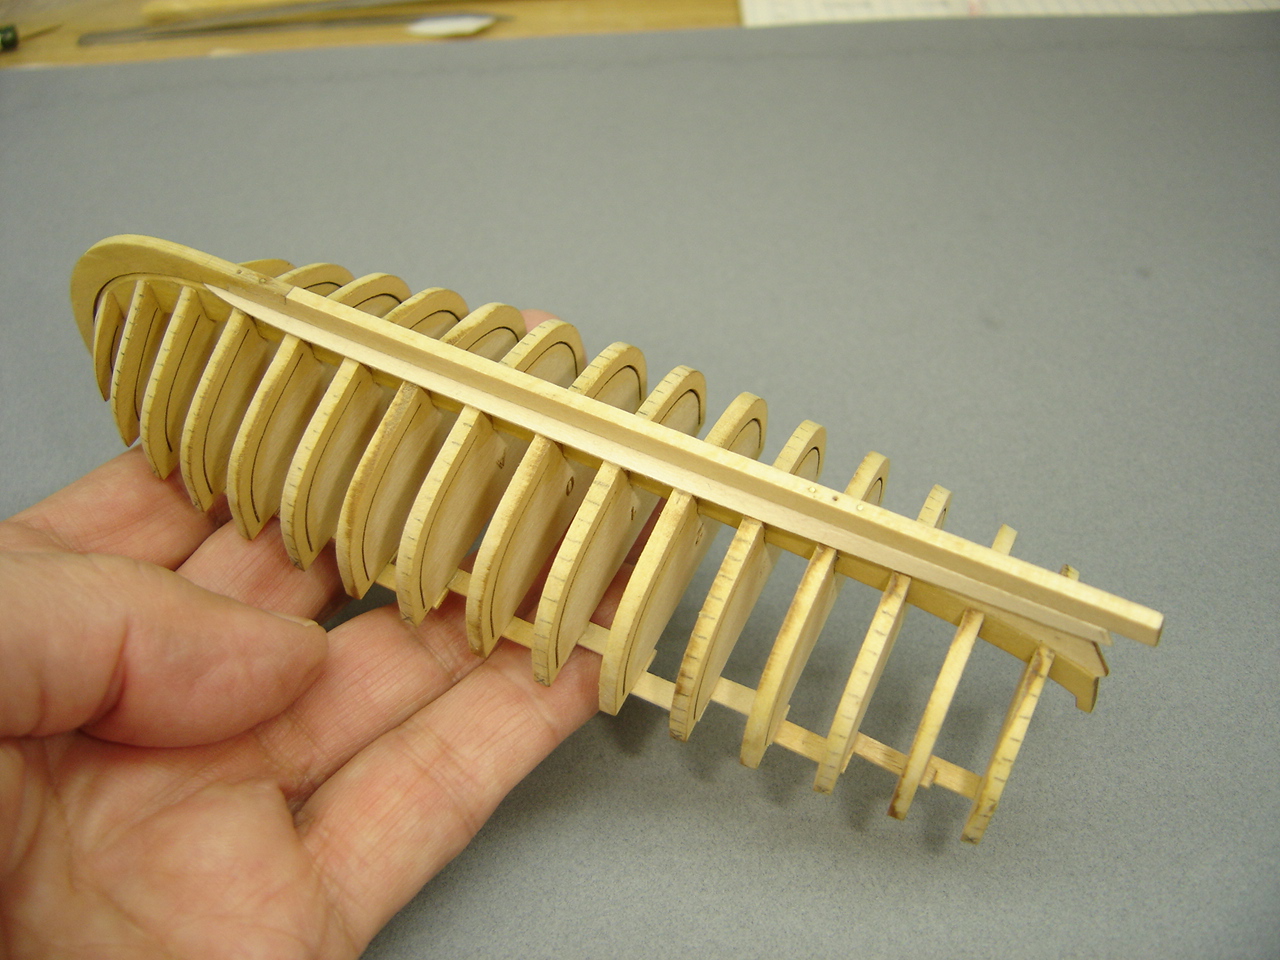
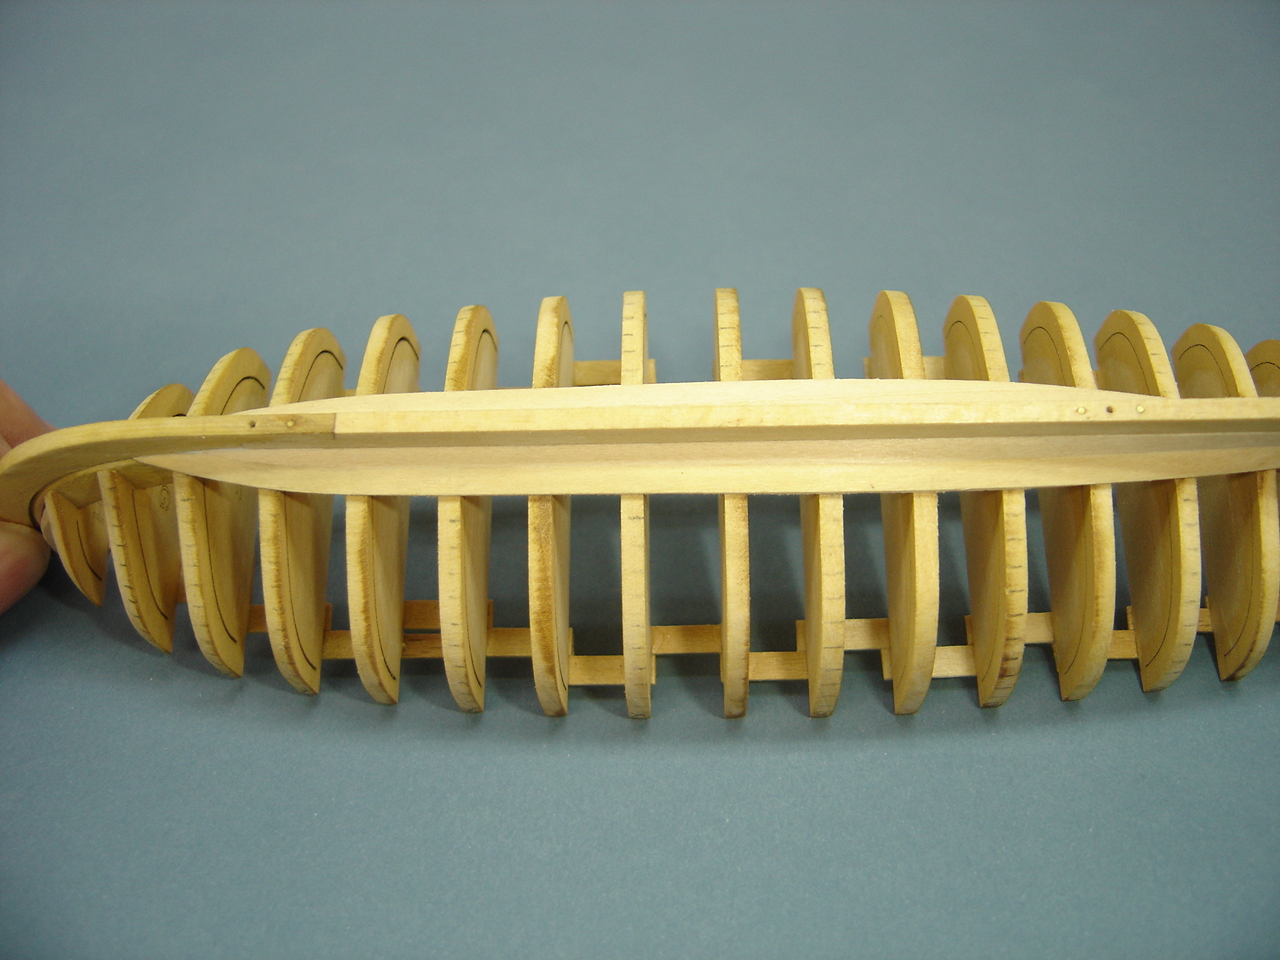
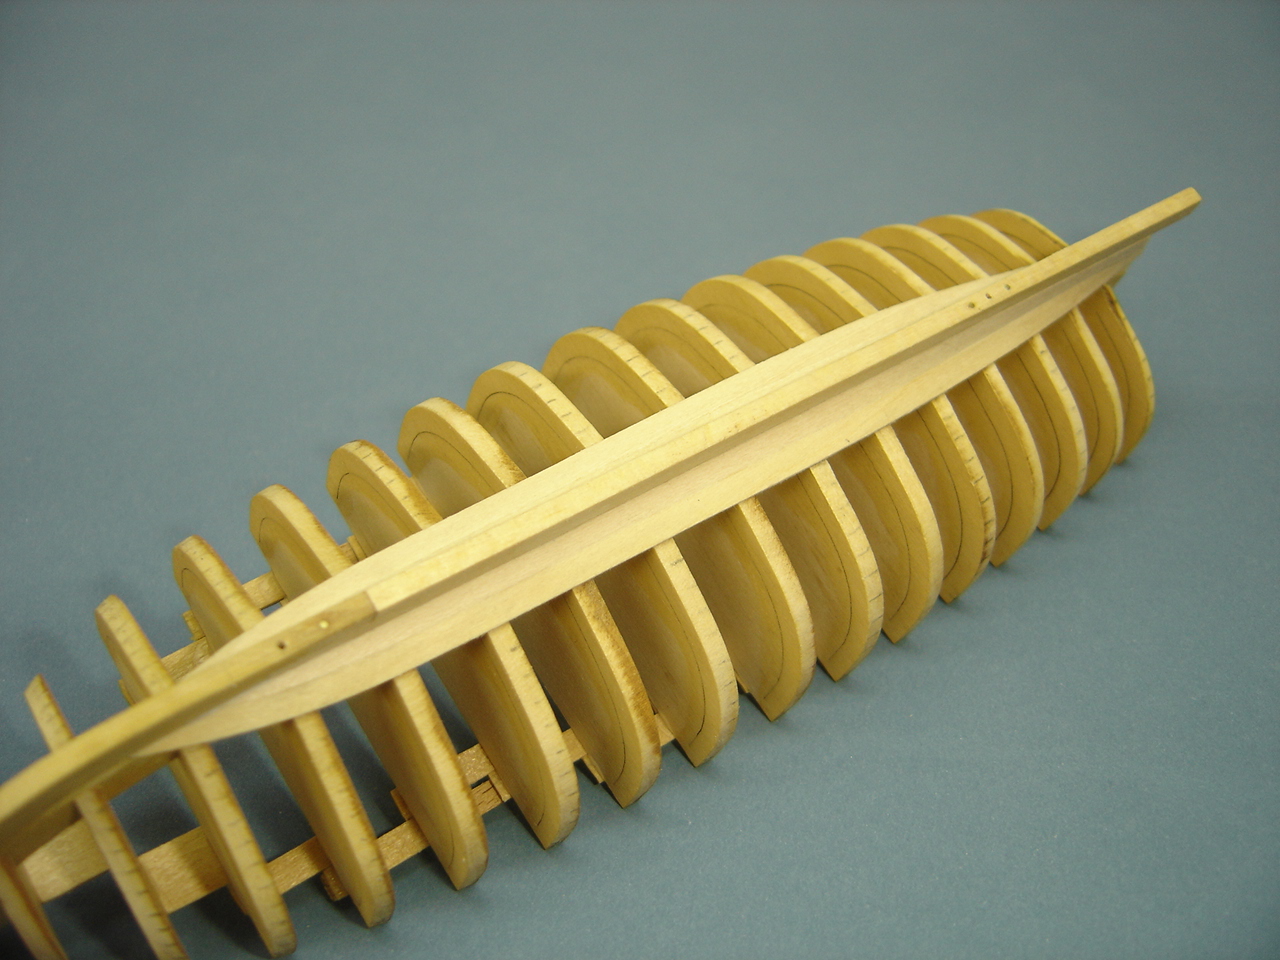
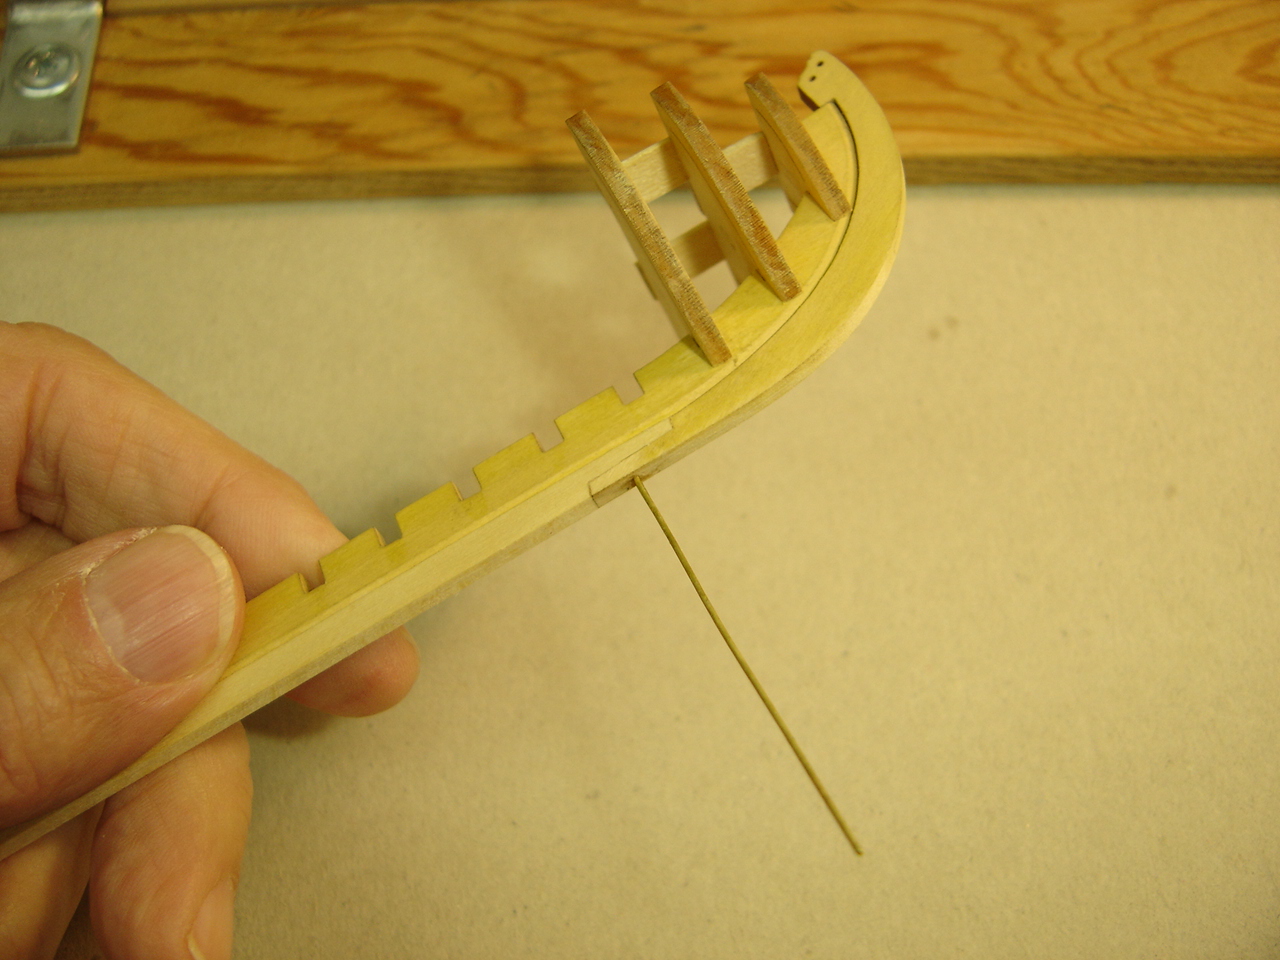
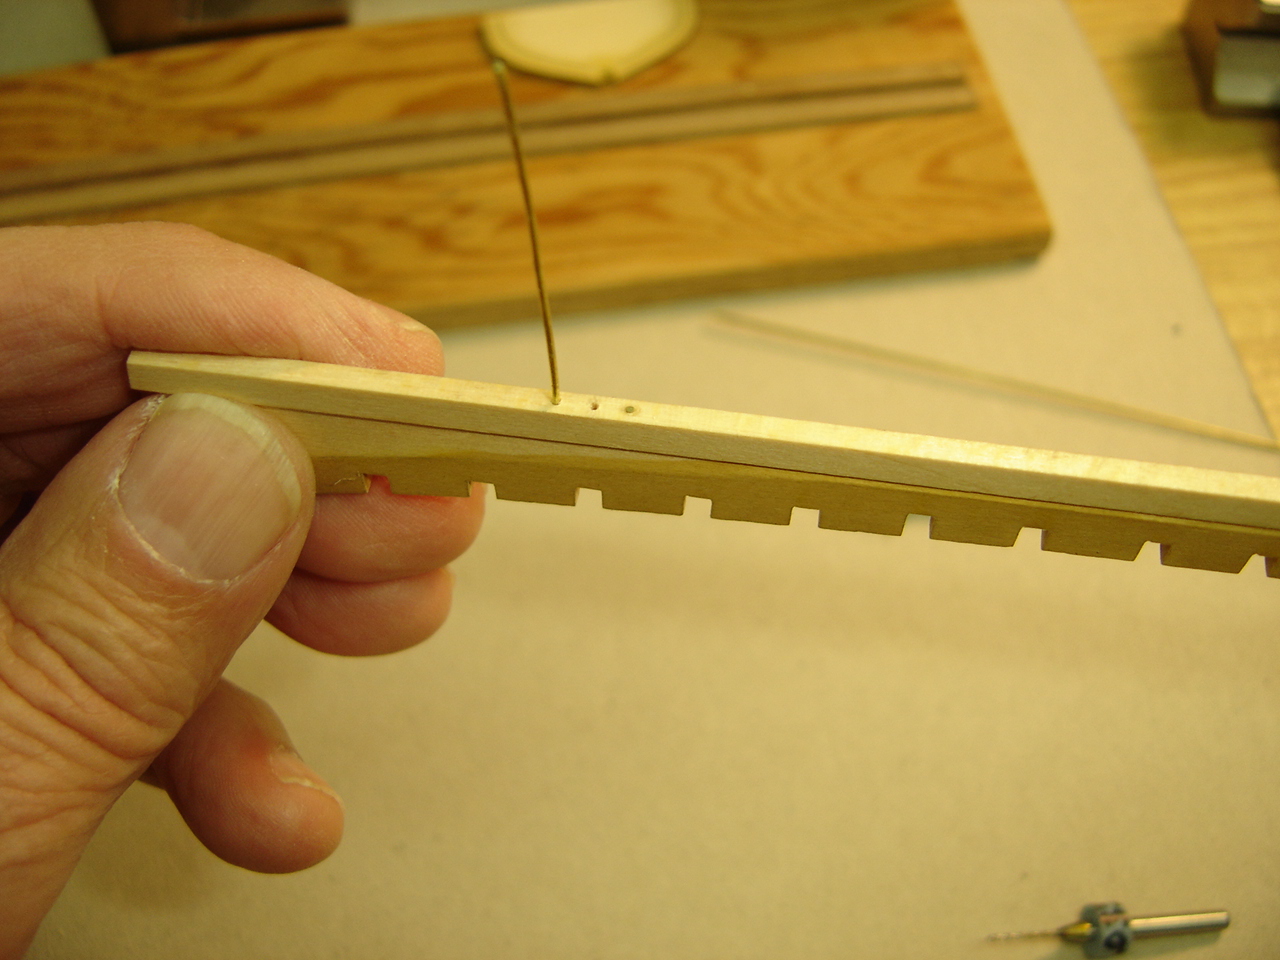
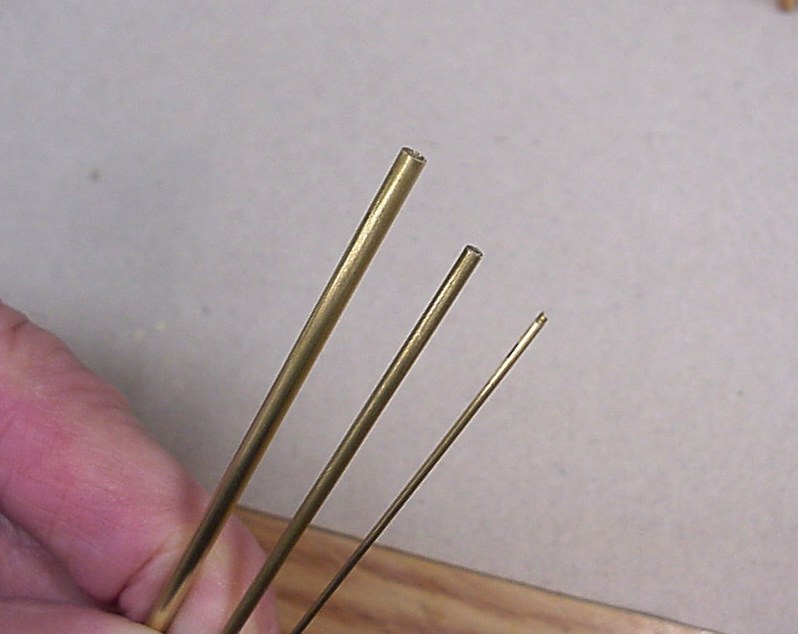
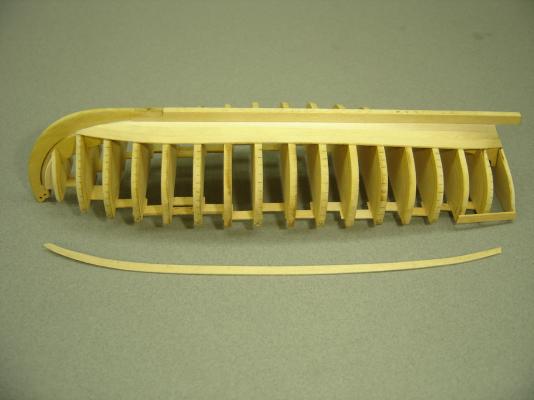
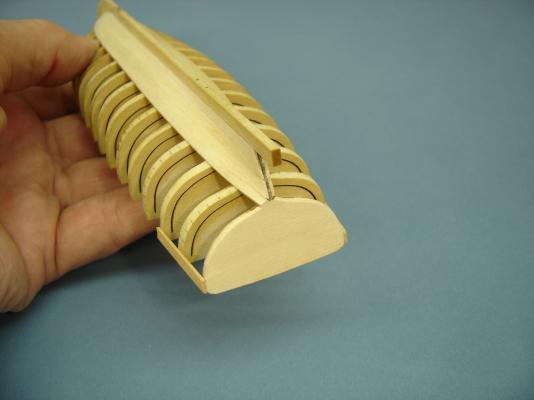
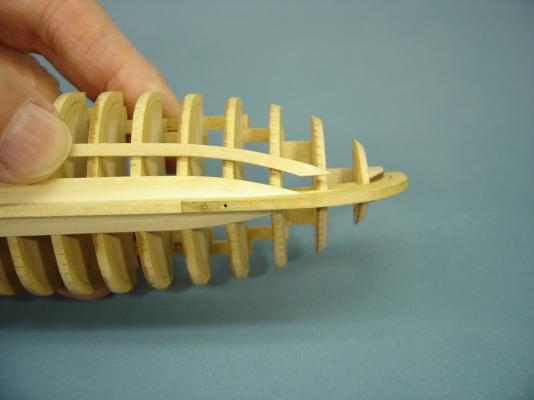
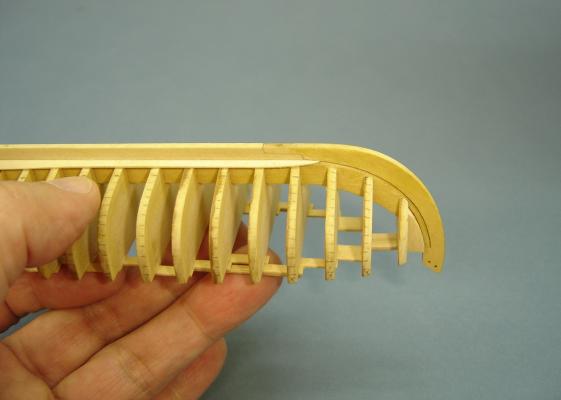
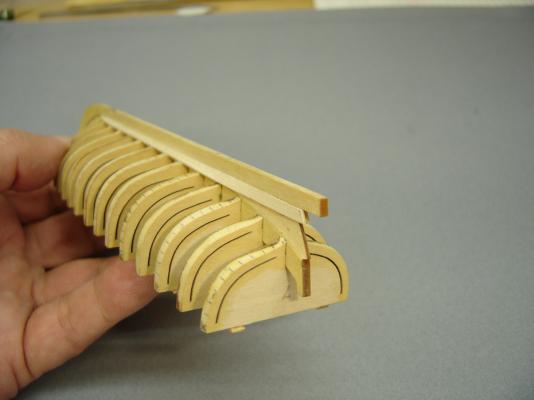
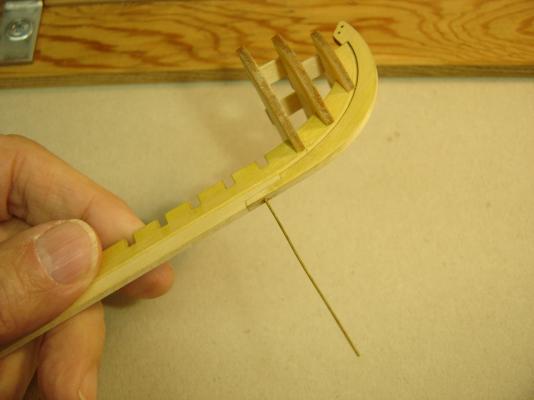
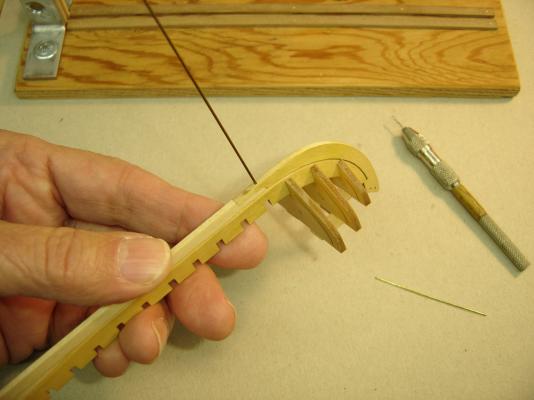
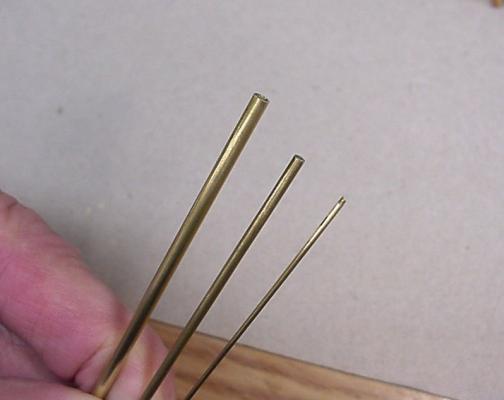
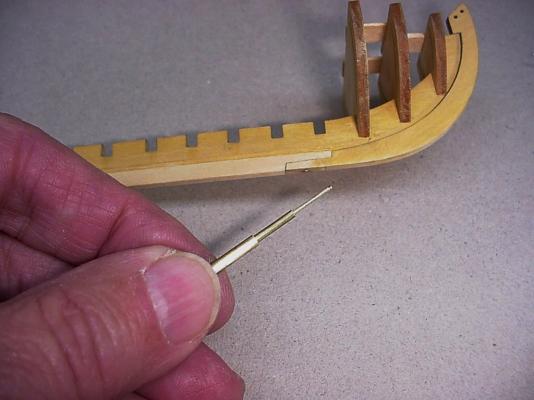
Hello all, After completing three bulkheads, I realized that I had forgotten to make provisions for mounting the model. Before I get into that, I'd like to point out the strips that were laid across each pair of bulkheads as a new bulkhead was installed. This made the assembly quite strong. I decided to install the pedestals directly under hull frames. The forward pedestal will be located at the forward end of the keel/stem scarf joint. As a precaution, I "pegged" the scarf joint with a length of brass wire, which I ran up into the false keel. Just forward of the brass peg, a hole was drilled through the keel into the false keel that will take a 1/32" brass rod. This is a press fit, and the main support for the model. The same procedure was performed at the stern with one exception. Two pegs were added, and the 1/32" hole did not extend into the false keel. I want to wait until the hull is planked, before the mounting hole is drilled any deeper. When the model is mounted, the 1/32" rod will slide into the smaller brass tube shown in these photos. That particular tube will be press-fitted into the plinth. After being cut to the proper mounting height and polished, the larger tube will be placed over the smaller tube. Hopefully, it will give the assembly a finished appearance, and provide additional support for the model.
- 277 replies
-
- 6
-
-
- model shipways
- 18th century longboat
- (and 1 more)
-
Hello Chuck, I was at the Newport Beach show, so we may have met. You are correct. I have built a number of models, and as soon as I figure it out, I'll post some information on myself. Regards, Bob
-
Thanks to all of you for your words of welcome. Bob
-
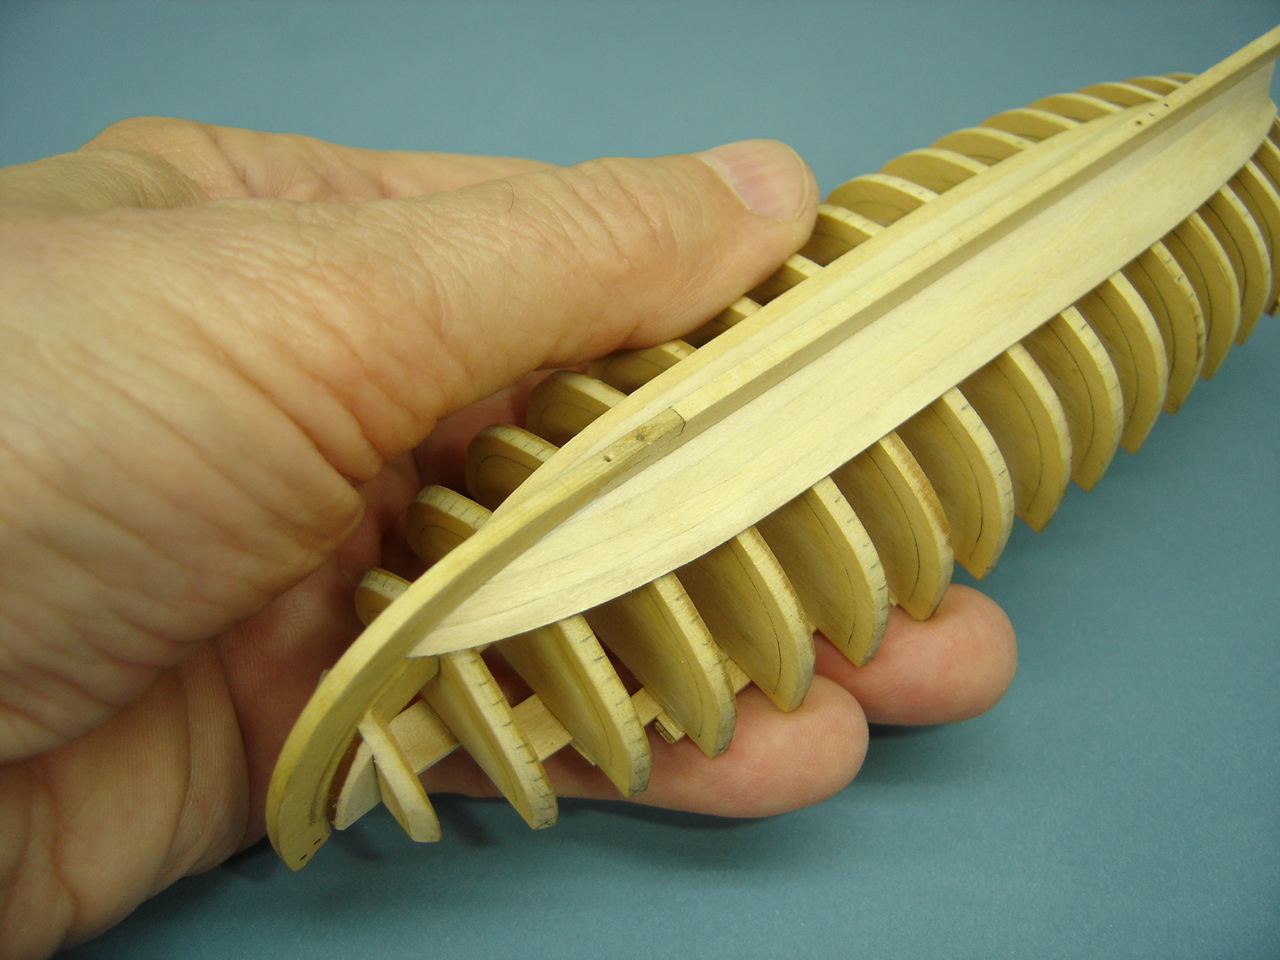
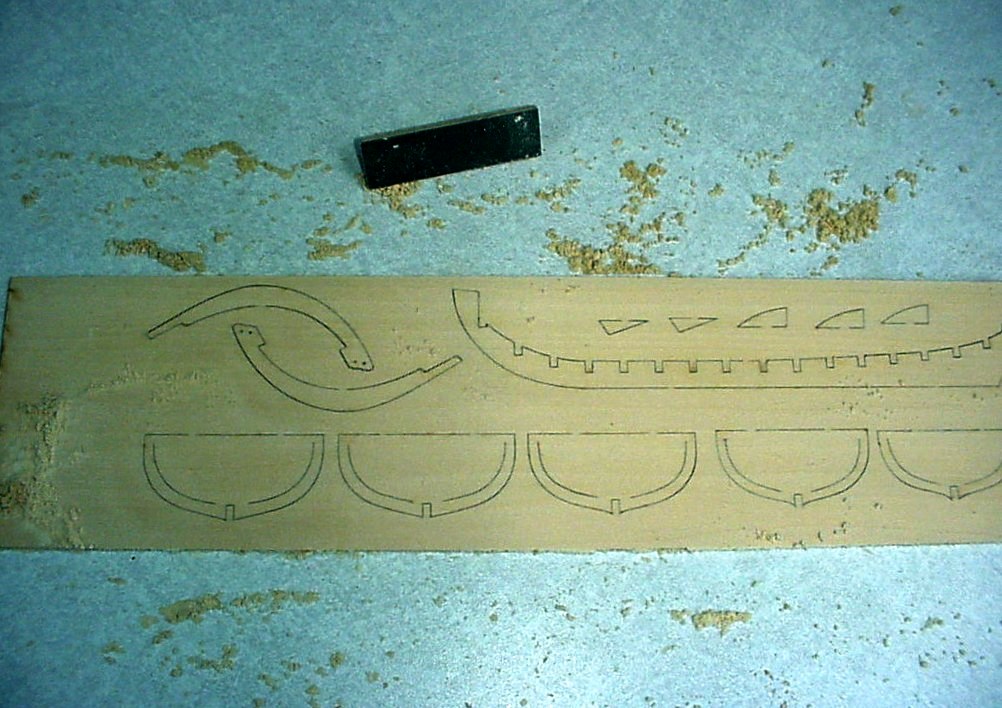
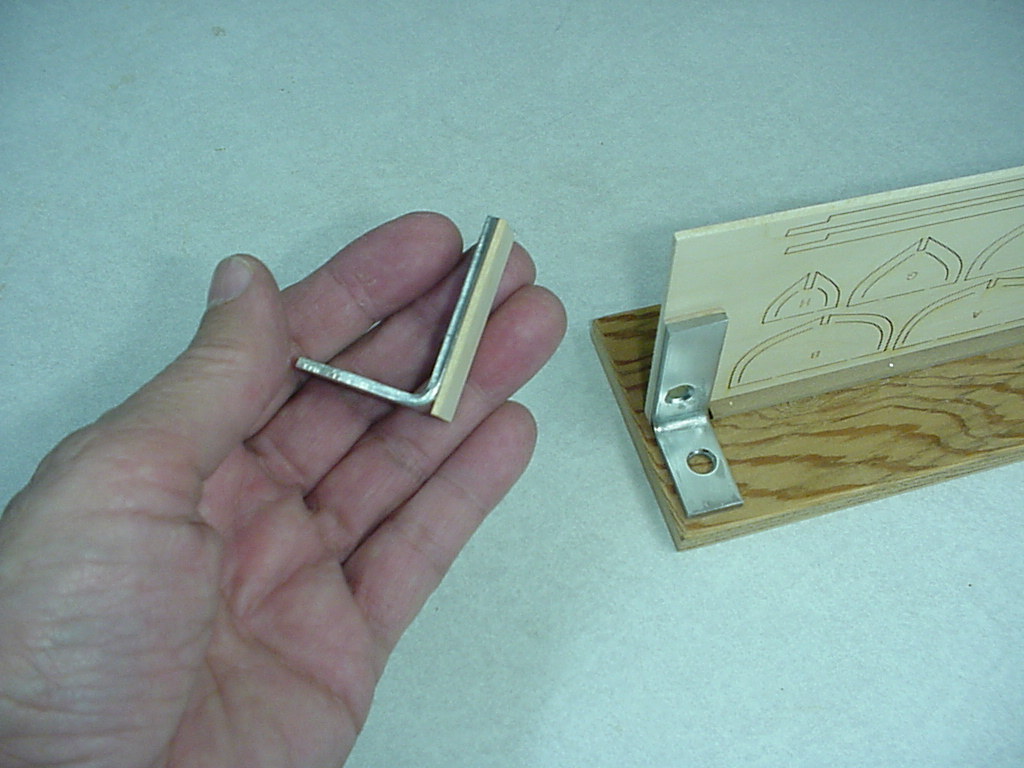
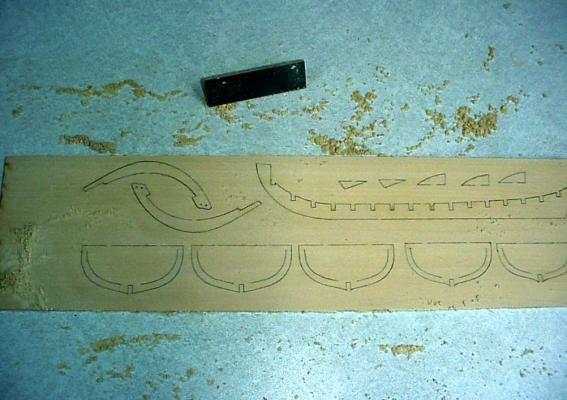
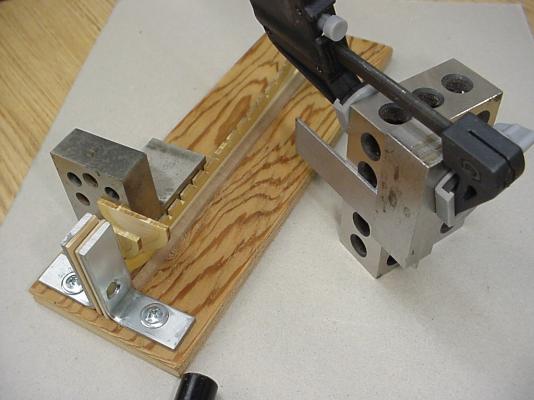
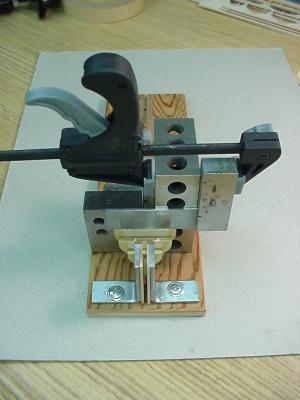
Hello all, This is my first try at posting a project to MSW, so please be patient with me. As part of the Longboat Tri-Club build, I've been lagging hopelessly far behind everyone else. After studying the various models already posted, I feel that my offerings will be very redundant, and certainly not as good. Anyway, I'm going to start with square one, and go from there. Removing the burn marks on the back side of the sheets went quite well. Next step was to duplicate the bearding line on the port side of the false keel, and make the necessary bevels for the rabbet. Using a piece of glass and some clamps, I assembled the keel, stem and false keel. I then squared up the stem and keel. Using the glass plate and a sanding block it went quite well. The sandpaper was attached to the block with two-sided tape, which is one of my most useful tools. At this point, I constructed a building board. The angle brackets had to be adjusted to ensure that they were square. I then epoxied some basswood to one face of each bracket. Slightly undersized screws were used to affix them to the building board. This provided some adjustability. Two steel blocks, a small square and a clamp were used to ensure that the bulkheads were plumb when glued to the false keel. The small angle was adjusted up or down as each new bulkhead was put in place. Although the blocks were a bit cumbersome, the results were acceptable. I found that it was necessary to introduce some play into the bulkhead notches before they were glued in place. The Elmer's glue caused the wood to expand, and on a number of occasions adjustments were almost impossible to make. One bulkhead had to be re-glued twice before it had the correct orientation.


- 277 replies
-
- 12
-
-
- model shipways
- 18th century longboat
- (and 1 more)