JpR62
-
Posts
699 -
Joined
-
Last visited
Content Type
Profiles
Forums
Gallery
Events
Everything posted by JpR62
-
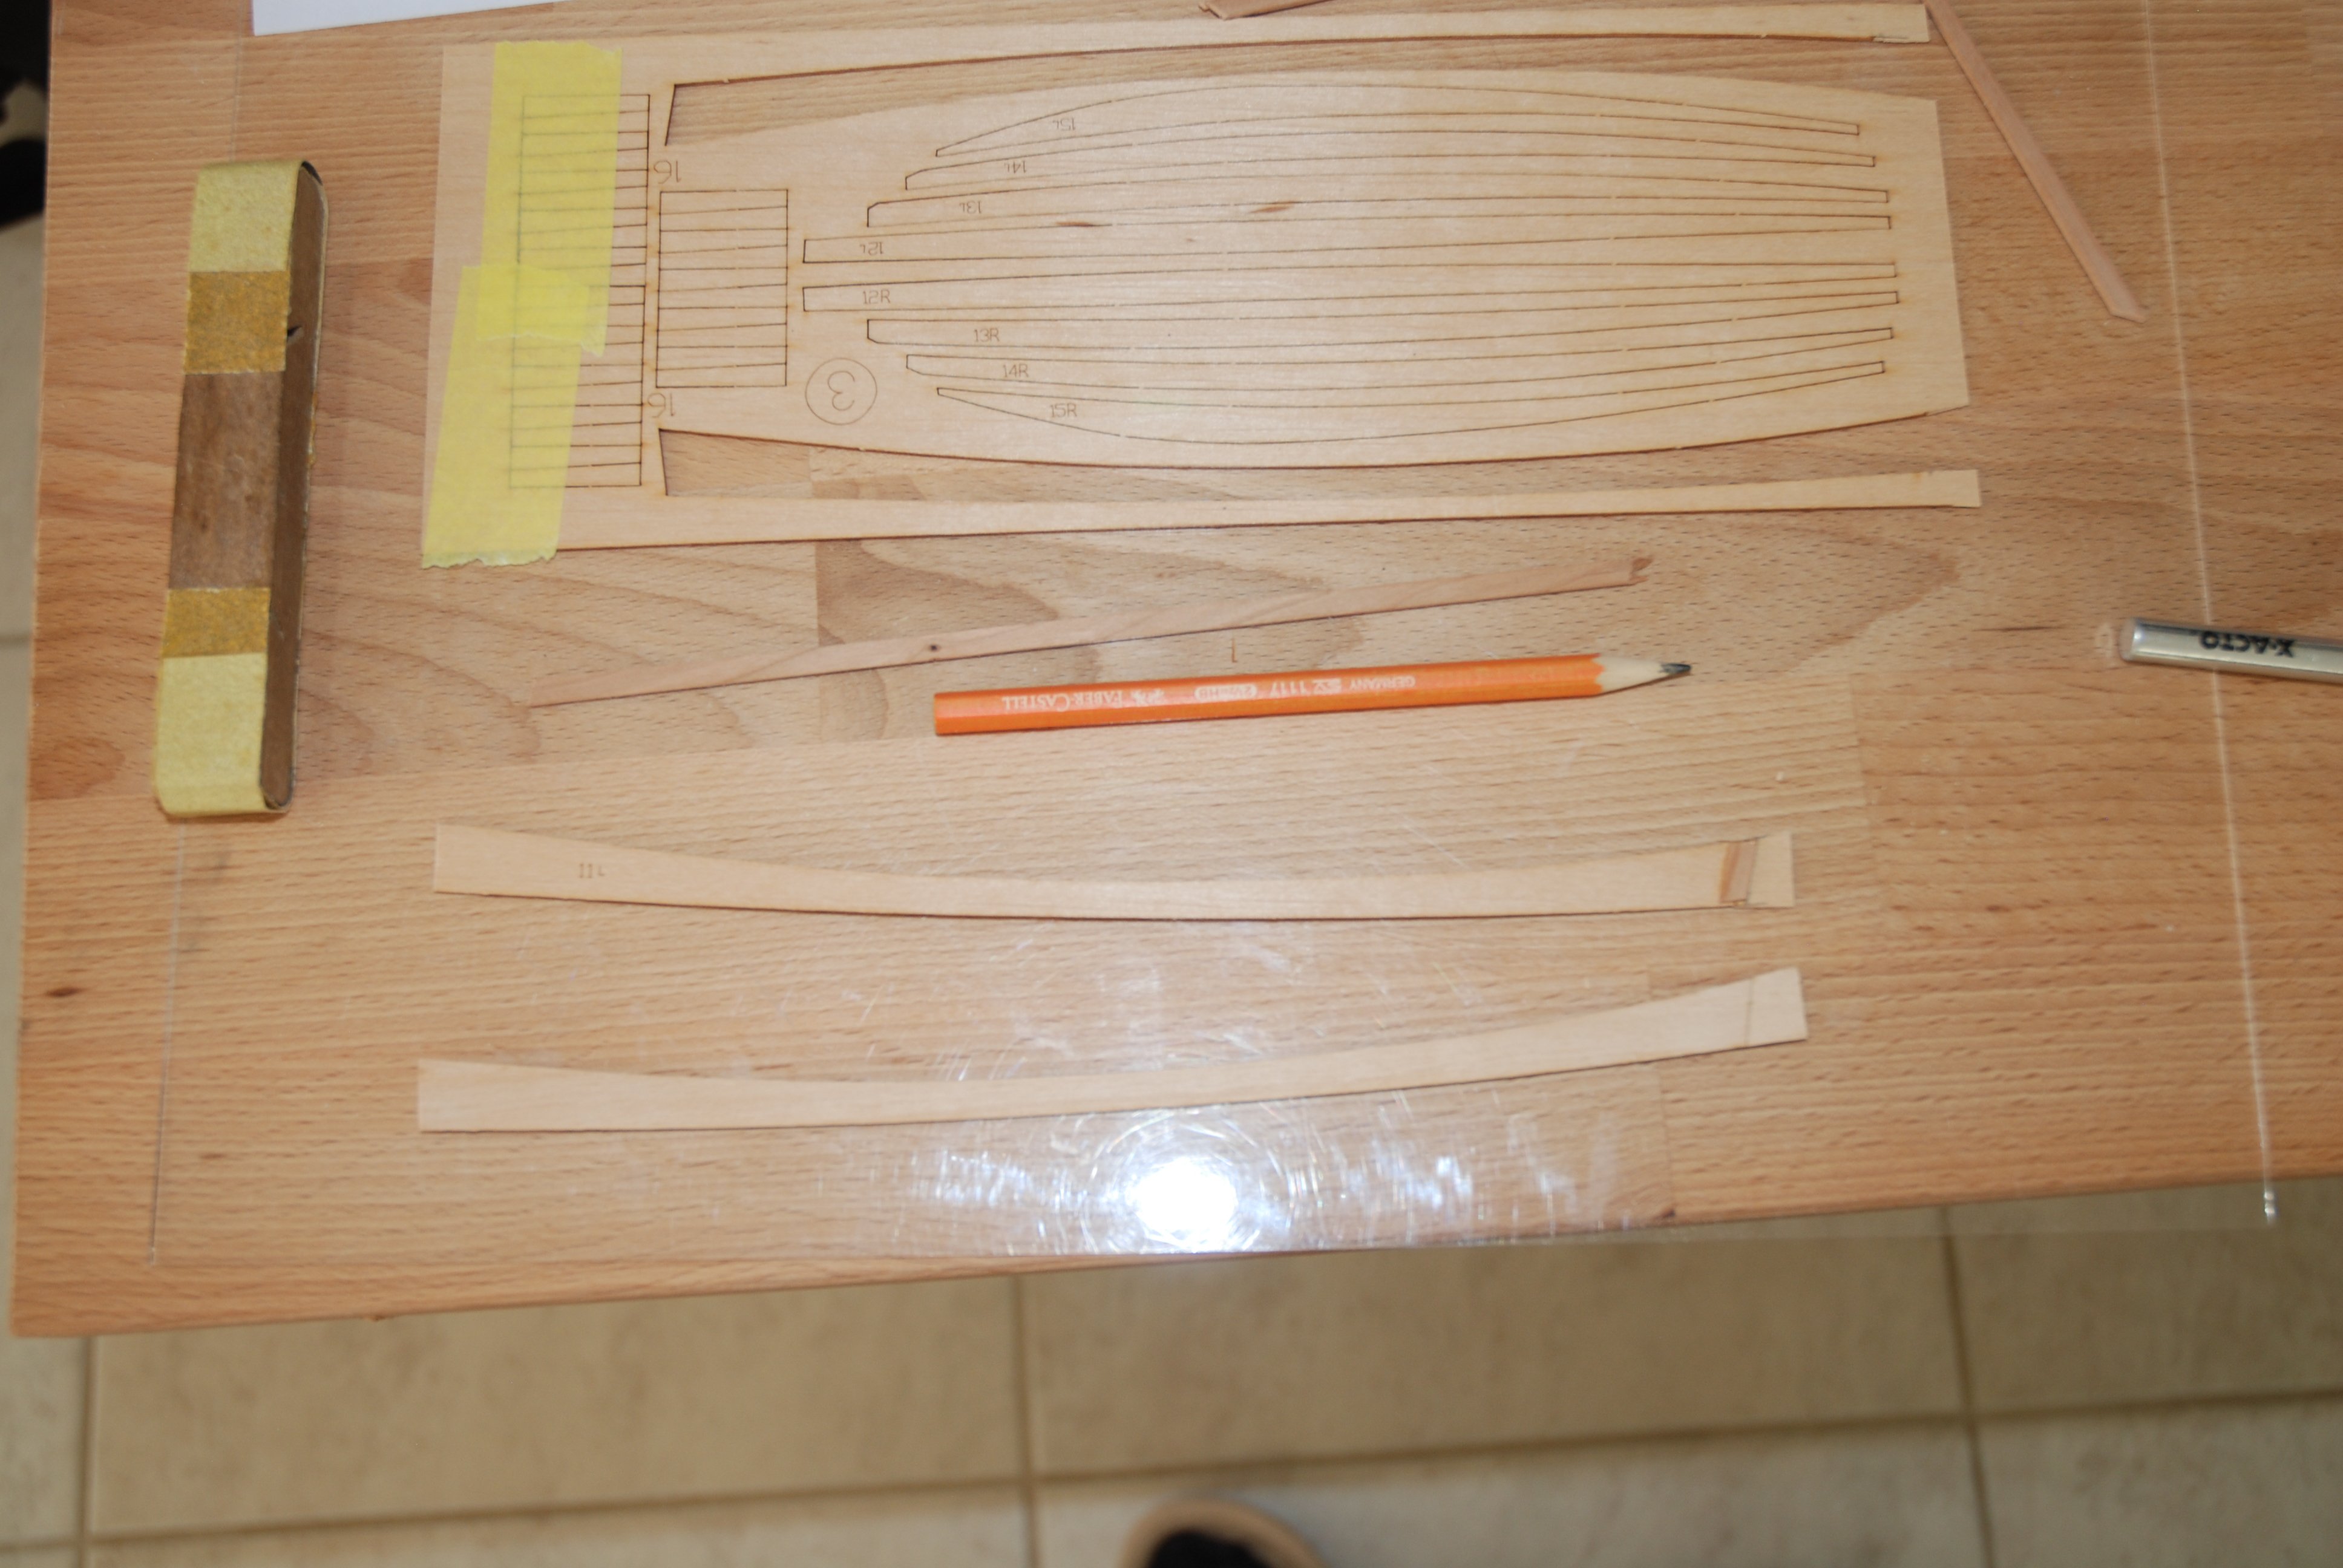
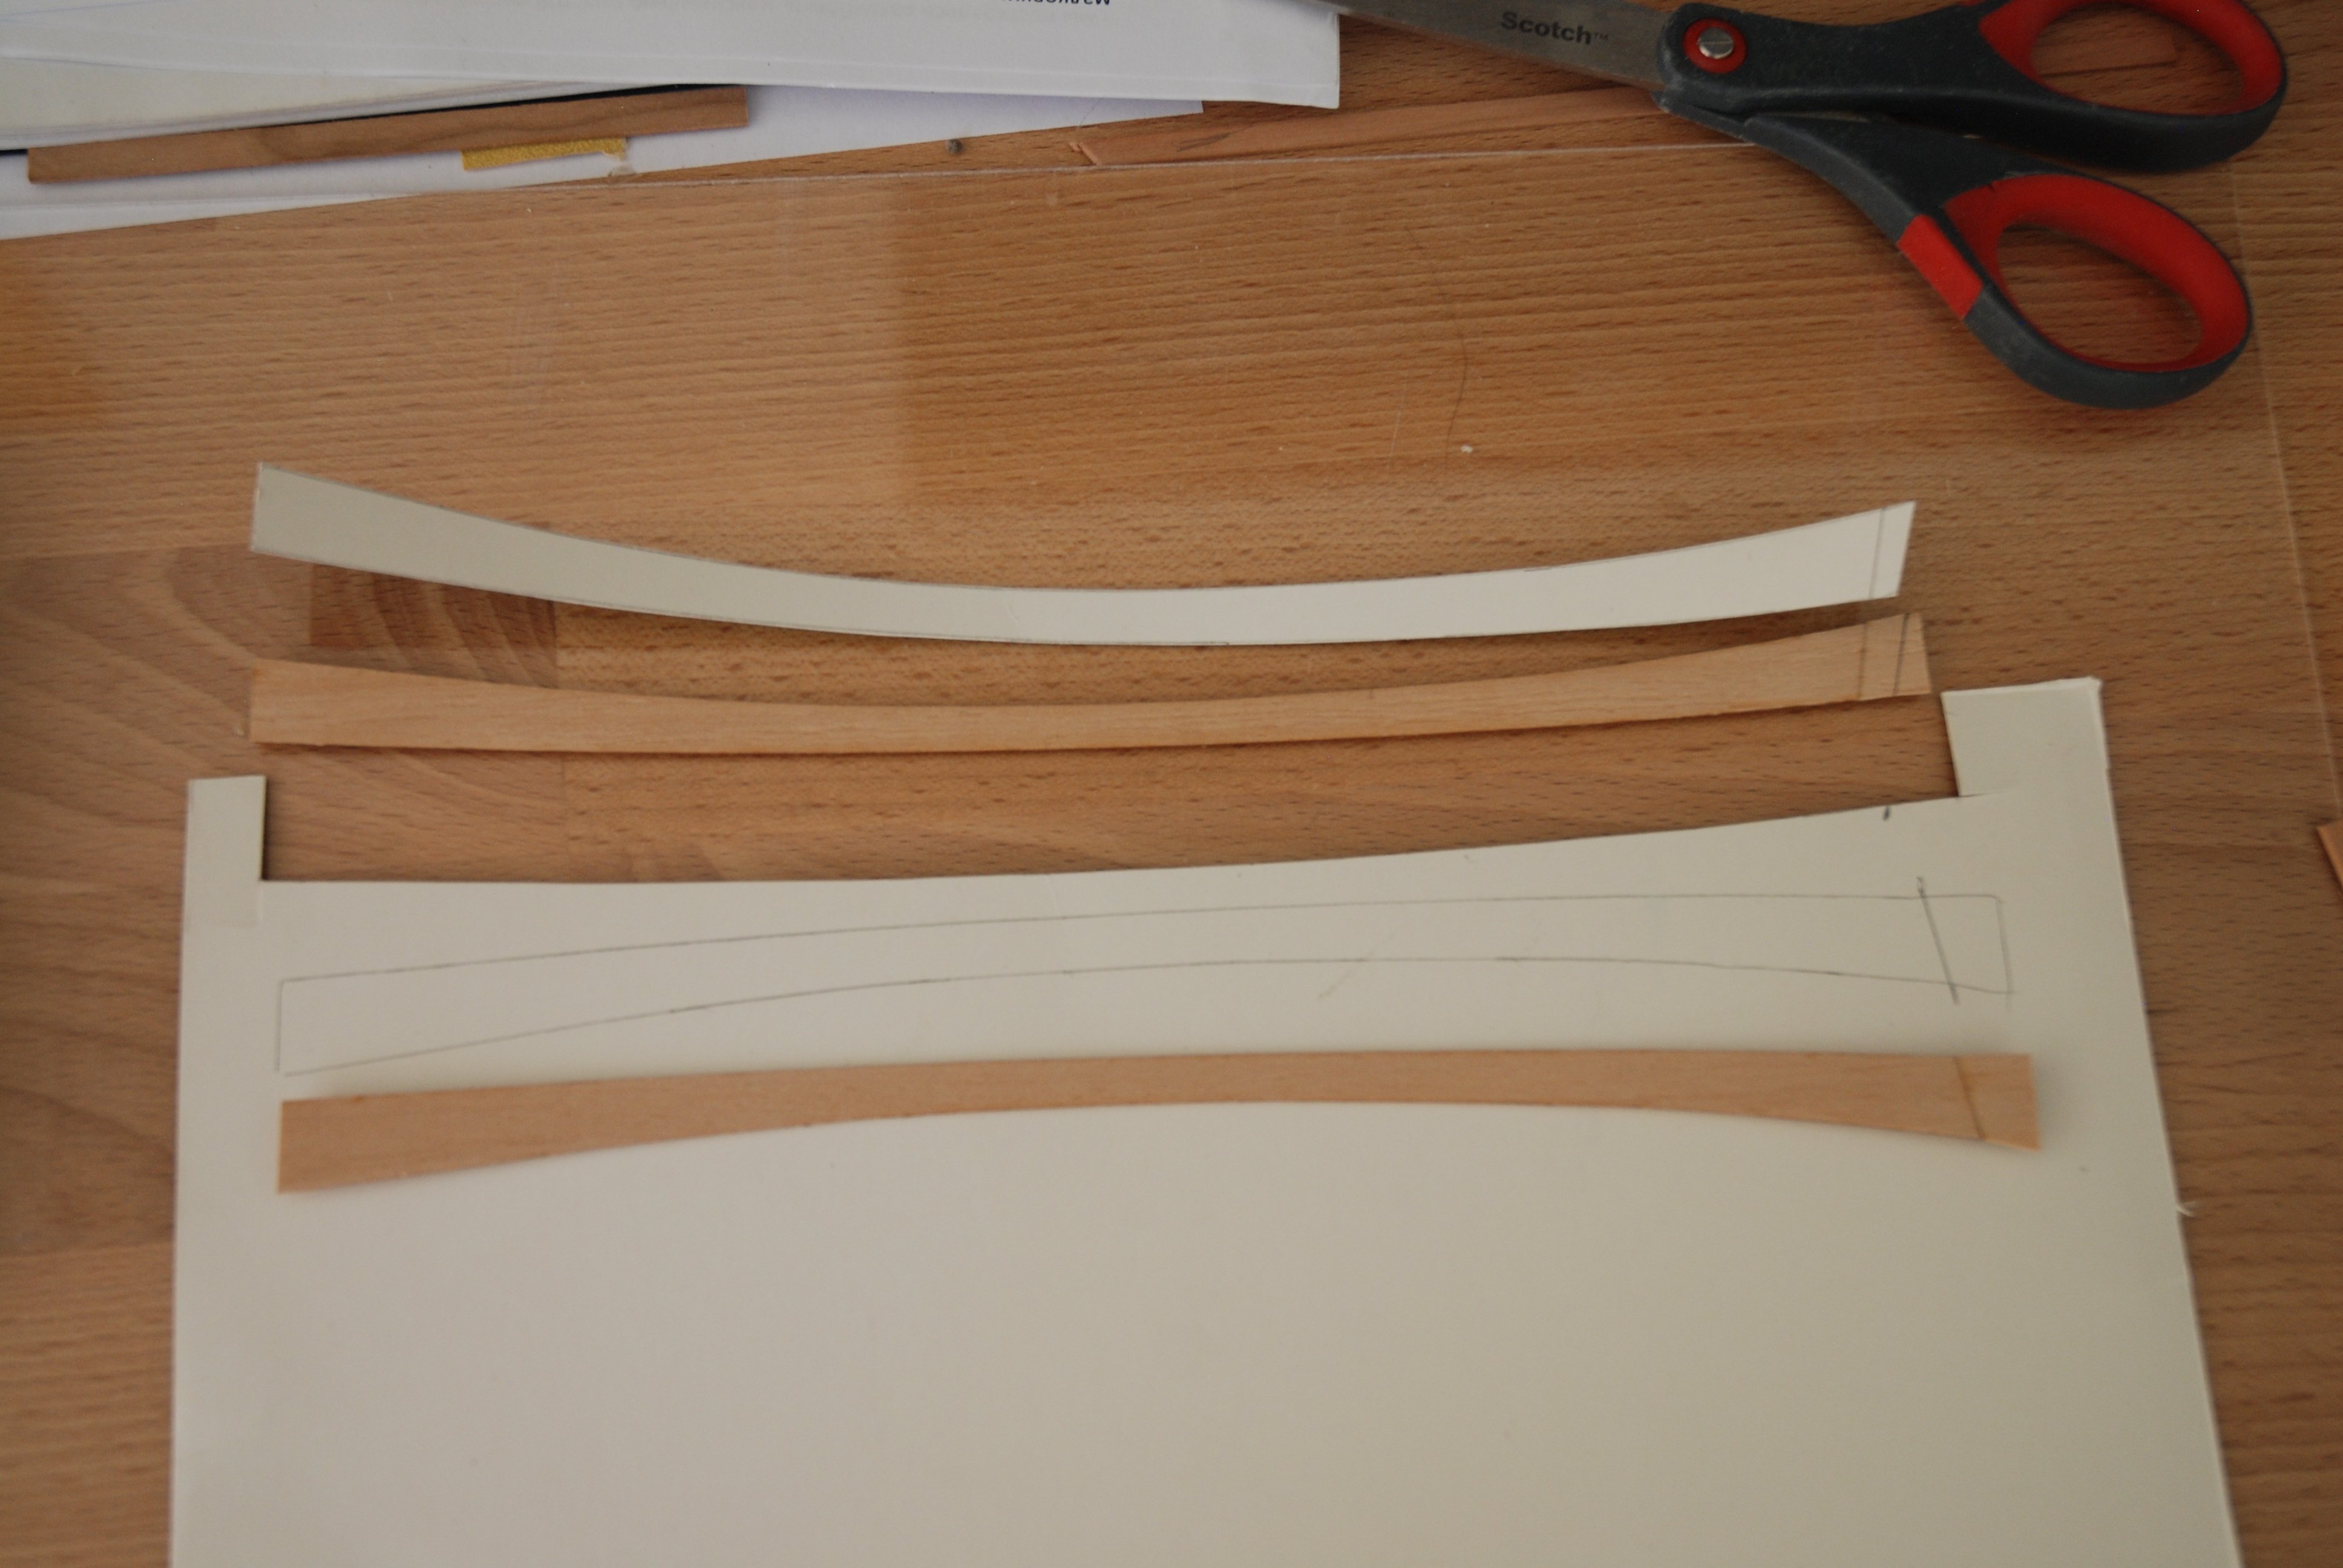
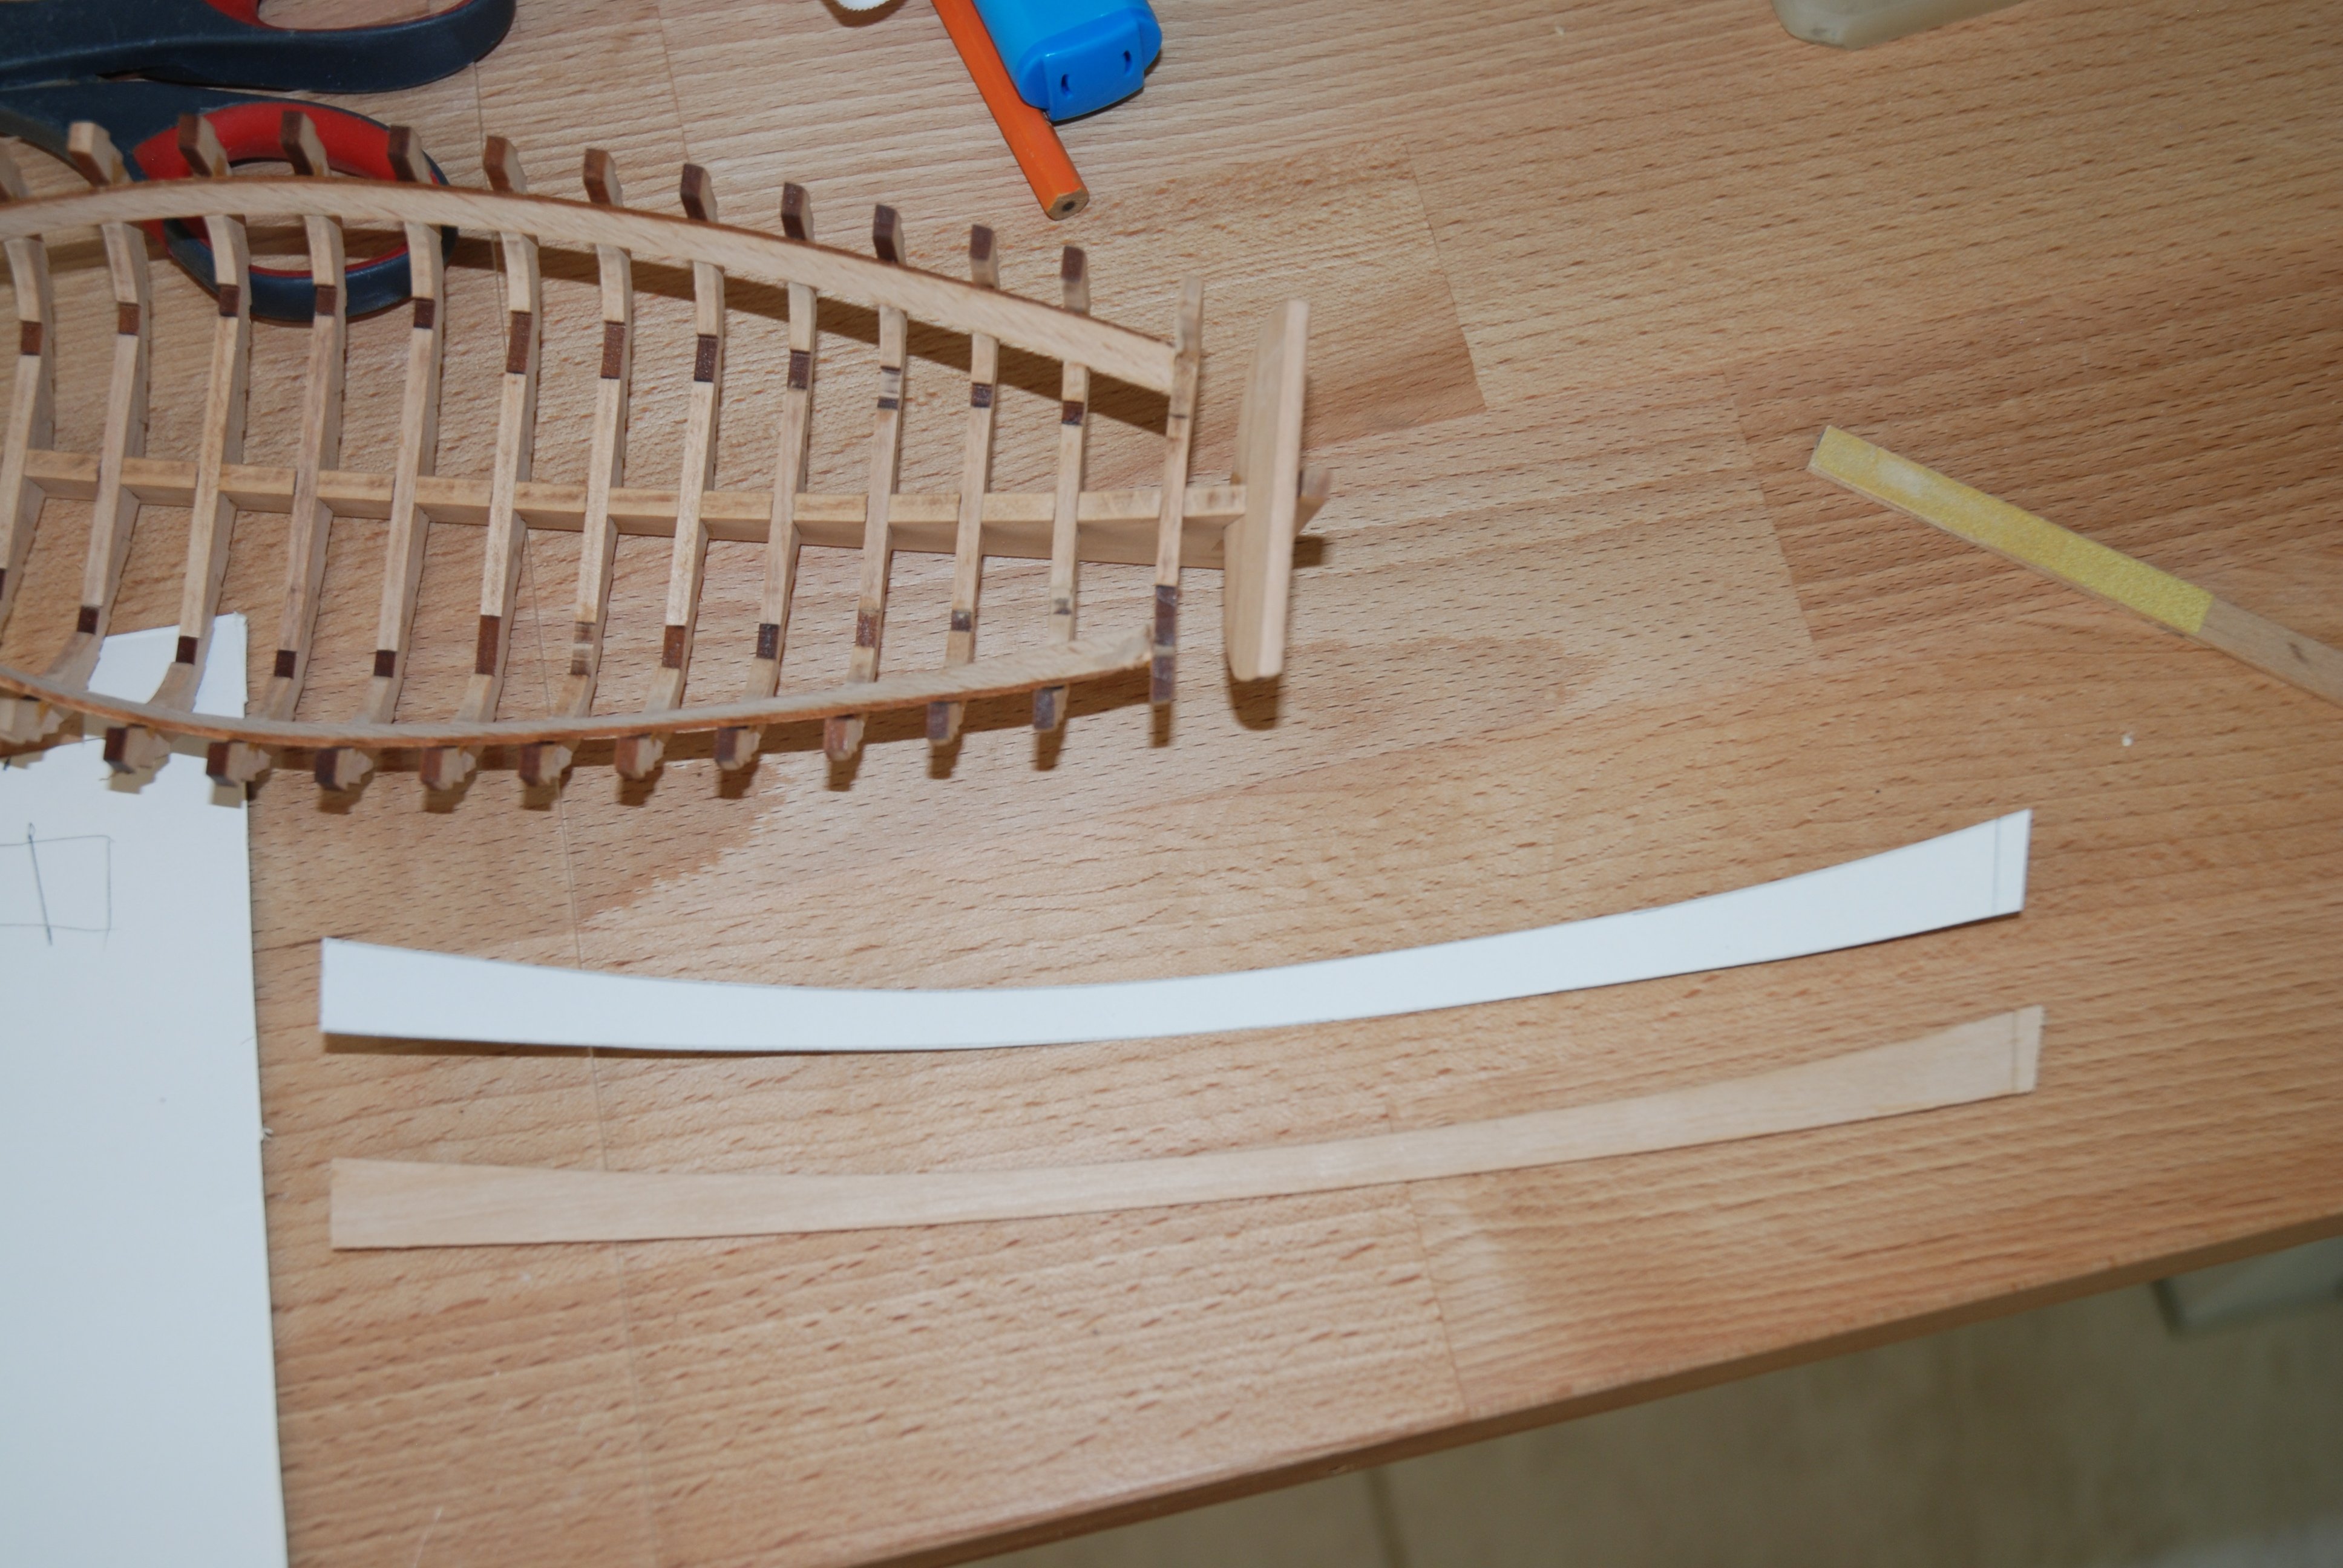
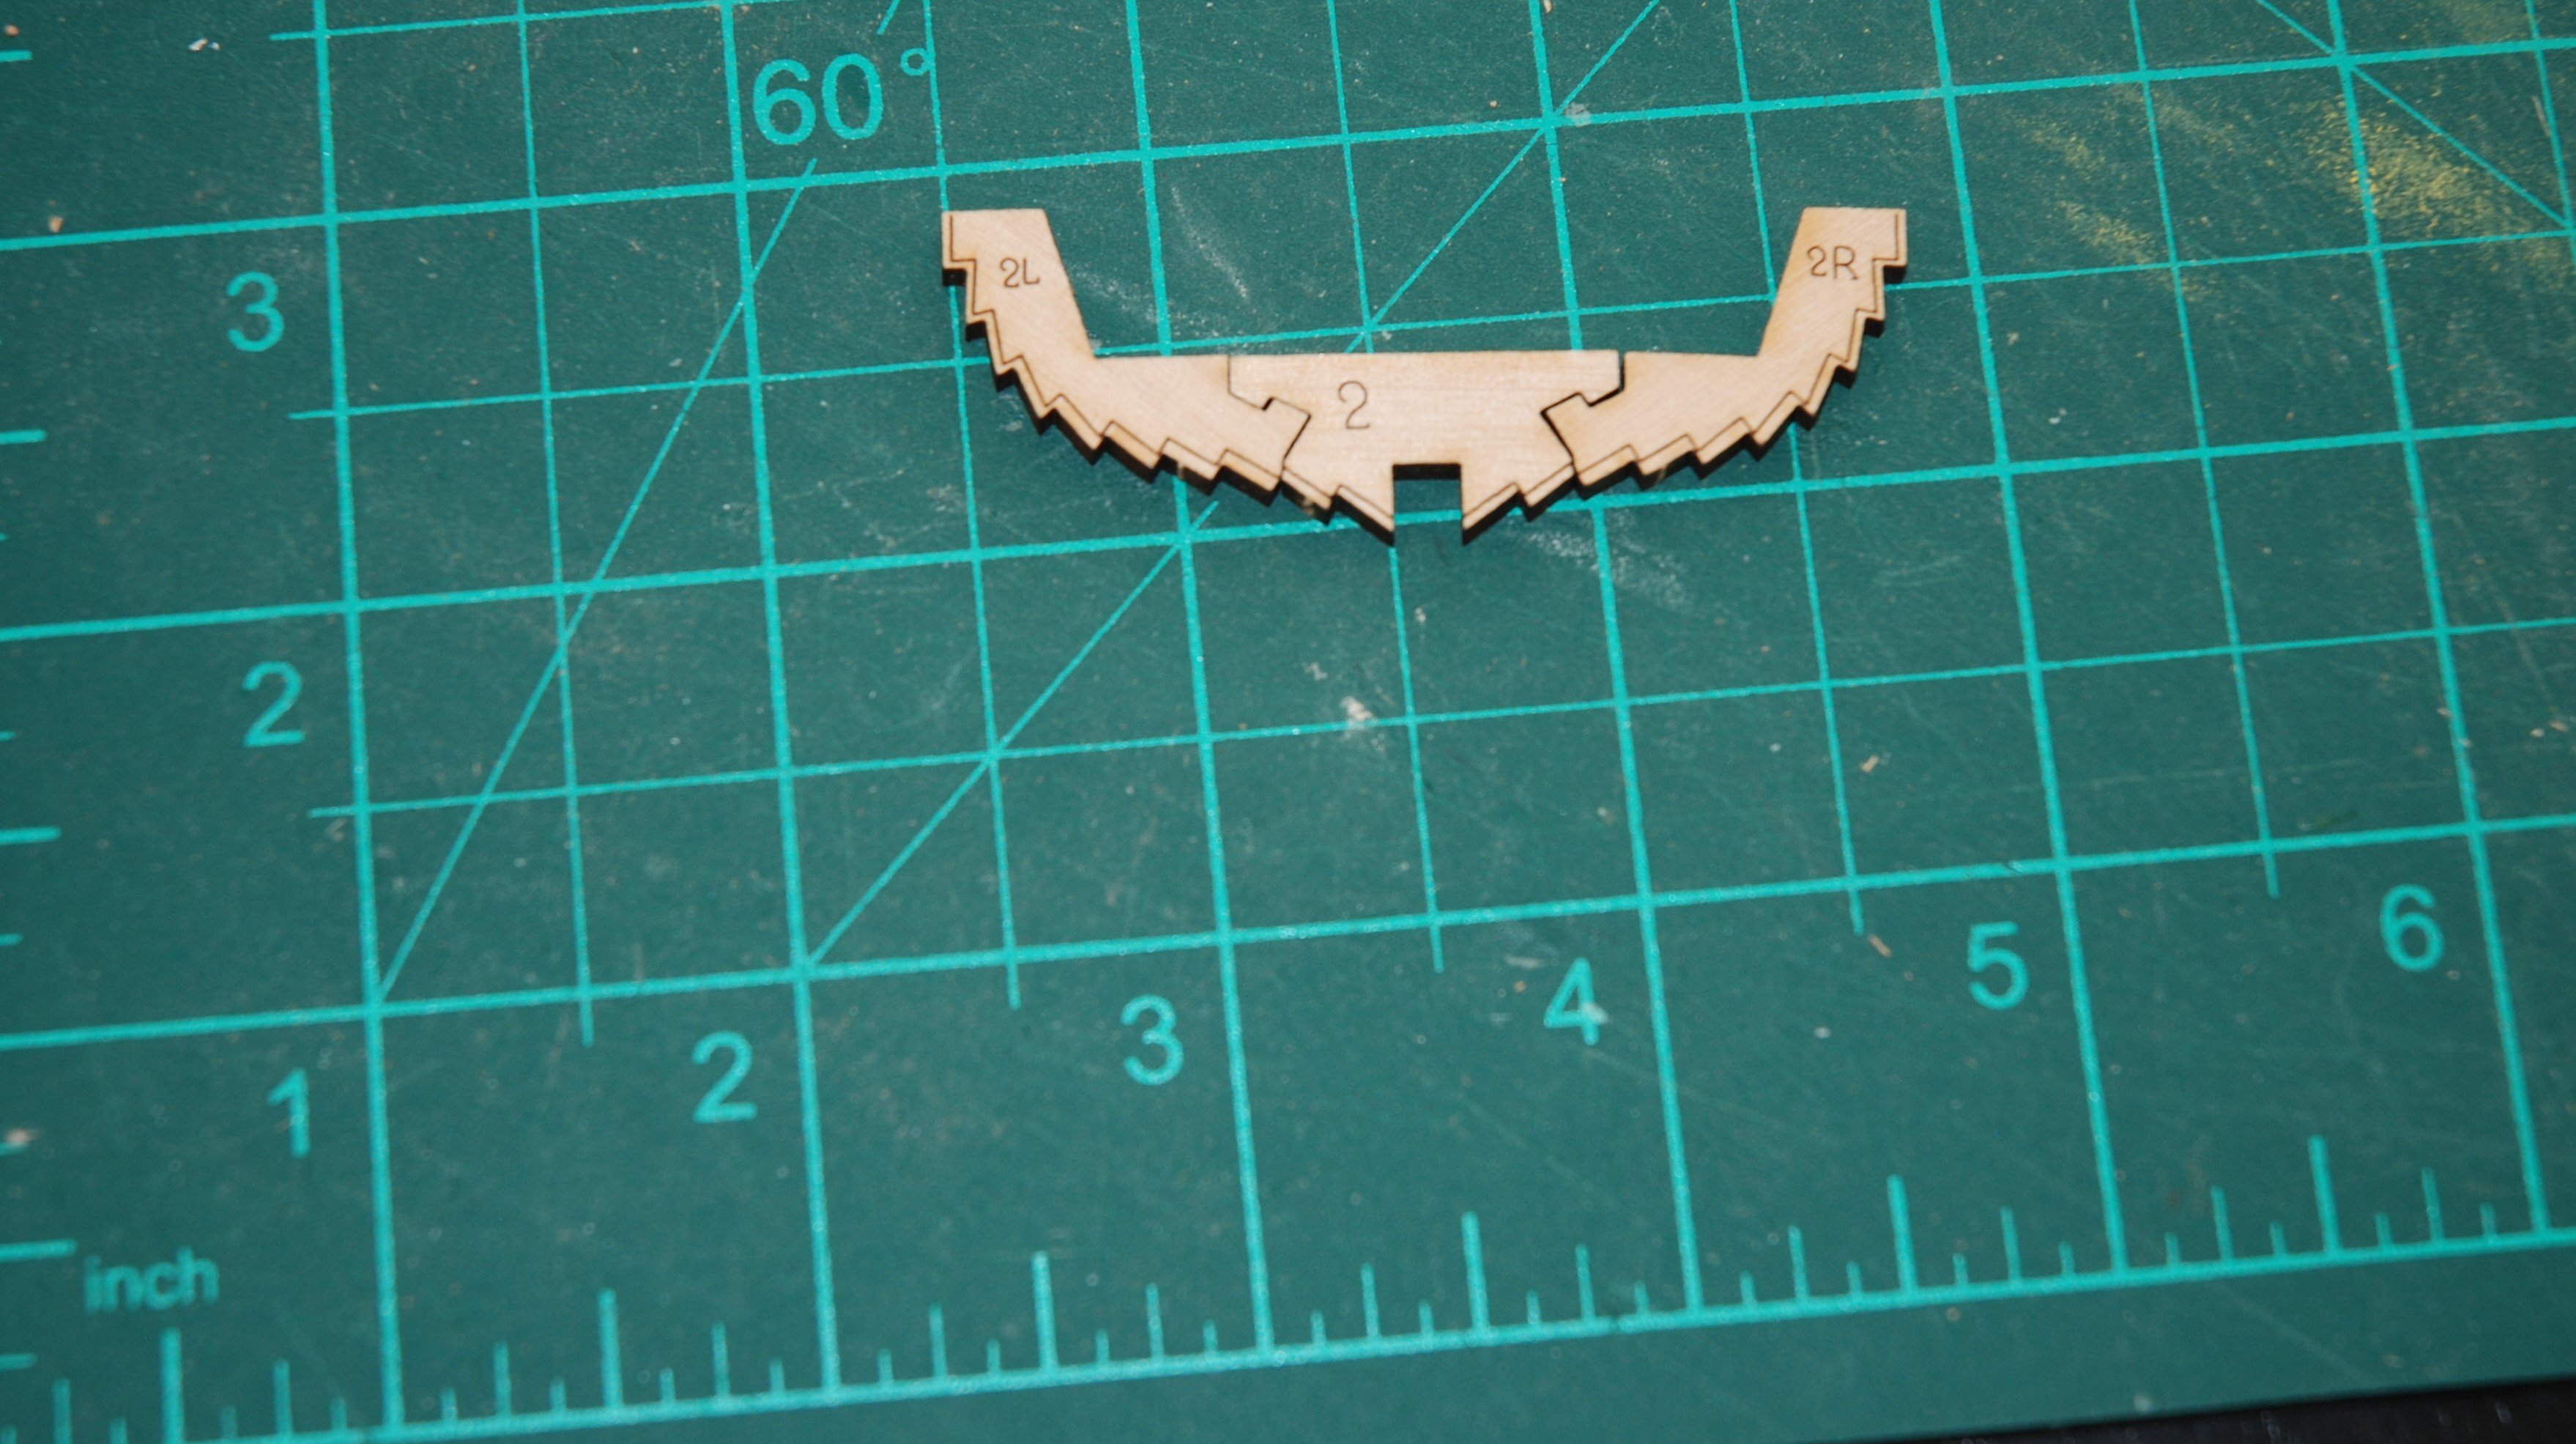
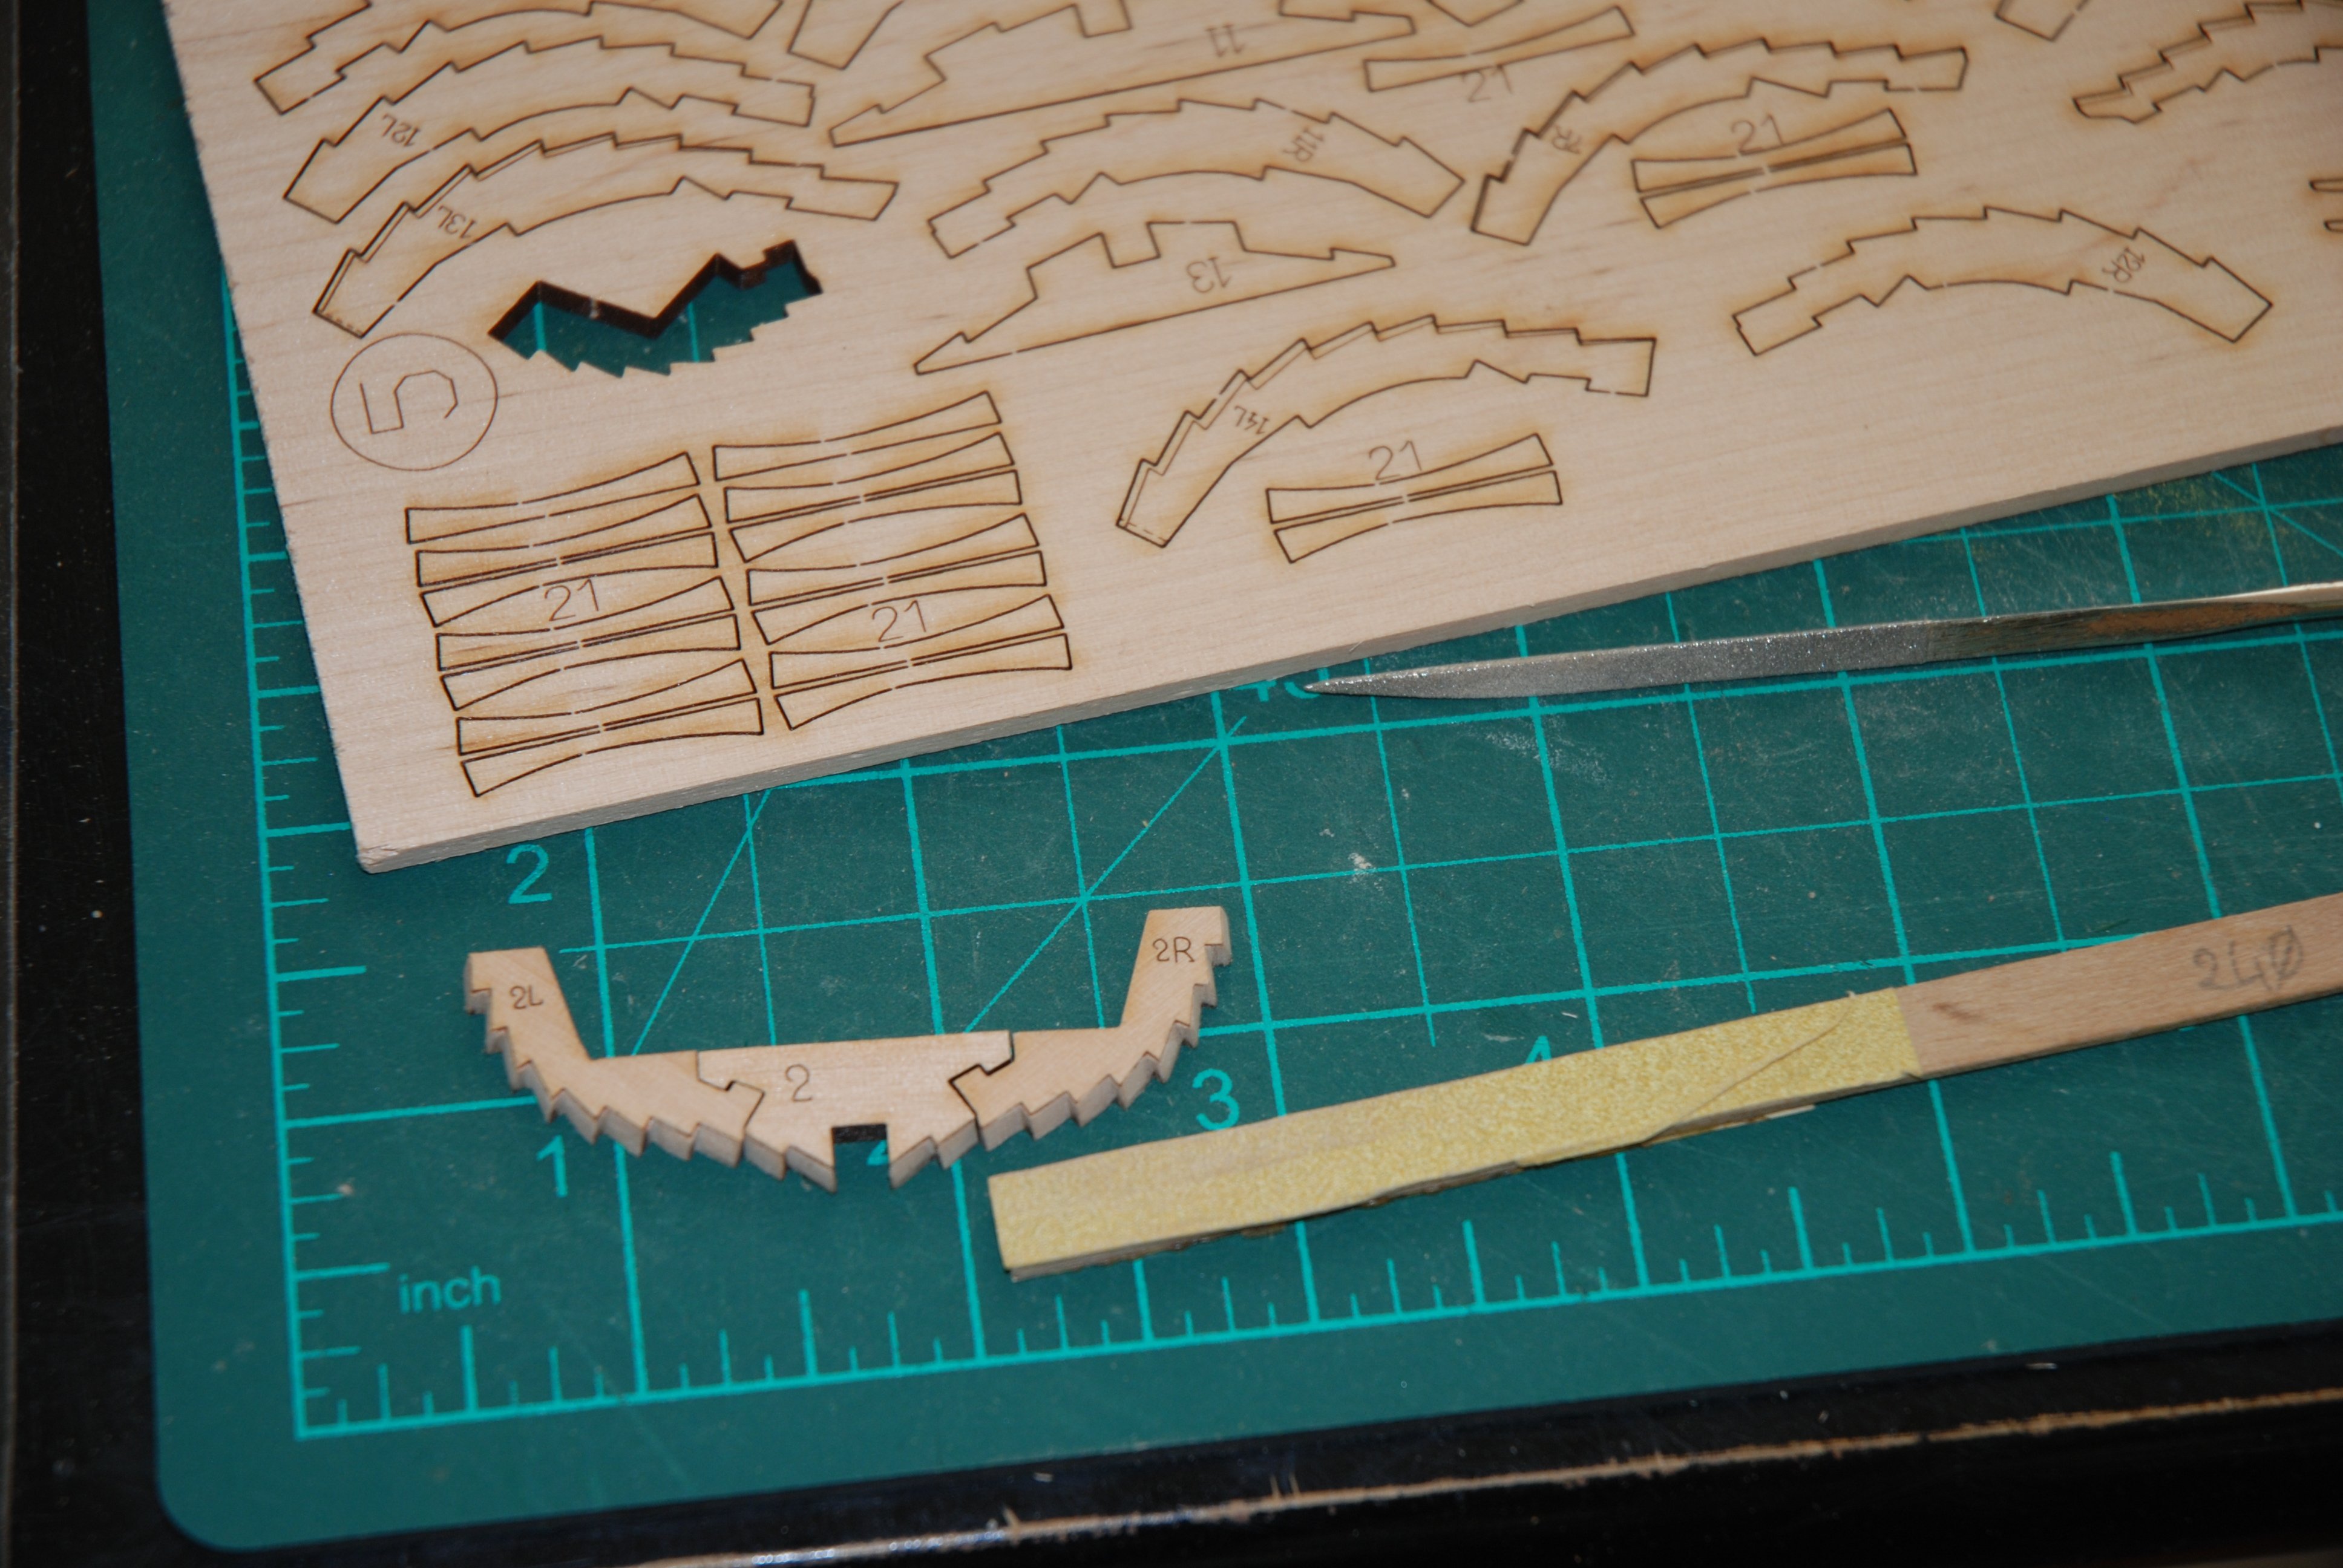
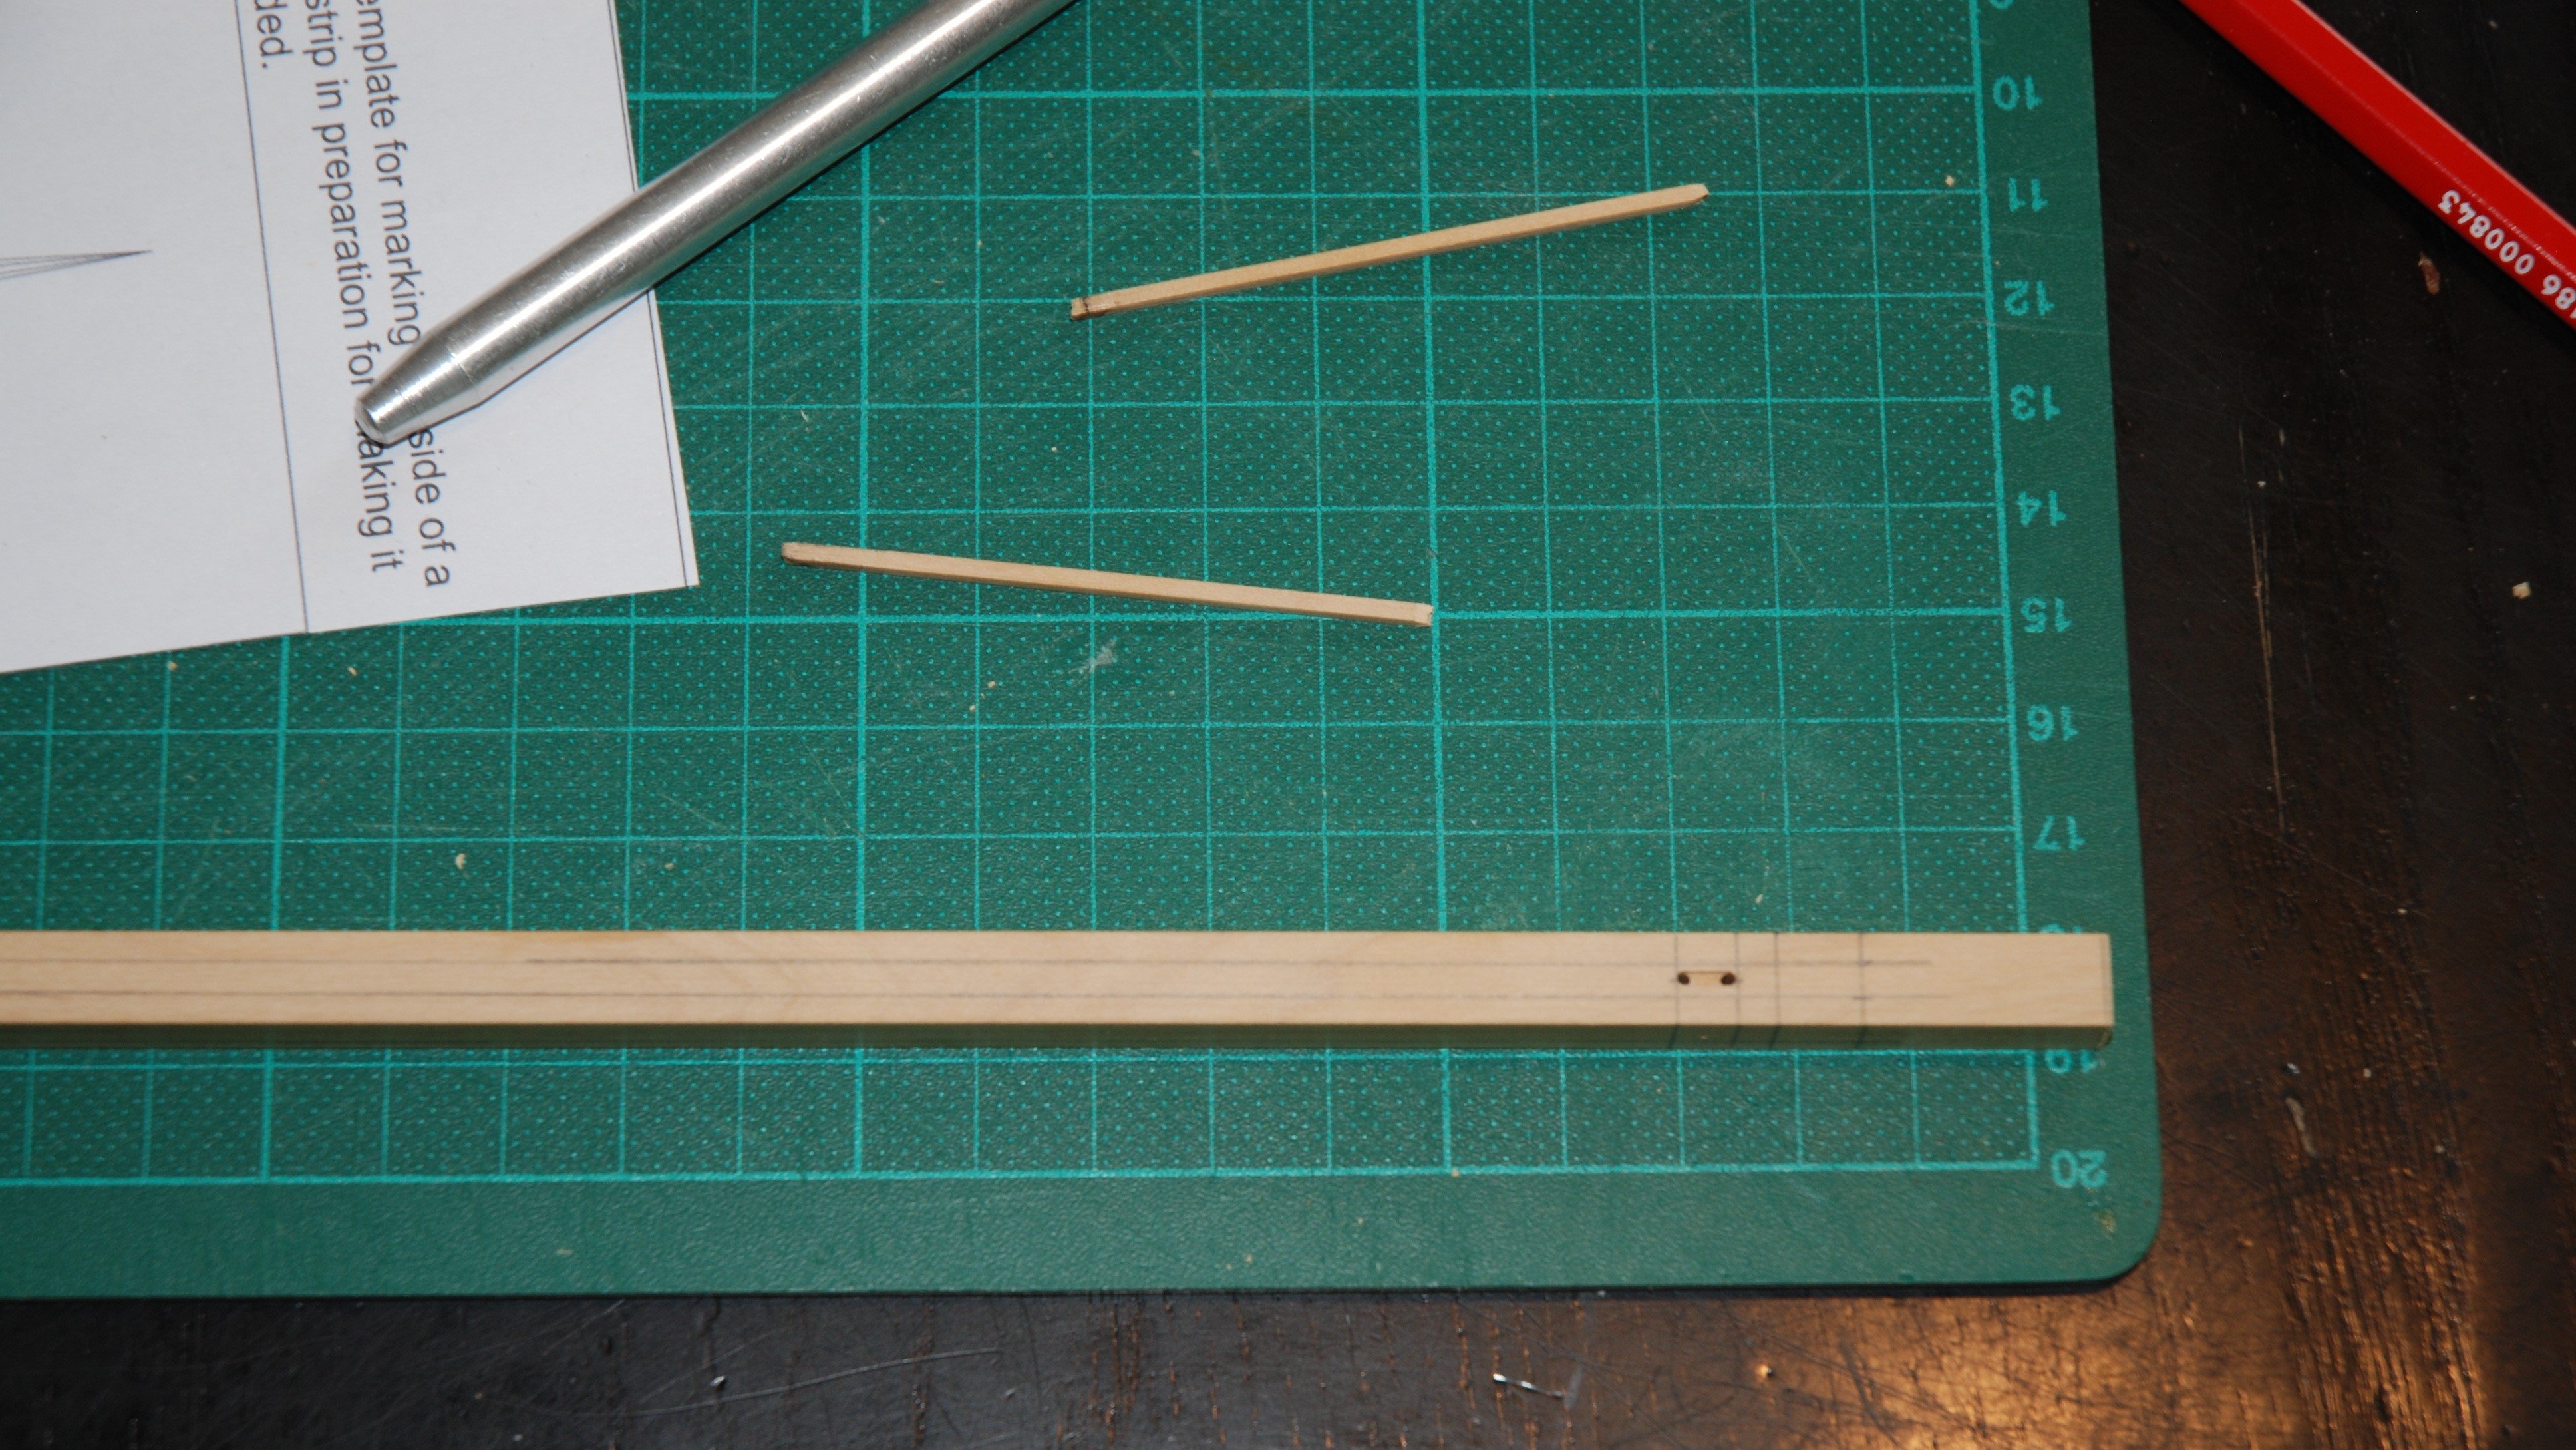
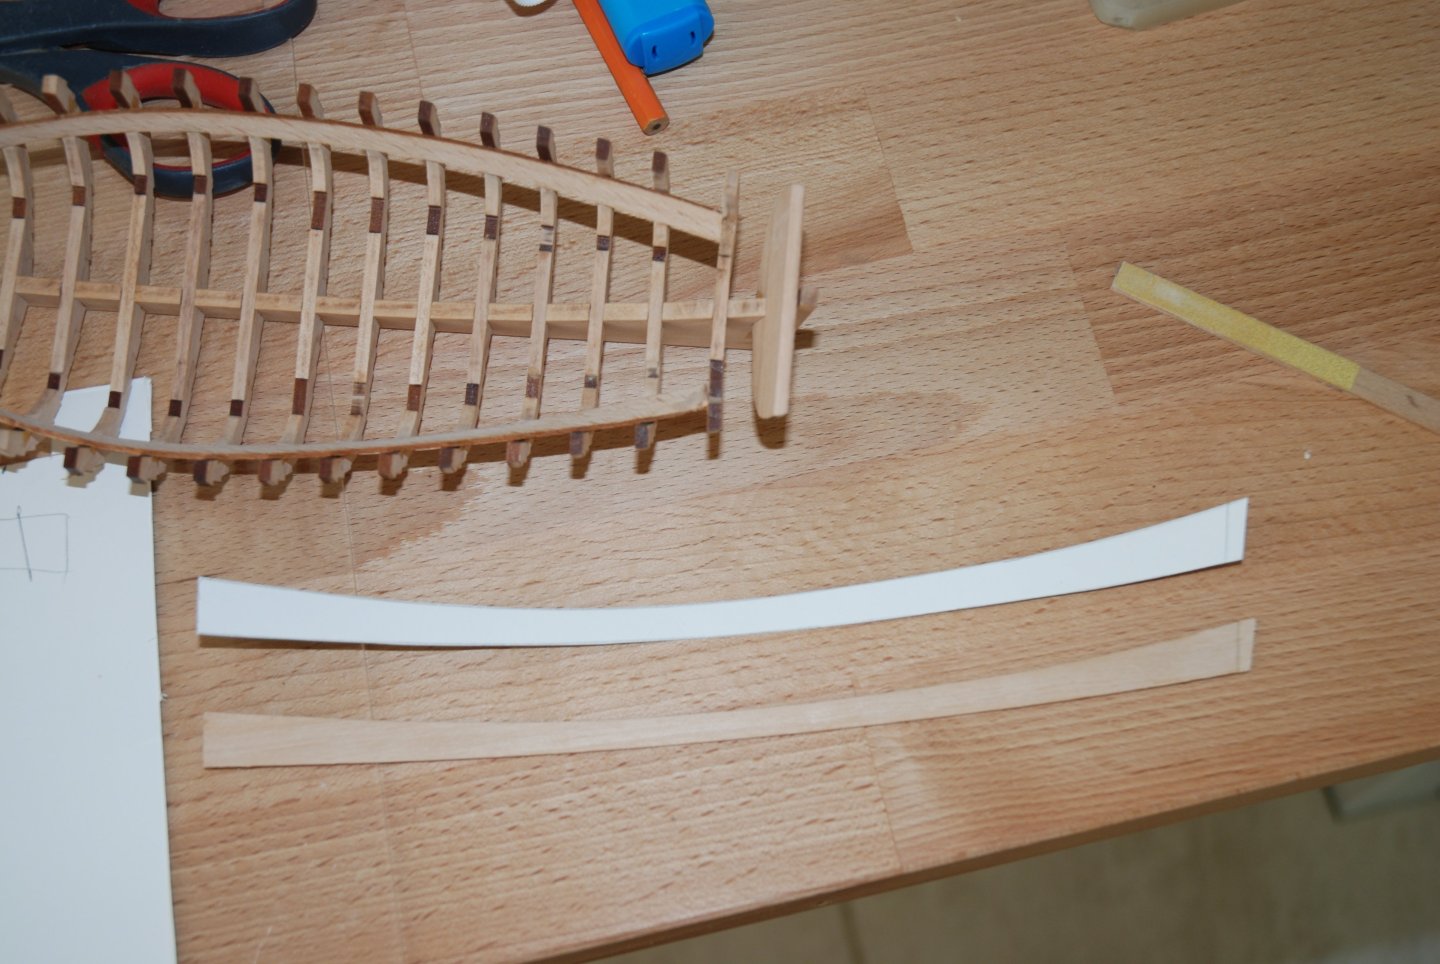
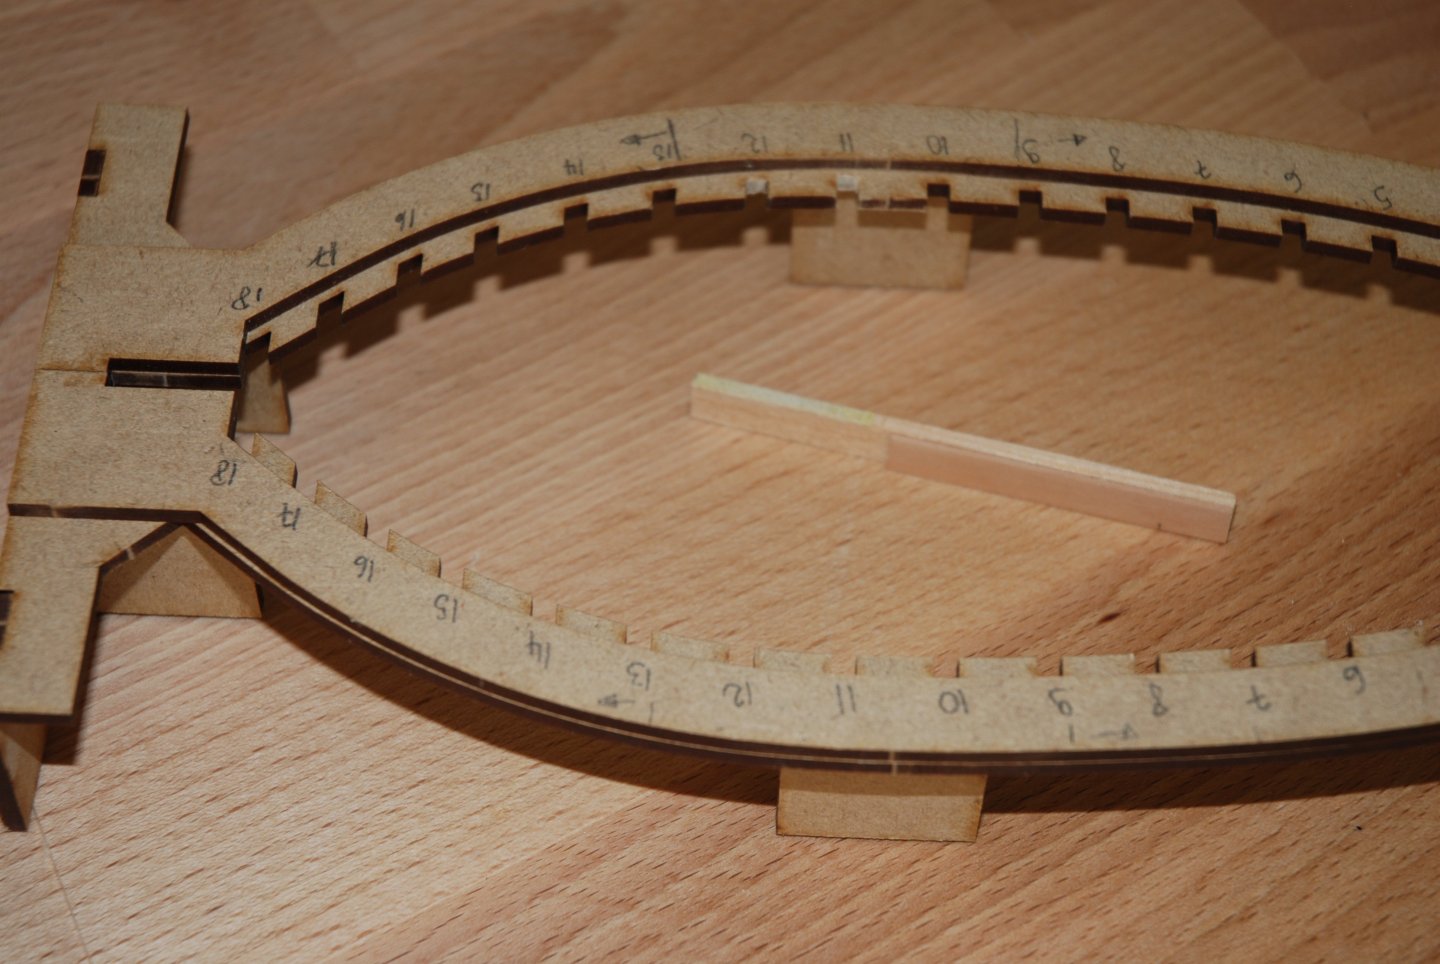
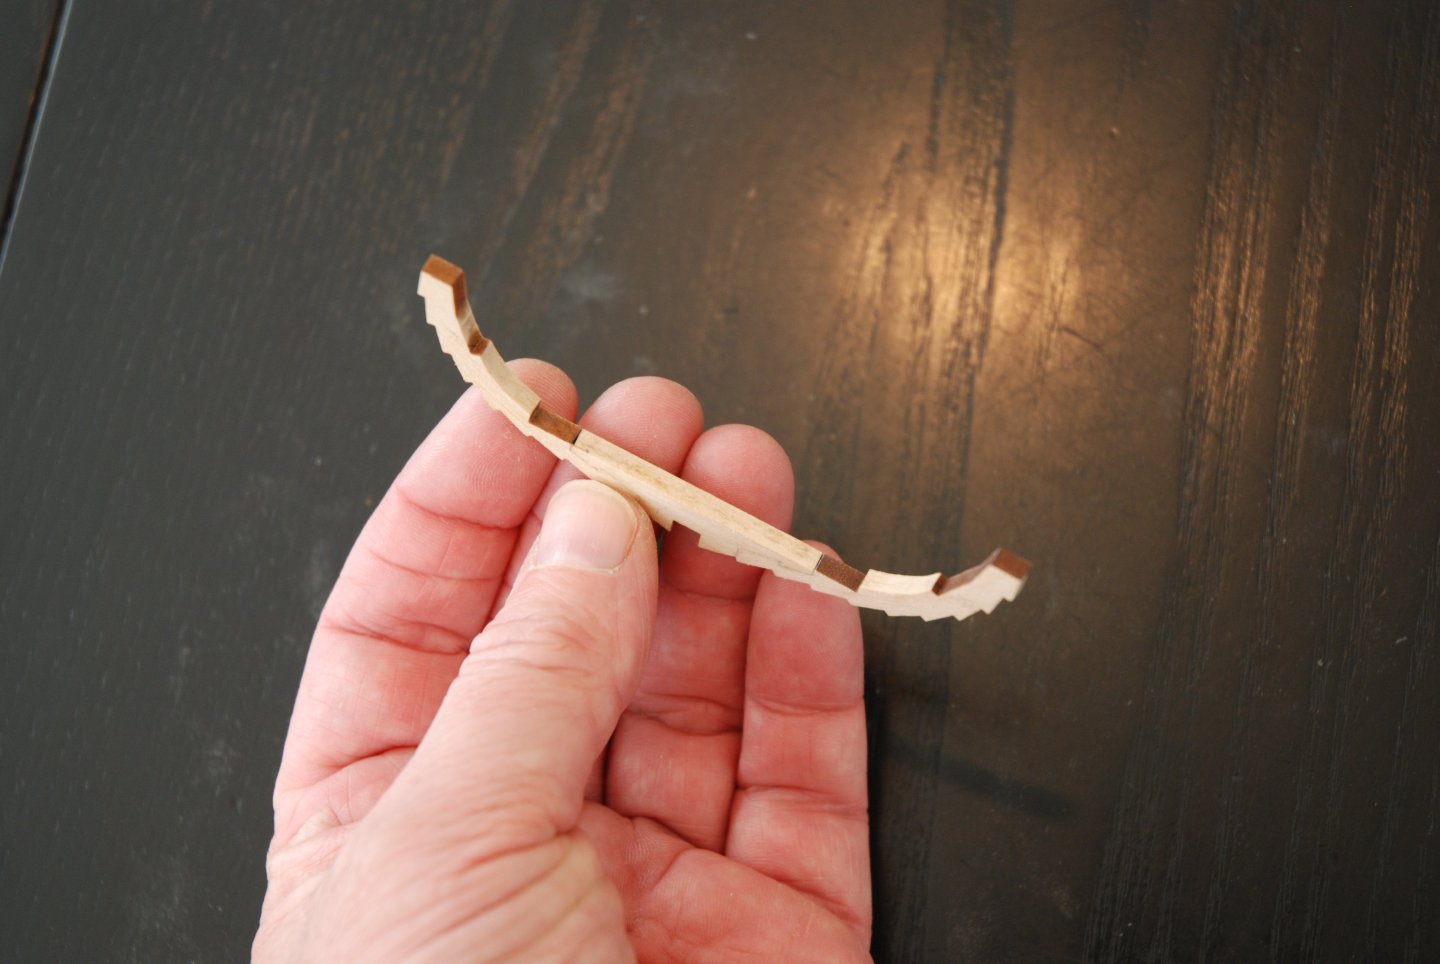
 For the second, I encountered the only problem present on this kit. The plank is slightly too short... This seems to be a common problem, as in the Ukrainian modeller's third video (which I linked to in my second post) the problem is pointed out and he shows how to correct this issue. I used the same method to lengthen the plank. After sanding off the laser burn marks on both sides, and before extracting the two planks from the laser board, I prepare a small piece of wood the width of the plank. I then glue it to the plank on the side facing outwards. This small piece of wood will then be invisible, as it will be hidden by the outer planking of the hull. This small piece of wood connects the plank to the laser board, reinforcing the bond. I then extract the two planks by cutting the extension with an x-acto. For the moment, I don't care about the final length of the plank and cut the whole extension. I use the two planks to make two templates on cardboard. These will then be placed in the ship's hull, and the final length of the planks can be determined. All that's left is to transfer the cutting line to the planks. This gives me two planks of the right length. All that remains is to glue them to the inside of the hull.


- 22 replies
-
- 2
-

-
- ships boat
- Korabel
- (and 1 more)
-
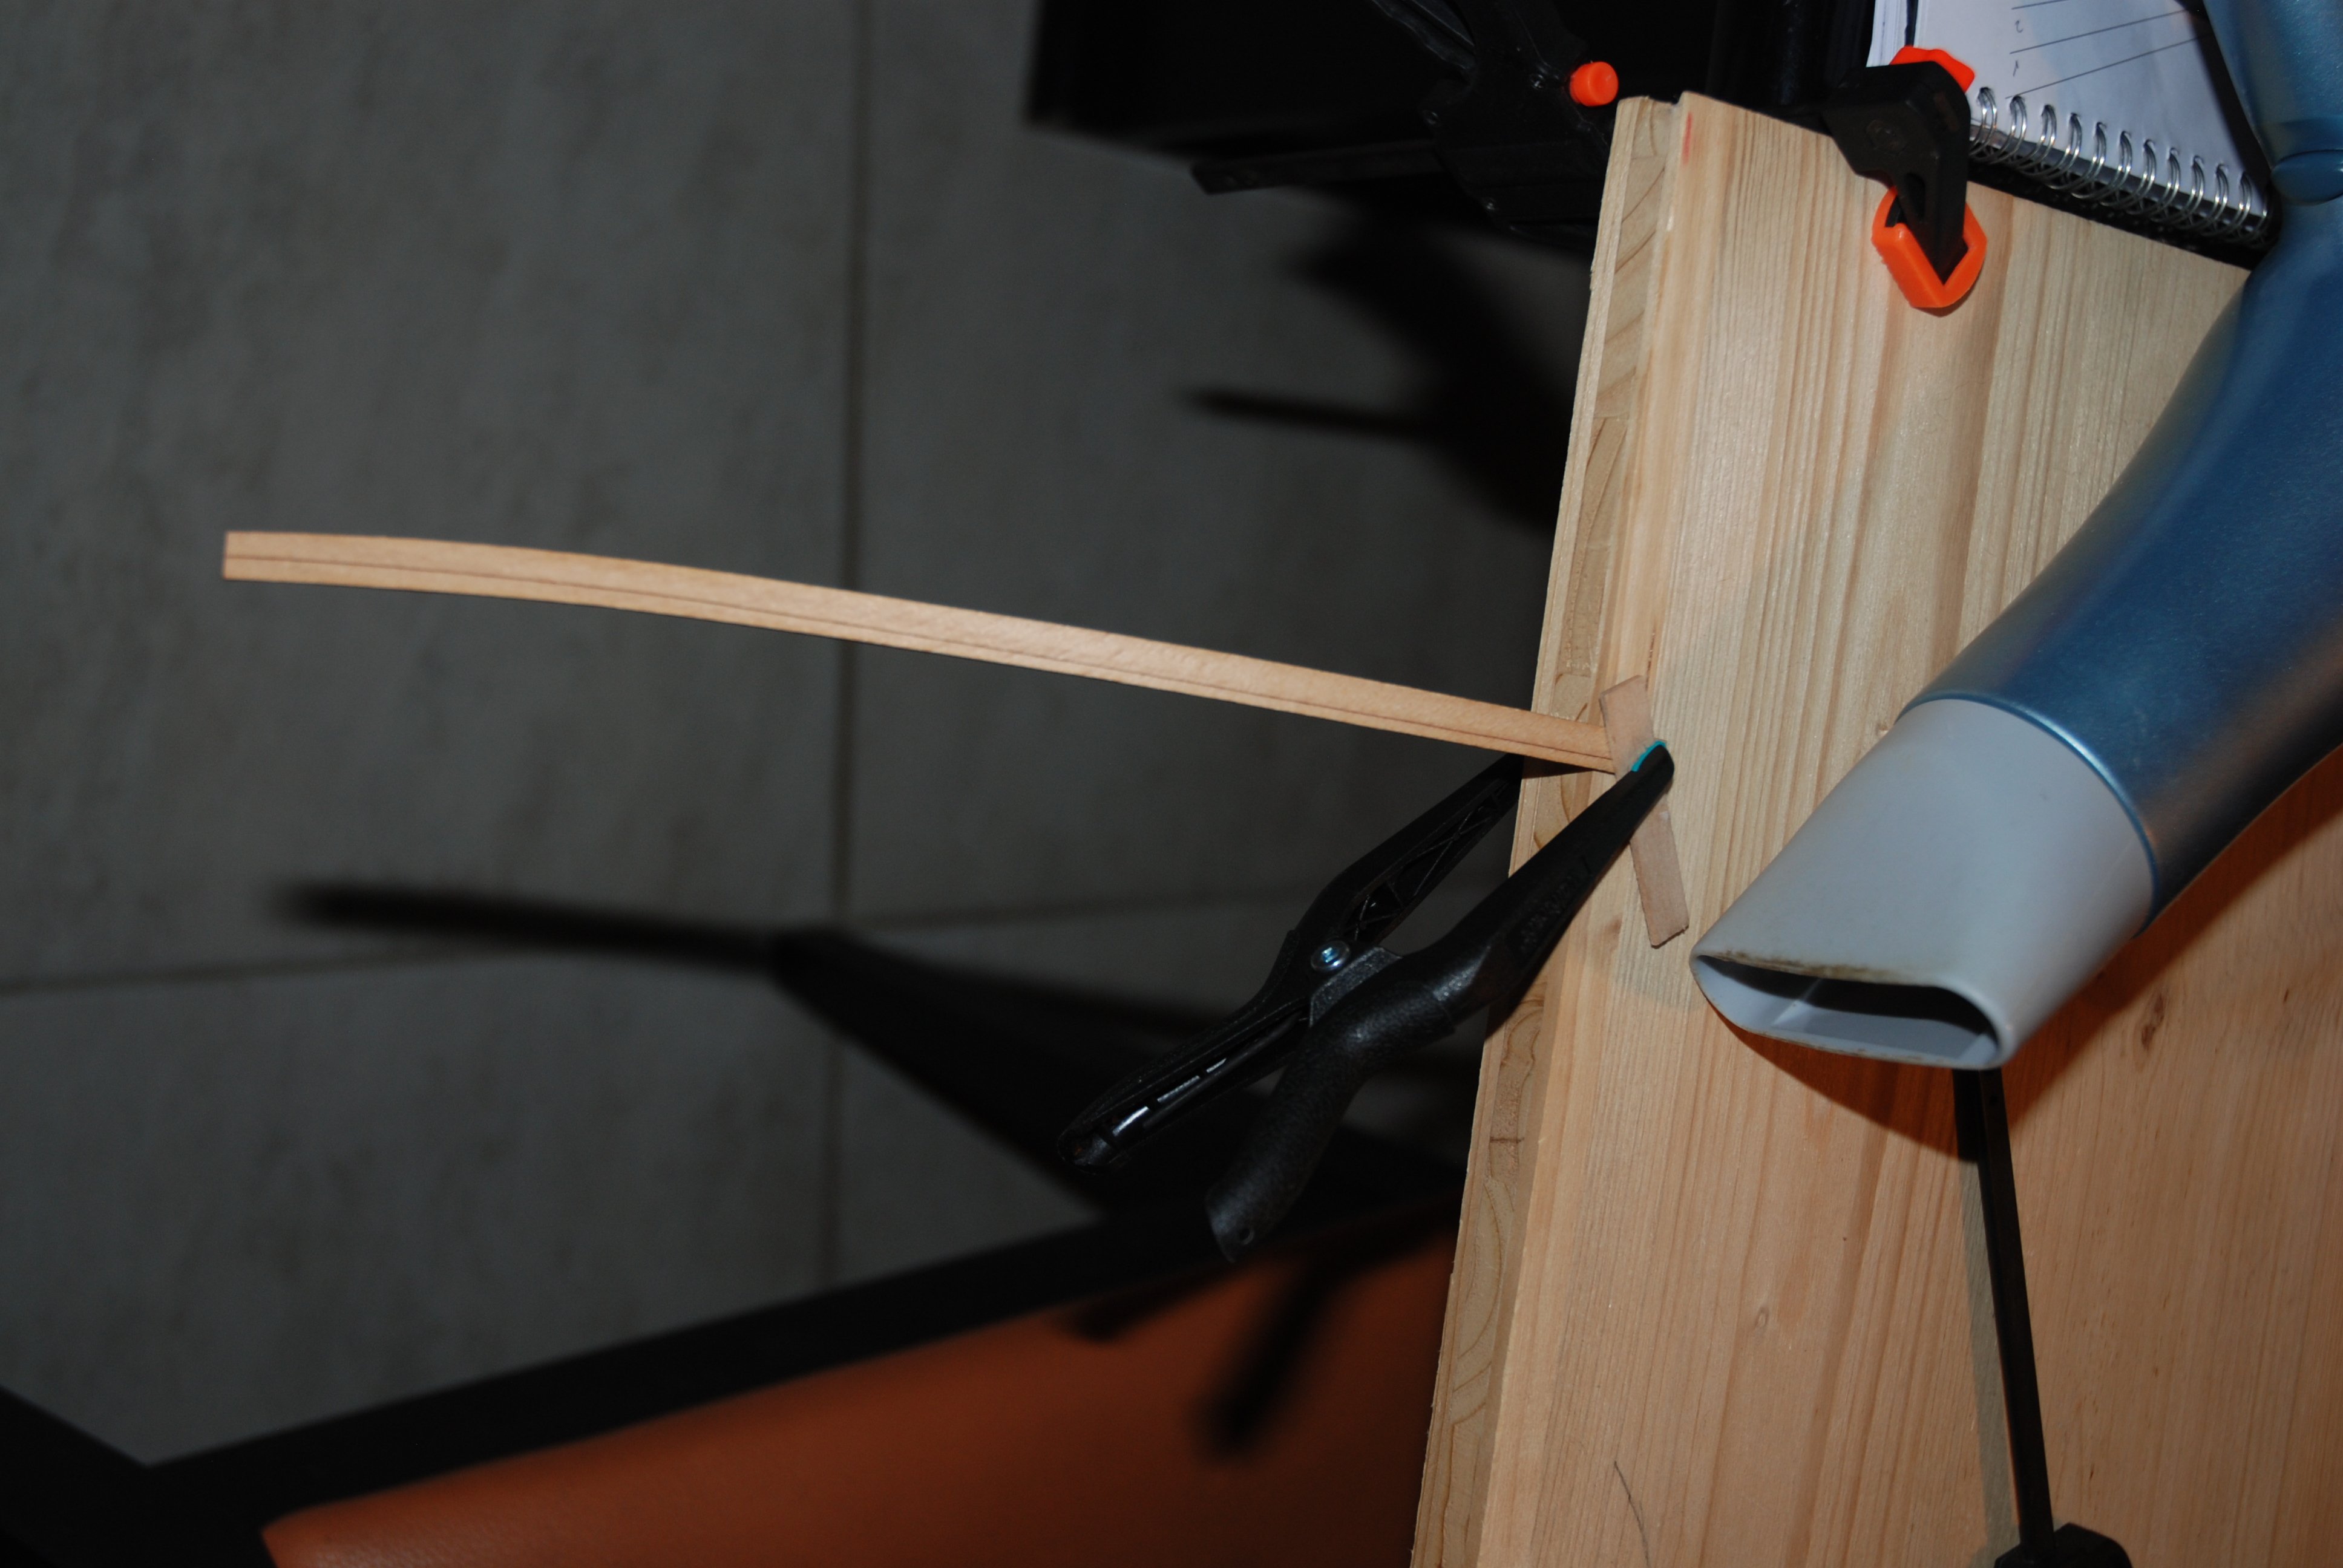
Thank you to all the 'Likes'. The work continued with the installation of the two interior planks. For the first, no problem. I shape it beforehand by moistening the board with a wet finger and using the heat of a hairdryer. Gluing goes smoothly

- 22 replies
-
- 1
-

-
- ships boat
- Korabel
- (and 1 more)
-
HM Cutter Cheerful 1806 by JpR62 - 1:48 scale
JpR62 replied to JpR62's topic in - Build logs for subjects built 1801 - 1850
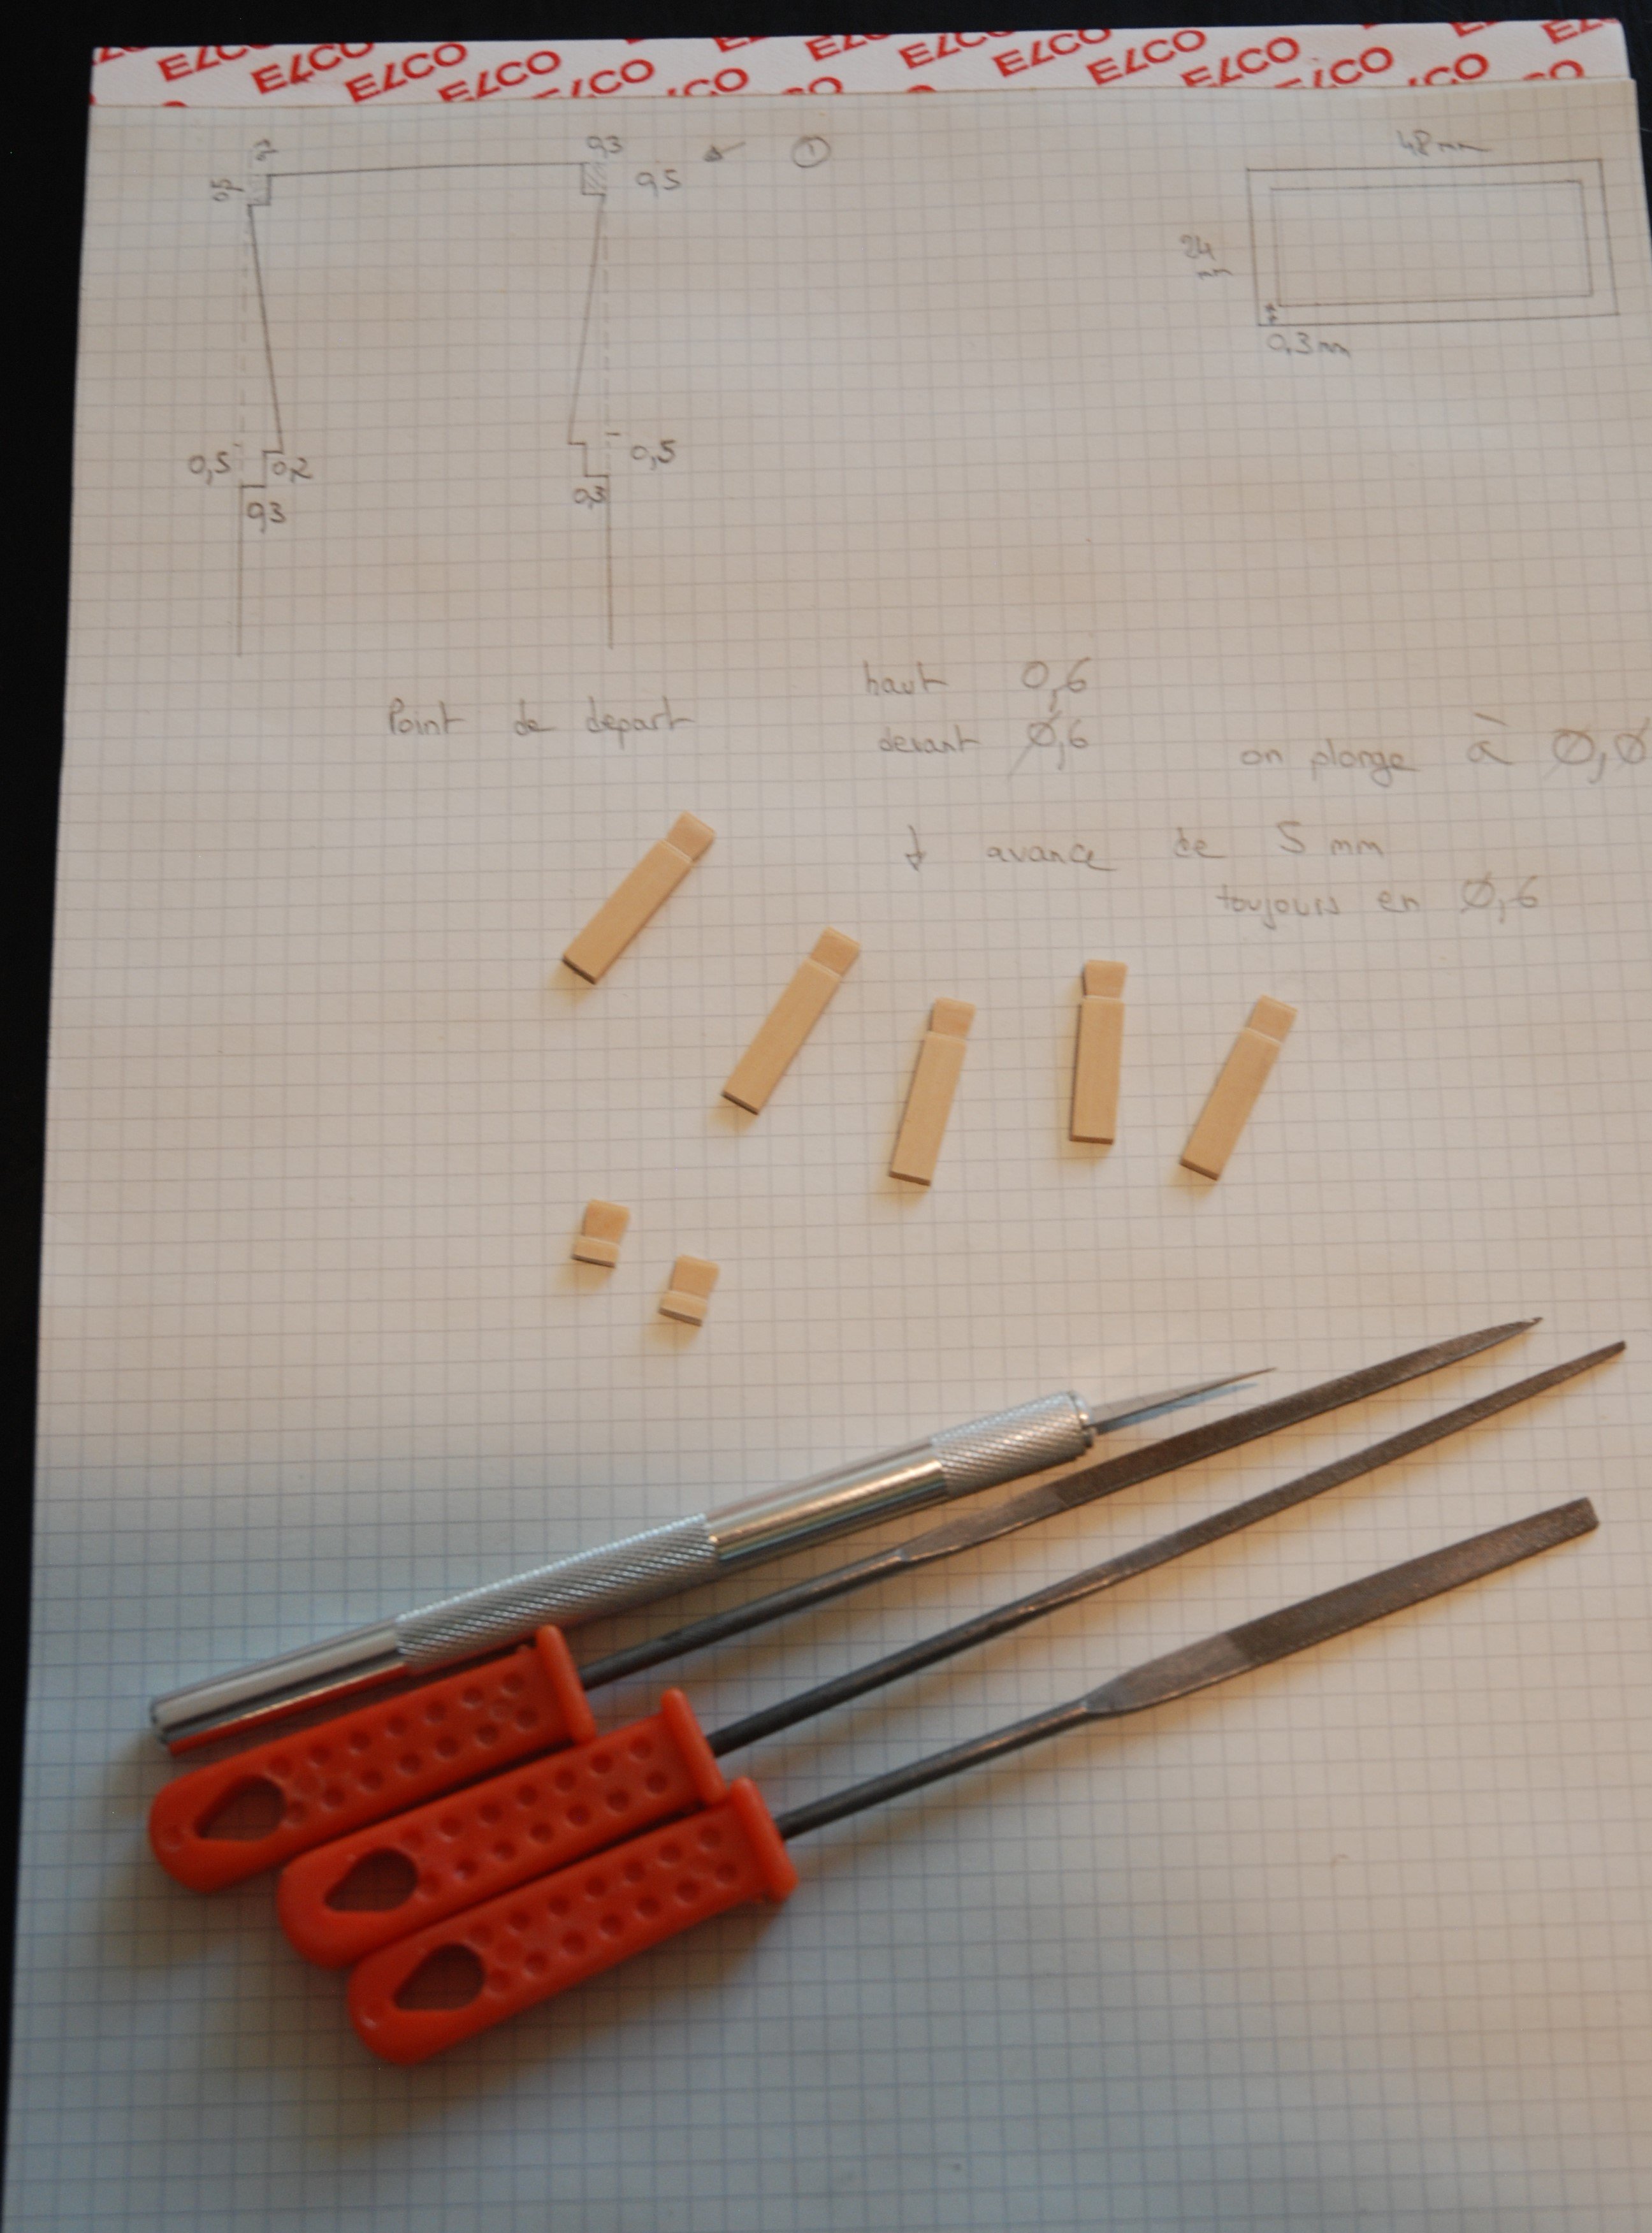
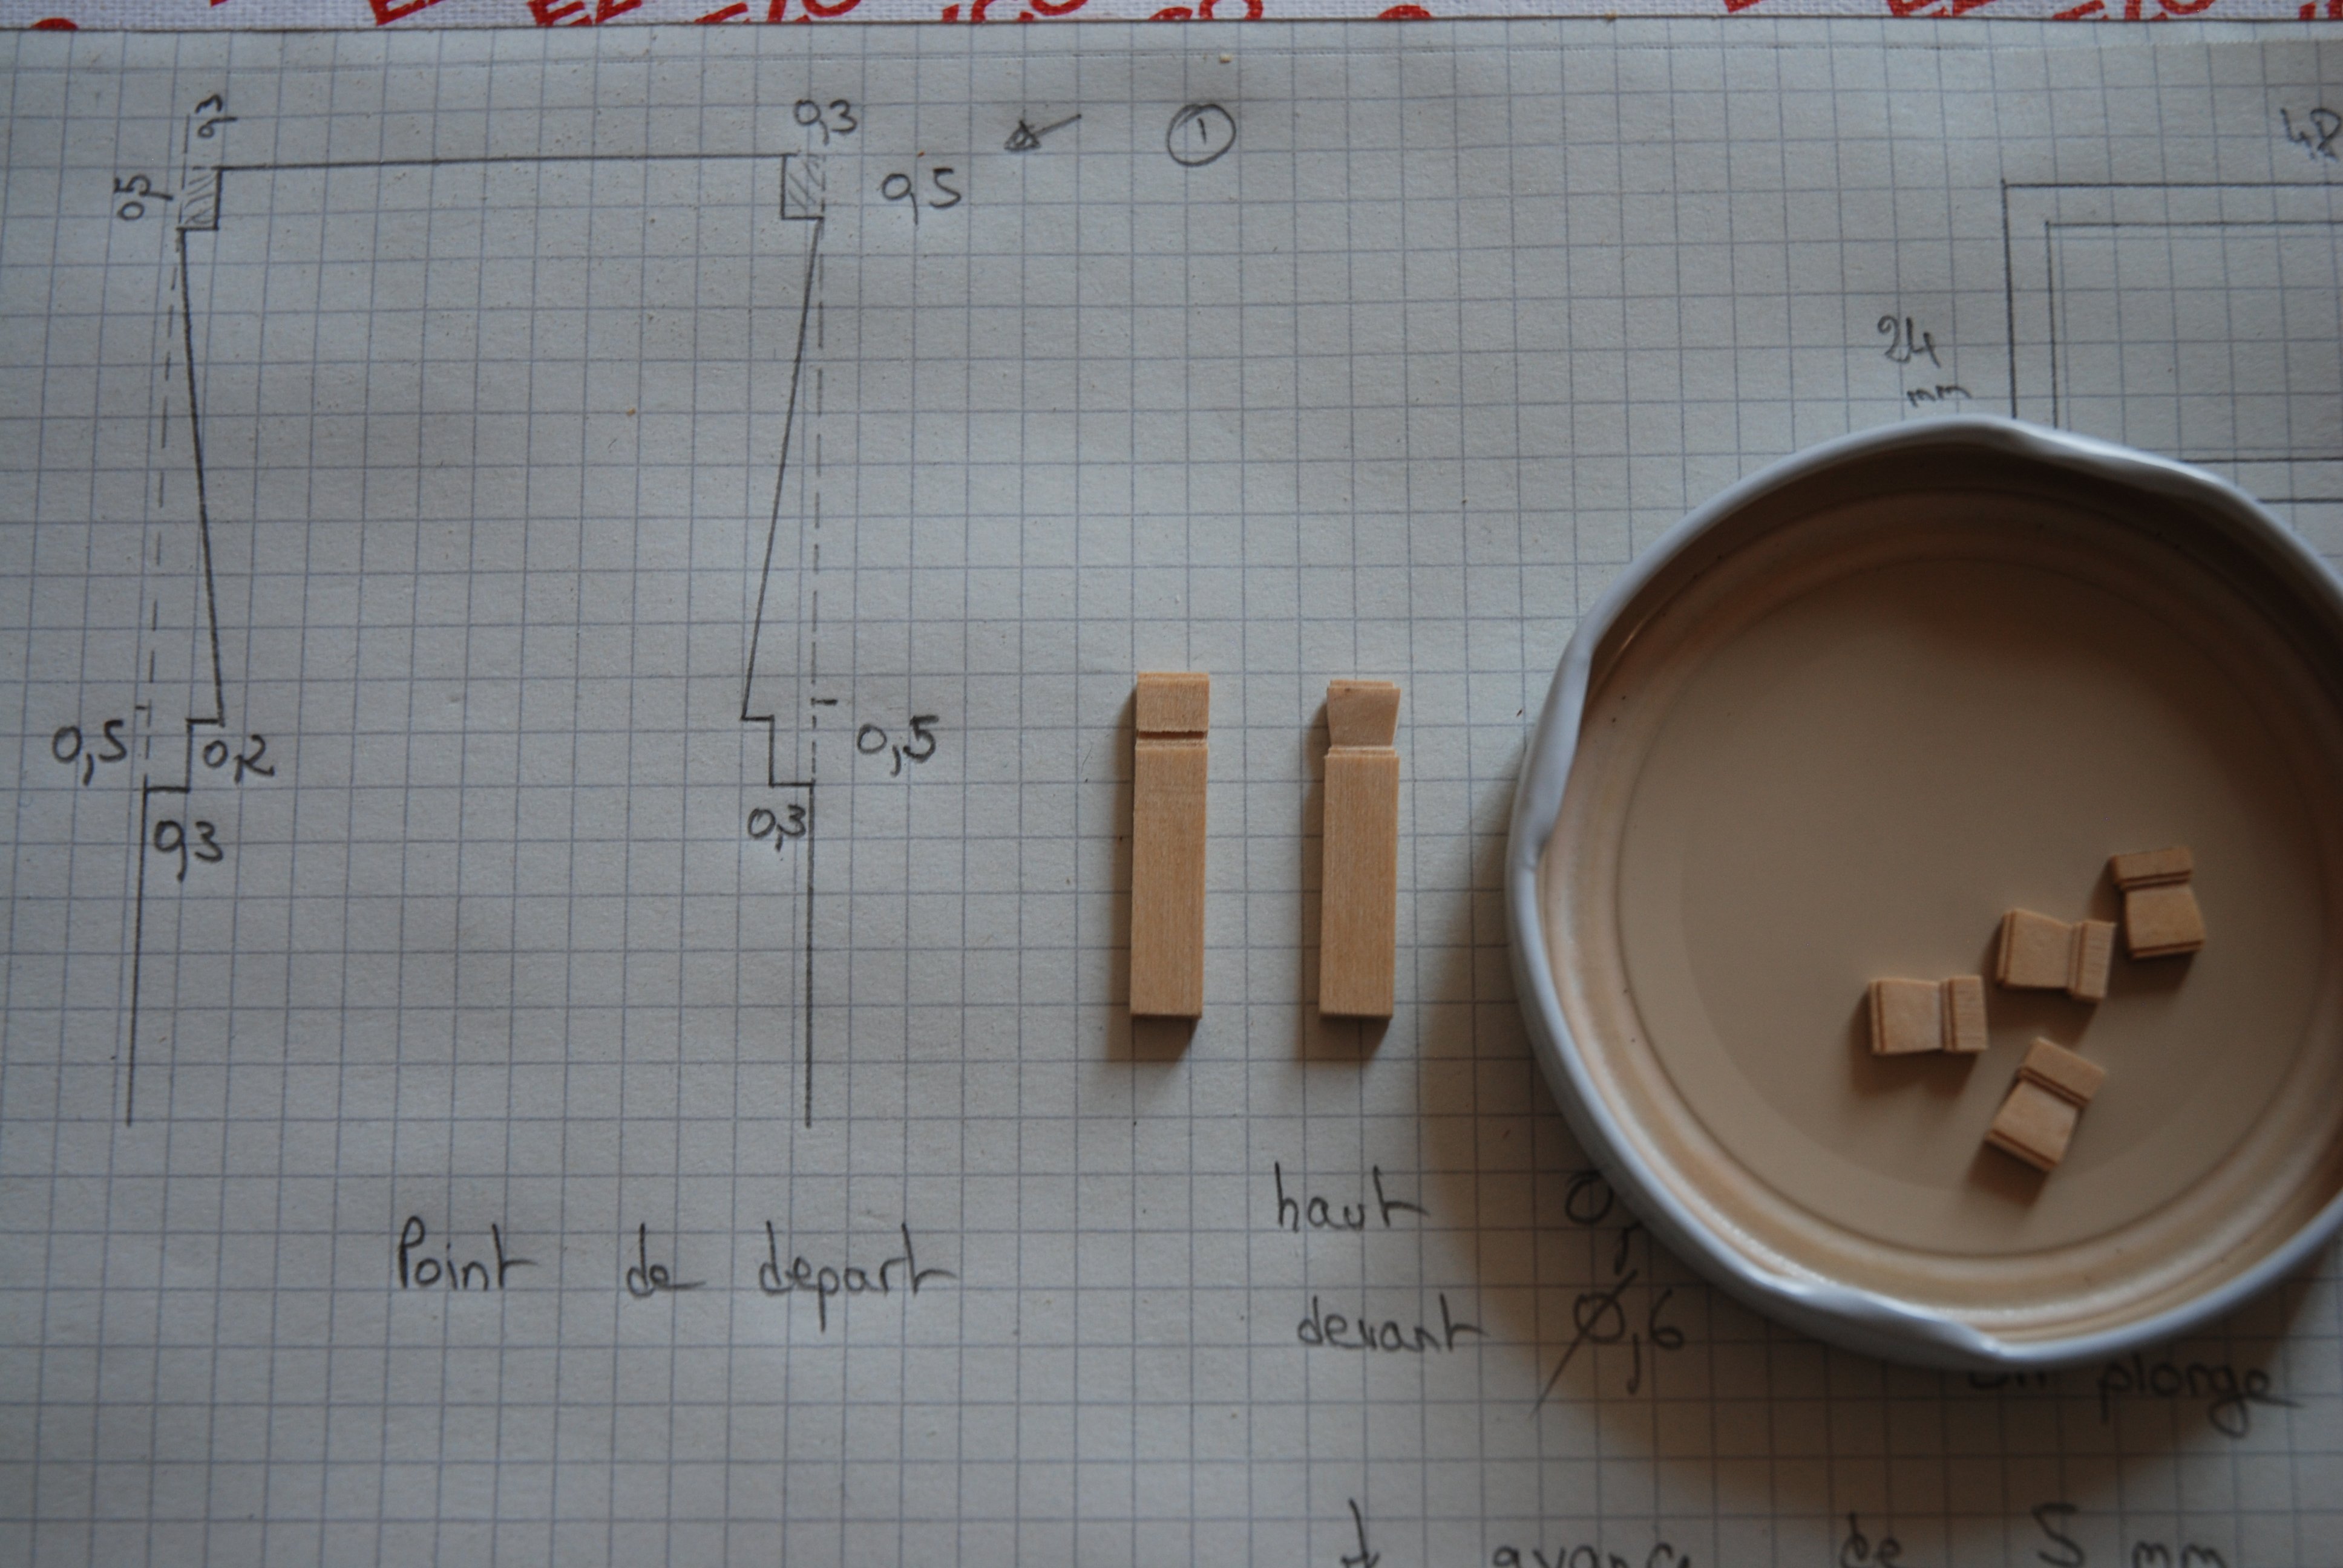
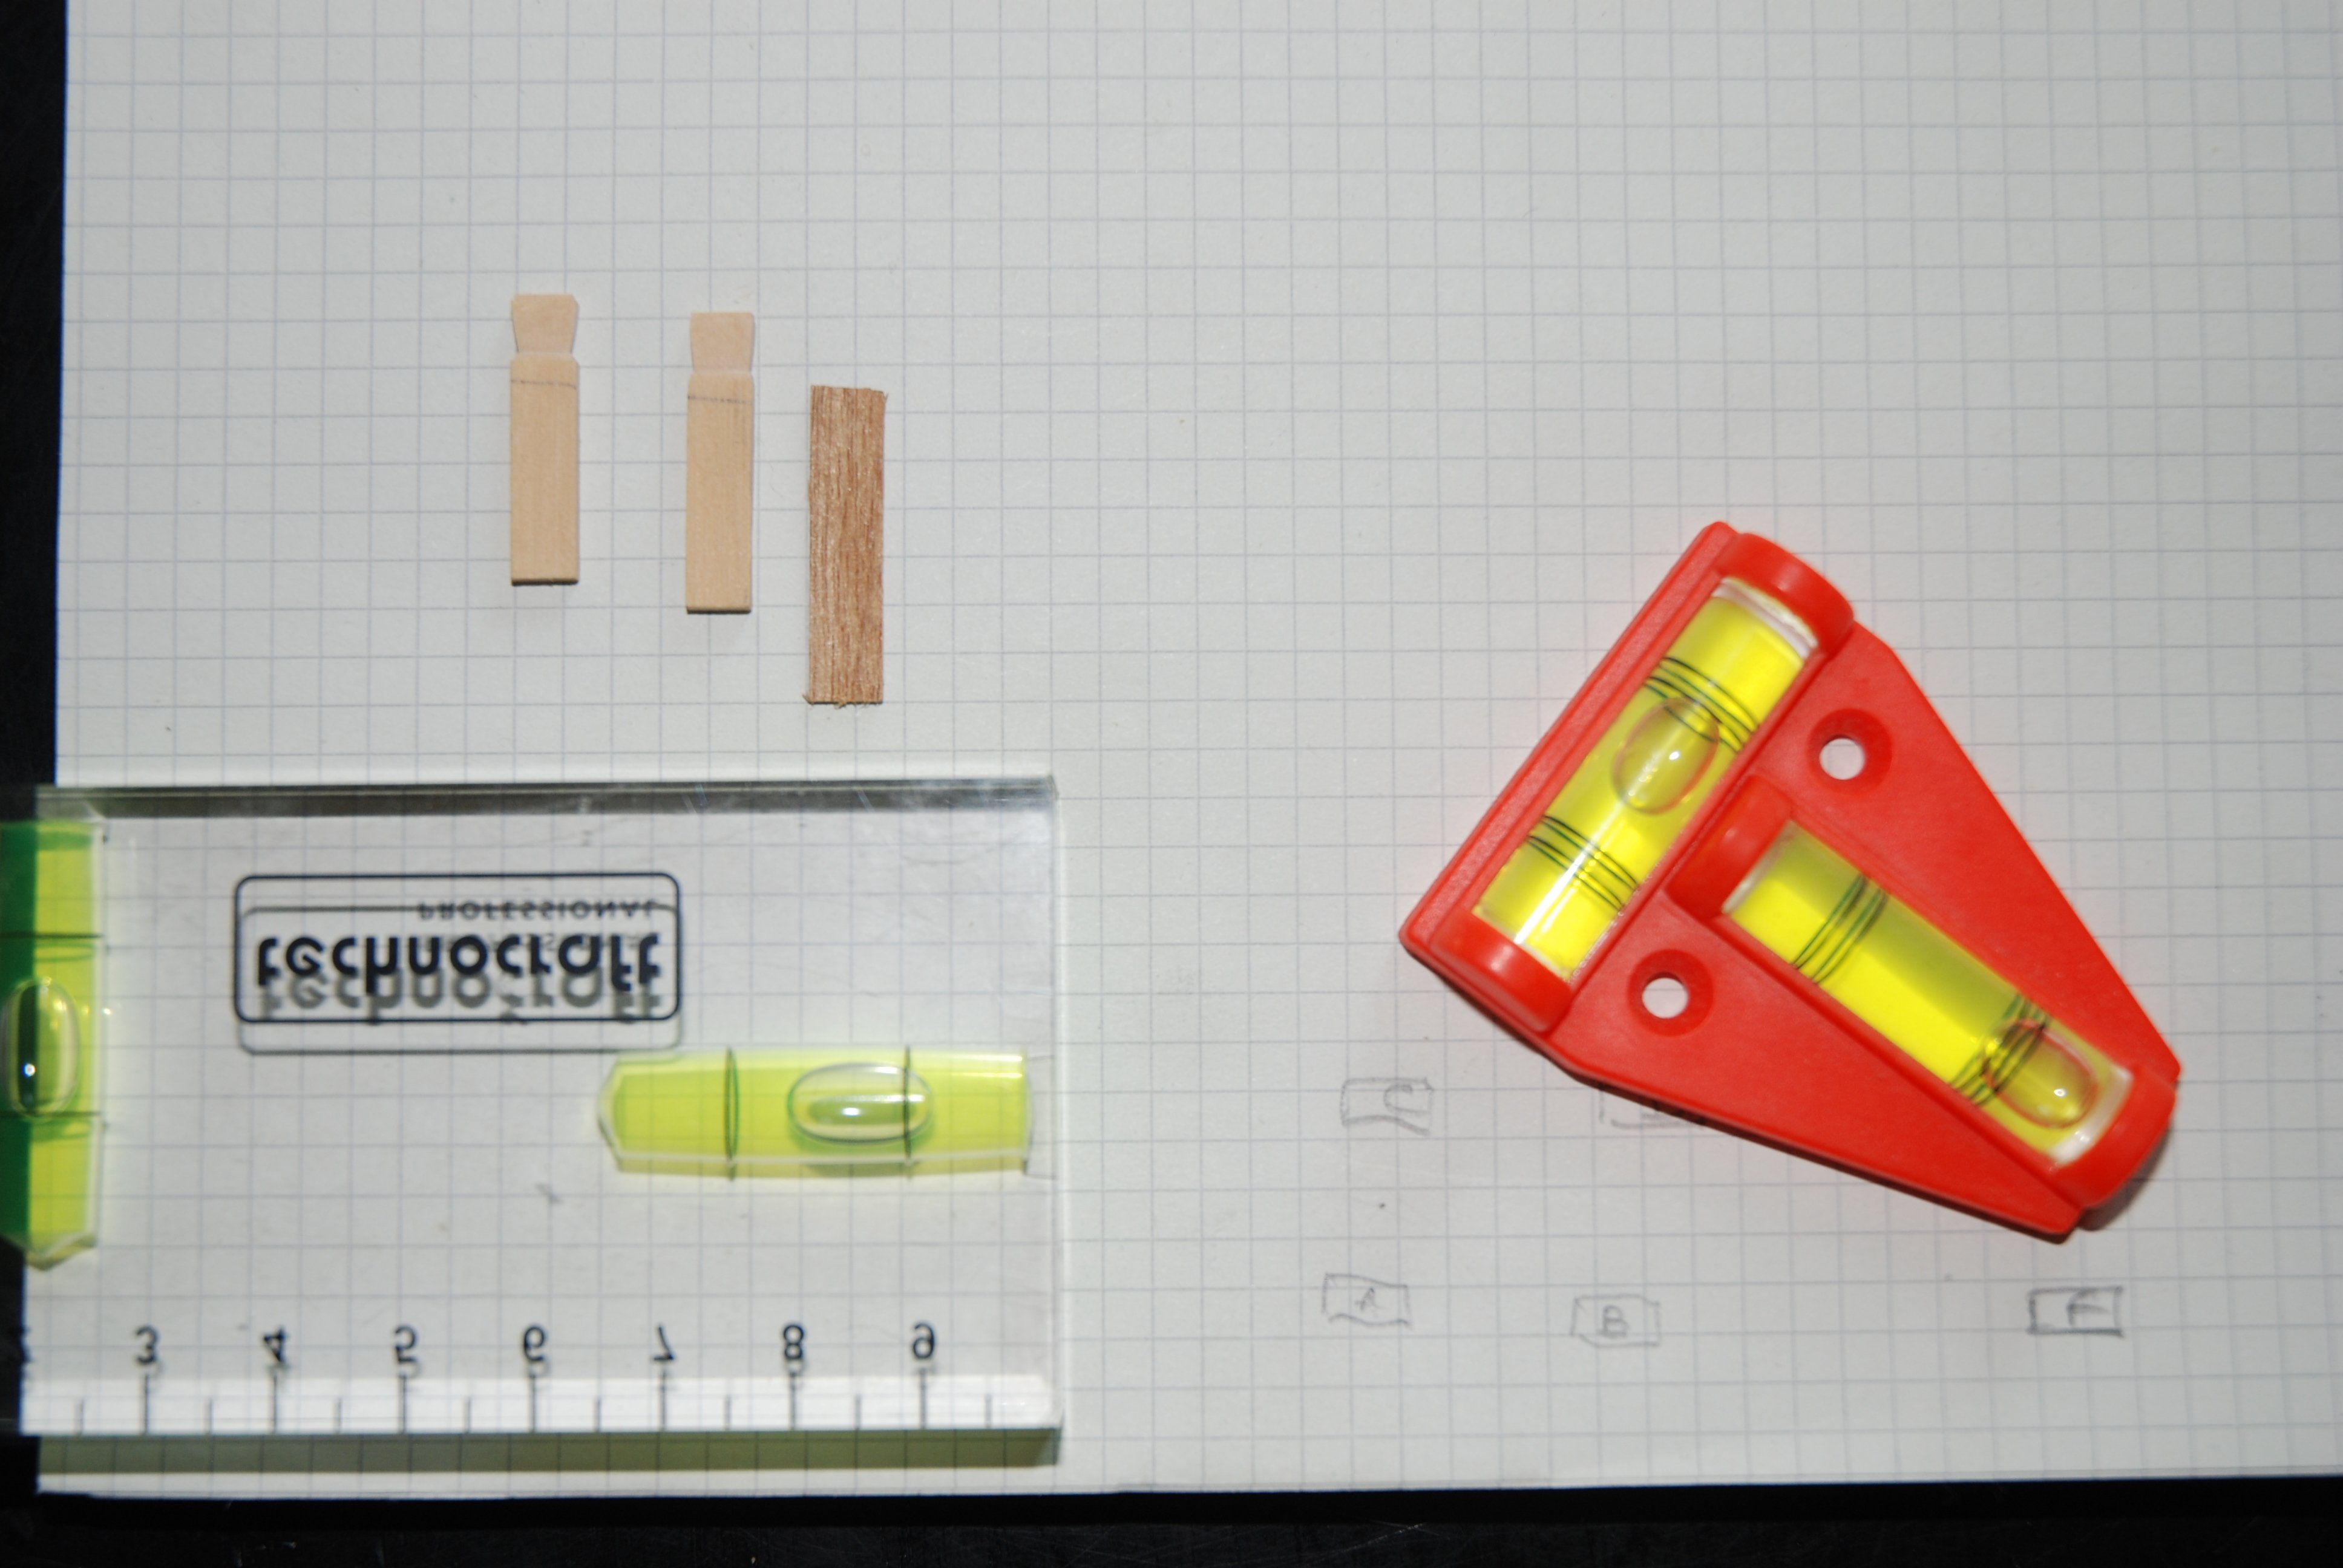
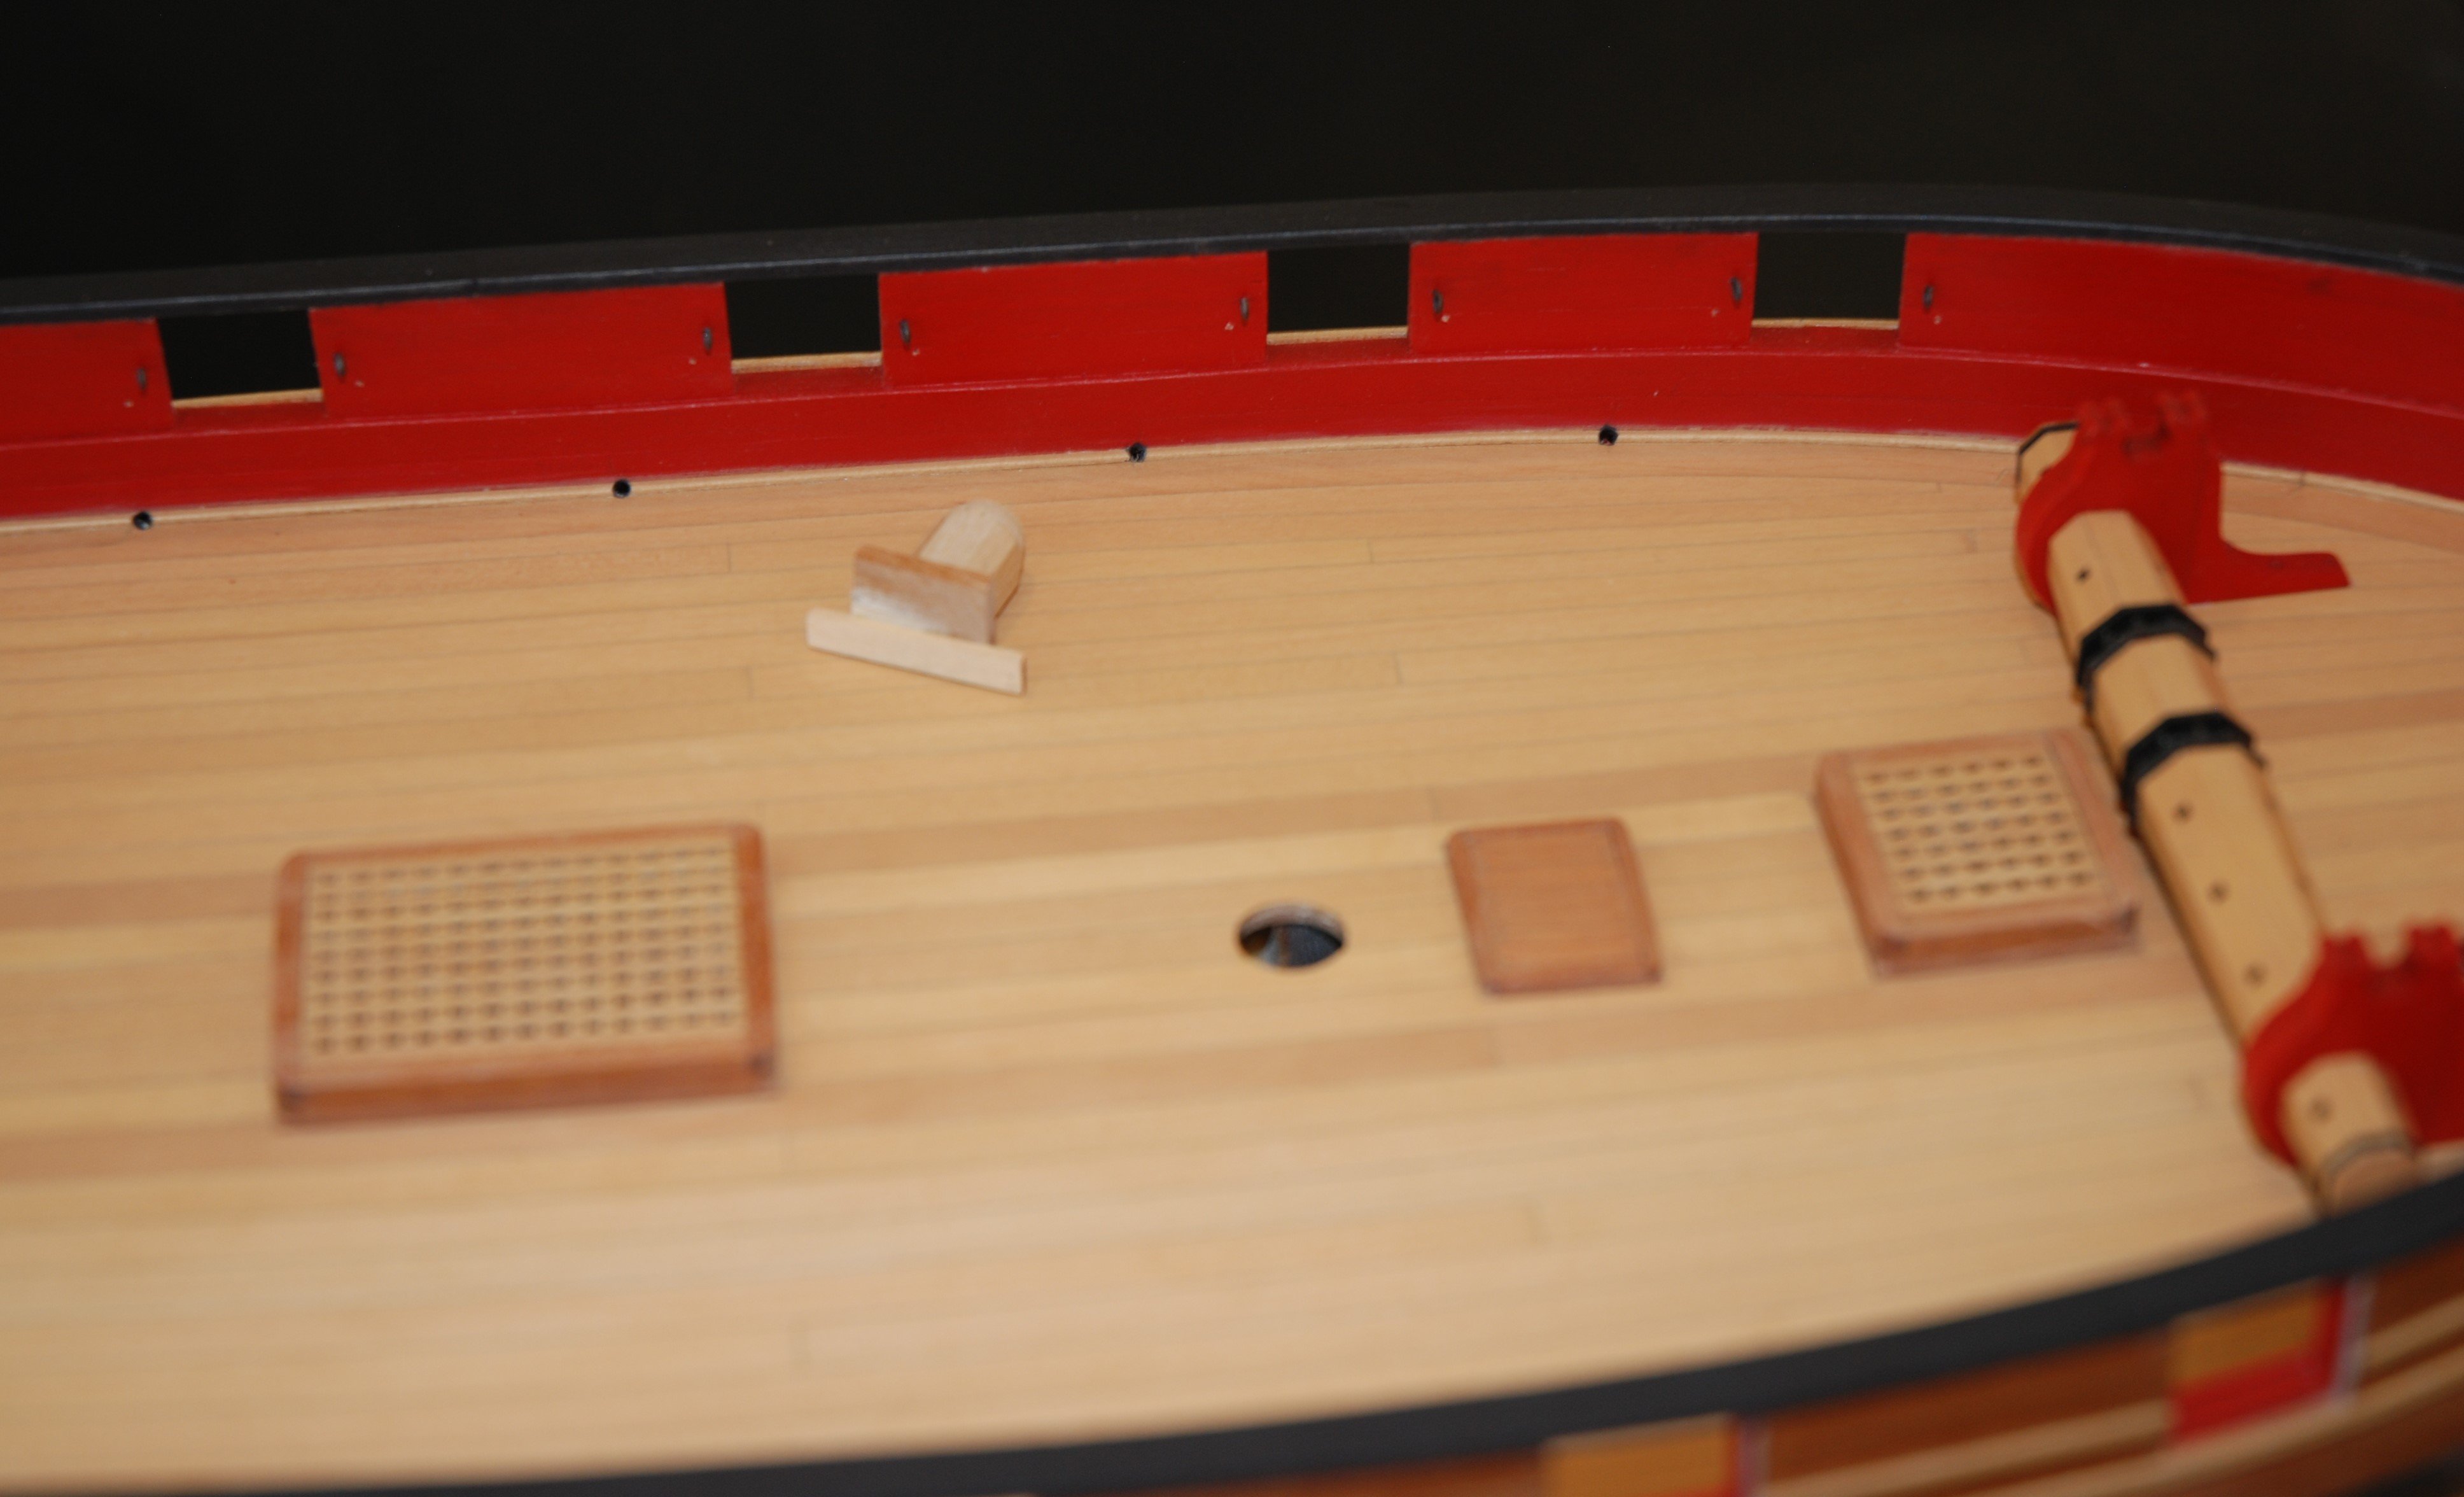
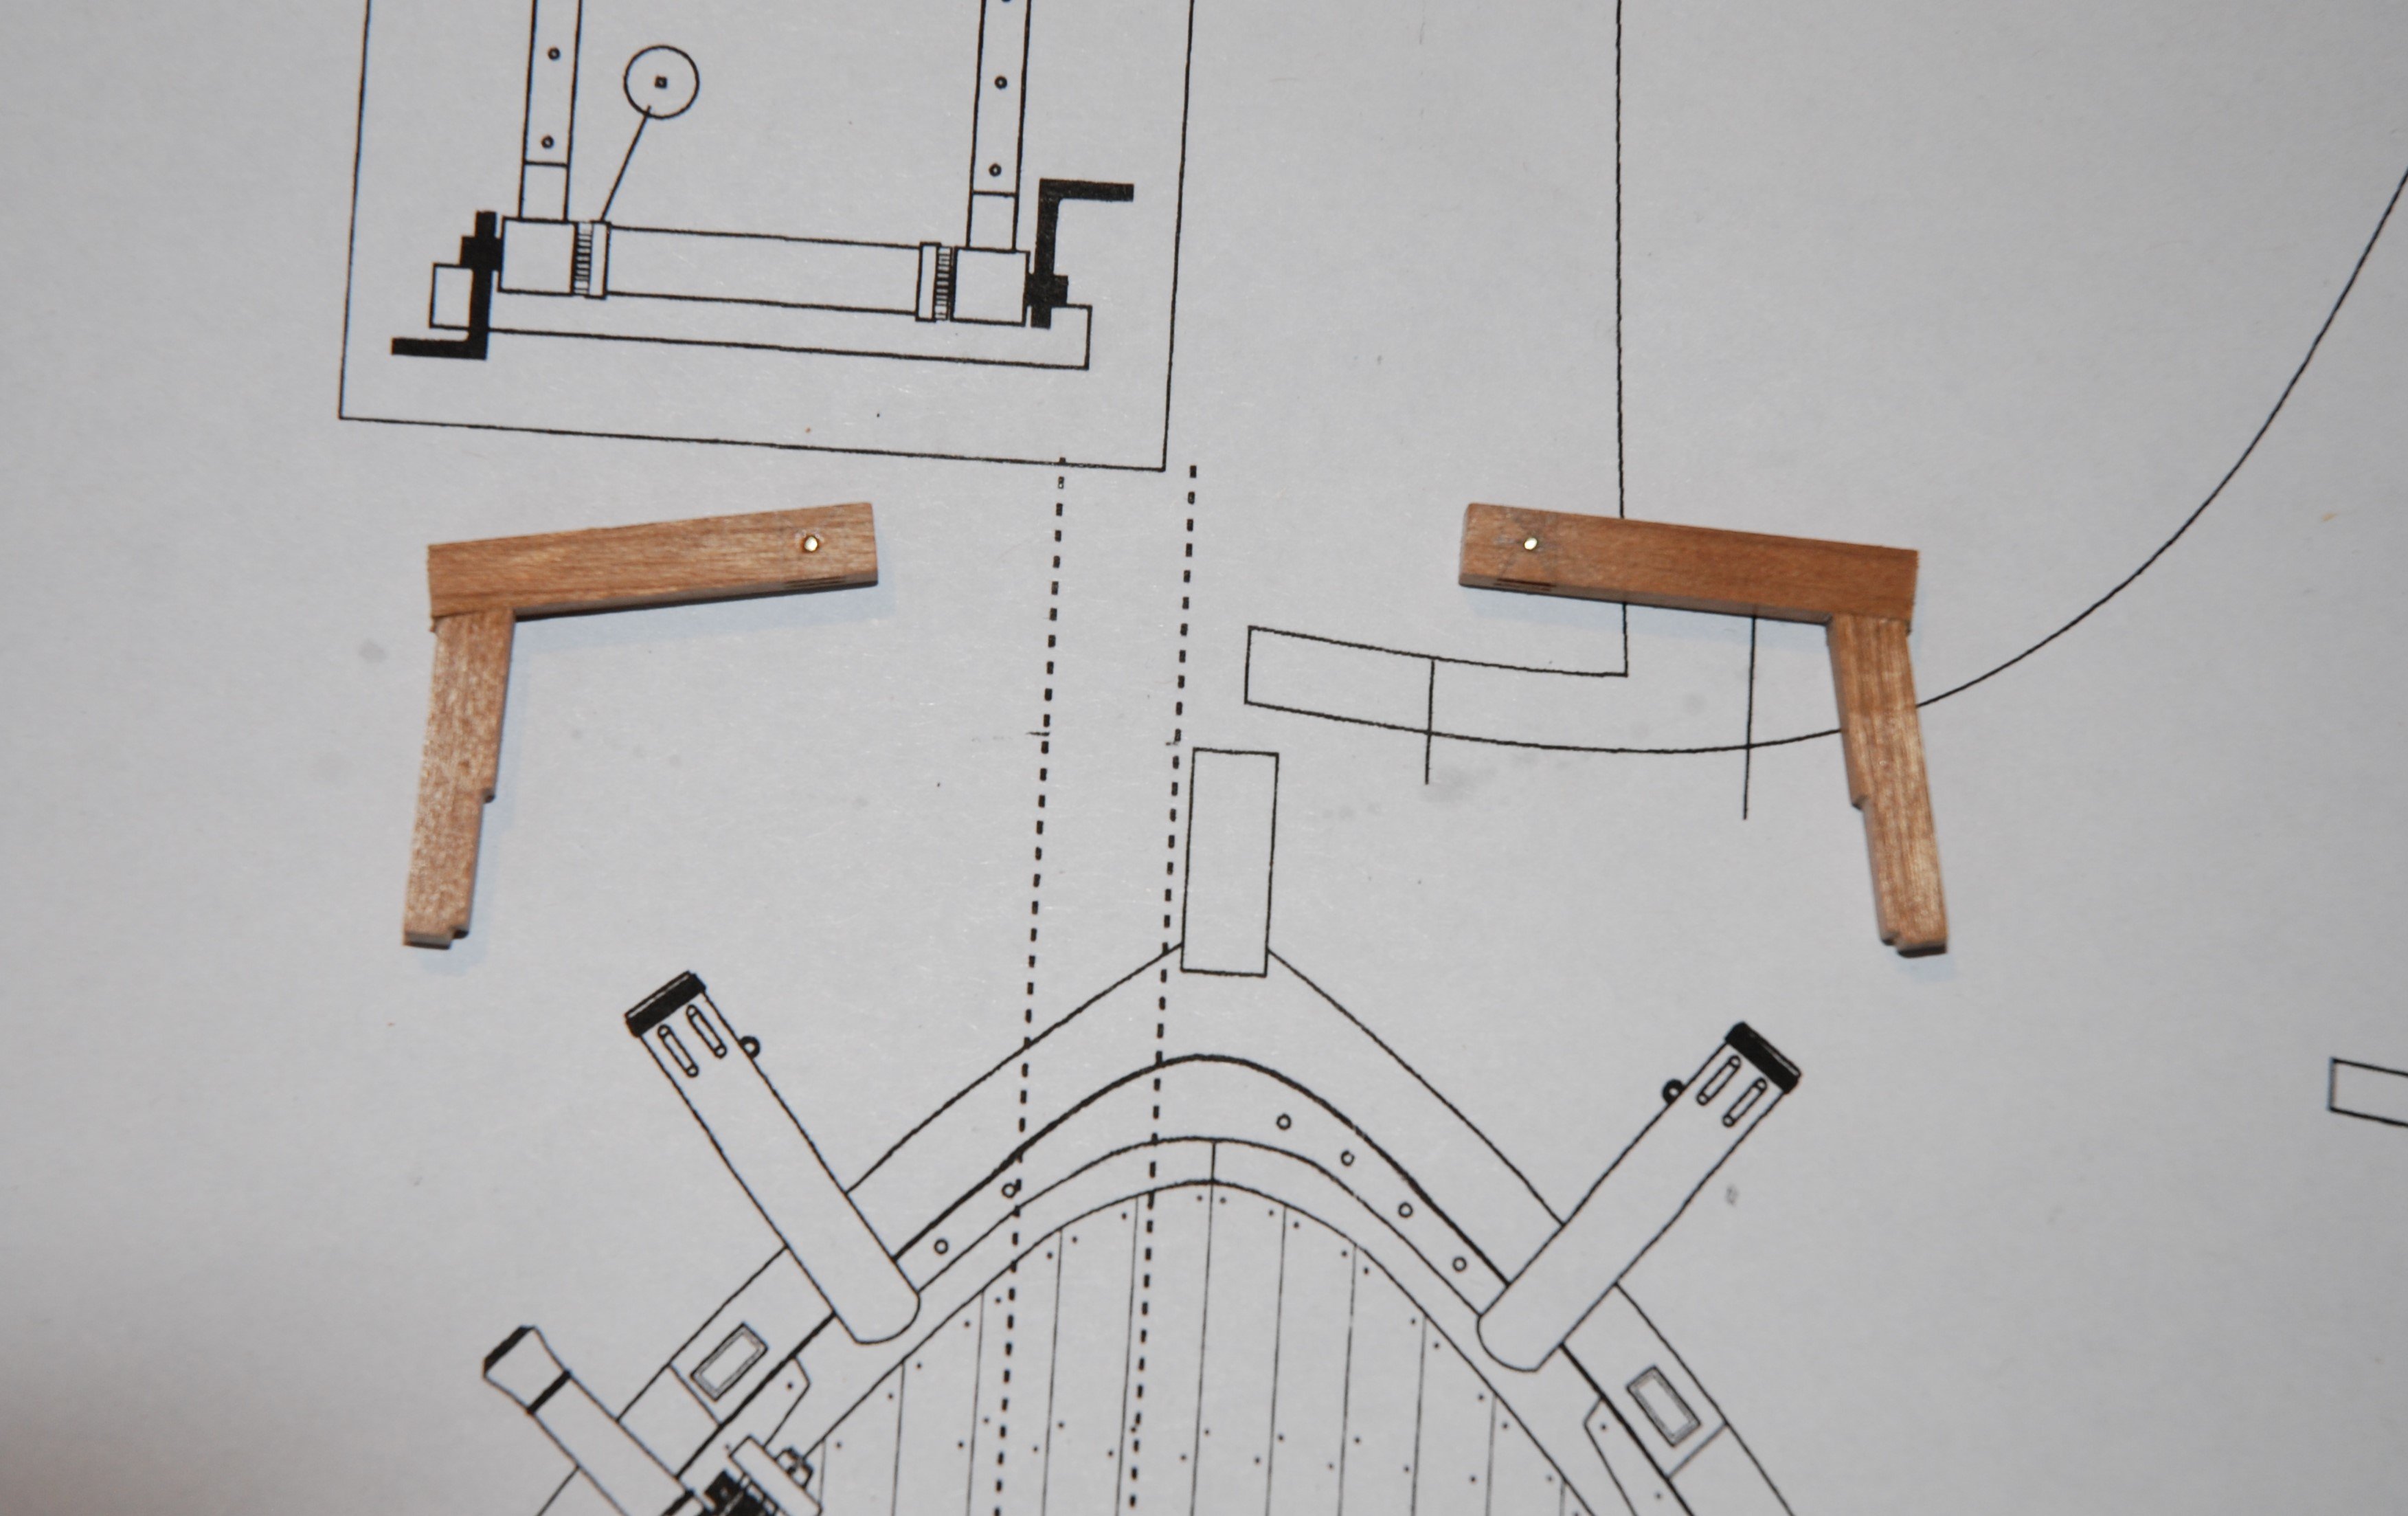
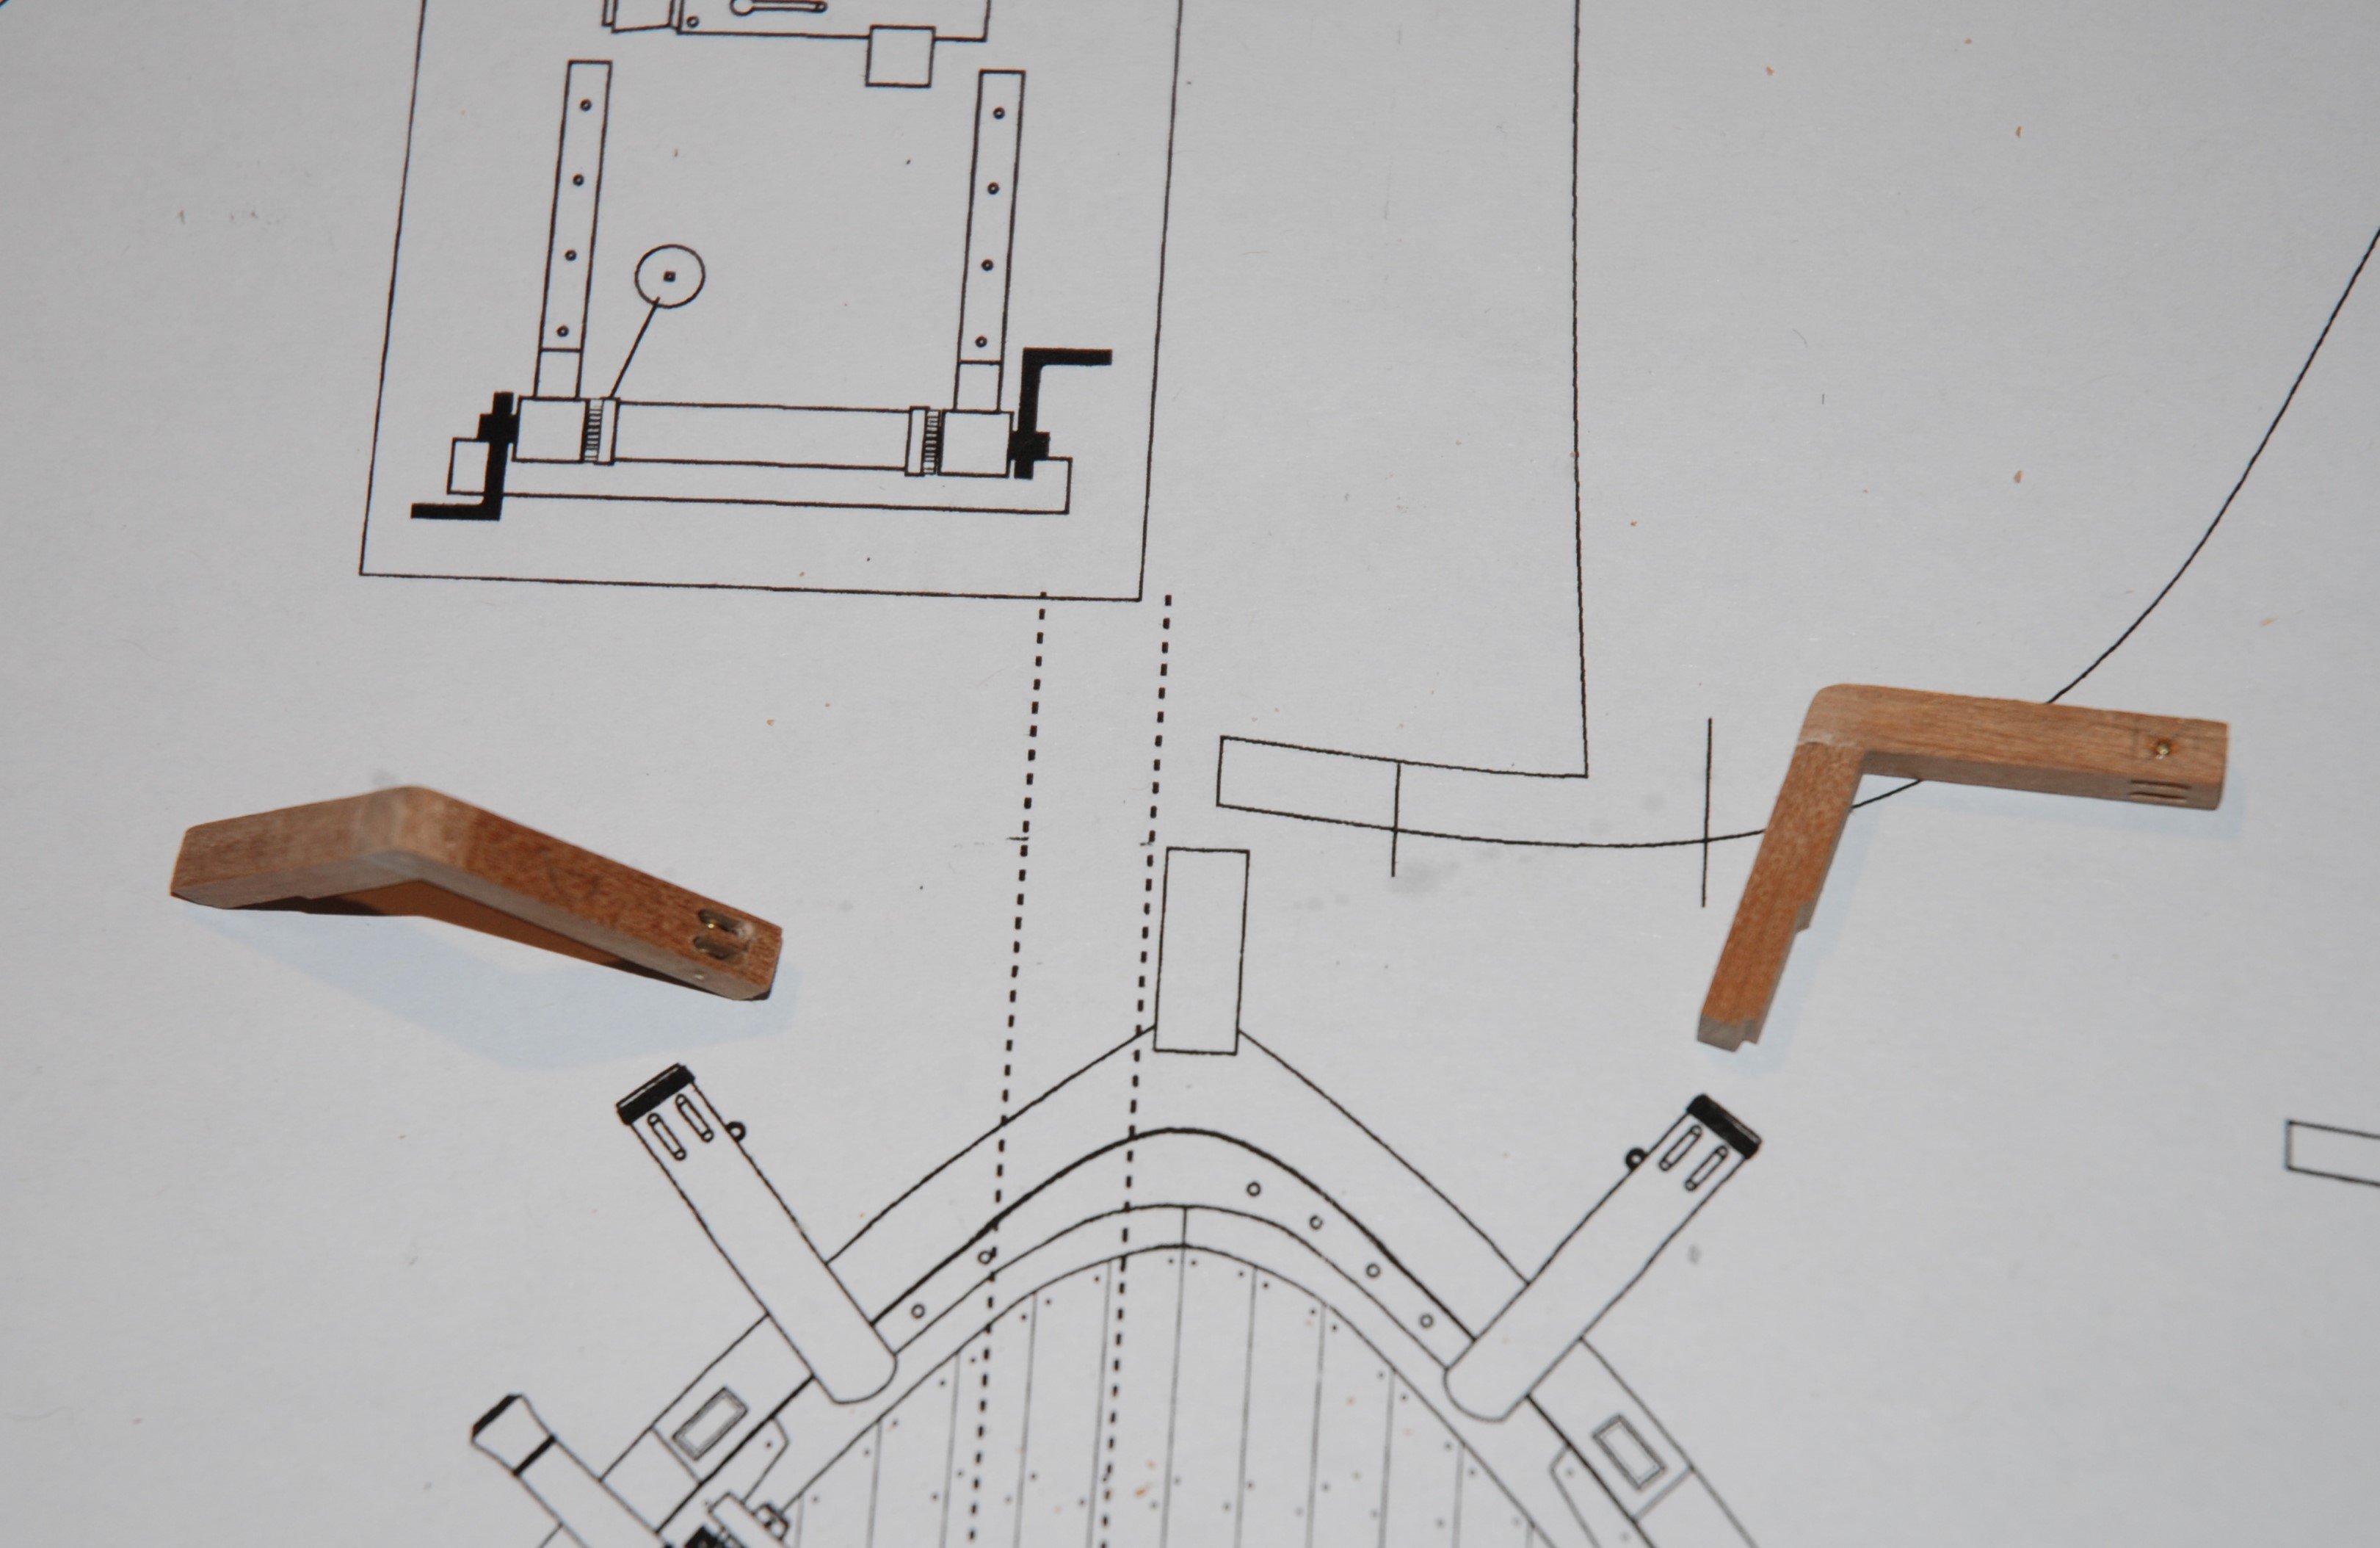
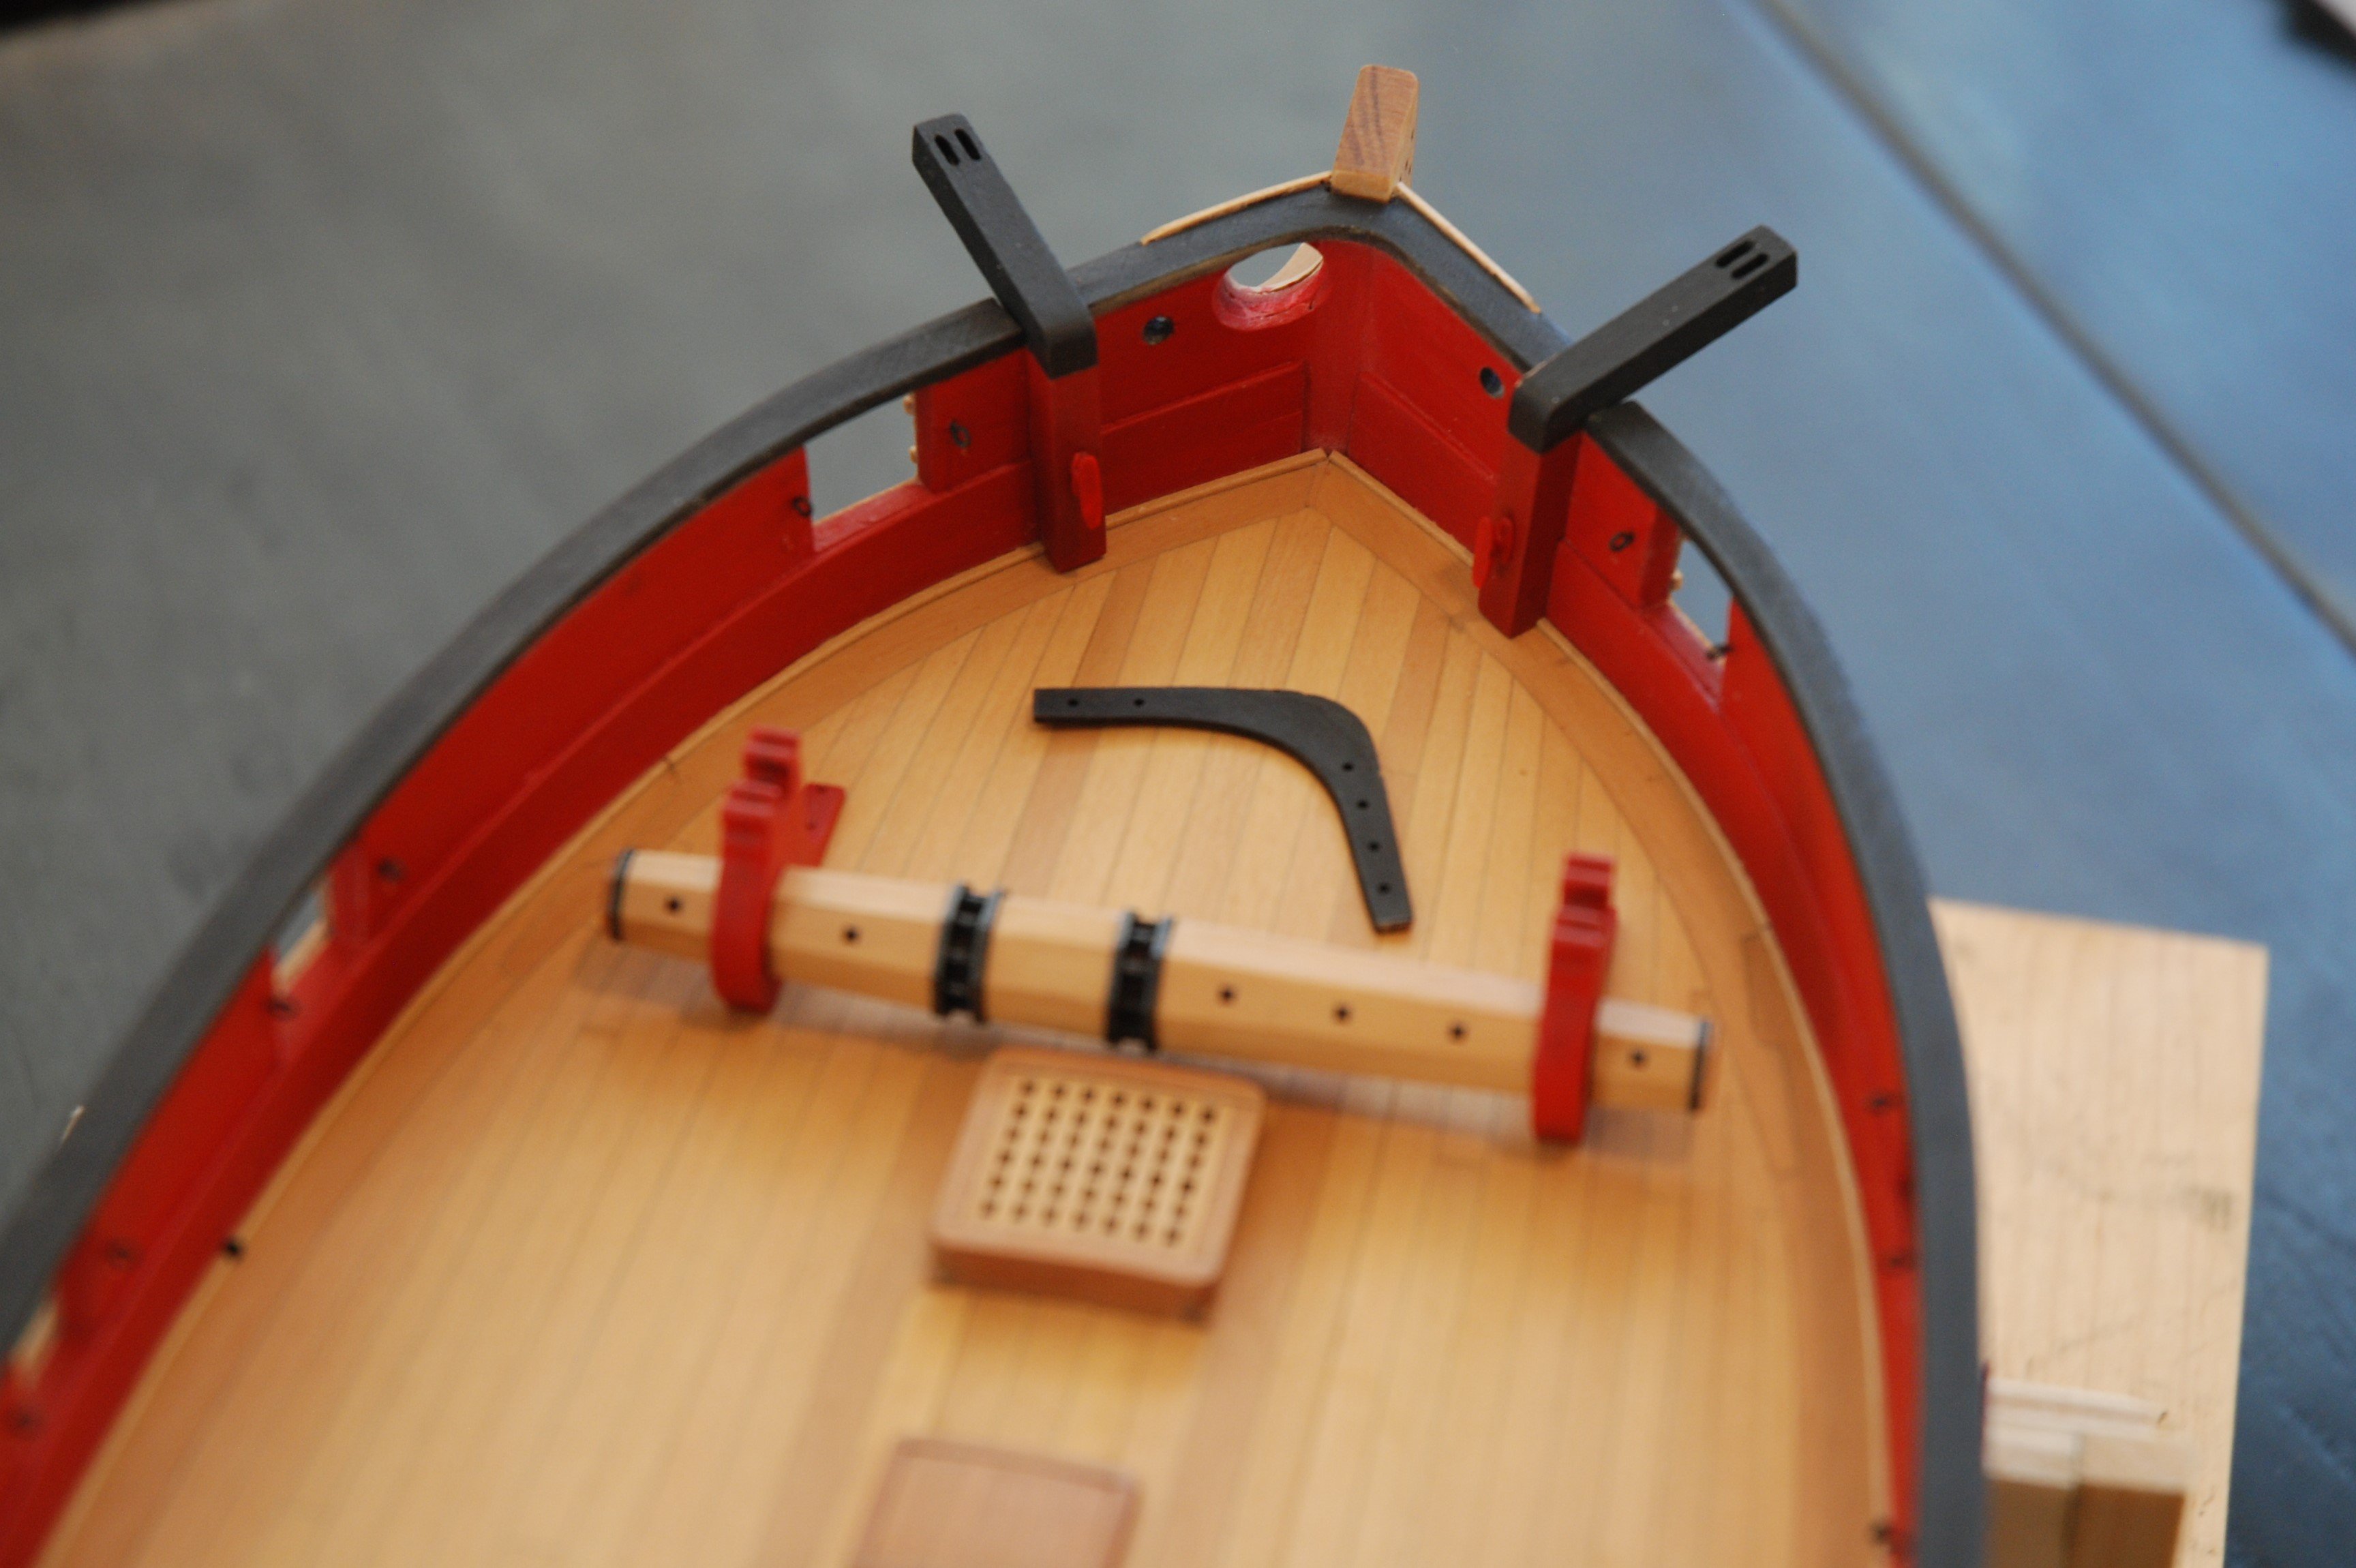
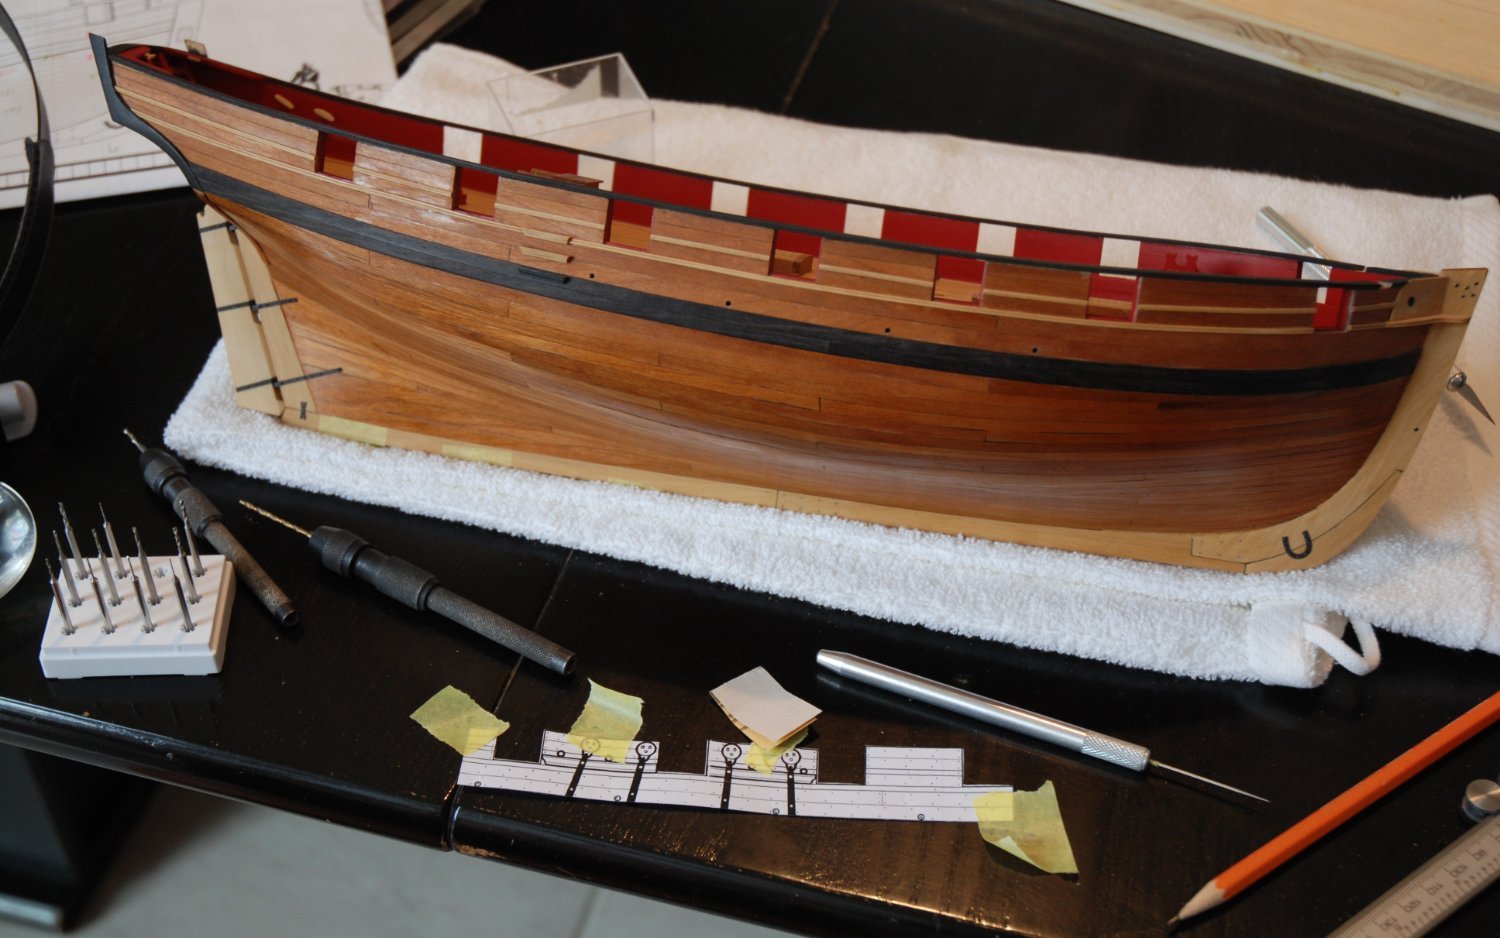
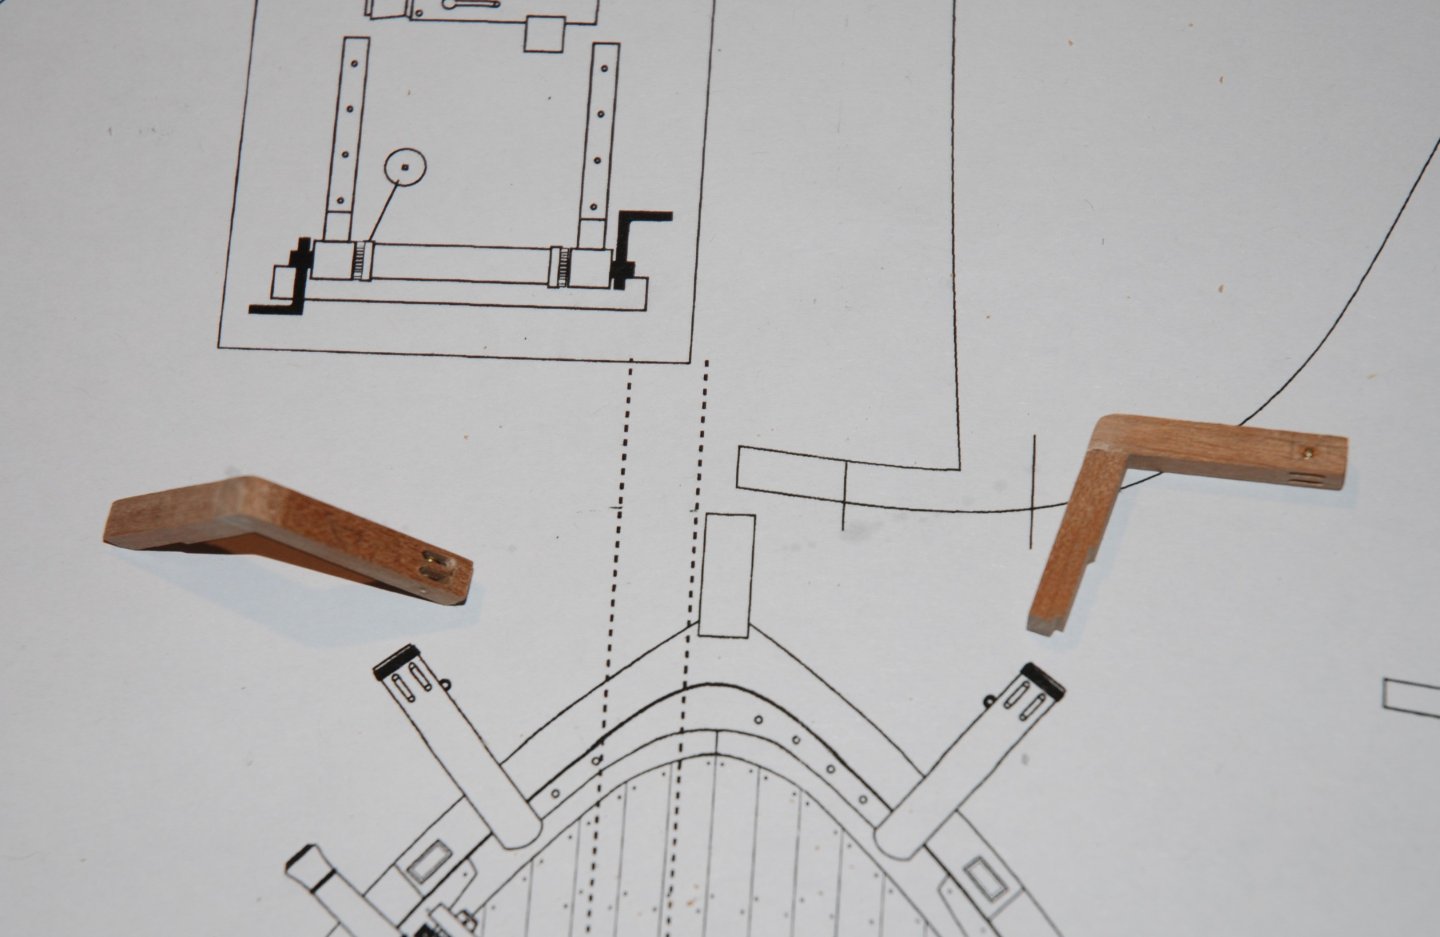
Thank You to all the 'Likes'. The work was then taken up again with the addition of details along the cap rail. I started by making and fitting the six timberheads. I started again by drawing a small sketch of one of the timberheads to determine the machining quotes for the part, as I'll be using my MF70 mini milling machine again. I machined 7 pieces at a time, gluing them together on double-sided tape (A spare part just in case...). I'm sure I'll get identical parts. The work consists of two phases: first, I make three cuts on each side of the pieces using milling cutters (piece on the left of the photo below), then I finish the shaping with an x-acto and small files (piece on the right). Cutting the two timberheads at the stern is a little more complex, as a precise angle must be calculated (they must match the sheer of the cap rail). A simple board placed on the ship's deck enabled me to draw the angle line of the cap rail, which I could then easily transfer to the parts to be recut. Small metal pins were then inserted into each timberhead to reinforce the bond to the cap rail. Positioning on the cap rail was based on copies of the plan. Next step: the boom crutches.


-
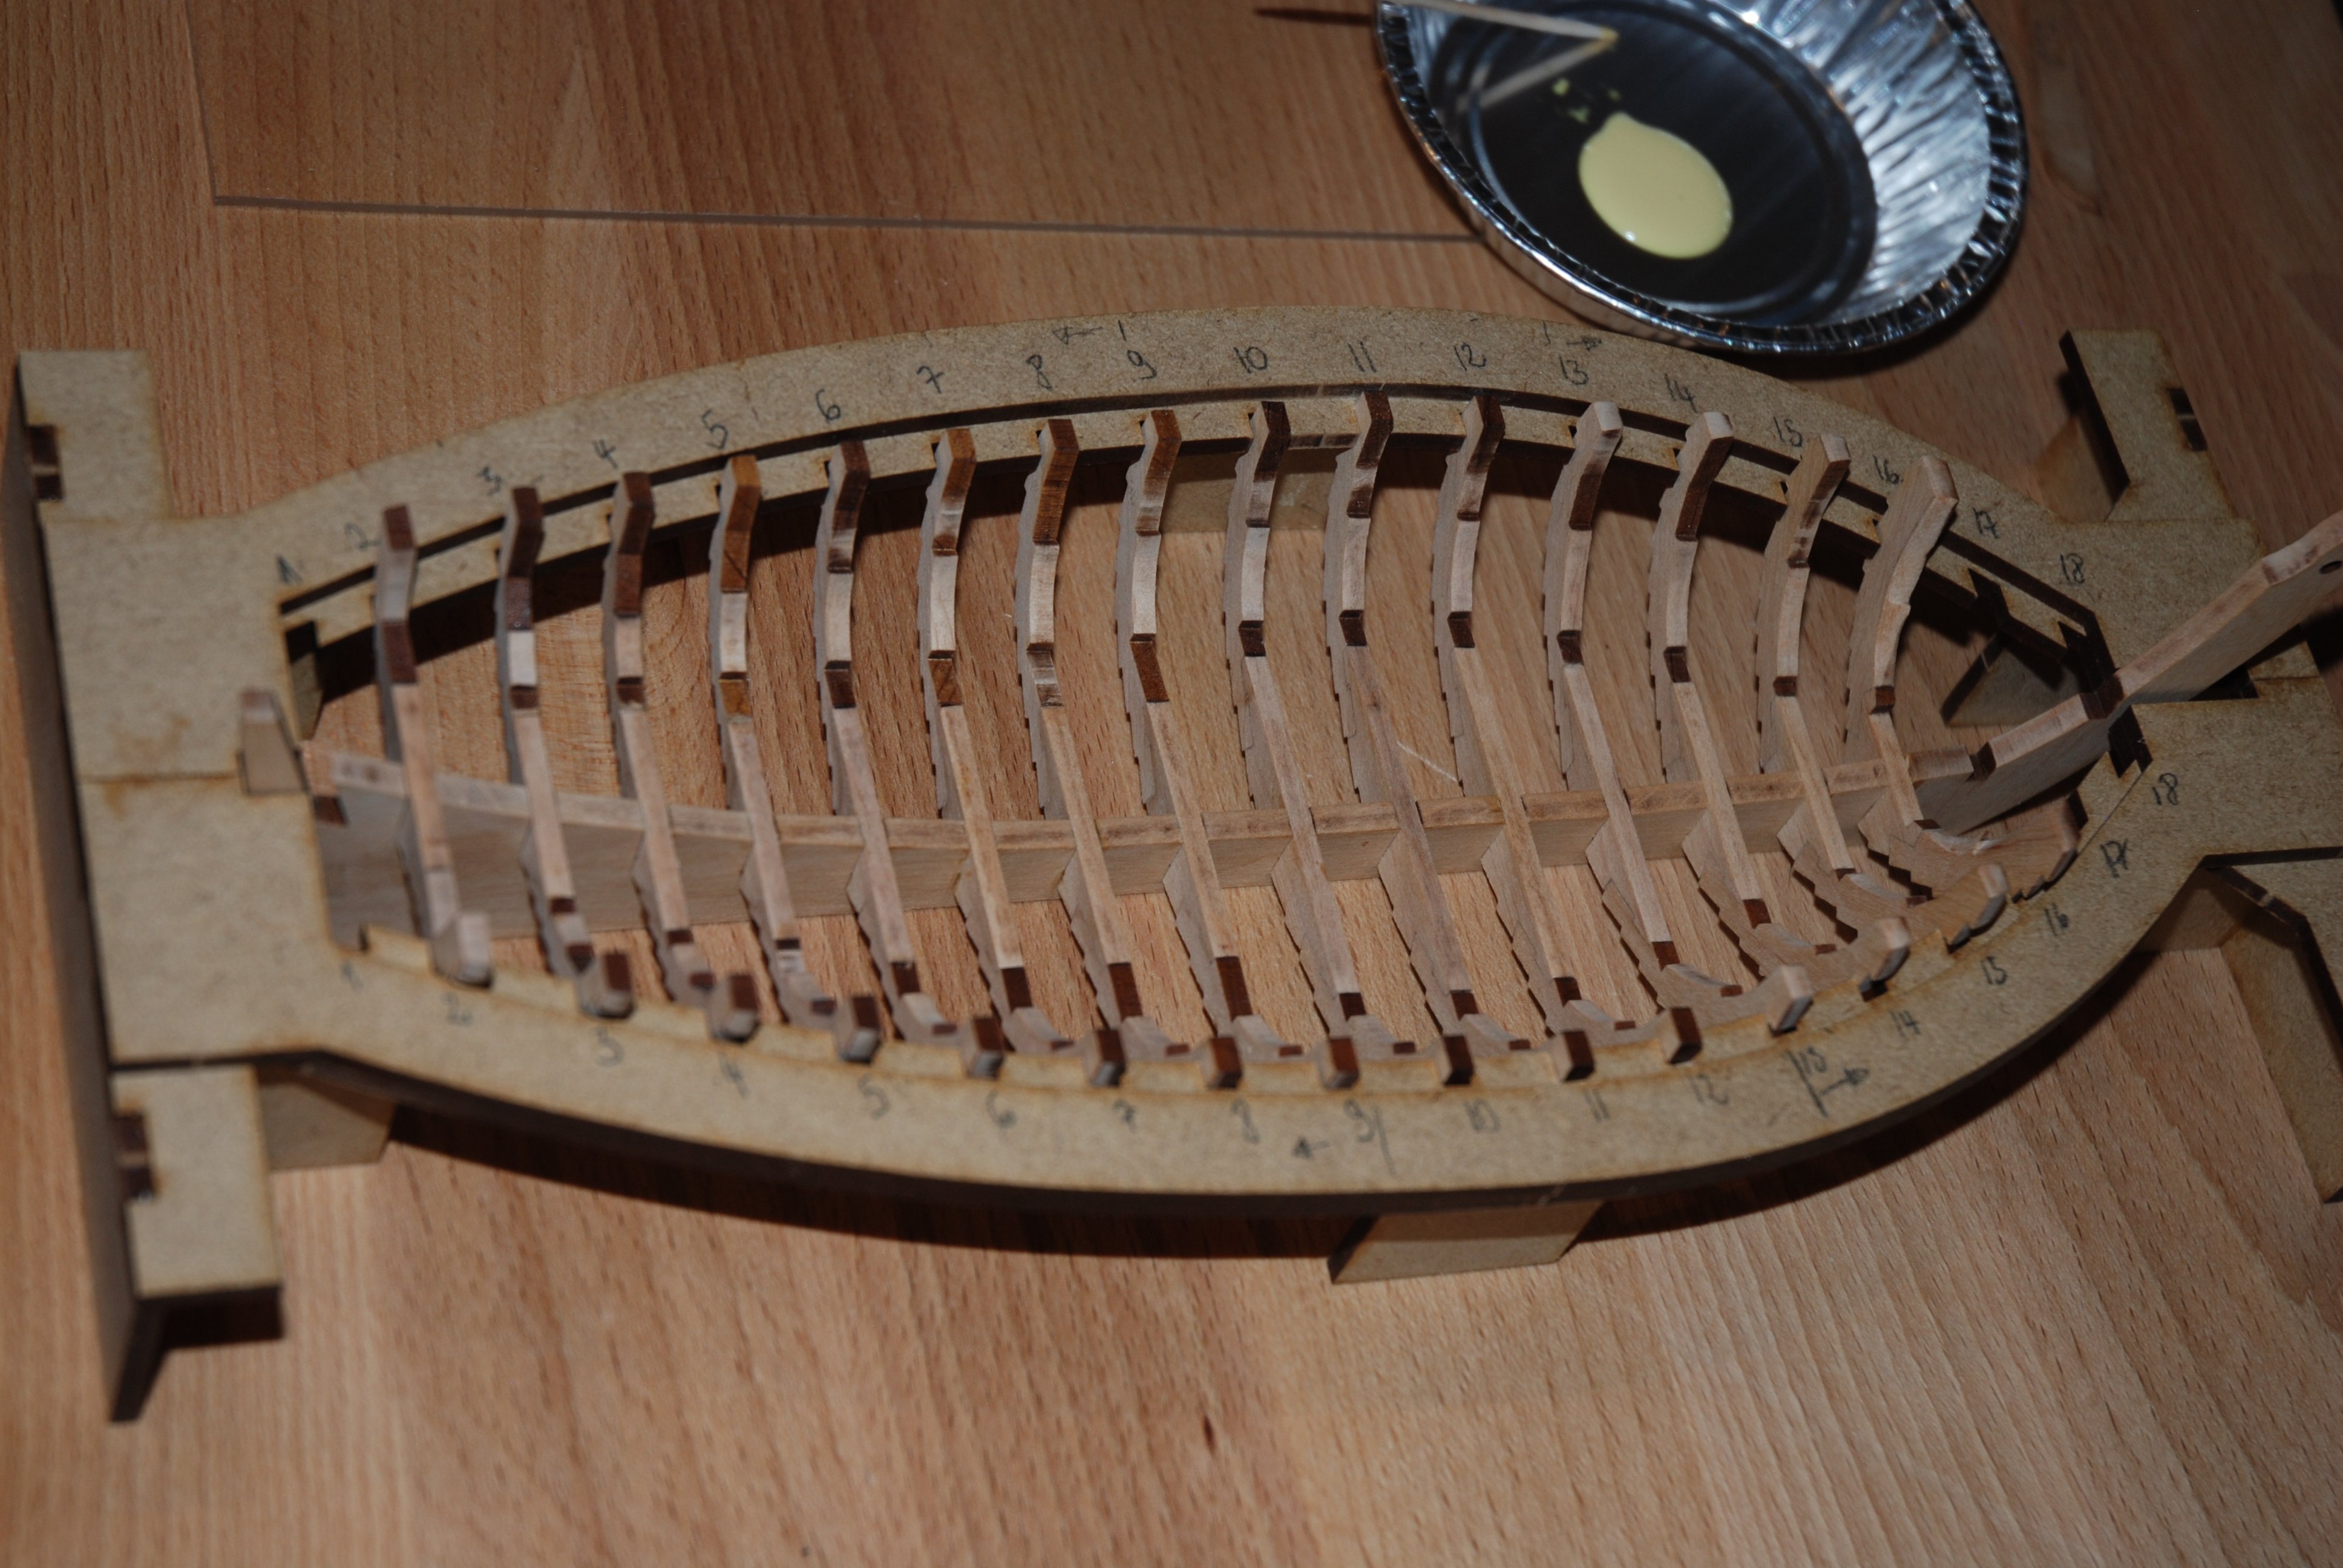
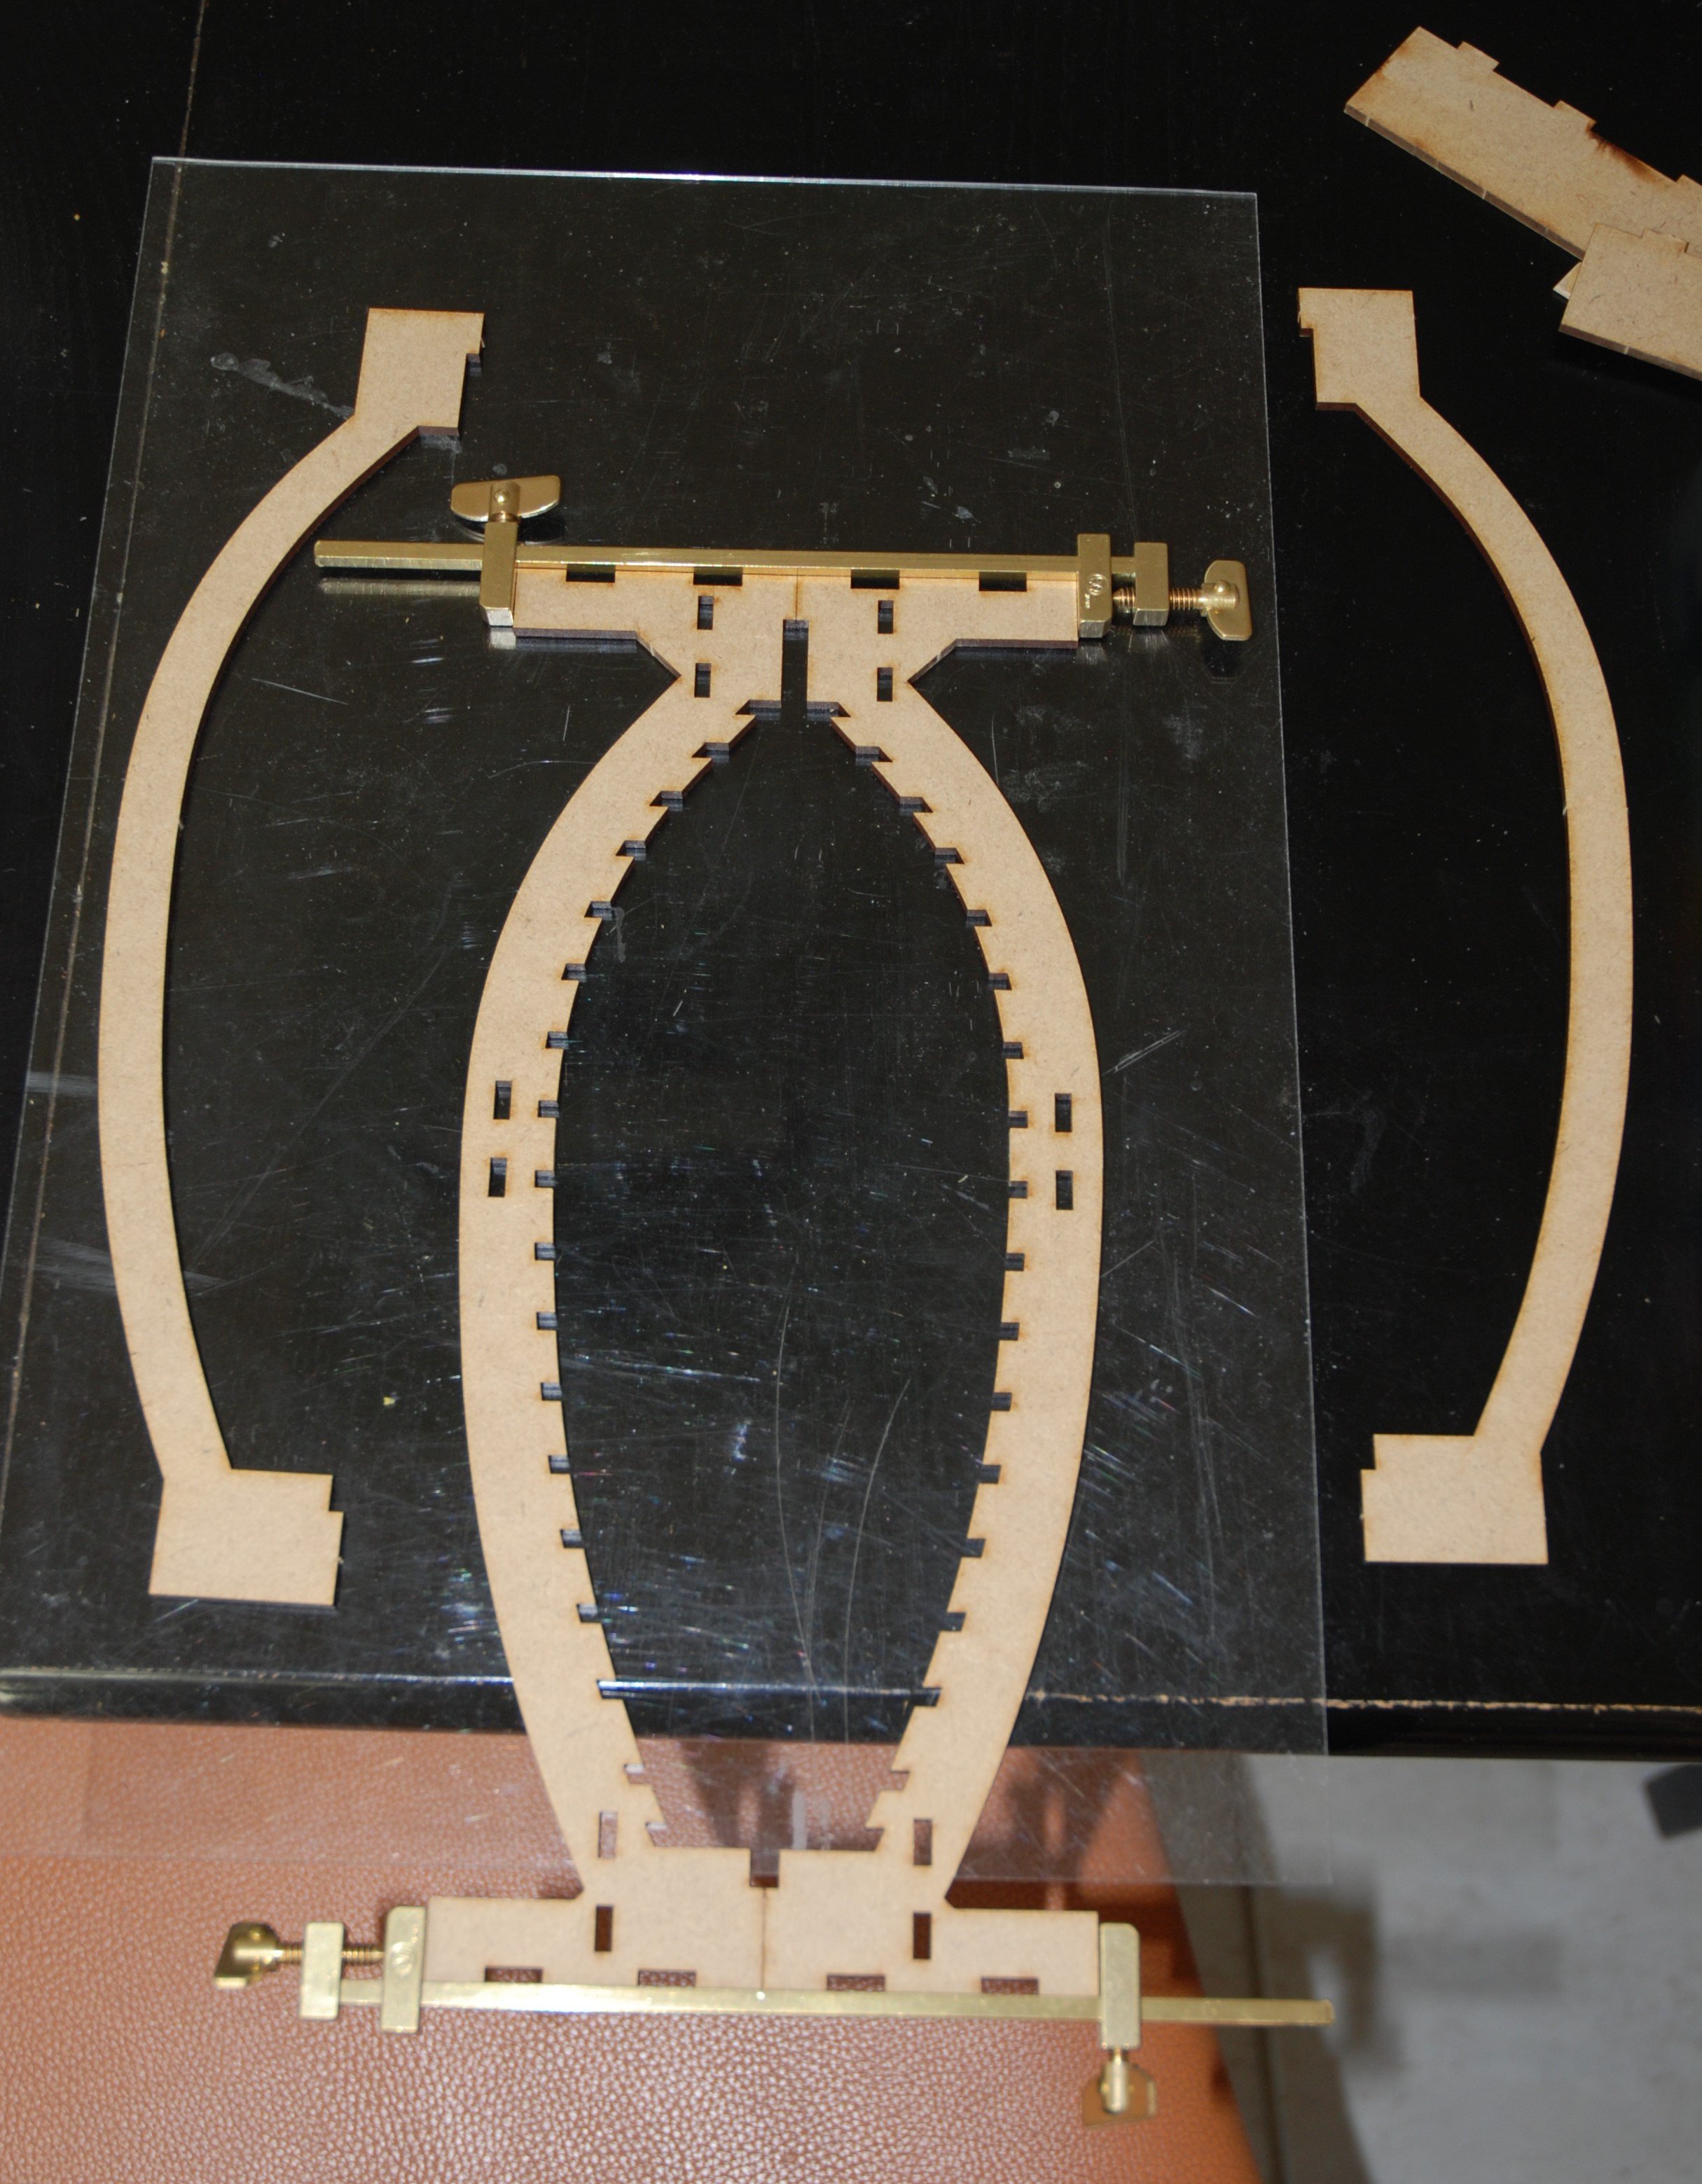
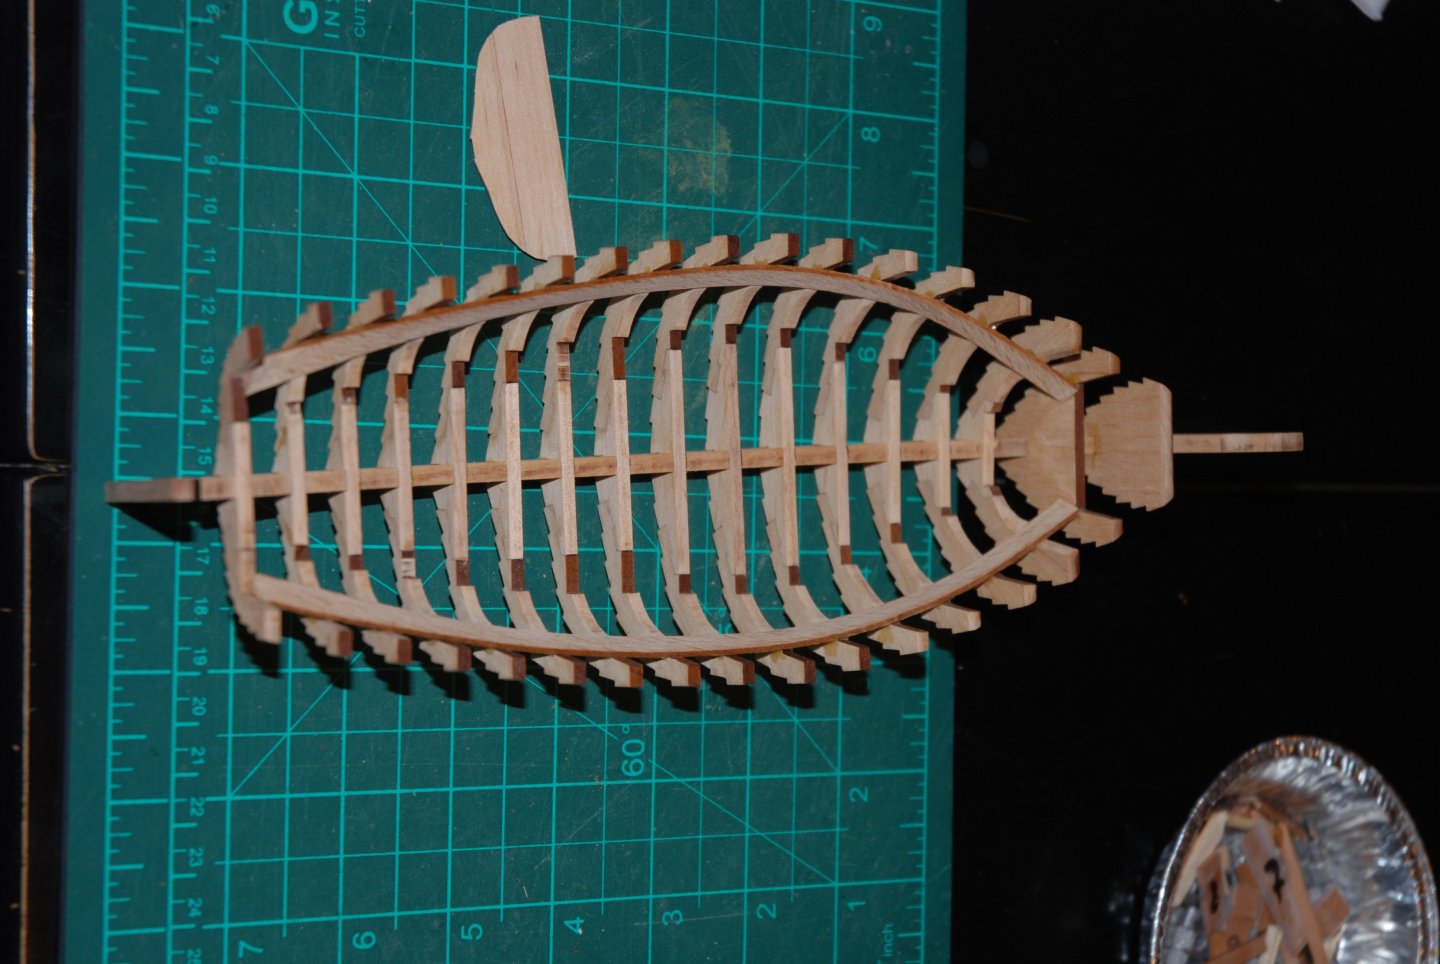
Thank you to all the 'Likes'. The work continued with the gluing of the frames to the keel. Some of the slots in the work cradle required a little sanding so that the frame could be positioned. Each frame is first blank tested. Then they're all glued to the keel. To be continued.


- 22 replies
-
- 4
-
-
-
- ships boat
- Korabel
- (and 1 more)
-
HM Cutter Cheerful 1806 by Erik W - 1:48 scale
JpR62 replied to Erik W's topic in - Build logs for subjects built 1801 - 1850
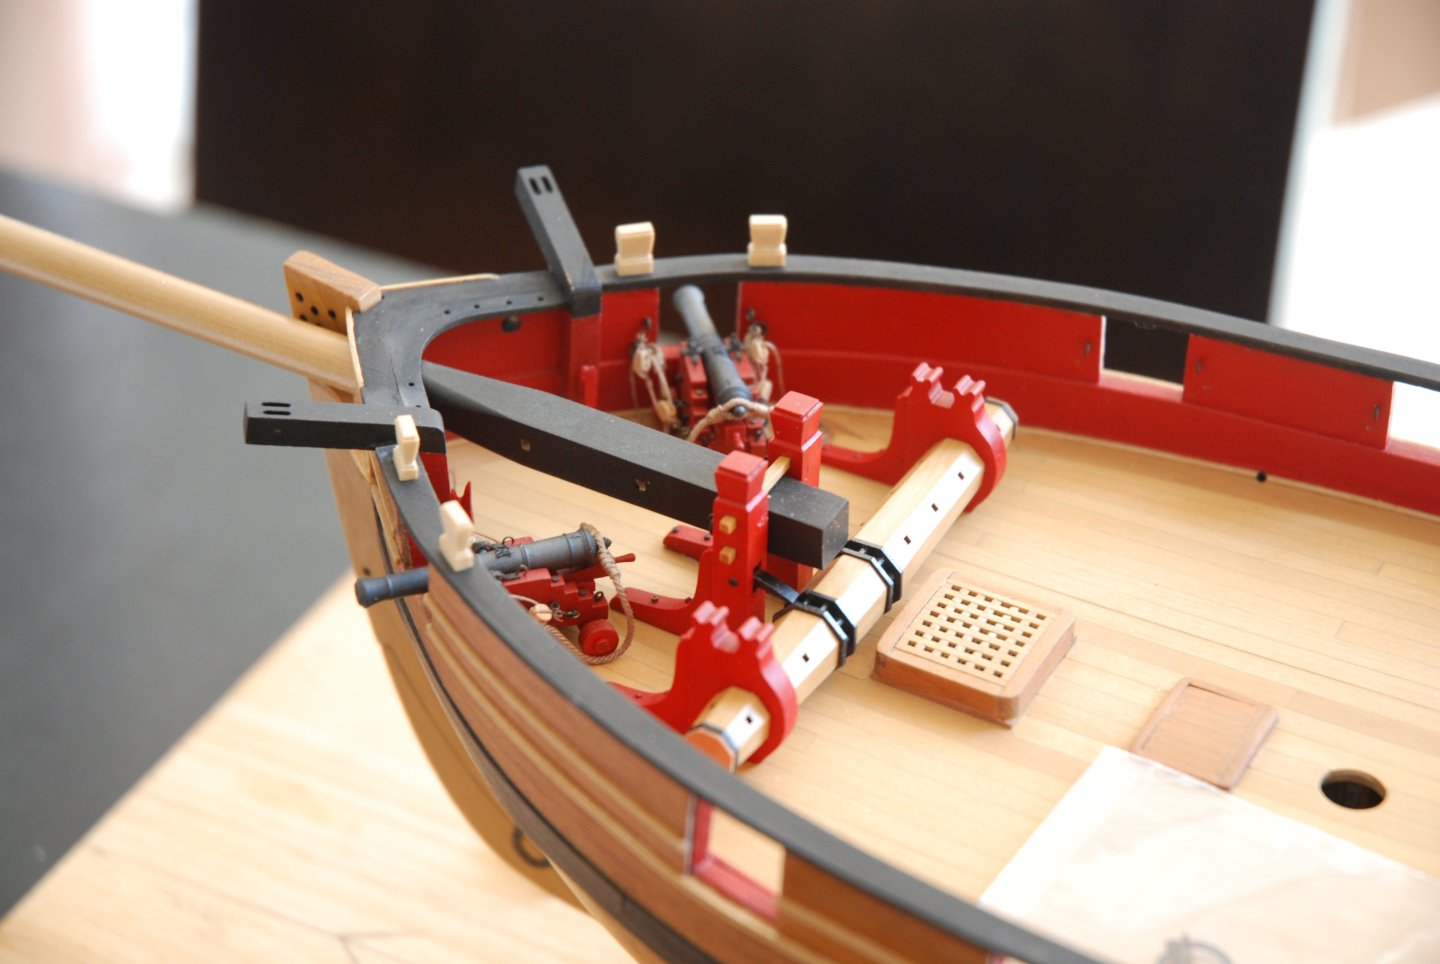
Superb work on these carronades. Everything on this deck is truly remarkable, and the deck planking is absolutely stunning. A great source of inspiration. -
HM Cutter Cheerful 1806 by JpR62 - 1:48 scale
JpR62 replied to JpR62's topic in - Build logs for subjects built 1801 - 1850
Thank you Gregory. Yes, it's cherry and the wales are made in black hornbeam. -
Thank you to all the 'Likes'. All the frames are now faired. But before gluing them to the keel, I still have to remove the laser burn marks on the 3 sections of each frame that will be visible inside the hull. I'll be able to proceed with a blank assembly and then the final installation of the frames. To be continued
- 22 replies
-
- 5
-
-
-
- ships boat
- Korabel
- (and 1 more)
-
HM Cutter Cheerful 1806 by JpR62 - 1:48 scale
JpR62 replied to JpR62's topic in - Build logs for subjects built 1801 - 1850
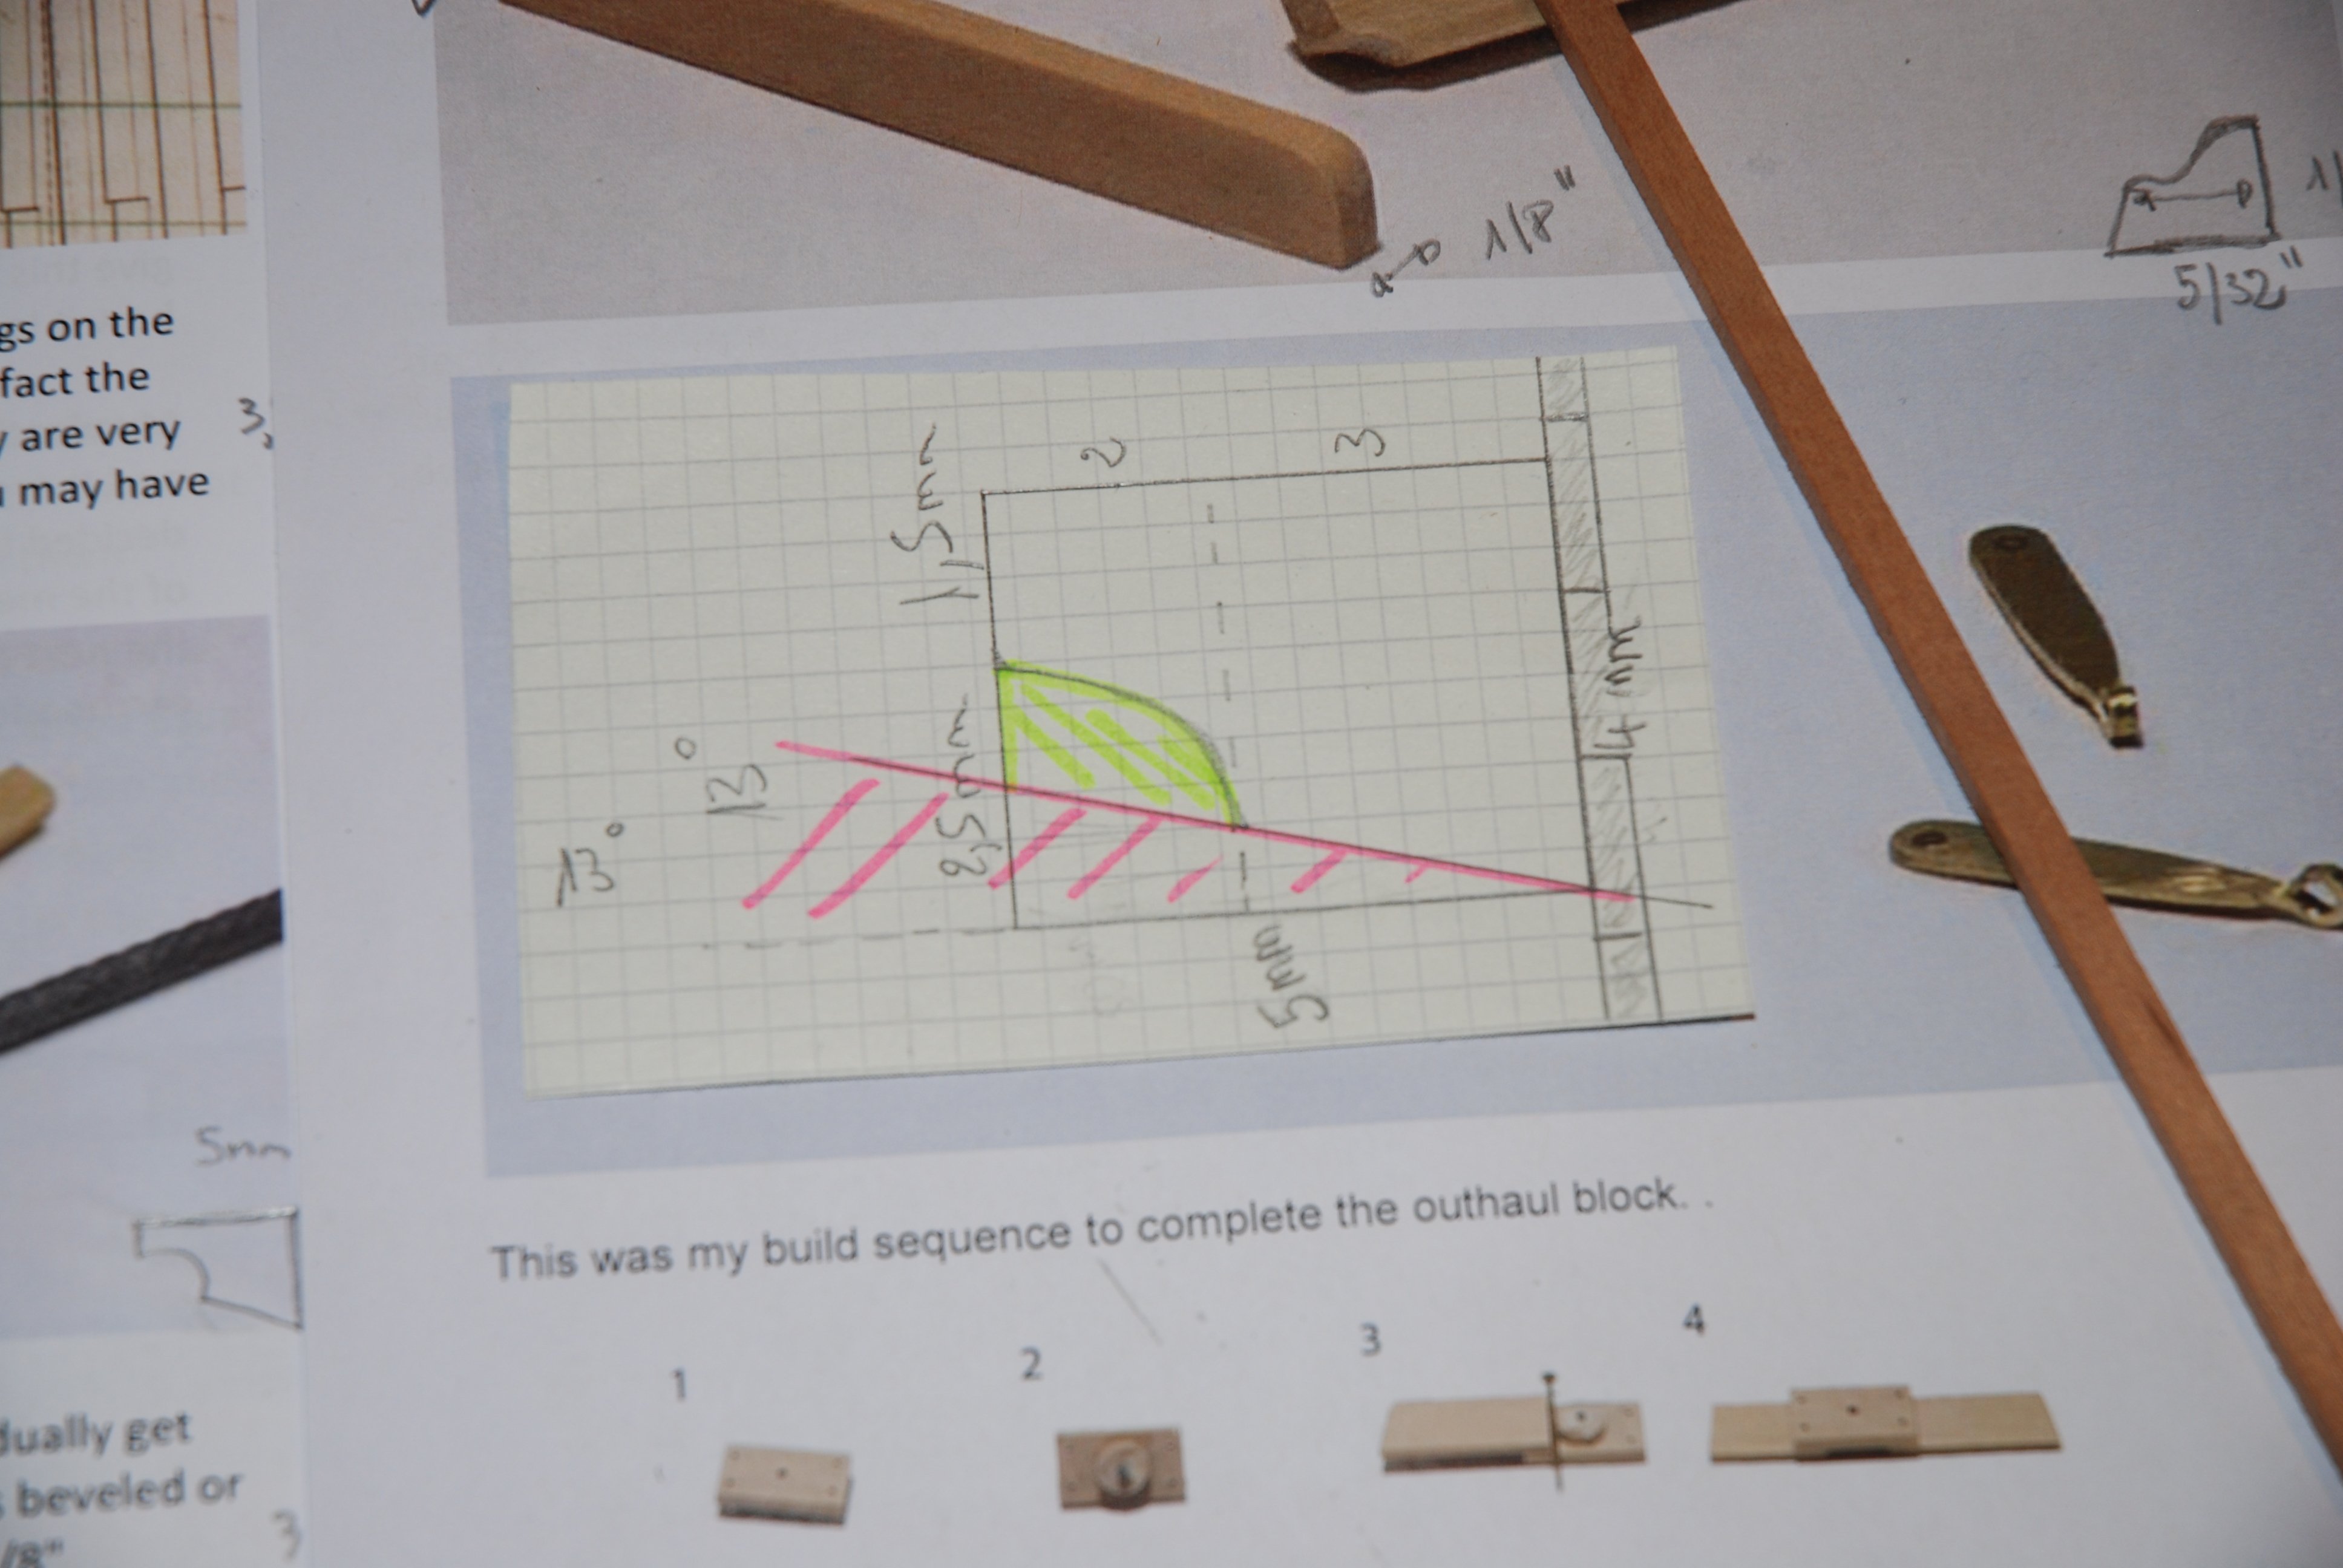
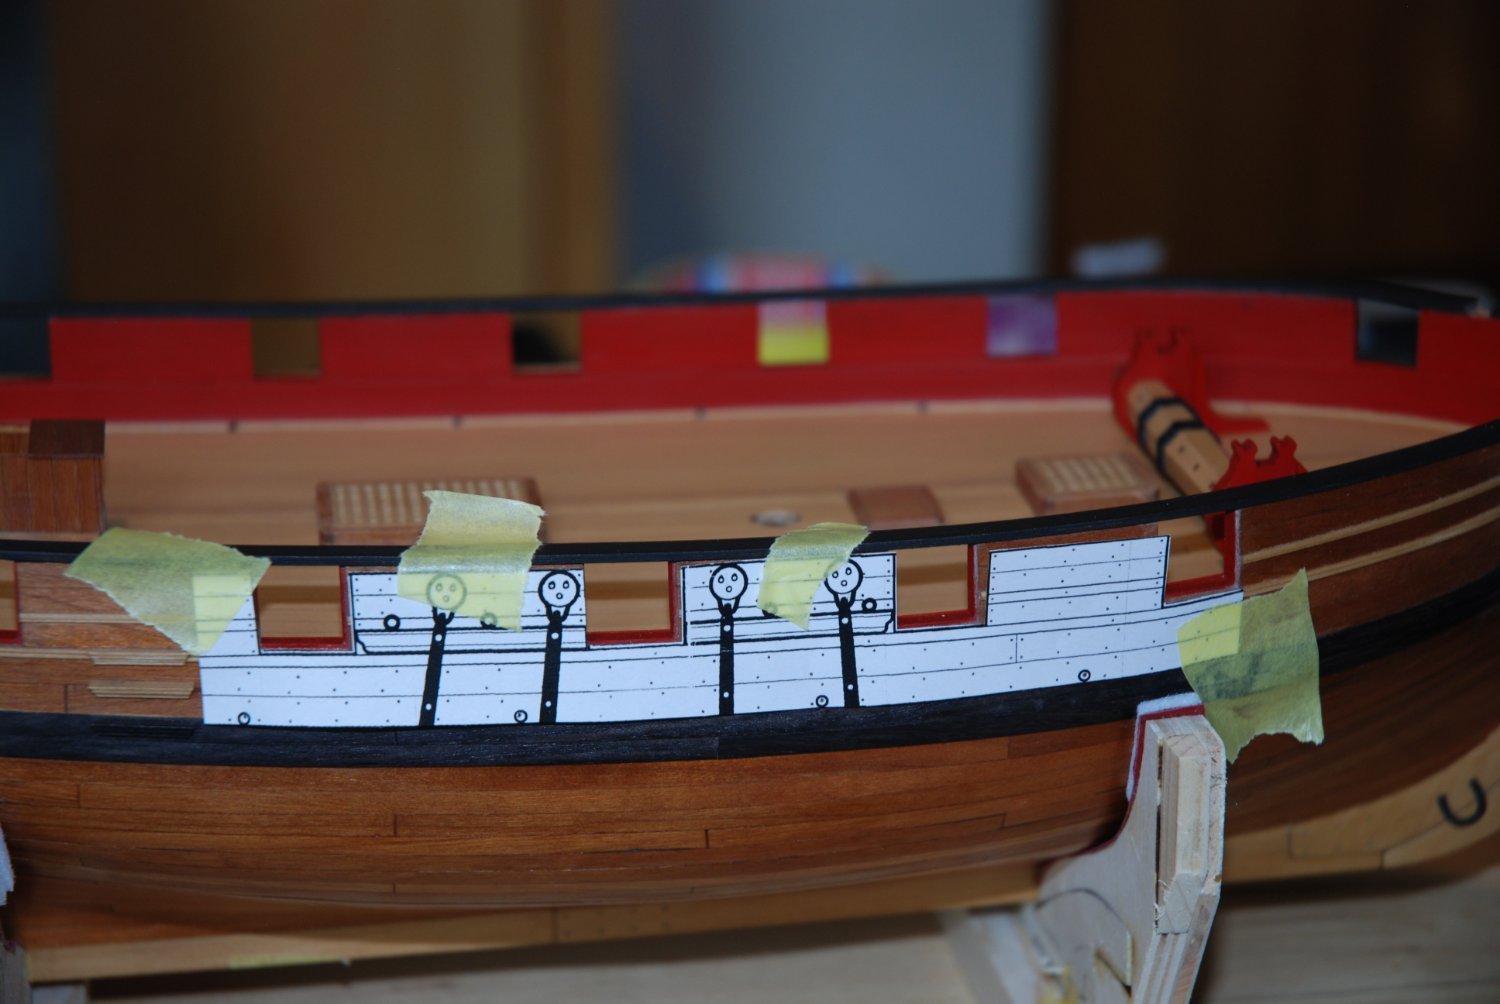
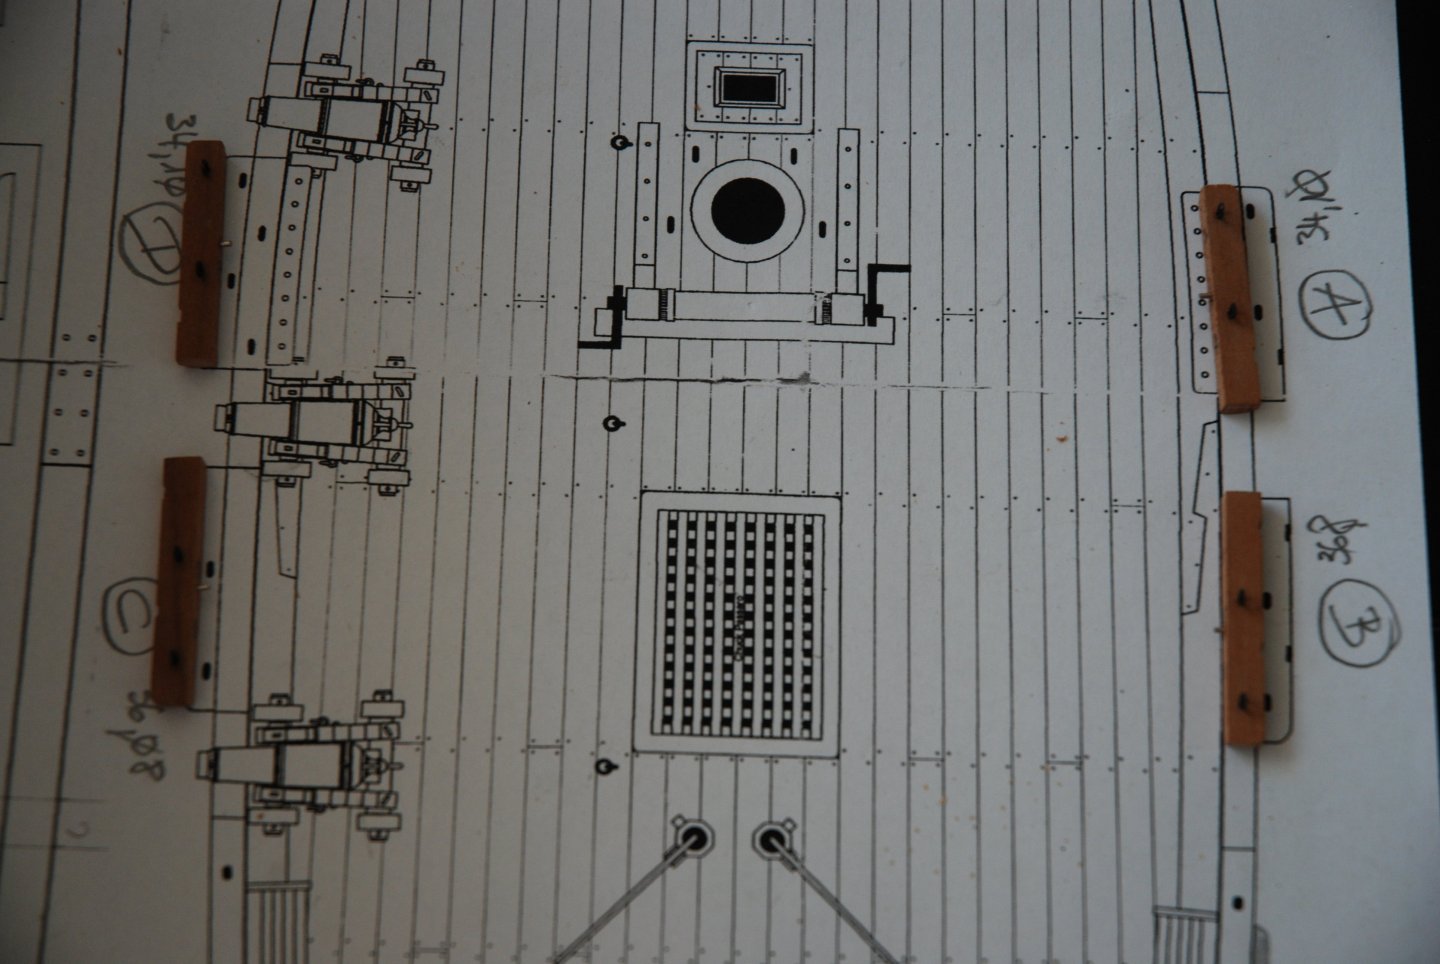
Thank you to all the 'Likes'. Construction then continued with the installation of the channels. They will be machined from a cherry wood plank. First, I draw a small sketch of the cuts and sanding required to determine the sequence of work. First, I'll sand the underside of the piece (hatched lines in pink) with a disc sander, the angle having been determined from my drawing. Then, using my MF70 mini milling machine and a ball cutter, I'll make the semi-rounded shape (hatched lines in green). The board will then be cut into four sections and the work is completed by hand with files and sandpaper. I then add the eyebolts and insert a small metal pin on the side to reinforce the bond to the hull. Some photos of the result To be continued
-
Thanks Jim. This little boat is really a beautiful model to build and the wood is of excellent quality. Above all, take your time and enjoy yourself.
- 57 replies
-
- 1
-
-
- marisstella
- batelina
- (and 1 more)
-
HM Cutter Cheerful 1806 by JpR62 - 1:48 scale
JpR62 replied to JpR62's topic in - Build logs for subjects built 1801 - 1850
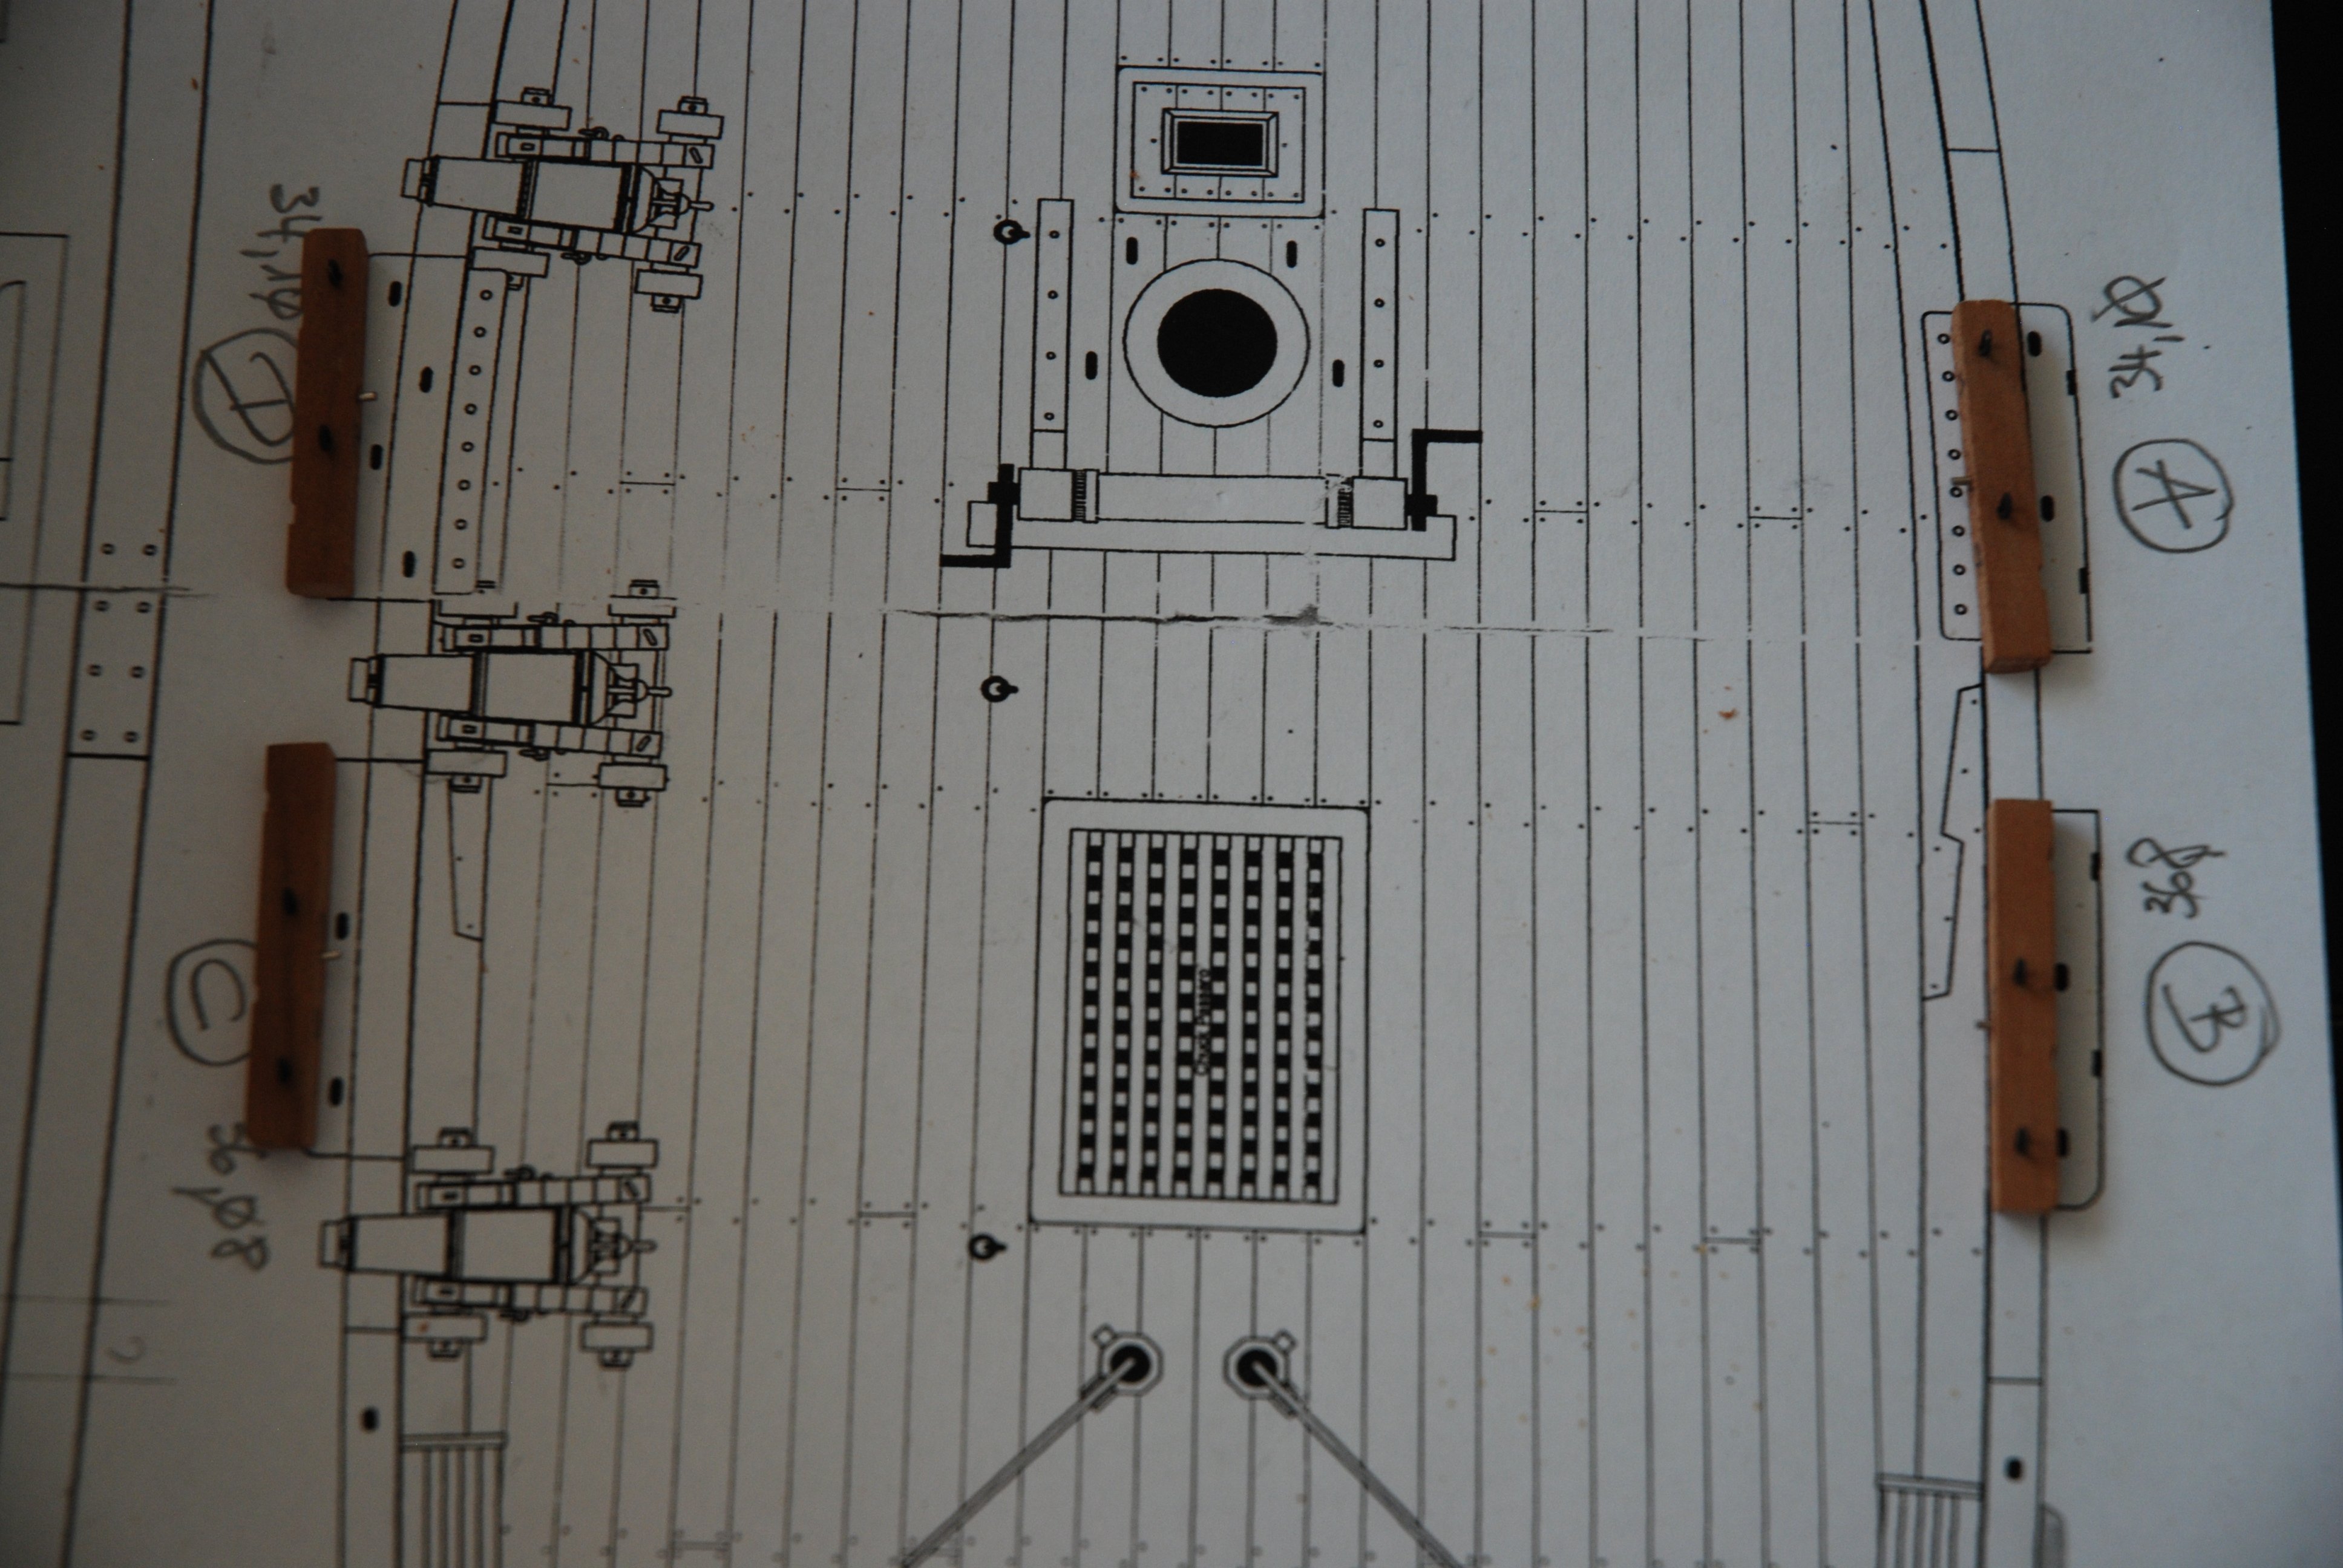
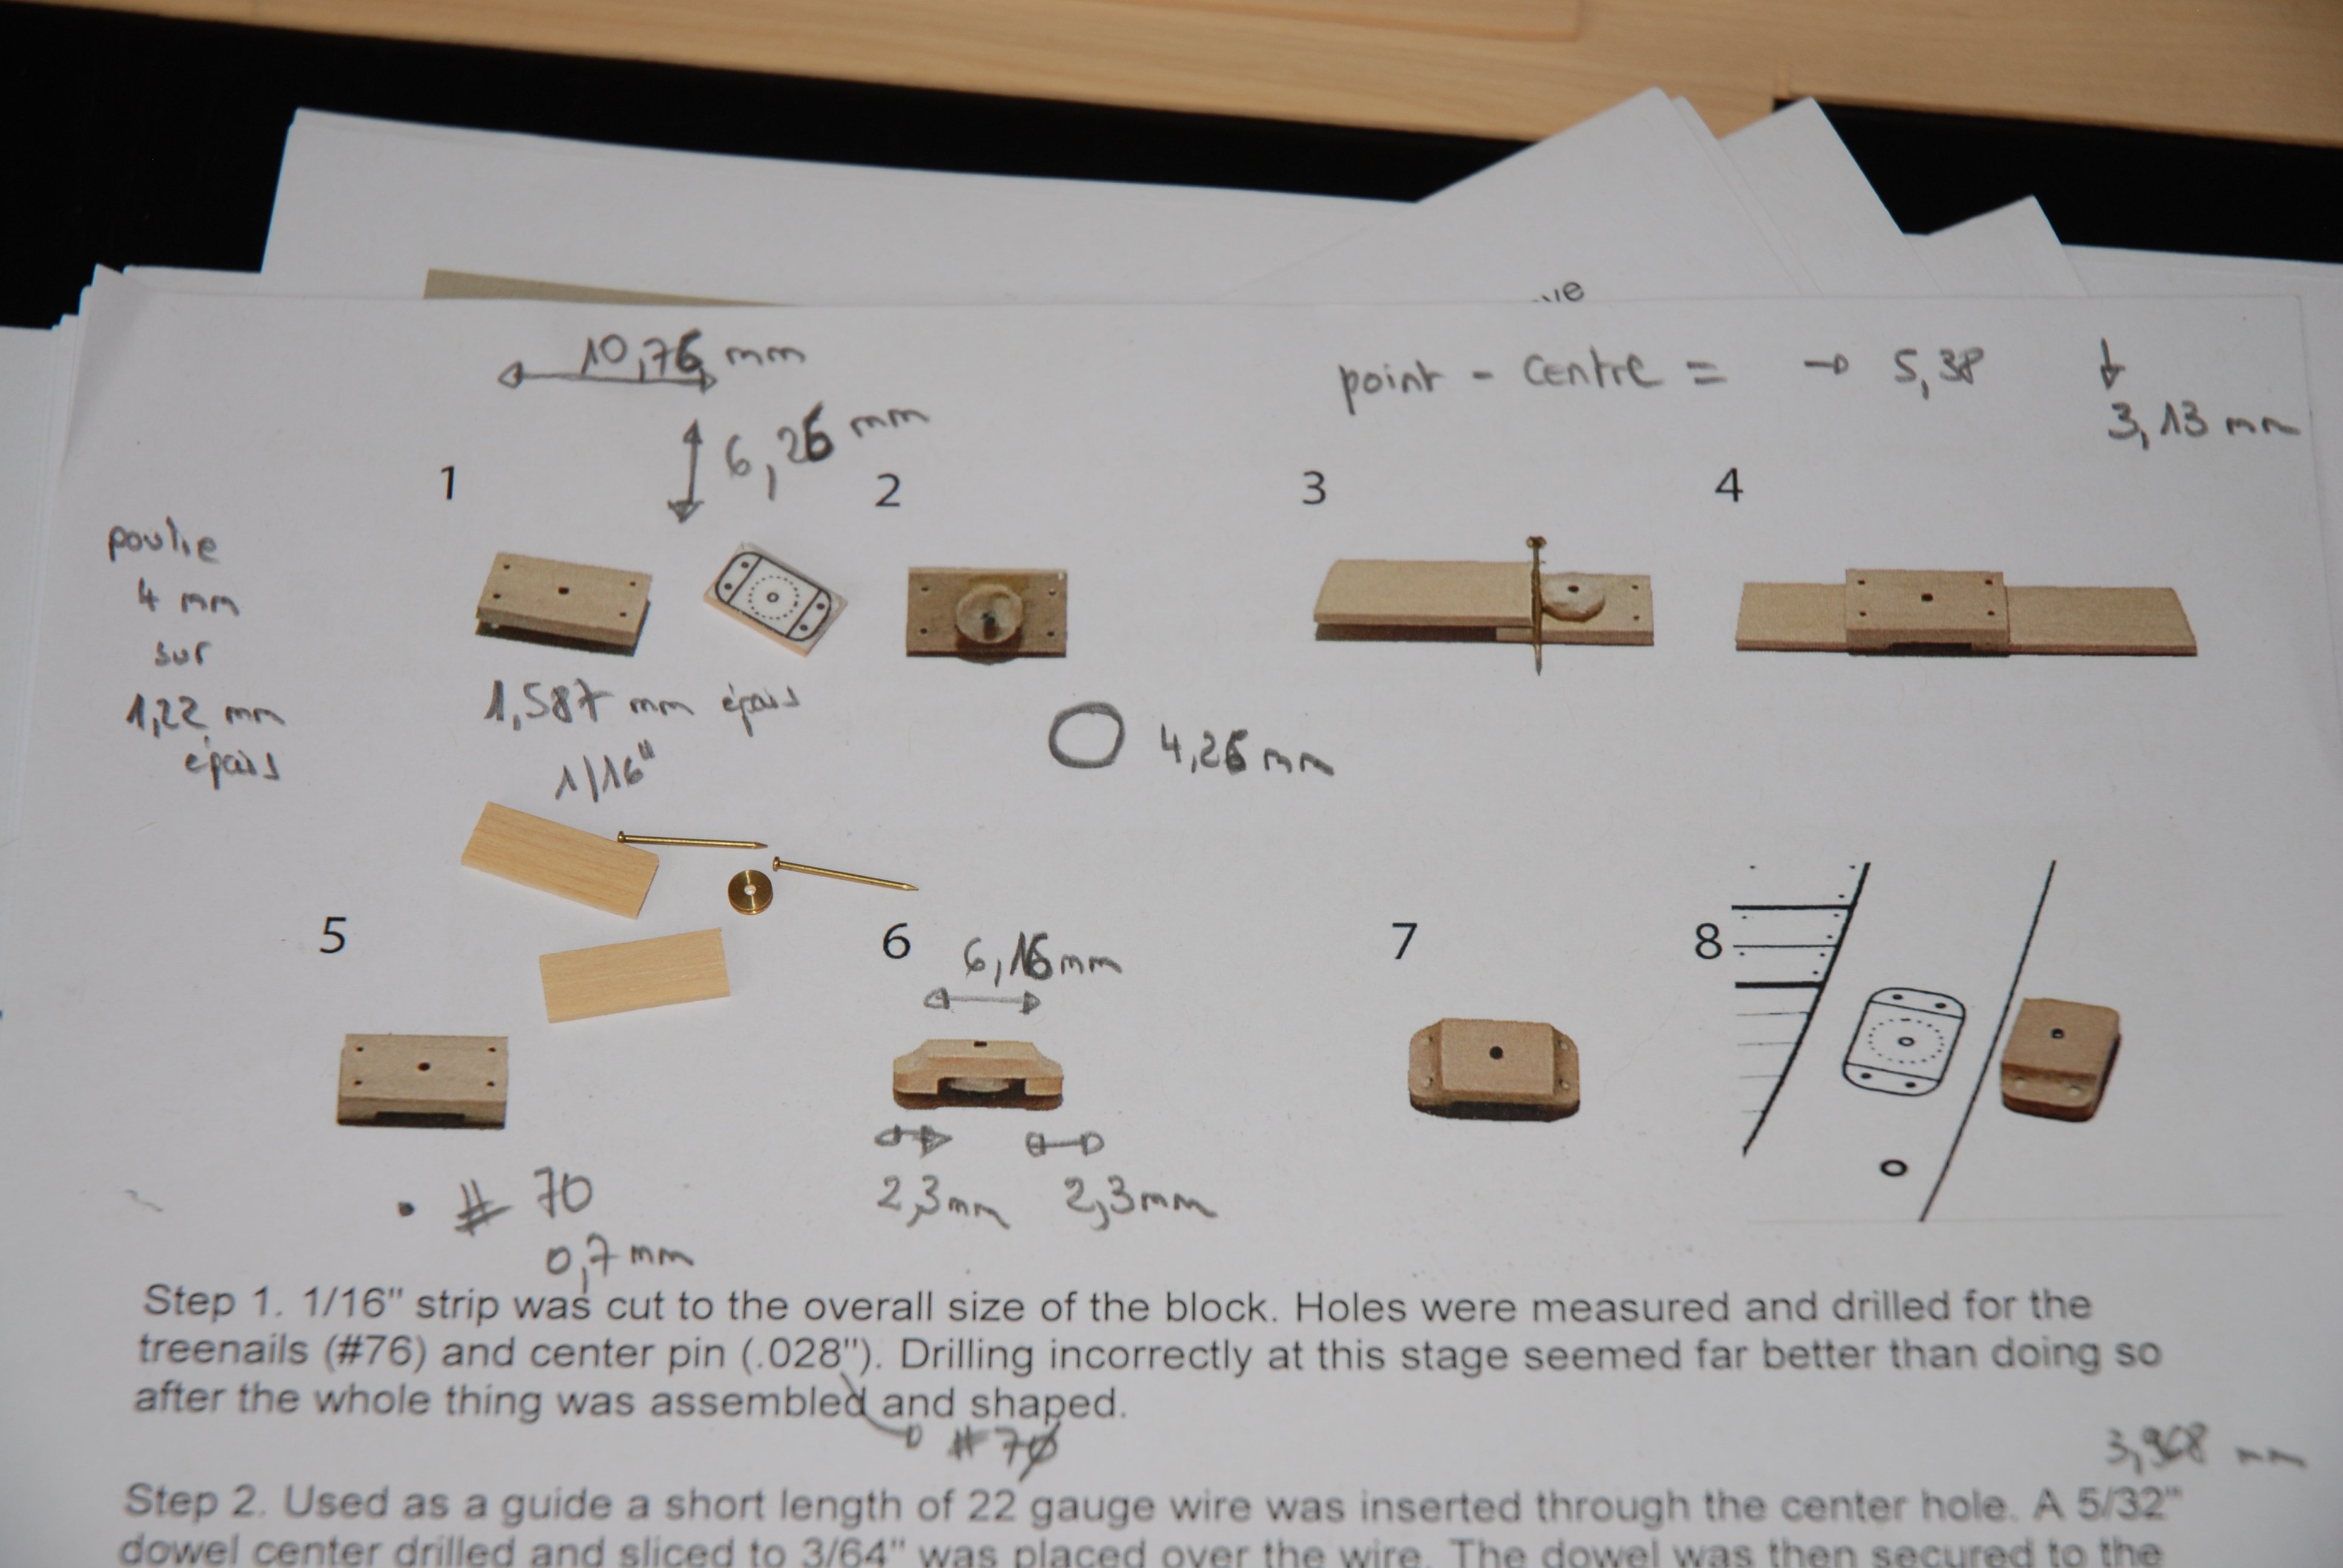
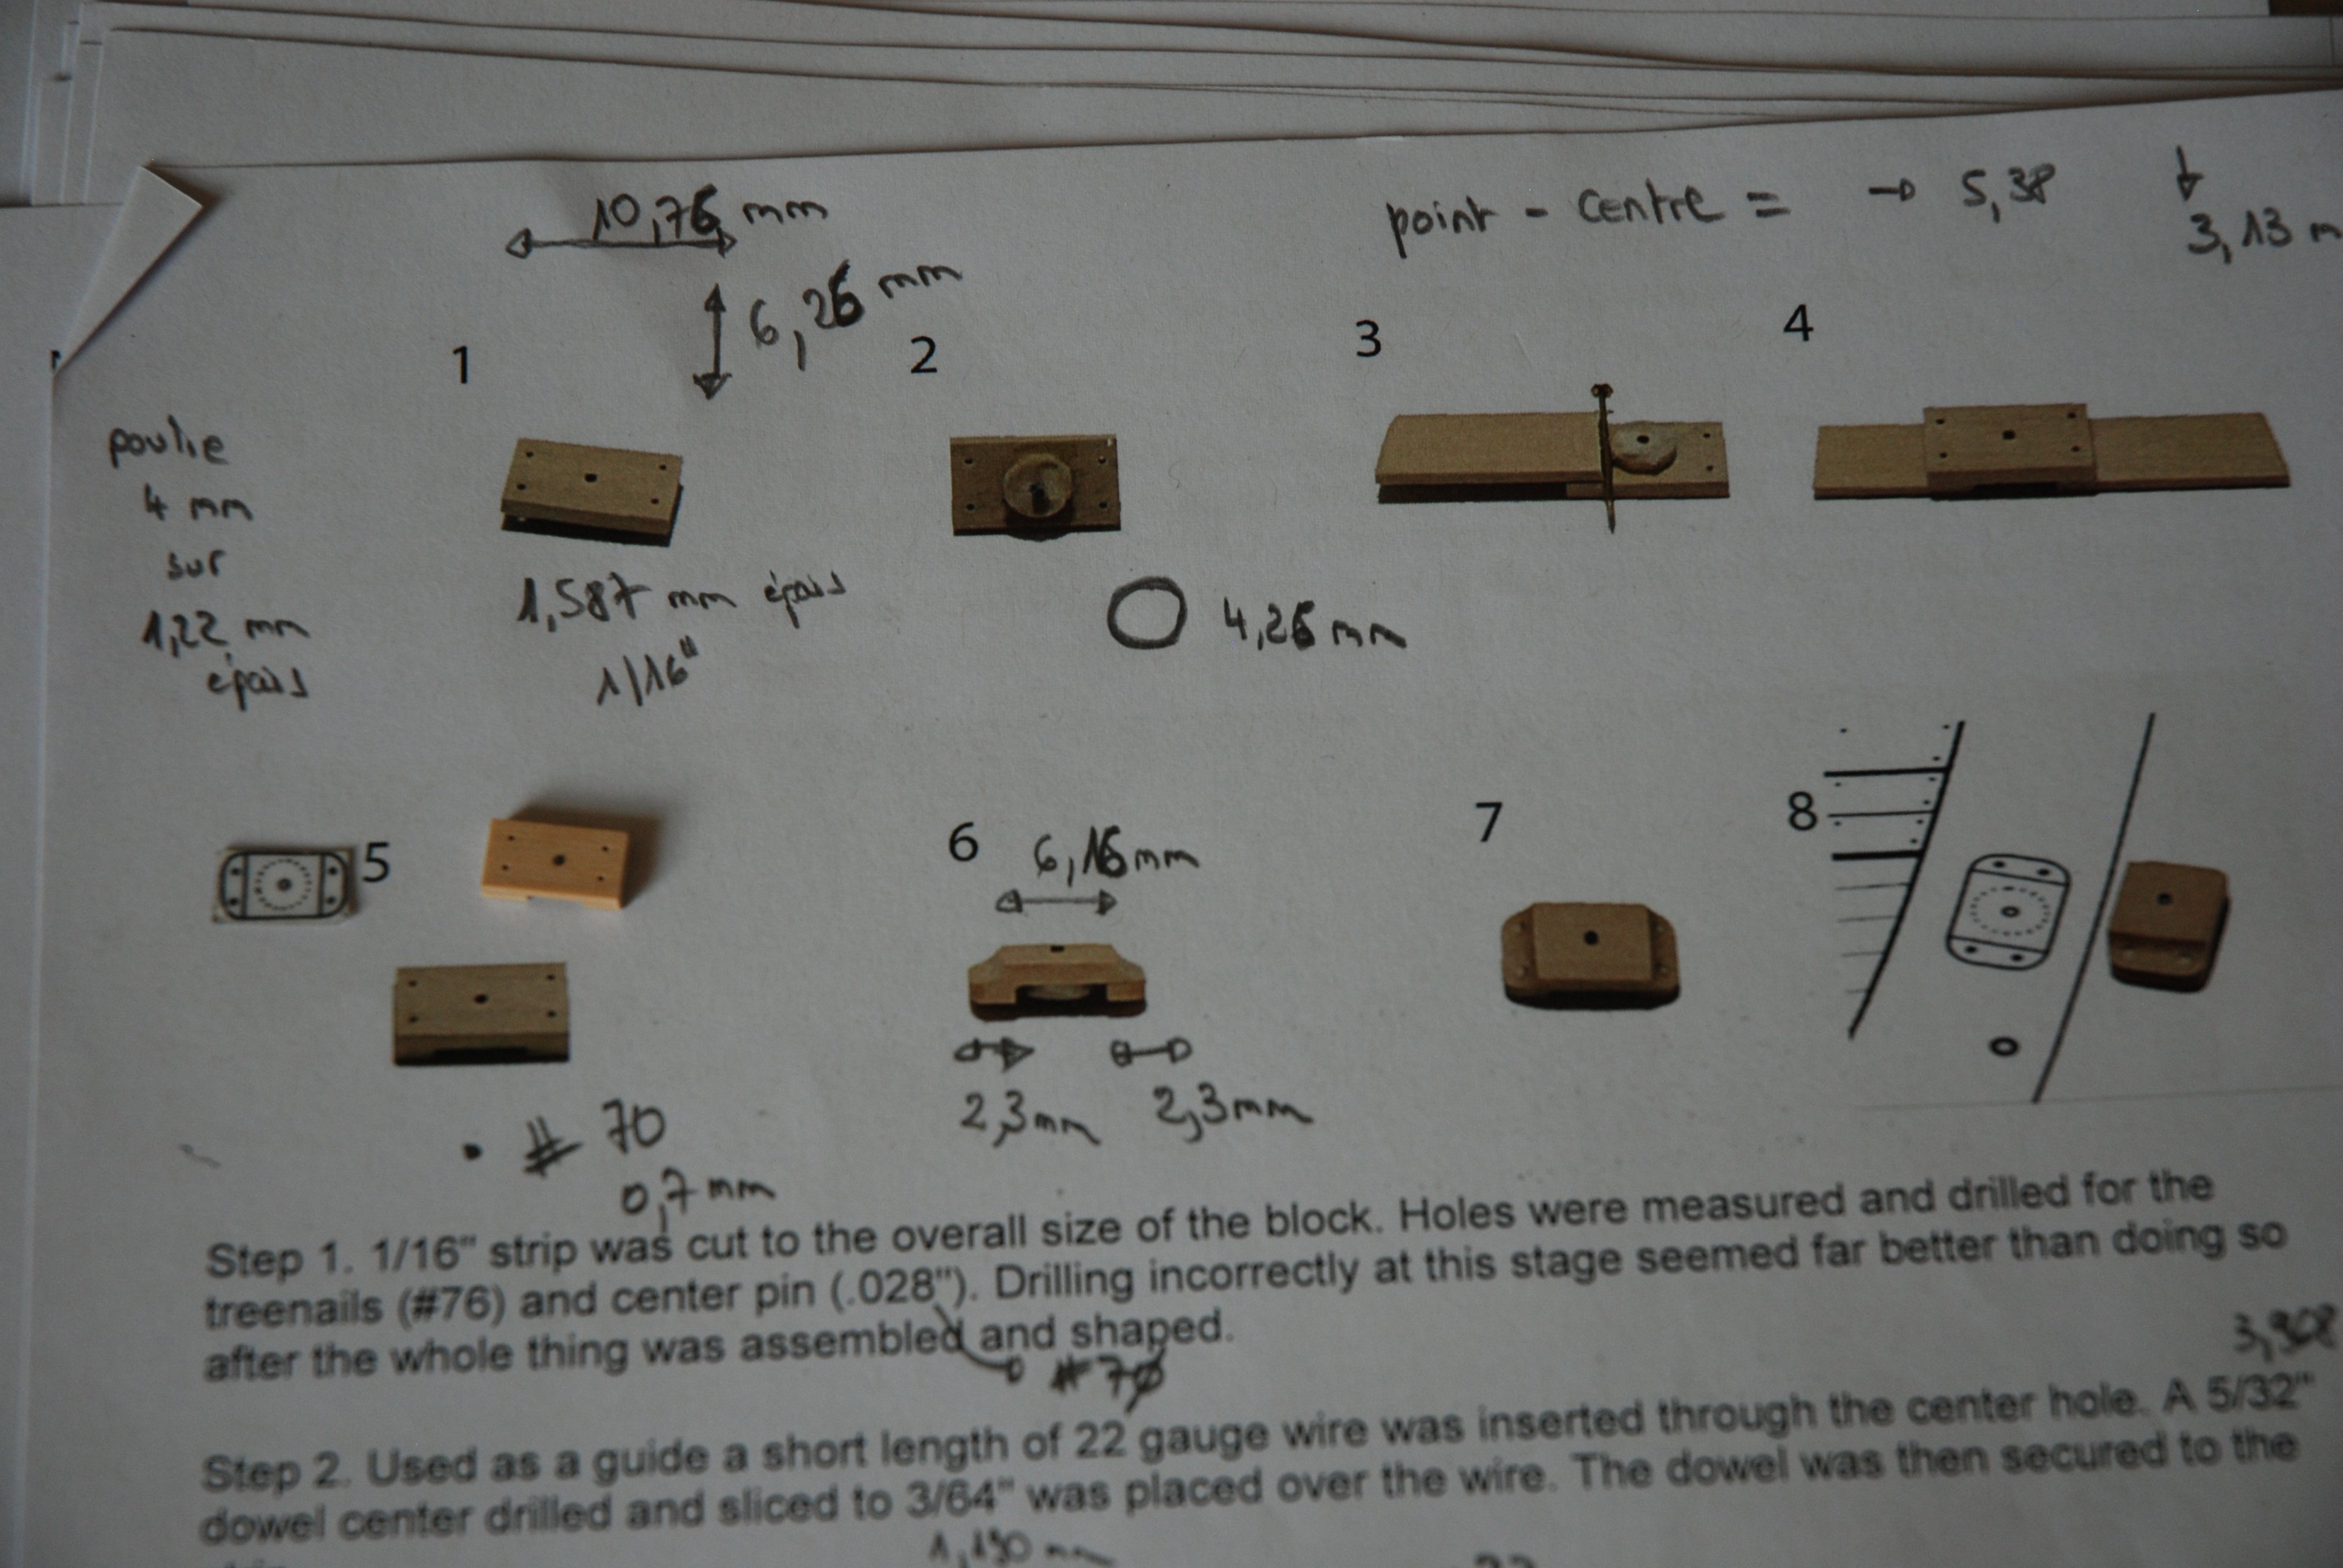
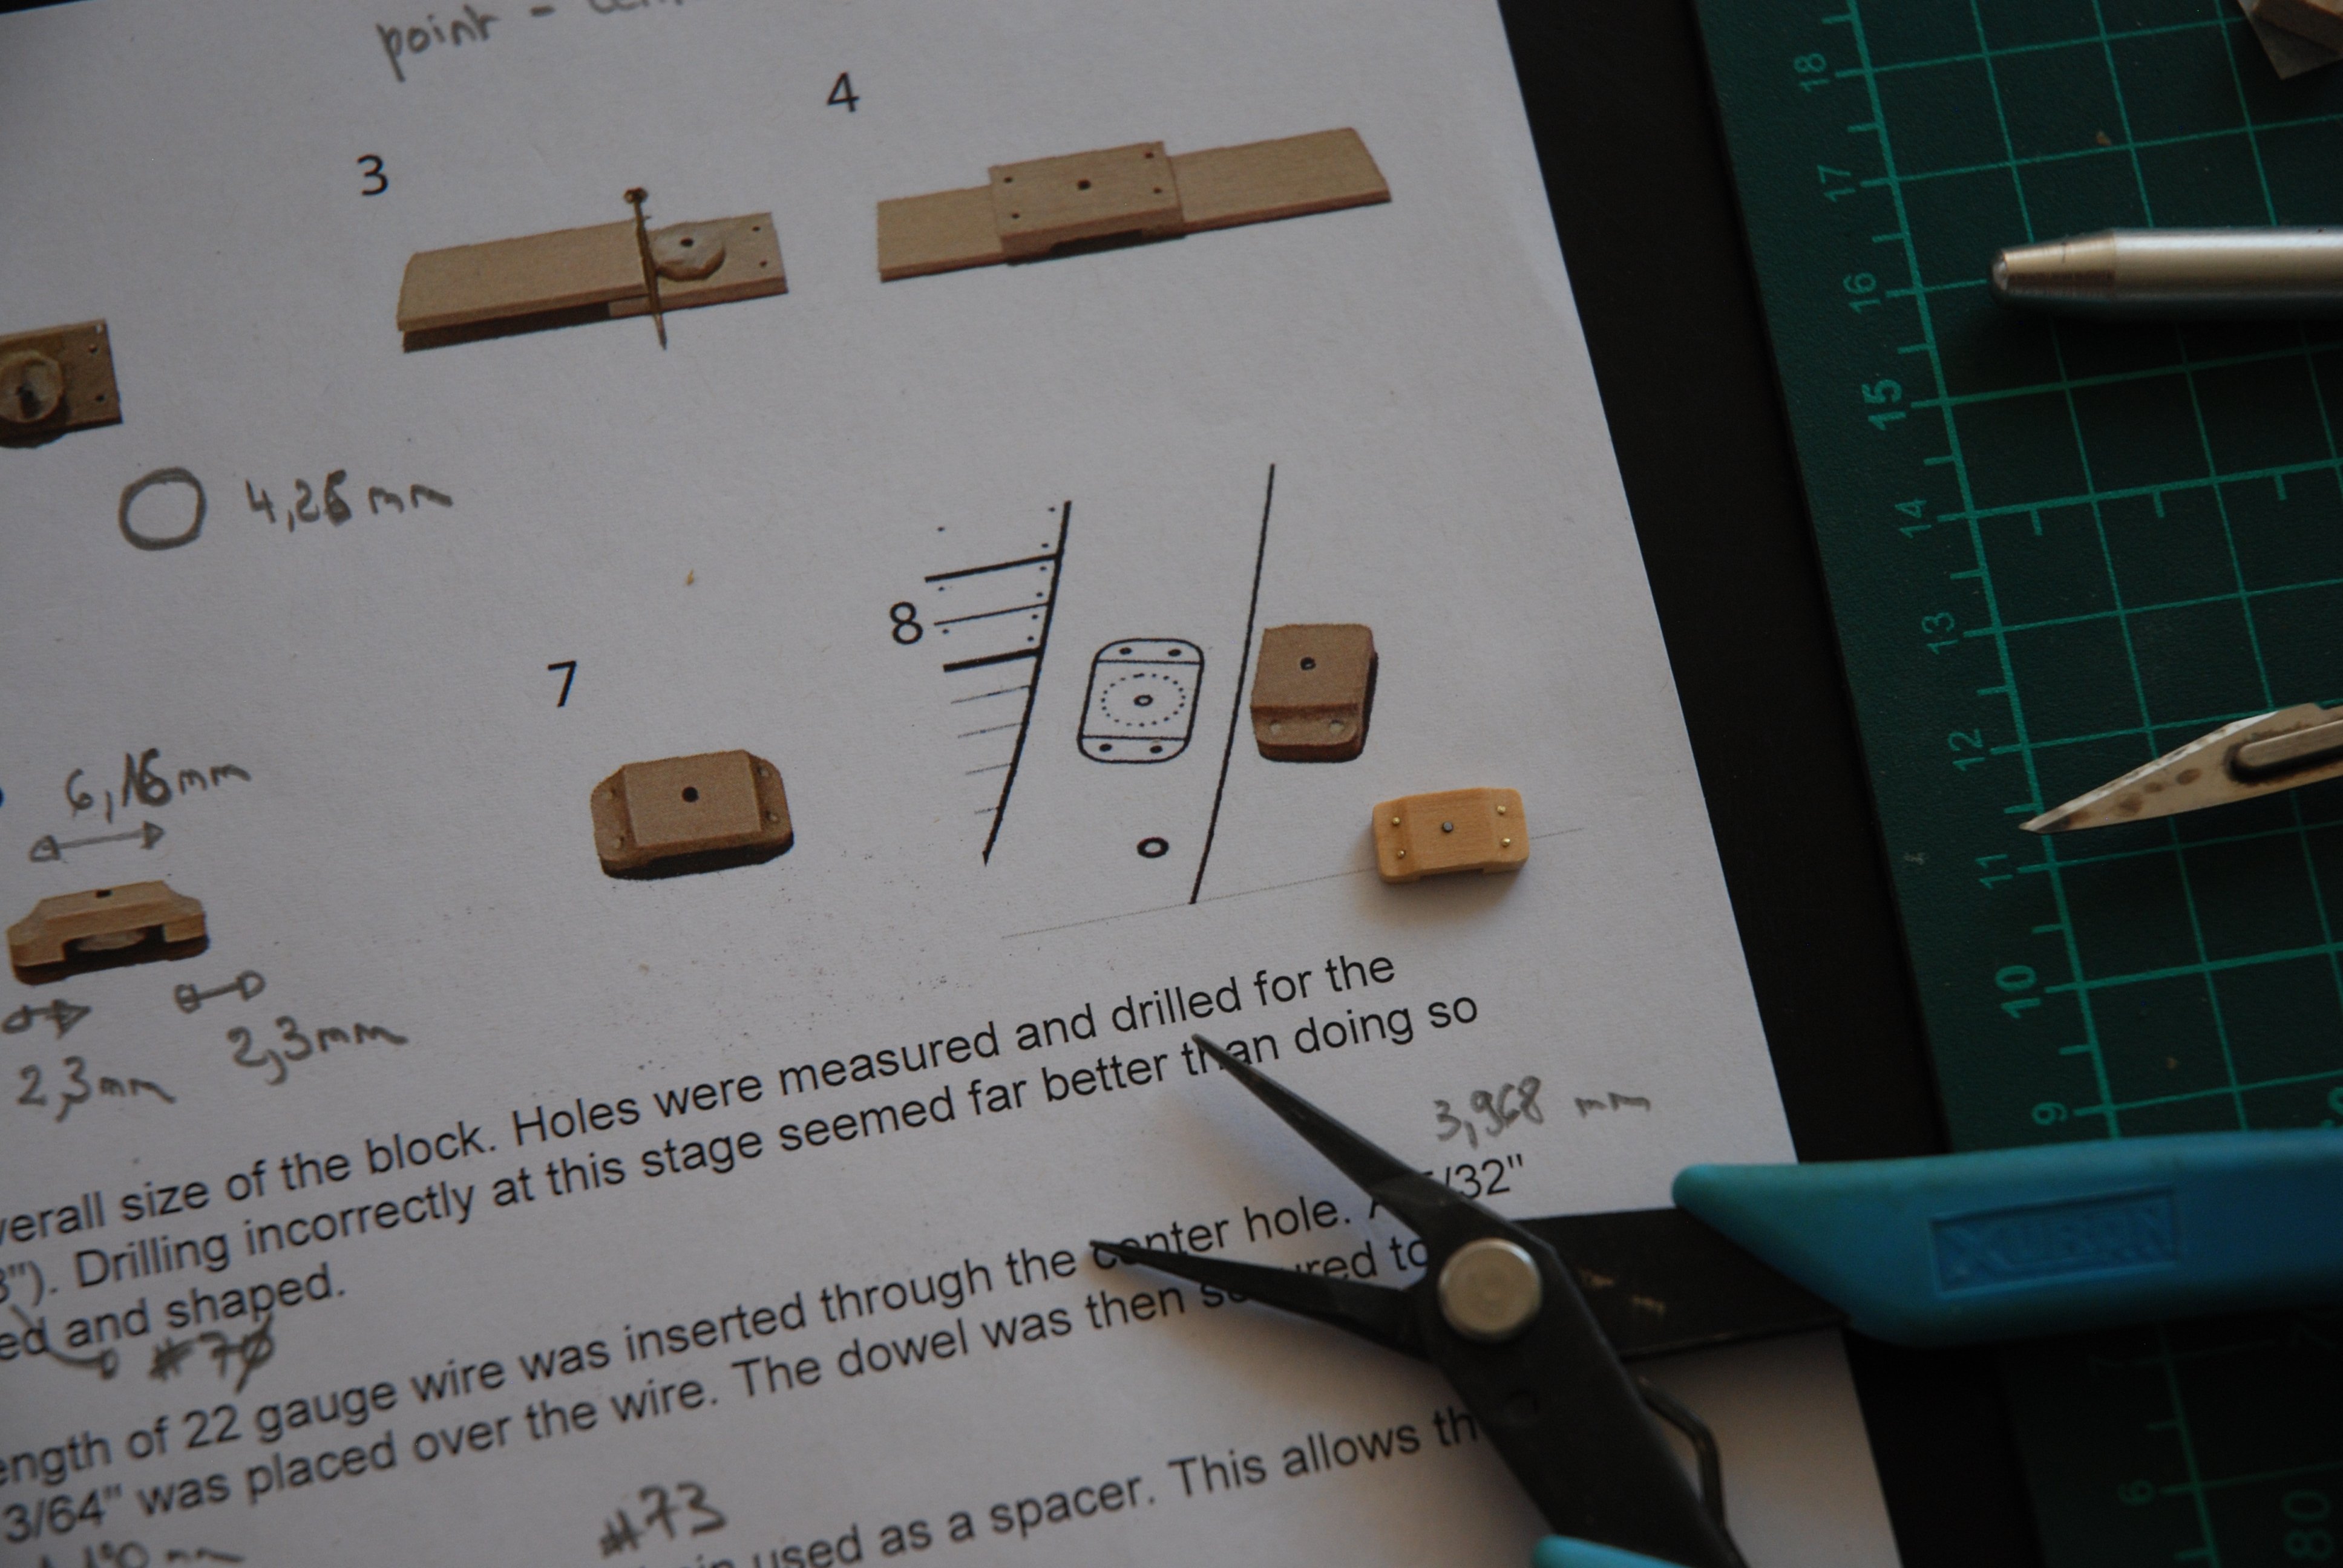
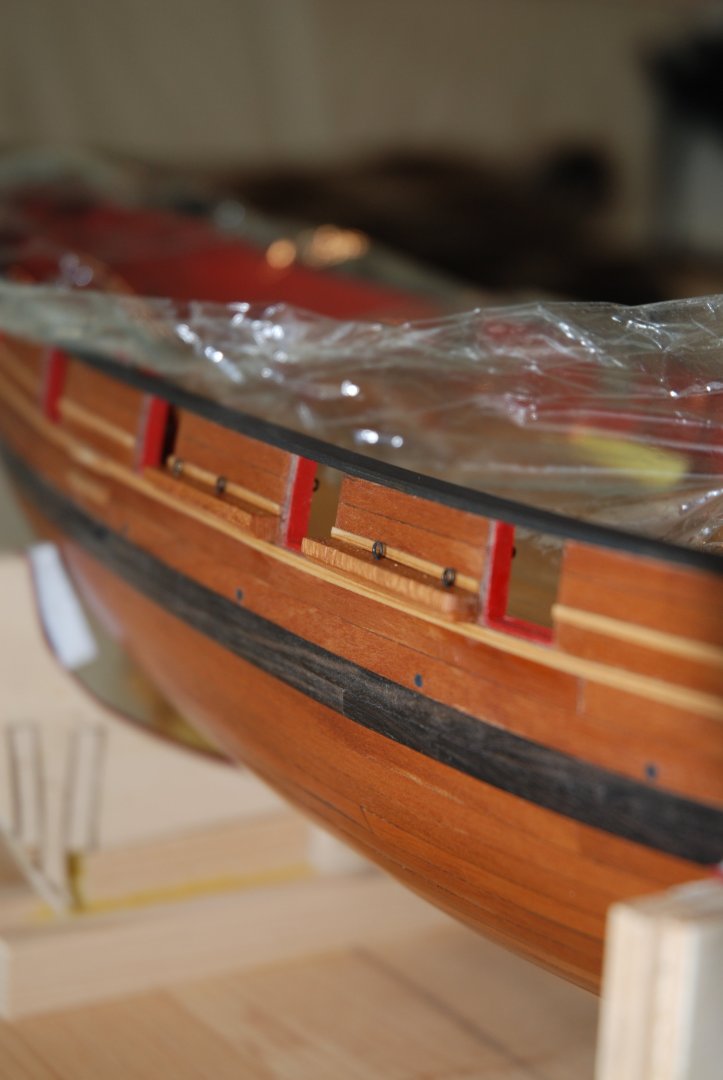
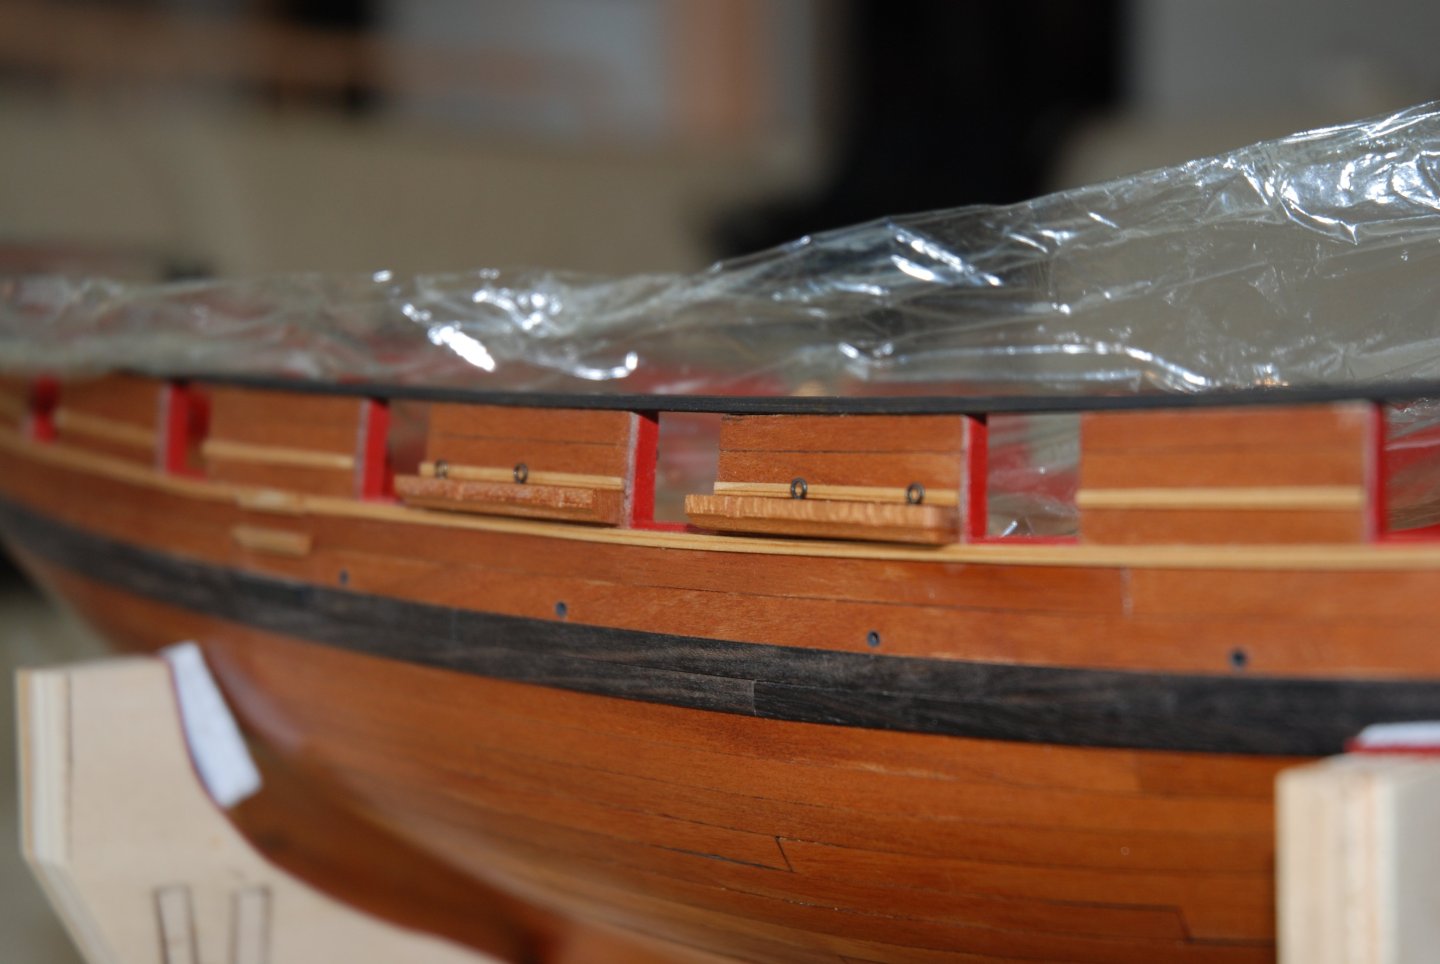
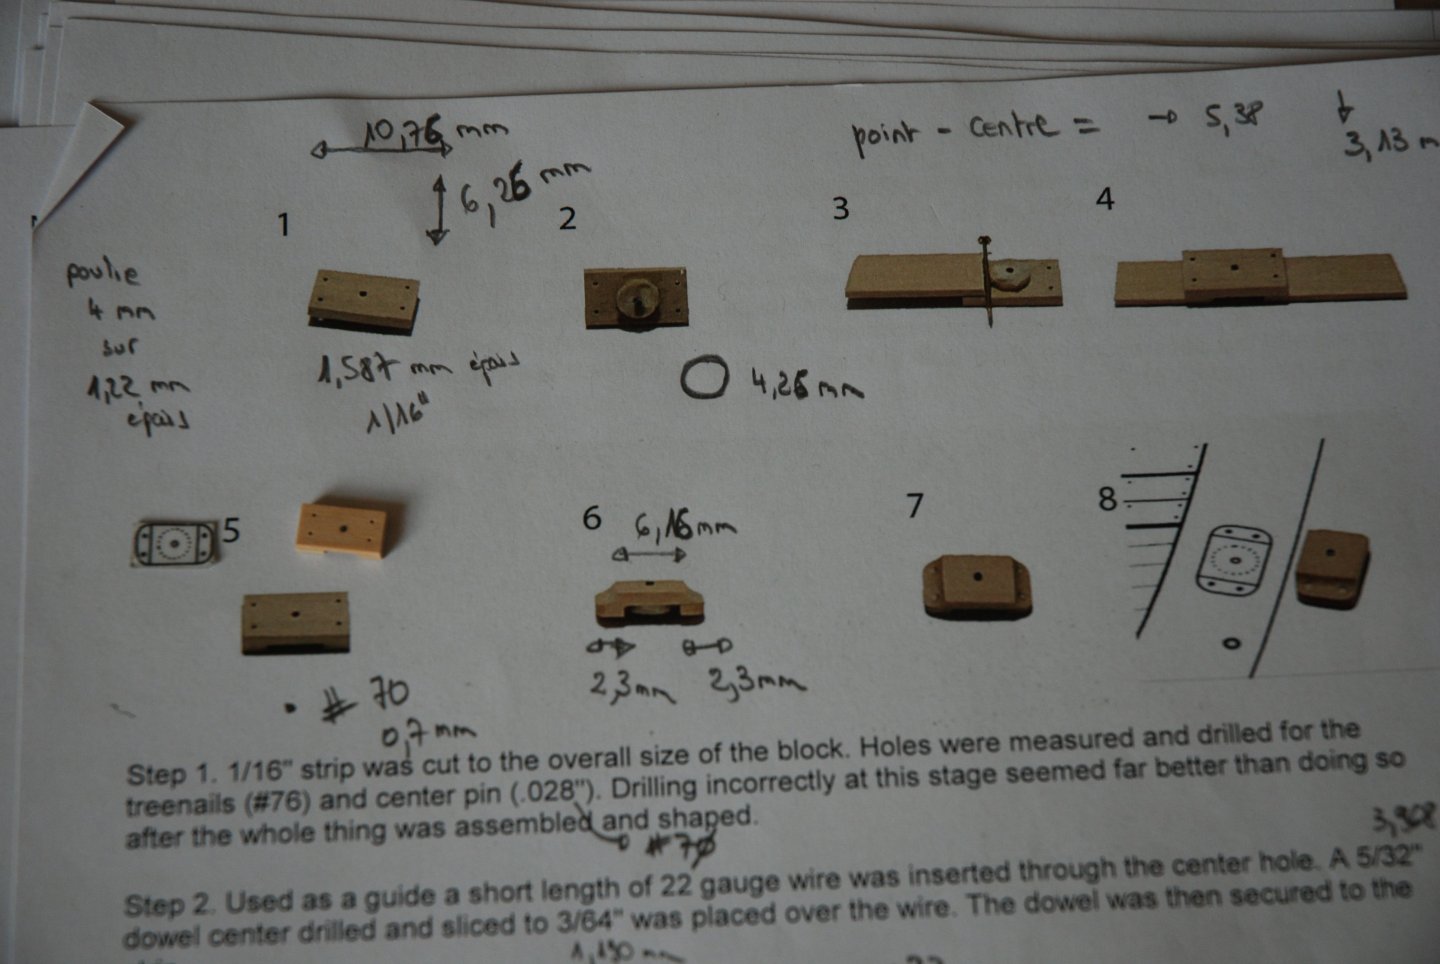
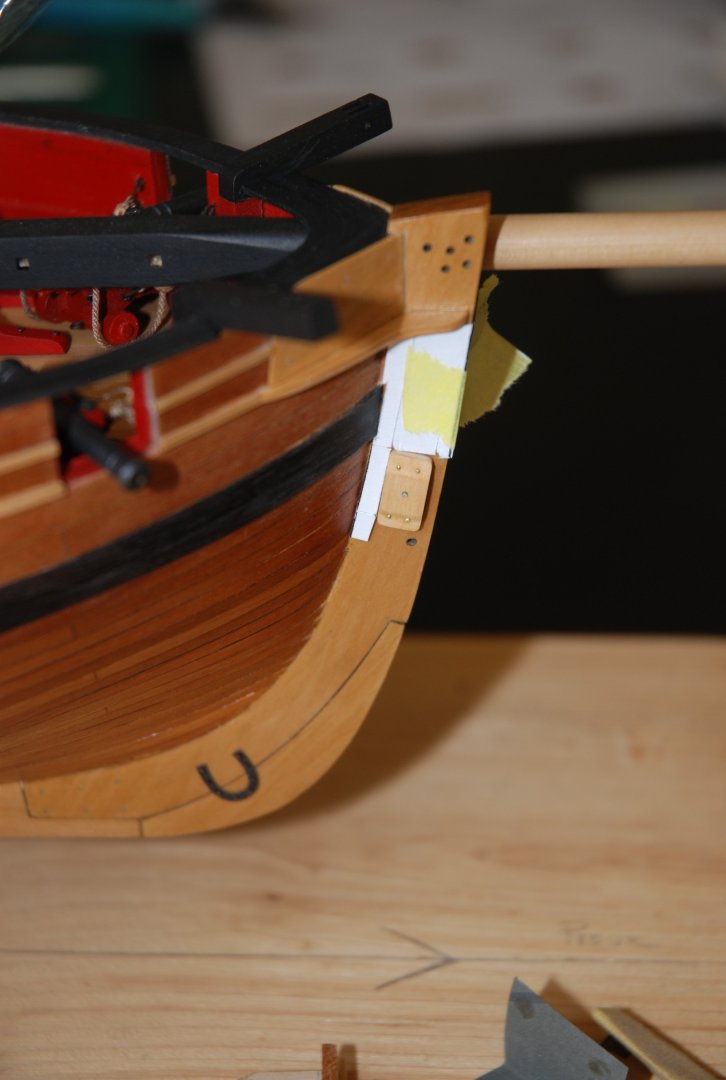
Thank you for all the 'Likes'. The work continues with the assembly and installation of the outhaul block. I applied the method used by Mike (Stuntflyer) and described in detail in his superb log on the construction of his Cheerful. I enclose a copy of his instructions, which I followed as precisely as possible. I just simplified the task by using a 4mm brass sheave from Amati. The outhaul block is mounted, the sheave installed and 4 small holes drilled. All that remains is to sand the part to its final shape. The outhaul block is finished. The four treenails are simulated using small pieces of 0.4 mm brass wire. And I glue it, using a copy of the plan as a guide. To be continued.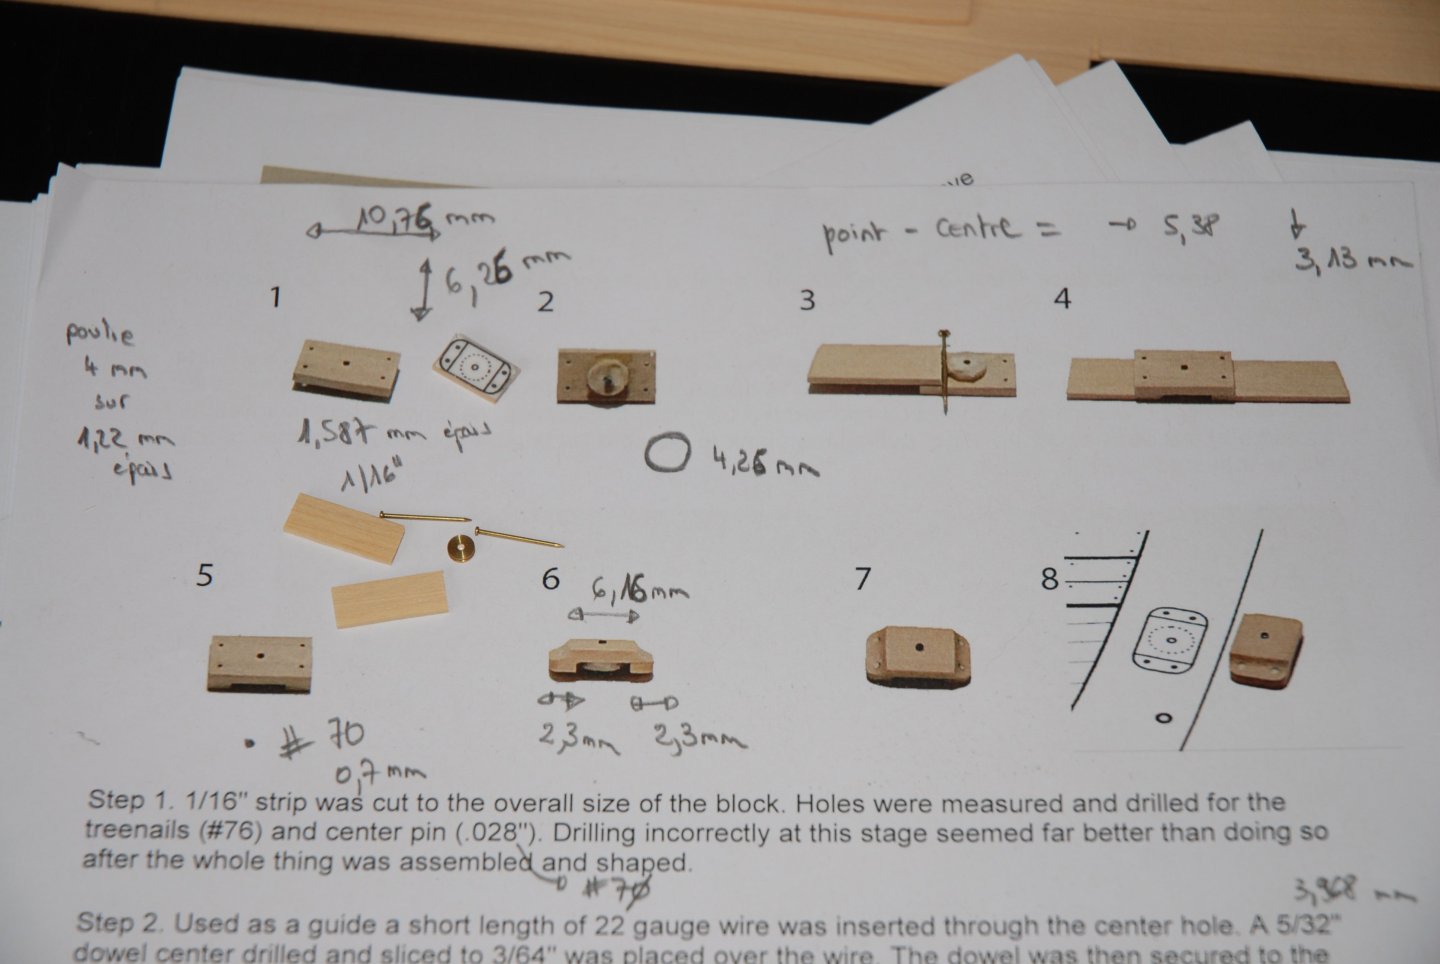

-
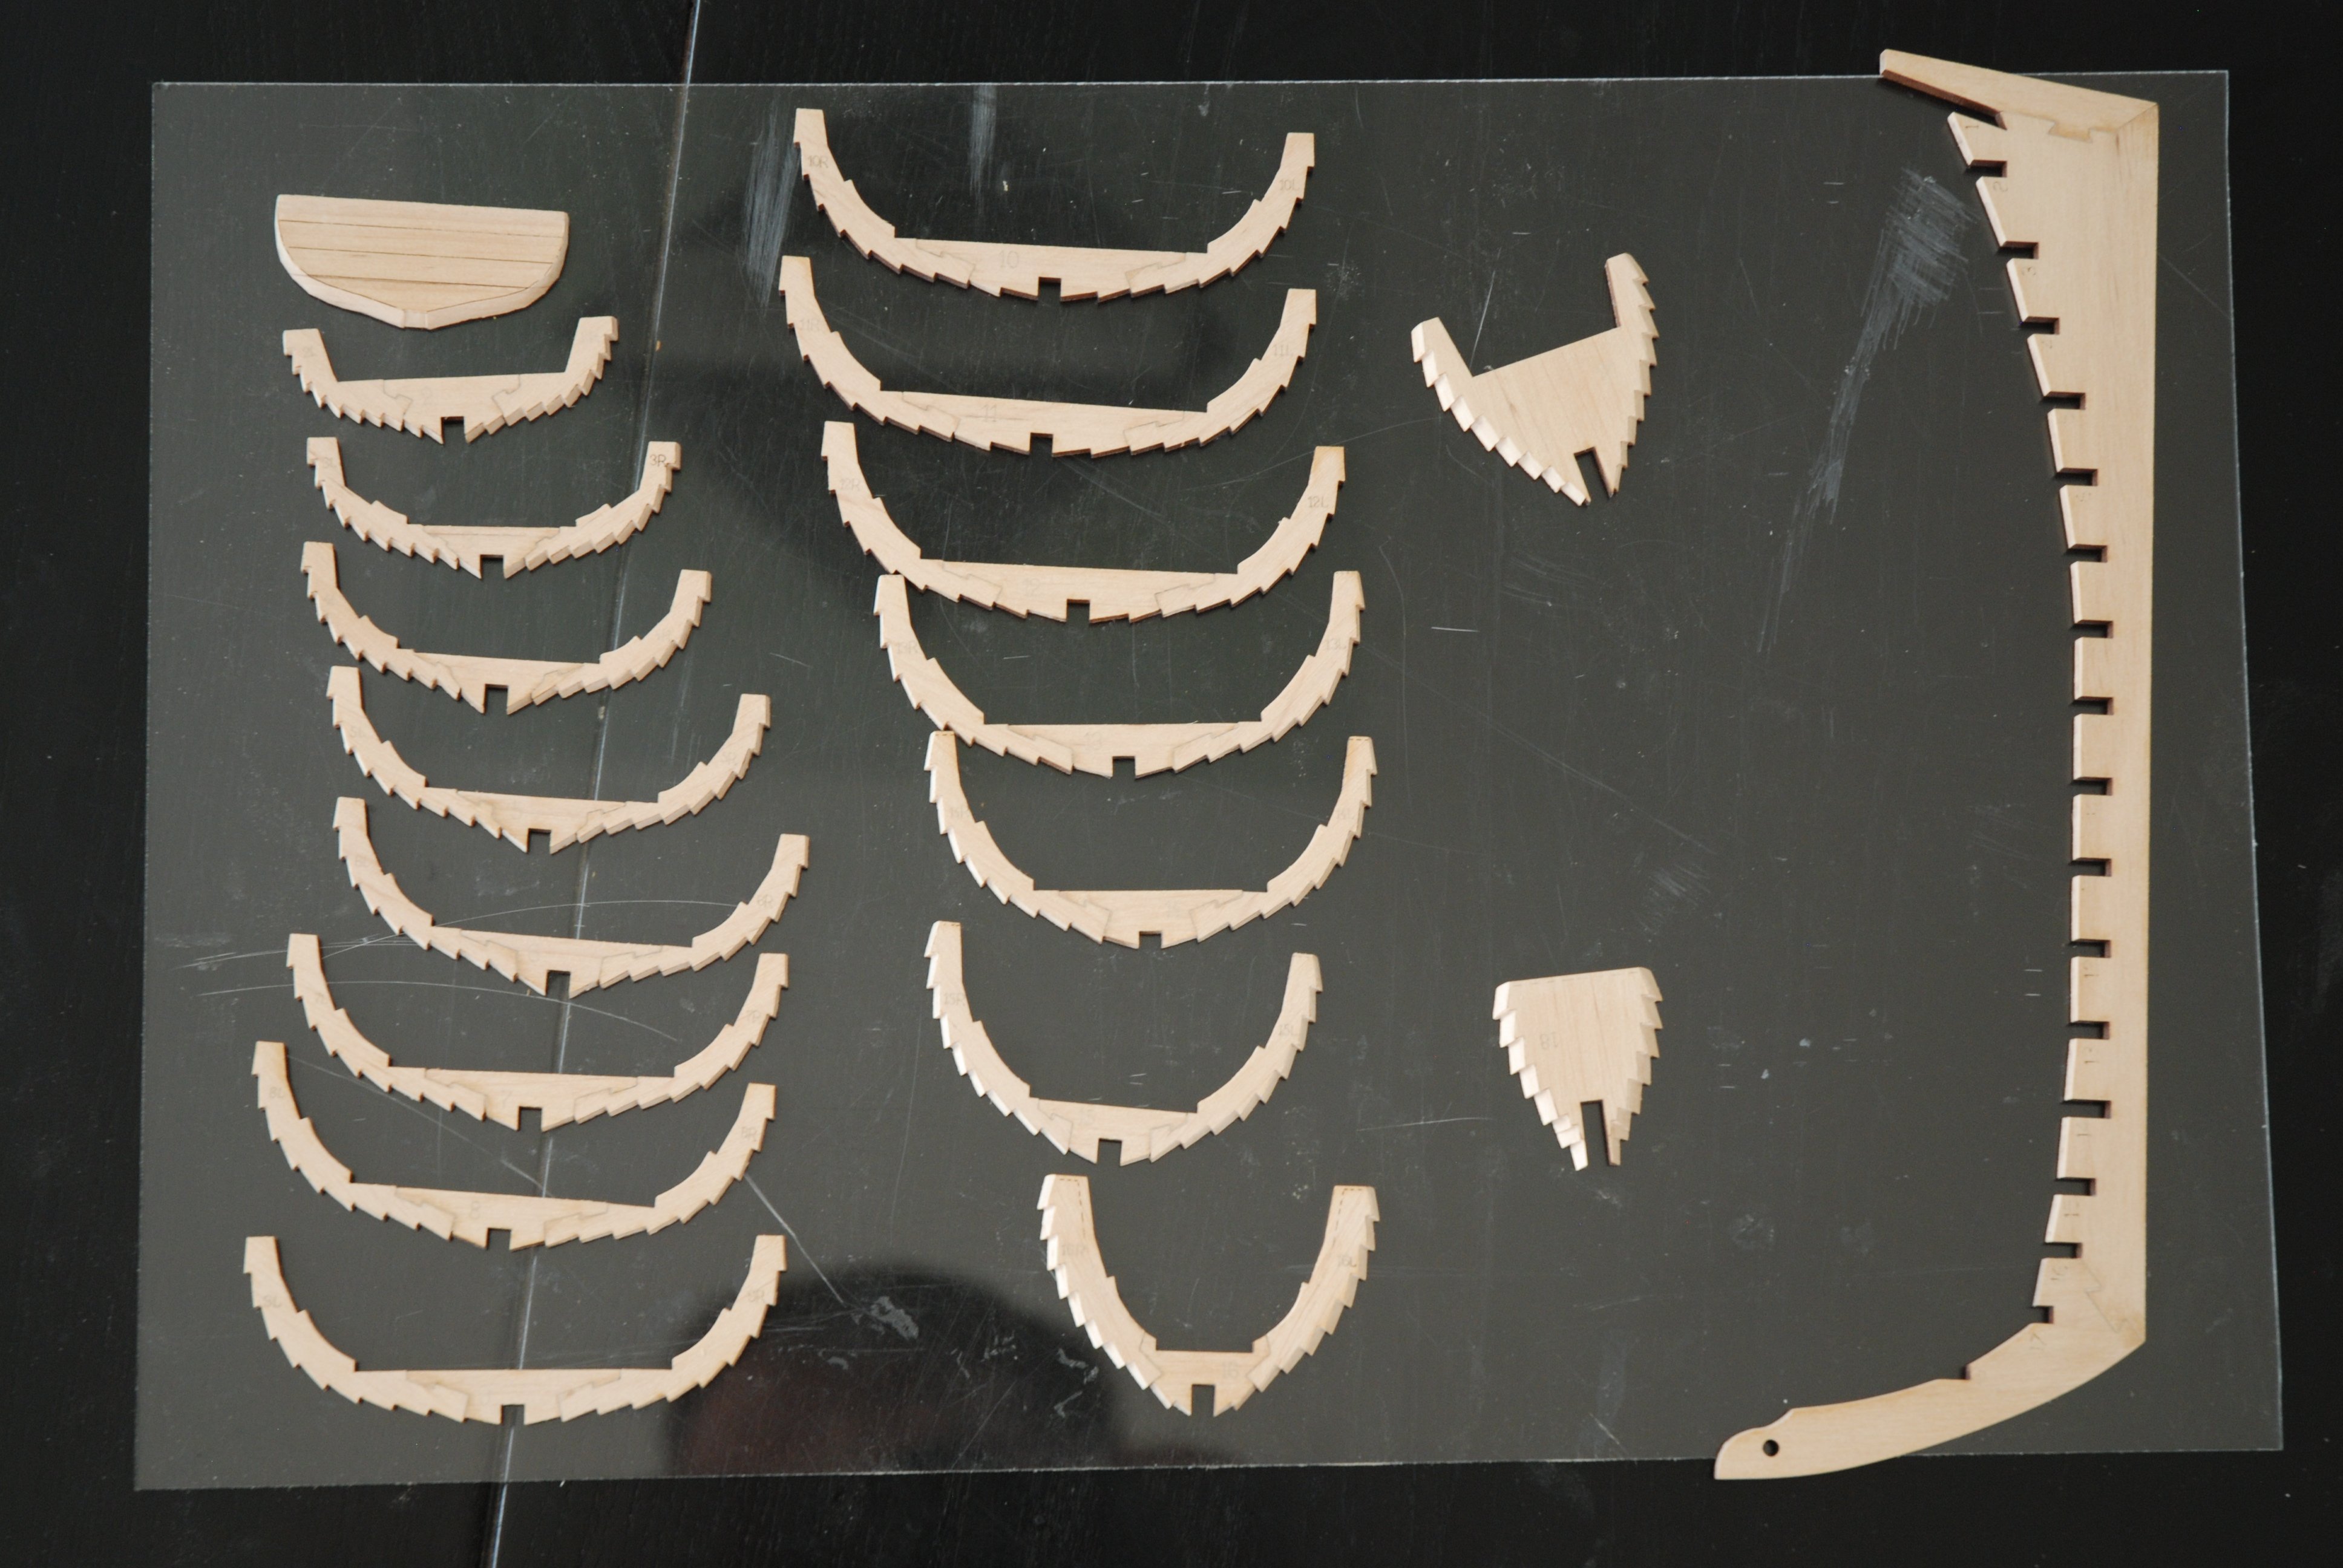
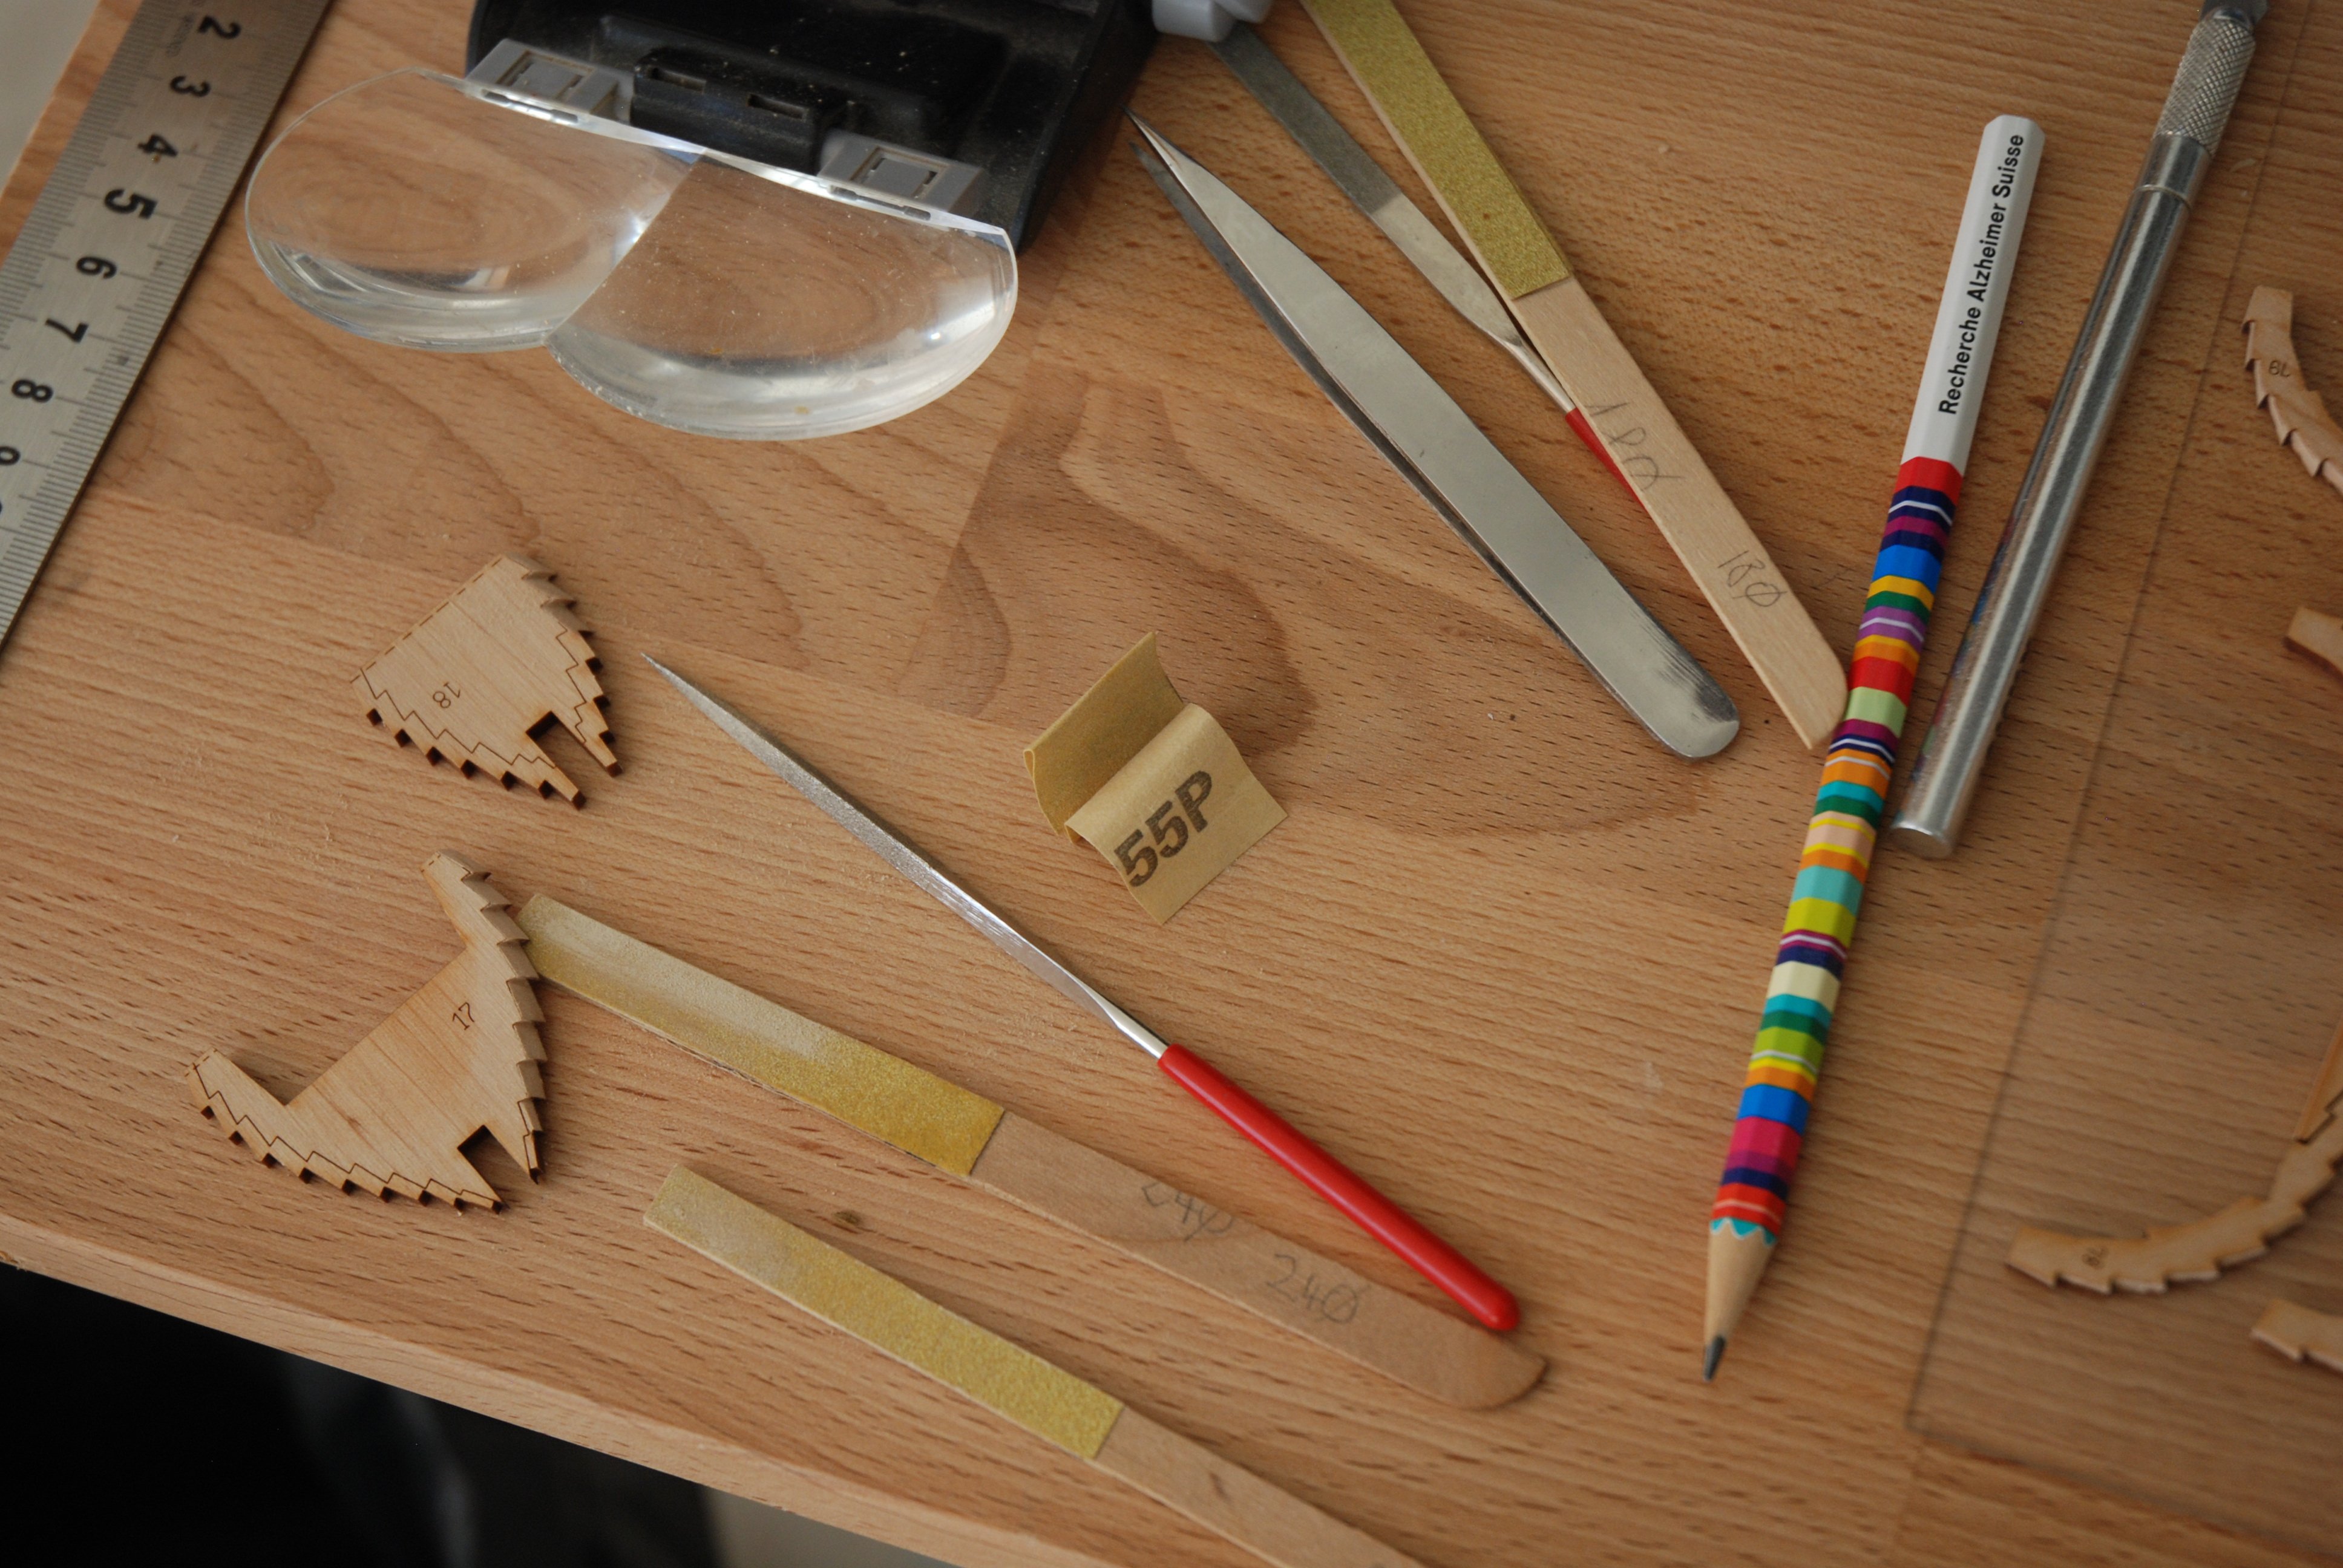
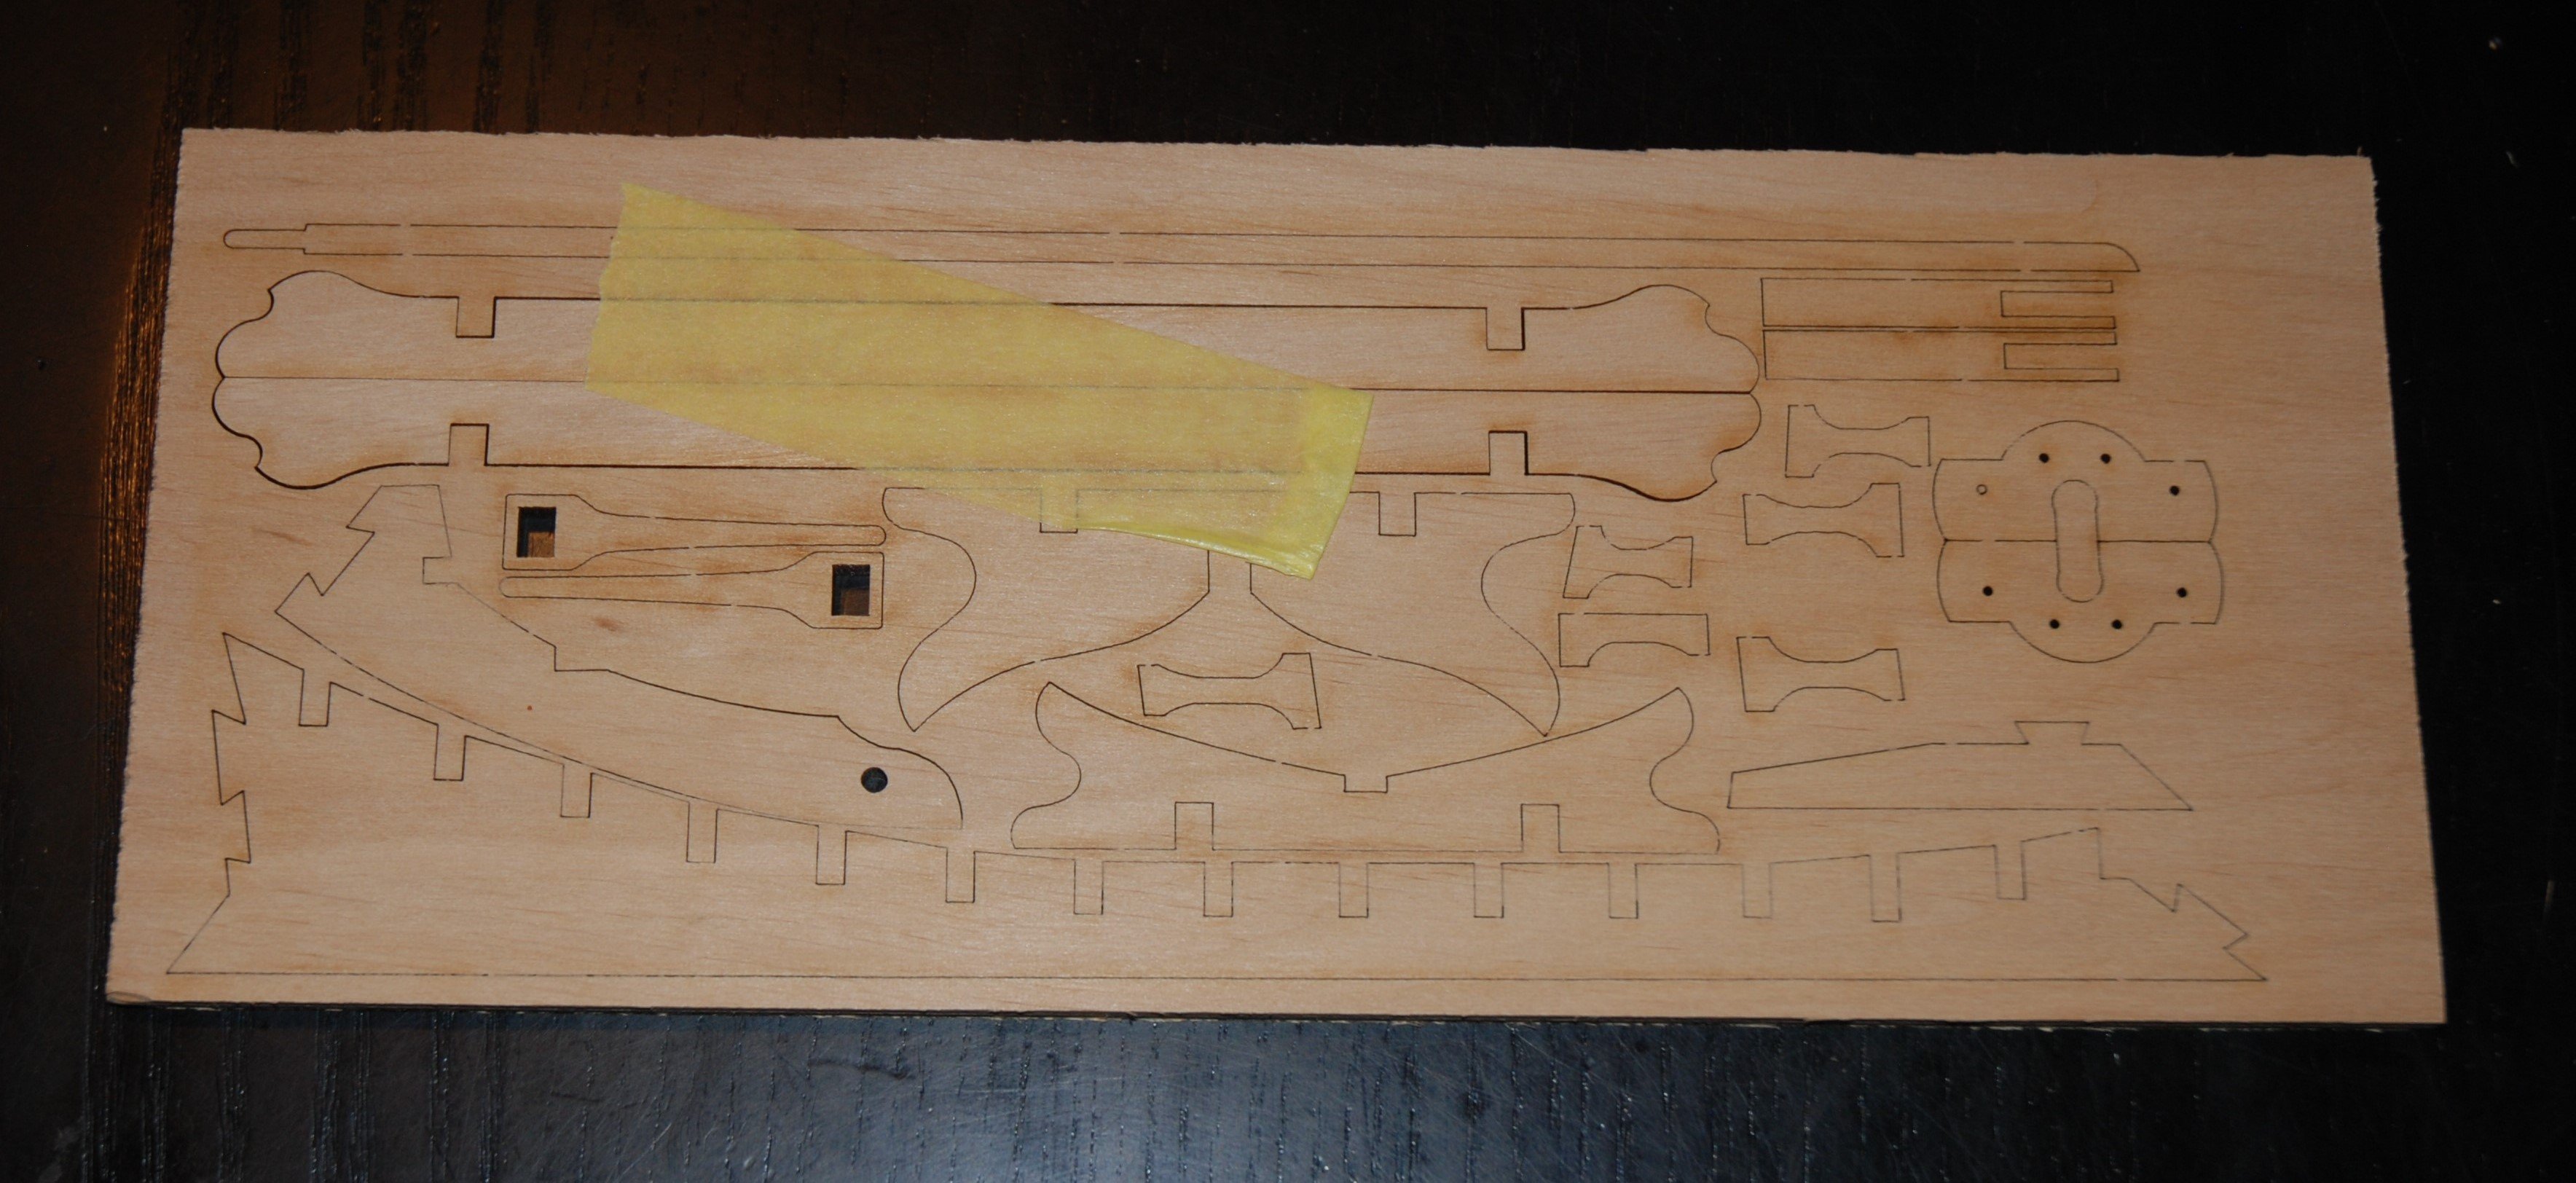
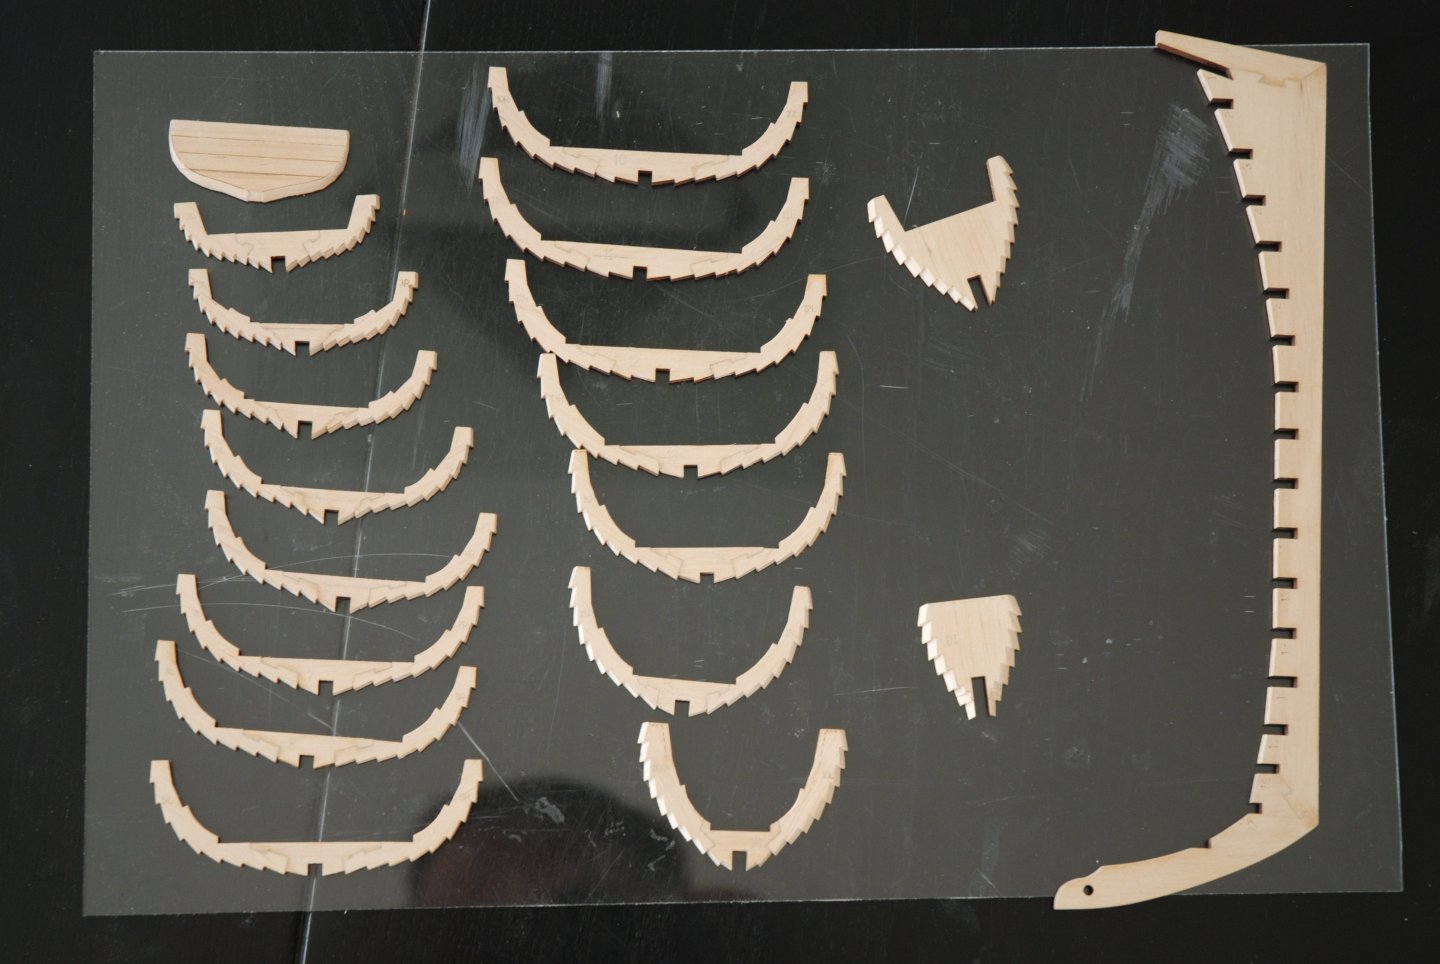
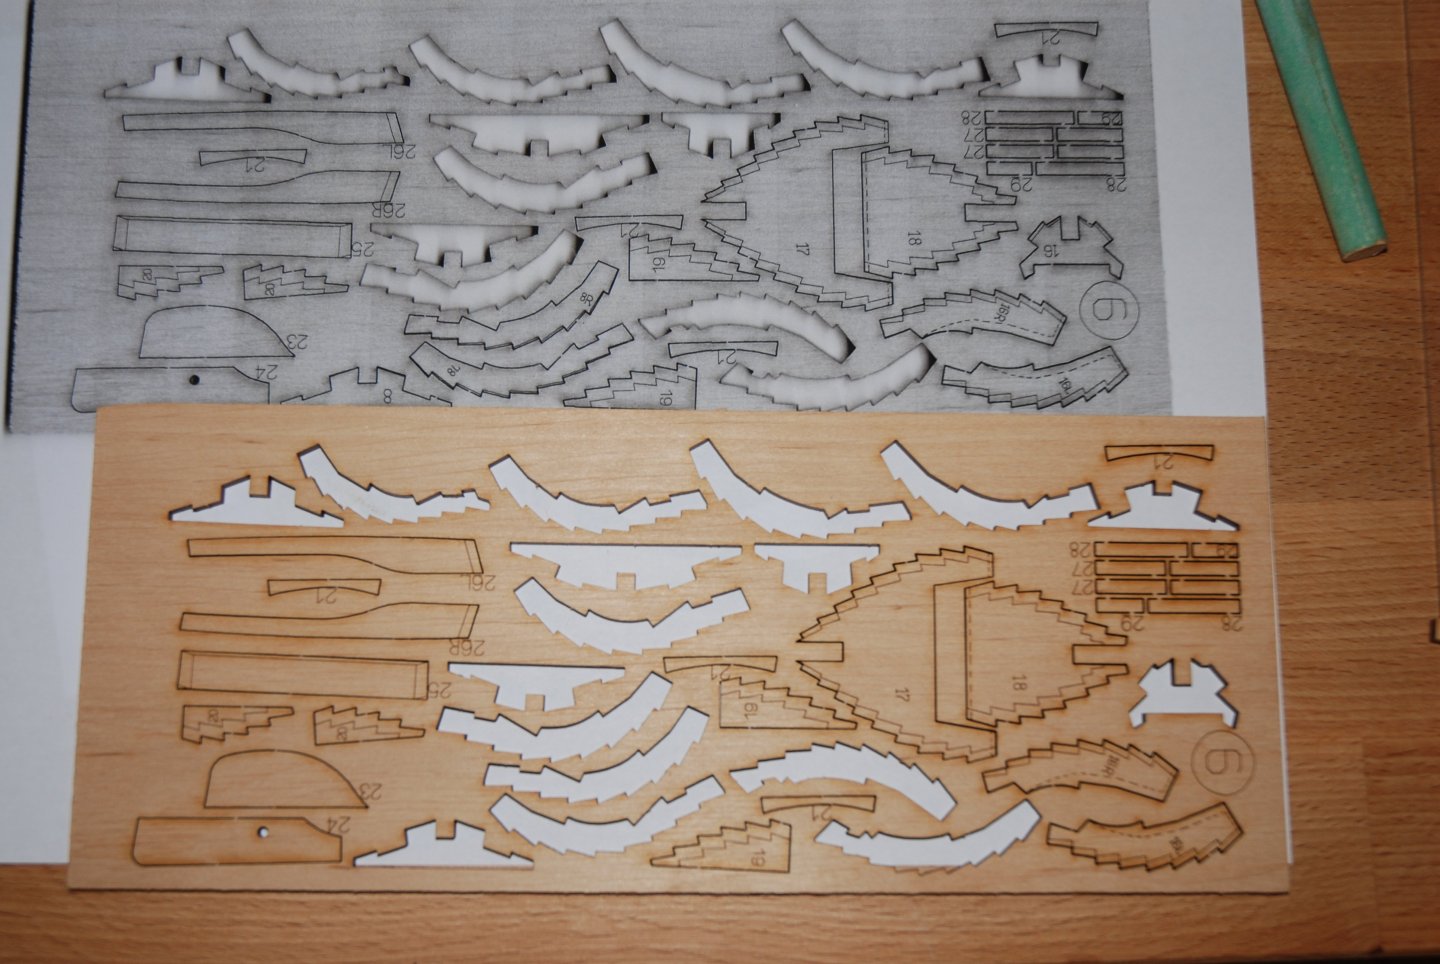
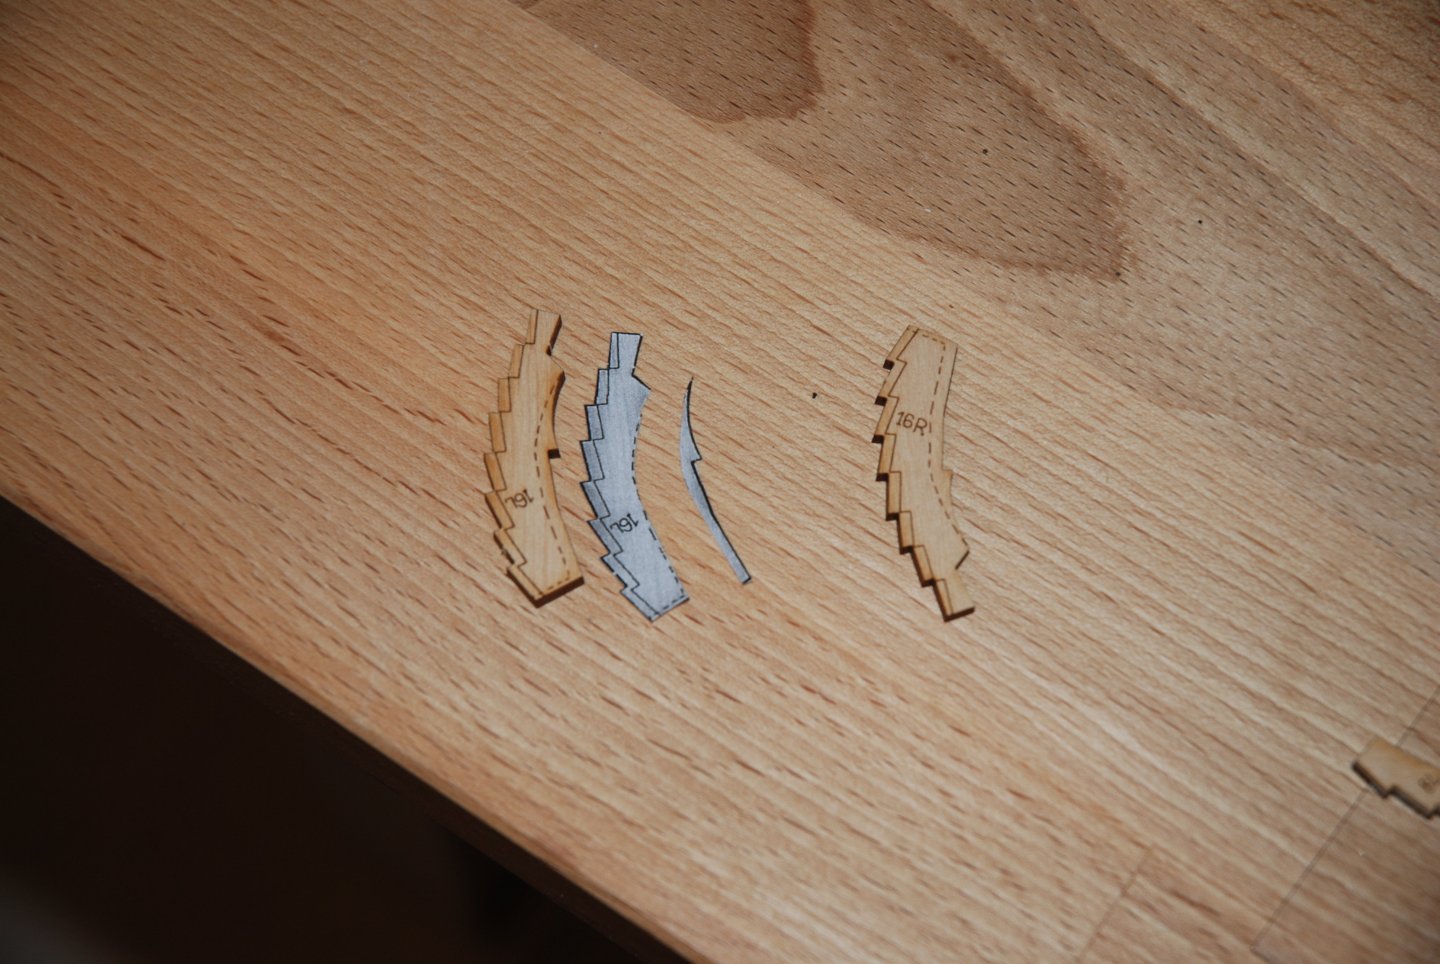
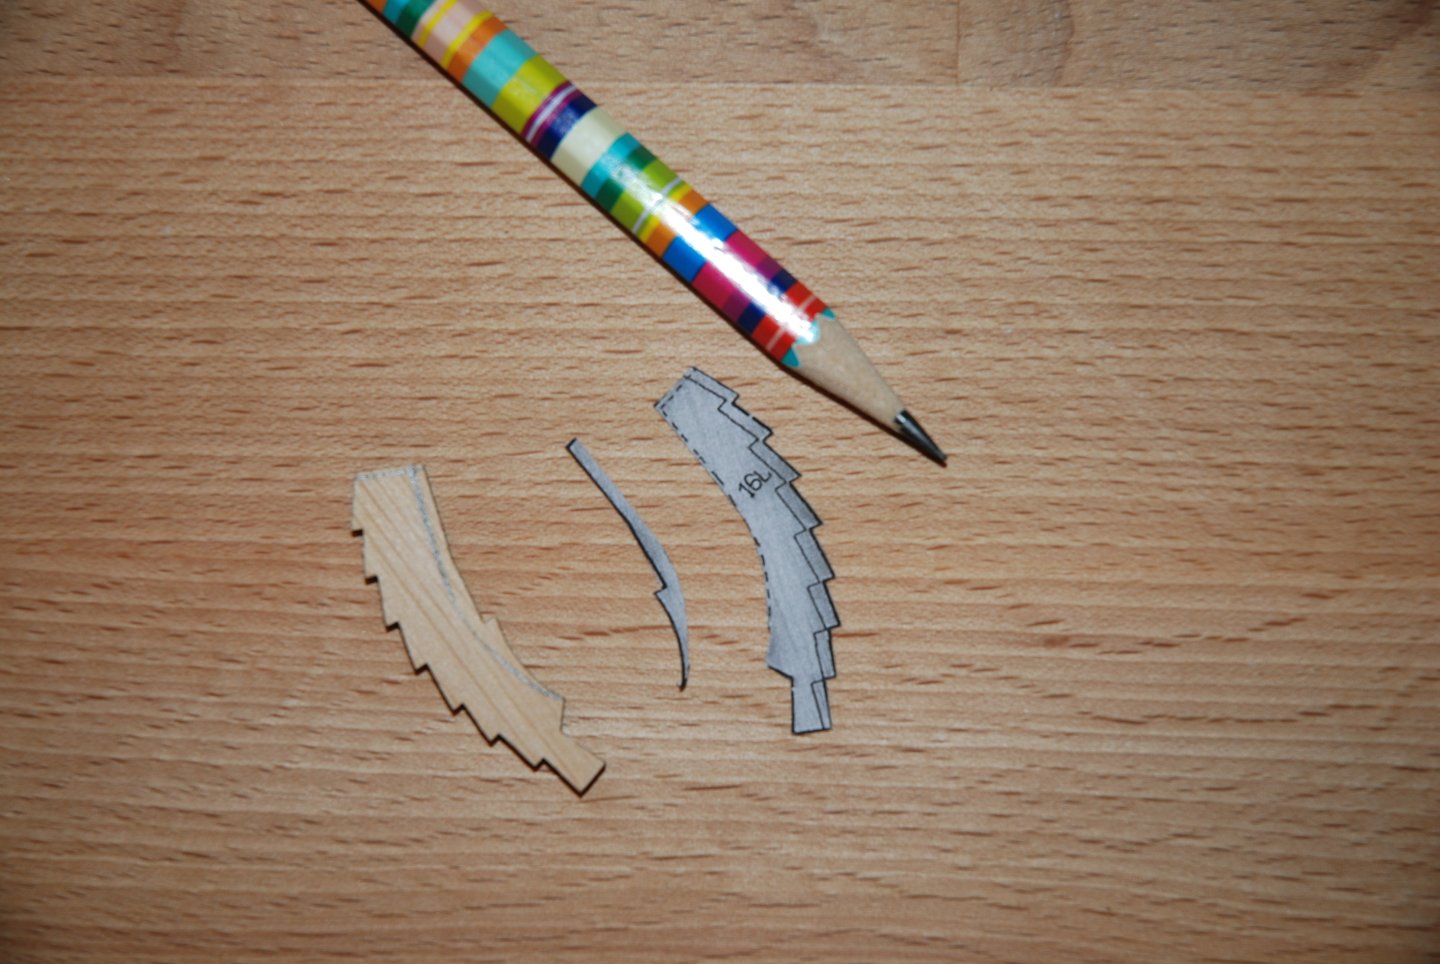
Thank you to all the 'Likes'. On some parts, in addition to the line indicating the sanding limit, there is a second dotted line. This simply means that the sanding must be done in reverse: this dotted line must be transferred to the back of the part. In the photo below, parts 16R and 16L require the dotted line to be transferred. To do this, I photocopy the wooden board directly! I then cut out the copy of the part concerned. So I can transfer the line precisely to the back of the piece. The last photo shows all the tools used for the fairing. Just a few simple tools and a lot of patience and time... To be continued.

- 22 replies
-
- 5
-
-
-
- ships boat
- Korabel
- (and 1 more)
-
HM Cutter Cheerful 1806 by JpR62 - 1:48 scale
JpR62 replied to JpR62's topic in - Build logs for subjects built 1801 - 1850
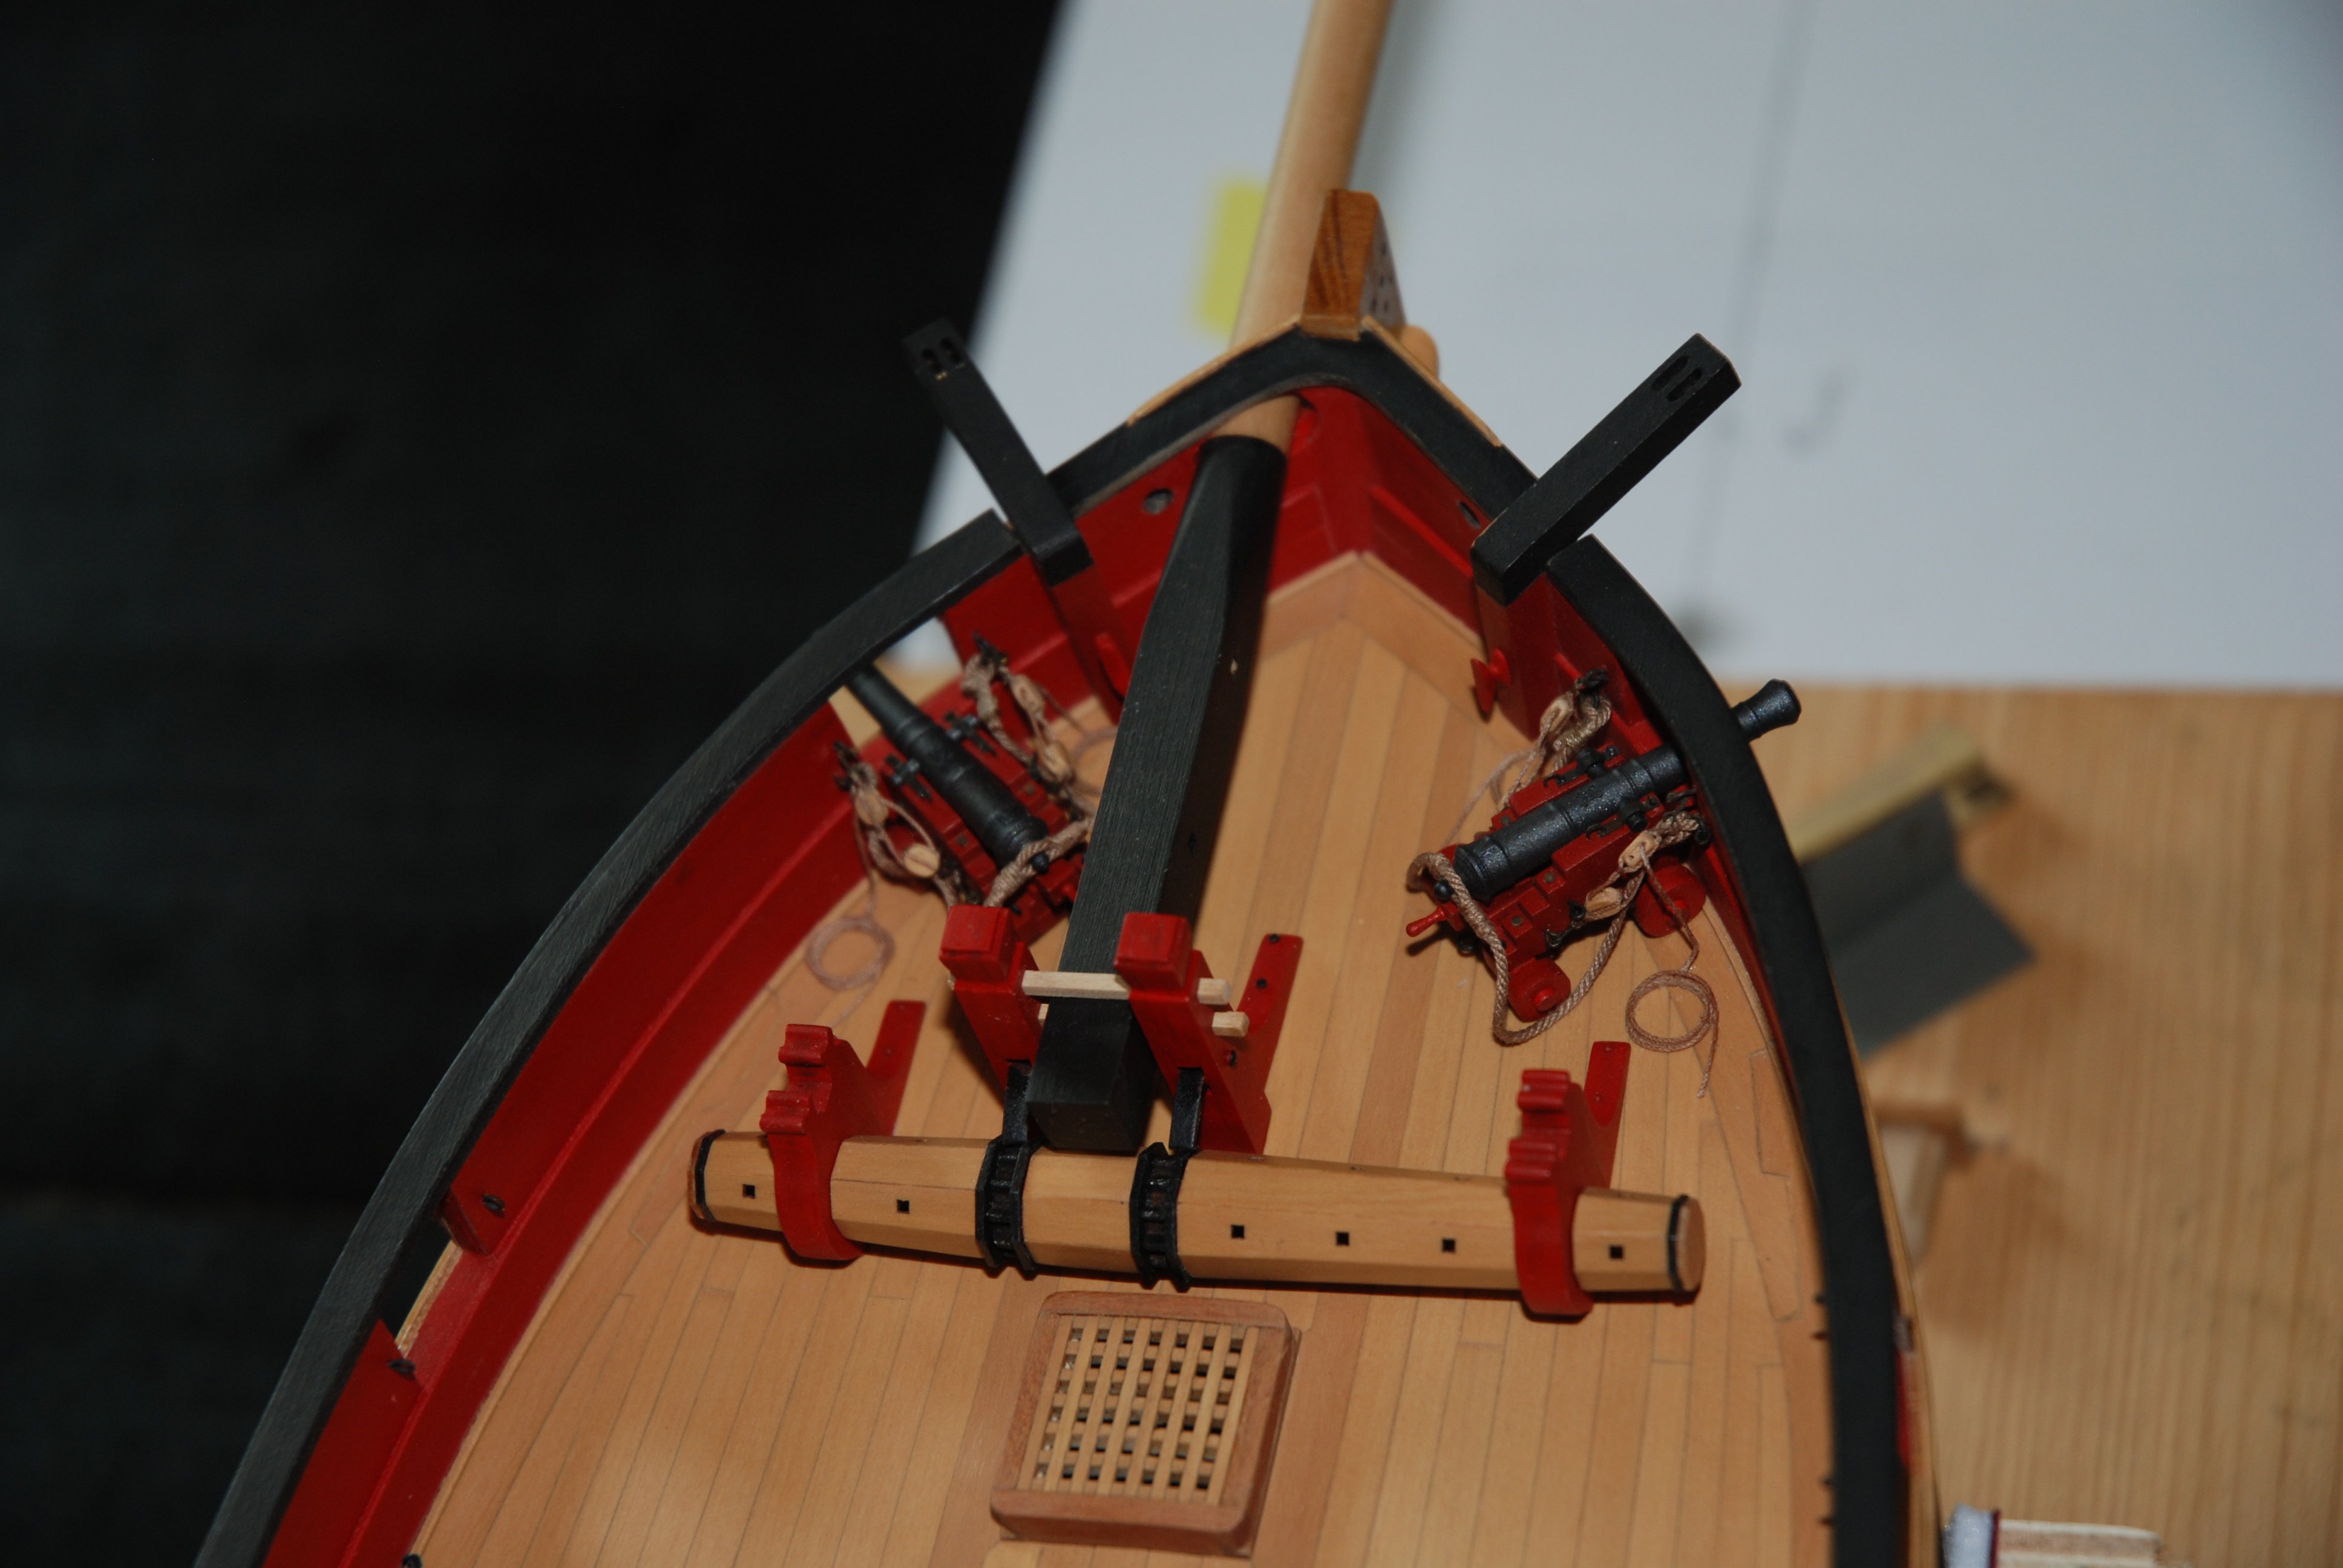
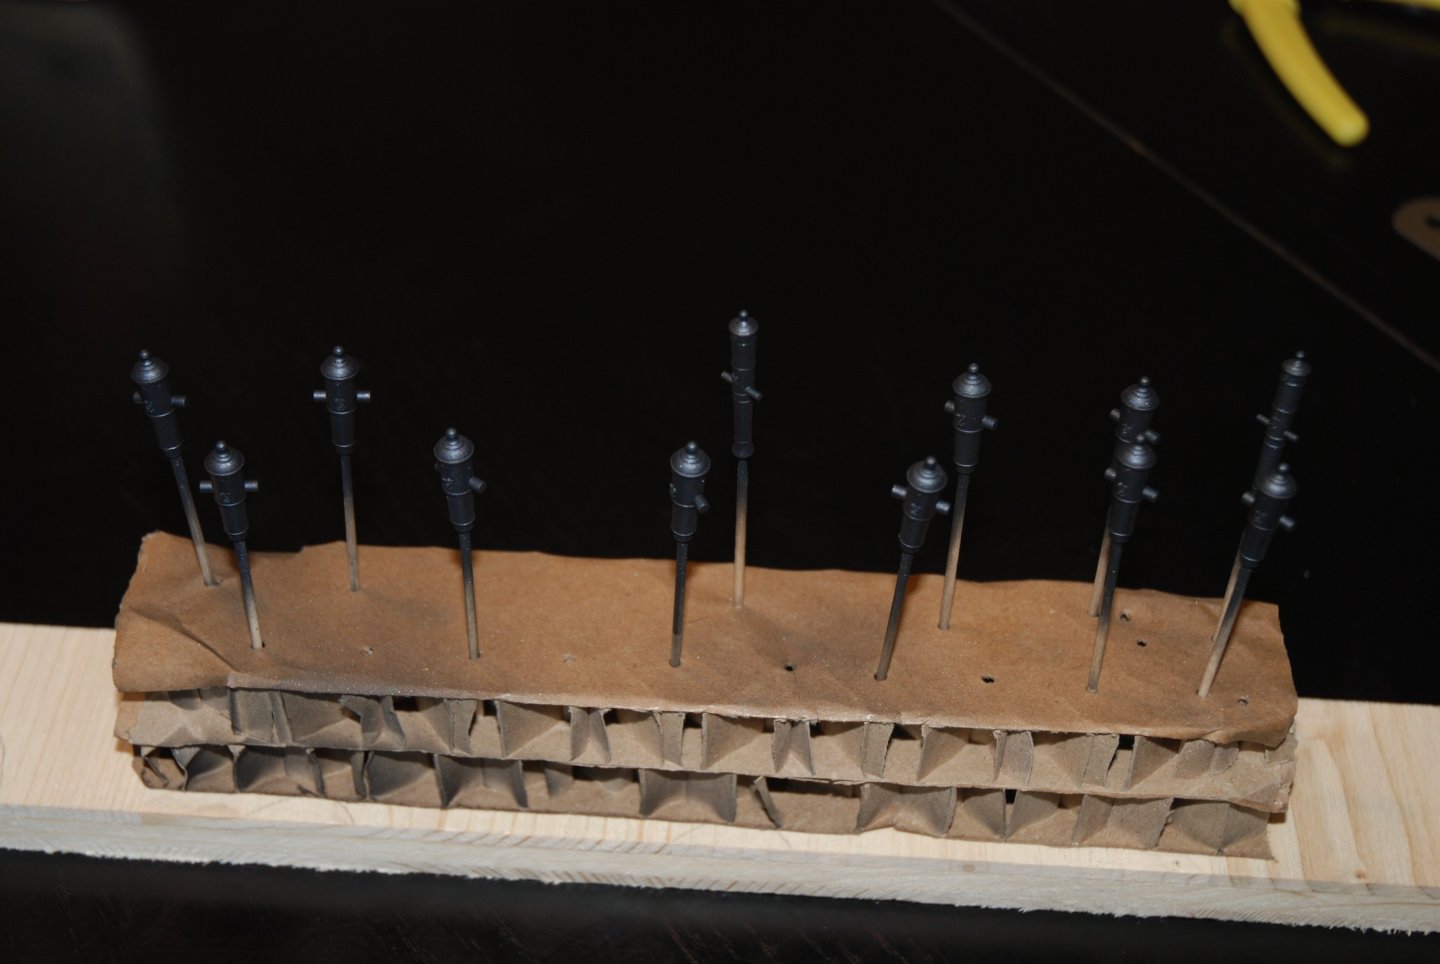
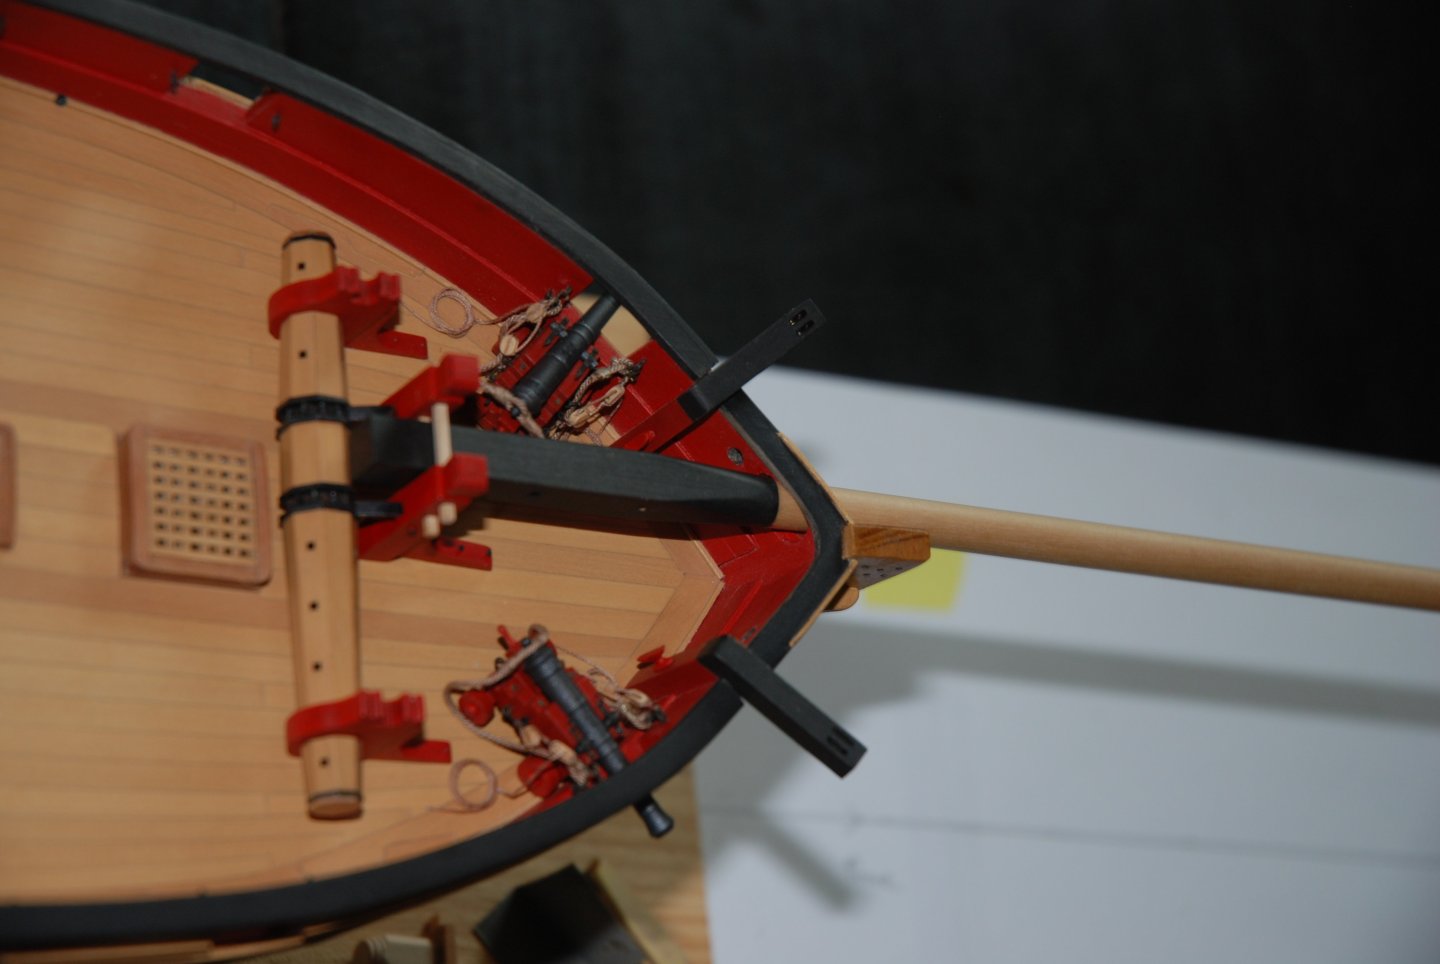
Thank you for all the 'Likes'. My work continued with the construction and fitting of the two long guns and the bowsprit installation. I'm also preparing the carronade barrels. I start by gluing on the English monograms (from Syren). I'll also add the touch hole (cannon vent) on the barrels of the cannons. They consist of a small square of lead foil (a wine bottle cap) with a small hole in the center. I then airbrush the guns. First I use a black undercoat (Black Surface Primer from Vallejo) followed by the final coat of paint (Black from Vallejo with a drop of Imperial blue and a drop of Gun metal). I then prepare the small elements that will detail the gun carriages. The MF70 mini milling machine from Proxxon is a great help... All these small metal elements are then chemically blackened. The box contains the various parts that will detail the carriages of the two long guns. I then assemble the two long guns, put them in place and fit the bowsprit. I'll come back to the mounting of the carriages in more detail when preparing the carronades. I then realized that I still had to fill in the gaps created by the installation of the catheads... To be continued.


-
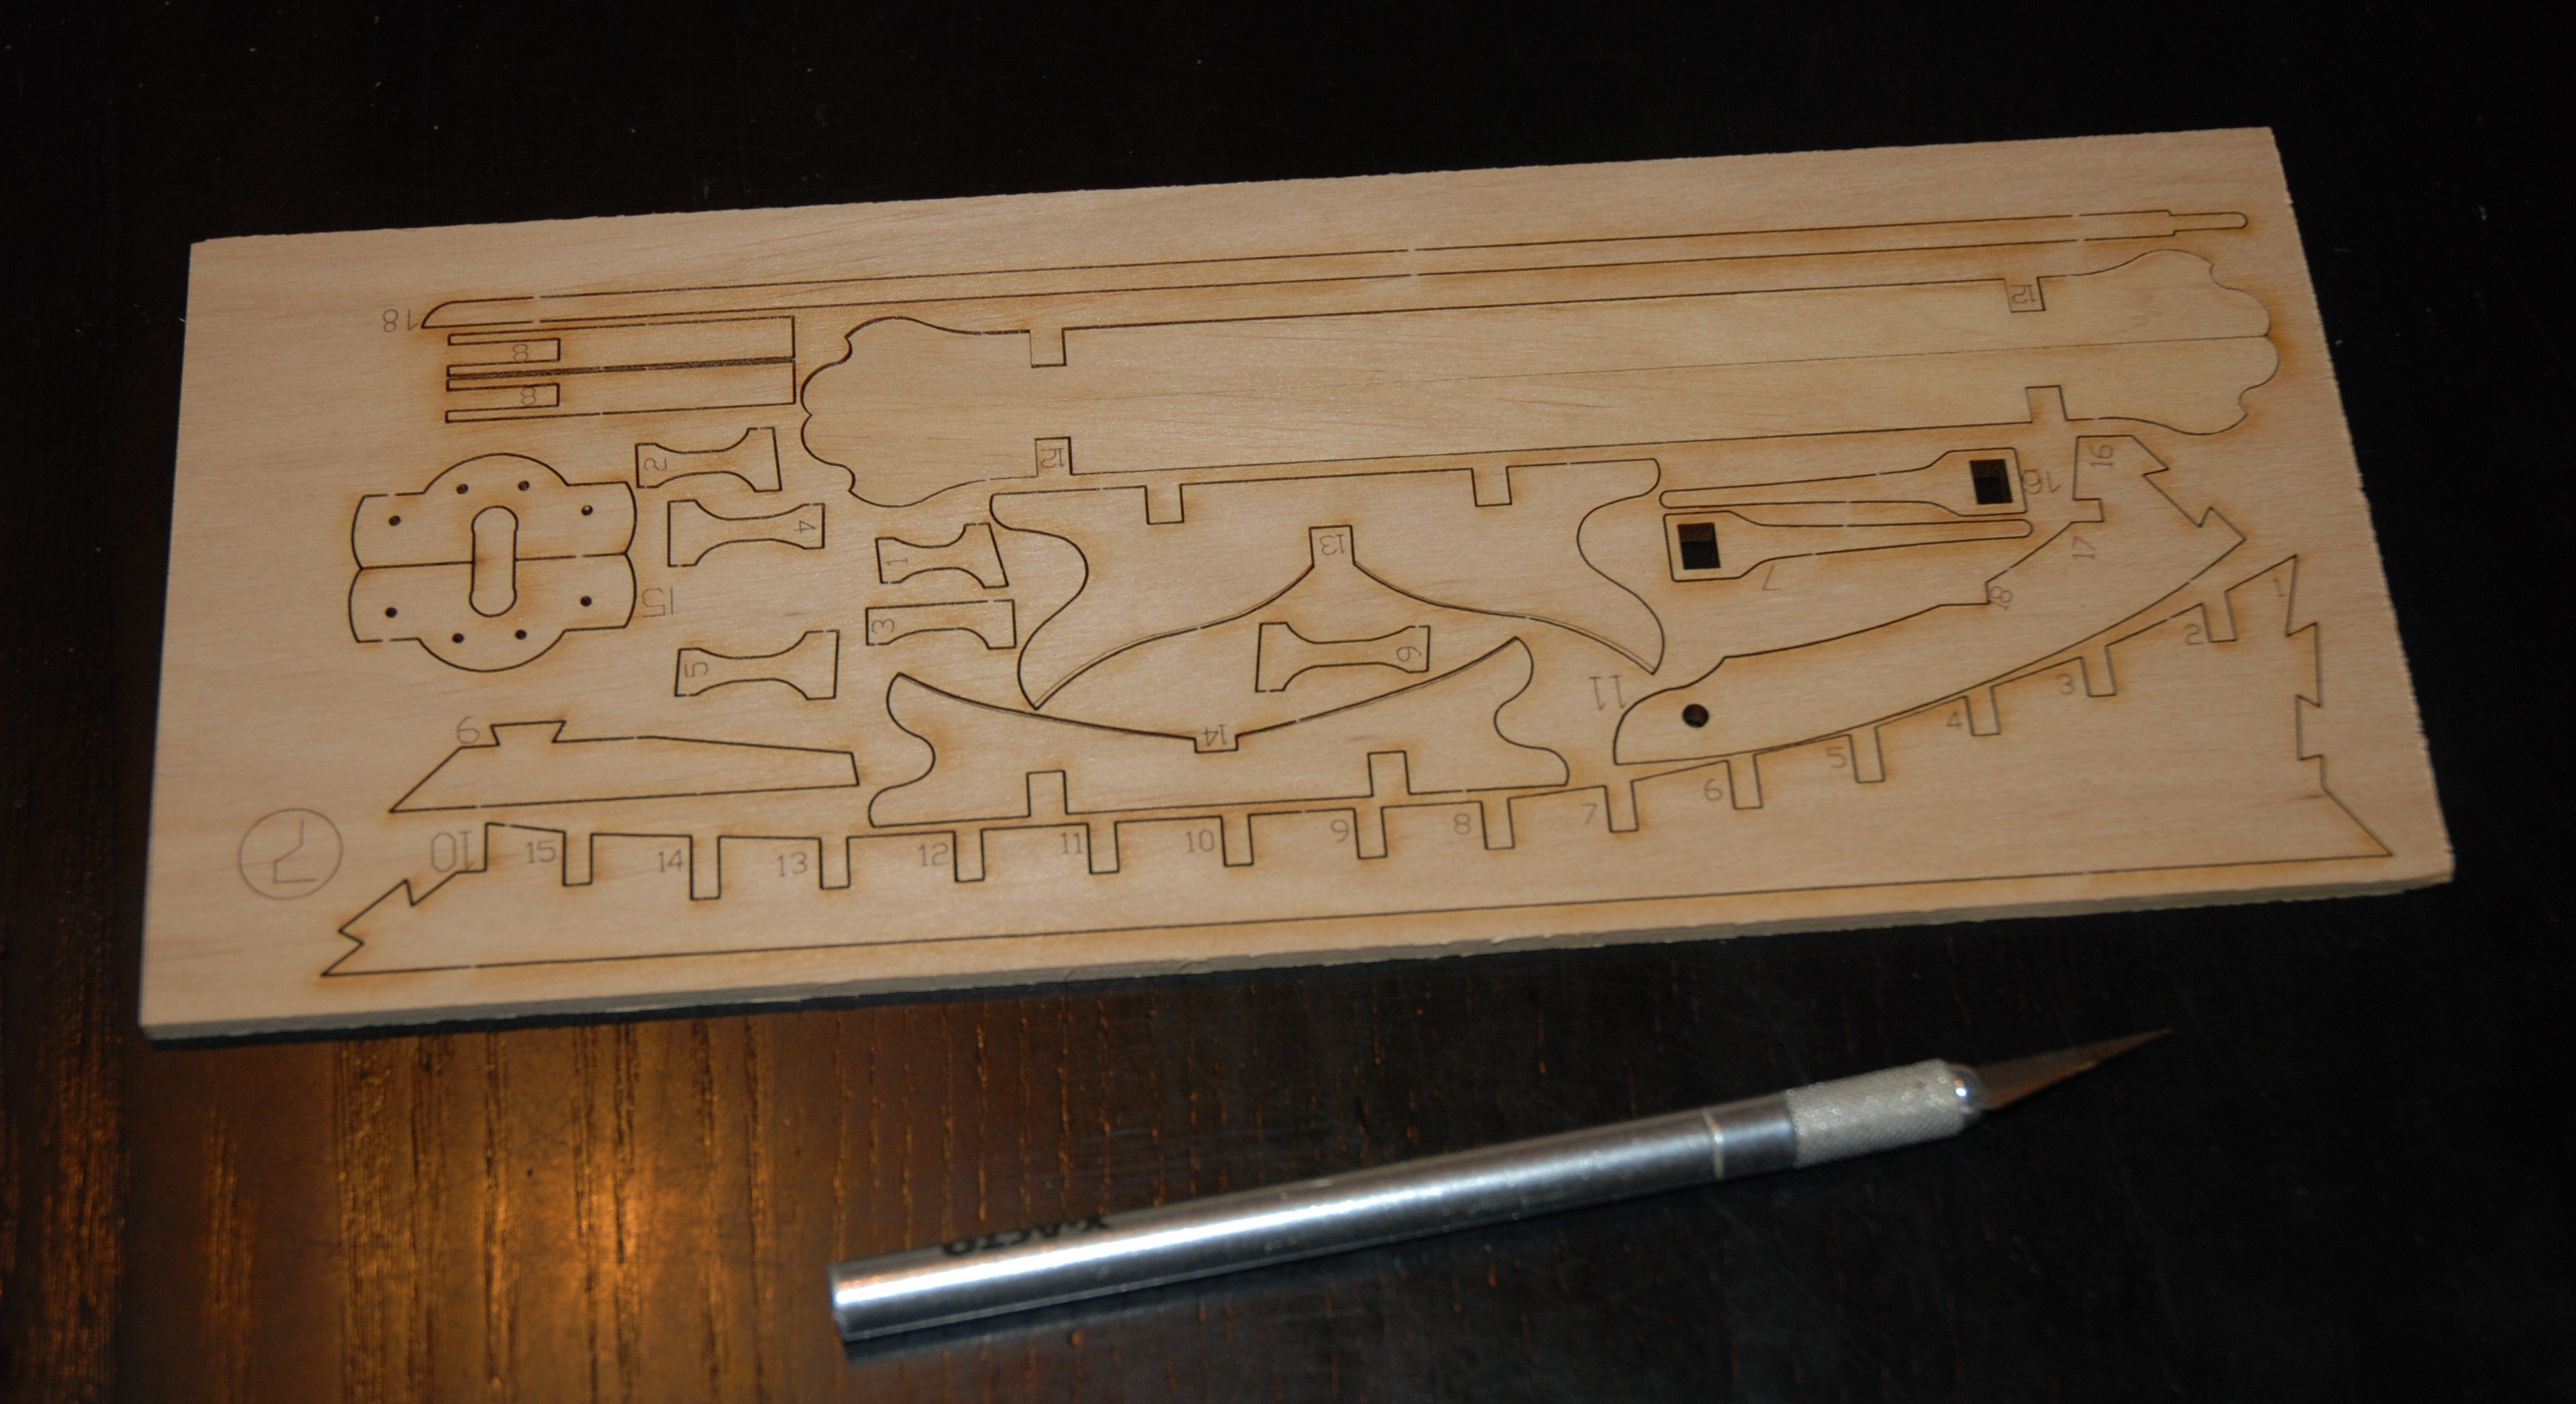
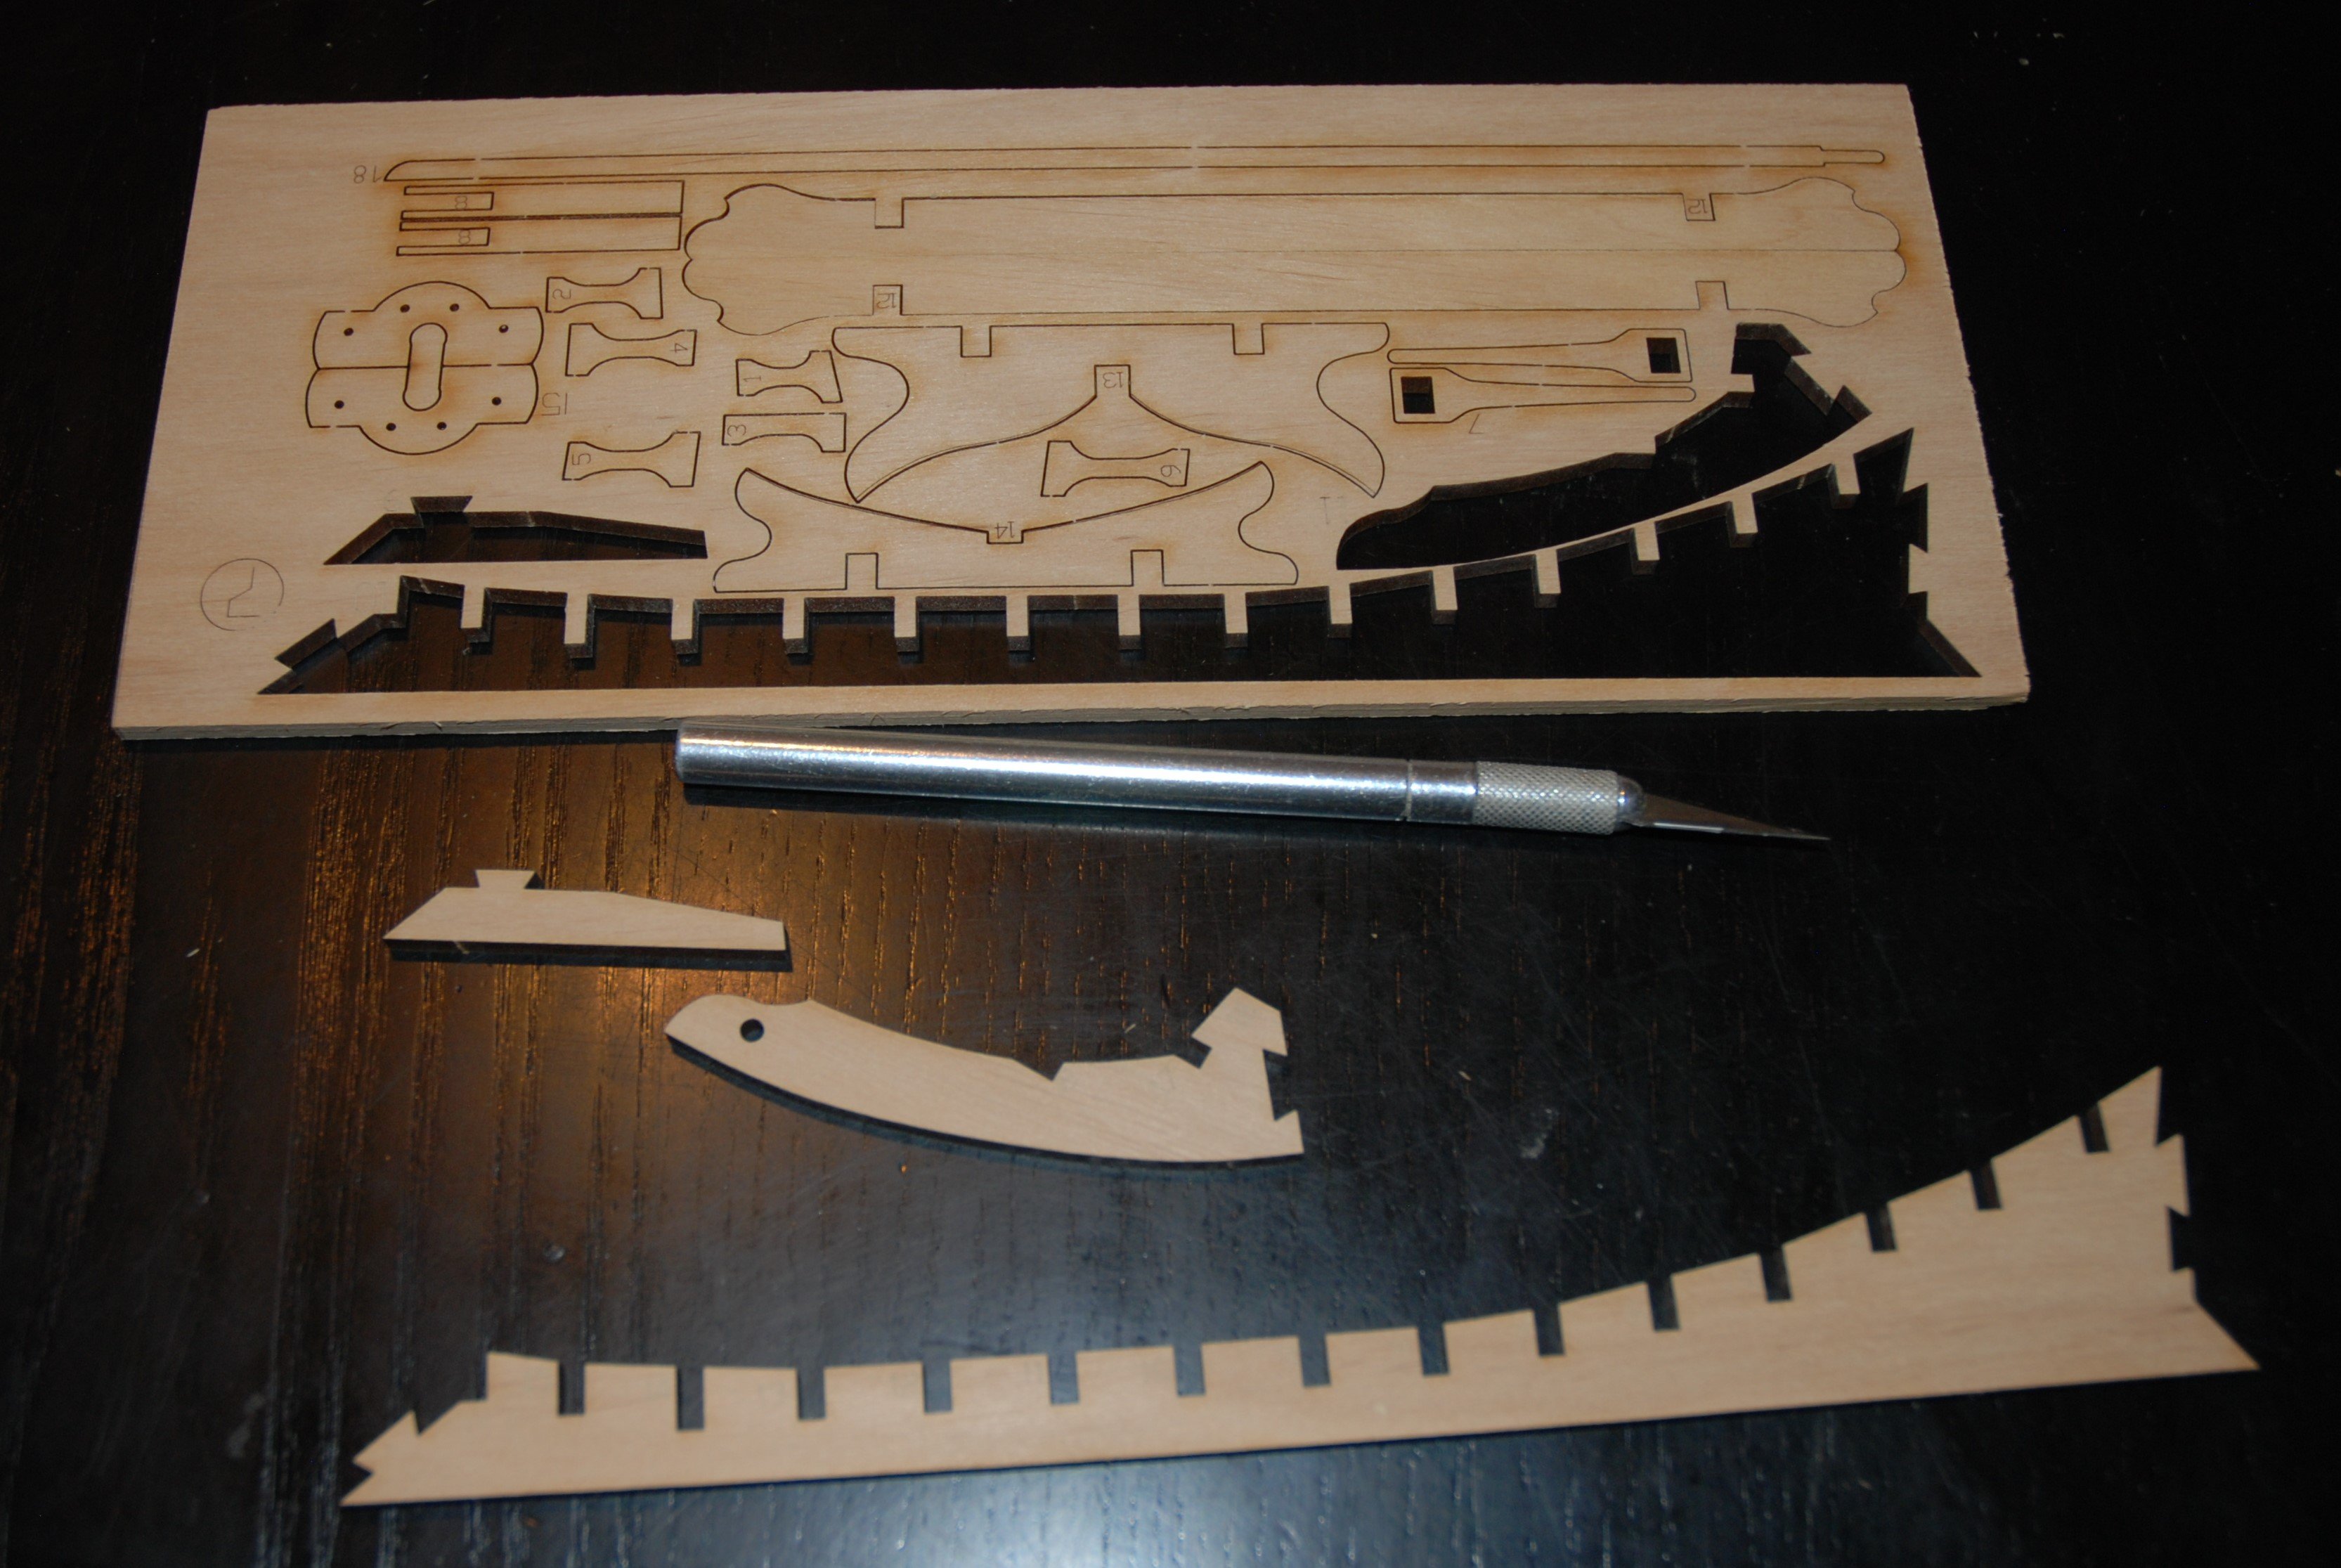
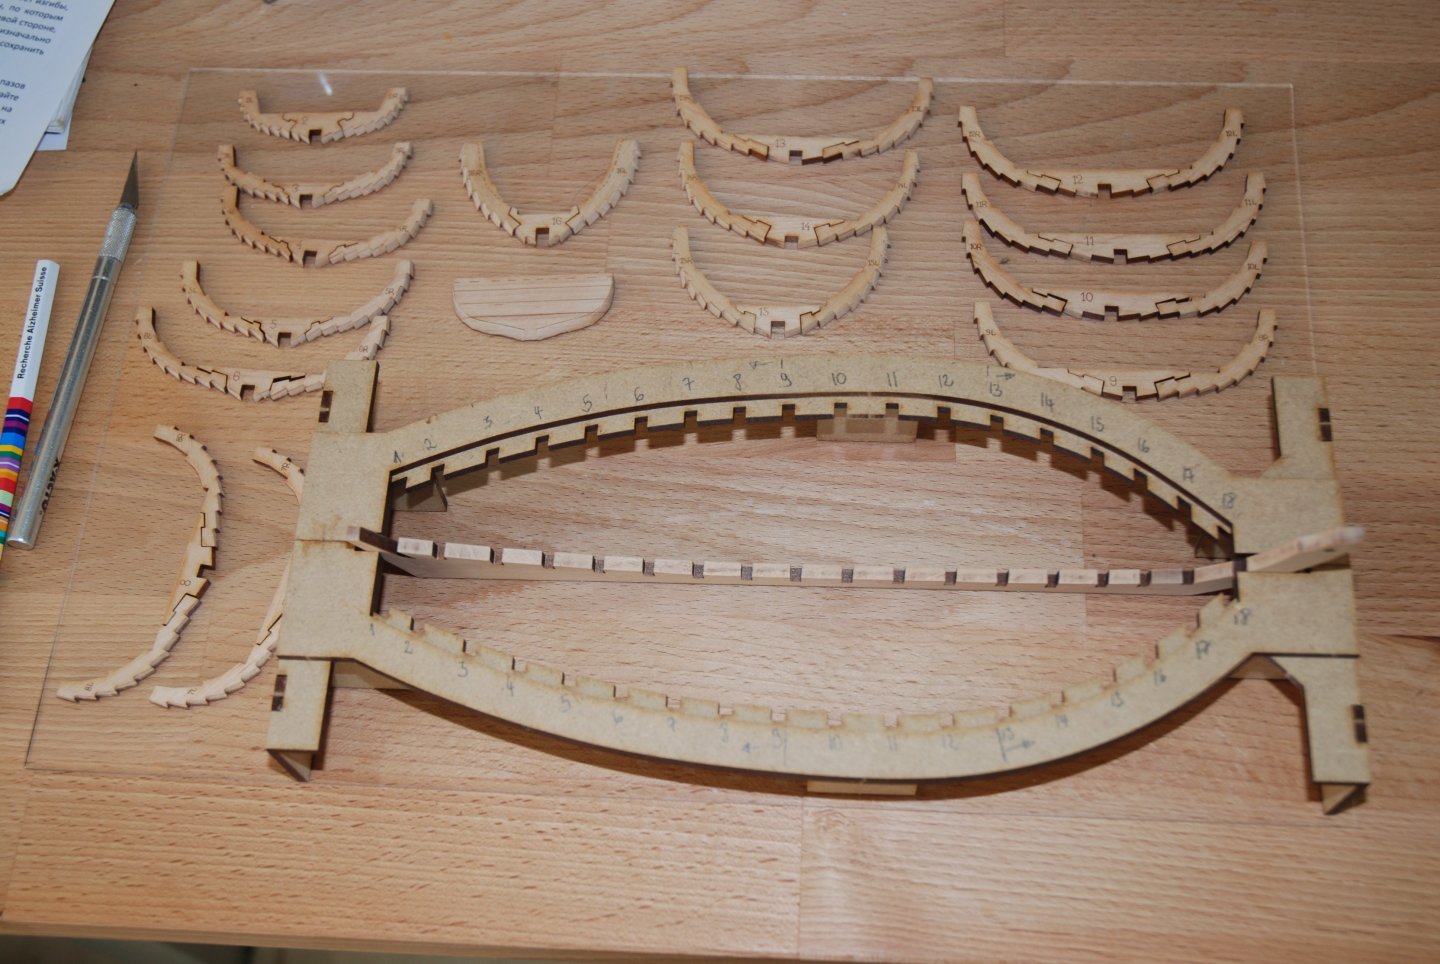
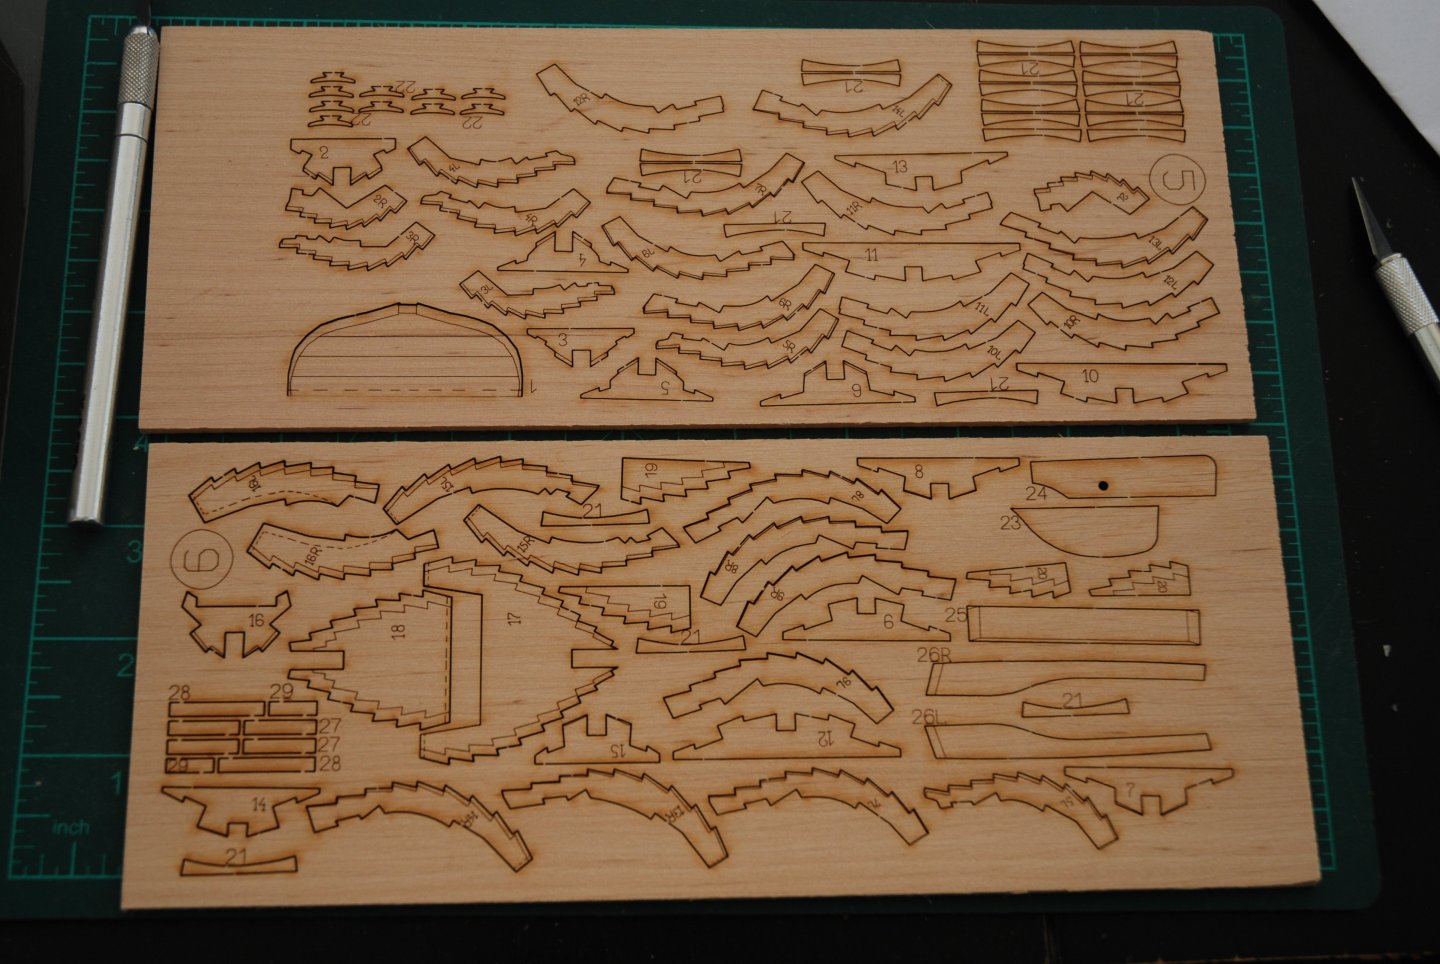
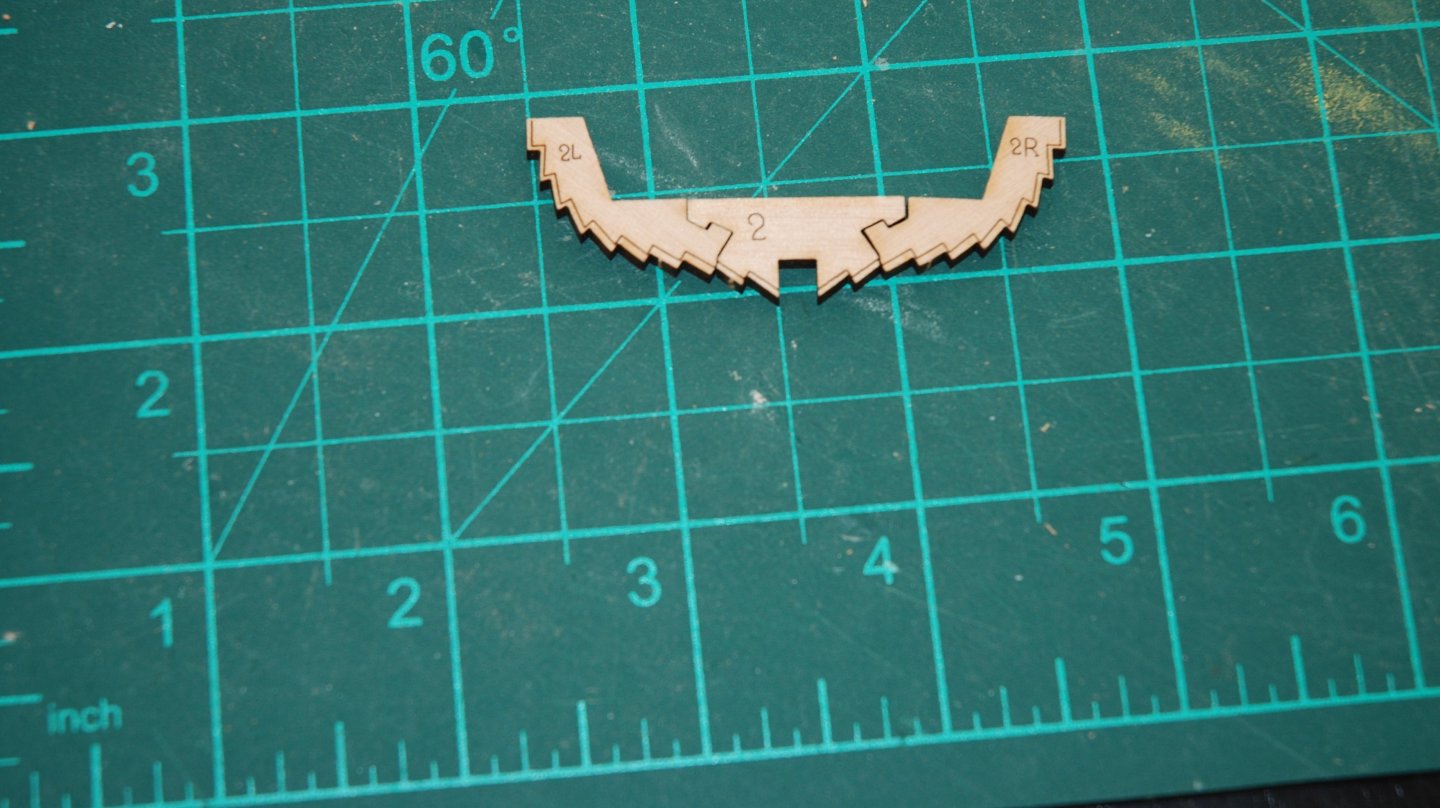
Thank you to all the 'Likes'. The frames : Each frame consists of a floor and two futtlocks. All the components needed to build the hull frame are located on two pearwood boards. Each element is numbered, and a letter identifies whether the futtlock should be installed on the port or starboard side. The planking will be clinker-build style. A light laser line indicates the limit of the area to be sanded to allow the hull to be faired. I start by sanding the various sections that will receive the planking. This way, the hull will already be faired. And I finish by gluing the three parts together. To be continued


- 22 replies
-
- 6
-
-
-
- ships boat
- Korabel
- (and 1 more)
-
HM Cutter Cheerful 1806 by JpR62 - 1:48 scale
JpR62 replied to JpR62's topic in - Build logs for subjects built 1801 - 1850
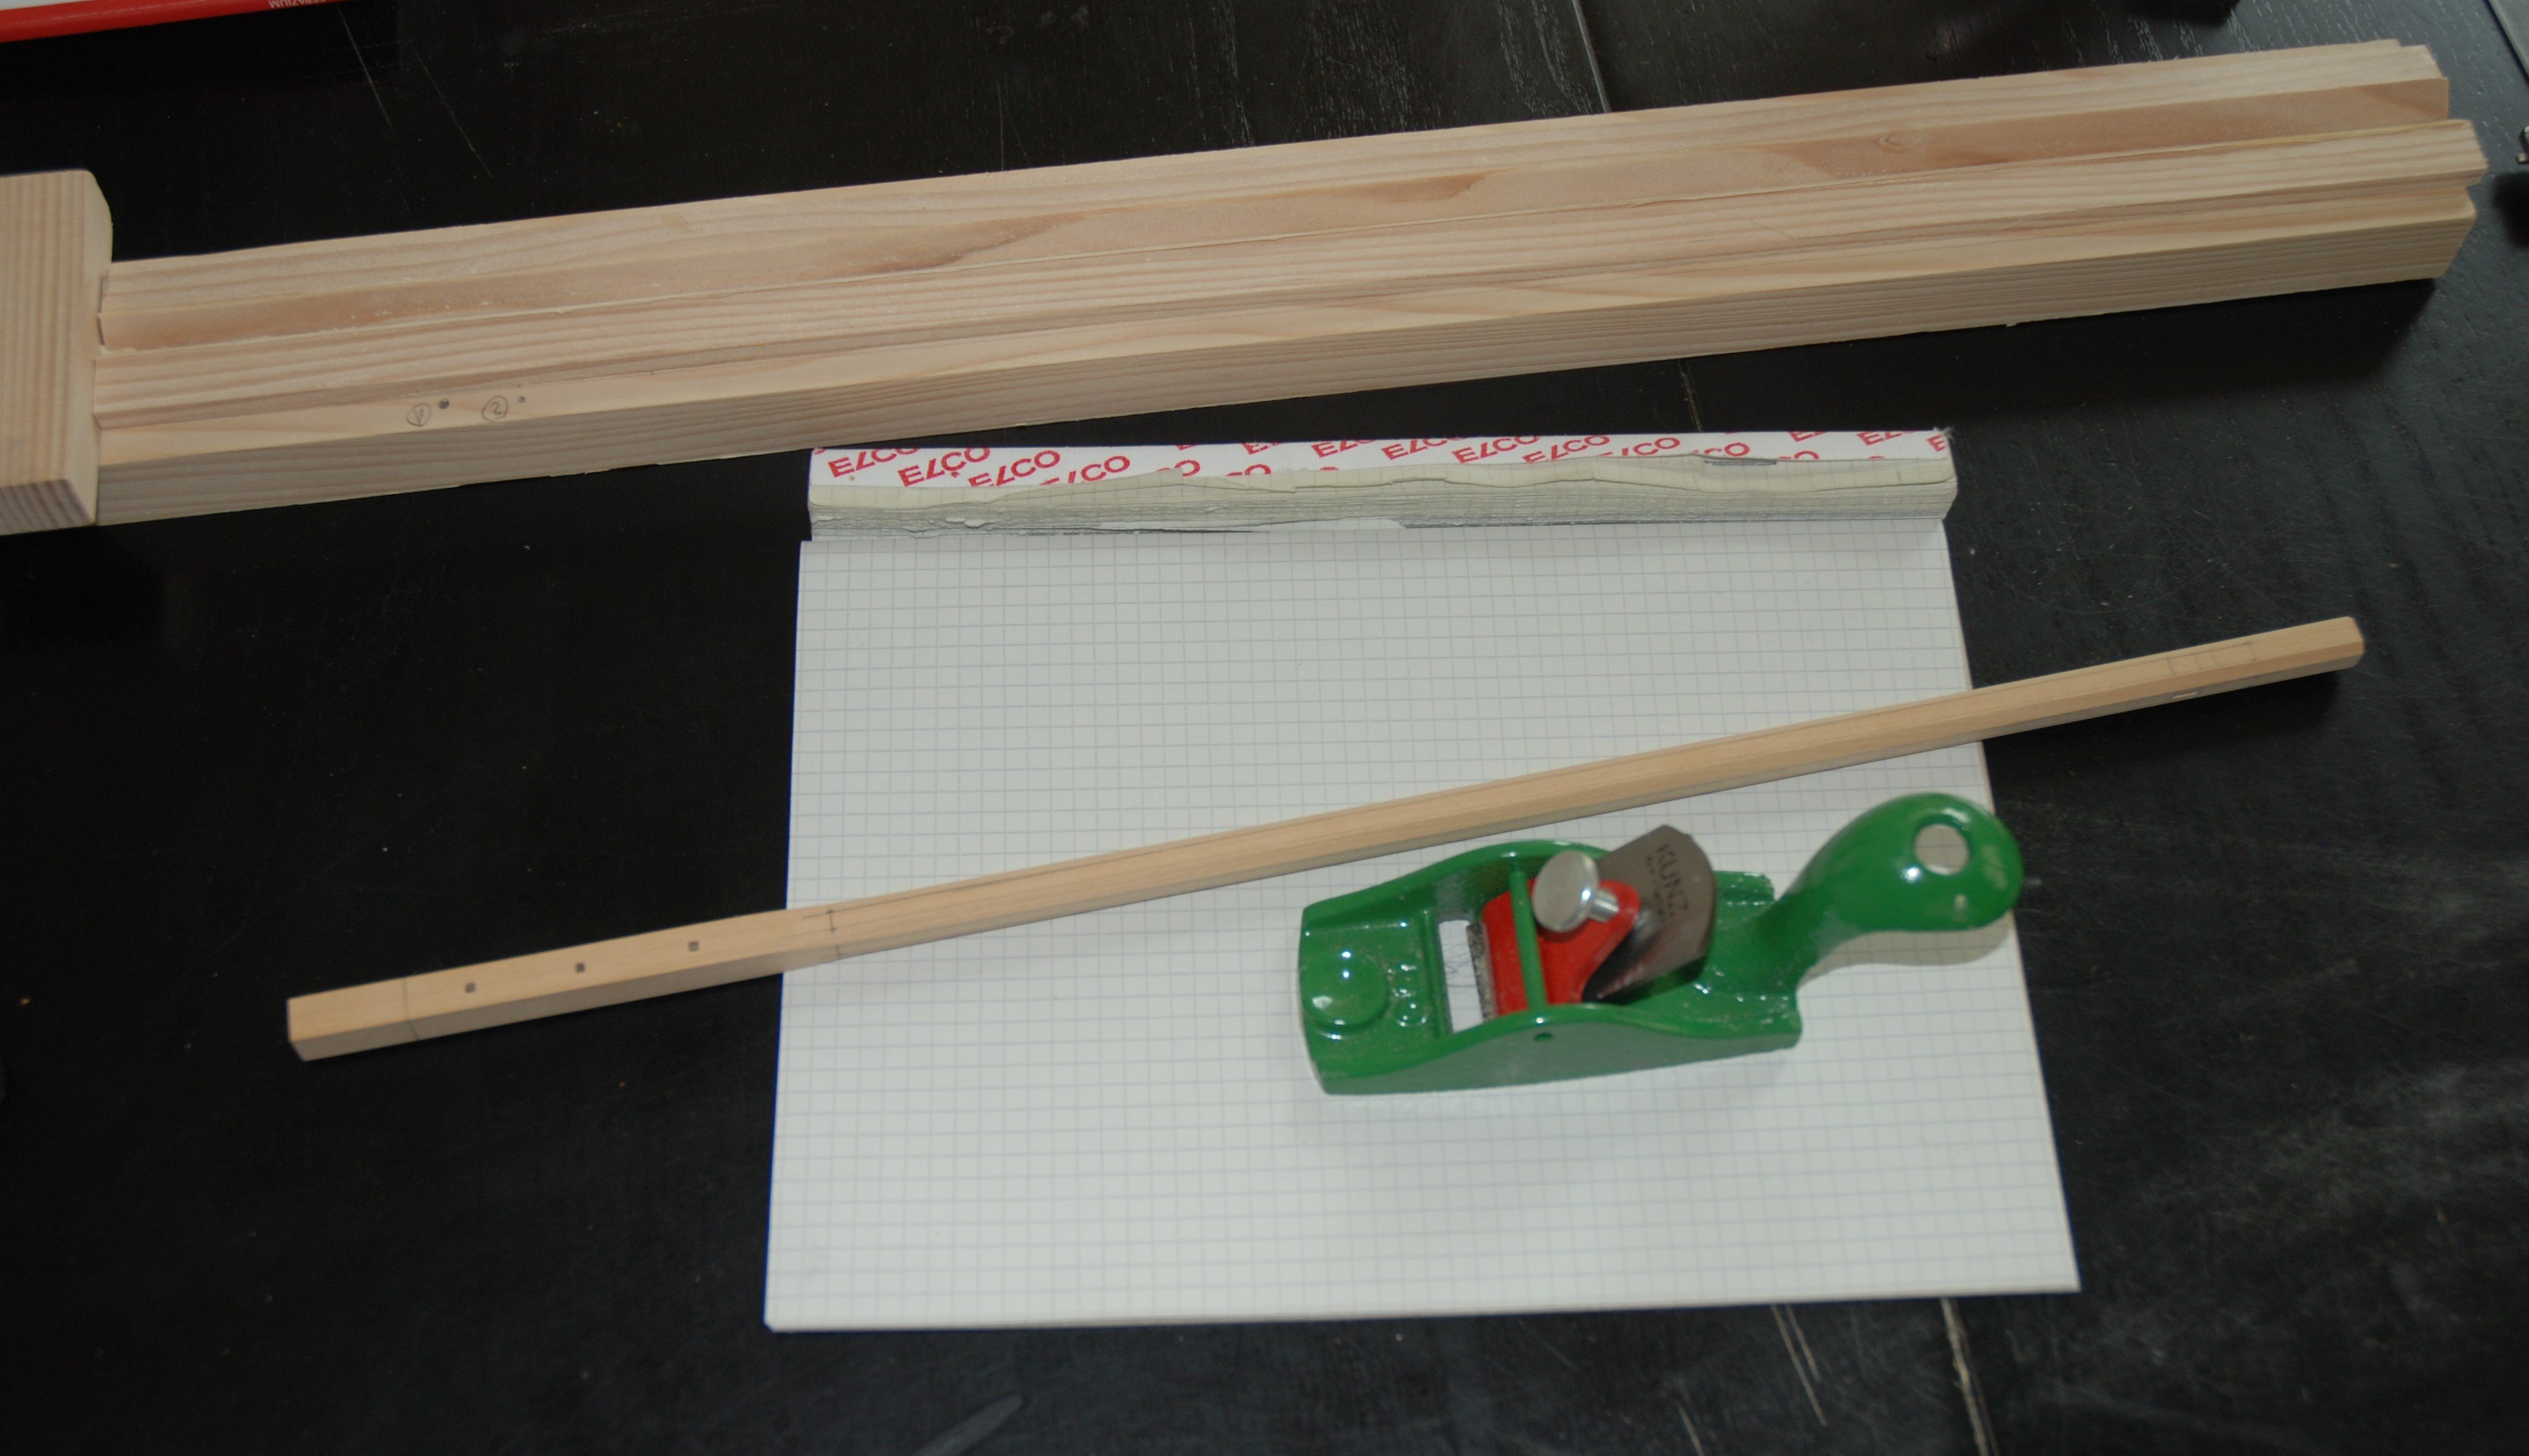
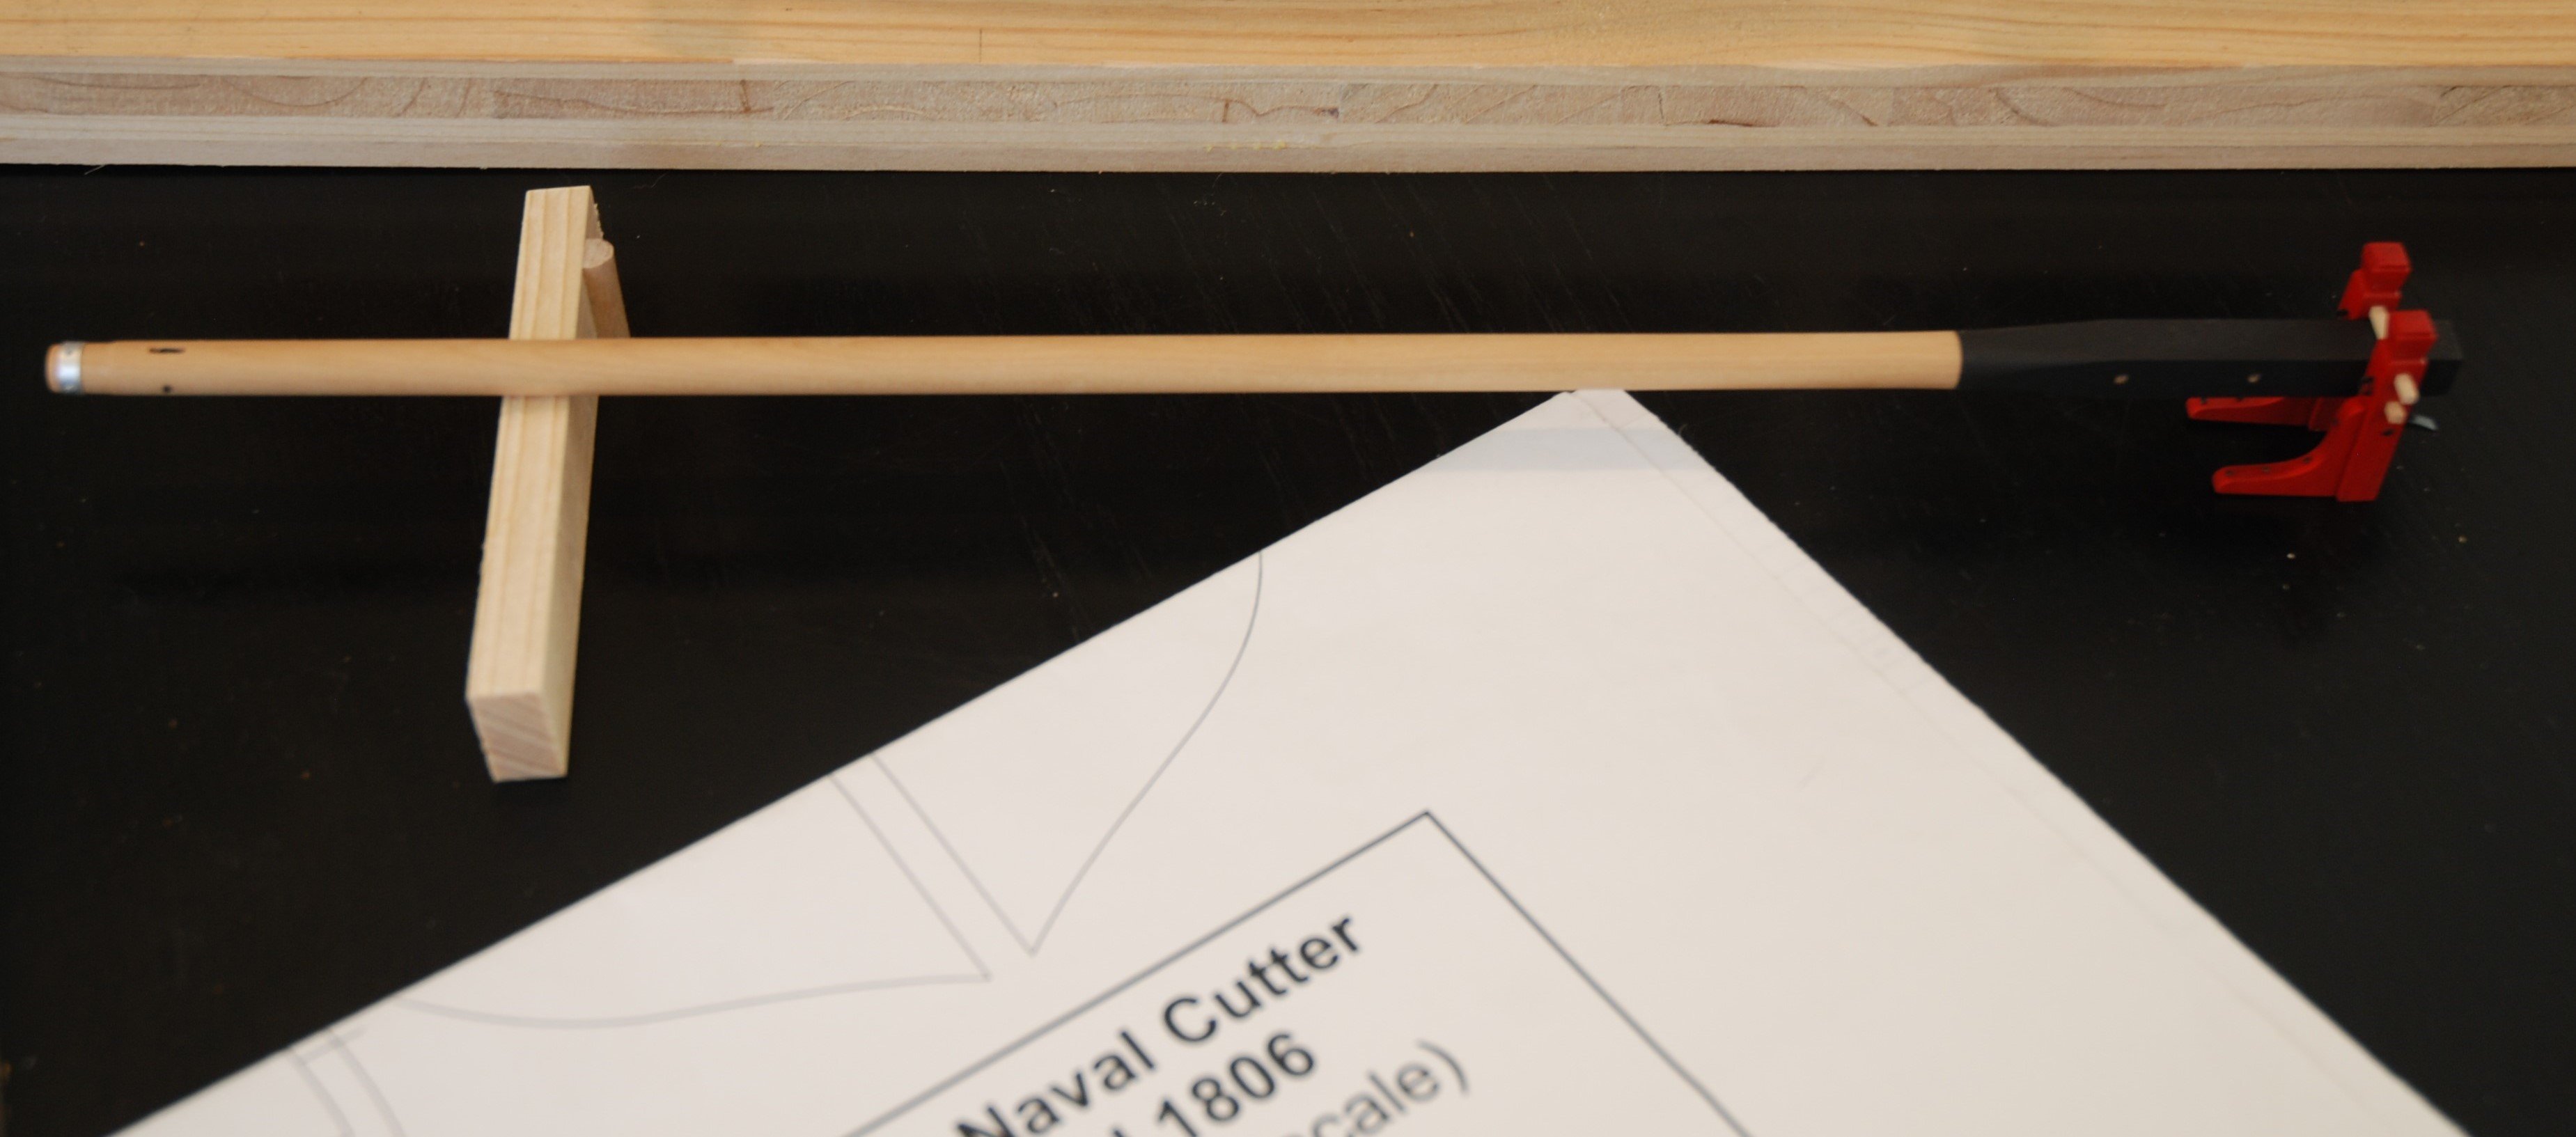
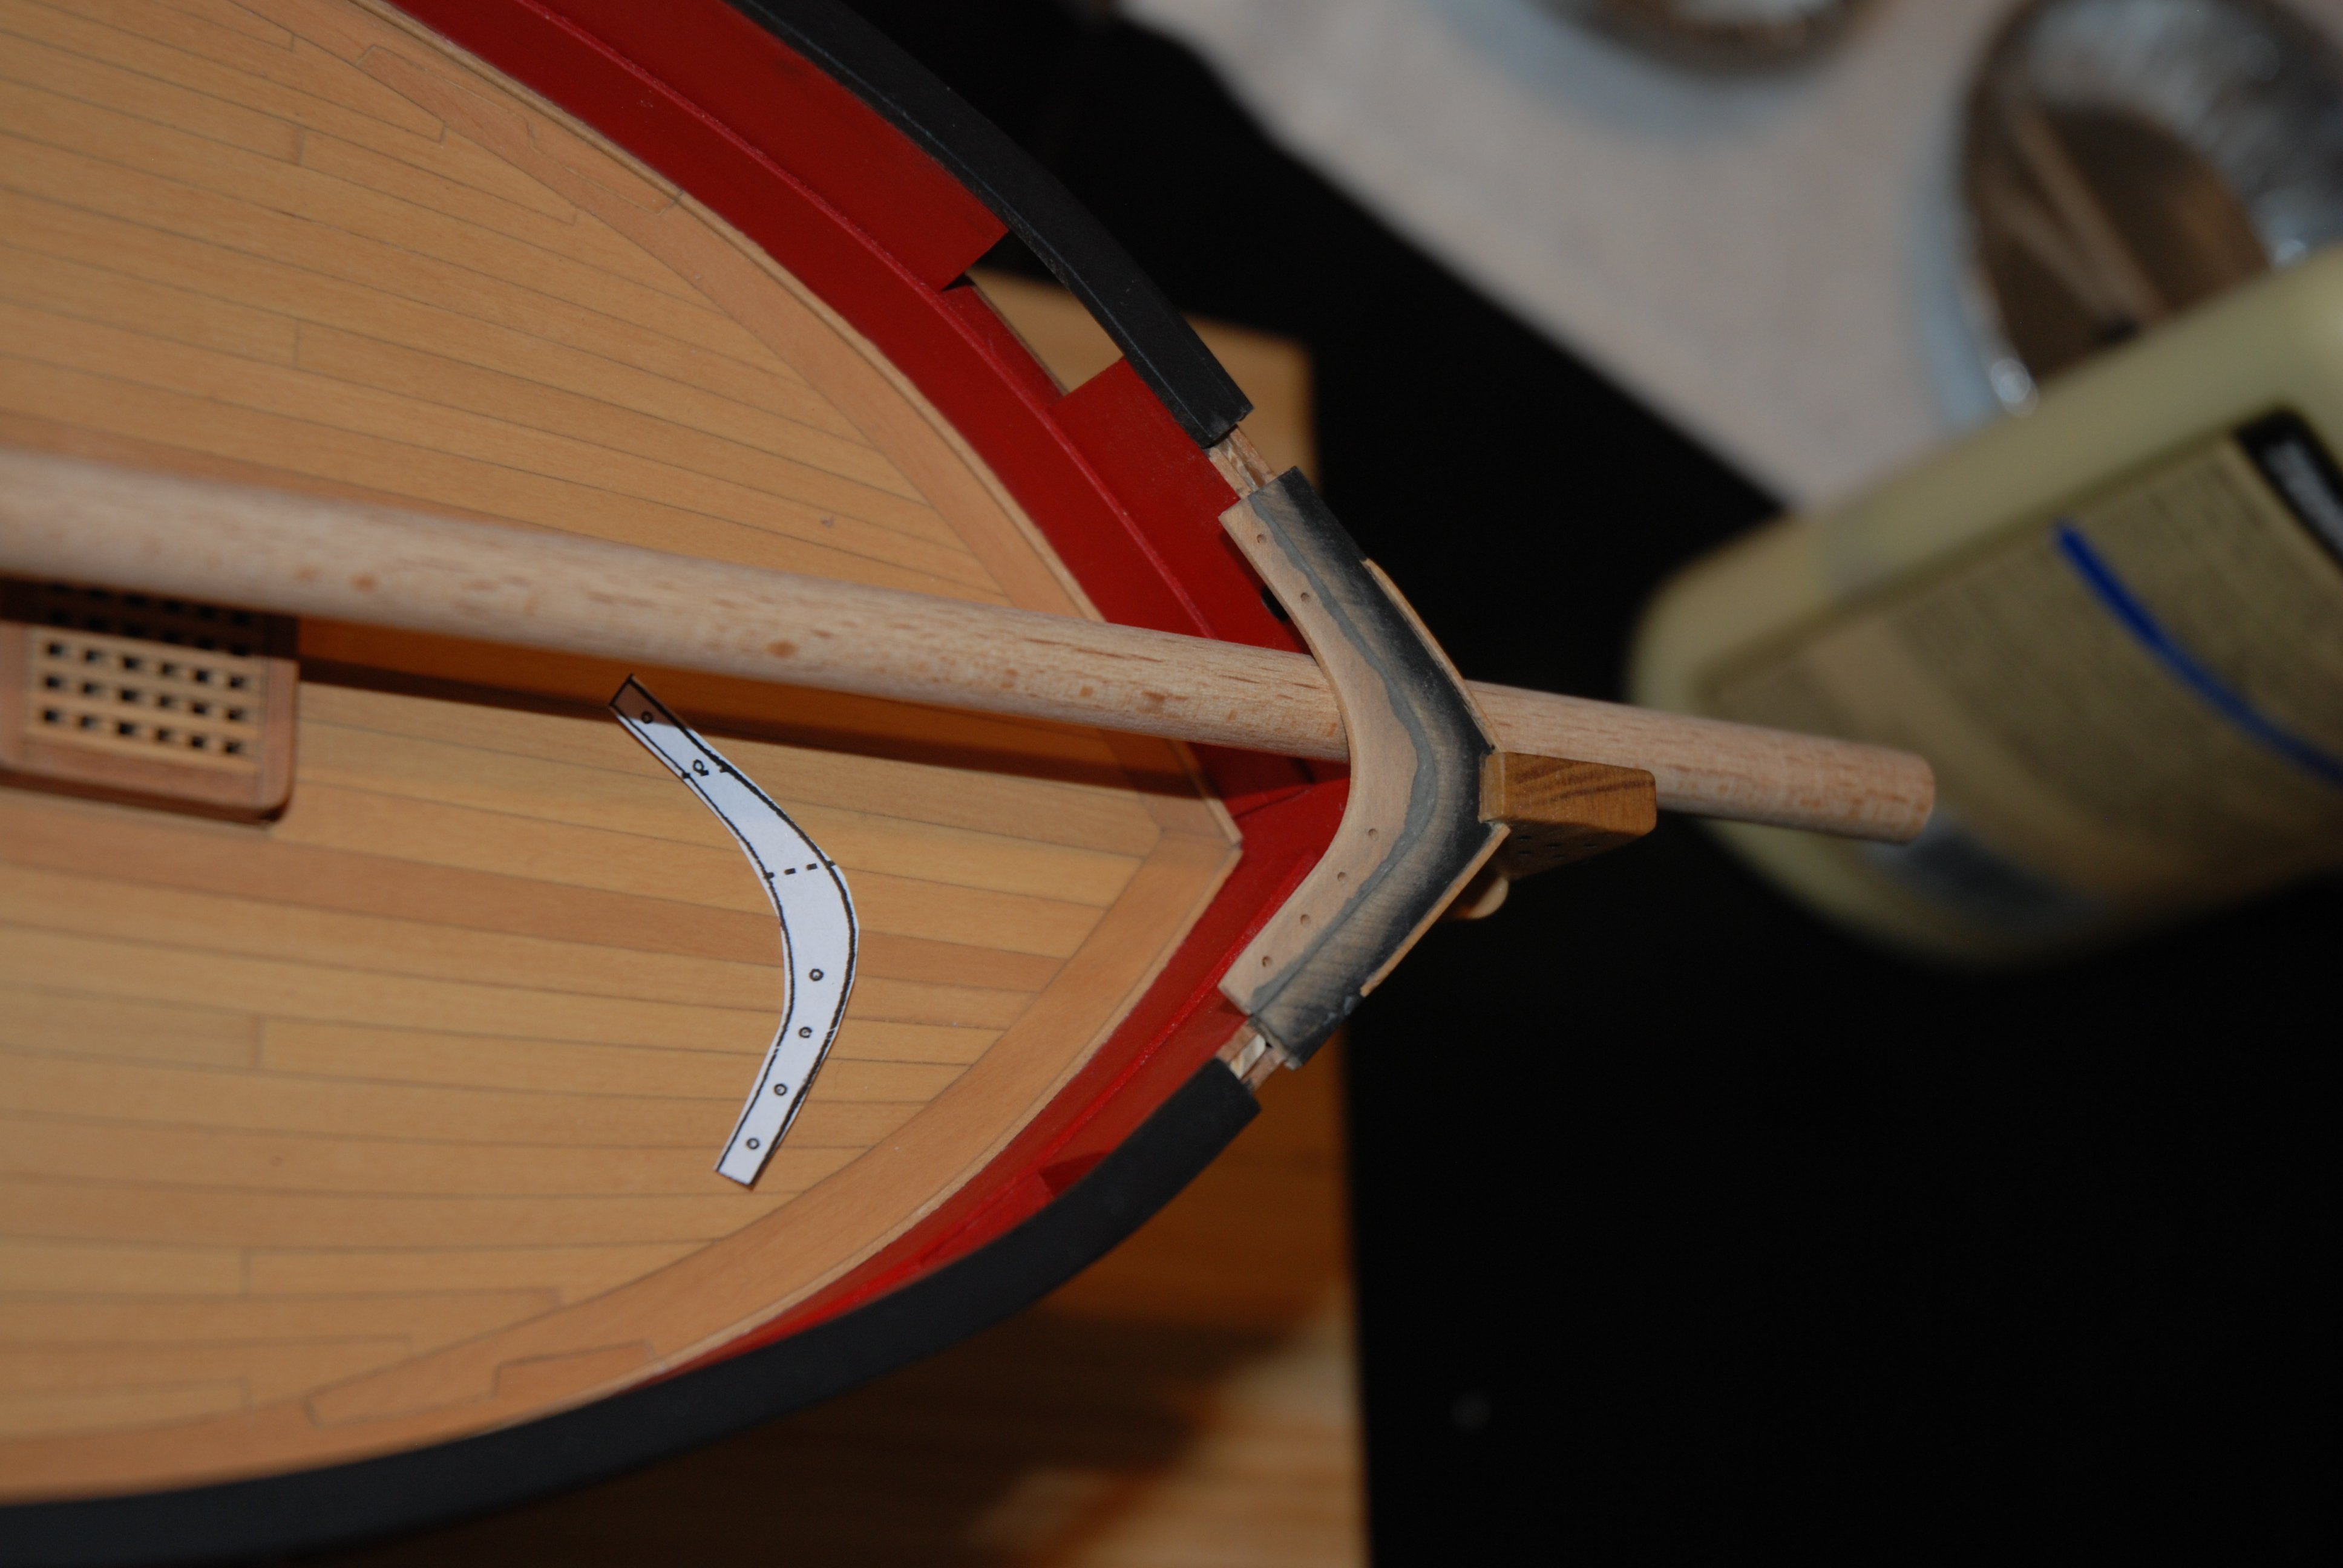
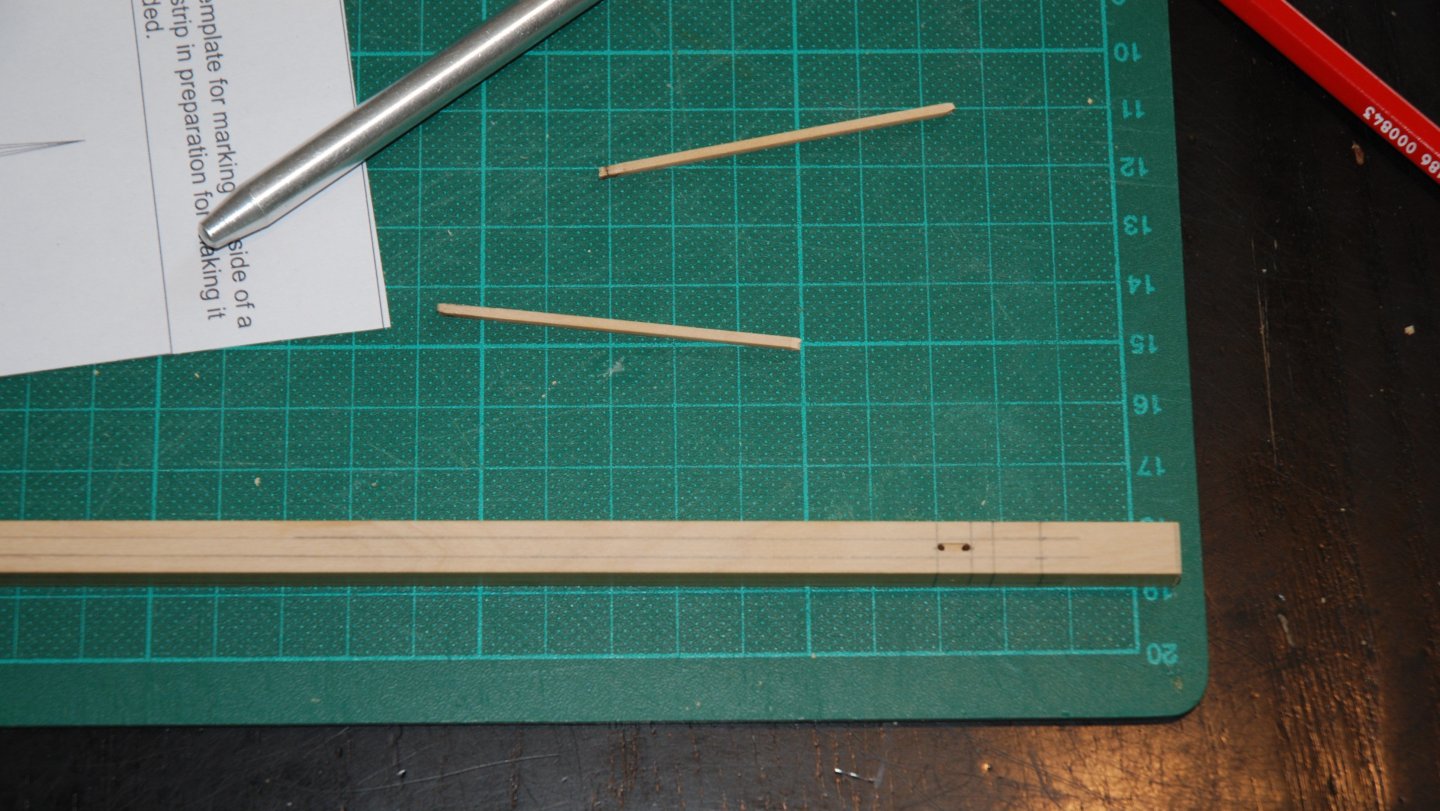
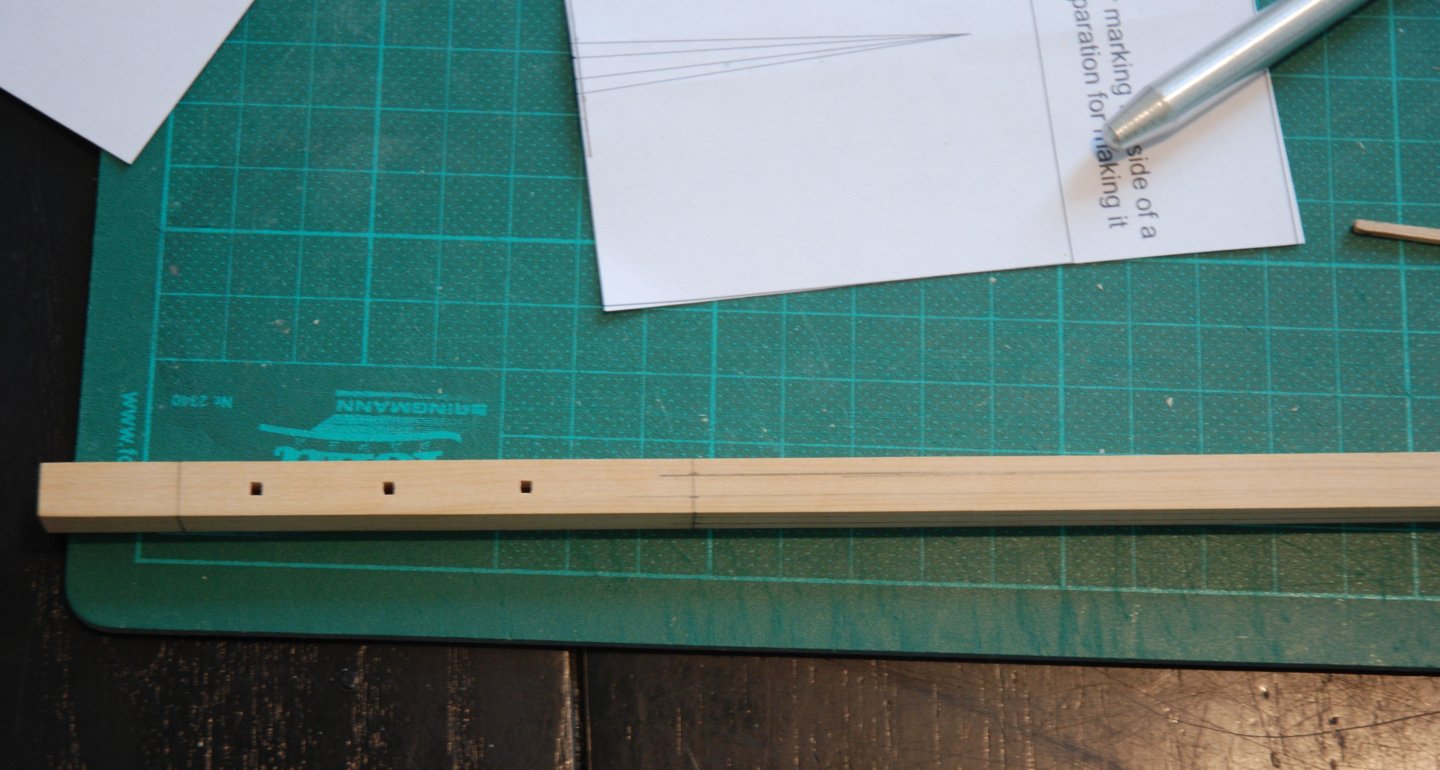
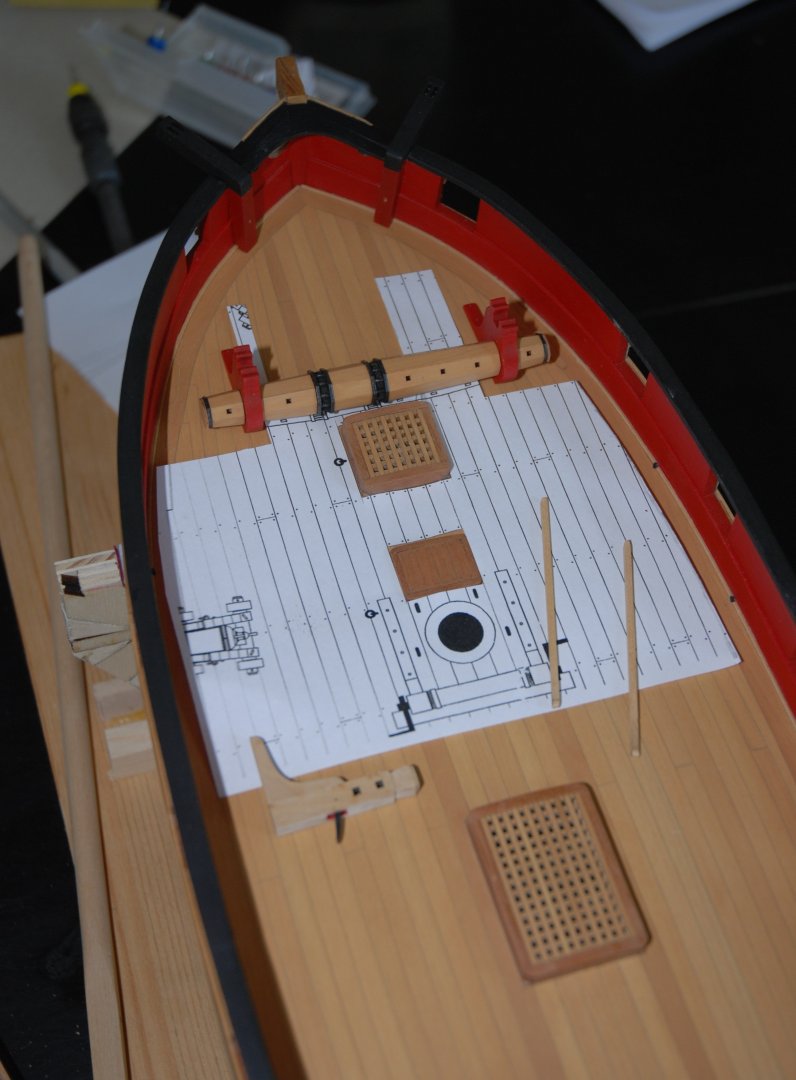
Thank you to all the 'Likes'. I decide to prepare the bowsprit next. I faithfully follow the process described in the instruction manual, which is really excellent. Just take the time to read and re-read the instructions... I draw the lines that delimit the different sections of the bowsprit, as well as the lines of the 7-10-7 ratio that will allow me to round off the bowsprit. The various holes are drilled at this point, because it's easier to drill them perpendicularly on a square part... I simulate the sheave. The three square holes are shaped and tested for size using a good-sized boxwood section. To round off the round section of the bowsprit, I use a holder and a mini planer. I based myself on a drawing found on page 13 of the excellent book 'The Fully Framed Model' (TFFM) - Volume IV, written by David Antscherl, which describes precisely how to build masts and yards. The tool is referred to as 'Holder for planing masts and spars eight-square'. Finally, I finish off the shaping with a sheet of sandpaper and my small Proxxon DB250 woodturning lathe. The bowprit step comes from the Syren kit and is a little wonder to assemble. As precise and well thought-out as ever. I finish by coloring the various parts and elements that need it, and then do a blank edit to validate the whole. But before installing the bowsprit, I'm going to build and fix the two long guns. I'll have more space to fit them... To be continued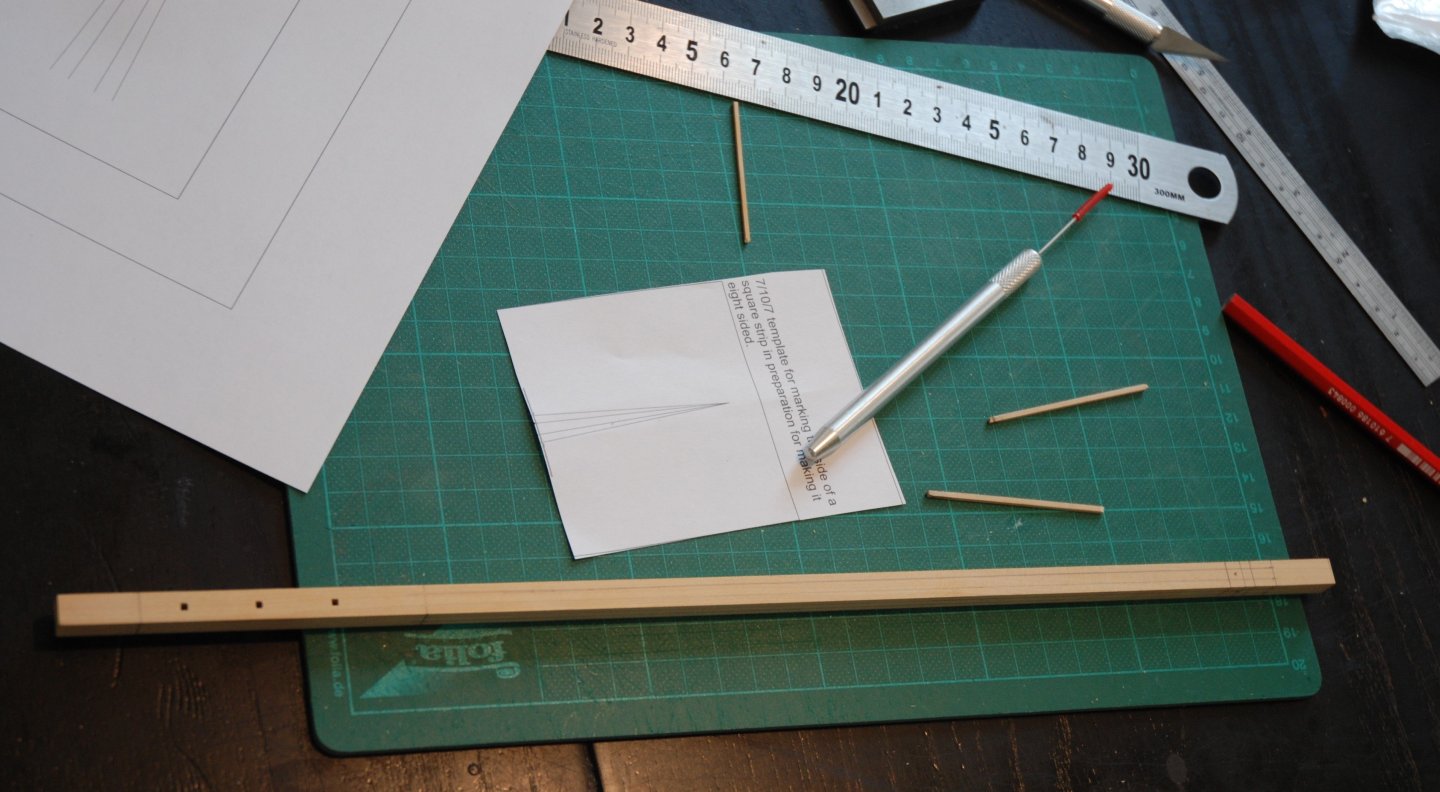


-
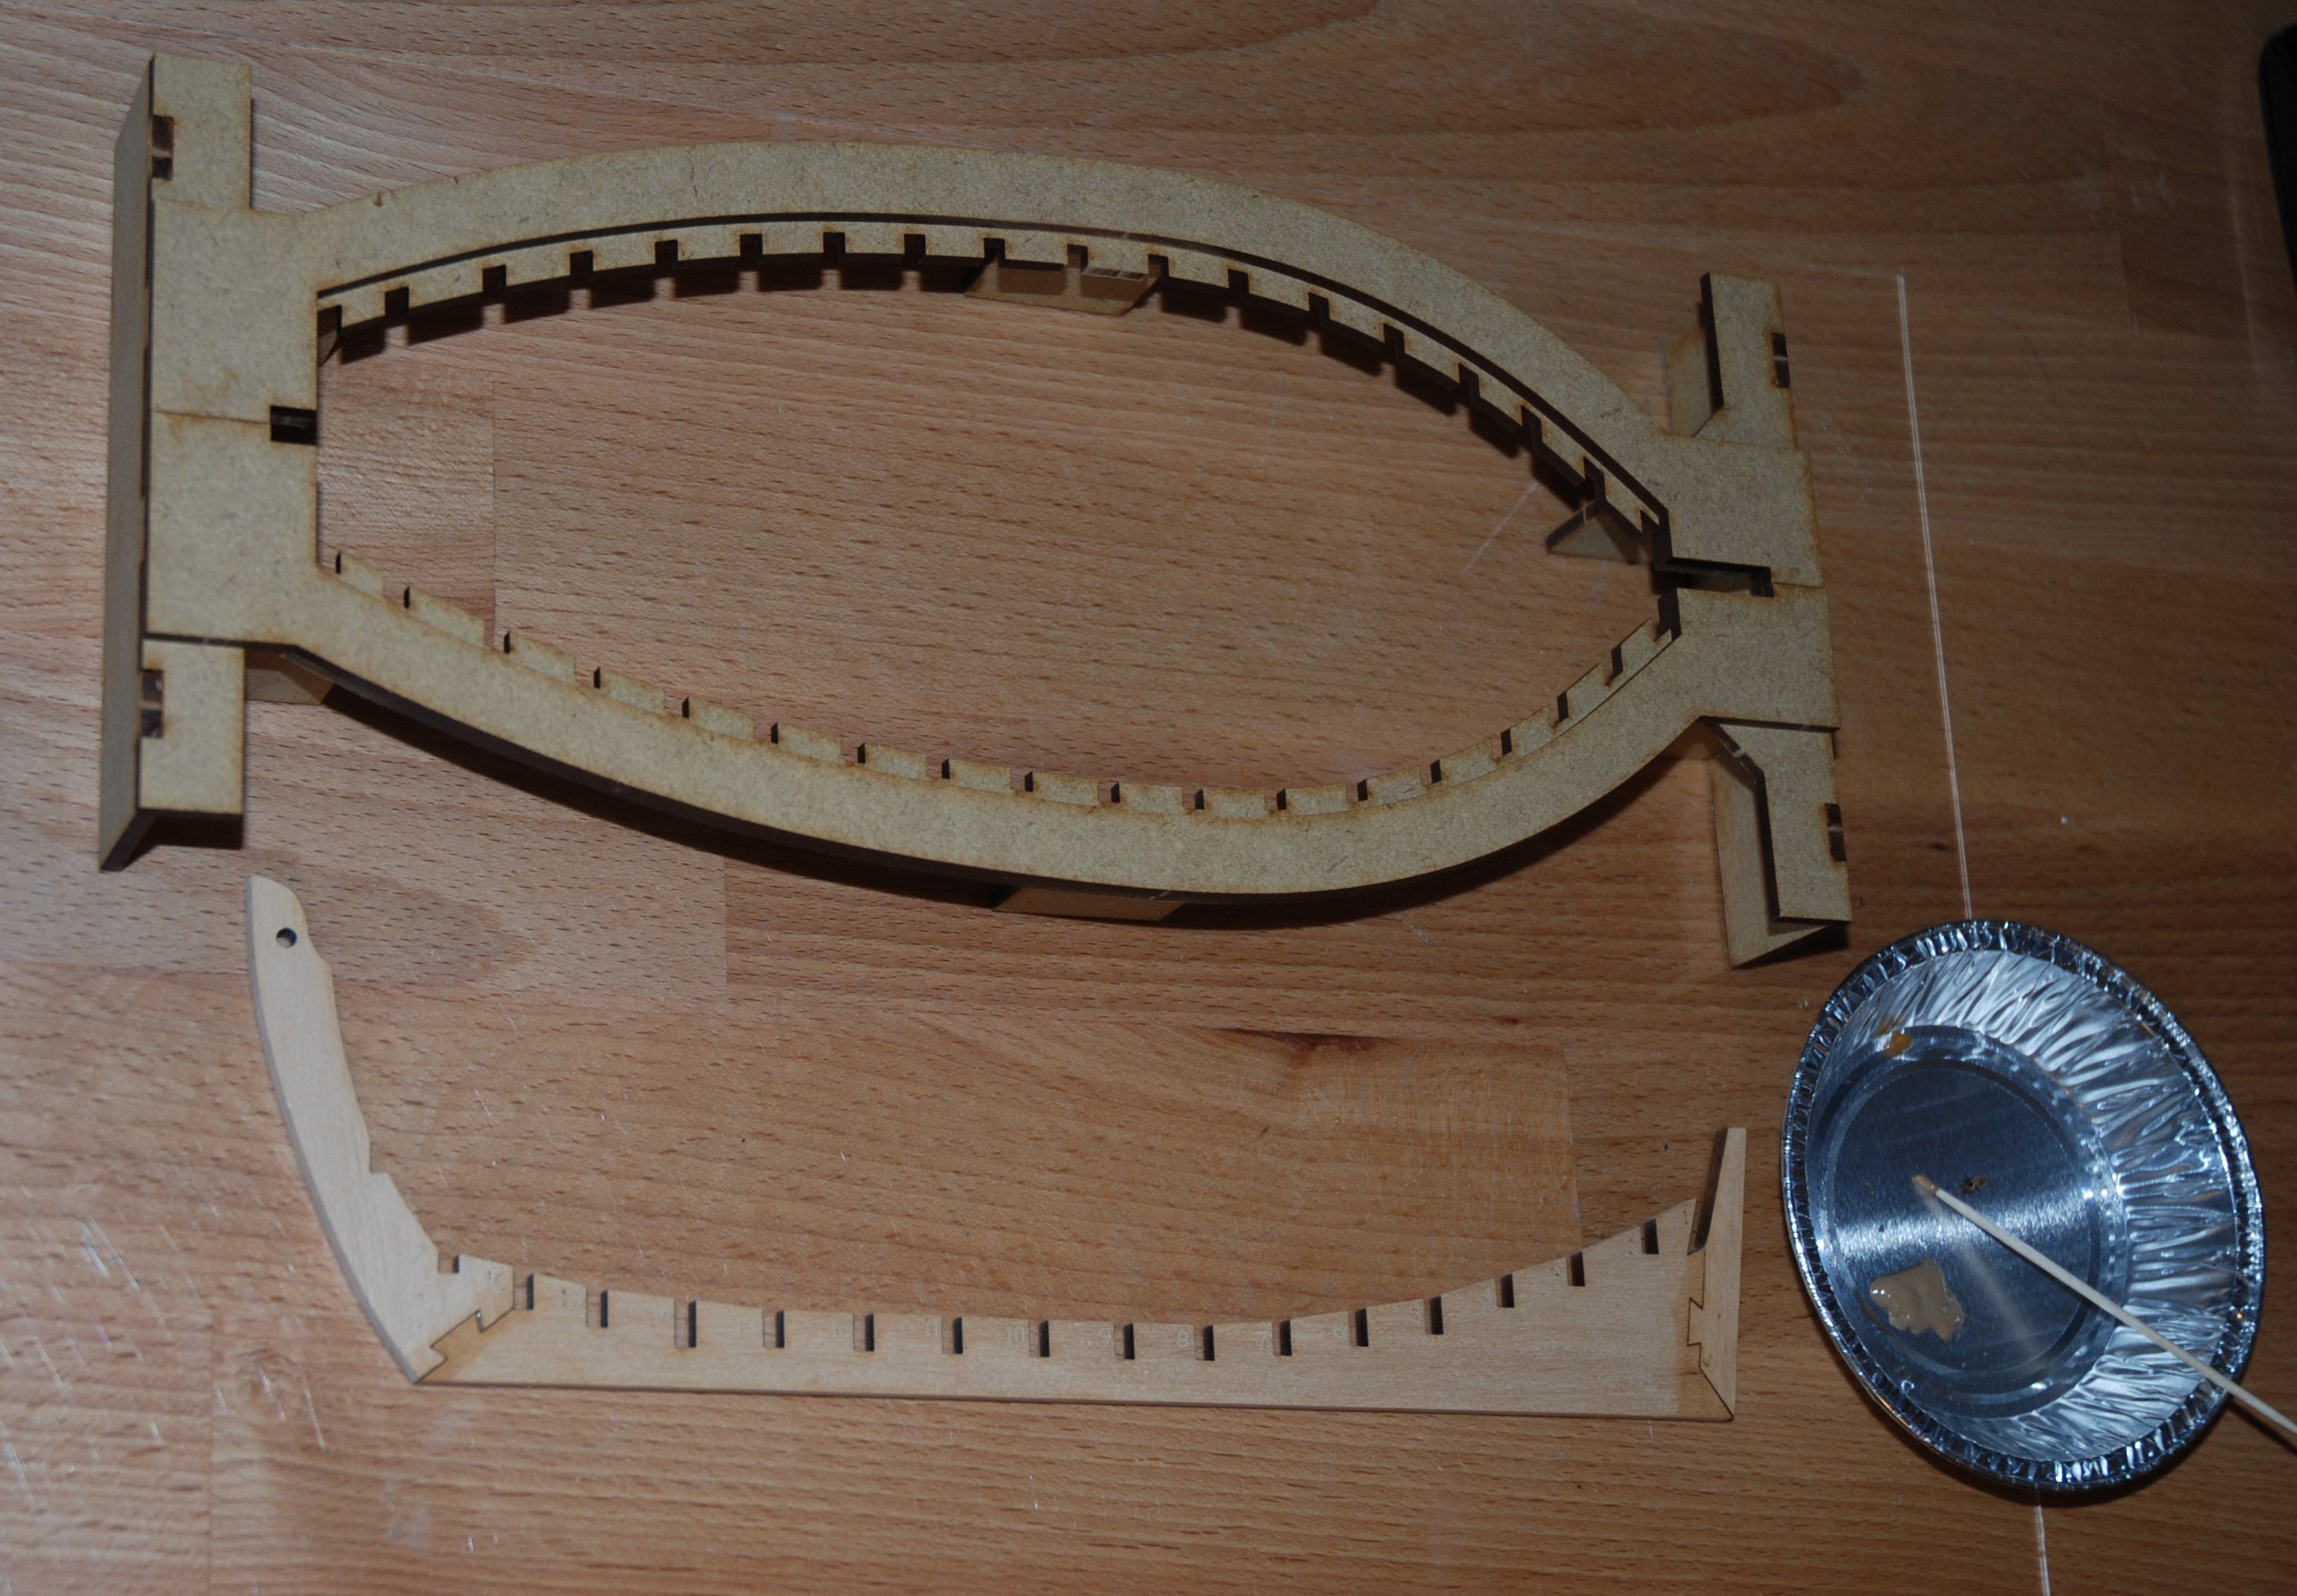
Thank You to all the 'Likes'. Boat building begins with the keel. As you can see from the photo below, the laser burn marks are not very pronounced. The cut is fine and precise. First, however, I remove the burn marks by sanding down with a sheet of sandpaper before taking out the various parts of the keel. It's easier to get even, precise sanding this way, and above all it avoids rounding off the corners of the parts. The three keel components are easily removed from the board. The three keel elements are assembled and glued. I use special Titebond 'Dark Wood Glue'. This will slightly accentuate the joint between the different elements. The keel is inserted into the work cradle To be continued.


- 22 replies
-
- 5
-
-
- ships boat
- Korabel
- (and 1 more)
-
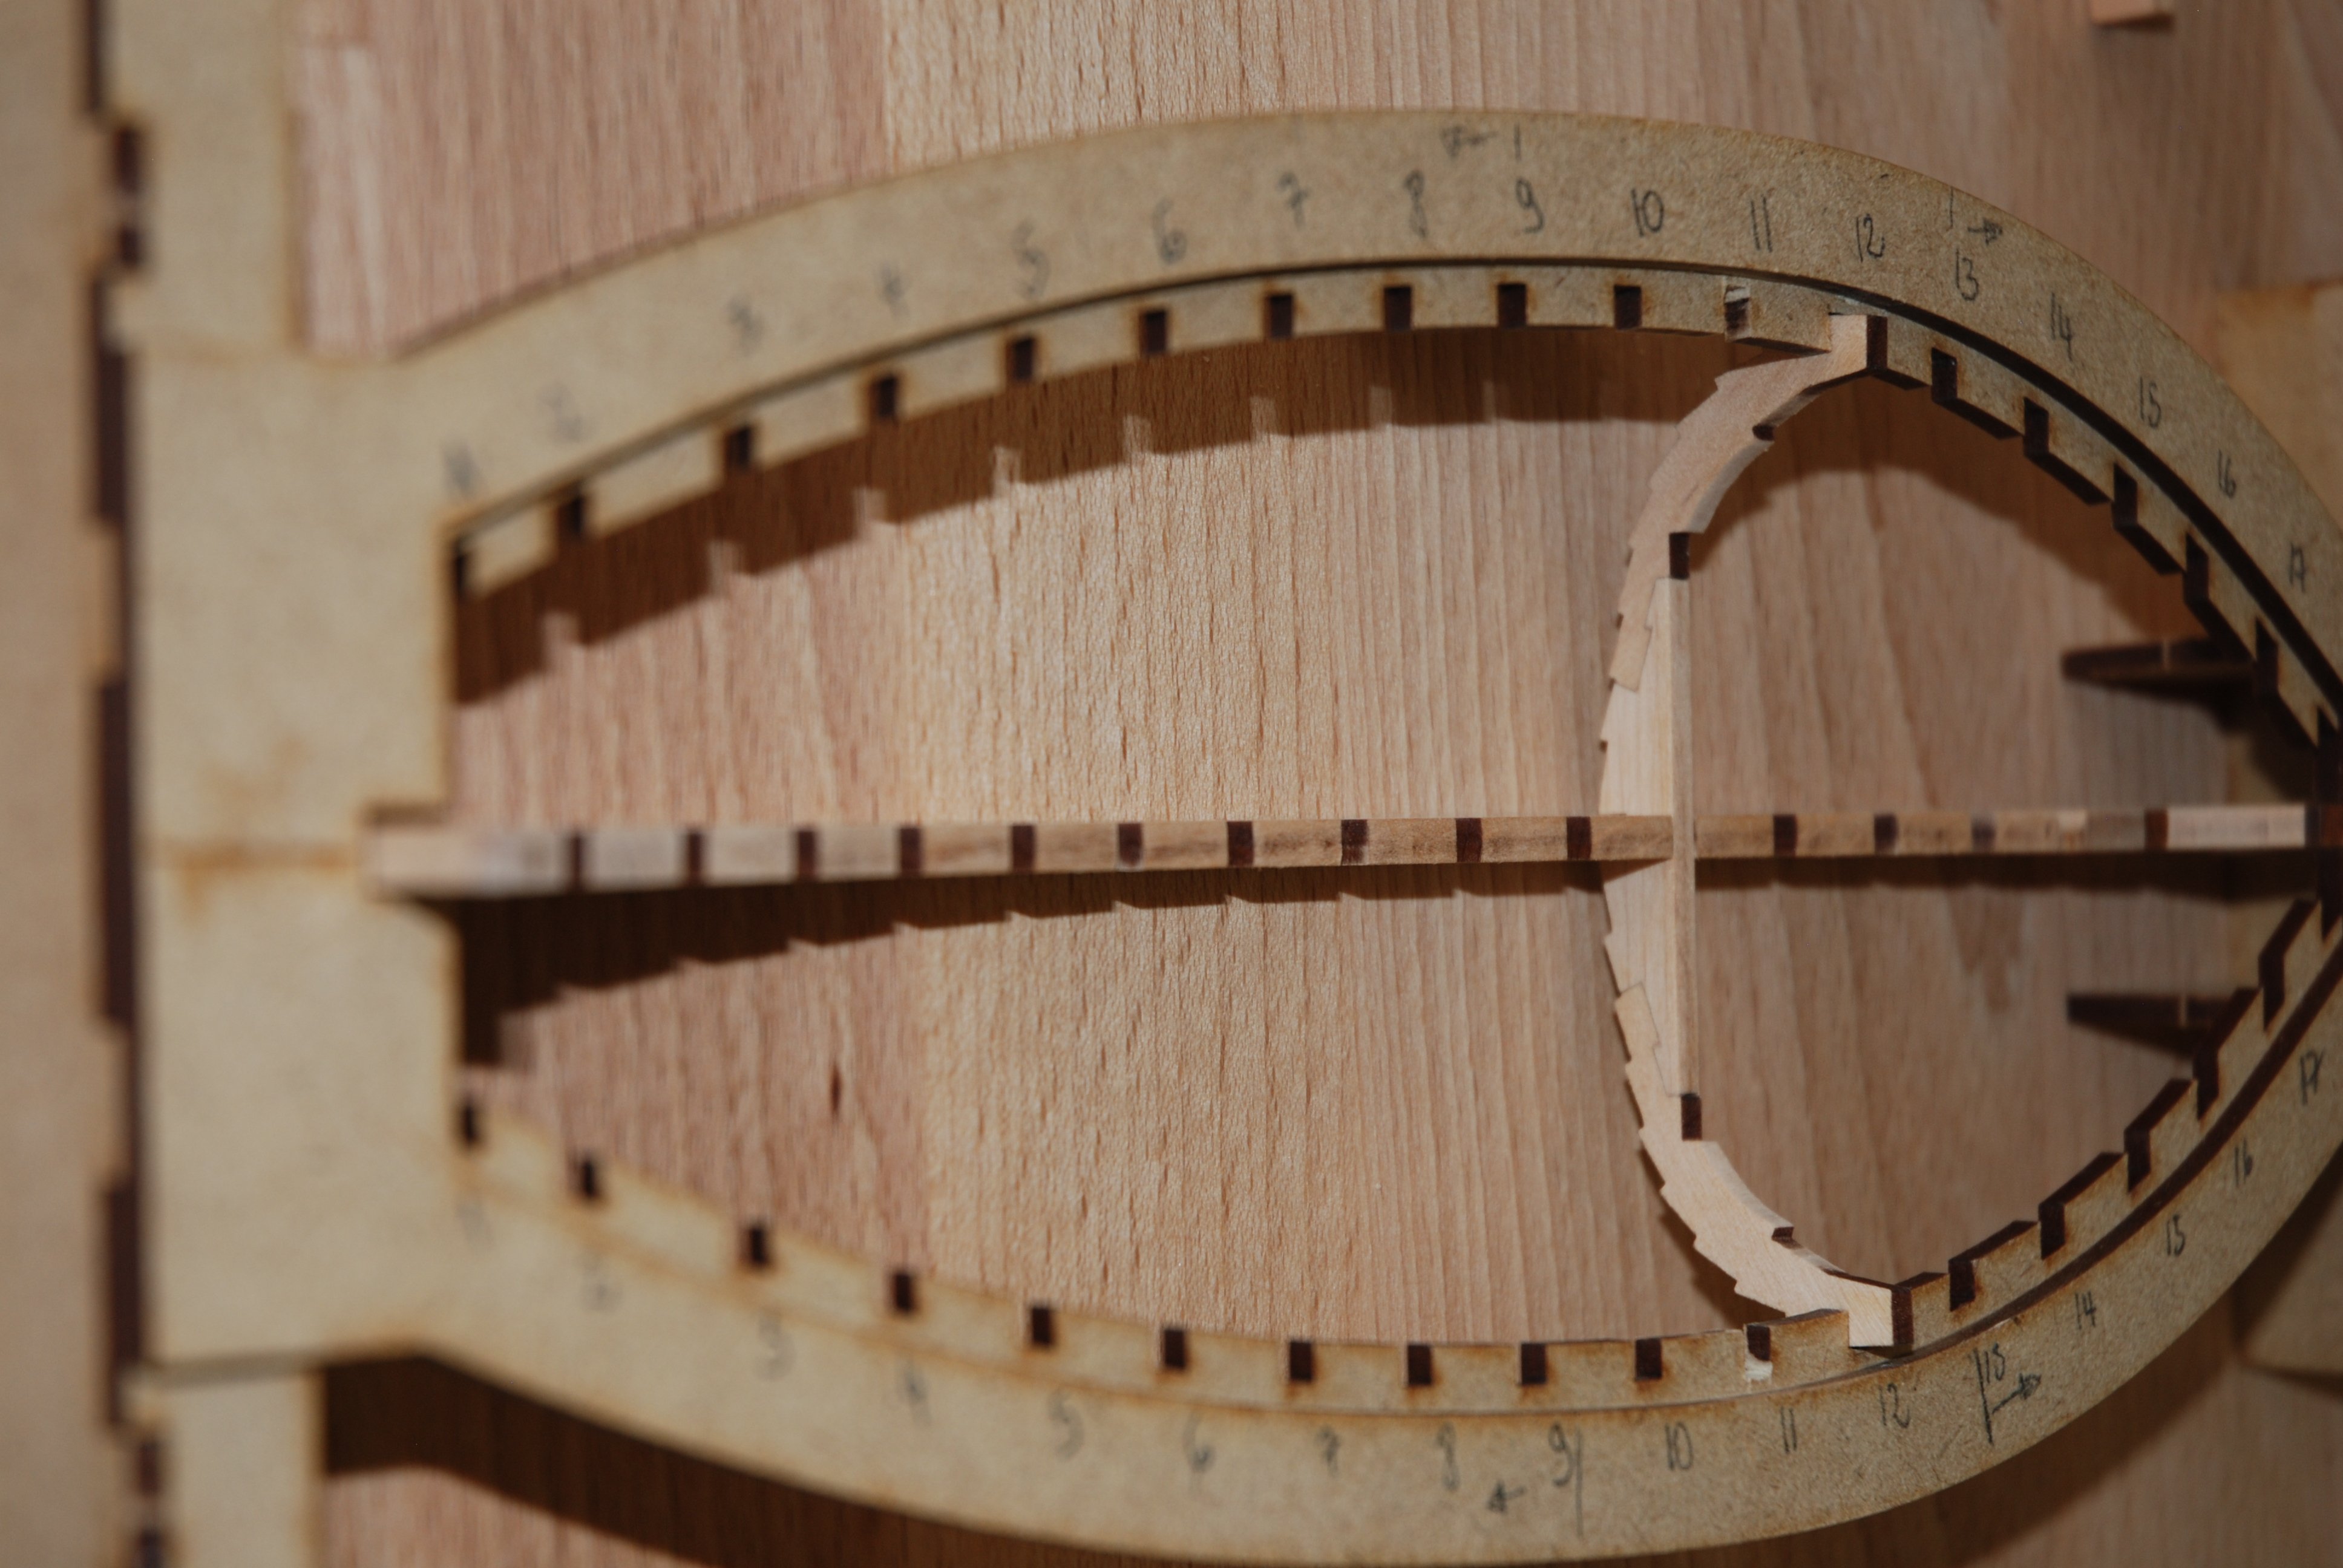
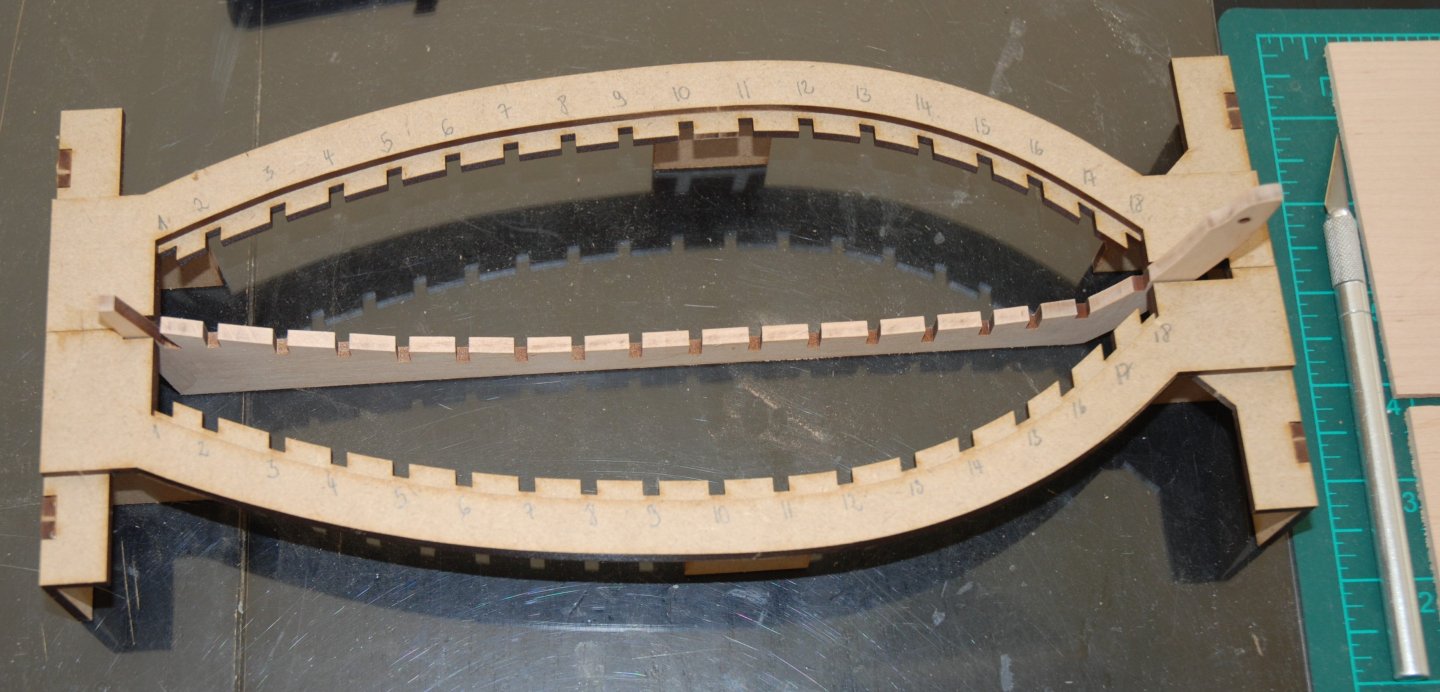
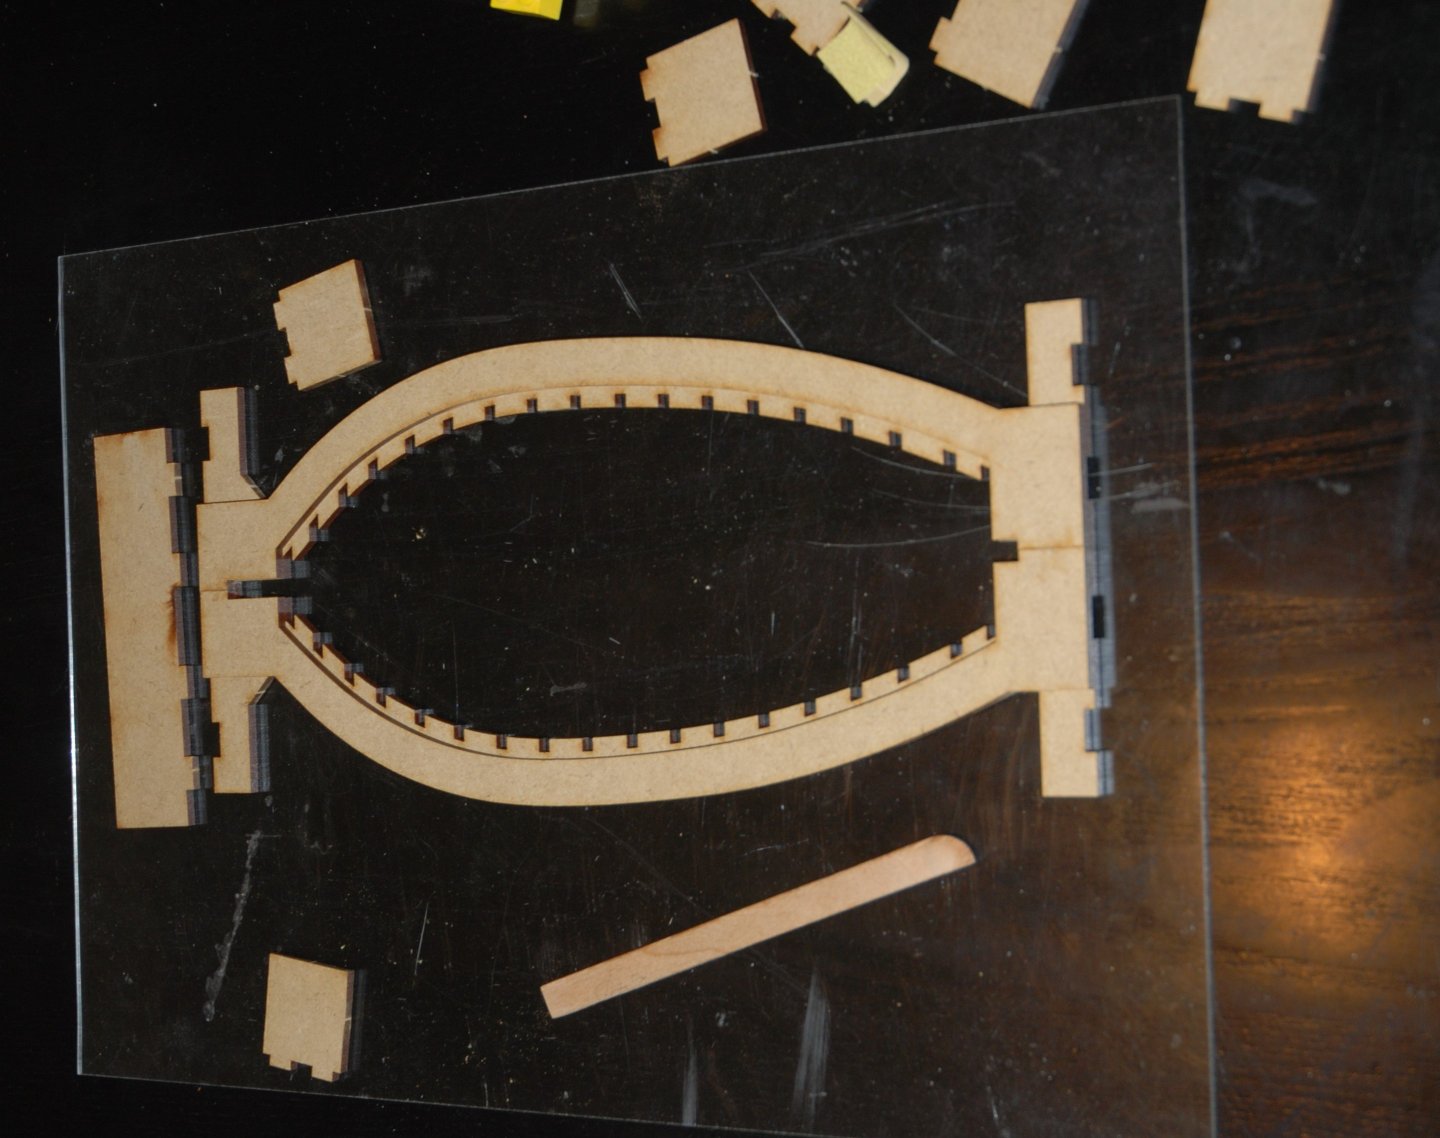
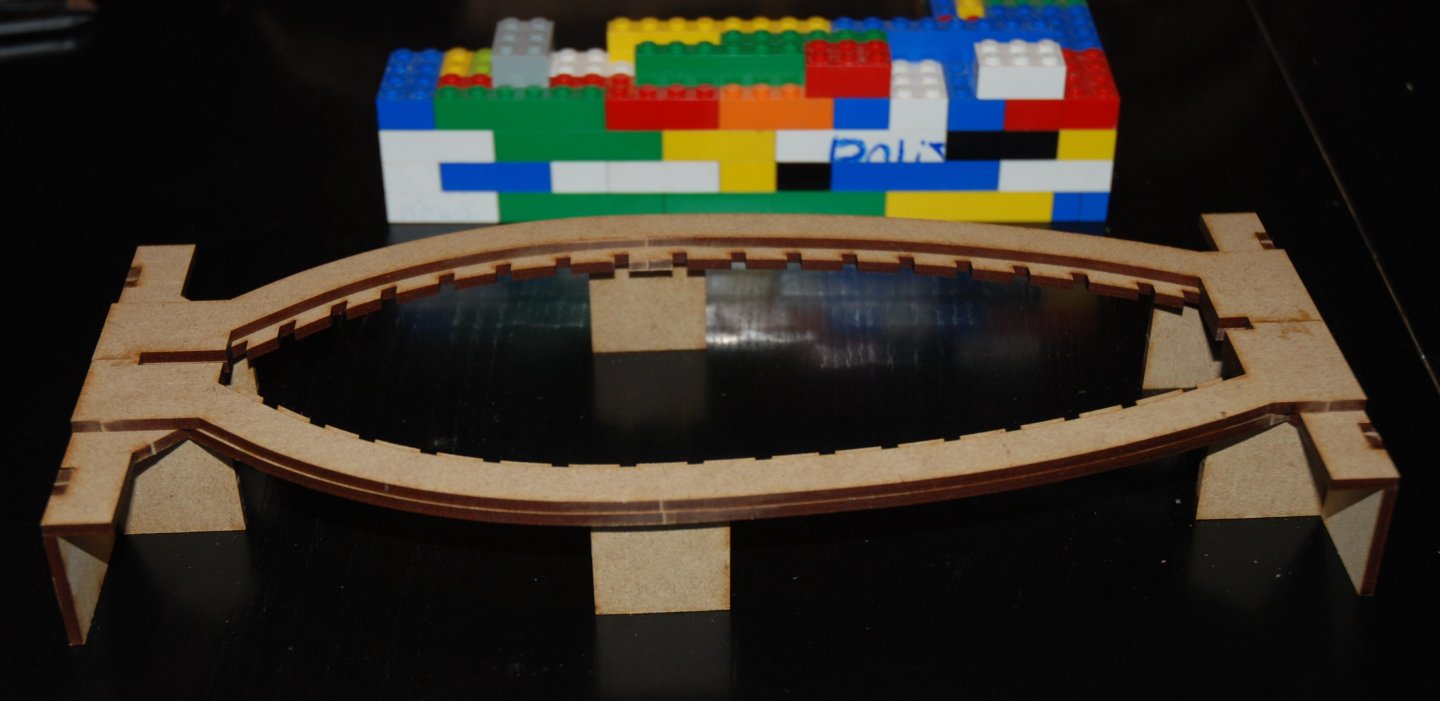
Thank You to all the 'Likes'. To help me in my build, I watched, as the model progressed, the various videos on a YouTube playlist made available by a Ukrainian modeler. I don't speak Russian, but all you need to do is activate the subtitles and their automatic translation into your mother tongue. Automatic translators have made enormous progress, and it's easy to understand the various steps. Here's a link to the YouTube playlist Play list 'Santa Maria' - 13 videos Construction has begun on the base for the boat's frame. Here's a quick photo summary of the build. To be continued


- 22 replies
-
- 7
-
-
- ships boat
- Korabel
- (and 1 more)
-
HM Cutter Cheerful 1806 by JpR62 - 1:48 scale
JpR62 replied to JpR62's topic in - Build logs for subjects built 1801 - 1850
Thanks JJ! My retirement is very recent (July) and during the summer my two children were at home because it was the school summer break. But as of next week, they'll be back at university and that's when I'll have plenty of time! 😄 -
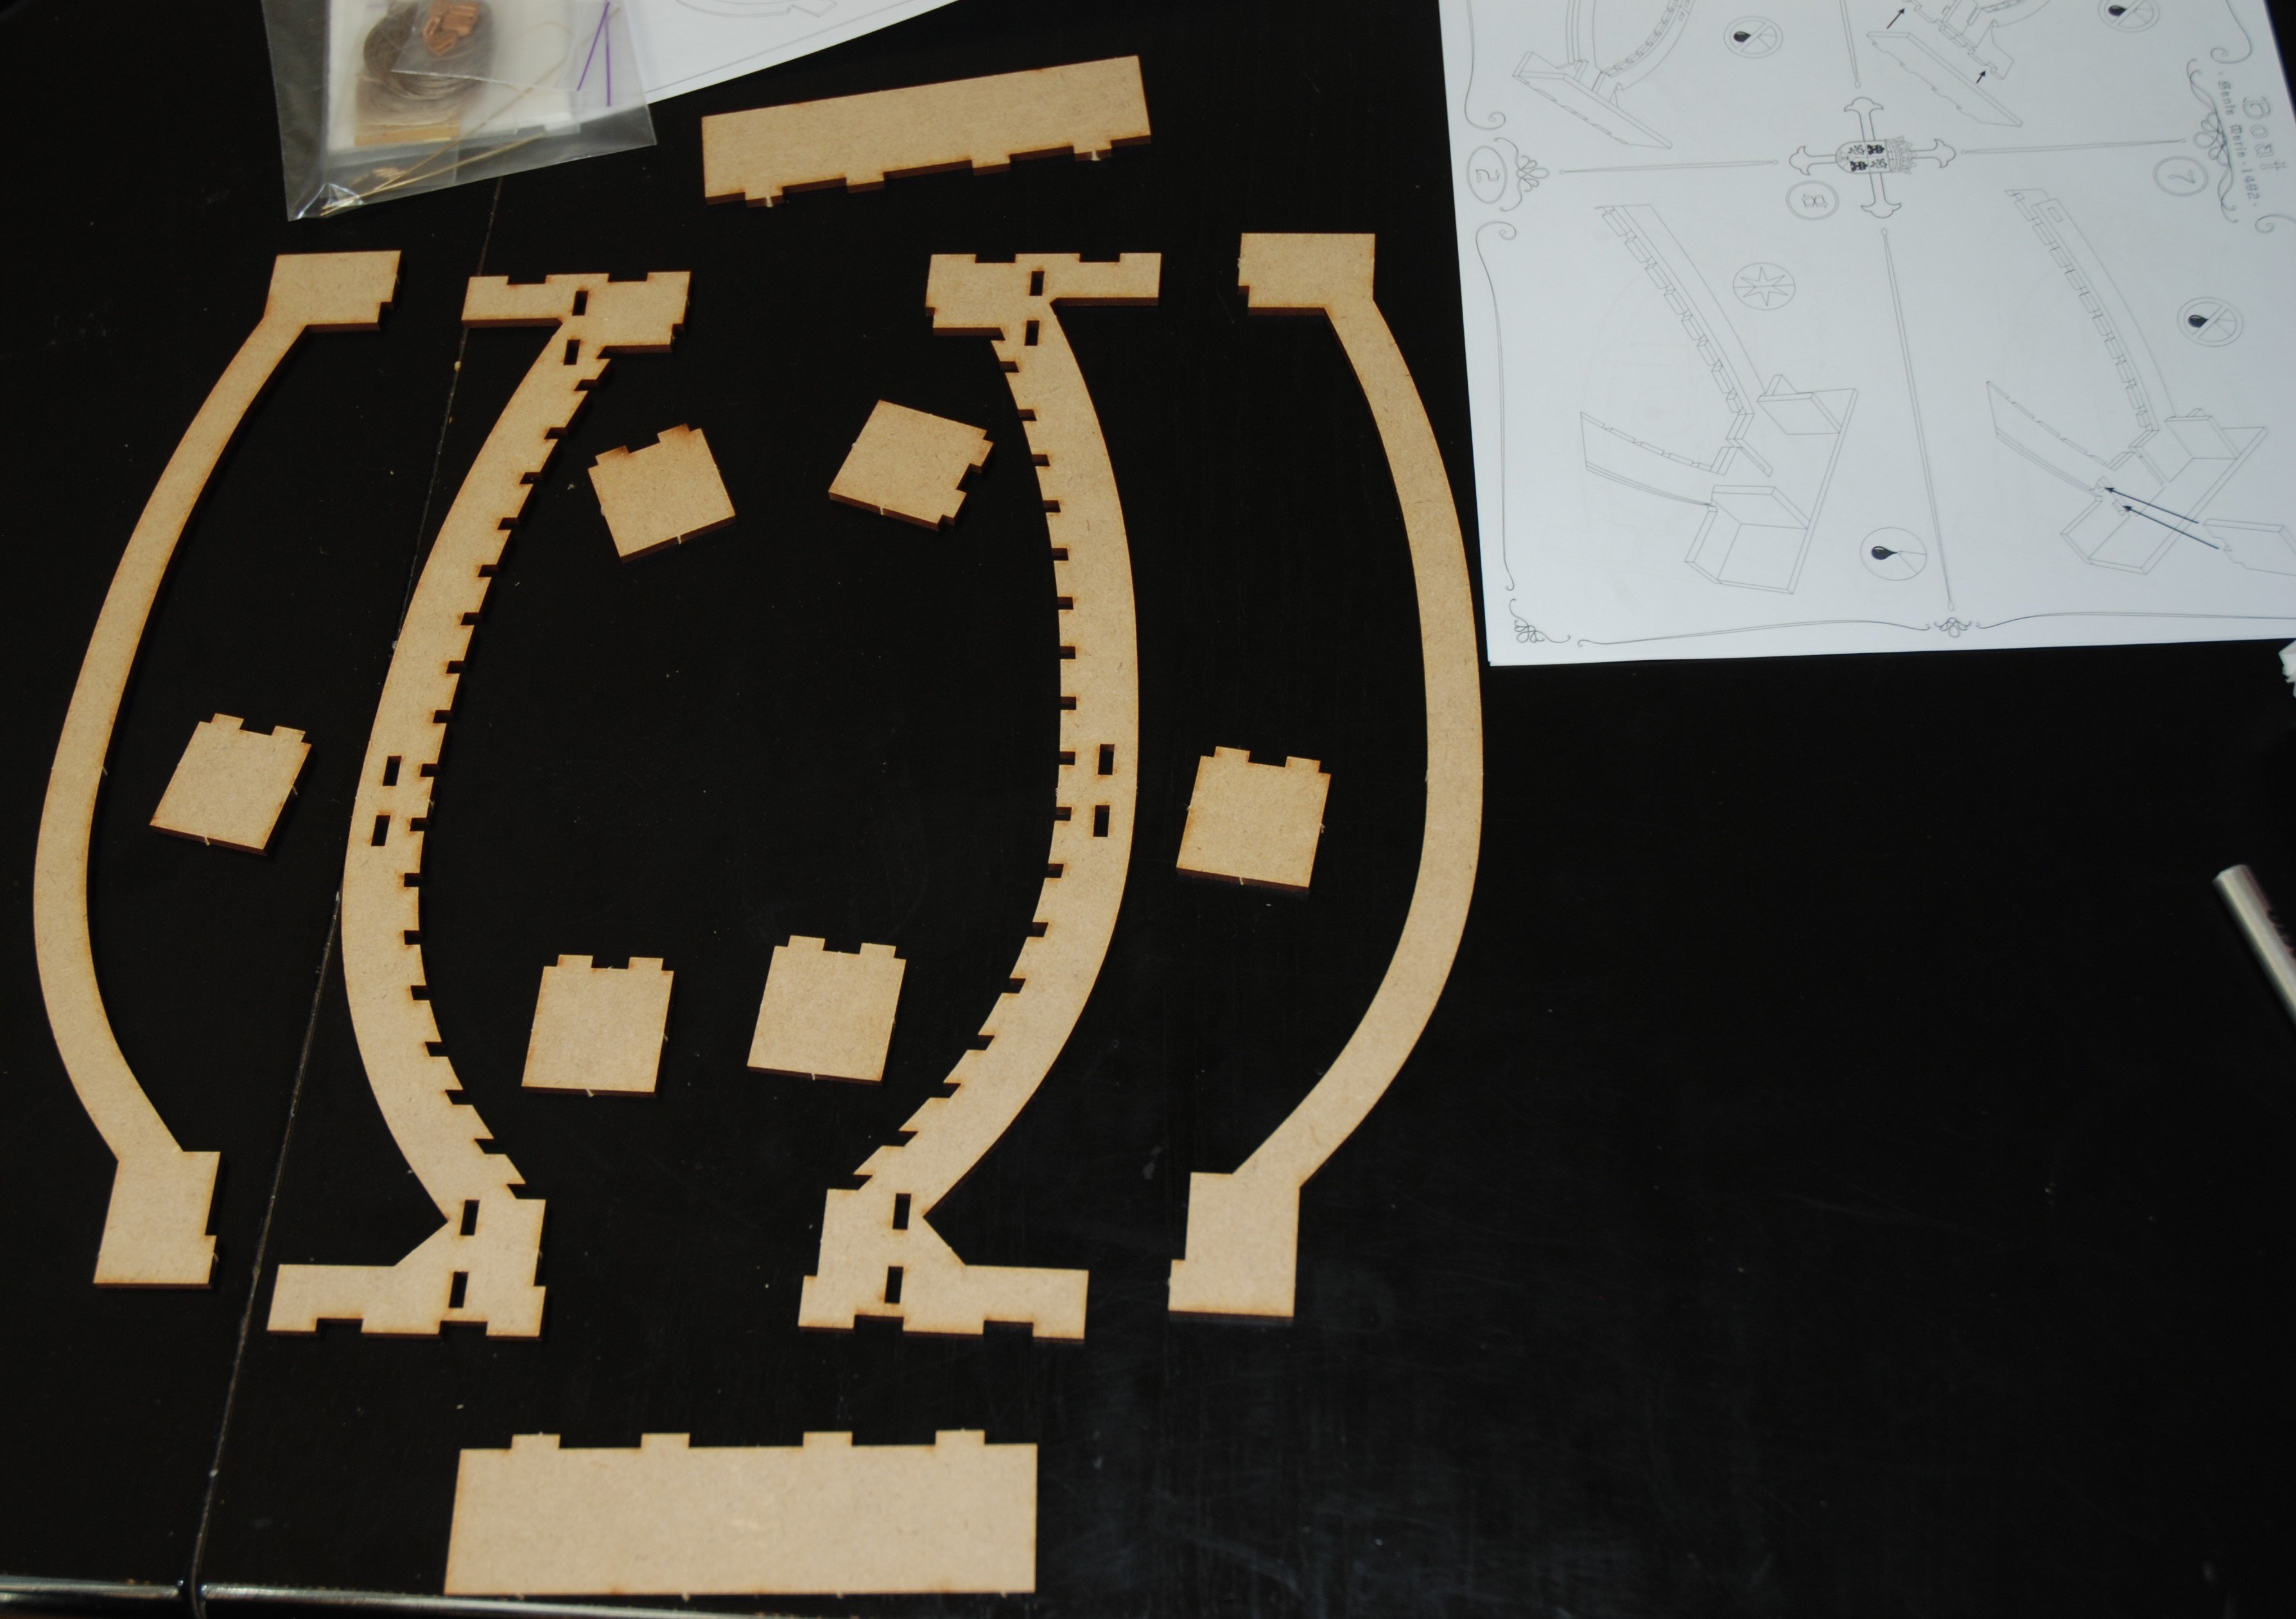
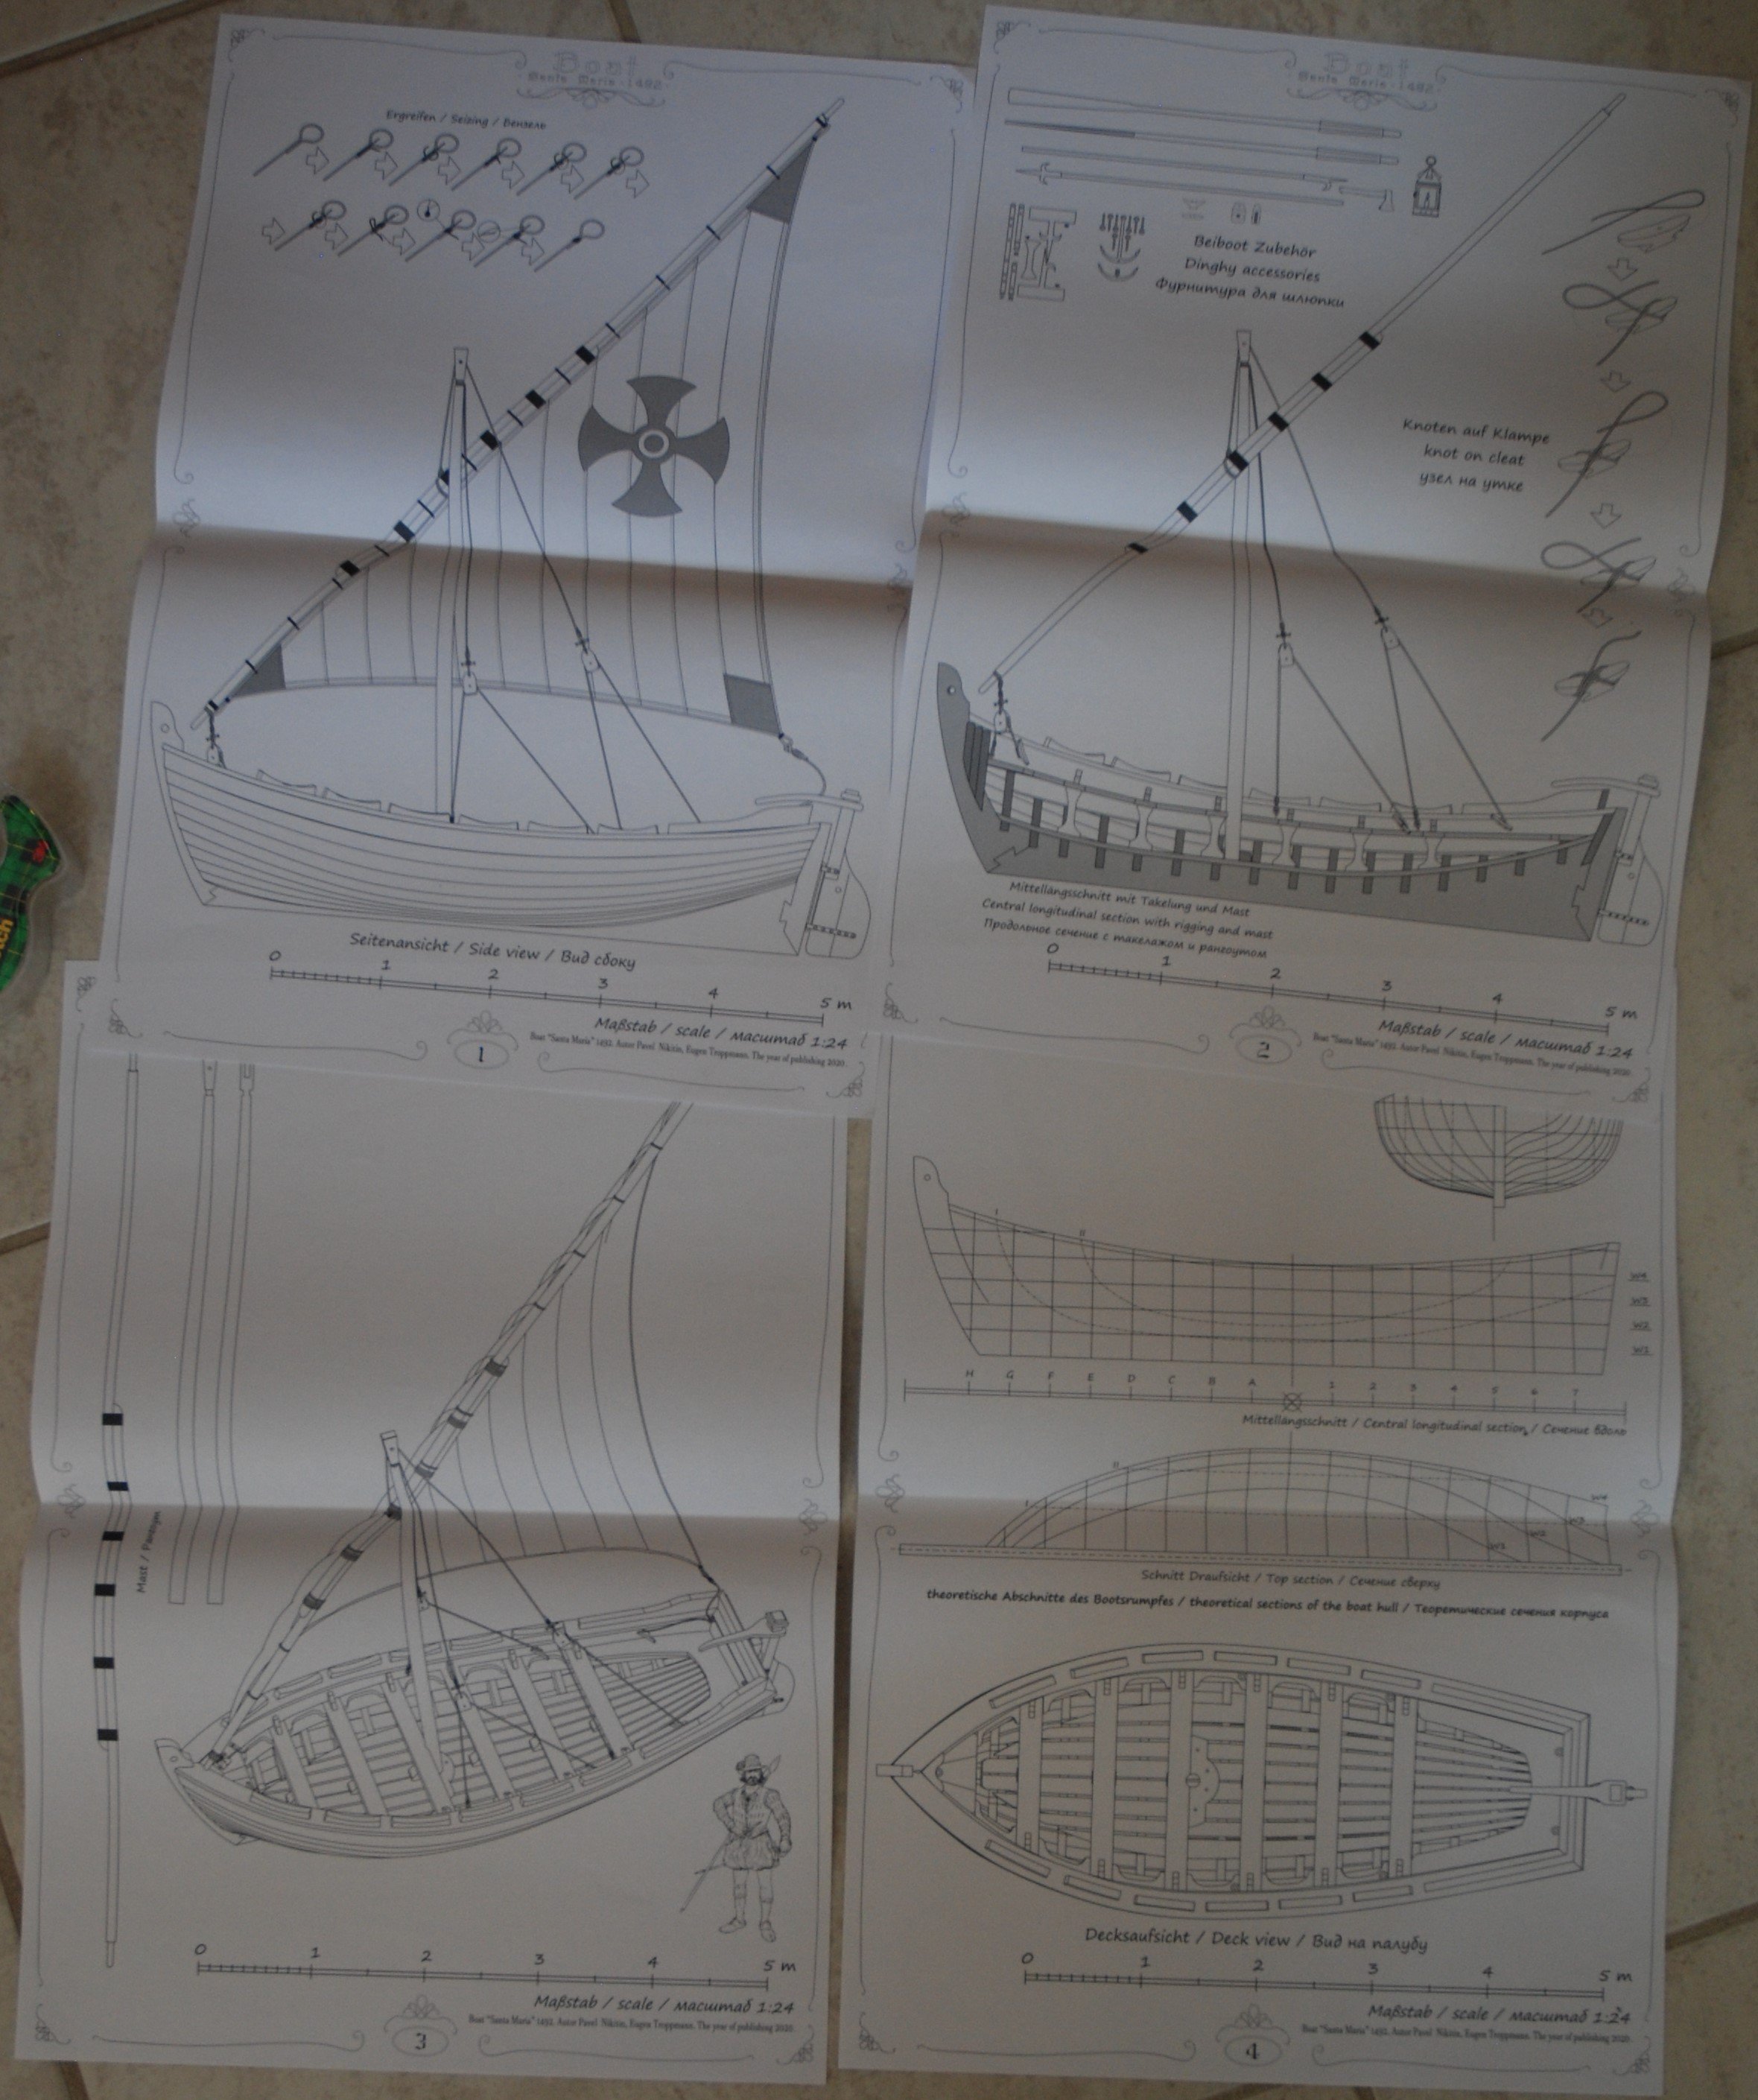
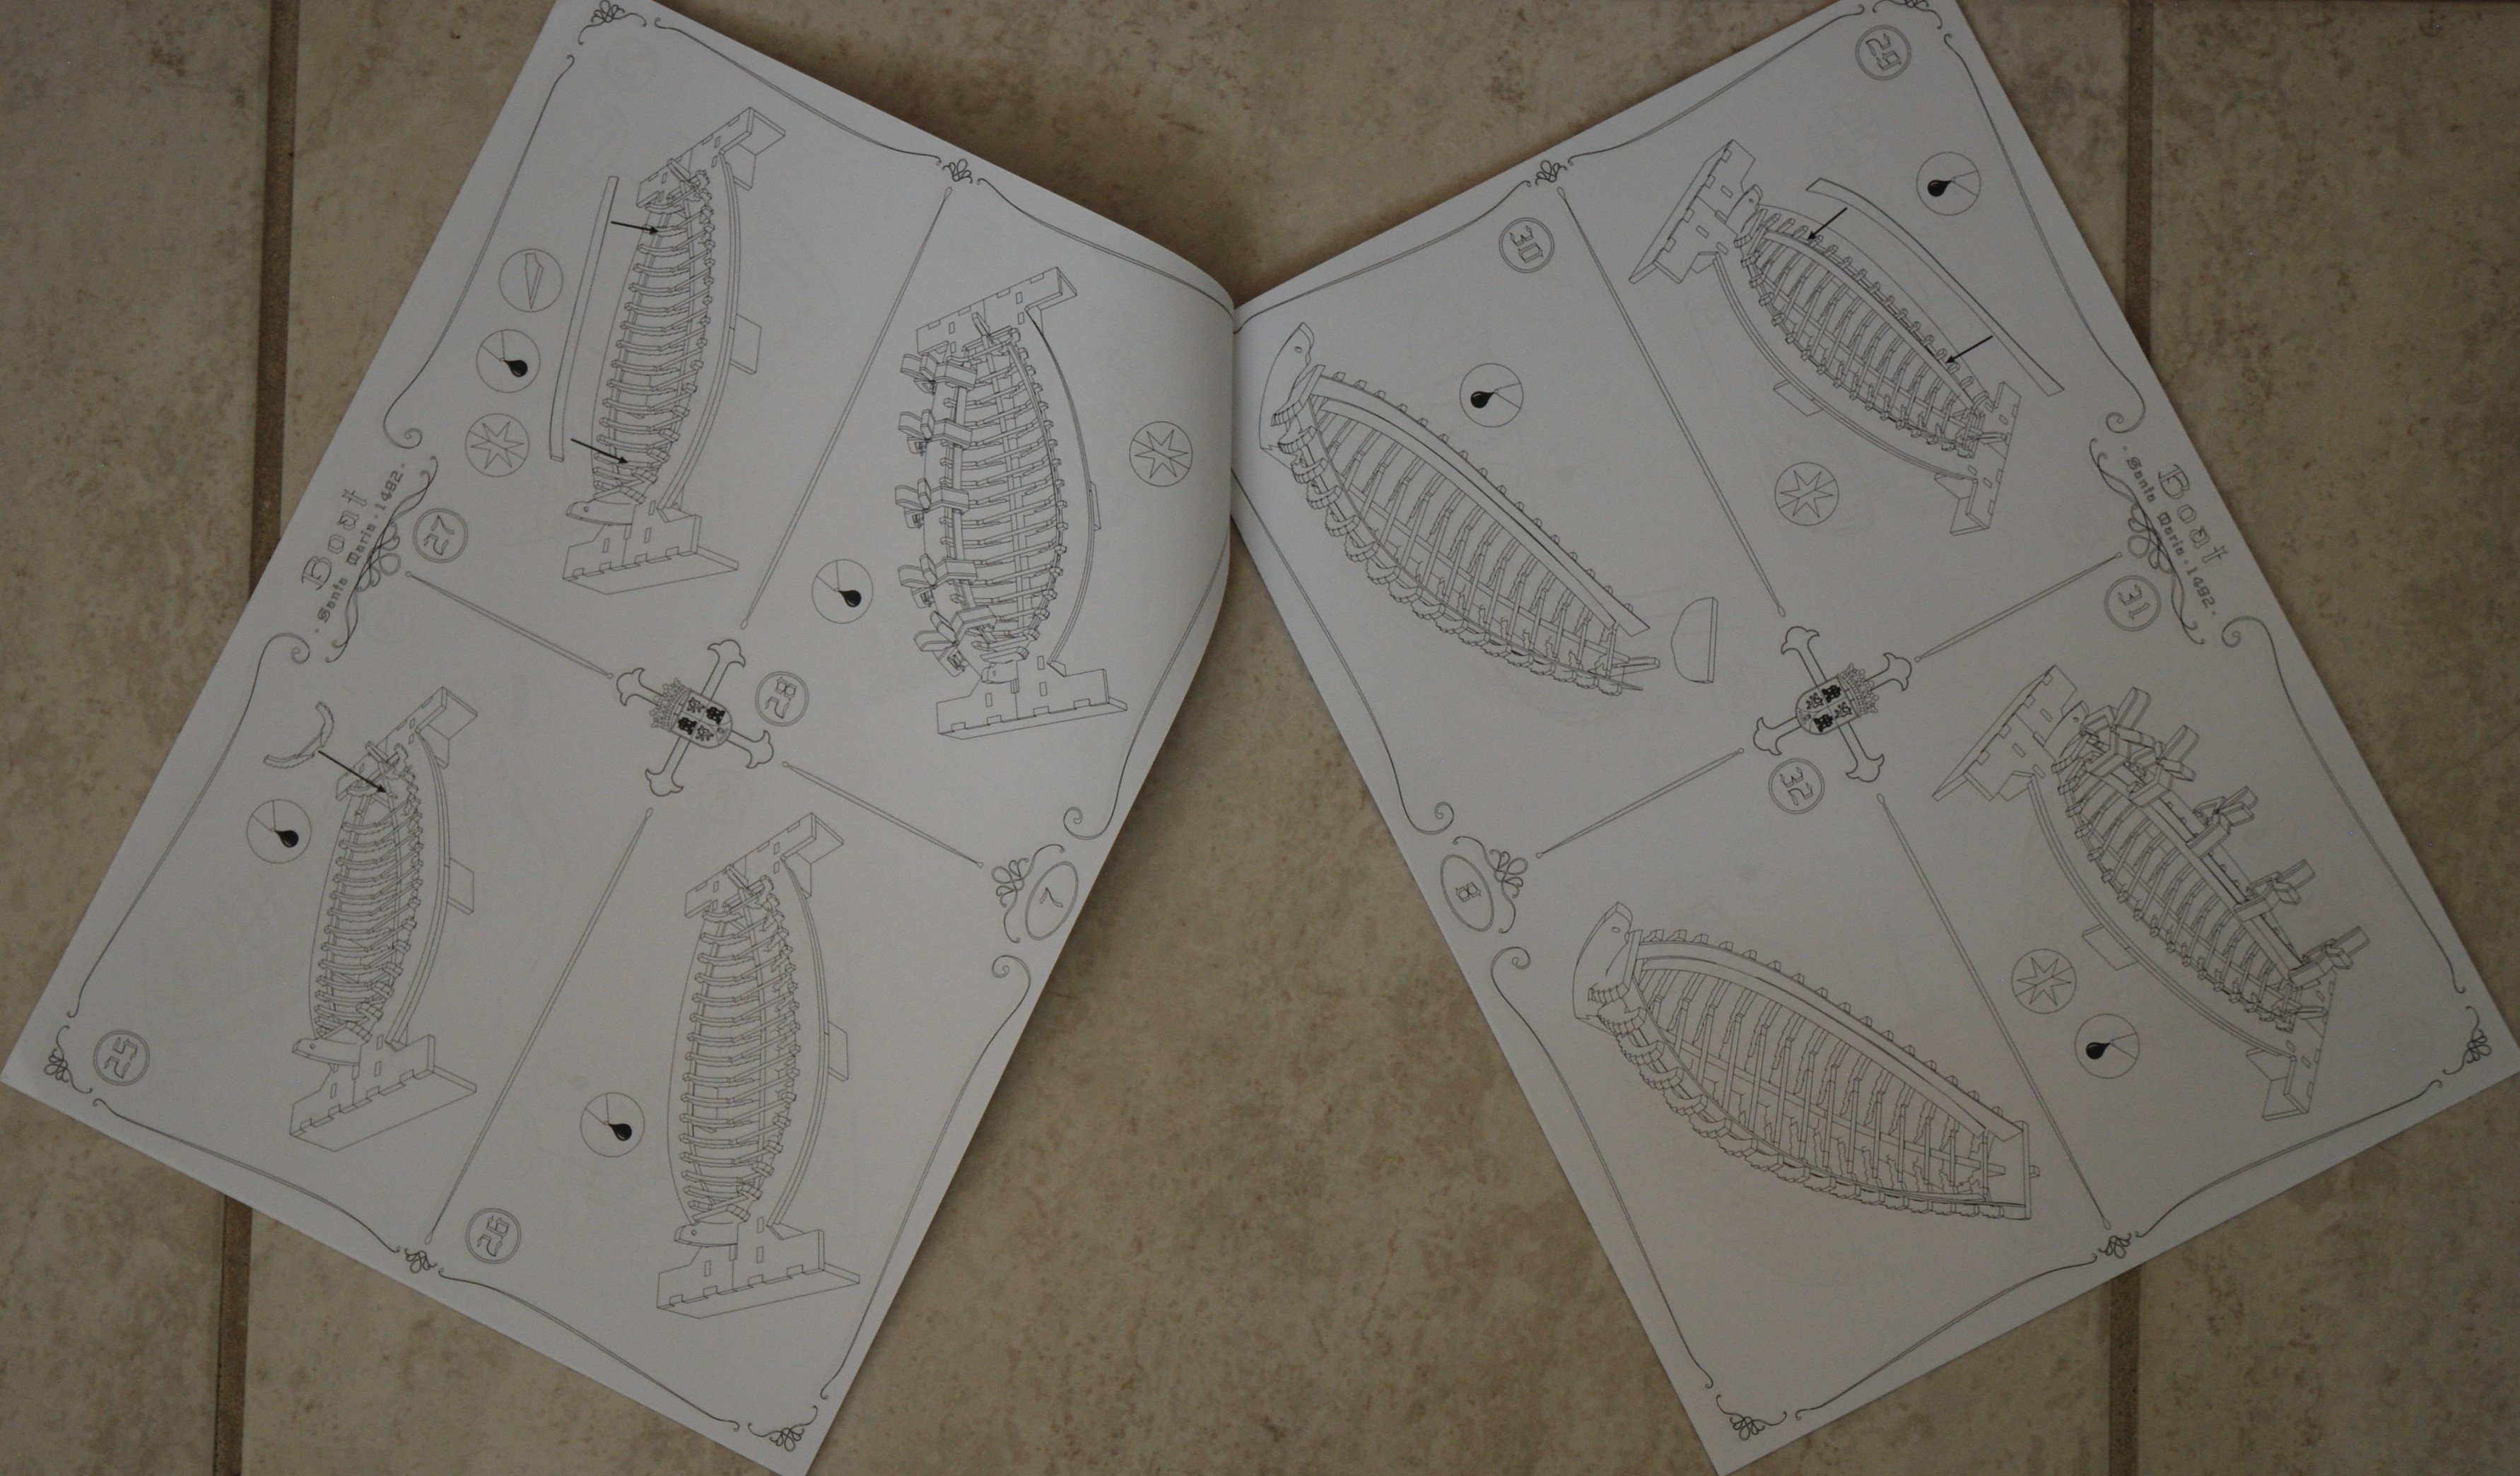
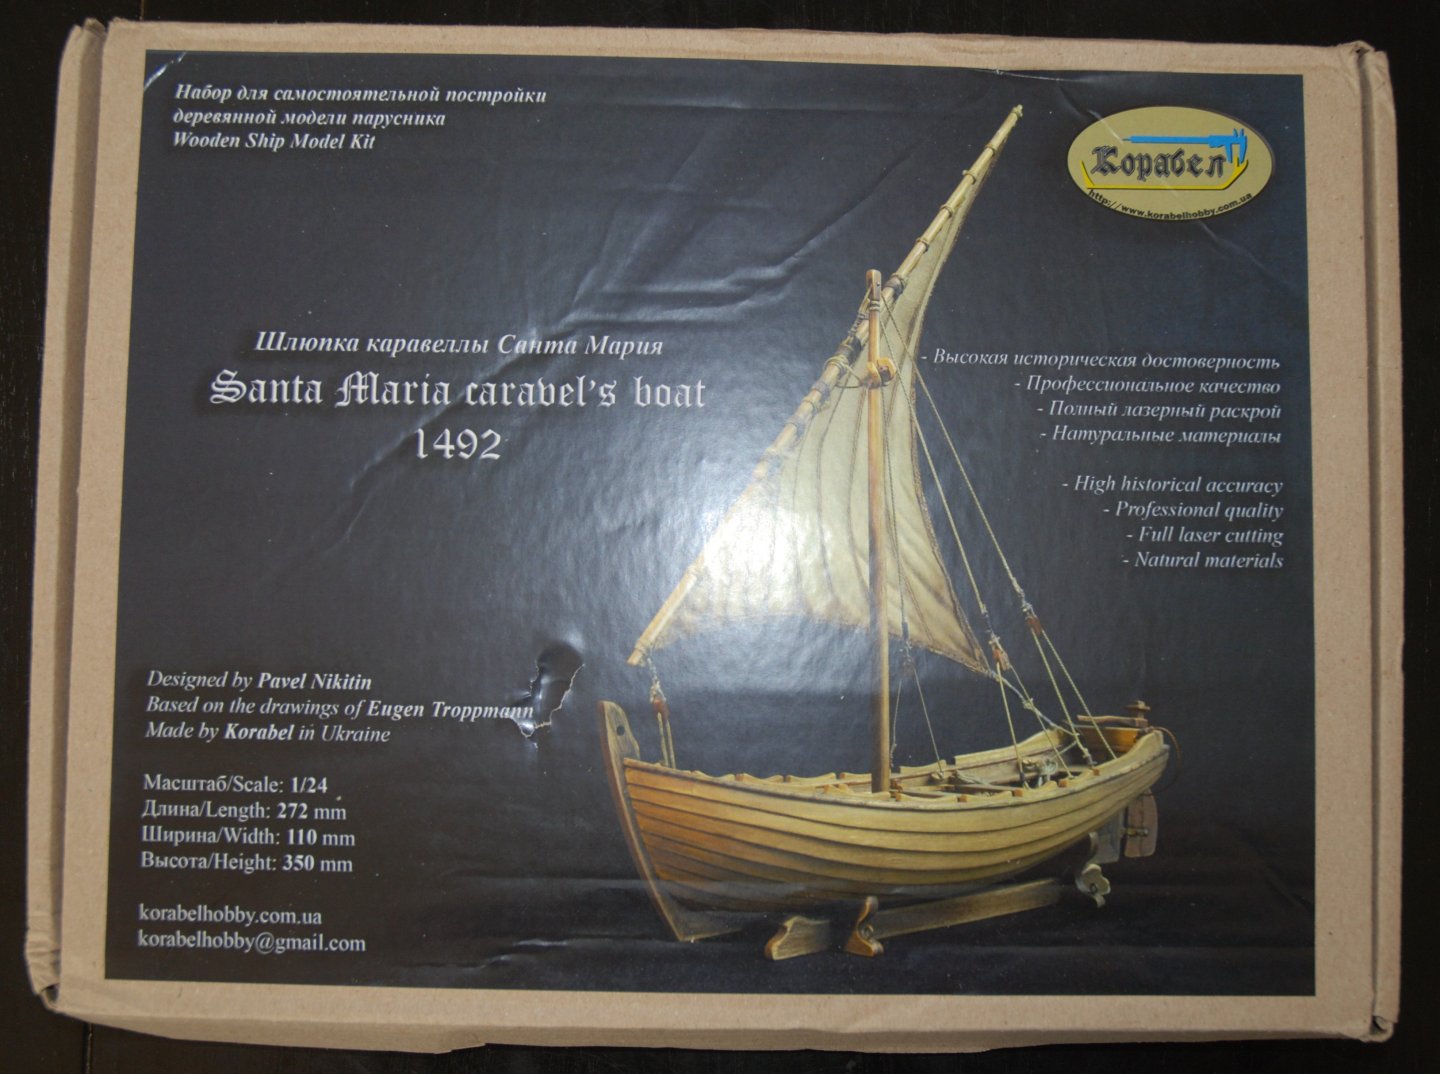
During this year, as I had little time for my hobby, I decided to build a small boat in parallel with my work on the Cheerful cutter. I chose the Santa Maria boat. I ordered this model (as well as 'Captain John Smith's shallop') directly from its designer in Ukraine. Here's a brief presentation of the model we received. The model is delivered in a cardboard box with a photo of the finished model. The plans consist of 4 large sheets (A3 format) The instruction manual contains very little text (only on the first 2 pages), but features drawings detailing the various steps involved. The model consists of 8 laser-cut boards. One in MDF for the base on which the boat will be mounted, three in pearwood for the hull, three in beech for the planking and one for the oars (maple?). The laser cut seems to me to be precise and without too many burn marks. And finally a PE board for the metal parts, fabric for the sail, mast and yard ('antenne'), good quality blocks and the rope. Only the rope, although of good quality, will surely be replaced by Syren rope, which is clearly of better quality. To be continued


- 22 replies
-
- 7
-
-
- ships boat
- Korabel
- (and 1 more)
-
HM Cutter Cheerful 1806 by JpR62 - 1:48 scale
JpR62 replied to JpR62's topic in - Build logs for subjects built 1801 - 1850
It's been a long time... But I've had a busy year. Having decided to retire this year, I've been very busy professionally. I've had to document the various professional projects I've carried out over the past 24 years and, above all, train my colleague who will be taking over my various tasks. As a result, I've had little time to devote to my hobby and, above all, I've completely given up sharing my work on this site. I was able to make some progress on my Cheerful and I'll try to share it with you. Here, in a few posts, is a summary of my work. I drilled all the holes needed for the carronades. I used a small jig that allowed me to drill them identically. I also enlarged the bowsprit hole by checking its size with a wooden rod of the same diameter as the bowsprit. Then the catheads were built, faithfully following the method explained in the instruction manual. The photos below summarize some of the stages in their construction. More to come


-
As beautiful and precise as ever. It's a real pleasure to see this work moving forward! Thanks for sharing.
- 399 replies
-
- 2
-
-
- winchelsea
- Syren Ship Model Company
- (and 1 more)
-
What a superb model! It's been a real pleasure to follow your magnificent work. The result is well worth the time invested. Congratulations!
-
Many thanks for these explanations and this really detailed step-by-step guide. What fantastic color work and realism. It's true that offering this element as a mini kit would be a great success. I'm still blown away by the solutions found. It's perfection every time !
-
HM Cutter Cheerful 1806 by JpR62 - 1:48 scale
JpR62 replied to JpR62's topic in - Build logs for subjects built 1801 - 1850
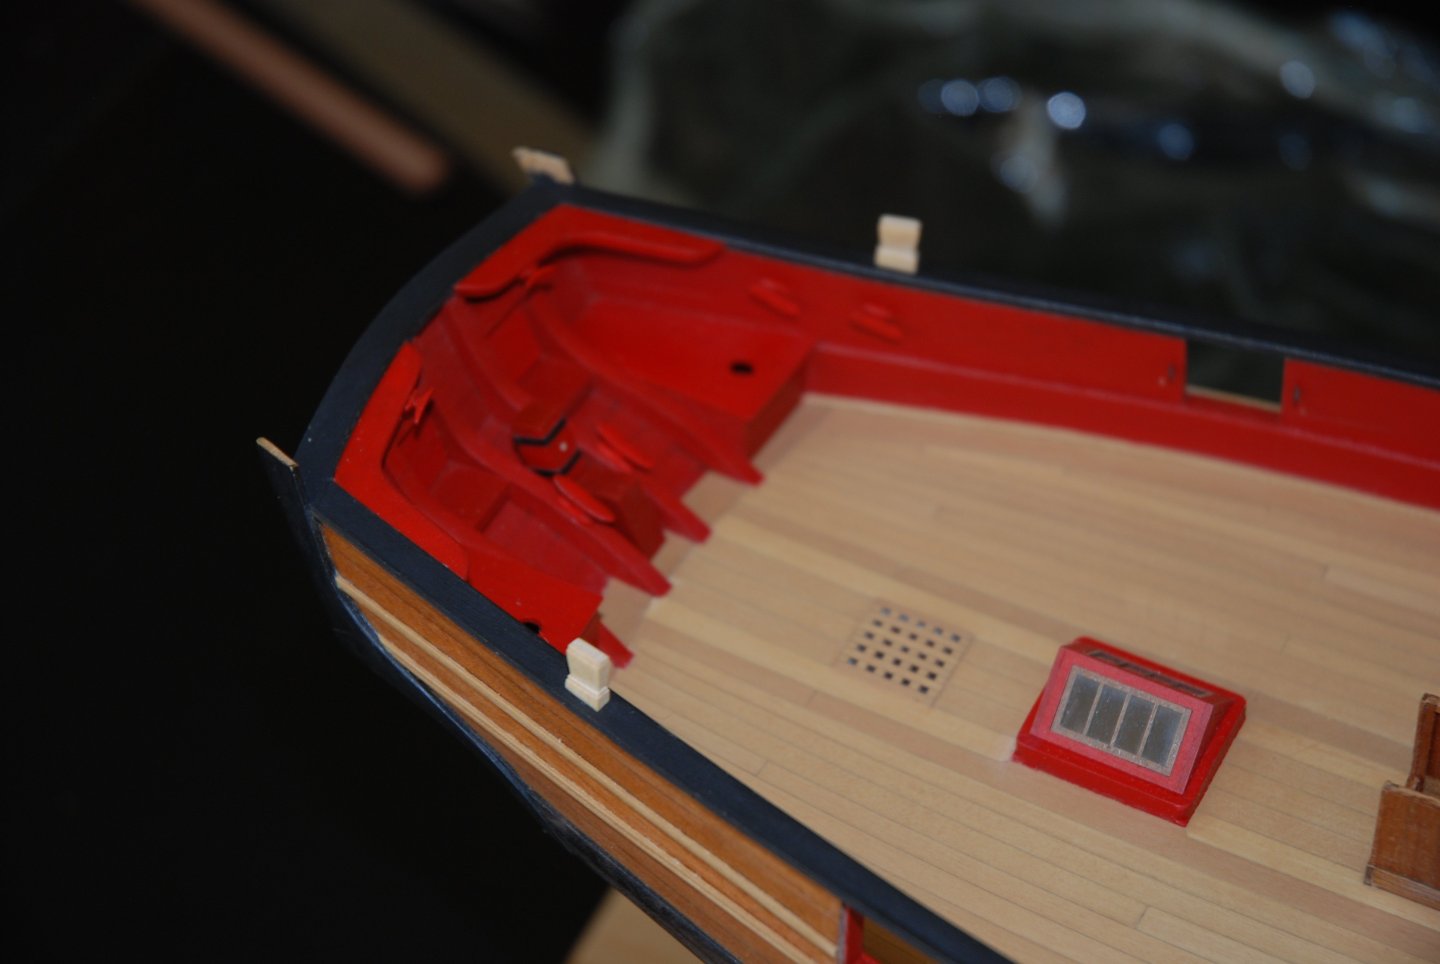
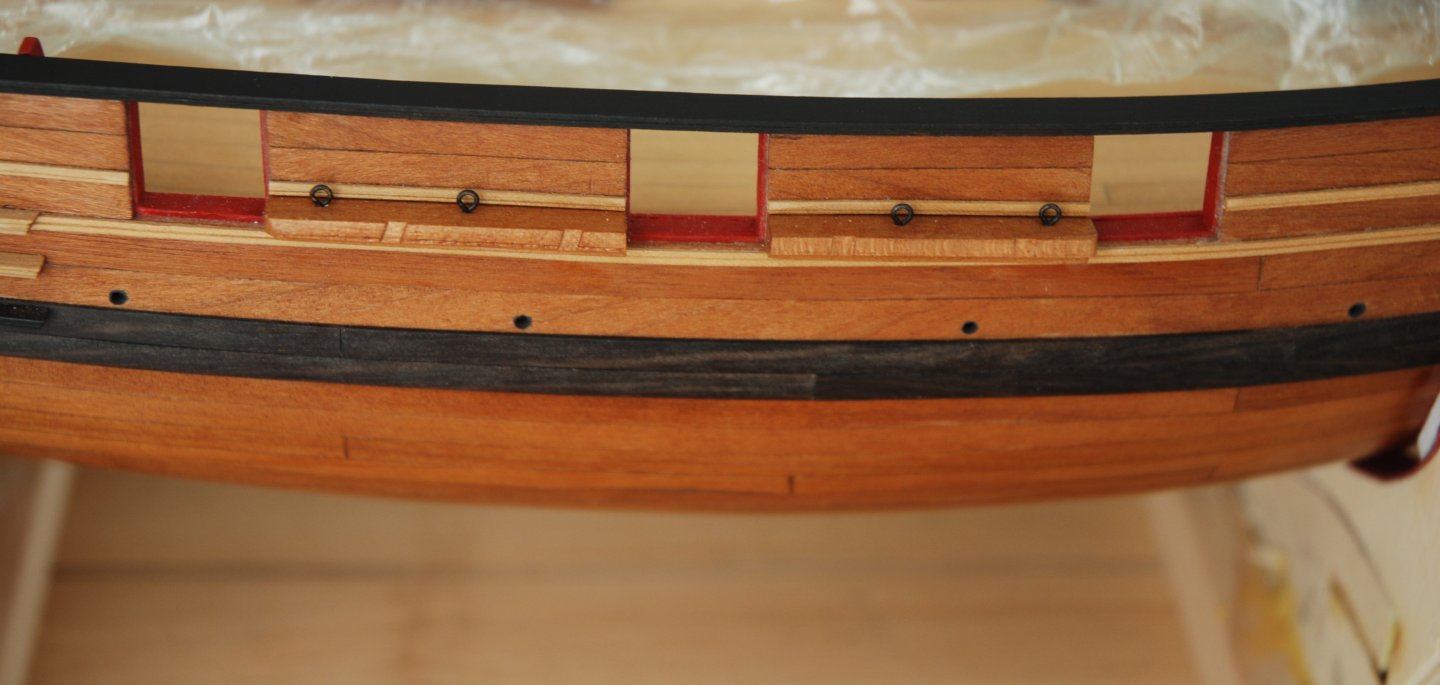
The scuppers Using photocopies of the plan, I determine the precise location of the scuppers. With the point of a needle, I mark the spot to be drilled. Then I drill the scuppers in two stages: a first hole is drilled with a drill bit smaller than the final measurement, then this hole is enlarged with a bigger mandrel to the final size of the scupper. To be continued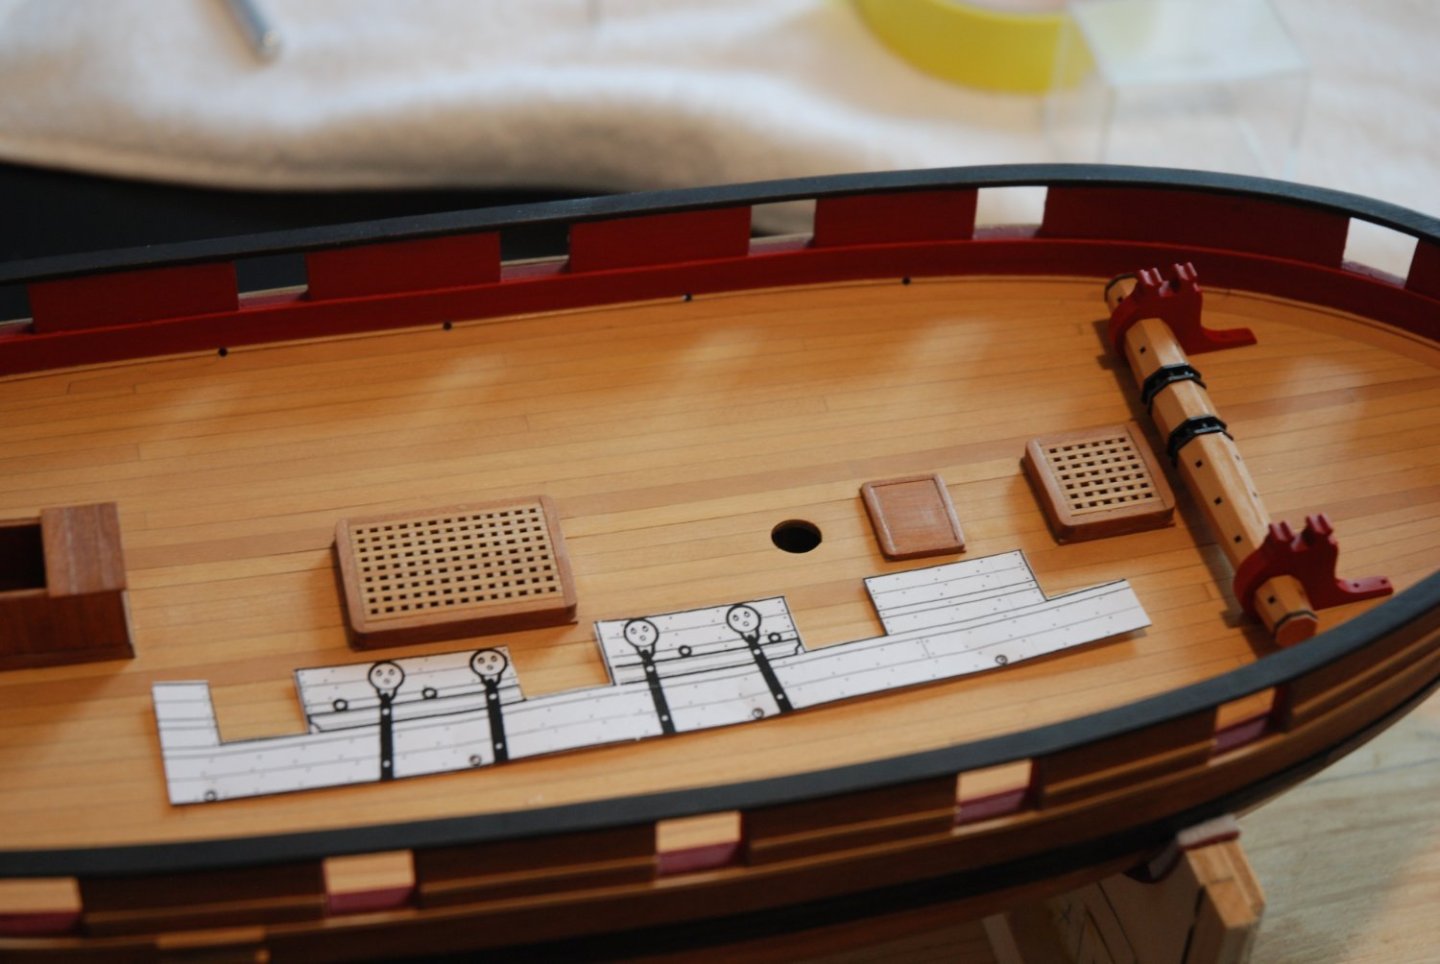


-
HM Cutter Cheerful 1806 by JpR62 - 1:48 scale
JpR62 replied to JpR62's topic in - Build logs for subjects built 1801 - 1850
Thank you Chuck ! Working on the Cheerful is a real pleasure. Everything is perfect, and the instruction manual is absolutely precise and didactic. You just have to take your time. Enjoy the Holiday too and a Happy New Year to the whole family! -
HM Cutter Cheerful 1806 by JpR62 - 1:48 scale
JpR62 replied to JpR62's topic in - Build logs for subjects built 1801 - 1850
Thank you ! The hull is planked with cherry wood and for the deck I use boxwood.