JpR62
-
Posts
699 -
Joined
-
Last visited
Content Type
Profiles
Forums
Gallery
Events
Everything posted by JpR62
-

HM Cutter Cheerful 1806 by JpR62 - 1:48 scale
JpR62 replied to JpR62's topic in - Build logs for subjects built 1801 - 1850
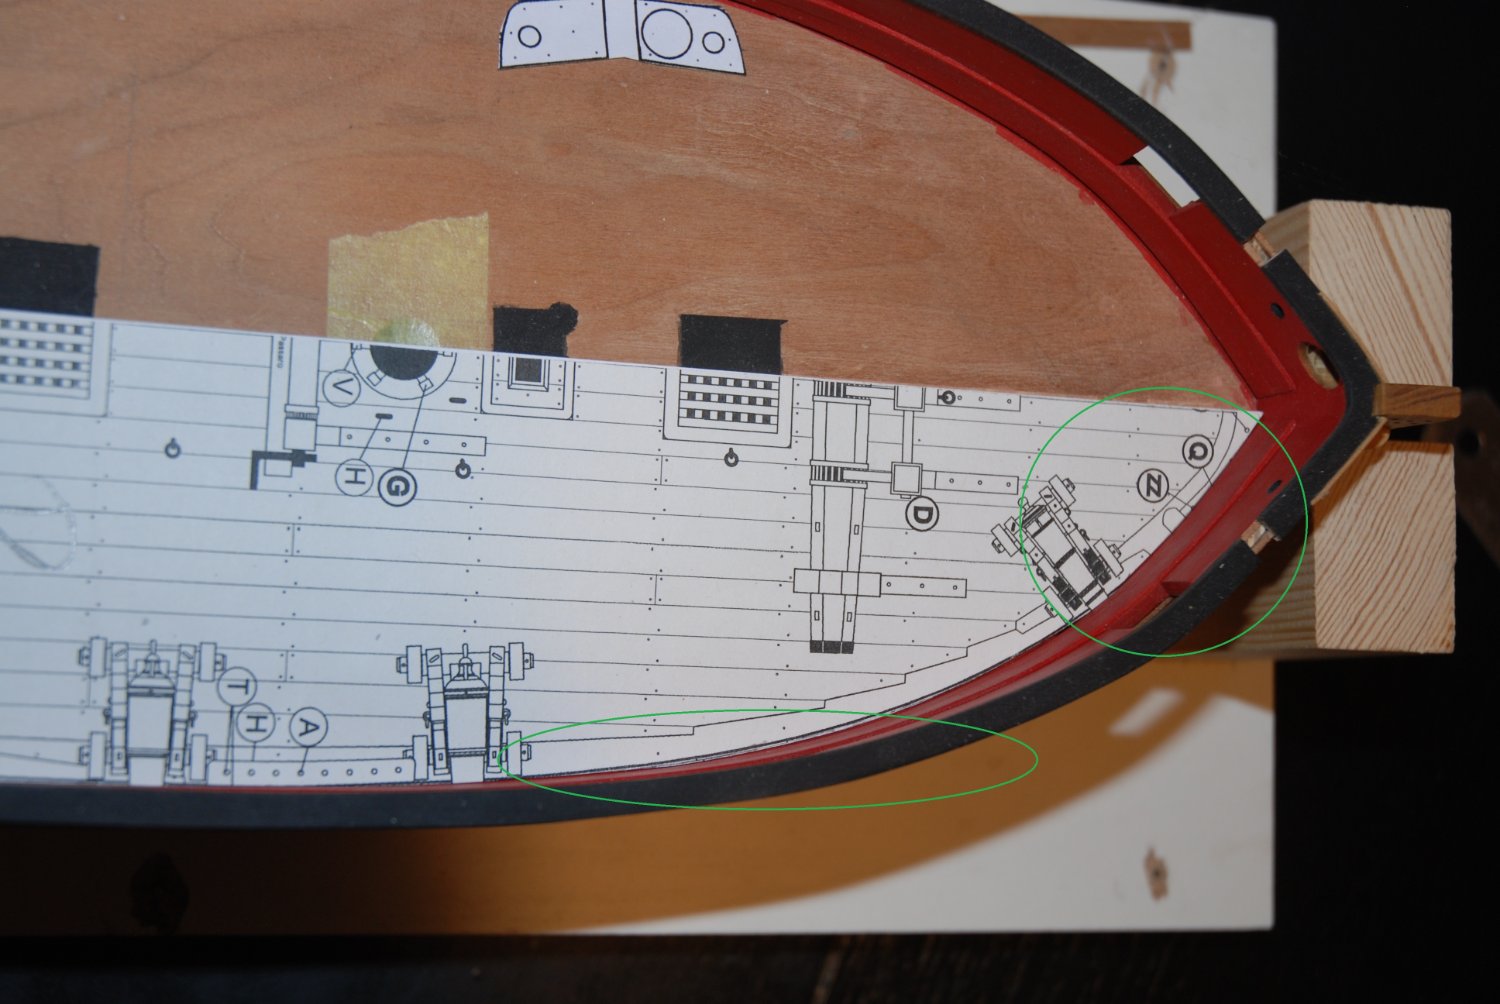
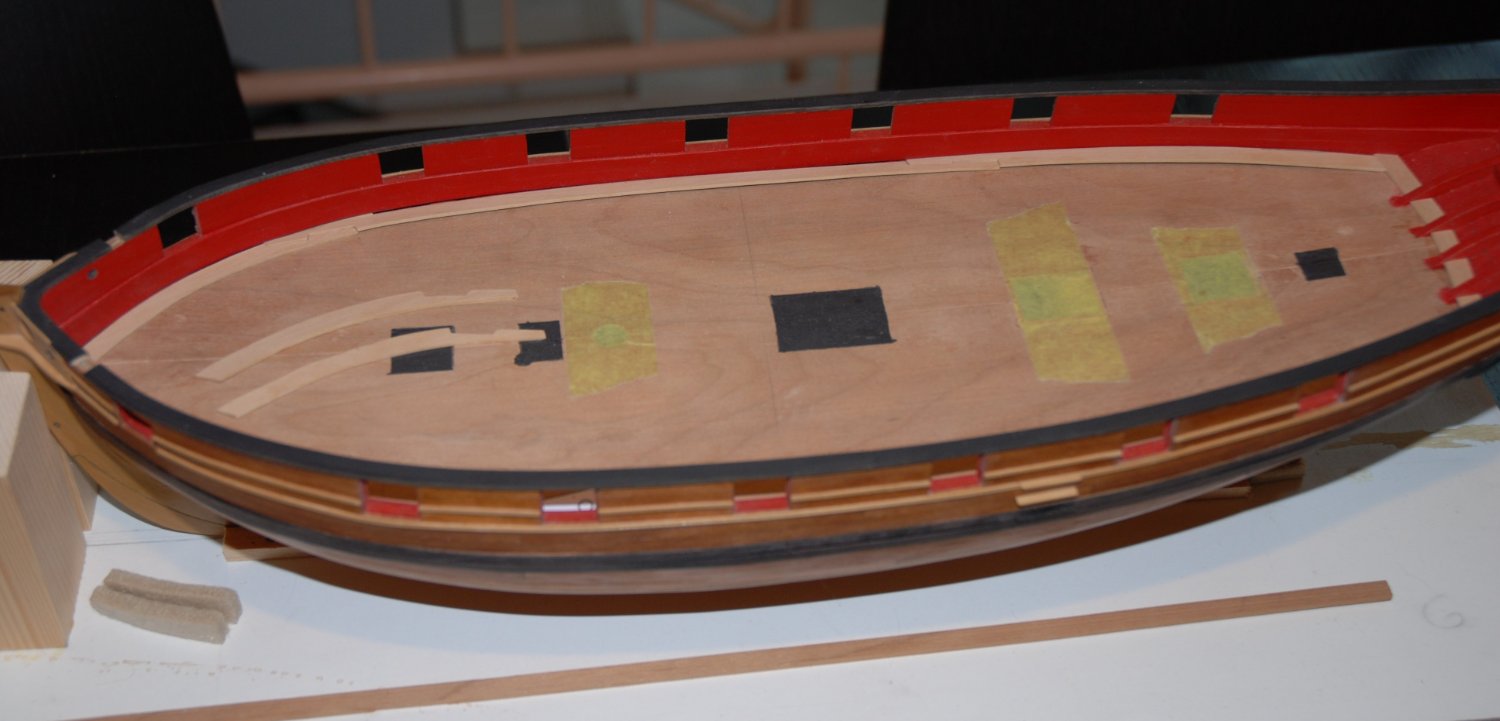
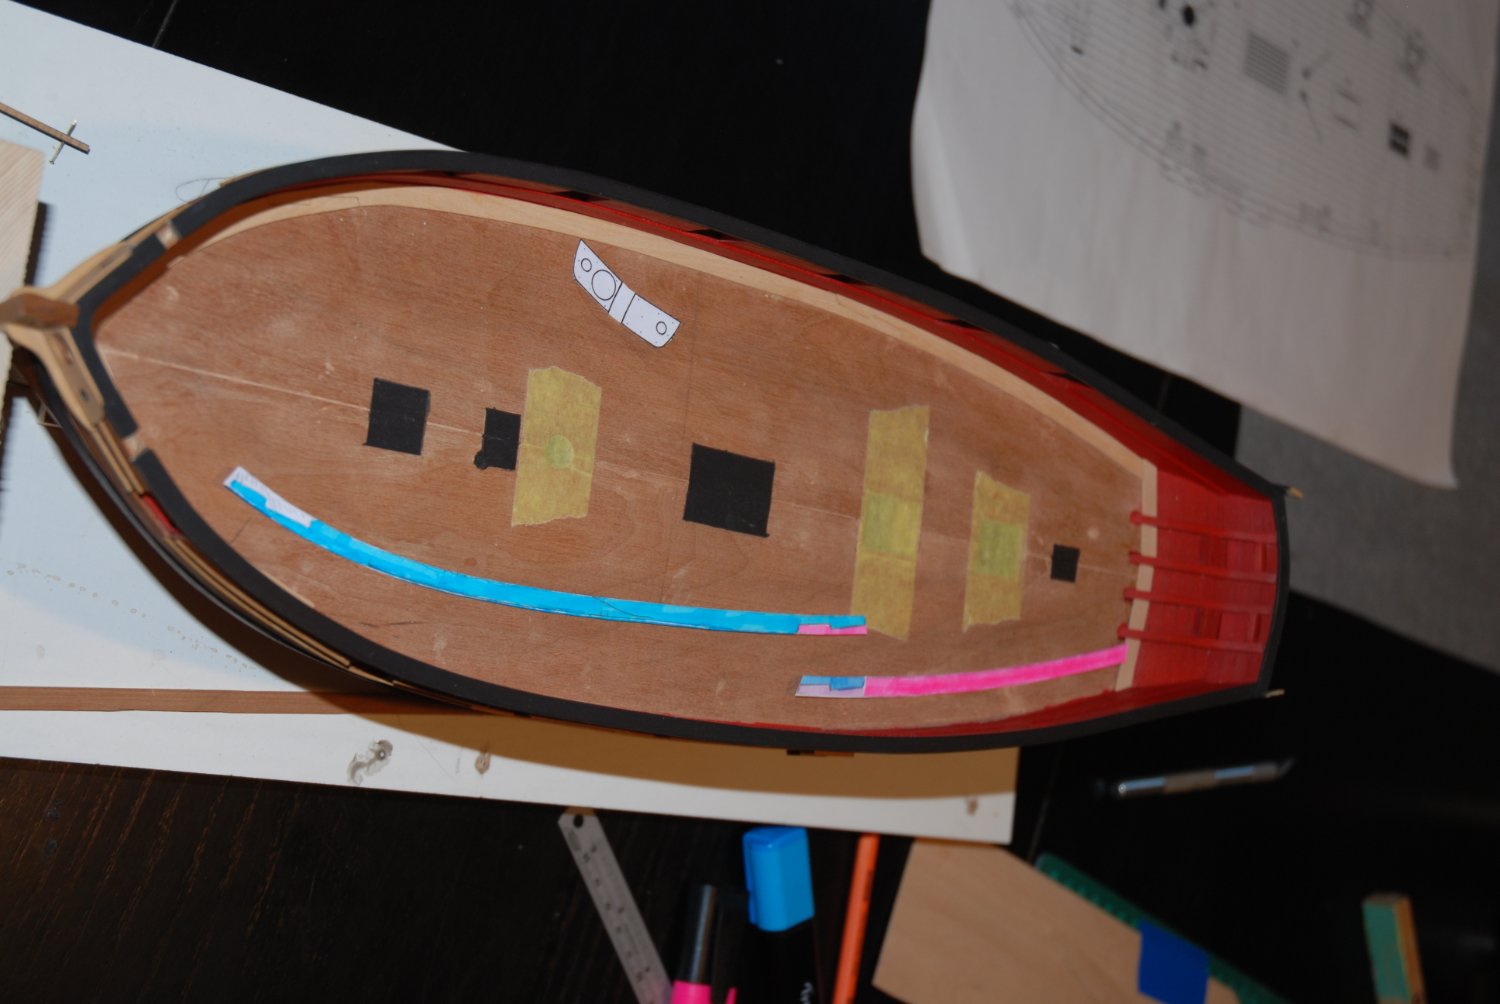
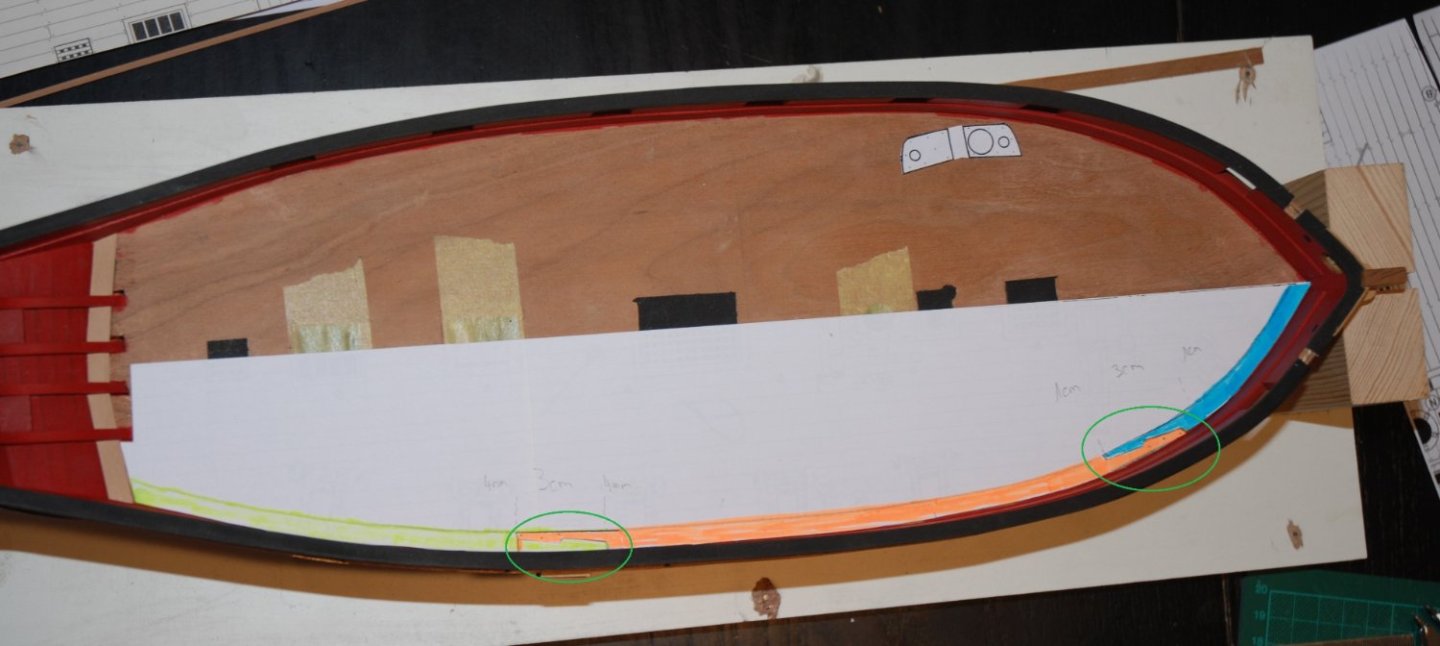
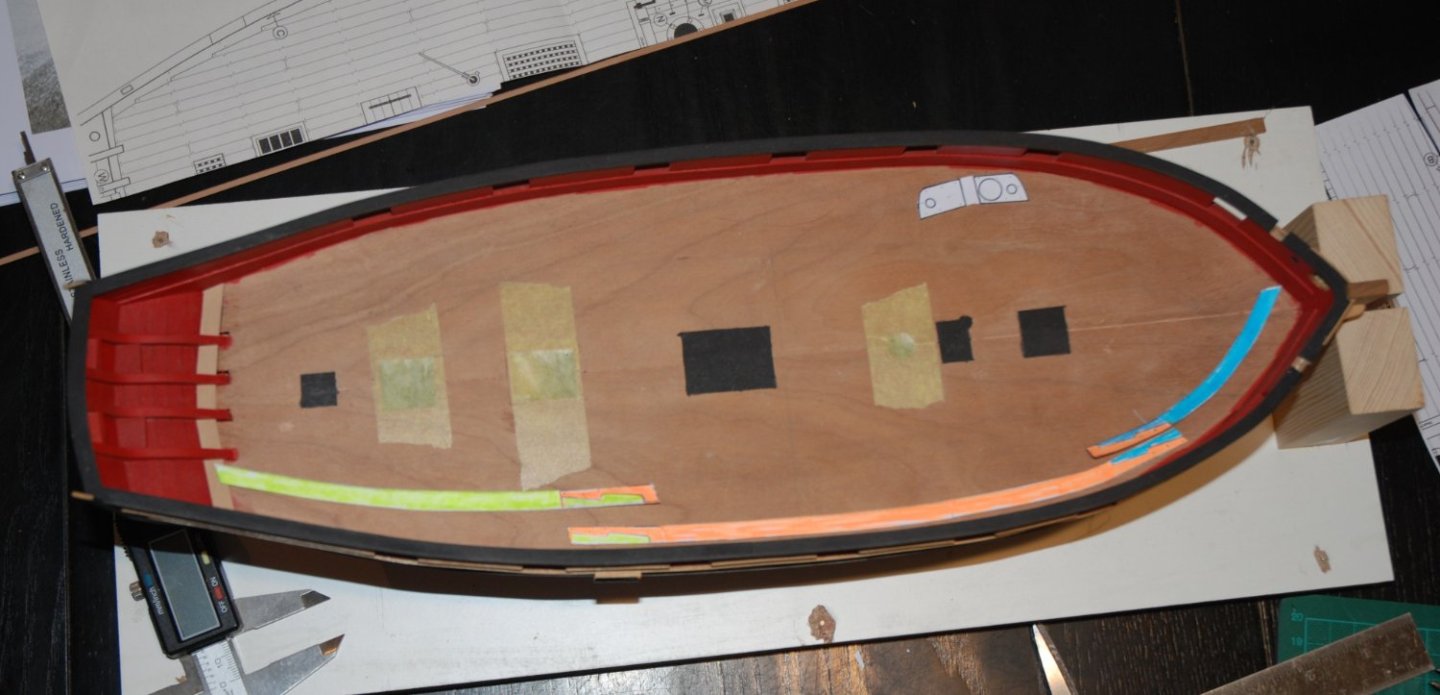
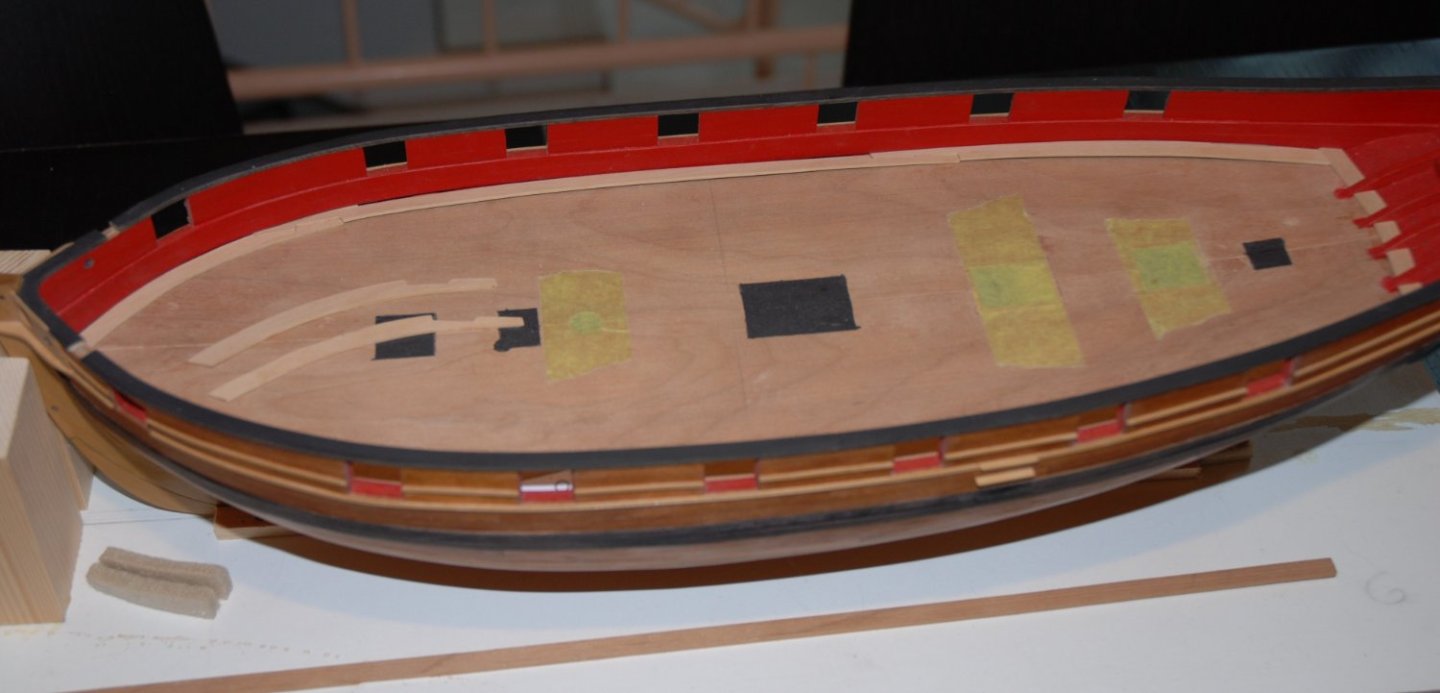
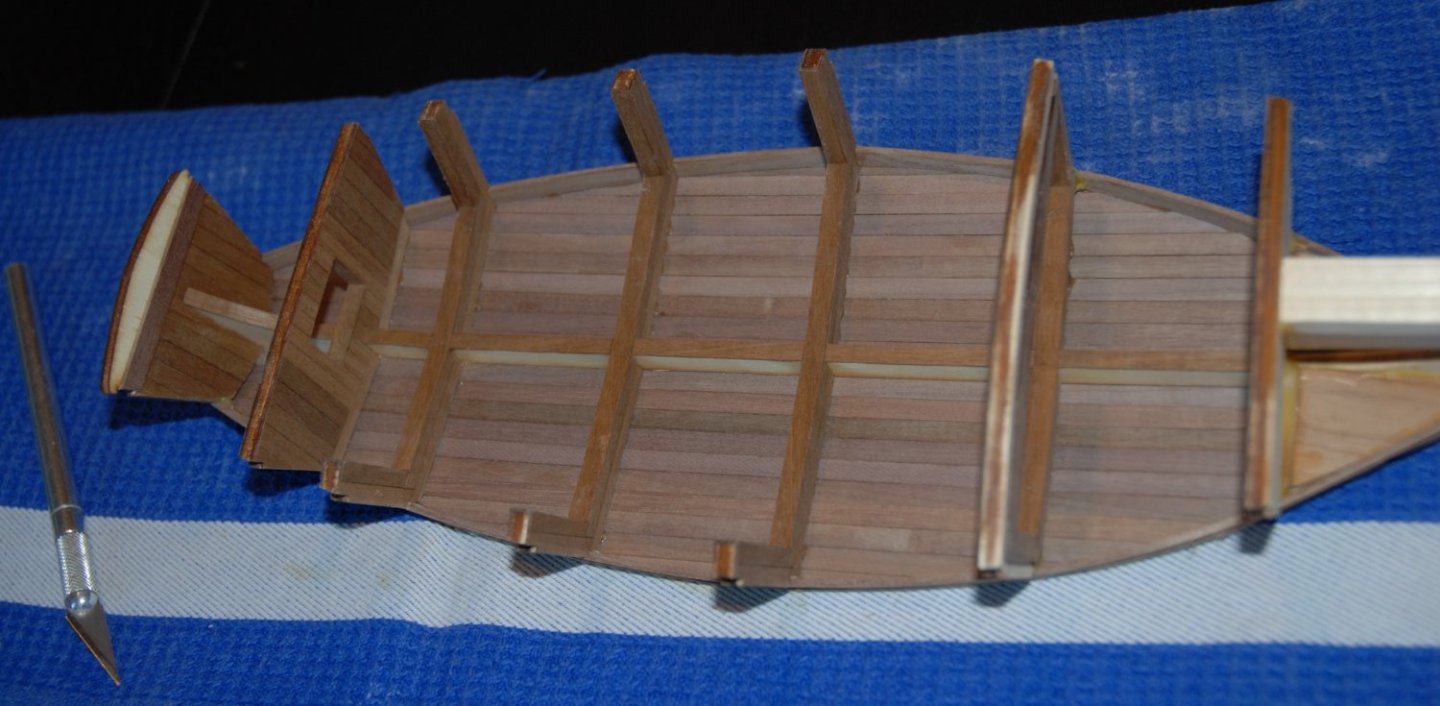
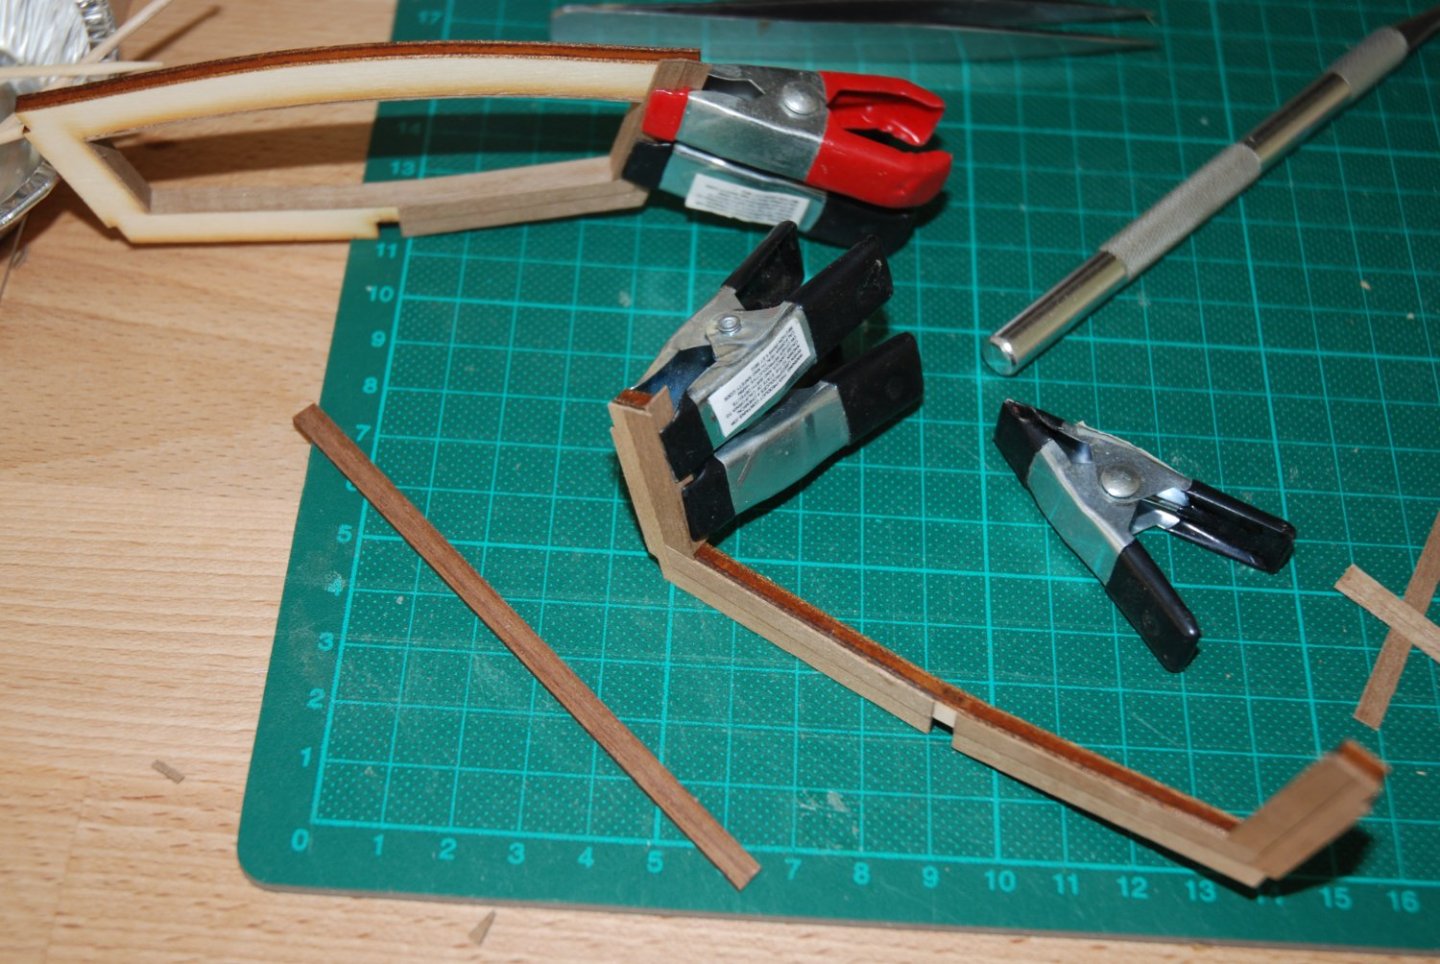
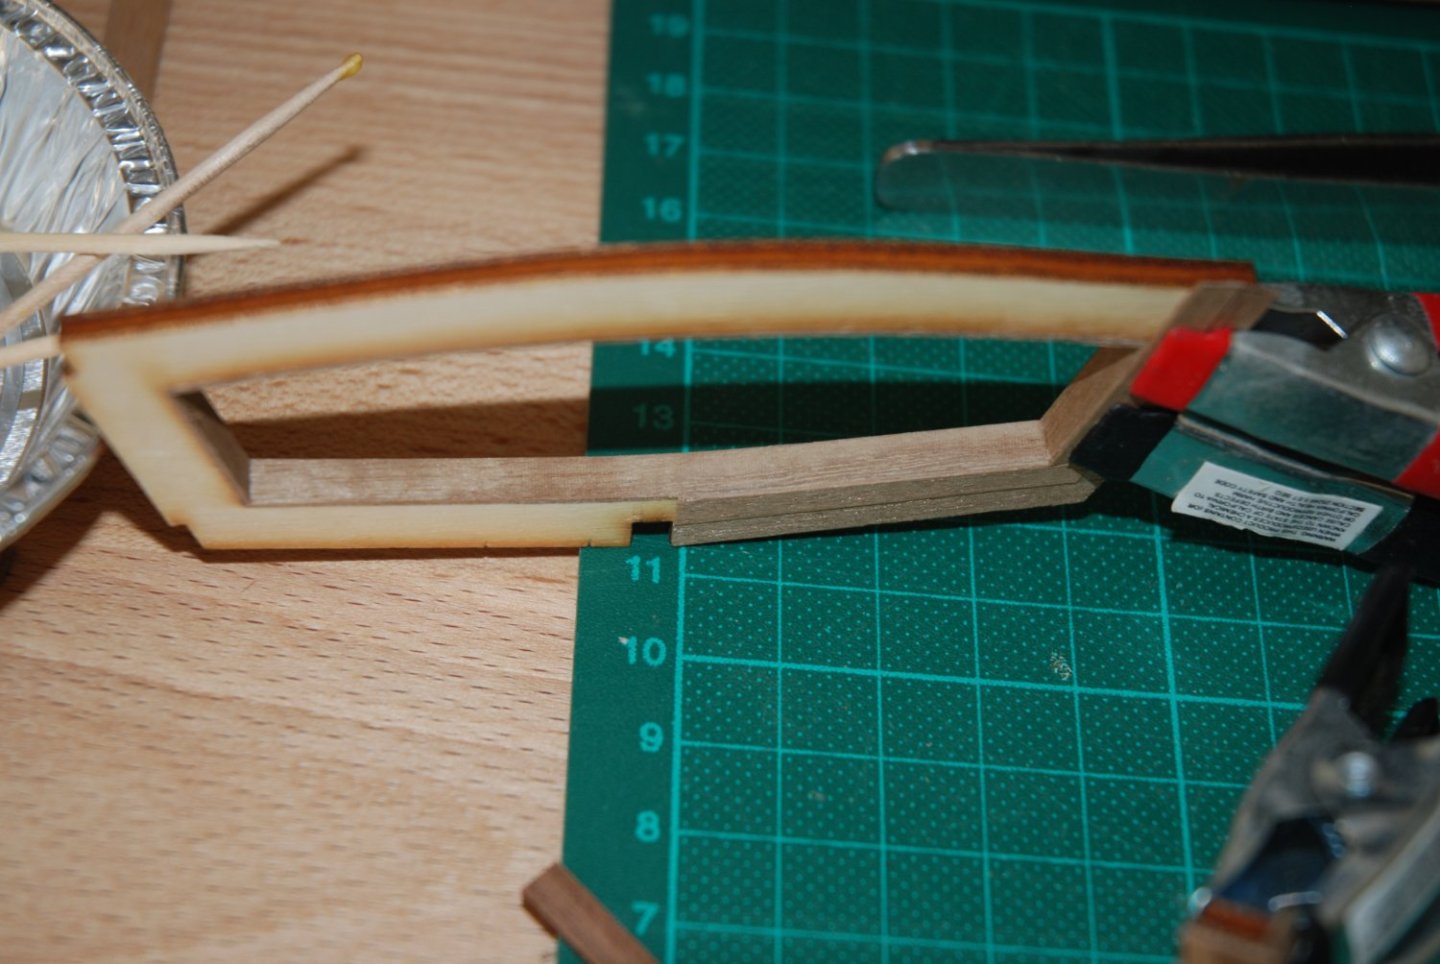
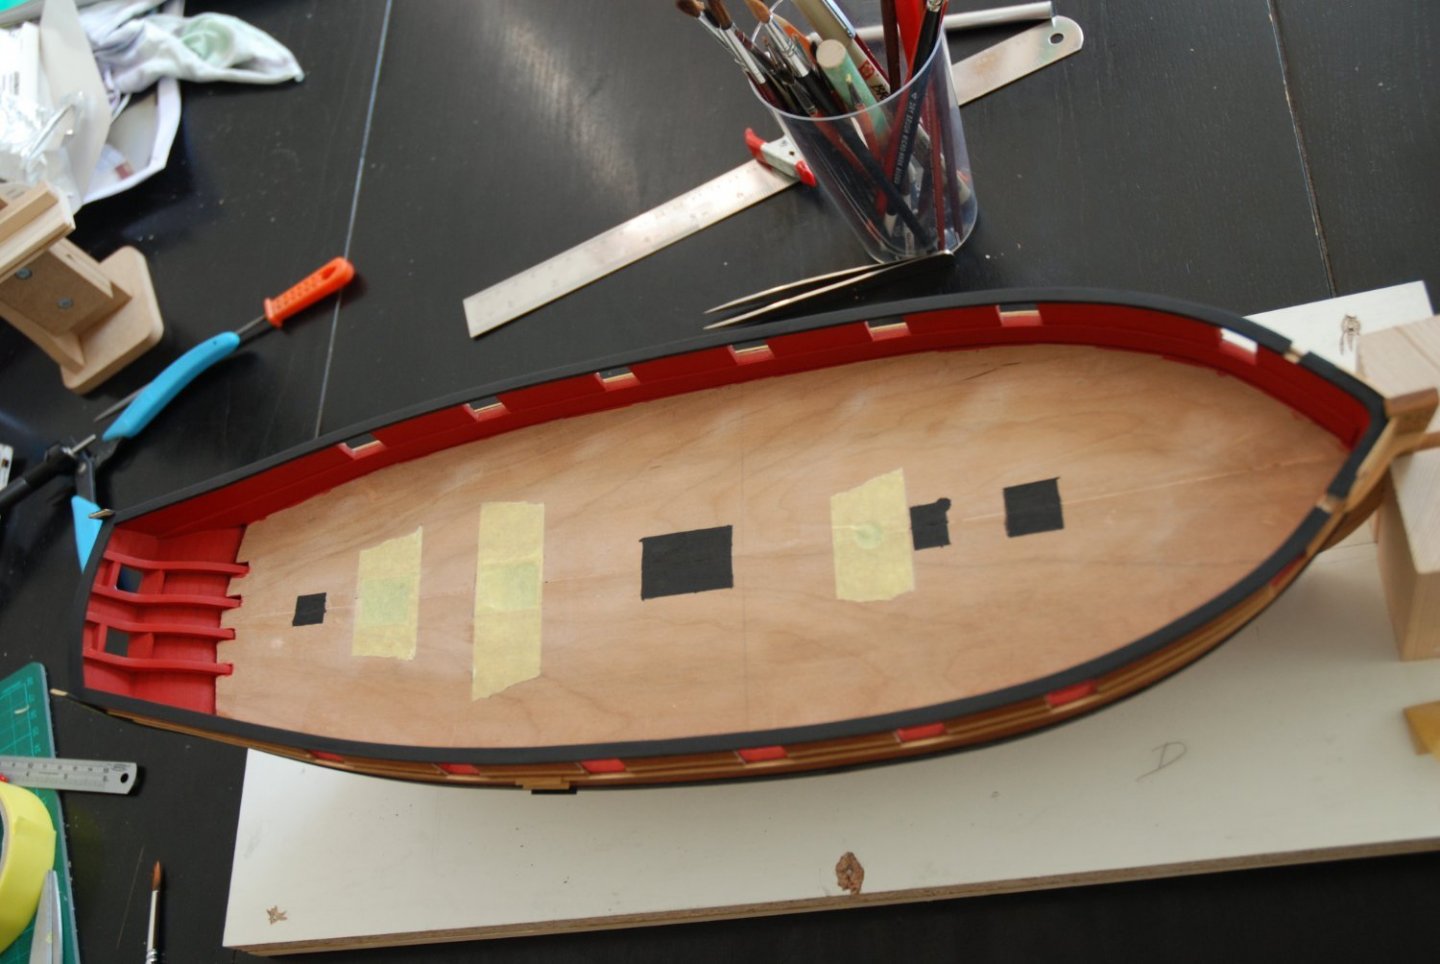
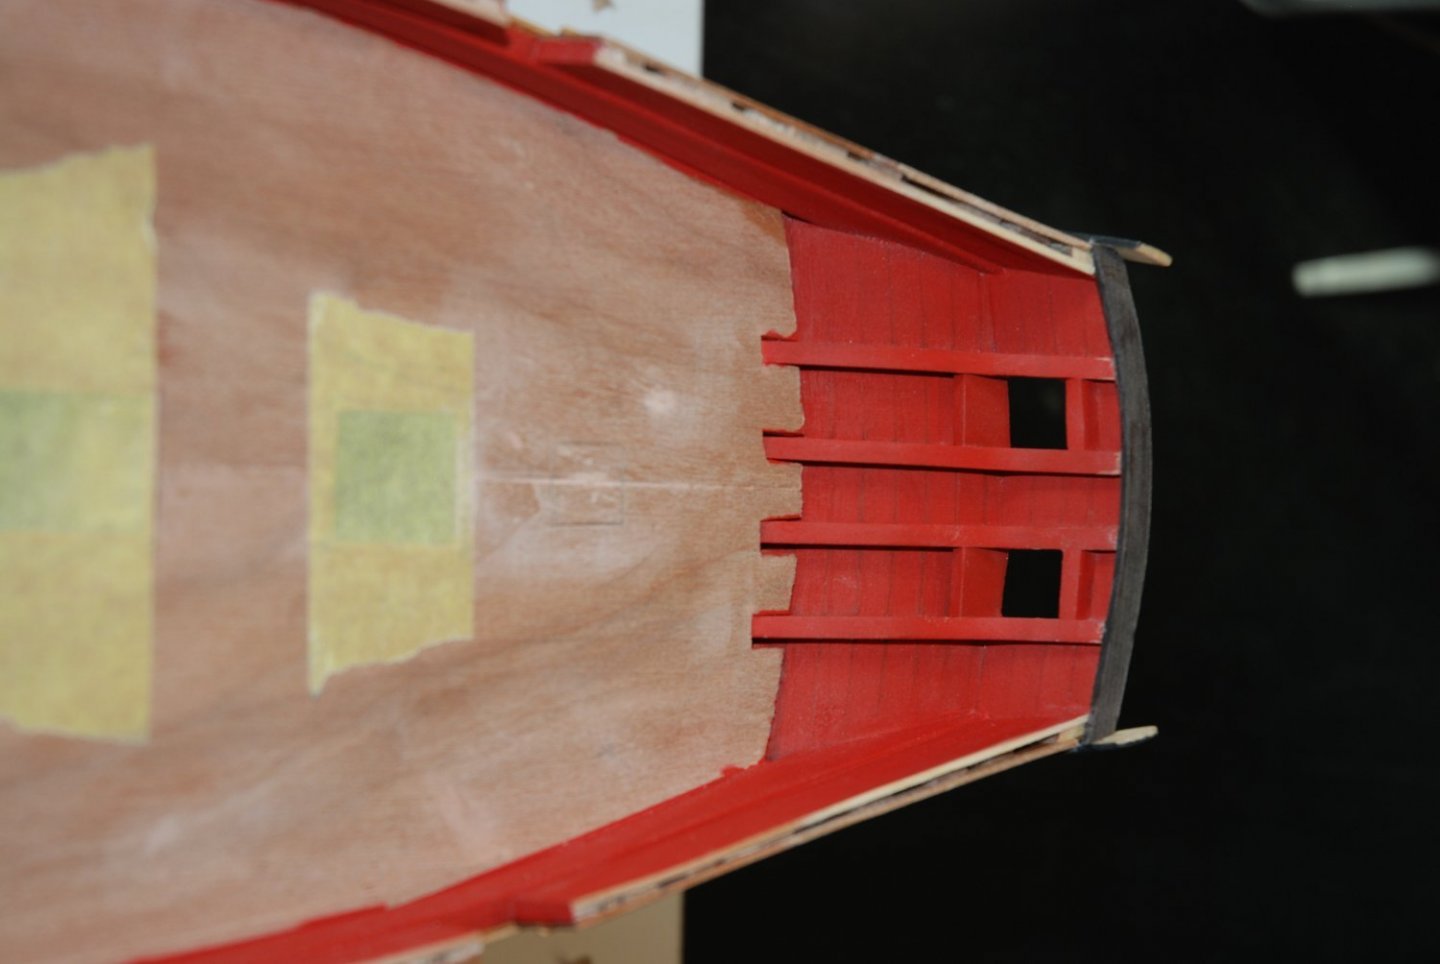
I was finally able to start working on the Cheerful again. What a pleasure! I worked on the margin planks. They were cut out of a 3/64" thick sheet of boxwood. Instead, I will outline the method used to determine the shape and size of these planks. I first made a photocopy of the deck plan that I cut into two parts along its length. Two small adjustments were needed to the bow of the cutter, either by gluing paper on the backside to add volume, or by cutting to best fit the shape of my model's deck. I then glued a white sheet on the photocopy and traced with a compass the inside line of the margin to obtain the final shape of the margin planks. Then I added the two scarph joints obtained again from a copy of the plan. The whole thing was colored with stabilos boss to separate the three segments of the margin. New copy of the work done in order to cut the 3 segments on all their length. My templates are ready. The three margin planks are cut out of the boxwood sheet with a cutter using these templates. The work on the scarph joints is not always easy and I had to do it three times for the small section at the bow before being satisfied with my work. In the picture below, nothing is glued yet. The edges for the scarph joints are darkened with pencil before gluing them on the model. And the same process is performed on the port side It's a bit tedious, but it allowed me to work serenely with the help of templates to cut the margin planks. Next step: setting up the waterway.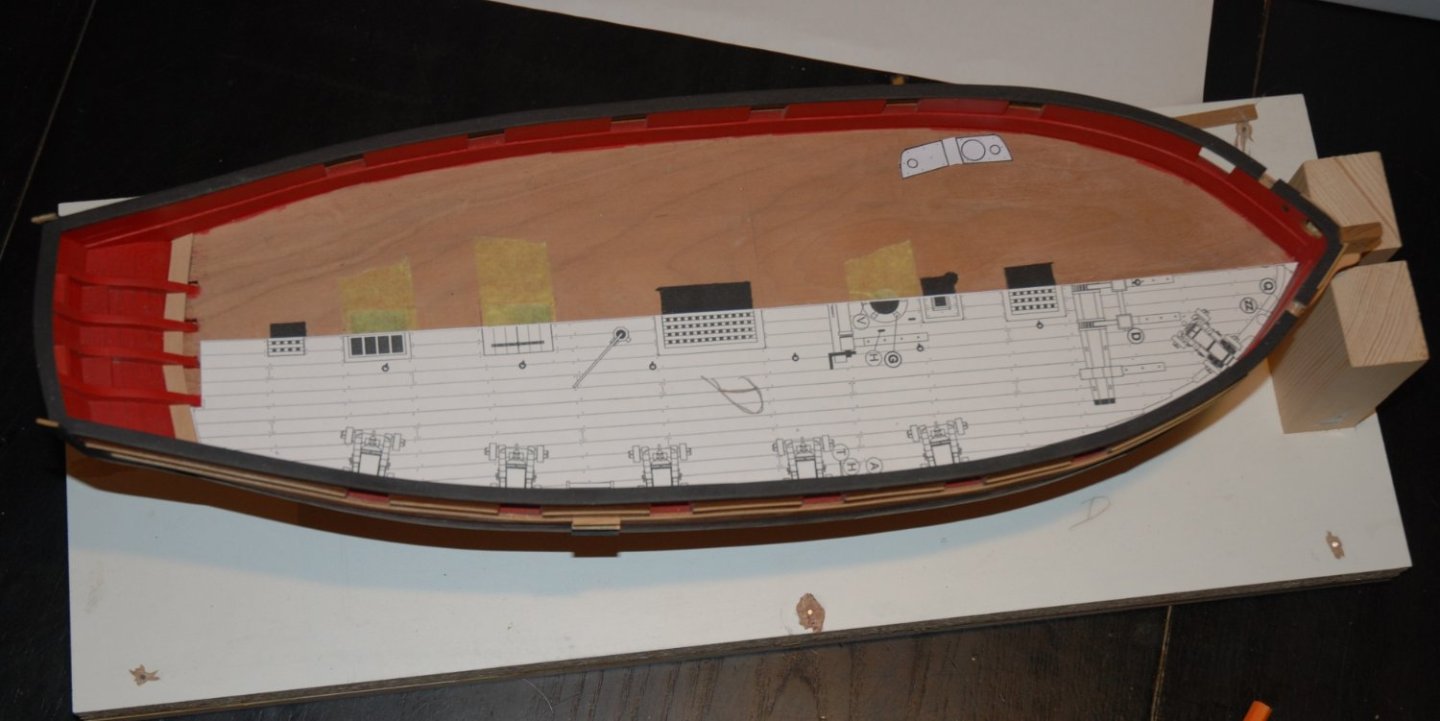


-
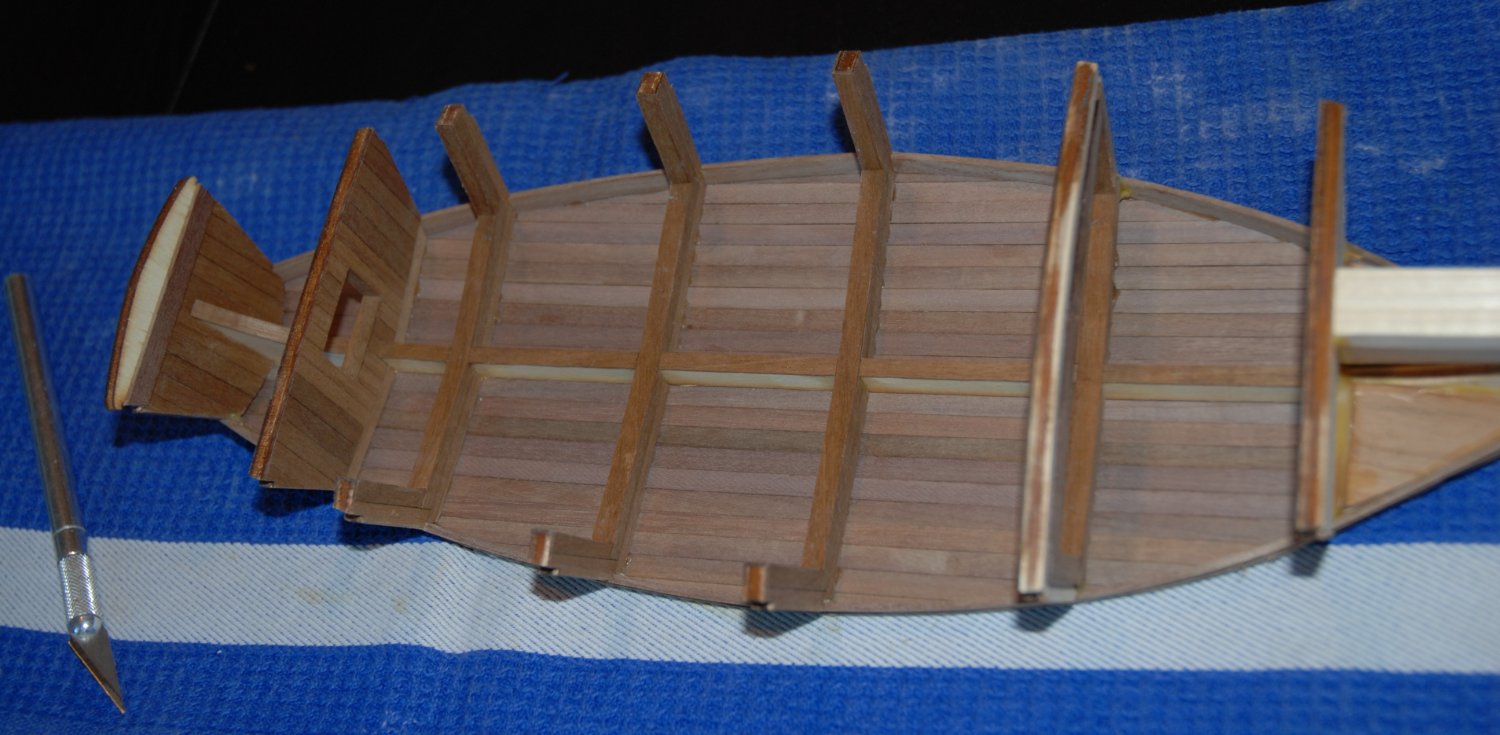
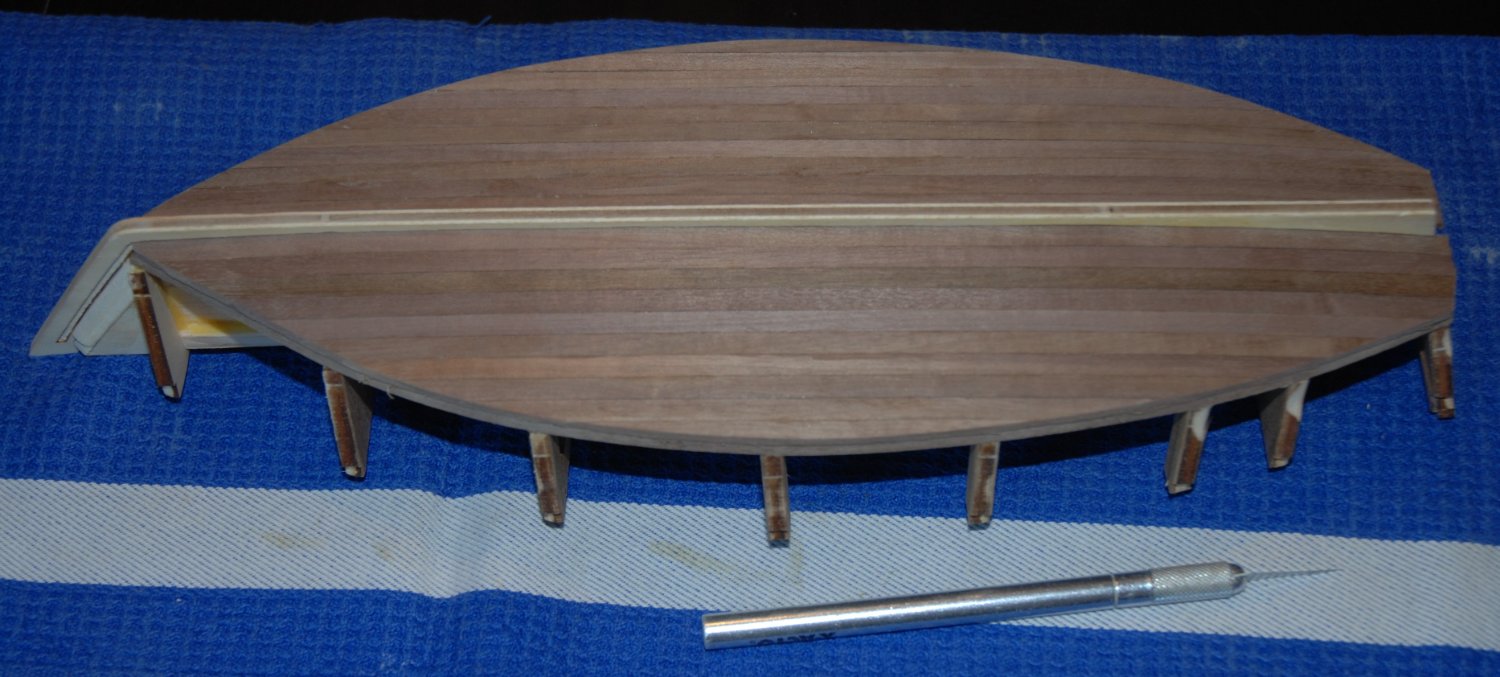
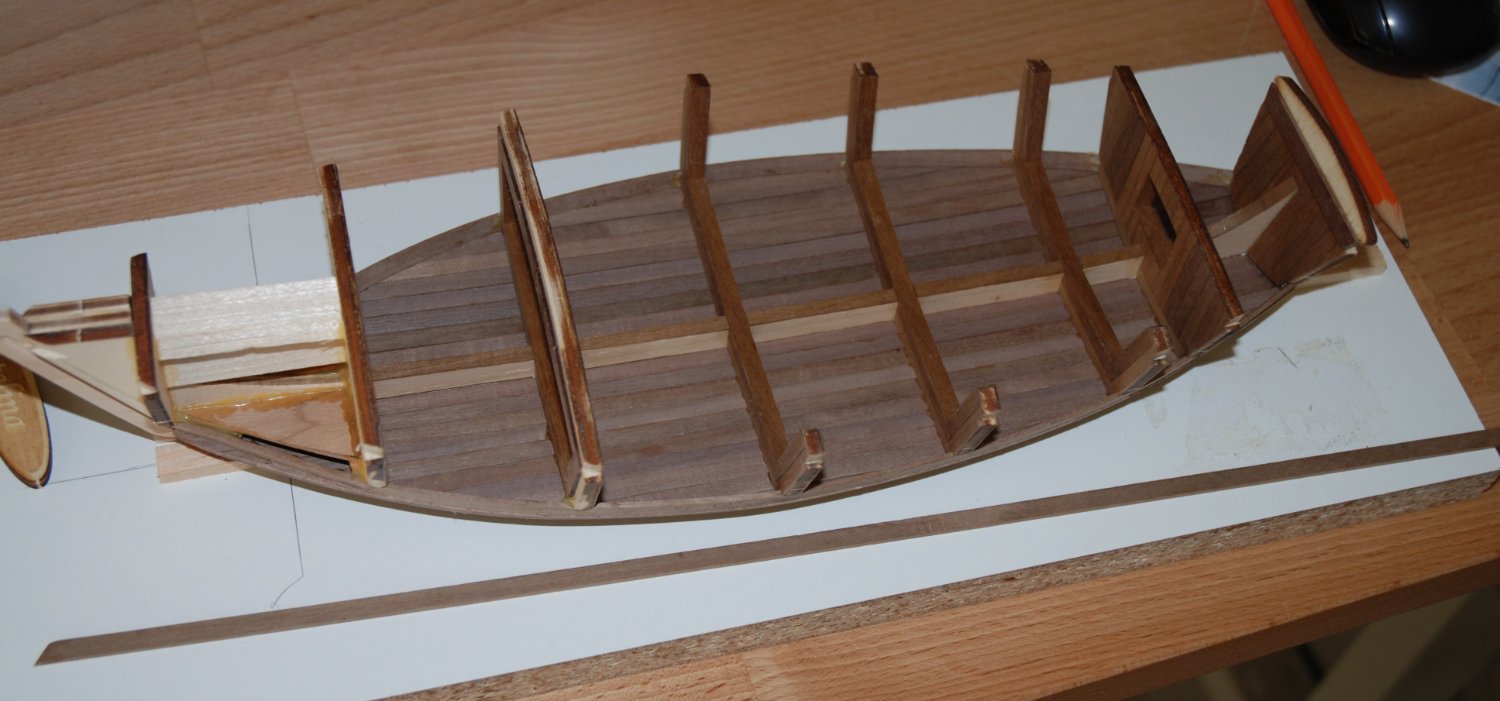
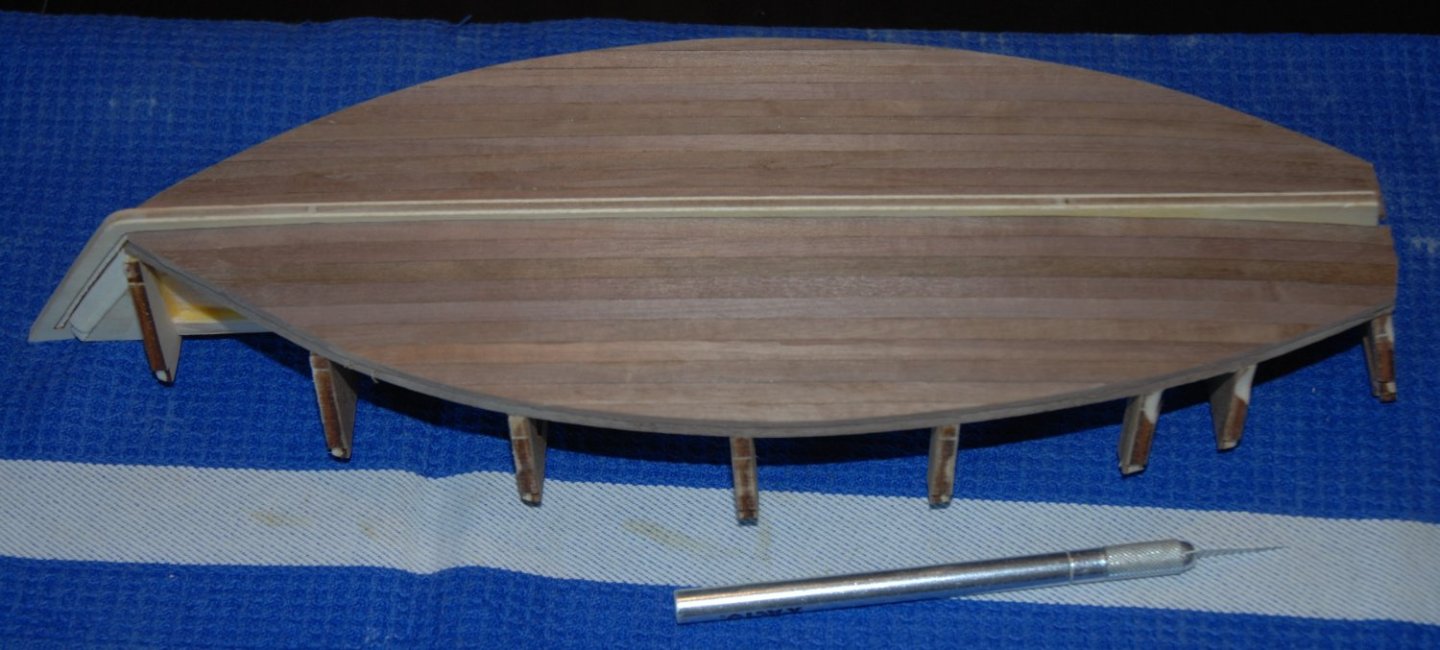
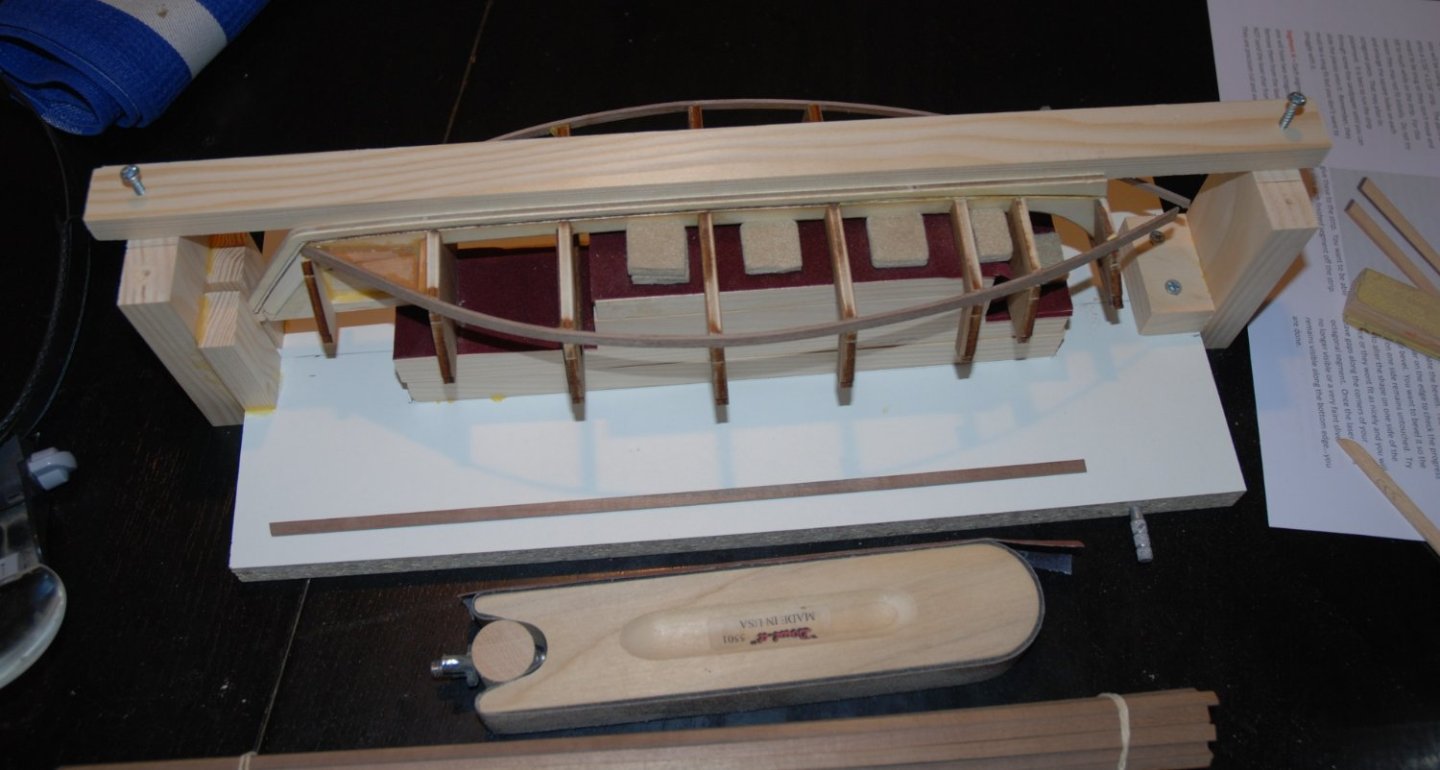
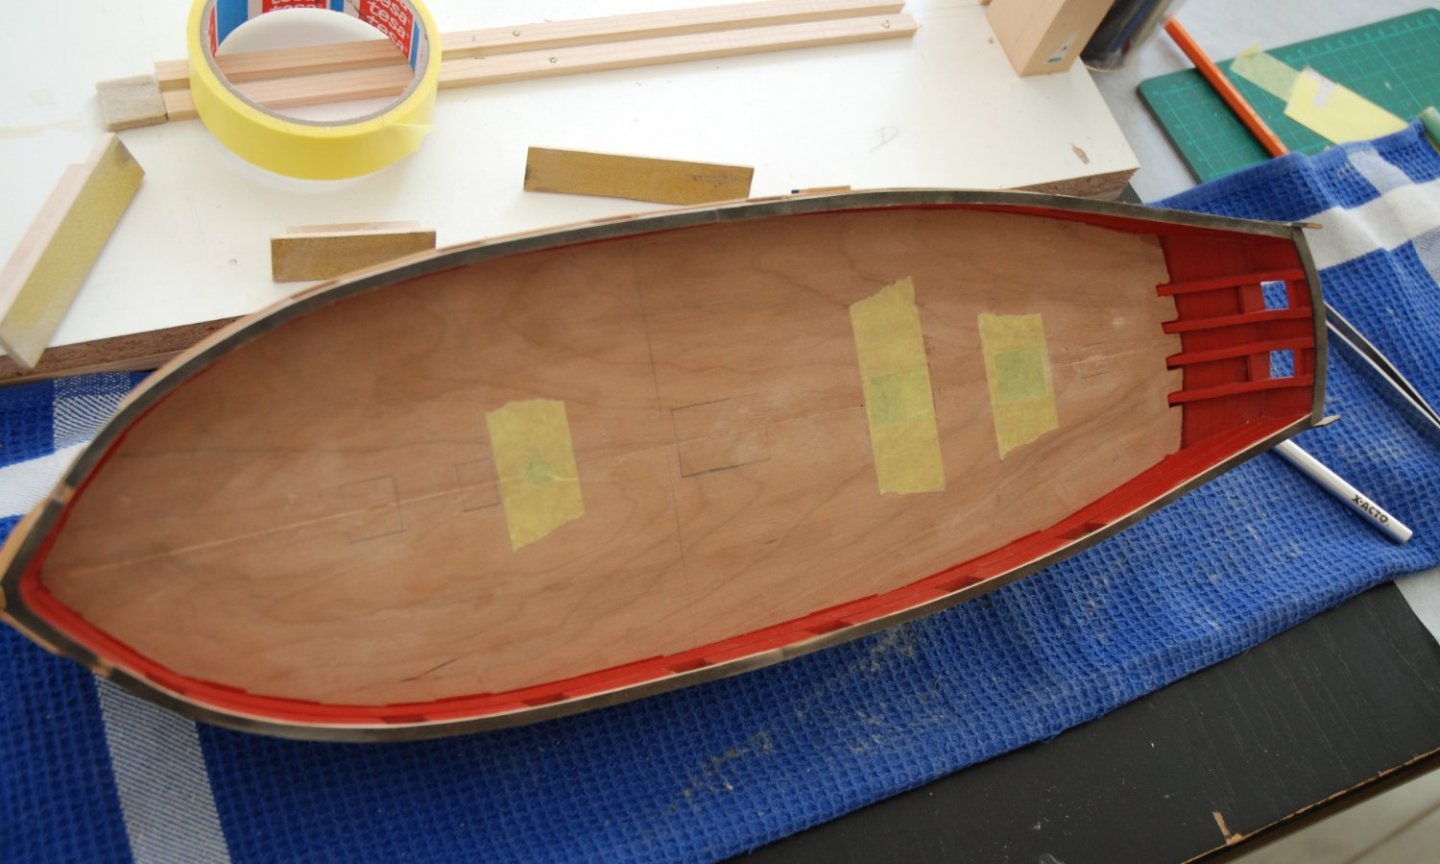
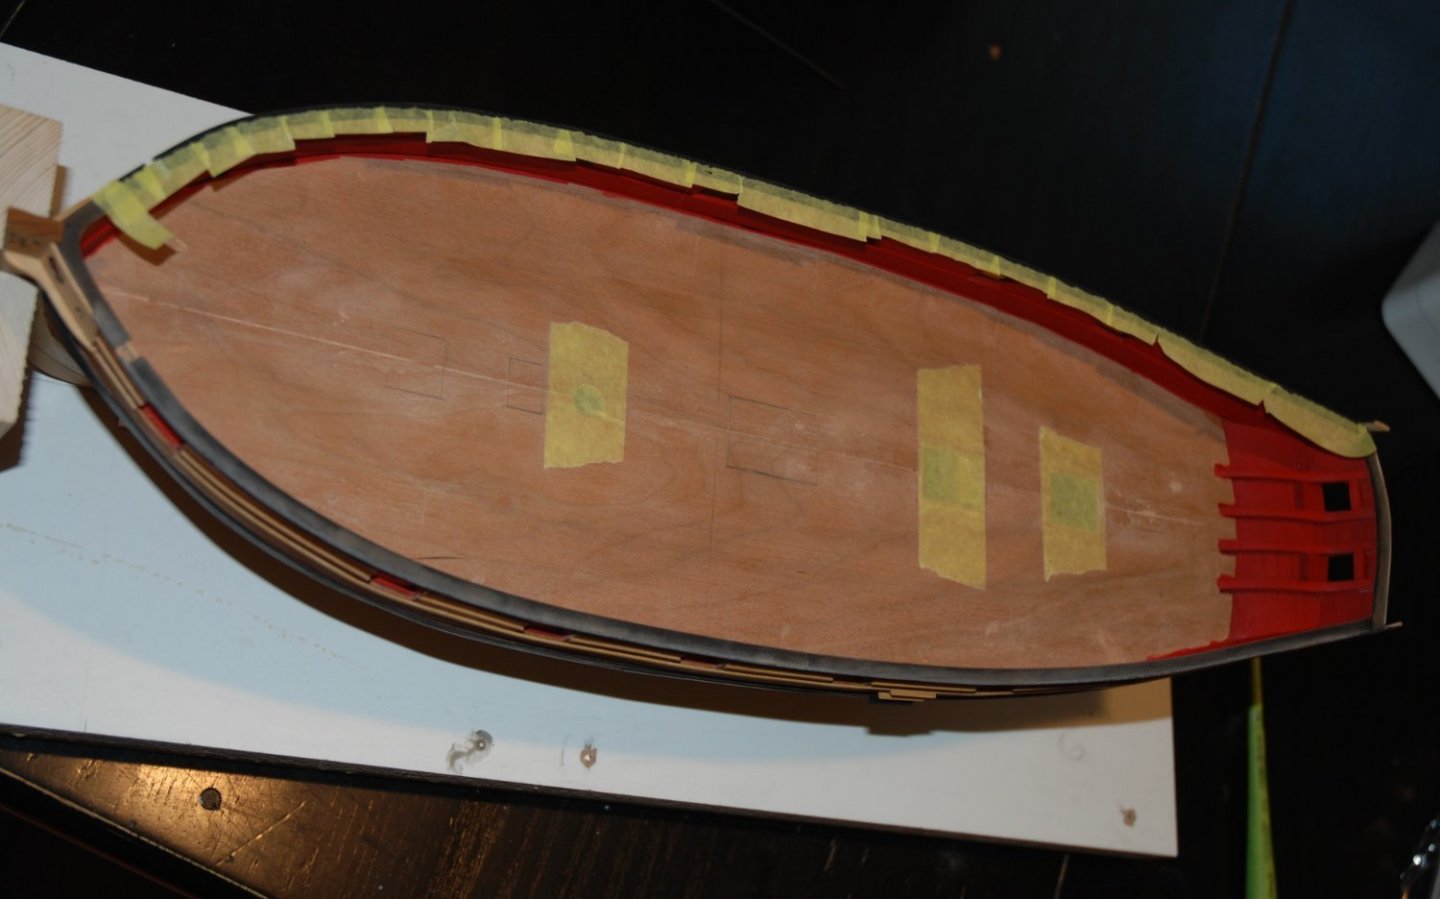
Thank You to all the 'Likes'. This week, I finished planking the flat bottom of the boat. I used my temporary support to make sure the keel stayed straight. The work base also made it easy for me to use clamps to make sure there were no gaps between the planks. Some glue residue to remove but overall I am quite satisfied. I also added a filler at the bow to stabilize the construction. The bottom has been sanded. Only one small regret for the moment: it's a pity that the keel is in plywood and not in wood. It will be necessary to stain it so that one does not make the difference. But apart from this point, this kit is a real pleasure to build. The planking wood is really of very good quality. I started to prepare the notches at the top of the frames in order to install the top batten that will permanently stabilize the frames.


- 57 replies
-
- 7
-

-
- marisstella
- batelina
- (and 1 more)
-
What a pleasure to have been able to follow this build. It is truly a remarkable work. A little beauty. Thank you for sharing !
-
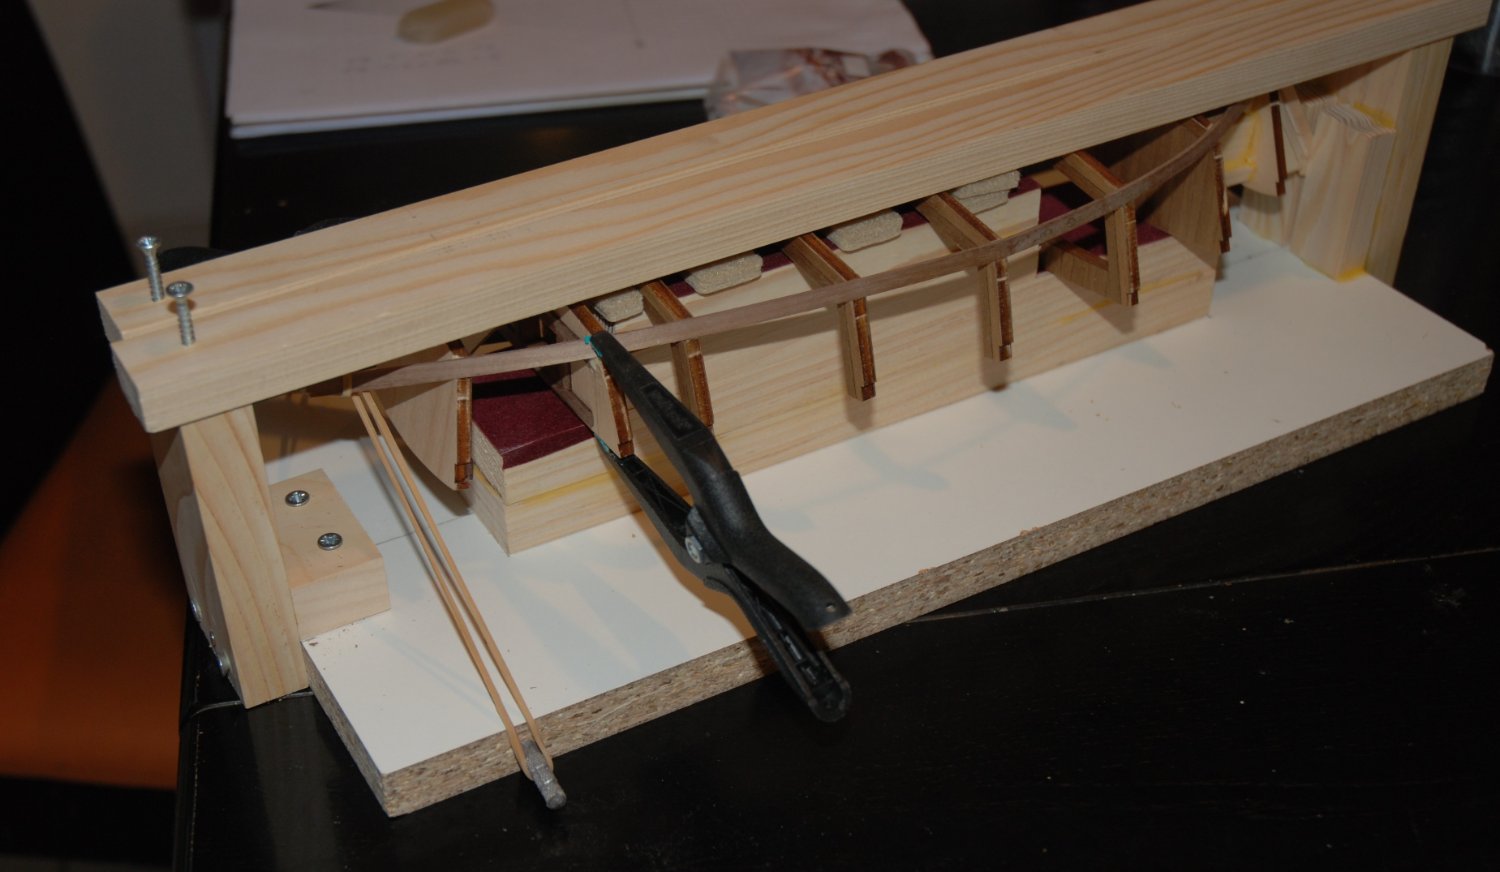
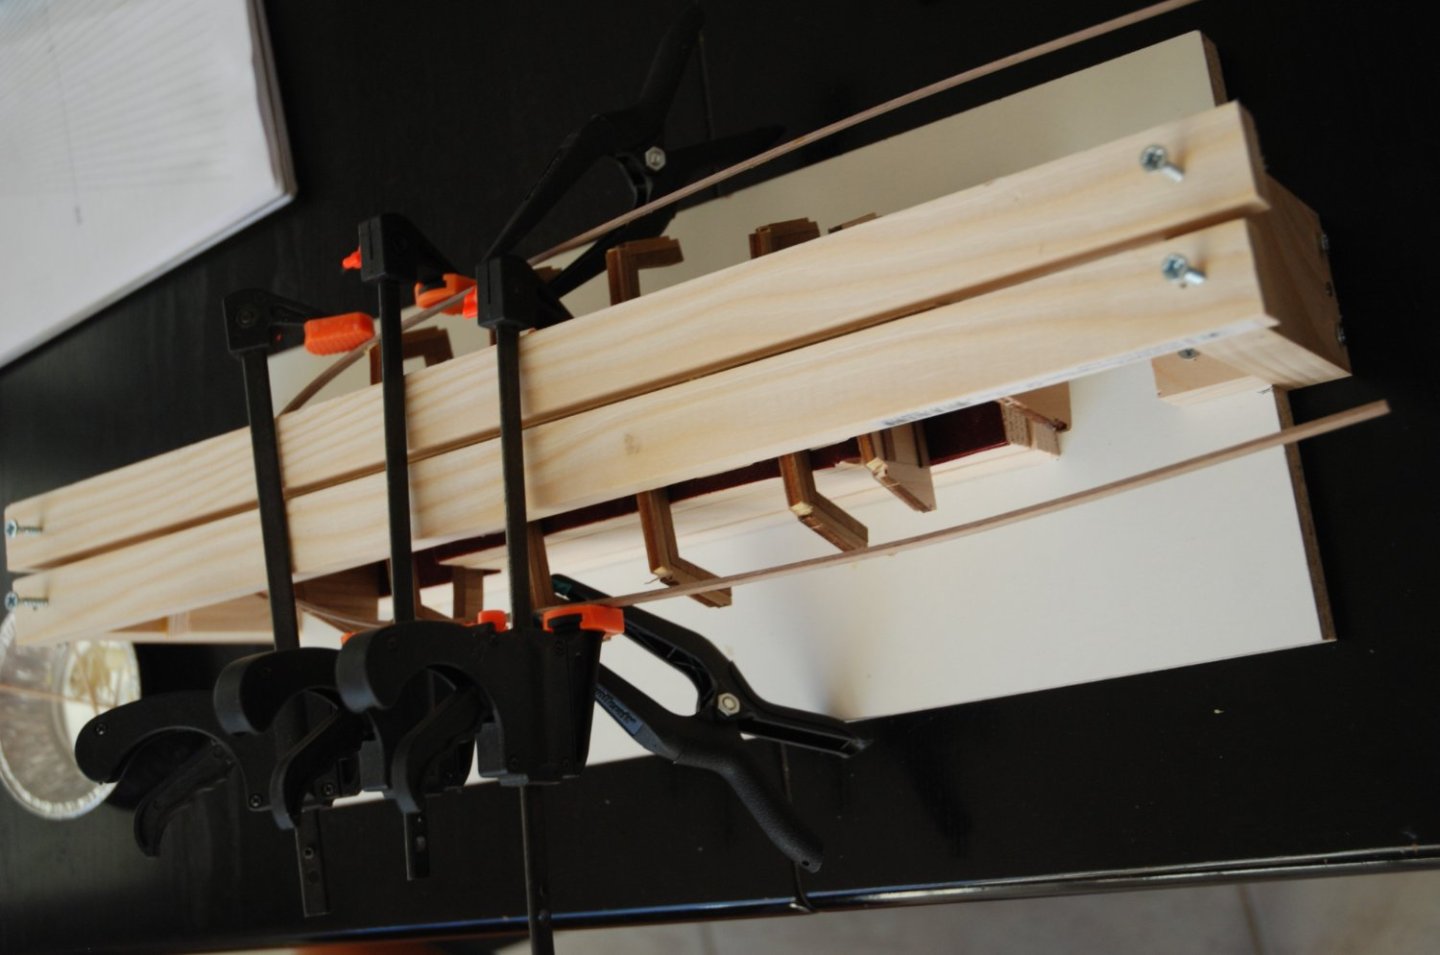
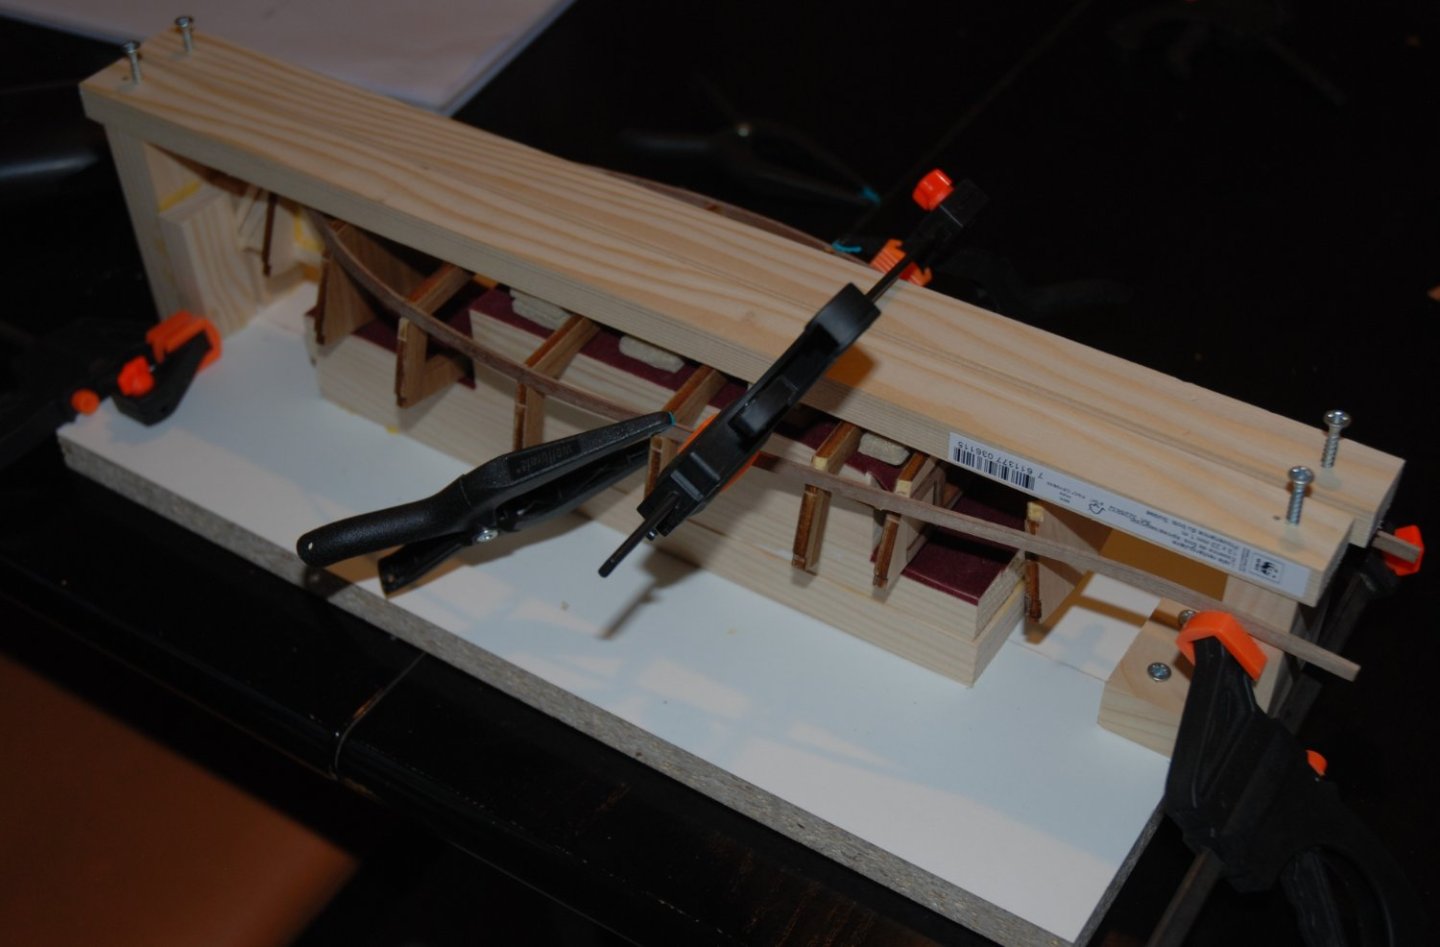
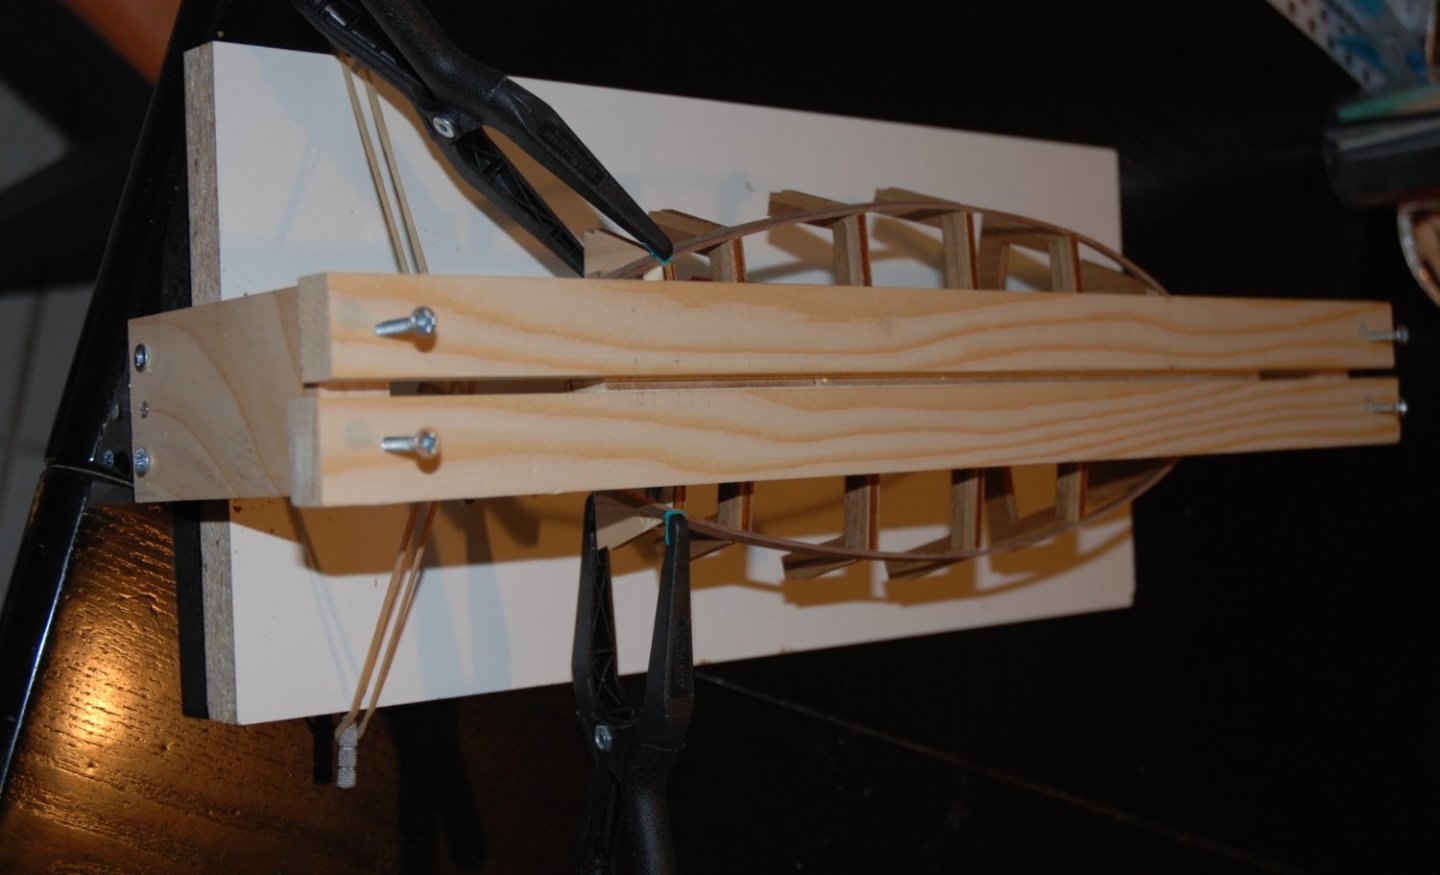
Thank You to all the 'Likes'. I put the 2 battens that will be used as a limit for the bottom planking of the boat. MarisStella, in its instruction manual, insists on keeping the keel straight during the installation of these battens because at this moment, the installation is still fragile and the keel being in plywood it can deform very quickly. So I built a temporary work base that will keep the keel straight and facilitate the planking phase. First step, adjust the slots that will receive the battens. I start by gluing the battens from the bow and work my way up to the stern. Nothing too complicated, you just have to take your time. Before installing the 2 battens at the top of the frames, I will proceed to plank the flat bottom of the Batelina. This will help stiffen the structure.

- 57 replies
-
- 7
-
-
- marisstella
- batelina
- (and 1 more)
-
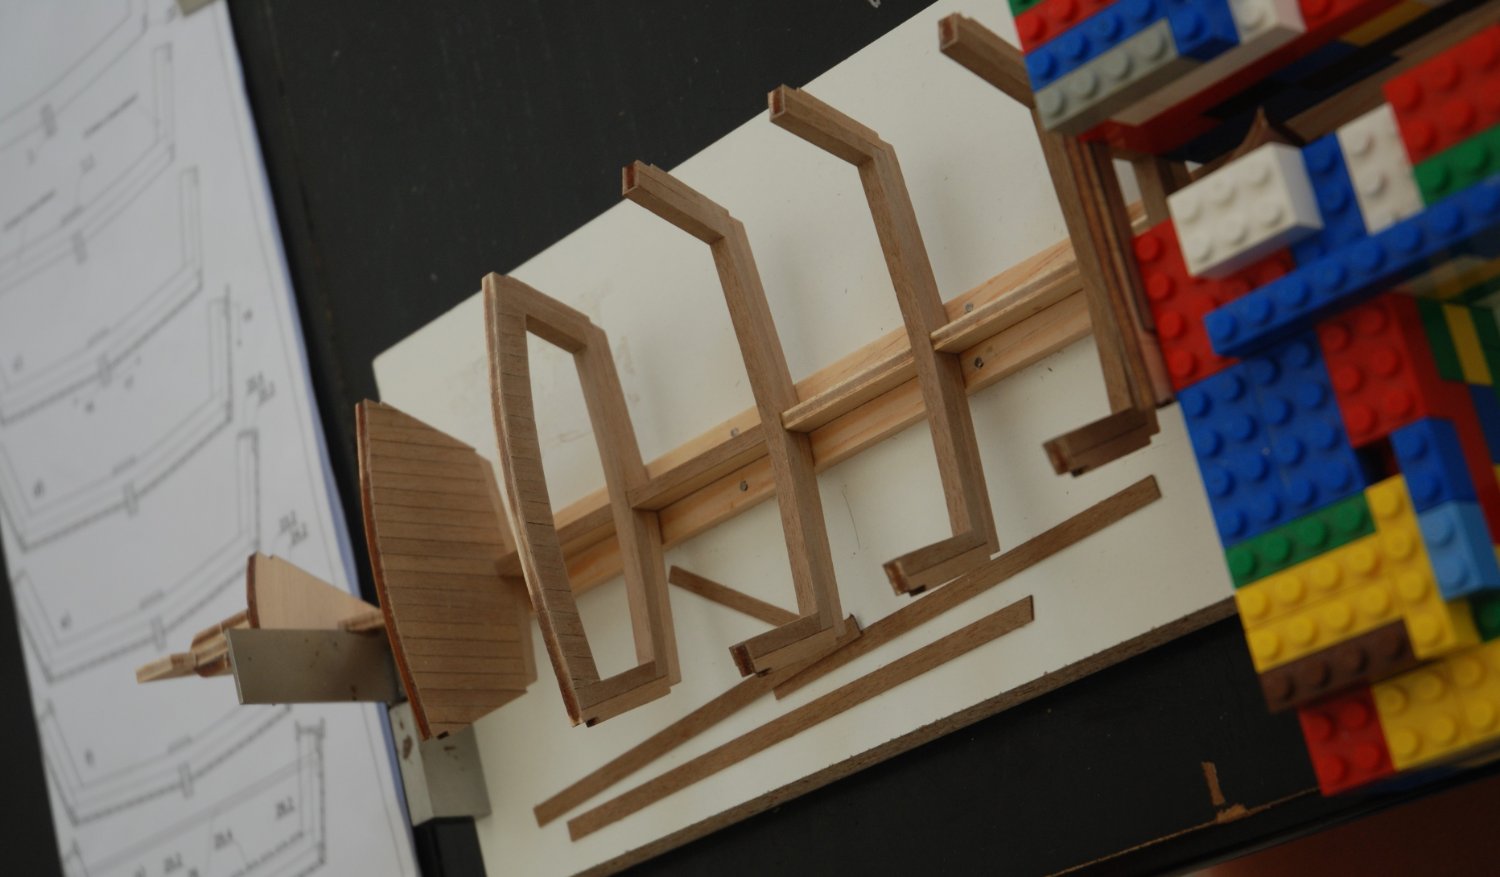
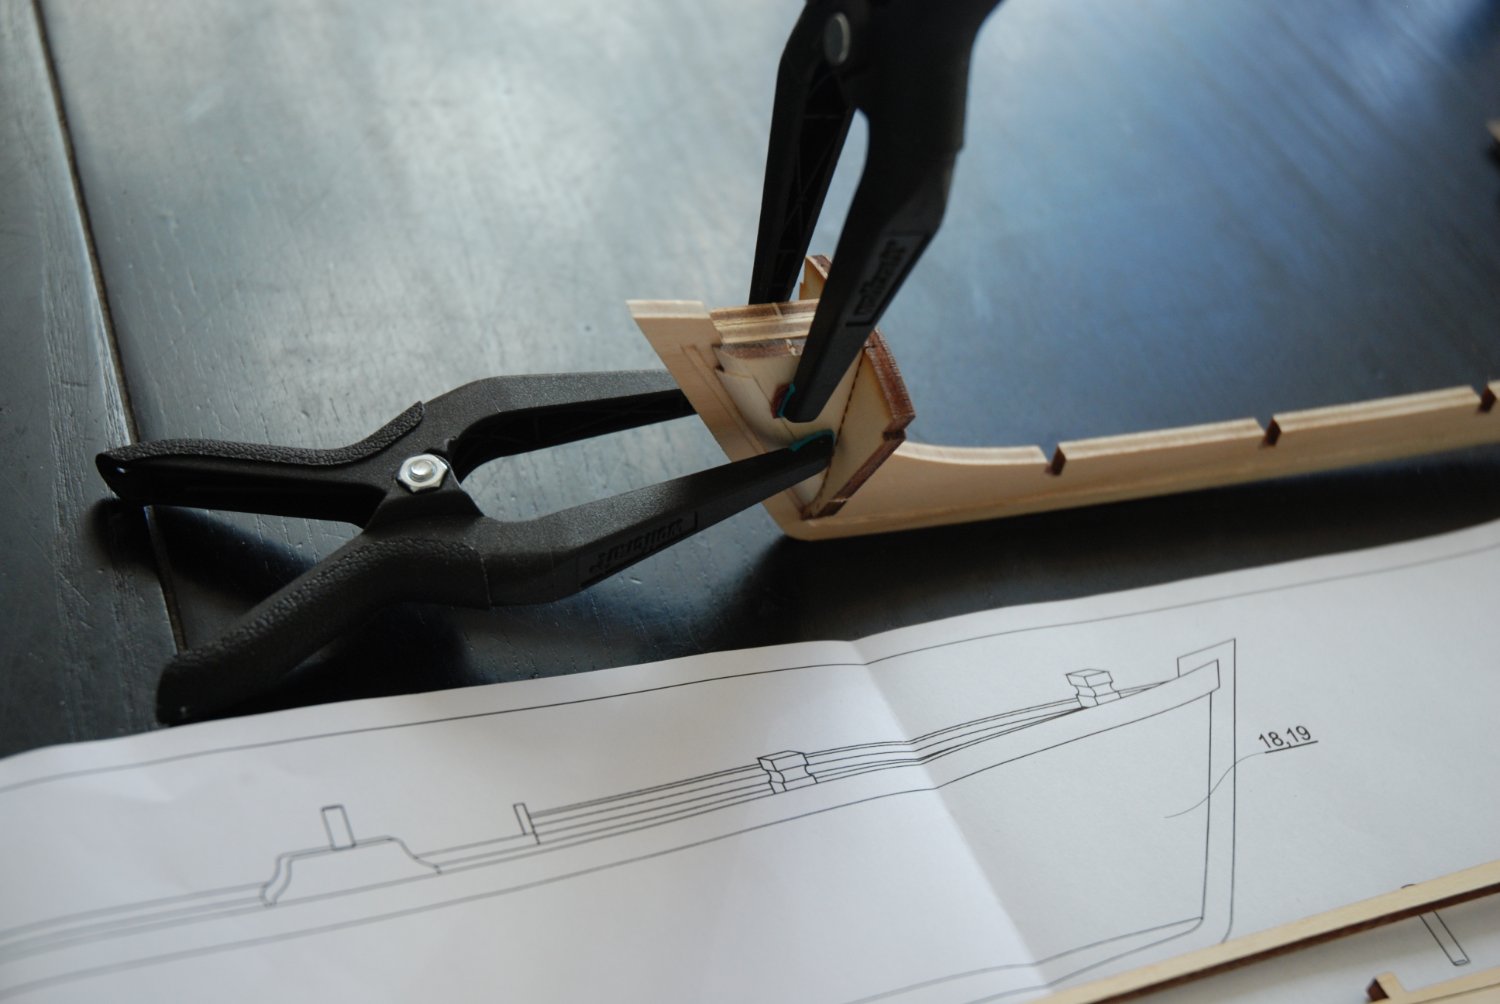
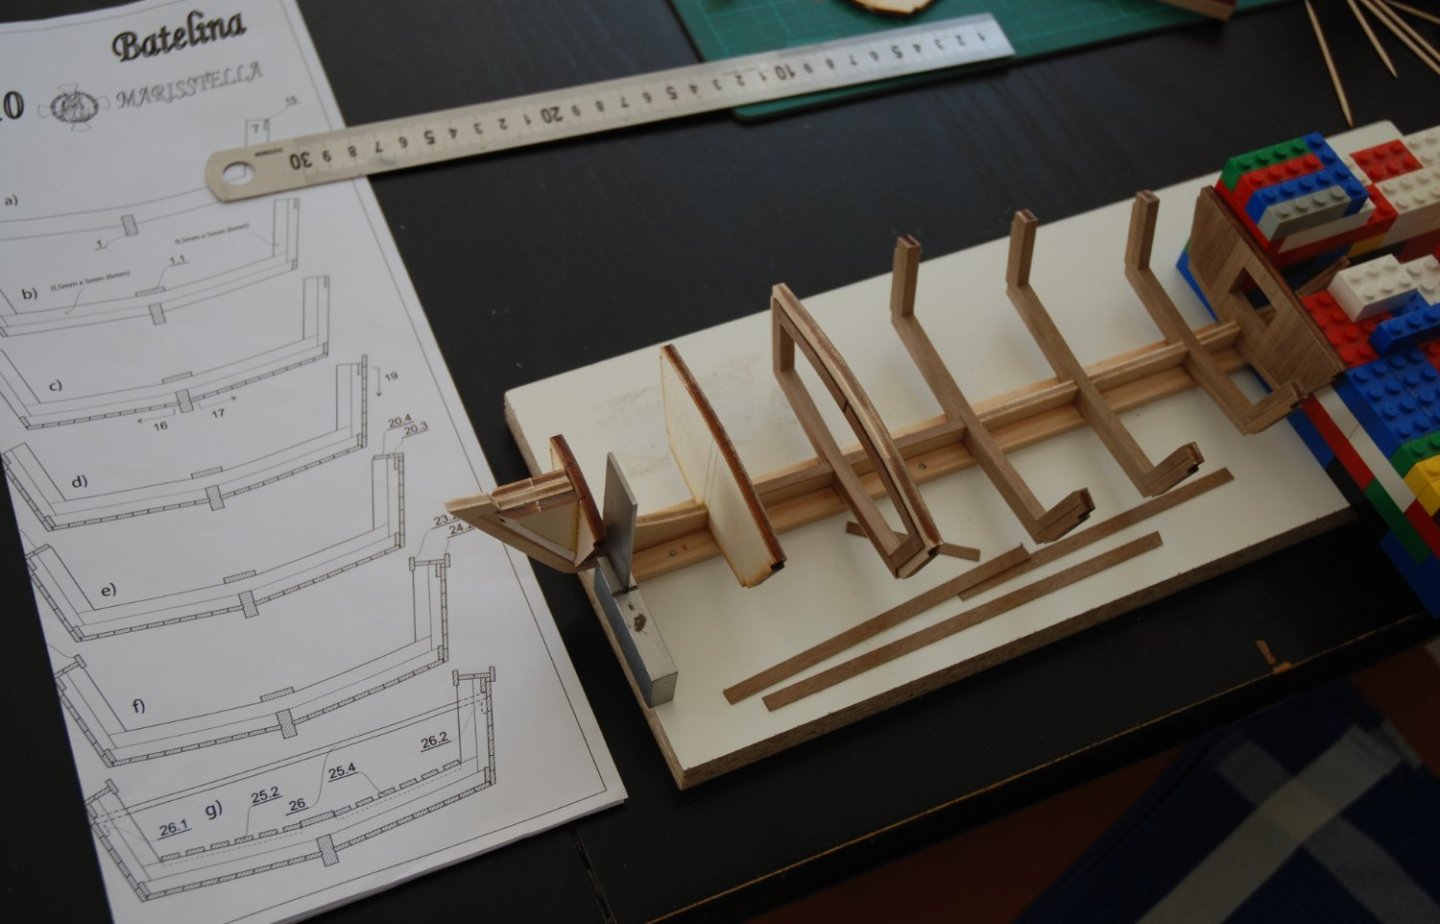
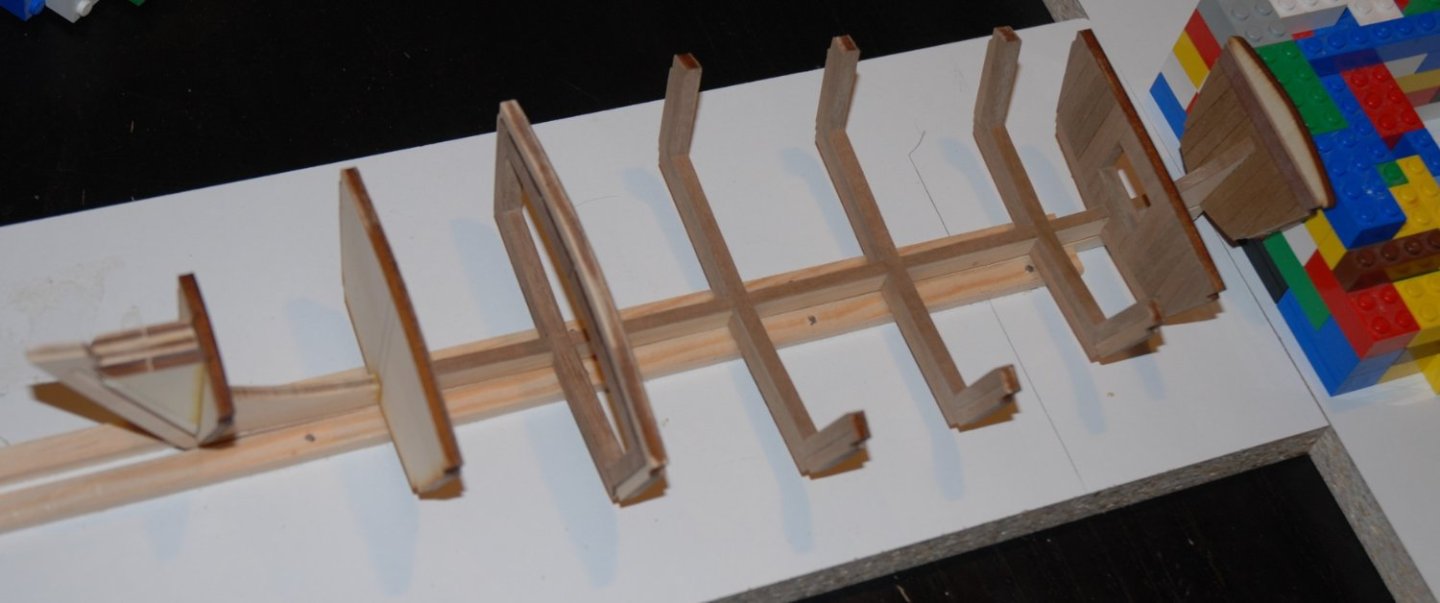
Thank You to all the 'Likes' and Thank You Captain Hook for your words of encouragement. I wasn't really lacking motivation but after my heart problems I was completely tired and it took a whole rehabilitation program to get back into shape. But fortunately, I am now much better and I can gradually resume all my activities. All the frames have been covered with the walnut strips. I really think that preparing them before putting them on the keel was a good idea. It makes the job much easier to do. The frames are then glued to the keel, taking care to align them properly. My children's Legos were again put to use. Thank goodness my kids are past playing age... All the frames are in place. I will be able to glue the 4 battens that will stiffen the frames before proceeding with the planking. You can see the slots at the bottom and top of each frame. These slots will need to be adjusted so that the battens do not protrude from the frames. It will be my next task.

- 57 replies
-
- 9
-
-
- marisstella
- batelina
- (and 1 more)
-
Thank You to all the 'Likes' Work continues on the preparation of the various frames

- 57 replies
-
- 9
-
-
- marisstella
- batelina
- (and 1 more)
-
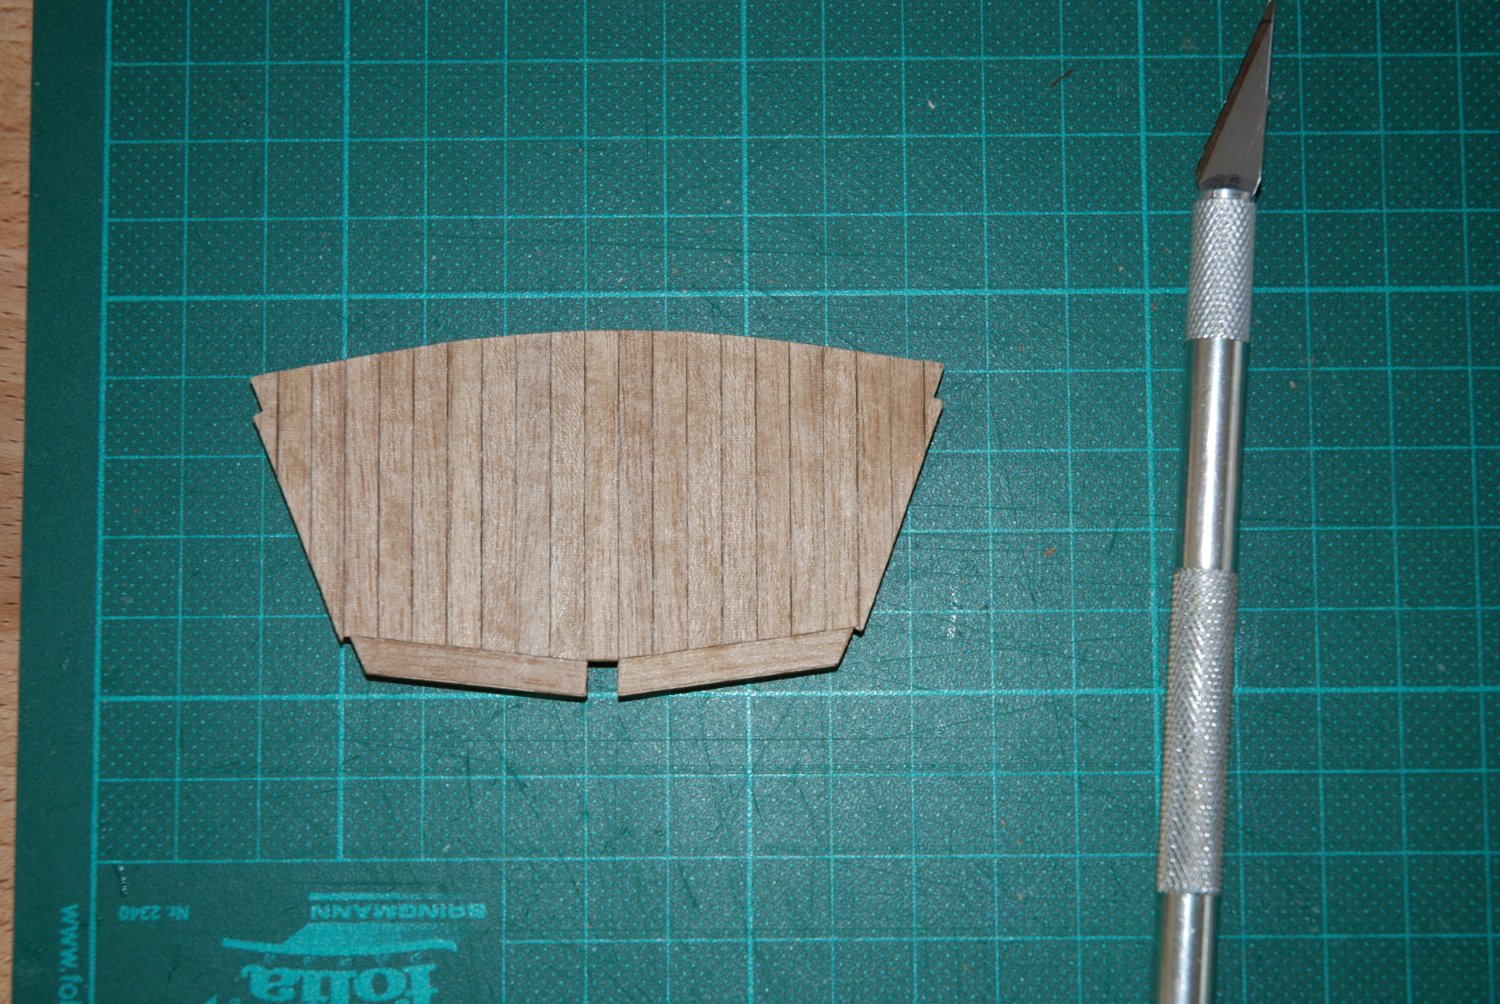
Thank you to all the 'Likes'. I worked on frame #5 and decided to anticipate the plywood covering phase. Indeed, as already indicated the frames are provided in plywood and to obtain a more interesting result, MarisStella recommends to cover the plywood frames with walnut strips of 0,5 x 5 mm. Normally, this step should only be done once all the frames are installed on the keel. But I think it is better to do this before gluing each frame. In my opinion, it makes the task easier and gives a better result. All strips are glued to the side of the frame that will remain visible. The strips are cut to their final size and shape. The frame can then be installed on the keel All that remains is to repeat the operation on all the other frames.
- 57 replies
-
- 10
-
-
- marisstella
- batelina
- (and 1 more)
-
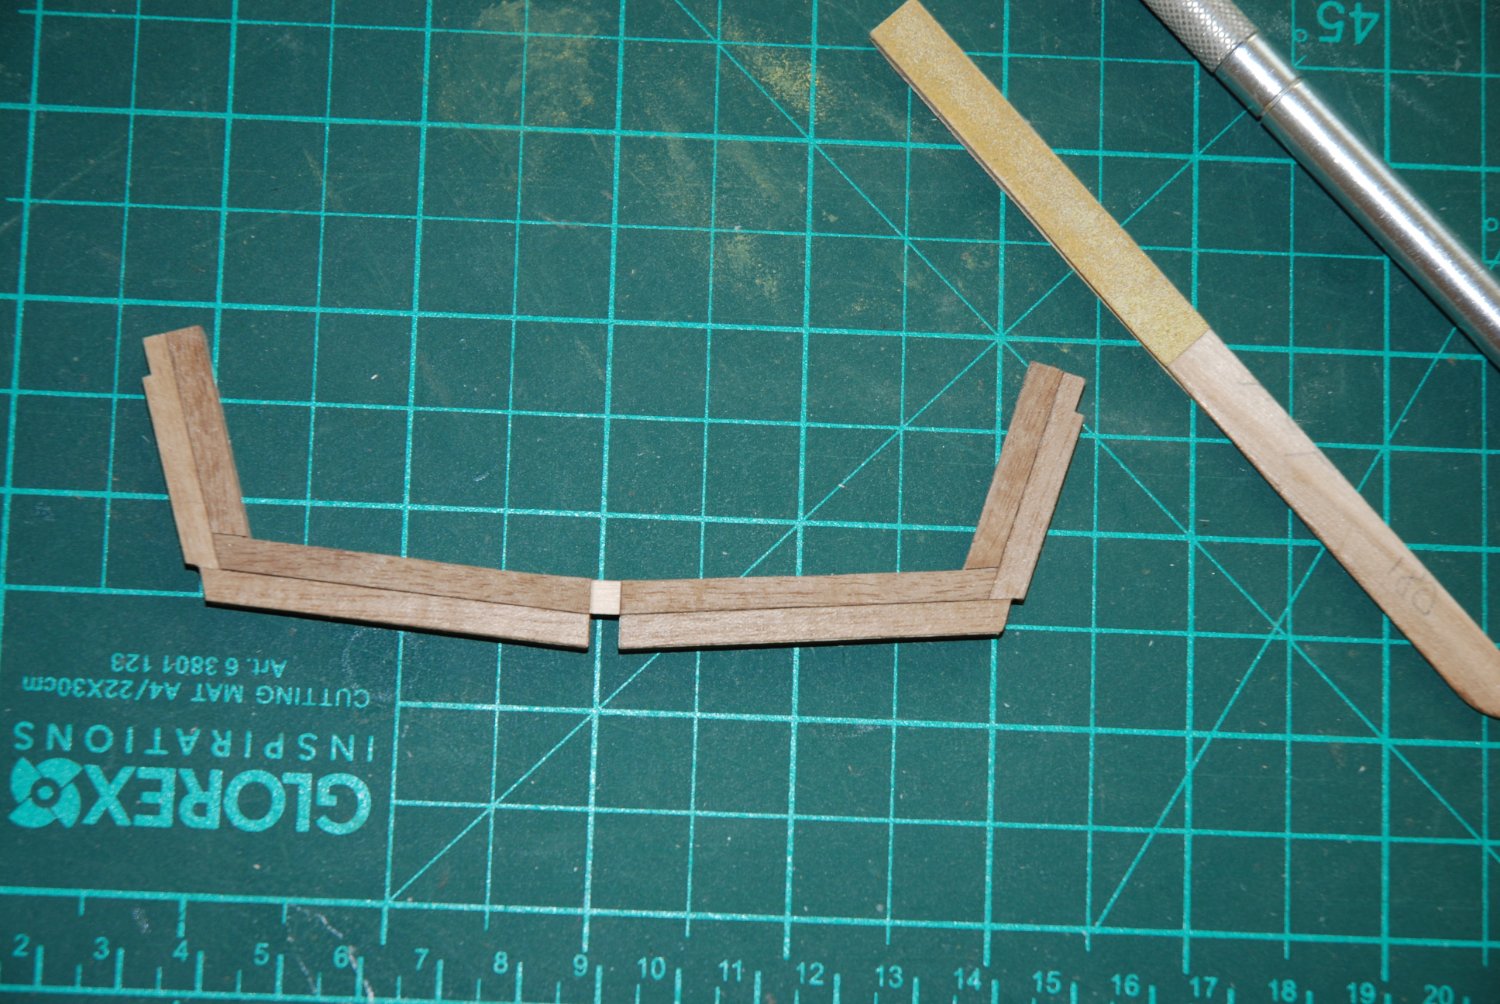
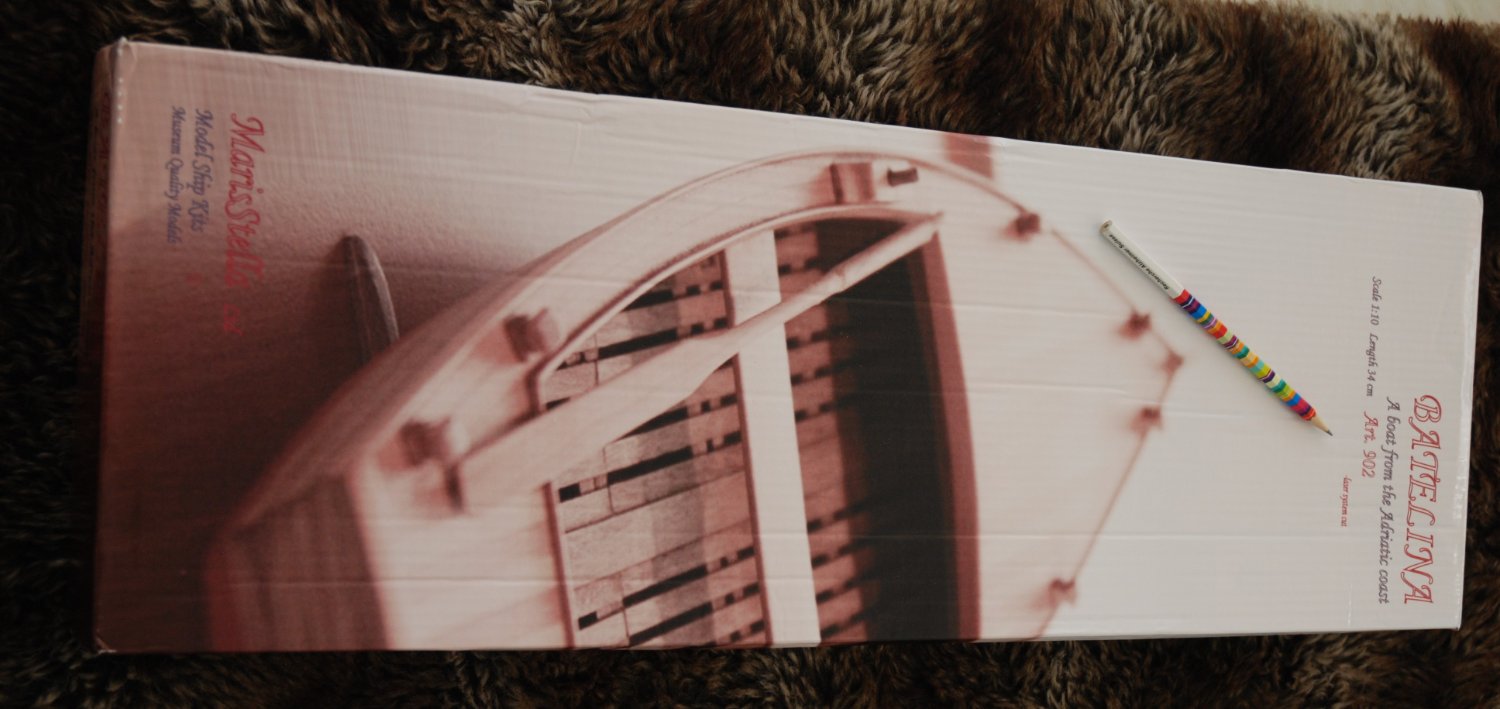
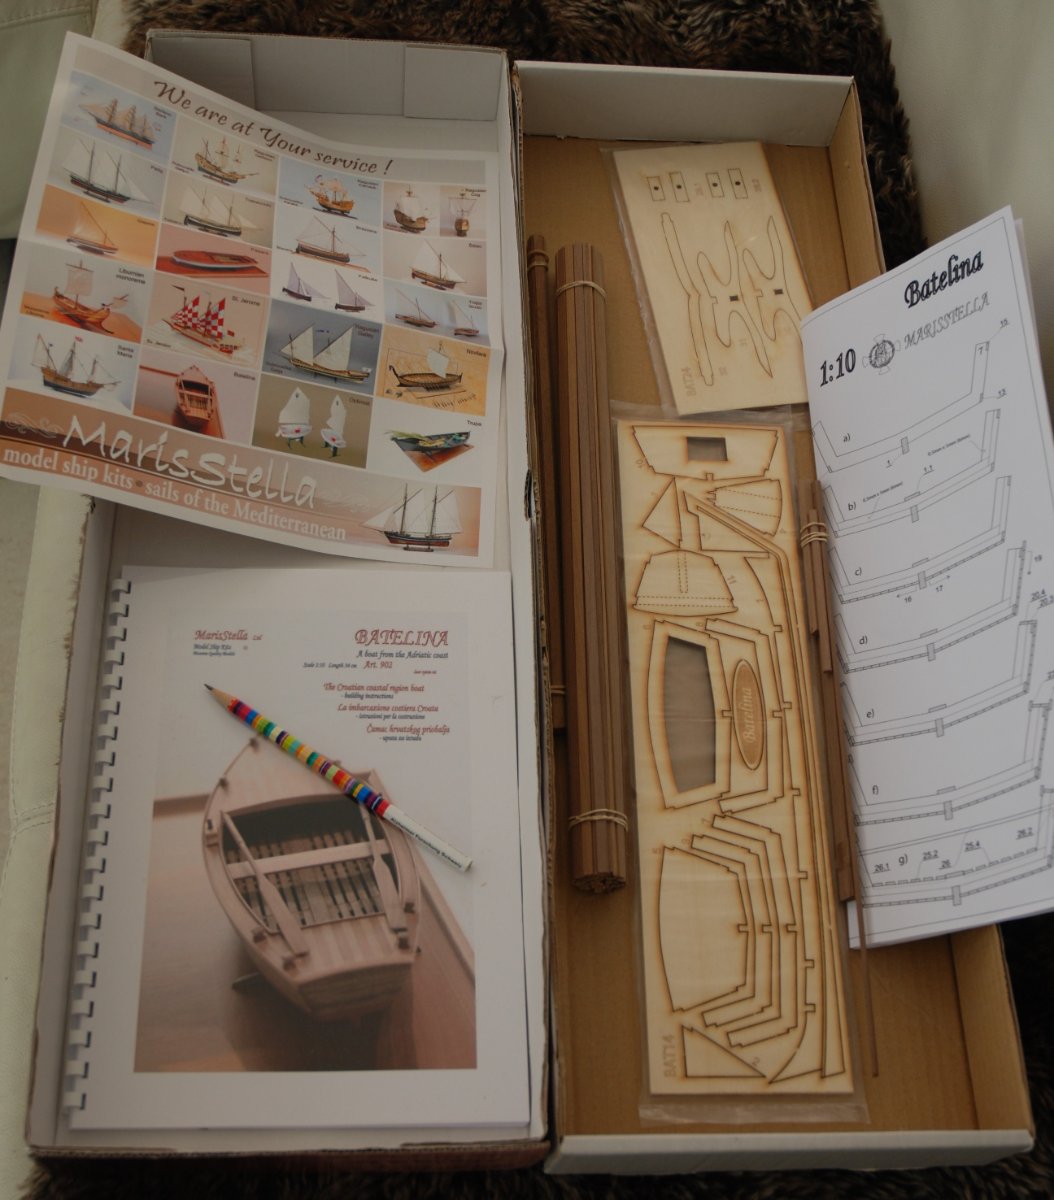
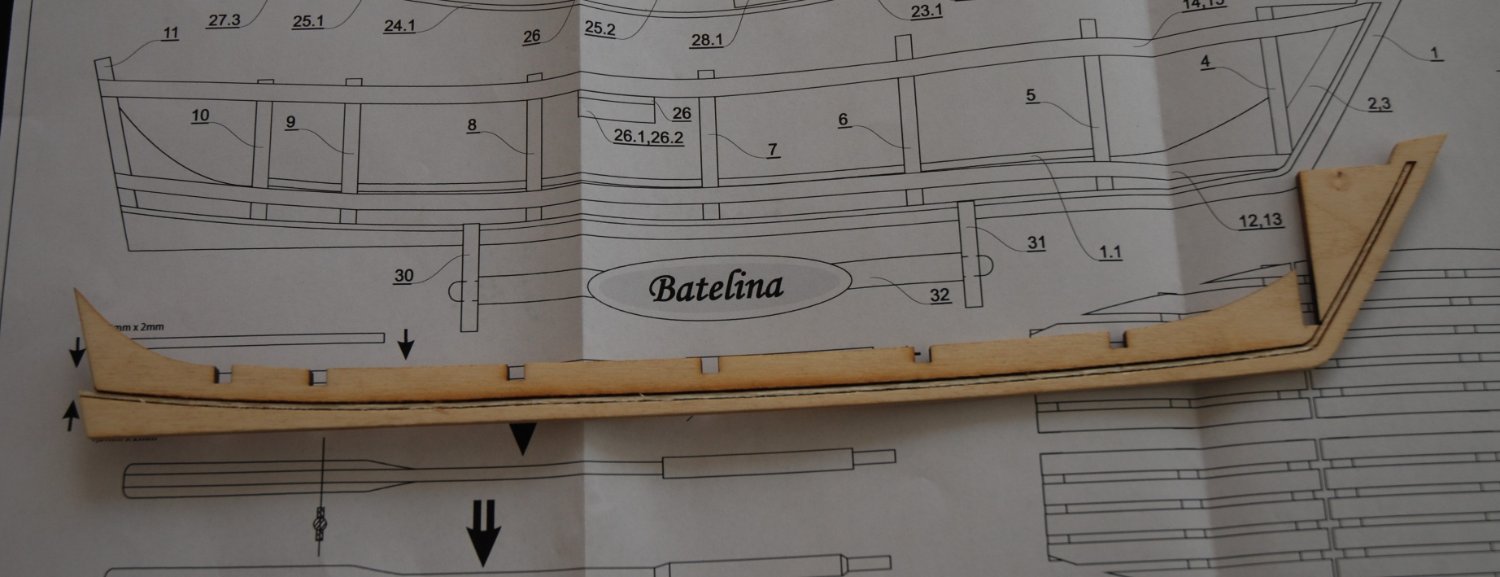
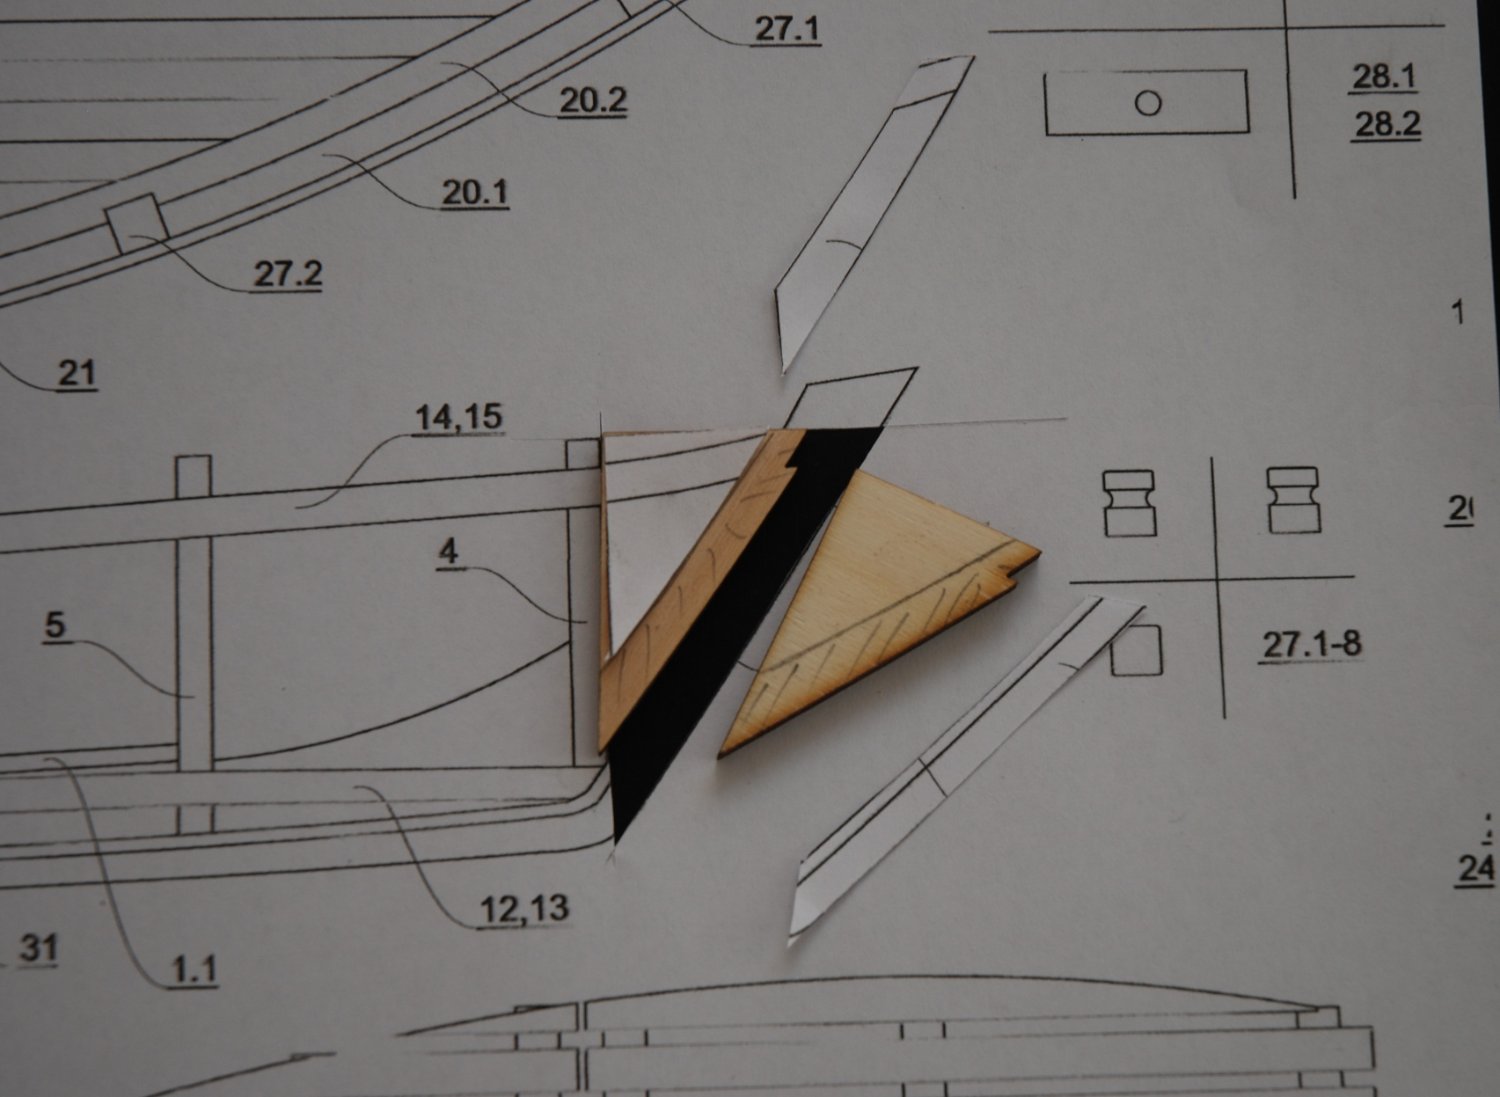
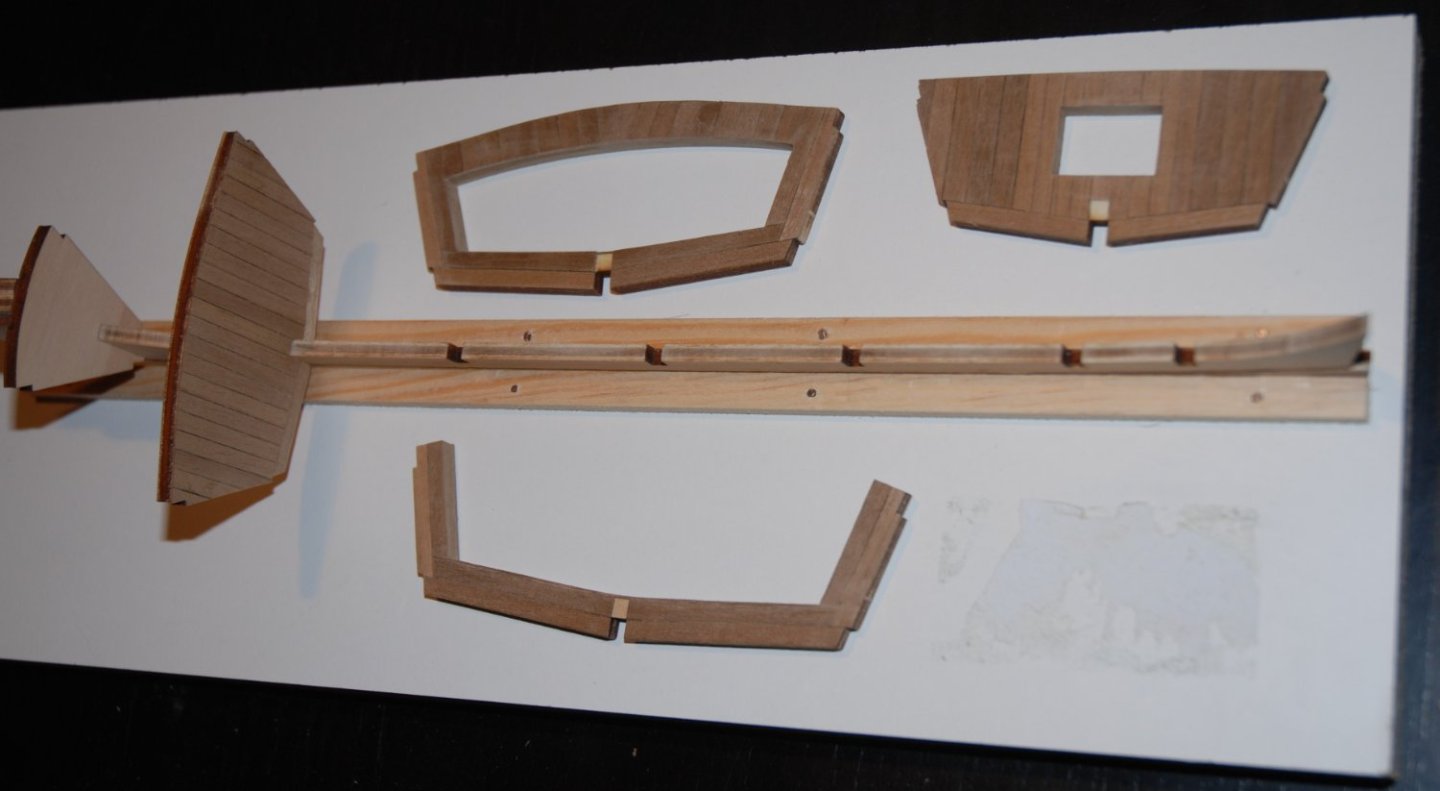
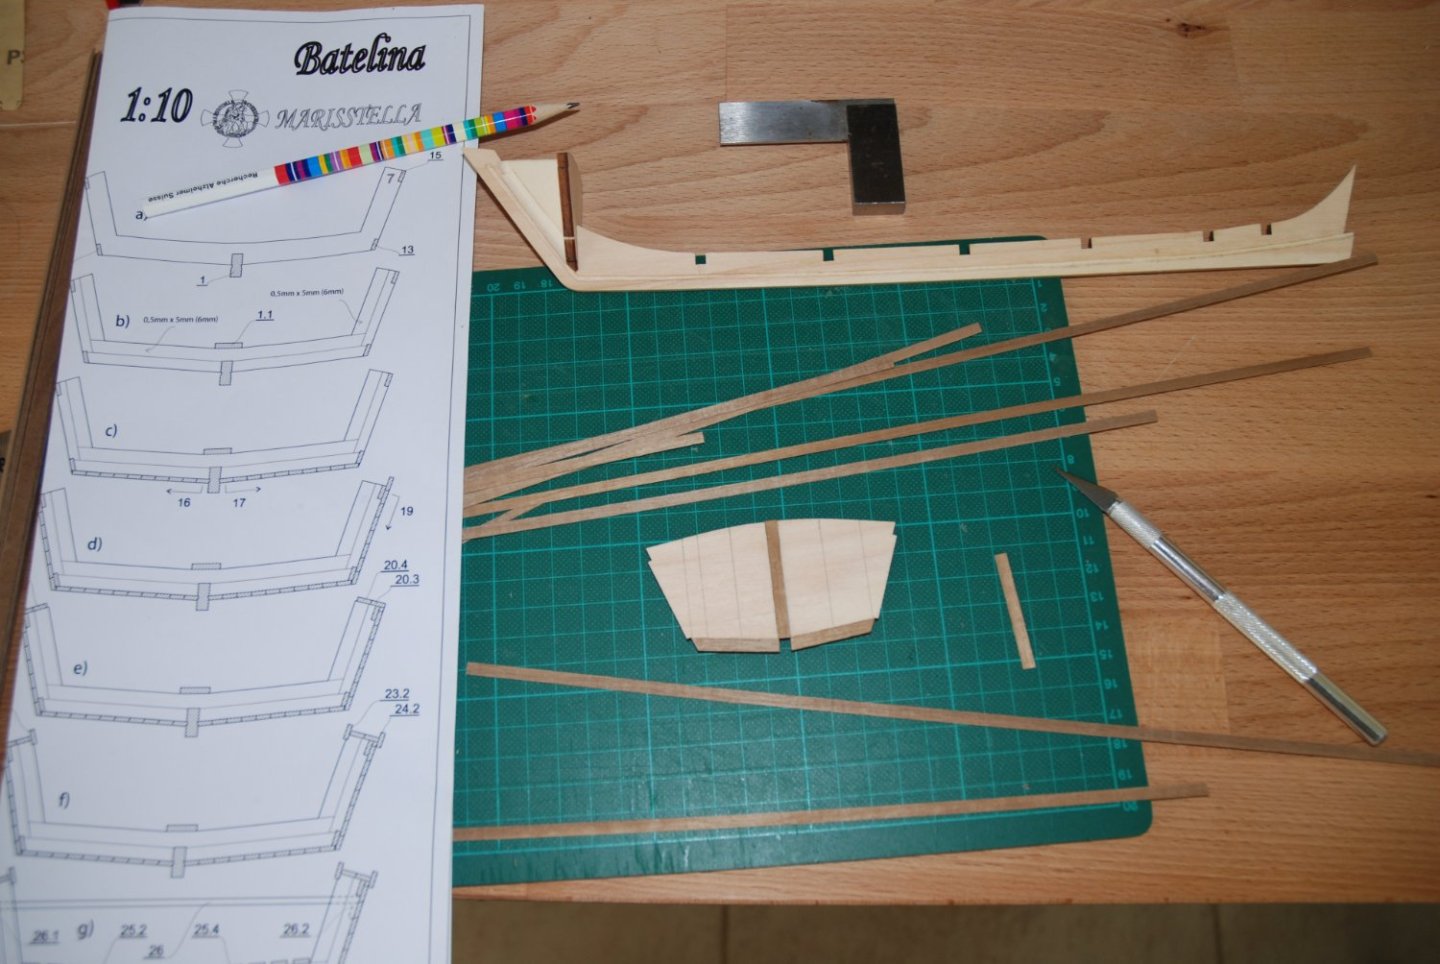
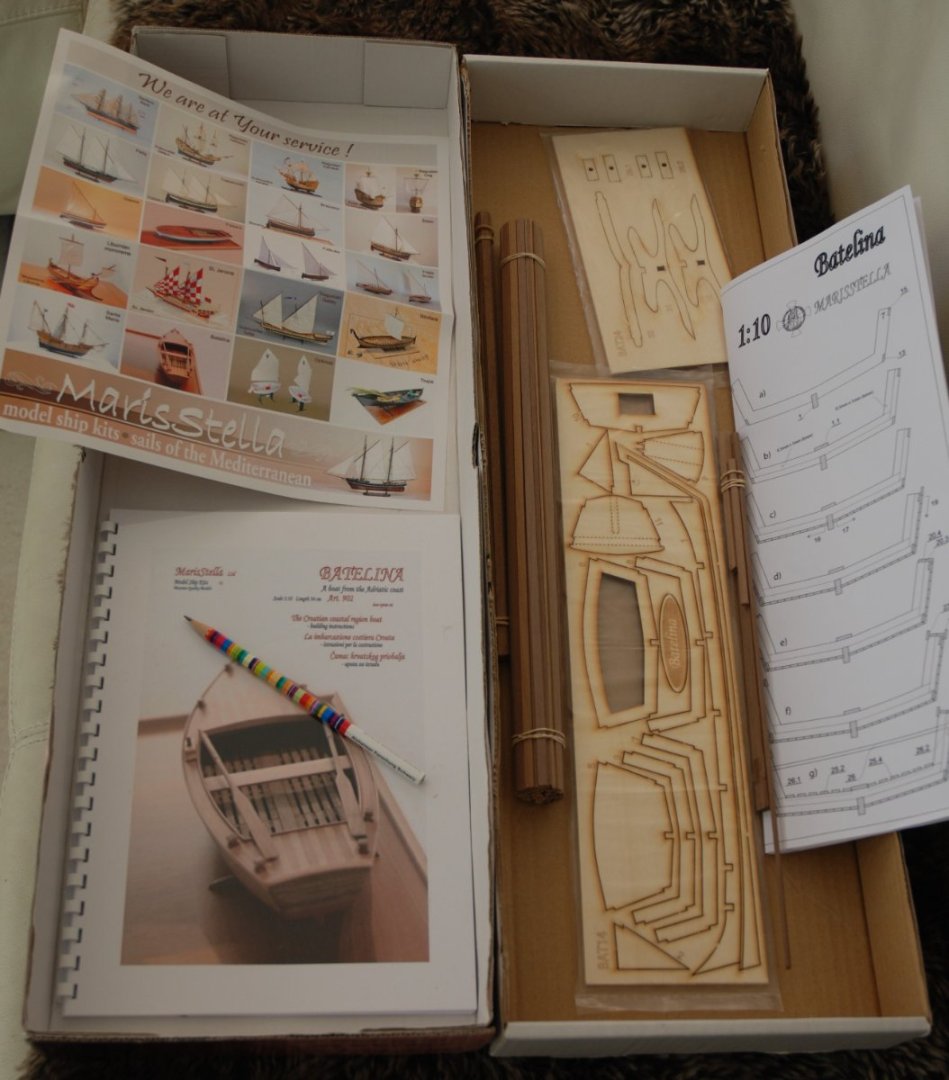
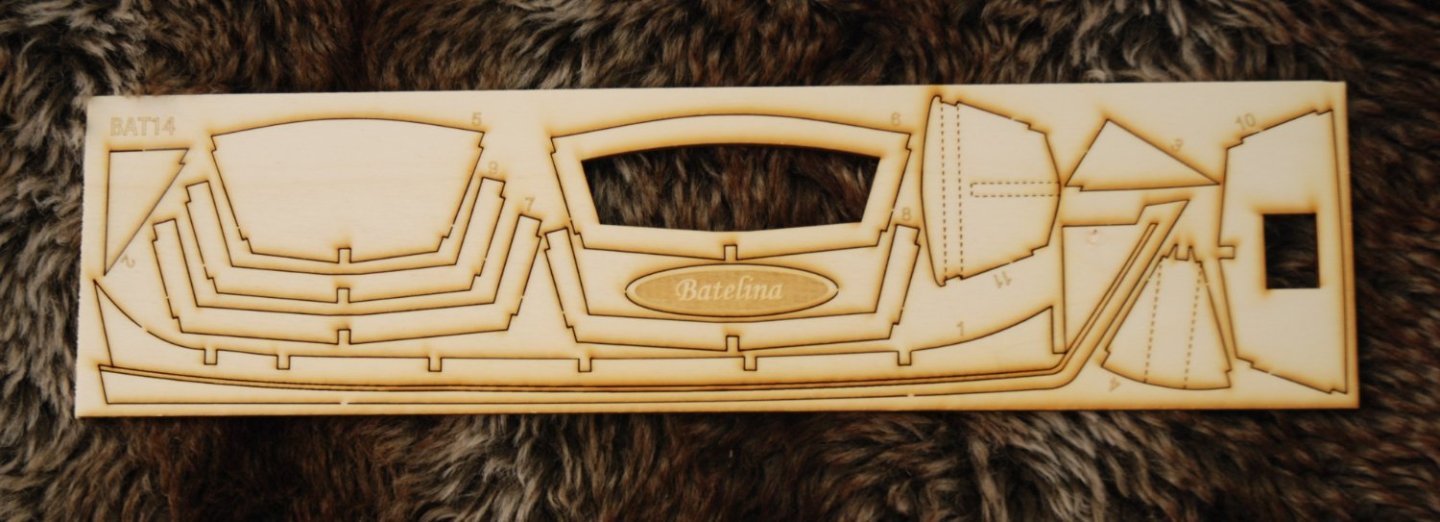
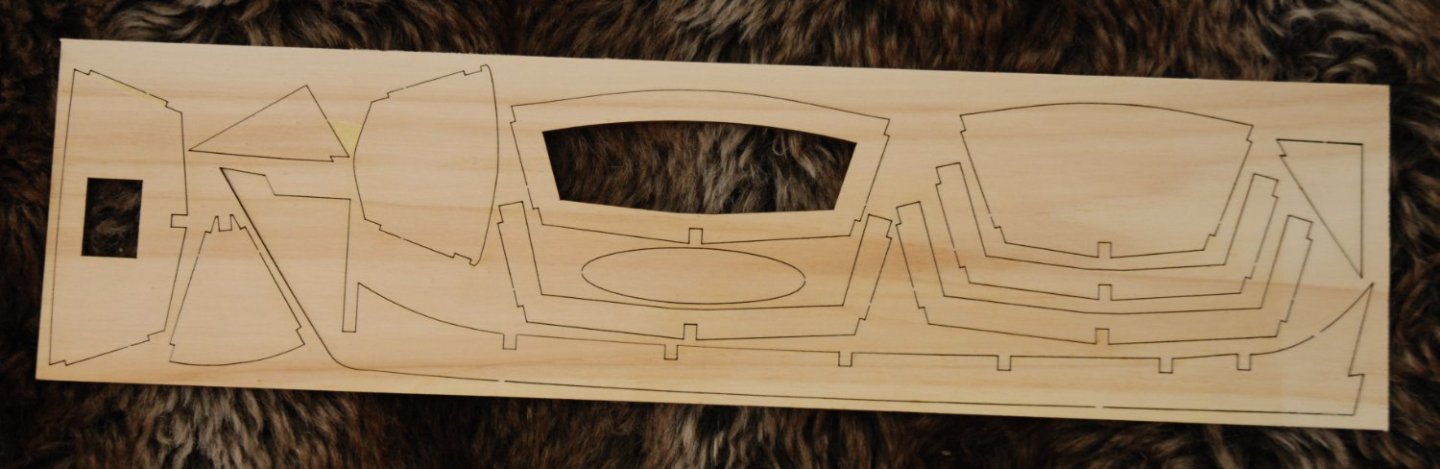
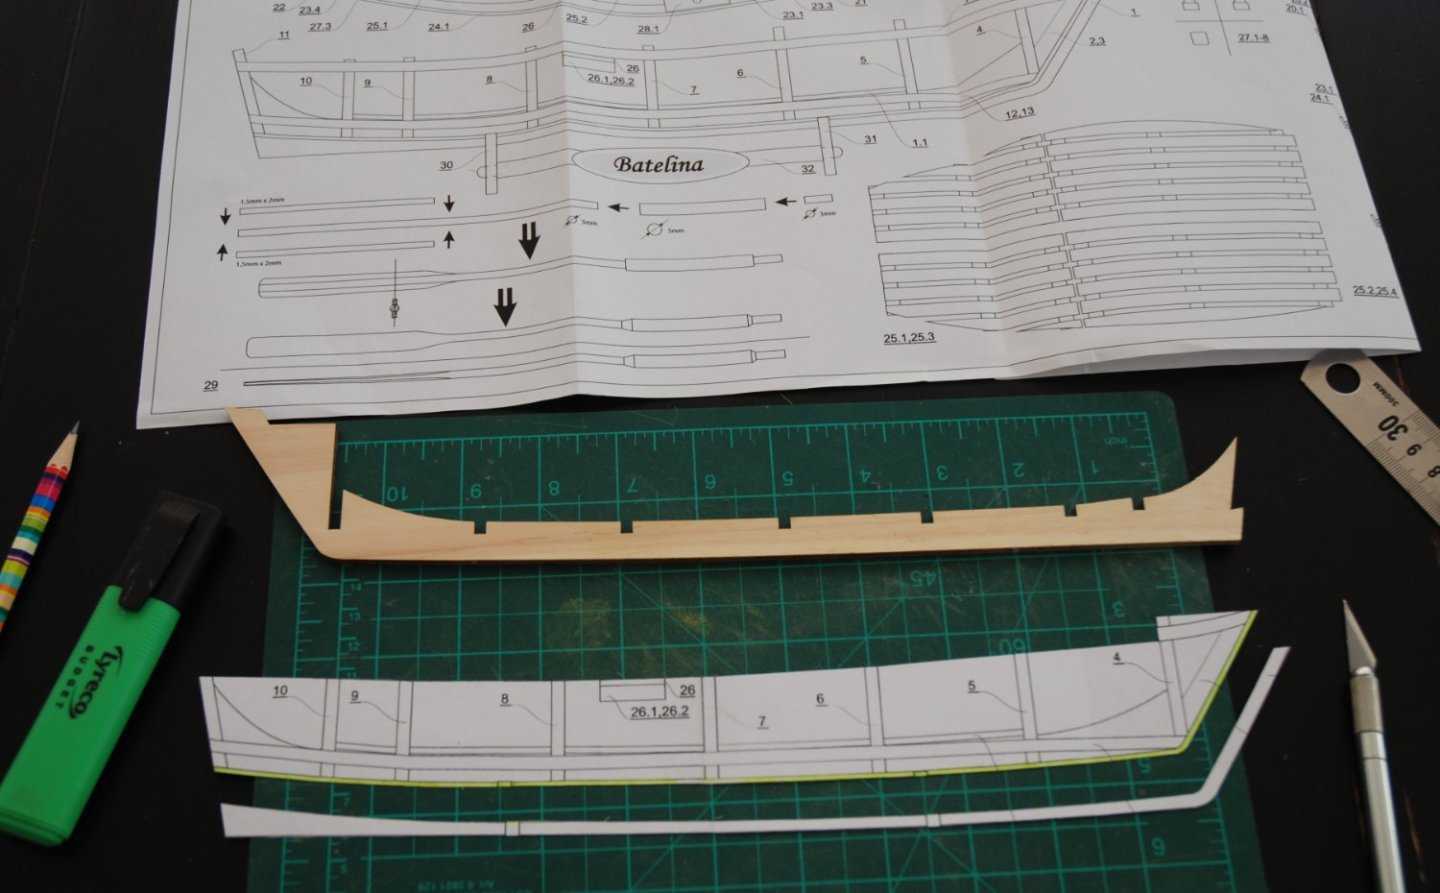
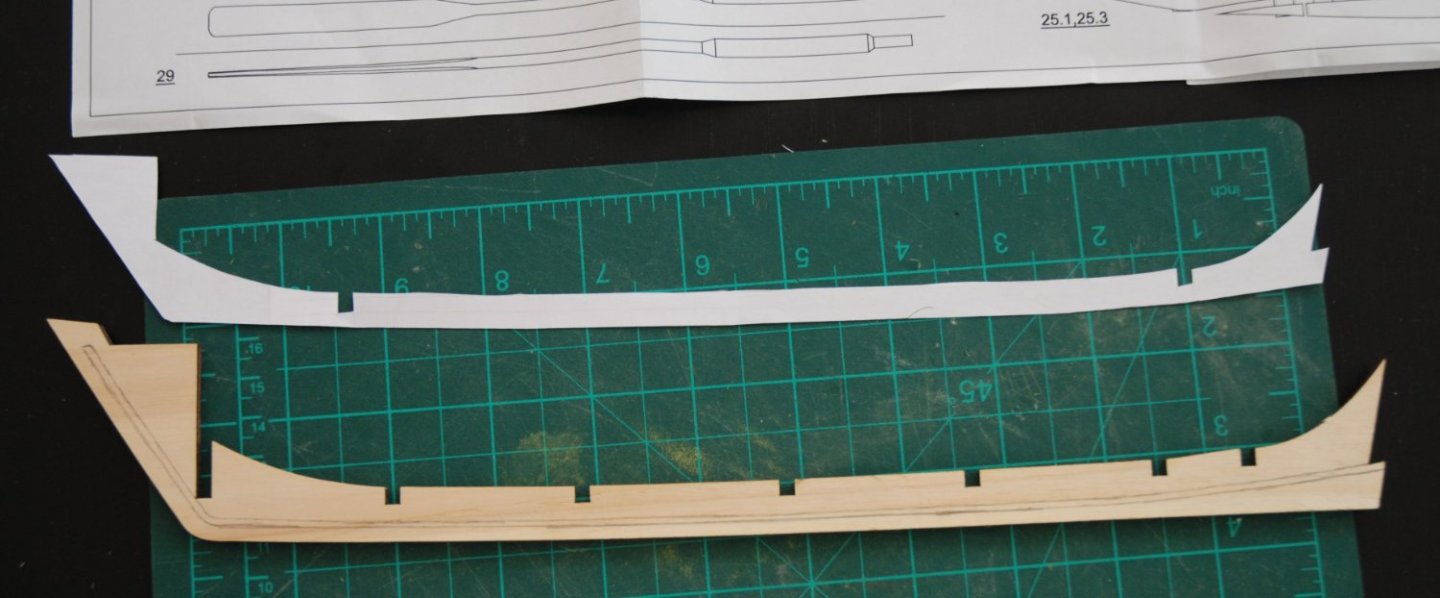
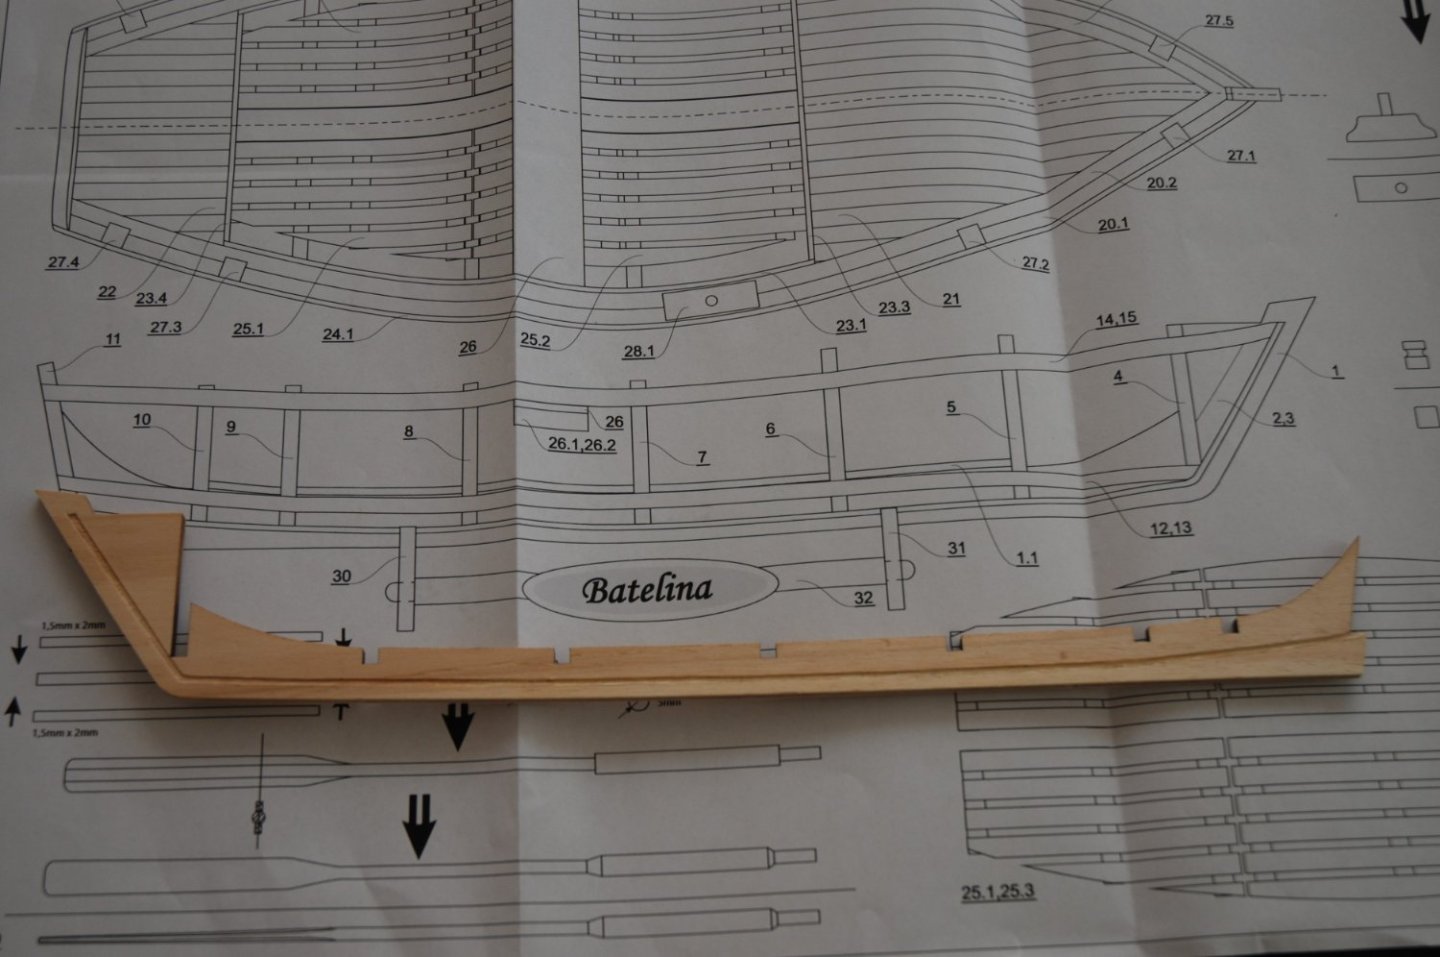
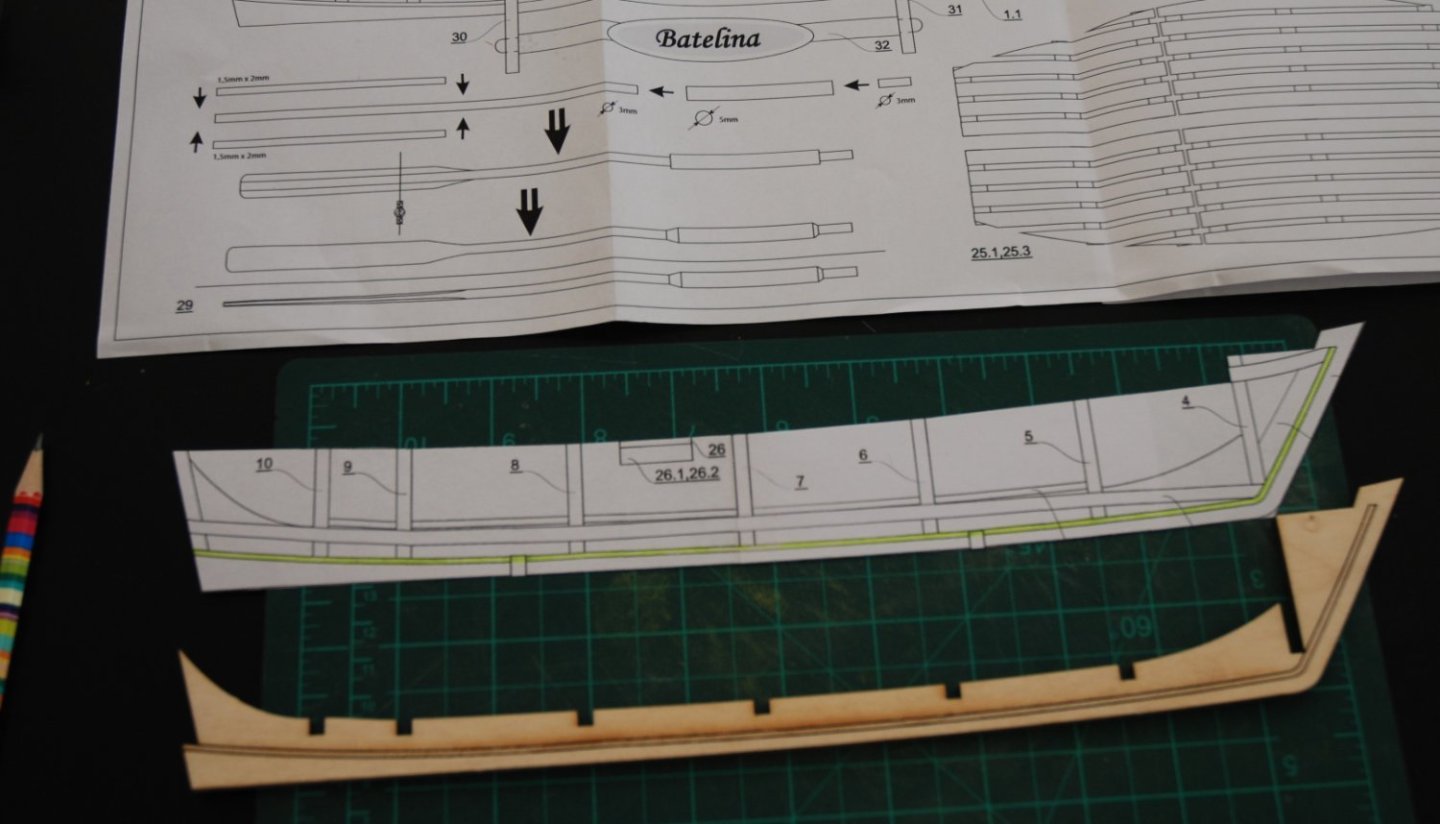
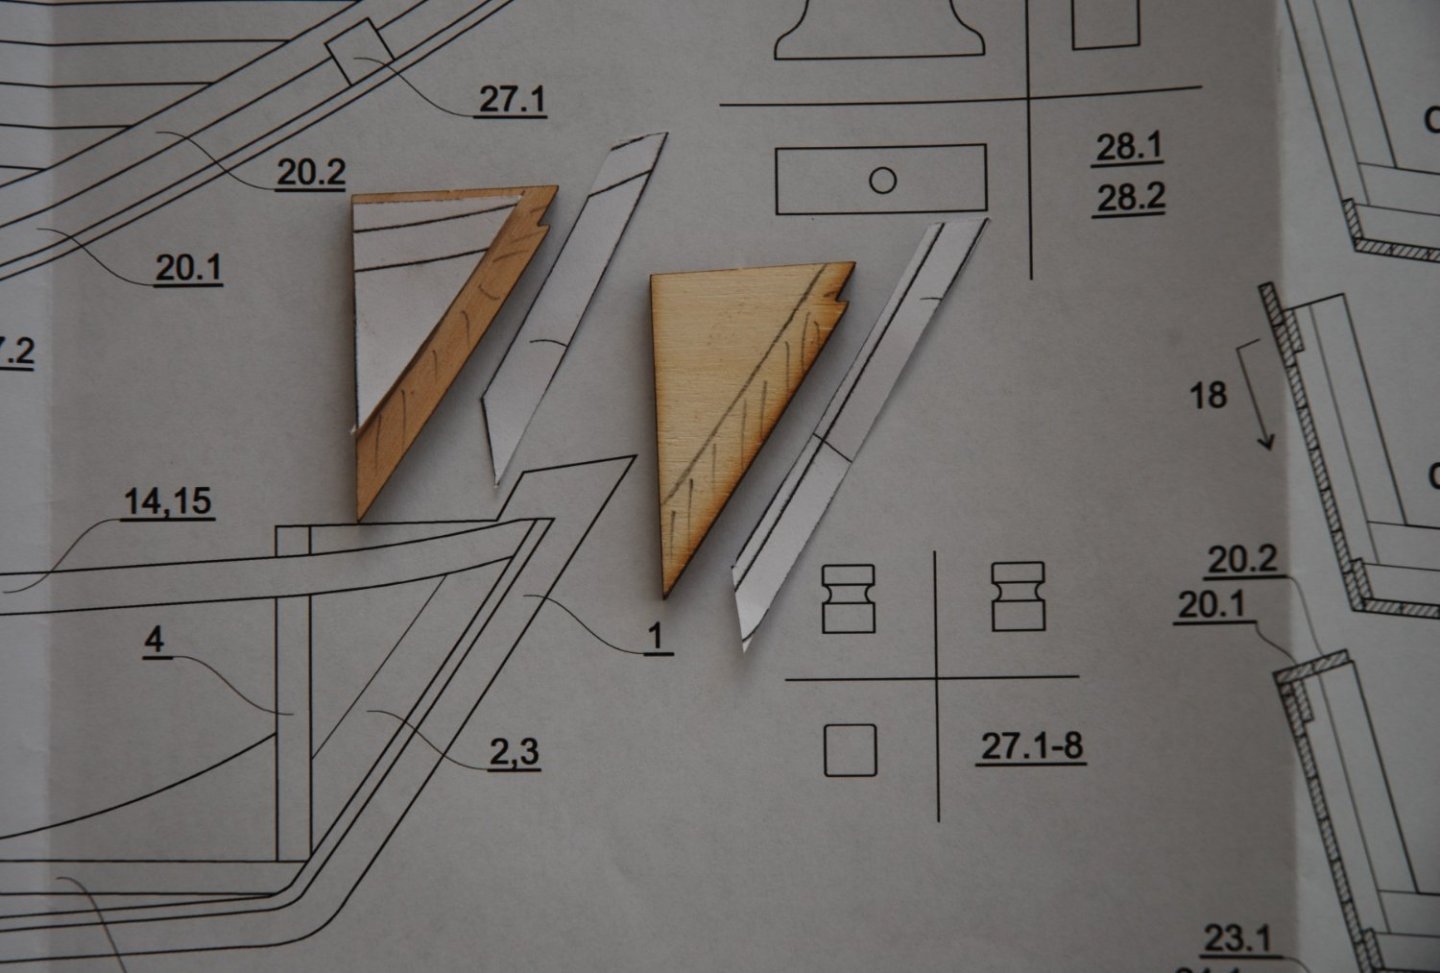
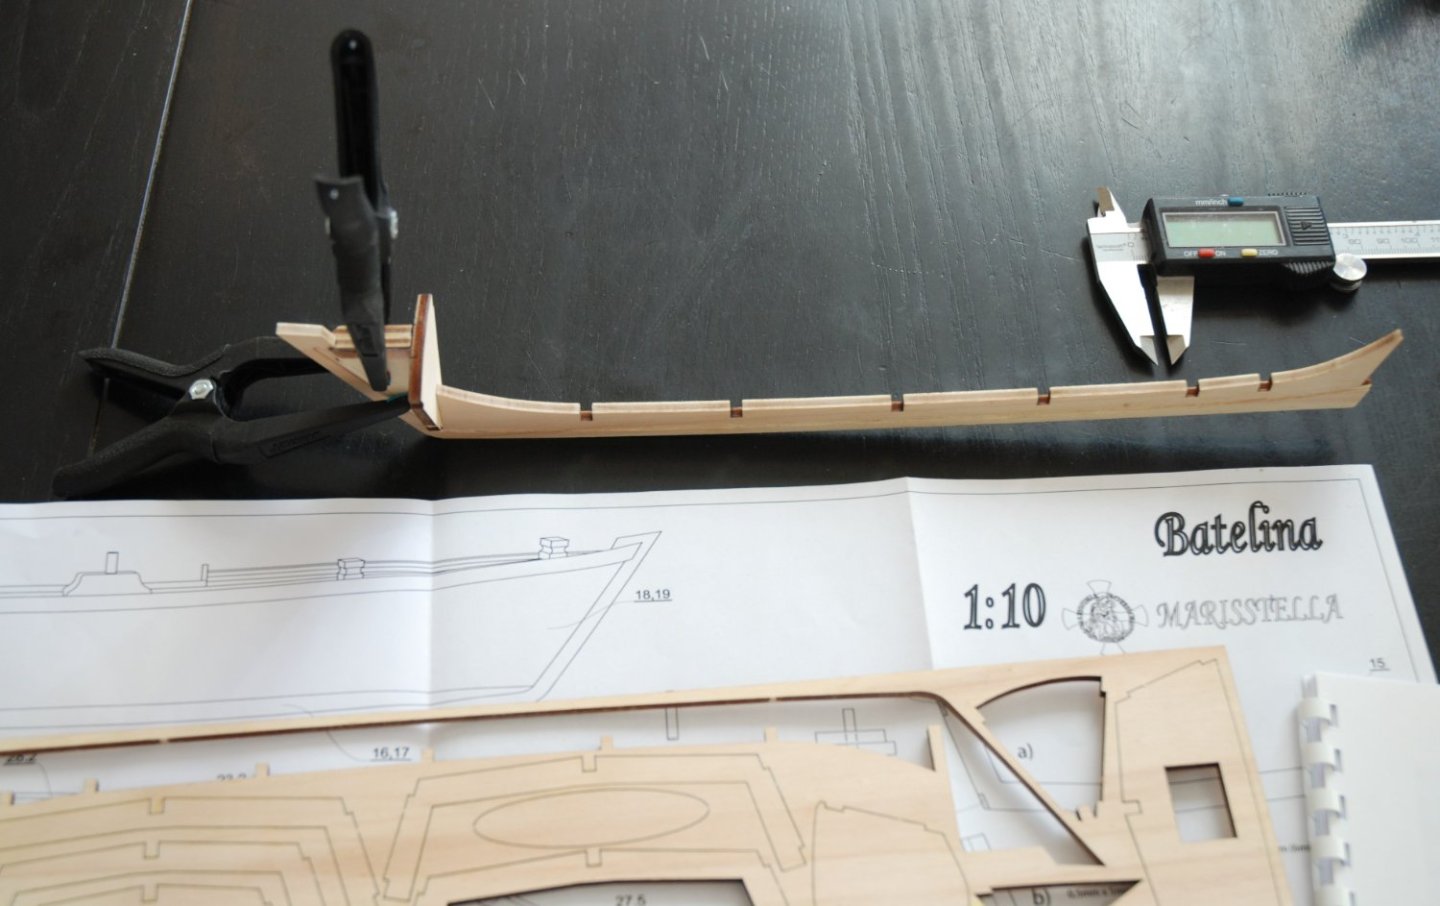
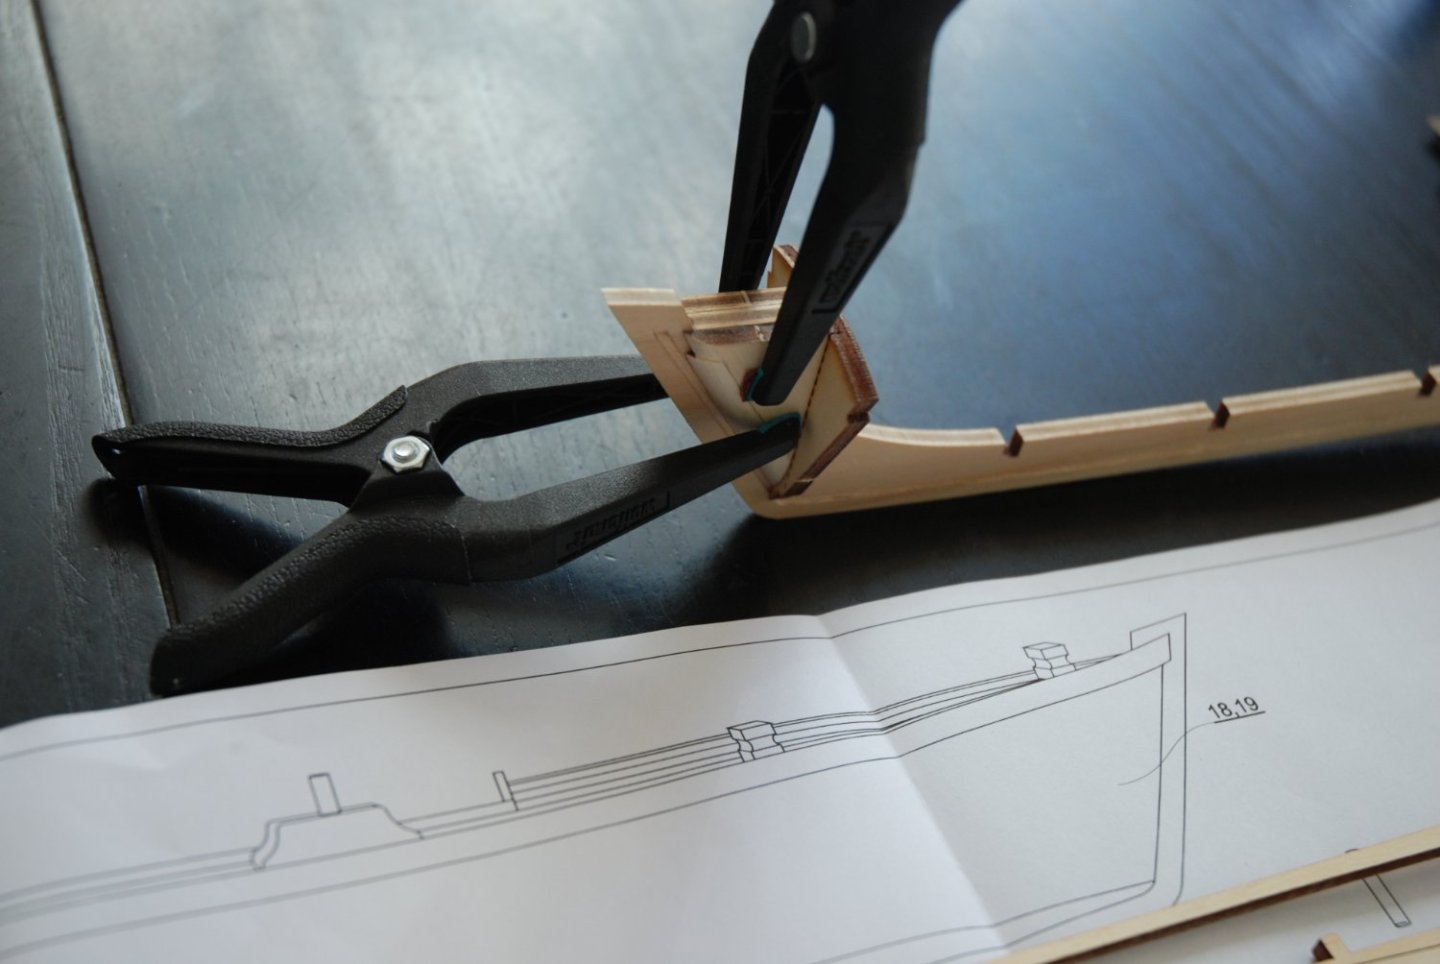
Recovering from a health problem that kept me away from my studio since june, I decided to start a small project that will hopefully allow me to slowly find my feet. I've had this little kit from MarisStella for some time now, and I decided to build it because it should perfectly match my expectations: a simple model without any headaches that should be a pure pleasure to build and yet give a nice looking model. The kit Batelina is a 4 meter flat bottom boat used since the early 1900's as a small fishing boat. The name "Batelina" is derived from the Italian word "battere" which means to hit, this was describing the sound of the flat bottomed boat hitting the waves. This vessel is now found throughout the entire Croatian coastal region. The kit is at the 1:10 scale. The wood supplied is of excellent quality and can be used without needing to be replaced. The box also contains a laser board with a precise cut and without too many traces of burn residues. There is also a base provided (which I do not think used because the laser board is plywood) A 1:10 scale plan and an instruction manual richly illustrated with color photos describing the different steps complete the box. The manual is written in three languages (English, Italian and Croatian) Rabbet The rabbet is already drawn on one side with a small laser cut. You just have to remove the wood inside the tracing with a small wood chisel. I photocopy the plan to simplify the drawing of the rabbet on the other side. The plan is cut out and the rabbet area is removed so that the rabbet can be traced on the blank face. A wood chisel will allow me to hollow out the rabbet. Bow Filler I photocopy the original plan again so that I can have templates to trace the part of the bow fillers that needs to be beveled. Once the two fillers are beveled, they are glued to the keel with the first frame. Time to move on to the next frames...


- 57 replies
-
- 7
-
-
- marisstella
- batelina
- (and 1 more)
-
HM Cutter Cheerful 1806 by JpR62 - 1:48 scale
JpR62 replied to JpR62's topic in - Build logs for subjects built 1801 - 1850
Thank you for your words of support. Indeed, an important point is to stay well. On the advice of my cardiologist, I now attend cardio-training 2 evenings a week, physical activity being an essential point. And this week, I was able to go back to my workshop 😁 -
HM Cutter Cheerful 1806 by JpR62 - 1:48 scale
JpR62 replied to JpR62's topic in - Build logs for subjects built 1801 - 1850
No, unfortunately not. 😒 I had a complicated year in terms of health which unfortunately kept me away from my workshop since the beginning of June. At the beginning of June, I suffered a heart attack which required several hospital stays during the summer. From mid September, I followed a cardiovascular rehabilitation program, which lasted 10 weeks and allowed me to recover completely. I will finally be able to go back to my workshop. ☺️ I am looking forward to it because I have missed it. I hope that 2023 will be a less eventful year ! 😅 -
What sad news. From my first readings on this site, Bob has been a reference for me thanks to the excellence and precision of his work that he enjoyed sharing. We will miss him. Rest in Peace Bob.
-
Best wishes for a speedy recovery. Take good care of yourself and come back soon in good health.
-
Congratulations on this wonderful model. It will undoubtedly be a reference for its historical accuracy and for the beauty and perfection of its realization. Thank you for sharing this fantastic work!
- 1,784 replies
-
- 4
-
-
- winchelsea
- Syren Ship Model Company
- (and 1 more)
-
Superb realization! A new little gem! Thank you for sharing this beautiful build log.
-
Beautiful model, Paul. I really enjoyed following your great work with beautiful innovative details. Many thanks for sharing!
- 112 replies
-
- 2
-
-
- Cheerful
- Syren Ship Model Company
- (and 1 more)
-
Ohla, Thank you for this unboxing. I hope to follow its construction on this site 😉. A 1:48 HMS Speedy, it's really an interesting model and moreover MarisStella produces very good quality kits.
-
Wonderful result. Happy to have been able to follow the different steps of the creation of this superb model. Thank you.
- 238 replies
-
- 2
-
-
- sloop
- providence
- (and 1 more)
-
Superb execution. It's innovative and the result is amazing. As Rusty says, you would never guess that it is made up of several layers.
- 1,784 replies
-
- 2
-
-
- winchelsea
- Syren Ship Model Company
- (and 1 more)
-
Beautiful work Glenn and great tutorial. Thank you for taking the time to detail so precisely the different steps 👍
- 840 replies
-
- 2
-
-
- winchelsea
- Syren Ship Model Company
- (and 1 more)
-
HM Cutter Cheerful 1806 by JpR62 - 1:48 scale
JpR62 replied to JpR62's topic in - Build logs for subjects built 1801 - 1850
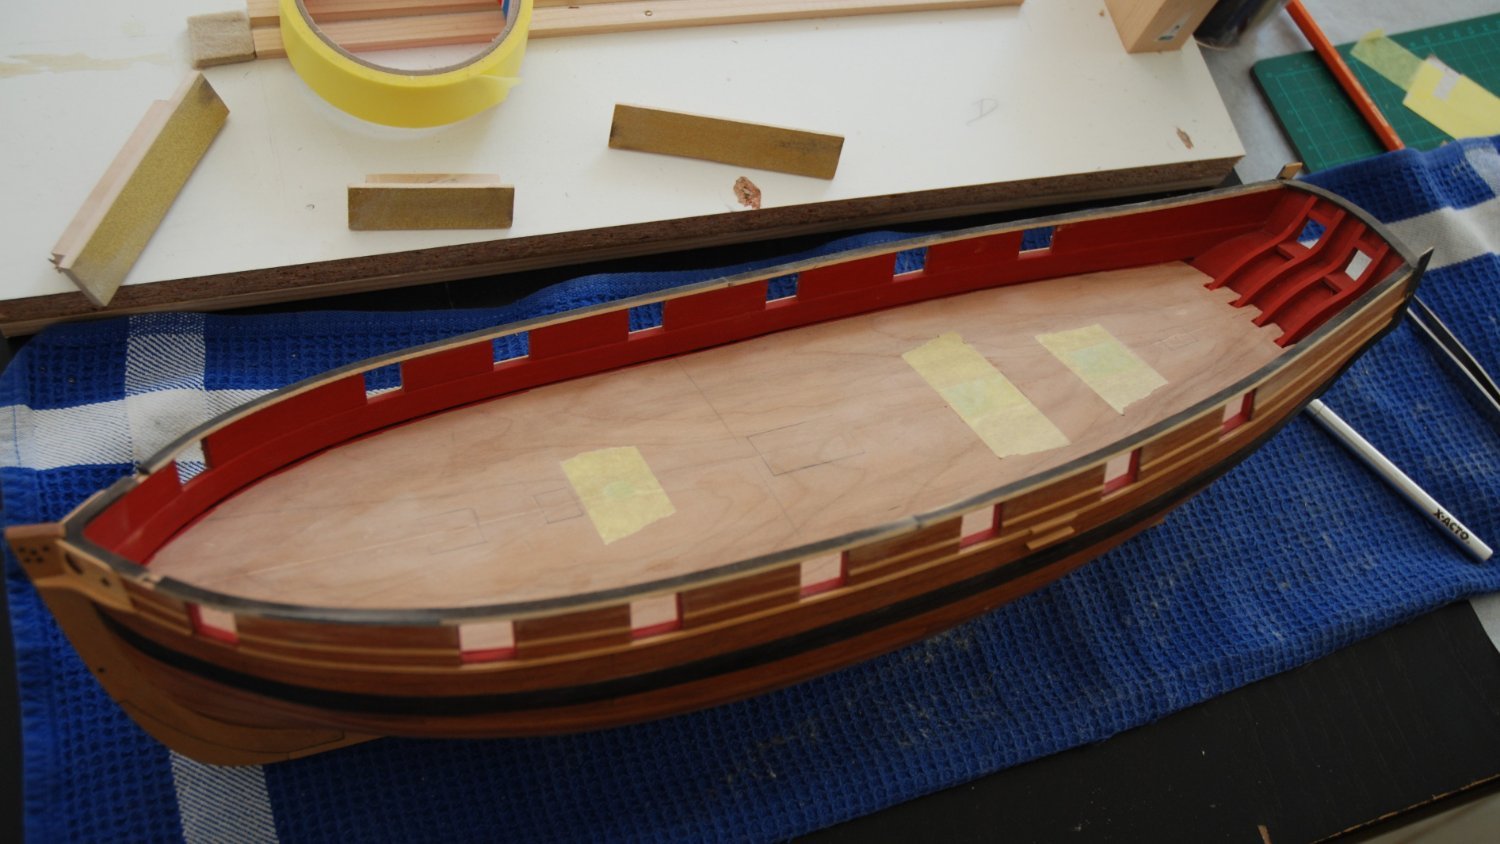
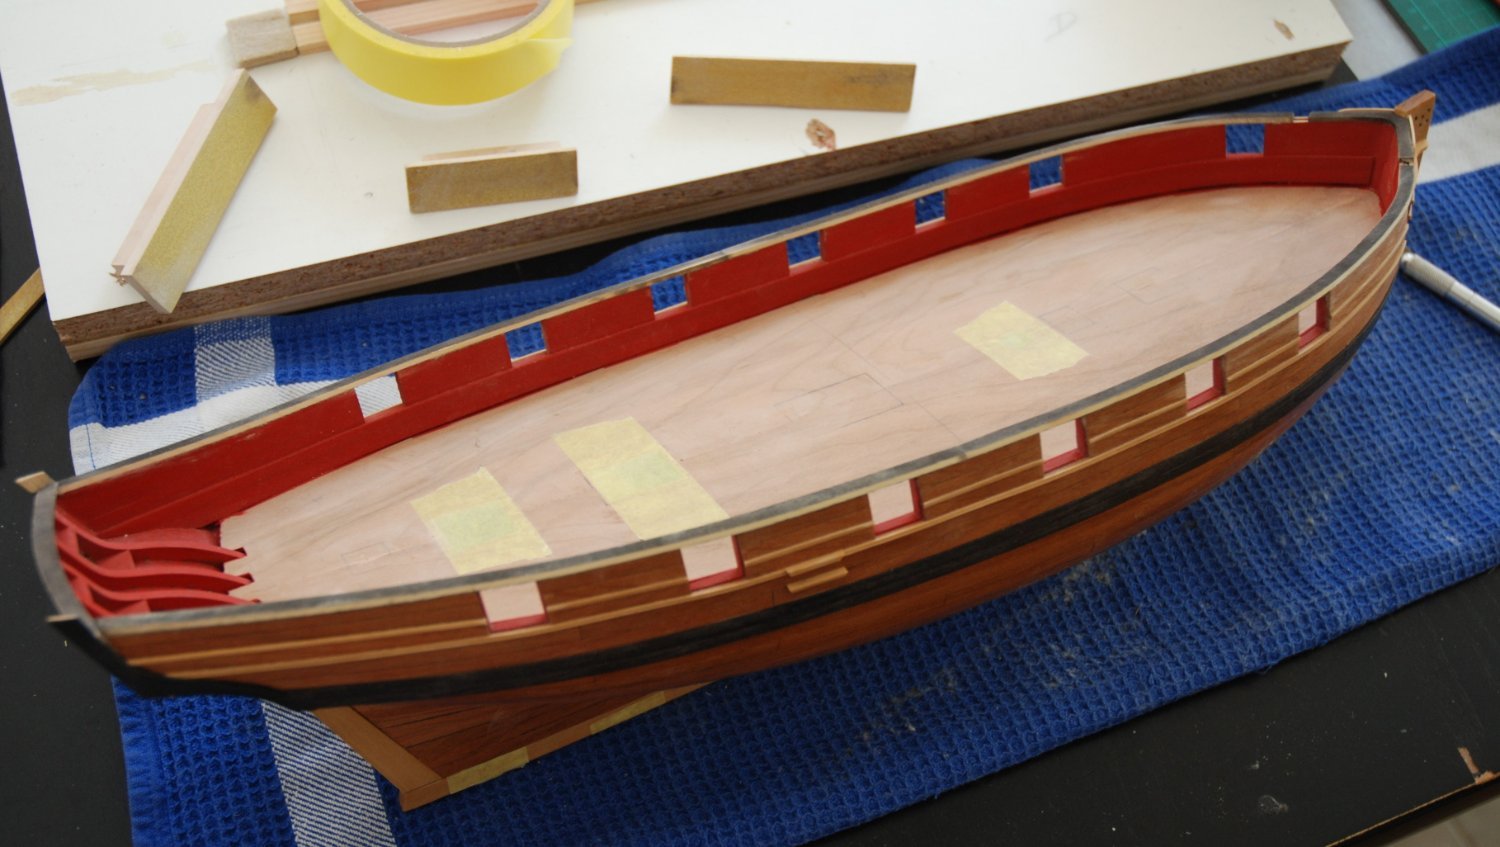
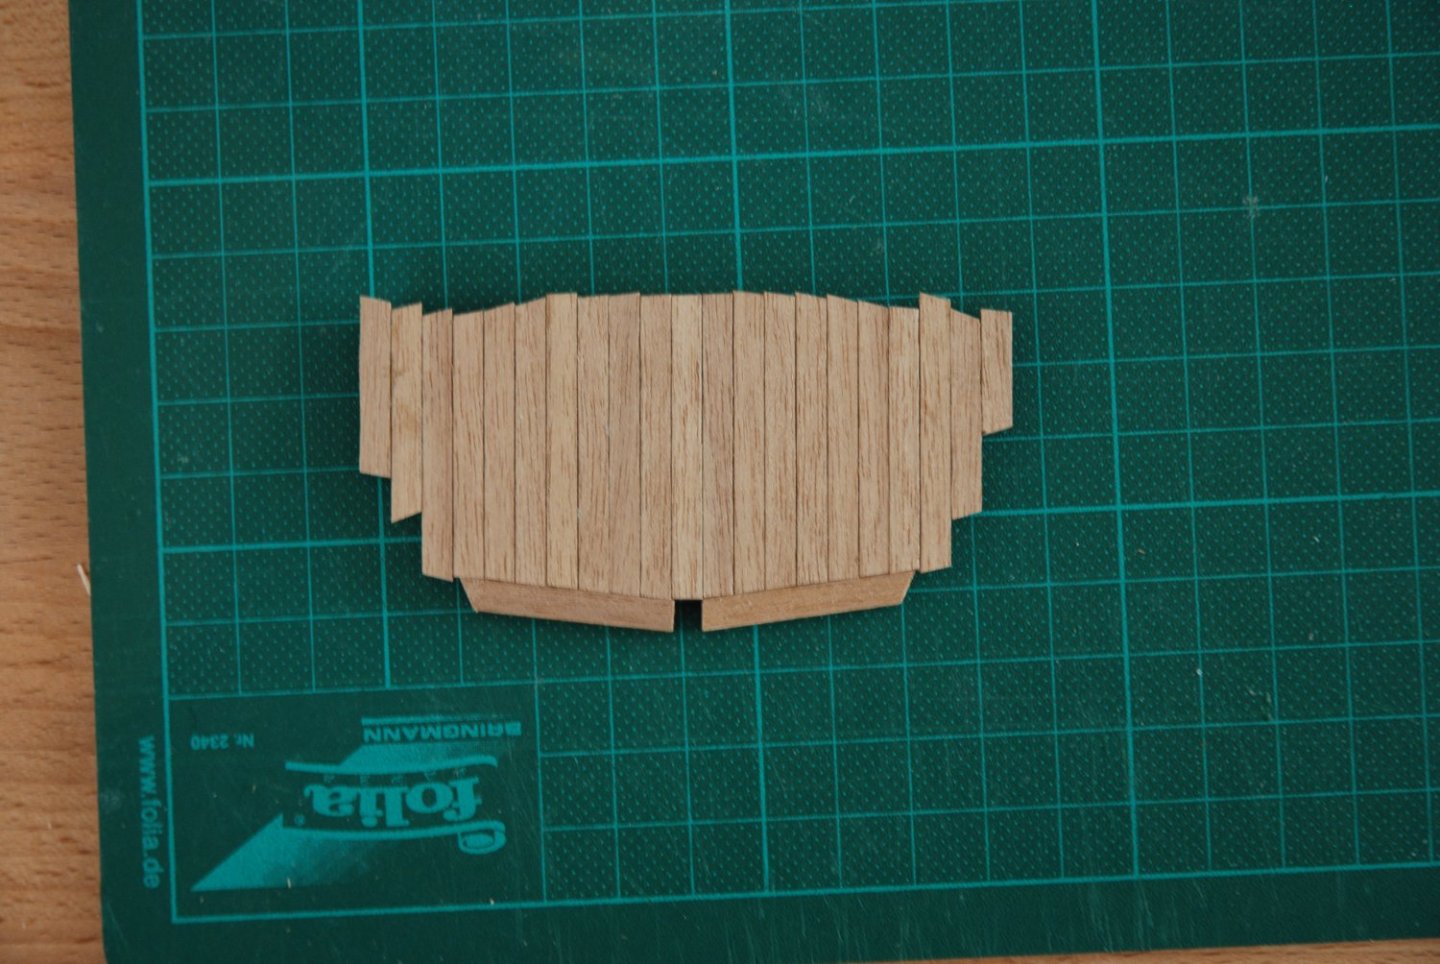
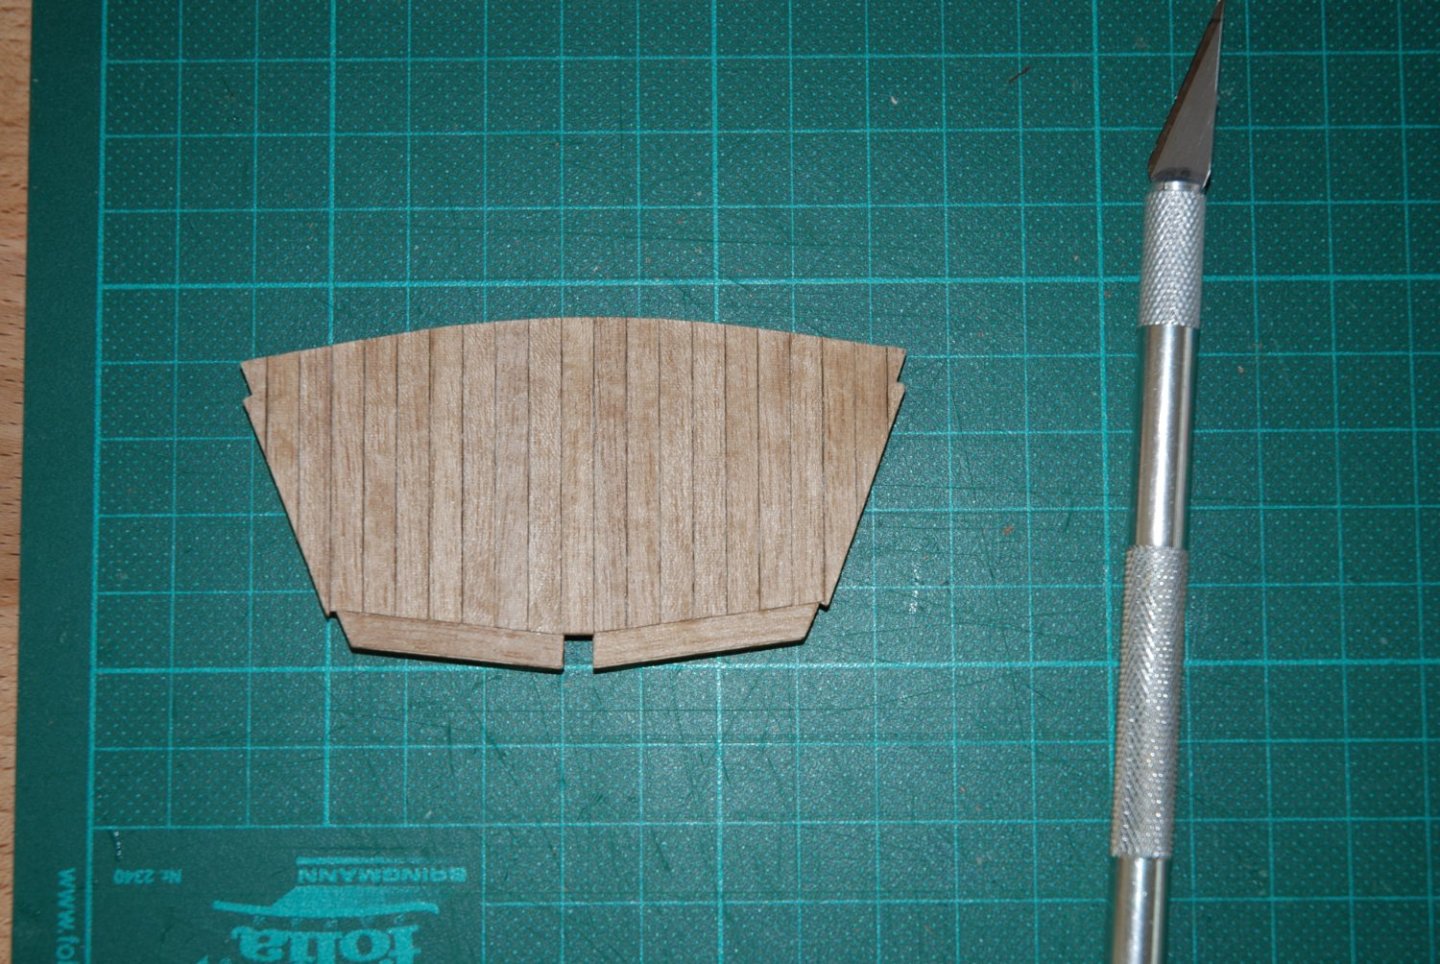
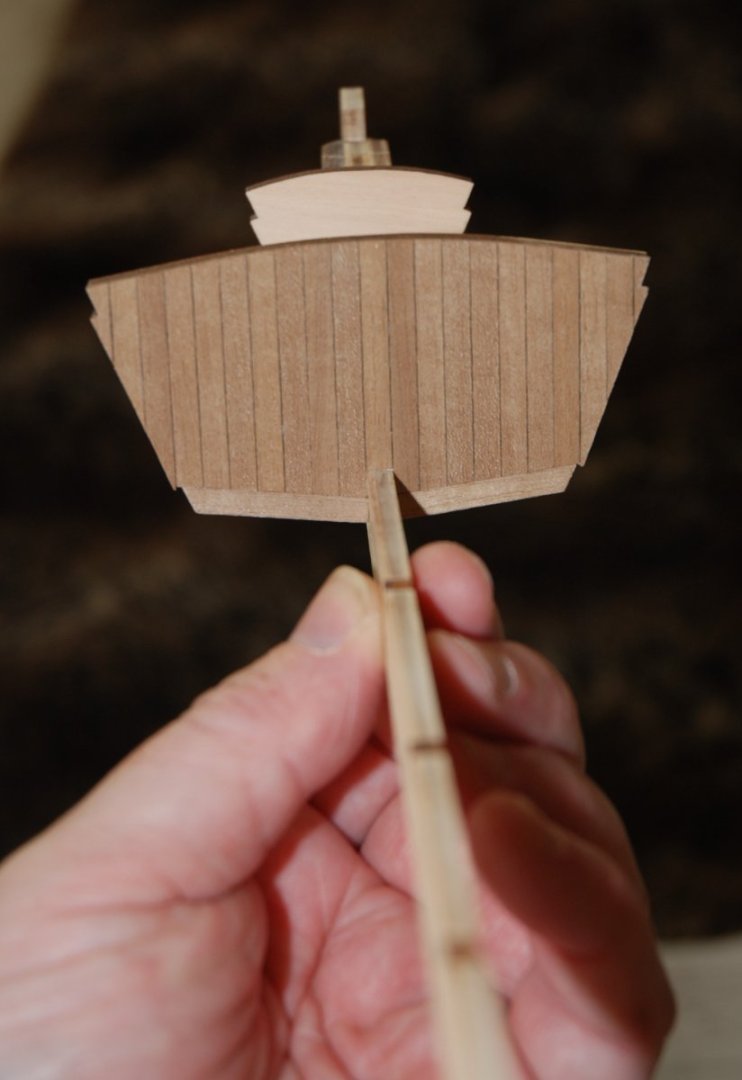
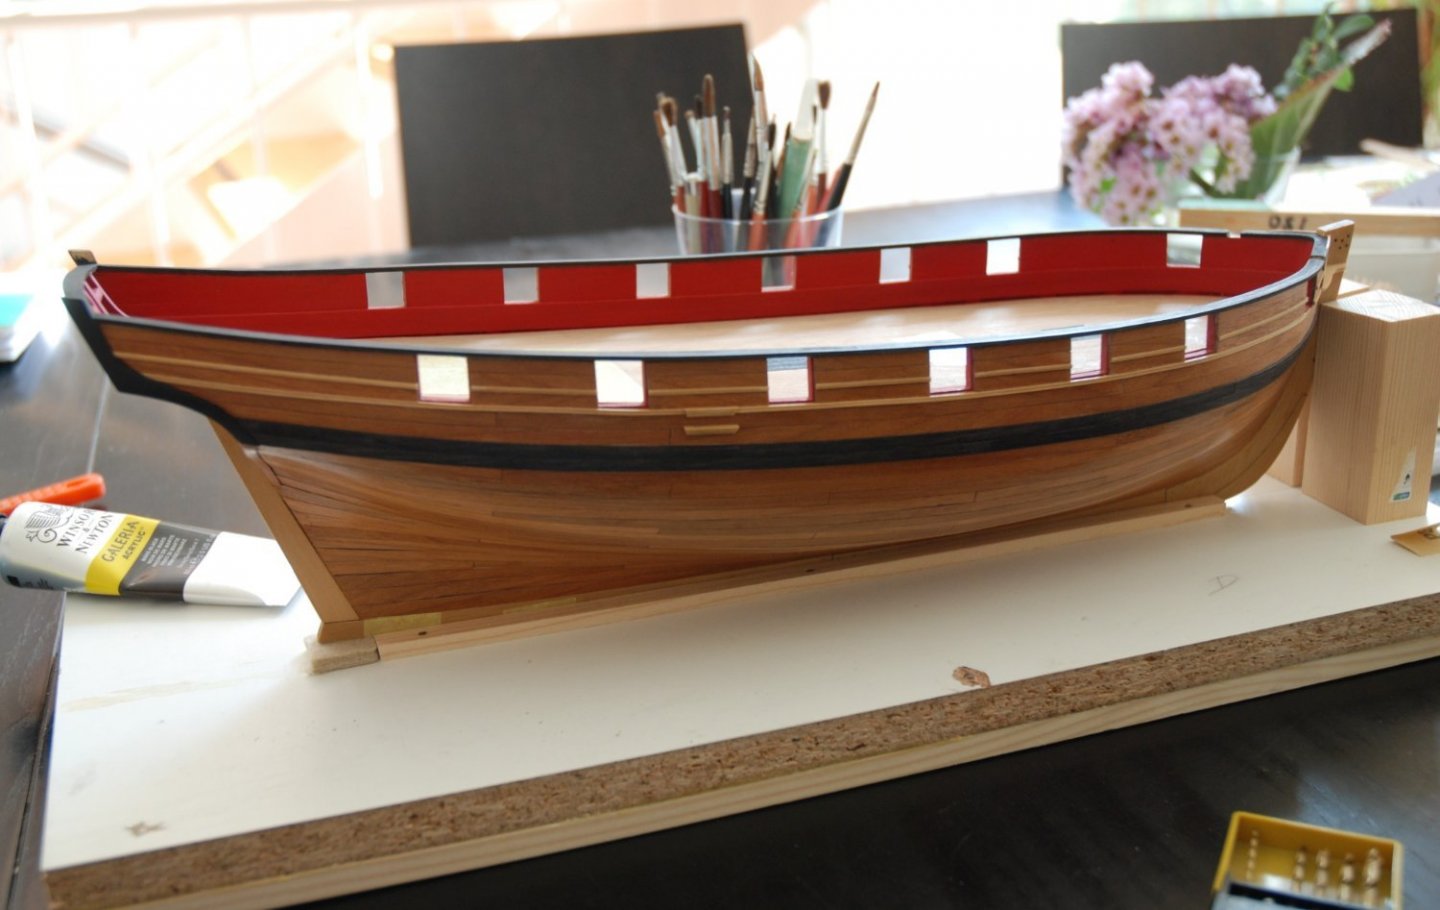
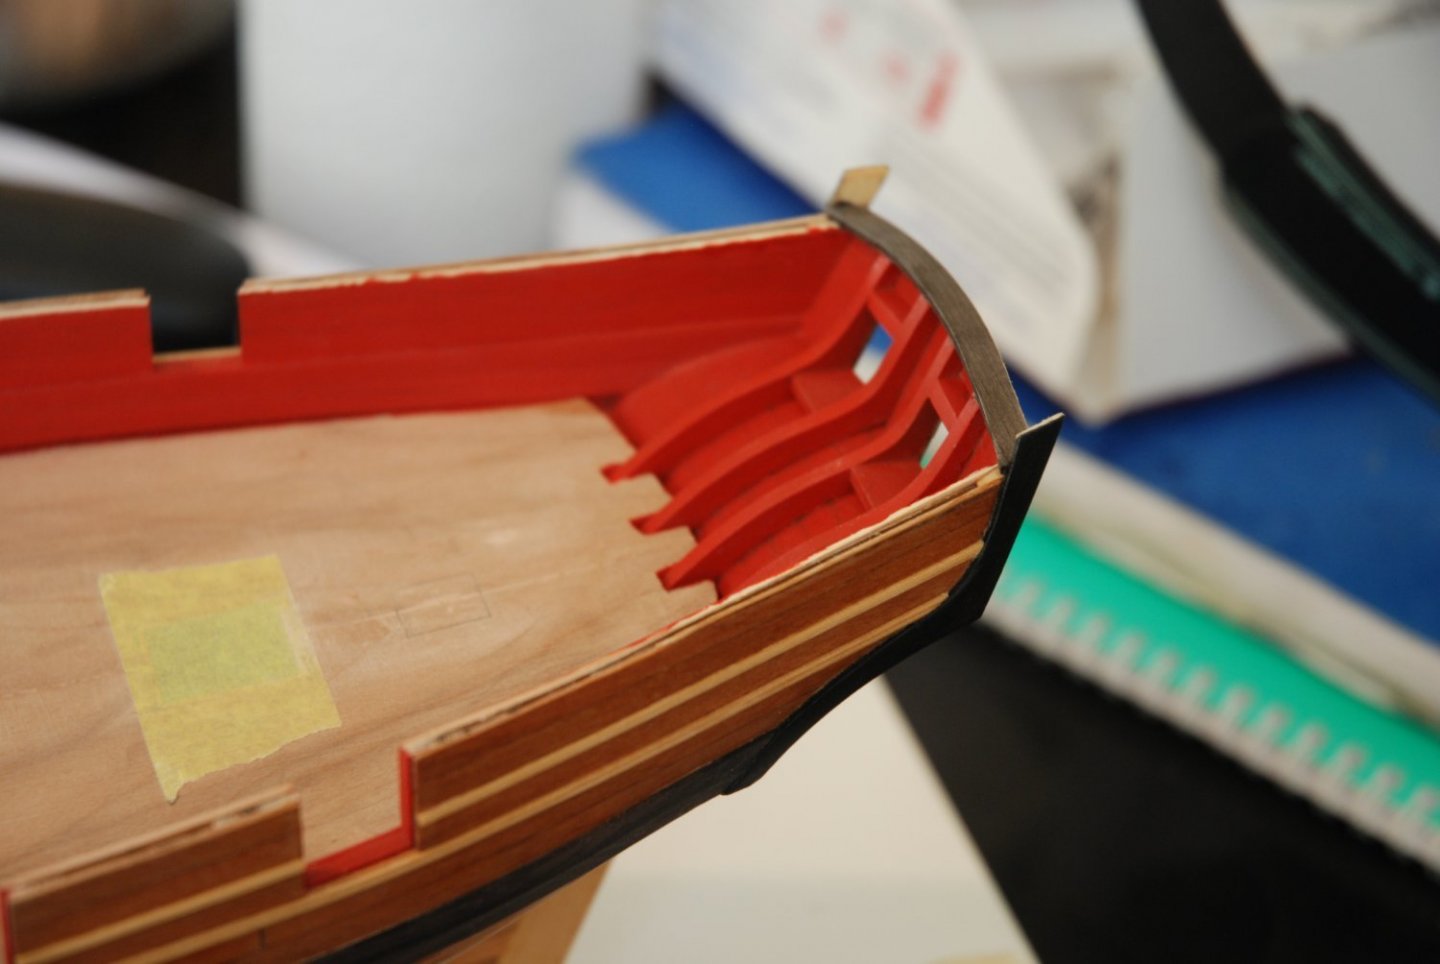
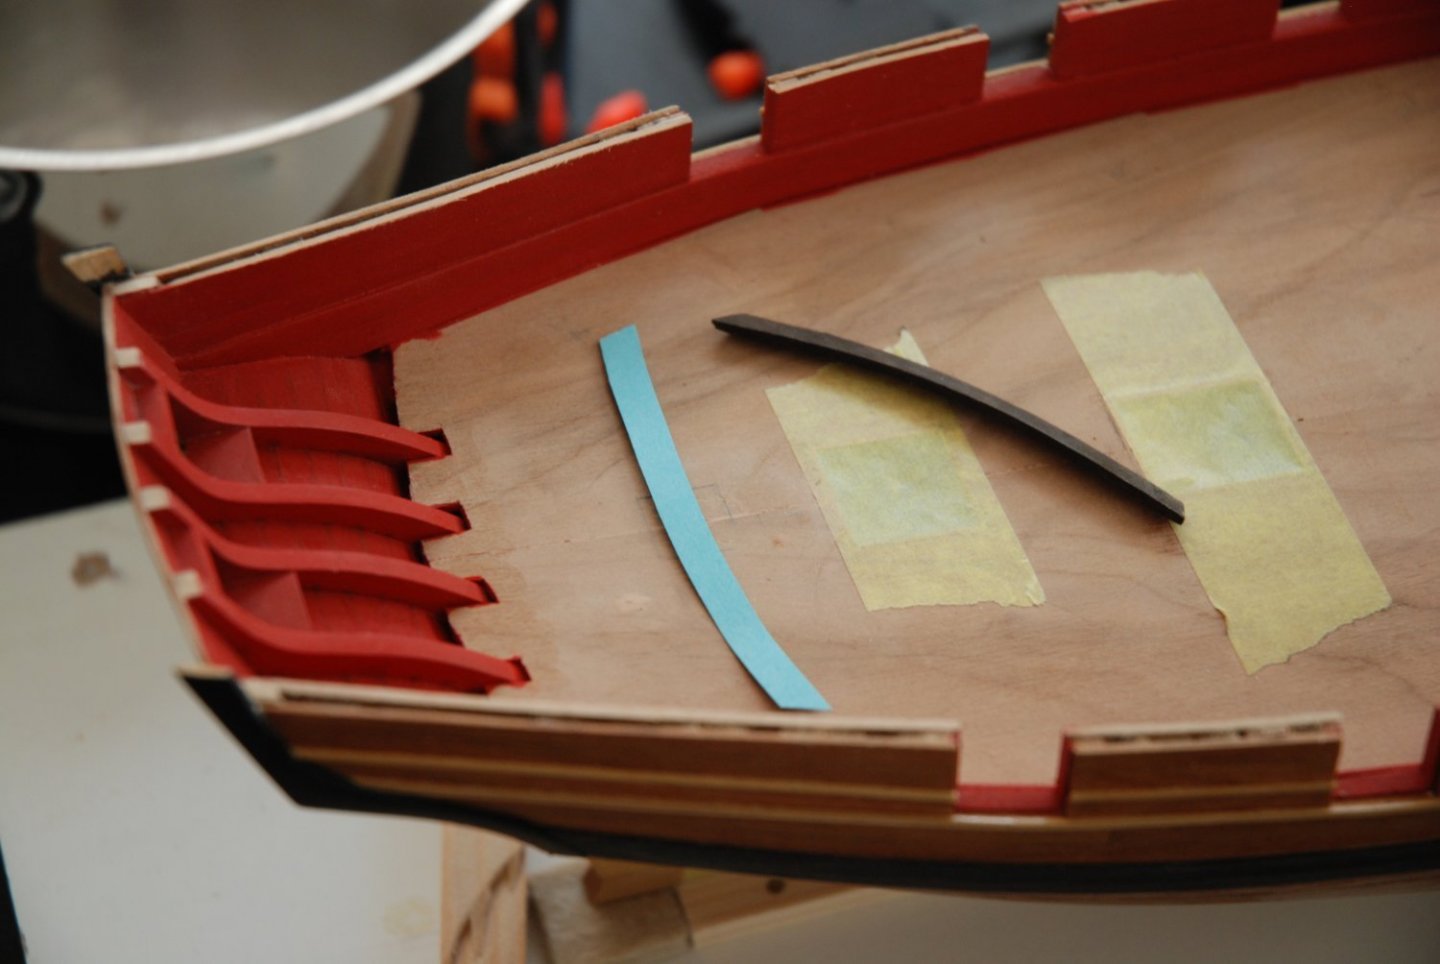
For both sides (port and starboard), I proceed in the same way. I first make a card template by directly taking its shape from the model and use this cardboard template to reproduce the pieces to be cut on the cedar sheet (leaving a safety margin of 1 mm on each side). I decided to reproduce the cap rail in 2 segments, the joint being placed between gun ports 3 and 4. The 4 segments are then ebonized and glued. I then protect (on both sides of the bulwarks: outside and inside) the planking with masking tape and sand to be level. Despite the masking tape, some paint was scratched and will need to be touched up. The fancy moldings are prepared, ebonized and glued to the outer side of the cap rail. I protect the first part of the cap rail (the 5/32" wide strip) with masking tape so that I can fill the small gaps between the cap rail and the molding without getting too dirty. This will also allow a faster sanding... On the picture below, the cap rail on the port side is already sanded while the wood filler (tinted black) has been applied and dried on the starboard side The cap rail is then painted black. I'll be able to concentrate on the last details (drilling the hawse holes and bowsprit) and start the deck planking. And always as much fun.

-
HM Cutter Cheerful 1806 by JpR62 - 1:48 scale
JpR62 replied to JpR62's topic in - Build logs for subjects built 1801 - 1850
While preparing the two sides of the cap rail, I notice that there is still a small gap on each side. So I added a small triangular plank on the outside and inside to be level with the rear part of the cap rail.
-
HM Cutter Cheerful 1806 by JpR62 - 1:48 scale
JpR62 replied to JpR62's topic in - Build logs for subjects built 1801 - 1850
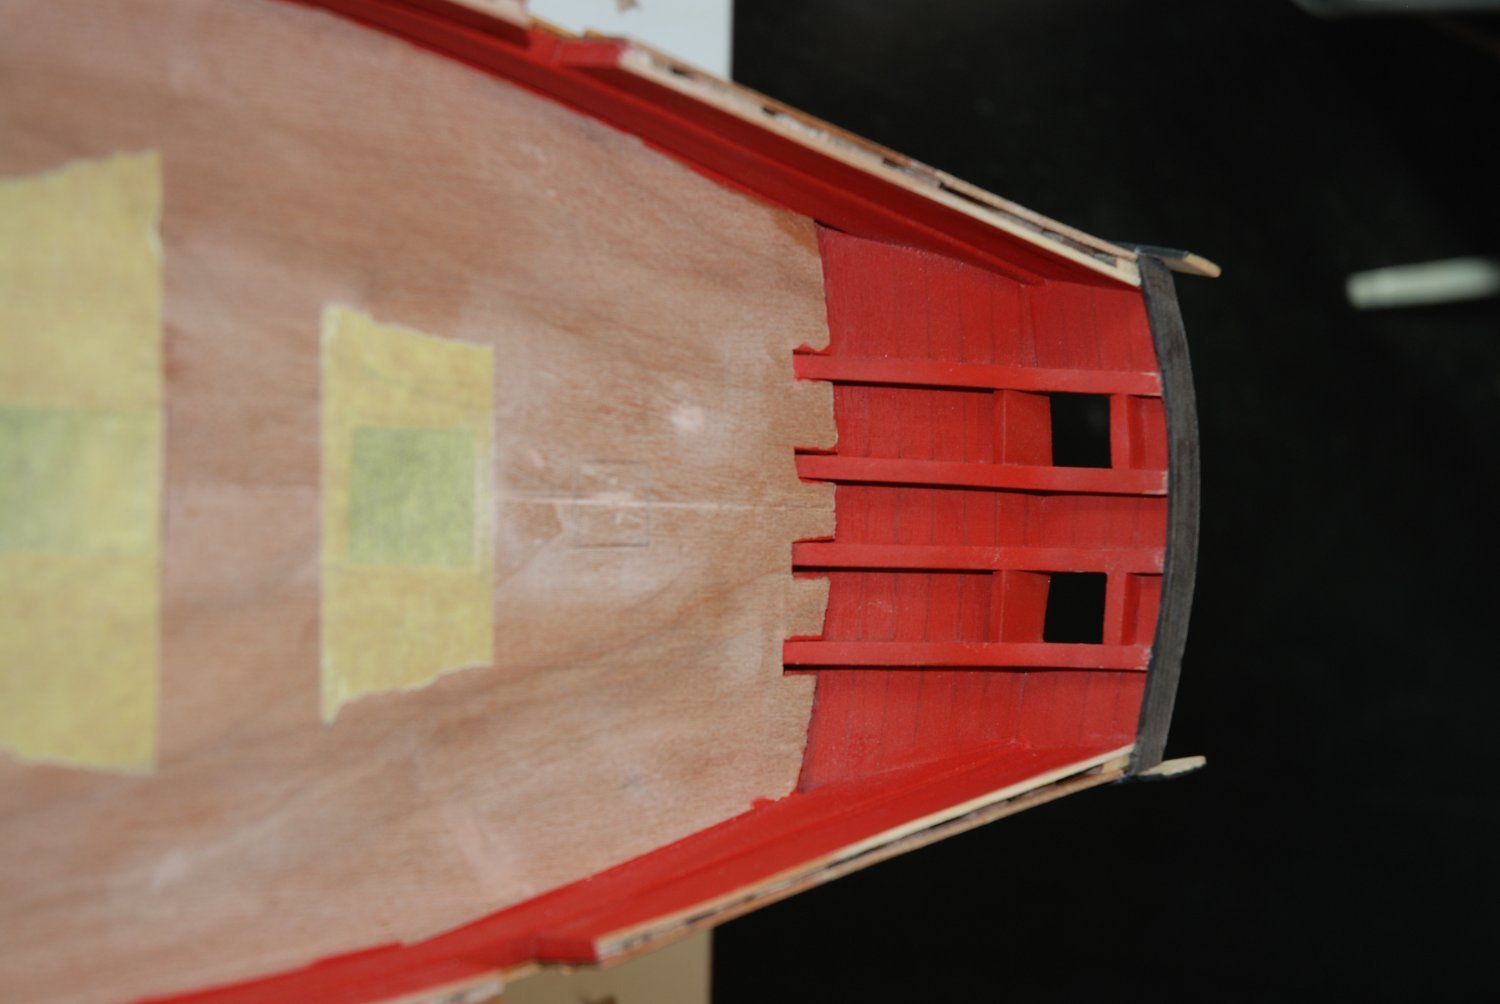
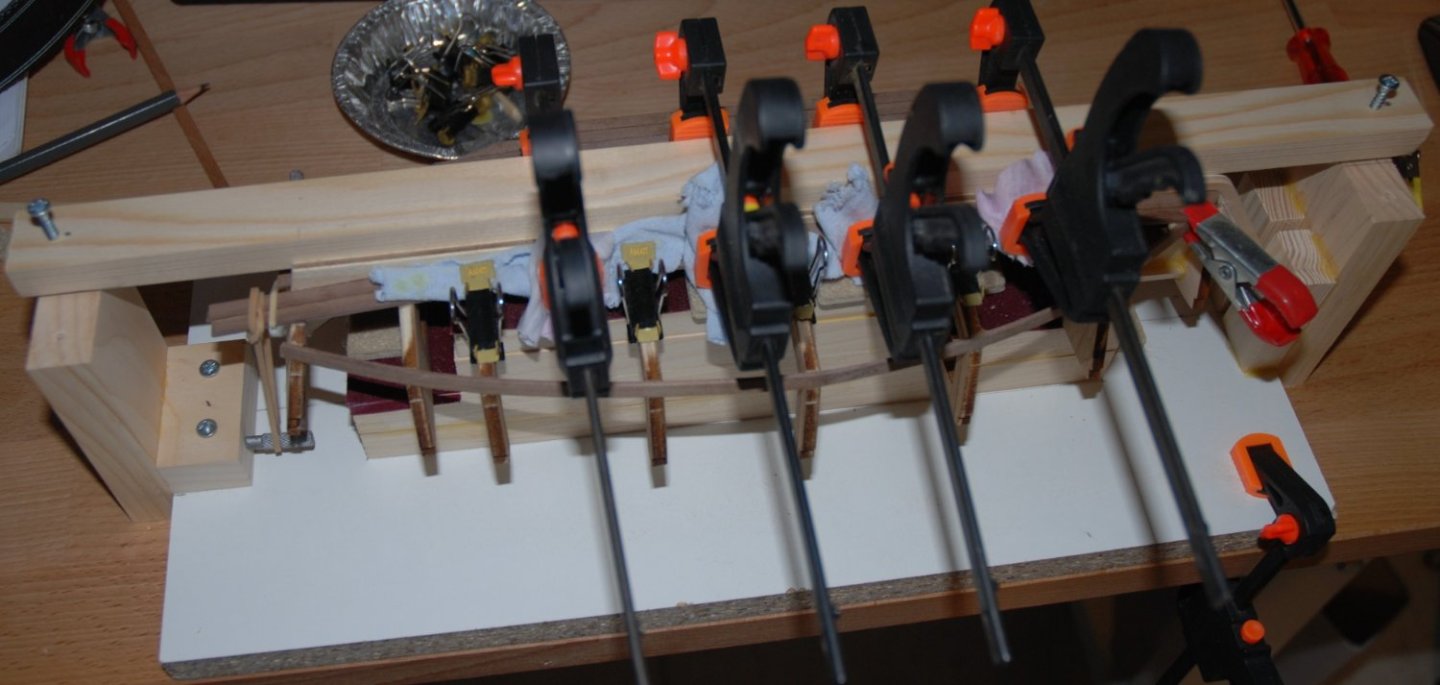
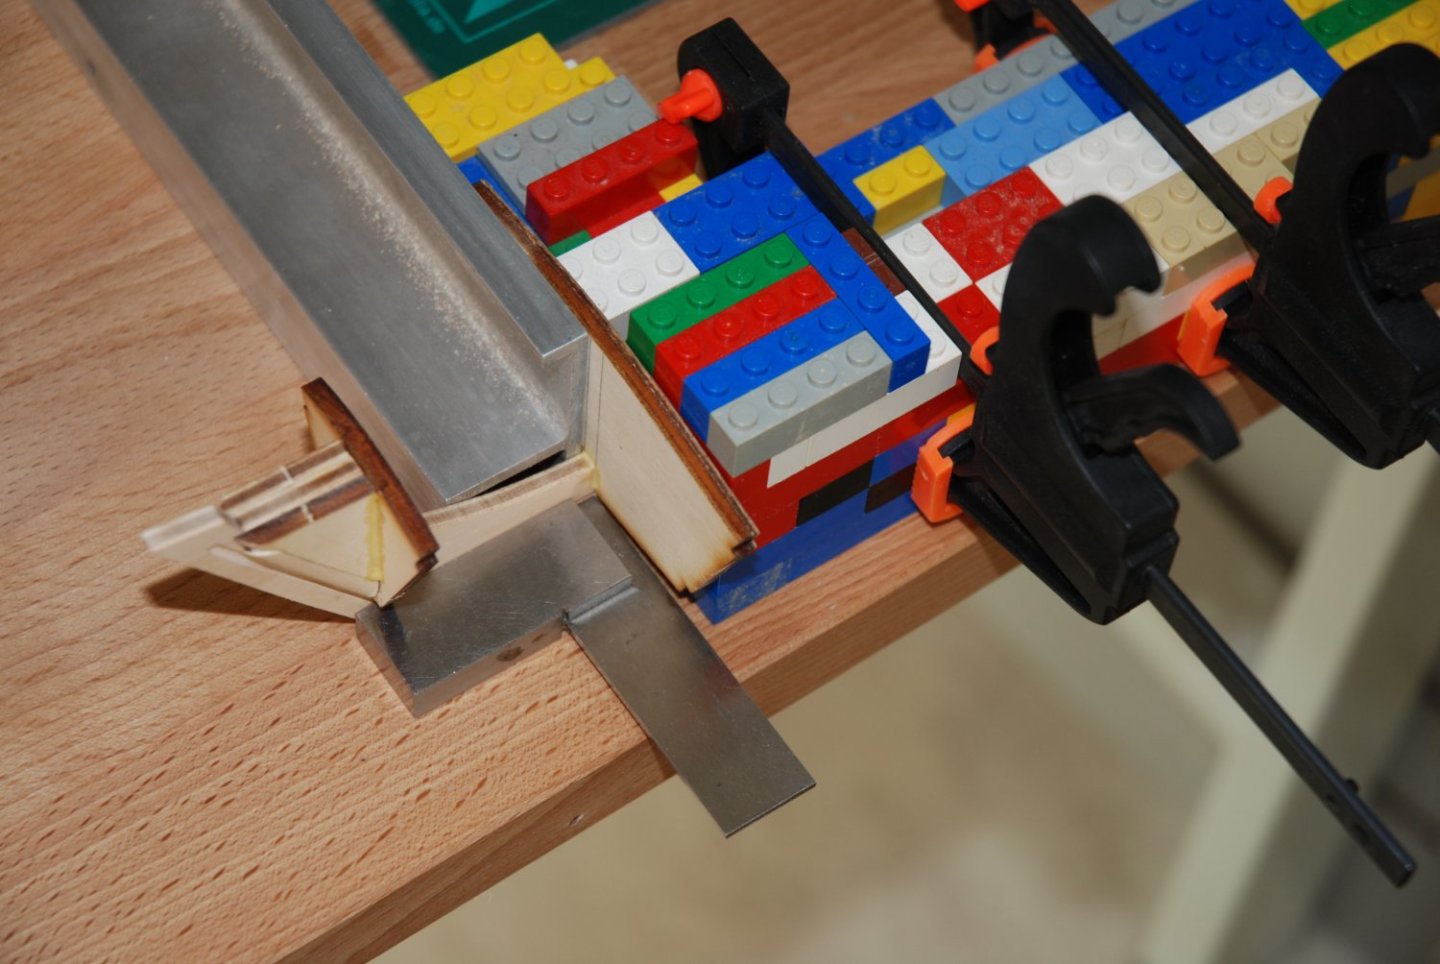
Thank you to all the 'Likes' and thank you Will for your kind comment. I am also following your build log on the Erycina Fishing Trawler with attention. It is really a nice model. Cap rail I started by adding the cap rail over the transom. A cardboard template was taken directly from the model and then reproduced on a 1/16" thick Alaskan Yellow Cedar sheet. As I don't have a scroll saw, I preferred to work with Alaskan Yellow Cedar, which is perfect for making the cap rail and can be cut easily with a cutter. For an easy installation of this piece, I first shaped it: the piece was moistened with water and clamped on a pan whose curvature corresponds to the desired shape. I used a travel iron to keep the curvature of the piece. The piece is then ebonized using my 2 miracle mixes. Once glued, I sand the back part level with the stern. The 1/32" wide fancy molding will be added after the entire cap rail is in place.
-
Very happy to be able to follow the build of this new boat. Also, the theme looks more than interesting. I feel like it's going to be exciting 😊