JpR62
-
Posts
699 -
Joined
-
Last visited
Content Type
Profiles
Forums
Gallery
Events
Everything posted by JpR62
-
 What a wonderful job on this model. Bravo for making it so detailed and realistic. And most of all, thank you for sharing this beautiful achievement !
- 206 replies
-
- 3
-

-

-
- Vanguard Models
- Brixham trawler
- (and 2 more)
-
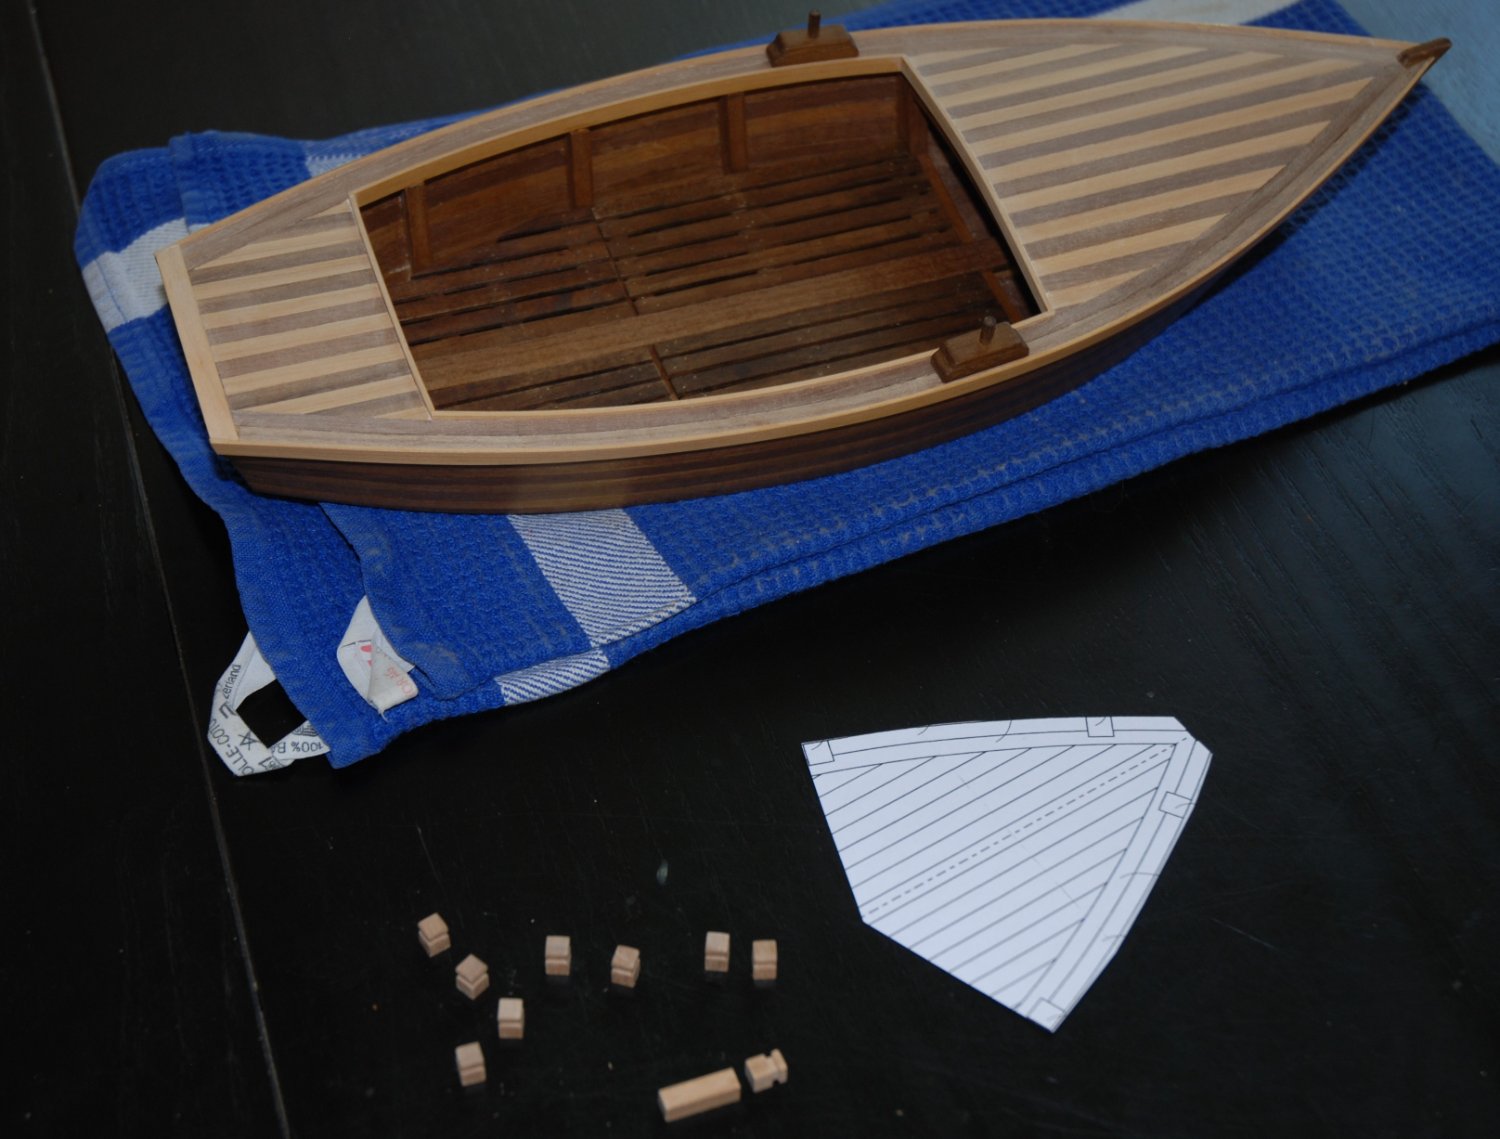
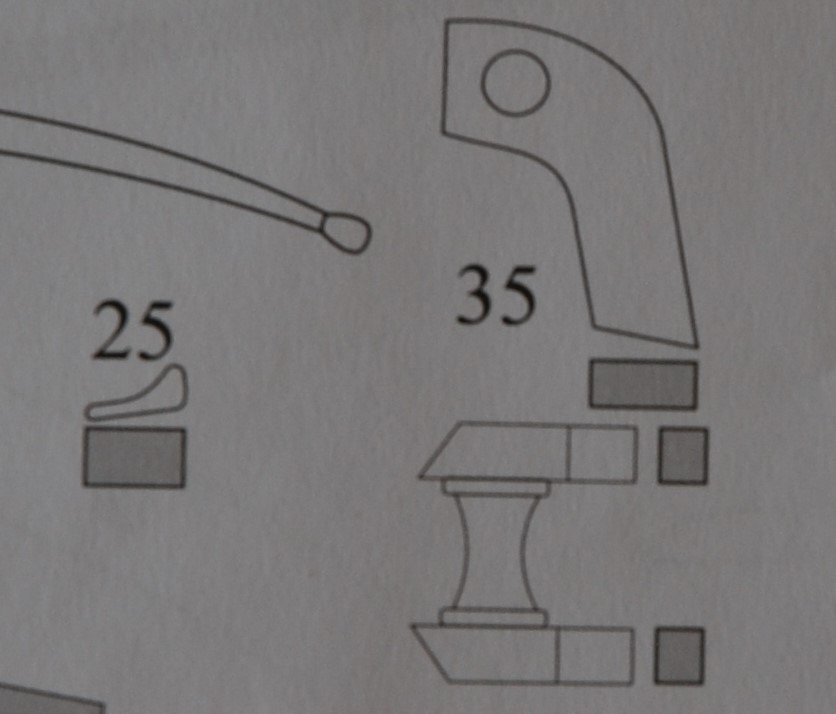
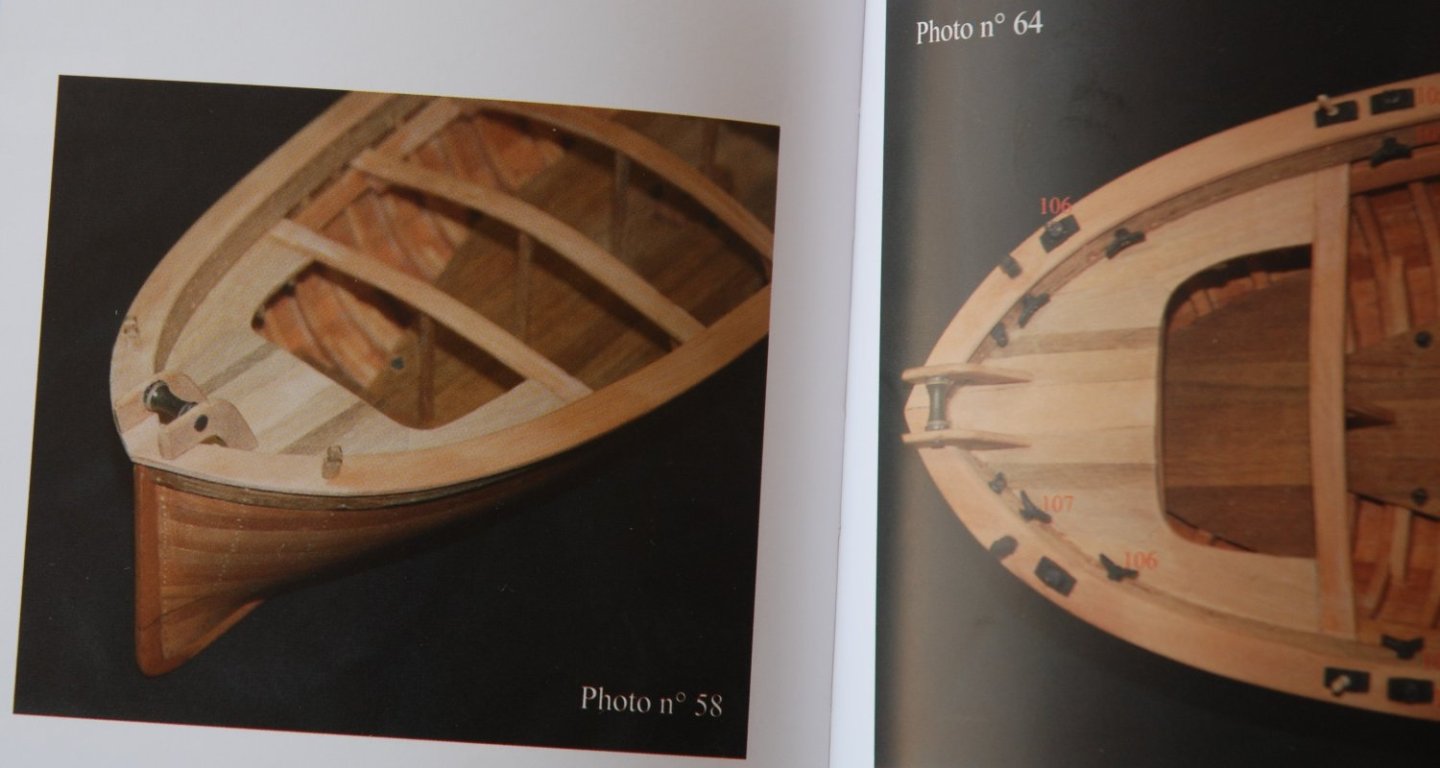
Thank you to all the 'Likes' I have finished now the installation of the bollards. They were made from a 6x6 mm stock, referring to the drawings shape. I shaped them from longer strips and once the final shape was completed, they were shortened to the required length. I treat them before they are put in place using the same process as for the gratings. Small metal rods will reinforce the bonding. For a precise location, I again use copies of the plan. Once the installation is complete, I treat the boat's decks with teak oil. You will notice the presence of a small davit at the back of the boat. I like to add a few extra details to give my model a personal touch. I found a precise drawing of this small davit in the excellent monograph on a Mediterranean Pointu Gozzo 'S. Caterina' written by Franco Fissore and published by Ancre Editions. As it is a boat of the same period and also used in the Adriatic Sea, I took the liberty to add it on my model. Here is a photo from this superb monograph that shows us this detail. I will now add some details about fishing...


- 57 replies
-
- 4
-
-
- marisstella
- batelina
- (and 1 more)
-
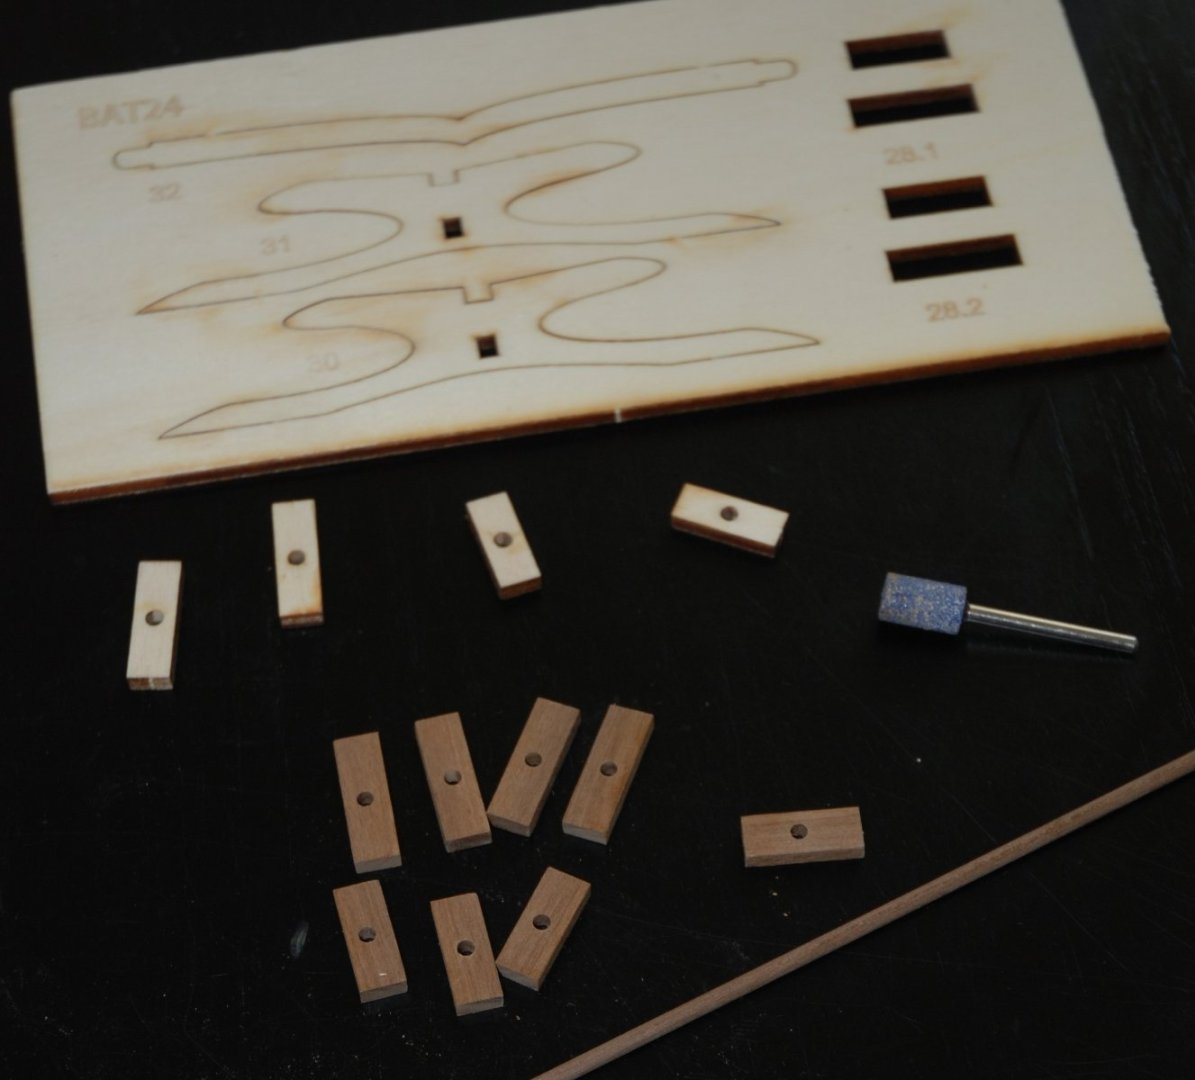
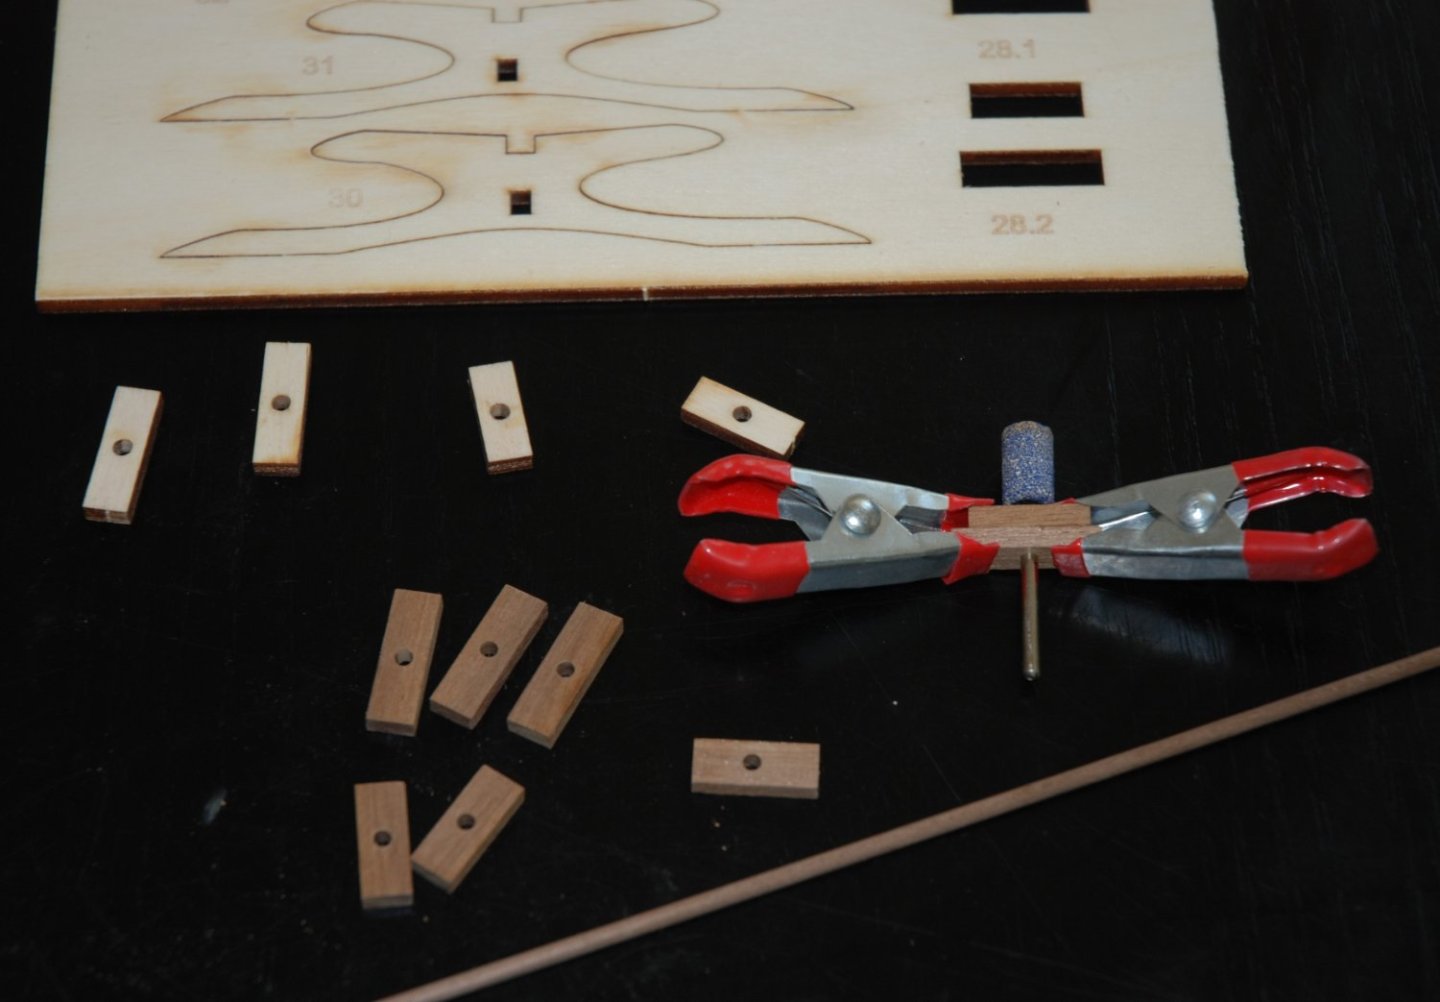
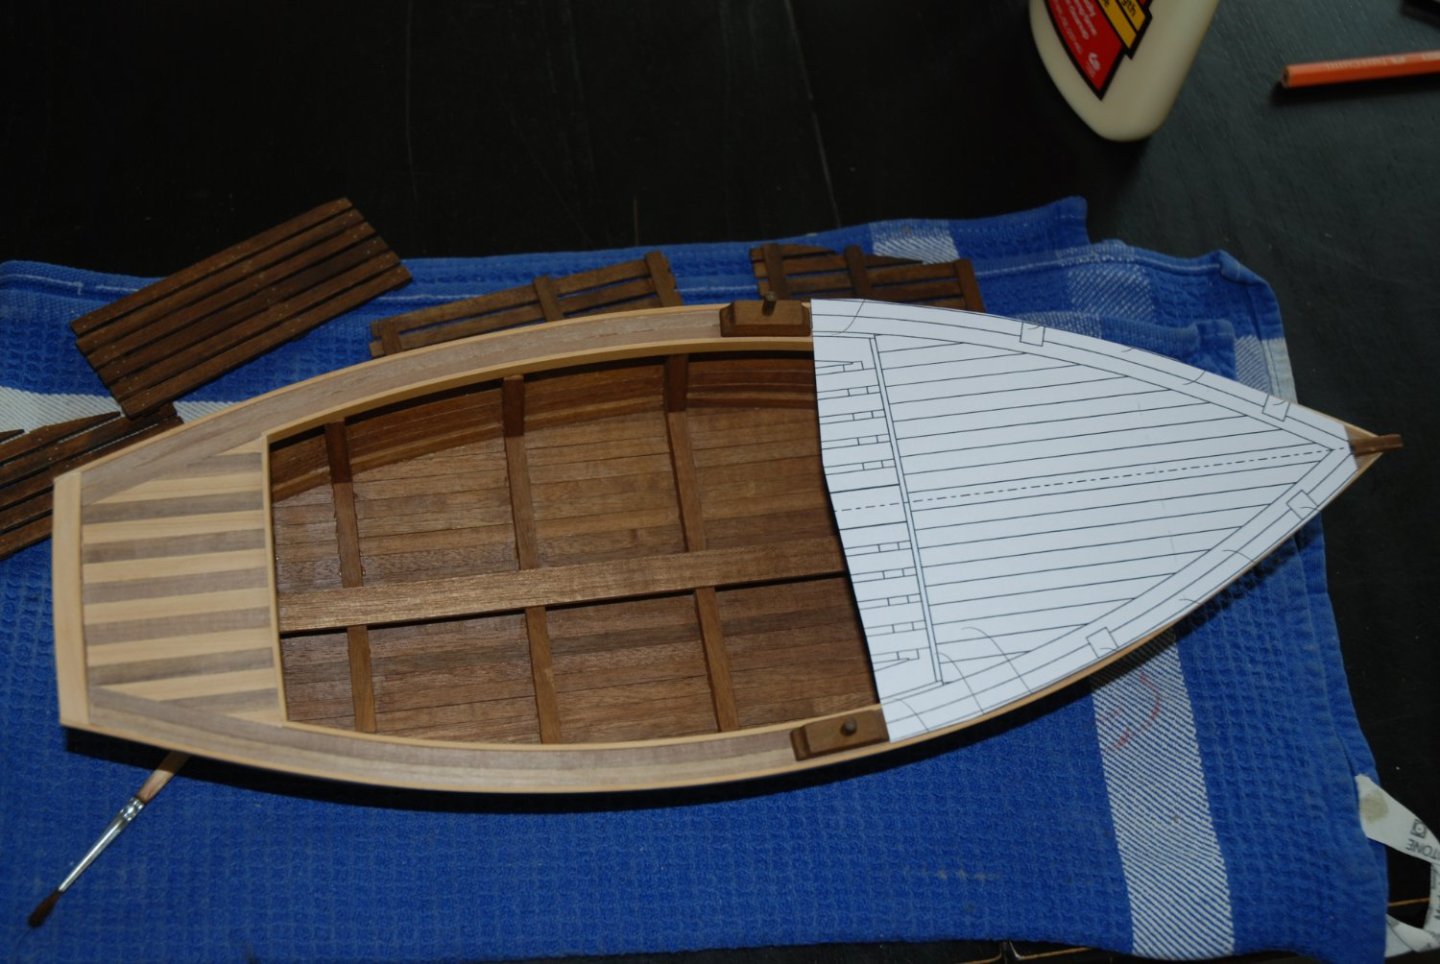
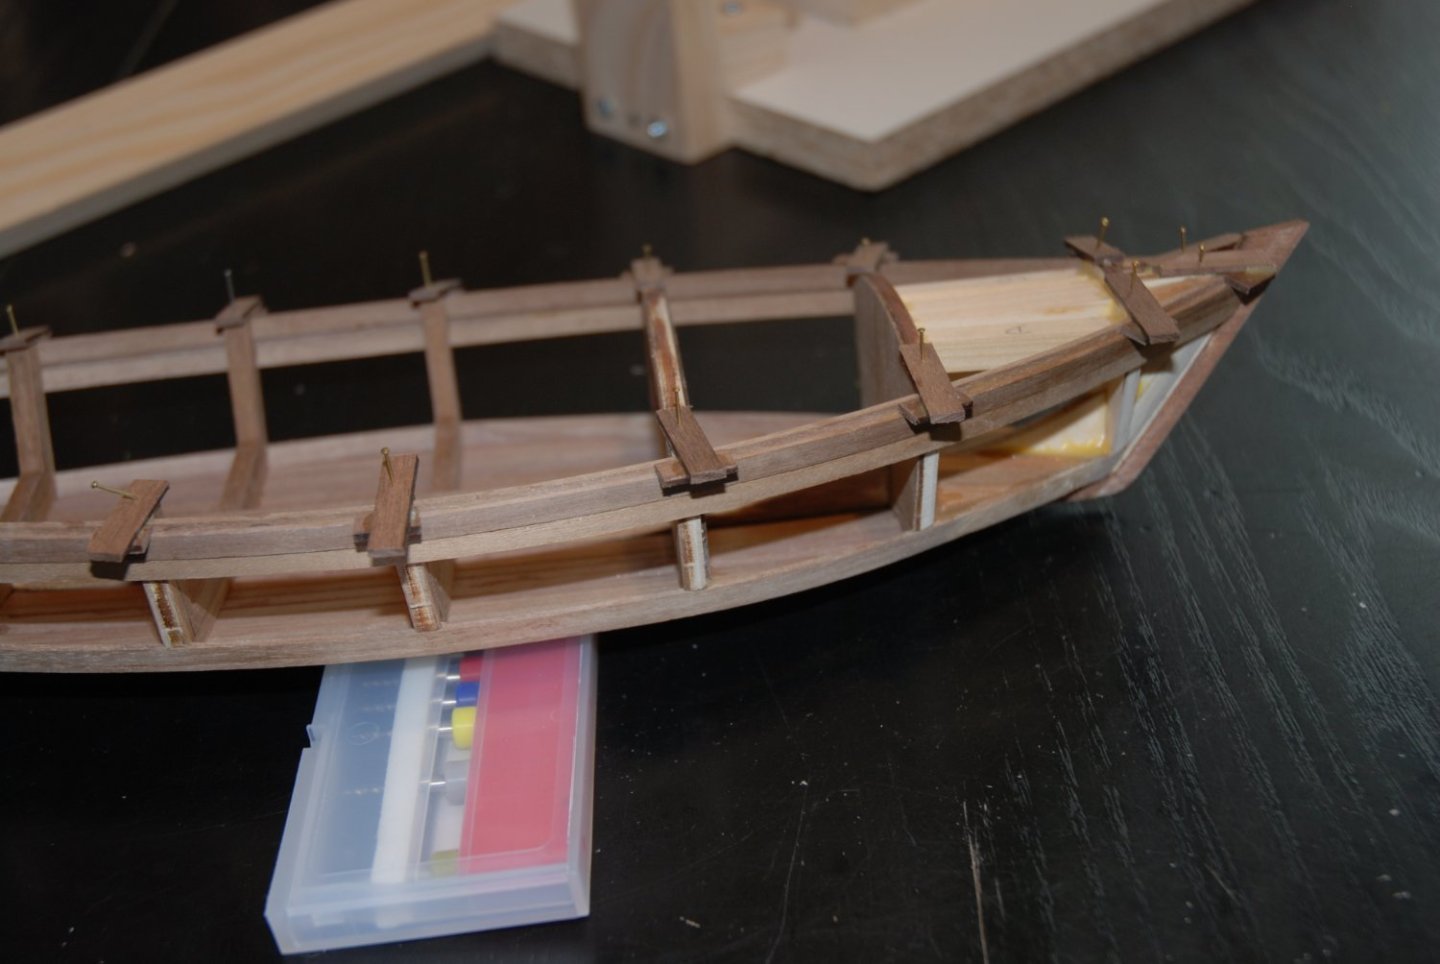
So I worked this week on the bits and the oar tholes. The oar tholes supplied in the kit are made of plywood. So I decided to replace them with solid walnut. Luckily I had in my wood stock some strips of the right thickness. A few cuts with my Byrnes table saw then the right size holes drilled and I'm ready for assembly and shaping. A copy of the plan allows me to precisely position the oar tholes. I can now focus on the bits.

- 57 replies
-
- 5
-
-
- marisstella
- batelina
- (and 1 more)
-
Superb Winnie ! I really like the customization done on this very nice version and the addition of the crew. This makes it a unique model.
- 105 replies
-
- 1
-
-
- winchelsea
- Syren Ship Model Company
- (and 1 more)
-
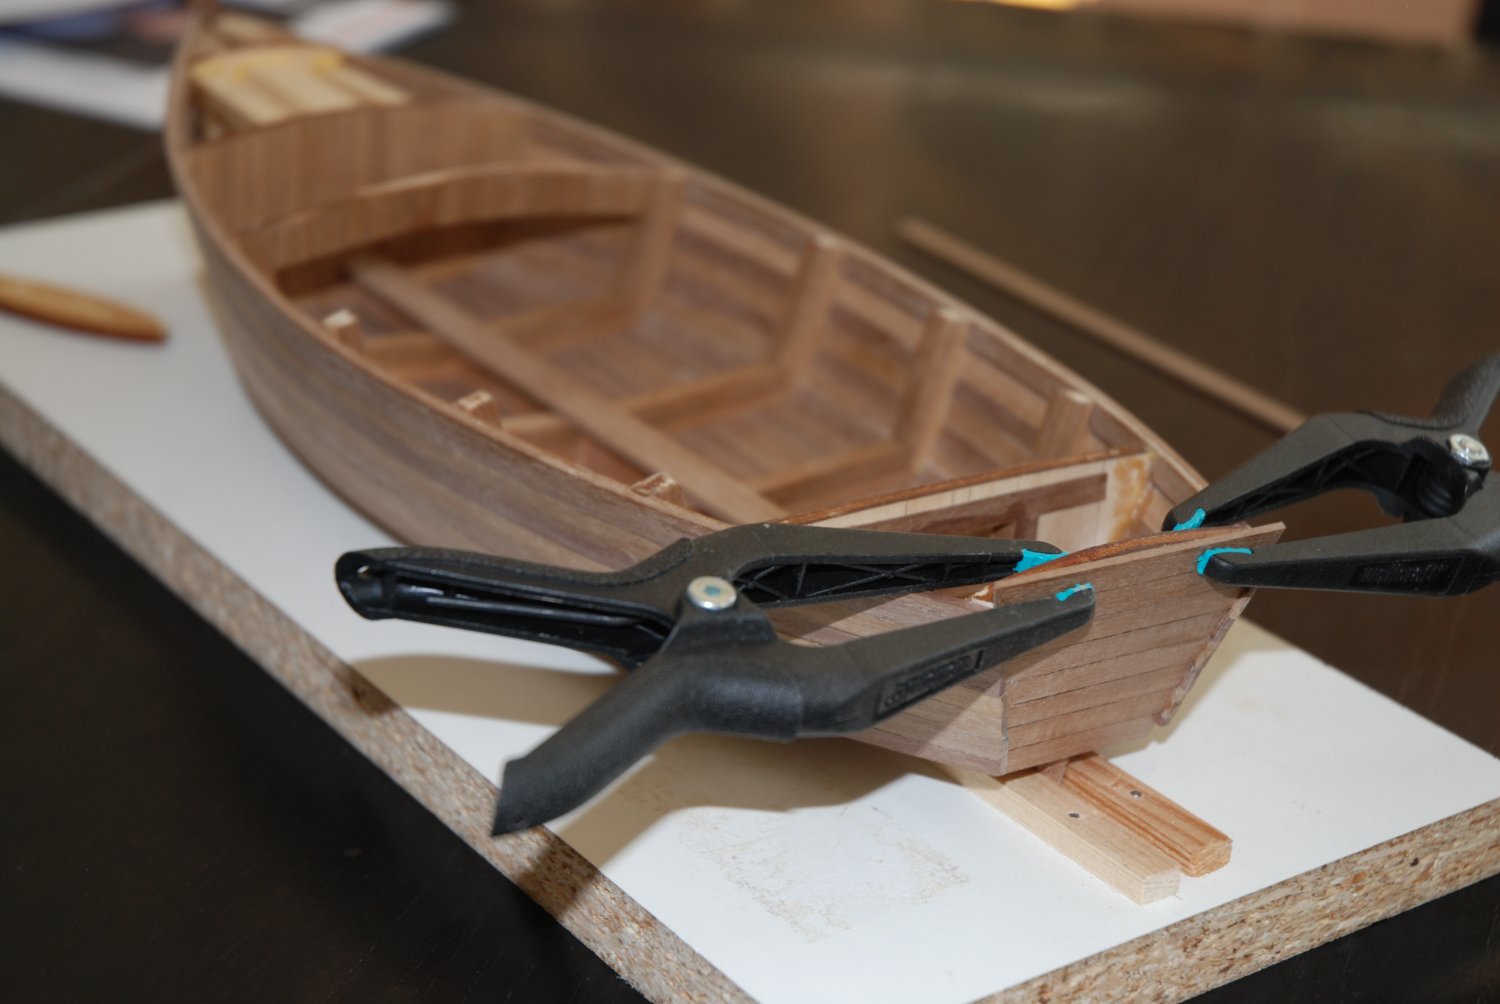
Thanks to all the 'Likes'. Bob, glad to see that the assembly of the Batelina gave you good memories. Now that you've drawn my attention to this future step, I think it would have been easier to put the bench down first. It will indeed be more difficult. The only advantage is that we will be sure of its position in height.
- 57 replies
-
- 2
-
-
- marisstella
- batelina
- (and 1 more)
-
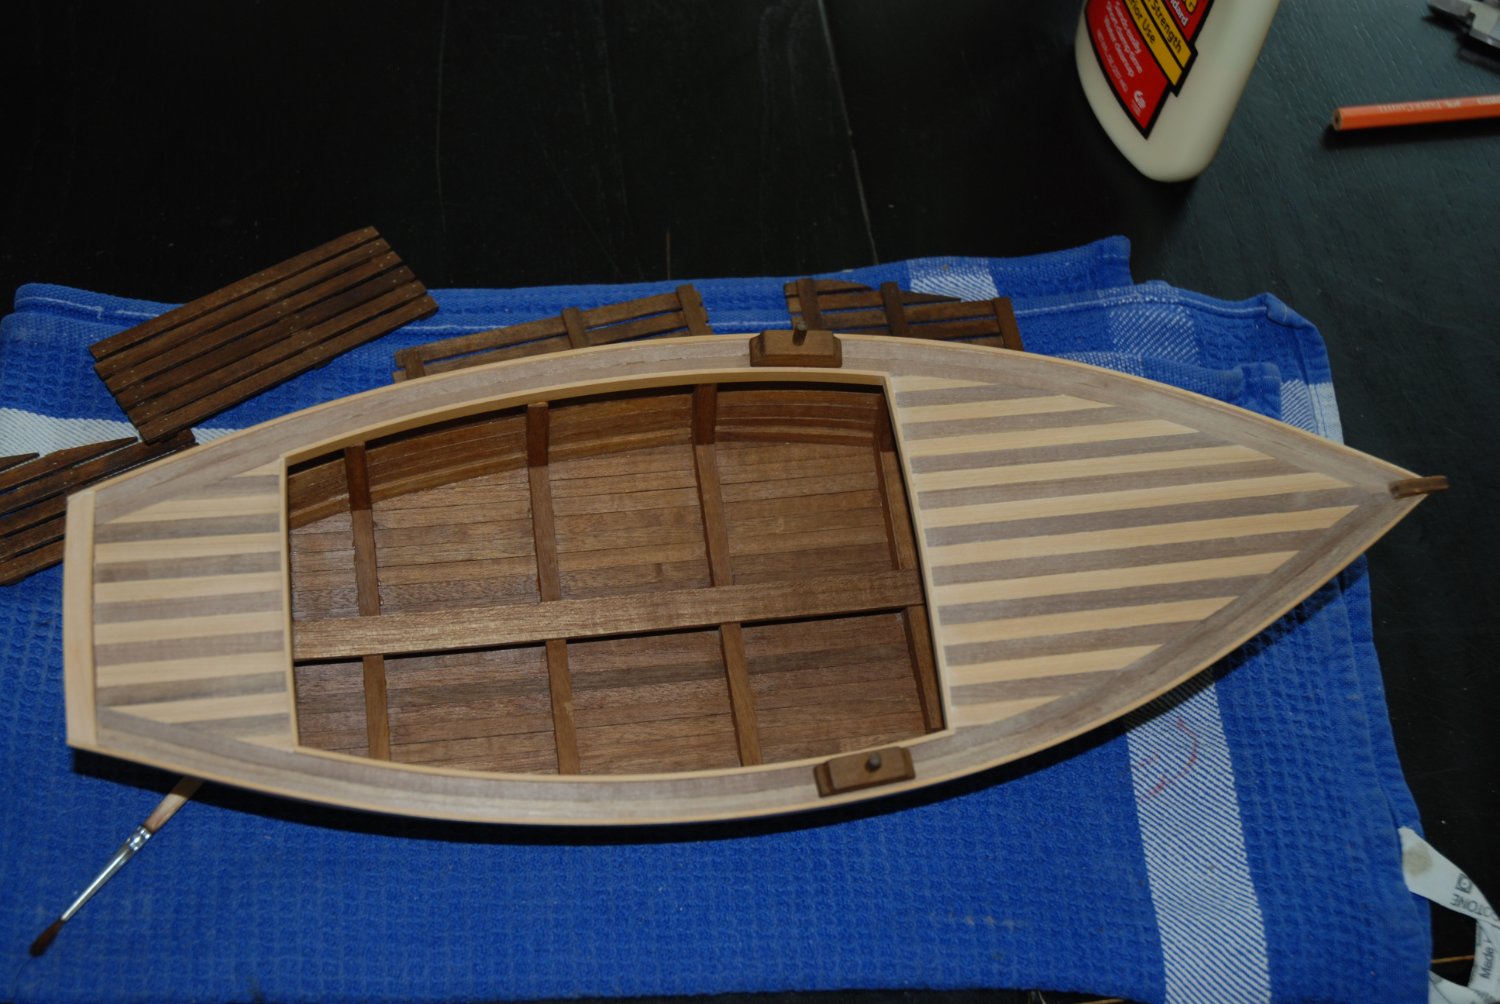
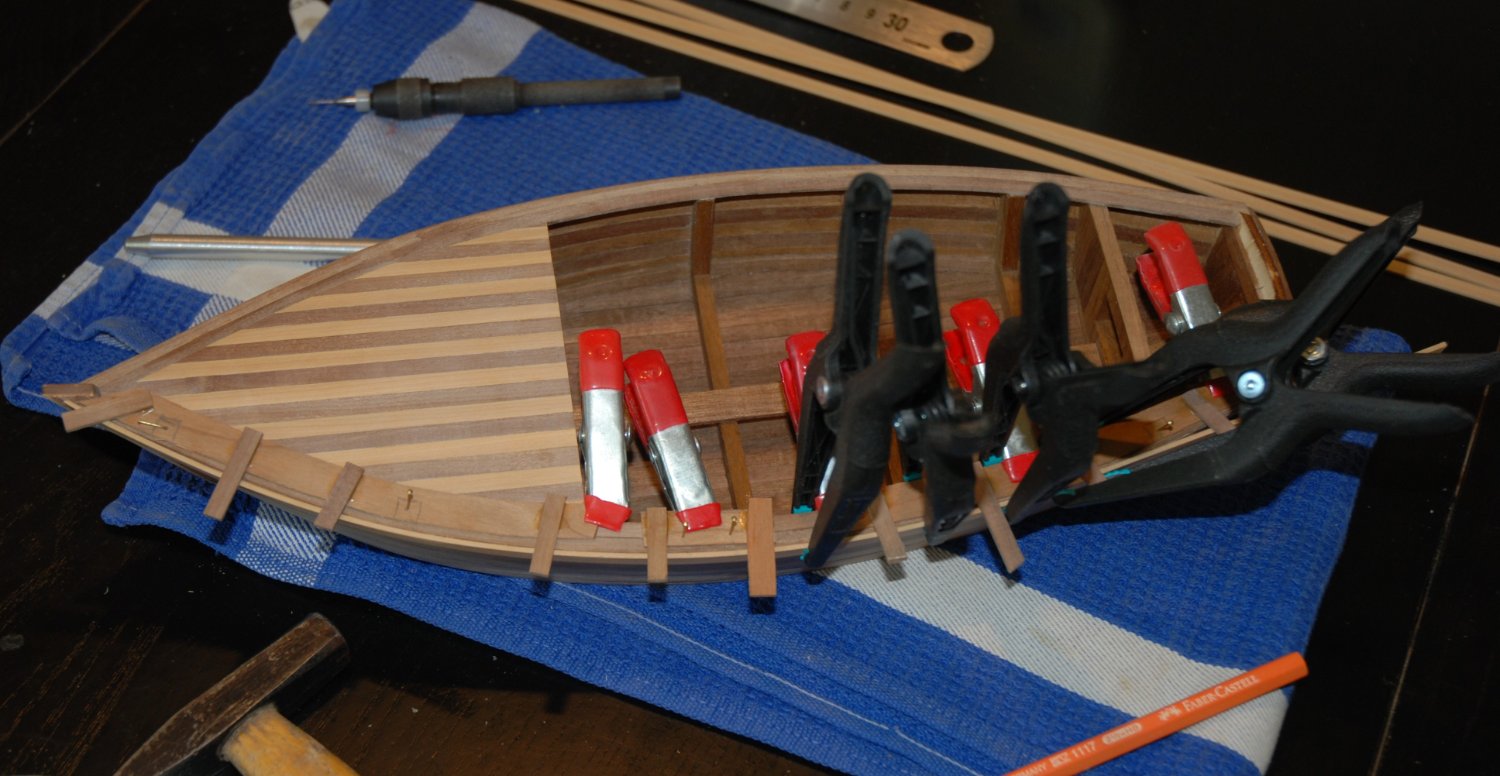
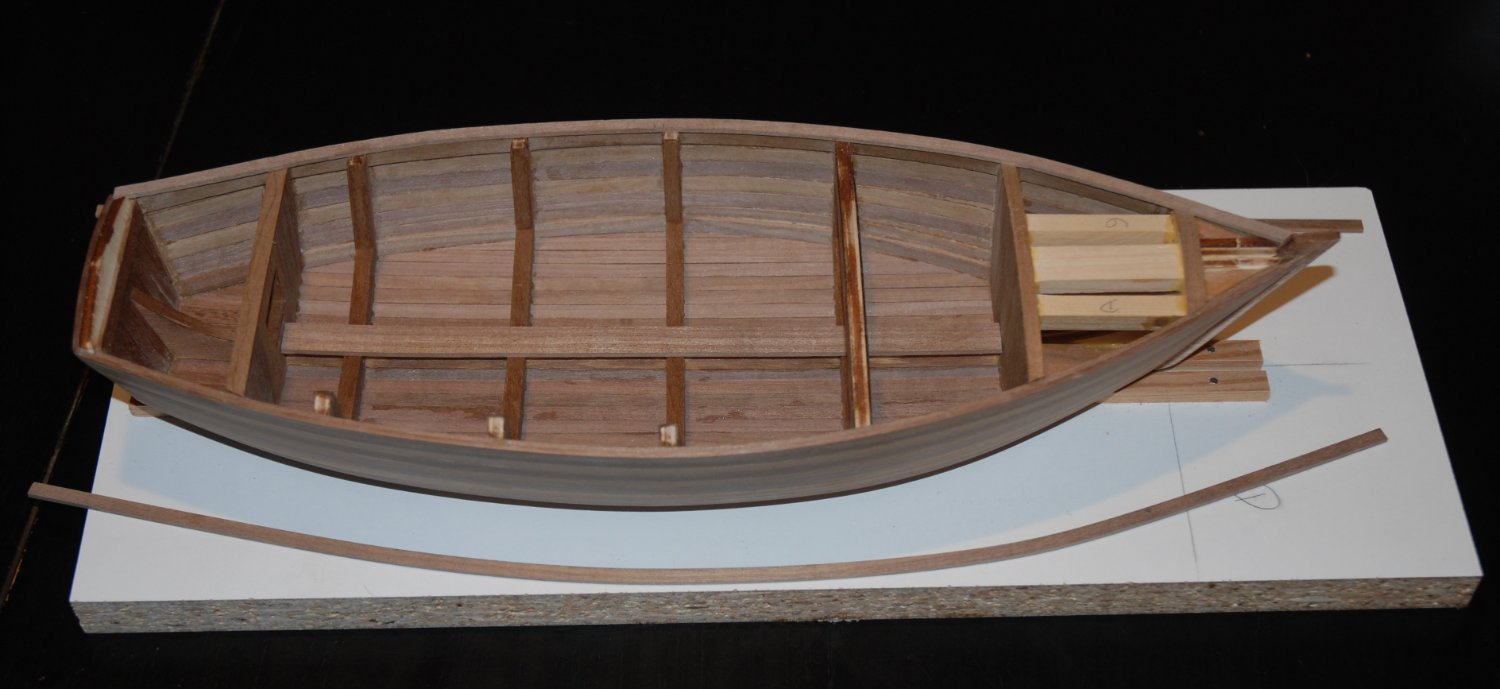
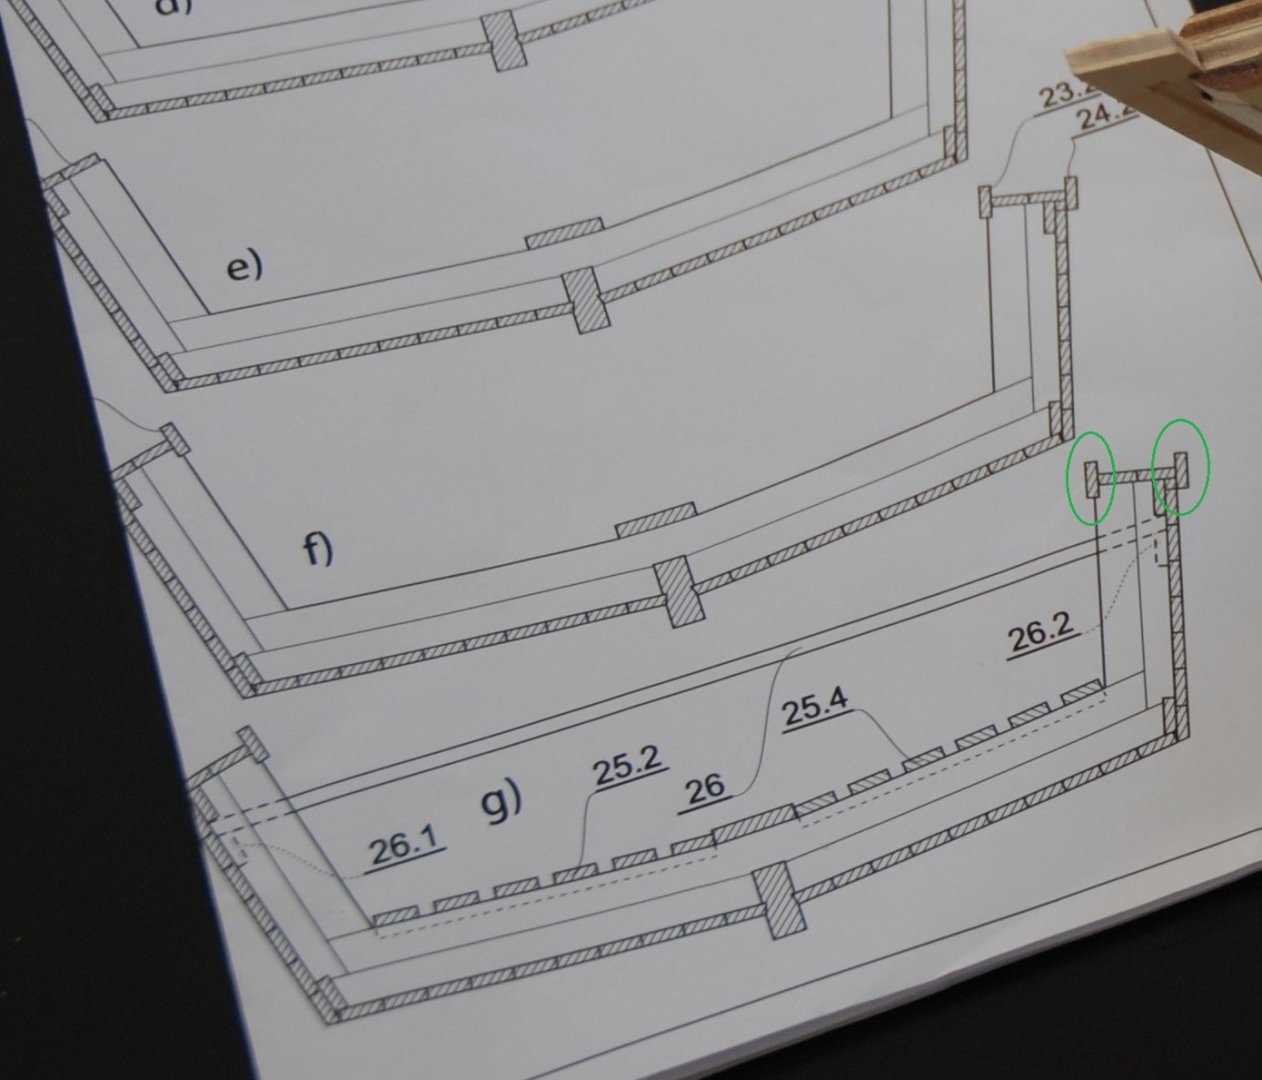
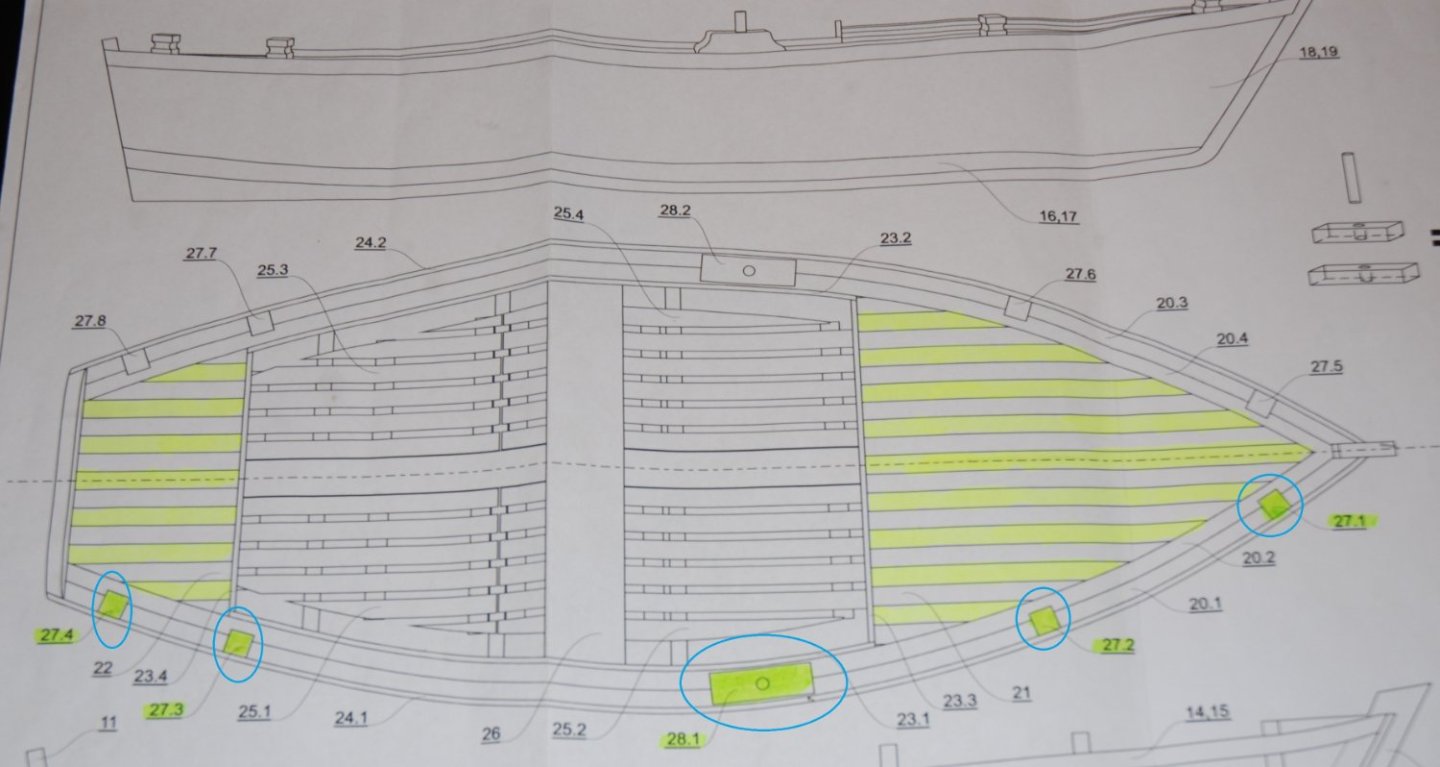
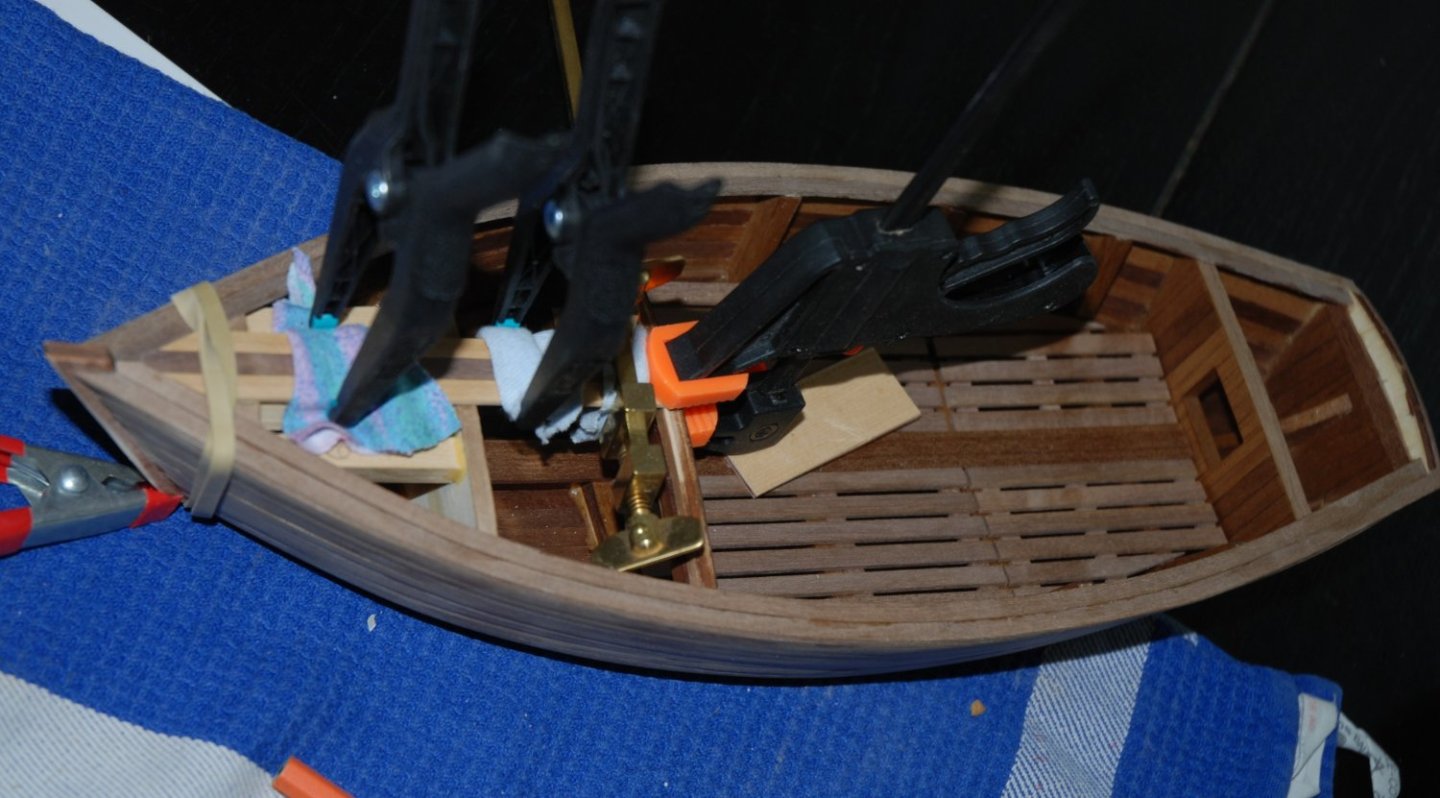
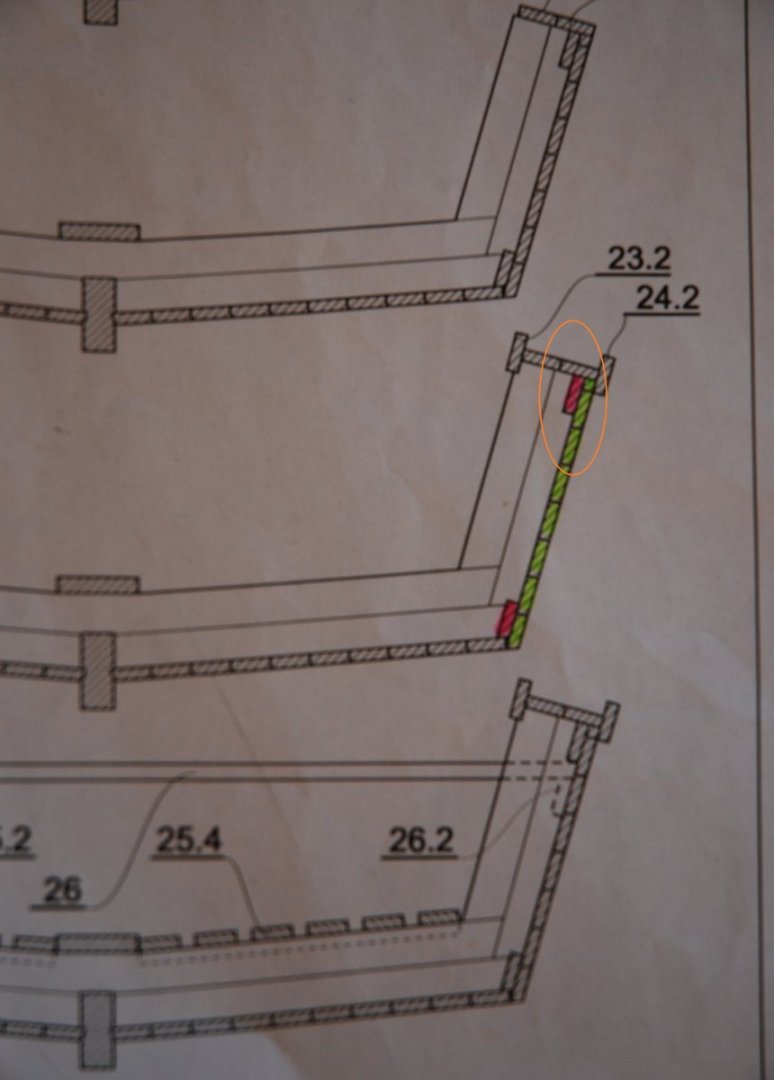
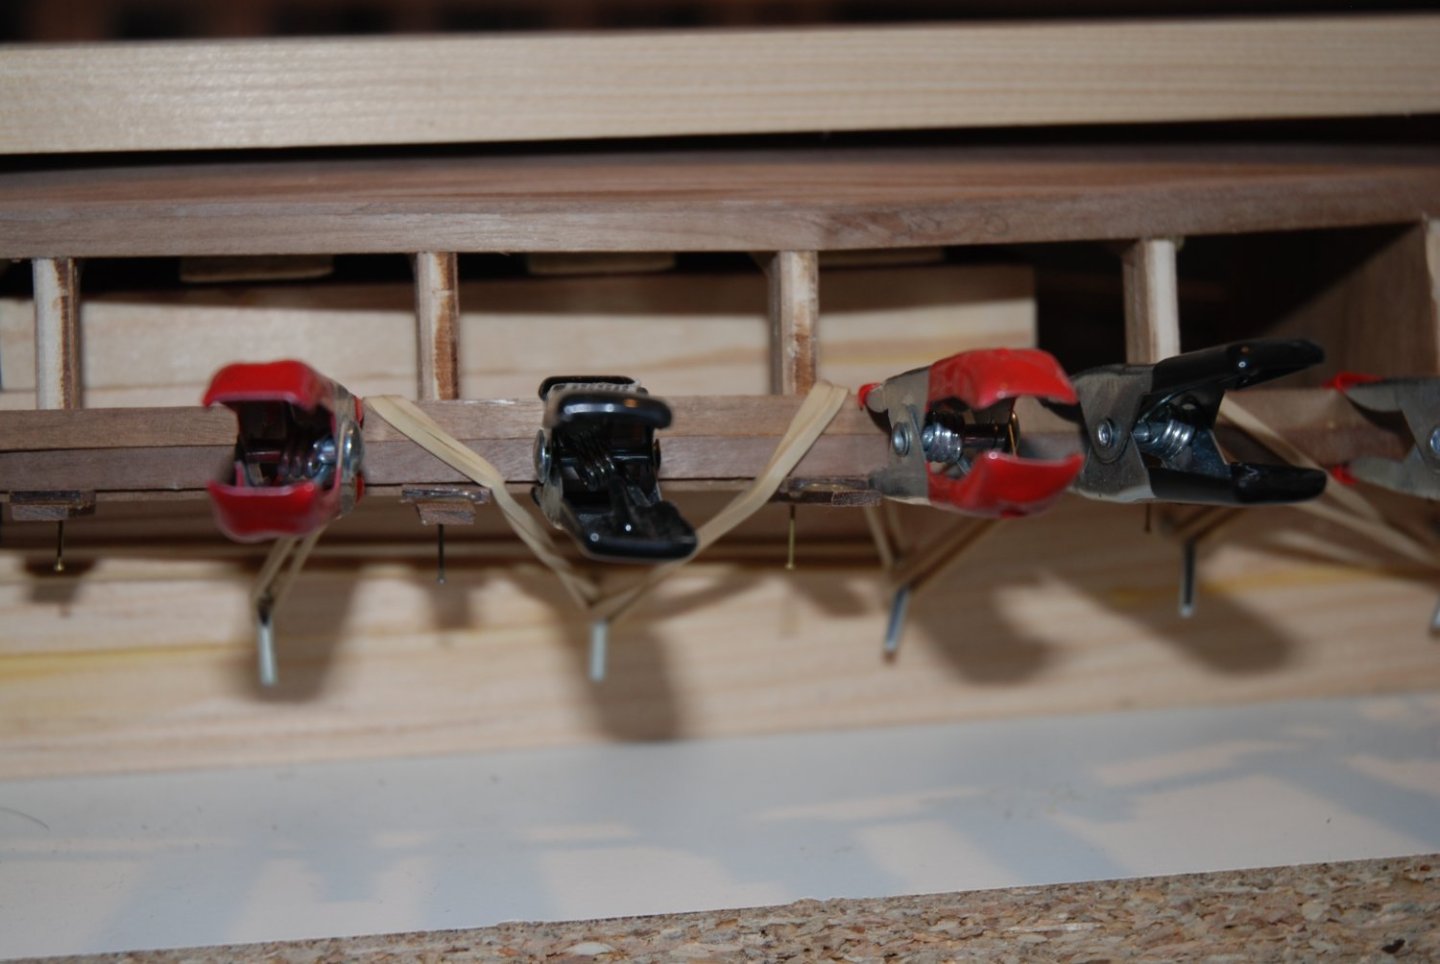
Thanks to all the 'Likes' and thank you Allan for yours kind words. I am finishing the construction phase of the hull by laying the last 6 planks. These are the ones that will border the top rails. The small difficulty lies in the fact that when installing these planks, it is necessary to be sure that they are glued 2 mm higher than the rails. To do this, I again use a small jig with a thickness of 2 mm and which follows the shape of the rails. Small pieces of wood glued at regular intervals allow to glue the strips at the right height. This jig is held in place with nails (the nails are placed exactly at the future location of the bits and oar tholes so that the holes drilled in the rails are hidden once these elements are in place) The support is further strengthened with the help of clamps. The photo above shows the preparation phase and the setting up of the jig on the starboard side. Then simply glue the strip in place, using the small protruding pieces as support. In the picture above, the outer plank on the port side is already glued and has been shortened to the right length at the stern of the boat. The rear deck is then finished by alternating walnut and boxwood planks. Then, I finish the job by laying the 4 strips of the upper internal planking. The installation of the 4 interior planks is easier because they are shorter. For these six planks of the upper planking along the rails, I opted for boxwood to again bring a colorful touch that differs from the rest of the hull. Next step: setting up bits and oar tholes.


- 57 replies
-
- 6
-
-
- marisstella
- batelina
- (and 1 more)
-
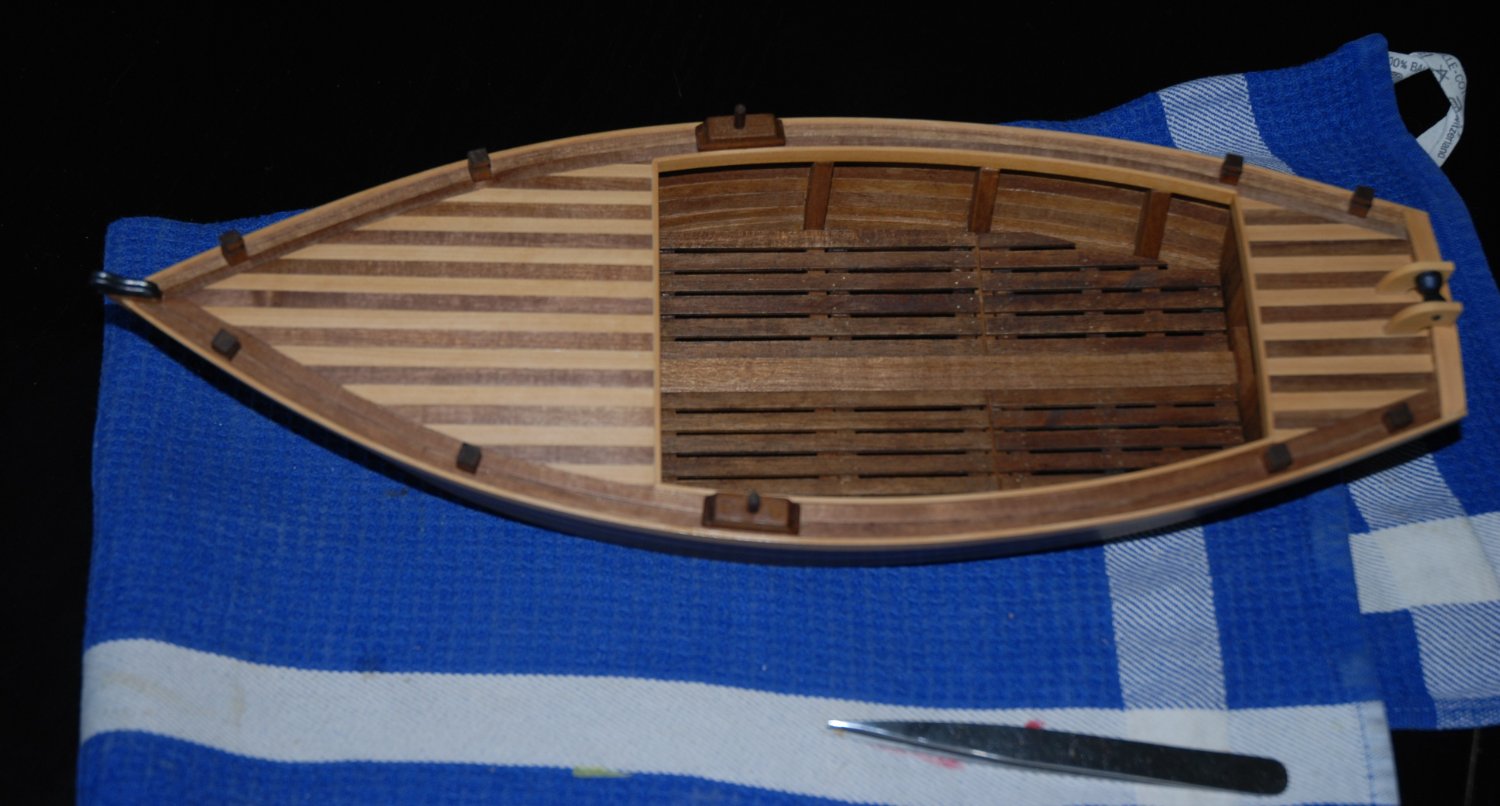
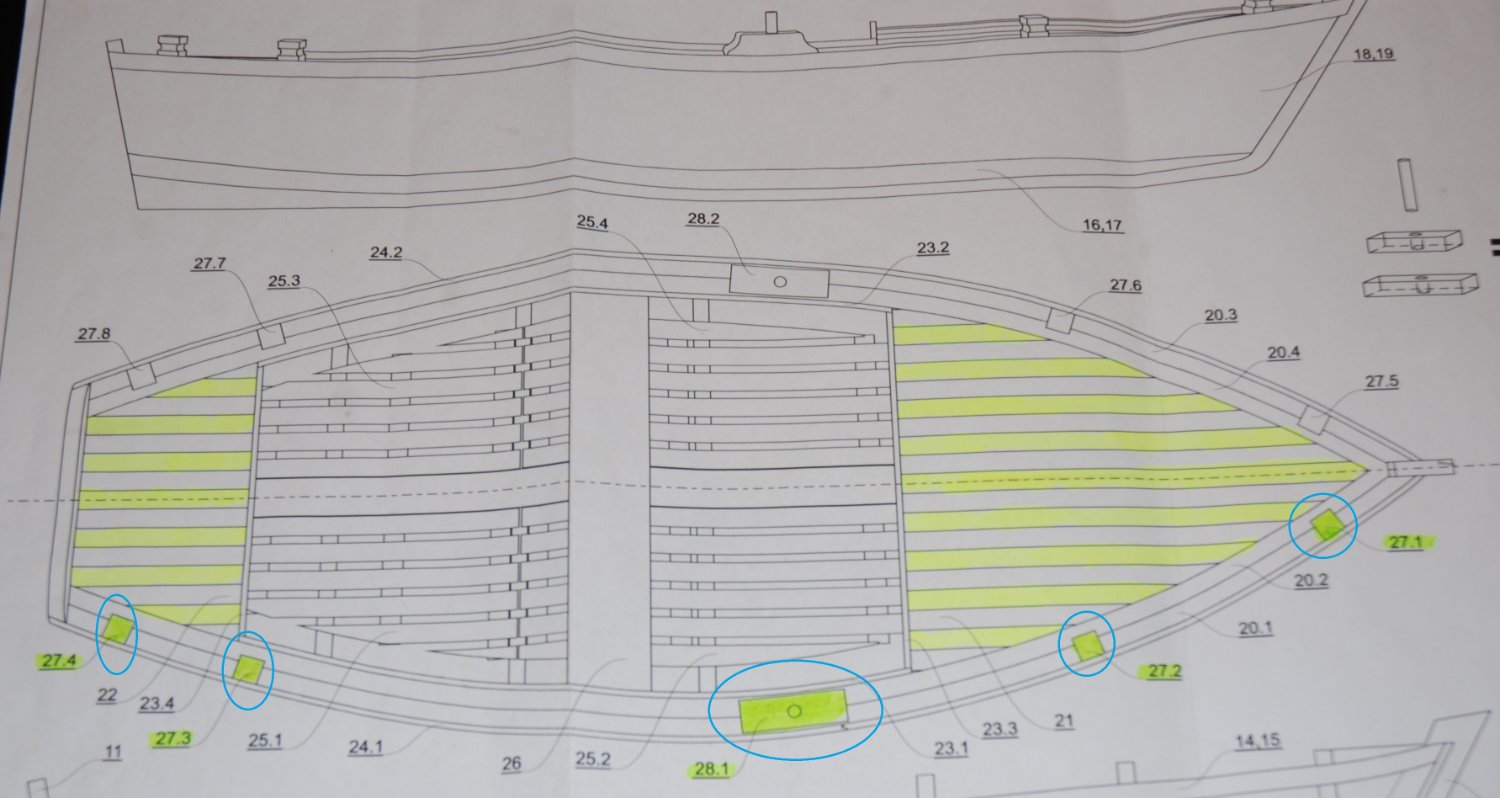
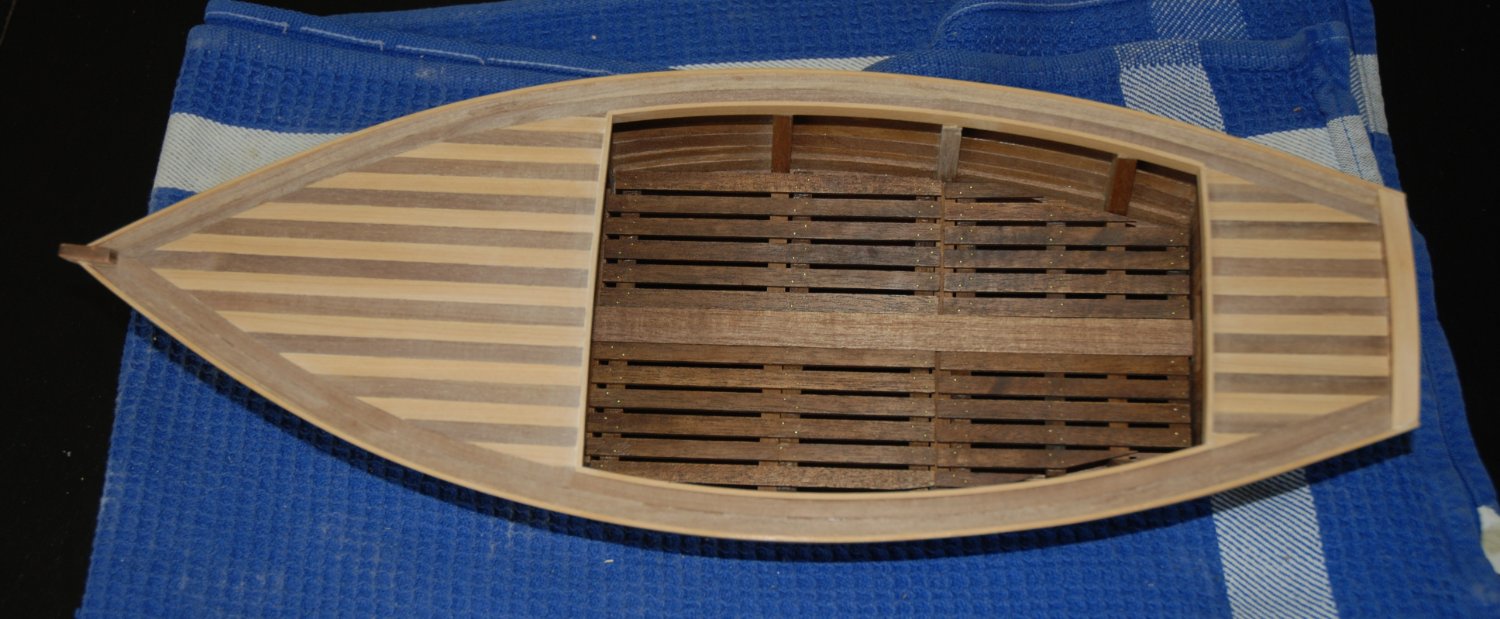
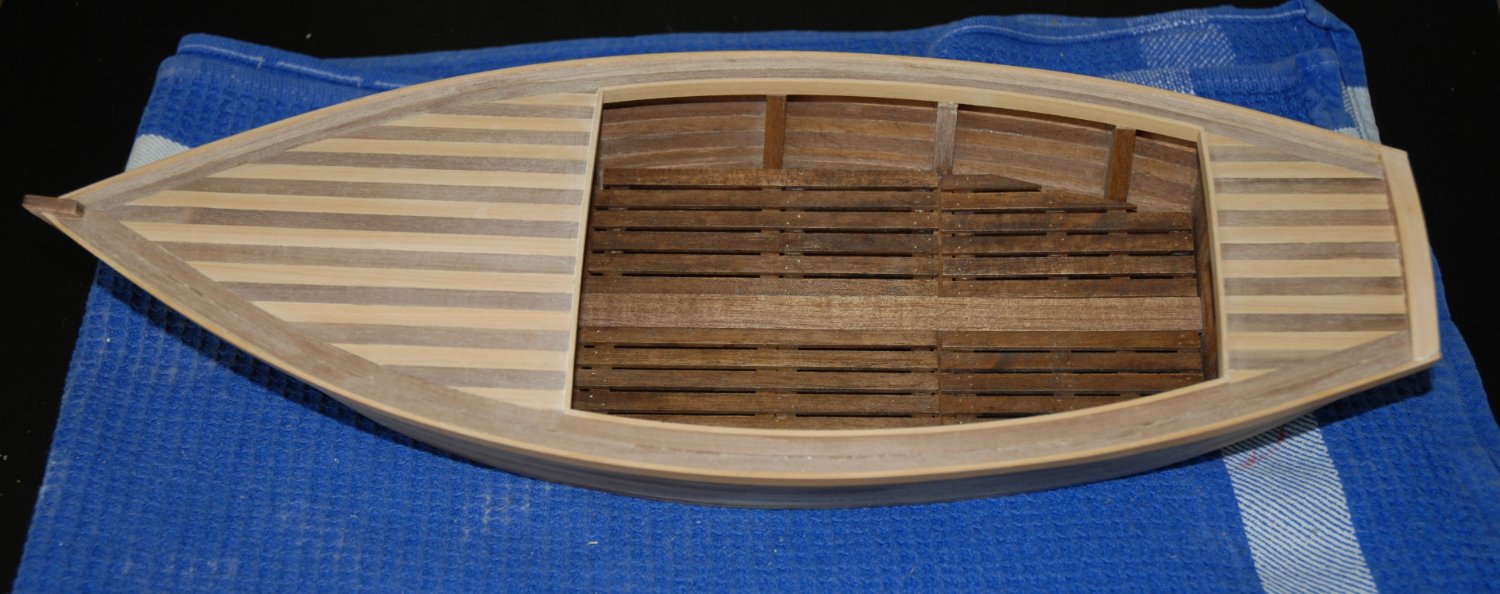
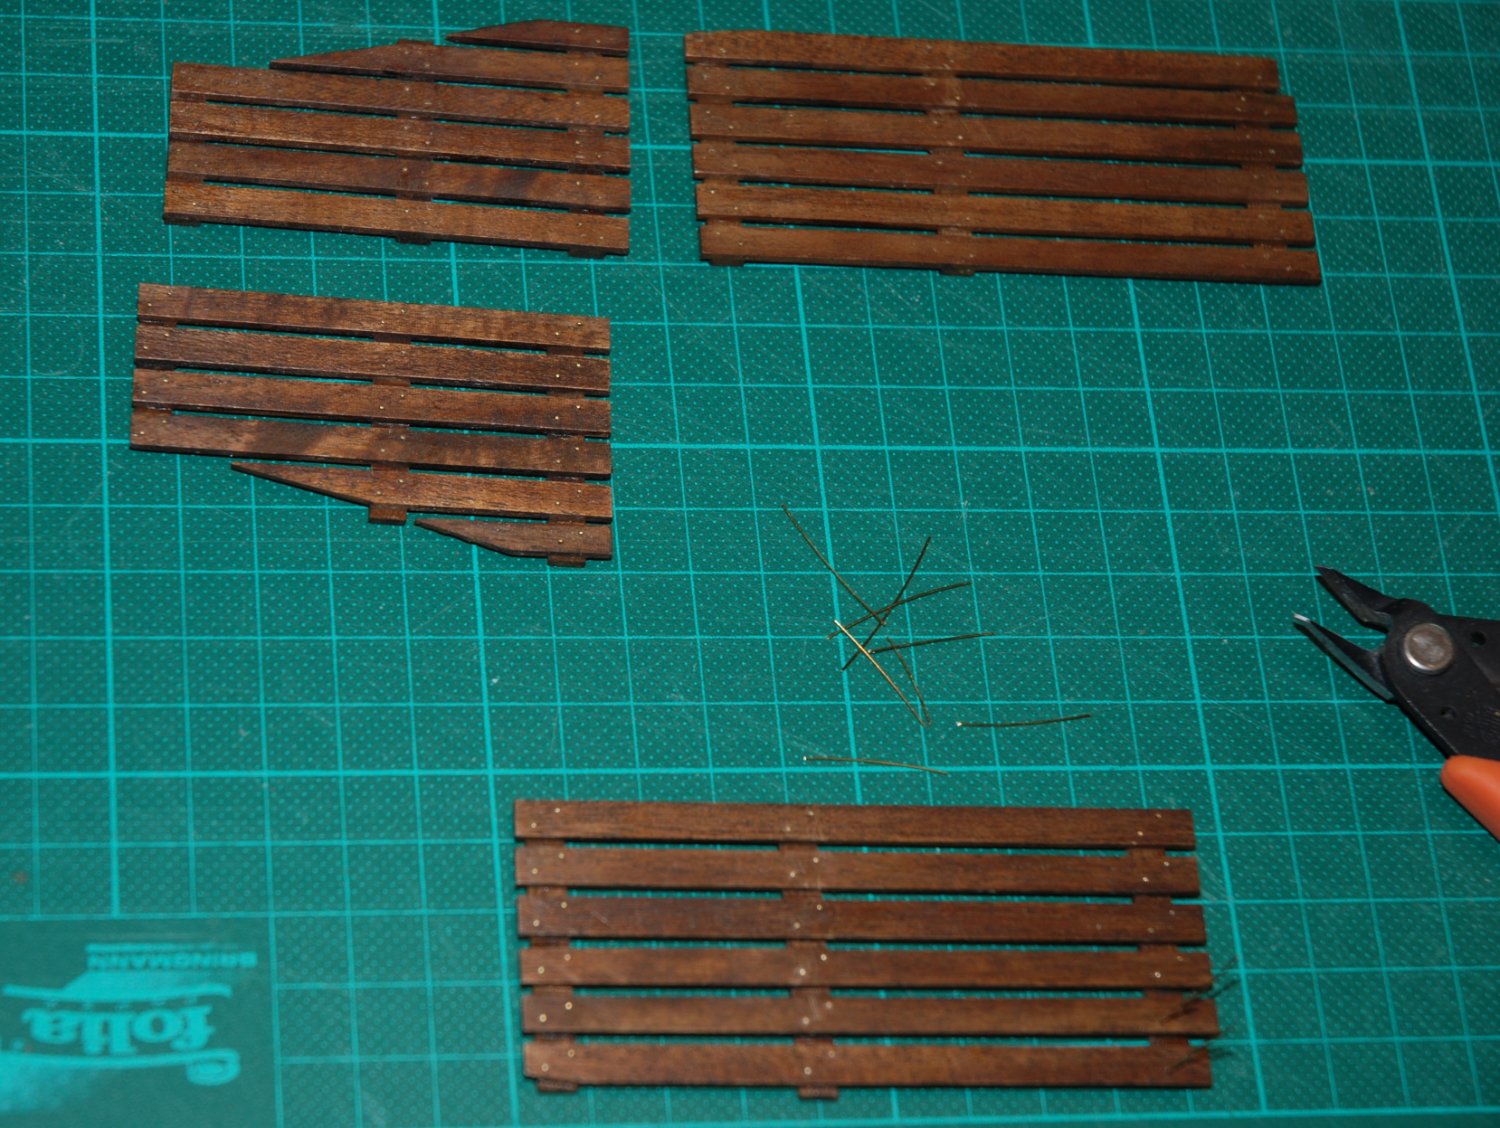
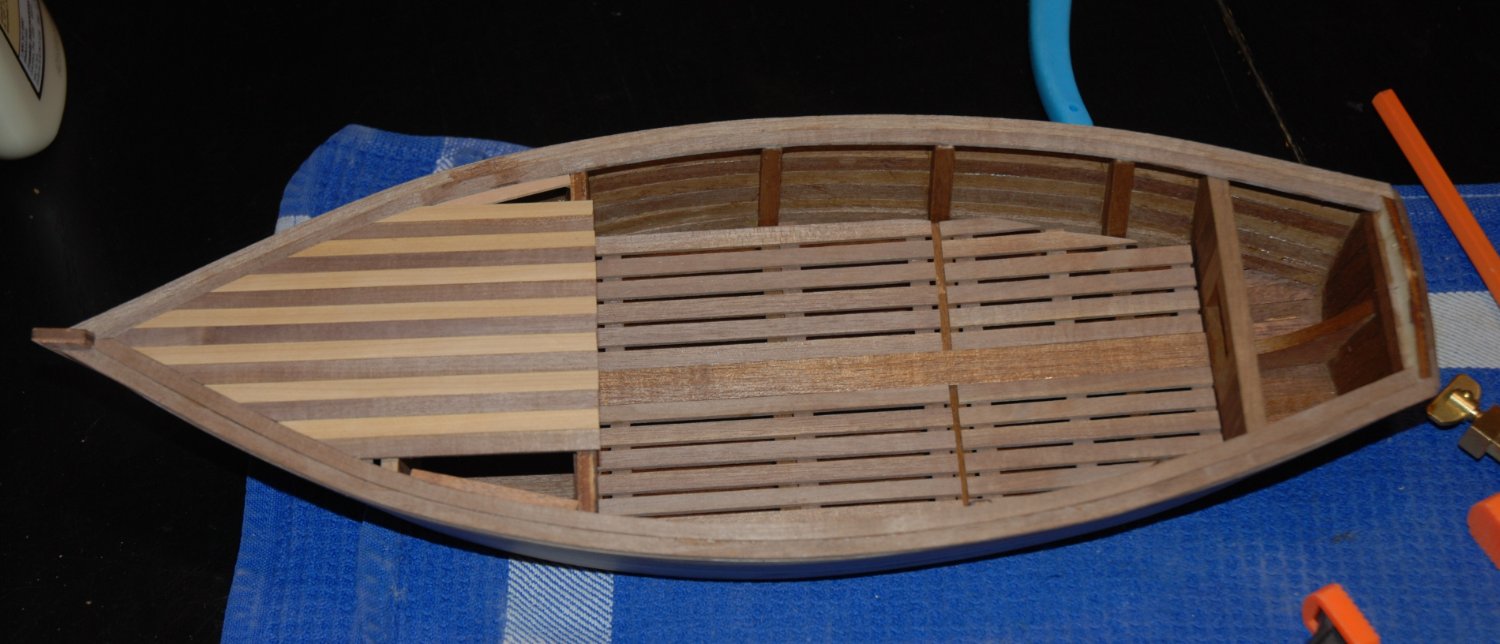
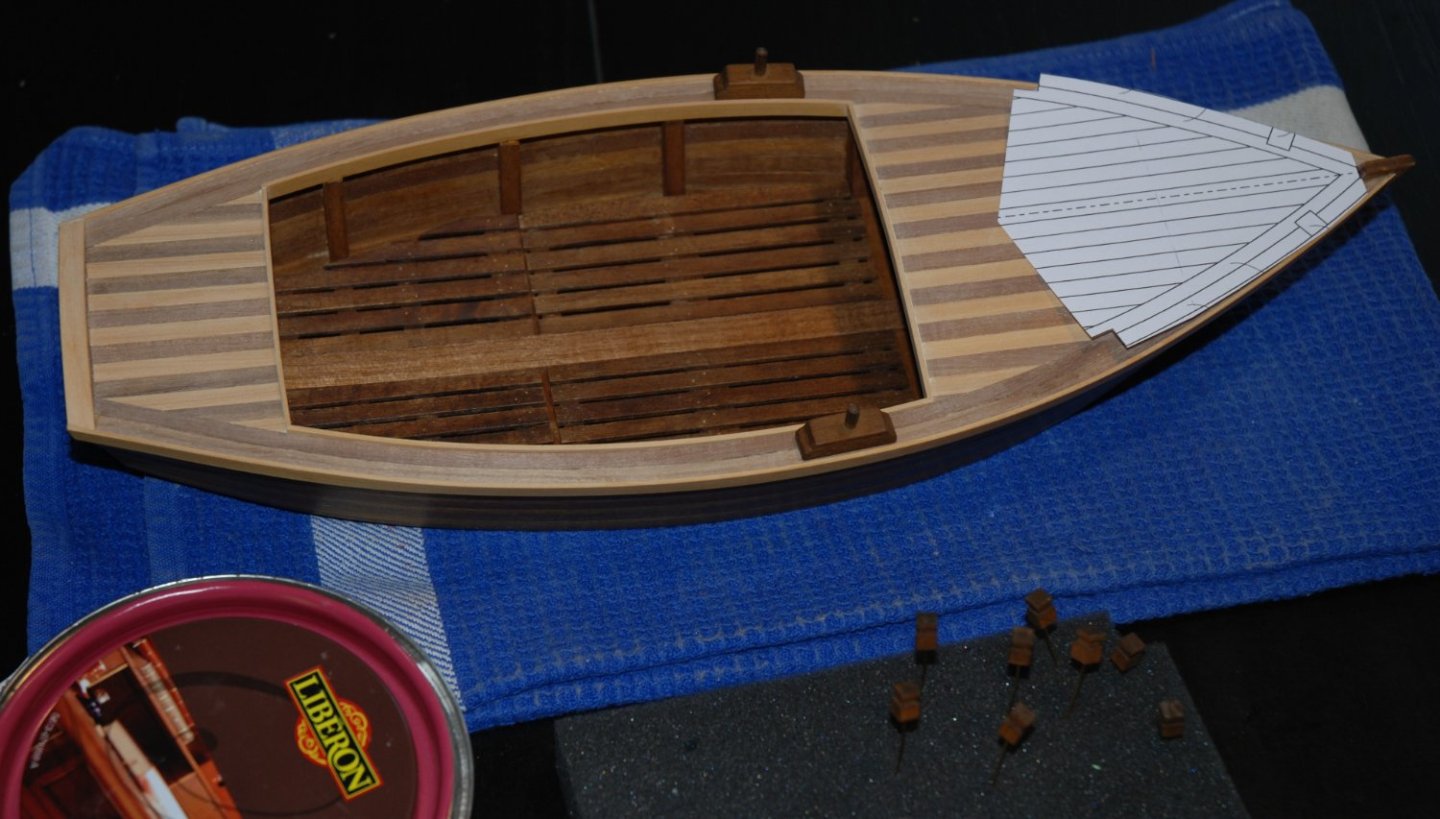
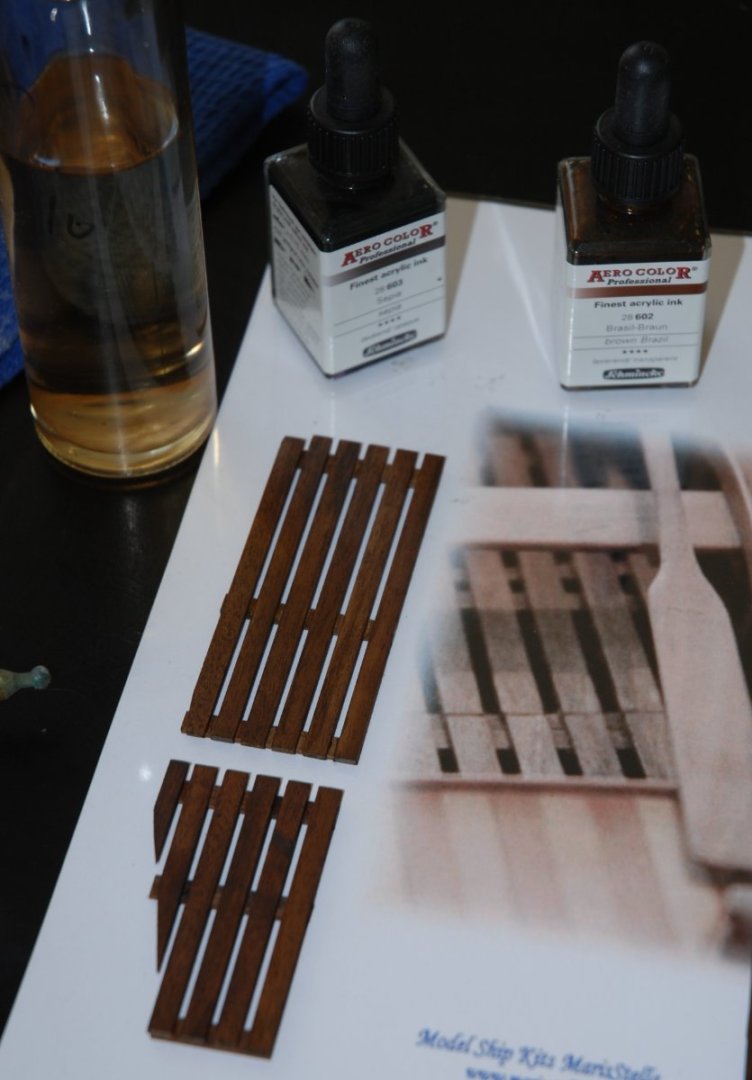
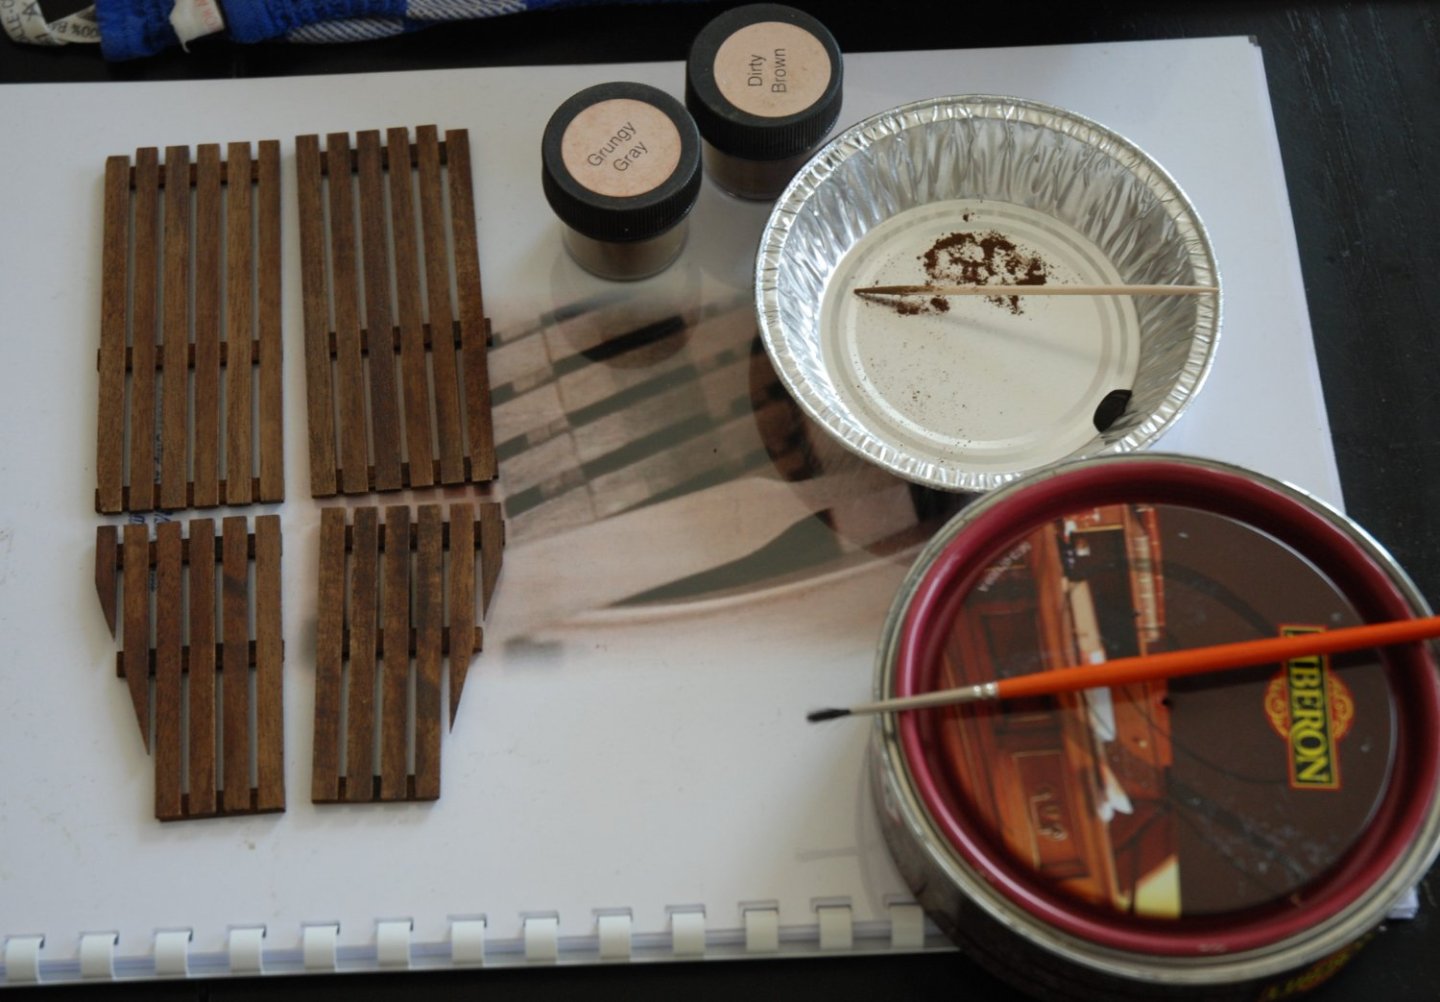
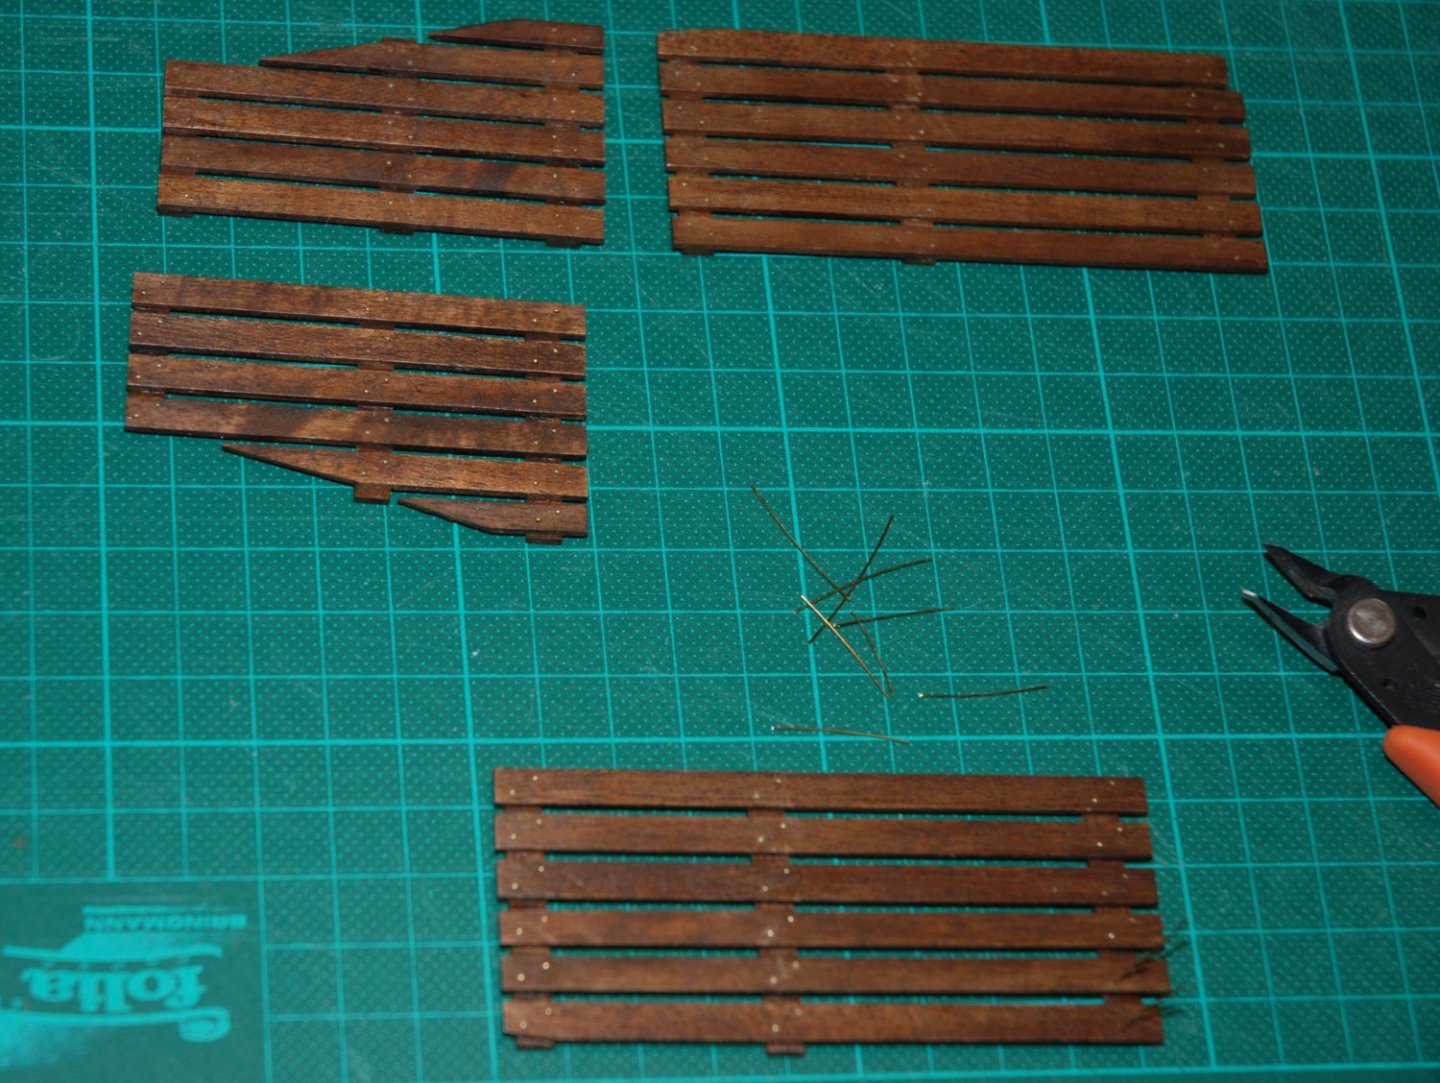
Thanks to all those who follow my build and who are kind enough to comment on it. I spent some time treating the grating on the bottom of the boat. I wanted to get a darker tone than the hull. I stained the wood with Schmincke 'Aero Color' acrylic inks. These are references 28.602 brown Brazil and 28.603 sepia at a ratio of 5 to 1. The mixture was diluted with alcohol. Once the wood is dry, it is treated with Black Bison antique wax from Liberon. The color used is 'Light Oak'. and I finish the treatment with powdered pastel (Doc O'brien's) The nailing is imitated with 0.4 mm brass wire. It will take on a less vibrant hue over time. And always a lot of fun to build this little boat.
- 57 replies
-
- 6
-
-
- marisstella
- batelina
- (and 1 more)
-
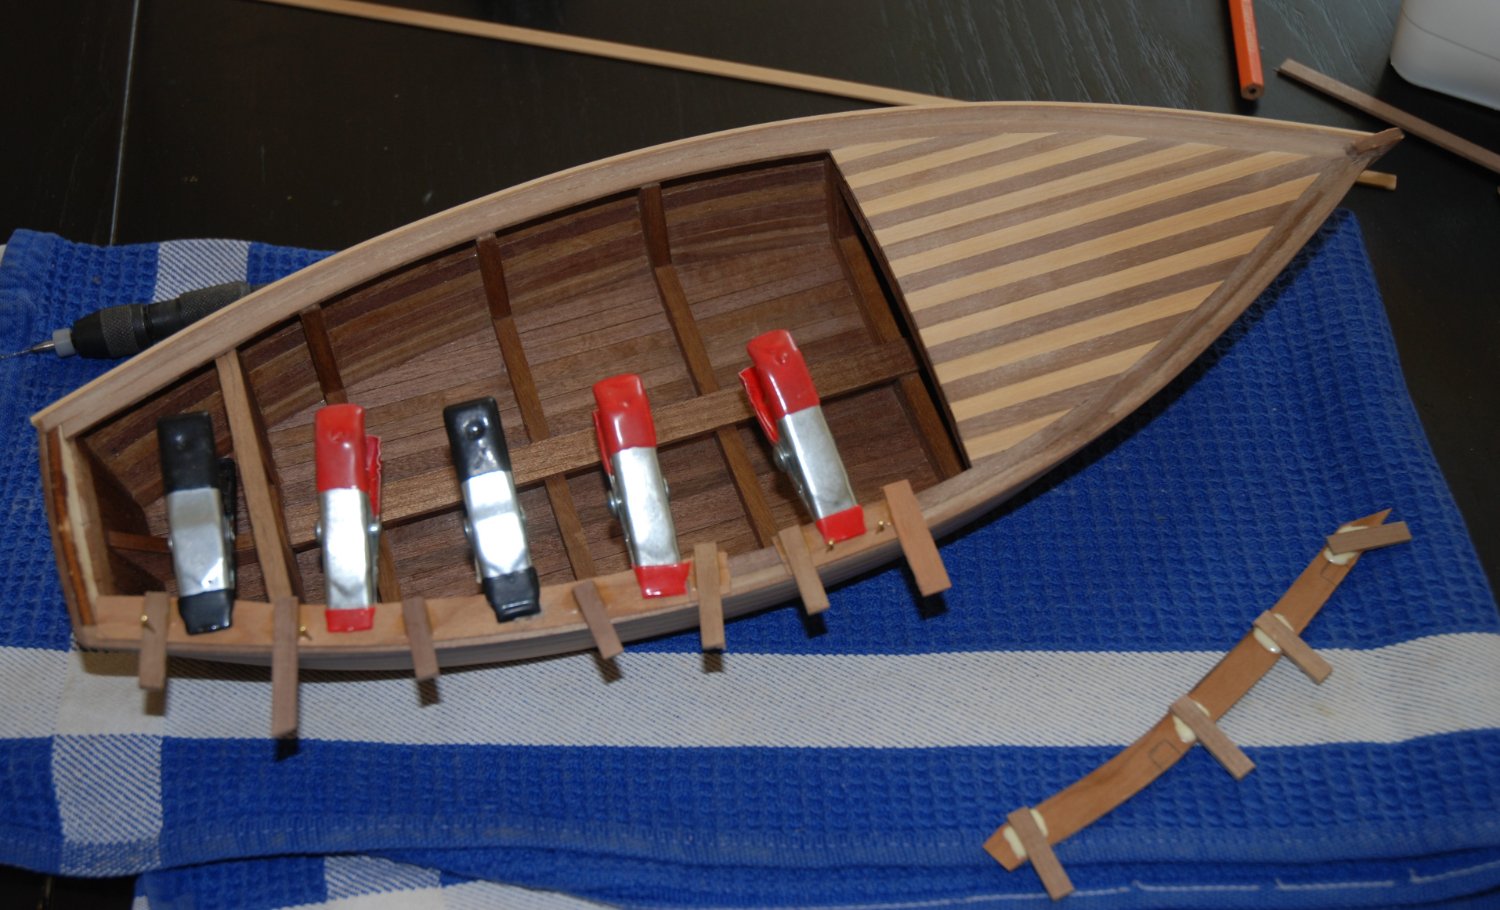
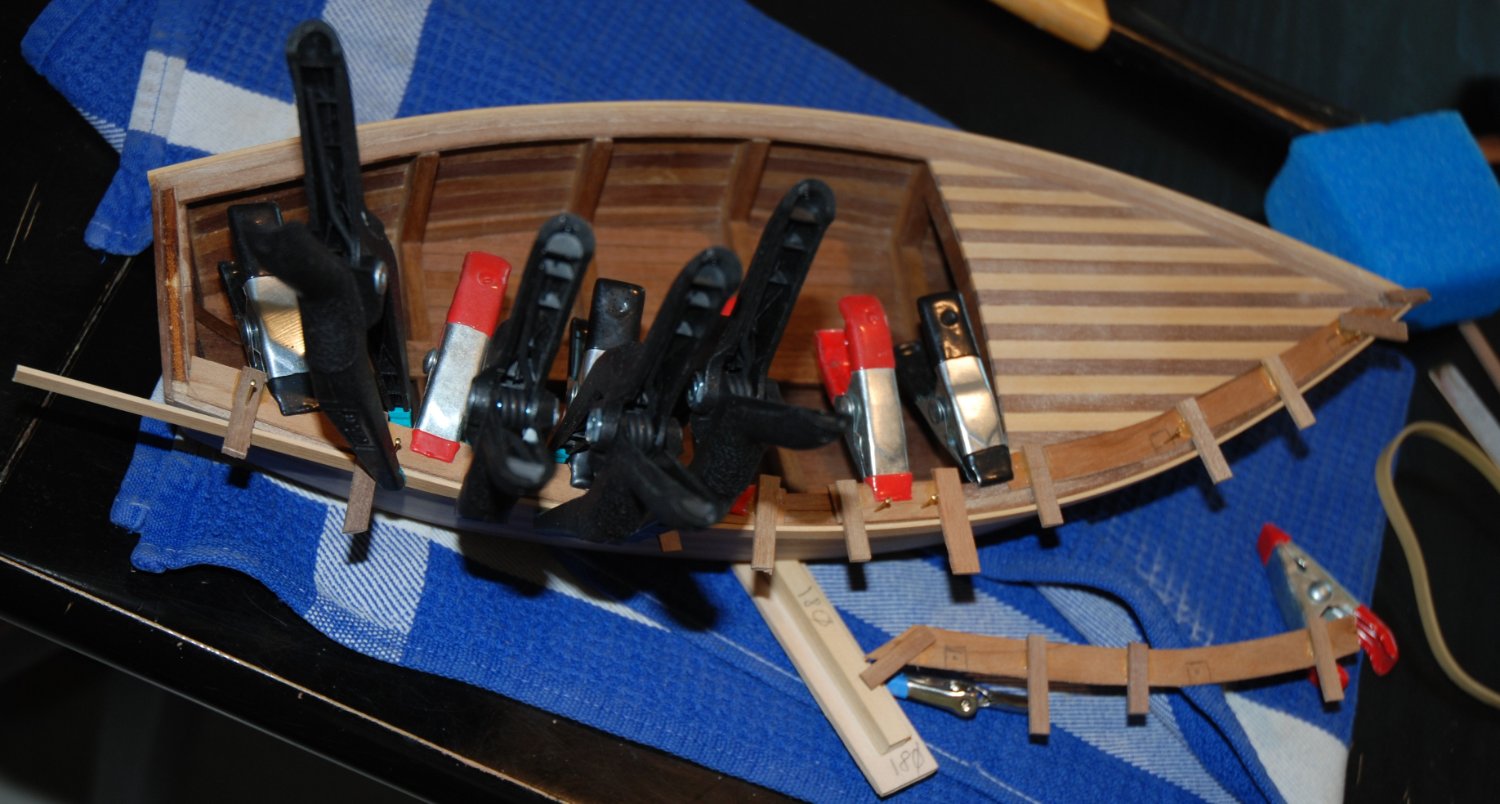
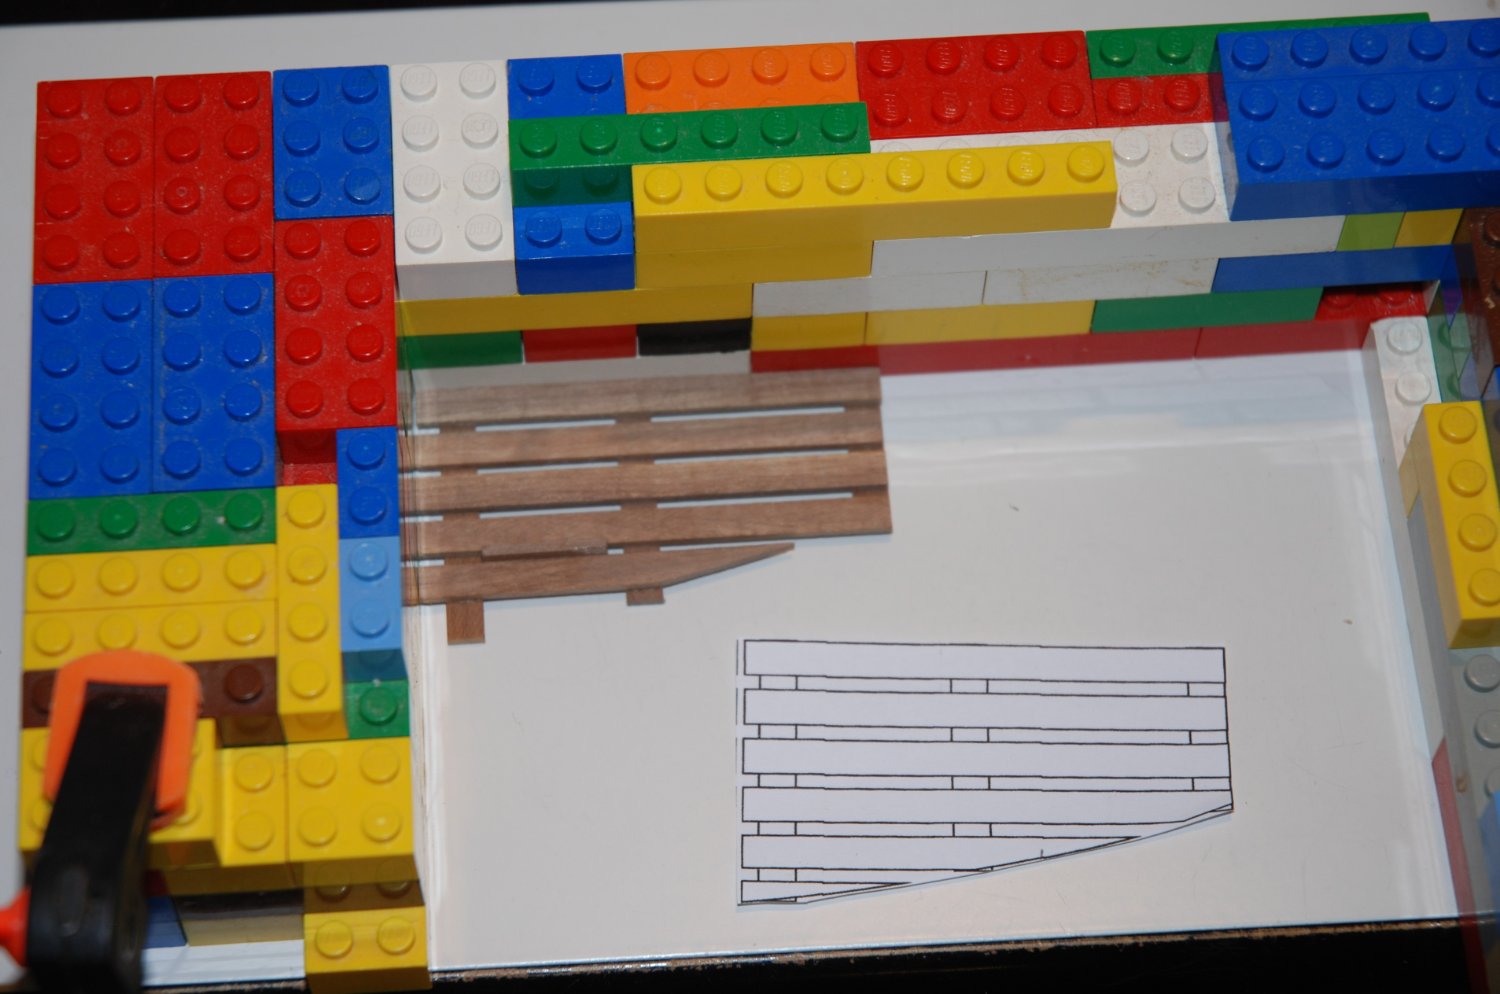
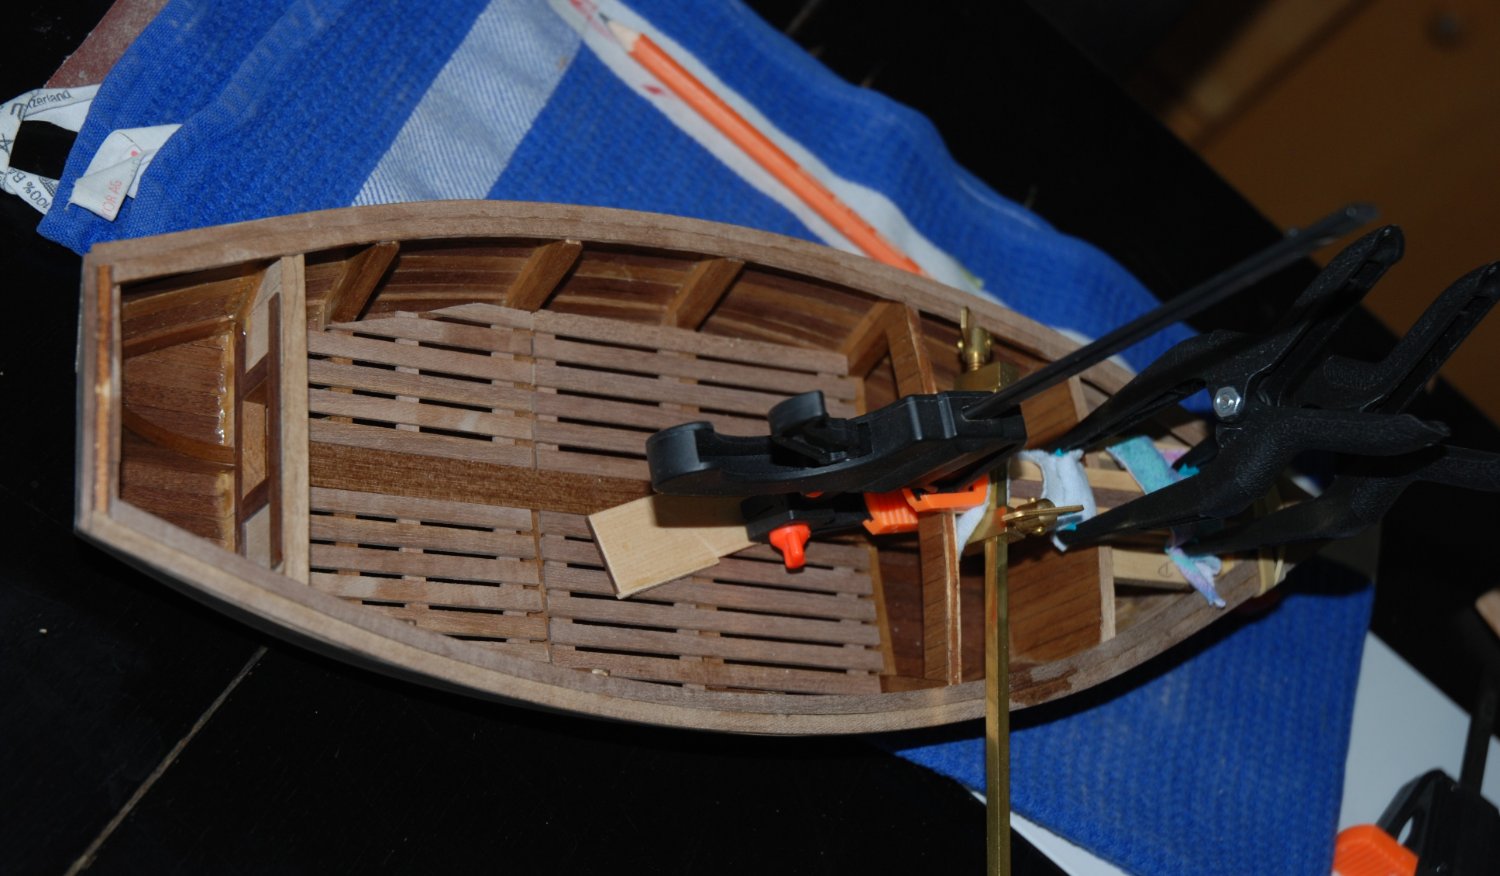
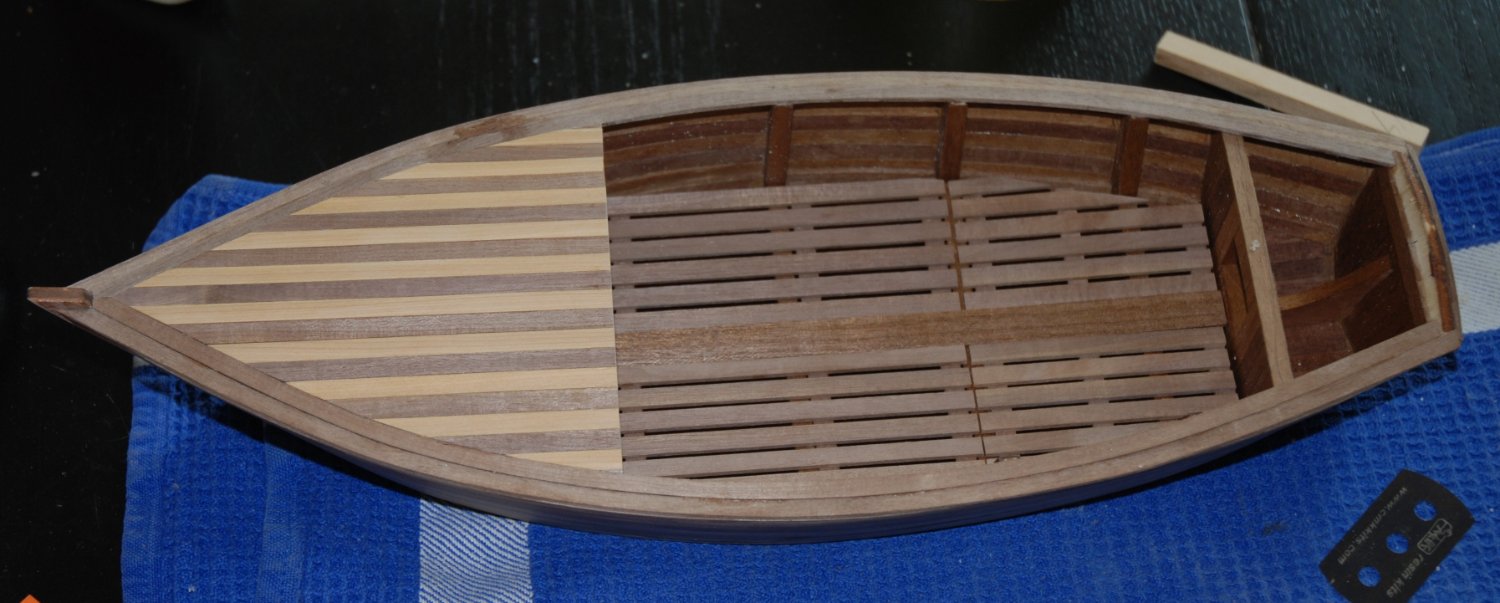
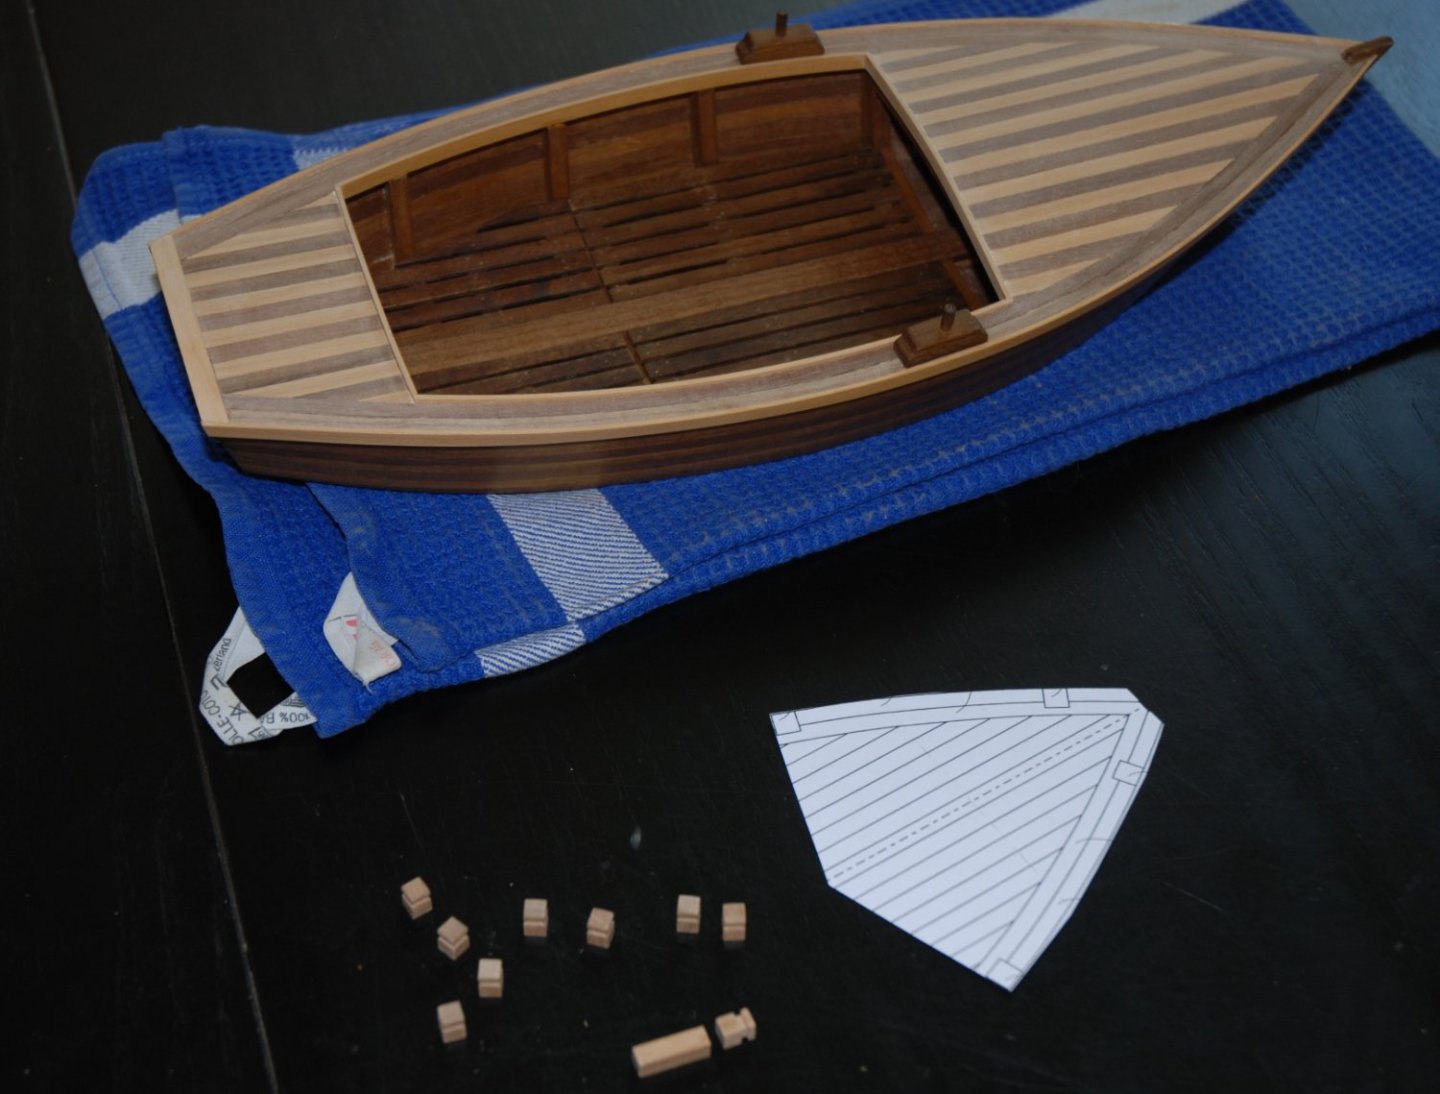
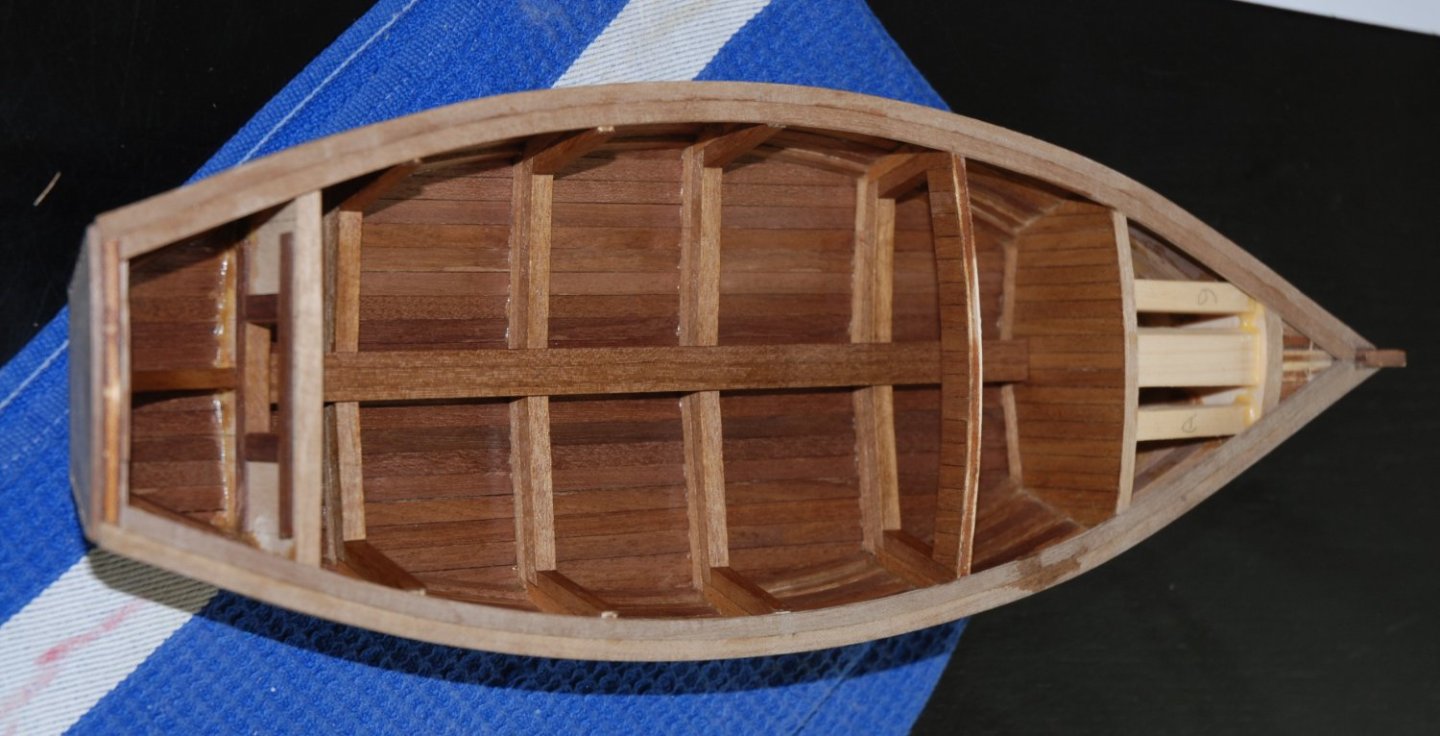
The work on the Batelina continues with as much pleasure as ever. I first reproduce the gratings based on copies of the plan. To respect the right angles, legos are again very useful. The next step is to install the deck at the bow of the boat. As I have some boxwood strips in my surplus, I decided to alternate the 2 wood species: the walnut planks provided in the kit and the boxwood strips from my own stock. The use of various clamps as well as small pieces of wood in inaccessible areas ensures that no gaps remain between the planks. I'm quite happy with the contrast between the walnut and the boxwood. Since I'm only going to apply an oil, it will give the boat a little more character.


- 57 replies
-
- 5
-

-
-
- marisstella
- batelina
- (and 1 more)
-
Thanks to all those who follow this work. Andrew, as the wood is really beautiful, I will simply treat it with Danish oil. Some elements will probably be stained and I'm thinking of using a second wood species for some parts of the boat.
- 57 replies
-
- 2
-
-
-
- marisstella
- batelina
- (and 1 more)
-
Thank you to all the 'Likes'. The top gallant rails are now all installed. It will be made of two row of strips. They were shaped before gluing with the travel iron. This makes it much easier to set up. Still many traces of glue to be cleaned...

- 57 replies
-
- 7
-
-
- marisstella
- batelina
- (and 1 more)
-
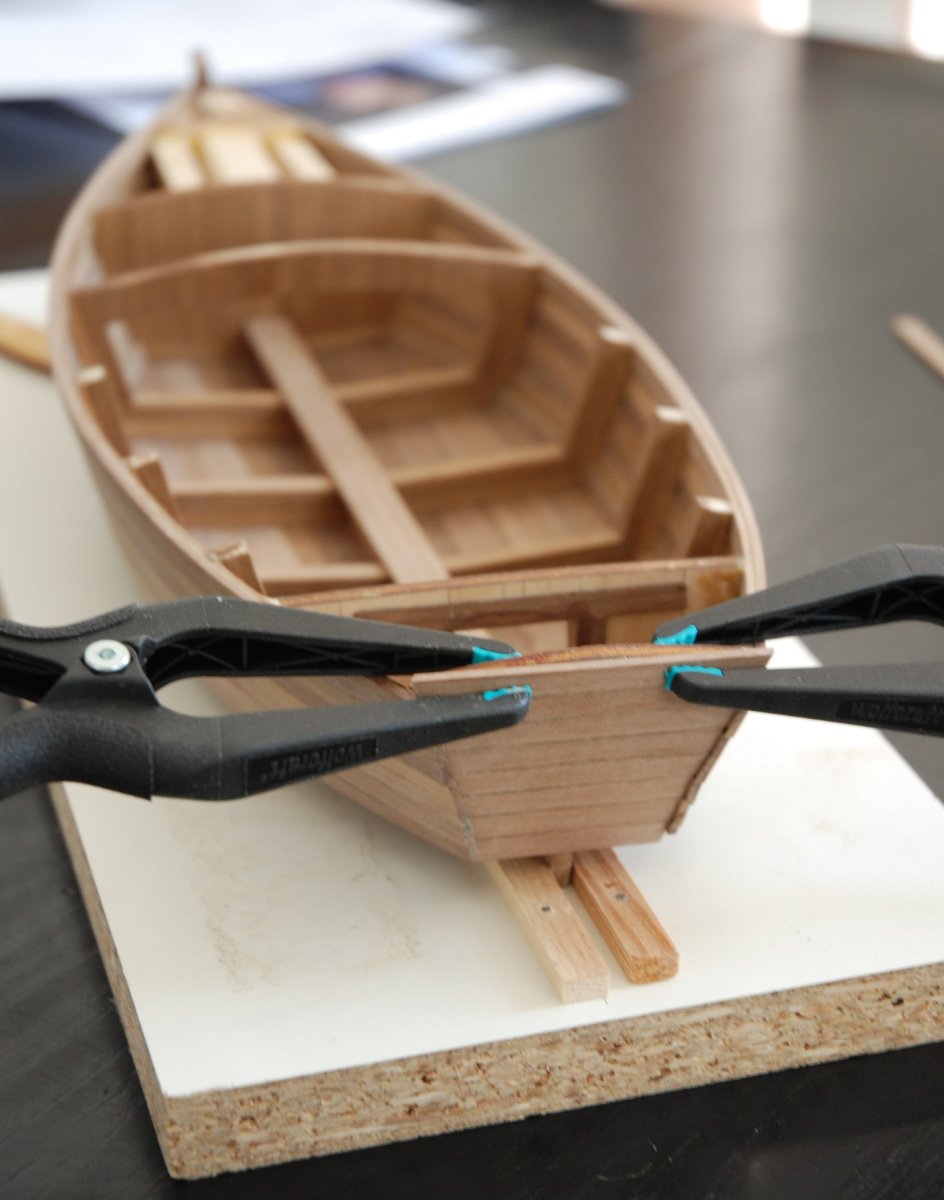
Thank you to all the 'Likes'. @bobandlucy, For me, legos are really useful. I often used them in my different assemblies. I don't regret keeping my children's legos 😄. @BobG, Batelina is really an interesting boat to build. The wood supplied is of very good quality. Glad that my build log brings back good memories. First disgression from the instruction manual. I decided to plank in the stern of the boat as shown in the photos in the manual. Since this piece is made of plywood, I use the excess planking strips from the hull to get a more interesting look in my opinion. Nothing complicated, the edge of each strip is just marked with a pencil to distinguish the different planks. This operation was also done during the planking of the hull. I started to put the top gallant rails on the boat. It will be made of two row of strips. The gallant rails were shaped with the travel iron. The gluing is done in several steps starting with the back of the boat. I hope to be able to present you the final result of this step soon. Thanks to those who follow my work.


- 57 replies
-
- 6
-
-
- marisstella
- batelina
- (and 1 more)
-
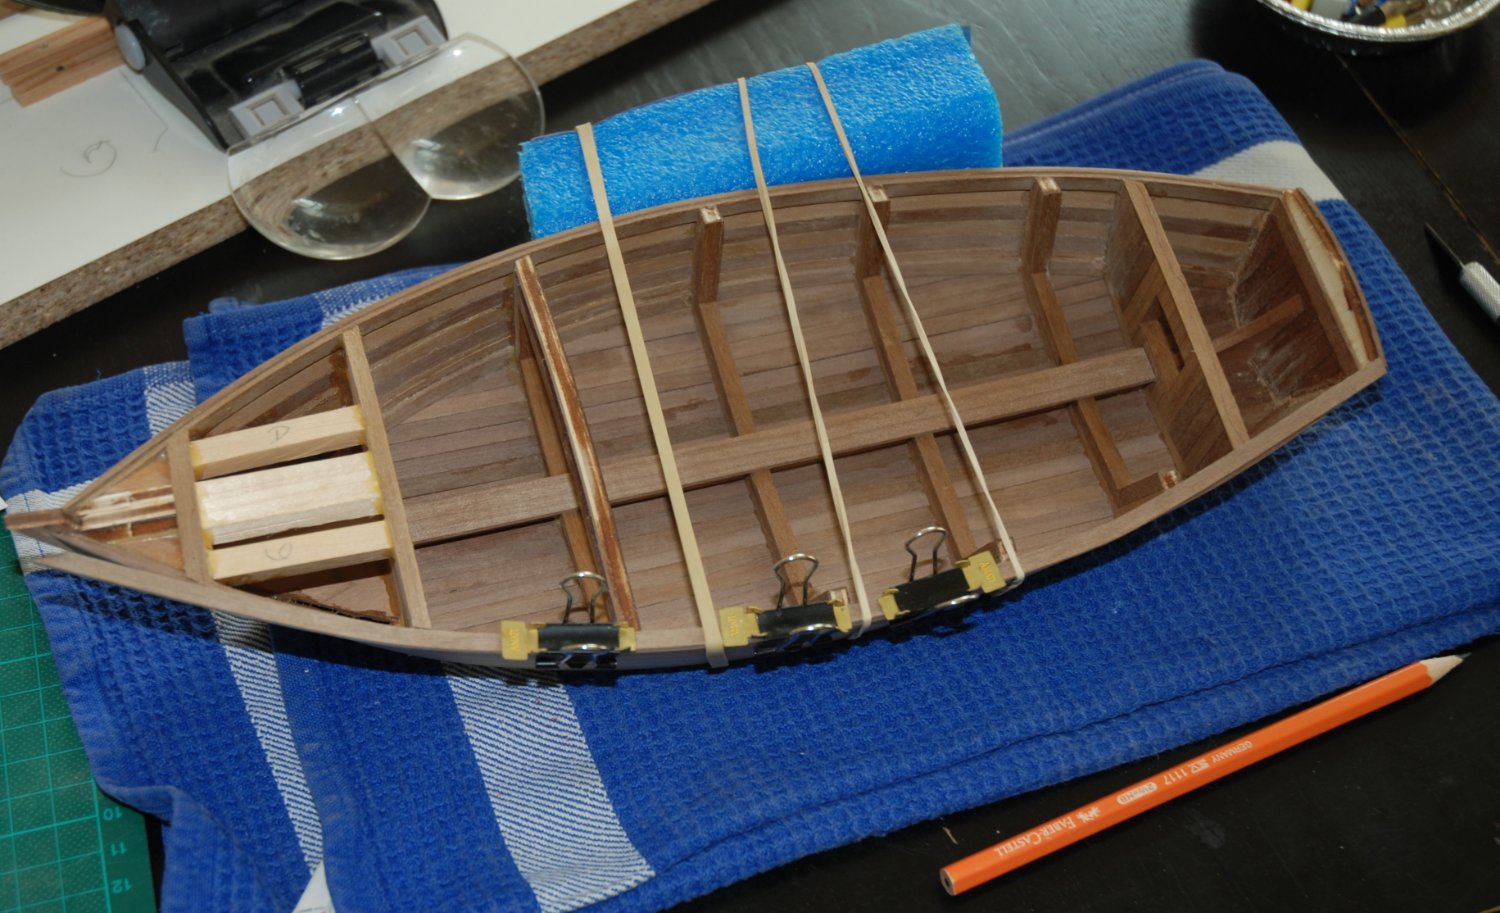
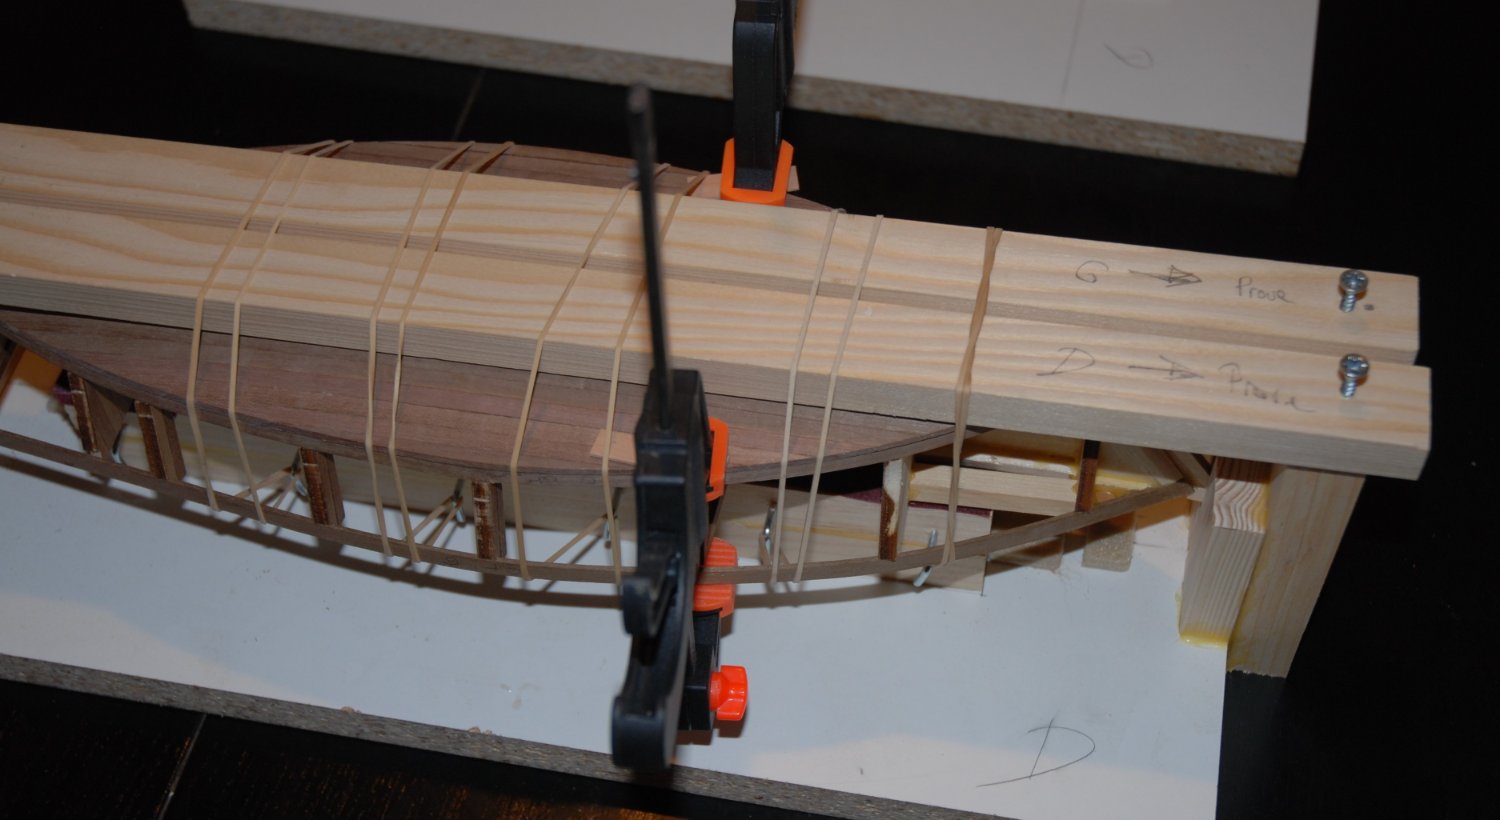
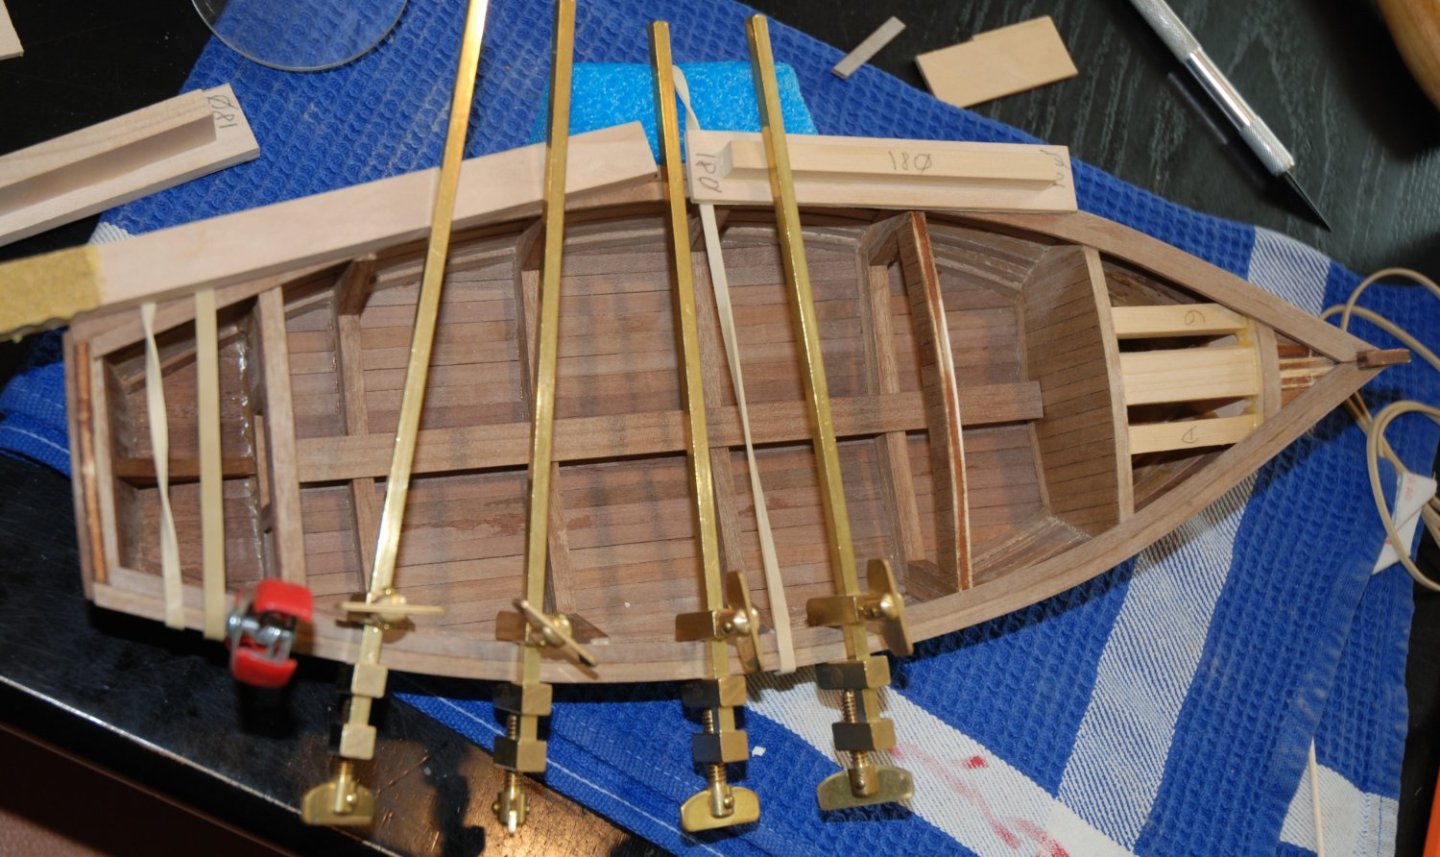
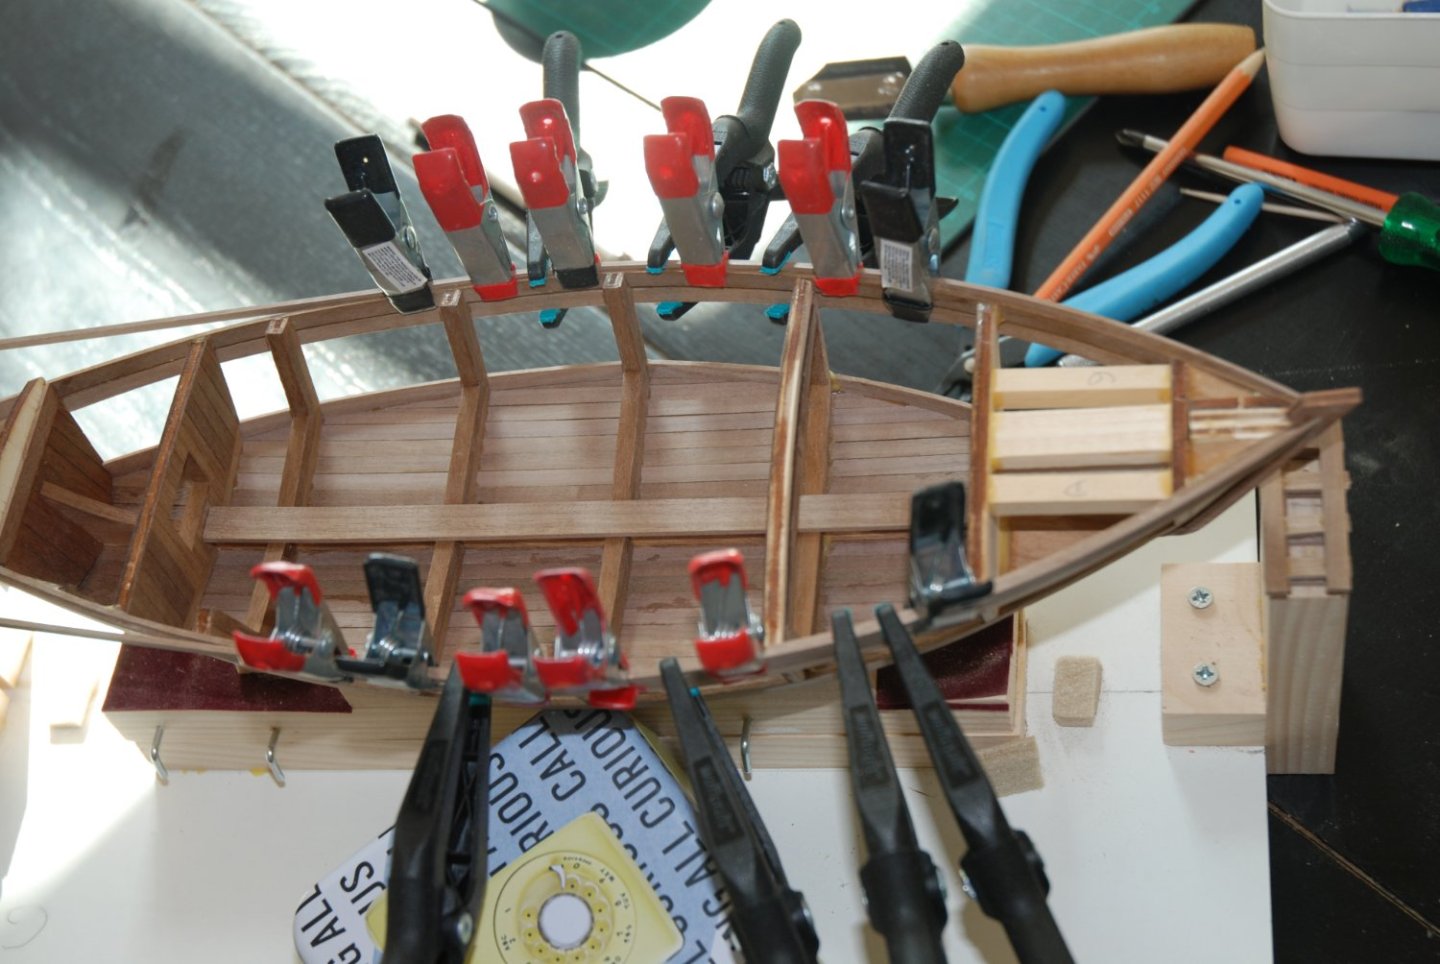
Thank you to all the 'Likes' and thanks to Andrew for his kind comment. Planking continues. For easier planking, I use Chuck's method: I wet the strip with my finger moistened with water and apply a heat source with a small travel iron. As if by magic, the plank keeps its shape. Since I glue with wood glue (Titebond - Original wood glue), I have to hold the strip in place while the glue sets. Since the hull has only eight rows of planks (including the three already in place), the installation of the five additional planks is completed fairly quickly. I still have to sand it all down and remove any unwanted glue.


- 57 replies
-
- 6
-
-
- marisstella
- batelina
- (and 1 more)
-
My God, it's accurate. Wonderful work!
-
Great work. Thank you for presenting it to us in such detail. It is a pleasure to follow this build !
- 48 replies
-
- 2
-
-
-
- Nisha
- Vanguard Models
- (and 3 more)
-
What a pleasure to be able to follow the creation of these magnificent blocks ! What a mastery !
- 589 replies
-
- 4
-
-
- le gros ventre
- cargo
- (and 1 more)
-
HM Cutter Cheerful 1806 by JpR62 - 1:48 scale
JpR62 replied to JpR62's topic in - Build logs for subjects built 1801 - 1850
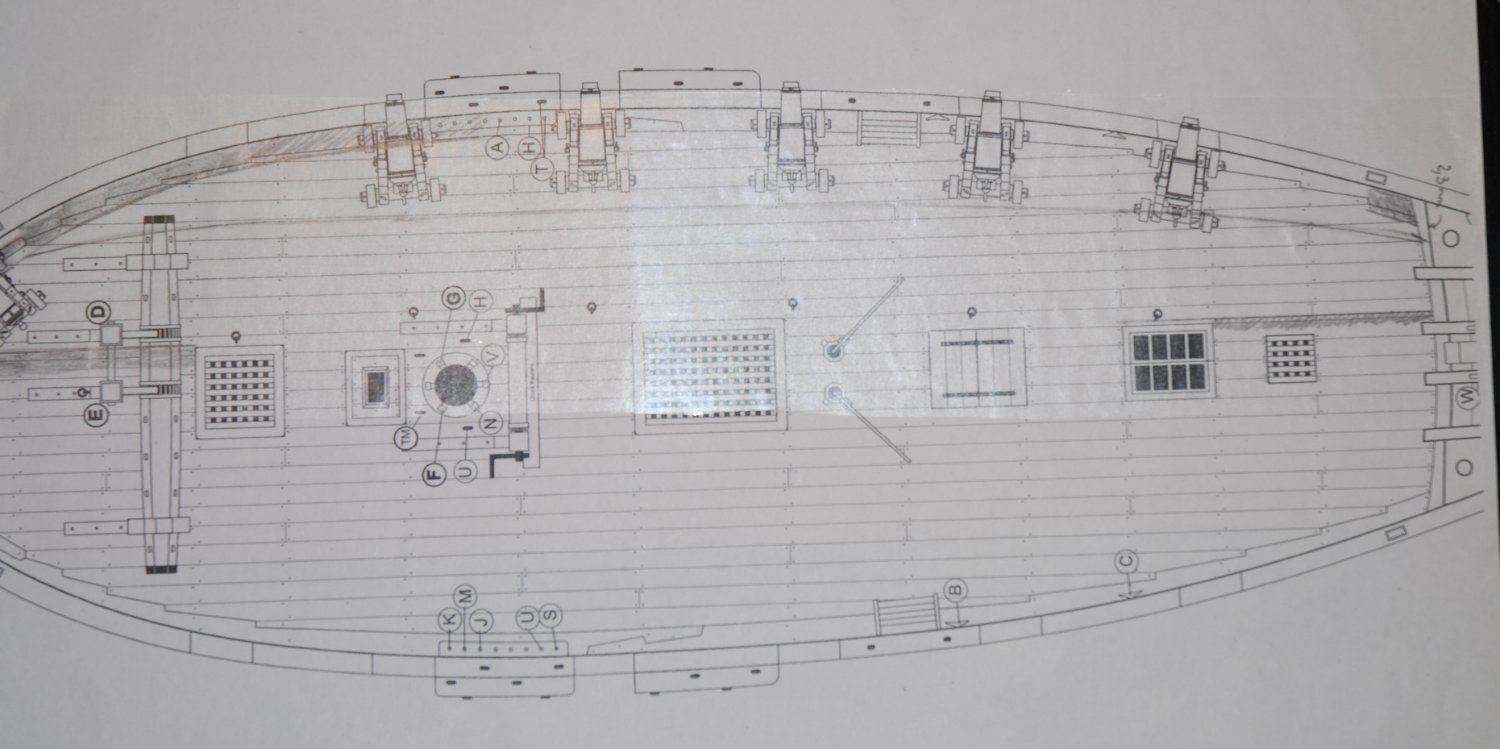
Thank you to all the 'Likes'. Yes Gary, the method described by Mike works quite well. We are fortunate to have a forum used by such talented people. All credit for this method goes to its creator 🙂. This week, I finished the installation of the 5 rows of center planks. I then traced the layout of the planks of the first belt which in my case will include 7 rows. I started again from a copy of the plan on which I placed the situation corresponding to my model (actual position of the margin plank and limit of the central belt). Once the dividing line of the two belts was drawn, I reinforced the photocopy by gluing a sheet of cardboard on its reverse side and cut out the copy of the plan to use as a template. All that remains is to calculate the spacing on each of the transverse lines representing the deck beams and to connect these points together. I also drew with a felt pen the separations of the planks on their length in order to respect the butt shift pattern. I will be able to start working on this first belt.
-
Thank you to all the 'Likes'. Small update. The first row of planks has been added. It will be sanded to its final height once the whole hull is finished. I will be able to continue the planking from the fourth row of planks.
- 57 replies
-
- 7
-
-
- marisstella
- batelina
- (and 1 more)
-
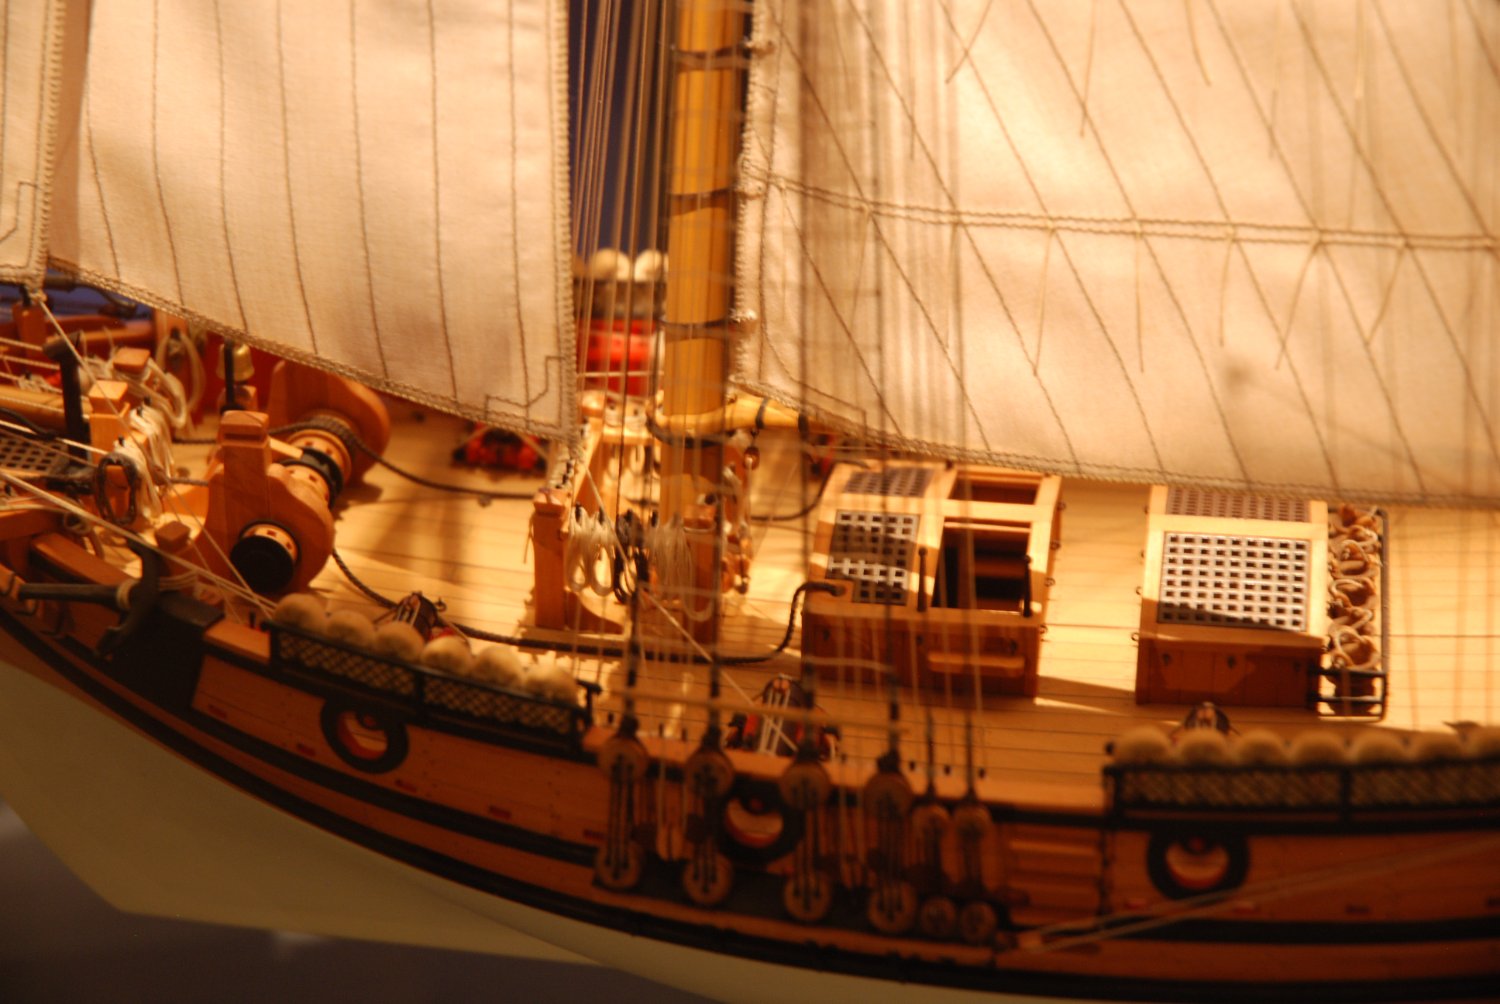
At the Internalional Maritime Museum of Hamburg, I took some photos of the English cutter 'Pollox', 1795, which had a bell placed at the bow of the ship just in front of the windlass.


-
HM Cutter Cheerful 1806 by JpR62 - 1:48 scale
JpR62 replied to JpR62's topic in - Build logs for subjects built 1801 - 1850
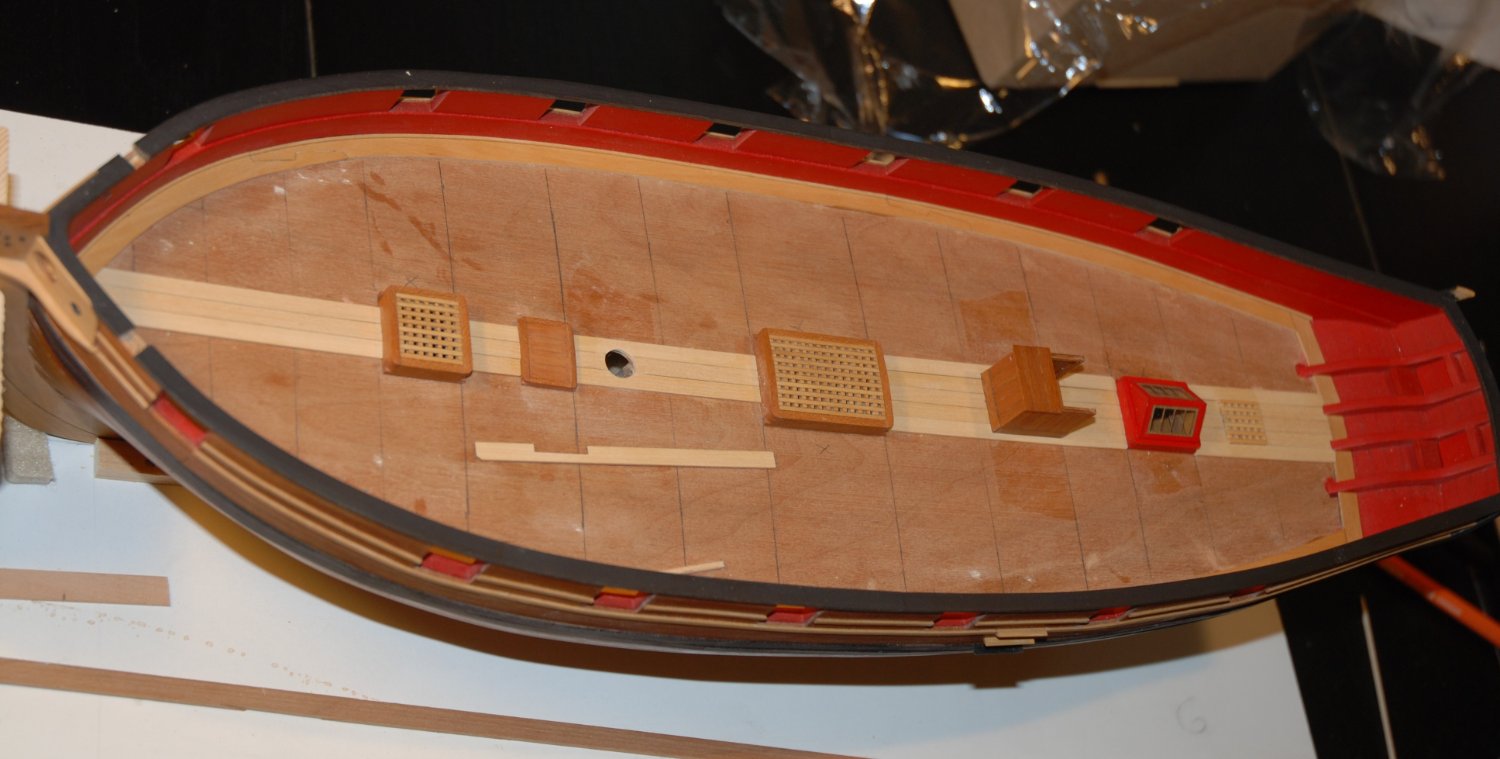
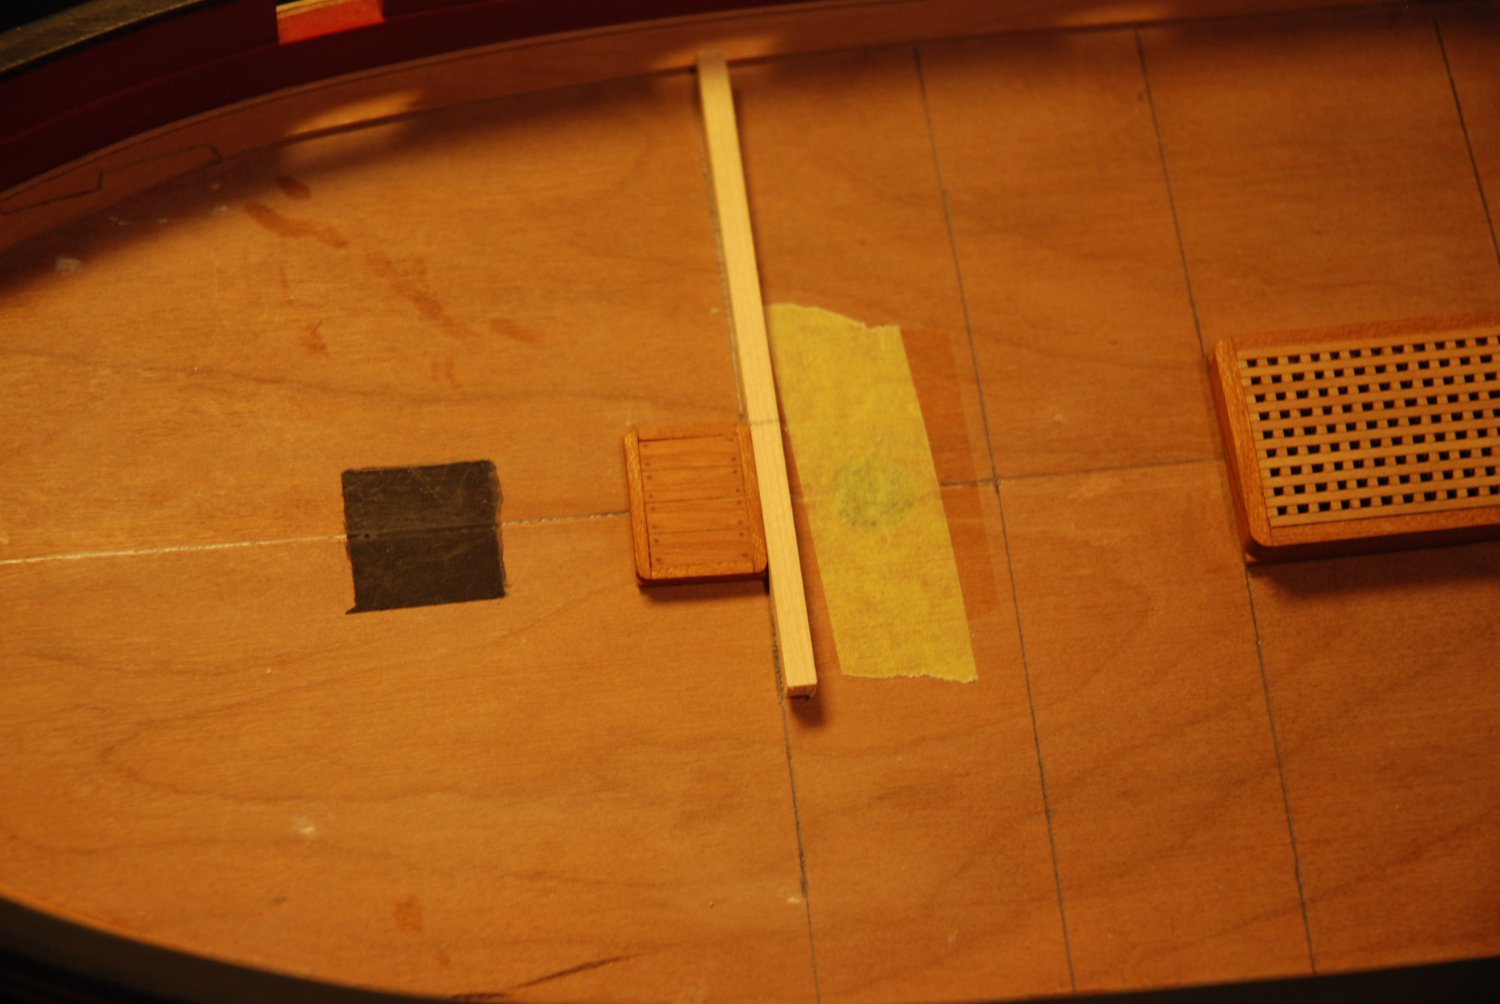
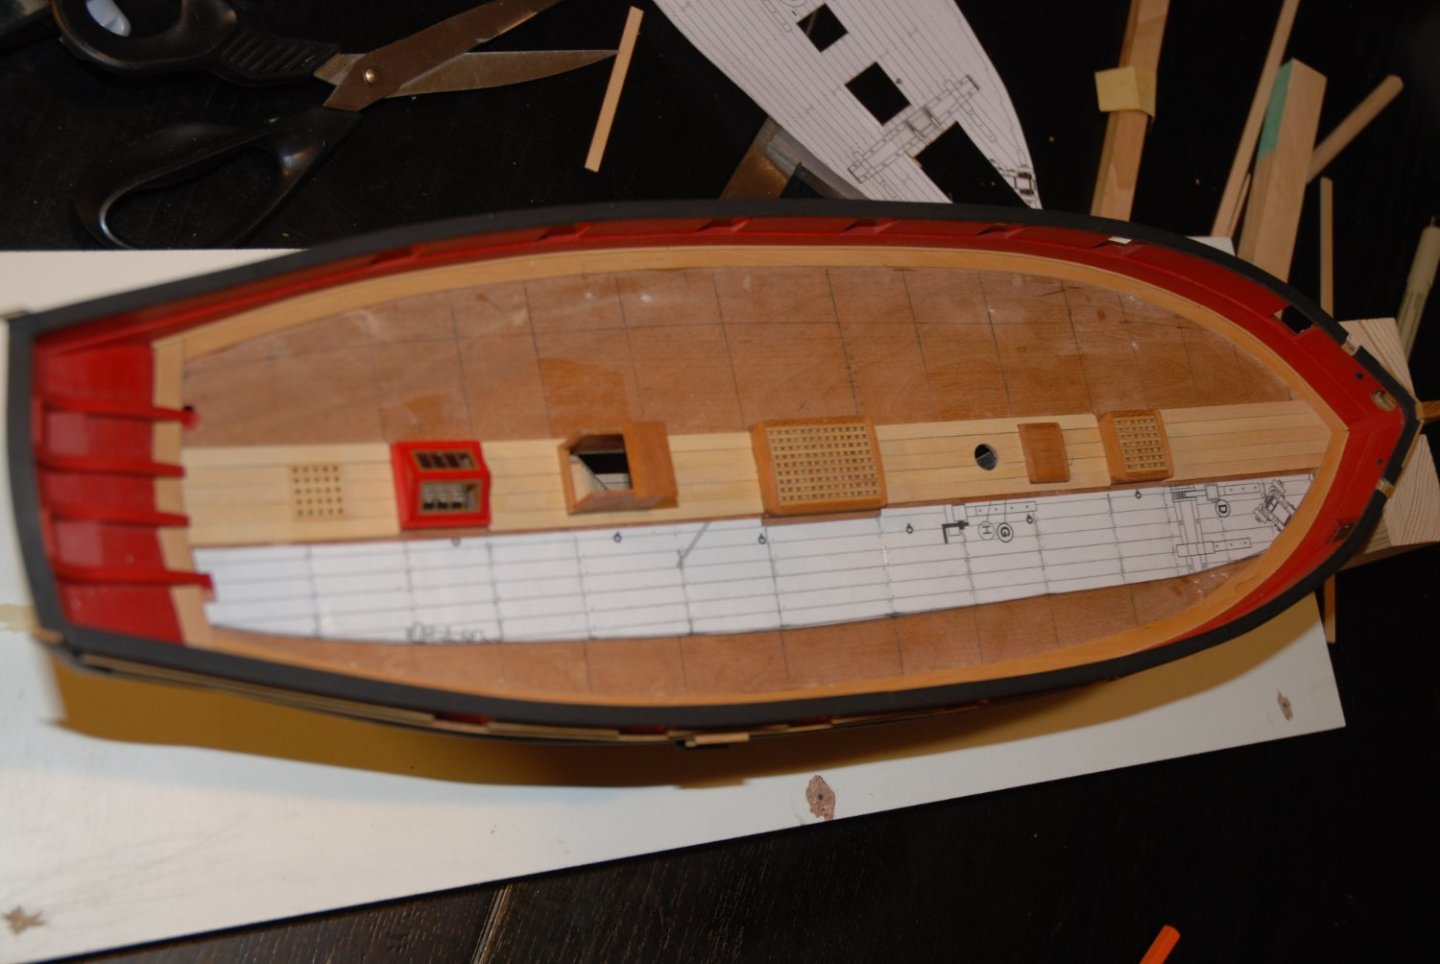
A big thank you to all for your encouragement and I take this opportunity to wish you a good year 2023 ! I set up the first plank of the ship's deck. I again used the method described by Mike (Stuntflyer). A small mark is drawn on the middle of the plank (front and back) as well as on the center of each of the deck elements. I also used a sheet of card stock to make sure the boards were aligned between each element. But the pictures will surely be more understandable. Next step: glue 2 new rows of planks on each side of this central row.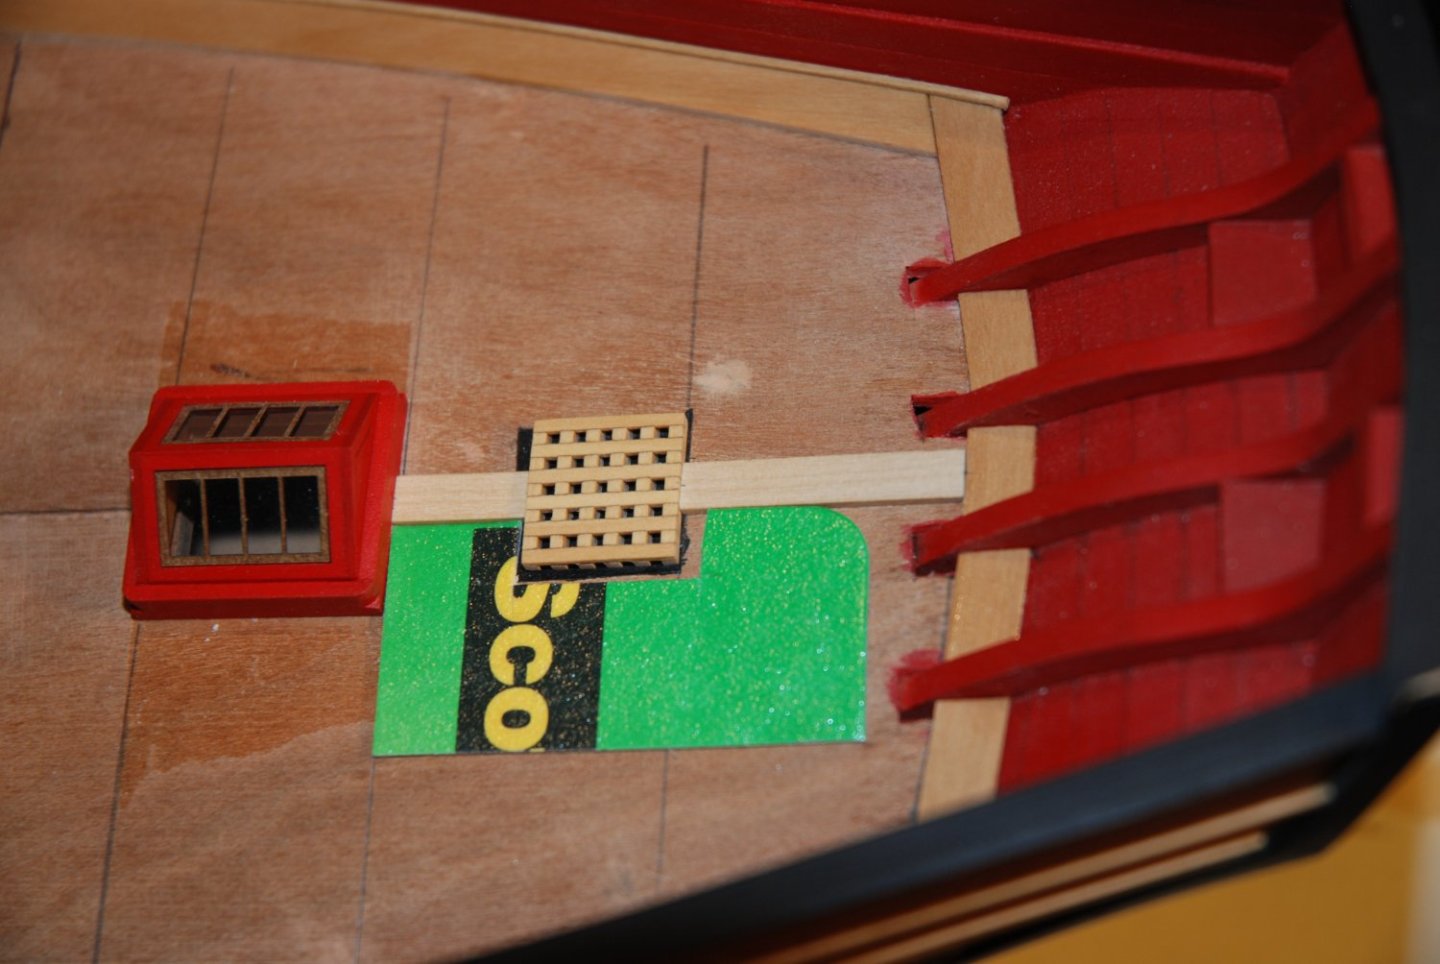

-
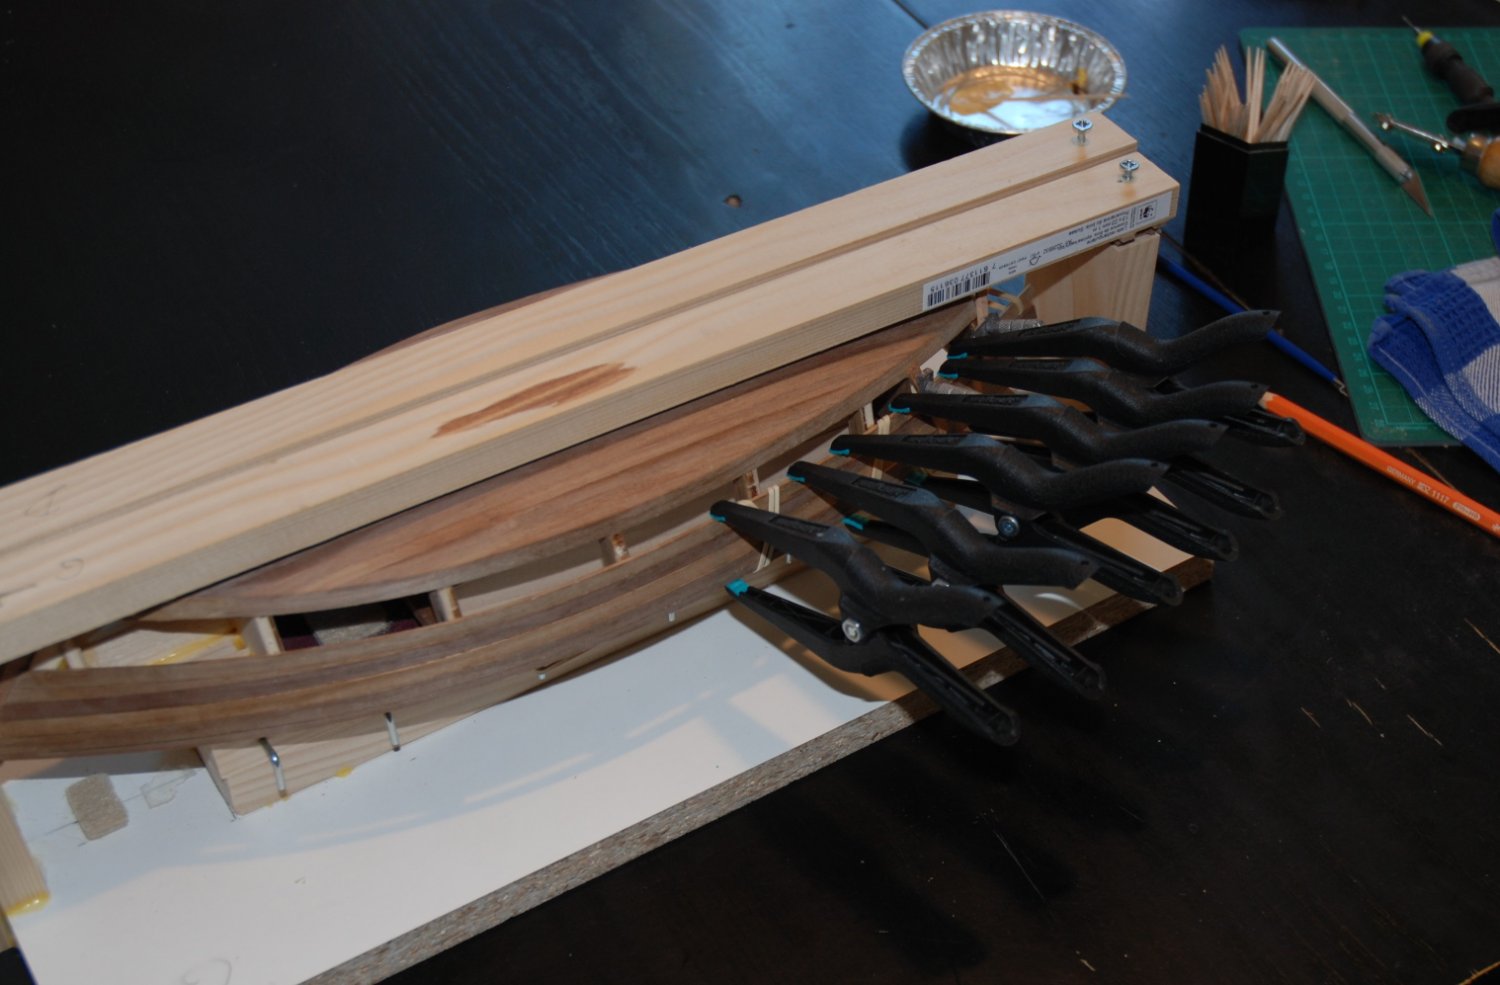
First of all, allow me to send you all my warmest wishes for the New Year. I started by planking the hull by placing the second and third planks under the top gallant rails. Indeed the first plank will be very thin (of the thickness of the planking: 1,5 mm) So I decided to put the first row in place only after the second and third rows are laid. In order to precisely position my two rows, I temporarily nailed small slats made of scrap wood used for the planking. This way I have a fulcrum on which I can base my two rows and leave room for the first plank. But the pictures are surely more understandable than my explanations... I can now glue the first row.

- 57 replies
-
- 7
-
-
- marisstella
- batelina
- (and 1 more)
-
HM Cutter Cheerful 1806 by JpR62 - 1:48 scale
JpR62 replied to JpR62's topic in - Build logs for subjects built 1801 - 1850
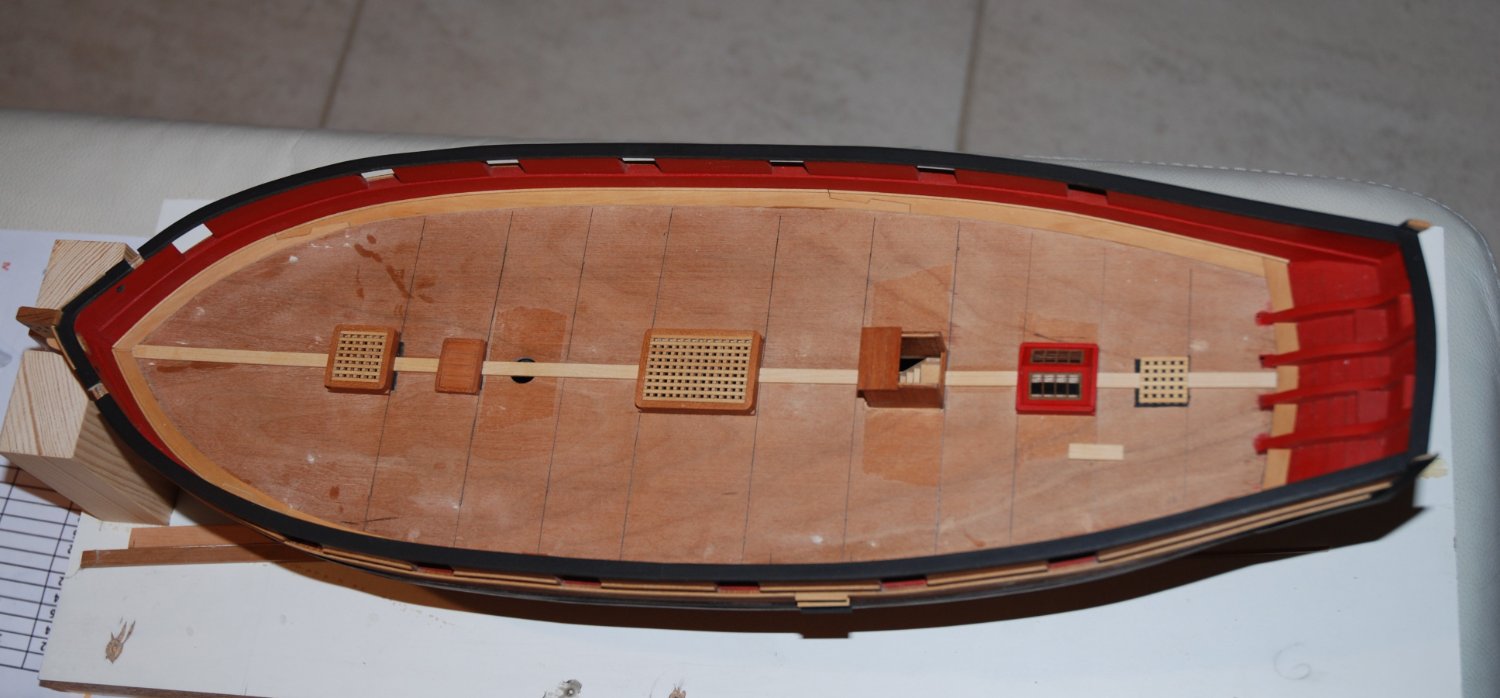
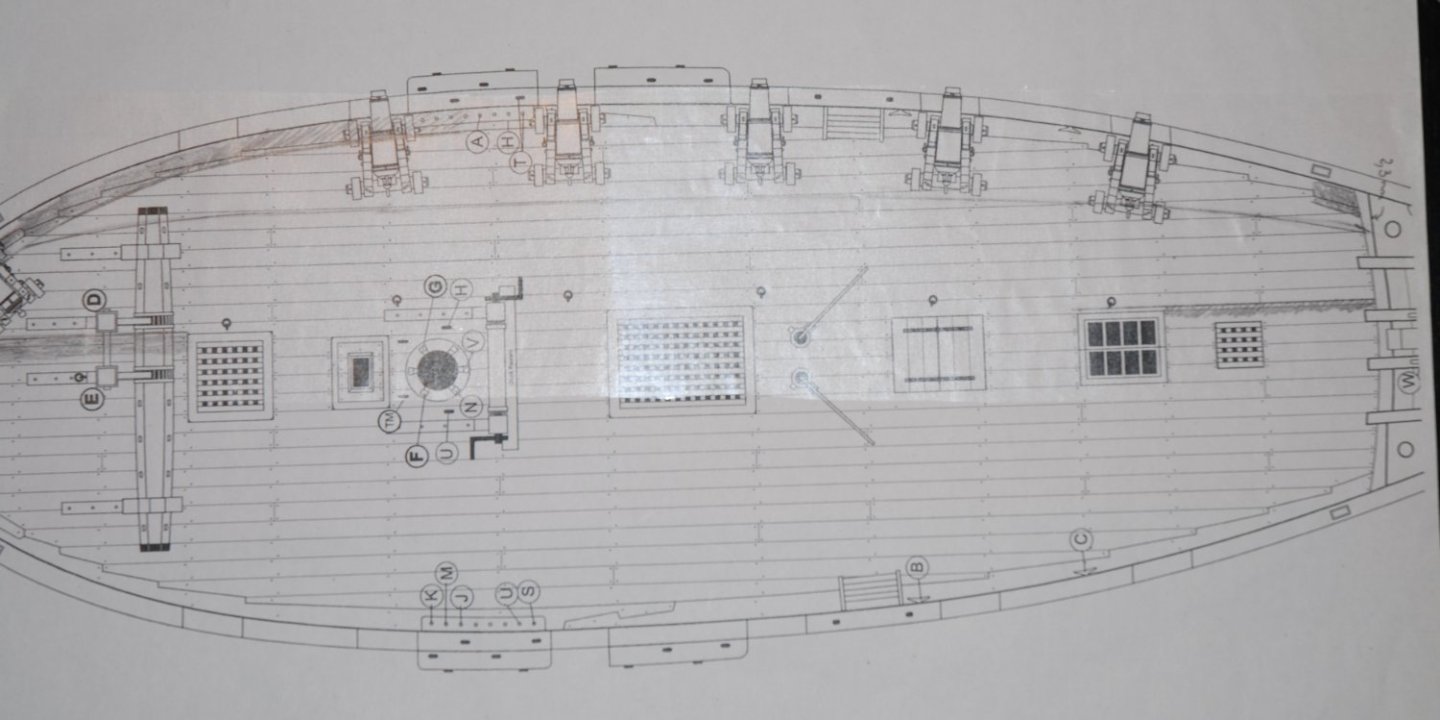
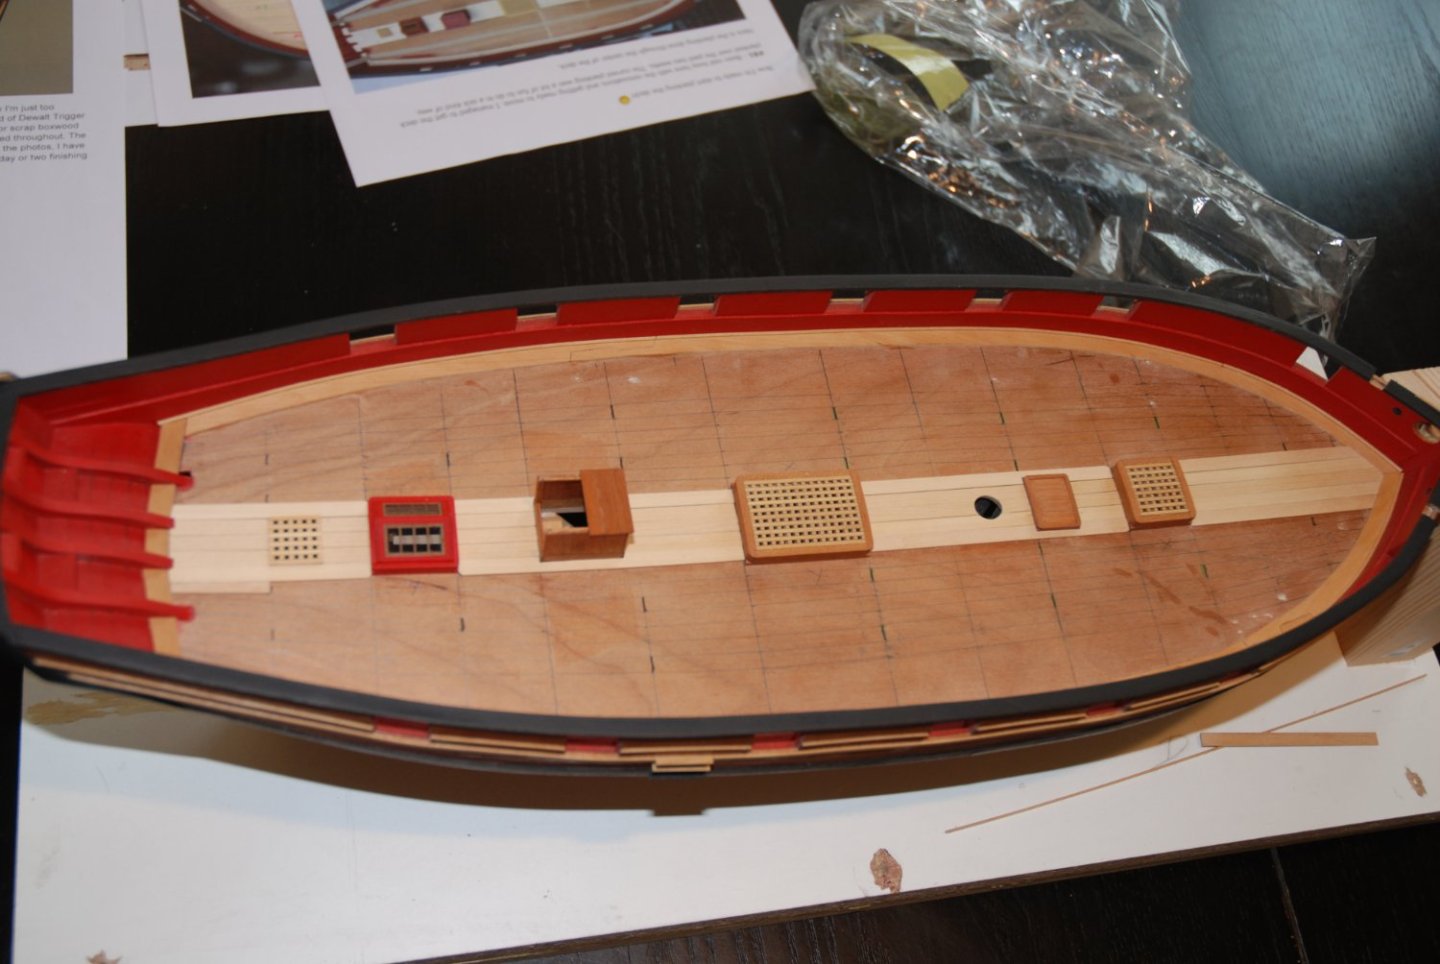
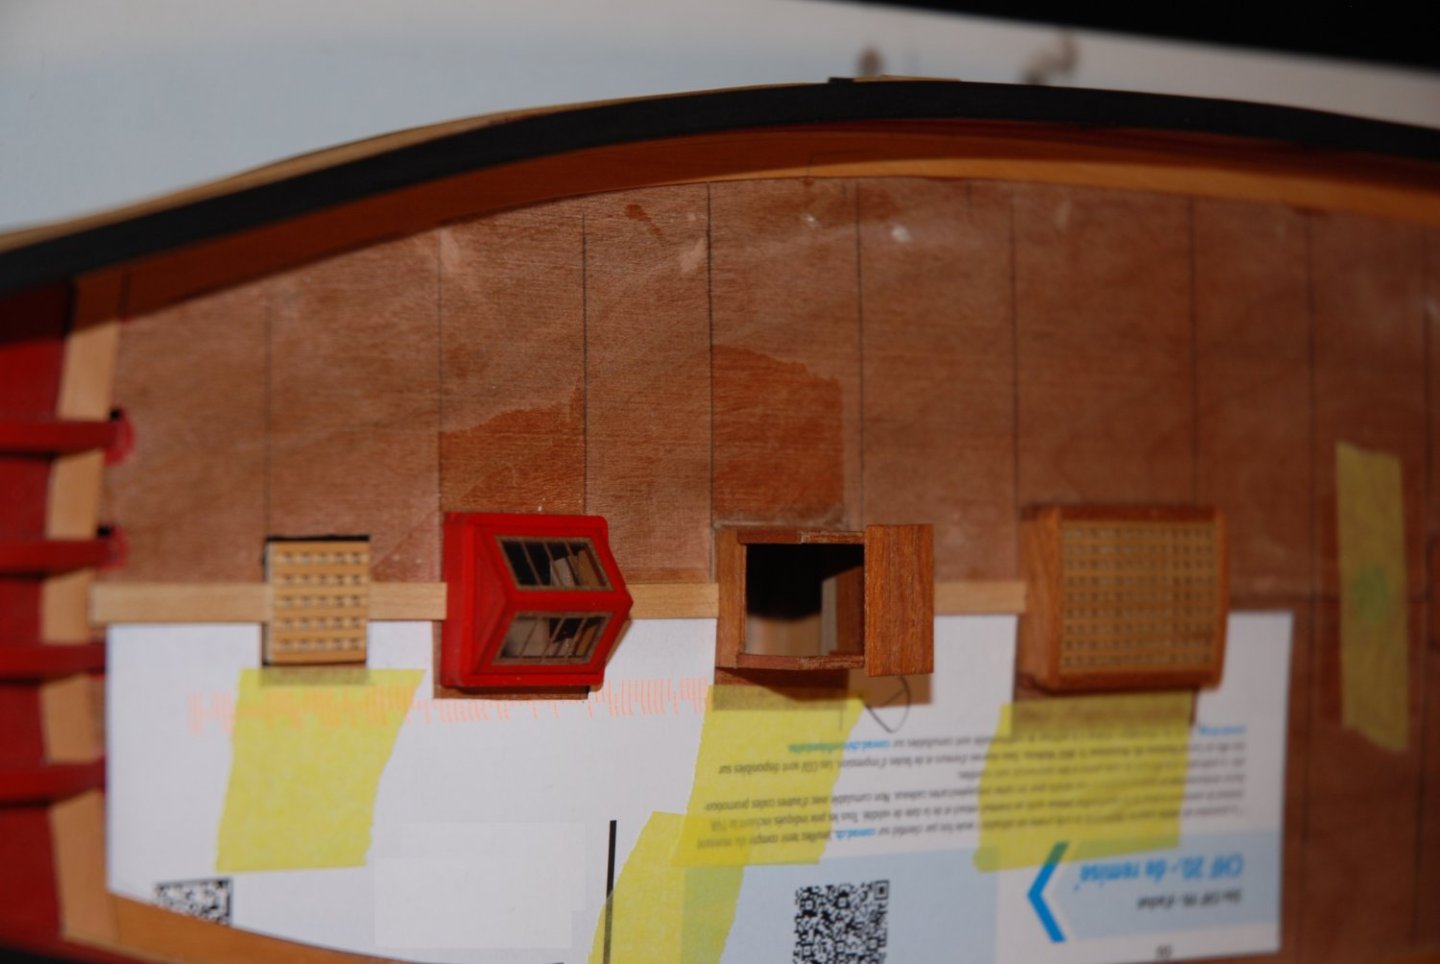
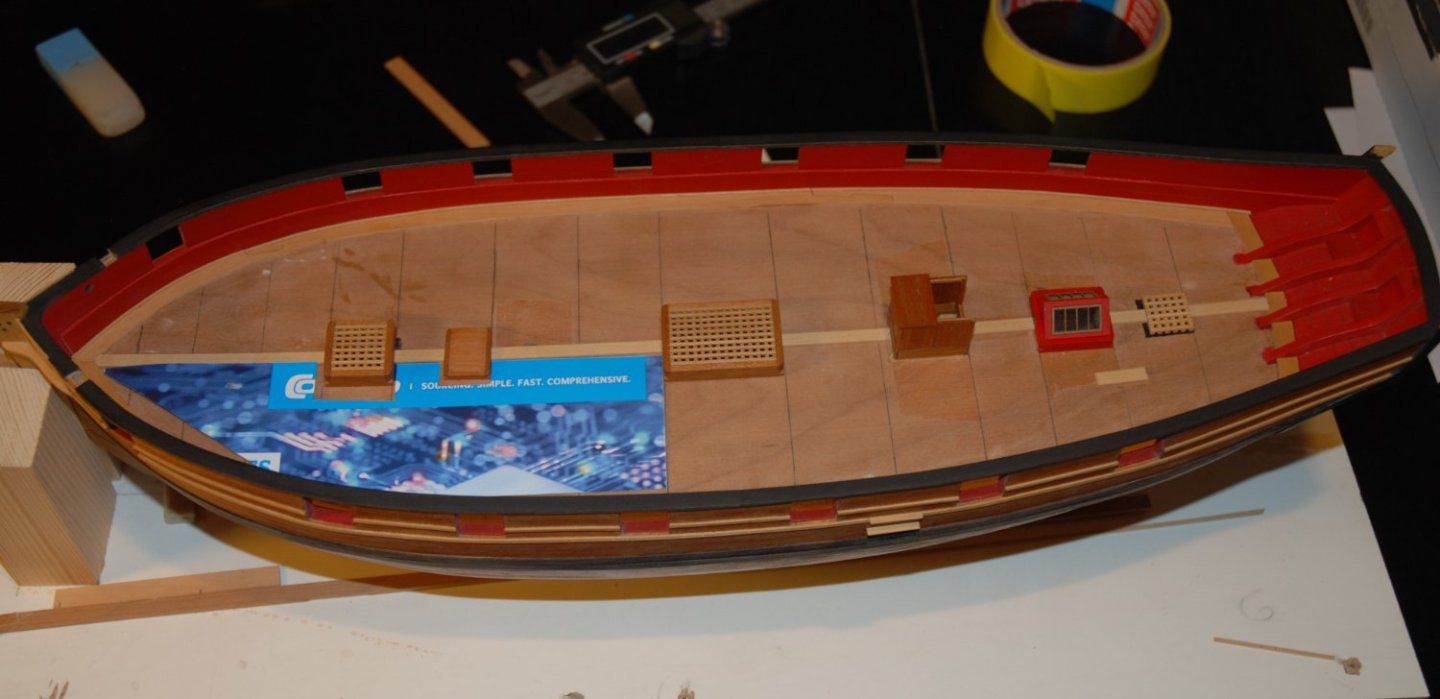
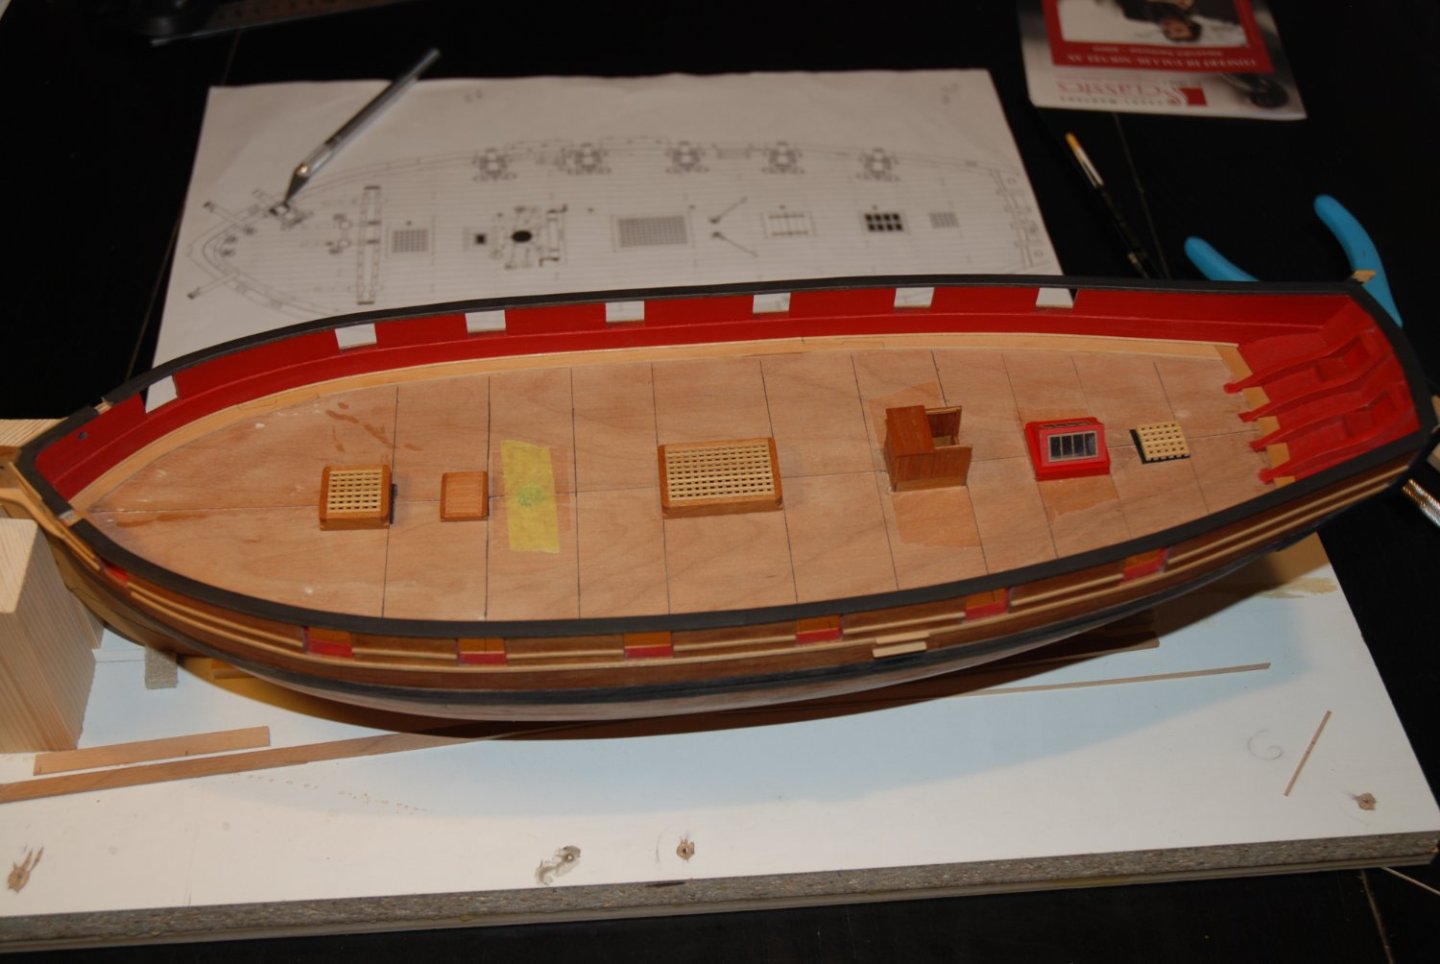
I glued the six deck structures and fitting onto the deck. I started by drawing the dividing line of the deck into two equal parts (from stern to bow) and also drew the first line across the deck where the deck beam is located. The others lines will be drawn as the deck structures are put in place. For the precise placement of the fittings, I used the method described by Mike (Stuntflyer) in his wonderful build log. A small mark is drawn on the front and back of each element (in the middle) which allows me to glue precisely in relation to the dividing line. When installing the next fitting, I also check the distances to the previous element. and I also check that the distance from the deck structure to the margin plank is identical on each side. In order to prevent the previous element from moving, I naturally waited until the glue had set before working on the next element. The installation was therefore spread over a good day. You will notice that the companionway is not finished. Since I'm going to leave the access doors open, I was afraid I might accidentally break them when I put the deck planks in place. So I will wait until the deck planking is finished before finalizing this element.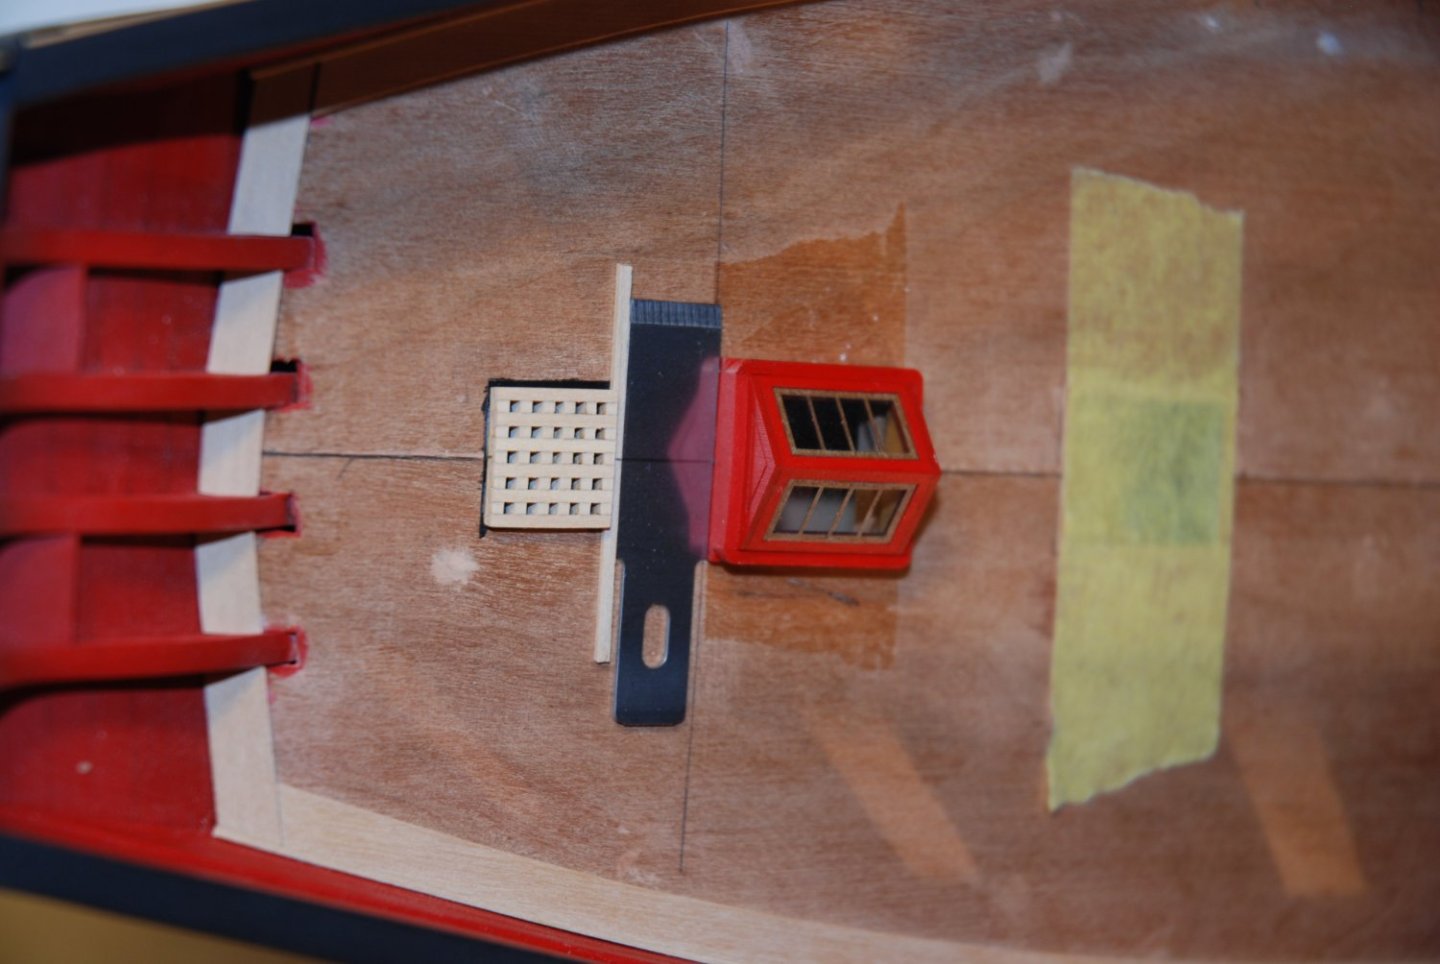


-
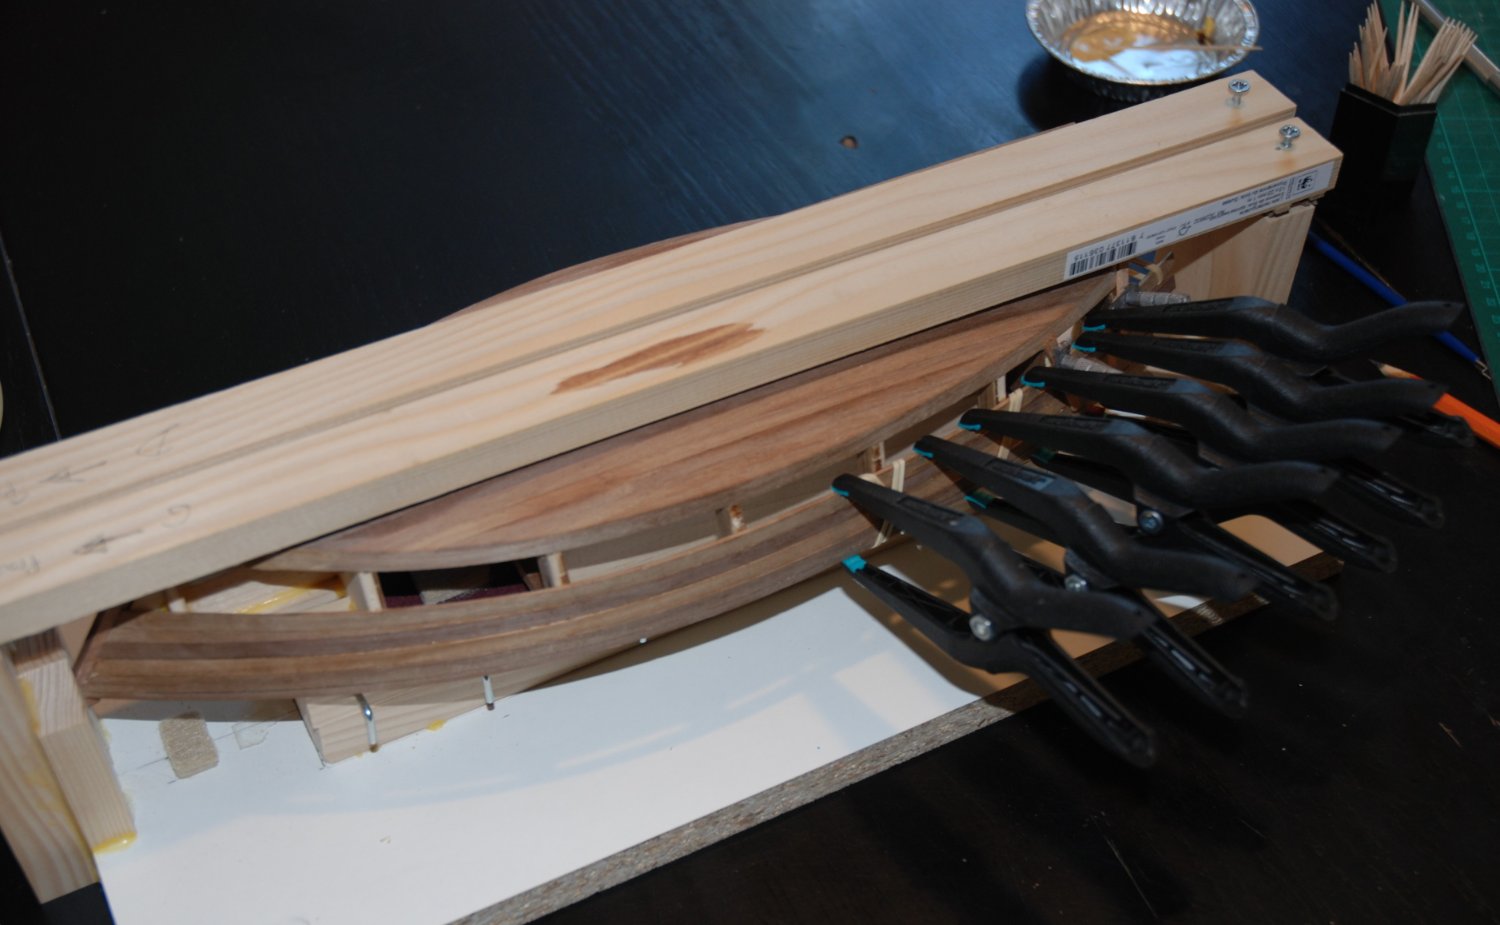
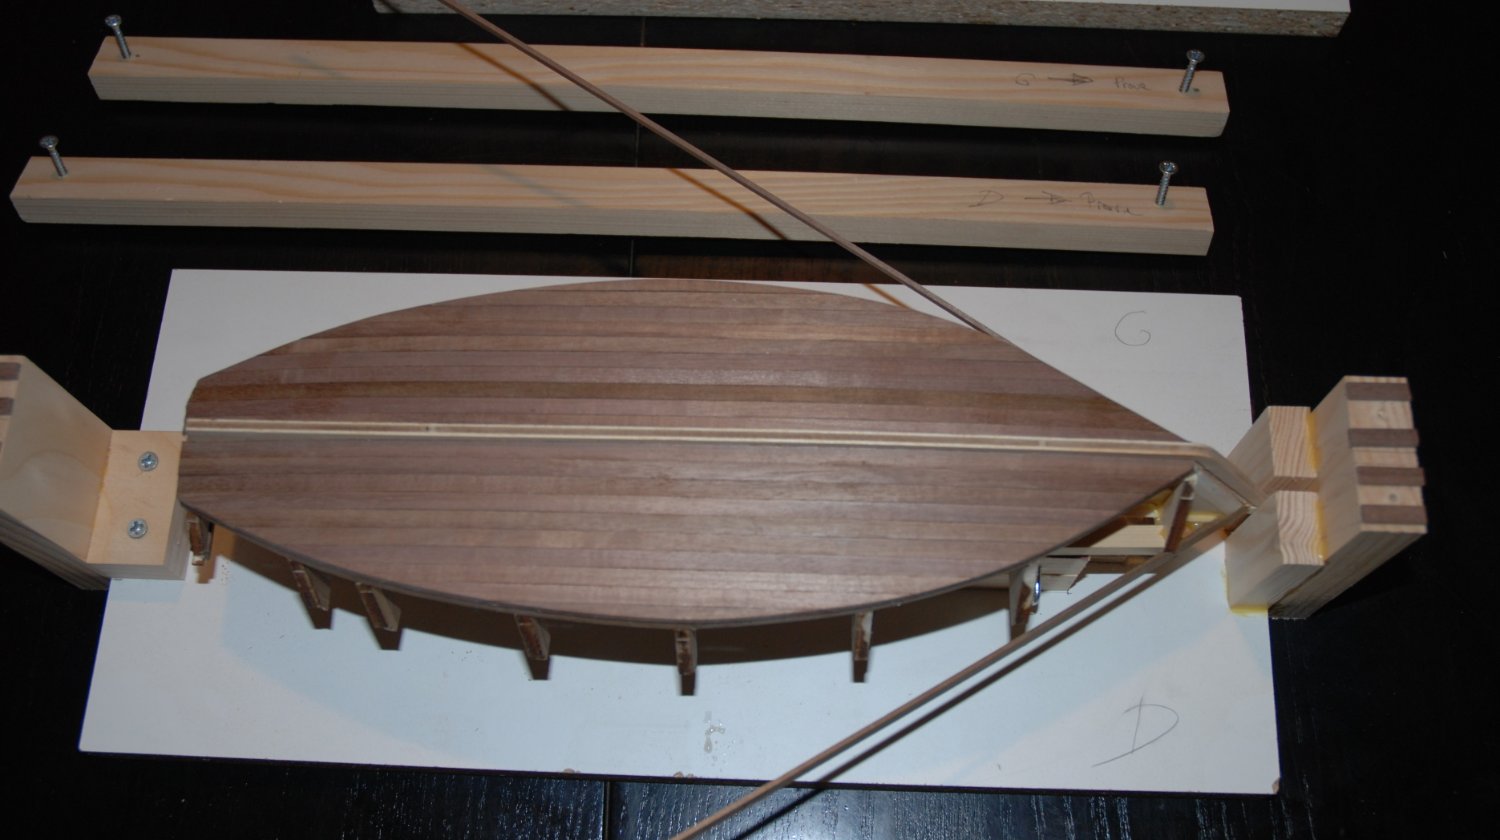
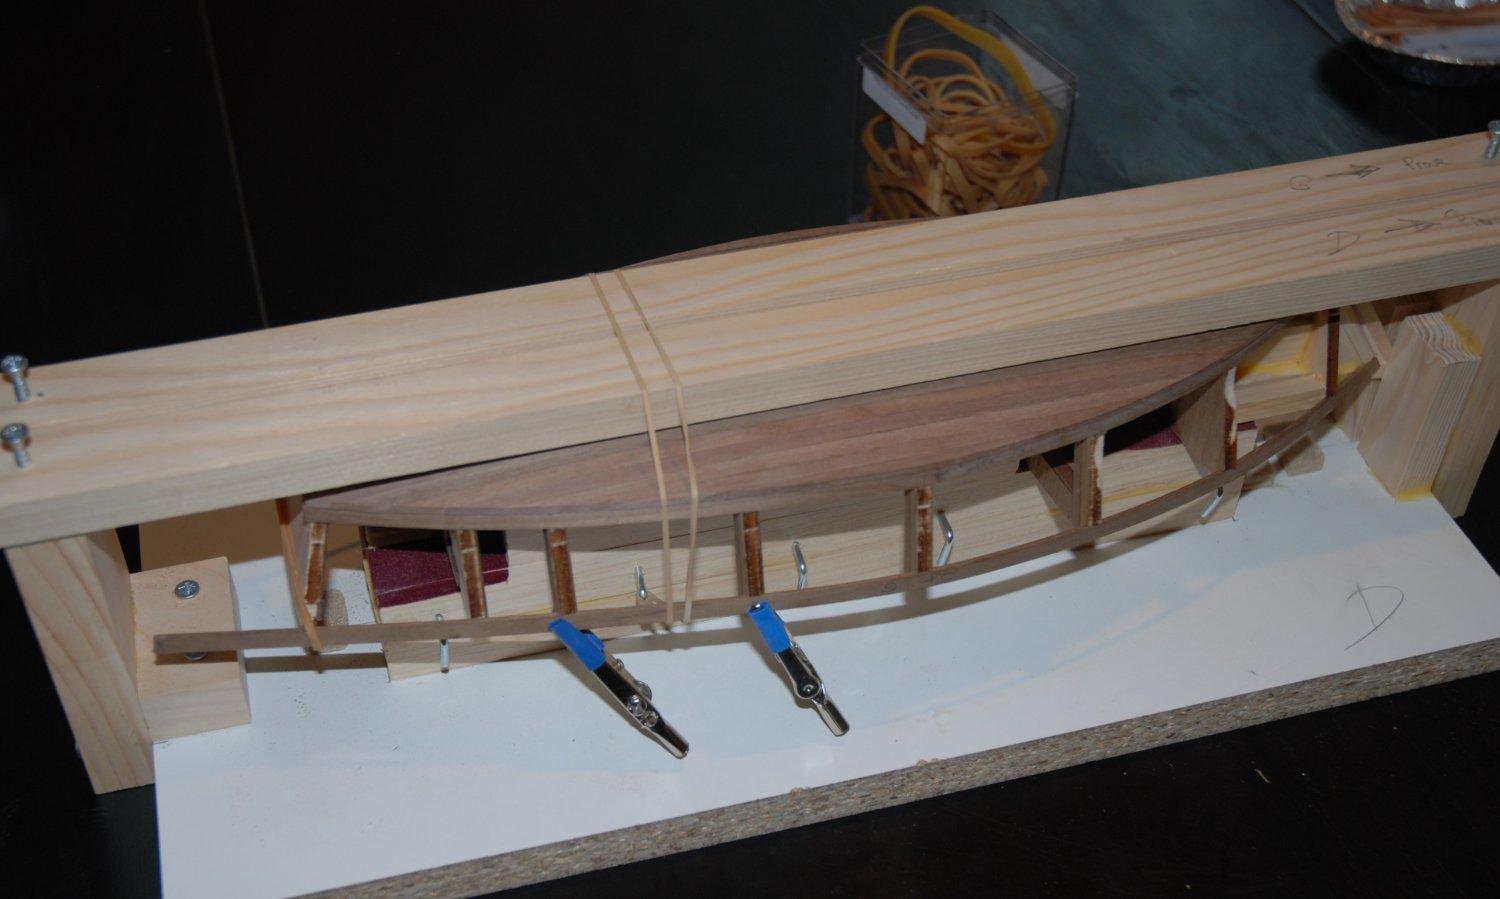
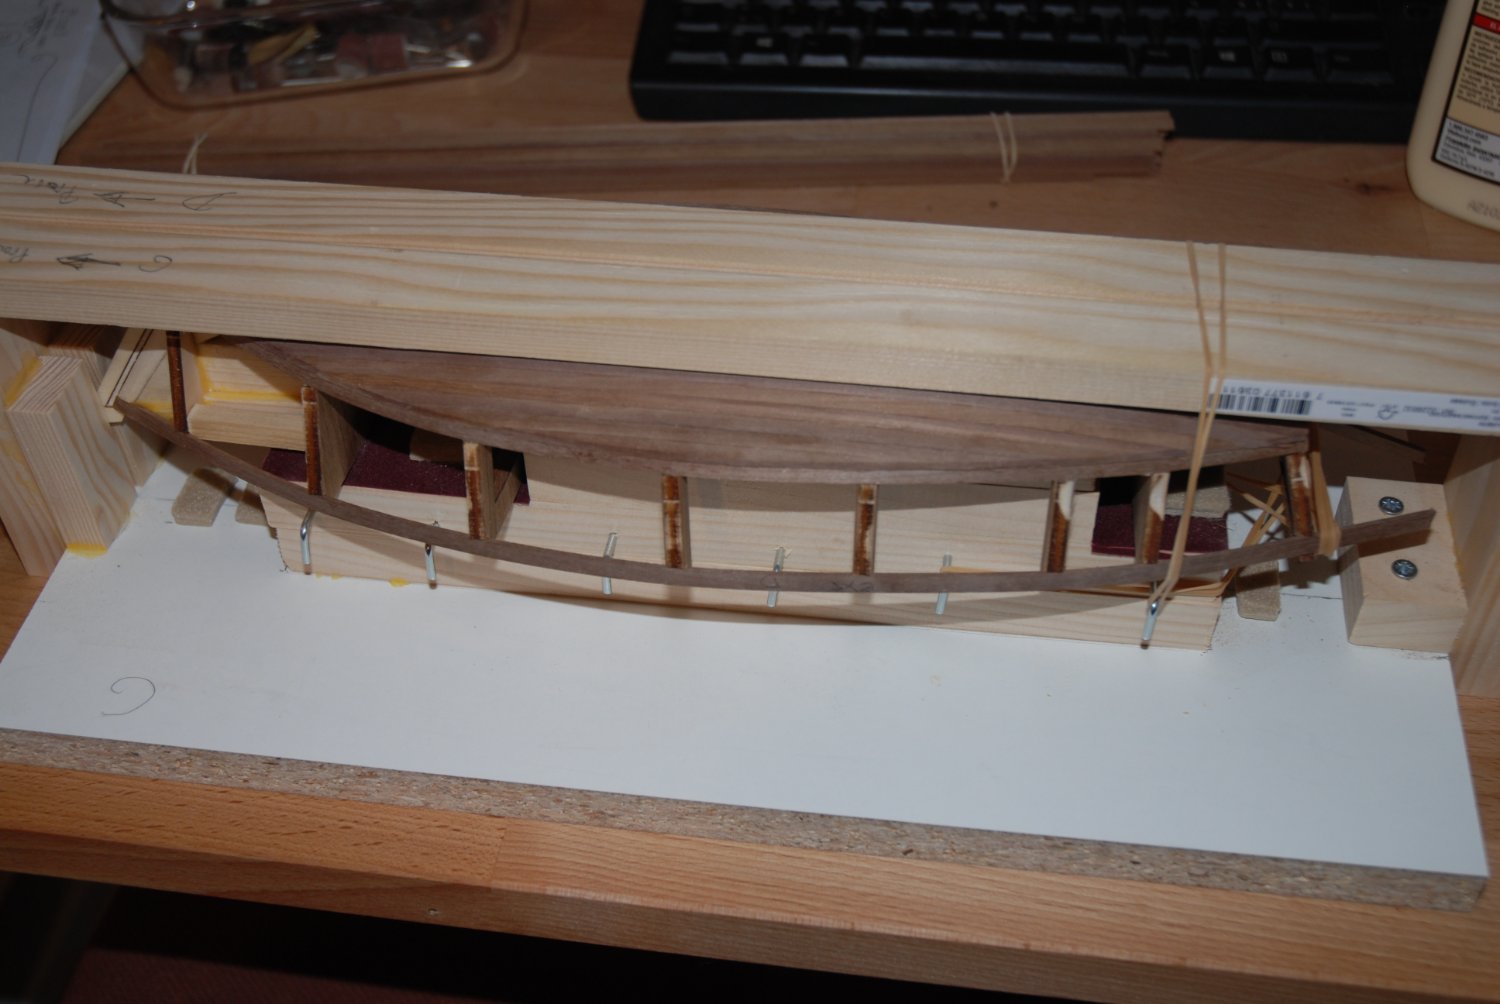
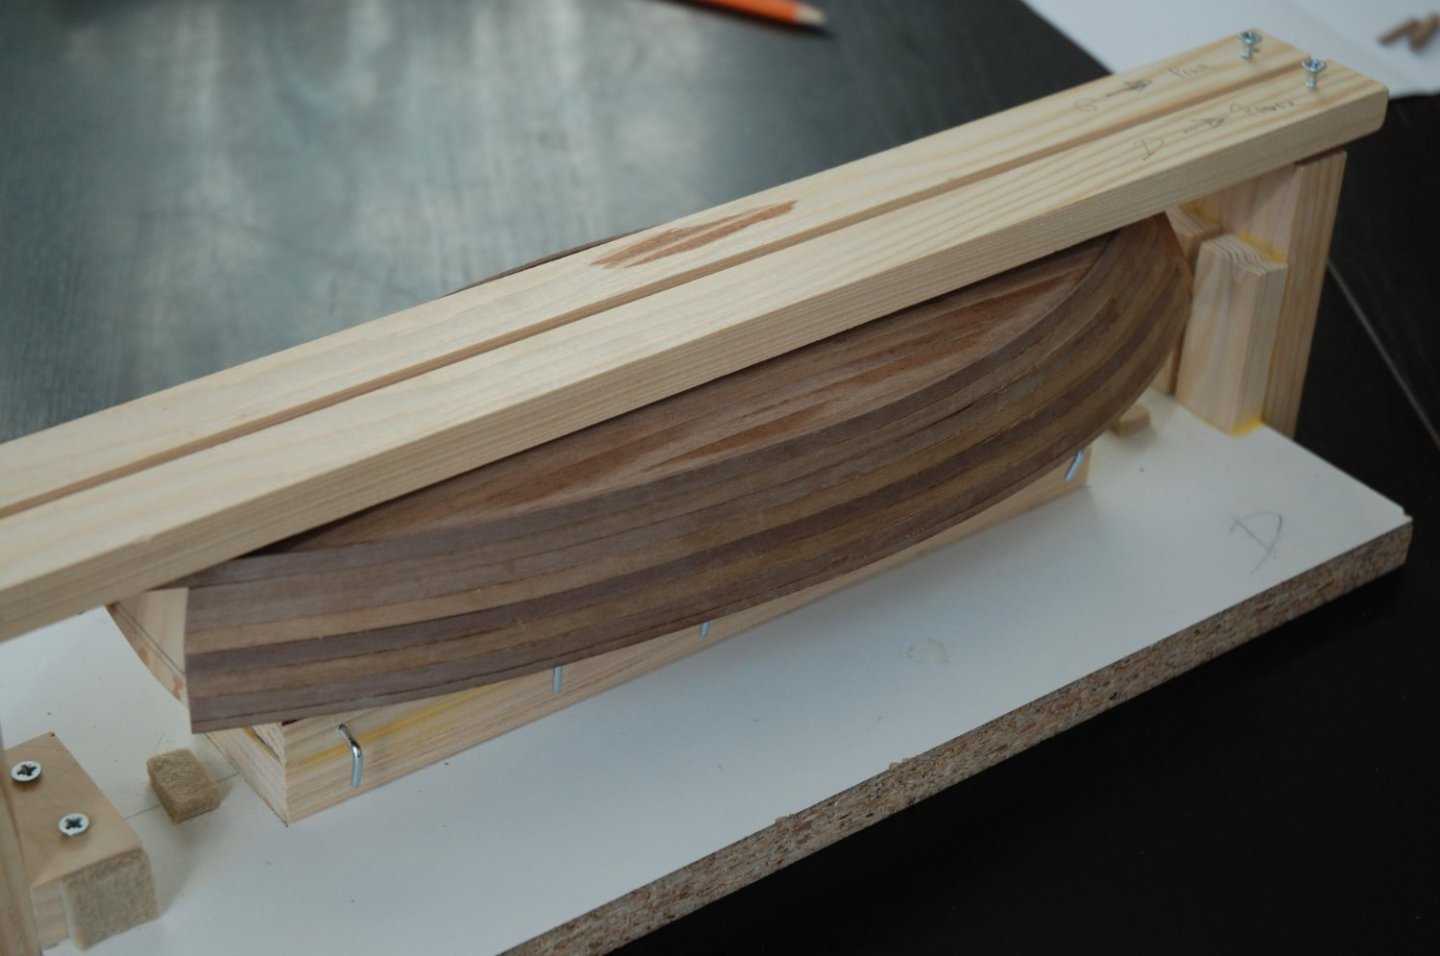
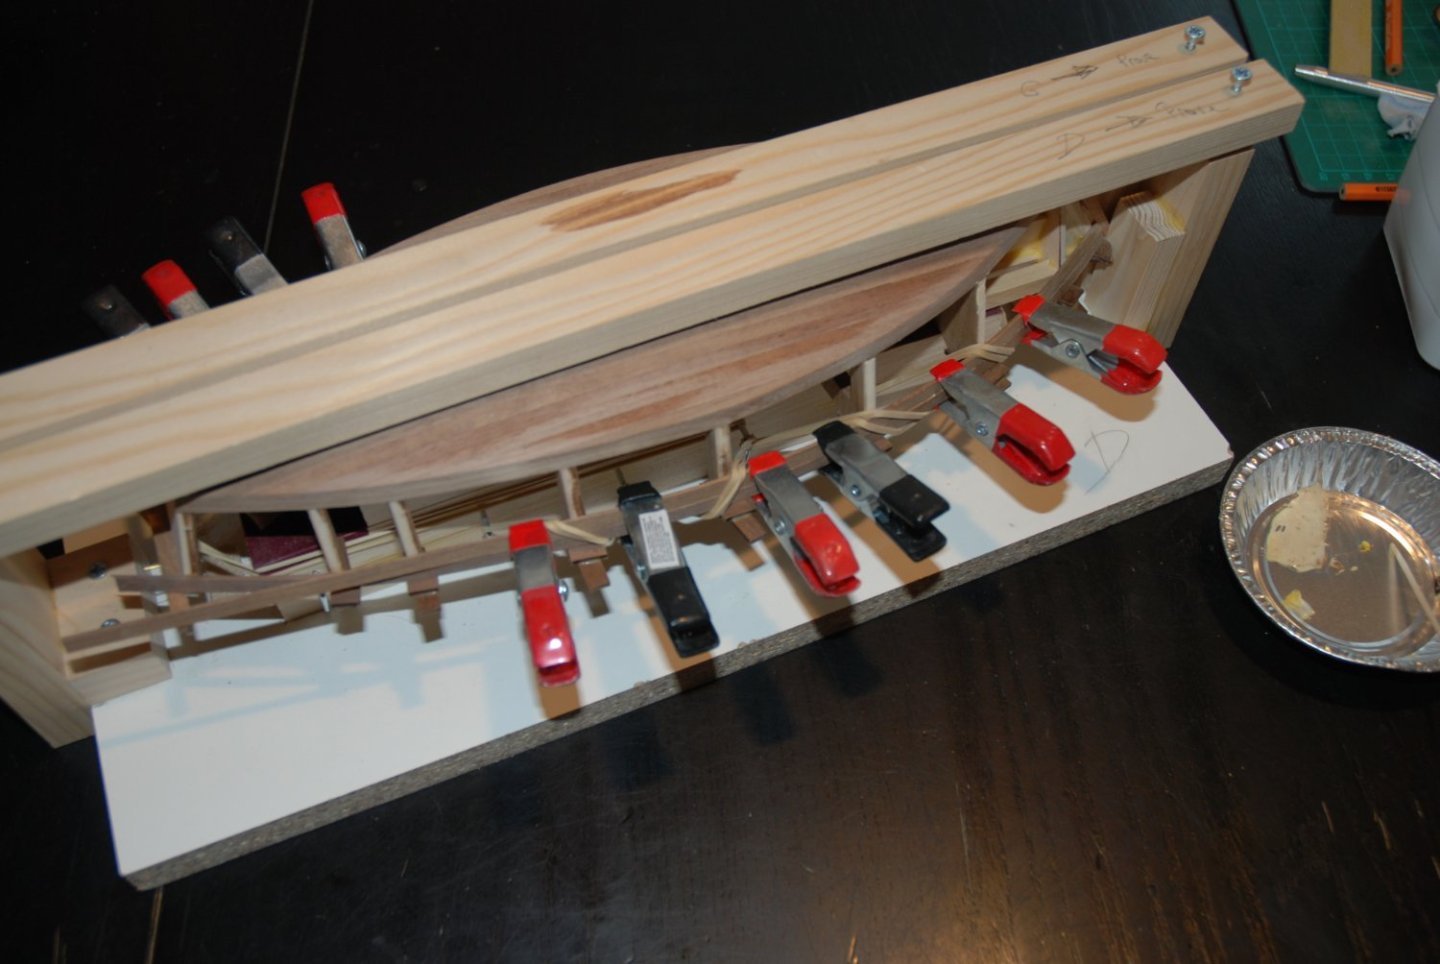
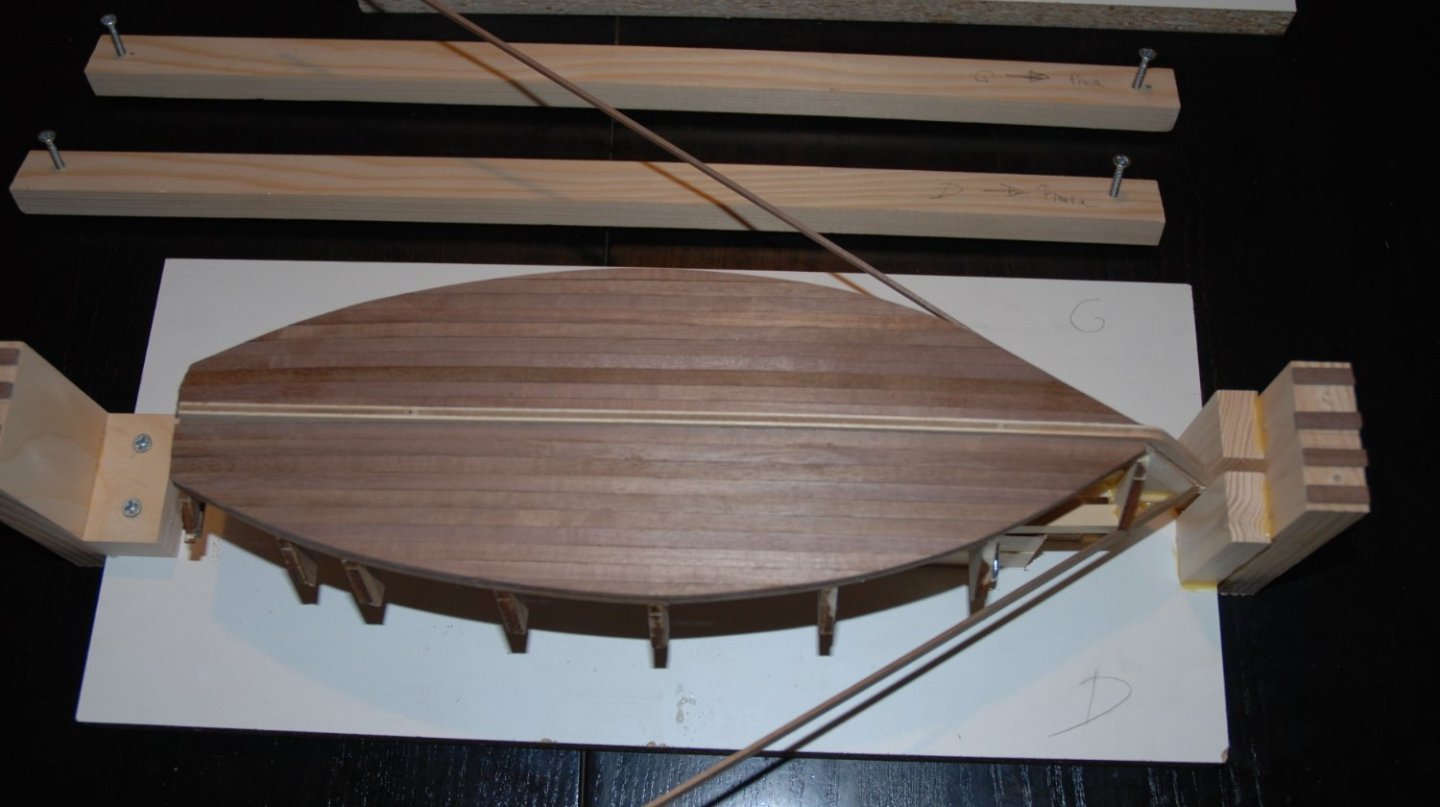
Thank you to all the 'Likes' and thank you Yves for your comment. My keel will stay straight for sure 😂! But what is most practical is that I can take my boat out and put it back in at any time. Just 4 screws to remove. It also allows me to use rubber bands to hold the planks in place when gluing. And with the plywood keel, a work stand is absolutely necessary to ensure that nothing gets warped. I do not regret the time invested in its construction.
- 57 replies
-
- 2
-
-
- marisstella
- batelina
- (and 1 more)
-
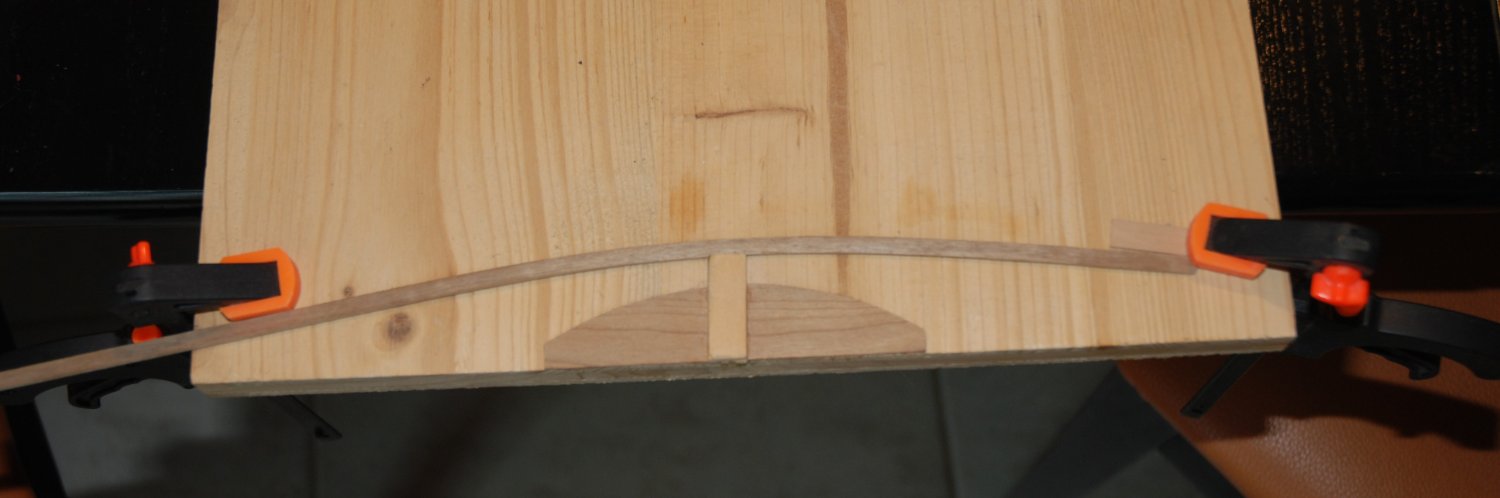
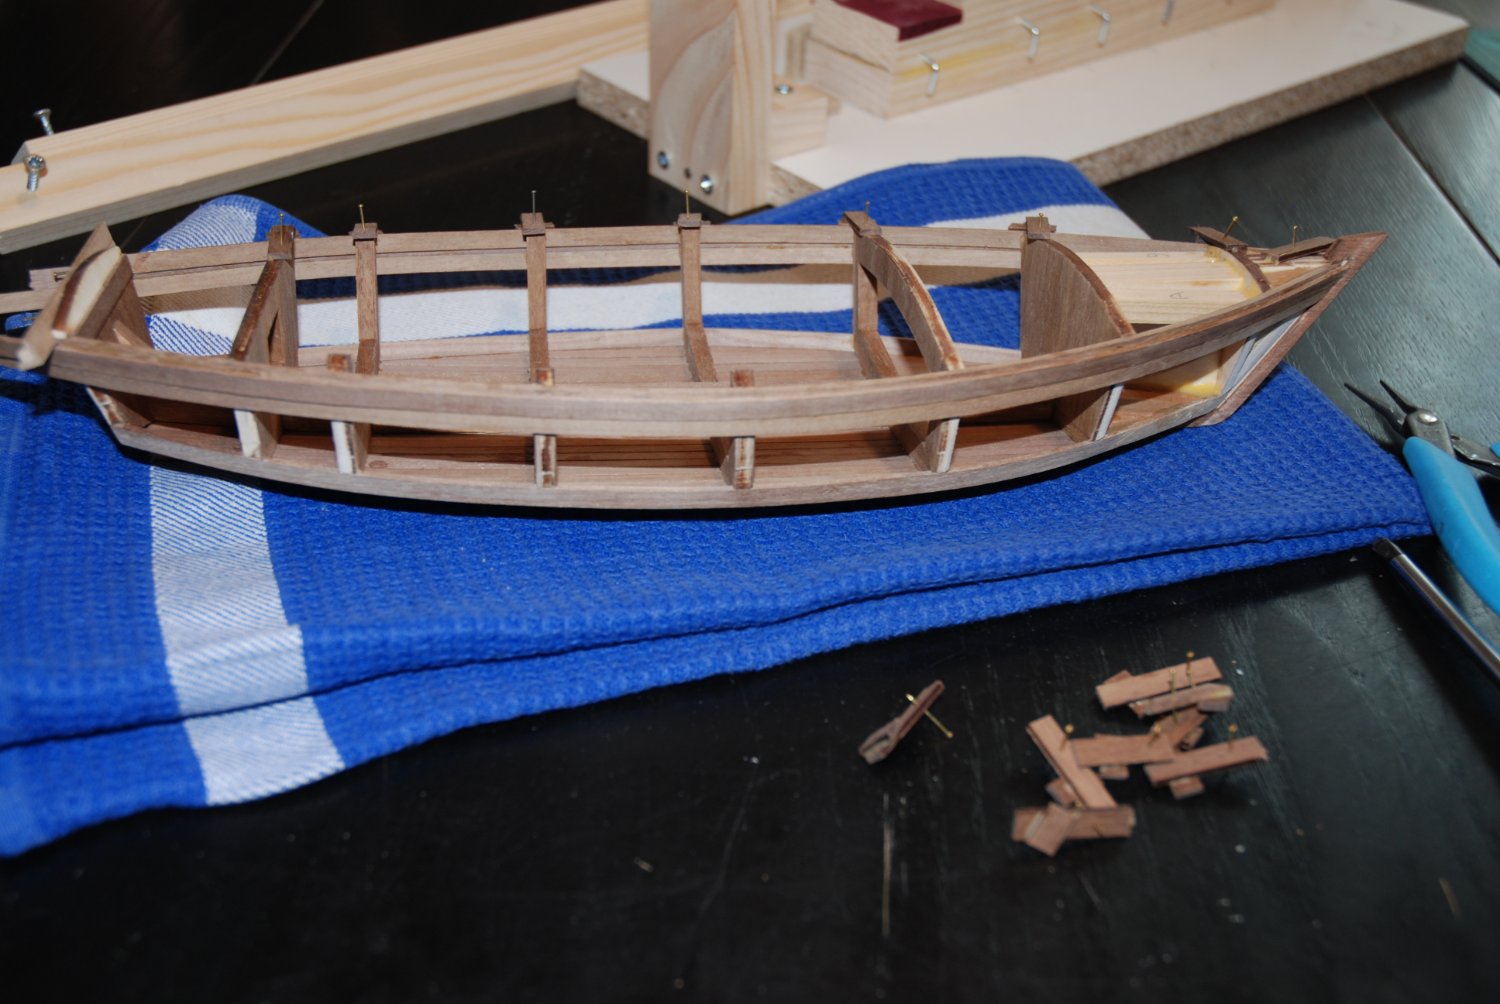
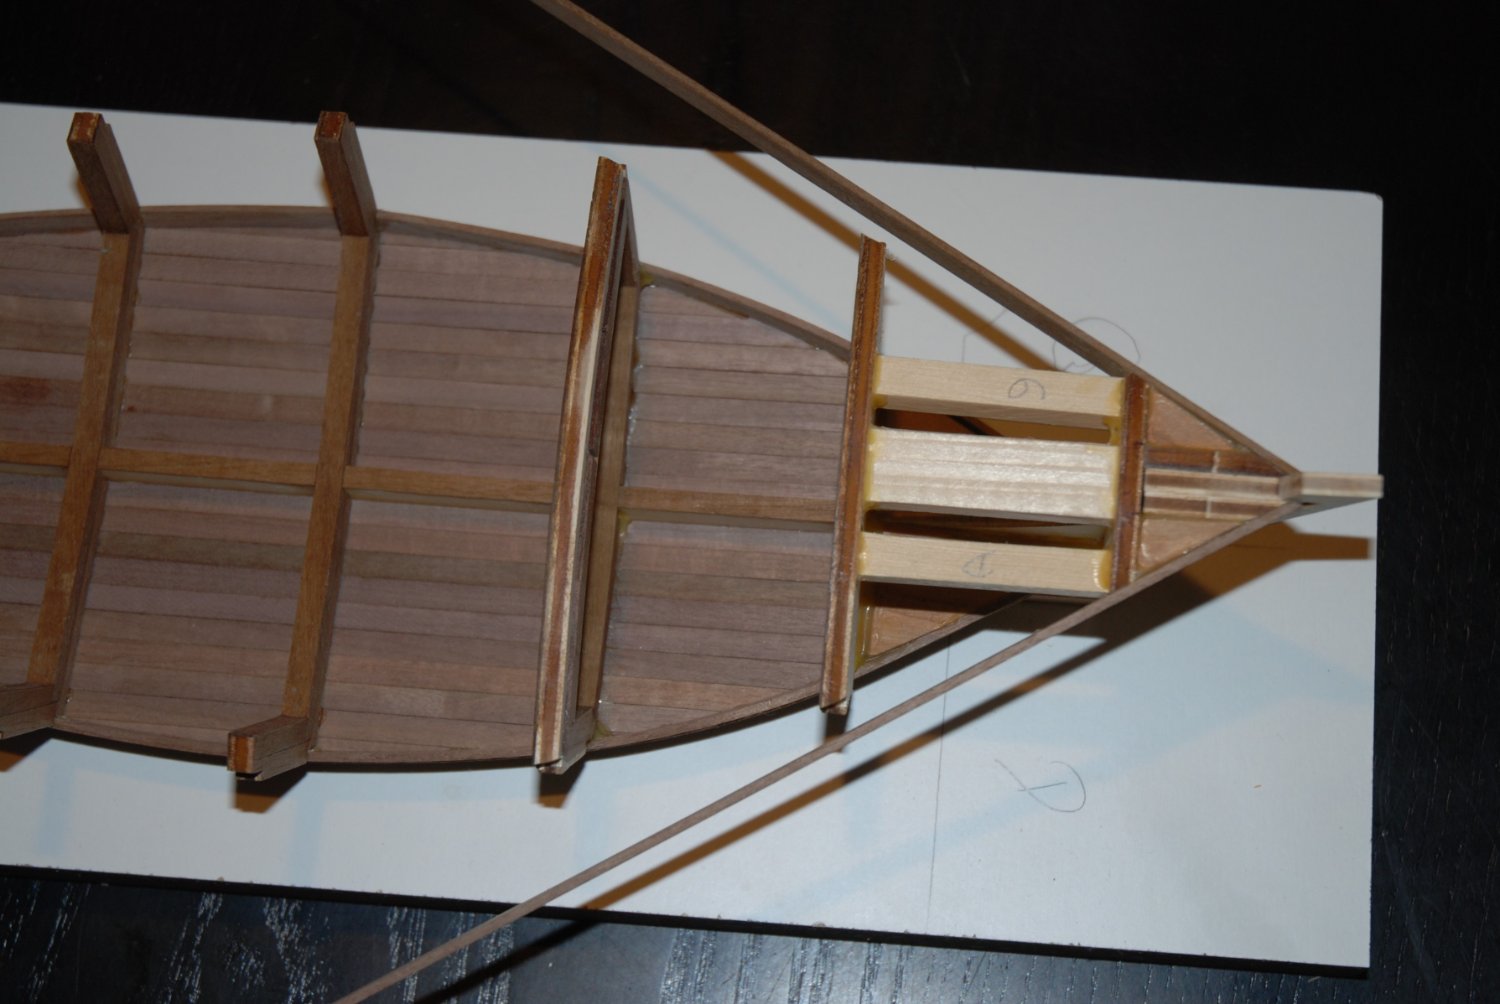
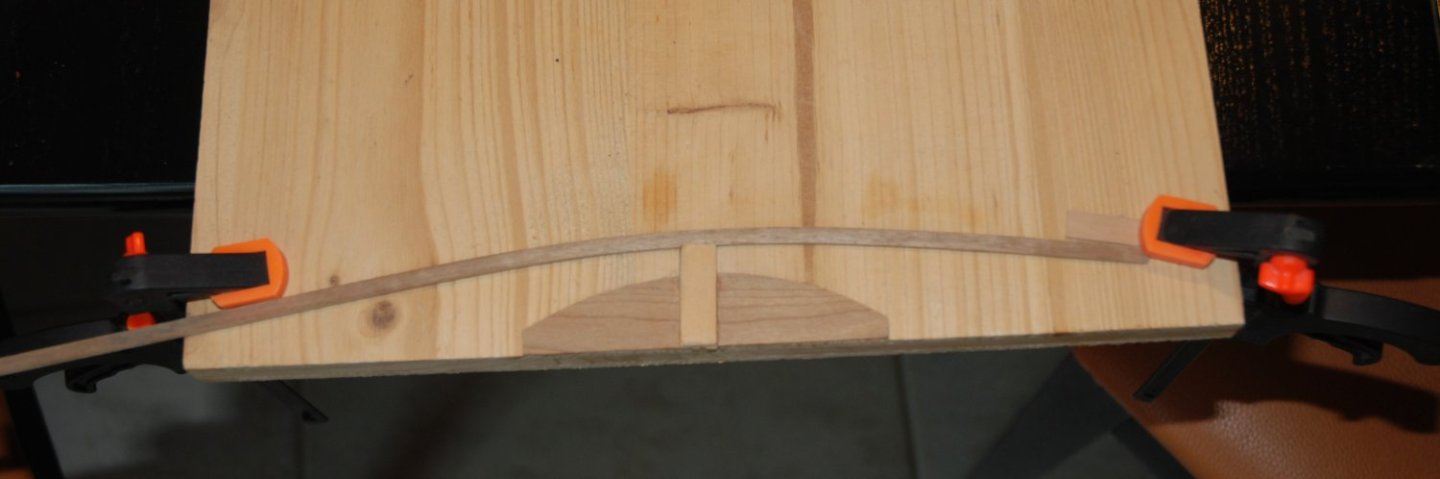
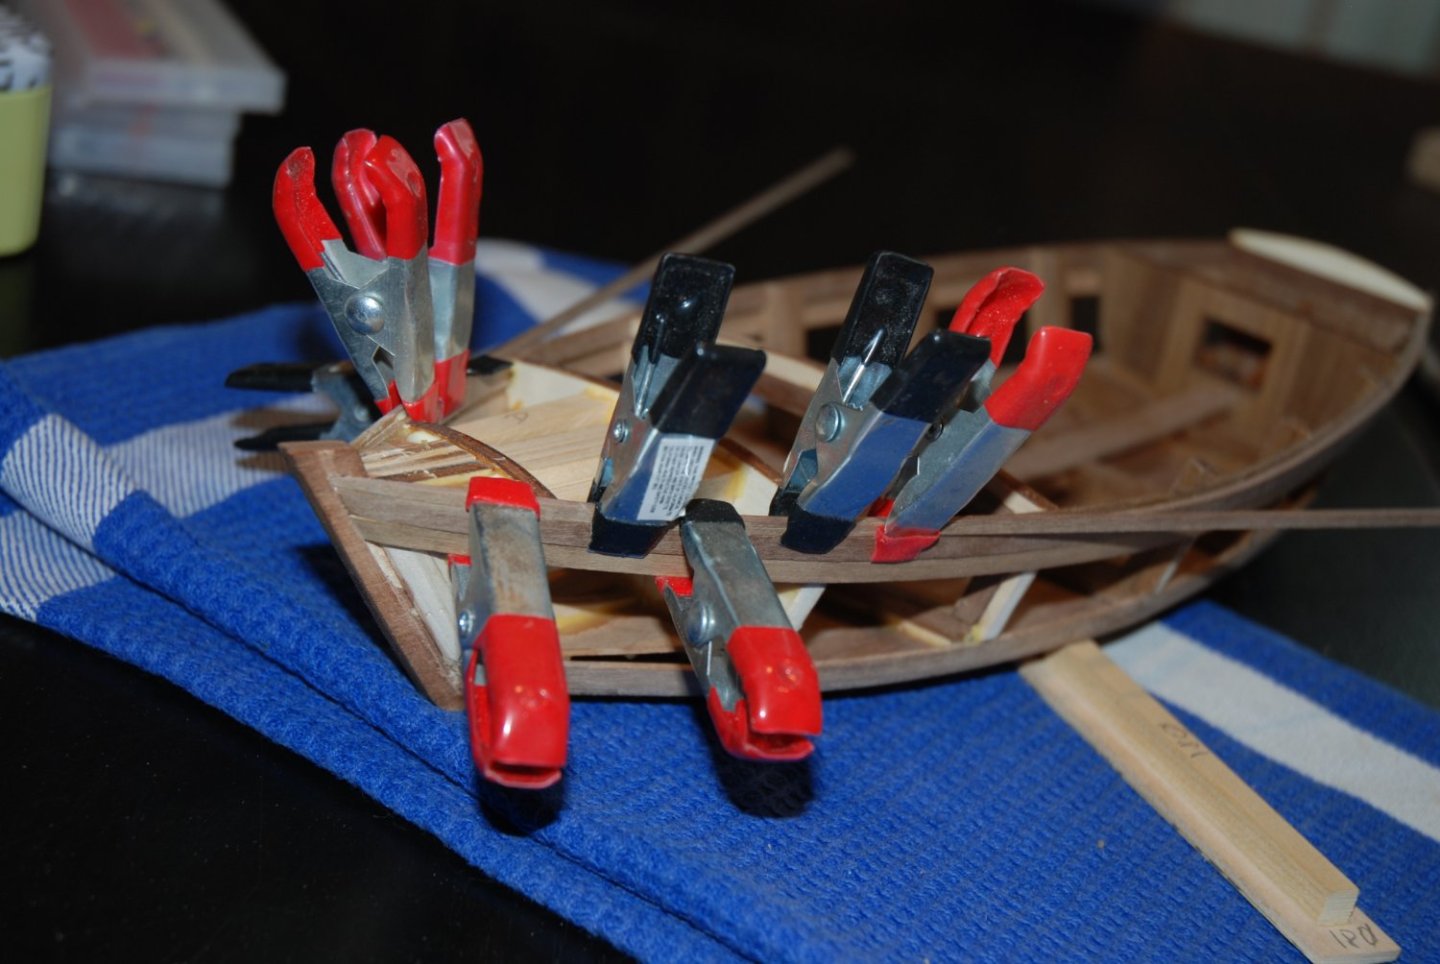
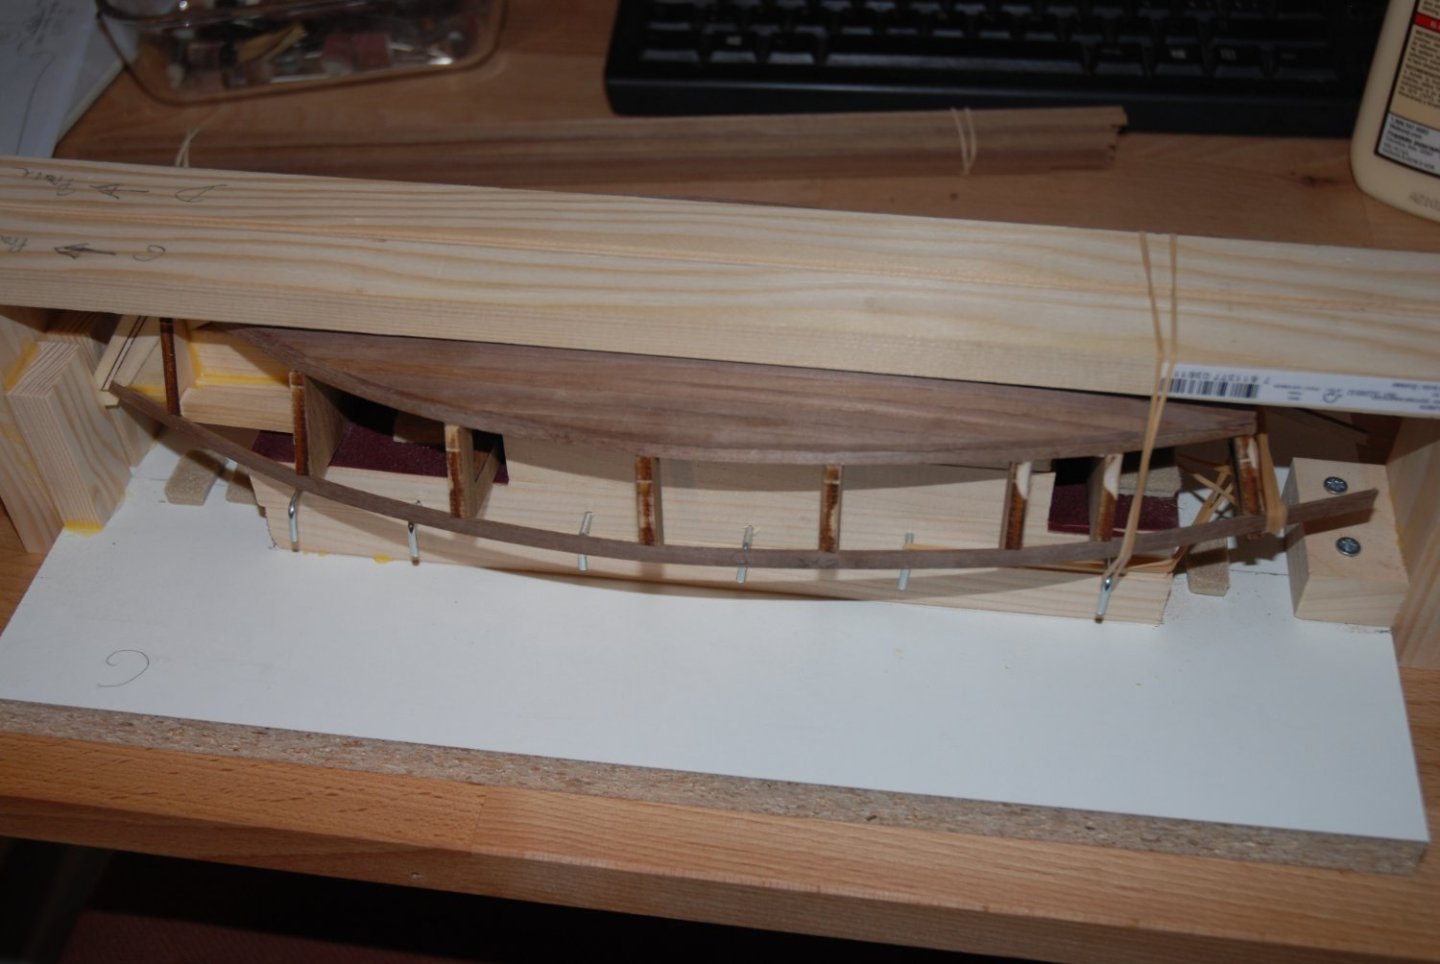
Thank You to all the 'Likes'. The upper batten has been installed. I started by gluing it in the rabbet of the bow. In the photo below, you can see the shaping of the notches that follow the future shape of the hull. Once the glue is dry, the boat is put back in the working base and I proceed to glue the batten by gluing it on two frames or three at the same time and thus moving backwards little by little towards the stern. I'll be able to start planking the hull. It will be a single planking. So the fairing of the frames will be important.


- 57 replies
-
- 8
-
-
- marisstella
- batelina
- (and 1 more)
-
HM Cutter Cheerful 1806 by JpR62 - 1:48 scale
JpR62 replied to JpR62's topic in - Build logs for subjects built 1801 - 1850
Thank you Don and Glenn for your encouragement and Thank you to all the 'Likes'. I am also very happy to have recovered from my health problems and to be able to resume my work on this beautiful model. Chuck has put so much thought into its development that it's really a pleasure to build. Really the ideal model to start a first-time scratch building. -
What a beautiful model. And what a pleasure to have been able to follow the construction of this little jewel. Thanks to you !