HOLIDAY DONATION DRIVE - SUPPORT MSW - DO YOUR PART TO KEEP THIS GREAT FORUM GOING! (Only 72 donations so far out of 49,000 members - Can we at least get 100? C'mon guys!)
×


JpR62
-
Posts
699 -
Joined
-
Last visited
Content Type
Profiles
Forums
Gallery
Events
Everything posted by JpR62
-
 Beautiful cutter ! I had a lot of fun following your work. The log is full of tips and very good advice. Thanks a lot! I can' t wait to follow the construction of your next model. Already an idea ?
- 274 replies
-
- 1
-

-
- Cheerful
- Syren Ship Model Company
- (and 1 more)
-
HM Cutter Cheerful 1806 by JpR62 - 1:48 scale
JpR62 replied to JpR62's topic in - Build logs for subjects built 1801 - 1850
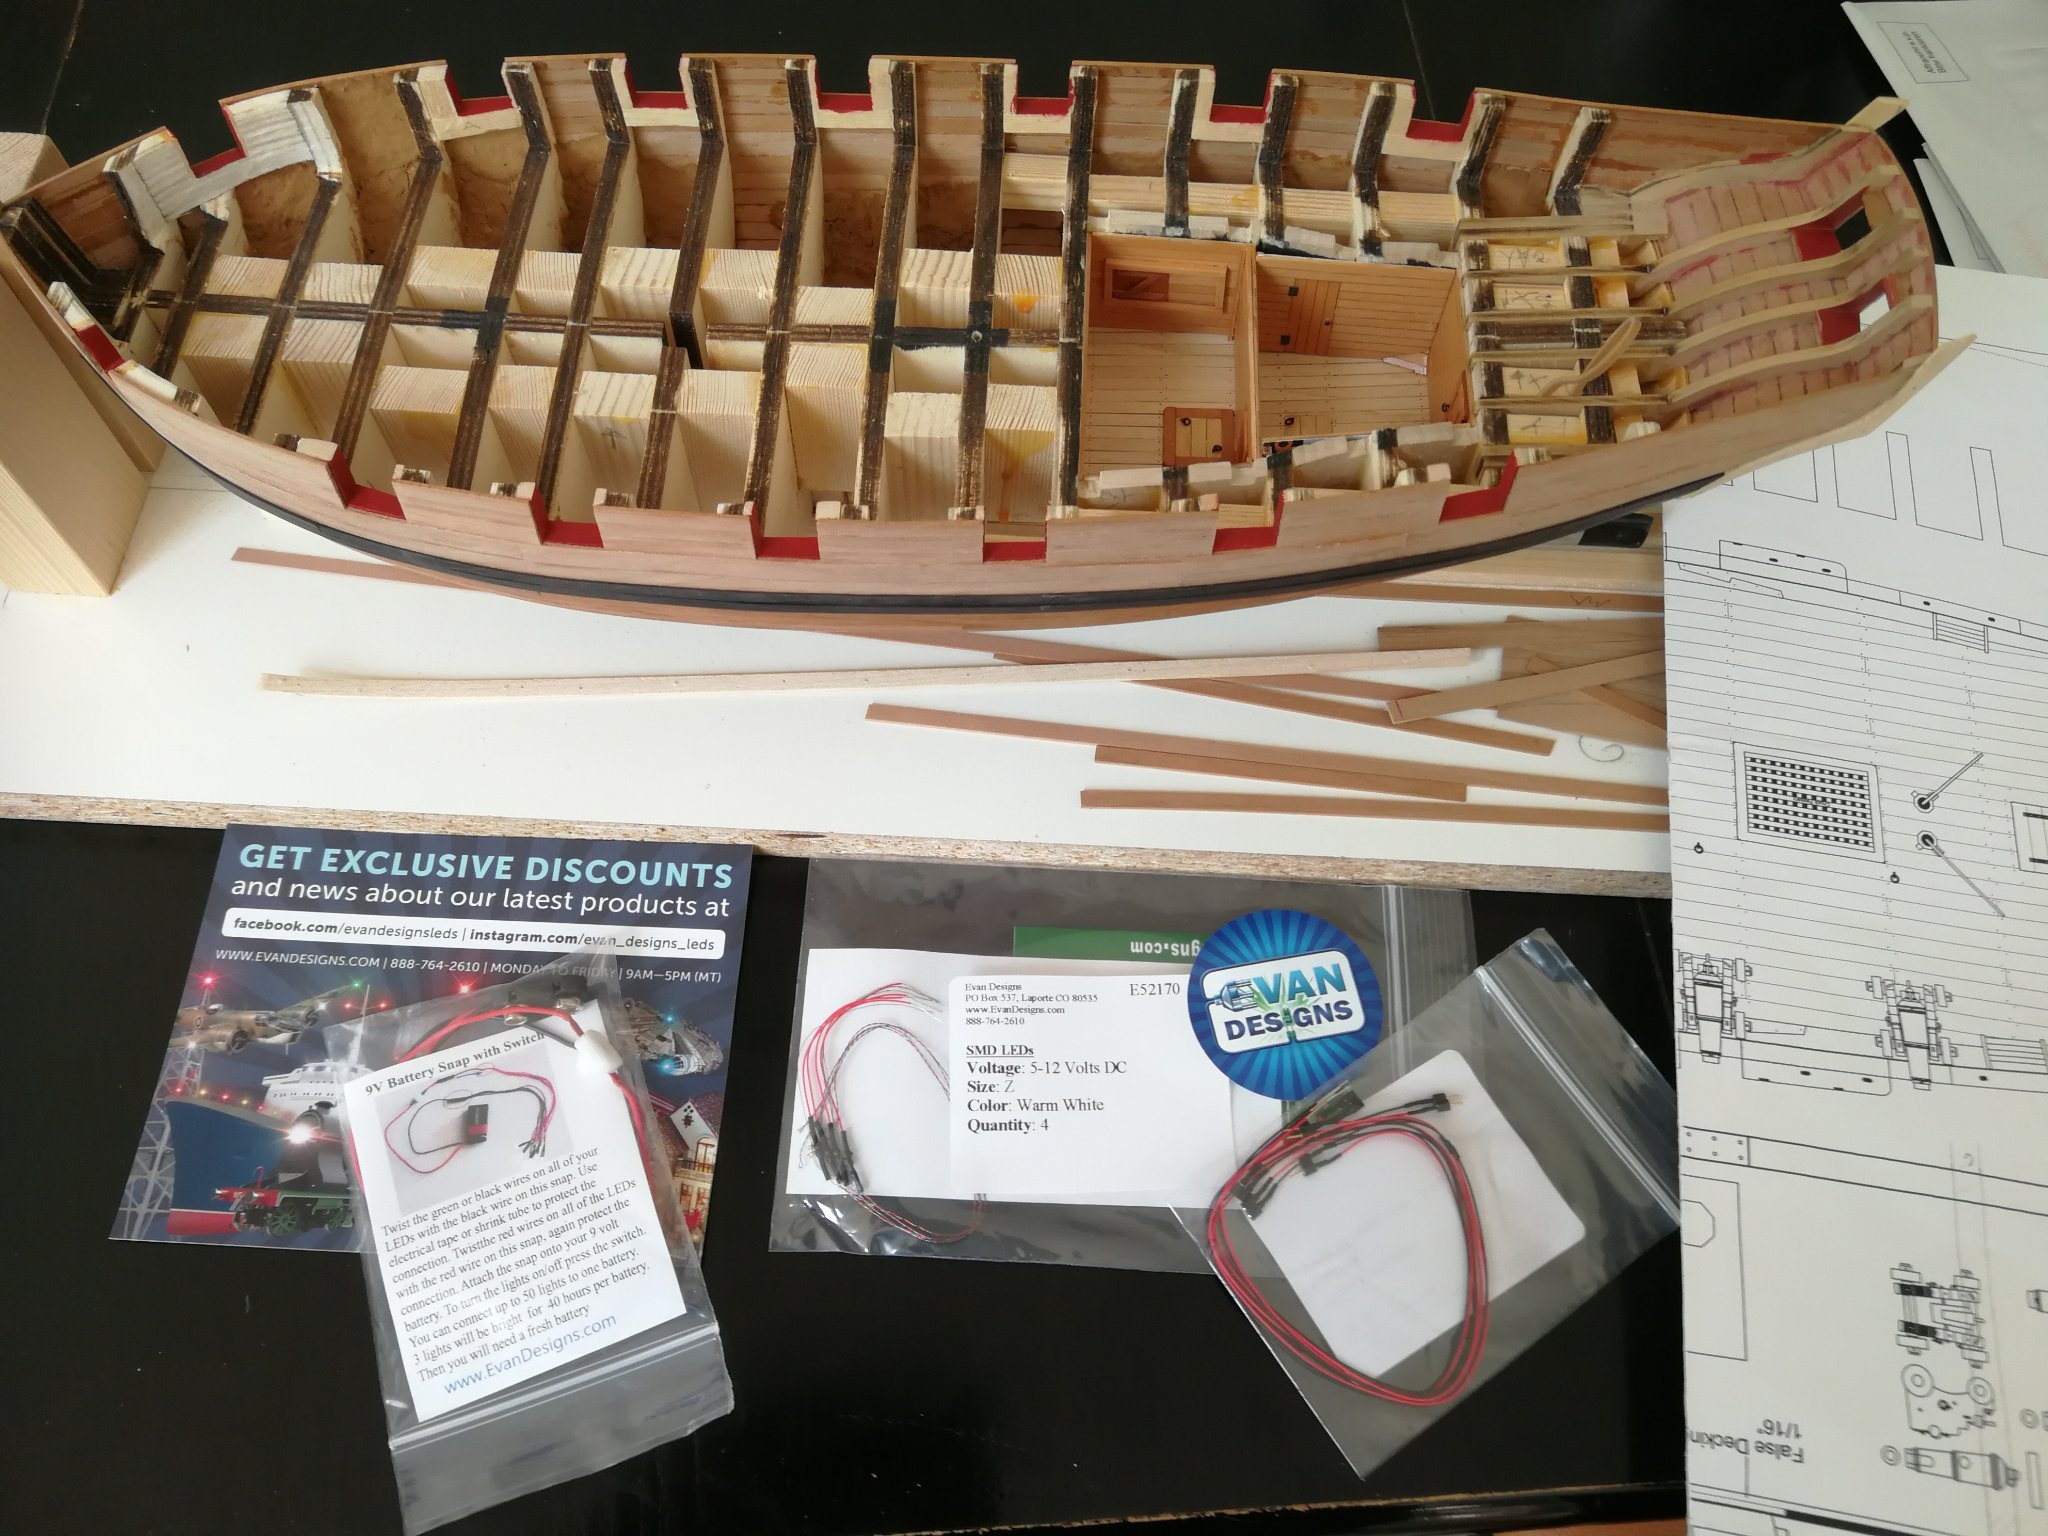
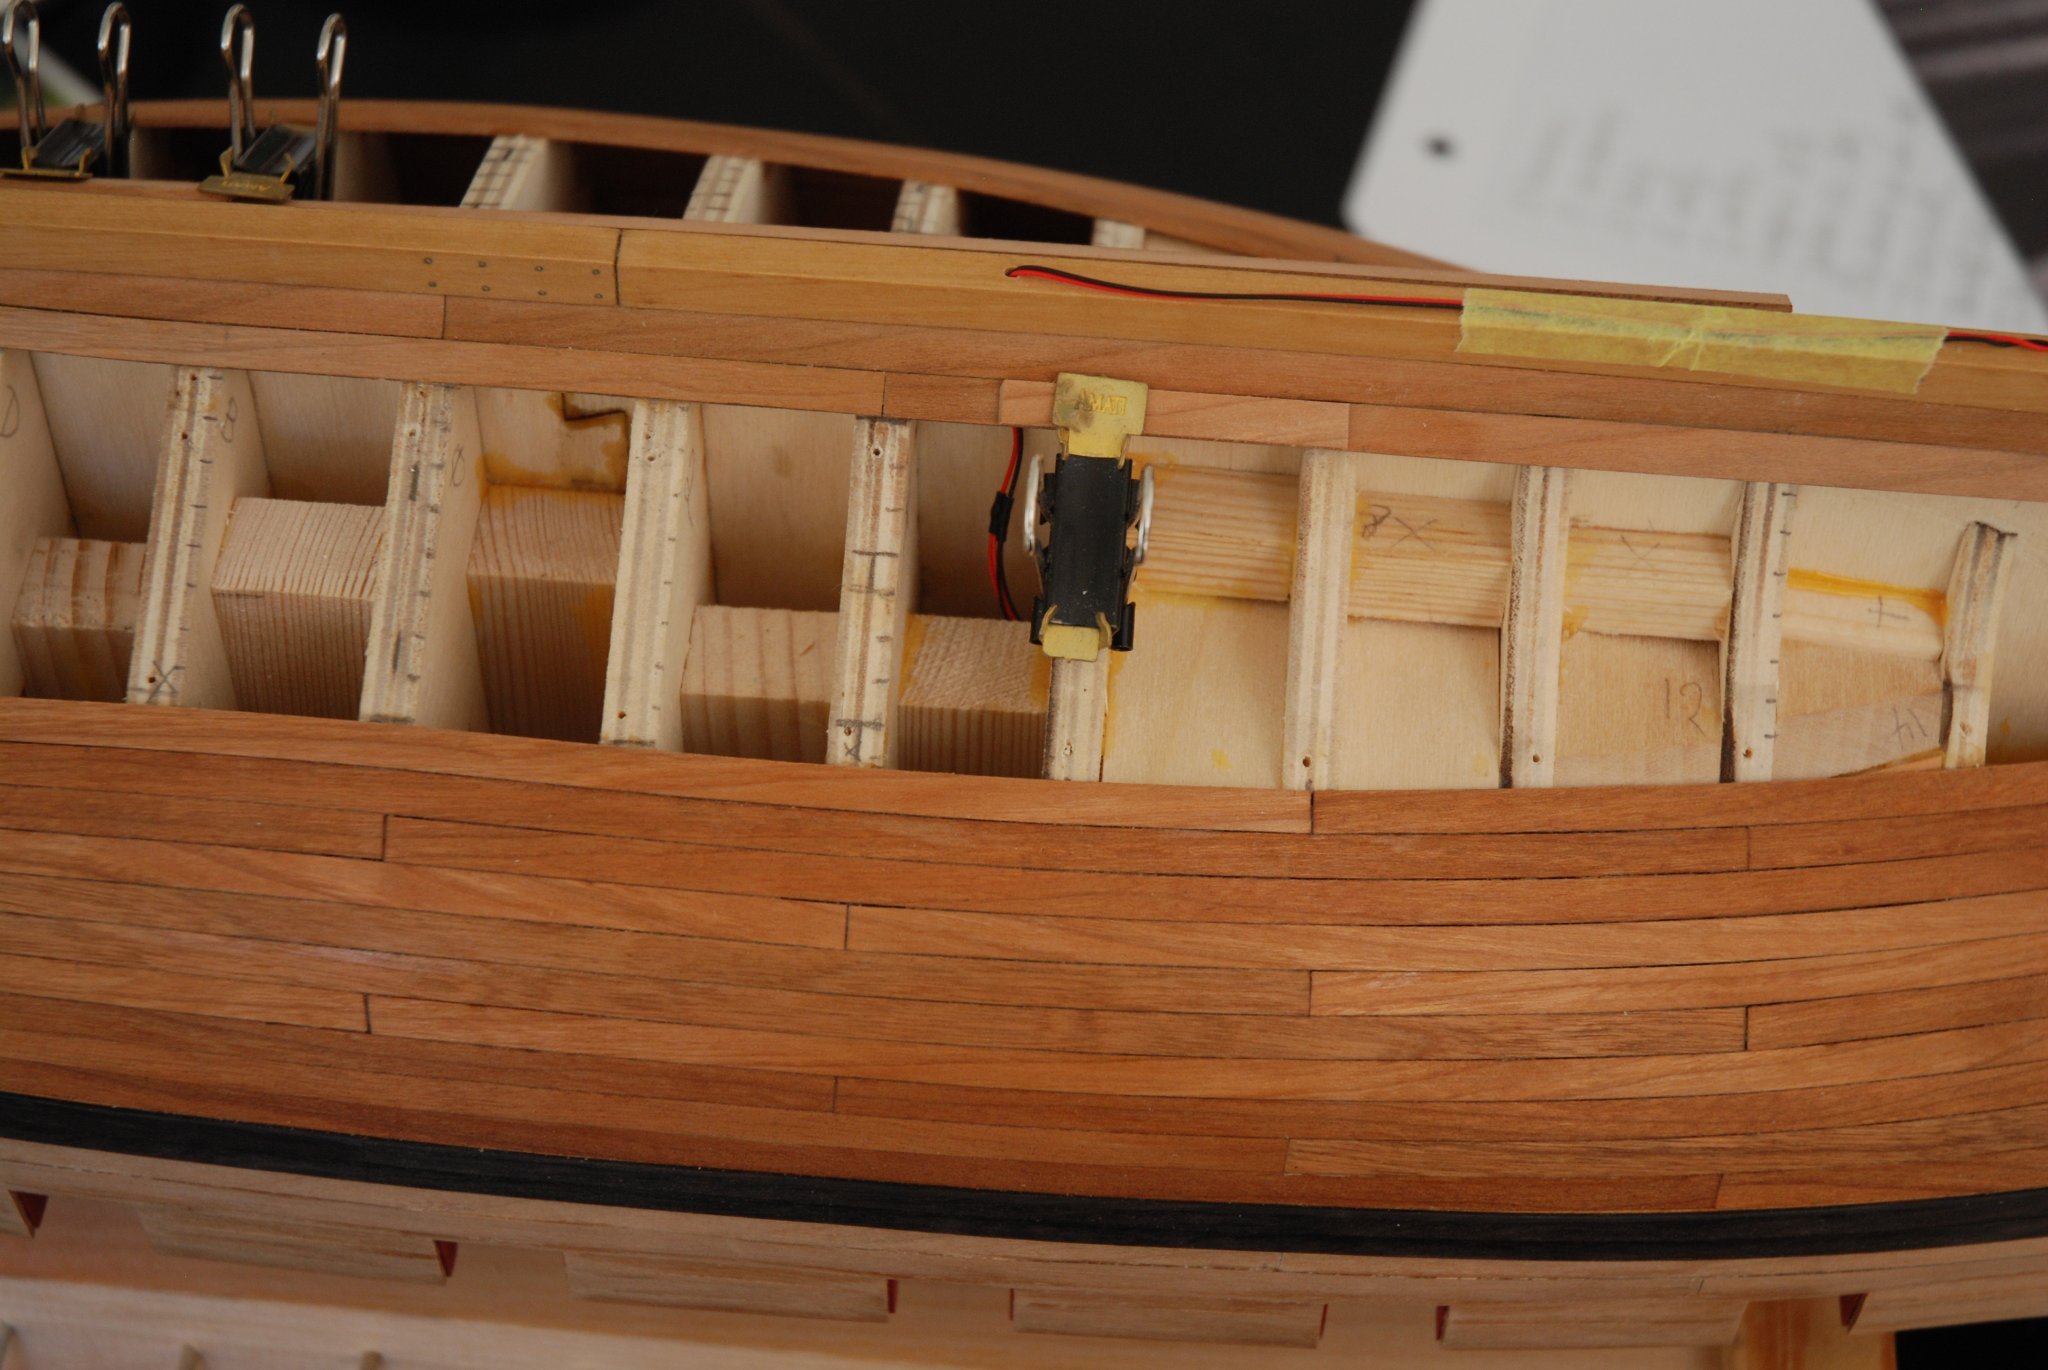
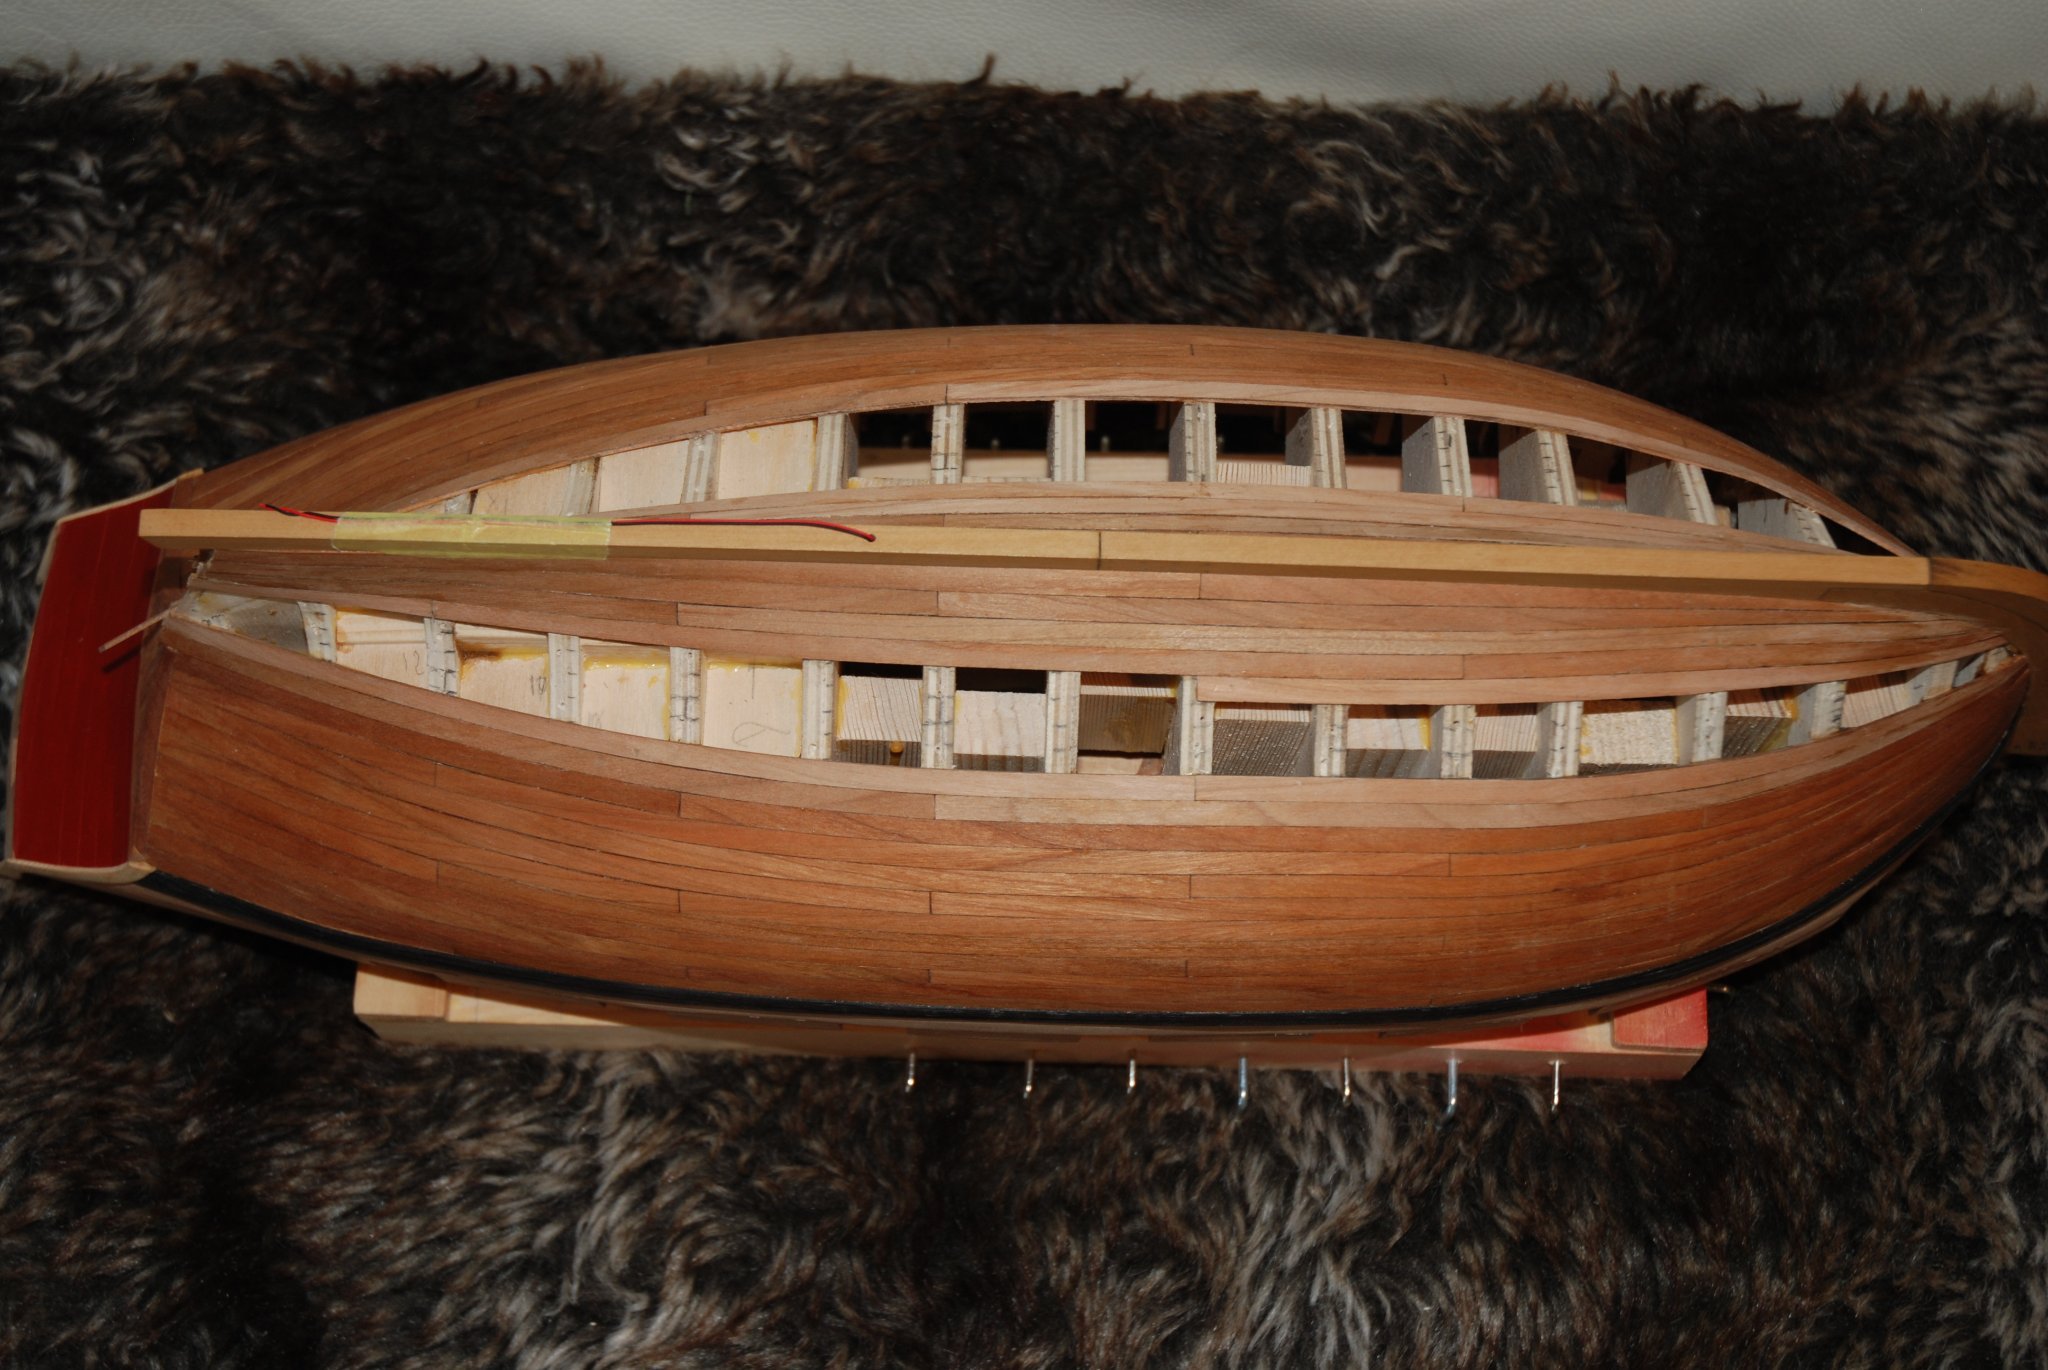
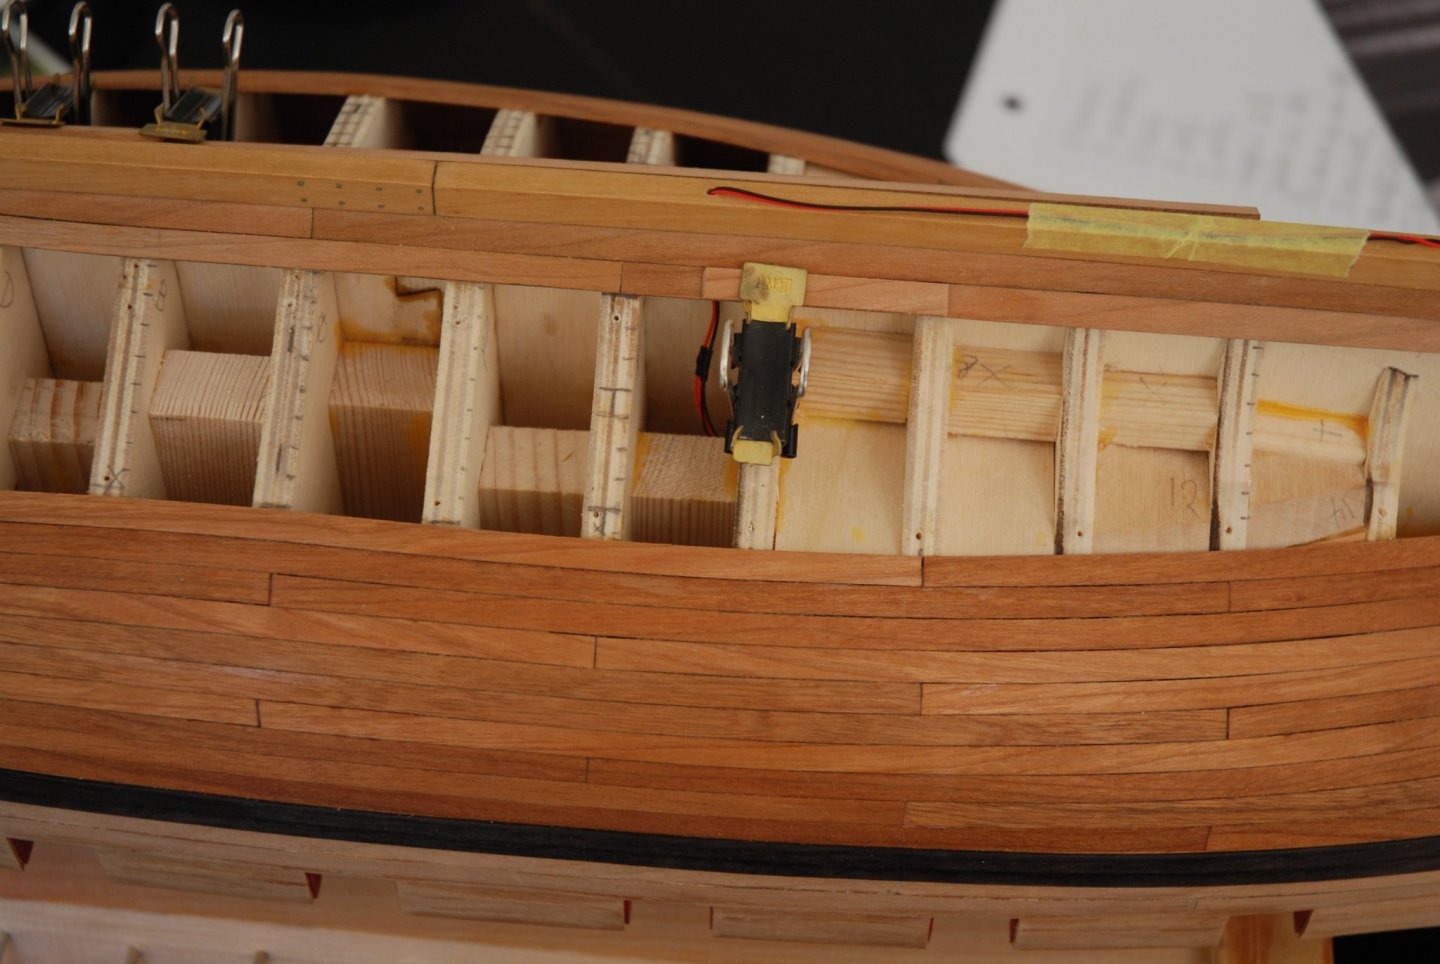
The work is progressing slowly because unfortunately my job takes up a lot of my time these days and I can only devote a little time to my hobby. However, I have made some progress. The electrical part has been installed in order to light the two rooms. And the planking of the second belt has started. I still have 3 rows to port and 5 rows to starboard to finish. In a few weeks, I hope to have more time to finish my planking. But I'm racking up the hours these days at my office... I look forward to quieter days 😉.


-
Great job Bob! This frigate just keeps getting more beautiful!
-
Always so precise and spectacular! Thank you for sharing your wonderful work ☺️
- 589 replies
-
- 1
-
-
- le gros ventre
- cargo
- (and 1 more)
-
Again an absolutely essential video! A very big thank you for sharing these techniques and for the time spent to make us discover your fantastic work. 😊
-
HM Cutter Cheerful 1806 by JpR62 - 1:48 scale
JpR62 replied to JpR62's topic in - Build logs for subjects built 1801 - 1850
Thank you all for your kind comments. I am fortunate to be able to work on a really well-designed kit, to have a precise and well written documentation and to be able to base myself on the work already done and described by many talented modelers 😁. Paul, I don't have a large number of finished models, but compared to Alaskan yellow cedar, cherry is a harder wood. It is a bit more brittle and difficult to bend than cedar. But if you moisten it well, it's still pretty easy to work with. On the other hand its advantage, it is less easily marked than cedar. Two woods to be apprehended differently but this is what makes the charm of this hobby 😉. However, in my opinion, cedar is easier to work with. -
HM Cutter Cheerful 1806 by JpR62 - 1:48 scale
JpR62 replied to JpR62's topic in - Build logs for subjects built 1801 - 1850
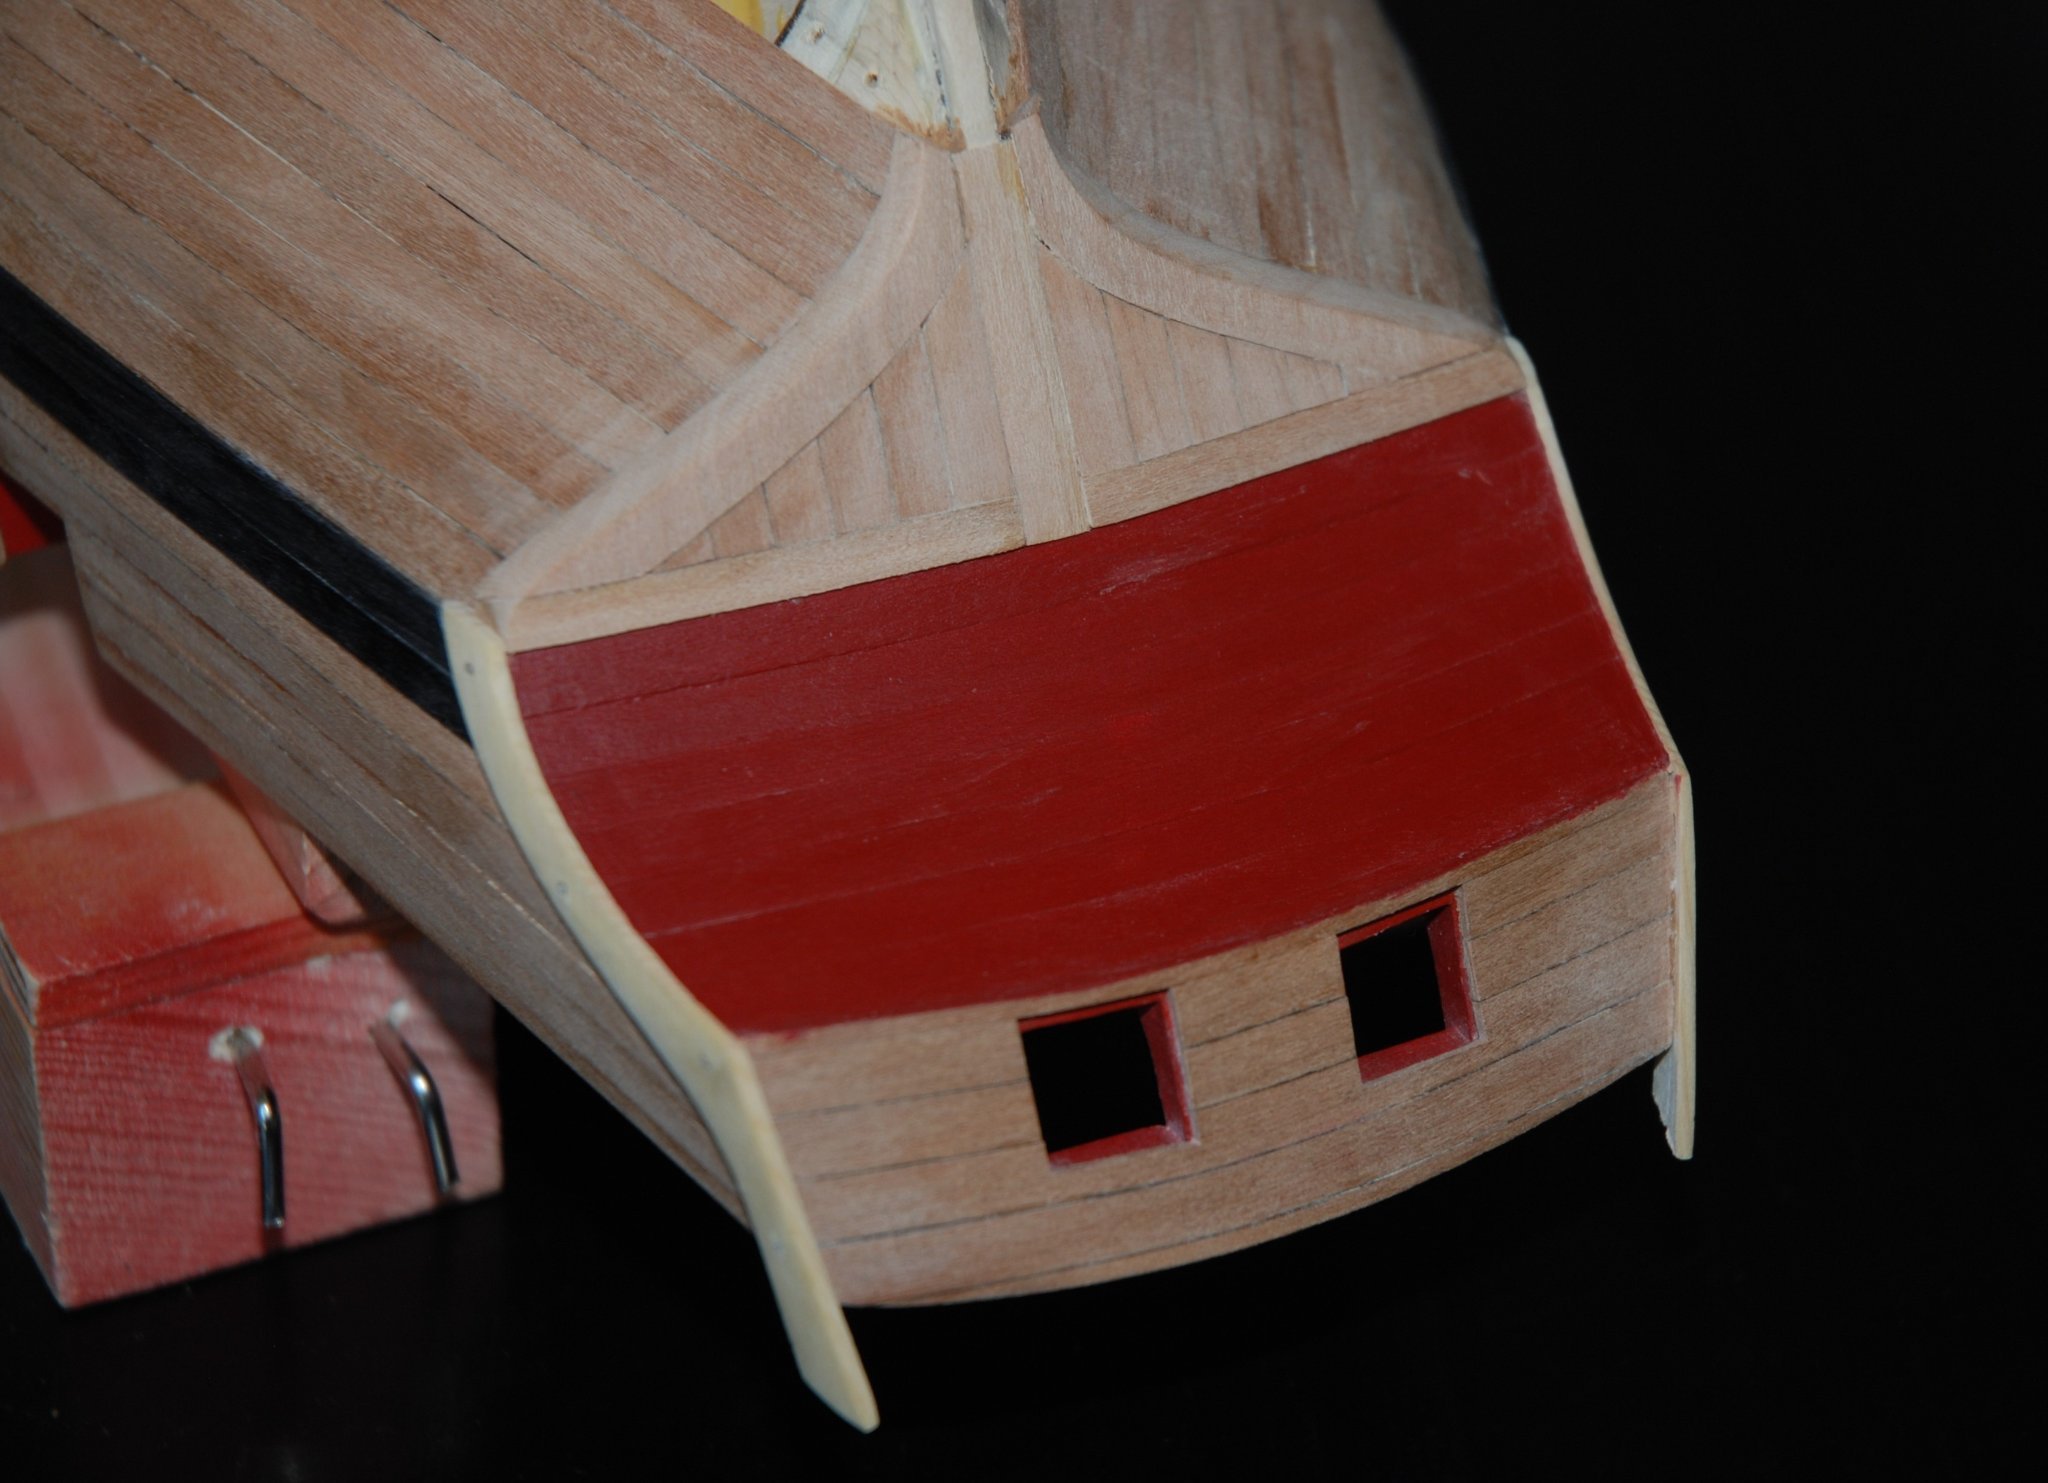
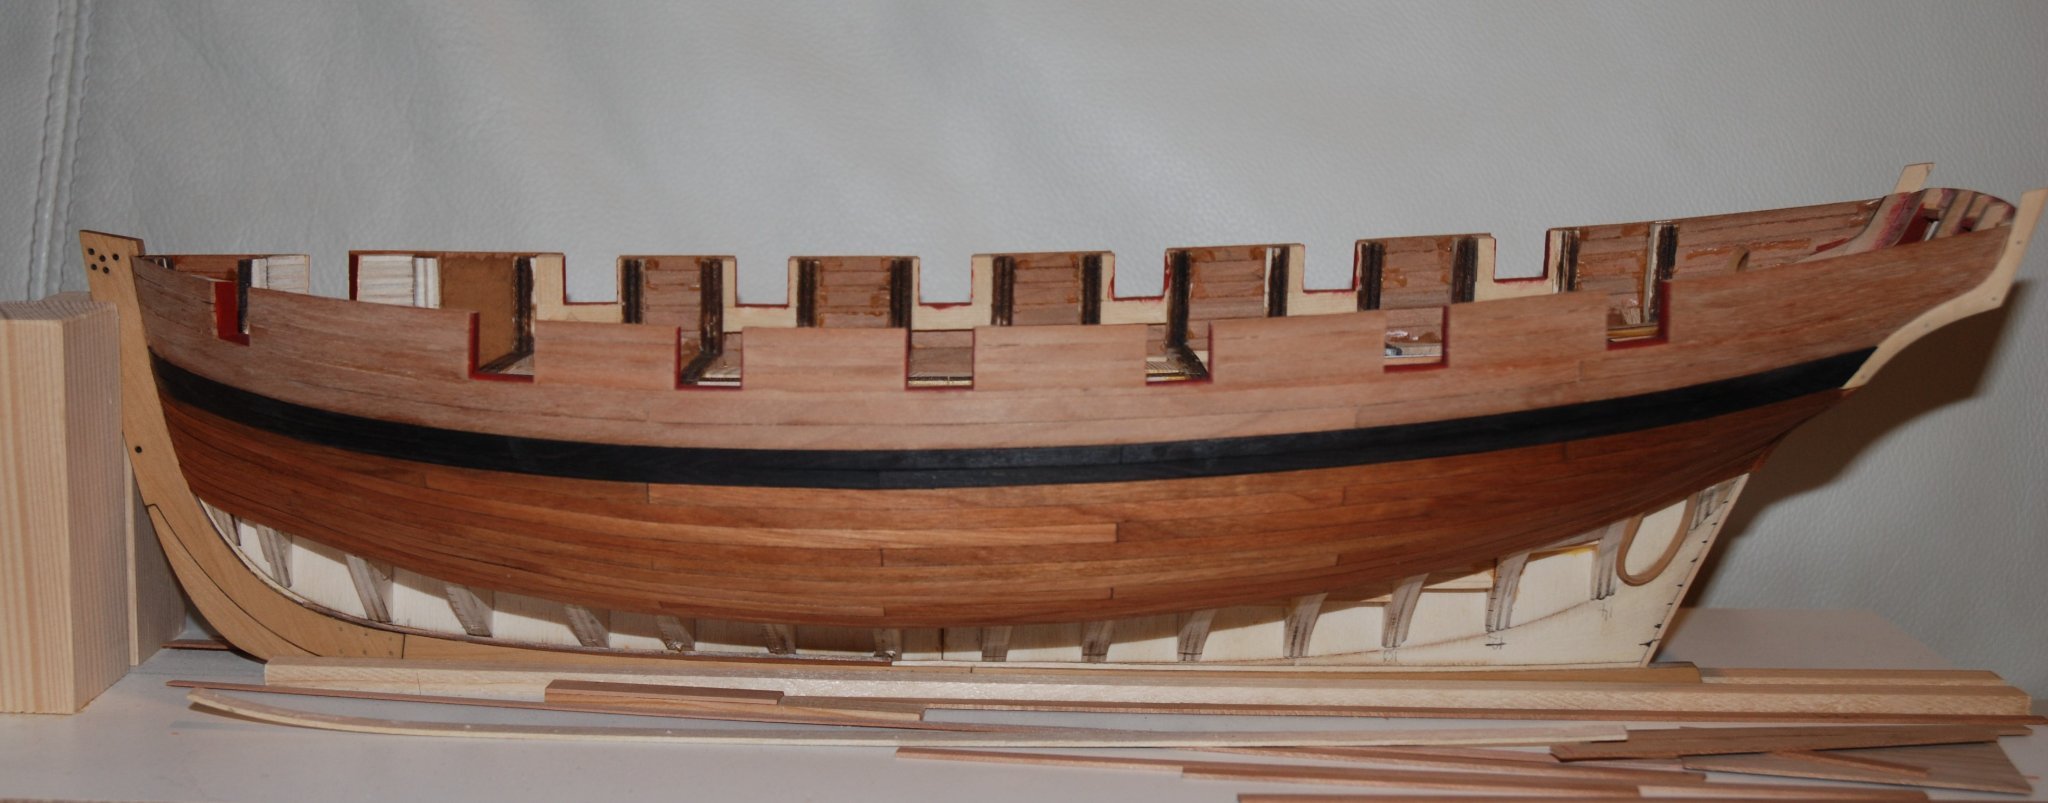
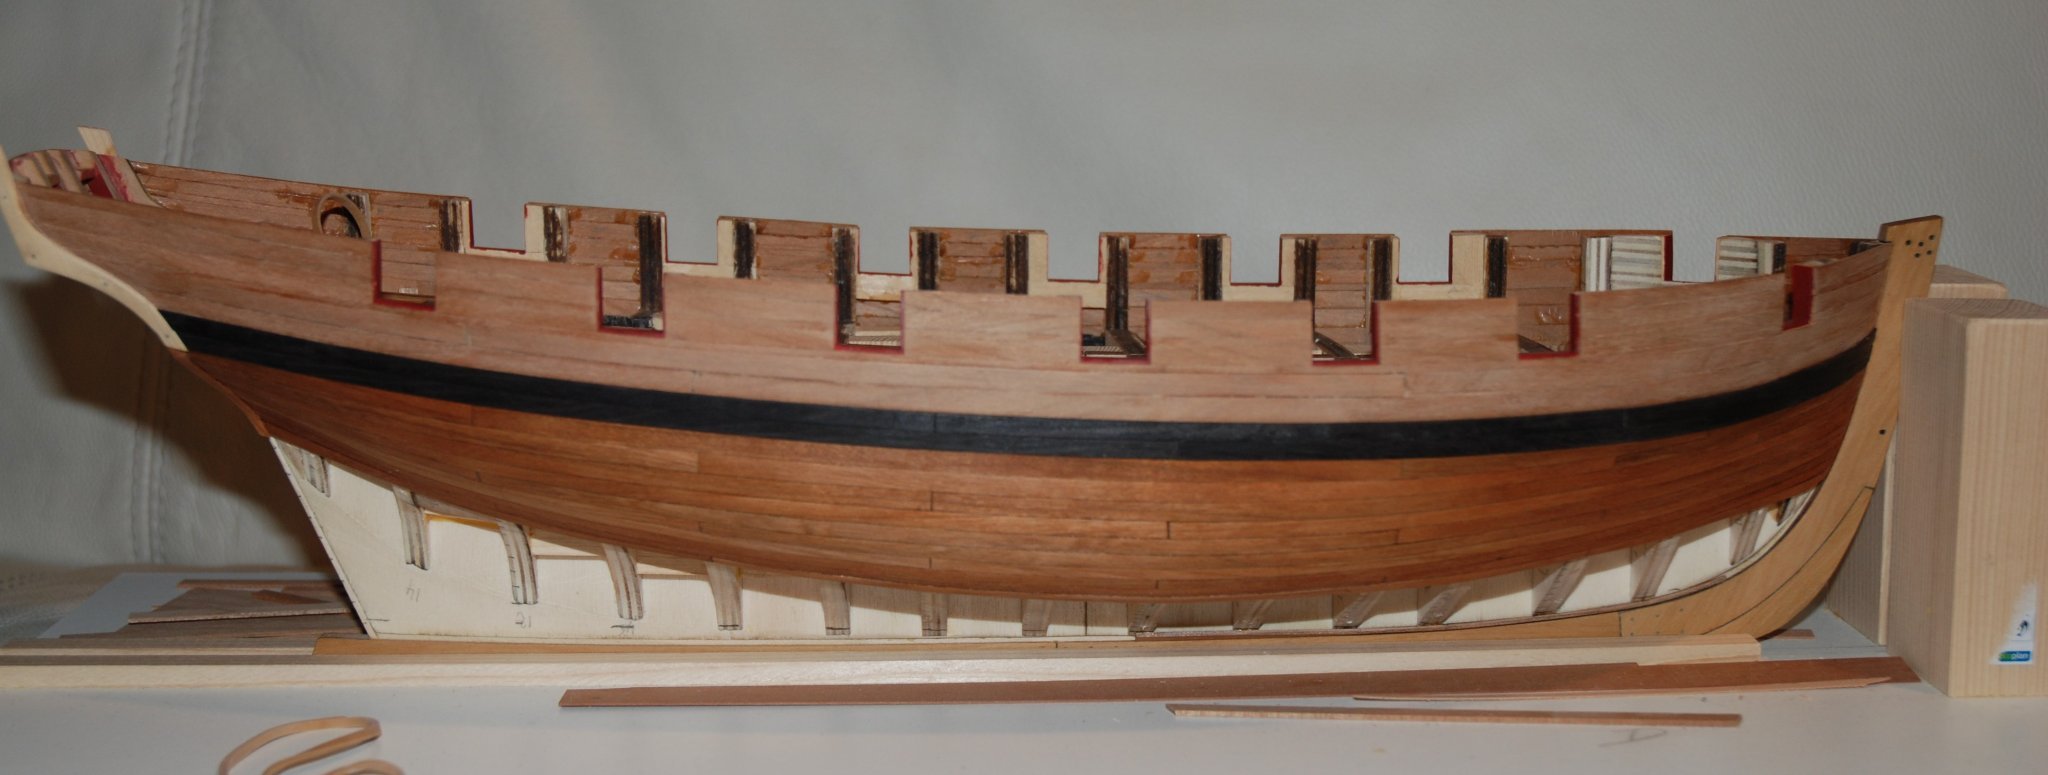
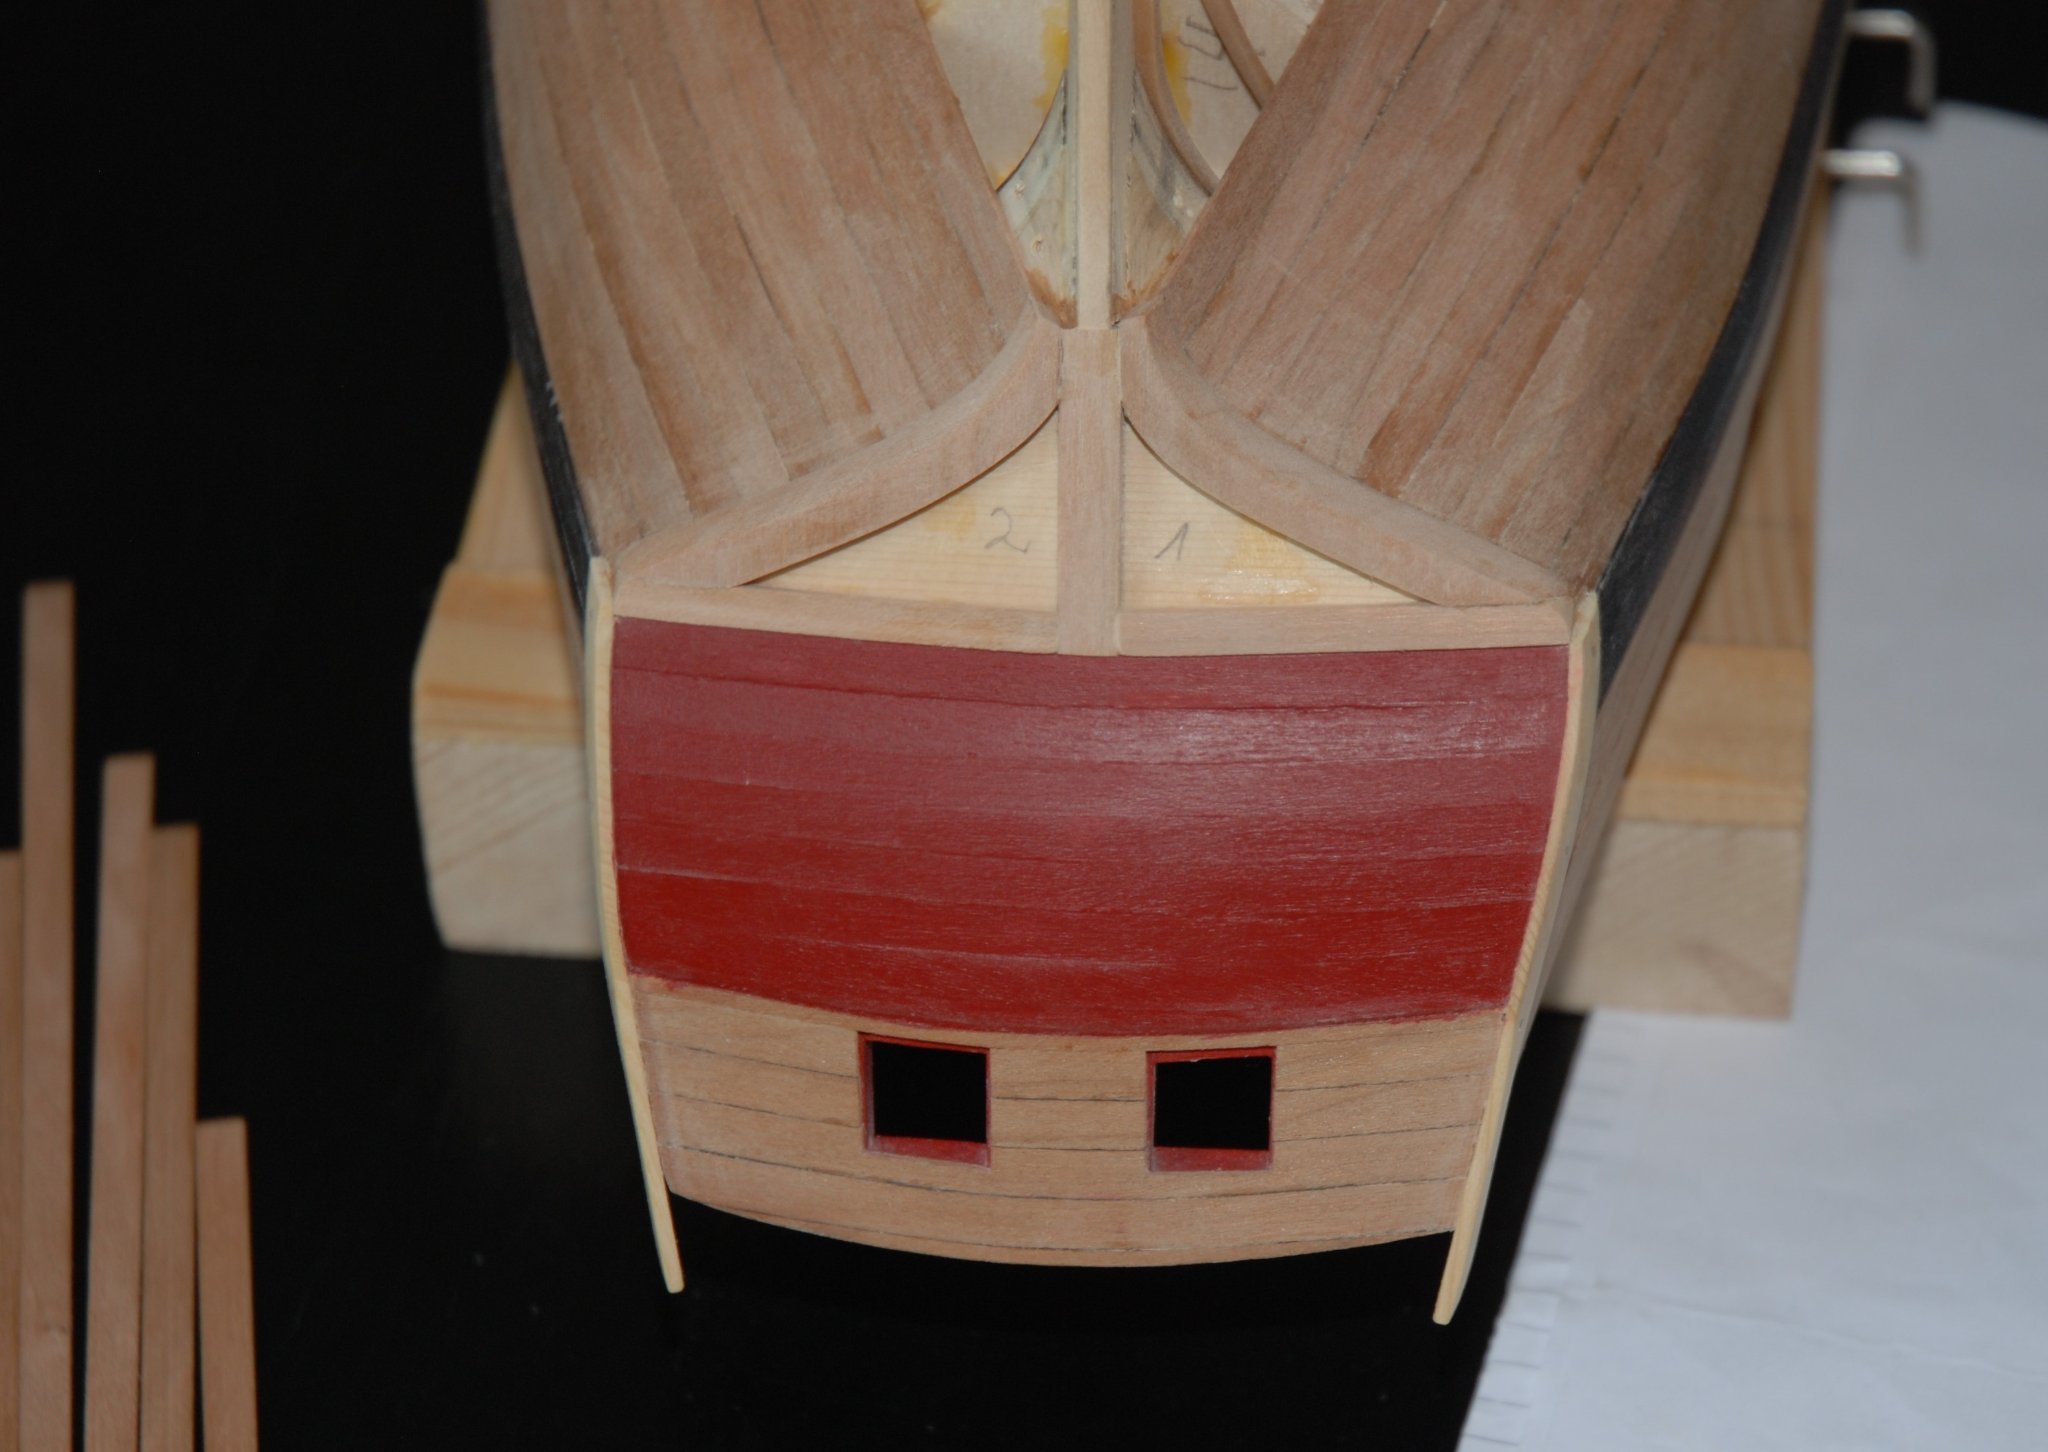
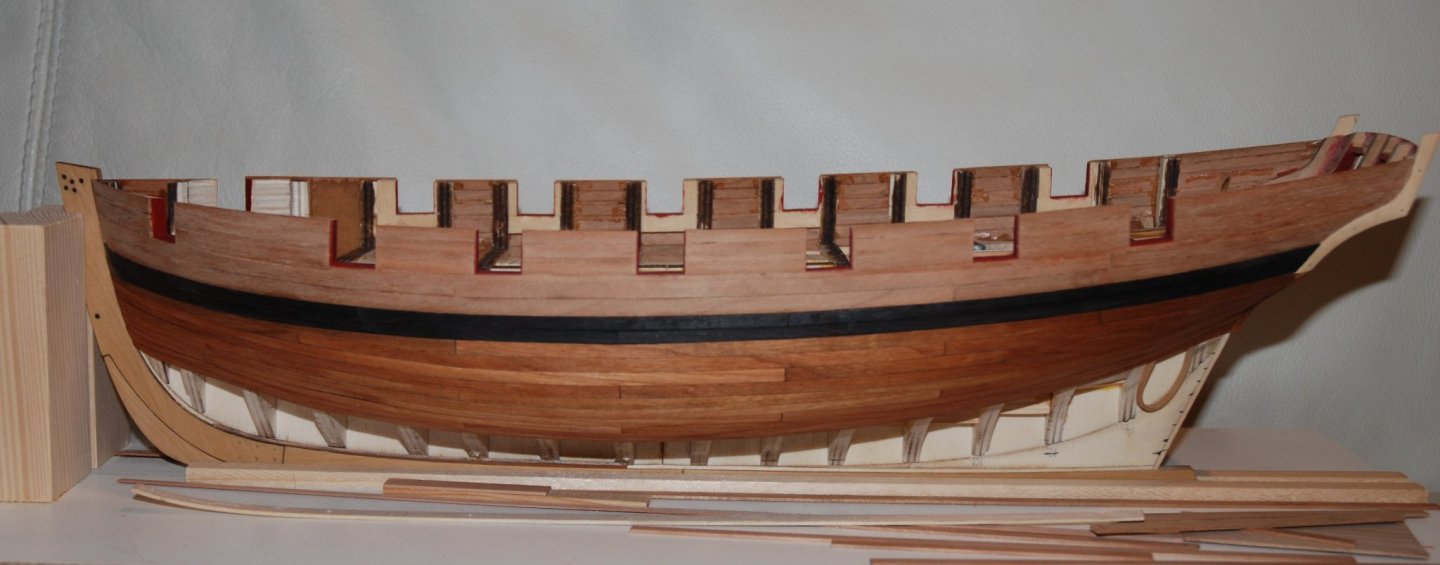
Thanks Paul, Blue Ensign, Glenn, CaptainHook for your interest in this build log and thanks to all the 'Likes'. I realize that time is running out, but since I only work with wood glue, it takes some time to plank the first belt of the hull. Indeed, I don't know why, but using cyanolyte is impossible for me. It glues everything (including my fingers) except what should be... 😏 This step ended with the work on the square tuck. I was a bit afraid of its construction, but finally by following the method described in the manual, everything went pretty well. I was even surprised how logically everything fell into place. Everything is wonderfully thought out and described. For the vertical planking, I chose to use the same width of planks as those used for the hull, that is to say a width of 3/16". A light sanding and a first coat of teak oil bring out the beauty of the cherry. The part above the wales will be varnished only after the mouldings are glued. For the planking, I followed the method Chuck described for his Winnie frigate: I used an travel iron to shape the planks. Not everything is perfect, but the craft is coming along nicely. I hope to further improve my work method for the second belt. I will now finish lining the second belt and begin planking it. But before I do, I still need to install the lighting for both rooms. Luckily, the ordered lighting material has arrived...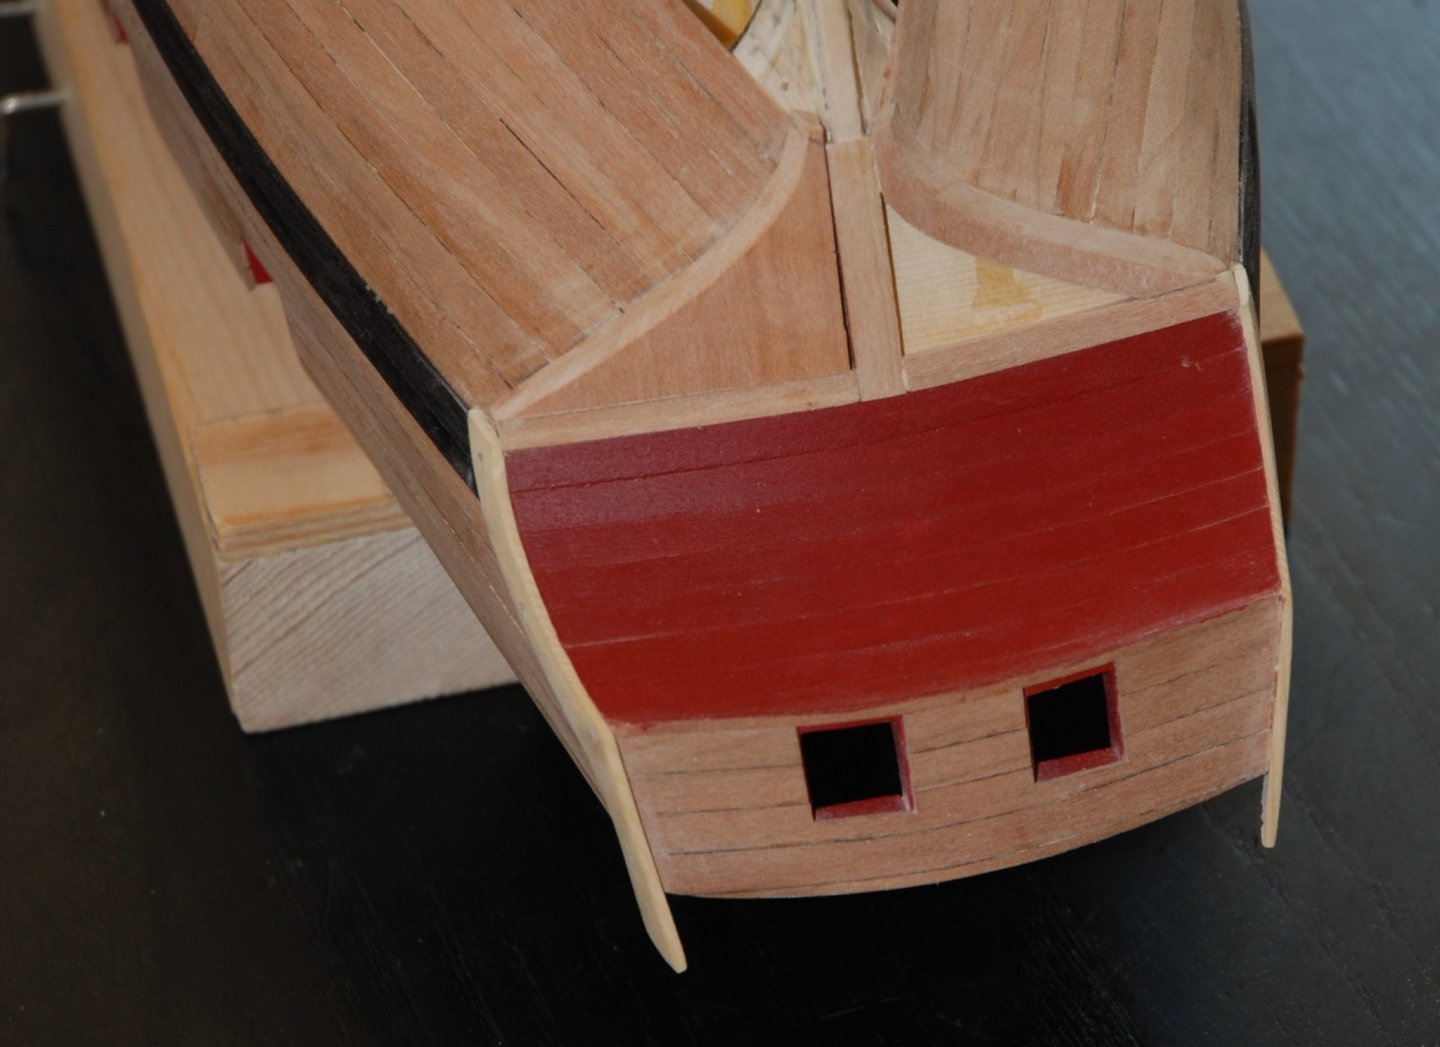


-
What a wonderful paint job on these friezes and lower counter. Can't wait to see what happens next.
-
What a wonderful job on this Dory. Always a pleasure to be able to follow your precise and careful work. And the detail and care in the presentation turns a simple model at first glance into a little masterpiece. Bravo and thank you!
- 70 replies
-
- 3
-
-
- Lowell Grand Banks Dory
- Finished
- (and 1 more)
-
What a wonderful model! It was a pleasure to follow its build. A big congratulations!
- 263 replies
-
- 1
-

-
- Medway Longboat
- Syren Ship Model Company
- (and 1 more)
-
Great work. As always, it's perfection. For the application of the airbrush paint, is it diluted with water or with a specific product?
- 607 replies
-
- 2
-
-
- winchelsea
- Syren Ship Model Company
- (and 1 more)
-
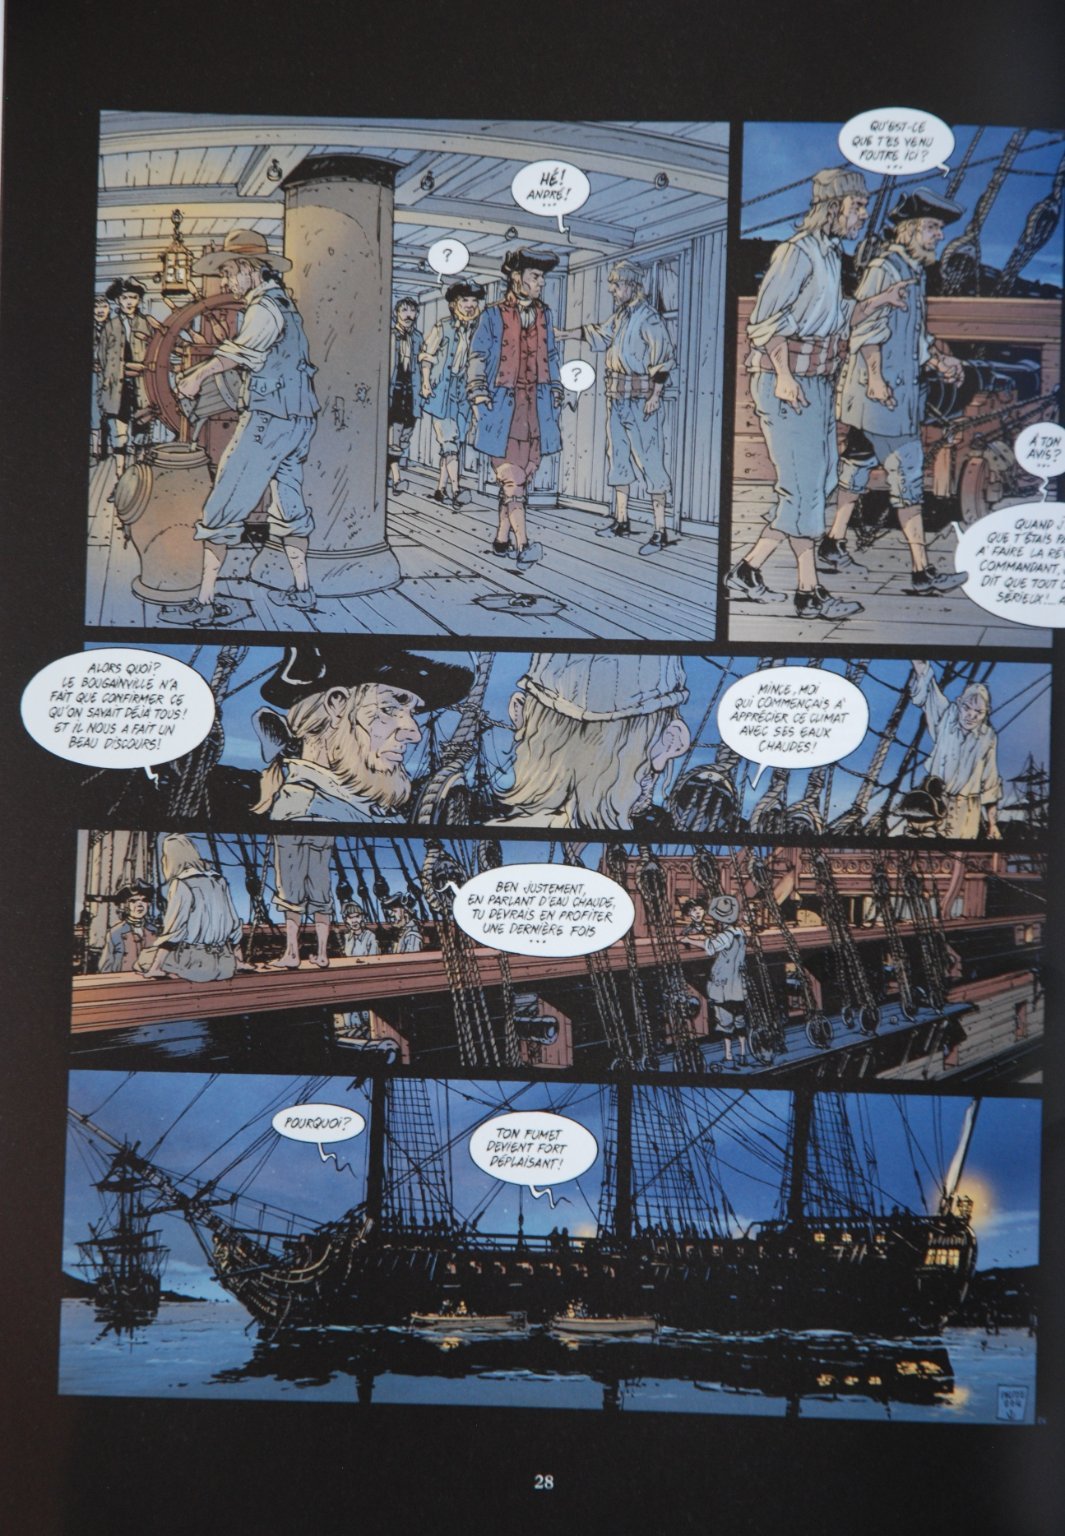
What a fantastic video and beautiful work on these guns. Rigging the guns looks so simple. I never would have thought to just prepare the seizing by wrapping the sewing thread around a finger. I will definitely adopt this method for my next rigging job. A video to watch several times and treasure! Thank you for sharing this beautiful work 😄
- 156 replies
-
- 1
-
-
- marisstella
- marisstella model ship kits
- (and 4 more)
-
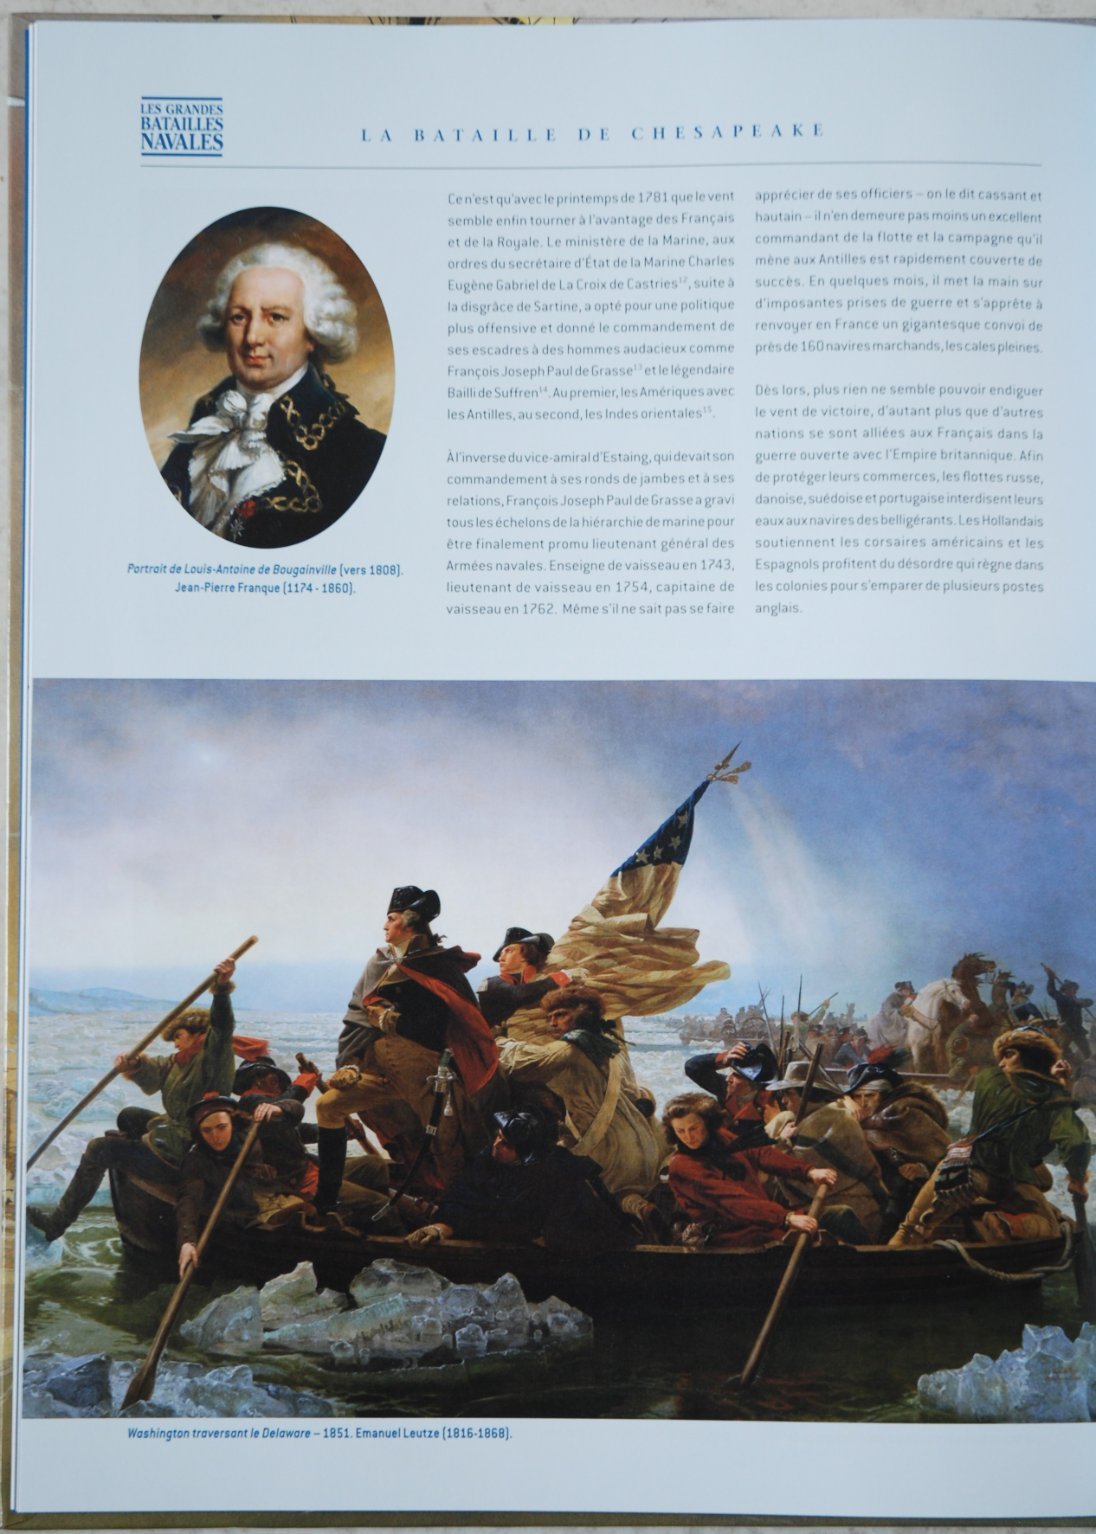
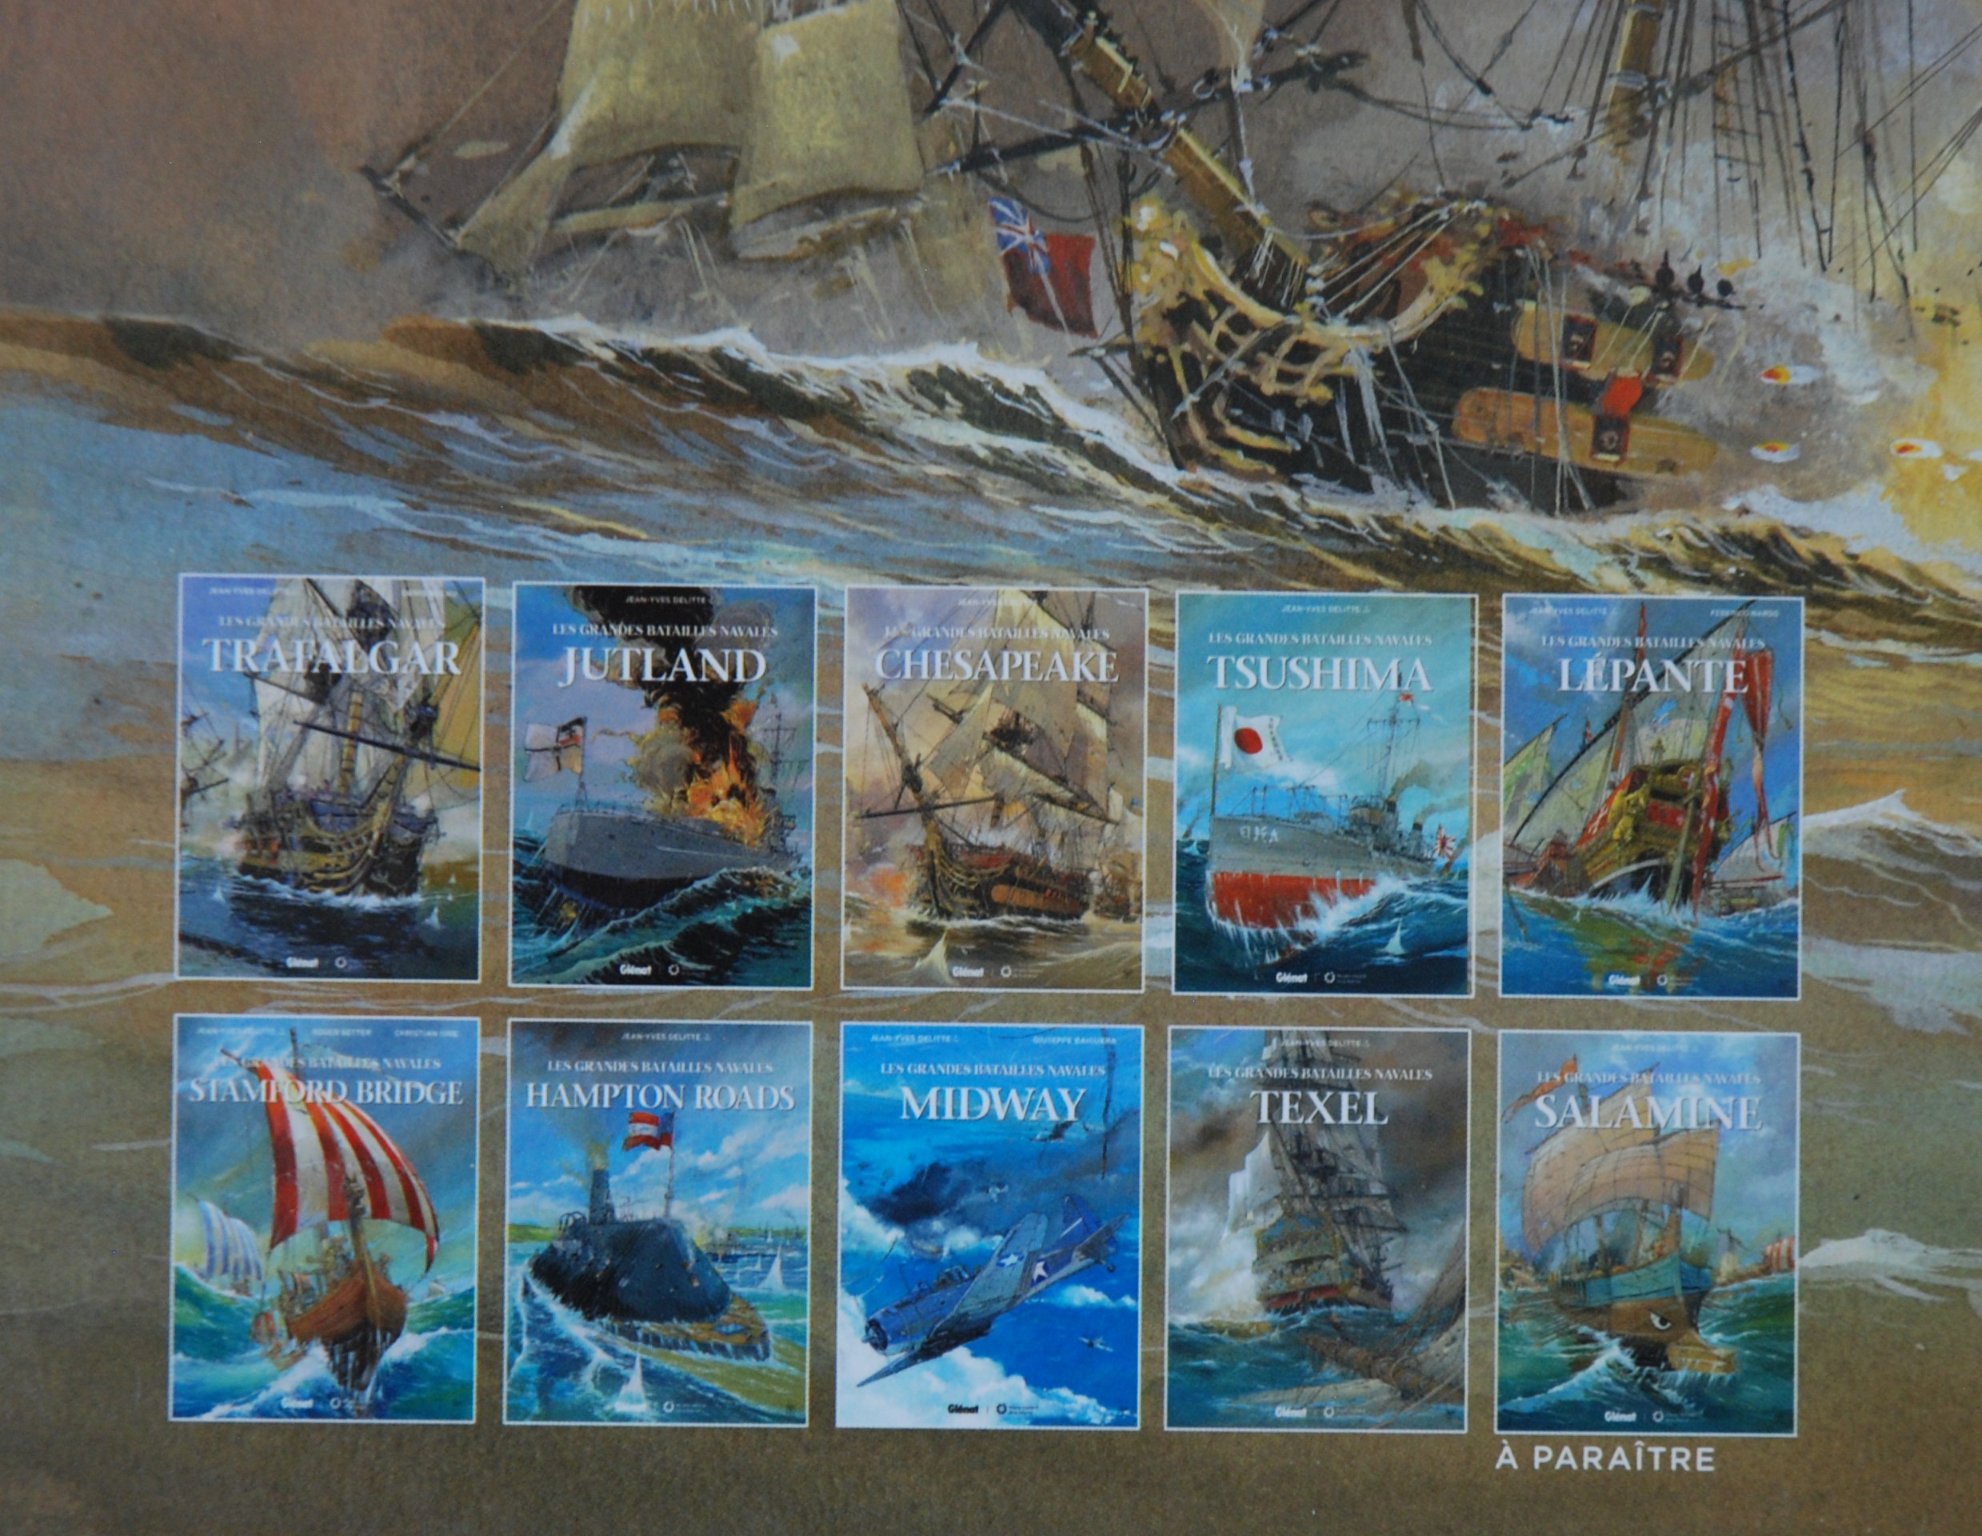
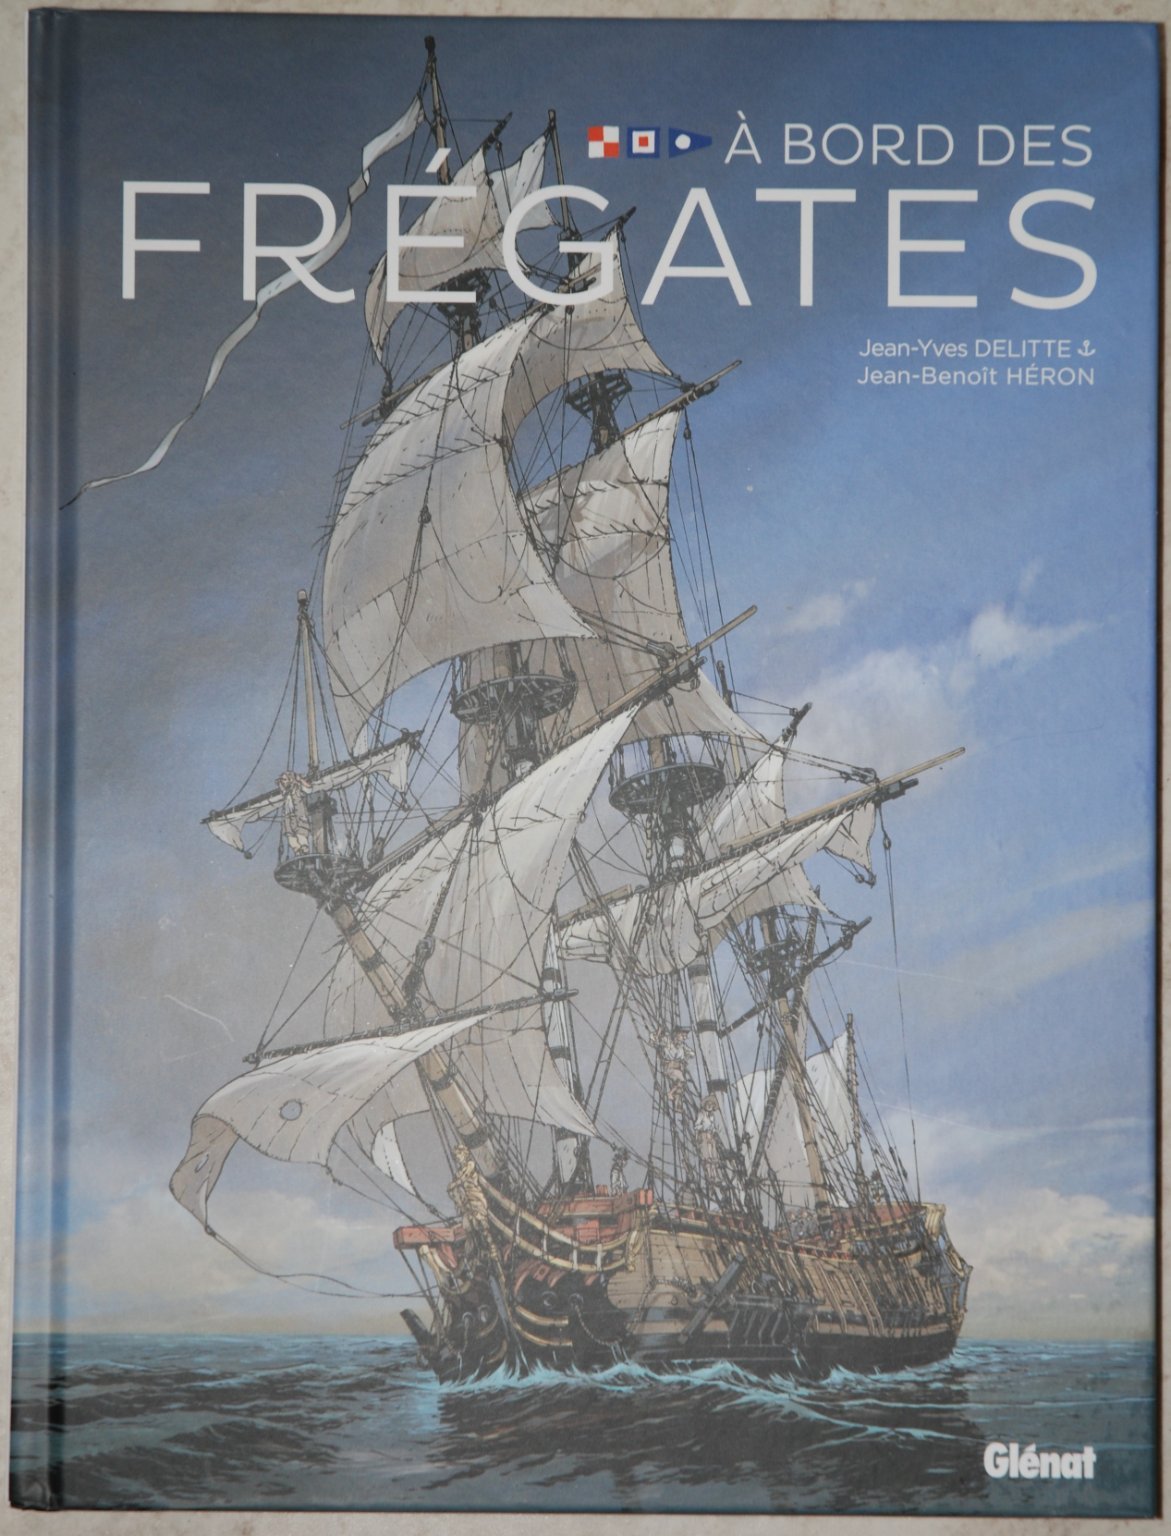
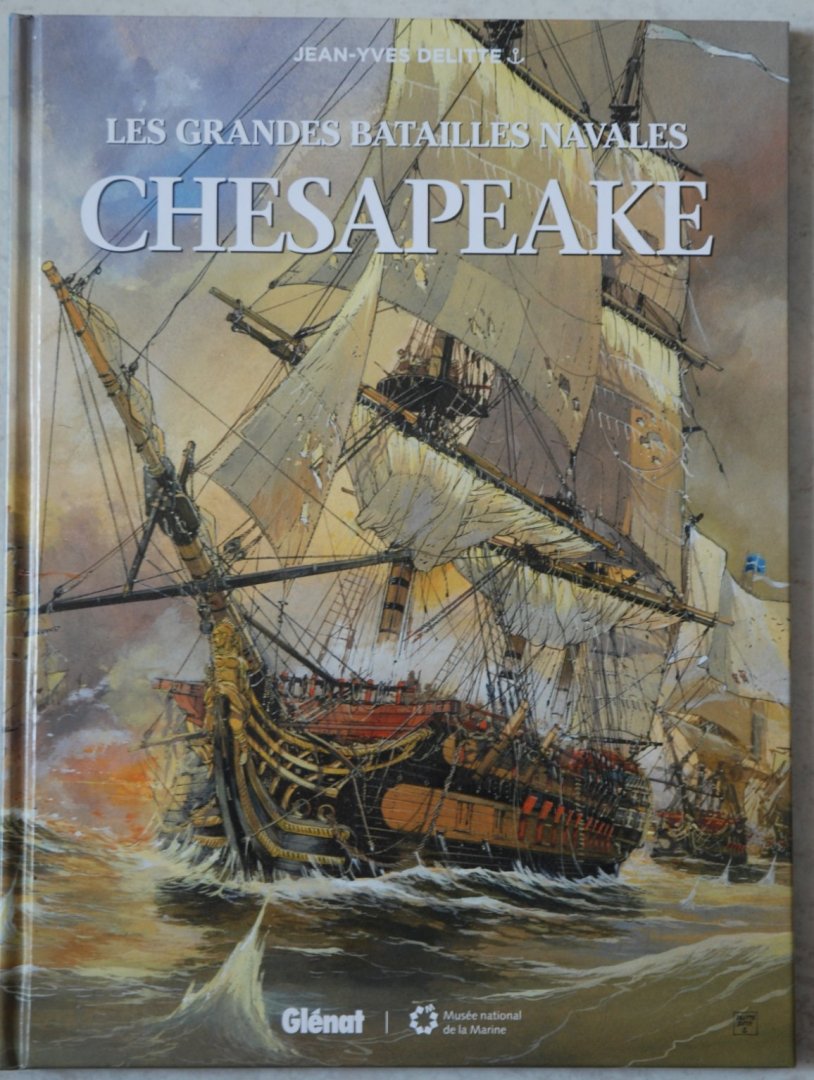
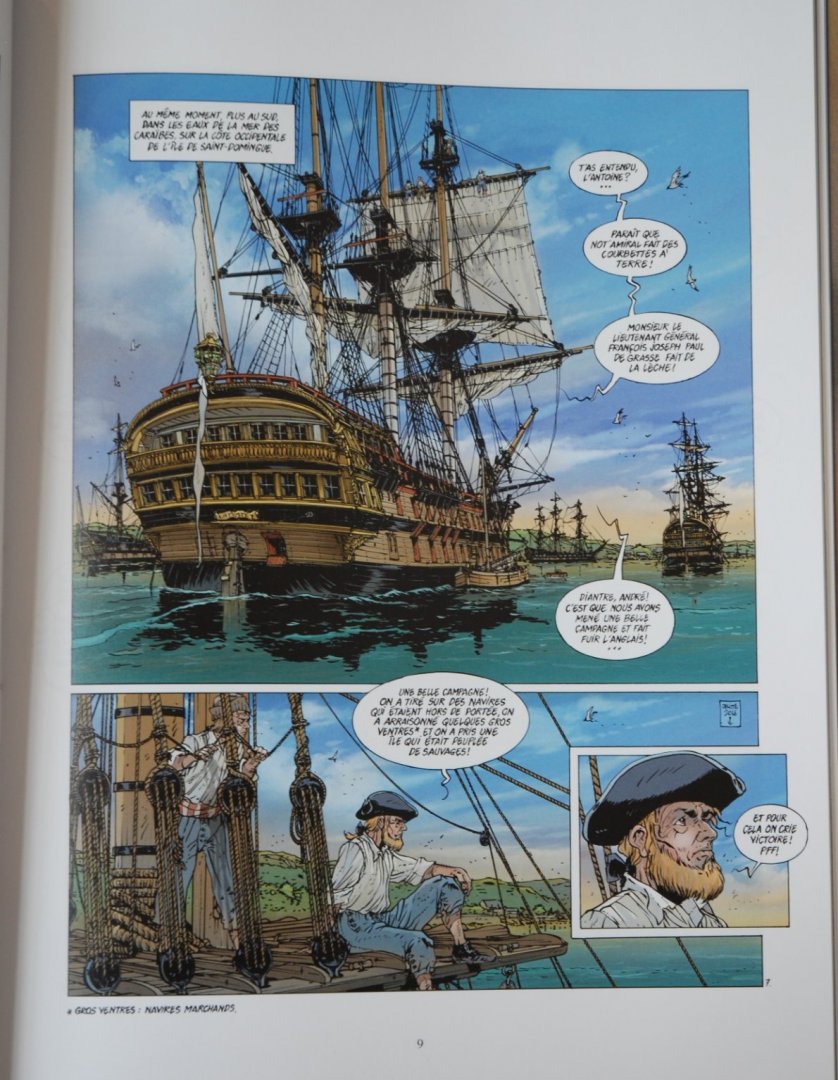
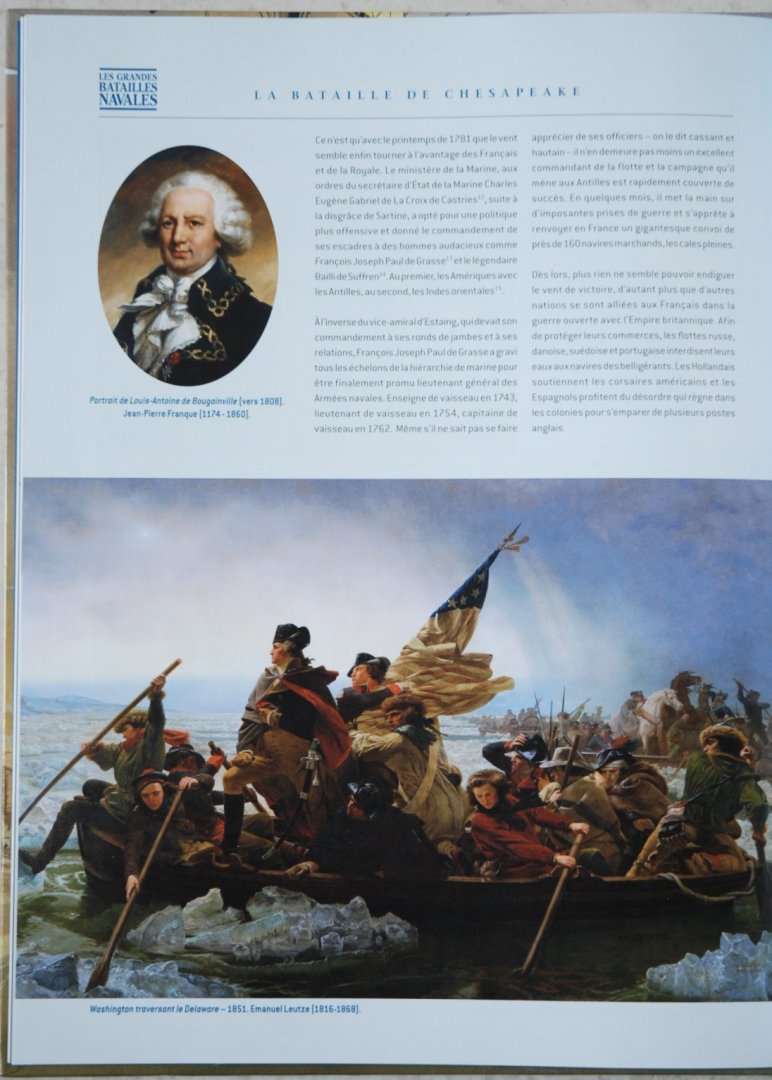
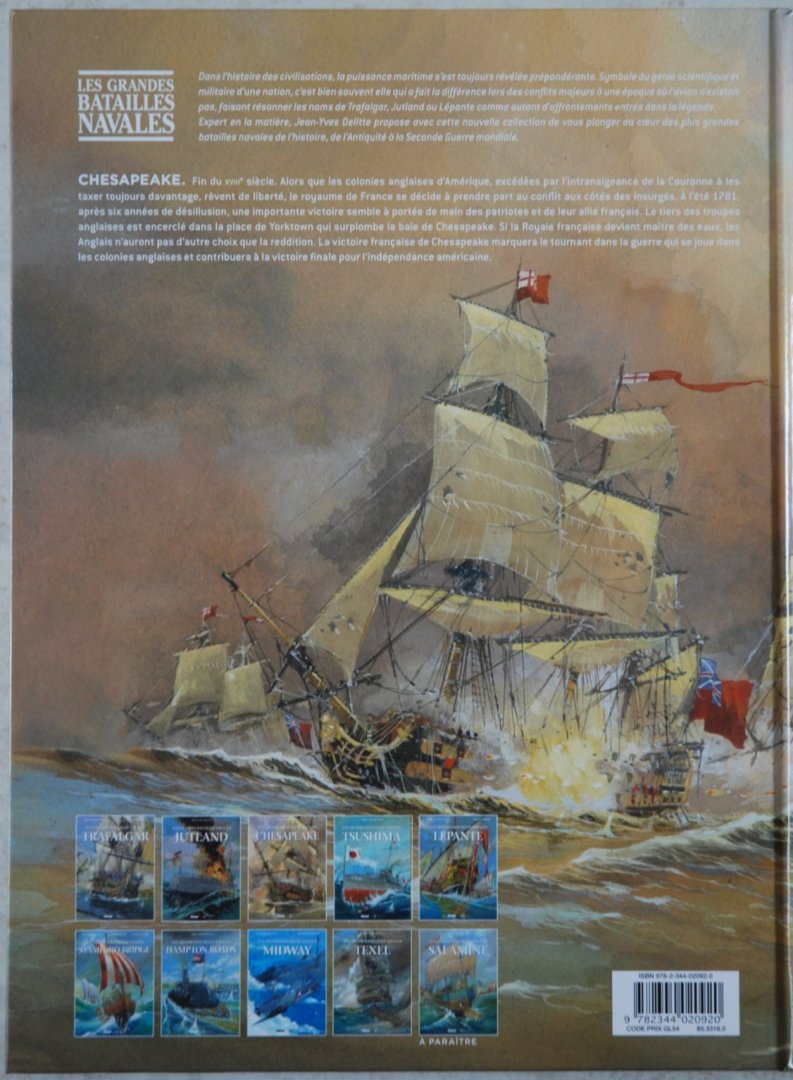
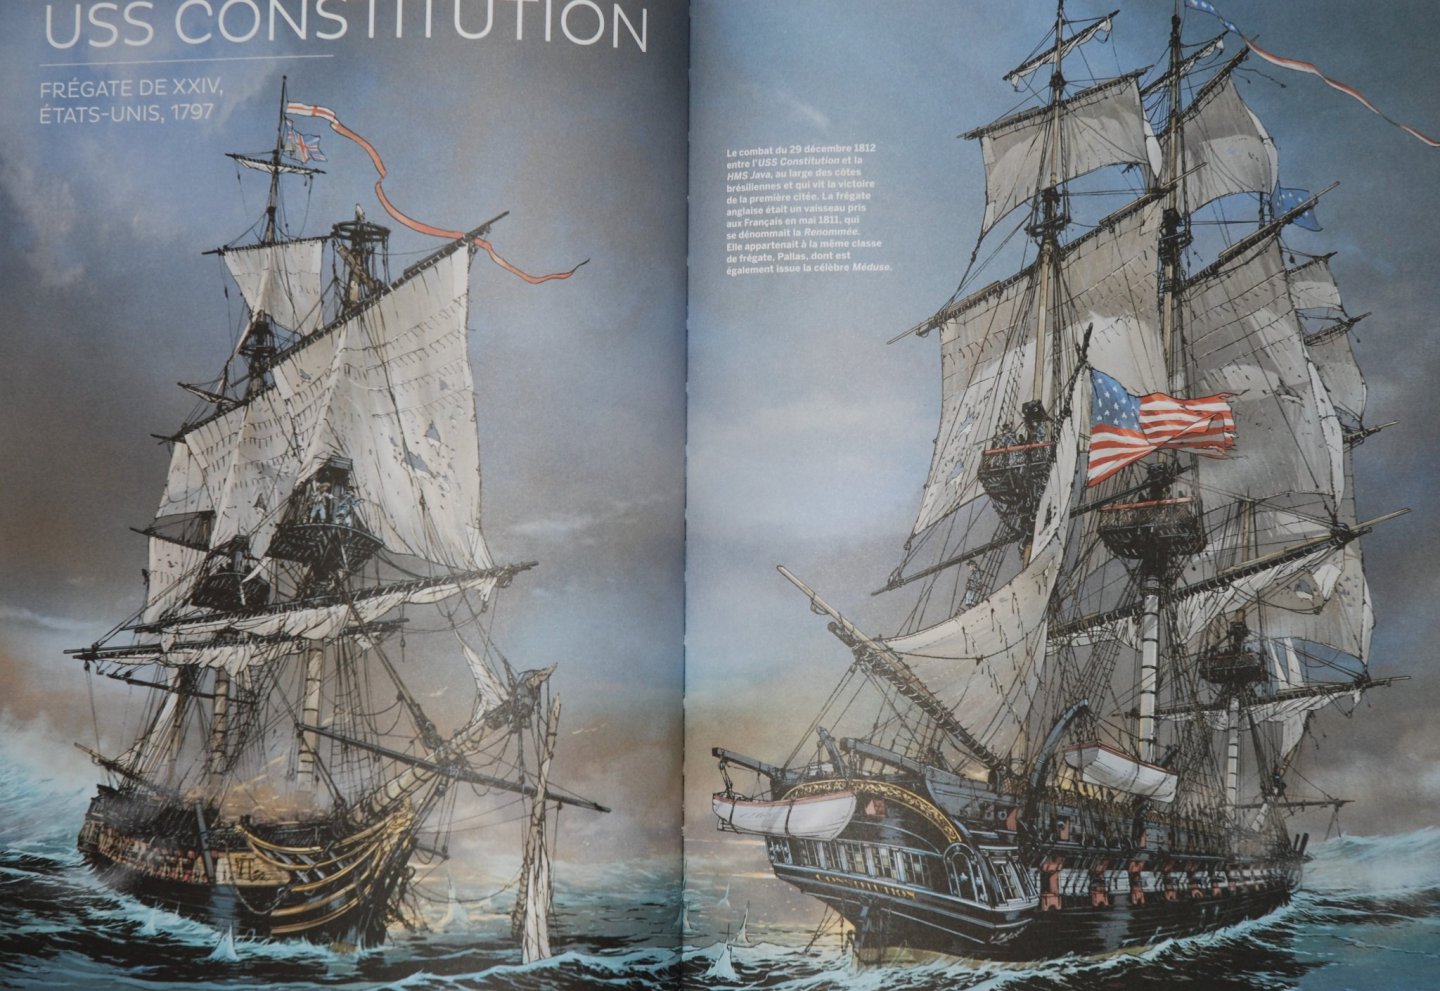
'Chesapeake' by Jean-Yves Delitte Collection 'Les Grandes Batailles navales' Comics ISBN 978-2-344-02092-0 Pages : 48 + an 8-page historical dossier Language: French Published in March 2017 Editions Glénat & Musée national de la Marine Price : 15 euros 50 Collection 'Les Grandes Batailles navales'


-
- 3
-
-
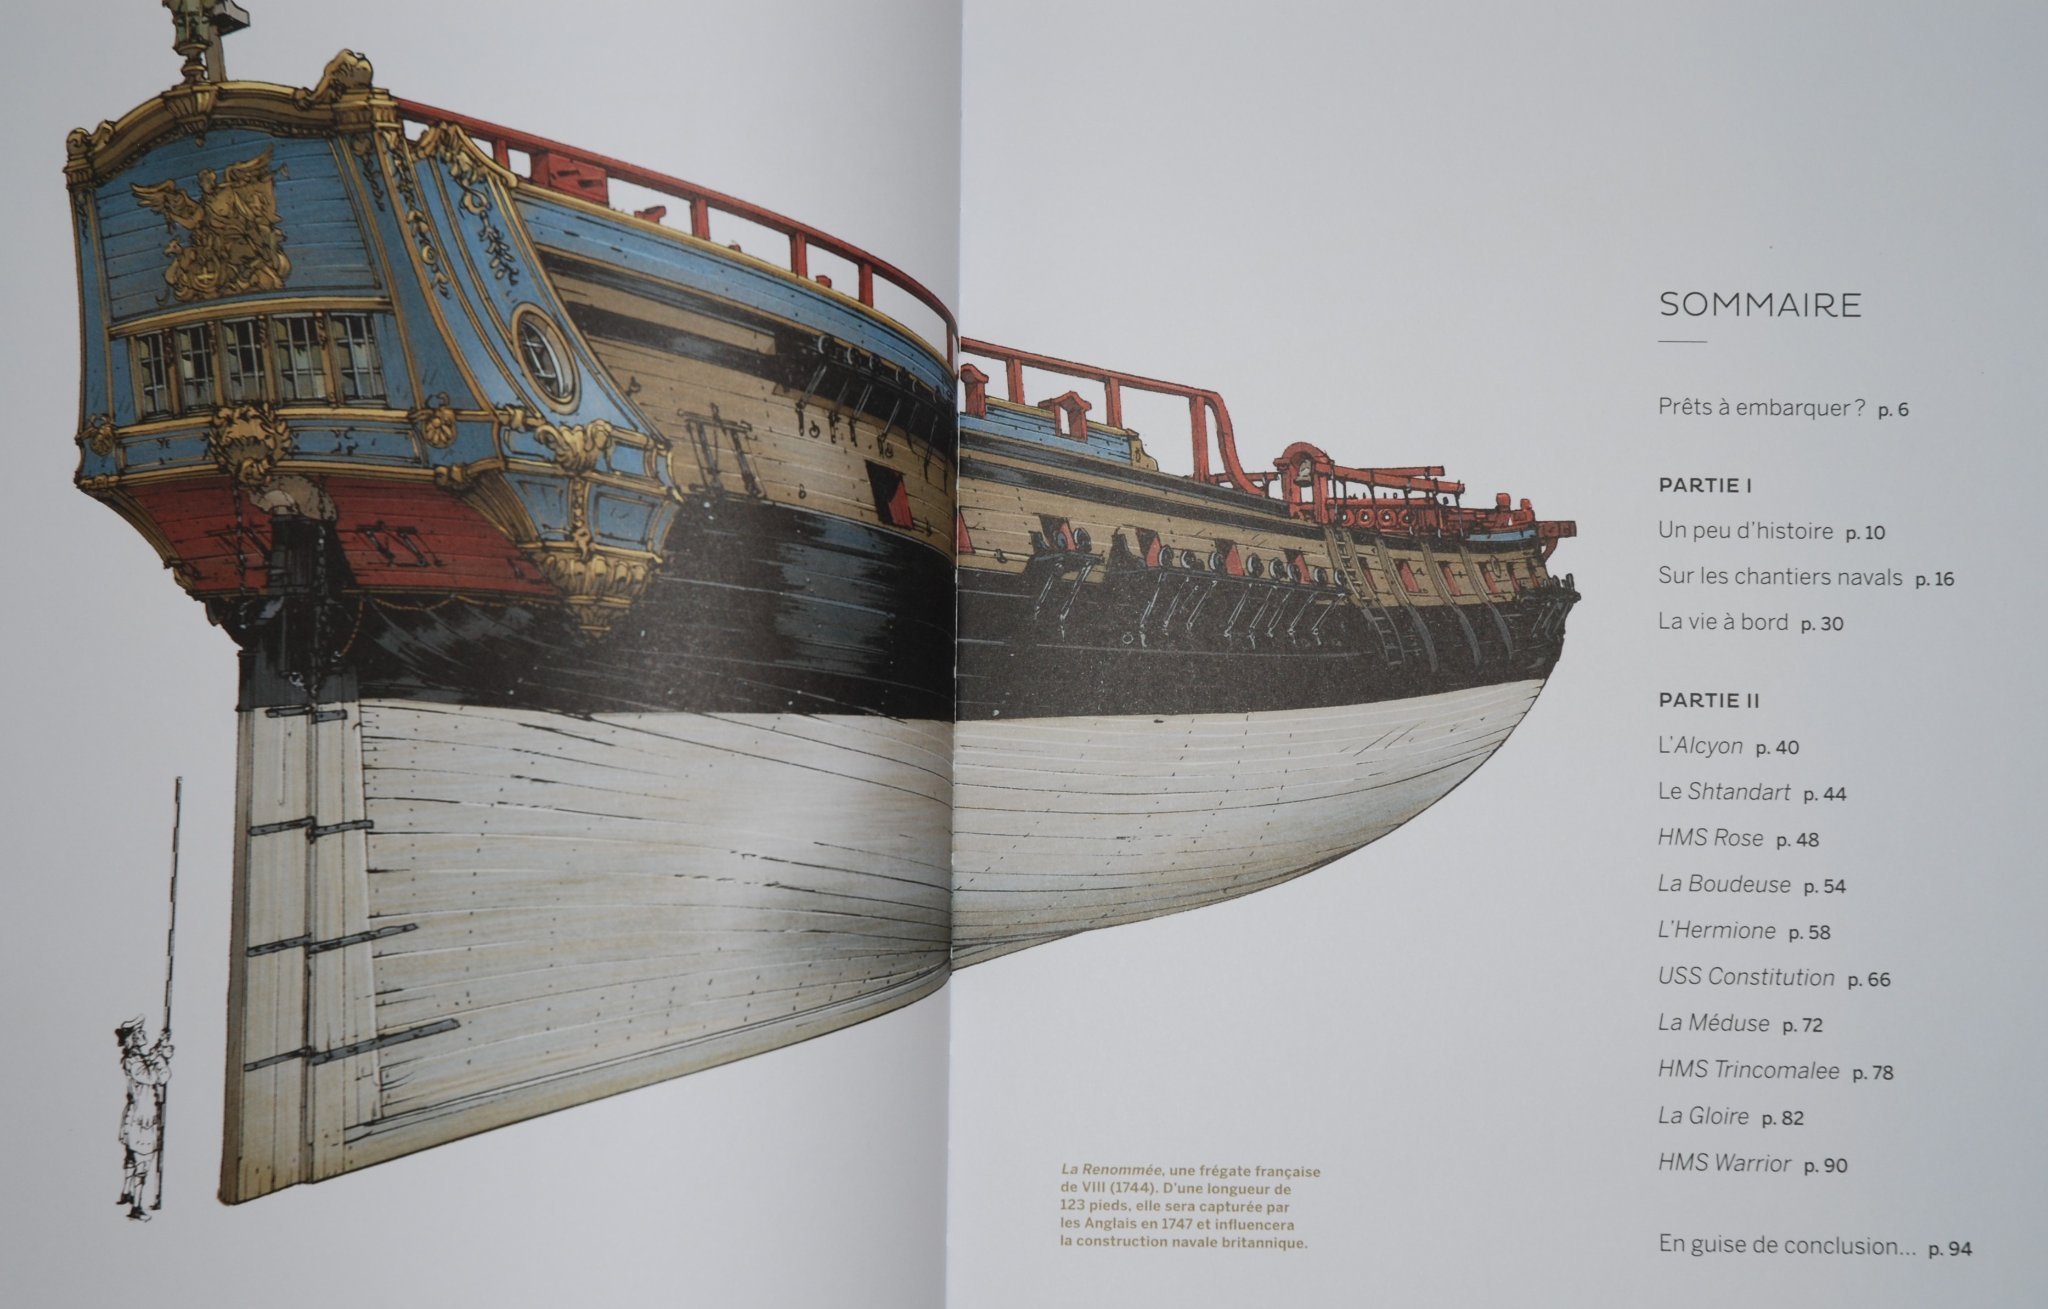
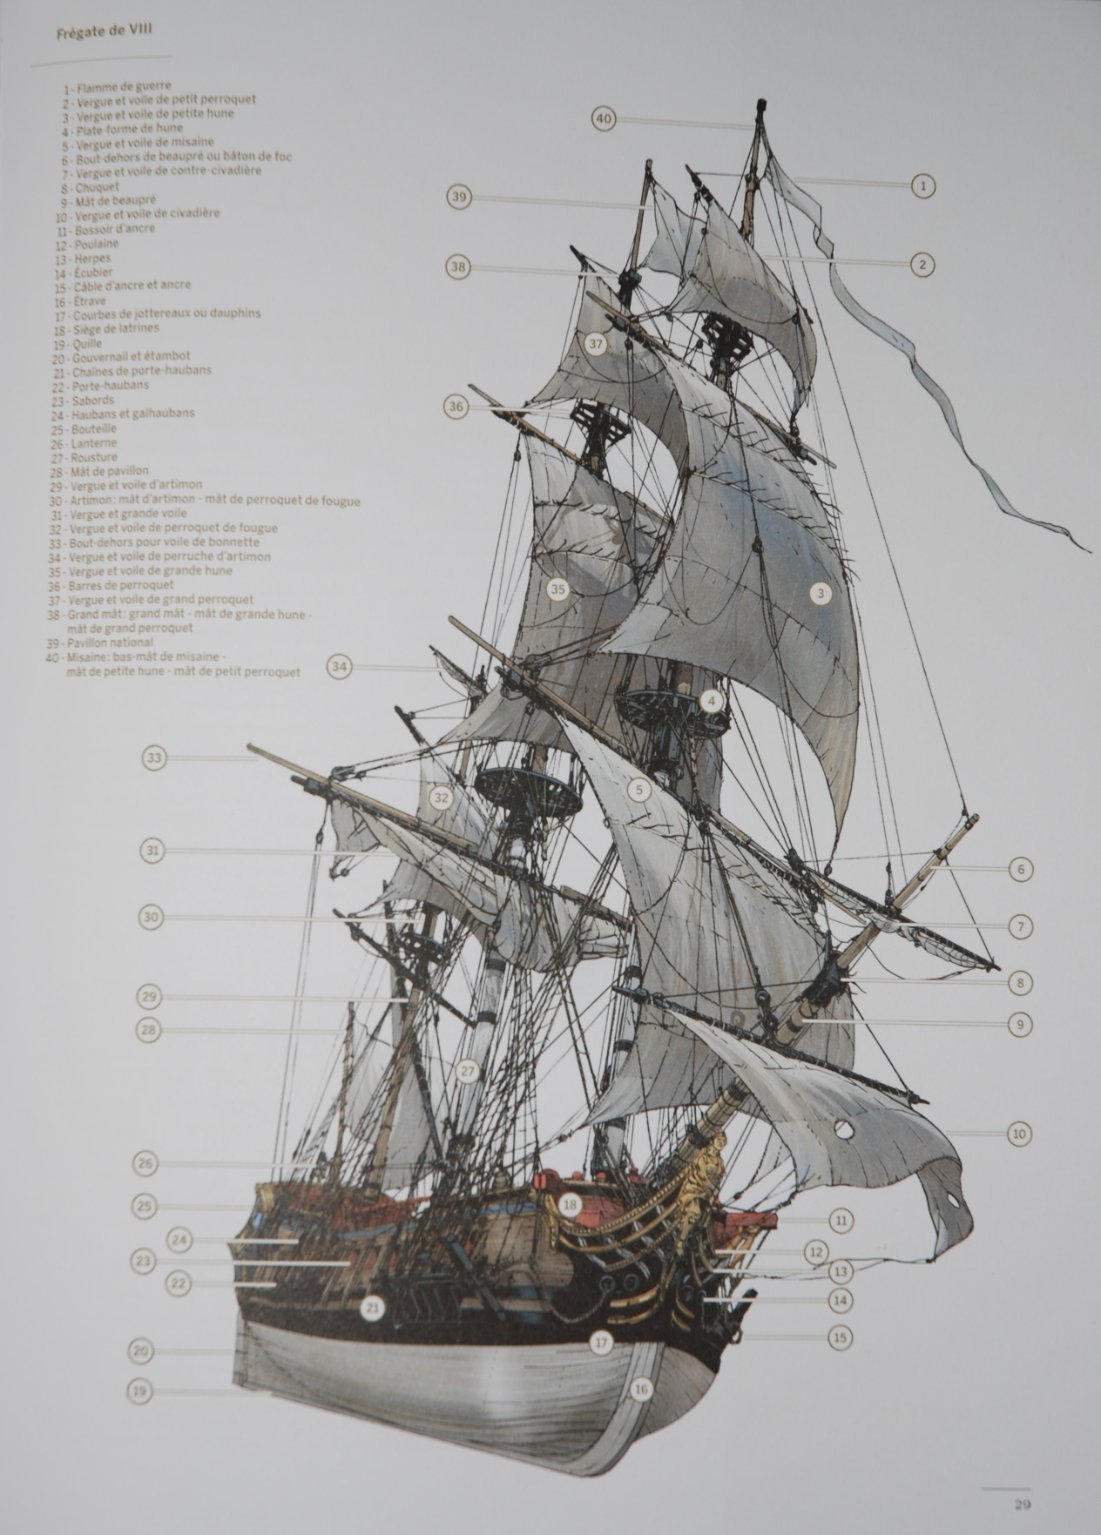
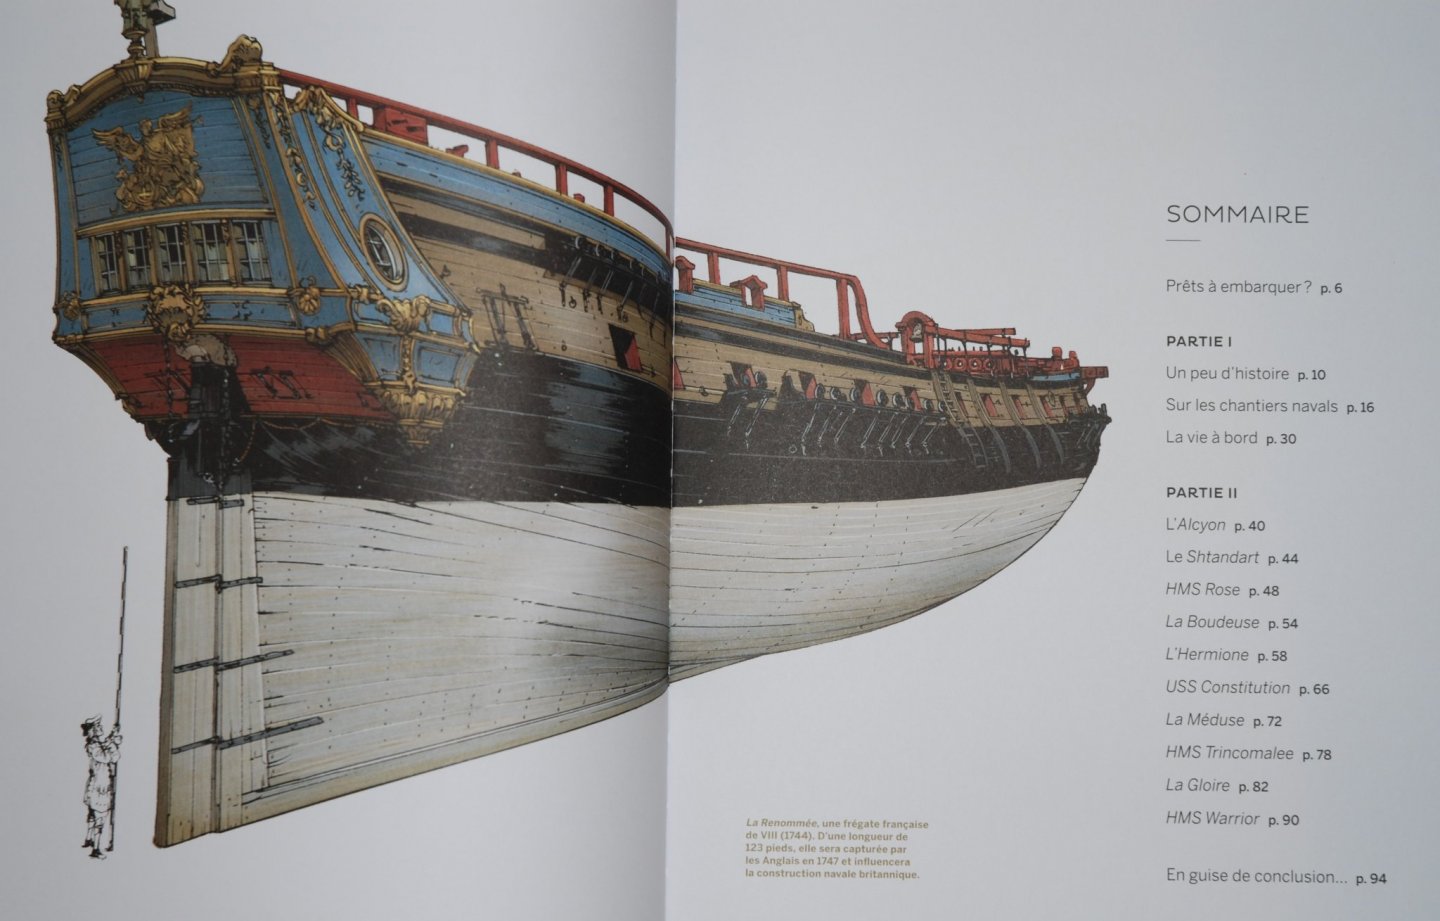
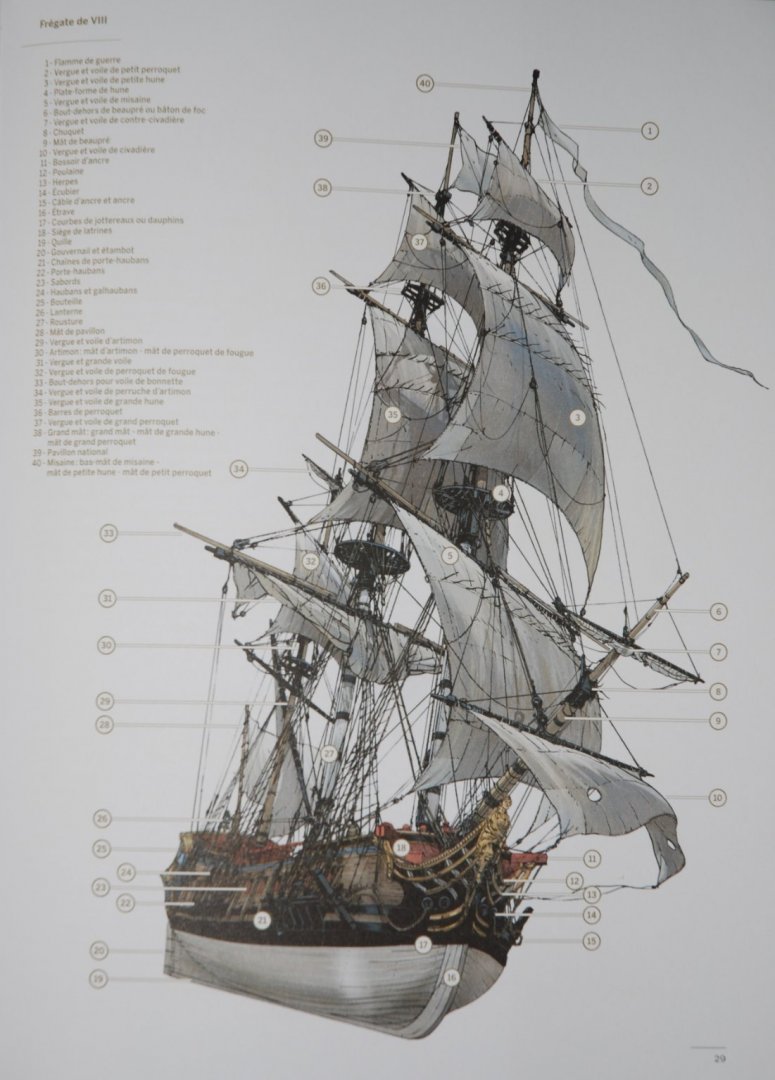
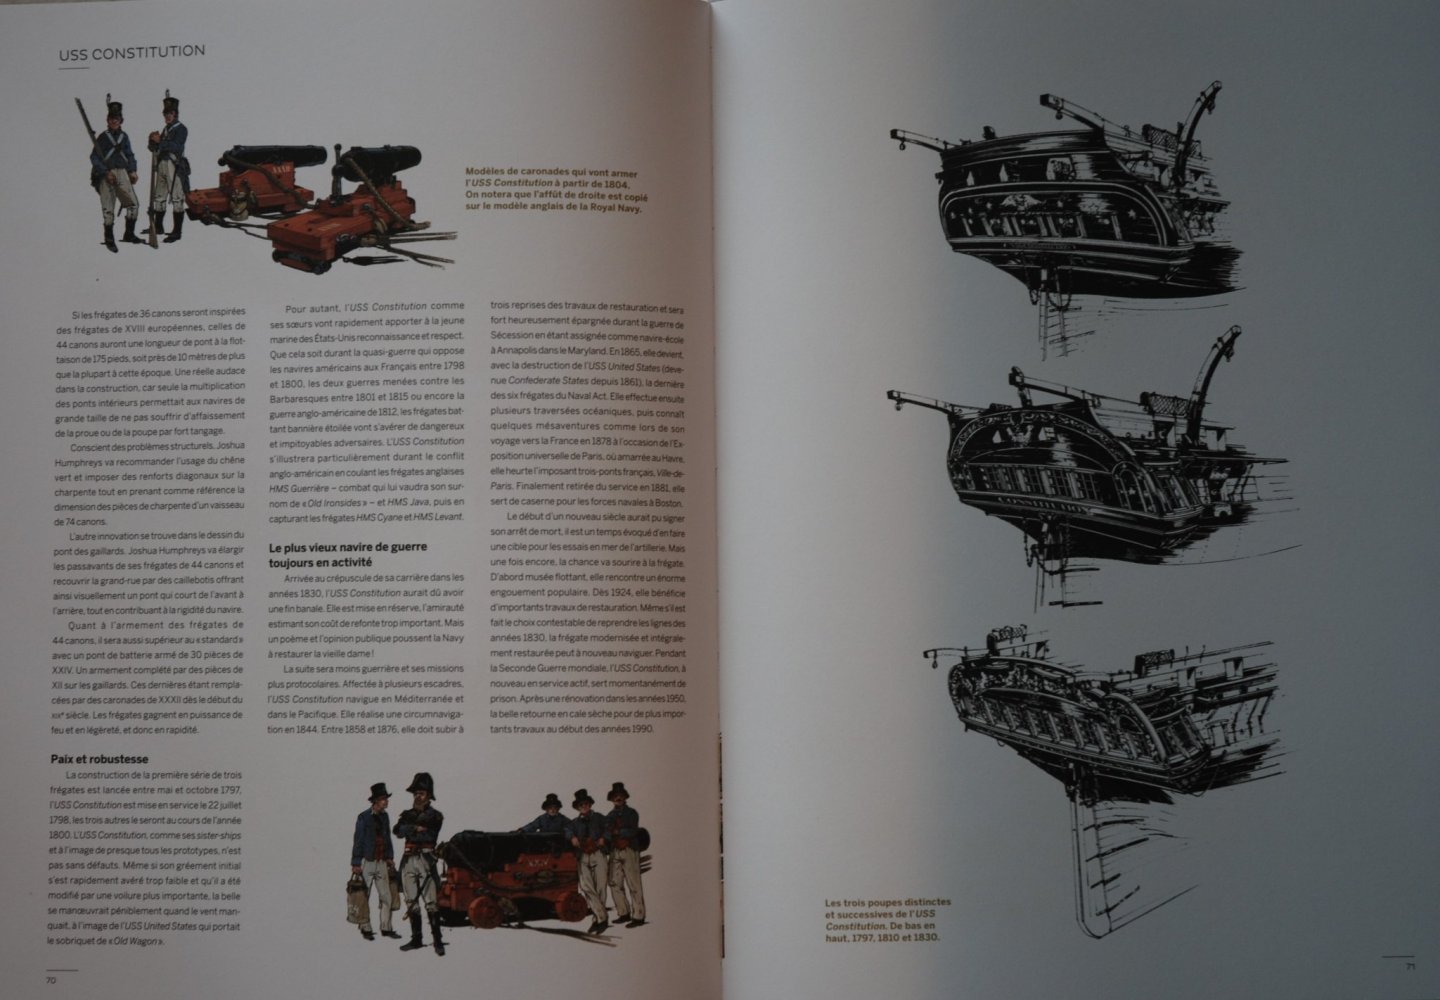
'A bord des Frégates', a book from Jean-Yves Delitte and Jean-Benoît Héron, Collection 'A bord' Published by 'Editions Glénat', April 2020 ISBN 978-2-344-03687-9 A book in 2 parts: A popularization of the history, construction, and life aboard a frigate. and in the second part, a brief presentation of 10 famous frigates. A book of popularization containing very beautiful illustrations. One of the authors, Mr. Jean-Yves Delitte, is an official painter of the French Navy. He is also the author of real maritime frescoes in comics, with his series 'Black Crow' or his tetralogy 'U-Boot'. He also told the story of the prestigious 'Belem'. He also directs the collection 'Les Grandes Batailles navales' in which he retraces with an undeniable talent the maritime history from Antiquity to our days. Unfortunately only in French language Prix : 25 euros https://www.glenat.com

- 1 reply
-
- 5
-
-
A great new finished model, Bob. Great job on this longboat and the Winchelsea is going the same way!
- 78 replies
-
- 1
-
-
- medway longboat
- Syren Ship Model Company
- (and 1 more)
-
This longboat is a little gem, Ryland! What a wonderful work that fully honors the quality of this superb kit.
- 263 replies
-
- 1
-
-
- Medway Longboat
- Syren Ship Model Company
- (and 1 more)
-
Very nice realization, Bob! This deck is really starting to look great. This frigate will be superb.
-
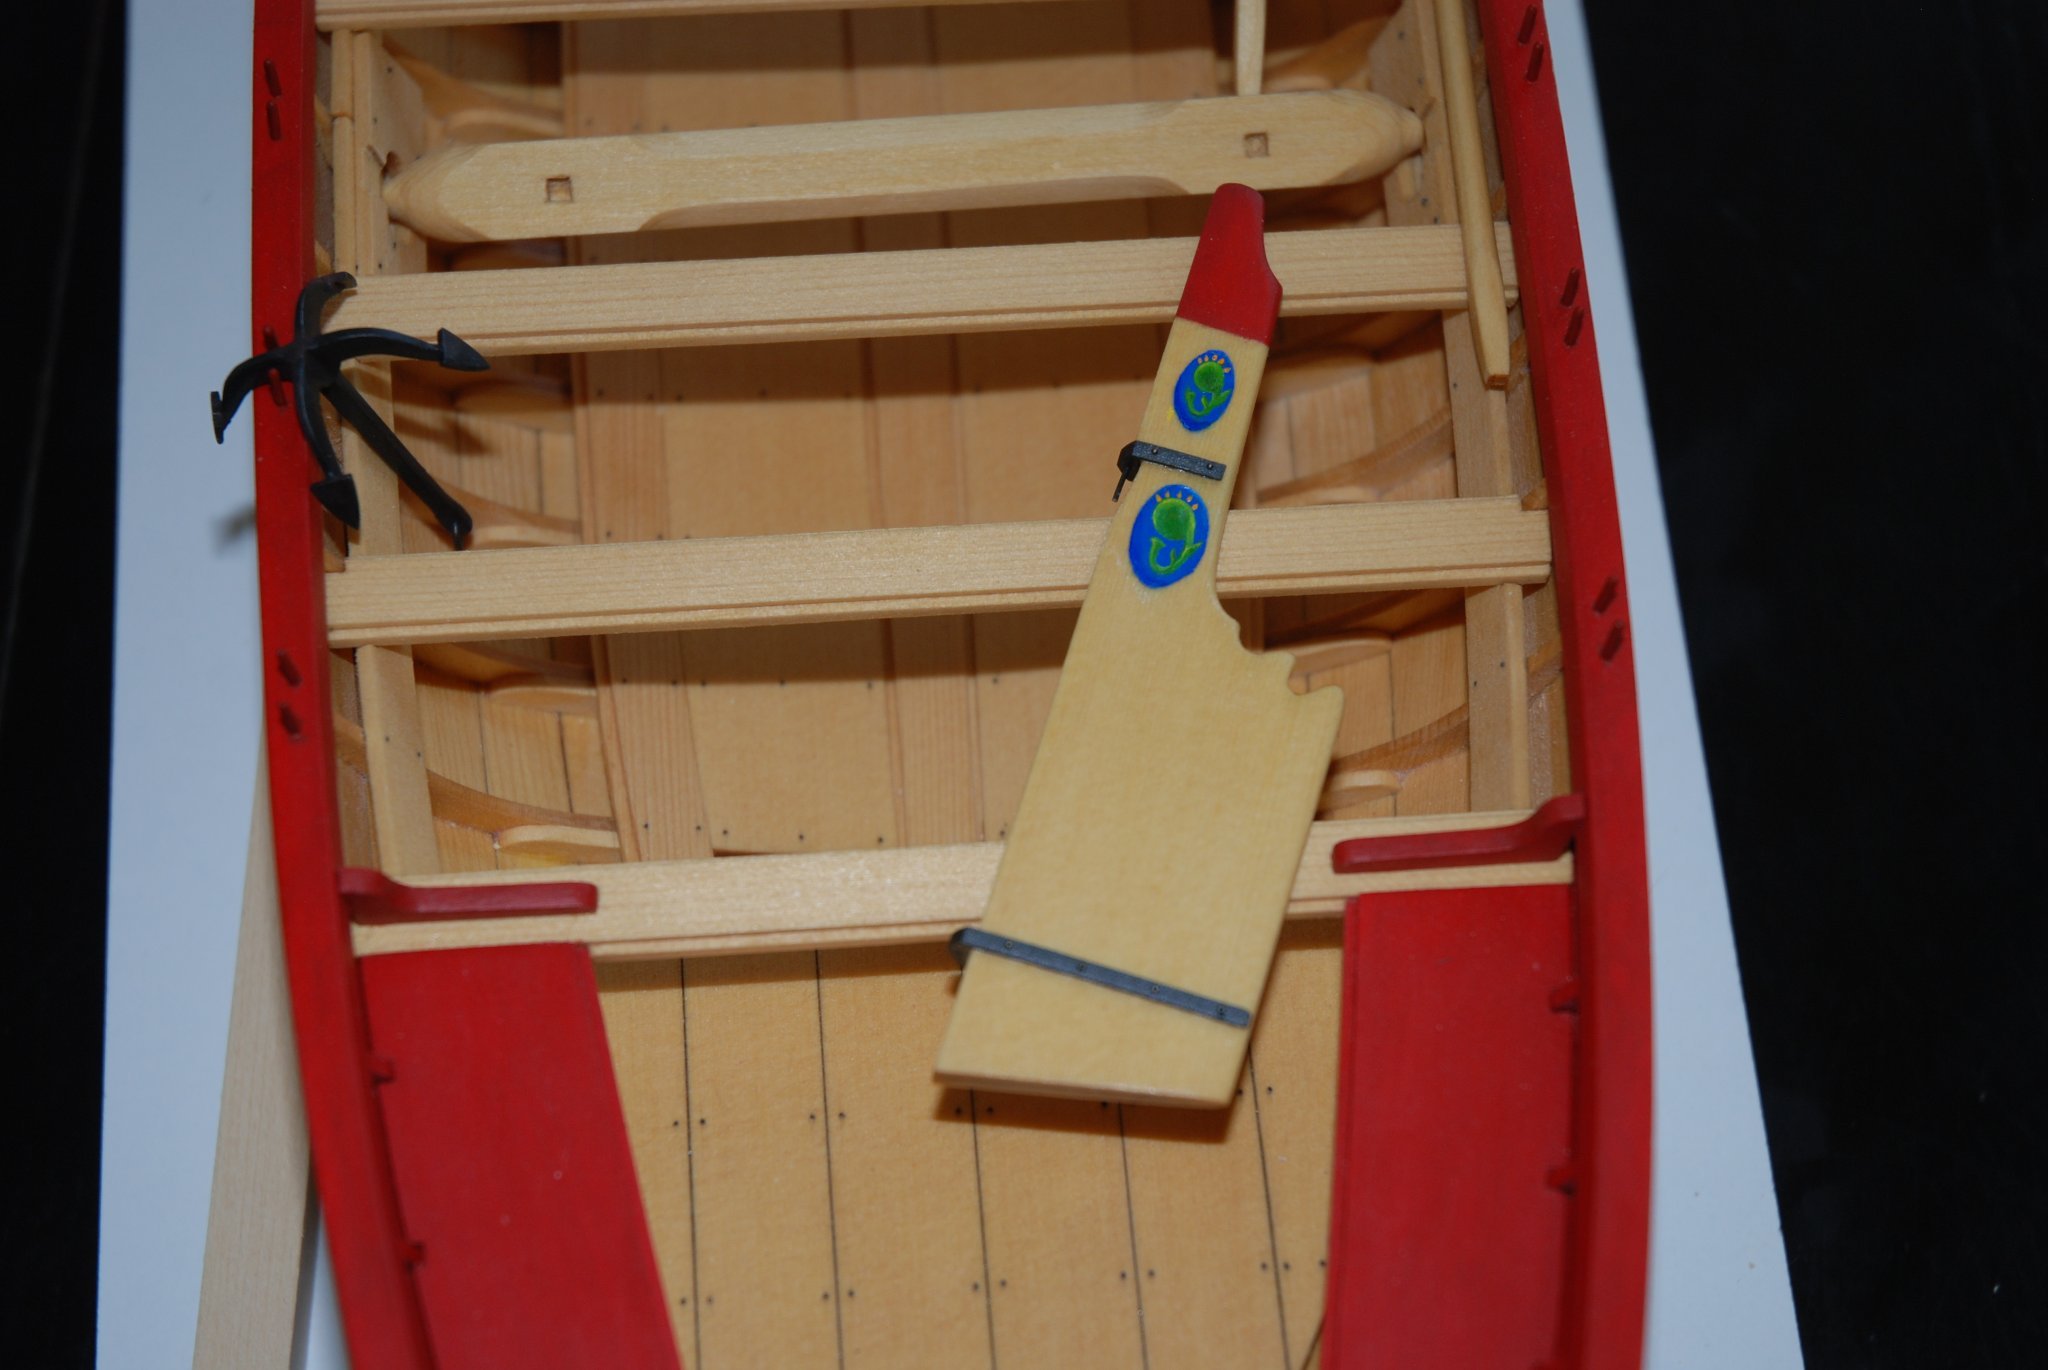
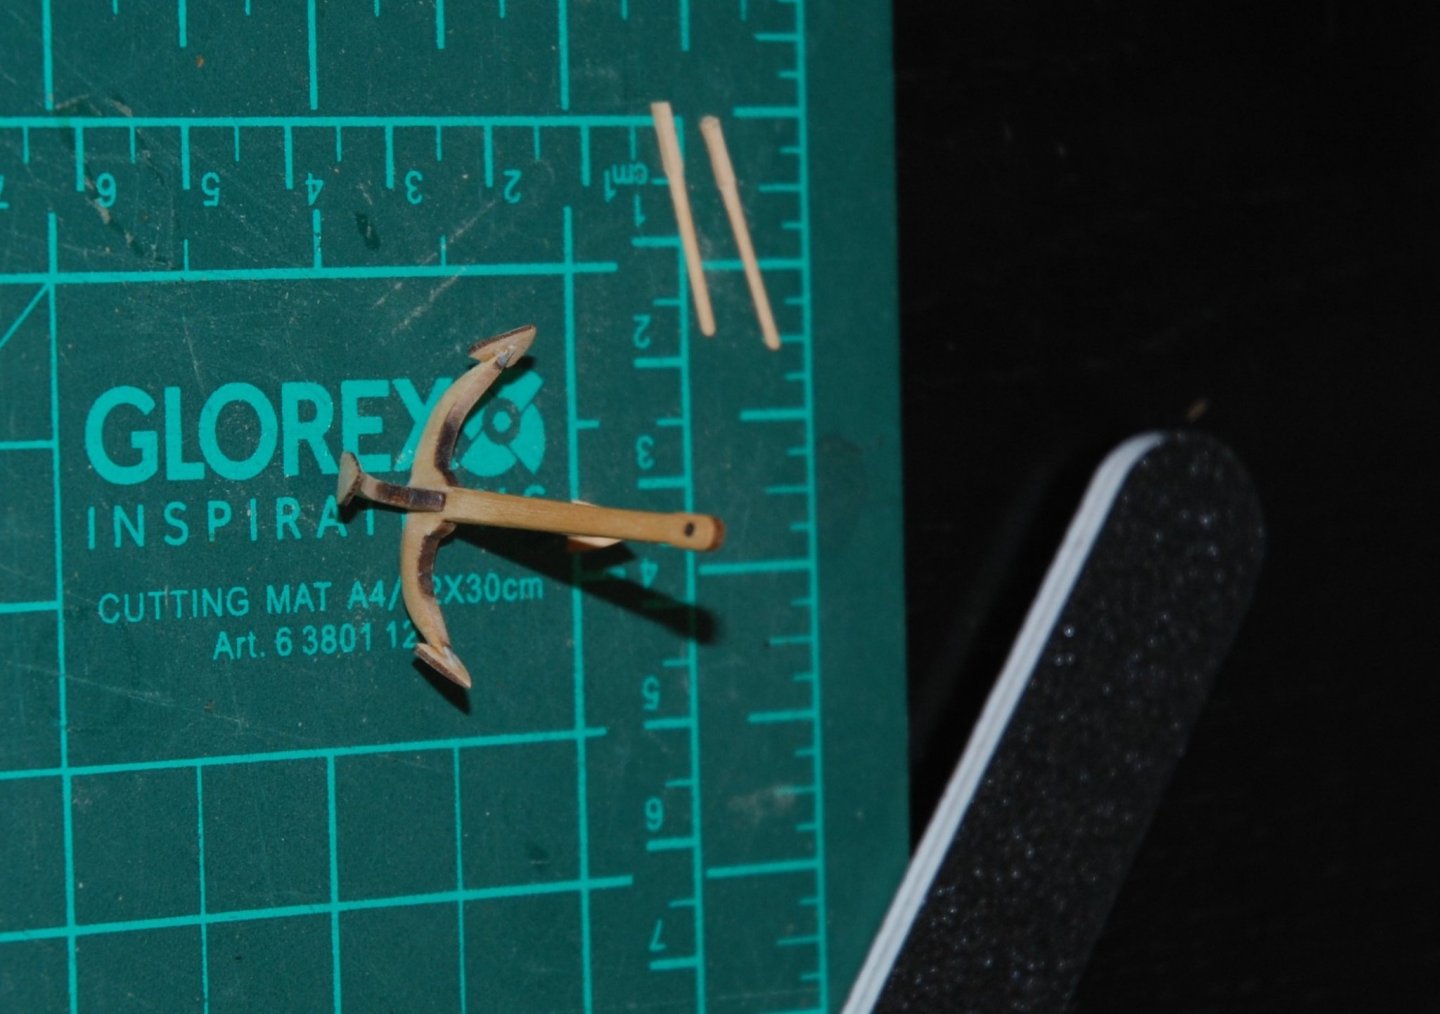
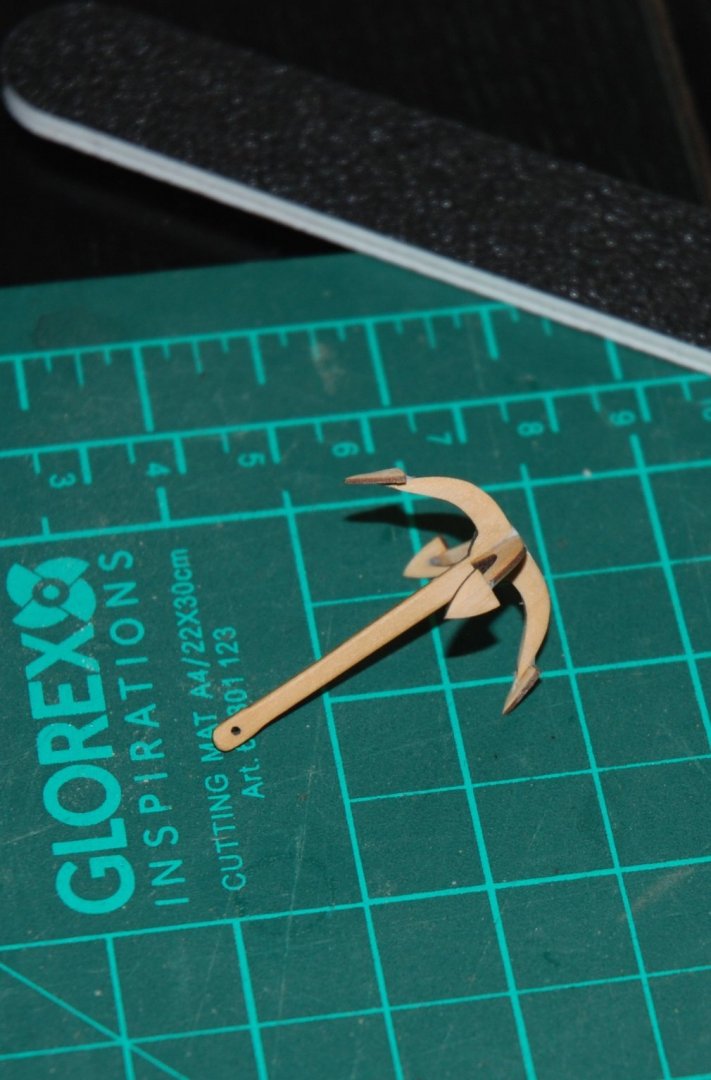
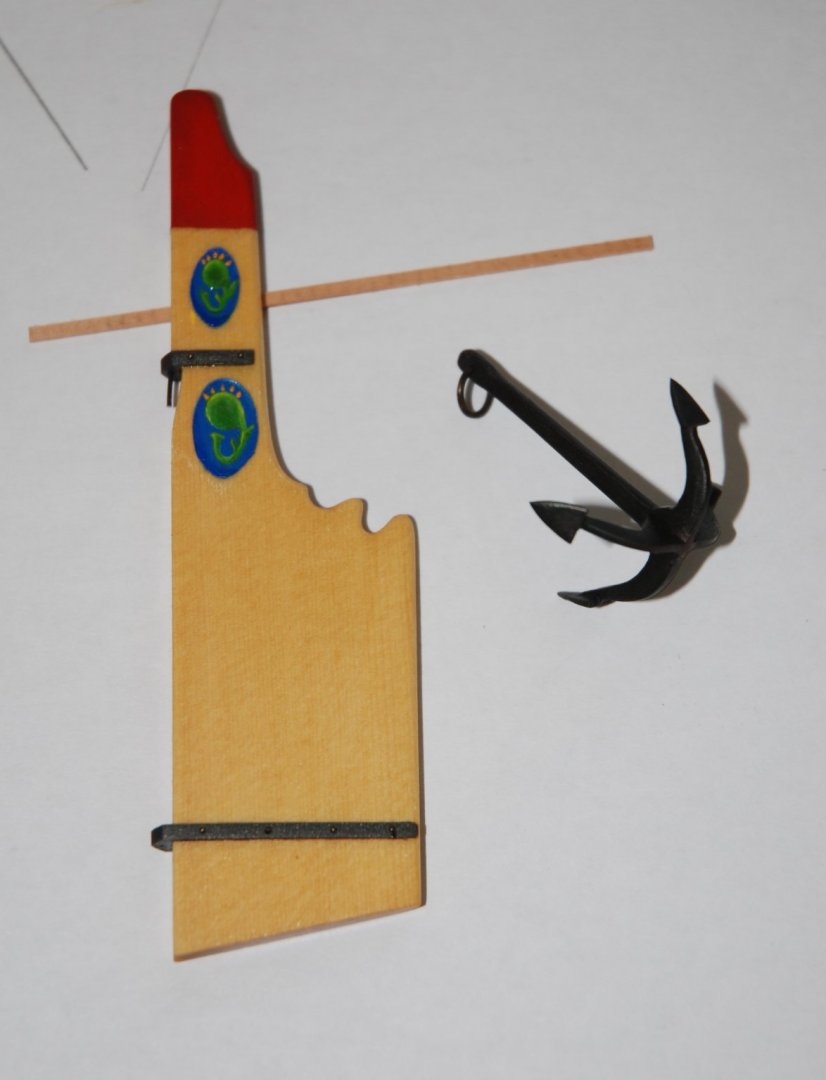
Thank You to all the 'Likes'. I'm starting to add the final details before taking care of the mast. For the grapnel, I just changed the angle of the flukes on the grapnel arms to make them more vertical. Once painted, I applied a light veil of weathering powders. The rudder is being finished. I still need to touch up the rounding of the painted bottom frieze and add the tiller. Always a pleasure to work on this longboat.


-
HM Cutter Cheerful 1806 by JpR62 - 1:48 scale
JpR62 replied to JpR62's topic in - Build logs for subjects built 1801 - 1850
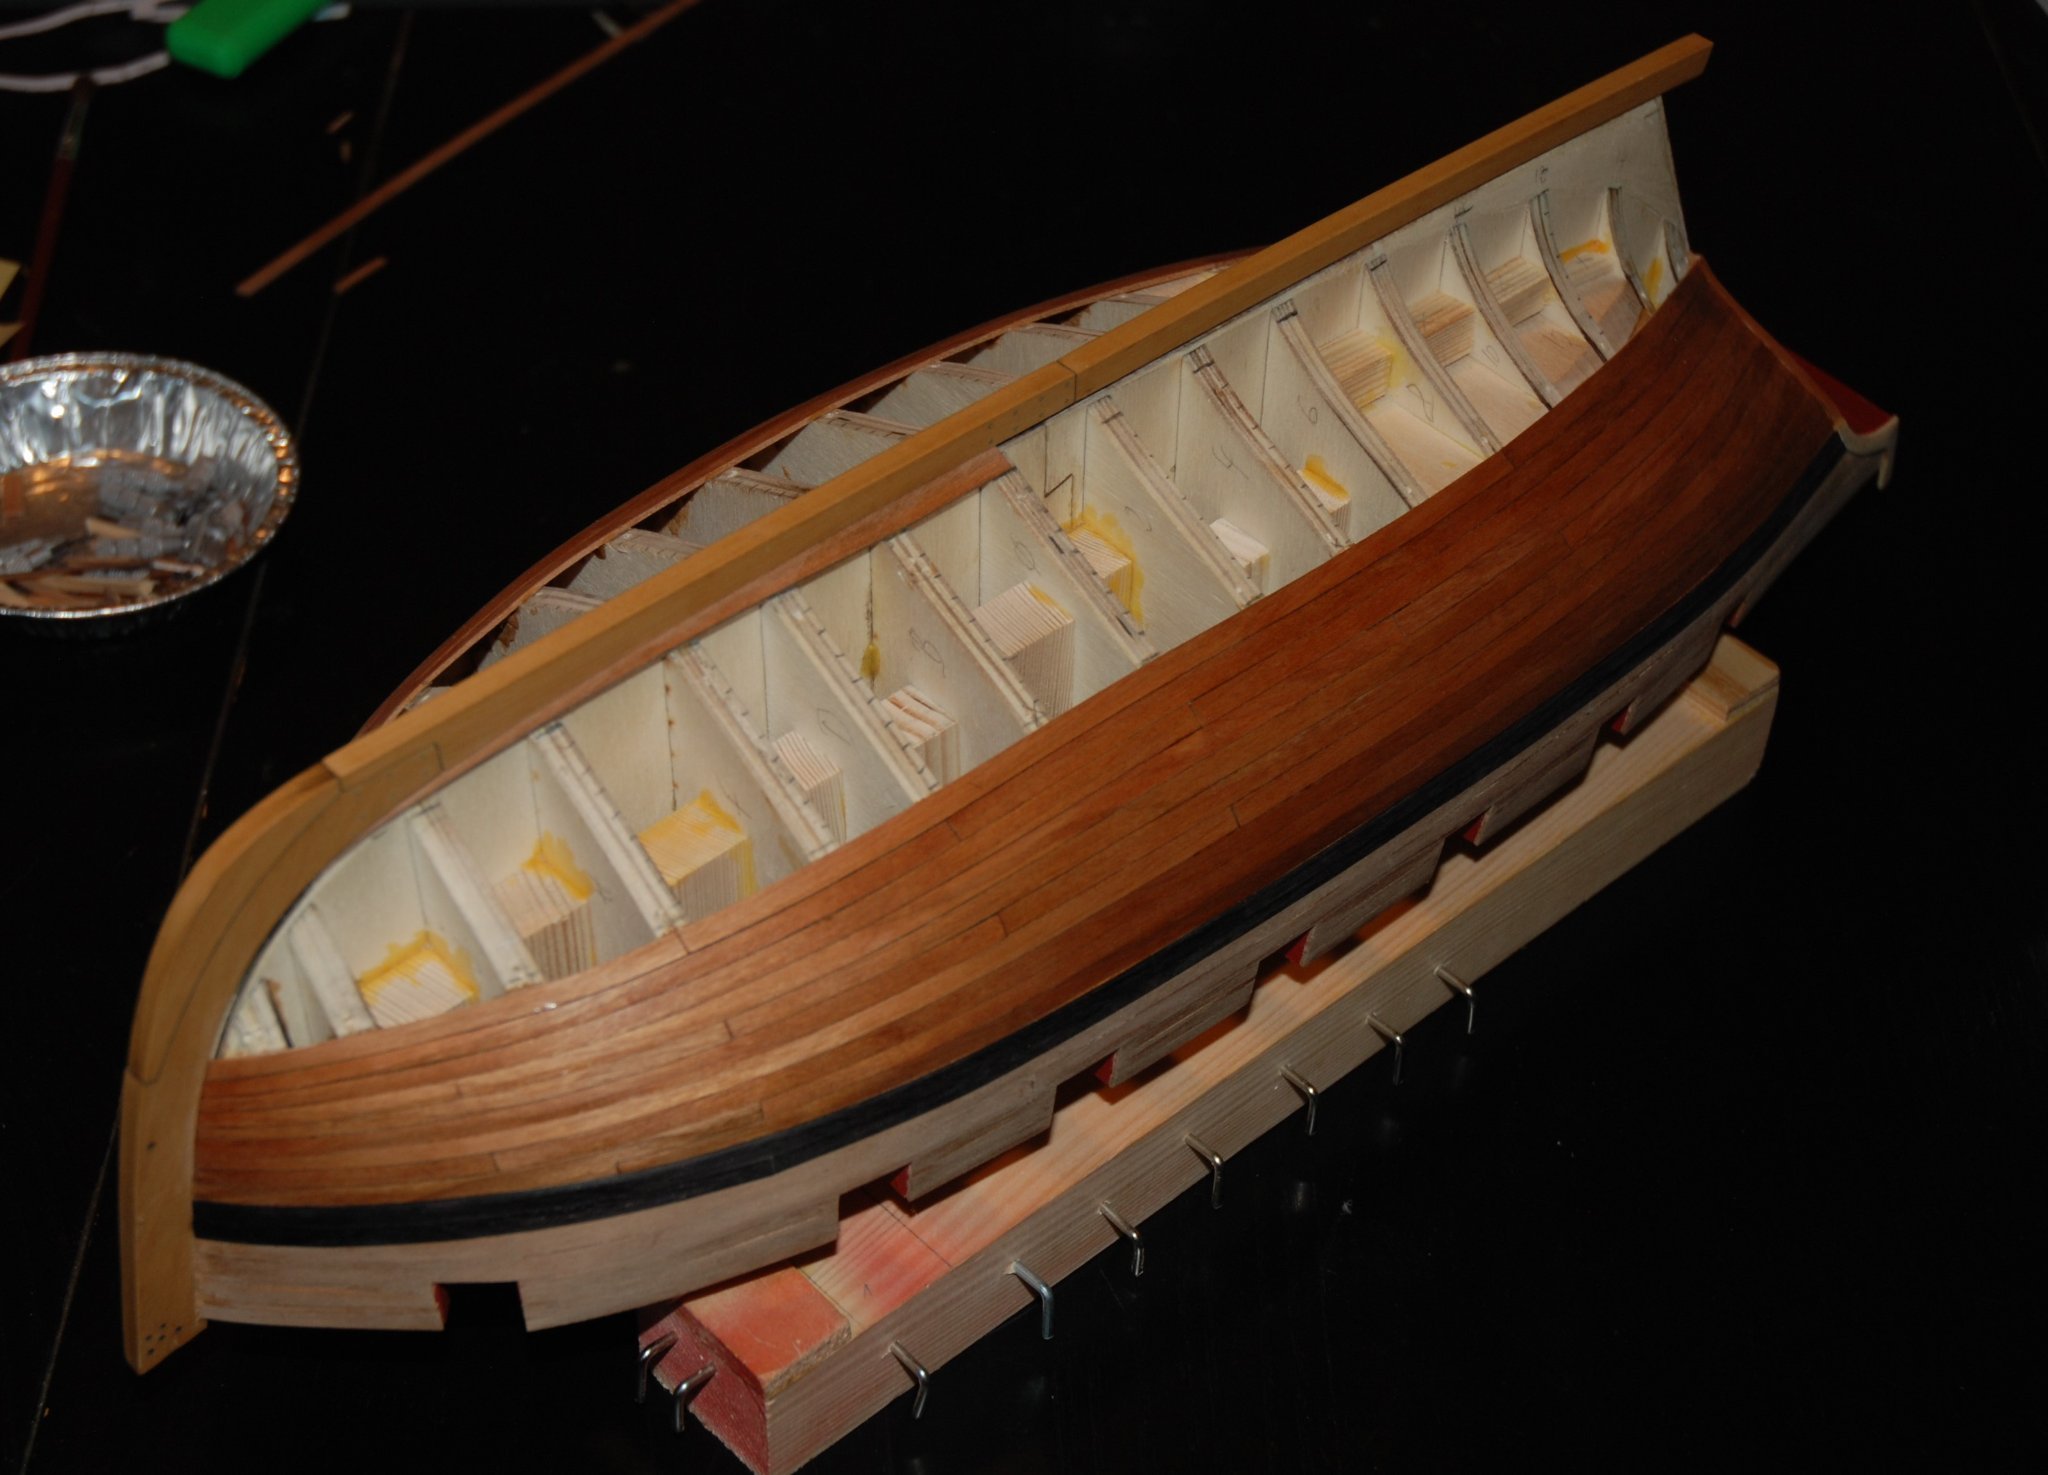
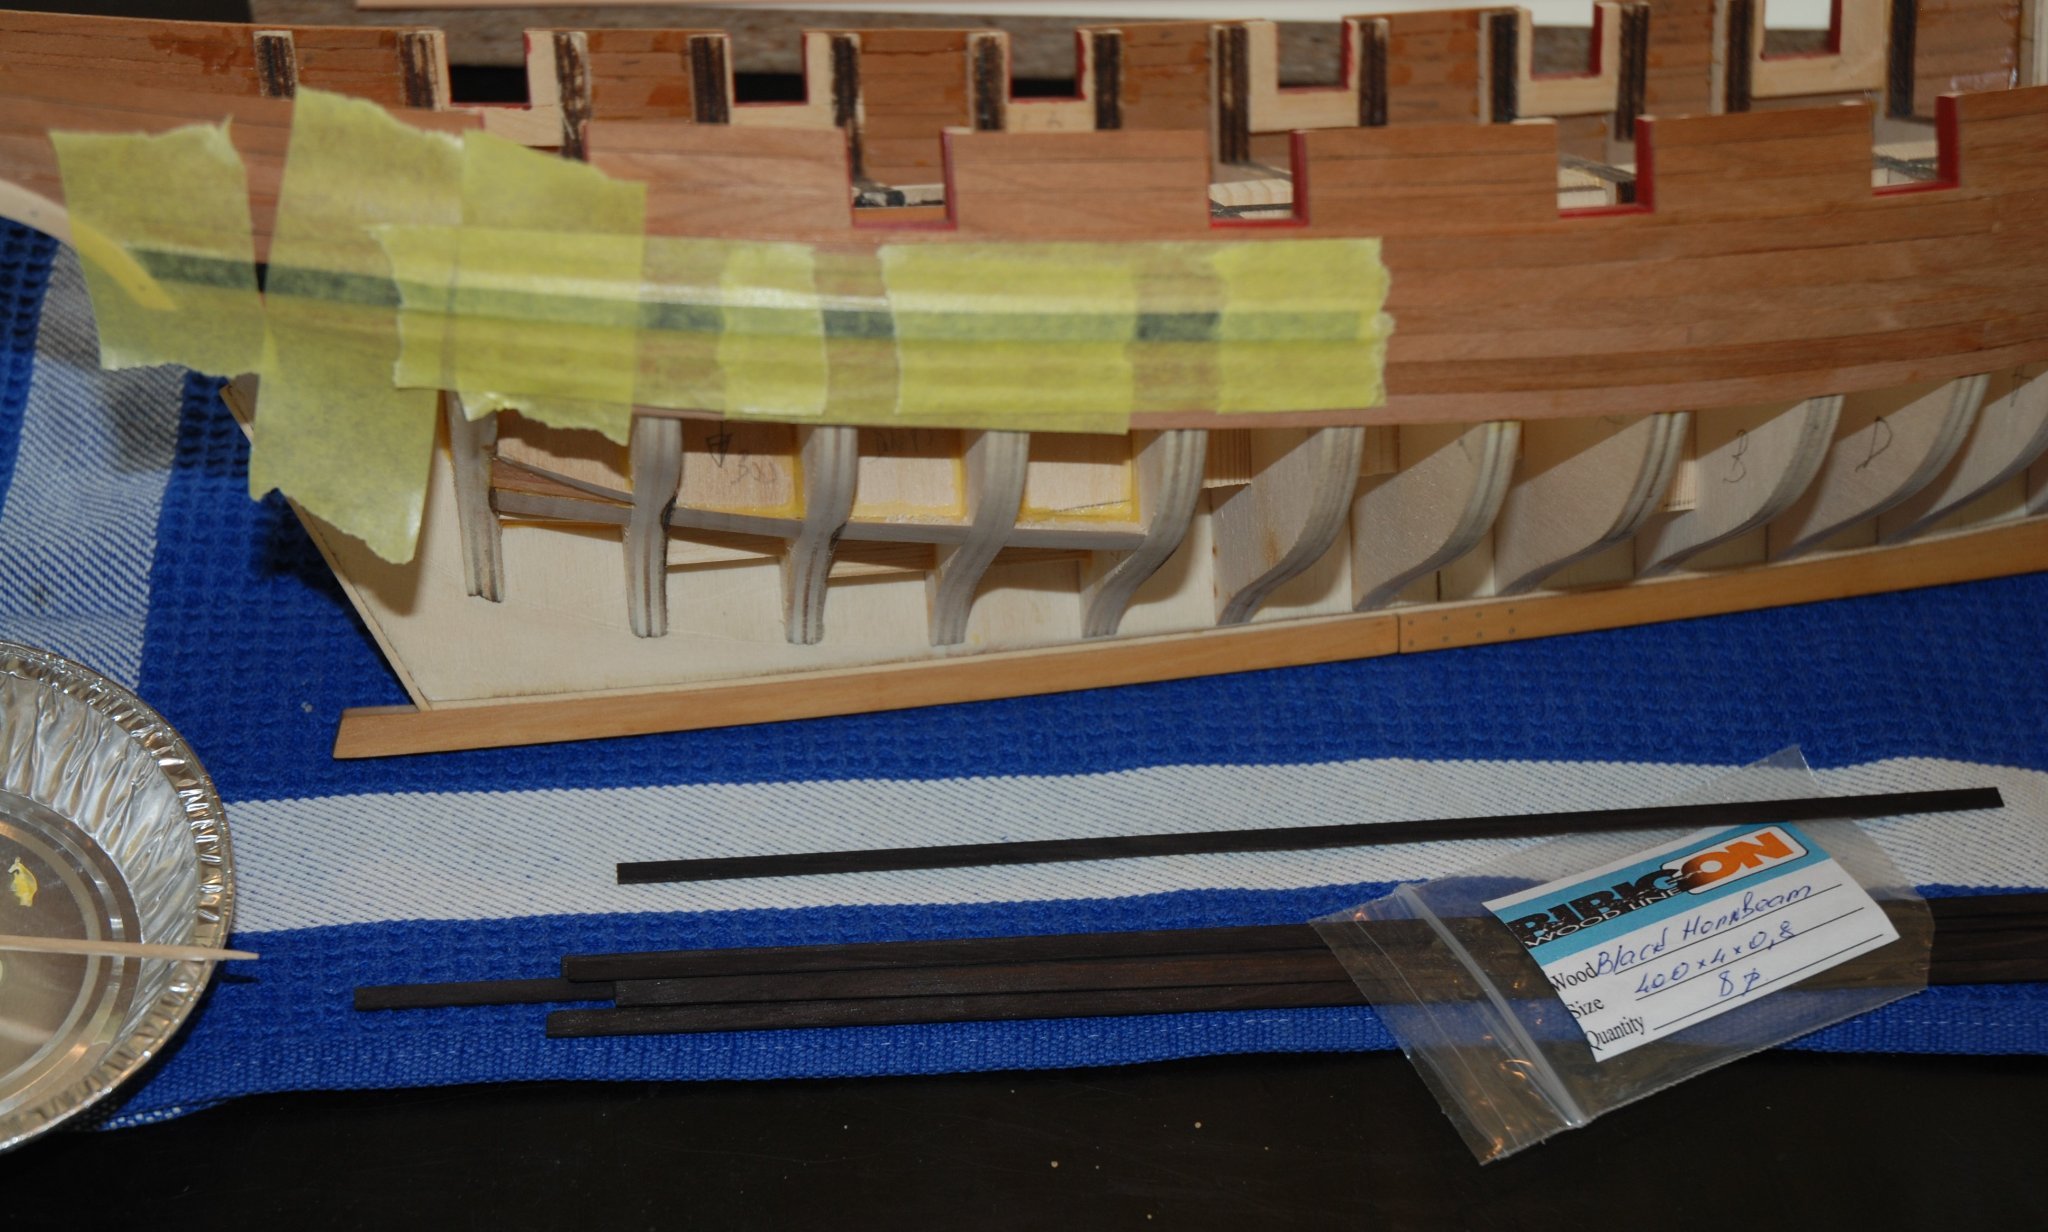
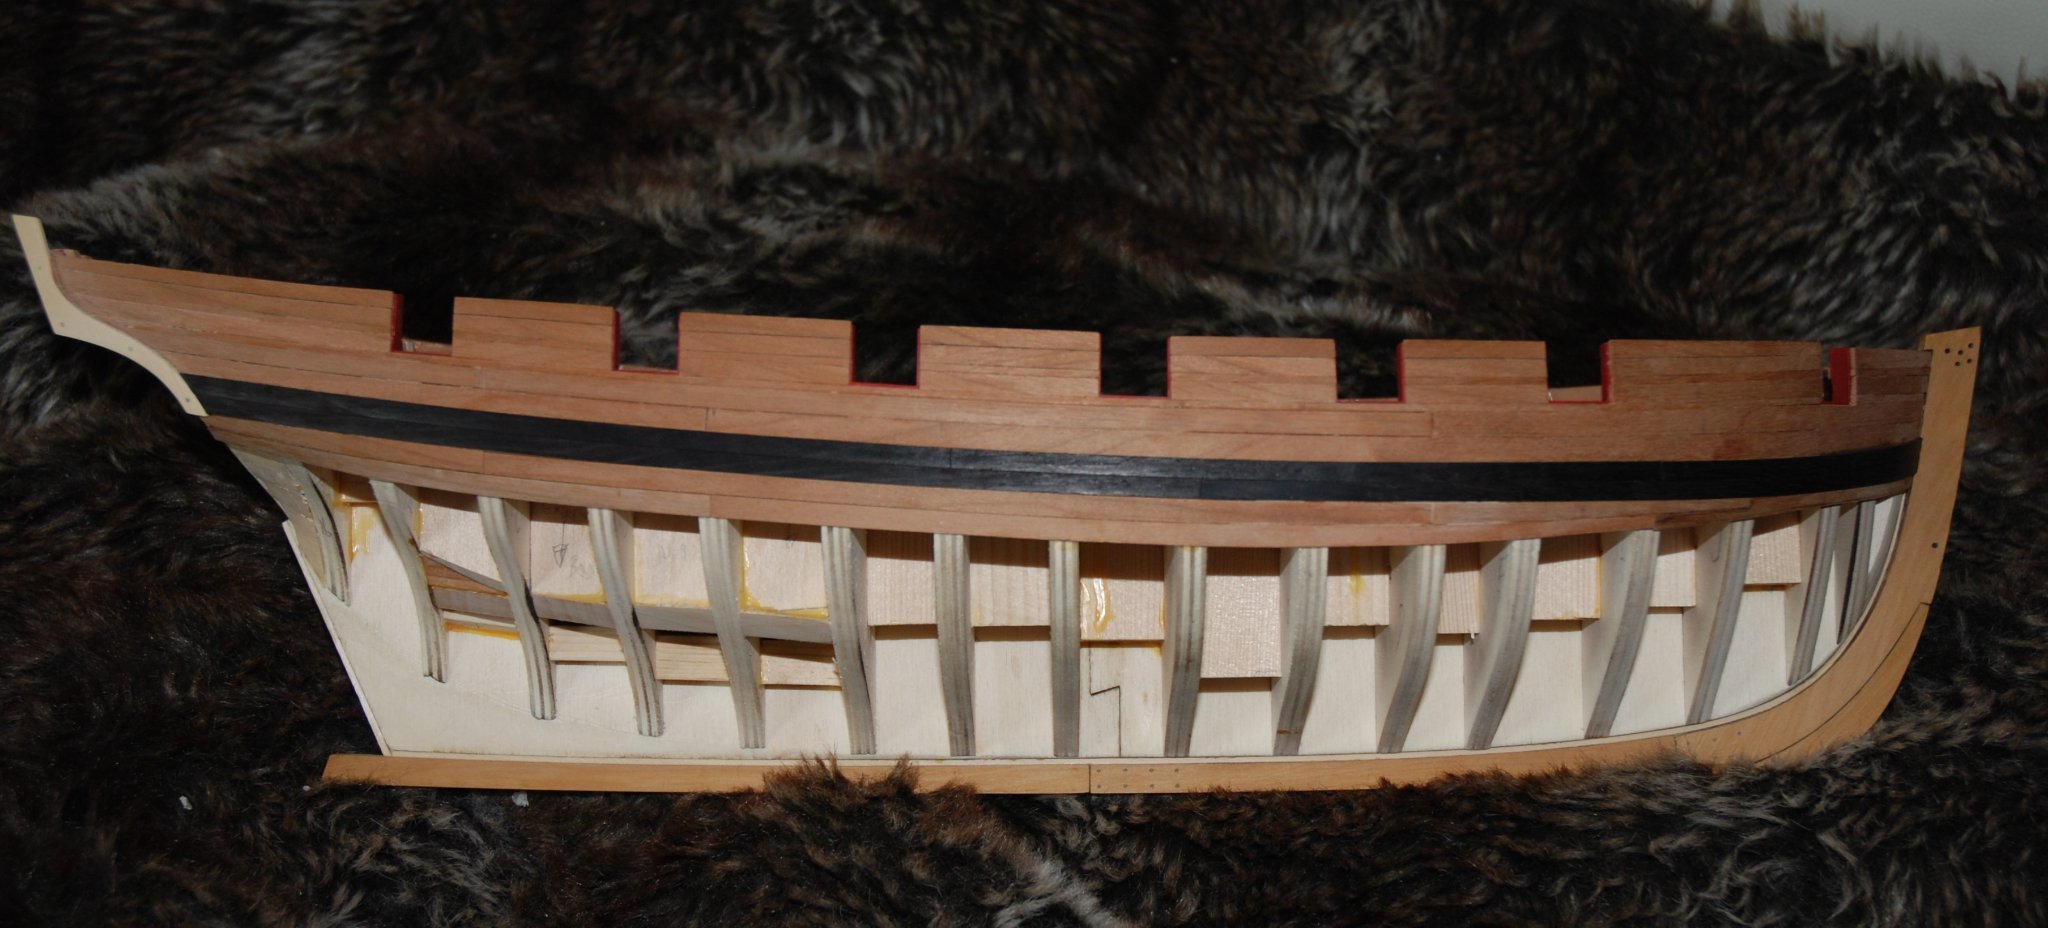
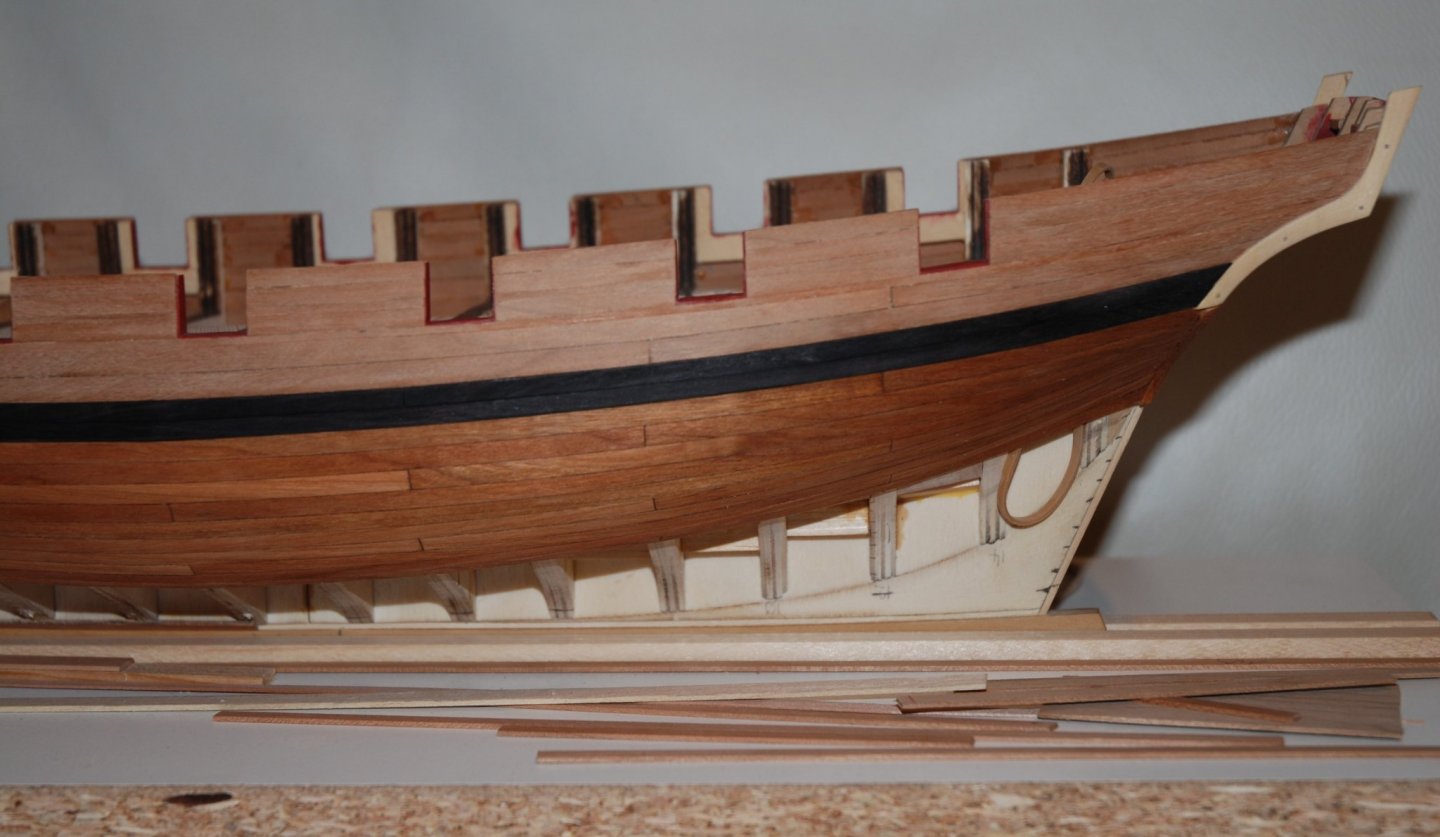
Thank You to all the 'Likes'. The second layer of wales is added. In order to make the painting easier, I decided to test a wood used by Russian modelers: black hornbeam. I was lucky enough to find a Russian supplier who was able to provide me with some (the same supplier who sold me the pear wood and the american maple used for my bases). So no more worries about paint on the edges... 😁 I'll be able to start planking the hull, starting with its lining.


-
HM Cutter Cheerful 1806 by JpR62 - 1:48 scale
JpR62 replied to JpR62's topic in - Build logs for subjects built 1801 - 1850
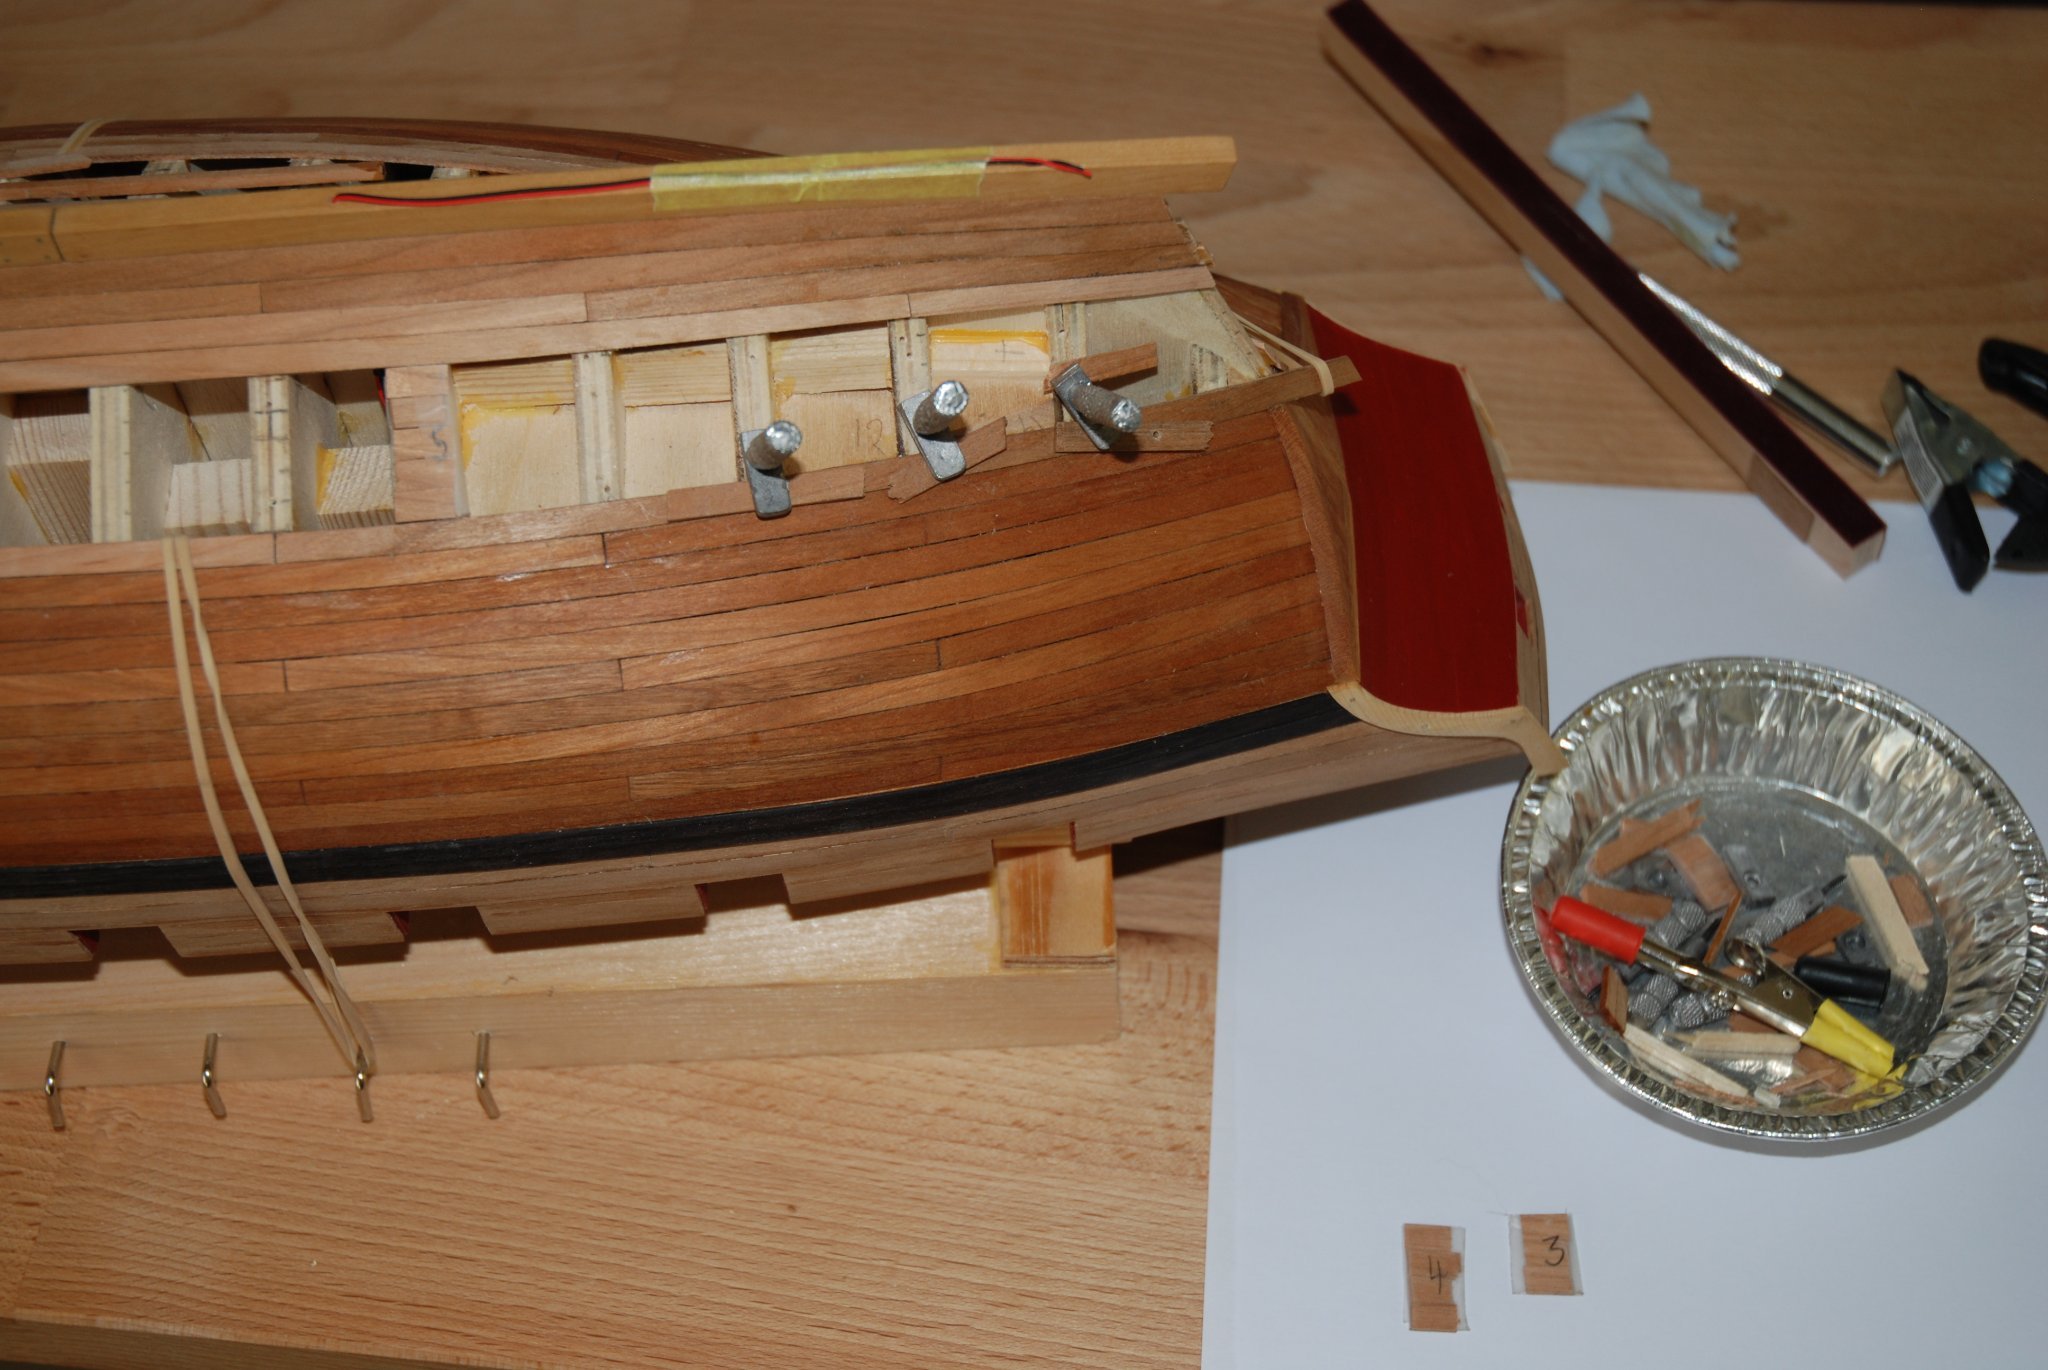
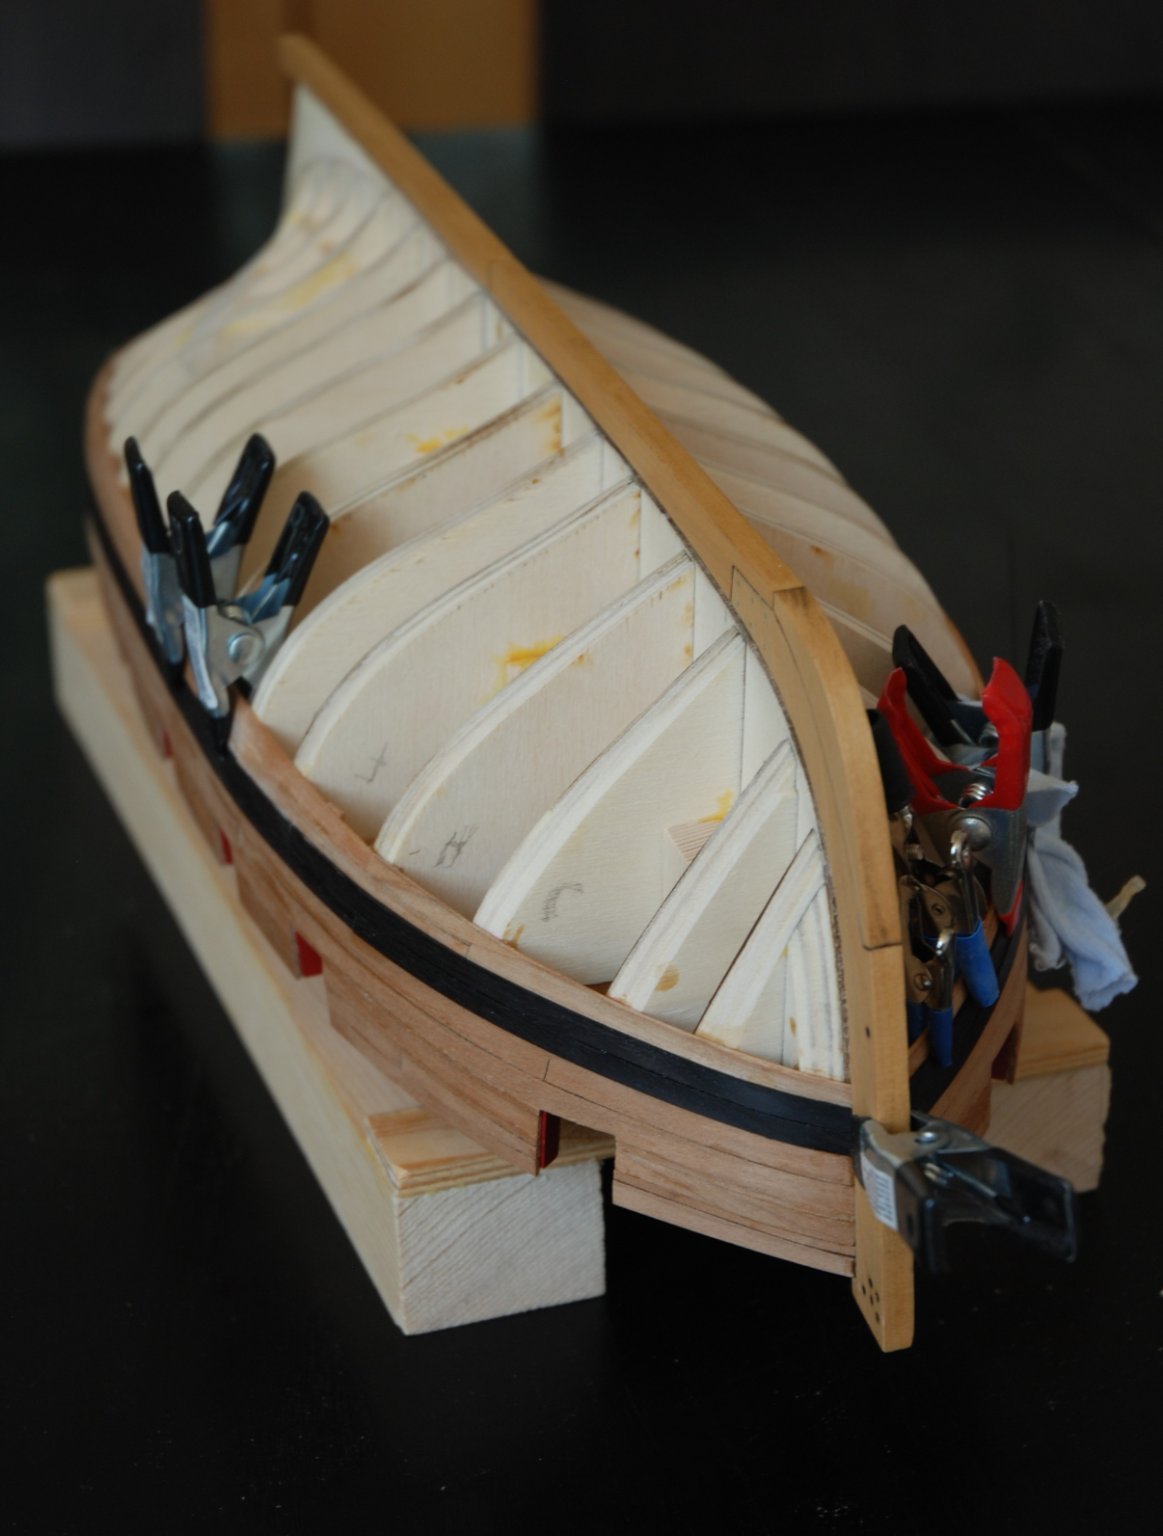
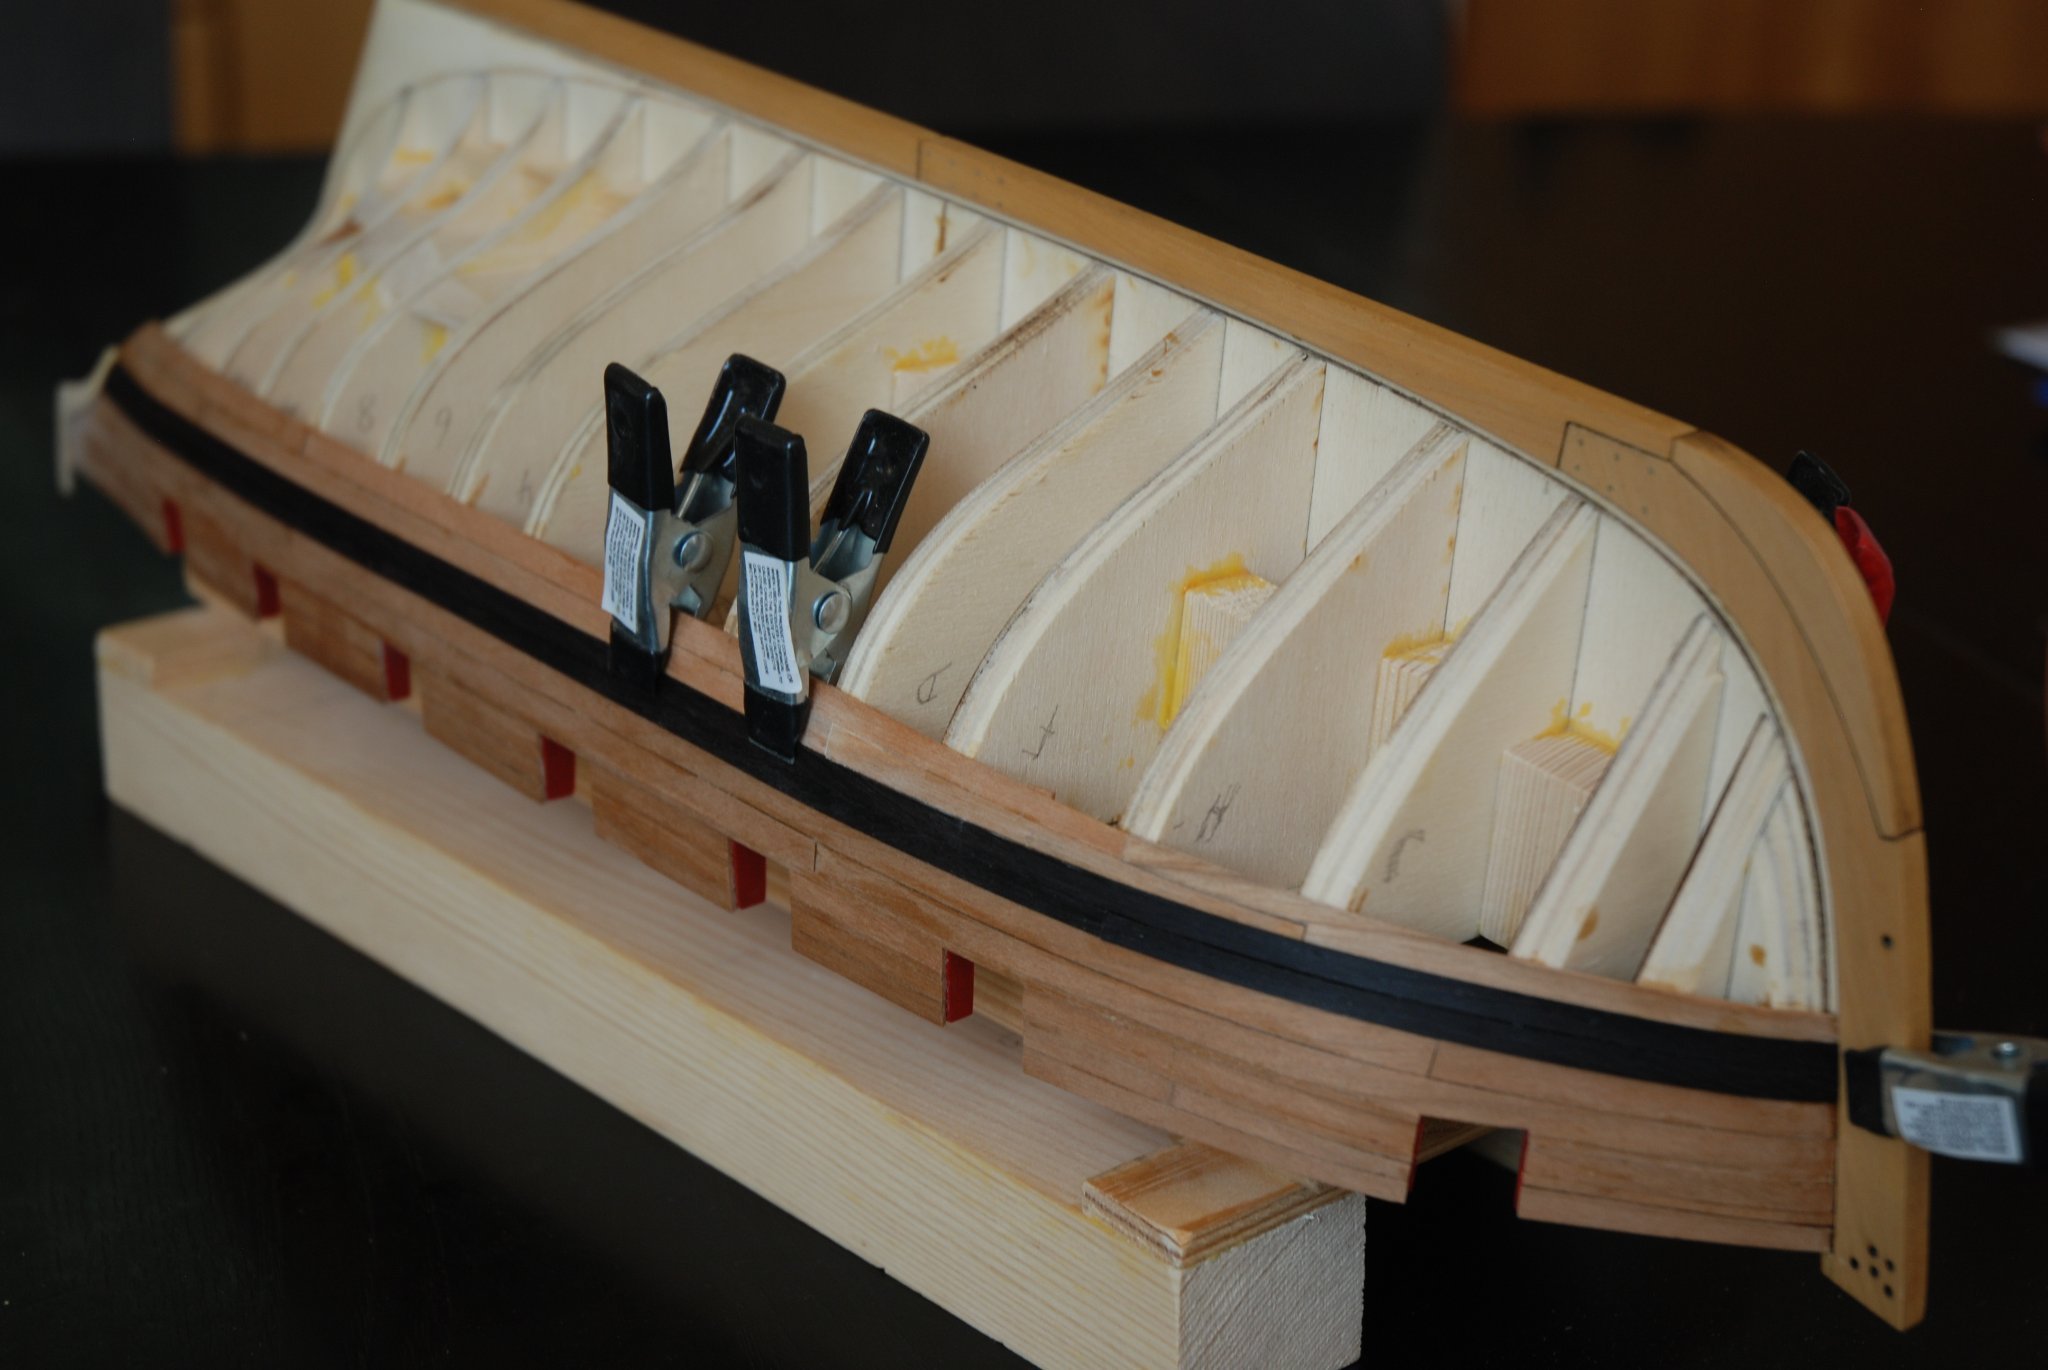
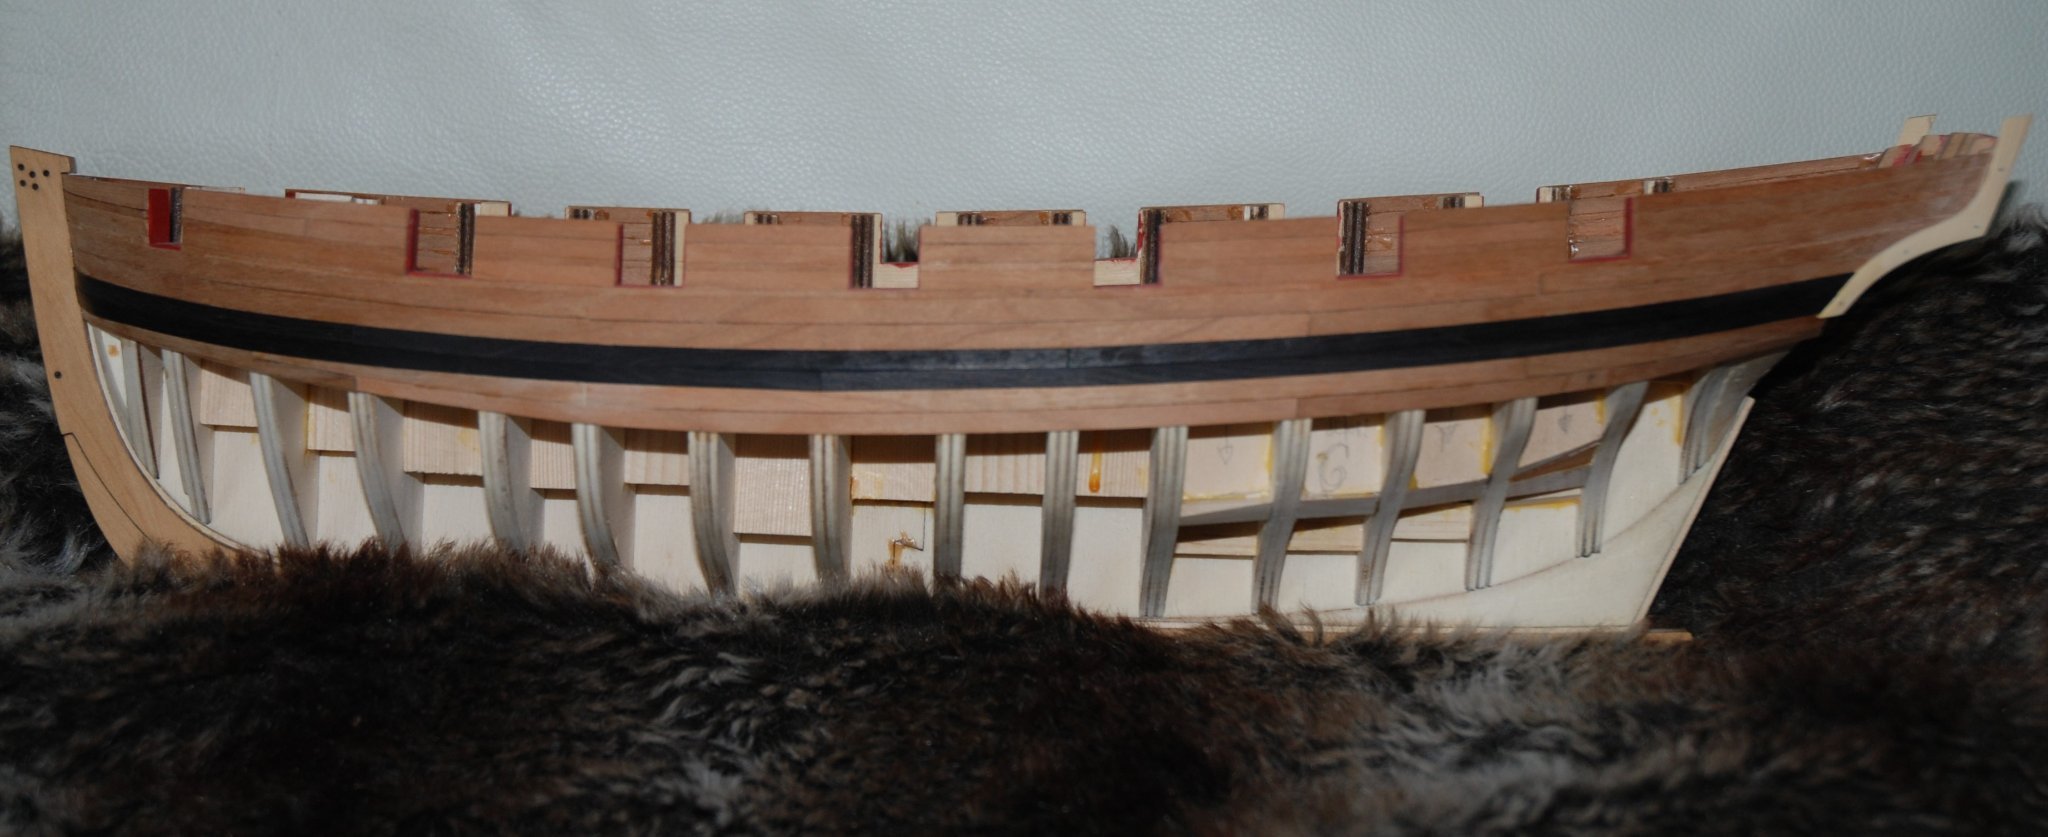
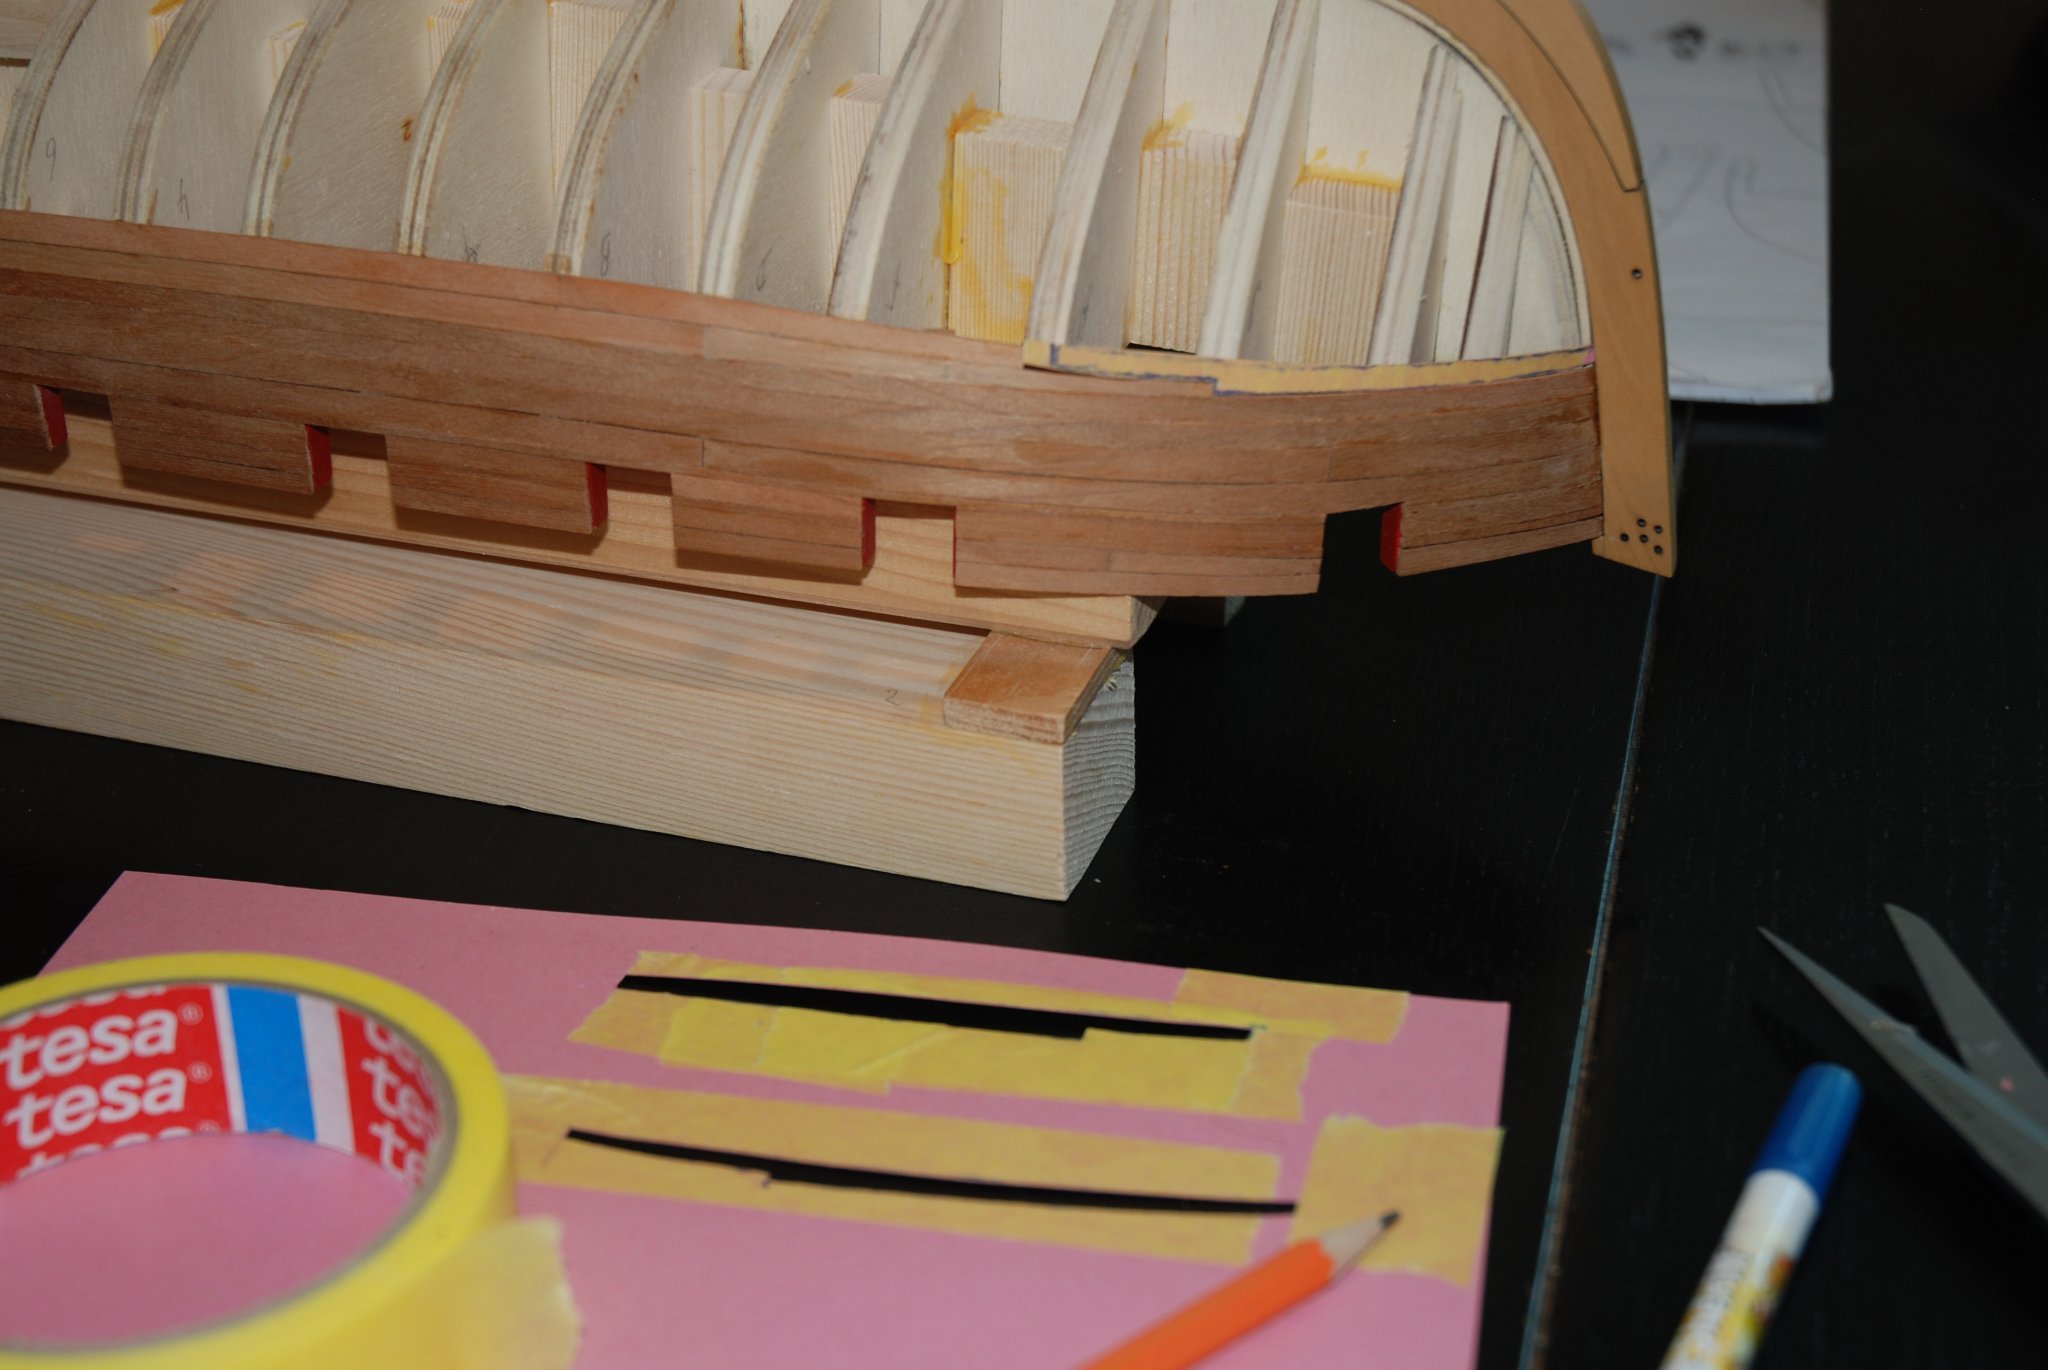
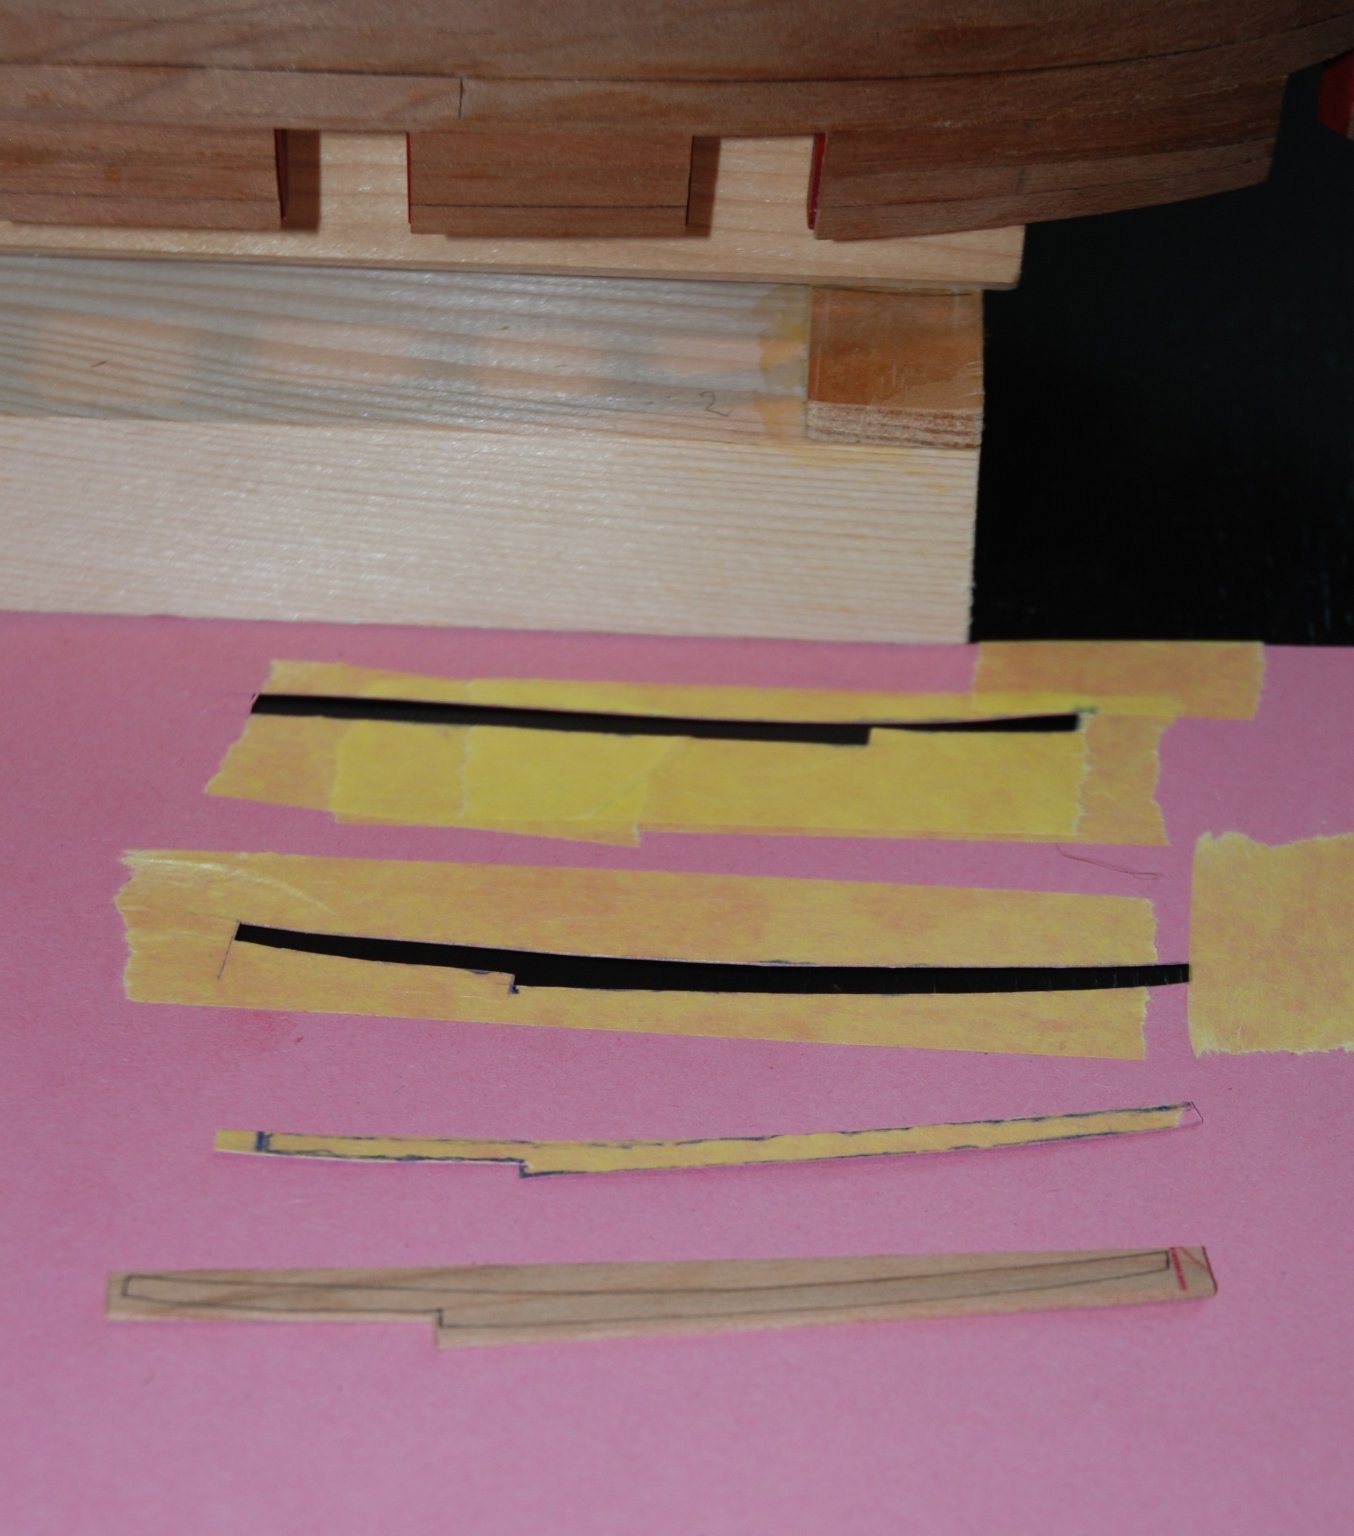
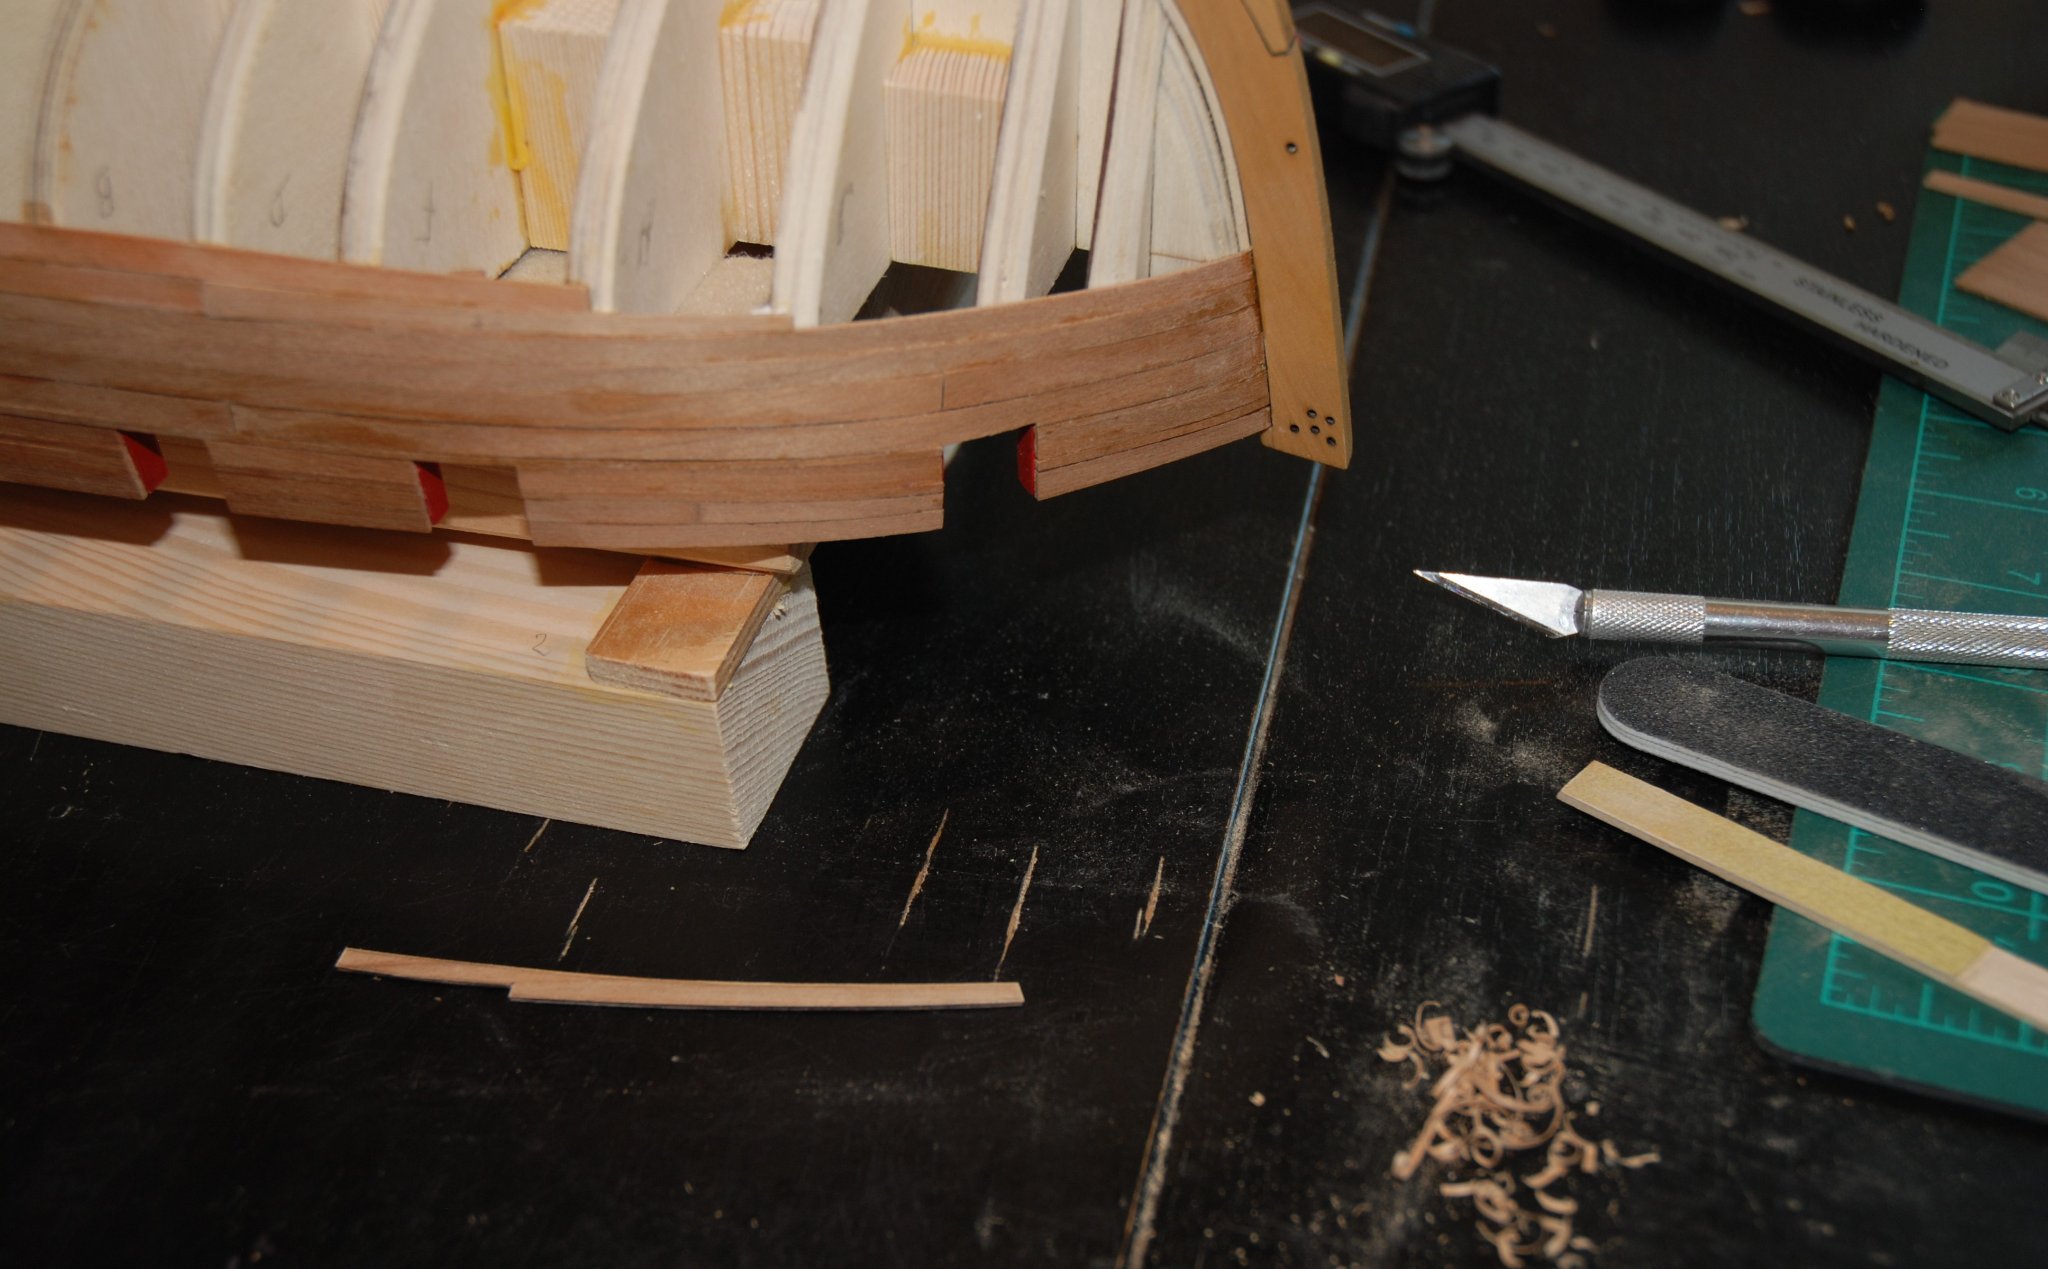
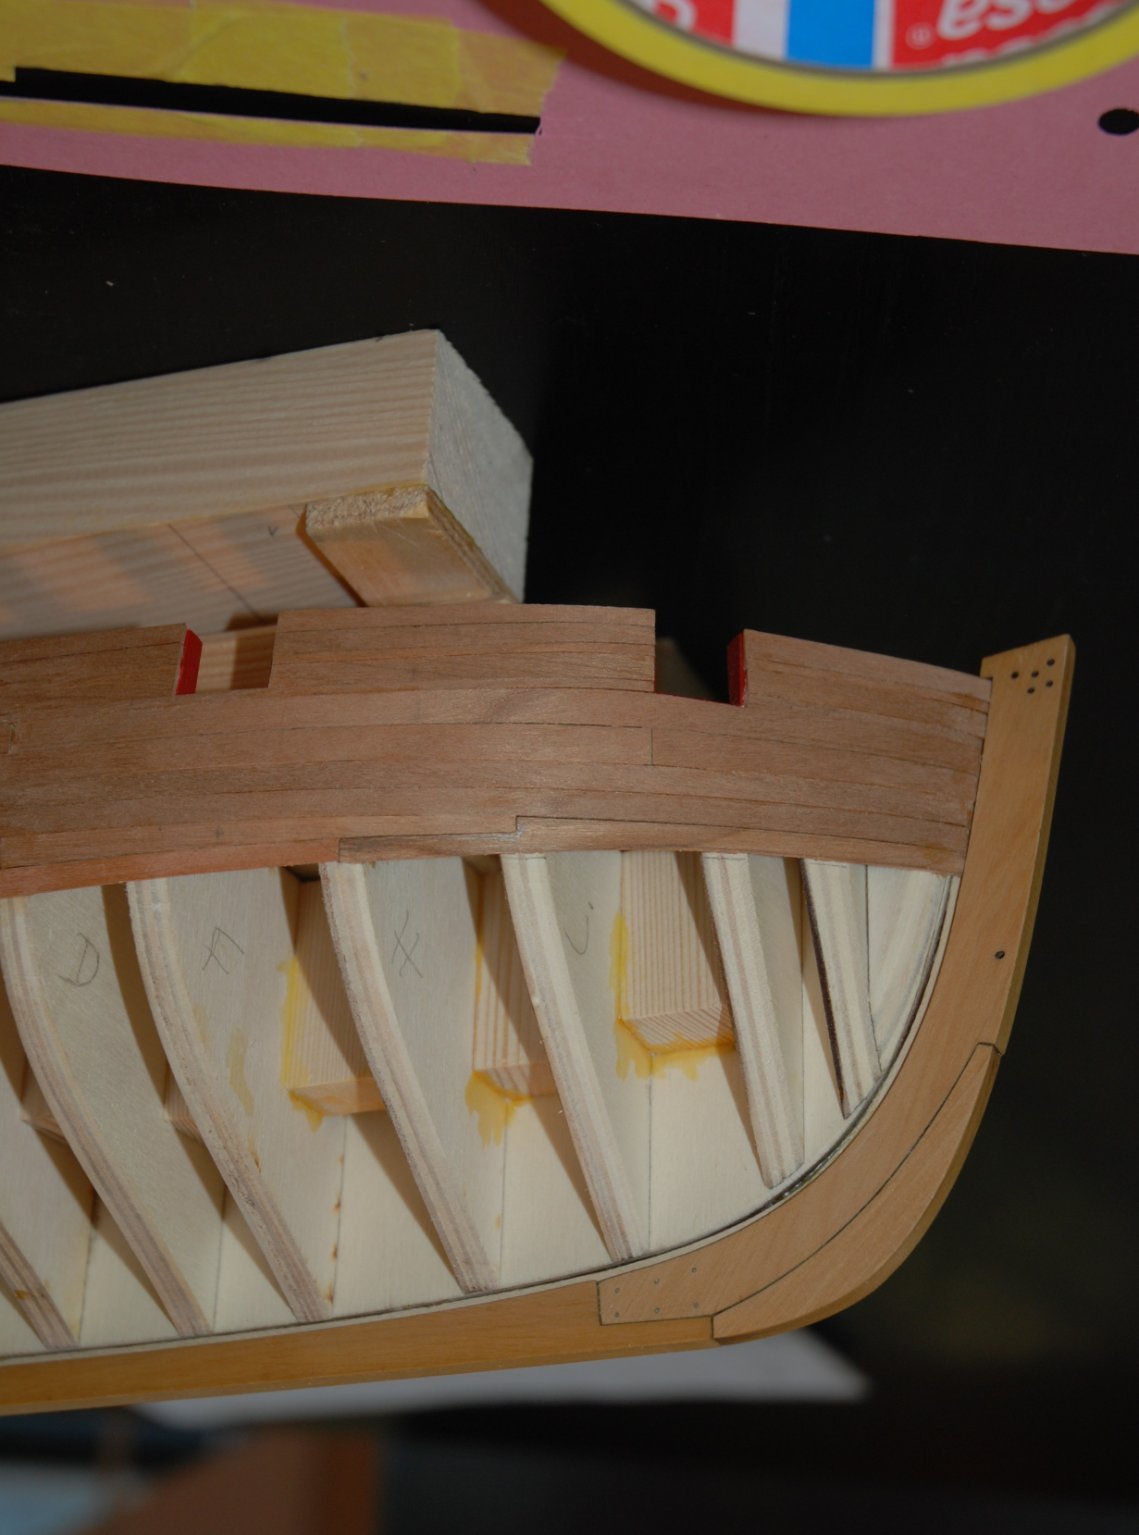
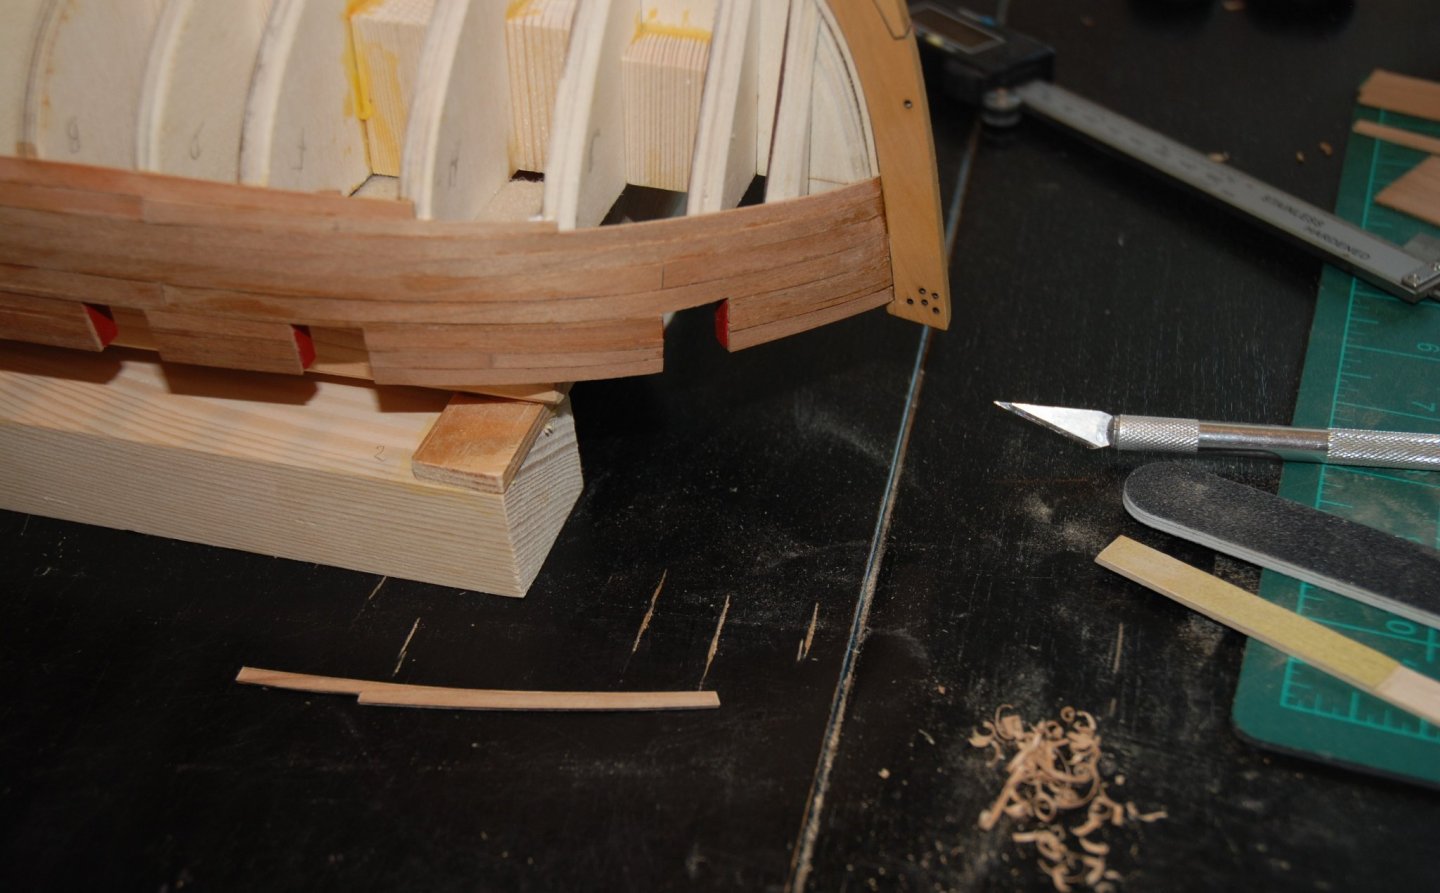
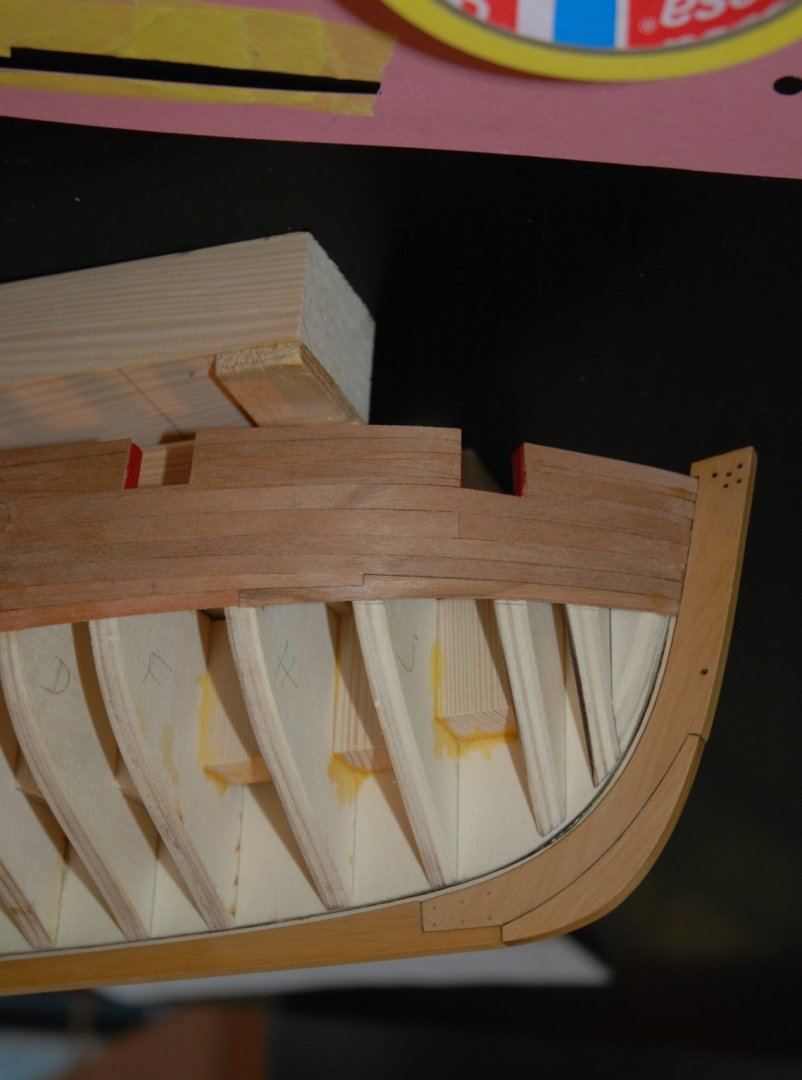
Thank you to all the 'Likes'. Following the method used by Rusty in his excellent log, I decided to lay the first two rows of hull planking first before proceeding to lay the second layer of wales. For the installation of the drop planks, I proceeded in the classic way. First of all I glued some protective tape on the hull which allowed me to draw the shape of my drop planks. The tape is then glued to a sheet of cardboard and a template is cut out. Once the shape is validated, it is transferred to a cherry sheet. The drop plank is cut with a safety gap. The final shape is then produced by cutting gently with a cutter and finishing with sandpaper. All that remains is to glue the drop plank. I will now be able to apply the second layer of wales.

-
What a pleasure to have been able to follow this build and the result is just magnificent. You can be proud of this beautiful barge. Can't wait to see your next model !
- 185 replies
-
- 2
-
-
- queen anne barge
- Syren Ship Model Company
- (and 1 more)
-
Great work, Glenn. This Cheerful is really a fabulous model. Thank you for sharing this beautiful work and especially for passing on so many tips and techniques. I look forward to following your work on the Winnie!
- 778 replies
-
- 3
-
-
- cheerful
- Syren Ship Model Company
- (and 1 more)
-
Your longboat is really beautiful. Very nice work.
- 109 replies
-
- 2
-
-
- medway longboat
- Syren Ship Model Company
- (and 1 more)
-
Great job on the rigging! This cutter really looks great! And always a wealth of information and techniques. Thanks
- 778 replies
-
- 1
-
-
- cheerful
- Syren Ship Model Company
- (and 1 more)