
Supplies of the Ship Modeler's Handbook are running out. Get your copy NOW before they are gone! Click on photo to order.
×


SardonicMeow
-
Posts
333 -
Joined
-
Last visited
Content Type
Profiles
Forums
Gallery
Events
Everything posted by SardonicMeow
-
 Nice modifications. I spent many hours yesterday struggling to run thread through the eyebolts on the deck, so your idea of adding fife rails / pin rails is definitely an improvement. Also, I'm in full agreement with your comment earlier about this kit. It feels less like a real ship and more like an abstraction of a ship.
- 50 replies
-
- 1
-

-
- virginia
- artesania latina
- (and 2 more)
-
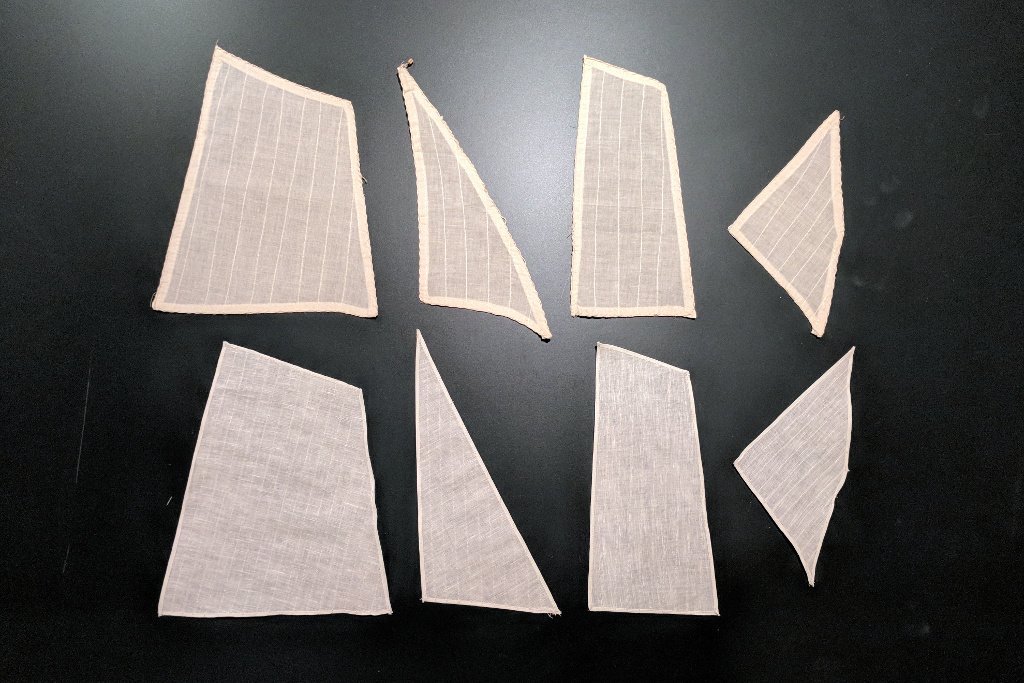
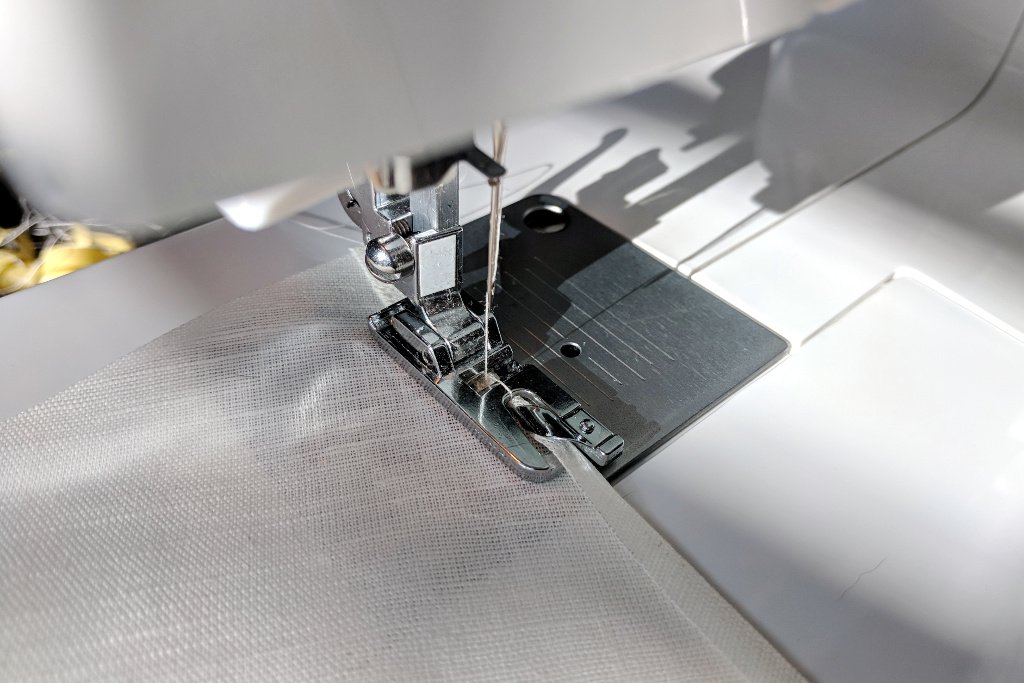
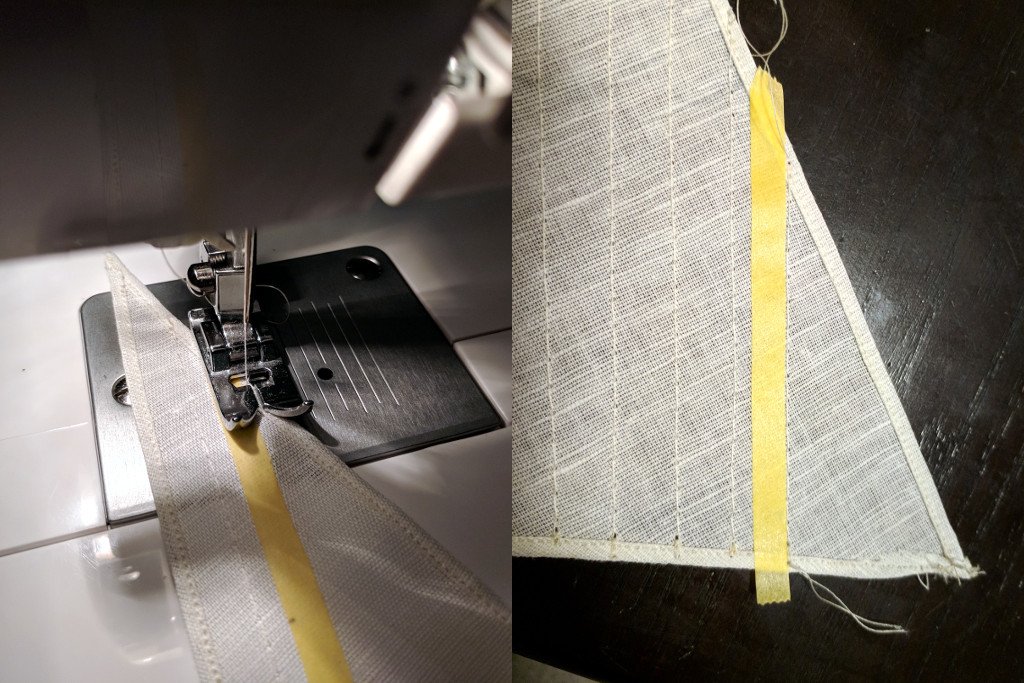
I made sails! I was a bit disappointed with the loose stitching and wobbly edges of the kit-provided sails, and wondered if I could do better. In the picture below, the originals are above and my replacements are below. I chose a sheer cotton / linen blend fabric. It was difficult to work with, particularly as the cut edges would fray easily. Using an idea from this article on the Lauck Street Shipyard site, I stretched the fabric over an old picture frame, then brushed on a coating of diluted white glue and allowed it to dry. The stiffened fabric was much easier to work with. After a lot of struggles with creating clean edges, I finally found success after acquiring a narrow rolled hem presser foot for the sewing machine. I created each sail by drawing its outline onto the fabric, then drawing a second line 1/4 inch out from each edge. (The narrow hem presser foot creates a hem of doubled fabric 1/8 inch in width.) I cut the fabric out along the 1/4 inch line, then folded and pressed it at the original line. By feeding the fabric with the fold always at the right edge of the entrance to the presser foot, as in the picture, I was able to get a perfect hem (usually) all the way around. The next challenge was sewing parallel seams across each sail. I wanted to avoiding leaving any marks on the fabric, and my wife suggested that I use tape as a guide. I tried using some Tamiya masking tape I had on hand, and by a happy coincidence, I discovered that the width of the tape (6mm) exactly matched the distance from the left edge of the standard sewing machine presser foot to the needle. The final results weren't perfect, but not too bad. In hindsight, I should have done the sewing with a darker thread, so that the seams would show up better.
- 54 replies
-
- 2
-
-
- artesania latina
- Virginia
- (and 2 more)
-
The value of using sawdust + PVA as filler is that it will match the color of the wood. Because the color does not matter on the first layer of hull planks you have completed, I think you will find it more convenient to use a commercial wood filler. If there are gaps in the second planking of the hull, you can use the sawdust + PVA method at that time.
-
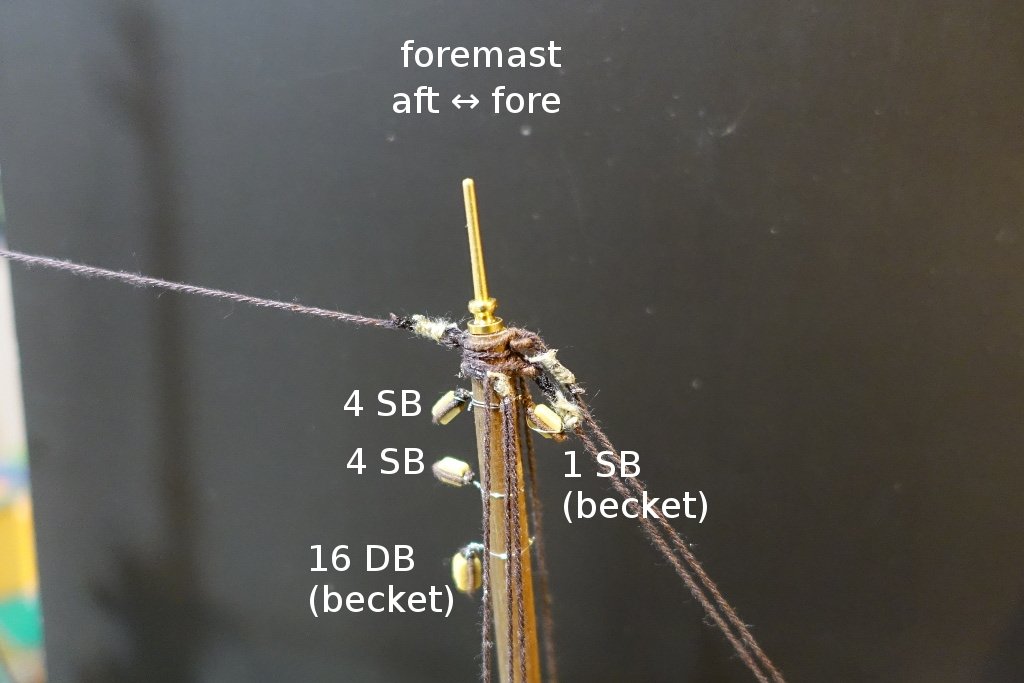
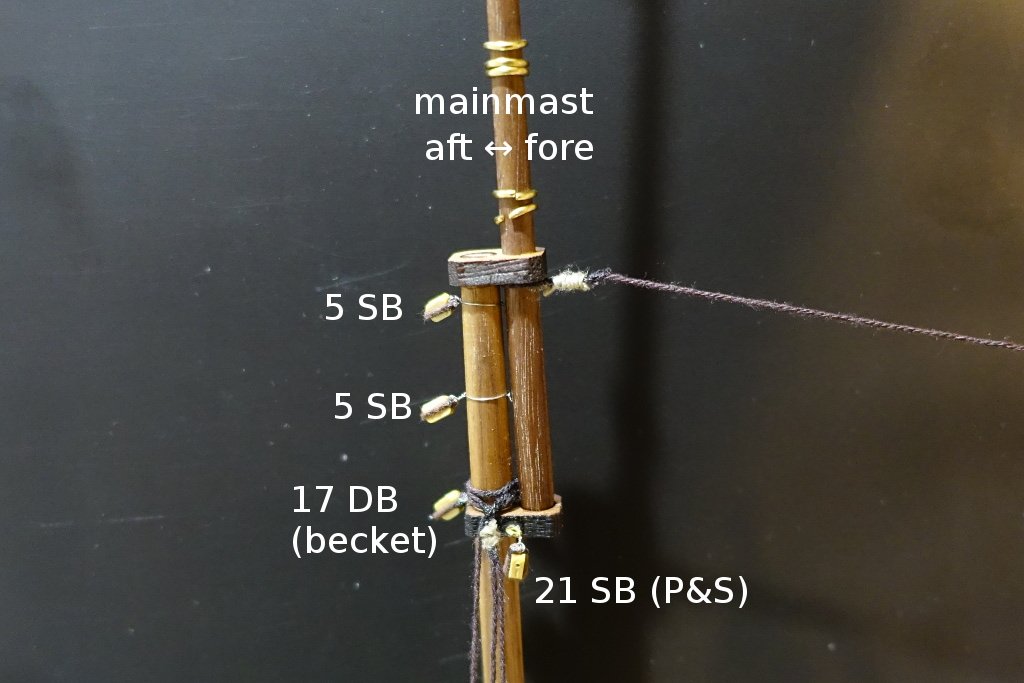
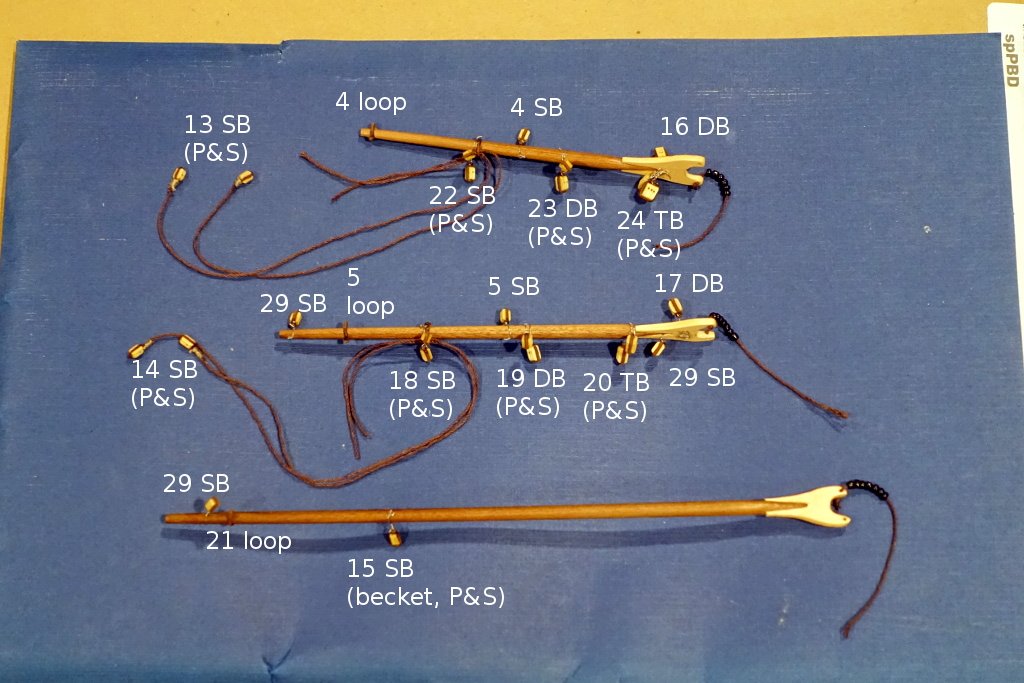
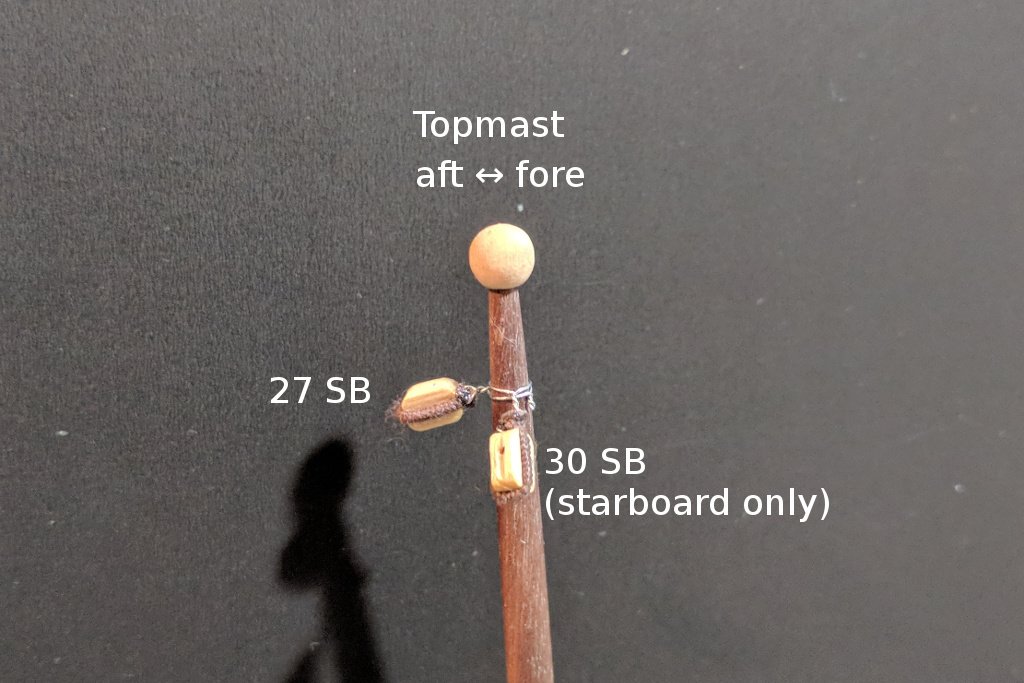
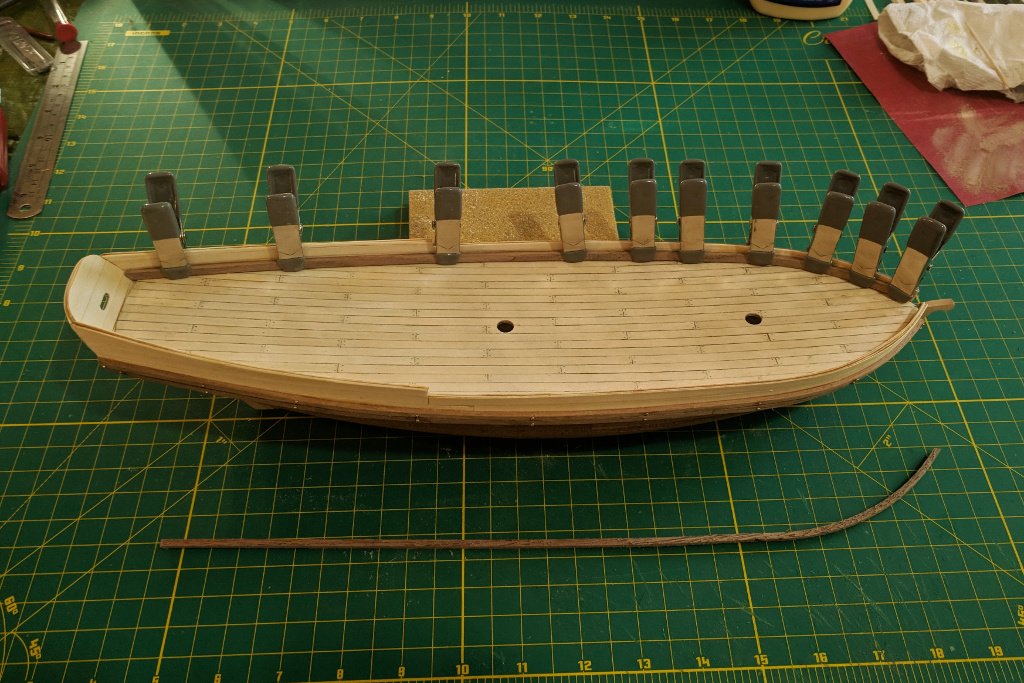
I am almost ready to start the running rigging. I was very disappointed to find that the kit instructions basically say "We're not going to tell you where each line goes, just look at the (completely inadequate) pictures." With no outside help, I might have given up at this point. Thankfully, MSW user Trufo has posted some detailed diagrams of how each line runs. After studying those diagrams at length, plus some help from the folks in the rigging forum, I have a plan for how to run each line. I am posting the plan in detail here, in case it is of value to future builders of this model. First, here is a link to Trufo's diagrams. The numbers I use below directly correspond to the numbers in the diagrams. Here is my enumeration of the rigging lines. As a novice ship builder who didn't know luff from leech two weeks ago, I can't promise that everything here is technically or historically accurate, but this is what I've been able to work out. jib halliard - Starts at a becket on a single forward-facing block at the top of the foremast, through a single block at the head of the jib sail, back through the starting block, down to belay on the port bowsprit bitt. jib downhaul - Starts at the head of the jib sail, runs down channelled through the jib sail hanks, through a single block at the end of the bowsprit, then aft to belay on the starboard bowsprit bitt. jib sheet - Starts from the clew of the jib sail, runs aft to belay on the upper bar between the bowsprit bitts. fore peak halliard - Starts at the end of the foresail gaff, through a single aft-facing block at the top of the foremast, through a single block at the center of the foresail gaff, through a lower aft-facing single block at the top of the foremast, down to belay on an eyebolt at the base of the foremast. main peak halliard - Starts at the end of the mainsail gaff, through a single aft-facing block at the top of the mainmast, through a single block at the center of the mainsail gaff, through a lower aft-facing single block at the top of the mainmast, down to belay on an eyebolt at the base of the mainmast. Not a rigging line, this refers to the attachment of the luff edge of the foresail to the foremast by the mast hoops. Not a rigging line, this refers to the attachment of the head edge of the foresail to the foresail gaff. foresail sheet - Starts from the horse near the cargo hatch, up through a double block attached to the clew corner of the foresail, down through a single block attached to the horse, up through the double block again, down to the the opposite end of the horse from the start. Not a rigging line, this refers to the attachment of the luff edge of the mainsail to the mainmast by the mast hoops. Not a rigging line, this refers to the attachment of the head edge of the mainsail to the mainsail gaff. mainsail outhaul - Starts at the clew corner of the mainsail, through a single block at the end of the boom, to the middle of the boom where it is wrapped around and secured. mainsail tack - Starts at the tack corner of the mainsail, down to an eyebolt on the jaws of the boom. foresail vangs - (One port, one starboard) Using the standing rigging thread, a line is run from the aft half of the foresail gaff down about 2/3rds of the way to the deck, ending with a single block. Using running rigging thread, start on the railing, up through the single block, back down to the railing and secure. mainsail vangs - (One port, one starboard) Using the standing rigging thread, a line is run from the aft half of the mainsail gaff down about 2/3rds of the way to the deck, ending with a single block. Using running rigging thread, start on the railing, up through the single block, back down to the railing and secure. boom sheet - (One port, one starboard) Starts at a becket on a single block near the end of the boom, down to a single block near the tiller, up through the starting single block, down to belay on an eyebolt near the tiller. fore throat halliard - Starts at a becket on a double block near the top of the foremast, down through a double block near the foresail gaff jaws, up through the starting block, down through the lower block, up through the starting block, down to belay at the base of the foremast. main throat halliard - Starts at a becket on a double block near the top of the mainmast, down through a double block near the mainsail gaff jaws, up through the starting block, down through the lower block, up through the starting block, down to belay at the base of the mainmast. mainsail upper brail - (One port, one starboard) Starts at the leech edge of the mainsail, through single, double, and triple blocks along the mainsail gaff, down to belay at the base of the mainmast. mainsail middle brail - (One port, one starboard) Starts at the leech edge of the mainsail, through double and triple blocks along the mainsail gaff, down to belay at the base of the mainmast. mainsail lower brail - (One port, one starboard) Starts at the leech edge of the mainsail, a triple block along the mainsail gaff, down to belay at the base of the mainmast. boom topping lift - (One port, one starboard) Starts at the end of the boom, through a single block at the mainmast trestle trees, down to belay at the base of the mainmast. foresail upper brail - (One port, one starboard) Starts at the leech edge of the foresail, through single, double, and triple blocks along the foresail gaff, down to belay at the base of the foremast. foresail middle brail - (One port, one starboard) Starts at the leech edge of the foresail, through double and triple blocks along the foresail gaff, down to belay at the base of the foremast. foresail lower brail - (One port, one starboard) Starts at the leech edge of the foresail, a triple block along the foresail gaff, down to belay at the base of the foremast. Secures the tiller arm to eyebolts at the port and starboard sides of the helm area. Not a rigging line, this refers to the attachment of the luff edge of the topsail to the topmast by the mast hoops. topsail halliard - Starts at the head of the topsail through a single aft-facing block at the top of the topmast, then down to belay at the base of the mainmast topsail tack - Starts at the tack of the topsail, down to belay at the base of the mainmast. topsail sheet - Starts from the clew of the topsail, through a single upward-facing block at the aft end of the mainsail gaff, through a single downward-facing block at jaws end of the mainsail gaff, down to belay at the base of the mainmast. flag halliard - Starts from the starboard railing just in front of the mainmast shrouds, up to a starboard-facing single block at the top of the topmast, down to secure on the same railing. The pictures below show the locations where lines will be run on the masts and spars. number - indicates which rigging line passes through that location SB - single block DB - double block TB - triple block loop - A loop of wire is attached to this point; a line will be started by tying it to the loop (becket) - There is a becket on the block; a line will be started by tying it to the becket (P&S) - There are two blocks, one port and one starboard

- 54 replies
-
- 5
-
-
- artesania latina
- Virginia
- (and 2 more)
-
I had lots of leftover pieces of the wood used for the first planking. Since the kit doesn't come with a stand, it was the best use I could find for them.
-
The geometry of the rudder / stern post / transom is definitely a flaw of this kit. Every build log I've read mentions having trouble with them. In your rudder picture I notice that you added a rake the to aft-most railing stanchion instead of leaving it vertical. It's a nice touch.
-
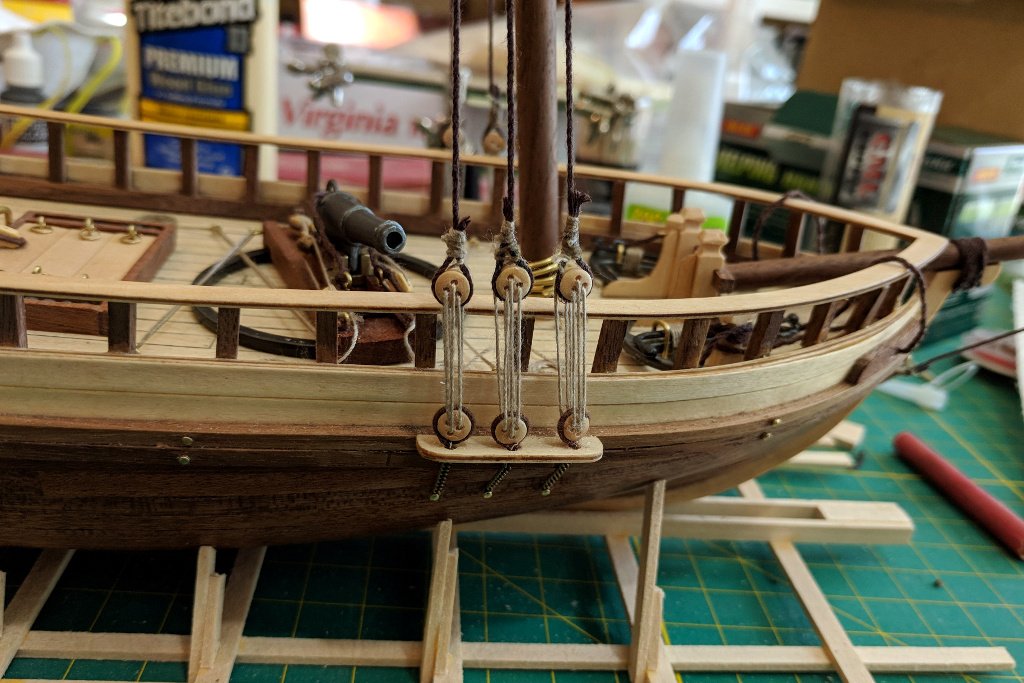
All the standing rigging was completed over the weekend. The necessary blocks and mast hoops were added to the bowsprit and masts, then the standing rigging lines were run. In order to have a consistent spacing of the deadeyes on the shrouds, I put three brass pins through a wooden block matching the pattern of the deadeye holes. Then I put a deadeye on the pins, and sat the block on the ship's railing. I attached the shroud to the deadeye so that it would be secured at the same height above the railing. One set of secured shrouds is pictured below.
- 54 replies
-
- 8
-
-
- artesania latina
- Virginia
- (and 2 more)
-
Welcome, Nikbud. I'm nearing the end of my own build of this same model. Yours is looking great.
-
Fore and aft rigging questions
SardonicMeow replied to SardonicMeow's topic in Masting, rigging and sails
Thanks for the responses. It looks like I have several valid options. -
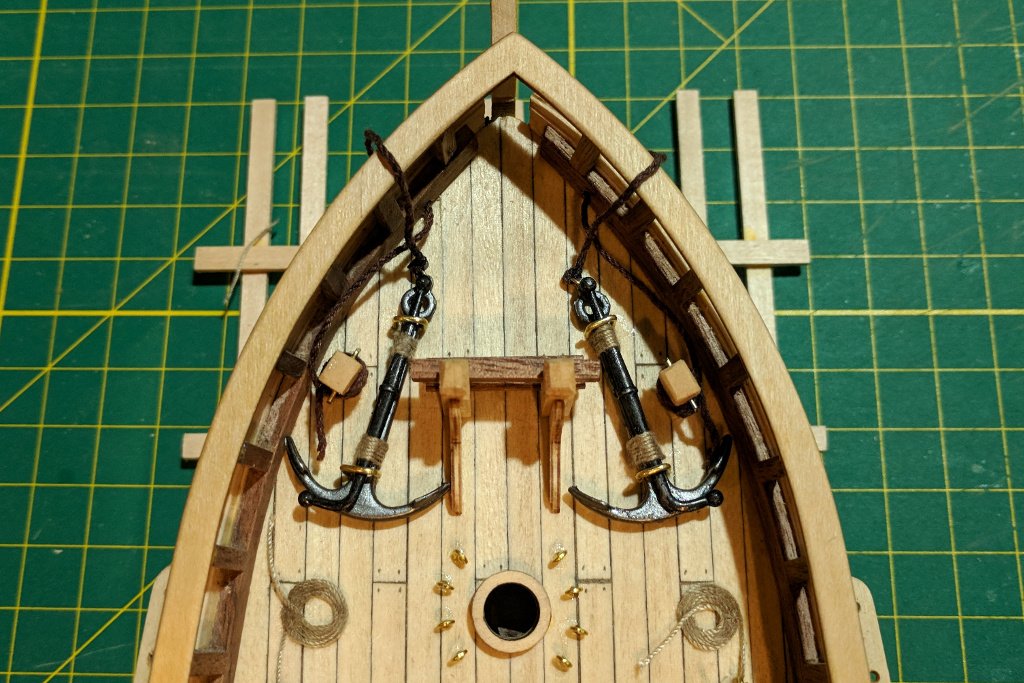
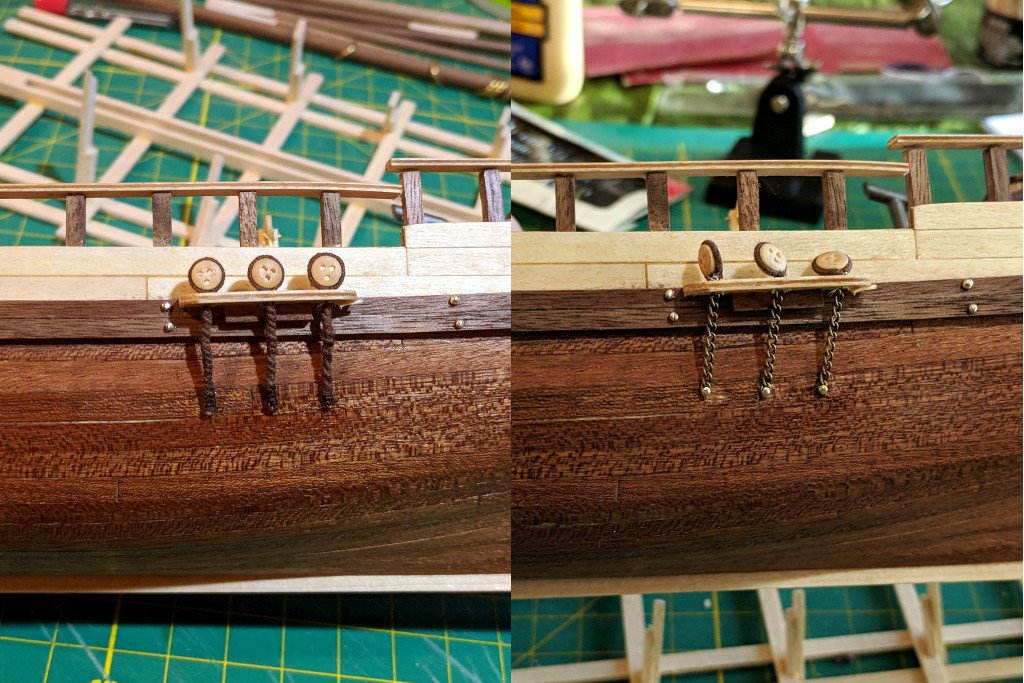
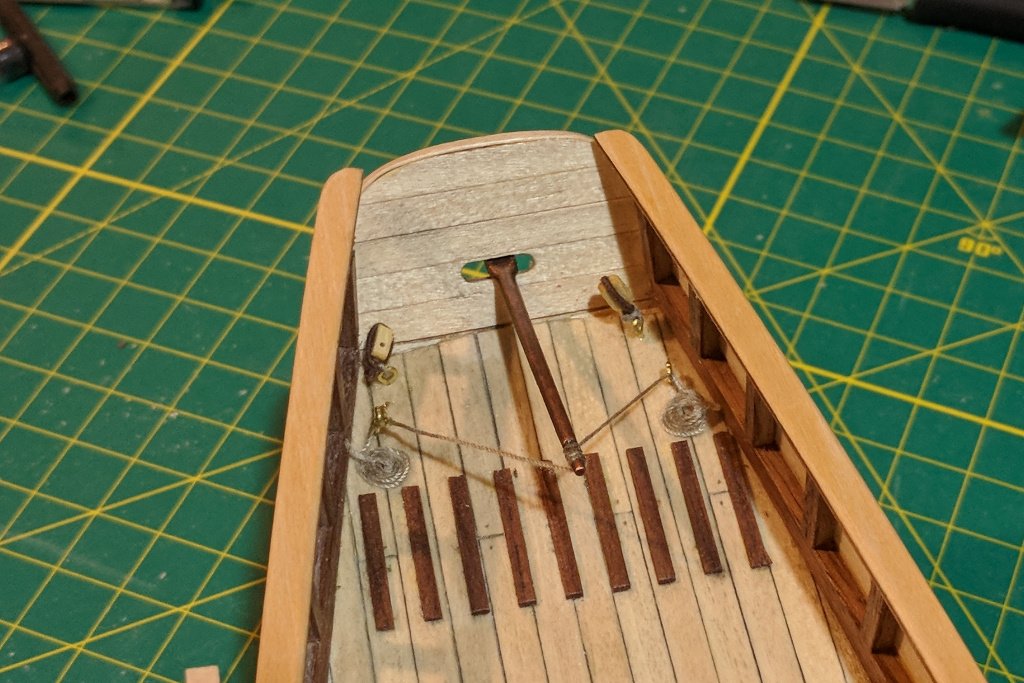
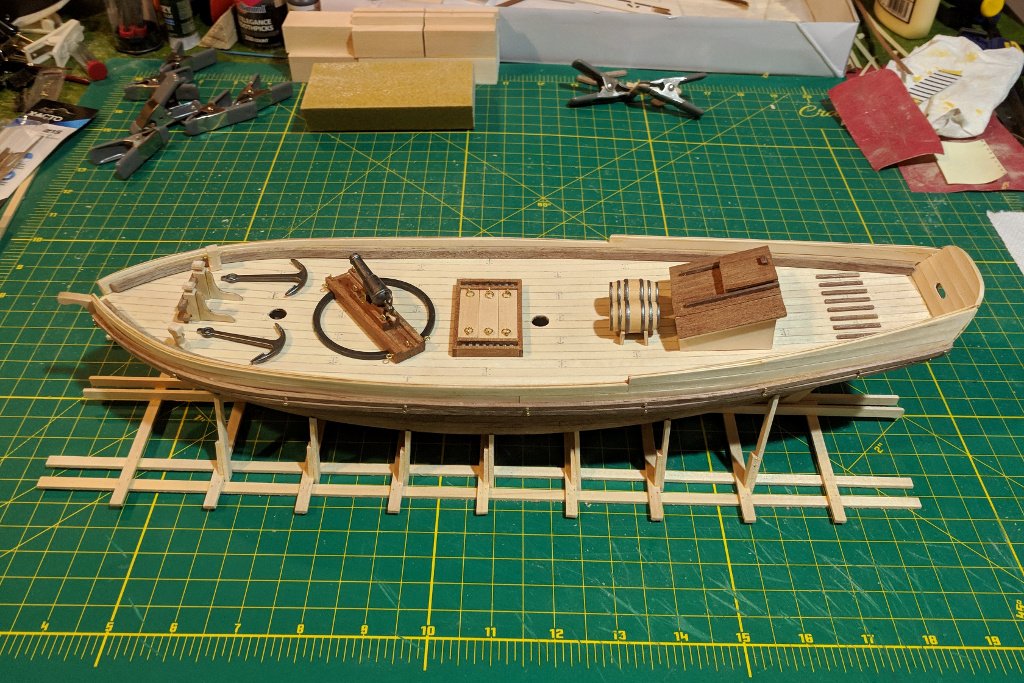
I am completing the final details on the deck. Here are the anchors. The idea of lashing the anchors and stocks together with the light line was taken from Matt763's build log. I created chainplates by twisting lengths of cloth covered wire away from the deadeyes. However, I didn't how they looked, so I removed them and found some chains, which were attached and secured by brass pins. I added some line to hold the tiller in place. In hindsight, I should have kept the lines more slack. Blocks were added at the stern which will accept the boom sheet lines. All my time at this point has been spent trying to figure out how to run each line of rigging.
- 54 replies
-
- 1
-
-
- artesania latina
- Virginia
- (and 2 more)
-
Fore and aft rigging questions
SardonicMeow replied to SardonicMeow's topic in Masting, rigging and sails
Thanks, Henry. That's very helpful. -
The time is soon approaching when I will start the rigging of my model, Virginia 1819 from AL. As a complete novice, I am full of anxiety. It doesn't help that the kit instructions basically say "We're not going to tell you where each line goes, just look at the (completely inadequate) pictures." Thankfully, MSW user Trufo has posted some detailed diagrams of each line in this post. After studying those diagrams at length, I'm most of the way there to figuring out how each line runs, but I still have a few questions. The ship is a schooner with a relatively simple sailplan: a jib, foresail, mainsail, and single gaff topsail. 1. The jib downhaul runs from the head of the job through a block at the end of the bowsprit and is secured on one of the bowsprit bitts. Is it just loose from the head of the jib to the block? Or attached to the stay? Or sewn into the luff edge of the jib? 2. The diagrams show a line from the tack of the mainsail going downwards, but it isn't clear where it ends. Does it attach to the boom near the jaws? Or down to the base of the mainmast? (I am thinking that I might omit this line anyway, as the lowest mast hoop should hold the tack corner of the mainsail in the right position. For what it's worth, there is no corresponding line for the foresail, which has no boom.) 3. The topping lift for the boom runs from the end of the boom up to a block at the trestle trees and down to the base of the mainmast. However, the diagram is only showing the starboard side. Is there an identical topping lift on the port side of the mainsail? Or is there just the one, and I need to decide which side it goes on? 4. Do brails run continuously from one side, through the sail at the leech edge, to the other side? Or are there pairs of separate lines, one on each side, that start at the same point on the leech edge? Thanks in advance for your help.
-
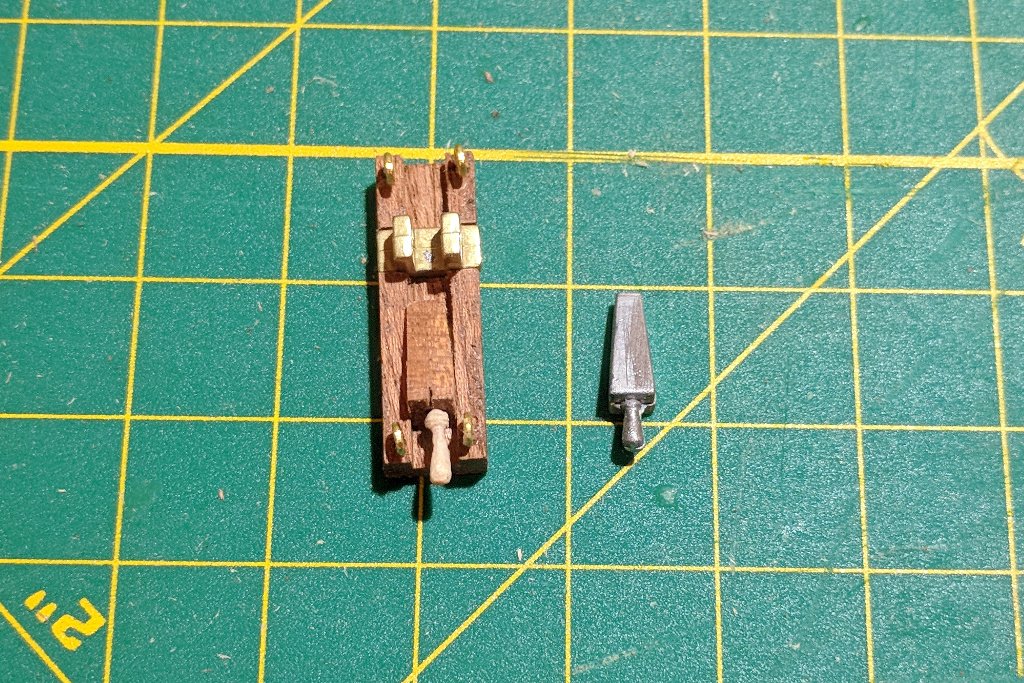
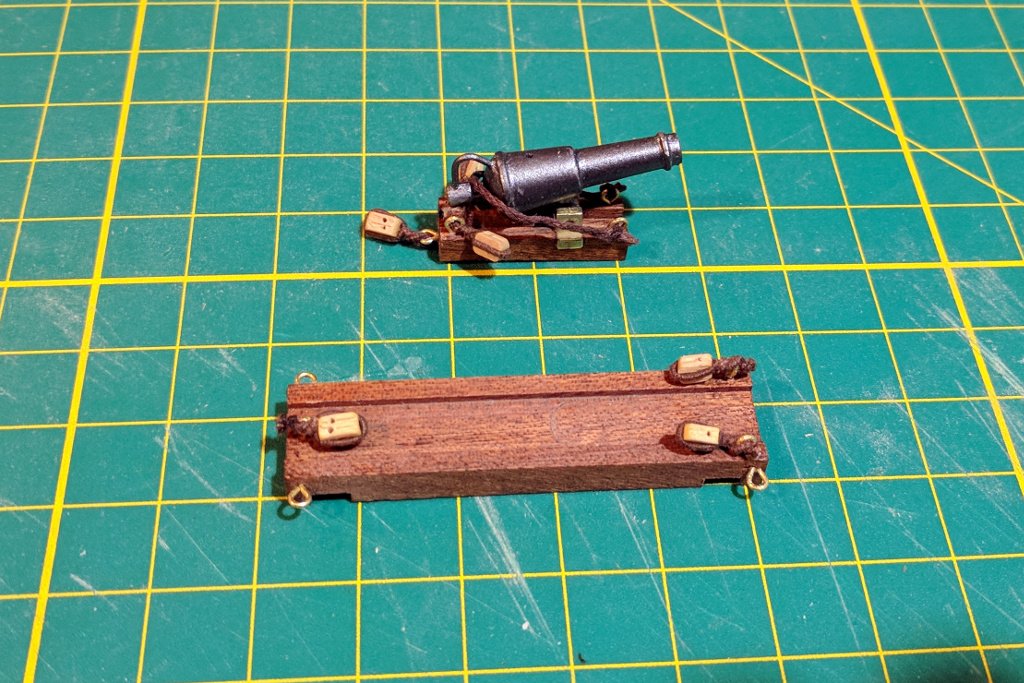
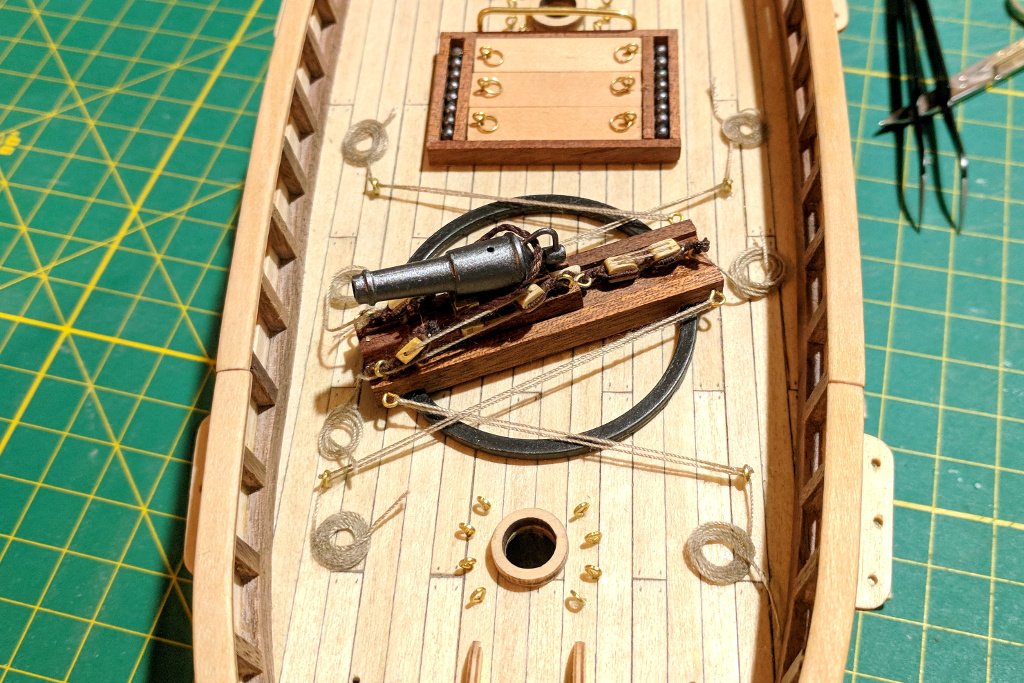
These images show the assembly of the carronade. First, eyebolts were added. I matched the picture in the instructions, but later discovered that the instructions omit an eyebolt that goes on the end of the carriage. I fashioned a wooden quoin to replace the metal one from the kit. The carronade was attached to the carriage and the recoil rope added. Blocks were attached to the appropriate eyebolts. As an experiment, I used cloth covered wire to strop the blocks, rather than the kit-supplied steel wire. It didn't turn out as well as I had hoped. Lines were run and everything was added to the deck. I tried several different ways of making rope coils, which is why they don't quite match. After all the glue was dry, I realized that the carronade is aimed through the shrouds. Ugh. We'll have to imagine that it was in the process of being swiveled, because it will be impossible to correct without causing serious damage to the model.
- 54 replies
-
- 2
-
-
- artesania latina
- Virginia
- (and 2 more)
-
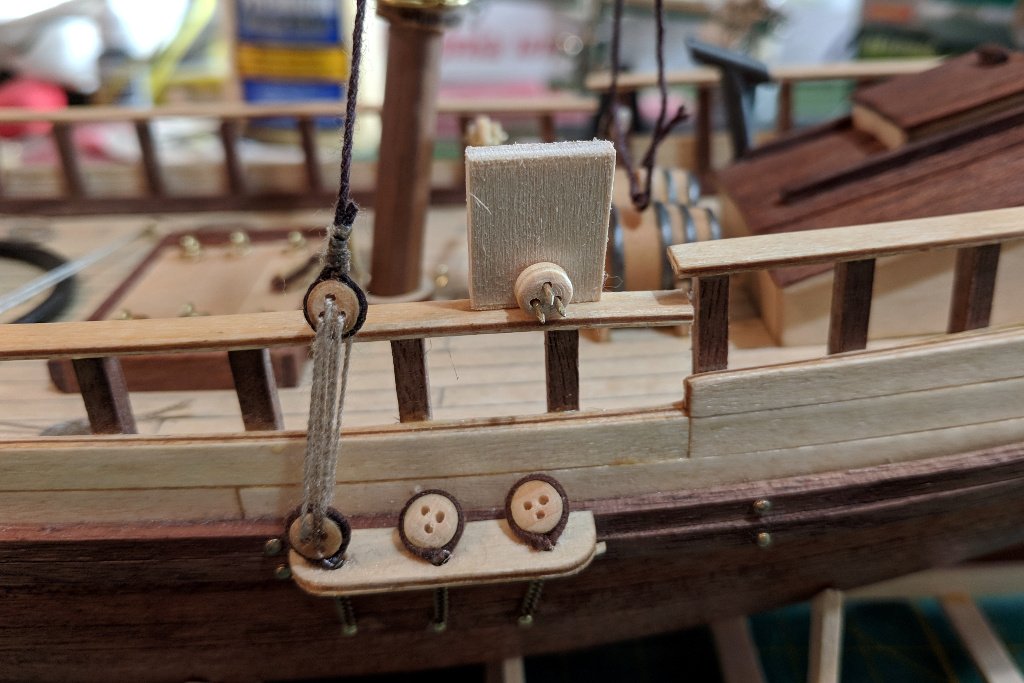
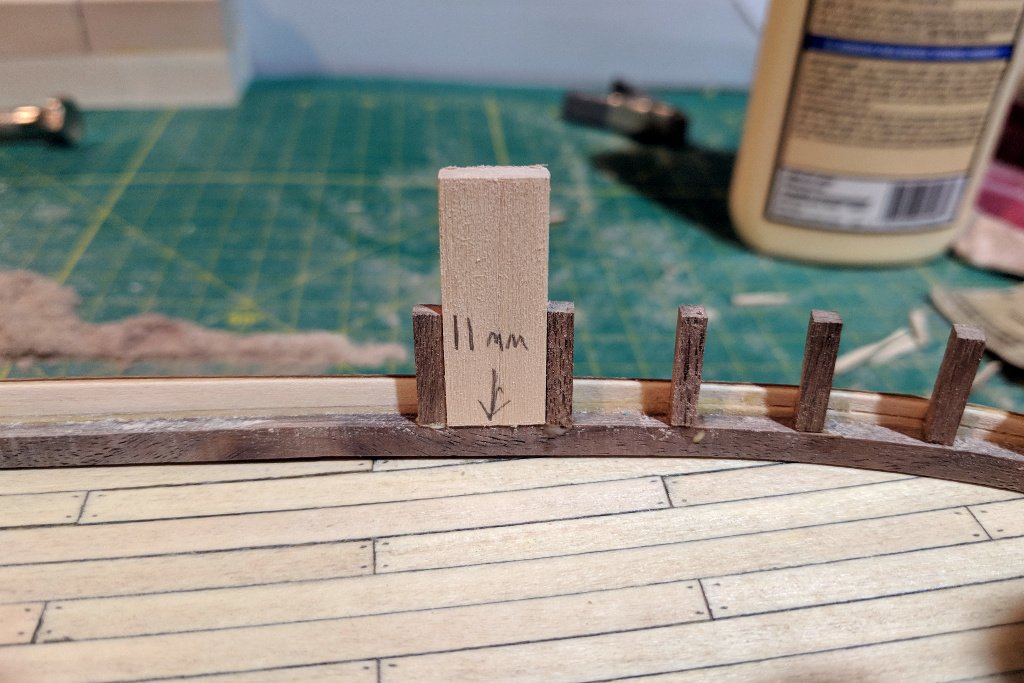
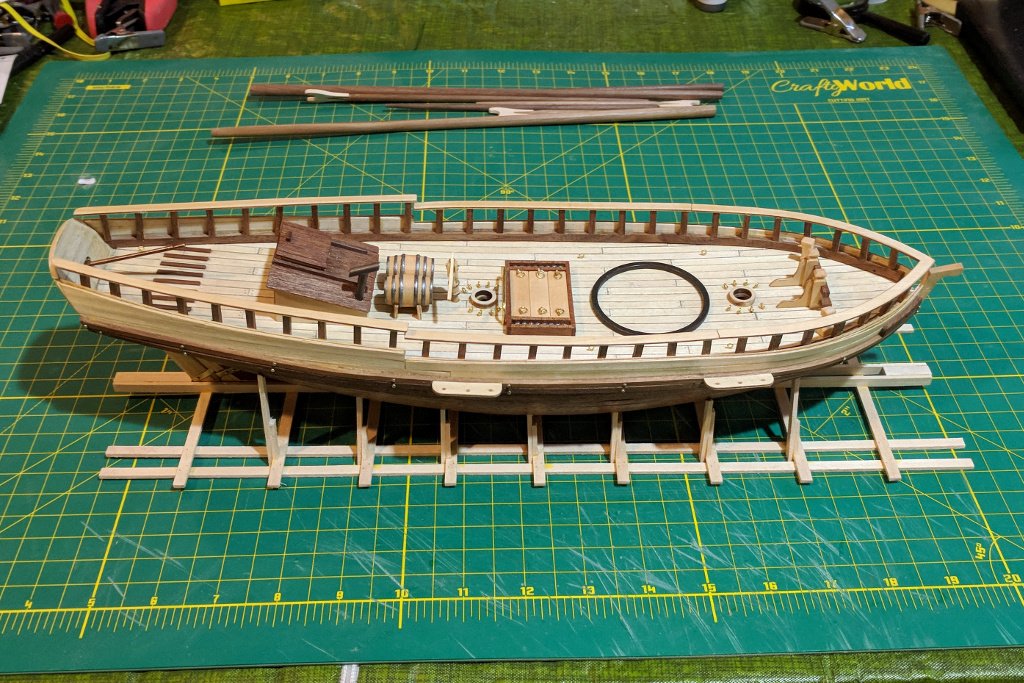
I cut out the required stanchions, one set of 38 at 14mm for the forward railings and 20 at 17mm for the aft railings. A jig made it easy to cut pieces of equal size. Starting at the bow, I glued the stanchions in place, using the spacer pictured below for even spacing. In spite of the proper spacing, I only used 34 of the shorter stanchions. Even though I did my best to keep each stanchion of equal height, it was necessary to sand them down to create an even surface for the railings. After gluing the railings on, I was unhappy with how the railing piece at the bow curved upwards, so I removed it (breaking off a few stanchions in the process), and sanded things down even further at the bow so that the bow railing would lie more flat. The channels were also glued on at this point. While checking the railing height, I noticed on the plans that there will be a line running from the bowsprit bitts, over the top of the railing, to the end of the bowsprit. Even though I lowered the railing a little, it was clear that this line would be obstructed by the railing. Soon it became clear that I had made a mistake weeks ago by gluing the stem too low. As it was, the bowsprit would lie nearly horizontal. With much anxiety, I cut off the end of the stem, fashioned a new one, and glued it in place. With the major surgery on the stem complete, I gave the model another coat of polyurethane. After that, I could finally start attaching various pieces of deck furniture and eyebolts to the deck. I realize that I have hit another major milestone: all the woodwork is done. Almost all the work from this point forwards is rigging.
- 54 replies
-
- 4
-
-
- artesania latina
- Virginia
- (and 2 more)
-
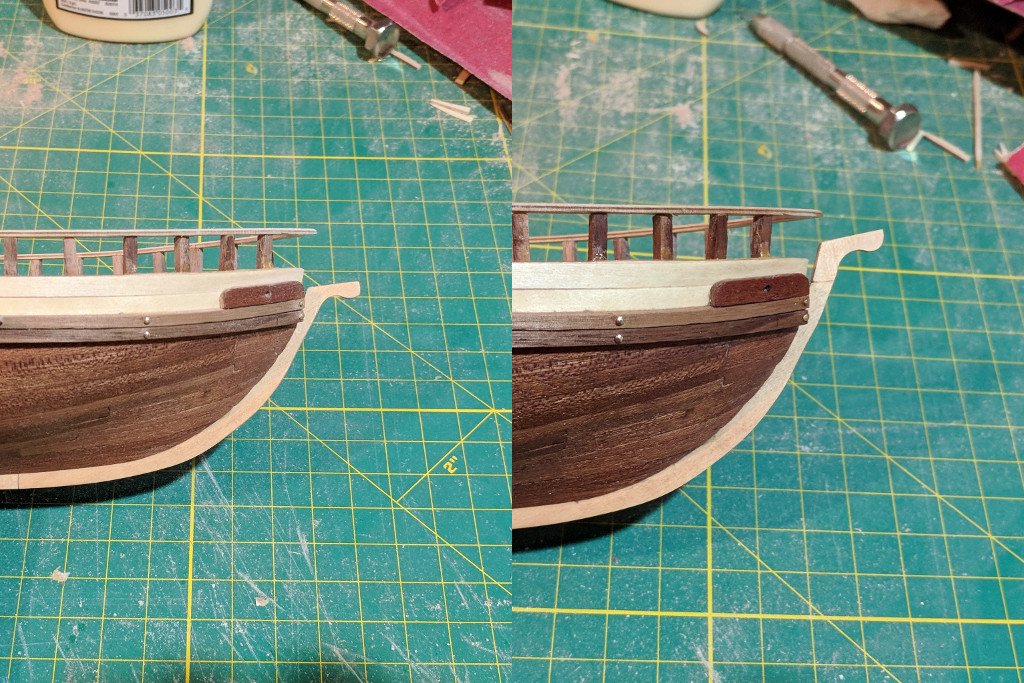
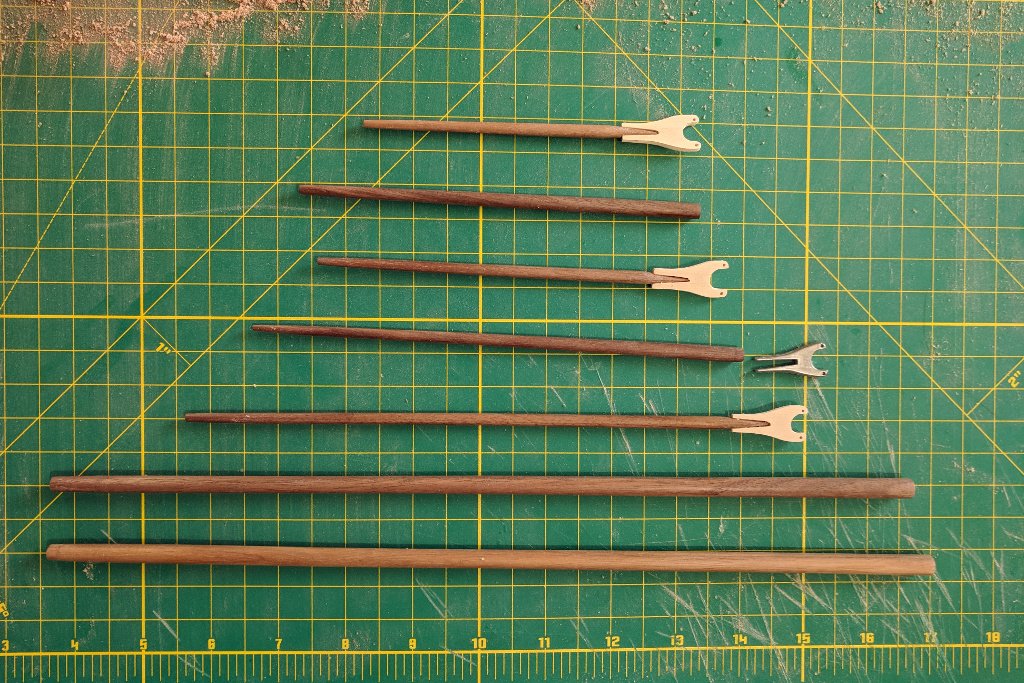
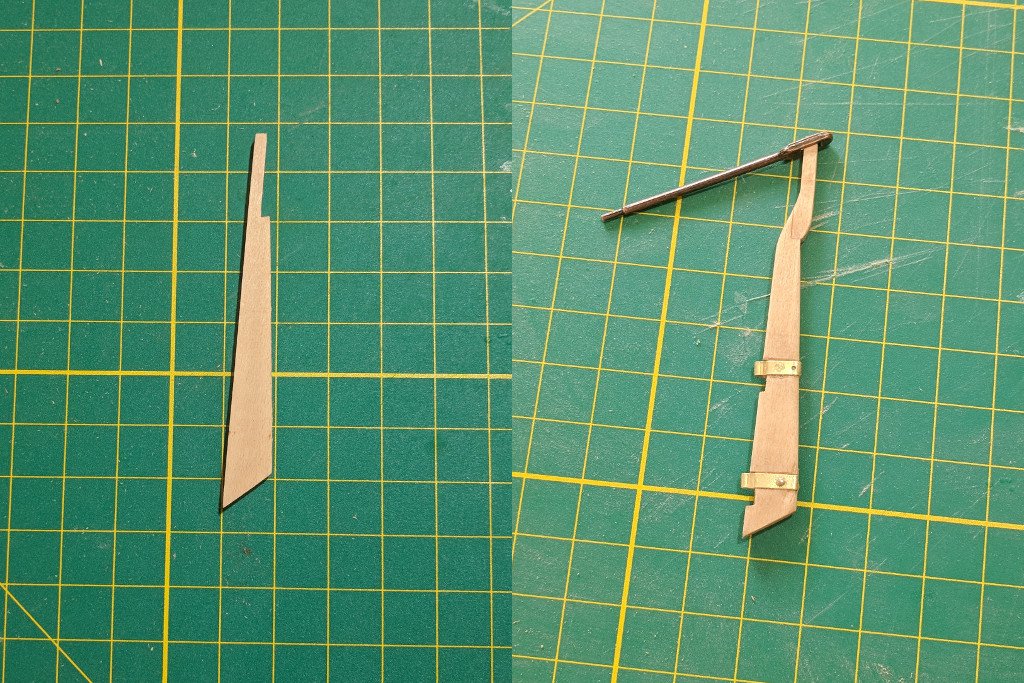
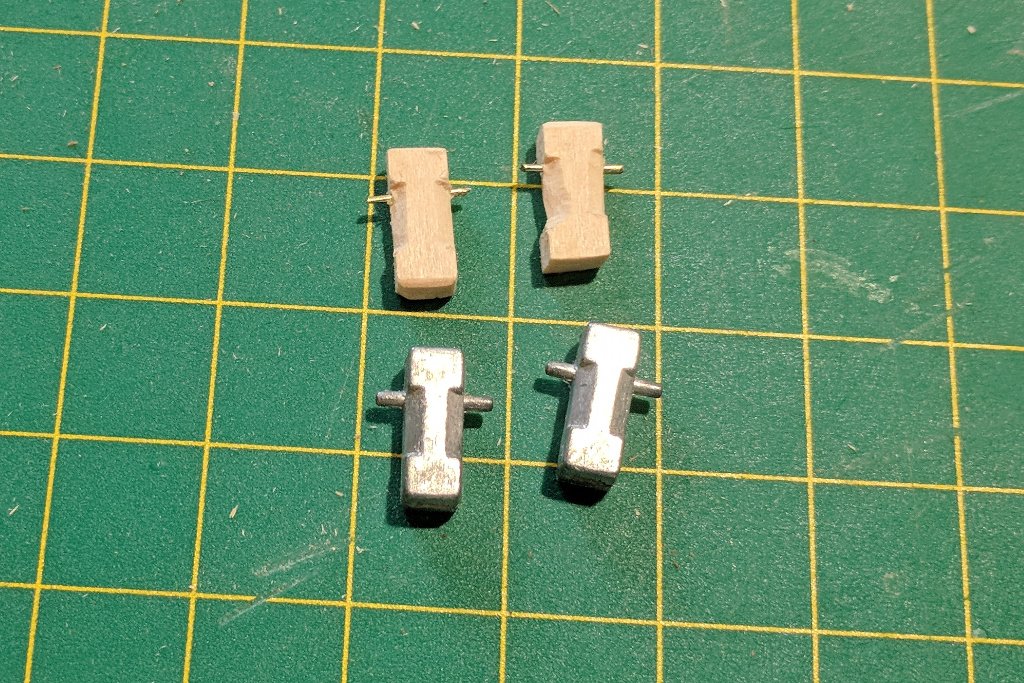
Over the weekend I gave the hull and other assembled pieces a coat of polyurethane. While waiting for the polyurethane to dry, I worked on tapering the masts, bowsprit, boom, and gaffs. I am grateful for the strength of the wood provided in the kit for the masts, as the dowels would certainly have snapped if they were of a lesser wood. The kit provides metal pieces for the boom and gaff jaws, but I decided to create wooden replacements. The original metal part can be seen in the photo. Next I addressed the rudder. The transom, as I built it, juts out in such a way that the rudder will be too far from the stern post. I think this has been a problem mentioned in every build log for this kit that I have read through. To fix it, I glued an extra piece of wood to the top of the rudder piece, then sanded it down so that the rudder piece would curve in toward the stern post. After many checks and adjustments, I attached the hinges and mounted the rudder onto the model.
- 54 replies
-
- 3
-
-
- artesania latina
- Virginia
- (and 2 more)
-
Thanks, Richard and rony. Replacing the metal parts was a nice challenge to give me a taste of scratch building.
-
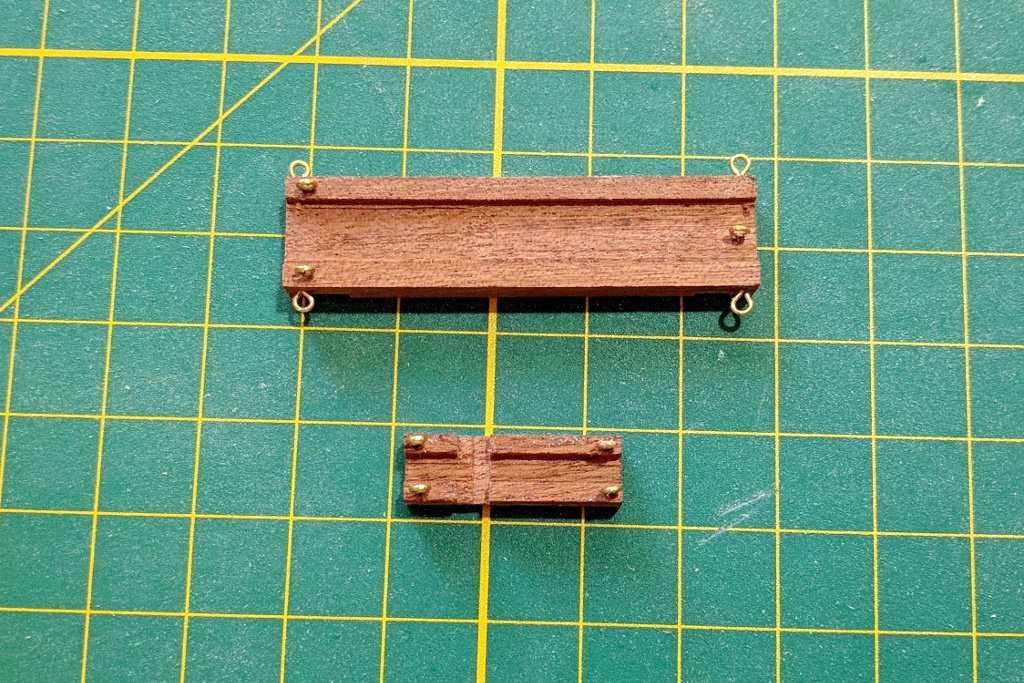
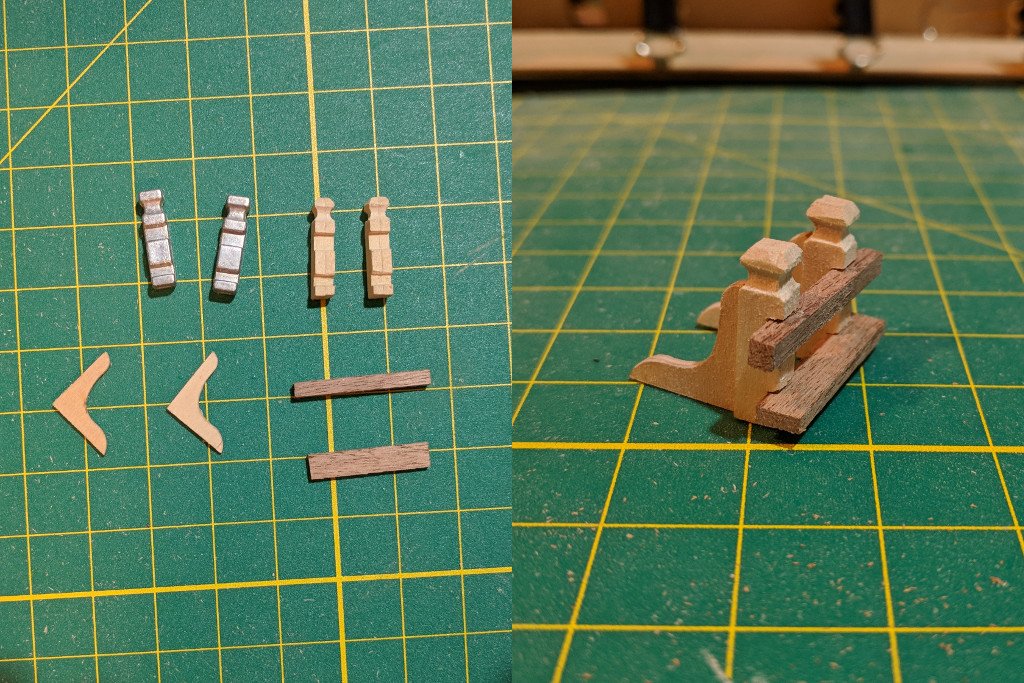
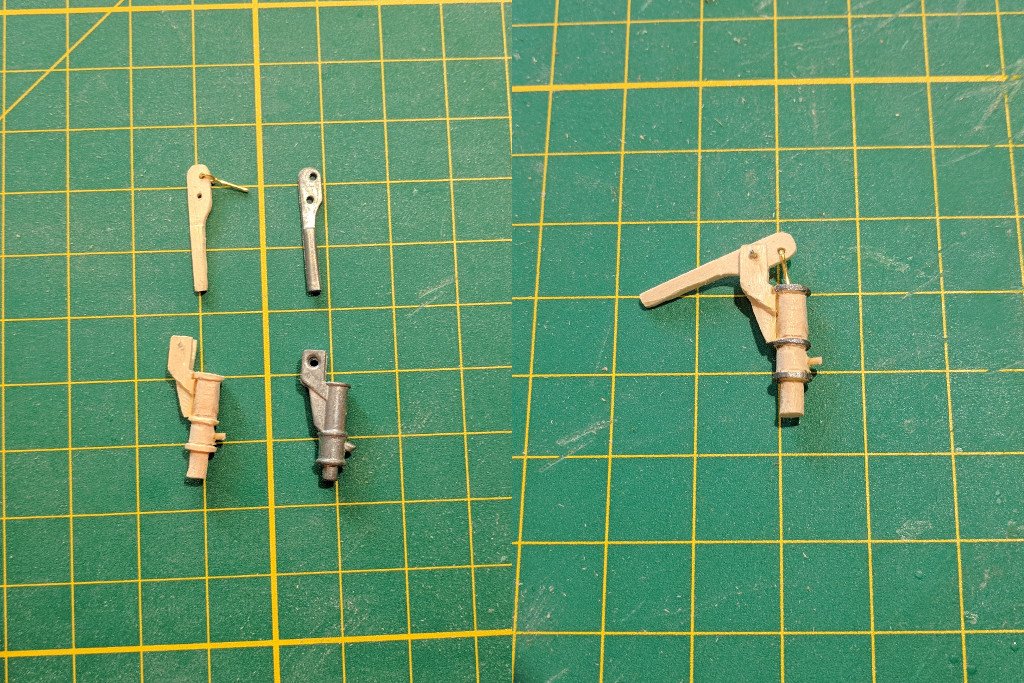
Here are some more little pieces for the deck. I tried to challenge myself by creating replacements in wood for several of the metal parts. The originals and replacements can be seen in the pictures. I placed various parts on the model to see how it would look at this point.
- 54 replies
-
- 3
-
-
- artesania latina
- Virginia
- (and 2 more)
-
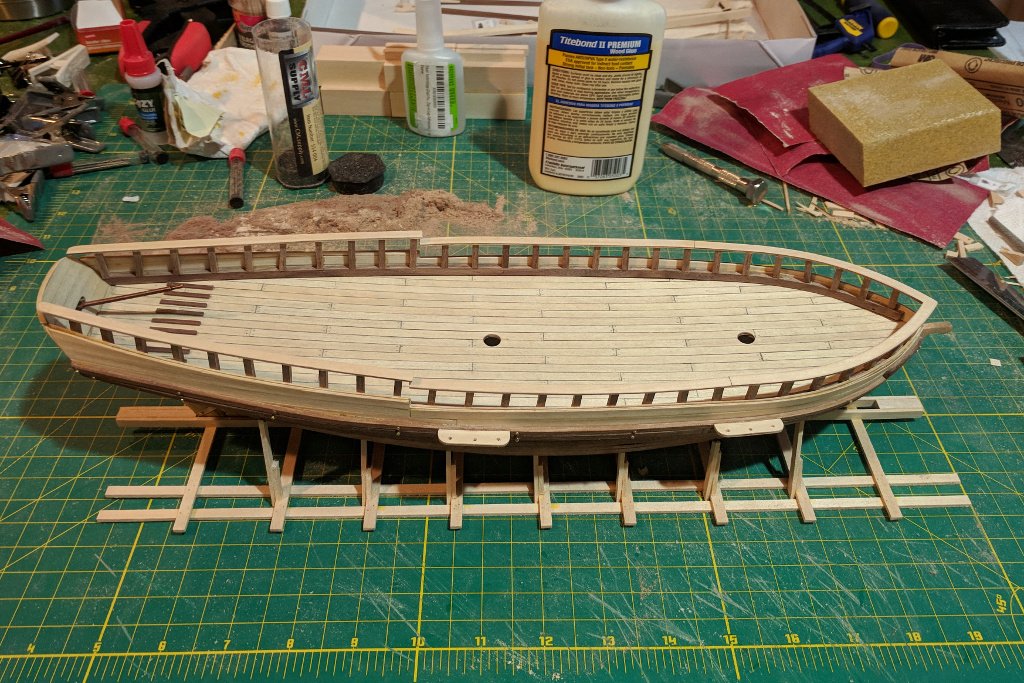
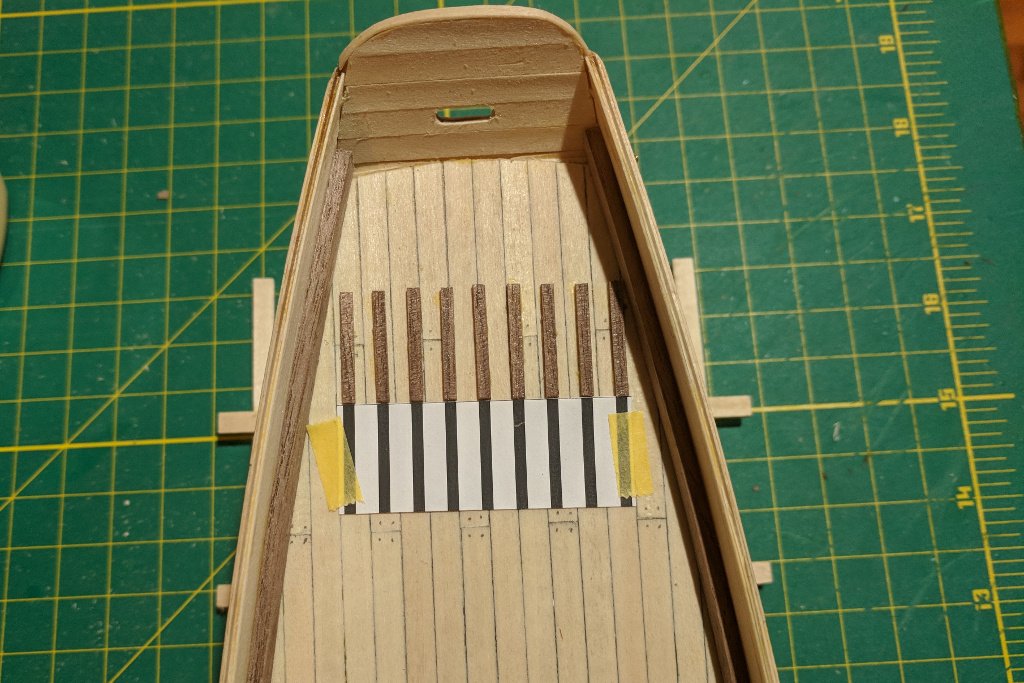
I looked for other parts I could add before putting on a coat of polyurethane. The first are the extra planks on the floor of the helm area. I created a template so that I would have perfect spacing between each piece. I also added the hawse pieces to the bow. They were soaked in hot water and I tried to bend them to add the necessary slight curve. However, the wood ended up splitting. In hindsight, I should have bent the original long piece of wood before cutting it into the separate pieces. To cover up the problem, I added a piece of the mahogany veneer to each hawse piece. The kit does not come with a stand for the model. I had a good number of the pieces used for the first hull planking left, so I used them to create a slipway for the model to stand on.
- 54 replies
-
- 2
-
-
- artesania latina
- Virginia
- (and 2 more)
-
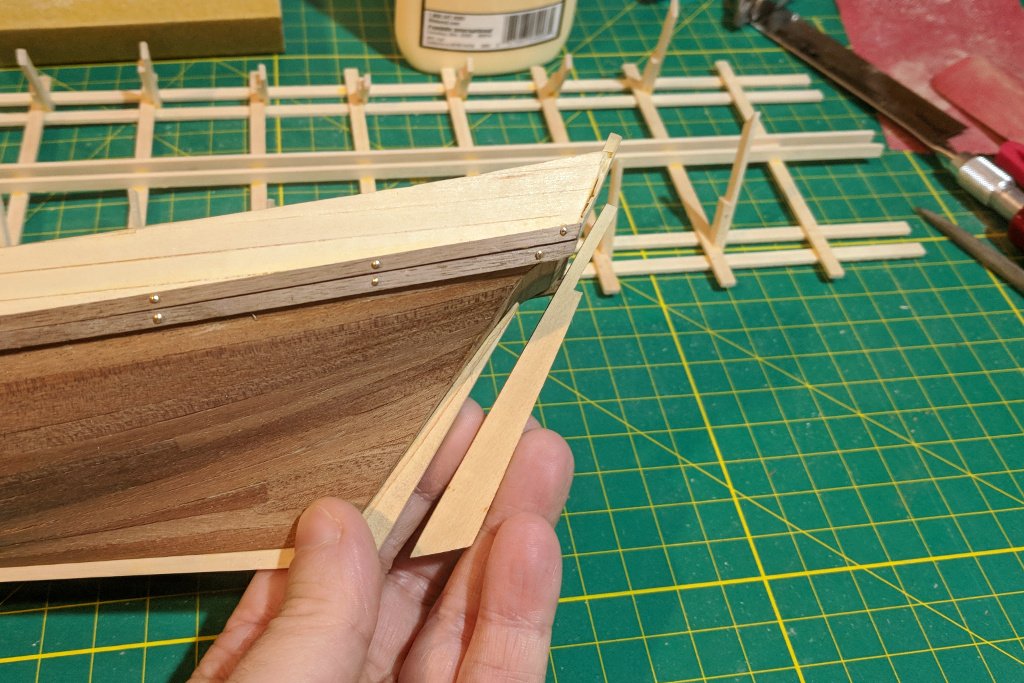
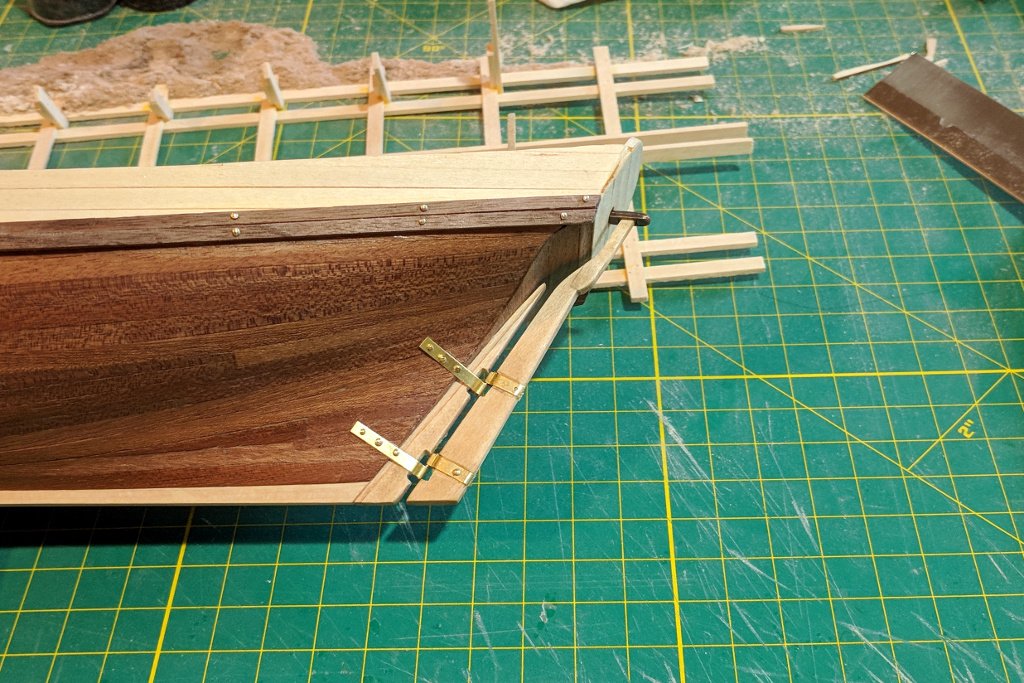
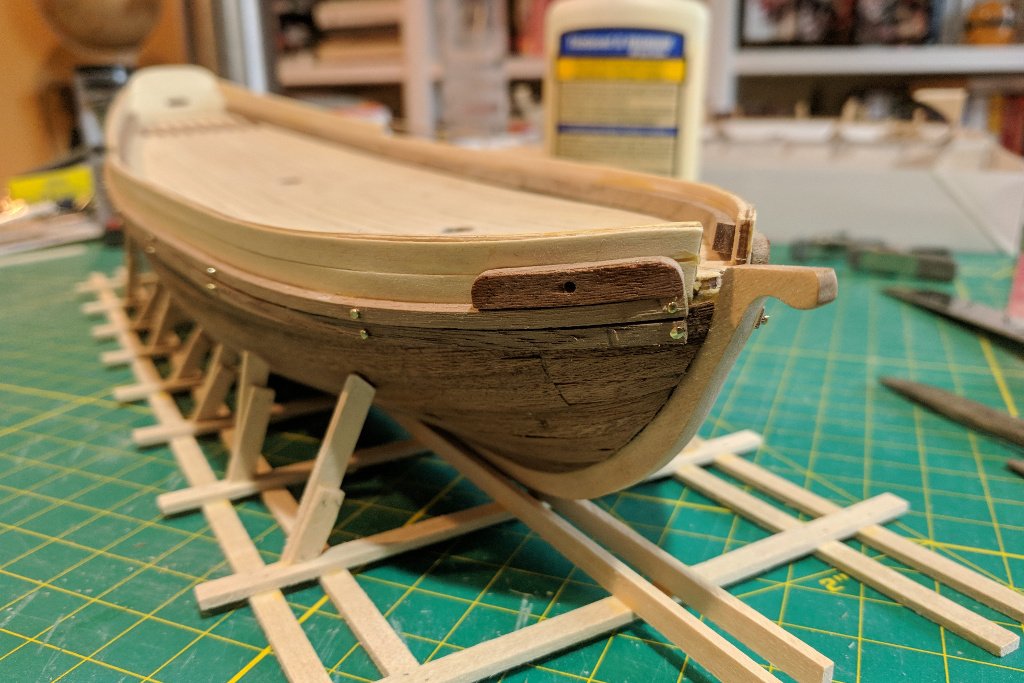
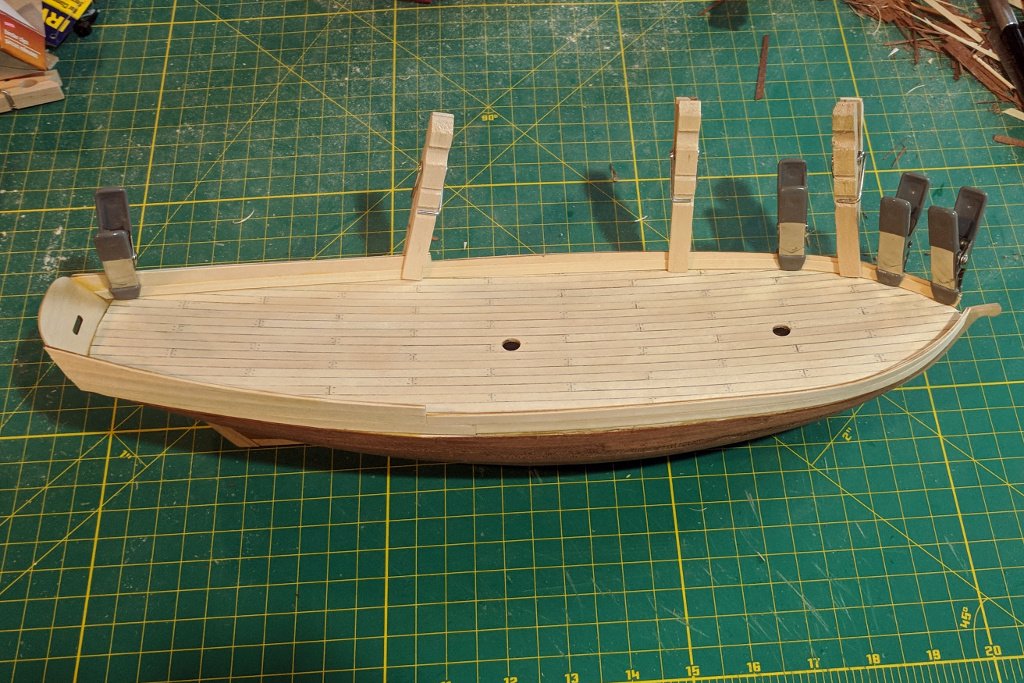
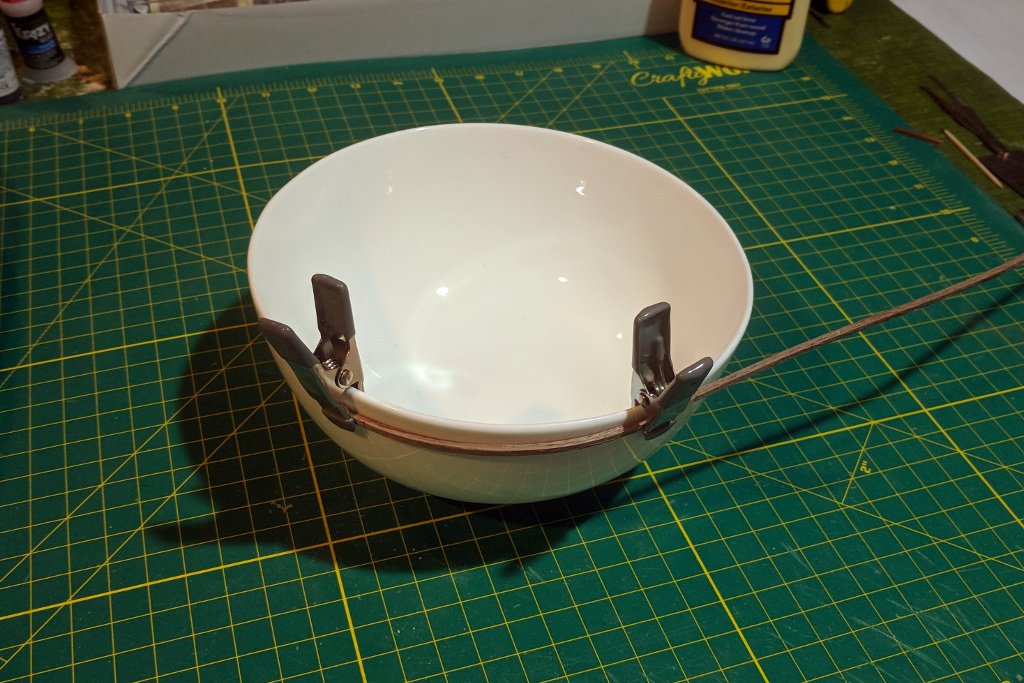
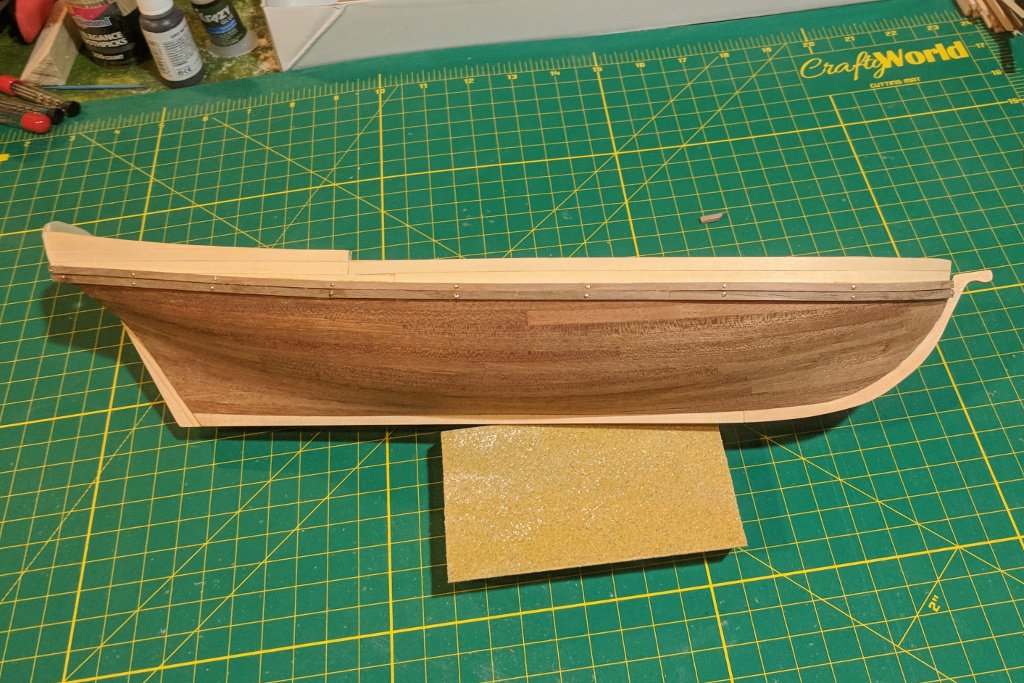
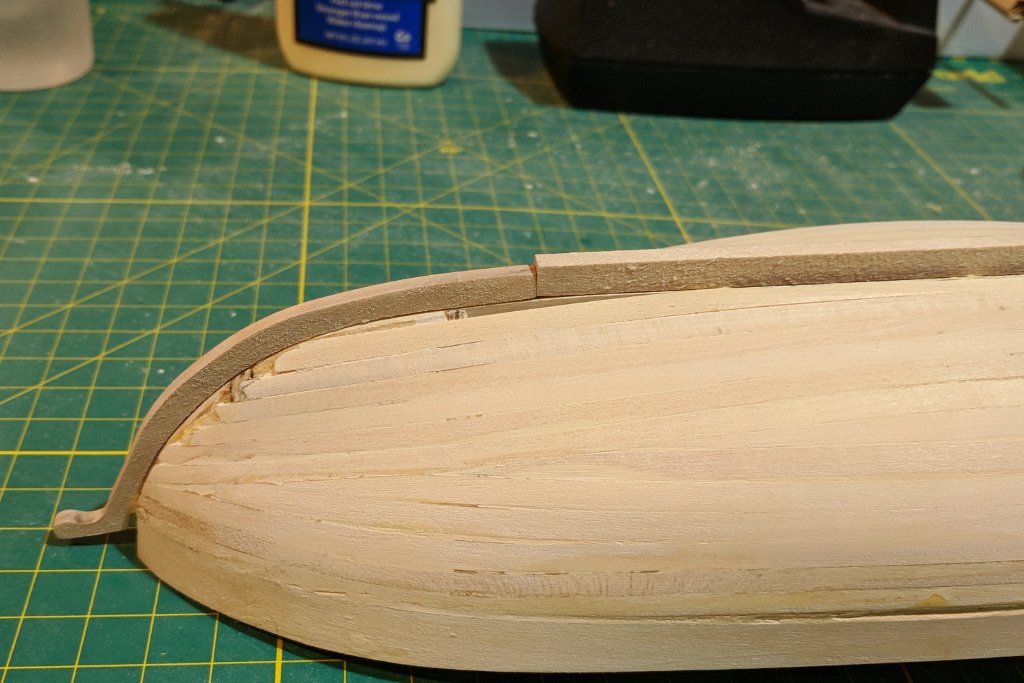
The final hull planks have been added. I consider this a major milestone. And the finishing planks were added to the inside and outside of the bulwarks. On the outside of the bulwarks, it wasn't possible for a single plank to run end to end, as the sheer was too extreme. I split the planks into two sections in order to manage this run. There is a gap between the bulwark outer planks and the hull planks that will be covered up by the rubbing strakes. Planks to finish the transom were added. After reflecting on the recommendation from aviaamator, I removed the stern post so that I could add the final stern planks directly, rather than working around the stern post. Next were the rubbing strakes. (That's what the instructions call them, but is this the right term? Maybe wales is a better term?) They were soaked in hot water, then formed around the edge of a bowl. I'm very pleased with how the rubbing strakes turned out. After forming them to the shape of the hull, I drilled holes where I wanted each pin. Starting at the bow, I placed the strake against the hull, and drilled through the first hole into the hull, then inserted a pin. Then I positioned the piece where I wanted it, drilled the next hole through, and added the next pin. I repeated this to the stern. Then I removed everything, applied glue, and put everything back, pushing the pins all the way in. The stringers (again, is this the right term?) were also bent using the same bowl, then glued into place using lots of clips to hold them in place. I'm now near a point where I am considering applying some polyurethane to the hull.
- 54 replies
-
- 3
-
-
- artesania latina
- Virginia
- (and 2 more)
-
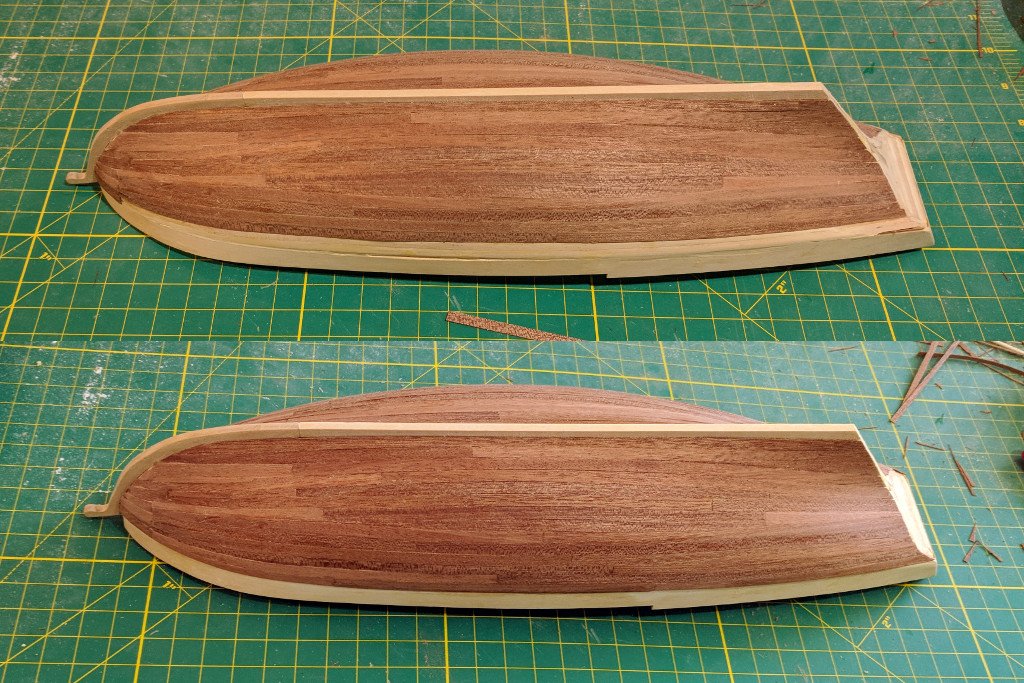
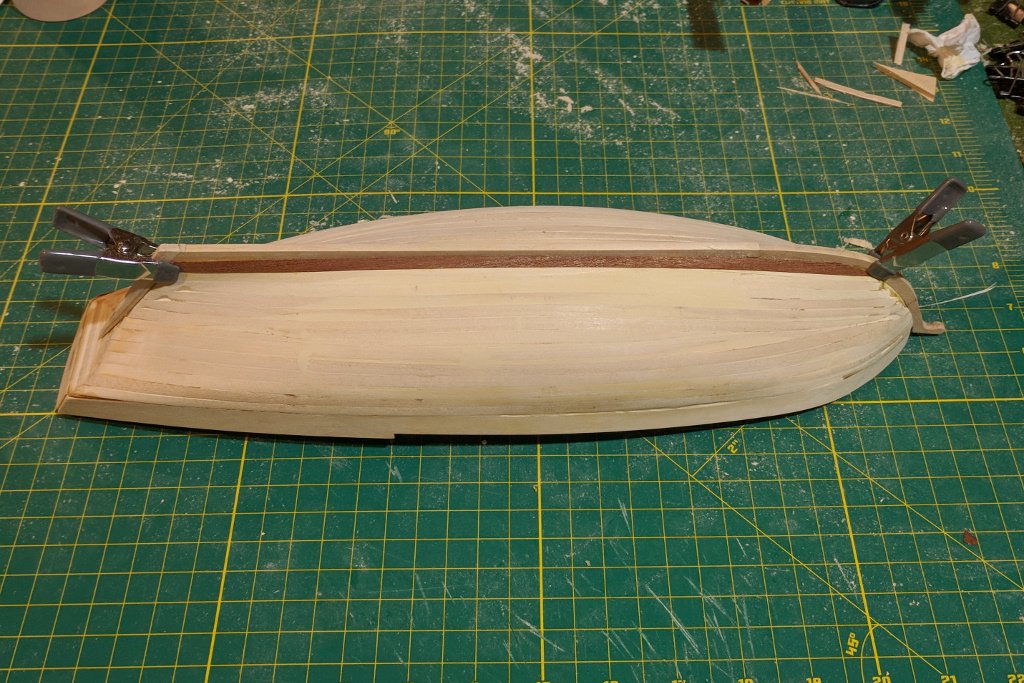
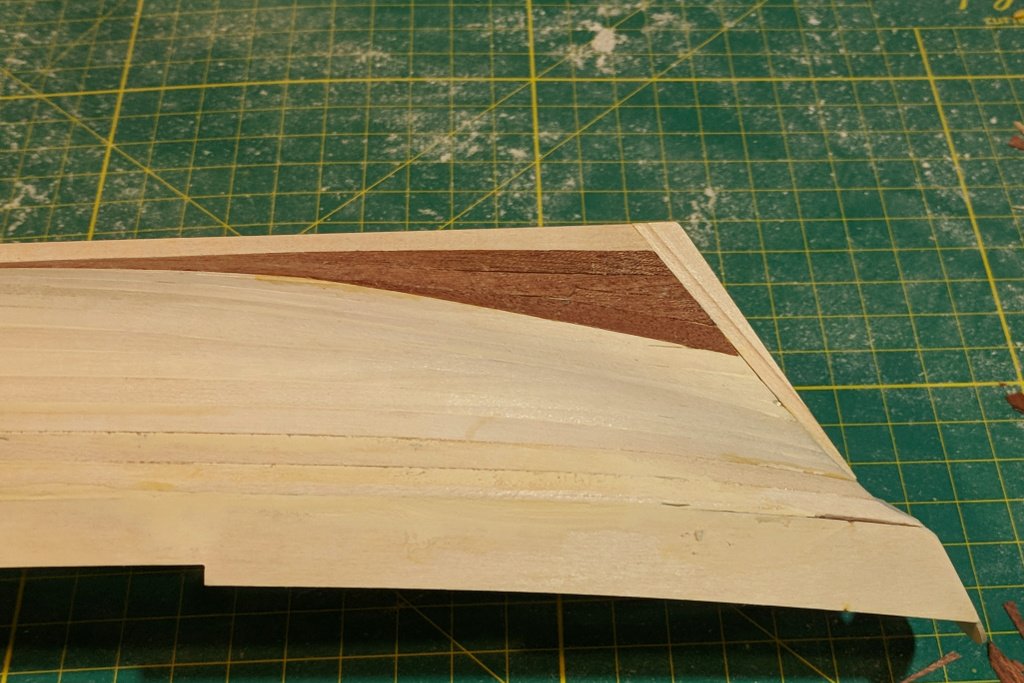
The stem, keel, and stern post have been attached and the second, final layer of hull planking has been started. The second planking is unlike the first in several ways. The thin mahogany veneer strips provided for the outer planking are very brittle and difficult to cut or sand without splintering, so shaping them is more challenging. However, they are much easier to glue. I can apply some wood glue, spread it with my finger until it is thin and tacky, and the planks can be laid down like tape. They are set in place in just a minute or two. The outer planks cannot be laid flat except by strictly following the curves of the hull. This has required carefully making each plank appropriately wide or narrow, and I found that it has been easier to do this by breaking the planks into many shapes, rather than trying to lay a single long plank from bow to stern. It has been a slow process to test fit each piece, sand off a few molecules, test fit again, etc. until the piece is ready to glue.
-
I see. You are saying that I should have attached those boards before attaching the stern post. It is true that is it too late for that. However, I will be able to glue the boards on either side of the stern post, which will be almost as good.
-
aviaamator, which board(s) do you mean? A, B, or C?

- 54 replies
-
- 1
-
-
- artesania latina
- Virginia
- (and 2 more)
-
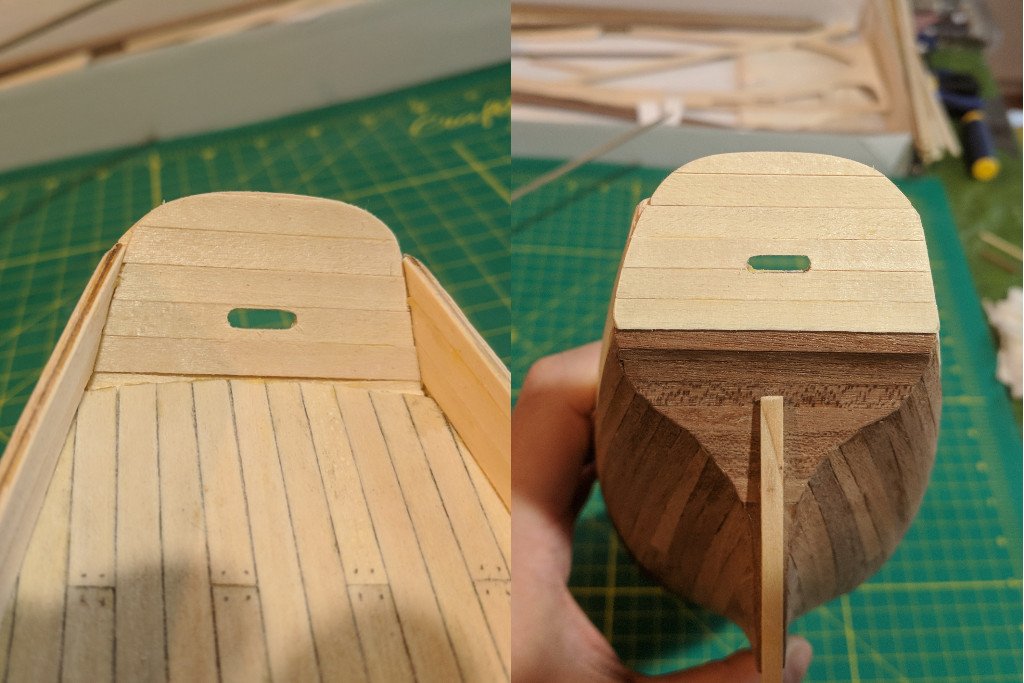
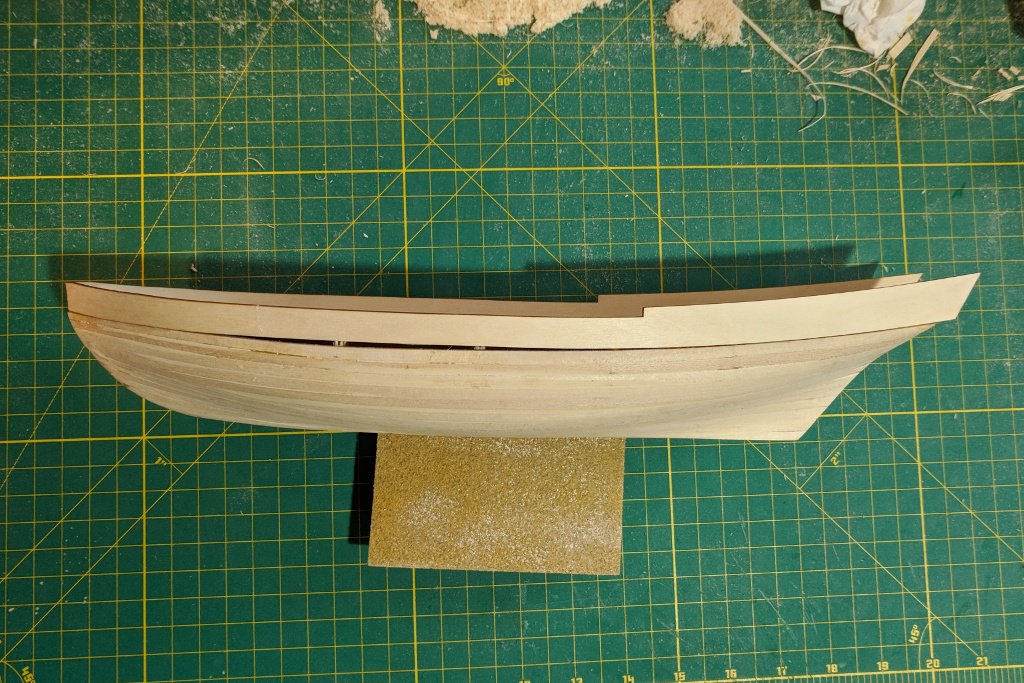
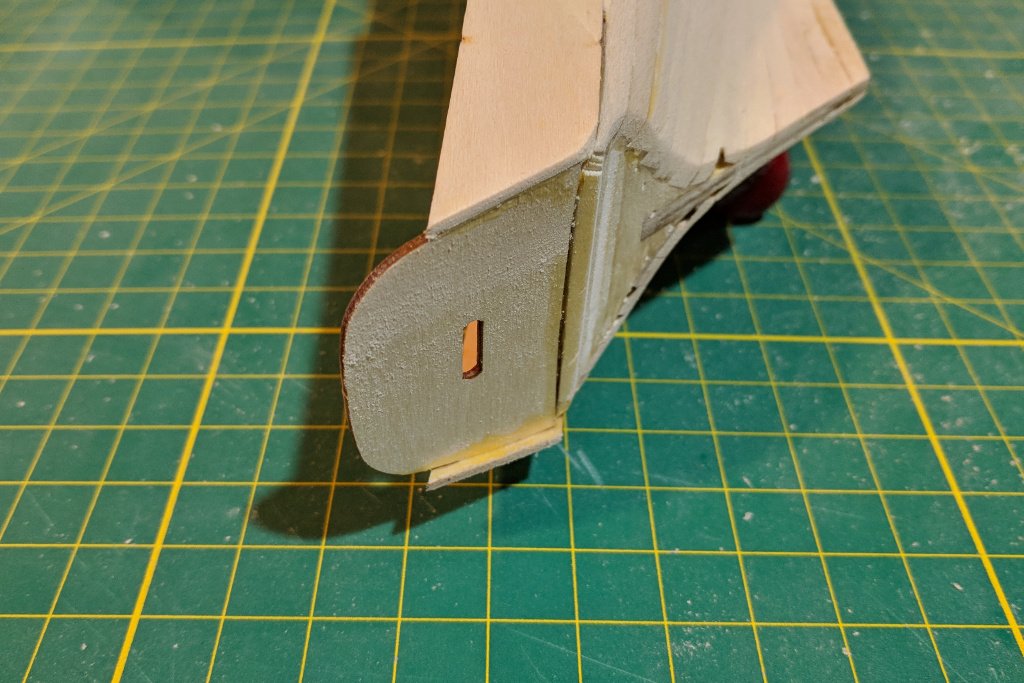
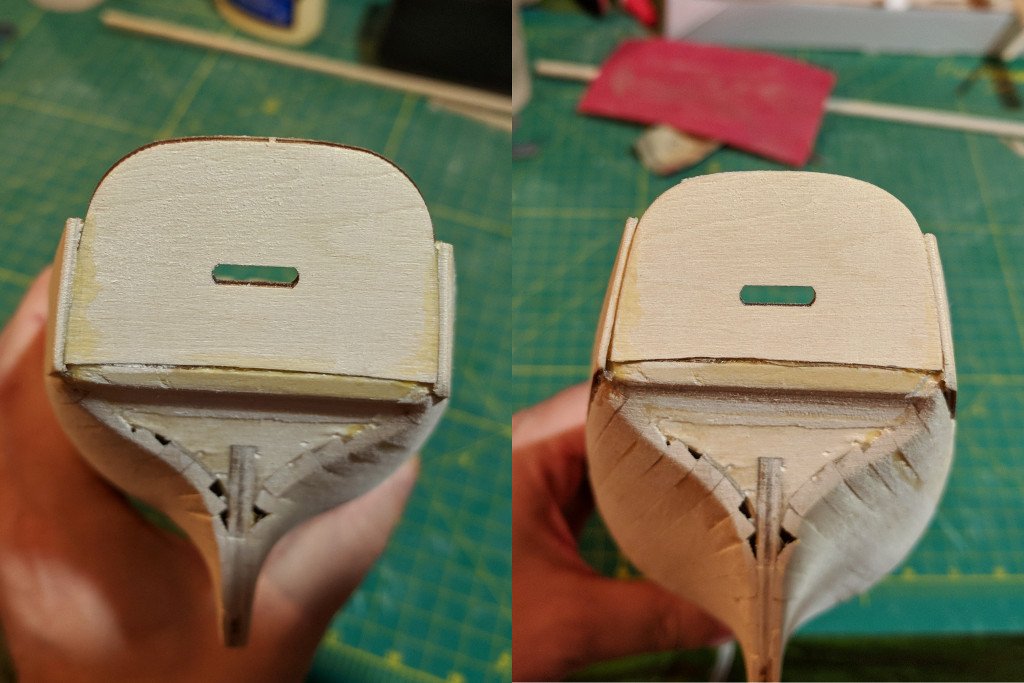
The bulwark pieces were soaked and allowed to dry with the proper curves. Then they were glued into place. I paid the greatest attention to the size of the opening at the bow, making sure it was sized to allow the bowsprit through. At the center of the ship, the edges of the bulwark did not match the top of the upper strake of hull planks, as you can see below. Wood filler was used to patch areas between the bulwarks and hull, then sanded smooth. The transom was glued in place. Because the sides of the transom piece are curved, it was necessary to clamp the backs of the bulwarks to the transom in order to leave no gap. The bulwark pieces stuck out beyond the transom, so these were sanded down to be flush with the transom. Below, the top piece has been sanded while the lower one has not. I tested the position of the rudder and realized that the hole for the tiller was too high. I checked against the plans and looked at other build logs and it was clear that the hole should be about halfway between the top and bottom of the bulwarks. To fix it, I removed the transom, cut off the lower 5mm, and glued the piece back into place. The kit instructions want the second layer of hull planking to be put on before the stem, keel, and stern post pieces are attached. However, it was my impression that if I proceeded in that order, there would be no way to ensure that the final planks would lie nicely against the stem, keel, and stern post. Therefore, I decided to change the order. At first, I assumed that the stem should be positioned with its top level with the deck, so that the bowsprit would lie on the deck. However, it looks like that is not correct; the bowsprit should lie above the deck and not touching it. Therefore, I glued the stem in place with the top of the stem about halfway between the the top and bottom of the bulwarks. Next I tested the keel, and noticed that the supplied wood piece is taller than the end of the stem. It will need to be sanded down to match.
- 54 replies
-
- 1
-
-
- artesania latina
- Virginia
- (and 2 more)
-
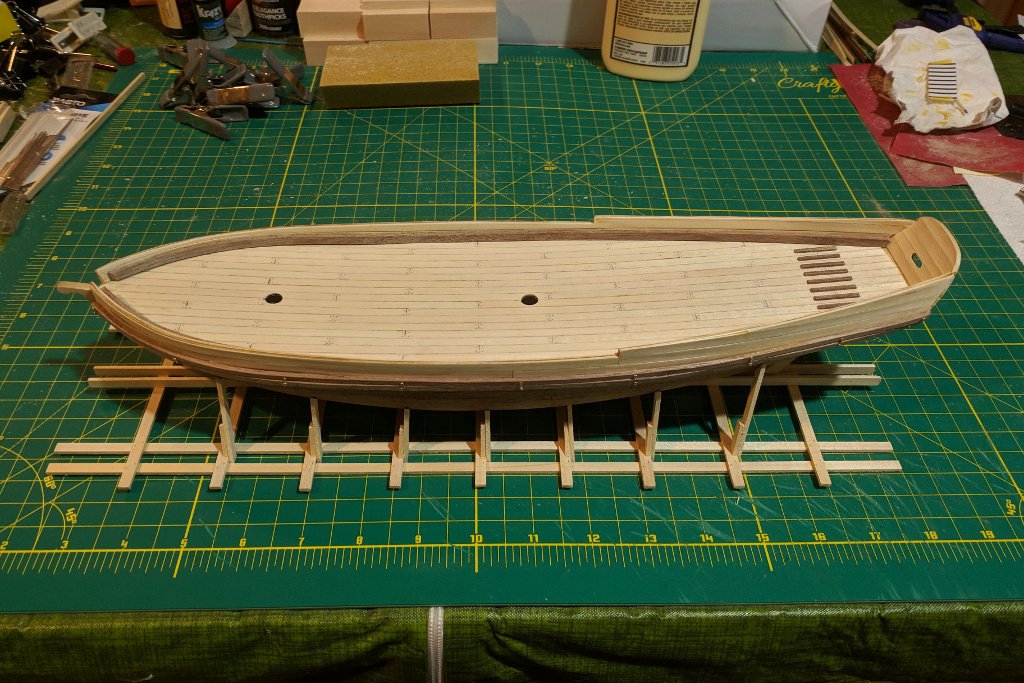
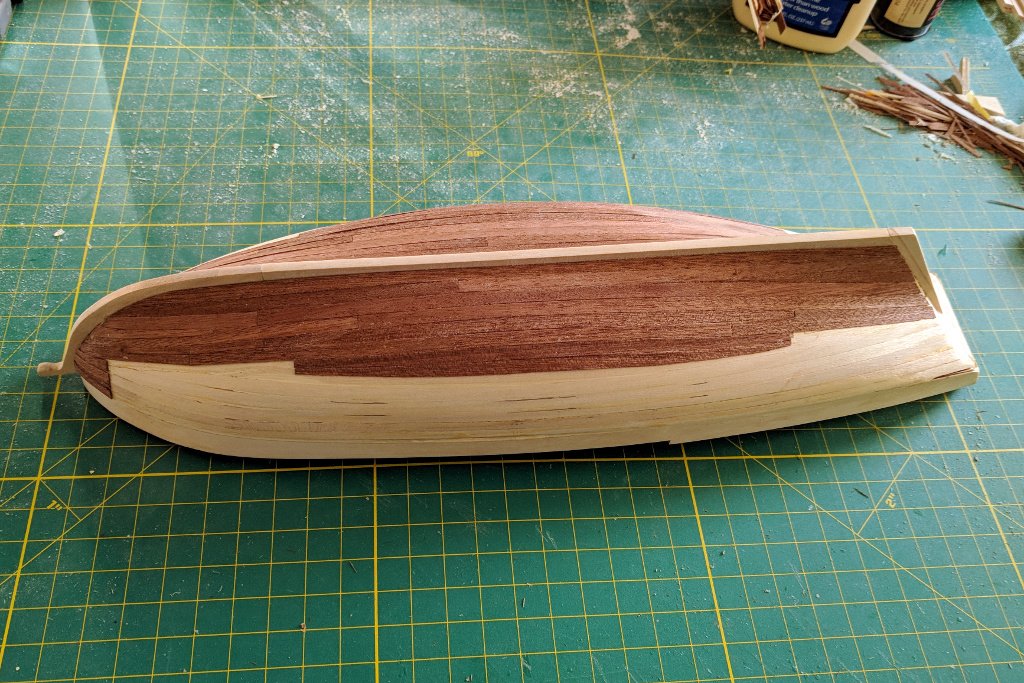
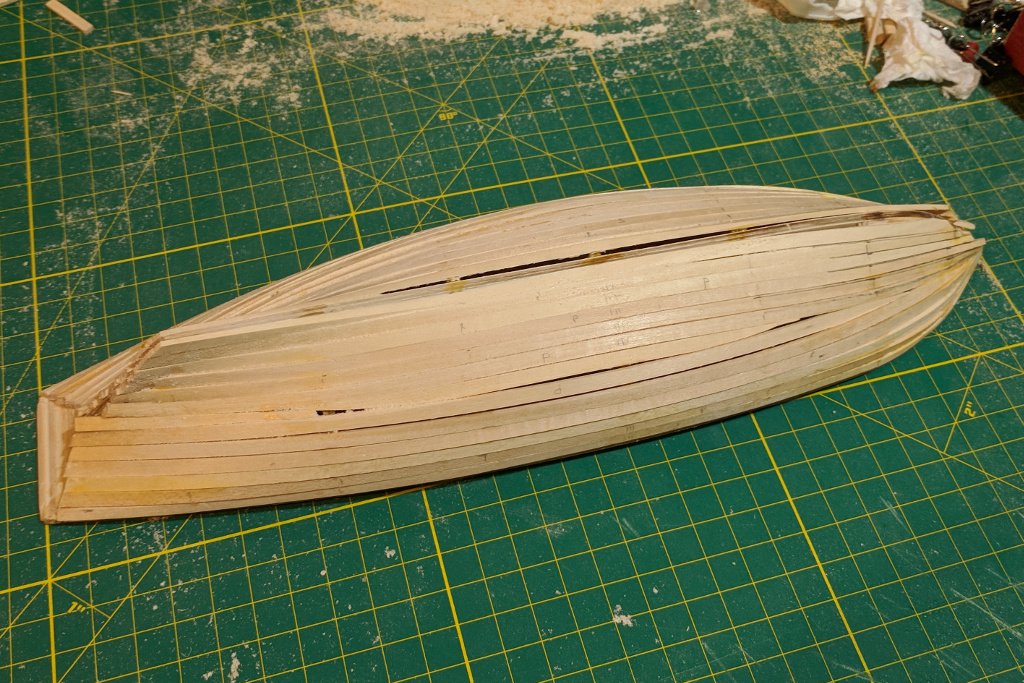
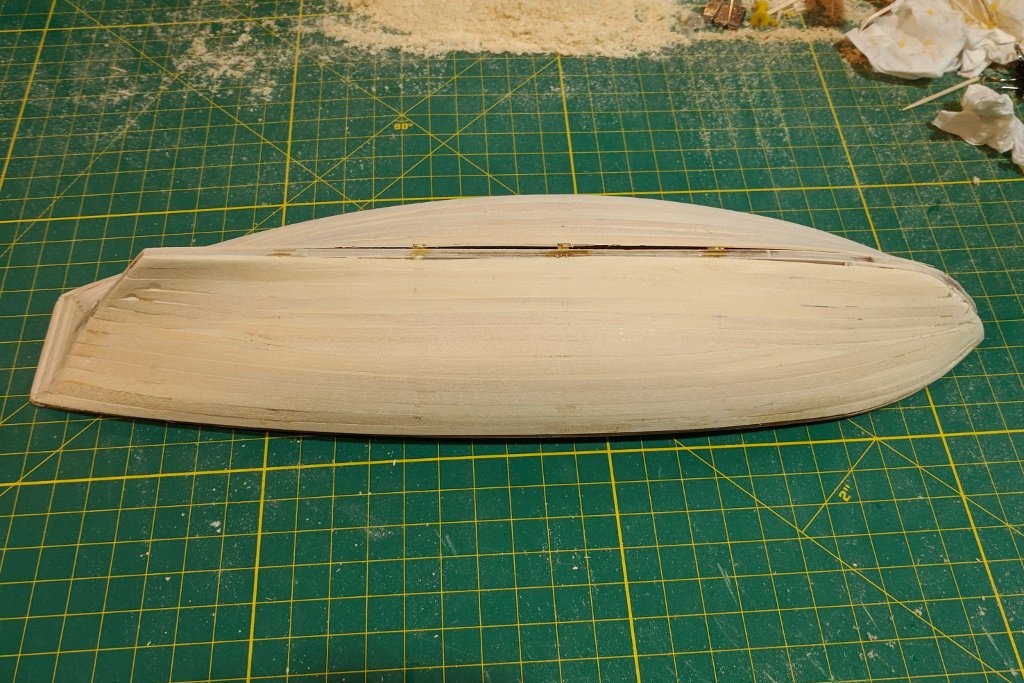
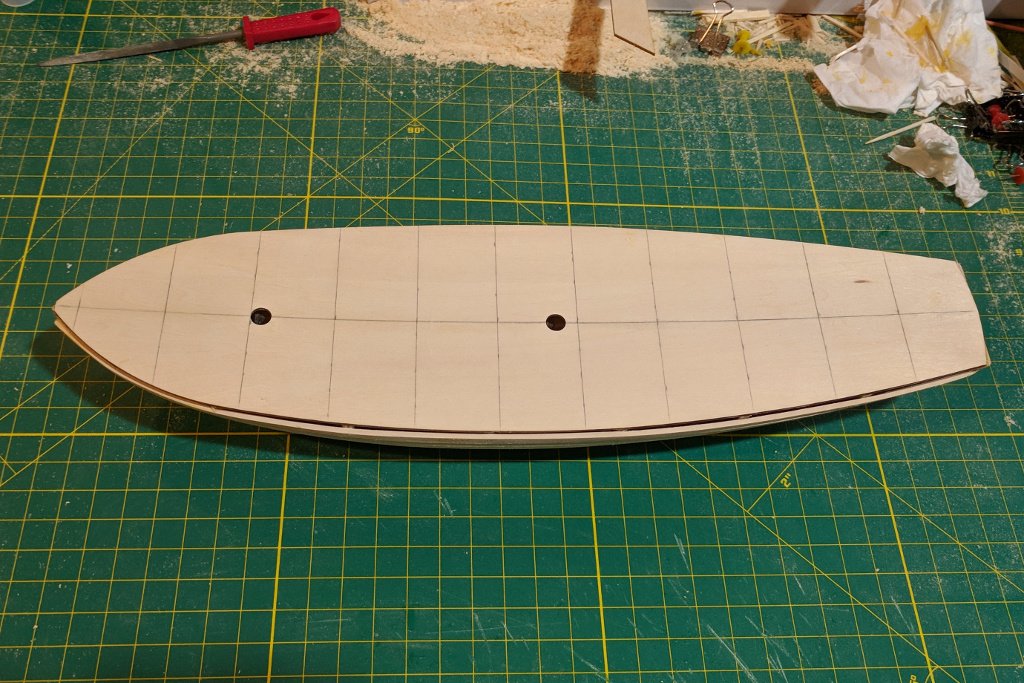
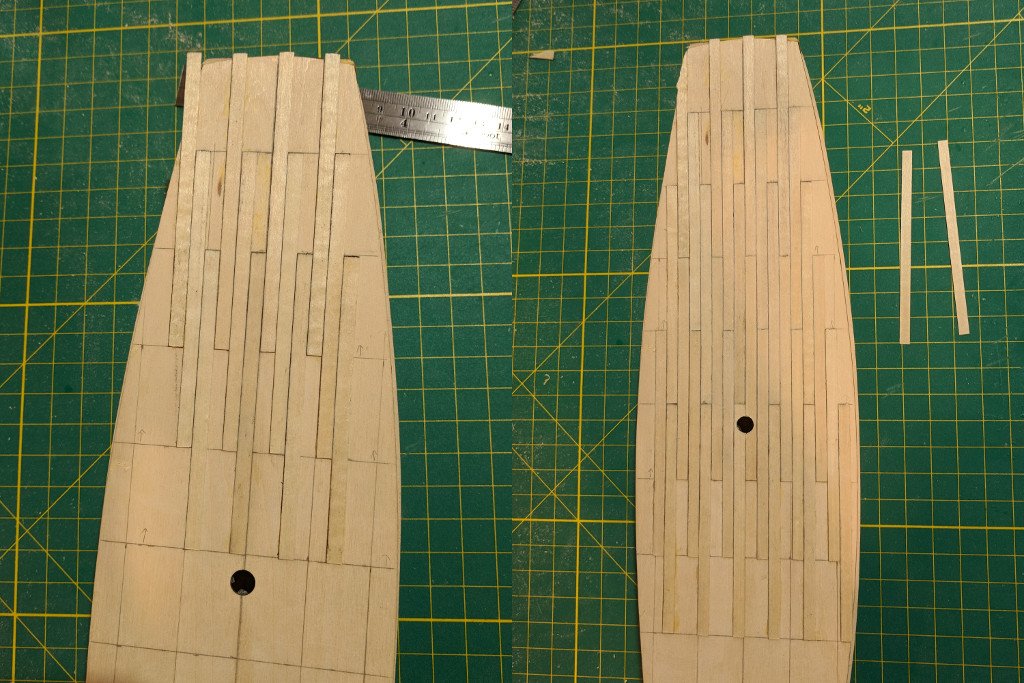
At last the hull planking was finished. Some good, some bad. The worst spot is at the bow, where it was difficult to hold the planks firmly in place, even when the planks were pre-bent. Wood filler was added and allowed to dry overnight. Then lots of sanding. The hull looks a lot better, and nearly every surface is ready to accept the second layer of planks. However, some issues remain at the bow. In the meantime, it's time to take care of the deck planking. I decided to go with a pattern that repeats every 3 planks. I marked out lines every 33mm with the intention of having planks 99mm long. Starting aft, I laid the first plank along the center line, then worked out and forward. For caulking, I first tried lining the planks with a black artist's pastel, but found that it created a lot of black dust that was making a mess. So I switched to artist's charcoal, which was a little cleaner. The port and aft edges of each plank were marked with the charcoal. Once all planks were laid and the glue was dry, I sanded the deck down and added nail marks with a mechanical pencil. I found the whole process of the deck planking very satisfying.

-
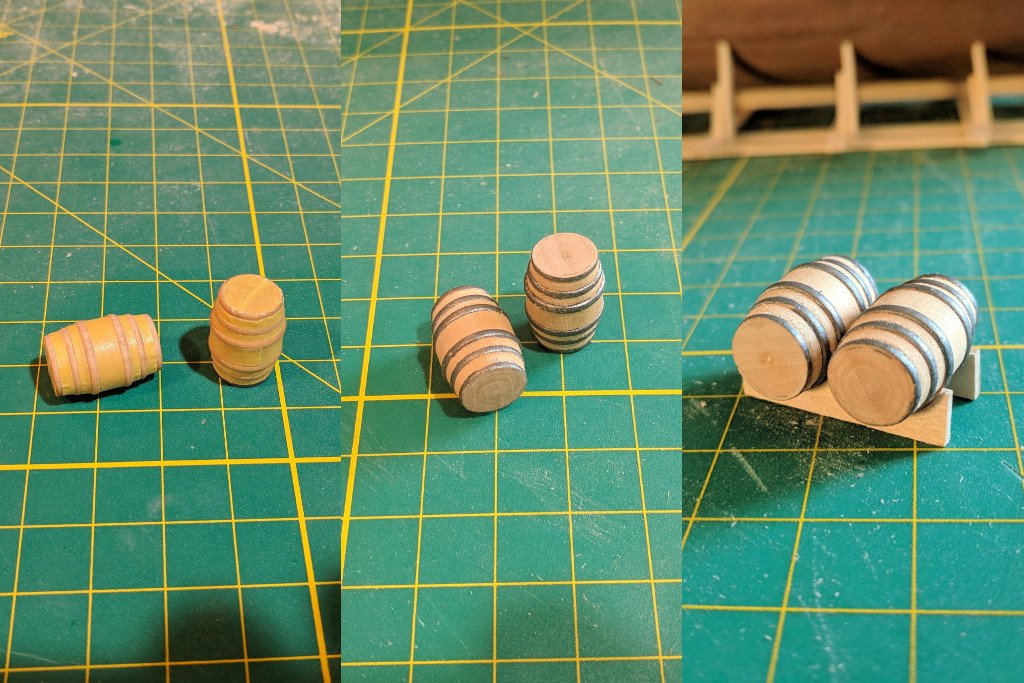
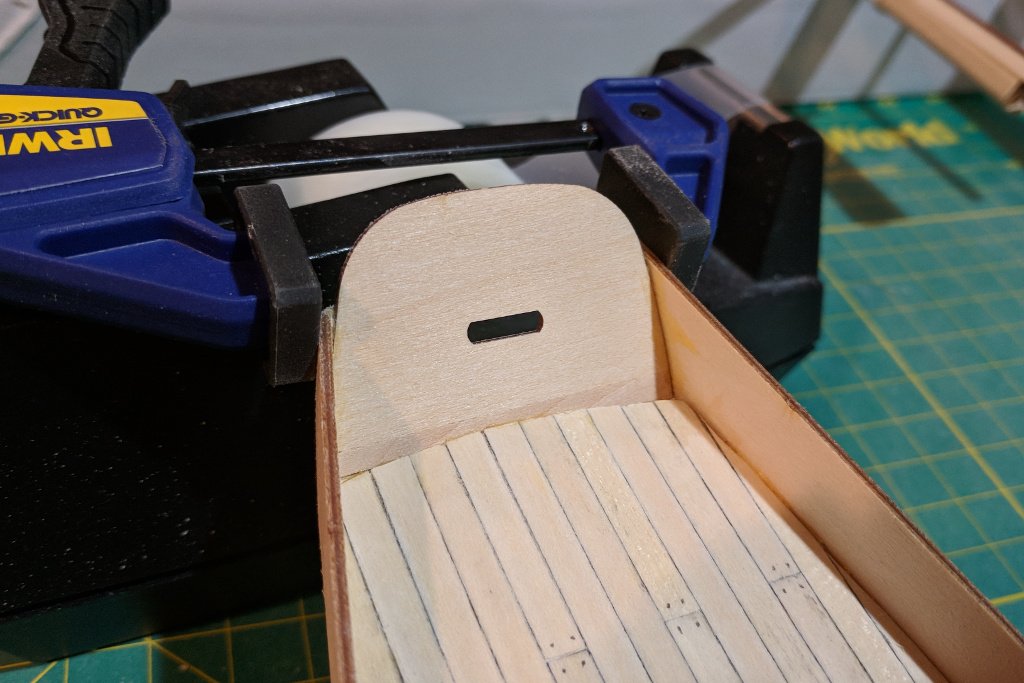
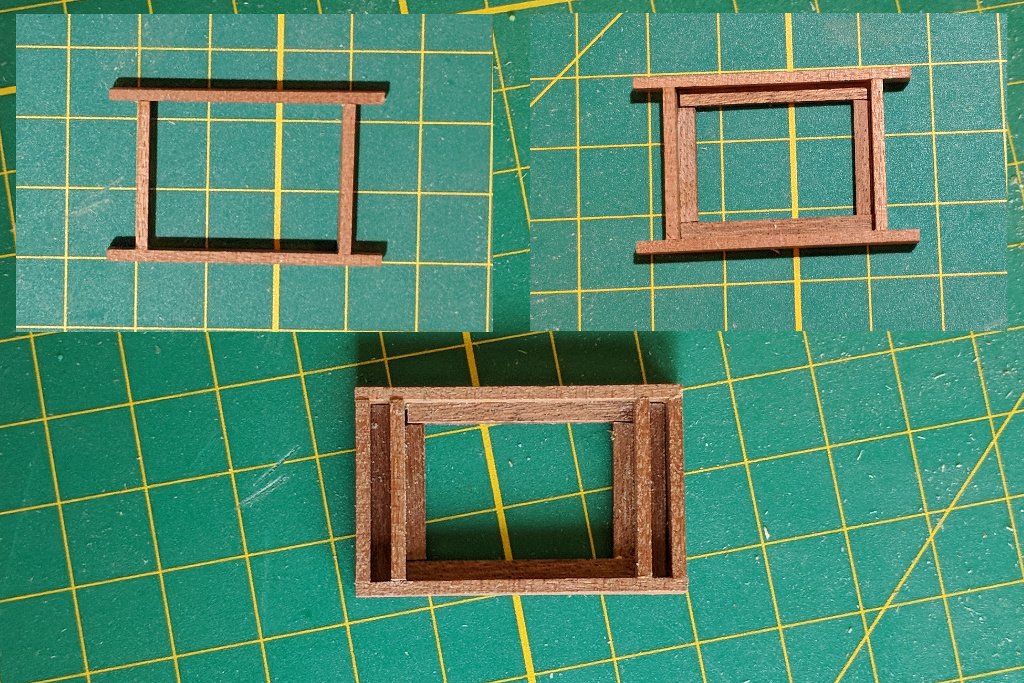
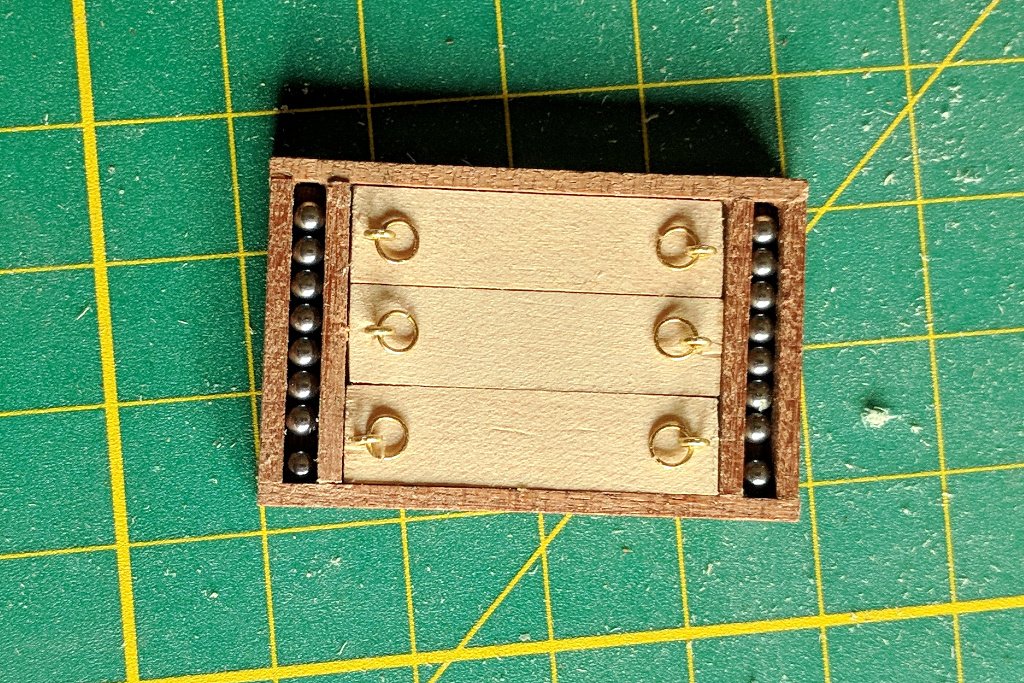
More pieces for the deck. This time it's the cargo hatch. Once again, there was some challenge getting the first parts to fit together at perfect 90 degree angles. Here are the doors getting ready to fit into place. As I mentioned in my log entry for the companionway, it was a challenge to link each ring to its eyelet without losing any pieces or bending a part too much. Also, when I was sanding the edges of the doors down to fit, I found it hard to maintain the right angles of the edges. I wonder if there is a good method to maintain the correct angle while sanding. The cargo hatch is complete, but the cannonballs haven't been glued into place yet. I don't know if it's worthwhile to paint them or leave them alone. When I was testing the fit, I found that the cannonballs were sitting a little low, so I used some leftover pieces from the companionway roof to fill in the slots and raise the cannonballs up slightly.

- 54 replies
-
- 2
-
-
- artesania latina
- Virginia
- (and 2 more)