

kearnold
-
Posts
100 -
Joined
-
Last visited
Content Type
Profiles
Forums
Gallery
Events
Posts posted by kearnold
-
-
On 12/26/2021 at 10:37 PM, cbeckenb said:
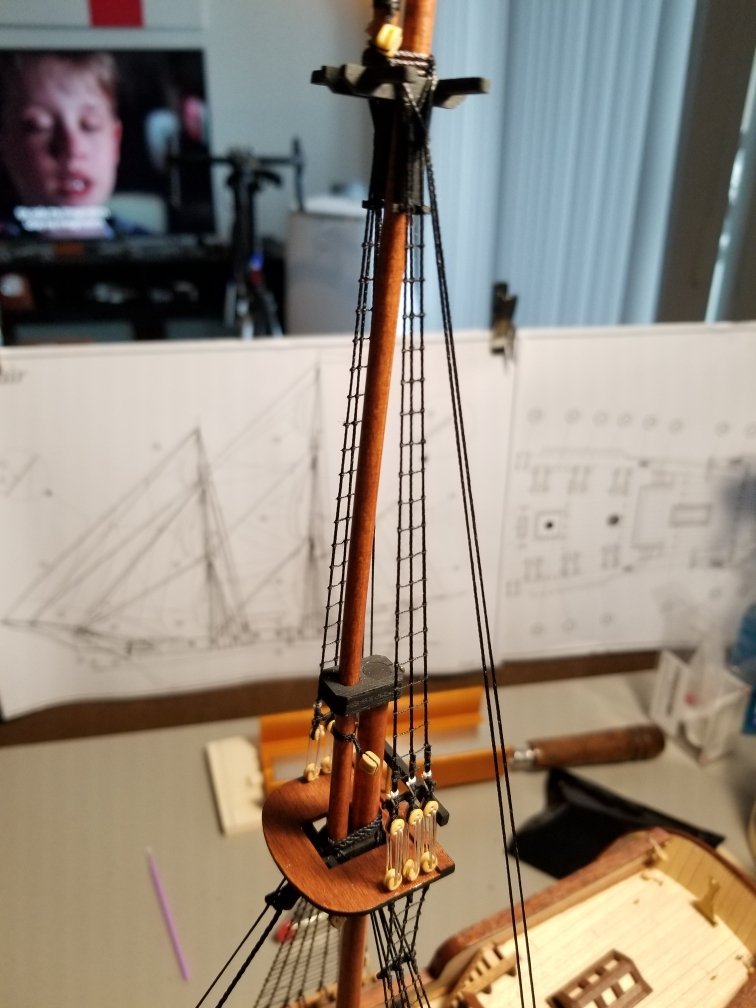
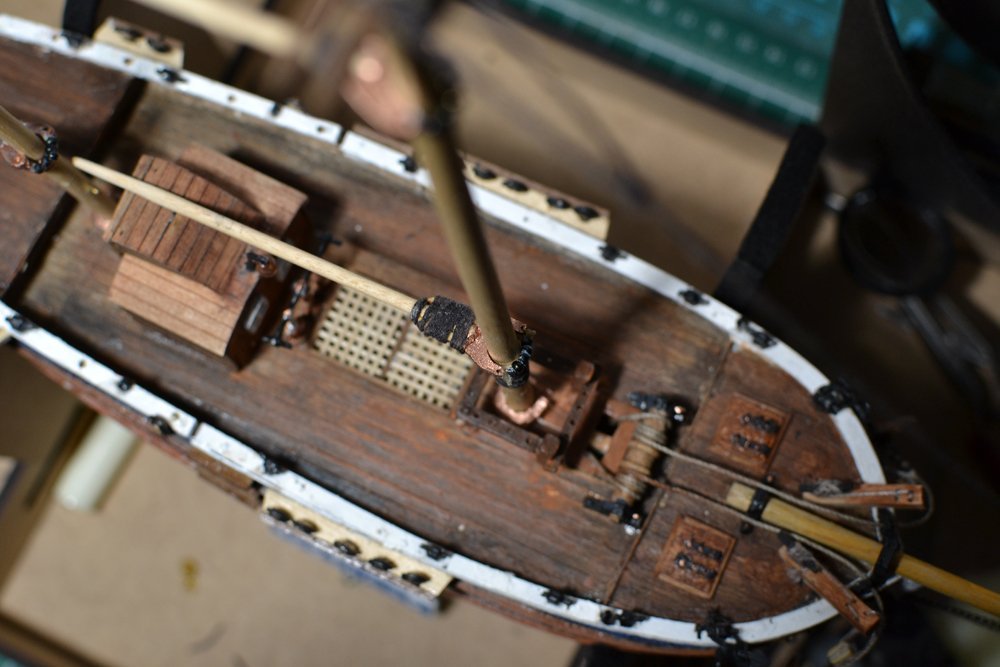
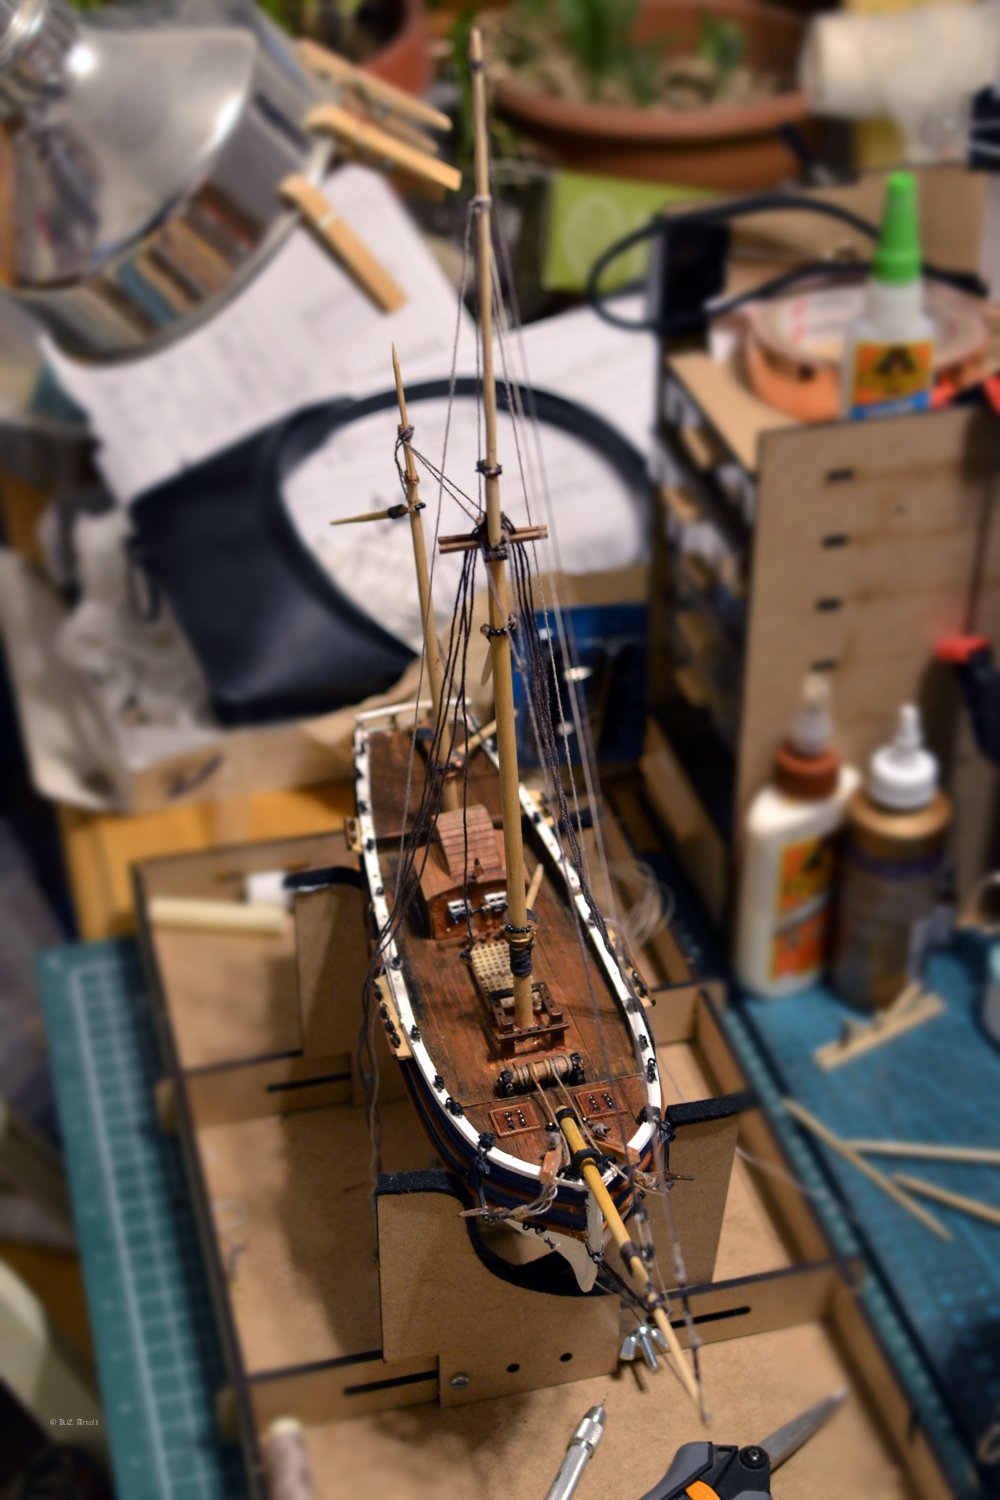
Now for the standing rigging.
I used Chuck's Syren practicum and instructions from the Fair American as guides for the rigging, since the Corsair instructions really don't tell you much.
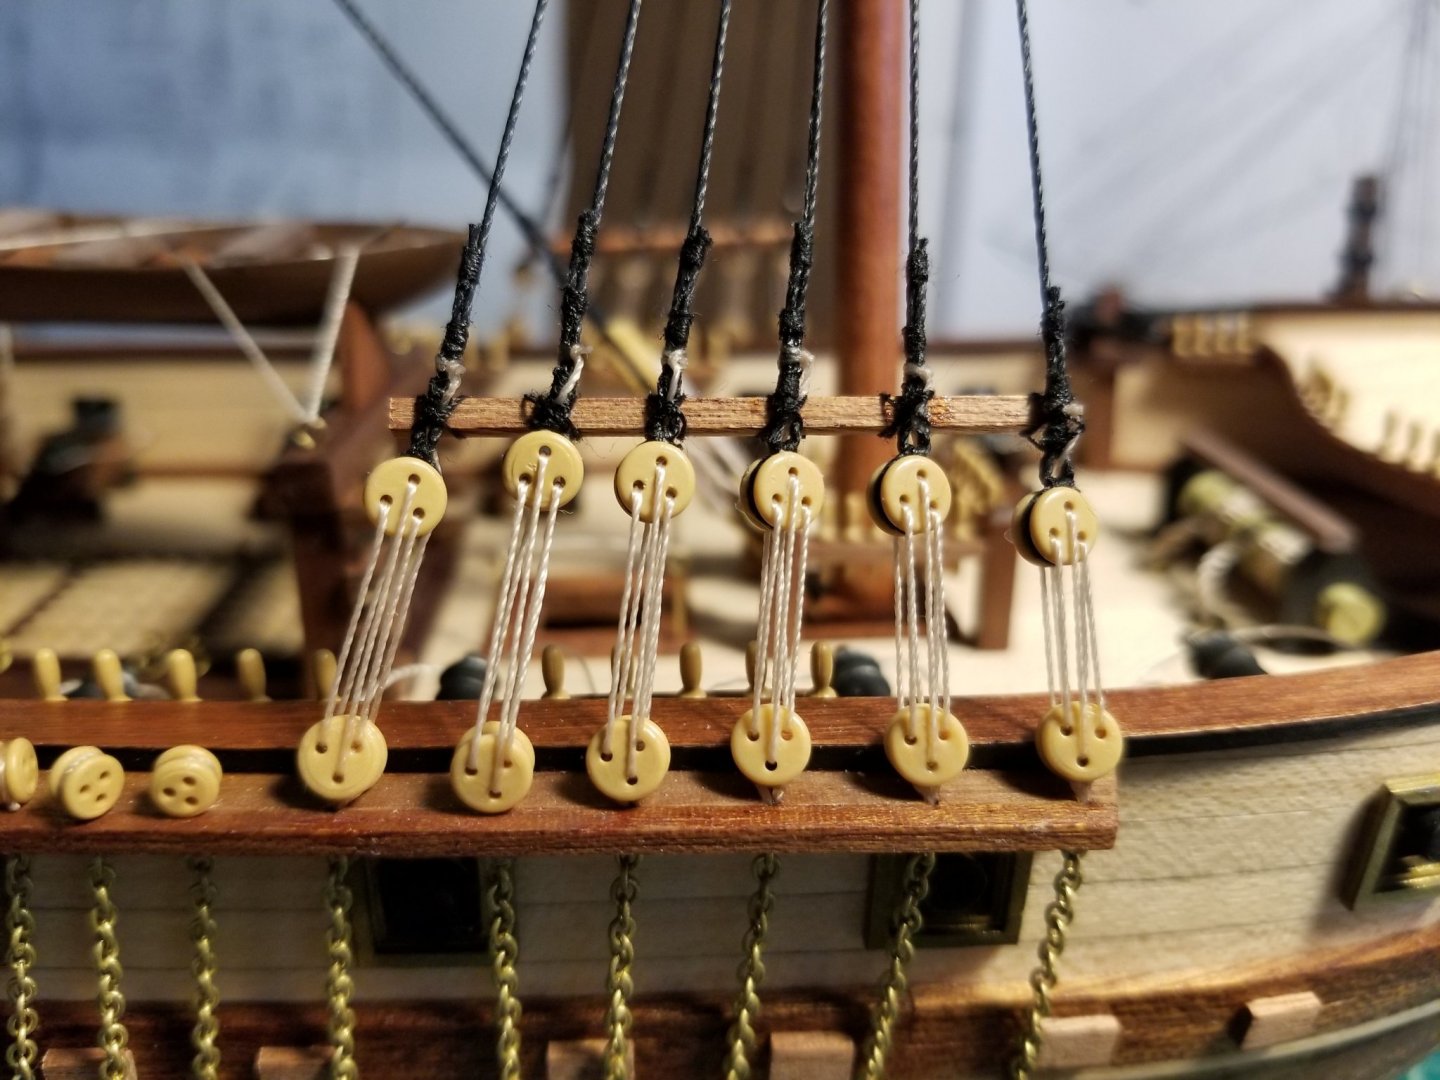
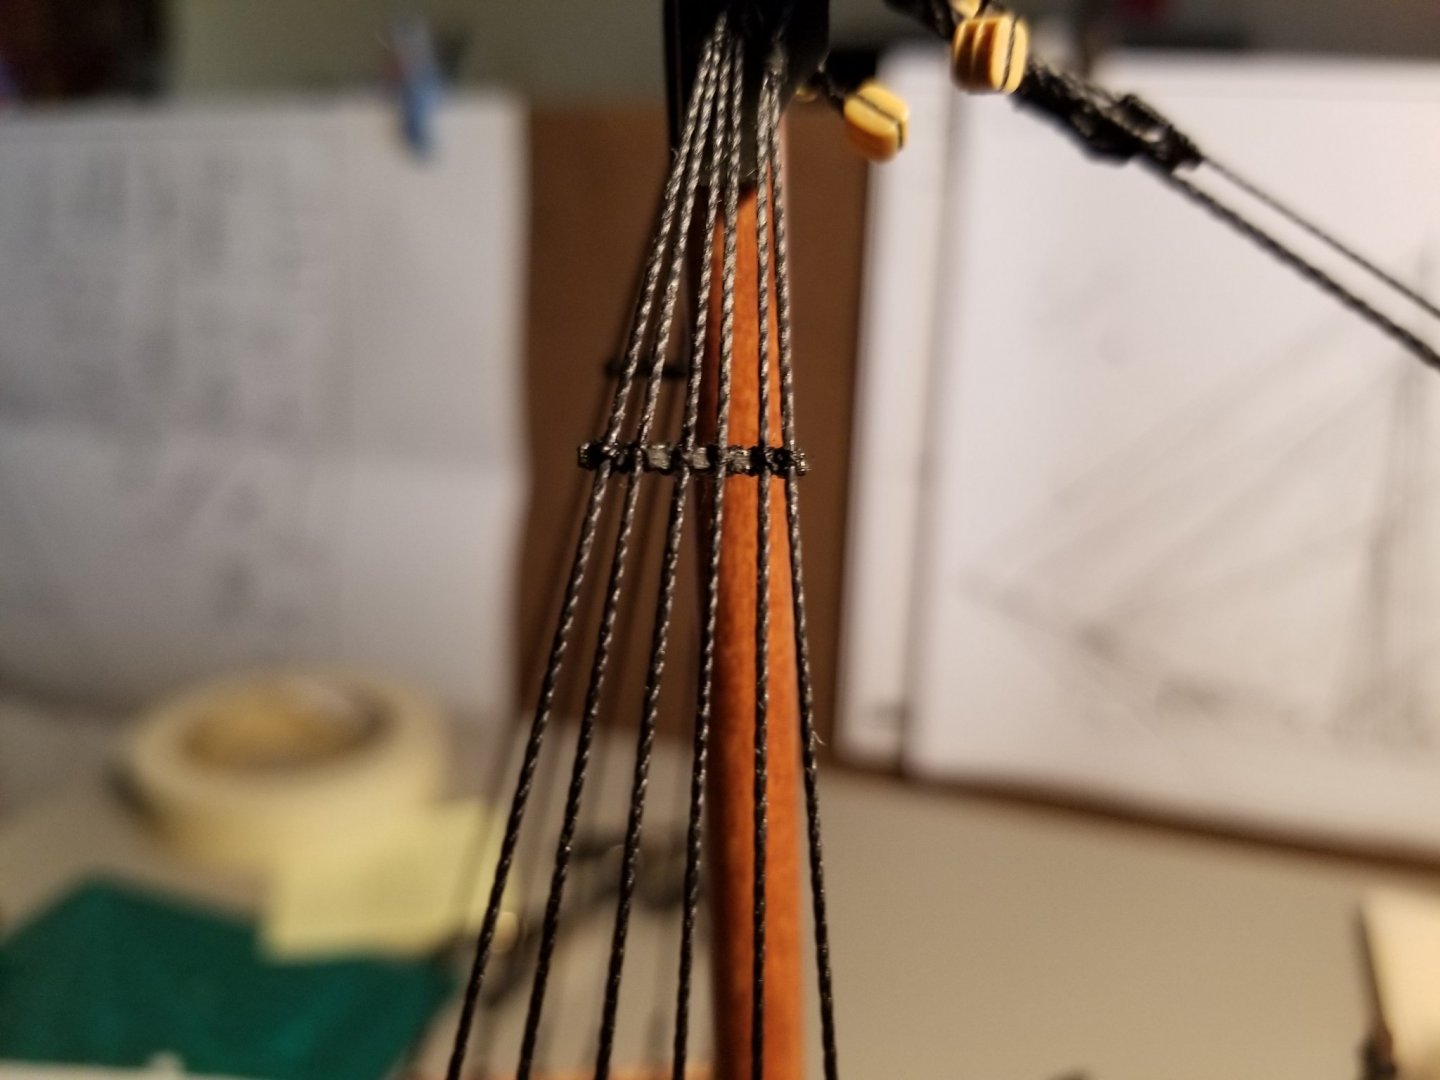
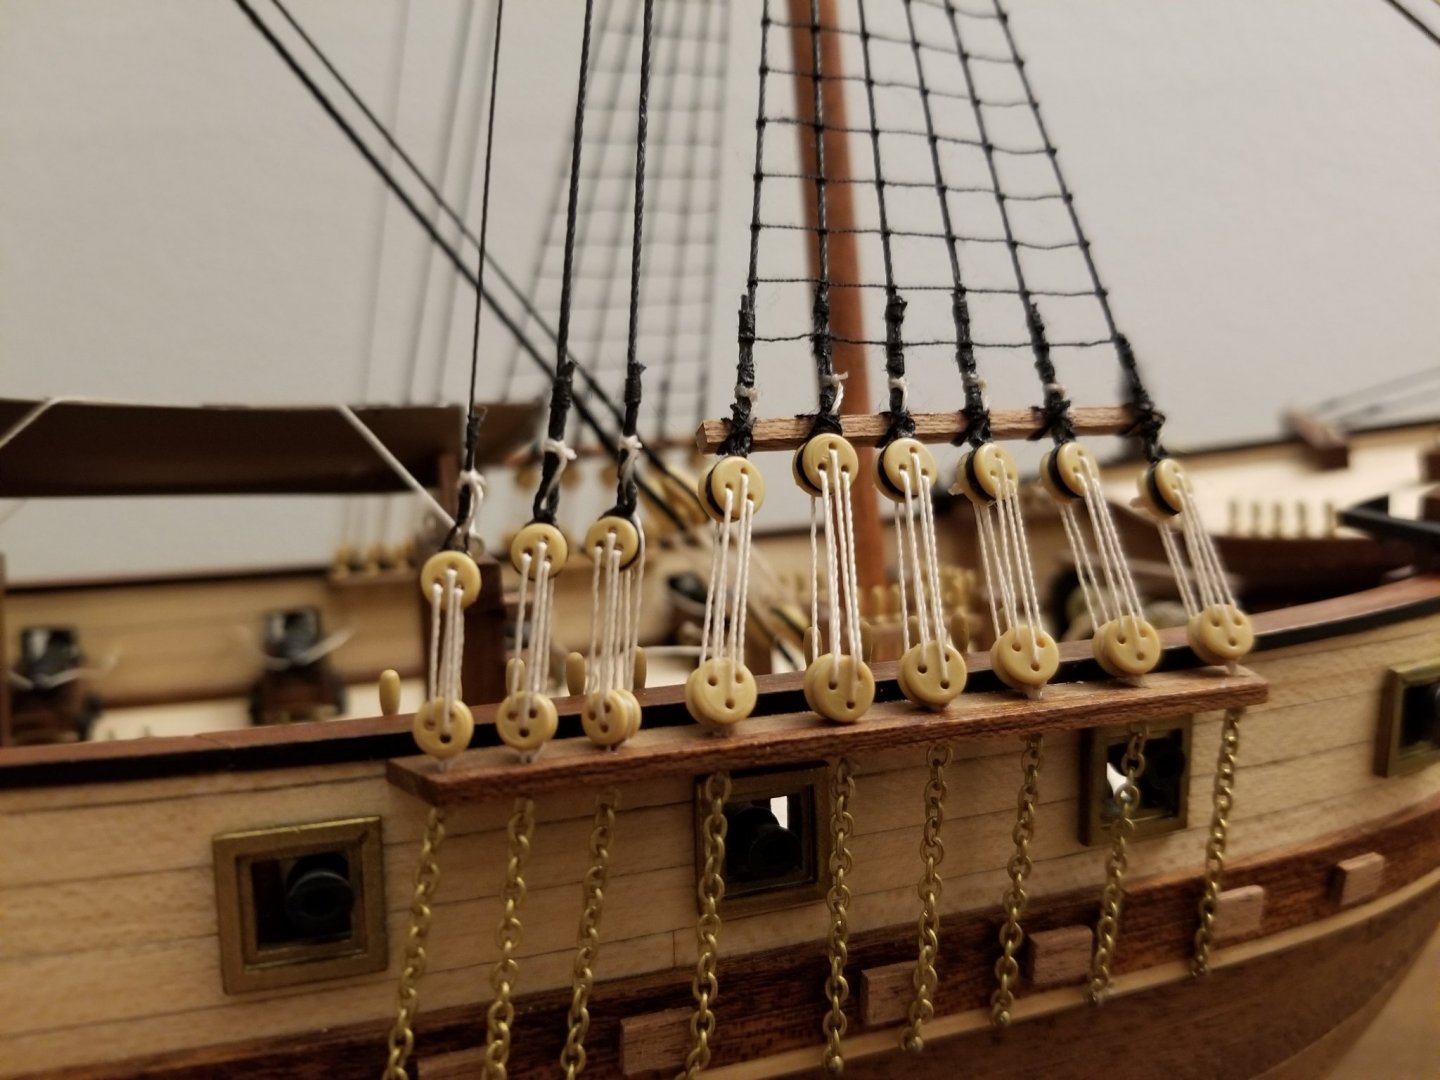
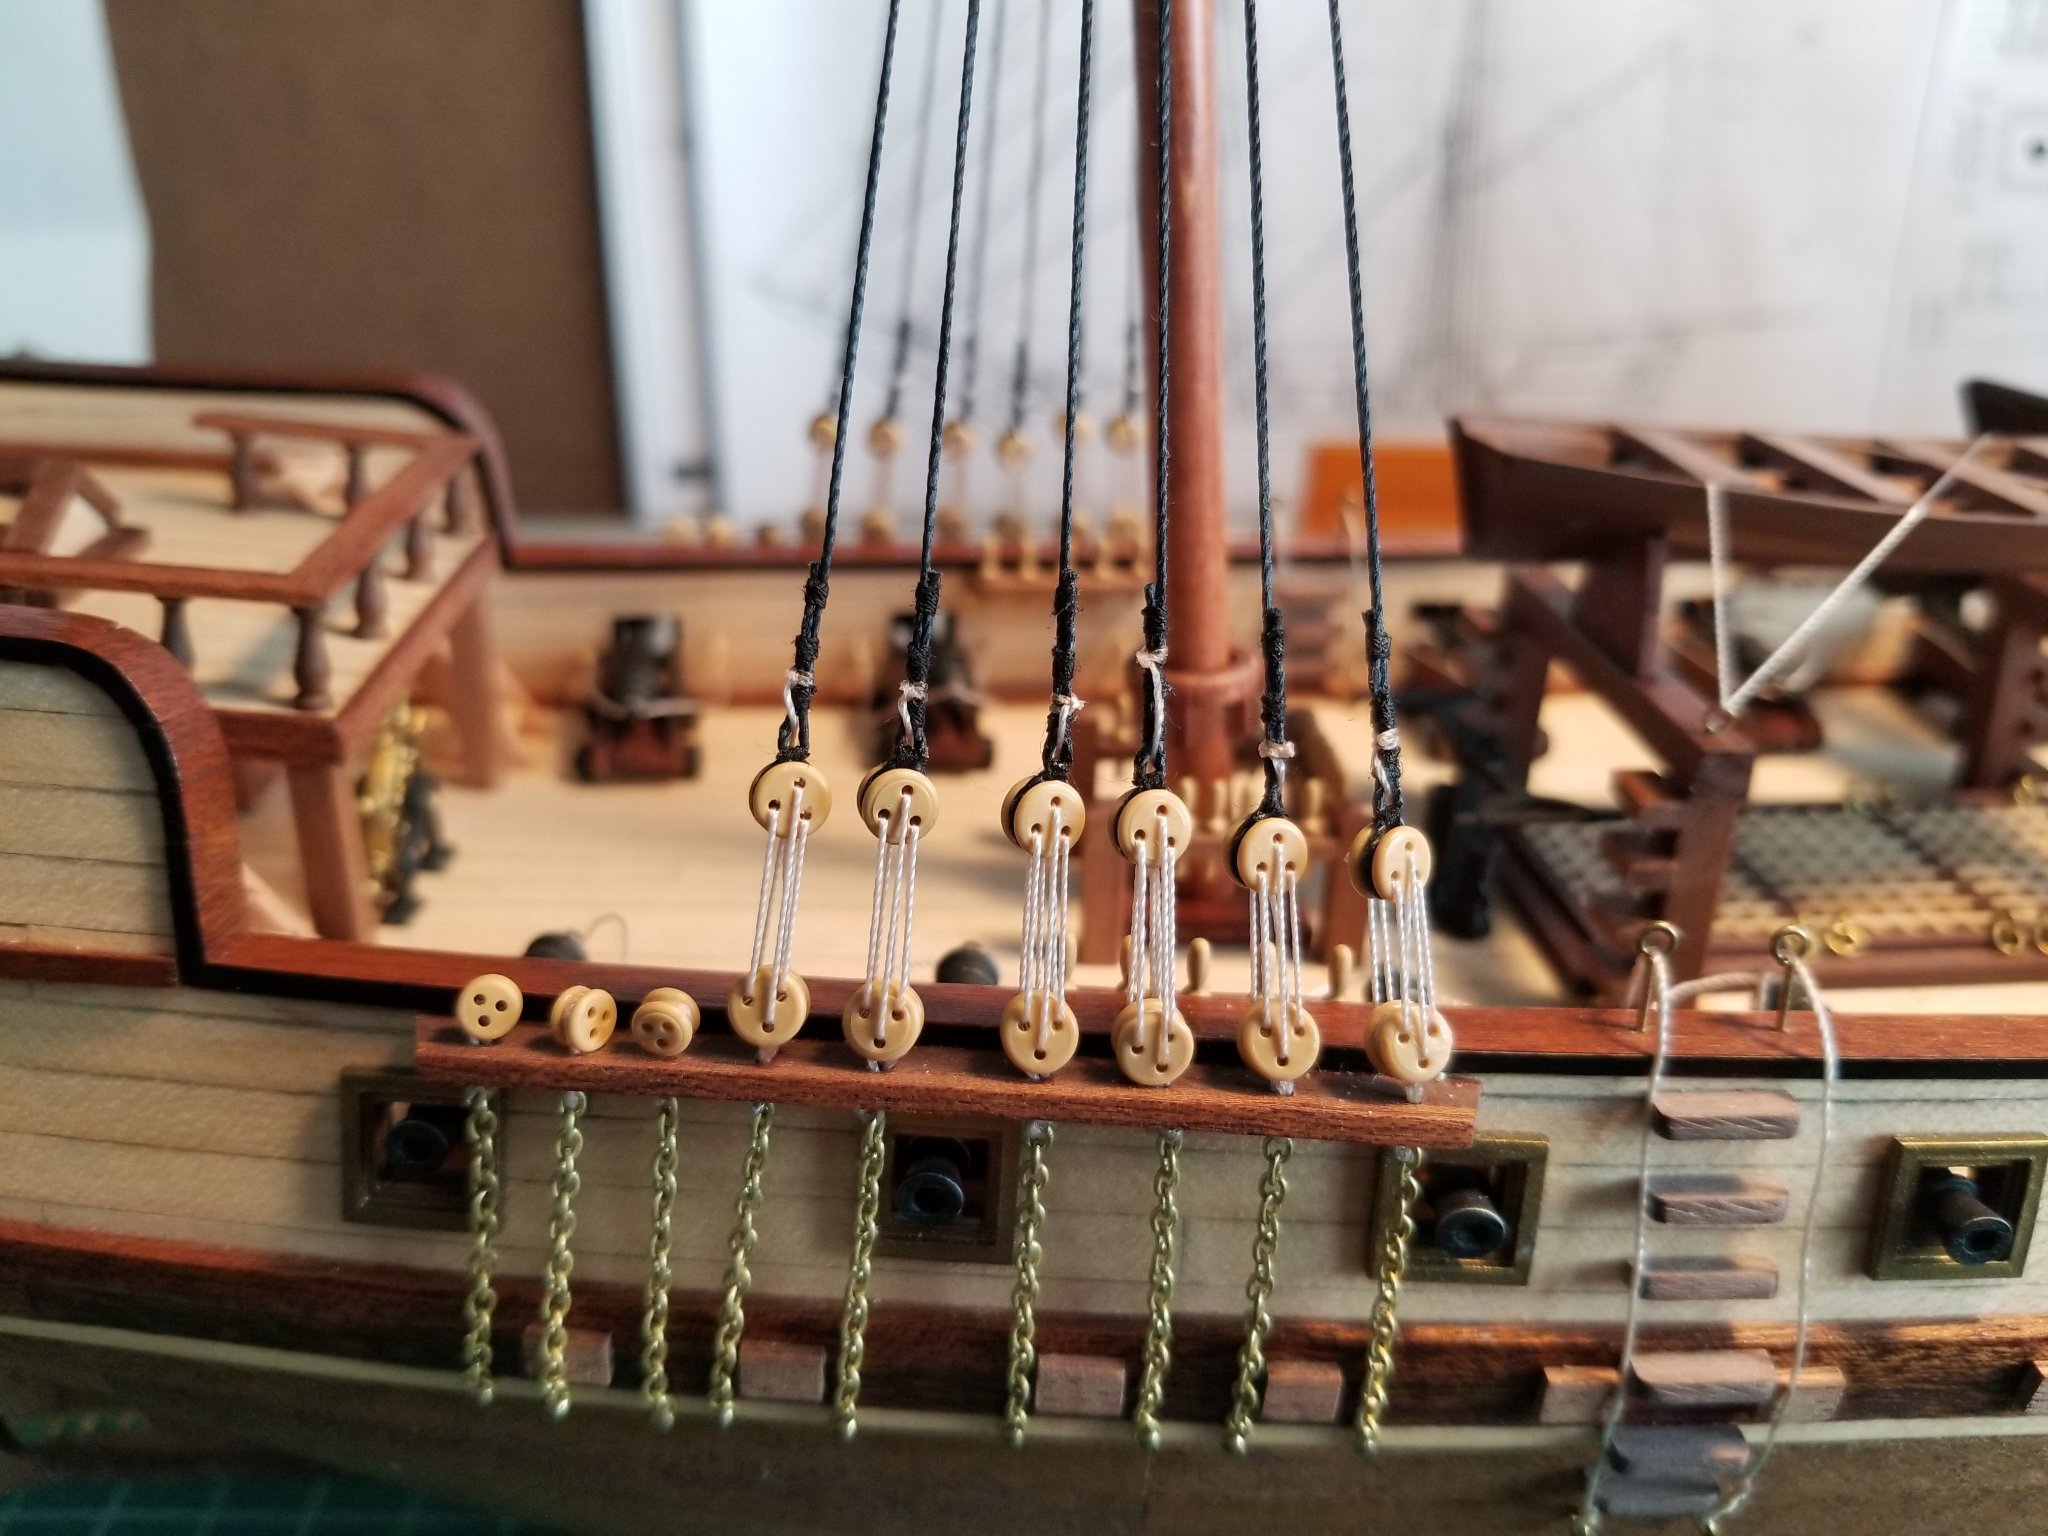
Started off with the shrouds:

I am reasonably happy with the deadeyes and lanyards, though they could be more even.
A note to anyone using this build log as a reference for this model: Make sure your knots and string tying the deadeyes to the chains are VERY strong! I had to redo at least 5 or 6 that broke while I was tightening the lanyards. And I'm not entirely sure that all will stand the test of time, though so far they're holding.
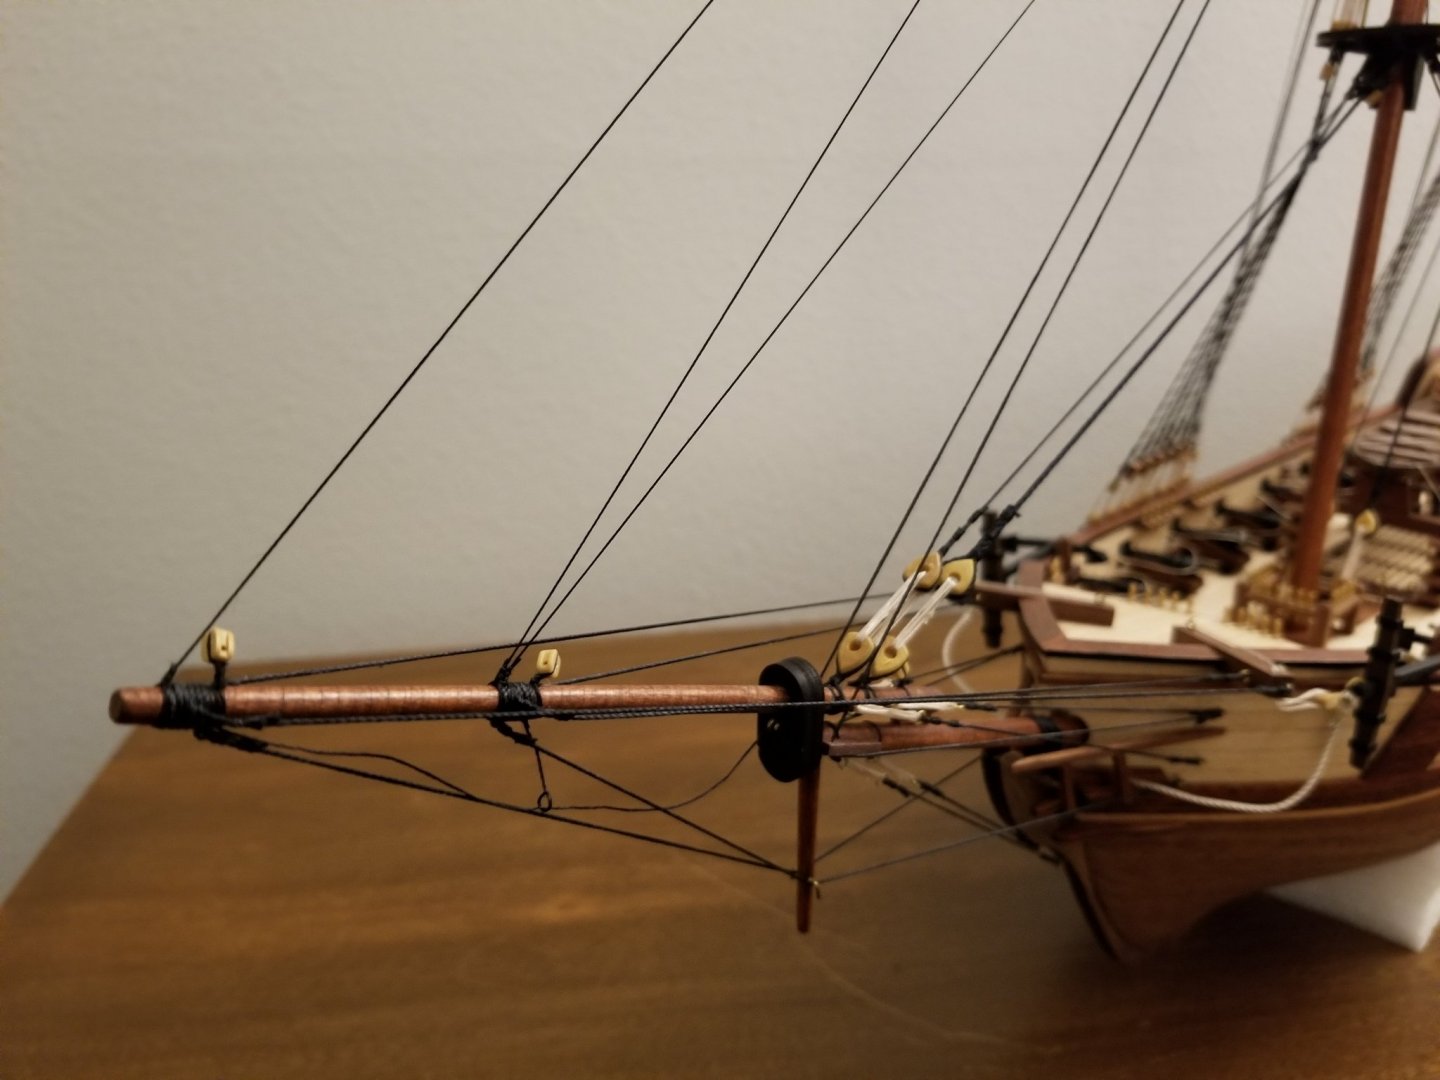
Next was the main and preventer stays. I used 1mm cord for the main stays and 0.5mm for the preventers.
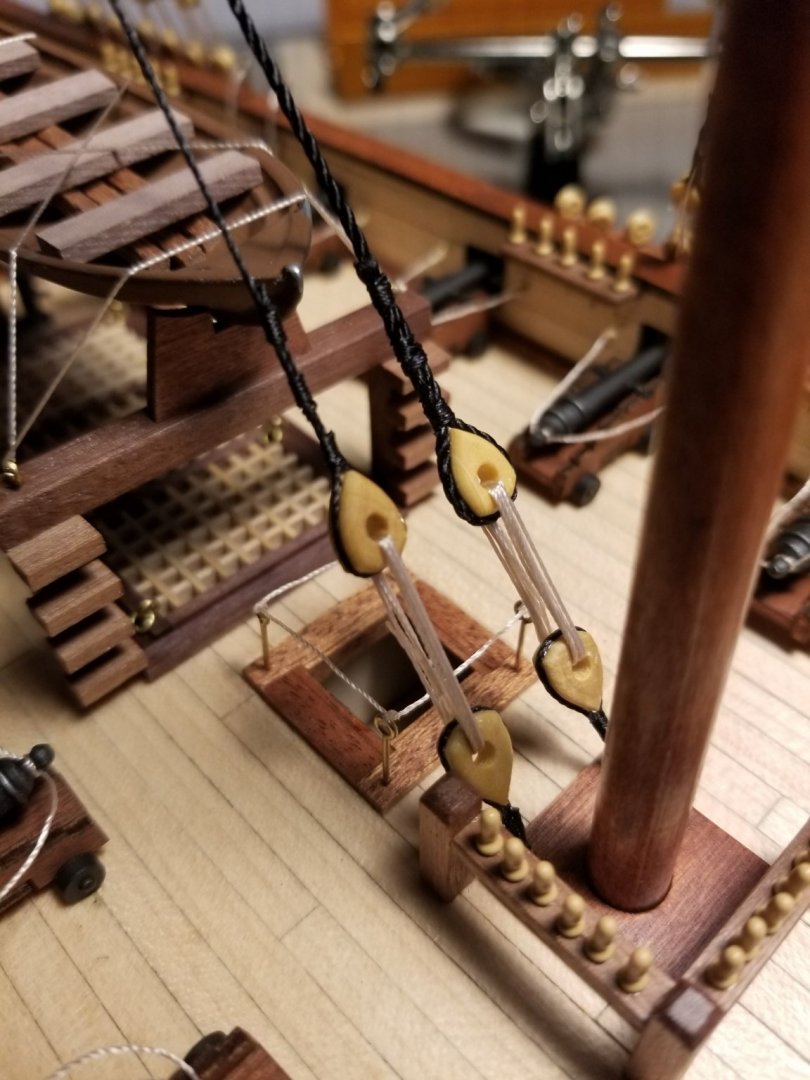
Again, the eyebolts pulled out of the deck a couple times while tightening these up...
Consequences of making everything taut, as I like to do.
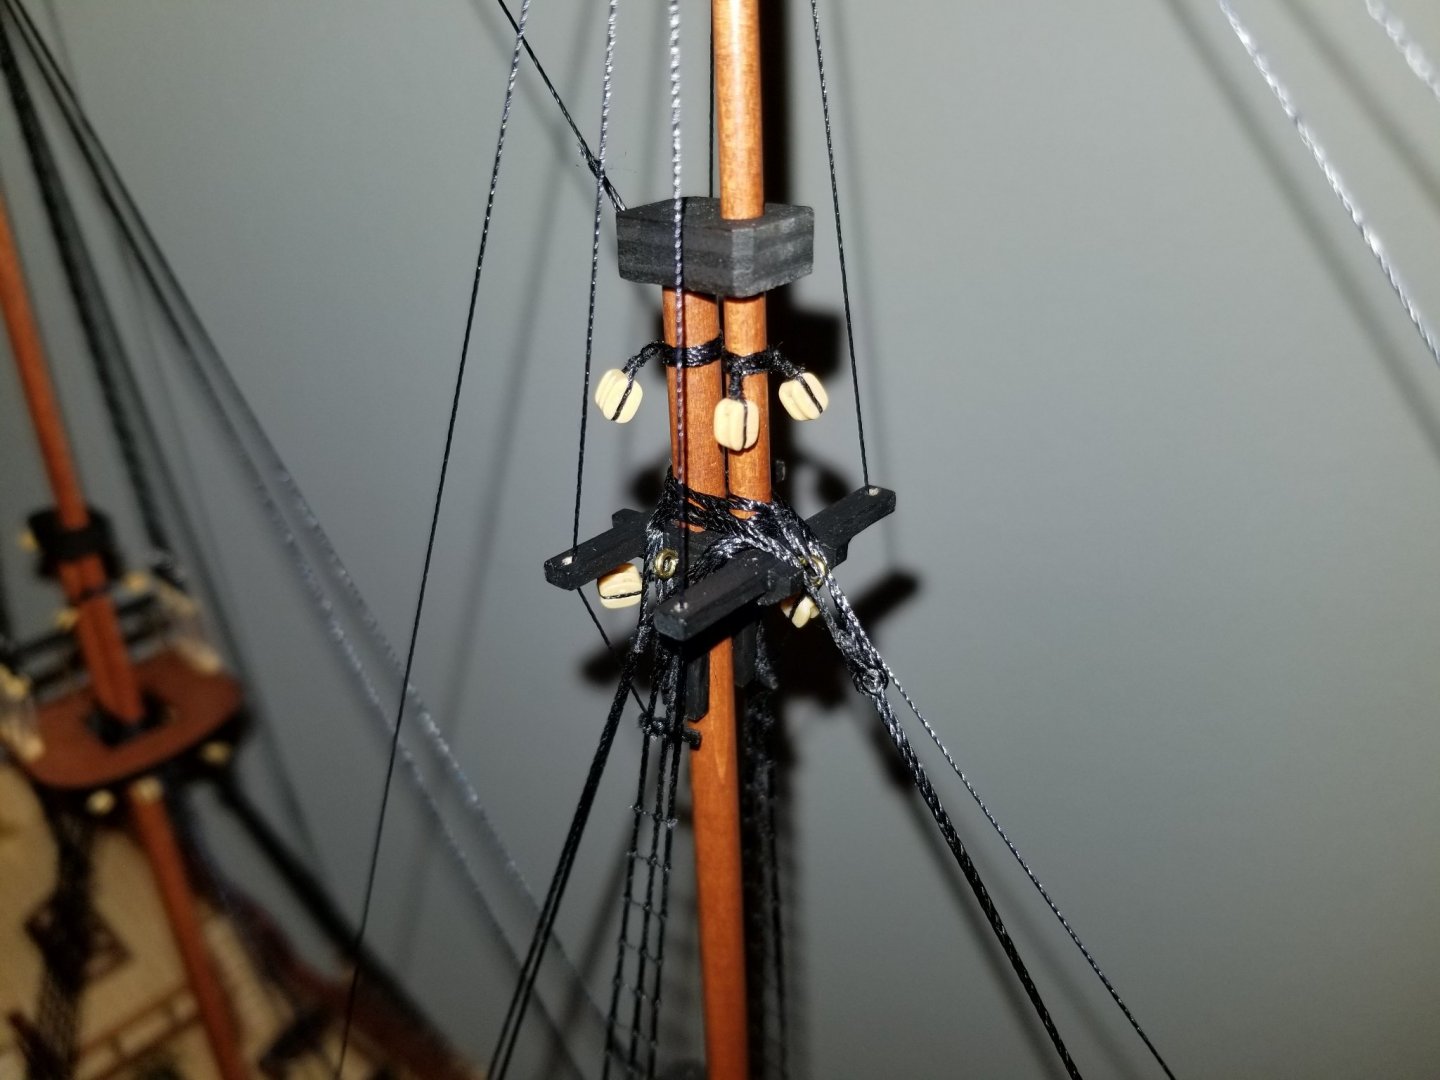
Next up, the sheer poles and futtock staves were lashed and glued:
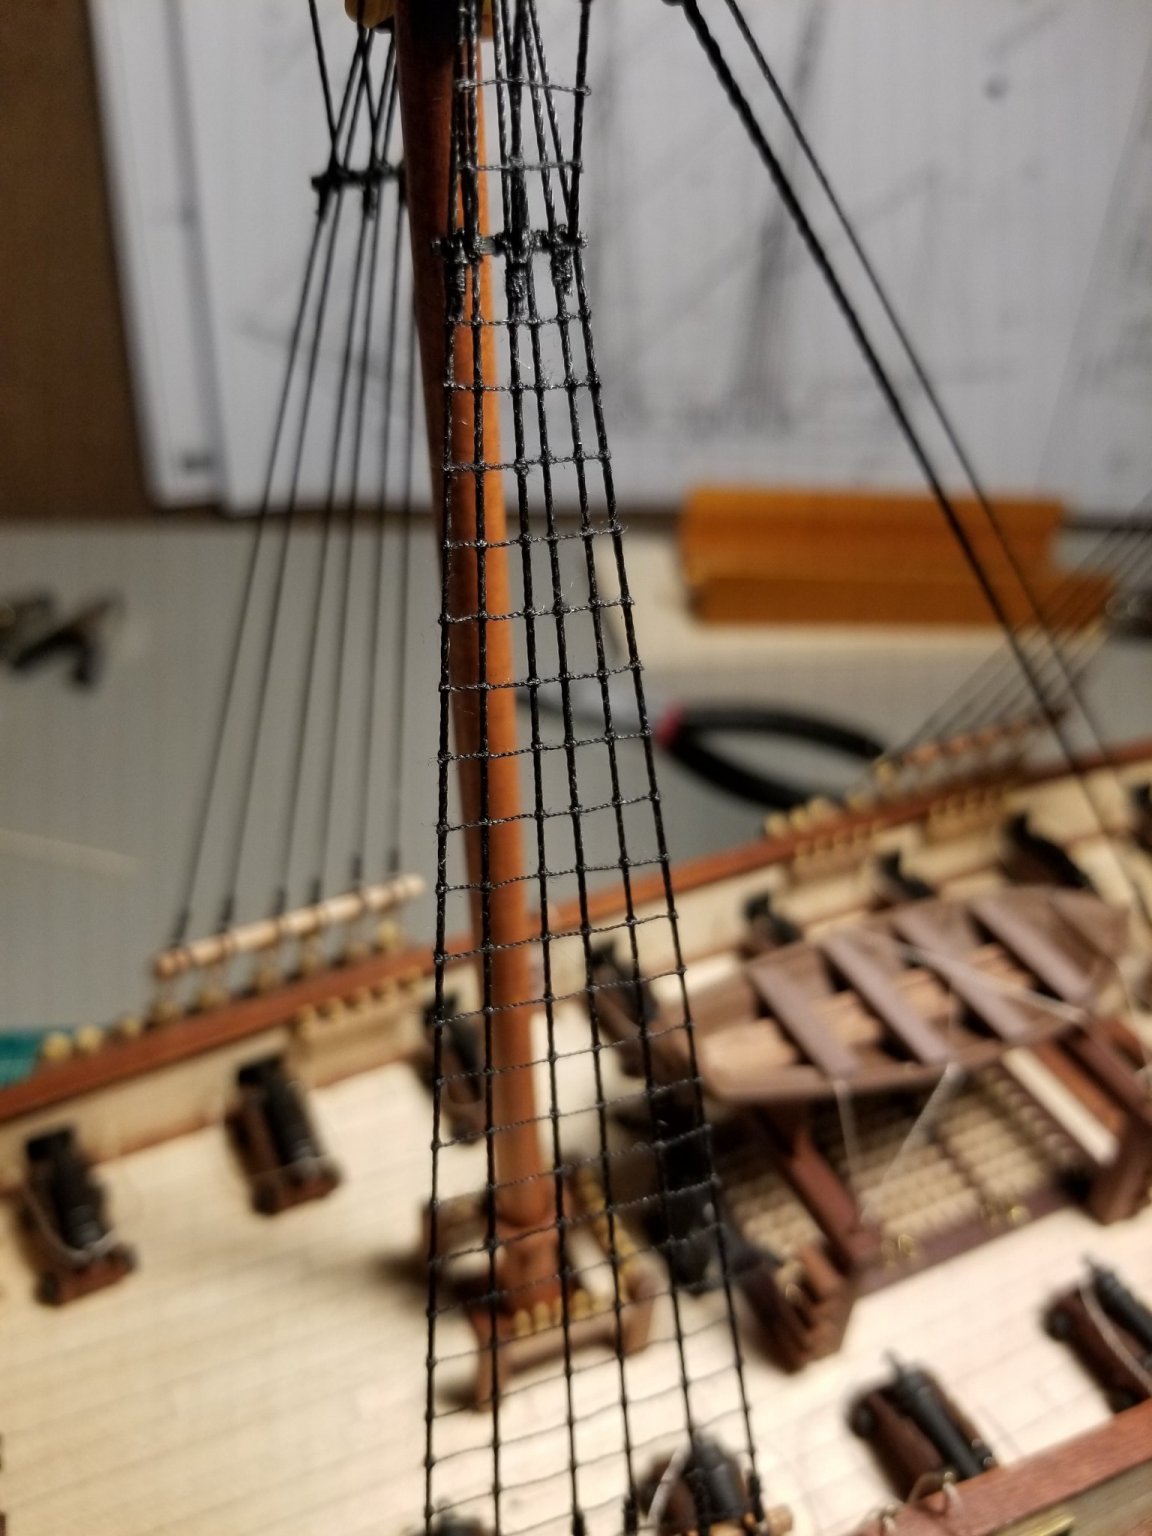
Now for my first attempt at doing ratlines:
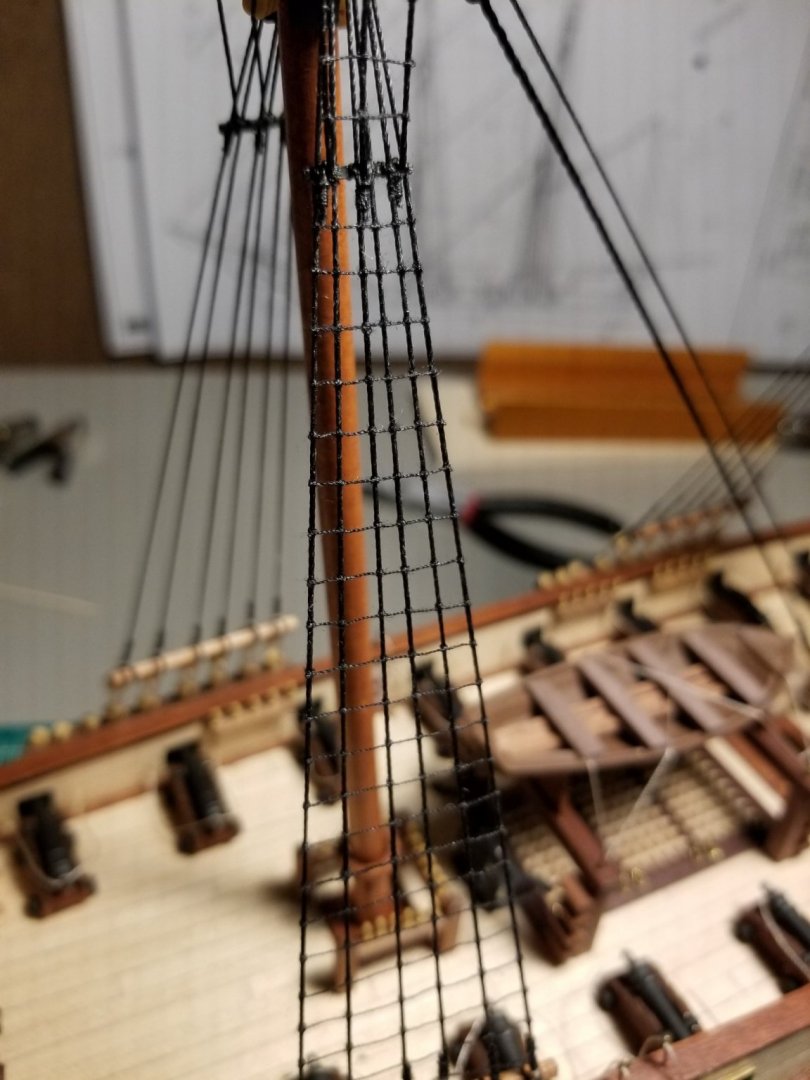
I used thin thread and a curved needle, clove hitching every knot. I used some very thin superglue to hold it all together.
They could do with some sag in between the shrouds, but I'm happy with the way they look.
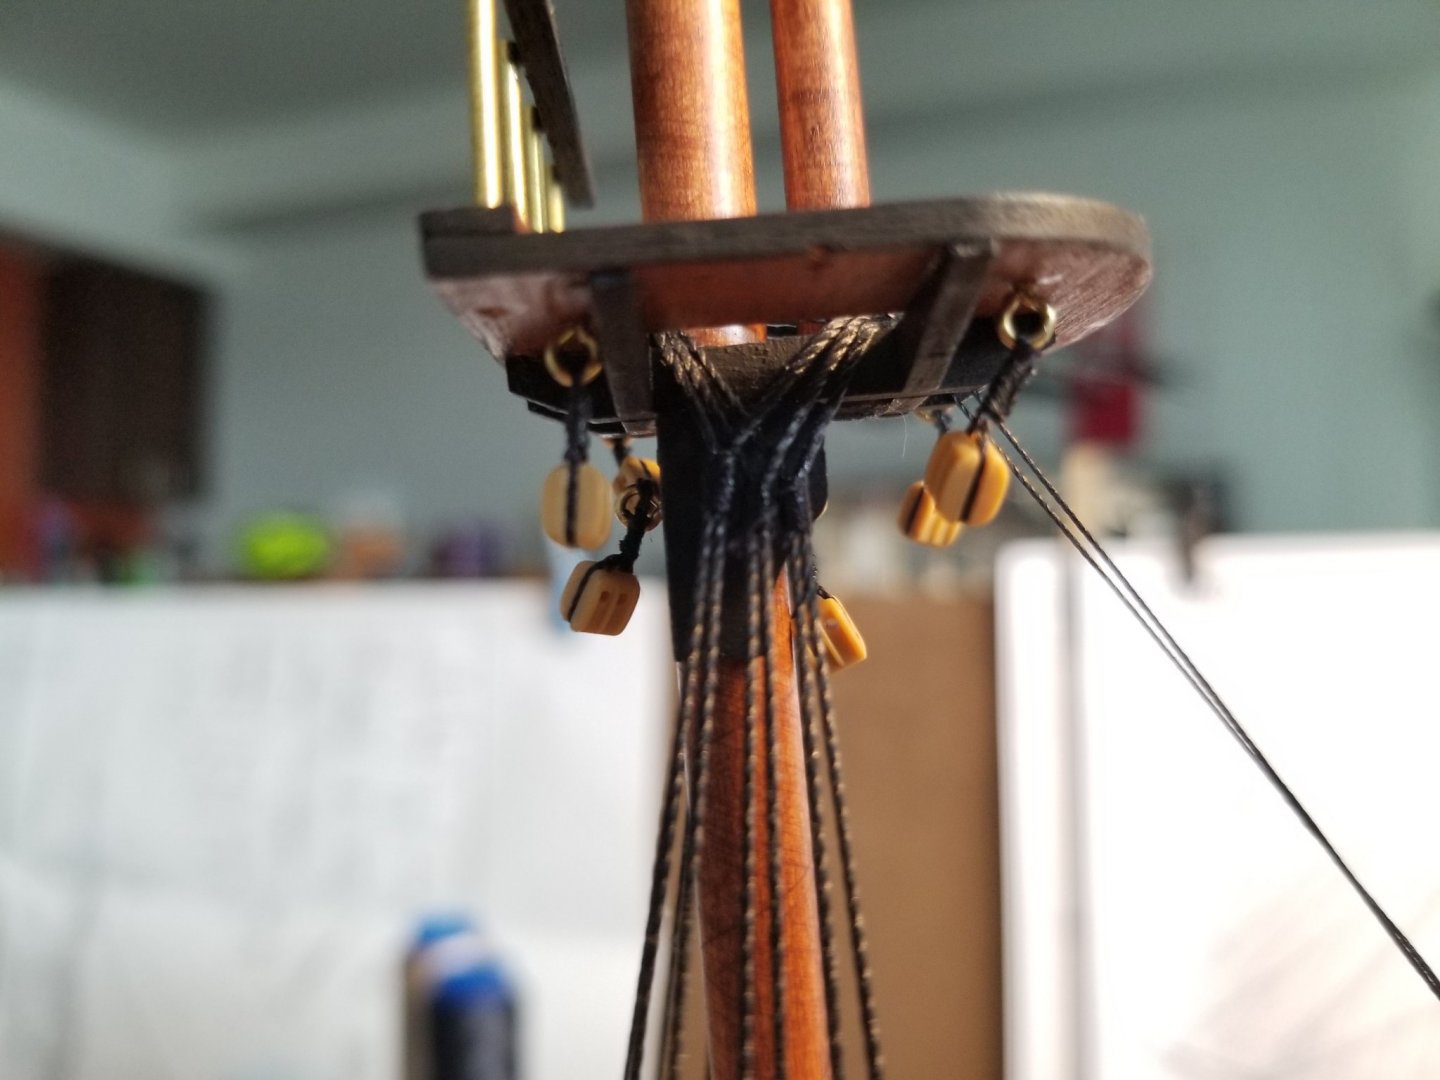
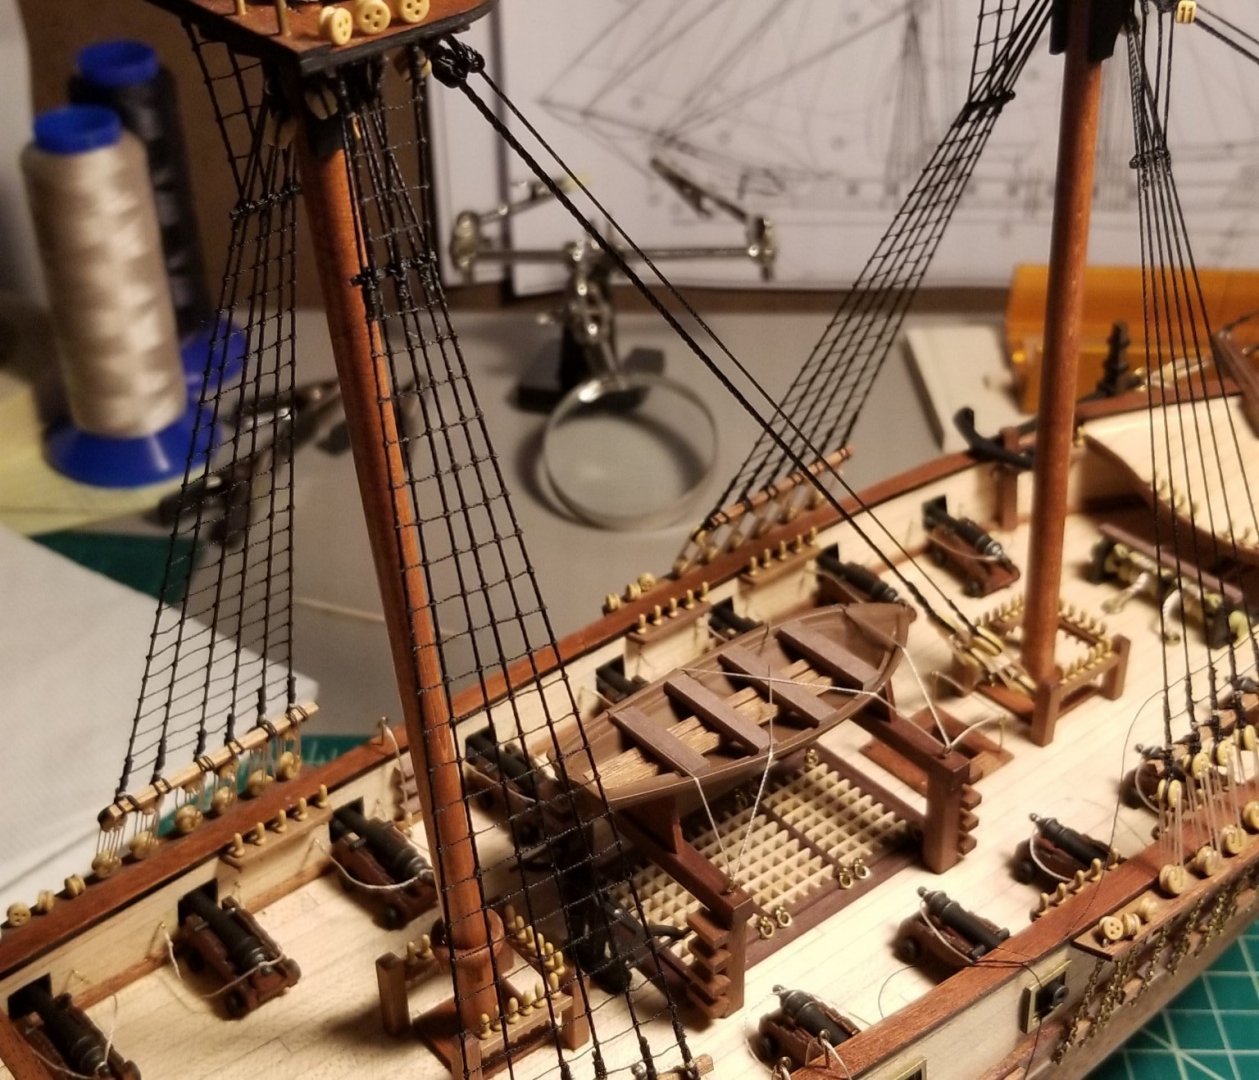
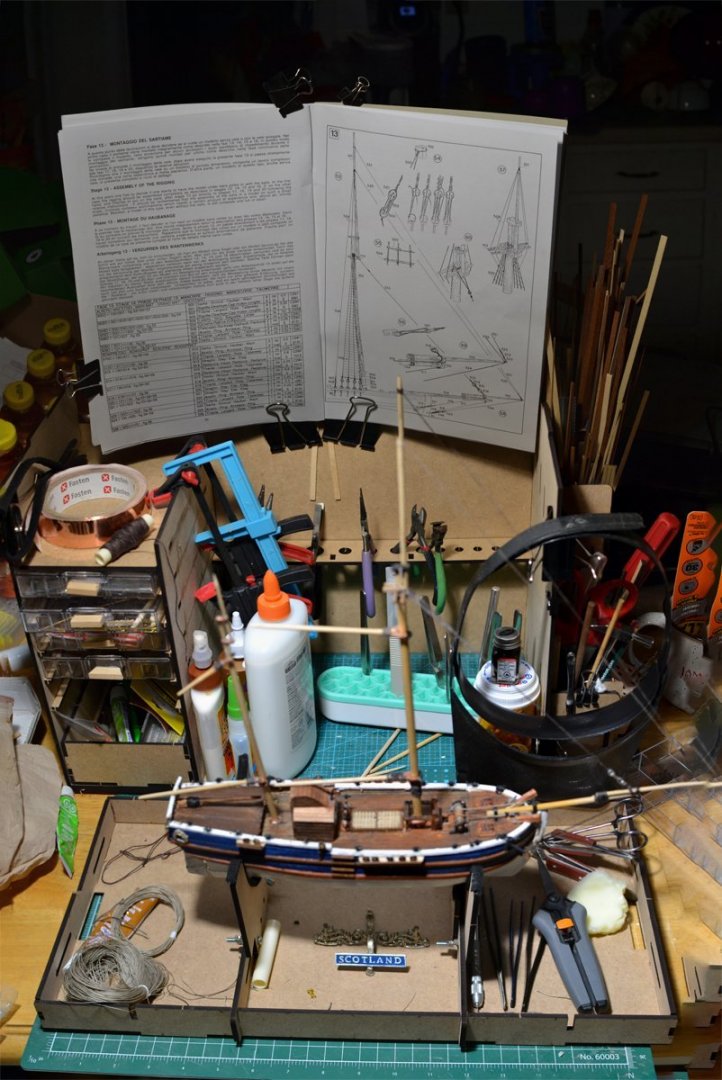
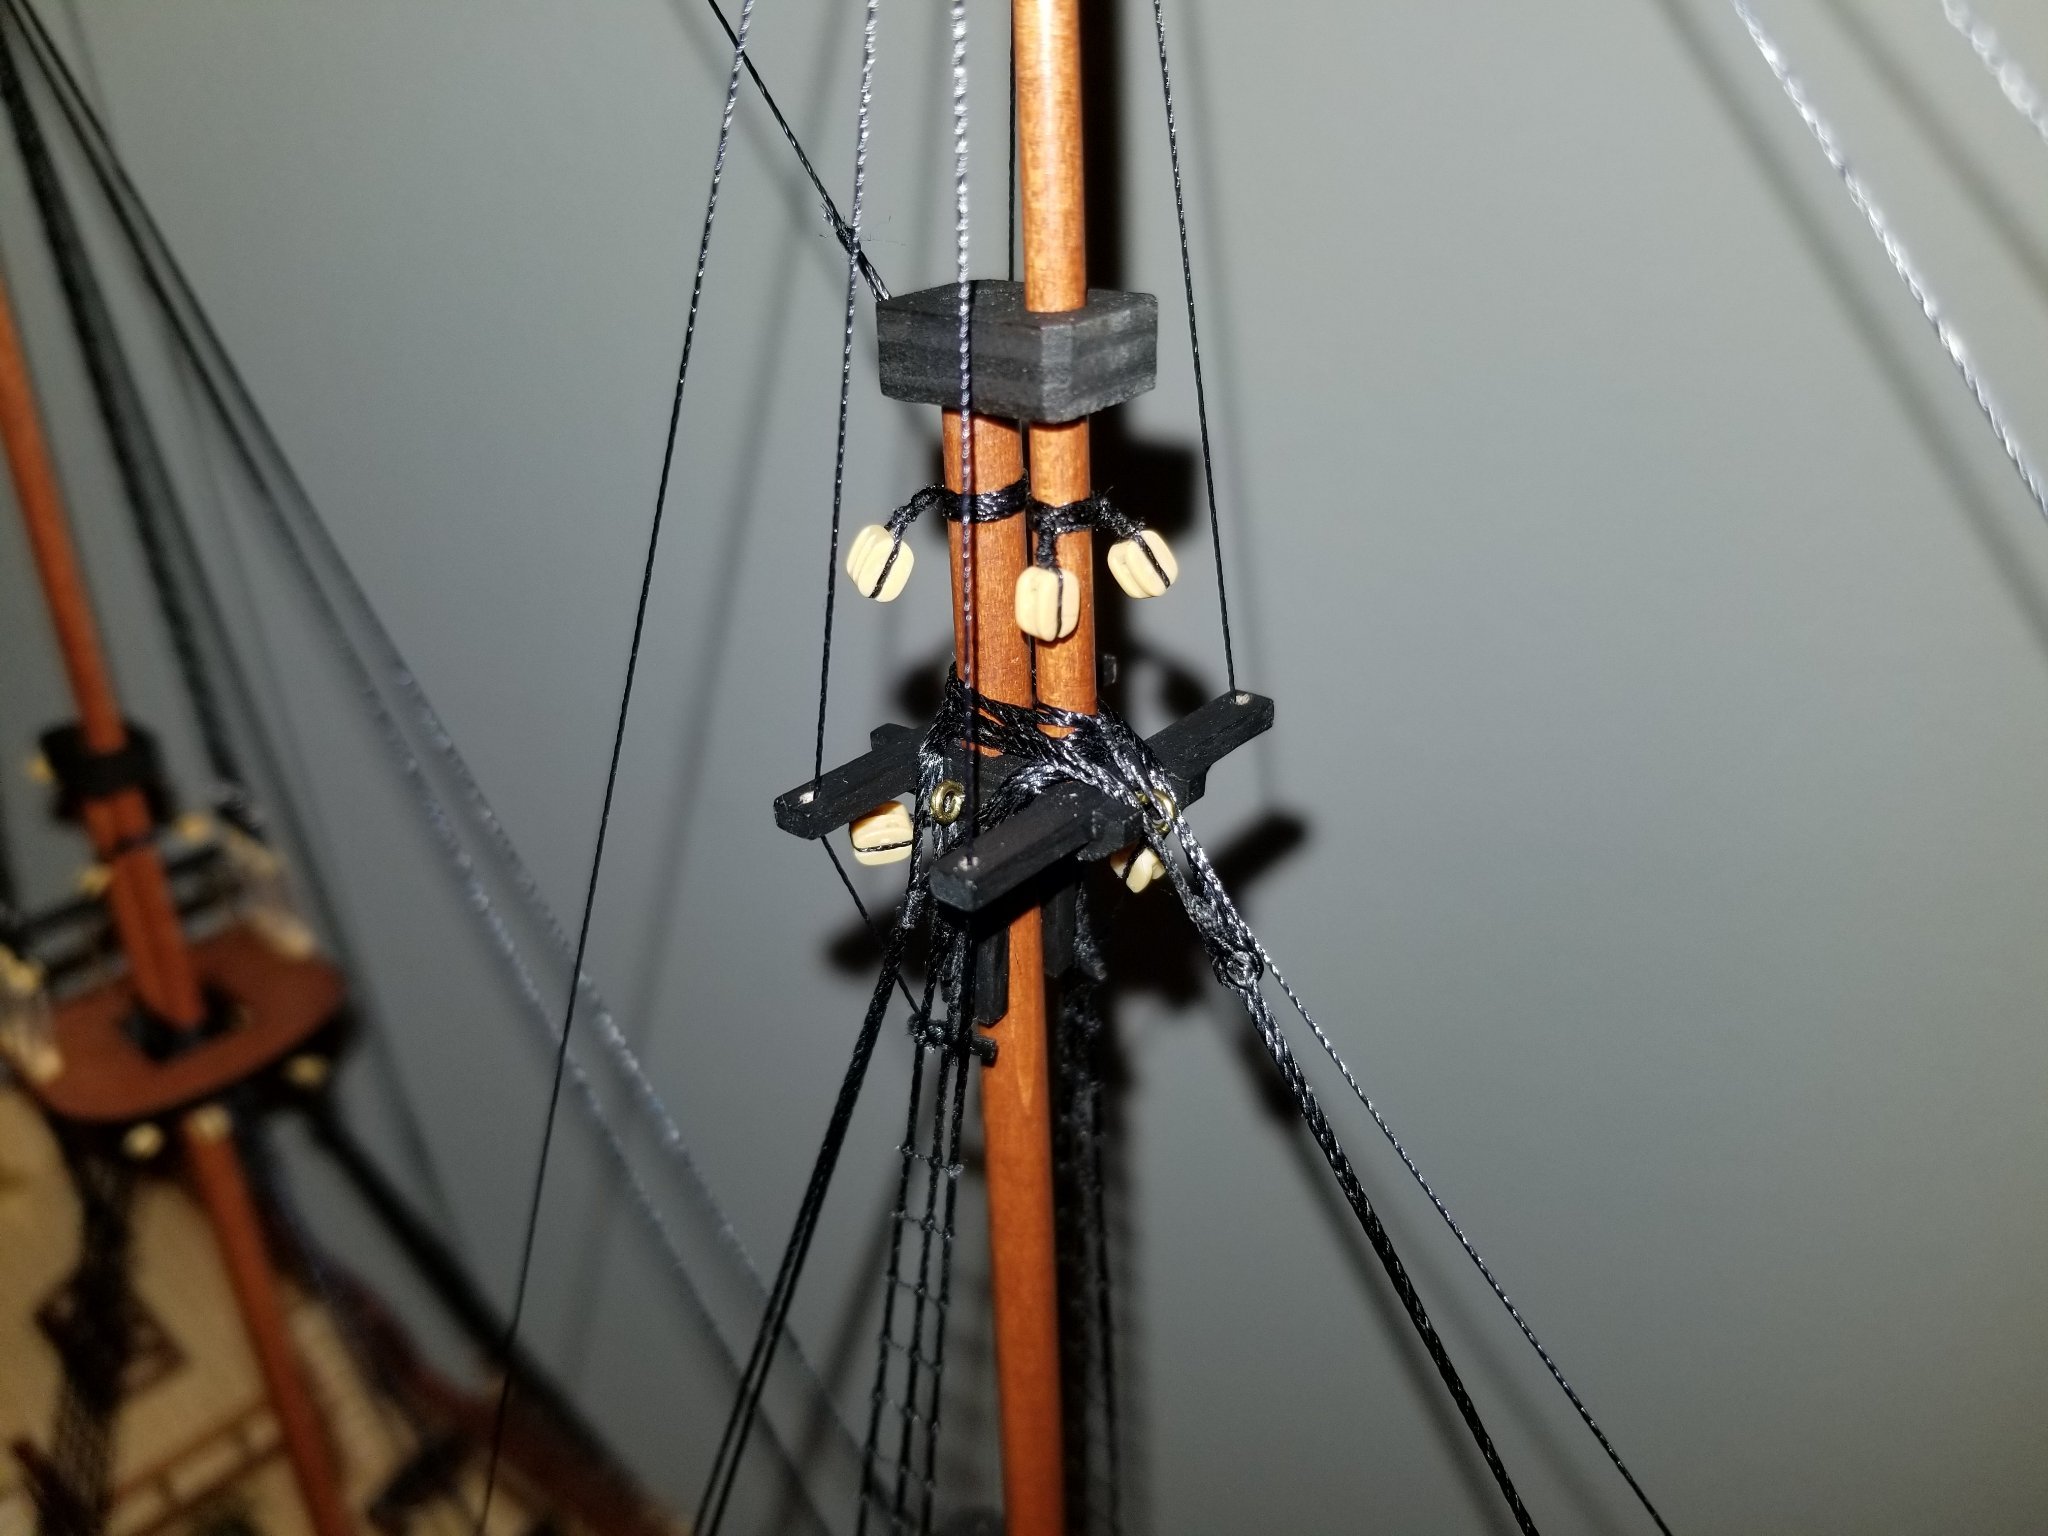
After my ~4 month hiatus, I picked up this weekend with the topmast shrouds:
These deadeyes turned out more even than the lower shrouds and I'm happy with the way they look.
Next were the ratlines for the topmast shrouds.
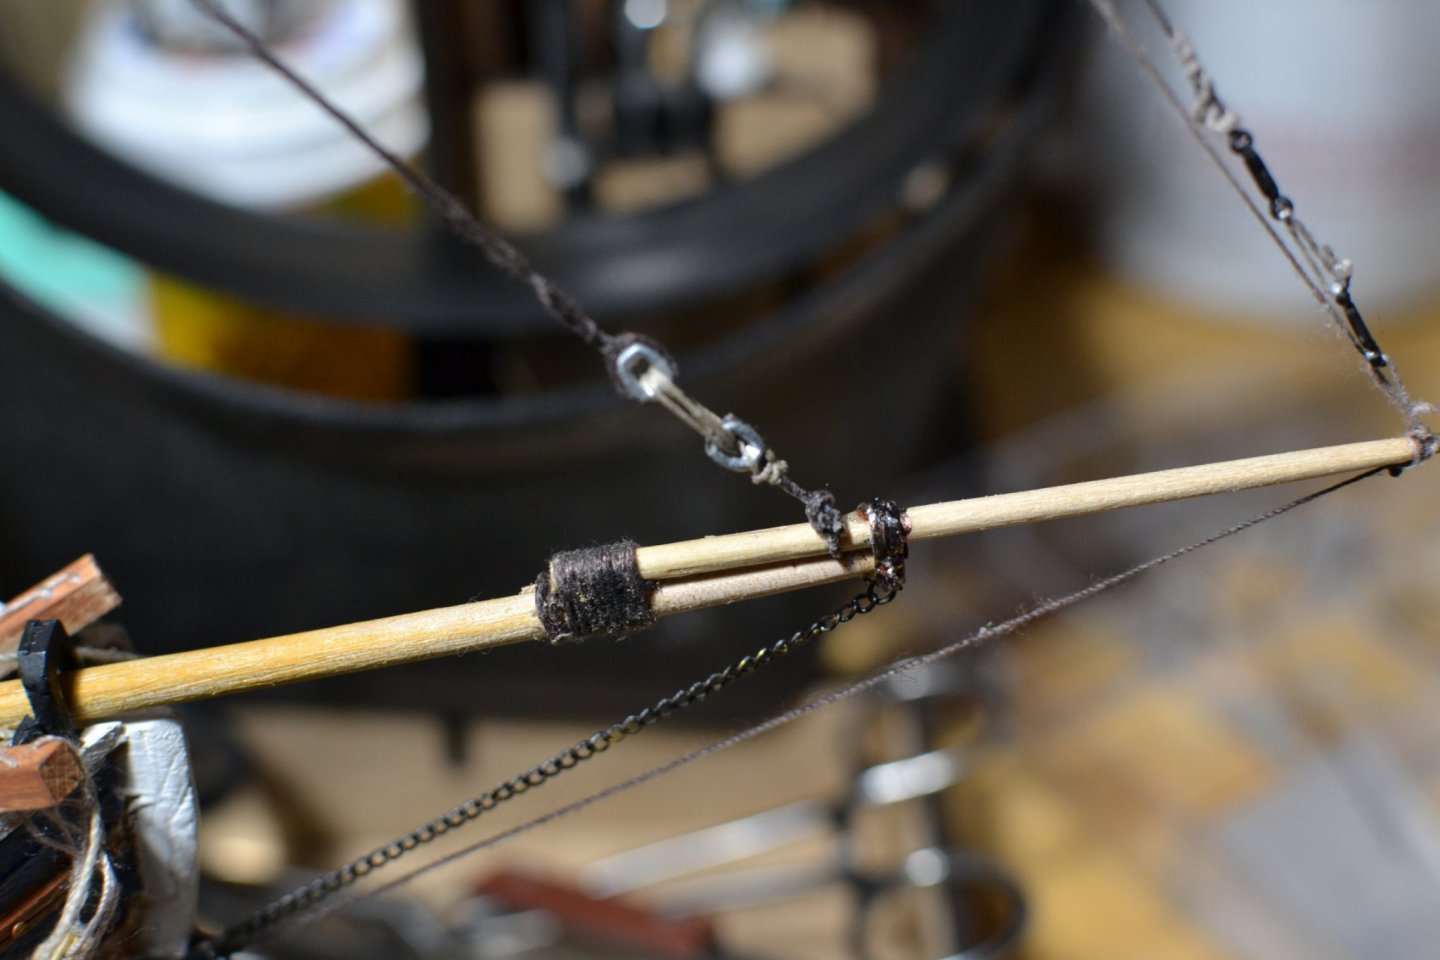
After that, I got the backstays on followed by the main and preventer stays. I had to be a little creative on where to attach these on the foremast... it seems that the proper way to do topmast stays is to reeve them through blocks and down to the deck. But, for this model, it seems the intent is just to seize them on the foremast, so that's what I did.
Topgallant shrouds, backstays, and other stays were then put on.
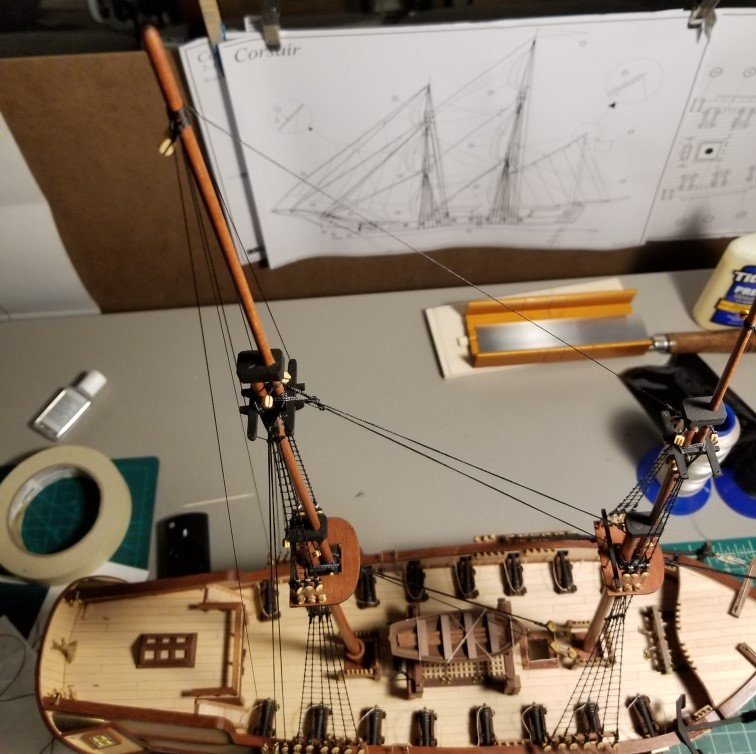
Once all that was done for the mainmast, it was all repeated for the foremast.
The masthead looks pretty busy with all those stays and shrouds.
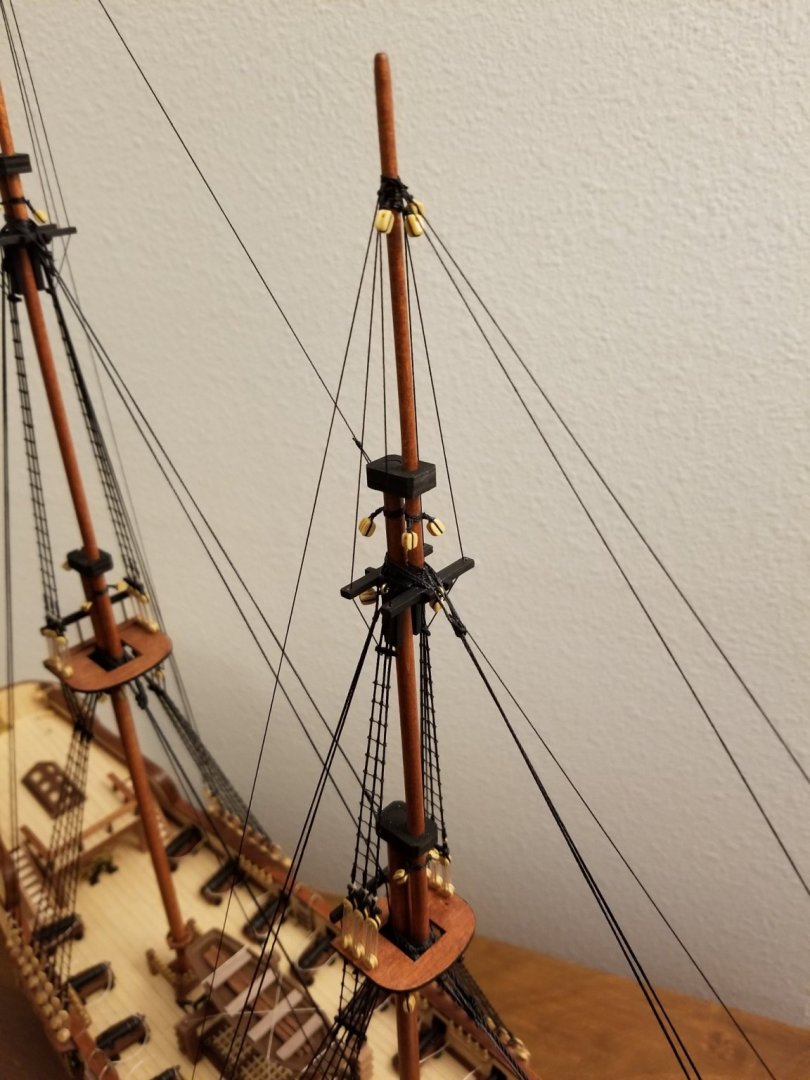
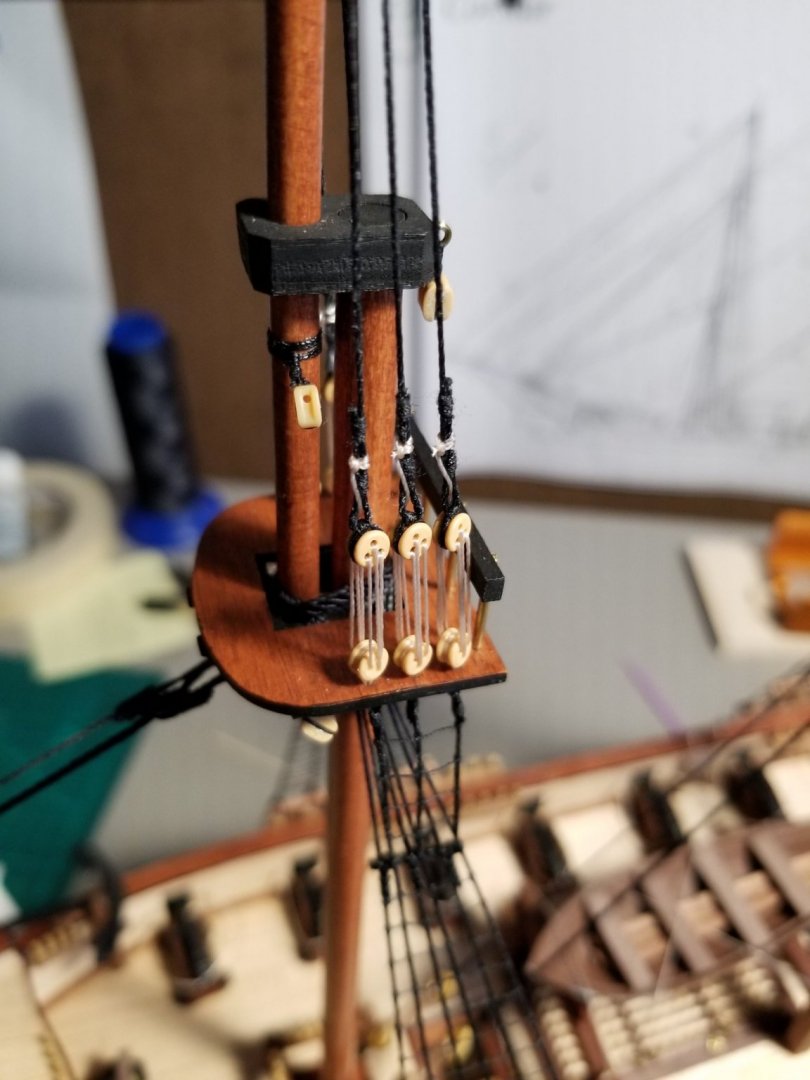
The final pieces were the fore topmast/topgallant stays and jib stay.
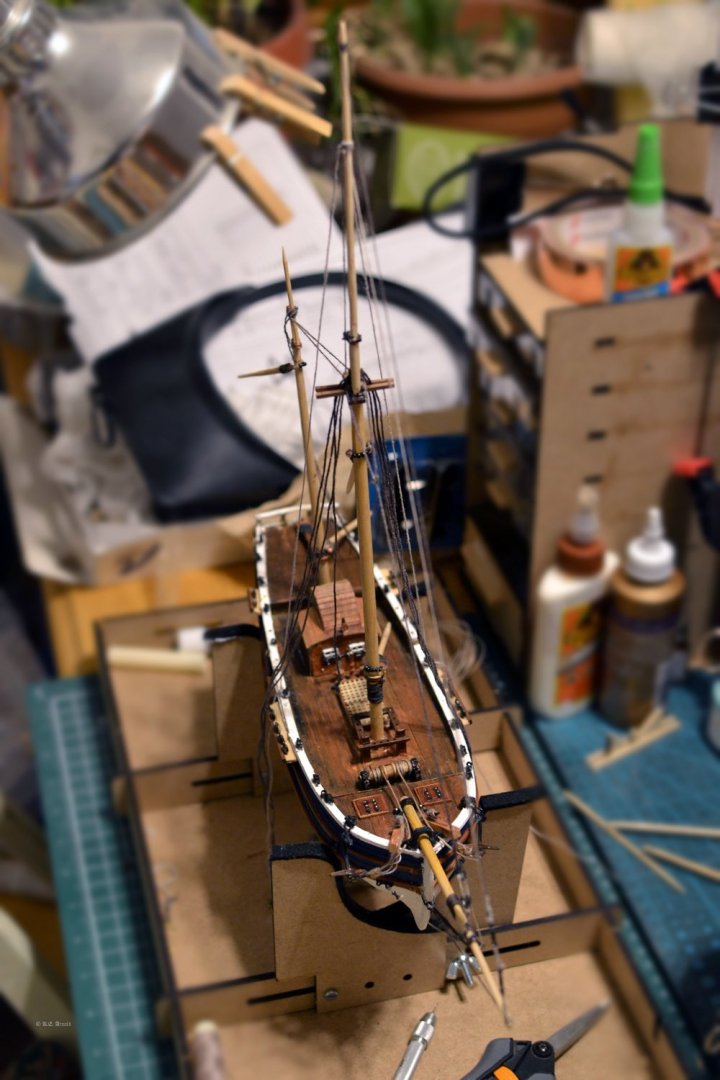
Here we are, standing rigging all in place!
(At least I think so! I may have missed something...)
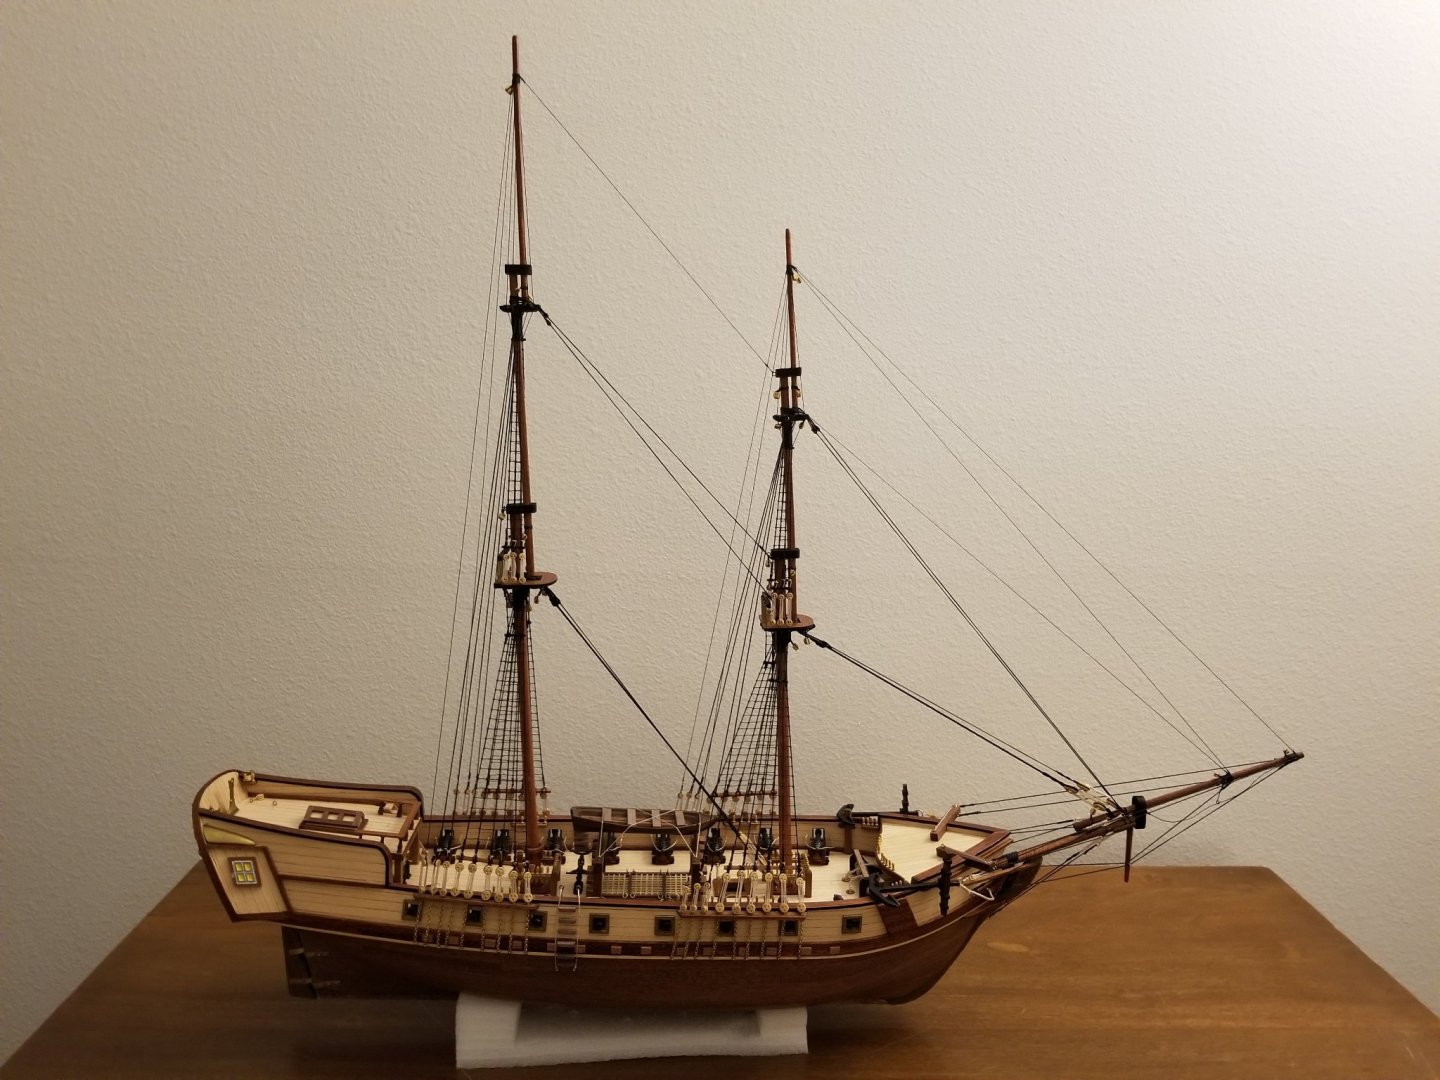
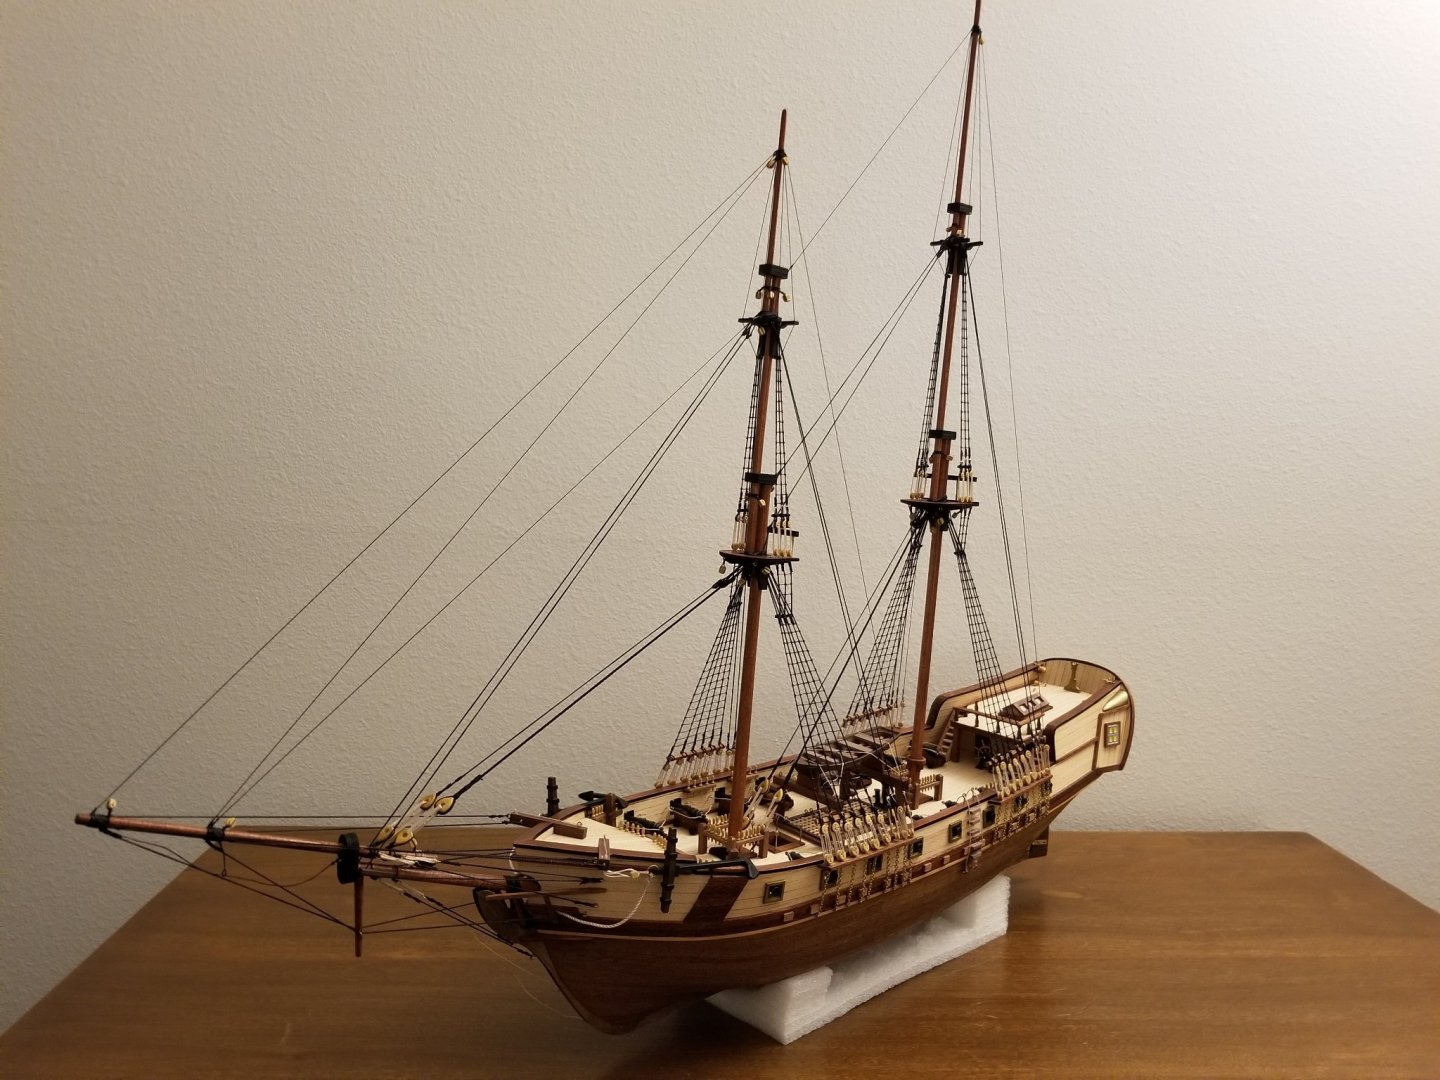
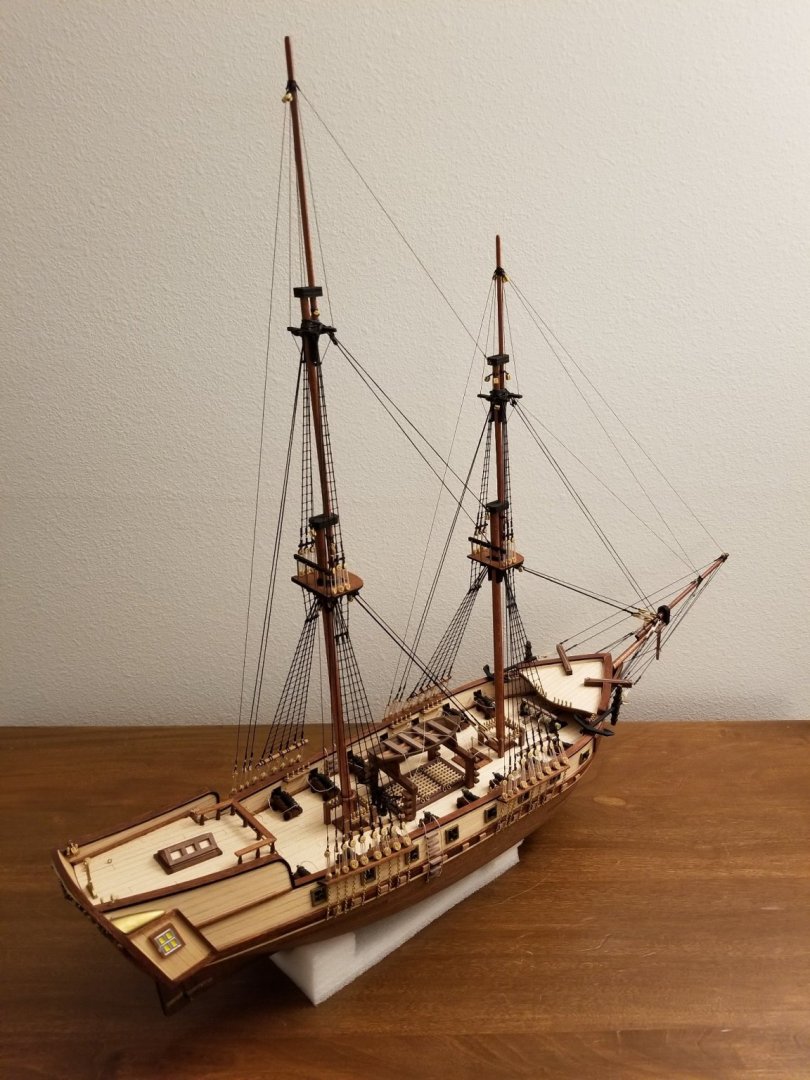
I'm very pleased with the rigging so far. All the lines are tight and none of them are slack; I managed to get the tensions balanced very evenly. Everything is very robust and stiff now.
Now the next things I need to do are to shape and rig the yards, boom, and gaff. Then it's the standing rigging, and I think that's just about it.
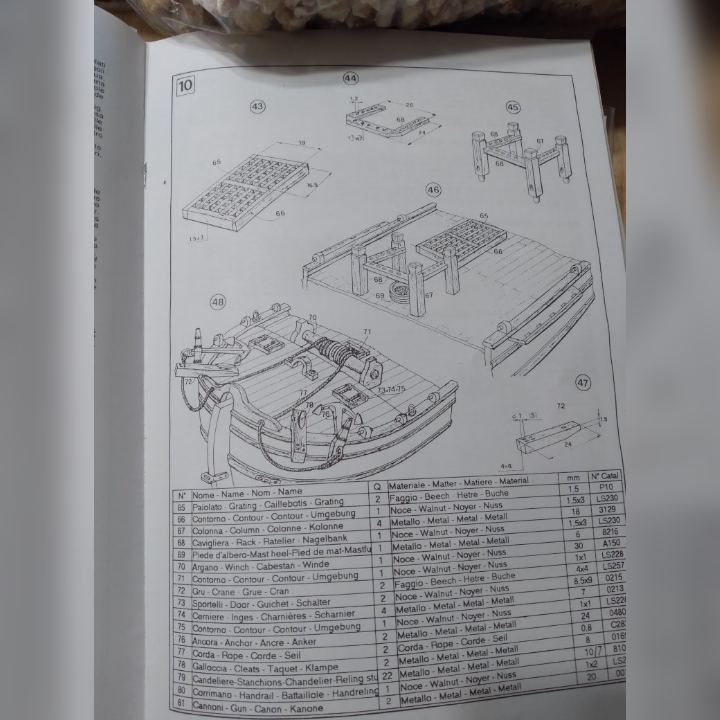
What is the spacing between the ladder rungs on the ratlines? the instructions showed 23 of them, but i do not see any full sized photos showing spacing
-
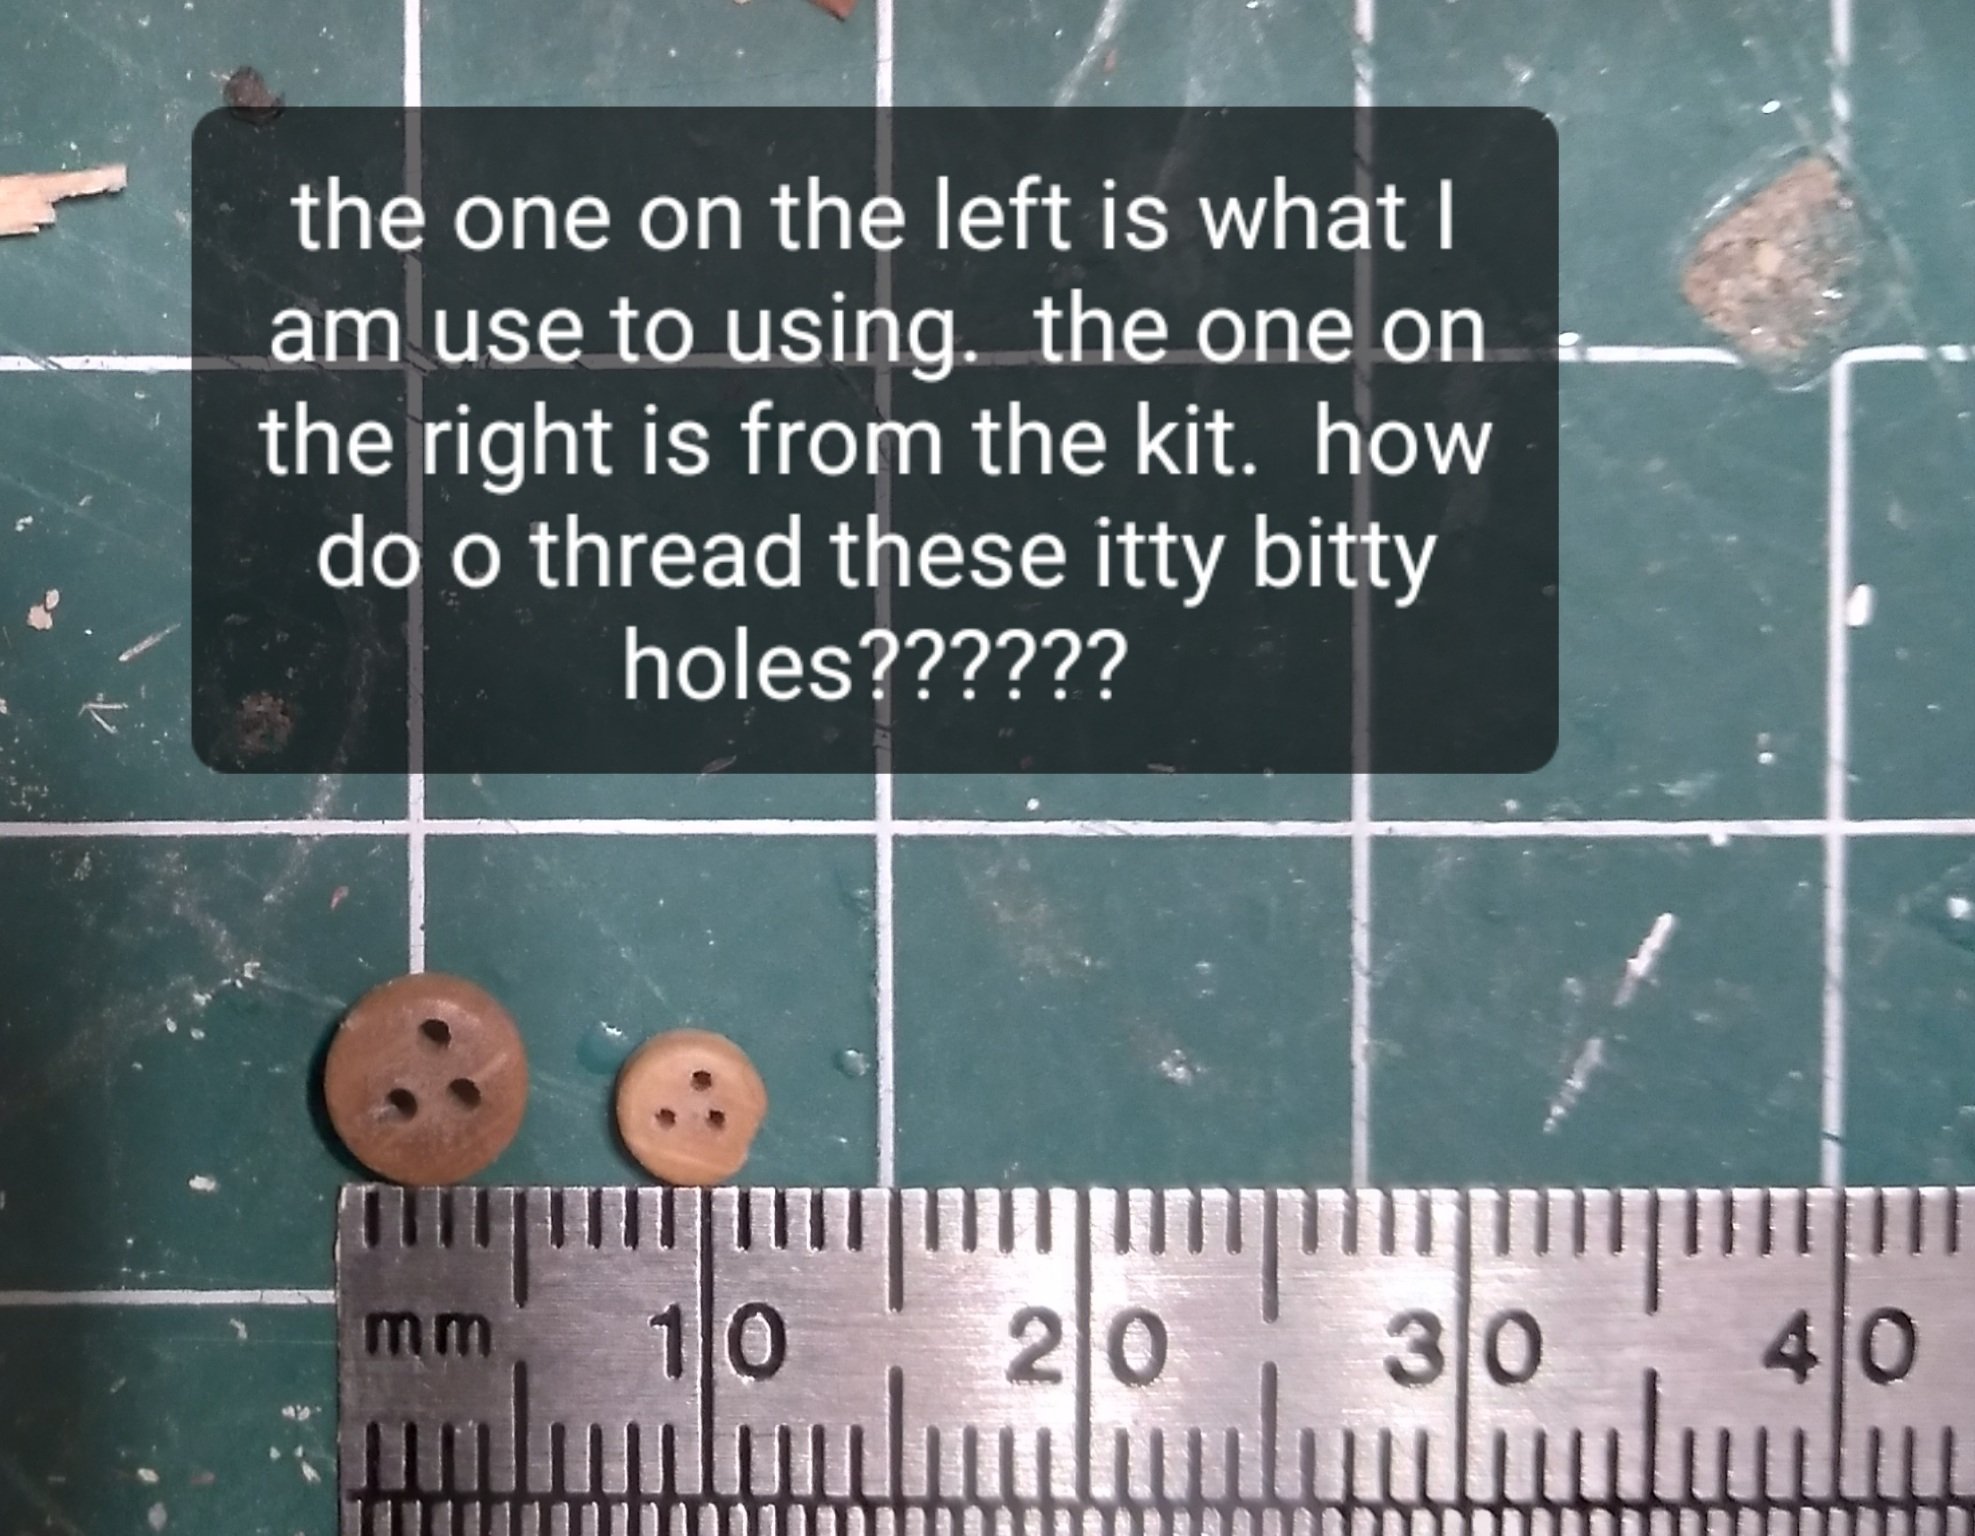
I want to buy assorted items for my current build (1:80) but I still can't figure out how to measure my dead eyes and blocks (and cannon and wheel and bell and lifeboat, etc)
Do i measure the long side or the short? thickness or length might be a better way to say it for the blocks. do i measure across the circle for the dead eye?
- Keith Black and ScottRC
-
 2
2
-
-
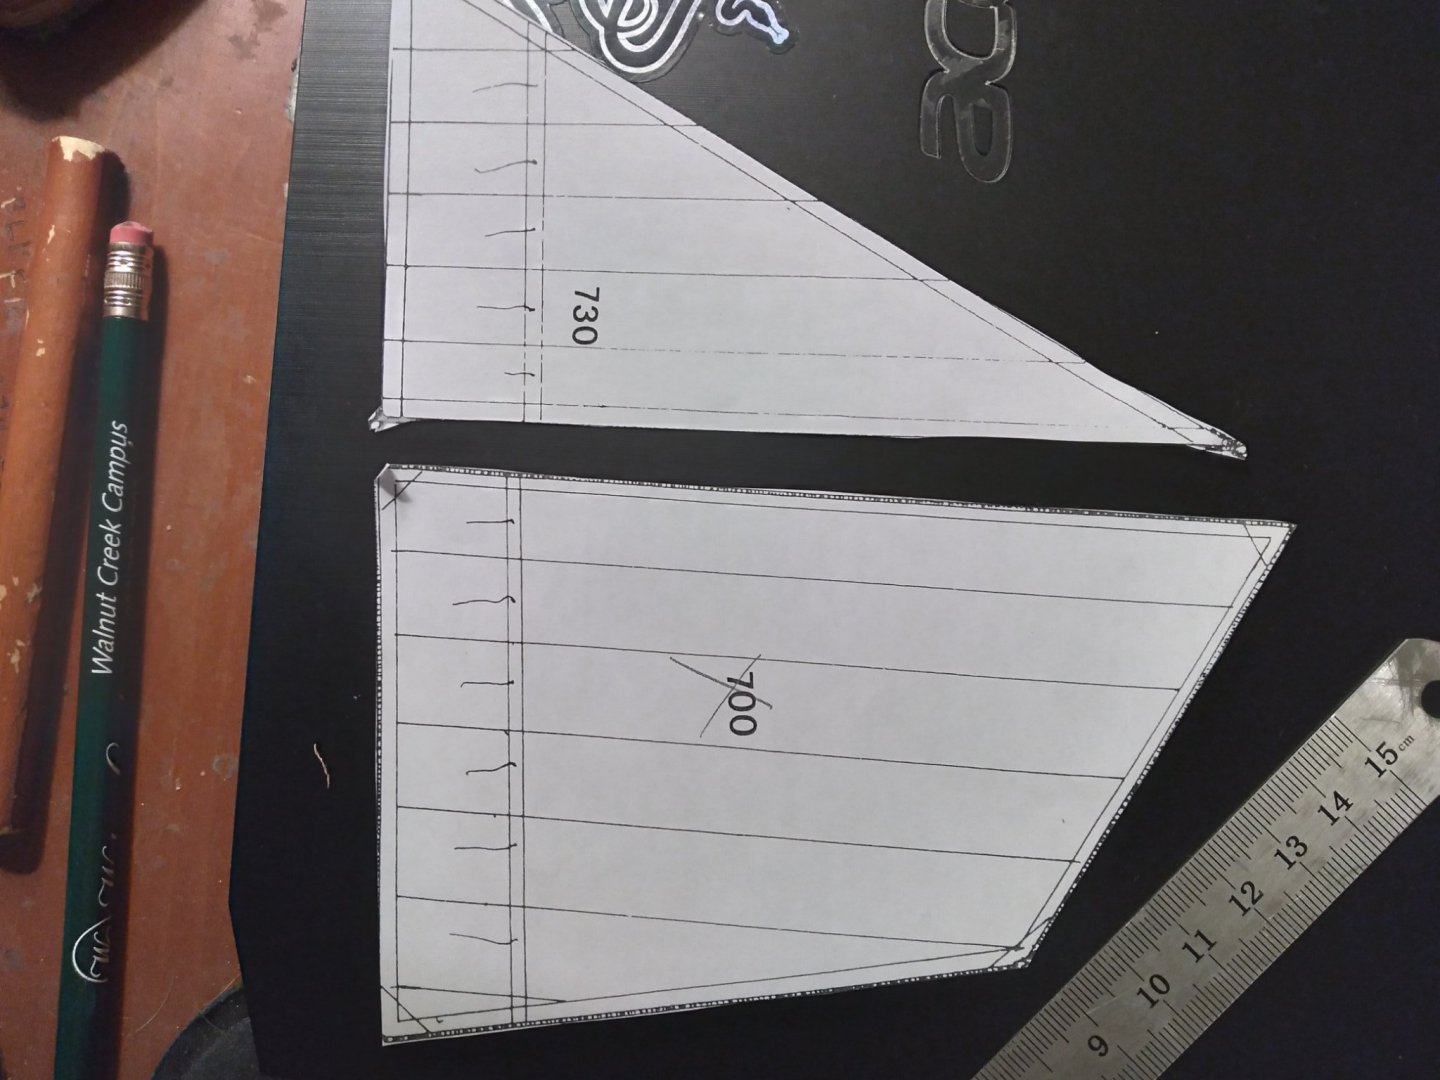
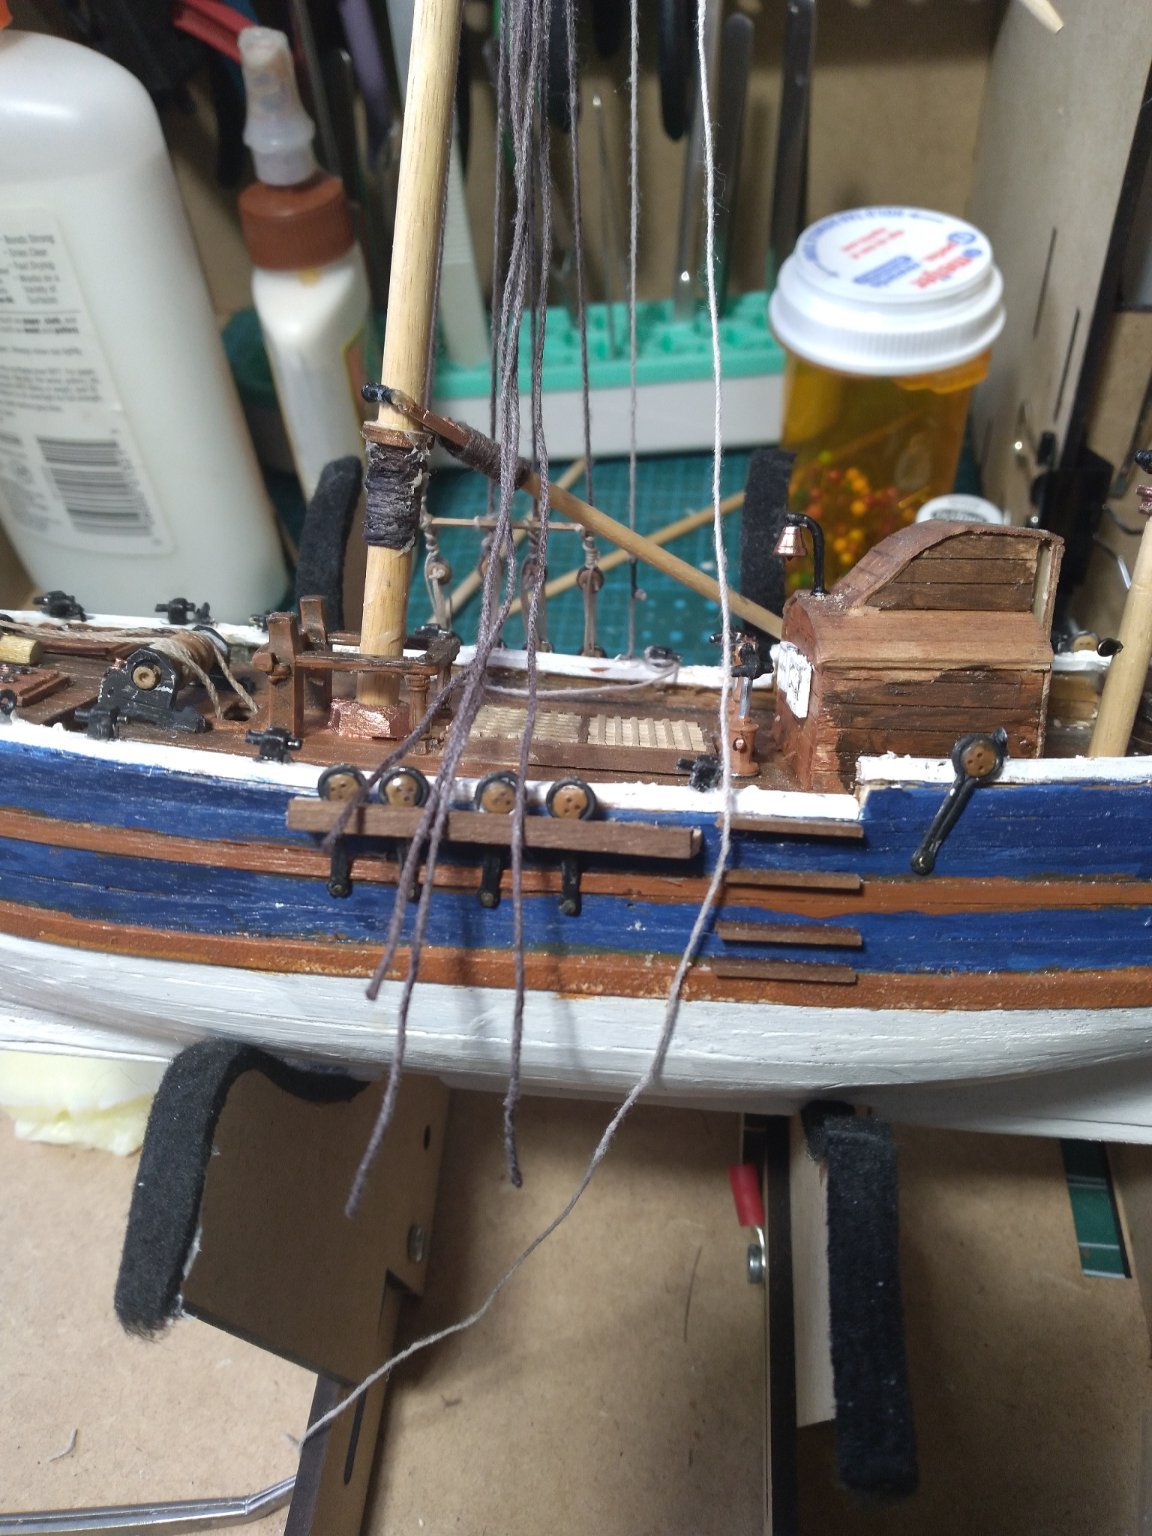
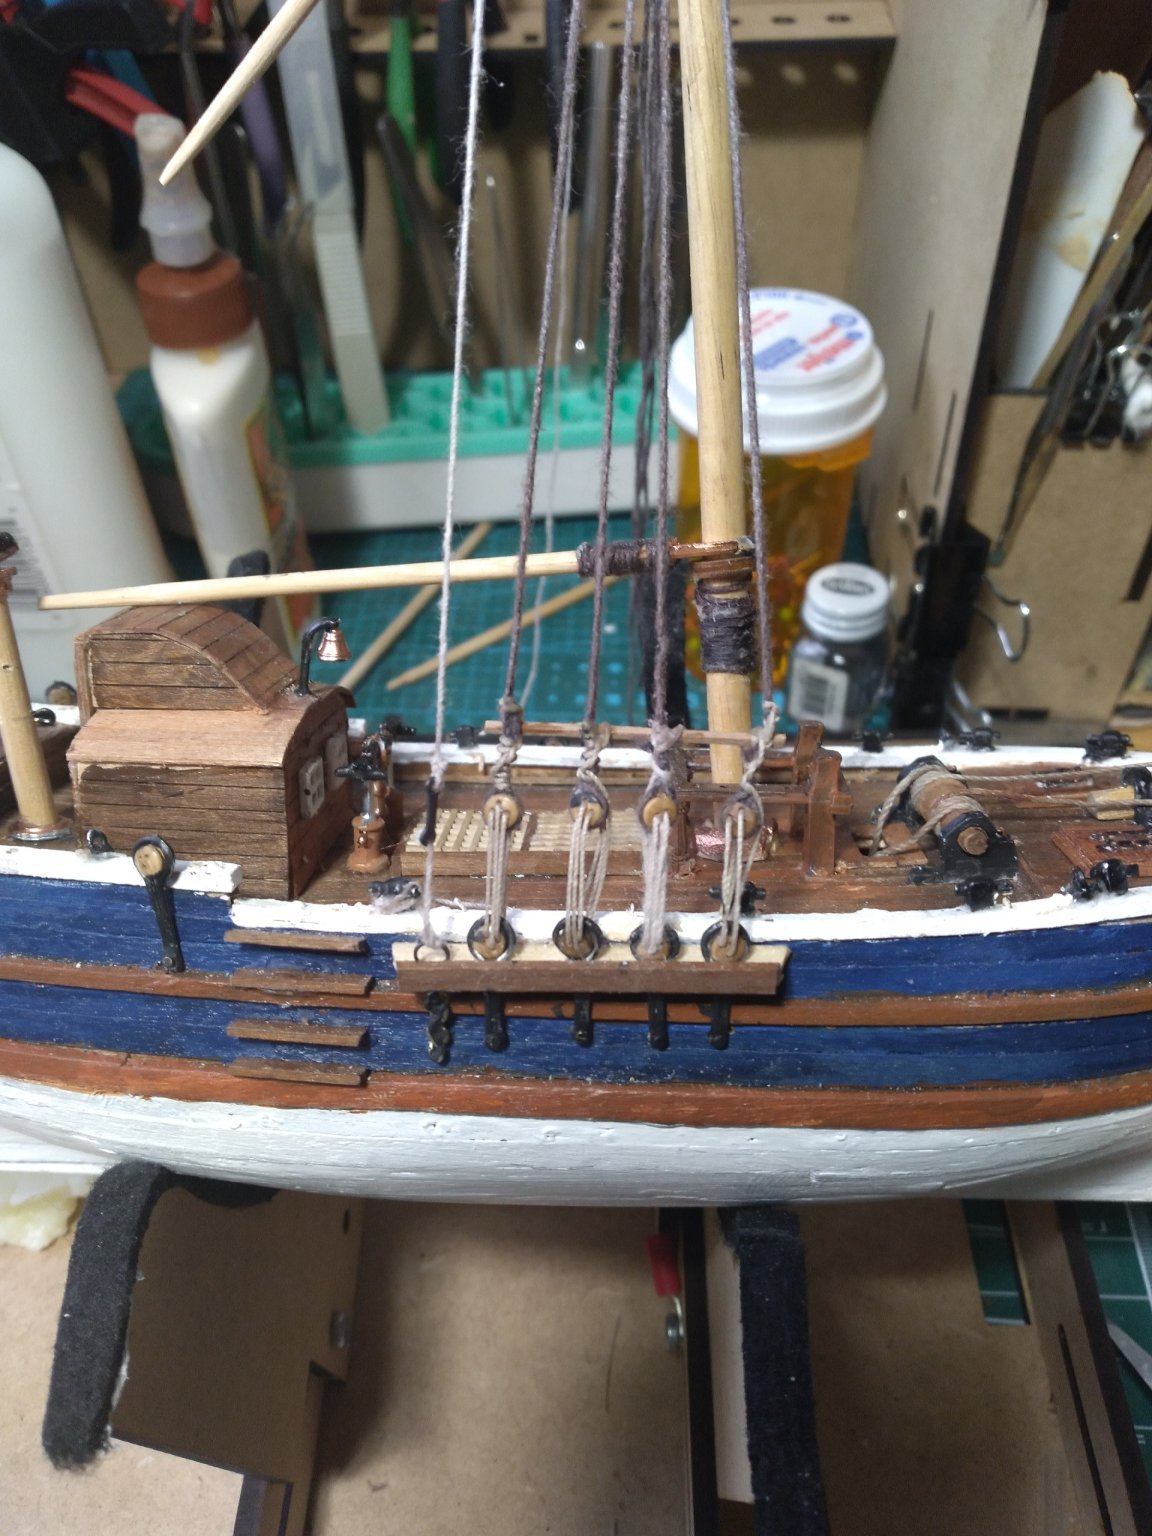
Took a quick break from the rigging to make the sails. The ties, ar the on both side of these types? I know they are only on the front of the square sales. But these type?
-
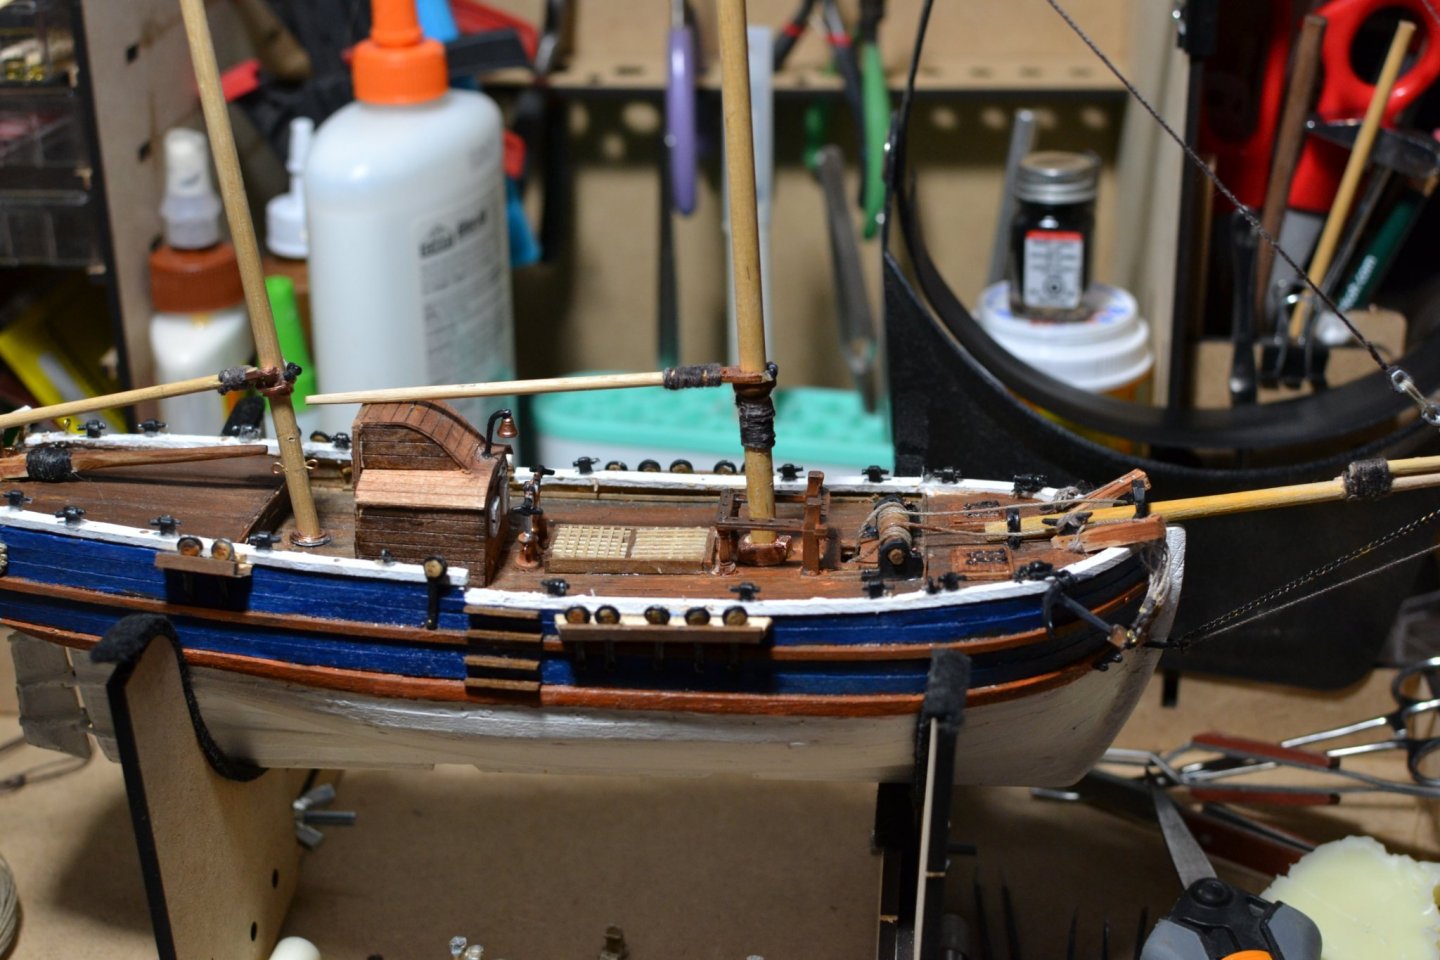
Finalizing the main mast shrouds and deadeyes. Ratlines and backstays are next


-
-
I have started the rigging and will be doing the shrouds soon.
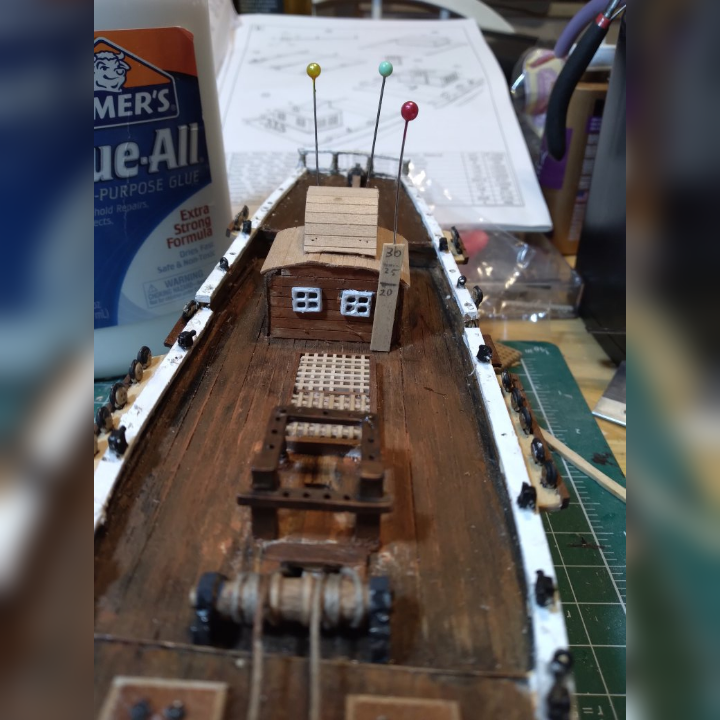
Before anyone says my anchor ropes are incorrect and only 1 should be around the windlass. I know. I had this conversation before and I finally said the hell with it. I am doing what the instructions for the ship show. (see earlier photos)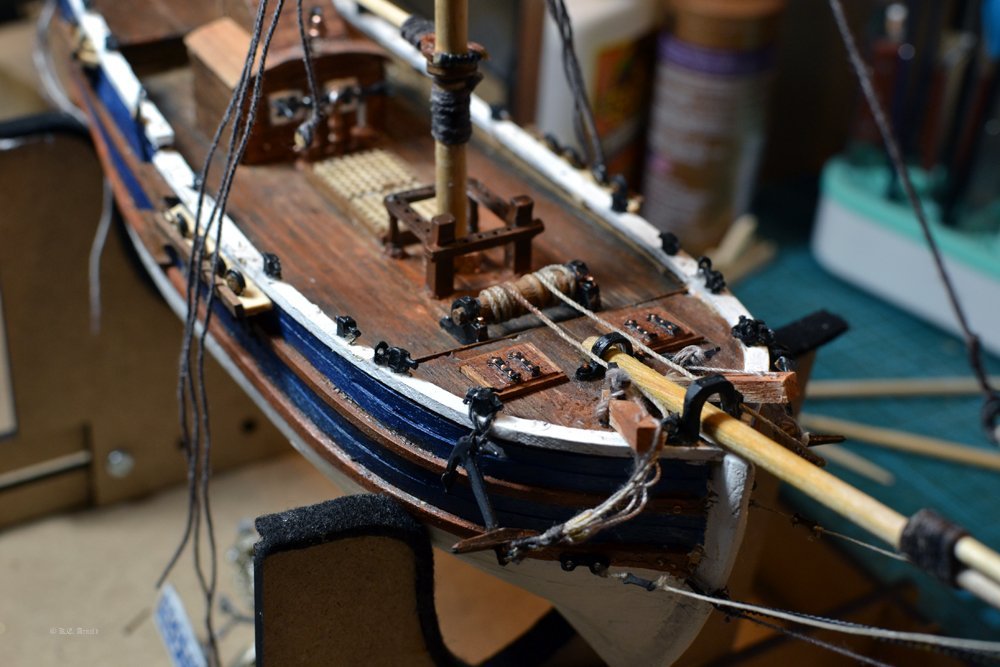

-
-
On 11/7/2021 at 9:42 AM, Jesse M said:
For me it's helpful. But I think it depends on each person's situation. I don't have a dedicated working space. I end up working on my models in three different spaces. So, having the ability to move everything at one time is very helpful. I've tried using toolboxes and craft boxes in the past. The downside to using them is the 'tear down' and 'set up' each time I want to start modeling. By that, I mean getting everything out to use for the current modeling session and then putting everything way. My modeling time is very limited. The cabinet negates a lot of that 'tear down / set up' time.
However, if I had a permanent desk or workstation, I wouldn't use this cabinet.
If I had a permanent / dedicated hobby desk or room I still might use this as a backup storage where it would sit in the corner of my desk and hold things that I don't need to use on a regular basis which would mostly be the scrap pieces of wood spare cannons and doors and dead eyes and everything else that is left over each time you finish a kit I would start combining all of those items together in the drawers and store them
-
On 11/6/2021 at 5:57 PM, Papa said:
Do you find this little hobby desk useful? It looks cramped to me.
It is somewhat cramped depending upon where you set it up if I had more of the kitchen table work on it would be pushed back for another 10 inches from my work mat.
The base size of the portable desk is a little too large to sit on top of a folding tray table or something like that. If I had the space I would move it to where it's at beside me and have the table space open I just don't have that kind of work area unfortunately.
I could probably tear down the workbench table I have that's currently supporting my scroll saw and use it as my work bench but right now I'm good with what I've got
-
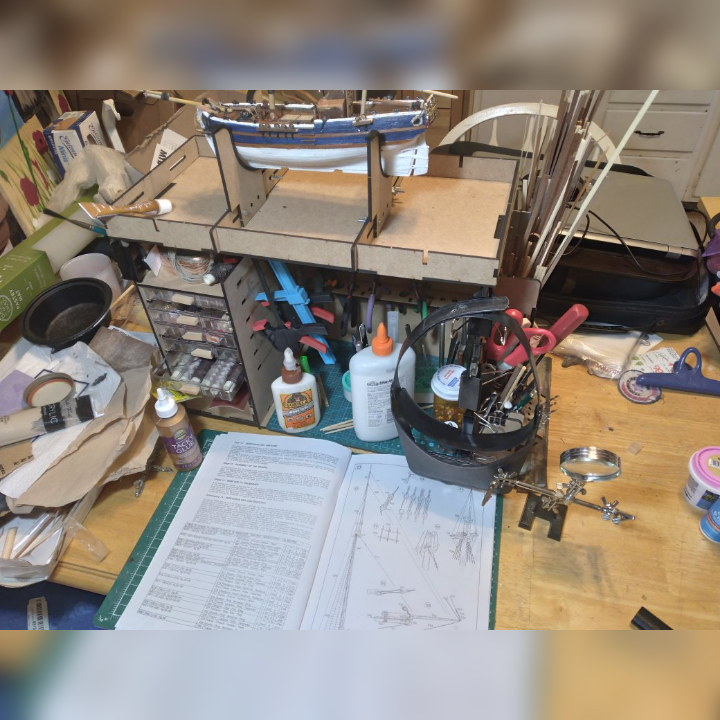
A few new files working on my new hobby desk
- EricWilliamMarshall, lmagna, BANYAN and 1 other
-
4
-
On 10/13/2021 at 3:22 PM, Laggard said:
Appreciate that. Newbie here. Took me two hours to rig this tiny section. No way I’m undoing it. Next build I’ll get it right. 😊 I simply don’t have the dexterity to tie a 3 mm block to a mast using a bowline knot. Or any knot for that matter.
I will be having the same issue. I have only worked in 5 mm and my fat fingers can hardly hold on to the tiny pieces 😅
-
Finally got my stuff together.
-
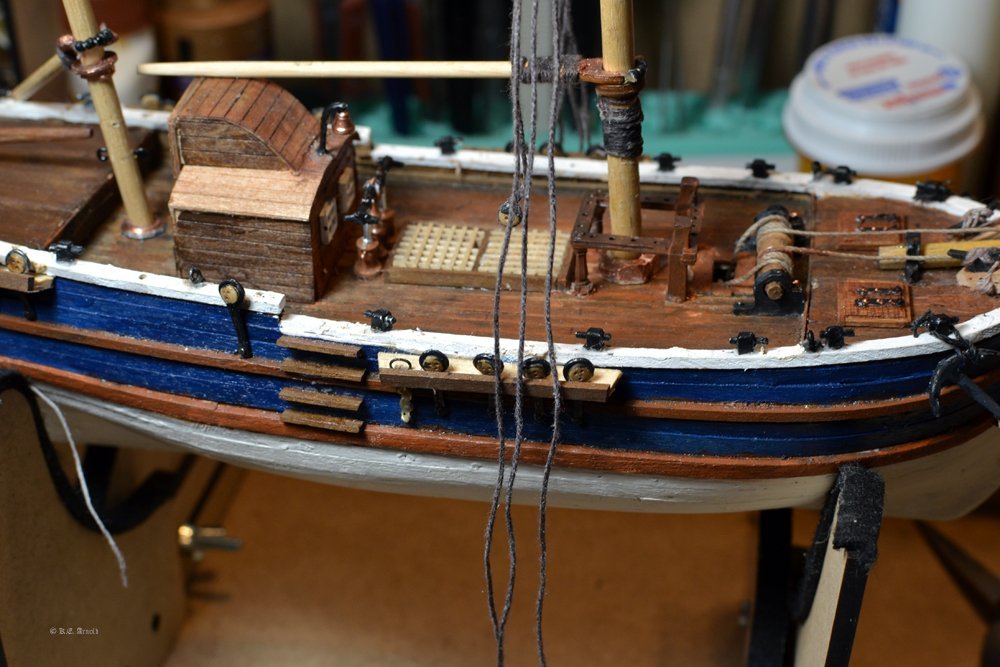
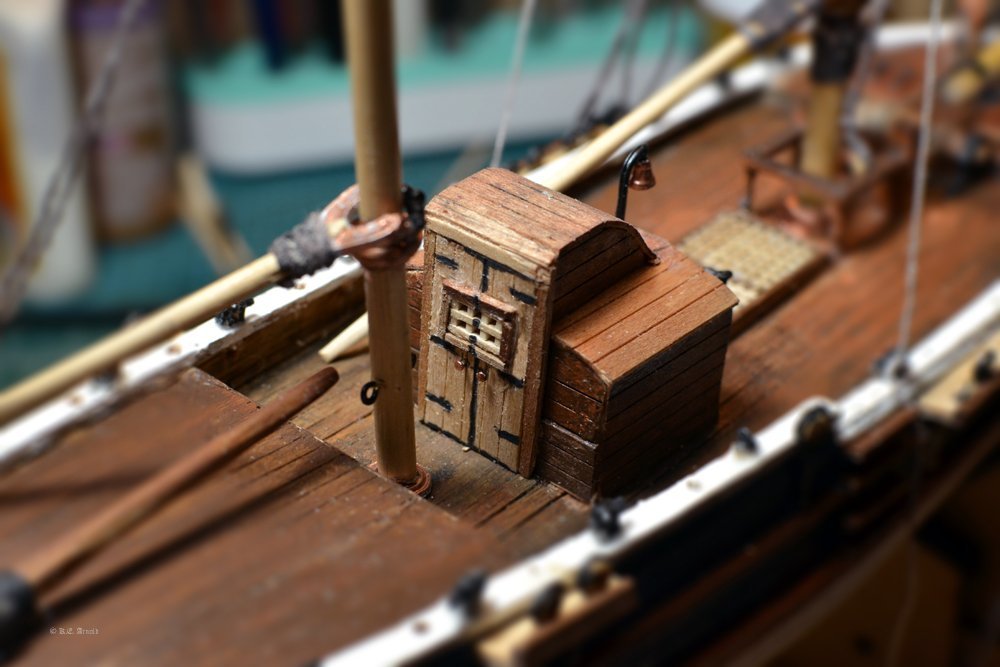
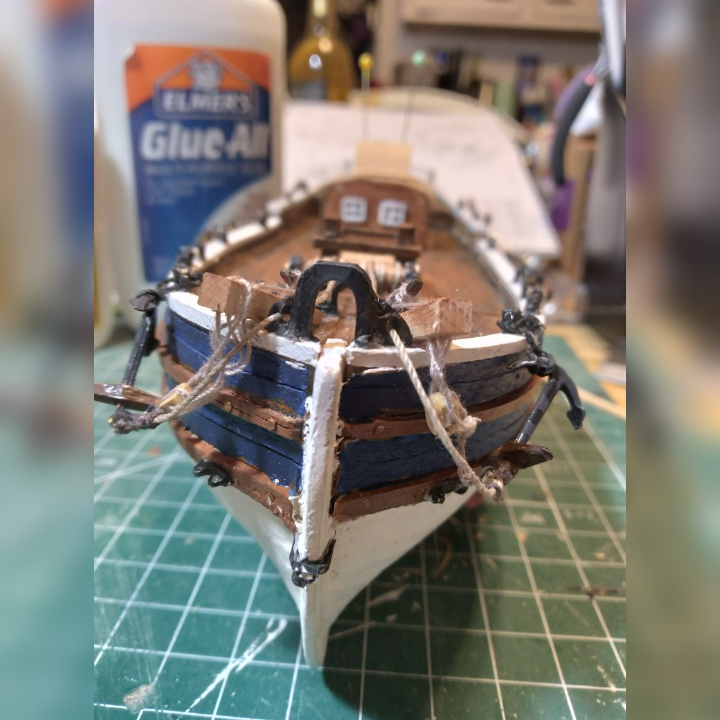
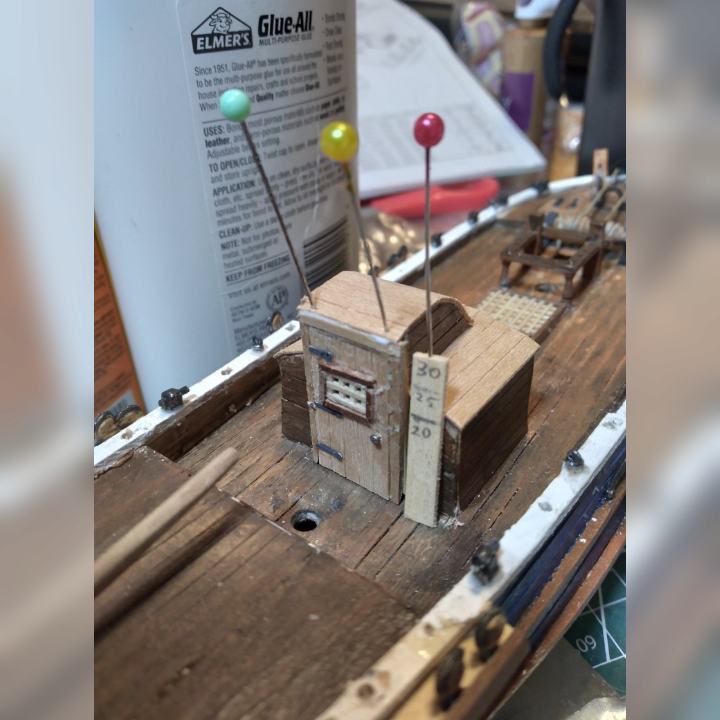
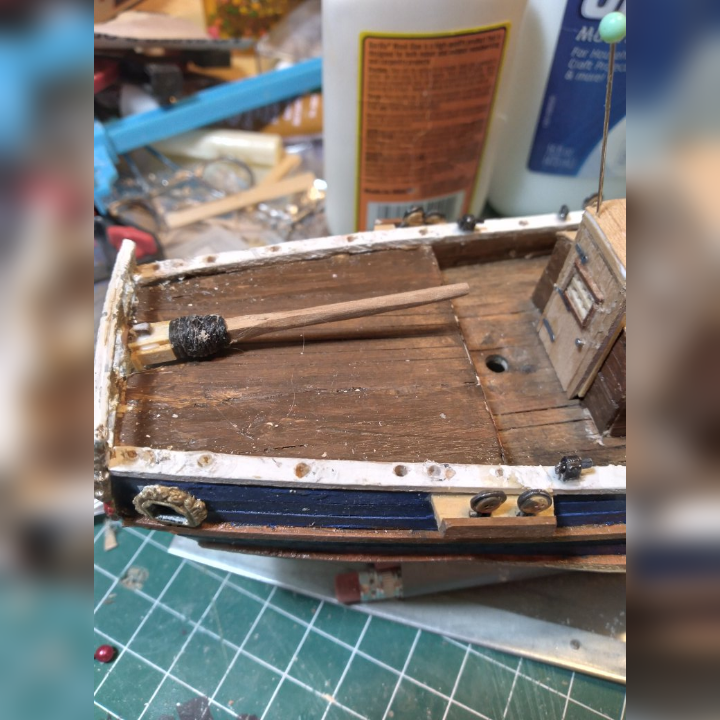
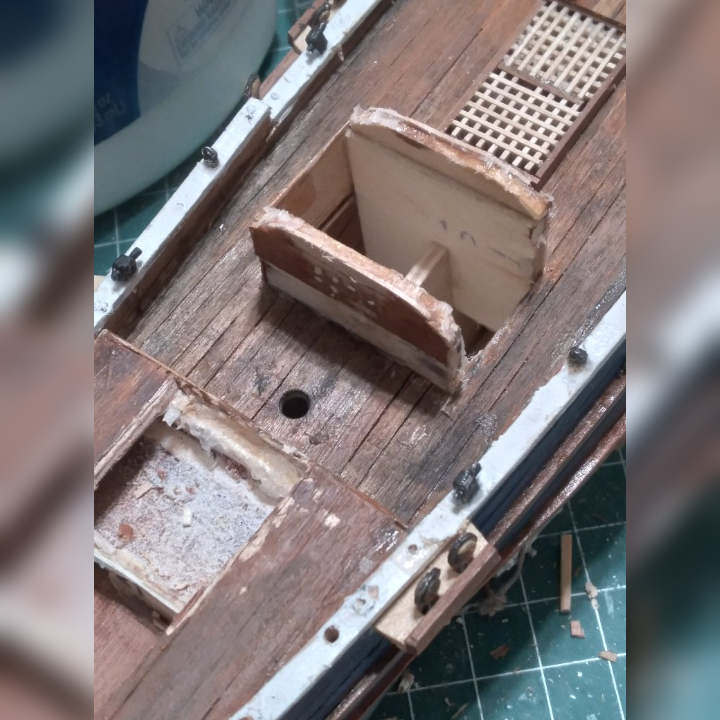
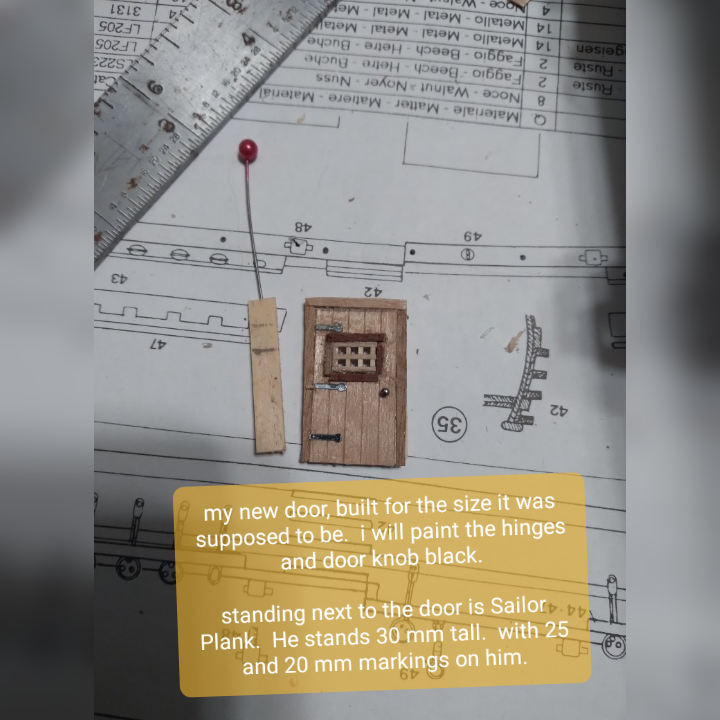
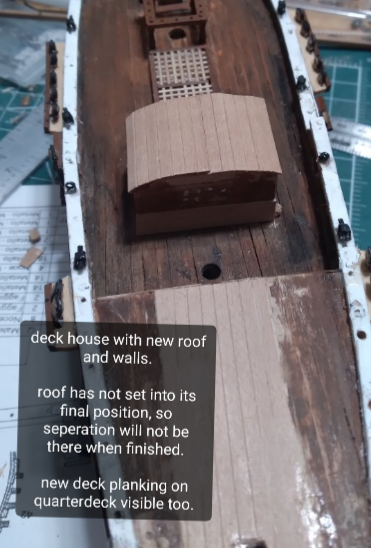
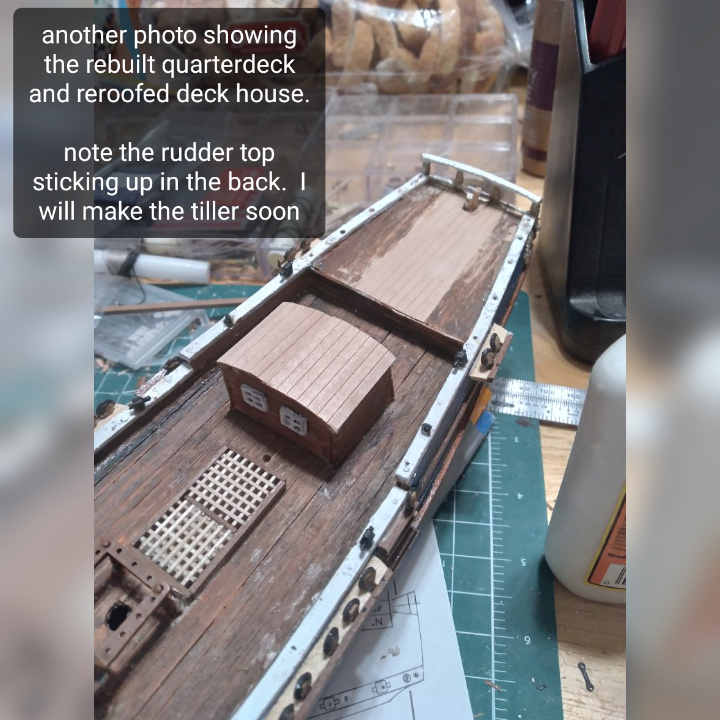
Tiller done, door done, anchors hung, quarterdeck done. Time to re do the rails. Captain Plank seems to like his new digs.

- GrandpaPhil and BANYAN
-
2
-
-
-
14 hours ago, kearnold said:
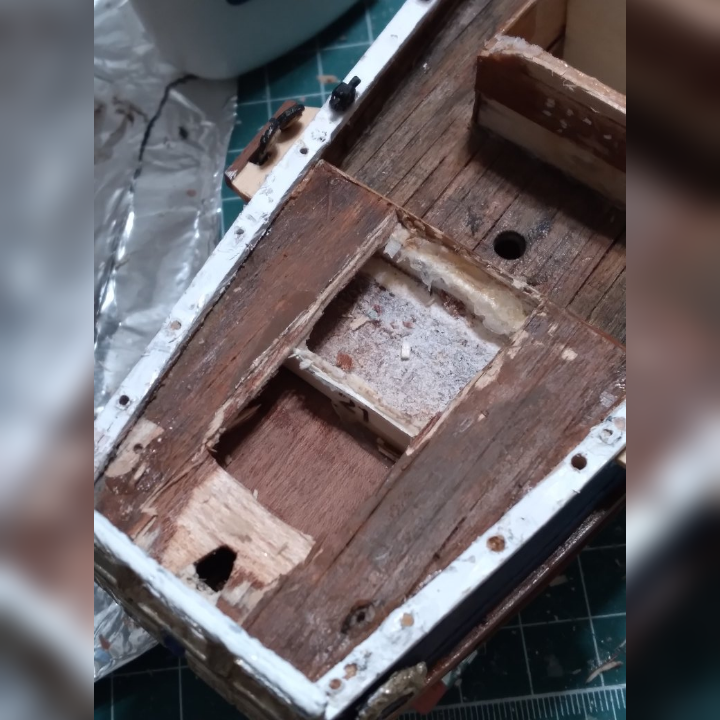
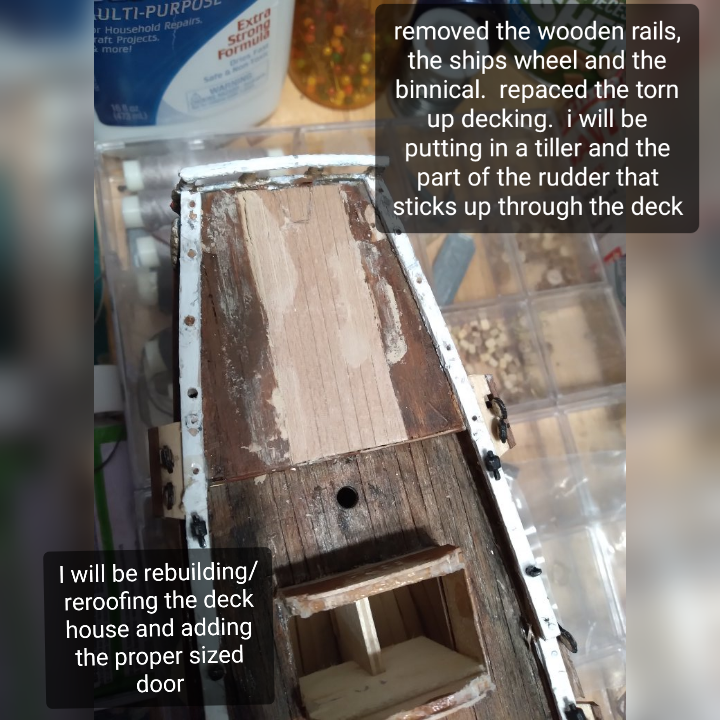
making the tiller bar would not be difficult. I would probably remove the binnacle too. Repatch the floor with new planking and put the bashed stuff into a desk drawer to forget about it.
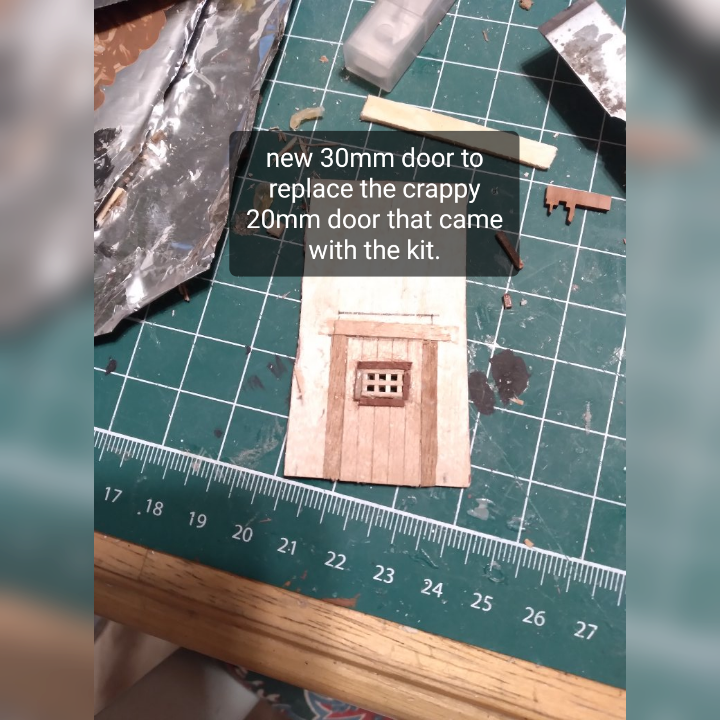
According to what someone told me 25mm figures would work, 30mm wold be just a wee bit to tall, but would work too. the only other thing I would have to fix would be the door going below decks. As for the anchor ropes, I am leaving them as it shown in the instructions. Maybe the "Coral" curse will be lifted then and I can move on.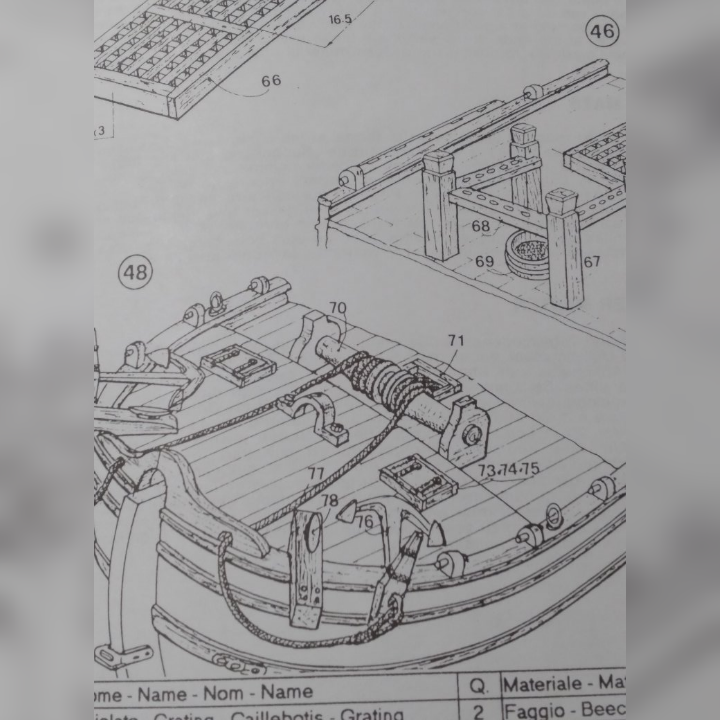
-
making the tiller bar would not be difficult. I would probably remove the binnacle too. Repatch the floor with new planking and put the bashed stuff into a desk drawer to forget about it.
According to what someone told me 25mm figures would work, 30mm wold be just a wee bit to tall, but would work too. the only other thing I would have to fix would be the door going below decks. As for the anchor ropes, I am leaving them as it shown in the instructions. Maybe the "Coral" curse will be lifted then and I can move on. -
To be honest, everything that is going on with this kit is starting to put me off doing these ships at all. I have never had so many problems building anything as I have with this particular model
-
As for making it historically accurate, yes I am fetching things here and there. And I'm probably going to rip the wheel out and replace it with the Ritter killer bar just because so many people seem to think that having a wheel is wrong. I'm trying to find a scale miniature that I could use for comparison purposes and I'm having difficulty figuring out the best way to do it. So far I've been told a person would be anywhere from 20 to 30 mm in height if that's the case then the Cannons that came with the ship all about the size of a shotgun
NOTE: talk to texed on my phone. Ritter killer=Rudder Tiller
-
6 hours ago, Roger Pellett said:
I know that you are enjoying “freelancing” this model, but sooner or later you are faced with mechanical reality- does what you are doing actually make physical sense. Such is the case with the windlass. With two cables wrapped around the windlass barrel, how do you drop just one anchor, and what do you do with the unused cable.
Deep sea vessels on long voyages would sail with anchors securely lashed down and cables stored below. The anchor and its cable would only be readied for use when she vessel reached shallow water near its destination. You are building a coasting vessel, that could need its anchors throughout the voyage. It would, therefore, not be unusual to have one anchor set up to be used, with the other on standby as a backup. Windlasses on coasting vessels often were equipped with an arbor or beam extending across the top. This allowed the unused cable to be hung in loose coils encircling the windlass barrel. When the other anchor was dropped the windlass could rotate without engaging the second cable.
I also believe that whenever possible, crews avoided rotating the windlass when dropping the anchor. The cable screaming around the windlass barrel propelled by the weight of the anchor must have been dangerous to both ship and crew. They did this by laying out the required amount of cable in large loops on the deck ahead of the windlass; between the anchor and the windlass. Once the anchor hit bottom, the ship was backed and the cable could be paid out gradually.
Roger
I am banging my head against the wall right now. What you said makes perfect sense what others have said makes perfect sense and yes I'm sure you are all correct. However all I have is a set of really crappy instructions. Many of the items in the kit are not to the proper scale some are to small some are to big. There are aspects of the directions that are left out, so I've got drawings that I'm trying to work off of. The way I have strung the anchors is what the picture shows in the instructions. If you look at the picture I posted above from somebody else's build you will see that the Rope is doing the same thing it's wrapped around The Windlass and going down into a hole. The only thing that that person did differently was they hung their anchors in a different fashion using whatever those posts are that are sticking out from the front of the boat.
-
1 hour ago, wefalck said:
I gather you refer to the anchor-cranes ?
Possibly. The instructions didn't name them.
-
would the 2 posts sticking out from the front be used for anything? the attached pic is from someone else's build, and I kind of like how he did it. The instructions for the kit just show the anchor rope going around what I call the "windlass". "Spill" is a new term for me.
I am debating on add the railings and the supports for them. I still haven't decided.thumb.png.9af69789541d50e3fbfa7e5db70d980e.png)
-


.png.2f9db064a9f943c401c396be6ab73200.png)
Ratline spacing
in Masting, rigging and sails
Posted
Please forgive me is this is answered somewhere else.
My current build does not have a full scale picture showing the spacing for the ratlines. It shows that there are 23 of the "ladder" ratlines, but the picture if maybe .25 size. I have seen a few answers for other scale ships, but nothing for a 1:80 scale. Sadly, my math is not good enough to figure out the distance between the lines.
Any help?
Current build is the "Corsair" from OcCre