

canoe21
-
Posts
4,355 -
Joined
-
Last visited
Reputation Activity
-

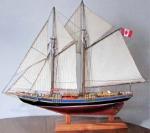
 canoe21 reacted to captainbob in Lettie G Howard by captainbob - FINISHED - 1:48 - POB - schooner
Part three:
Crosstree area.
Metal work. Gaff halyard blocks are mounted with open hooks.
Throat Halyard. Shackled at the top with a heart iron and at the bottom hooks into the spectacle iron.
Bottom of boom showing the eye for the sail throat, also a good view of the spectacle iron.
At present the parrals are just tiny beads.
The end of the gaff fitting for peak of main sail, side block for the top sail clew halyard and an eye for the gaff vang.
That’s it for now. If anyone wants more, just ask.
Bob
-
canoe21 reacted to captainbob in Lettie G Howard by captainbob - FINISHED - 1:48 - POB - schooner
Keith, this one’s for you. First, thanks for your appreciative words and wanting to know more. For the size of the blocks, the sheet blocks are 18”, the throat halyard blocks are 15” and all others are 10”. Now on to the pictures.
The admiral wanted lots of gold color on the boat, so the hoops are slices of tubing.
Since the boom does not travel up and down so it is captured with a simple bail.
There should be a plate on top of the shelf for the boom to ride on. Pins are just splinters for now.
More to follow.
Bob
-
canoe21 reacted to popeye the sailor in Syborn by popeye the sailor - FINISHED - 1:33 - trawler
so......these guys are all planked now, but I'm still working on the Half Moon boat. in the meantime, I have these guys in the works as well.......sorting out the rib problem. the plastic boat was too big for the Half Moon......I see that now. I made a good move in my decision to scratch build one for it.
there is quite a bit of interior detail that I need to put into these two boats........there is also an insert I need to clean up and shape. it's not laser cut.......one of the remnants from the Nordkap build. I had laid the inner keel in one of the boats so far..........but this will give you a fair idea of the inner detail I want to do.
I stained all three hulls.........here is the full monty of them this is where they will part ways with each other.......the Half Moon hull got the mahogany tint.
so now it will be to give the other boat an inner keel, so I can add the ribs. I only have one of the inserts that I spoke of, so I'll have to make a second one. I'm also in the process of sorting out the rib parts and gluing them back together, in the event I need longer ones
there are other parts I'll need to make for them as well.........should be a hoot!
-
canoe21 reacted to popeye the sailor in Syborn by popeye the sailor - FINISHED - 1:33 - trawler
I cut out the 'punch outs' for the insert that I spoke of earlier. the part is not laser cut, so I drilled some holes in the areas that needed to be cut out. Iused my scroll saw for this.
I wasn't the steadiest when I cut them out.....I may go in a different direction with this. this is a really thin plywood......very stiff and tough to sand, as well as work with. all I have at my disposal is either 1/16 and 1/8 basswood flat stock. the grain of the wood, either way is going to play a big part in how sturdy one would be...I've already tried to make a second one.....I don't like it. anyway, this one didn't come out as well as I would have liked it to.
so, I may try a different approach. I began to add the ribs to the interior of the plastic boats.
I continued on........and soon they both were done. I still need to trim one or two of the ribs
I took another Monday off.......I'll see what I can do further on them
-
canoe21 reacted to Shipyard sid in HMS VICTORY by Jerry - FINISHED - Caldercraft - Scale 1:72 - 1805 version
Greetings Jerry
Good to see you back on your build again, and a fine job you have done on your bolas !!! Yep I can imaging it being tedious for you, but knowing you you will soon be back into the swing of things. Any way I have started to move into my new yard and look how big that case will be . I have bought some tomato plants. Take care Jerry. Best wishes DAVID
-
canoe21 reacted to clearway in HMS Victory by clearway - Billing Boats - 1/75
more rails applied to the stern- once glue has hardened will sand back to correct profile.
Keith
-
canoe21 reacted to clearway in HMS Victory by clearway - Billing Boats - 1/75
Got more timber placed around the stern and roughly sanded back- still needs smoothed off and cleaned up. Cut the pieces from a sheet of lime wood as the billing timber isn't that good.
Keith
-
canoe21 reacted to clearway in HMS Victory by clearway - Billing Boats - 1/75
After much sanding that is most of the primer off, and can start thinking about adding more detail as well as finishing the decks- feels like some progress is being made at last
poop deck planking underway
Keith
-
canoe21 reacted to clearway in HMS Victory by clearway - Billing Boats - 1/75
Added some of the decoration on the quarter gallery and opened out the gunports on the wales. Also put in inlays for the quarter deck and forecastle in place.
Hope the admiral dosen't see where all her clothes pegs are going!
Keith
-
canoe21 reacted to clearway in HMS Victory by clearway - Billing Boats - 1/75
Decided to have a go at the window frames using the self adhesive paper method (franking labels) cut into 0.5mm strips- boy it was fun!
Firstnpacking strips were added same thickness as acetate.
Acetate was glued in place with humbrol "clear windows" then strips attatched.
gonna be fun painting these!
also did some work on the bows.
The admiral snook this shot of me working alfresco saying is that hms victory between your legs or are you just glad to see me!
Keith
-
canoe21 reacted to Jerry in HMS VICTORY by Jerry - FINISHED - Caldercraft - Scale 1:72 - 1805 version
Hello Everyone...
I have finally made it back to the work bench in the dry dock building and am happy to say I have begun to work on Victory again. I maade a change in plans and have decided to build the strop assemblies for the fore and main lower yards. It is more tedius than I thought so after building one of the four assemblies required I have decided to call it a day. Here are some pictures.
Good to be back.
Jerry
P.S. I fiished the three other strop assemblies this morning so we are ready to rig the Fore yard and main yard cluelines, sheets and tacks. See last photo
-
canoe21 reacted to Jerry in HMS VICTORY by Jerry - FINISHED - Caldercraft - Scale 1:72 - 1805 version
Good morning, Lawrence...
Yes, the healing process is proceeding along but I wish I had more patience as I'd like to be able to get back to the ship model which seems to smile at me everytime I walk by it.
I haven't made the coil jig yet as I still can't sit in one position too long. (That hurts my poker playing also.) LOL I still have some minor issues to be addressed by the doctor tomorrow so I hope that goes well.
I seem to be very tired during the day and after lying down for what I hope to be a short nap I find it hard to get out of bed the rest of the day. But I am walking as much as I can and I even did a little walking without the walker, using just a cane. I'm getting there and many, many thanks for thinking about me. Hope to see you on Skype soon. Best to Bernie...
Jerry
-
canoe21 reacted to riverboat in Alert by riverboat - FINISHED - Krick - 1/25th scale
Well here we go again.... another UPDATE!!!!....... I think I left off showing the first two planks being set, I've made some progress since then,
the first band is finished, port and starboard. Before I started to do the planking I had ordered some basswood sheets from National Balsa.
While waiting for it to come in,I found a sheet of basswood that I had purchased from Michael's. ( 1/16thx 3 x24 ), so I thought I'd get a little head start before my main supply came in. Well my supply came in and I started up again, I had finished 3 rows before I notice that National
Balsa's 1/16th and Michael's 1/16th were a little off, just enough to p--- you off, so out came the alcohol, the removal was easy enough, I'm glad I did it, it looks better ( to me) I think once the planking is finished and the hull is sanded some, It should look OK . Another nice thing about spiling is that there 's not much room for fillers. I've been beveling one side of each plank that butts up to the previous one so they get a nice tight fit. Following are some pictures of the progress. By the way I highly recommend the spiling method for planking. I don't know what took me so long to try it...... FEAR!!!! :D
this is the second plank being fit on the first strake
you could never get this shape by just bending
the following just show planking to the end of the first band
Well that's it for now folks..... Thanks for look'n in
Frank
-
canoe21 reacted to HIPEXEC in USS Constitution by Hipexec - FINISHED - Constructo - 1:82
When I look at this cannon in this scale, I can't tell that the ring is fake.
-
canoe21 reacted to popeye the sailor in US Frigate Essex by trippwj - Aeropiccola - 1:70 Scale - POB
good on you! yea.....having a false deck can be quite a plus......especially when it comes to staggering planks. the every other one.......every other two, is Ok........but if you wanted to go any more than that, it's almost impossible. now you can do any method you want! your even going to be able to pre map the deck layout......only for a short time though.....once you plank, it's all gone!
the only build I didn't have a deck platform for was the Susan A. I ended up making some goofs on the planking, and the only aspects that were mapped out, were the cabins. I also had to frame for the margins and the aft deck. it just makes the deck work easier
-
canoe21 reacted to Glenn-UK in HMS Victory by Glenn-UK - Caldercraft - 1/72
Finally completed the assembly of the 30 x 12 pound cannons tonight. Just got to finish the painting of the trunnion brackets and red rim on the cannons before I start the rigging phase of the 10 visible carriage assemblies
I have provided some pictures of the gun carriage assembly line and then some pictures of the completed assemblies.
I also bought a helping hand tool today as I think this will help when I start to rig the cannon rigging blocks. This new tool can be seen in some of the photos below.
-
canoe21 reacted to Sjors in USS Constitution by Hipexec - FINISHED - Constructo - 1:82
I have to agree with Lawrence,
Very clever idea to do it this way
You keep the cannons the brass colour ?
Sjors
-
canoe21 reacted to gjdale in HMS Victory by gjdale - FINISHED - Mamoli - Scale 1:90
25’ Cutters Ver 2.5 (continued)
All progressed reasonably well with the planking from here on, although I did need to make a couple of stealer planks that I would not have needed to do if I were cutting the planks individually from sheet stock. Never mind – I think I managed to sneak them in in a not too obvious way. The secret here was to really feather the ends of the stealers so that they blended with the adjacent plank.
Here’s a few photos of the completed planking. The stem needs trimming and shaping, as does the transom, but the hard work is done. While it could be better, I'm satisfied with the results here - they say the third time is the charm!
And just to prove that I was working on two at once:
I thought I’d throw these two photos in to show the real difference in hull shape between the Cutters and the Pinnace (the Pinnace is 3’ (actual) longer than the Cutters).
And finally, just for scale, here’s the obligatory picture of a Cutter in that giant fake hand…..
Next up, fitting out and painting. Stay tuned……
-
canoe21 reacted to gjdale in HMS Victory by gjdale - FINISHED - Mamoli - Scale 1:90
25’ Cutters Ver 2.5 (continued)
An idea that I picked up from looking at the 18’ Cutter build log by MauryS, was to simply use some blue painters tape to help hold the keel in place on the plug. This must have been serendipity, as I'd only just acquired some of this tape after watching some YouTube tutorials on using a scroll saw, where it was used underneath patterns due to it's low tack and lack of residue being left behind. Because we’re using more than one plank per strake, it is easy enough to re-locate the tape for the next plank. This is particularly important because of Lesson No.3 in the previous post! As soon as a plank was glued in place, I would remove the tape, pop the keel out of the plug and check for any glue seepage before it became a problem. This routine saved my bacon on more than one occasion later on. Here you can see the blue painters tape with the fore part of the Garboard being fitted.
Another thing I noticed by studying Maury’s log was just how far forward the Garboard strake went. Here you can see a close up showing that I have taken it almost to where the keel rises vertically.
And here is a shot showing the entire Garboard strake in place.
One problem I had with this version was that I no longer had enough sheet stock left to cut planks individually, so was limited to using some strip stock. All of this planking was done with 3/32” wide Boxwood strip (1/64” thick), with the exception of the Sheer strake, for which I used 1/8" wide strip stock. I found that once the planks were shaped, a quick dip in a glass of water (remember not to drink from THAT glass ) and the plank could be bent in the fingers roughly to final shape before fitting. The heat from the fingers and the thinness of the planks meant that they dried out during this process.
Here’s a couple of pics of the second strake in place:
And here is one showing the hull starting to take shape off the plug (remember to remove from the plug after EVERY plank to check for glue seepage).
One important aspect with this style of planking is the bevel on the edge of the planks. Both mating faces need to be beveled and this is best achieved with a small sanding stick (I use a flexible one similar to a nail file) prior to final fitting. The other, somewhat more tricky part is to add the “rolling bevel”. This occurs at both ends of the strake, where the bevel is reversed to allow for the “gain”, which is where at both bow and stern, the planks cease to overlap and lie adjacent to each other. In this picture you can just make out the bevel on the upper edge of the second strake, with the rolling bevel occurring just as it rounds at the bow.
Continued next post…..
-
canoe21 reacted to NAZGÛL in Wasan 1628 by Nazgul - FINISHED - Billing Boats Vasa 1:75
Hey all! I got some work done. I wanted to have one of the gratings covered as a nod to the real one at the museum. I also made the mainsail sheet blocks and after that I could start with the mizzen lanyards. It was very different from what I've done previous in modelbuilding, and I needed to start all over once to get them sitting ok at the top. I know it's far from what you guys manage, but I will knowledge my limits and settle with it. Hopefully I can pick up speed later on cause now it's snail speed.
Some pictures:
/Matti
-
canoe21 reacted to NAZGÛL in Wasan 1628 by Nazgul - FINISHED - Billing Boats Vasa 1:75
I'm now working on the channels and dead eyes for the mainmast. Here's a compilation of Vasa deadeyes. Their shape are very individual from piece to piece, some are almost circular other very irregular.
I like this and want to try and imitate that on my model. I use the round deadeyes that comes with the kit and sand everýone.
After the shape is ok it's time for some finegrit sanding to remove any edges and giving the surfase a handmade look:
I do this óne mast at the time to avoid getting to much repetative work. After this stage its time for making the metalparts that sits around the lower deadeyes.
/Matti
-
canoe21 reacted to gjdale in HMS Victory by gjdale - FINISHED - Mamoli - Scale 1:90
Thanks B.E., JesseLee and Sjors (and all of the "likes") - your continued support and encouragement has really kept me going of late - I've come within a hairs breadth of giving up on these little cutters, but the support from all of you helps me to keep things in perspective and resolve to continue. So Sjors, they very nearly did become UFOs (UnFinished Objects)
25' Cutters (continued)
The last few days have been somewhat "challenging" (the air in the shipyard is still an interesting shade of blue, and my long suffering wife has learnt to keep well away from the shipyard of late, occasionally slipping food and drink through the door).
The first issue I had to resolve was how to hold the keel/backbone assembly rigid in the plug while I applied the planking. I would like to acknowledge here the very kind assistance of Greg Herbert (dvm27), who was good enough to answer a number of PMs while I quizzed him about the method used by he and David Antscherl, while I searched for a way to apply that thinking to my own version of their technique. Greg suggested adding an extension to the fore section of the plug to grip the stem, so that is what I did. I was also trying to figure out the lining out of the hull, and had been a little stumped by the placement of the Garboard strake. Again, Greg offered a little advice and I managed to work it out from there. After lining out the plug hull, I gave it several coats of sanding sealer to both preserve the lining out markings, and prevent the planks from inadvertently sticking to the plug.
In these two pics, you can see both the lining out and the "Herbert Horns" (as I've dubbed them):
Then it was time to fit the Garboard strake. This gave me more grief than I am capable of describing, but we got there in the end. Here's a couple of pics of the Garboard in place. (Remember also that while I'm showing pics of one boat, I'm building two of them simultaneously). In these photos, you can also see a couple of frames in place. These were an experiment and were designed to be "sacrificial" frames. The idea was to spot glue the keel to them to assist in keeping the keel rigid. I attached four such frames to each boat. It didn't work - I suspect due to insufficient gluing surface (the keel would come away from the frame at the slightest provocation). The upper end of the stem is glued into the gap between the Herbert Horns.
One of the issues I have been facing is finding a way to clamp the pieces in place while the glue dries. This has been my single greatest source of frustration , but I eventually managed to find a way using a variety of different sorts of clamps. Nevertheless, I did find that there was a slight gap in places between the Garboard and the keel. This is partially because I could not see a way to cut a proper rabbet into the keel at these dimensions. Time then to try a new product...... and the winner is, Superphatic Glue, by Deluxe Materials (the RC Aircraft modellers will probably be familiar with this stuff). It is an ultra thin aliphatic glue that also has a strong wicking action. I was able to use this to run along the slight gap and wick into it. I was very pleased with the result as it made the bond between Garboard and Keel quite strong (as I found out later.......)
I then went to the next plank for each, spiling using the tape and pencil method described previously to create a card template before cutting the plank. Oh, by the way, I'm using 1/64" thick Boxwood for the planking this time around. It is very nice to work with, and while not quite as pliable as Holly, it's not far off at this thickness. Before fitting, the upper edge (i.e. closest to the sheer line) of the Garboard plank was sanded to slight chamfer, and the "under edge" of the next plank was likewise chamfered. This creates a better overlapping join and something of a flat mating surface for the glue to grip onto.
Once again, clamping was a real issue and the delicacy of the parts was proved several times as I managed to break both stems and both sternpost/transom assemblies. This was when I discovered how good the bond between the Garboard and keel was, as the "shell" came away from the plug completely, with planks and keel in tact. At least that was reassuring and I now know that I shouldn't have a problem with the planks sticking to the plug!
Here's a couple of pics of the the second plank in place. The Apron on the bow is proving quite useful as an alternative to a Rabbet, as it gives the planks a landing place along the stem.
In these pictures you can also just make out the "gain", which is where the overlapping of the planks disappears at the bow so that they are flush to each other along the stem.
Well, I've now been on leave for two weeks. At the start of this period, I had hoped to have completed these two boats by the time I went back to work. Instead, I seem to be further behind than when I started. Oh well, at least some learning has taken place! Hopefully, the planking will get a little easier from here on (famous last words!).
Stay tuned........
-
canoe21 reacted to md1400cs in Wasa by md1400cs - FINISHED - Corel - 1:75
Hi Mates,
Continuing onward with the carriage ropes and tackles installation.
After trying to install one completely assembled carriage with ropes attached, I found it to be too cumbersome and a pain in the @#&. That wasn’t going to work very well. Space was so limited and I needed to also, just below the upper blocks attach the hooks for the carriage stops. Too messy hmmm….
So, plan B; I completed all the rope/block assemblies for the14 carriages. Then chose to attach those to the weather deck first. Made a small hook so basic but so perfect ha ah…
Sliding in the cannons, then attaching the pins to each side of the carriages will be a breeze (I think). I can then adjust the ropes and tackles for a tight fit.
Have not decided how to display the left over rope lengths. The Vasa museum sort of hangs the excess on hooks near the rear of each carriage side. I’m short on length of the carriages, as they had to be shortened (Corel kit weather deck too narrow).
As noted from the just previous post, I wanted to emulate the 1/10th assembly with the use of small wooden pins. Used tooth pics. The results are acceptable, but I find that the scaling is a bit “off” My error, but still achieved the intent. Again thanks for dropping by and the Likes and comments always a pleasure.
Regards,
Michael
-
canoe21 reacted to Kevin in HMS VICTORY by Kevin - FINISHED - Caldercraft - 1/72
Cannons
the shooty things that i did not want to put on,
-
canoe21 reacted to trippwj in US Frigate Essex by trippwj - Aeropiccola - 1:70 Scale - POB
Gracious - time has certainly flown by this summer!
Not a huge amount of rogress to report. Have been far too busy doing things with the family when not working the paying job. Alas, that is all coming to an end. Brought my "other son" back to Arkansas this week - up side there was I got to see the other two grandkids! Son the elder leaves the nest (well, sort of) tomorrow - off to college he goes. Living on campus - not sure how we will handle not having any kids in the house (first time in 20 years).
Anyway, have cut out the openings in the gun deck for masts and gratings and installed the false deck into the hull.
Centerline aligns well, and the openings match the plans well.
So, at least until the end of September, the Essex will go into ordinary and the Emma C. Berry will move back onto the build table.
Thanks, all, for the kind words and for following along - see you over at the ECB build log!