HOLIDAY DONATION DRIVE - SUPPORT MSW - DO YOUR PART TO KEEP THIS GREAT FORUM GOING! (Only 24 donations so far out of 49,000 members - C'mon guys!)
×


texxn5
-
Posts
2,473 -
Joined
-
Last visited
Content Type
Profiles
Forums
Gallery
Events
Everything posted by texxn5
-
I have some of those too for holding things in place when I tire out. I guess it's getting pretty bad when we have to build jigs to hold "us" in place instead of the parts we're working with....lol, however, not a bad idea..
- 2,250 replies
-
- 1
-

-
- model shipways
- Charles W Morgan
- (and 1 more)
-
Hey Dennis, if it wasn't for us crazies there wouldn't be a forum....
- 2,250 replies
-
- 2
-
-
- model shipways
- Charles W Morgan
- (and 1 more)
-
I do have some long thin tweezers and use them, my problem is usually dealing with the memory of the thread, which is a good thing about Chuck's it lays well and doesn't twist. My fingers do pretty well, but the eyesight can be tricky. Thanks Gary
- 2,250 replies
-
- 1
-
-
- model shipways
- Charles W Morgan
- (and 1 more)
-
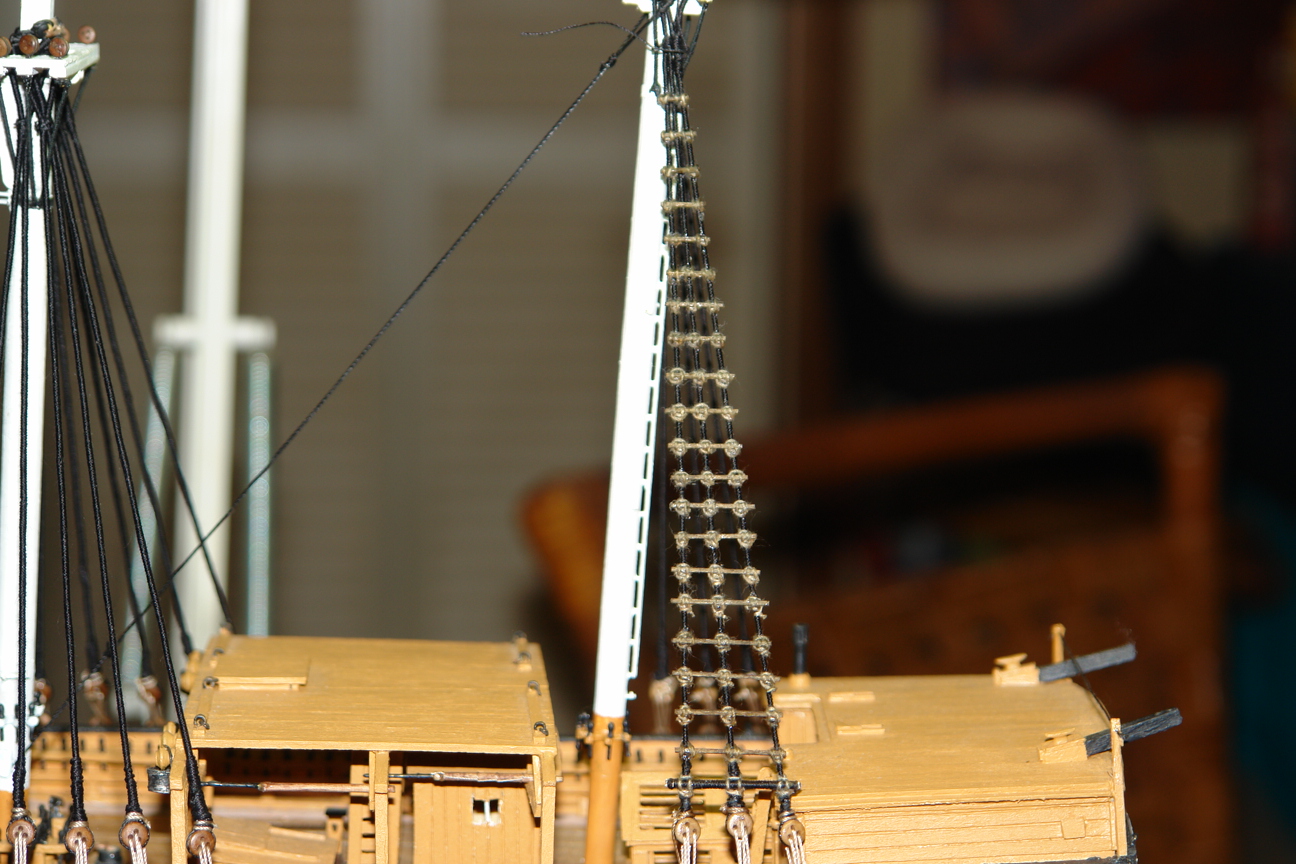
Thanks for all the input guys, Frankie, Piet, Grant, BE, I really appreciate your input. I'm trying Chuck's .008 line right now and it's not bad. I'll post some pictures later this morning for comments. If I have to tear it out again, I'll have to probably redo the shrouds for the Mizzen Port side. I'm not close to any fly fishing stores, so if I have to switch again I'll probably have to go online and find it. Thanks for the picture Frankie. Piet, I've already been through Diane's sewing basket and the smallest I could find is nice, but bright yellows and reds. It also seems to be pretty stiff. Oh well, marching on and hopefully Chuck's will look ok. Thanks for everything guys. John
- 2,250 replies
-
- 1
-
-
- model shipways
- Charles W Morgan
- (and 1 more)
-
Hi Frankie, I understand, but I also have learned it takes 2or3 sets of eyes on these things. I need all the help I can get and really do appreciate when someone bothers to let me know something isn't quite kosher. Thank you for enduring the pain to let me know it didn't look right.....lol. The .008 rope from Chuck is working good. Even with it's smaller size though, it still is a bit large in the upper rigging, but I think it'll be ok, especially on the lowers. Please don't hesitate to speak out if you see something...thanks John
- 2,250 replies
-
- 2
-
-
- model shipways
- Charles W Morgan
- (and 1 more)
-
Hi Frankie, I really want to thank you for pointing this out to me. As I sat back and looked at it I rally could see how bad it looked. I hate to have to tear things apart, but I started trying. I was so caught up in what I was doing, I failed to look at it objectively. Your comment woke me up to my oblivion. It is a slow process but I'm tackling it now. Part of the problem is that I glued the string with Testor's Green cement and it is the devil to get loose. Plus the fact that the string I used is cotton, so it comes apart. Have no fear - Chuck is here to bail me out. I have some of his light brown .008 line that I had set aside for something else and it works perfectly - only problem is I don't have enough of it, so I have to get an order in to him asap. Thanks again, I'll post pictures shortly. John
- 2,250 replies
-
- 3
-
-
- model shipways
- Charles W Morgan
- (and 1 more)
-
Hi Frankie, I can't say I disagree with you. It seems to swell up when I stain it. I have really had problems finding a thin enough thread that can be worked with. In tying these small knots it's difficult to handle the ends of the thread. The problem now is that I have too many of them installed to change them out without destroying the Mizzen.....still thinking
- 2,250 replies
-
- 2
-
-
- model shipways
- Charles W Morgan
- (and 1 more)
-
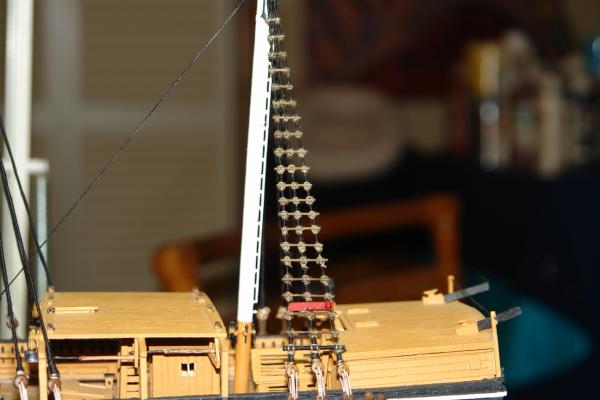
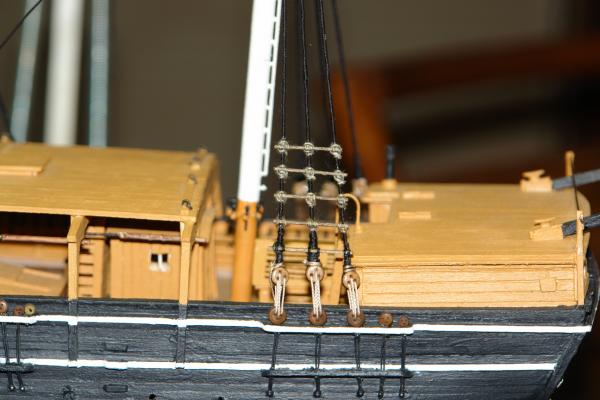
Thanks to all who stopped by and hit the like button. Finished the Port Mizzen Ratboards, built the port side Running light and installed it. Also discovered (thanks Lester) that the bottom Ratboard is actually a metal rod and it is served, so I replaced it with the proper configuration.

- 2,250 replies
-
- 10
-
-
- model shipways
- Charles W Morgan
- (and 1 more)
-
Beautiful work. It looks like fun. Glad to hear you've started your Morgan we need more members in the Morgan Club. If you haven't done so you might wish to check out my Morgan website. Really looking good and welcome aboard. John http://www.charleswmorganmodel.com
-
Hi George, yeah, these are actually more complicated than ratlines. With ratlines all you need is a clove hitch. I detailed the procedure on my website for lashing them and have photos of the steps. It was too much to duplicate it here so I just showed the results. Thanks for stopping by....
- 2,250 replies
-
- 1
-
-
- model shipways
- Charles W Morgan
- (and 1 more)
-
Thanks for all the visits and likes, much appreciated. I started installing the Ratboards today. It took me most of today to figure out how to lash them and find a suitable thread to use. I'm using a square lashing. This is going to take forever and I'm going to go nuts before this is completed. I got 5 done for the day.
- 2,250 replies
-
- 7
-
-
- model shipways
- Charles W Morgan
- (and 1 more)
-
Hi Dennis, thanks for stoping by, hope all is well on your end. Glad I got a smile out of ya. The block solution getting them from Chuck made all the difference in how it turned out. His quality is unsurpassed. Thanks for the kudos!
- 2,250 replies
-
- 2
-
-
- model shipways
- Charles W Morgan
- (and 1 more)
-
Thanks guys for all the comments. Changing the blocks made all the difference. Thanks Lester, glad you like the results.
- 2,250 replies
-
- 1
-
-
- model shipways
- Charles W Morgan
- (and 1 more)
-
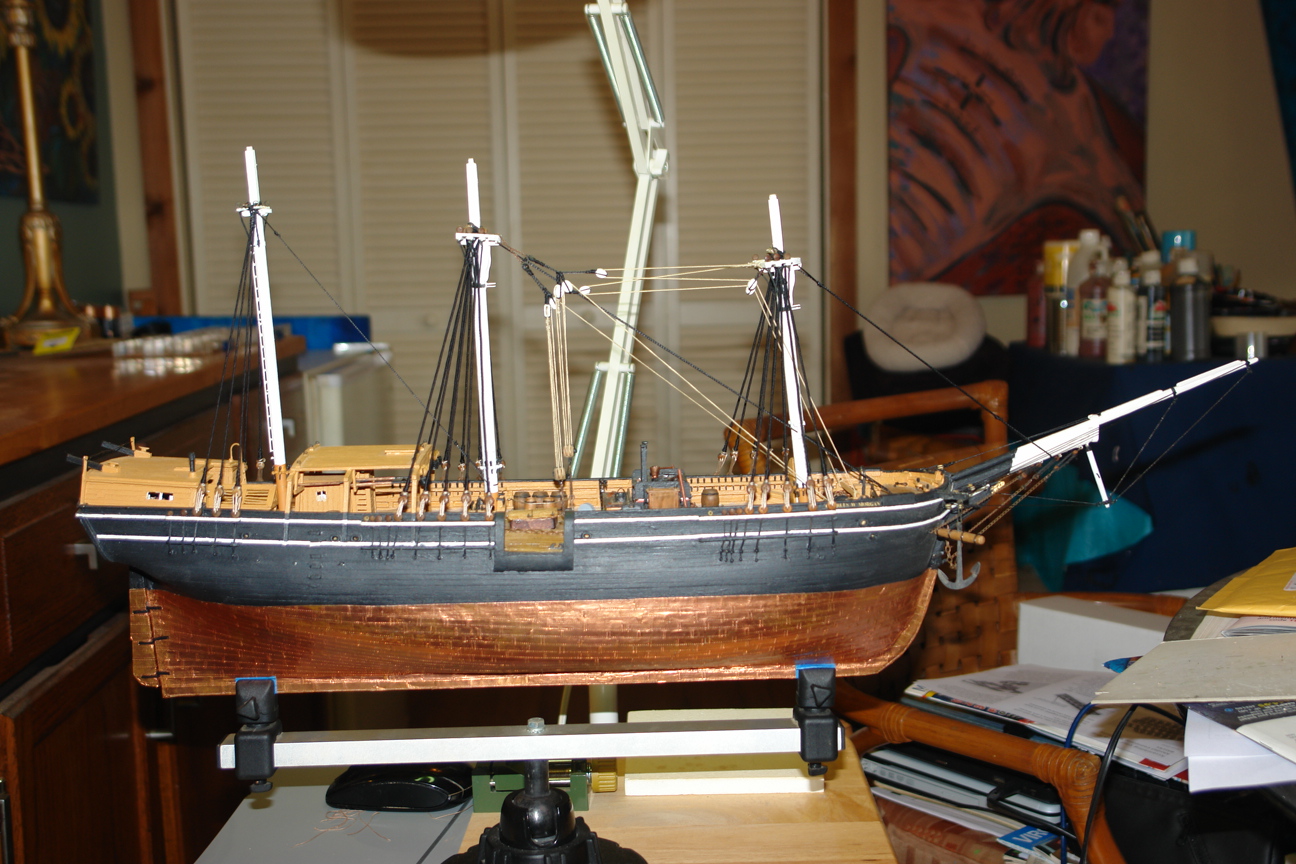
Thanks Brian, you will definitely enjoy seeing her for real. I'll probably go back next year to see her restored. I saw her in Sept '13 prior to rigging but that was the 4th time I'd been aboard her over about 25 years.
- 2,250 replies
-
- 1
-
-
- model shipways
- Charles W Morgan
- (and 1 more)
-
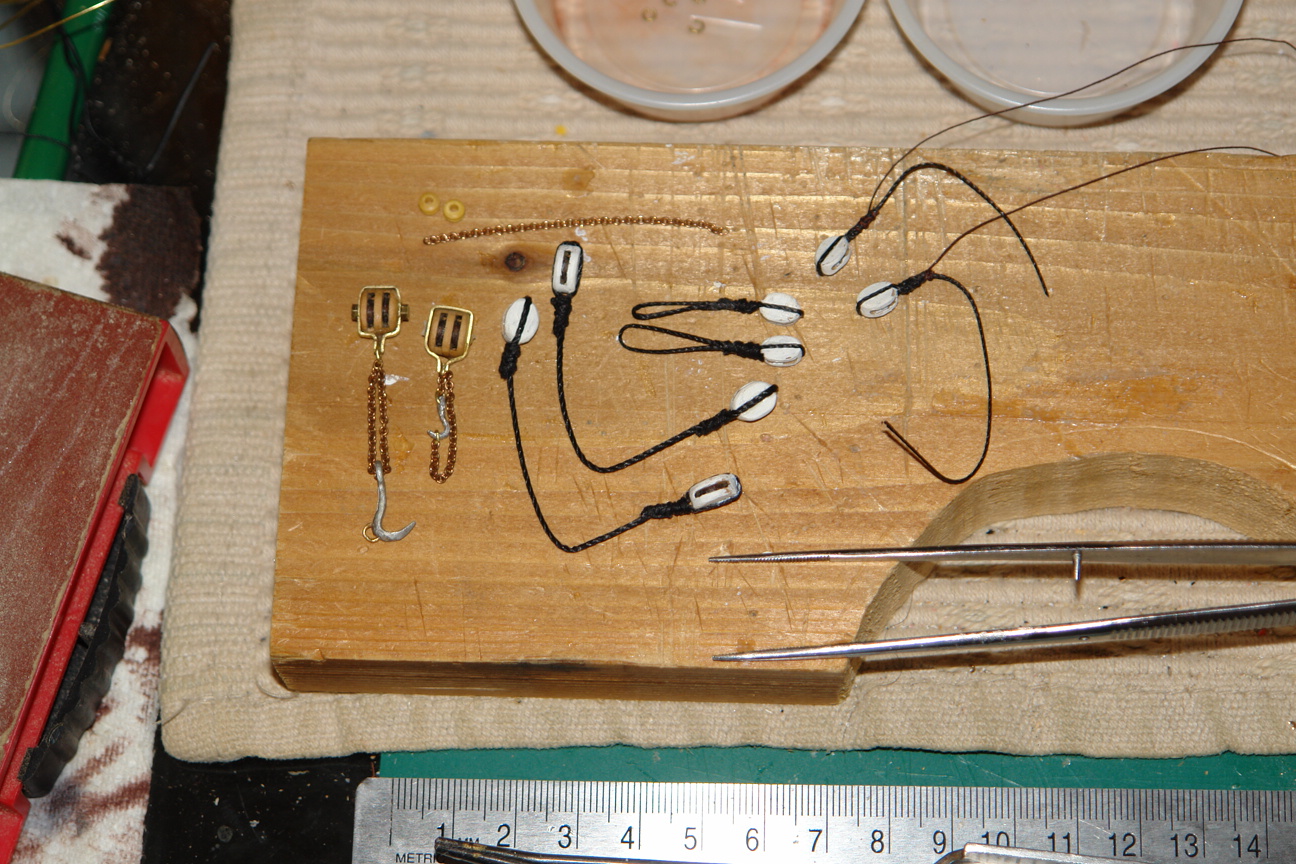
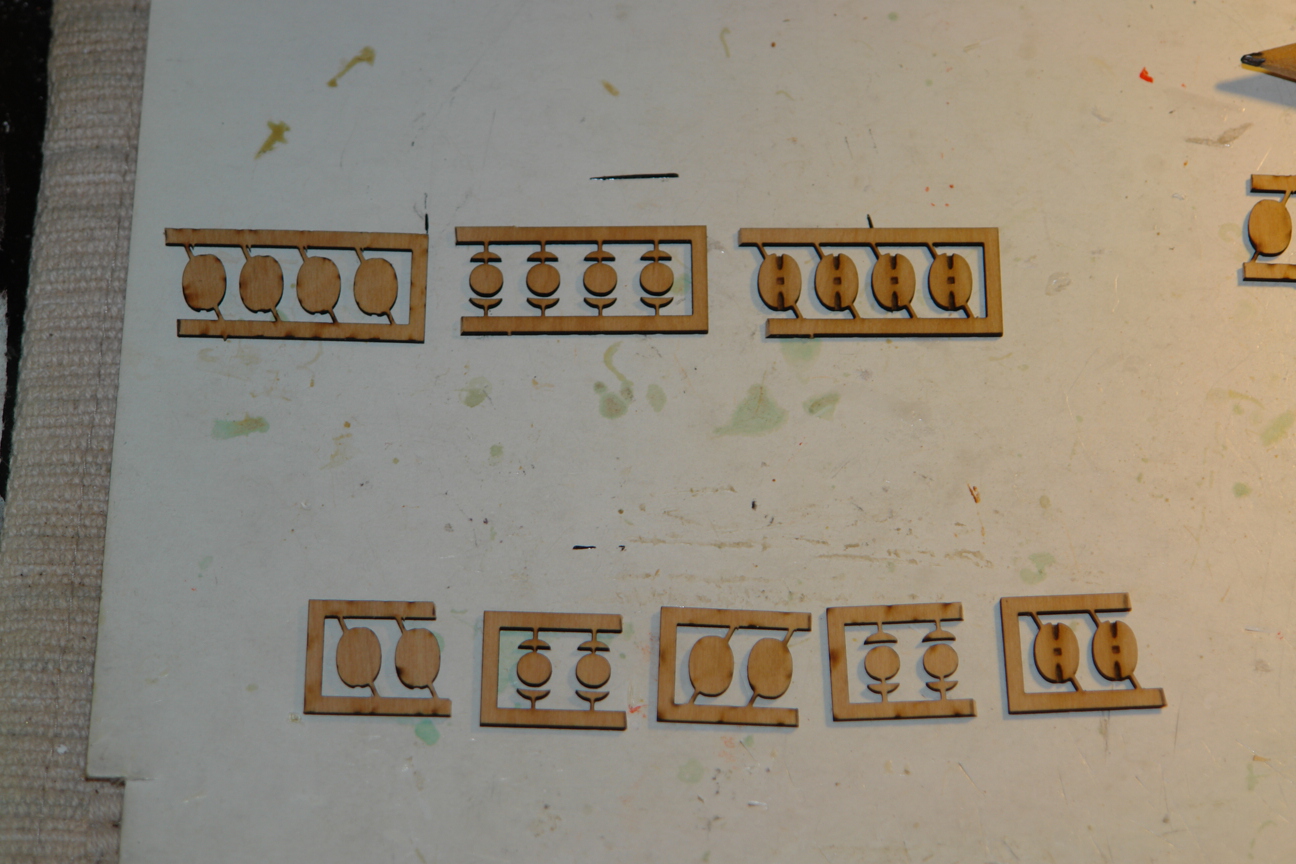
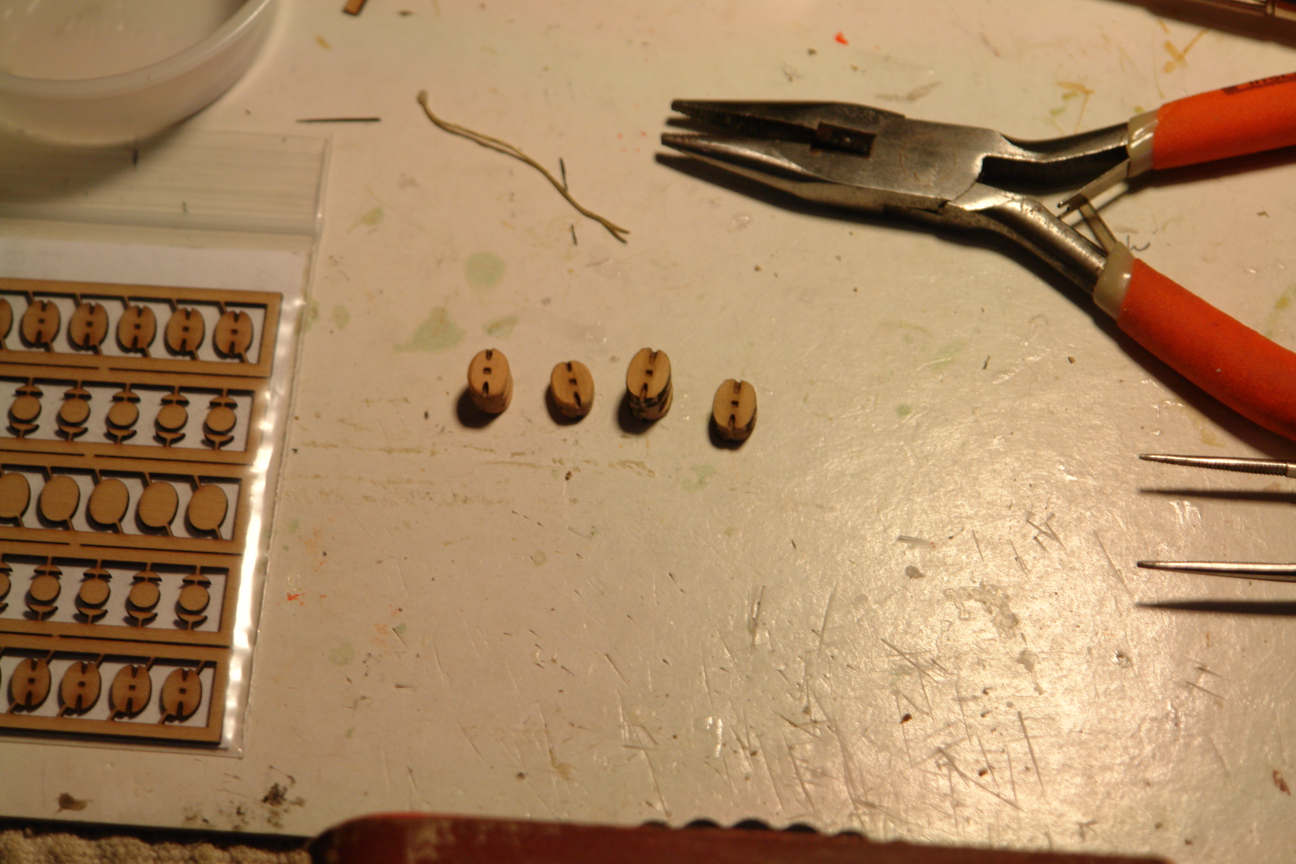
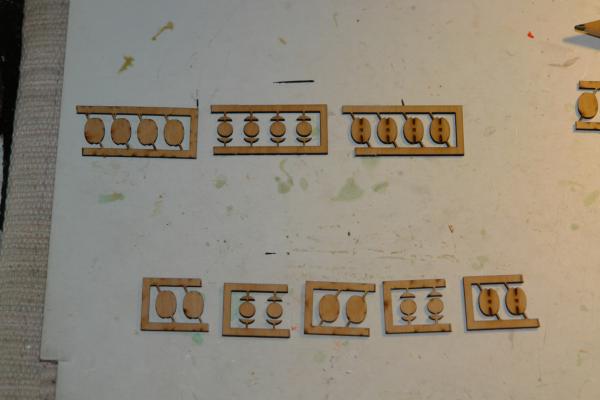
This is what Model Shipways calls a specialty block.

- 2,250 replies
-
- 3
-
-
- model shipways
- Charles W Morgan
- (and 1 more)
-
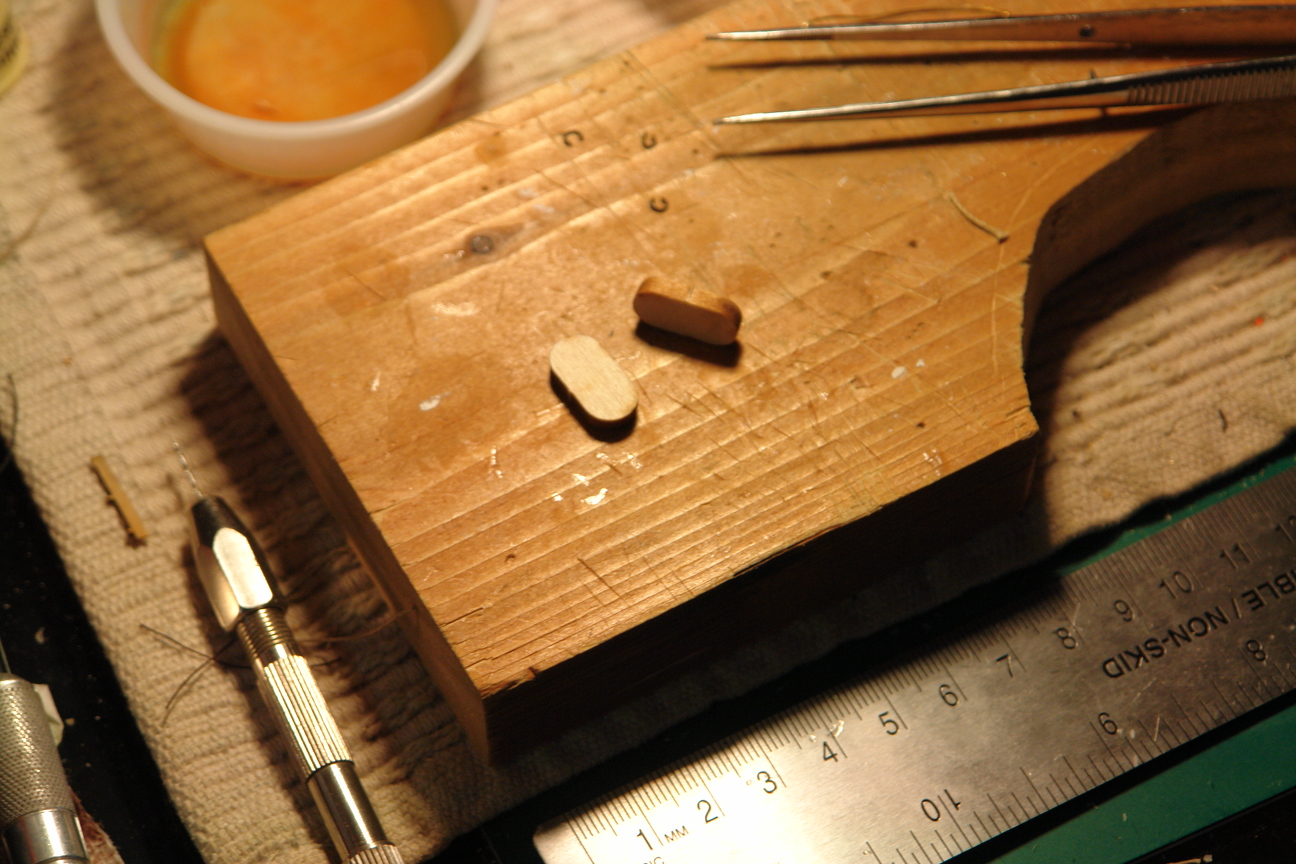
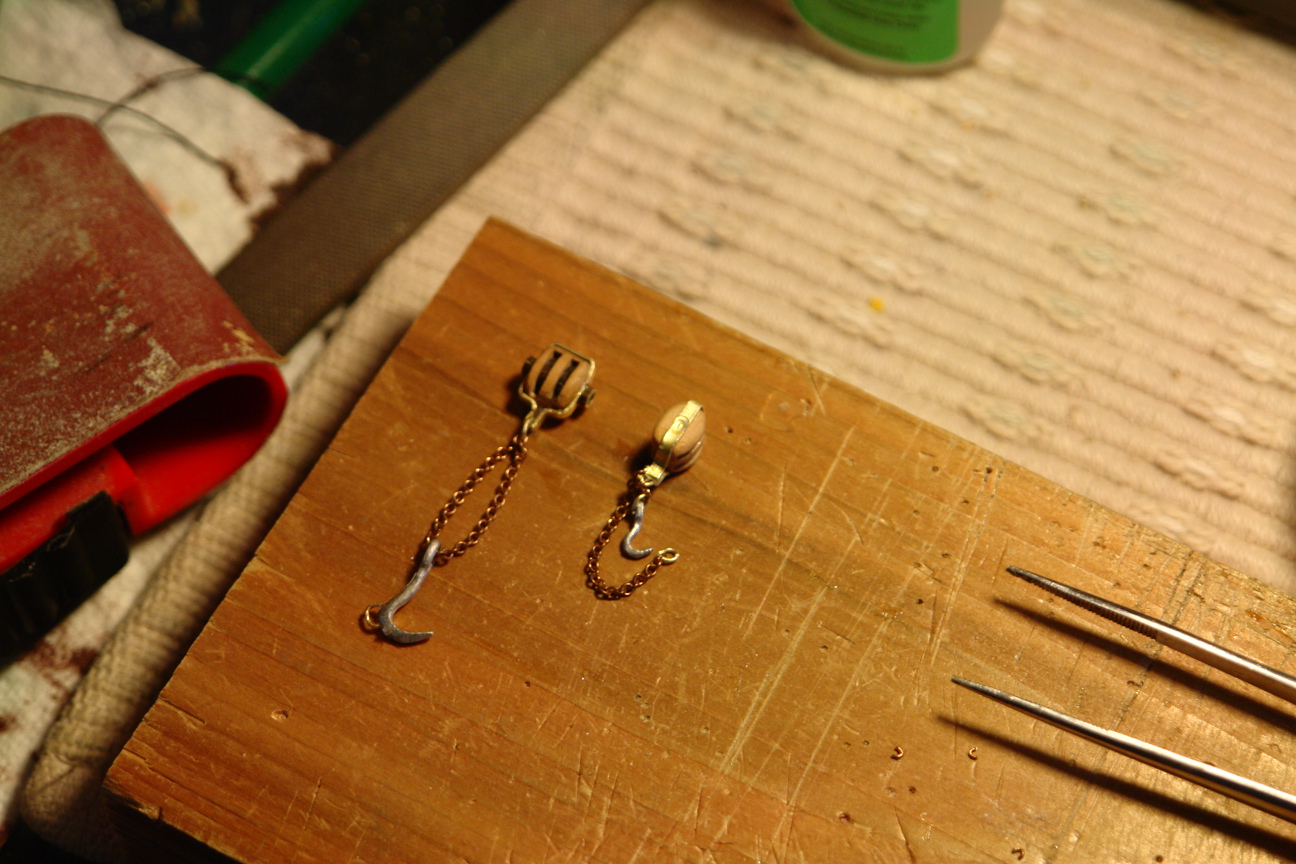
Thanks George, they are so cheesy I can't even believe they call them blocks. I'm going to photograph them and post it in a minute - they're that bad.
- 2,250 replies
-
- 1
-
-
- model shipways
- Charles W Morgan
- (and 1 more)
-
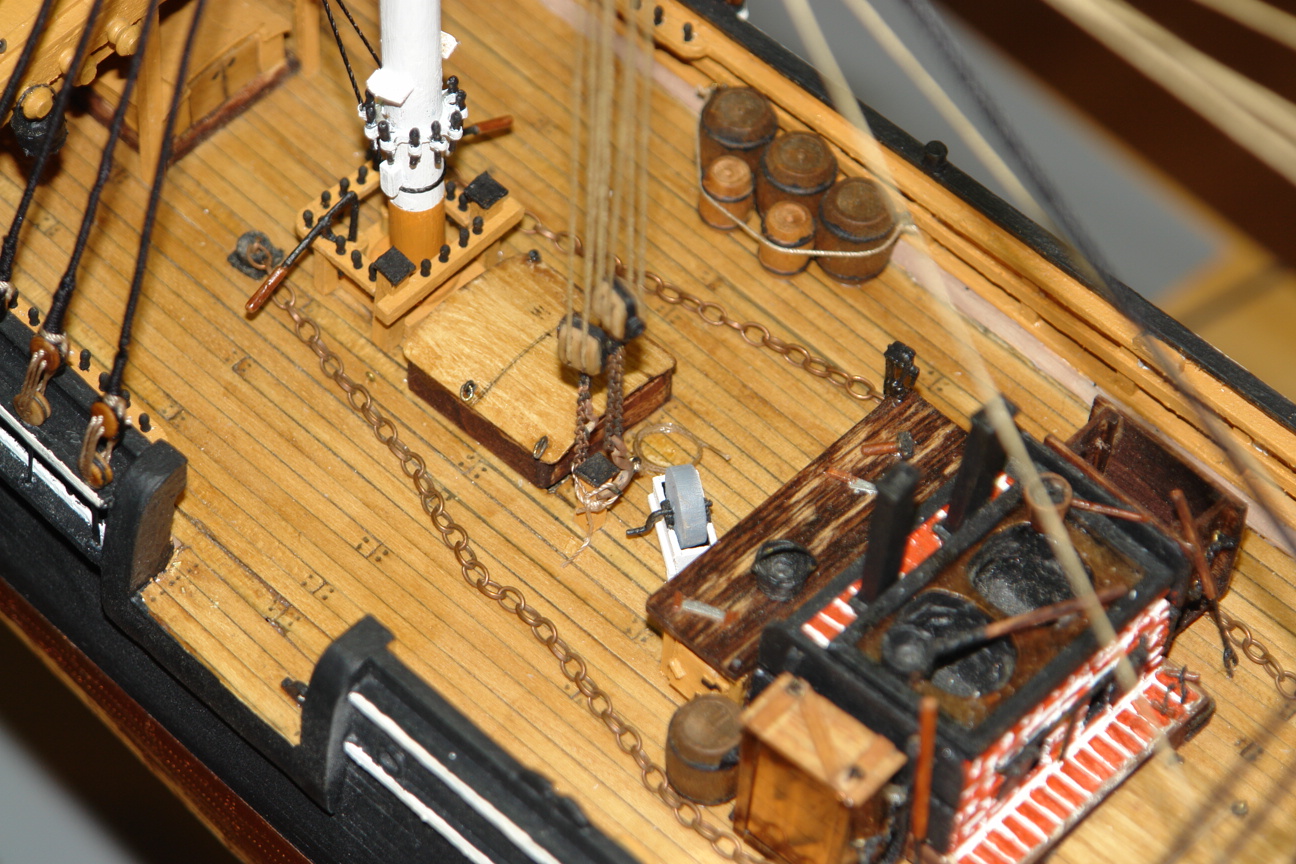
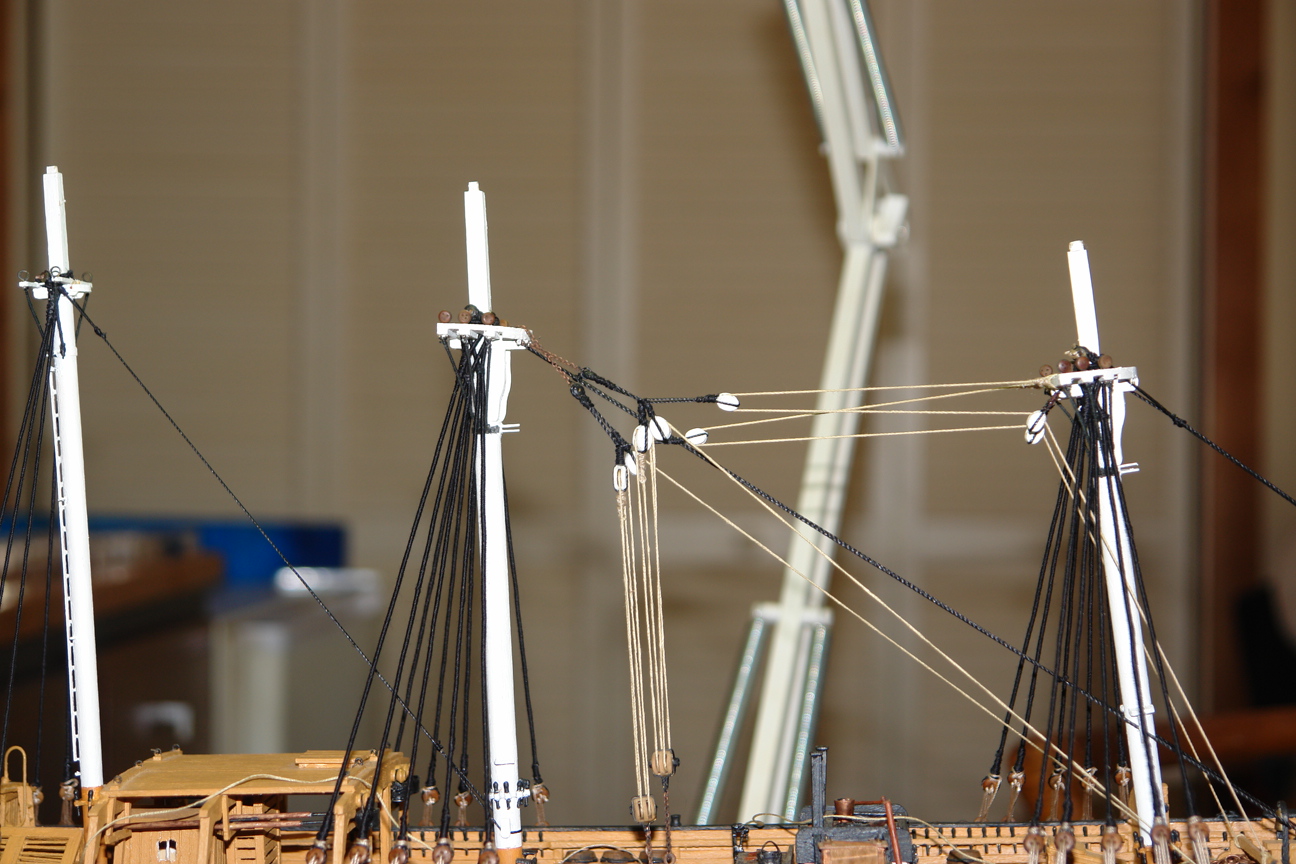
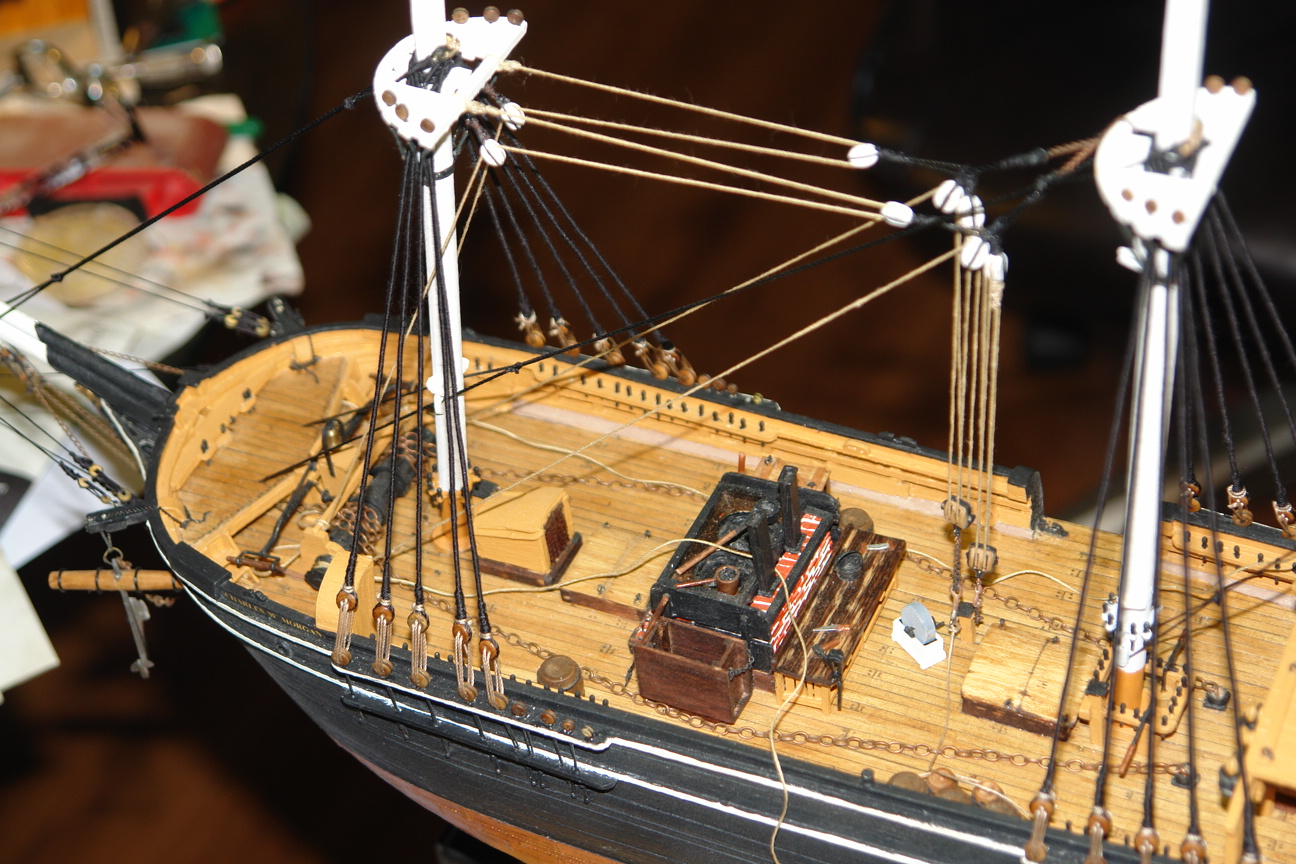
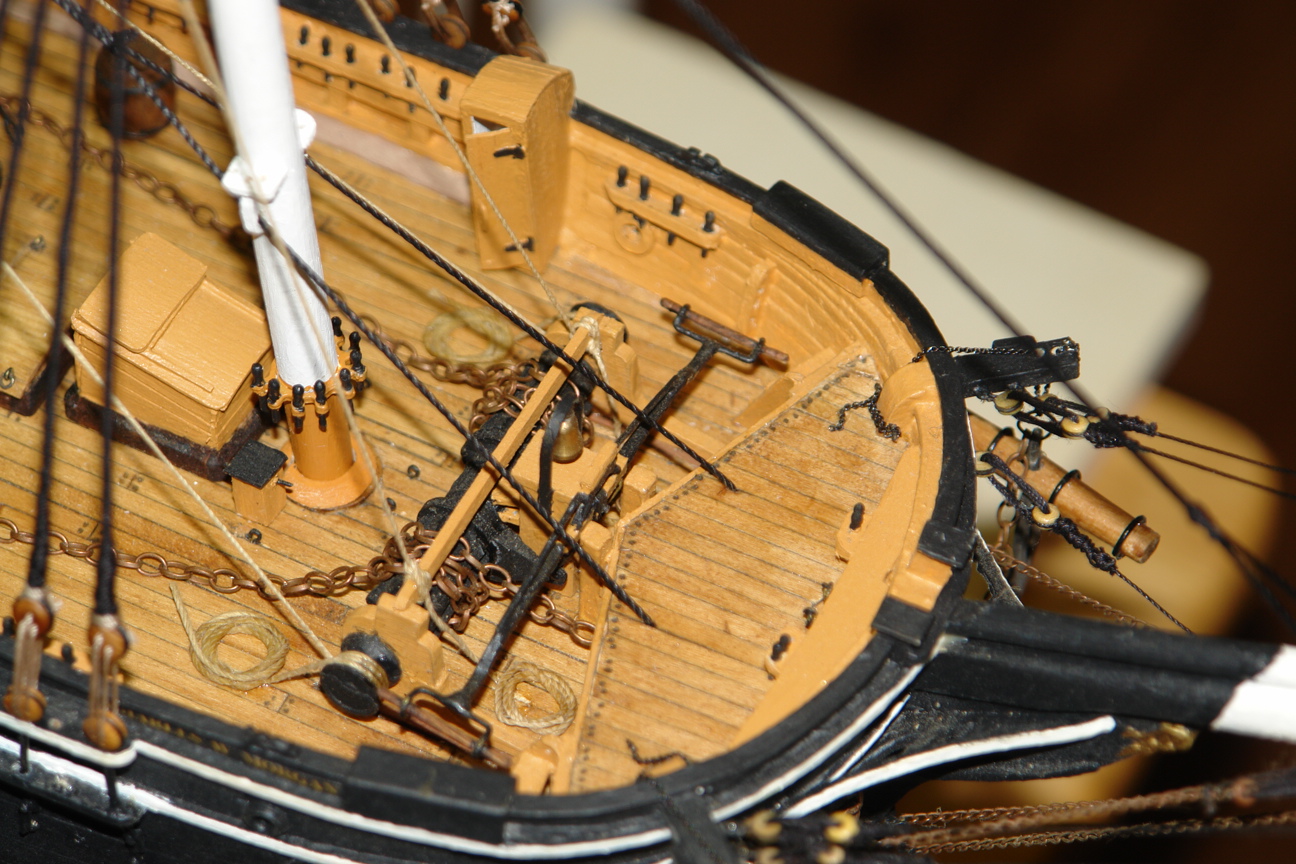
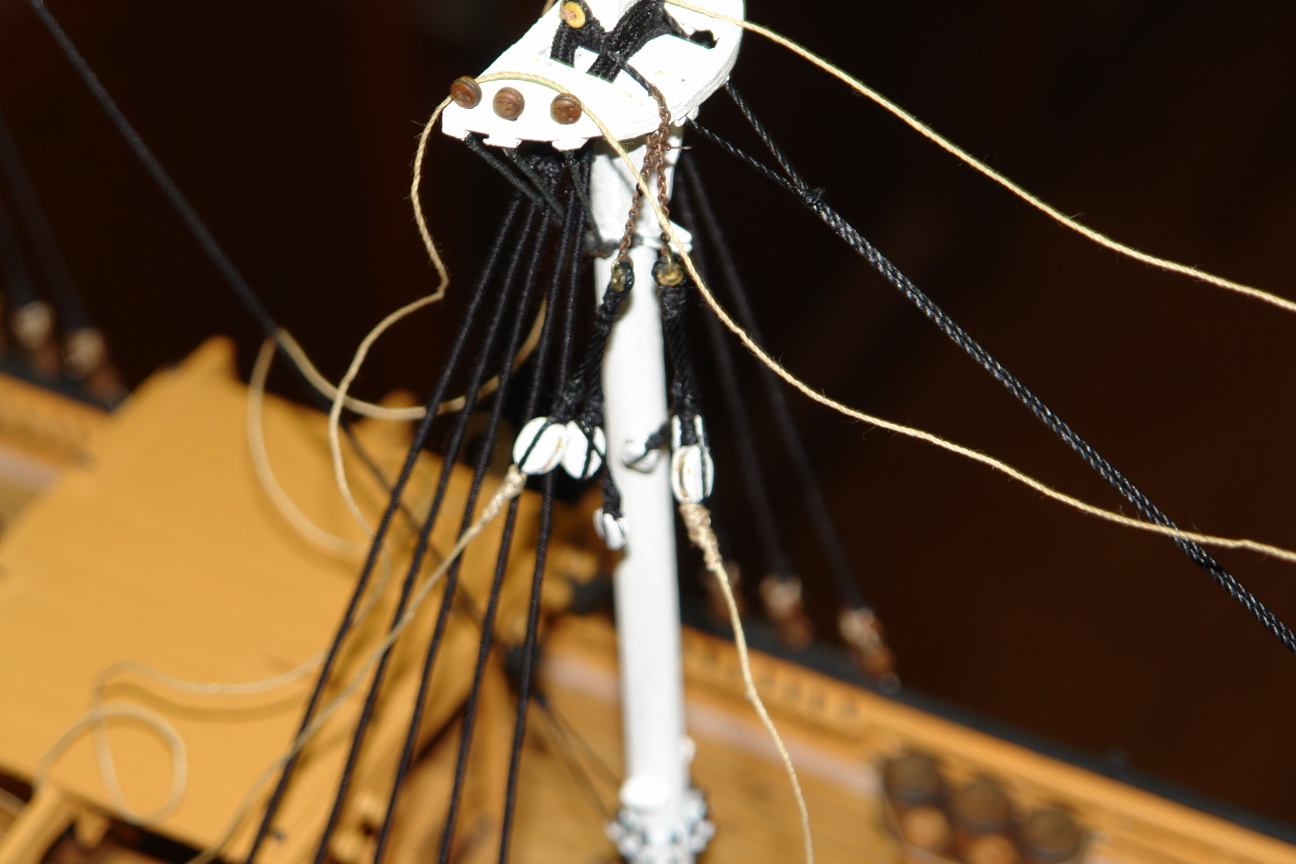
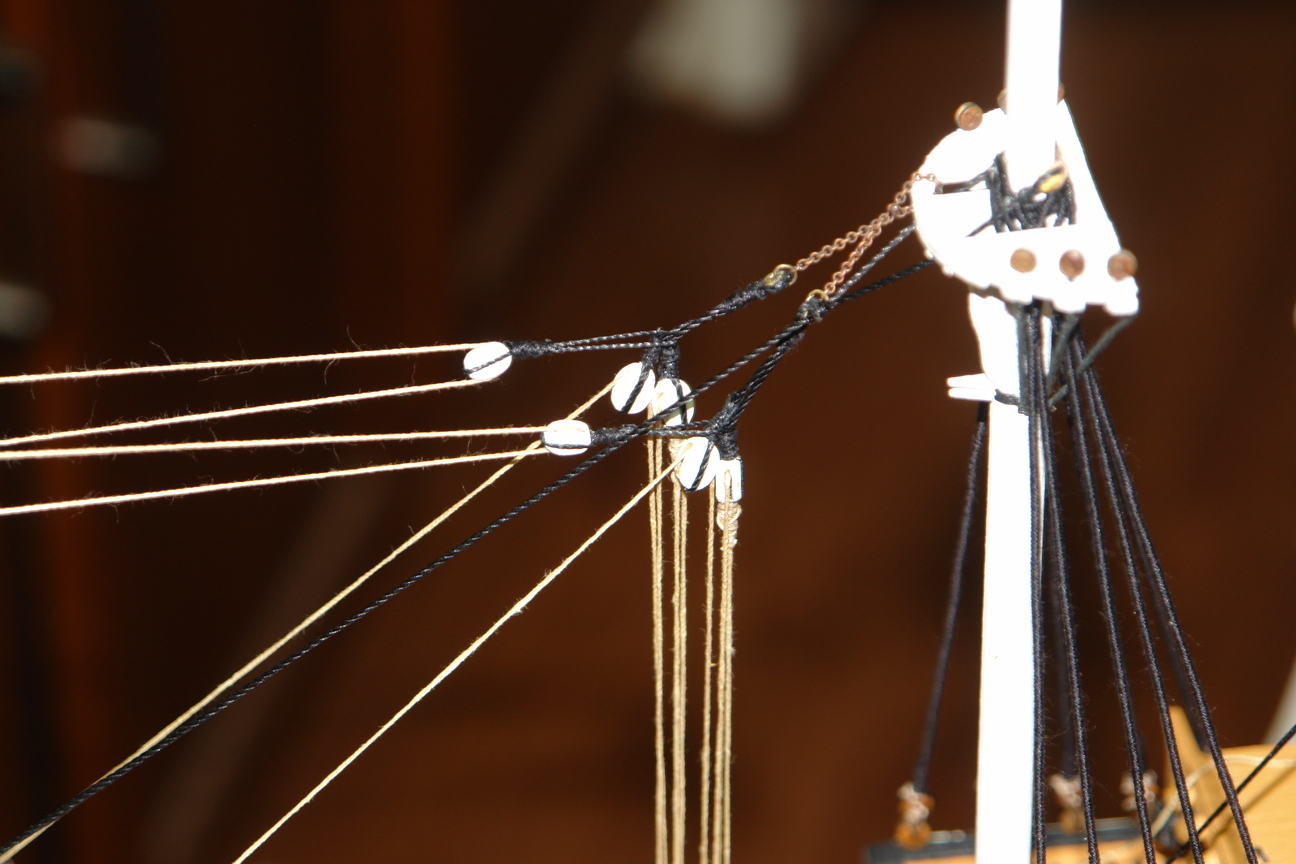
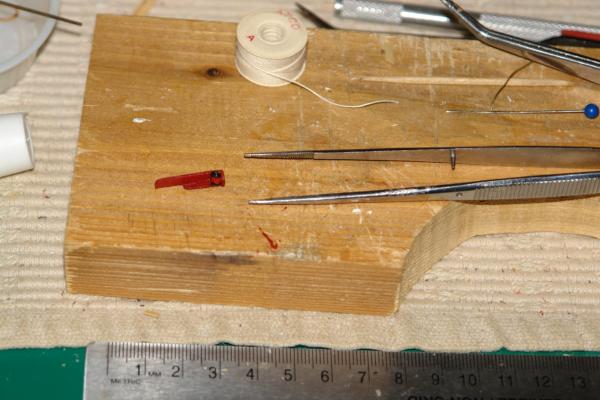
Hello to everyone and thanks for all the likes and comments. After 4 days of hard labor I managed to install and finish the Cutting-In Tackle. These are the lines that handle the Blubber and whale parts much like a crane. I went into this procedure in depth on my website as there is not much info on this on the plans or instructions. Please refer to the website for anyone interested. I'll just show some photos here for reference. I used Chuck's 5/16" and 9/32" specialty blocks for this and I am really happy I did. The kit blocks were just a rough laser cut oblong circle and unusable....why did they bother??? This was rigged here at this time as nothing is in the way and I'm really glad I did it now instead of later.


- 2,250 replies
-
- 10
-
-
- model shipways
- Charles W Morgan
- (and 1 more)
-
Looks nice Bruce - moving right along
-
Hi Tony, thanks so much for the offer man, but I got the deadeyes today from Model Shipways, so, crisis is over for now. I even have one extra now..just in case. Thanks again my friend, John
- 2,250 replies
-
- 2
-
-
- model shipways
- Charles W Morgan
- (and 1 more)