HOLIDAY DONATION DRIVE - SUPPORT MSW - DO YOUR PART TO KEEP THIS GREAT FORUM GOING! (Only 13 donations so far - C'mon guys!)
×
Jobbie
-
Posts
220 -
Joined
-
Last visited
Content Type
Profiles
Forums
Gallery
Events
Everything posted by Jobbie
-
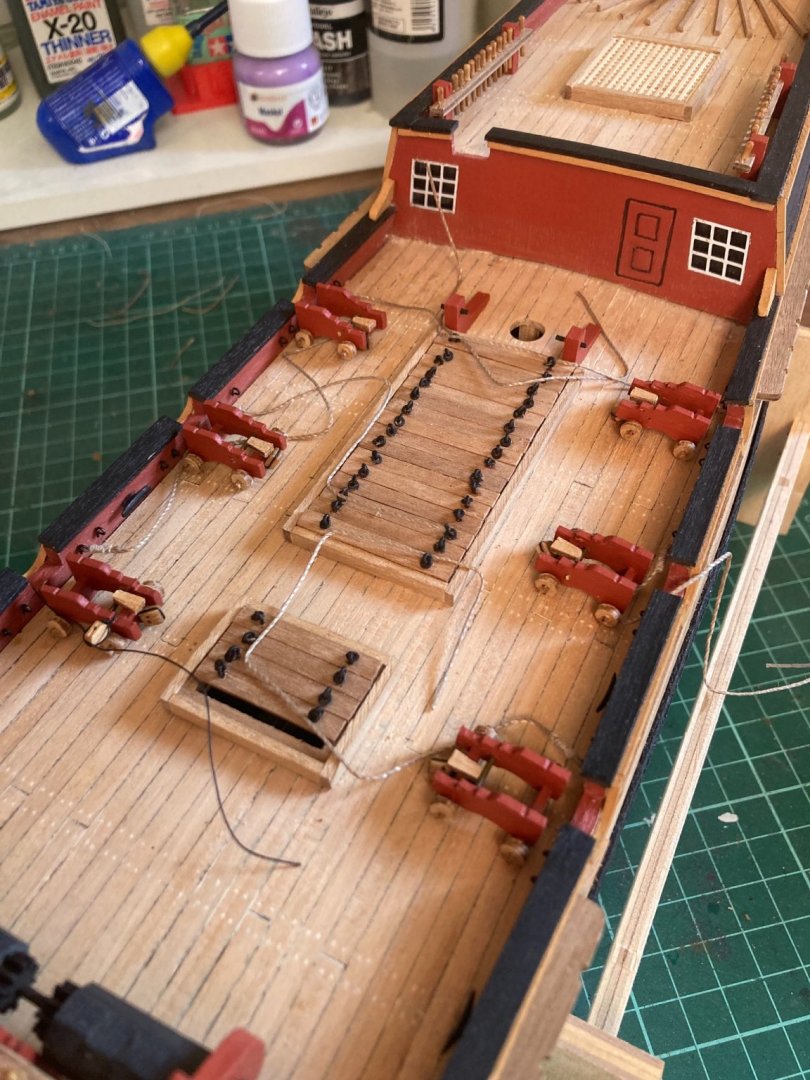
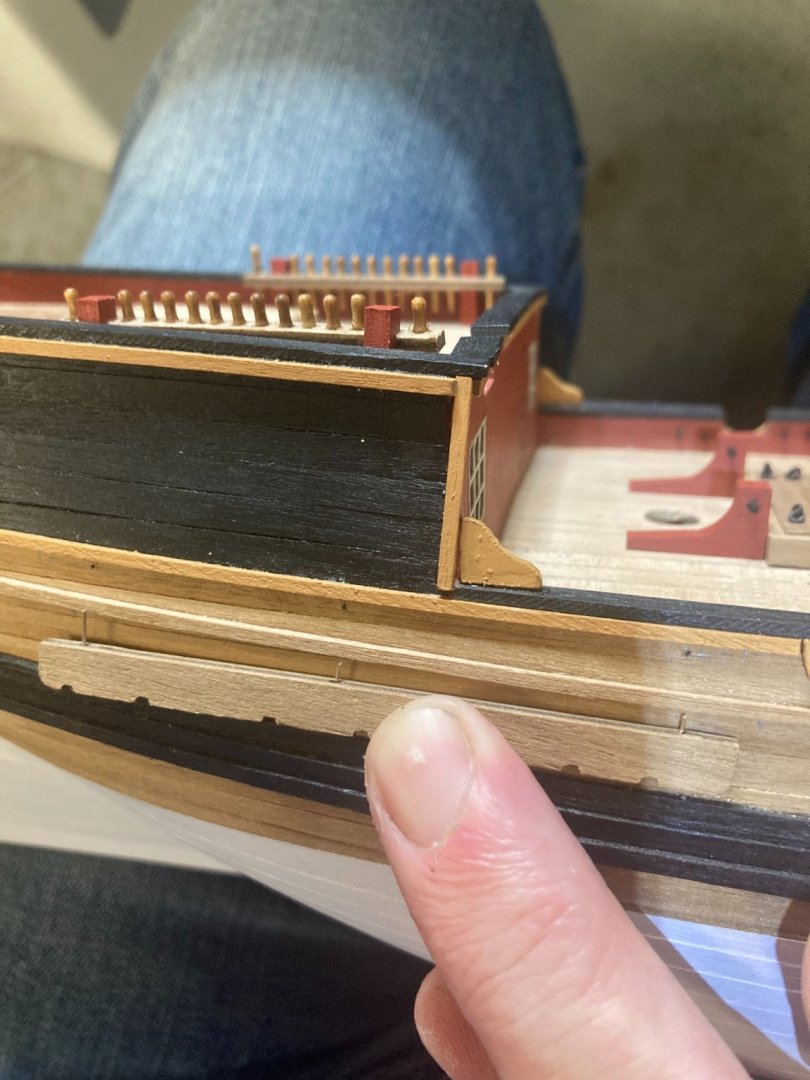
 The cannon-balls are fitted to the halved shot-garlands with Araldite five-minute epoxy and fitted along the bulwarks. Easy job.
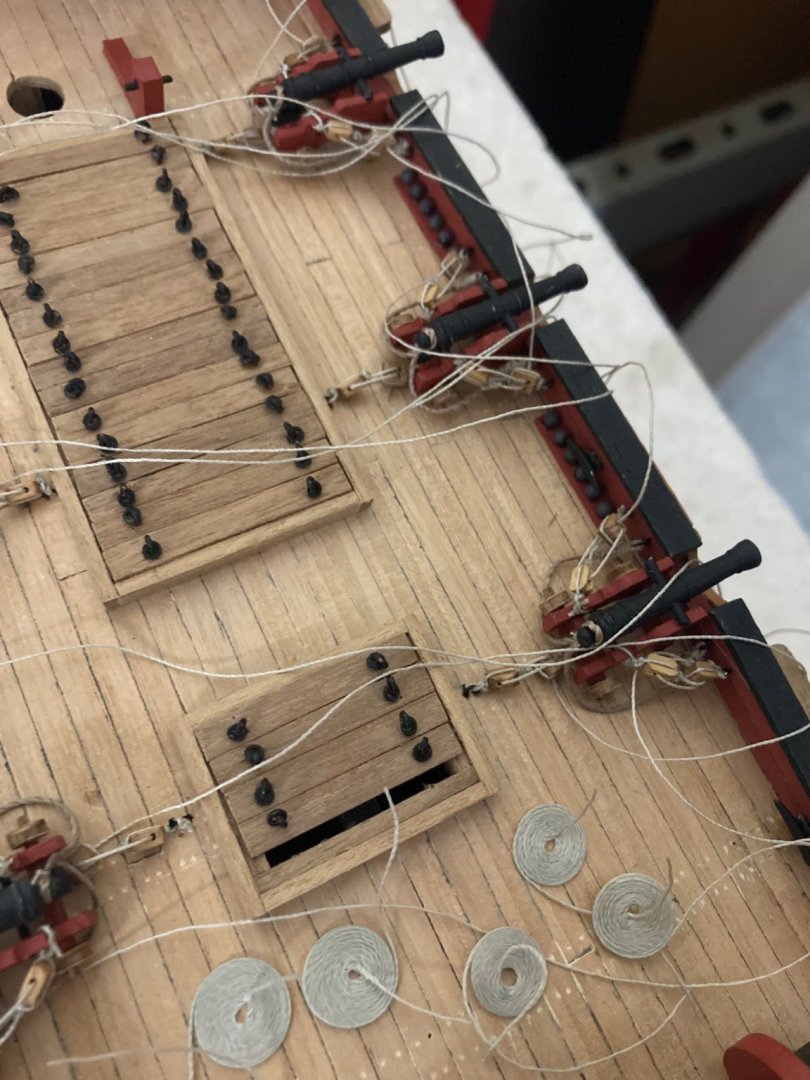
-
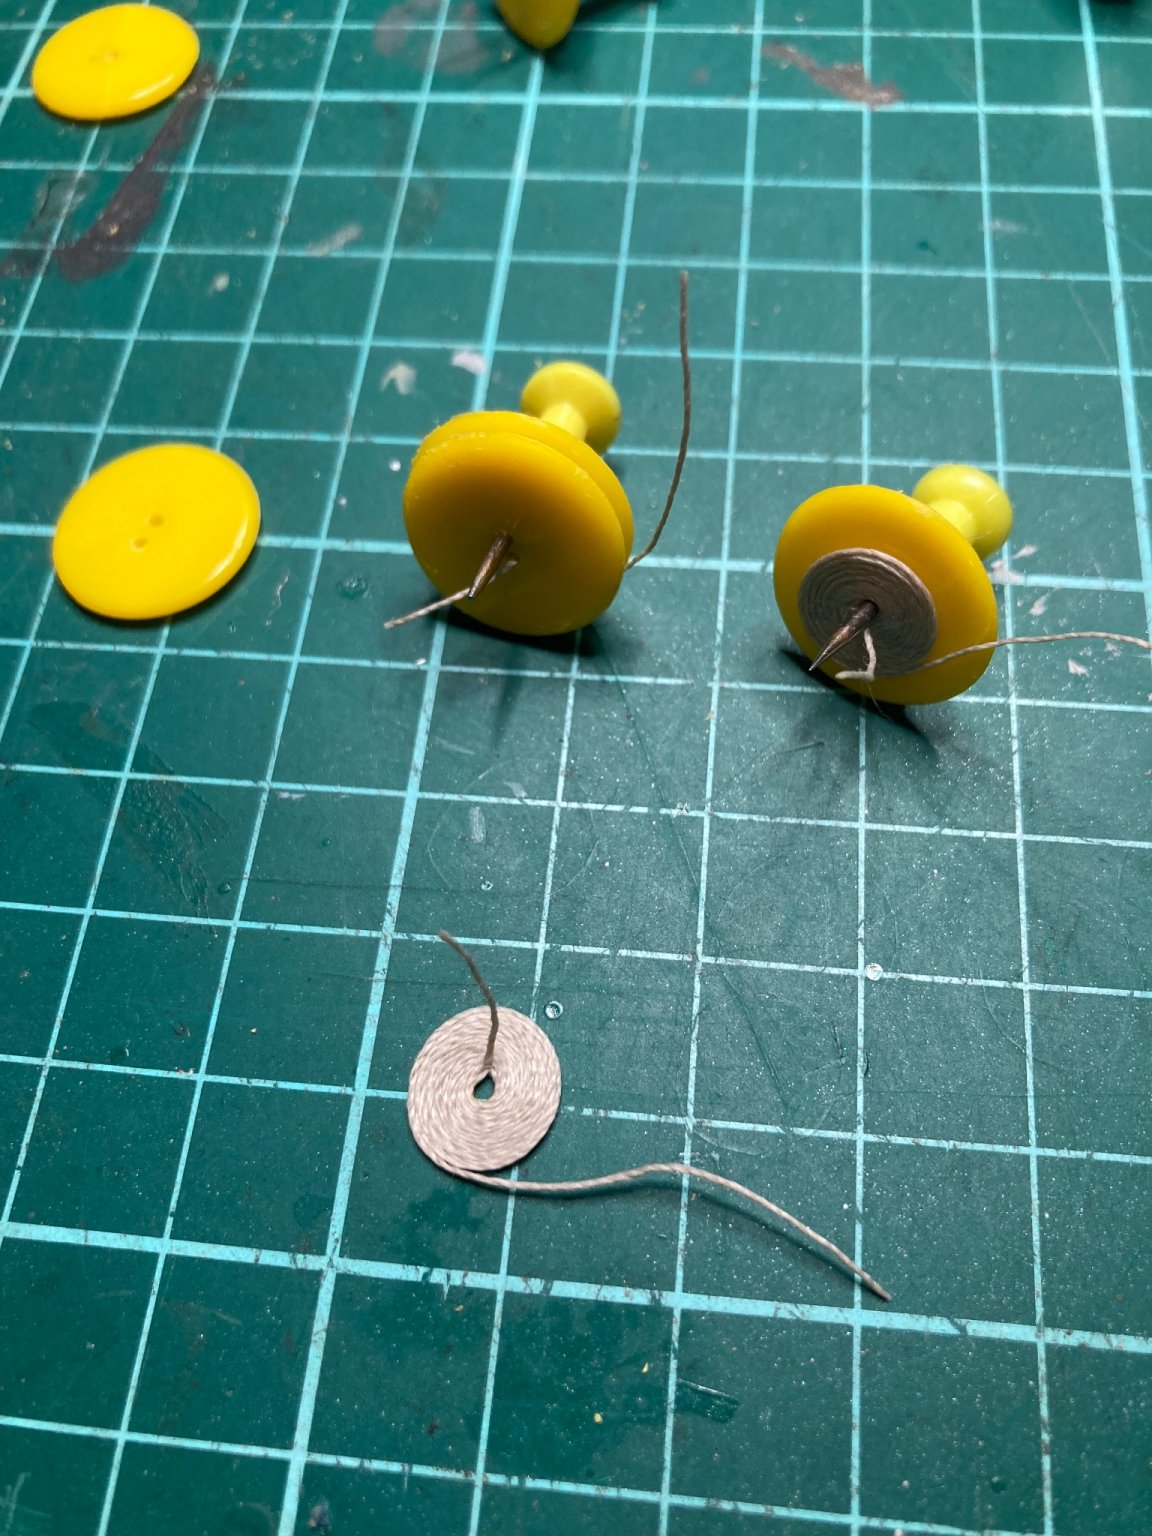
I made a simple jig for making rope coils using plastic counters and a couple of map-pins. Soak a foot of rope in diluted PVA, wrap it around the former and leave it for an hour or so. Works better than I thought it would.

-
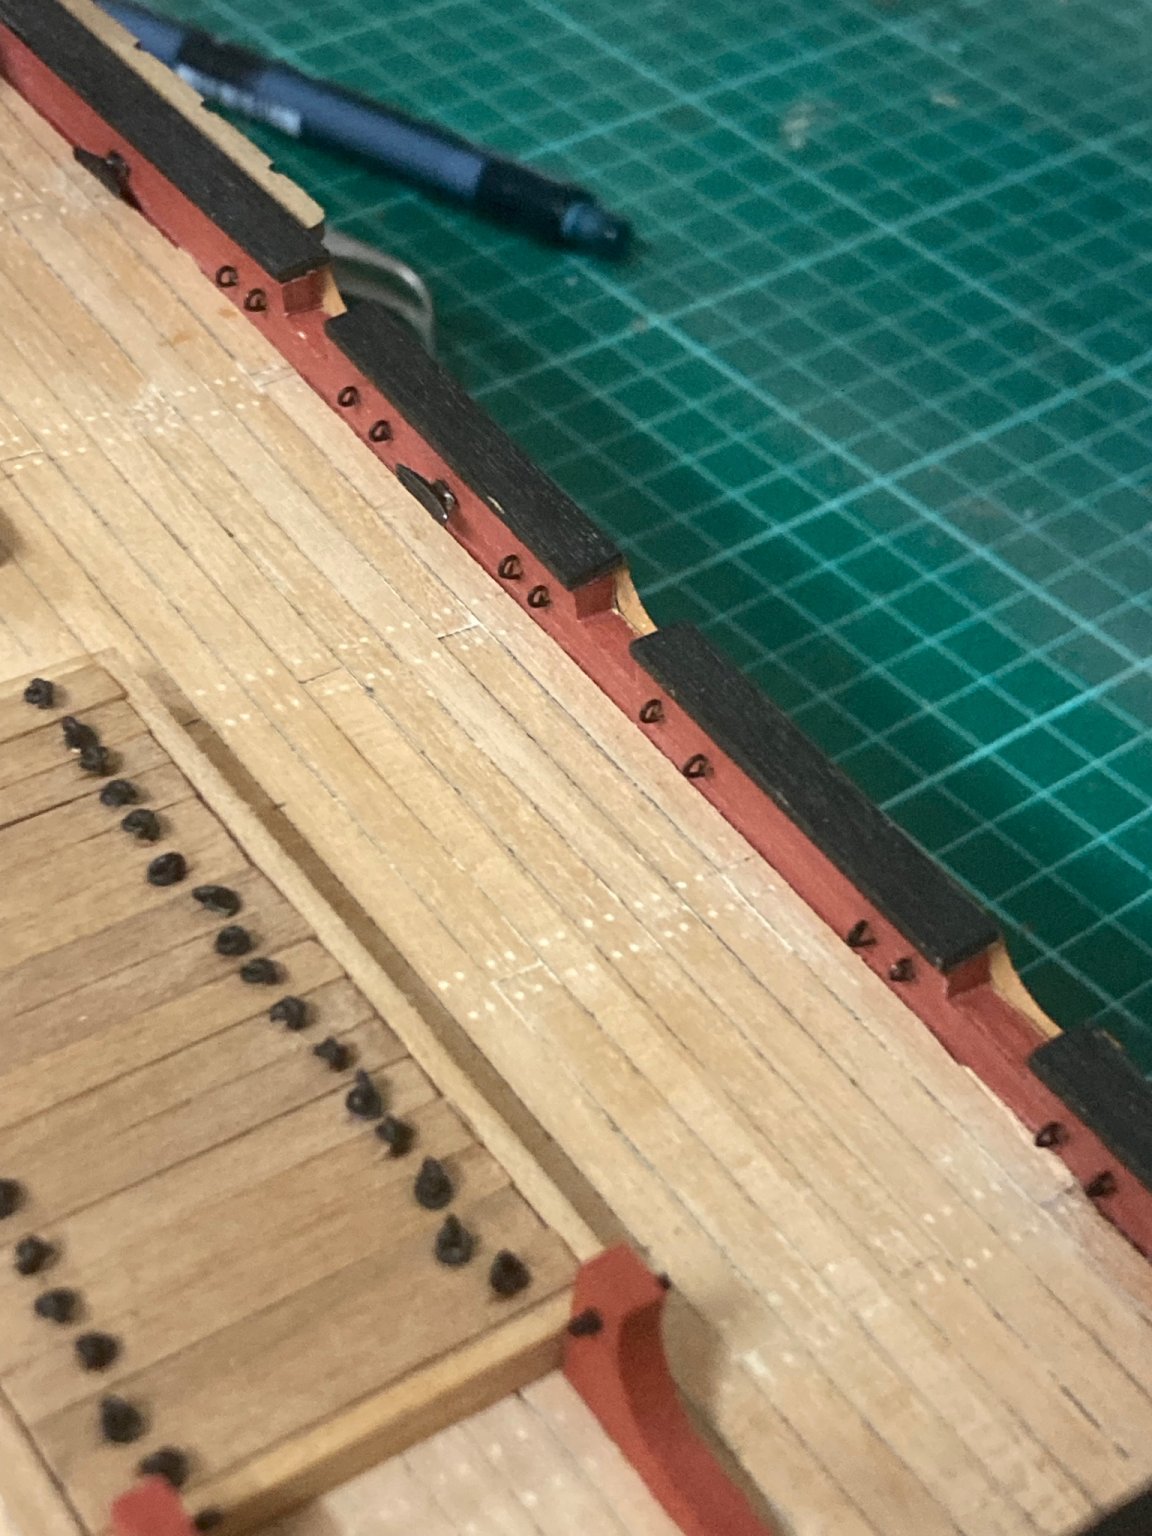
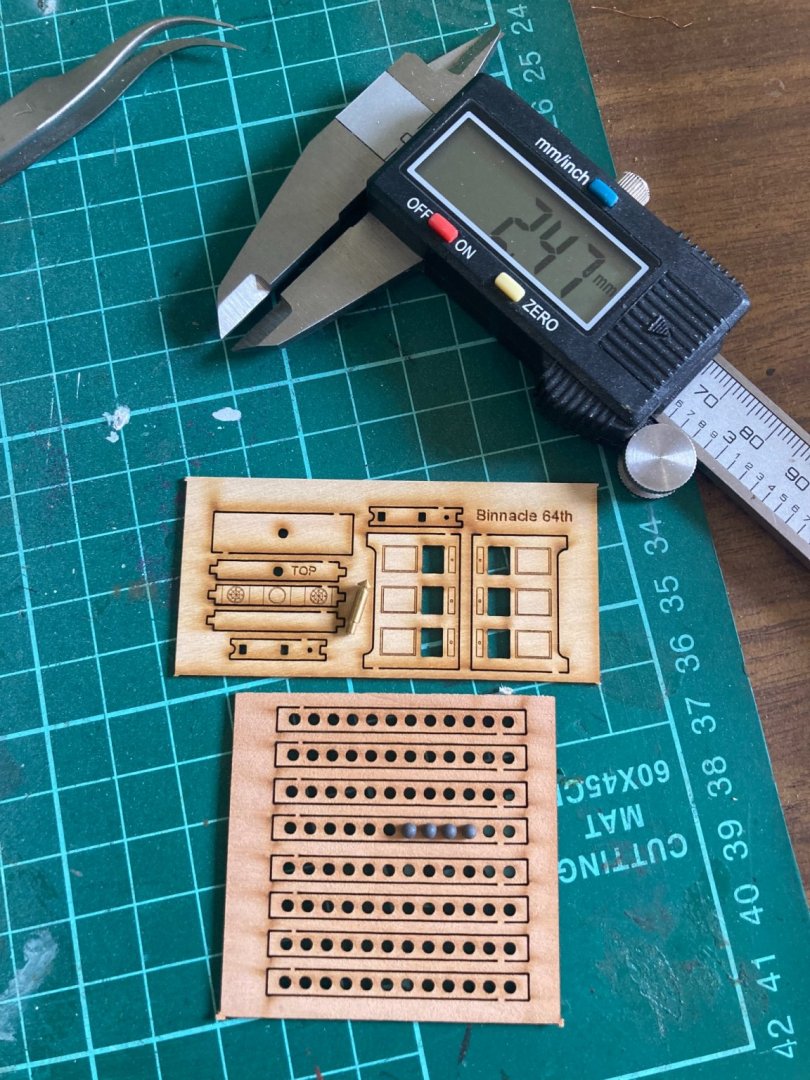
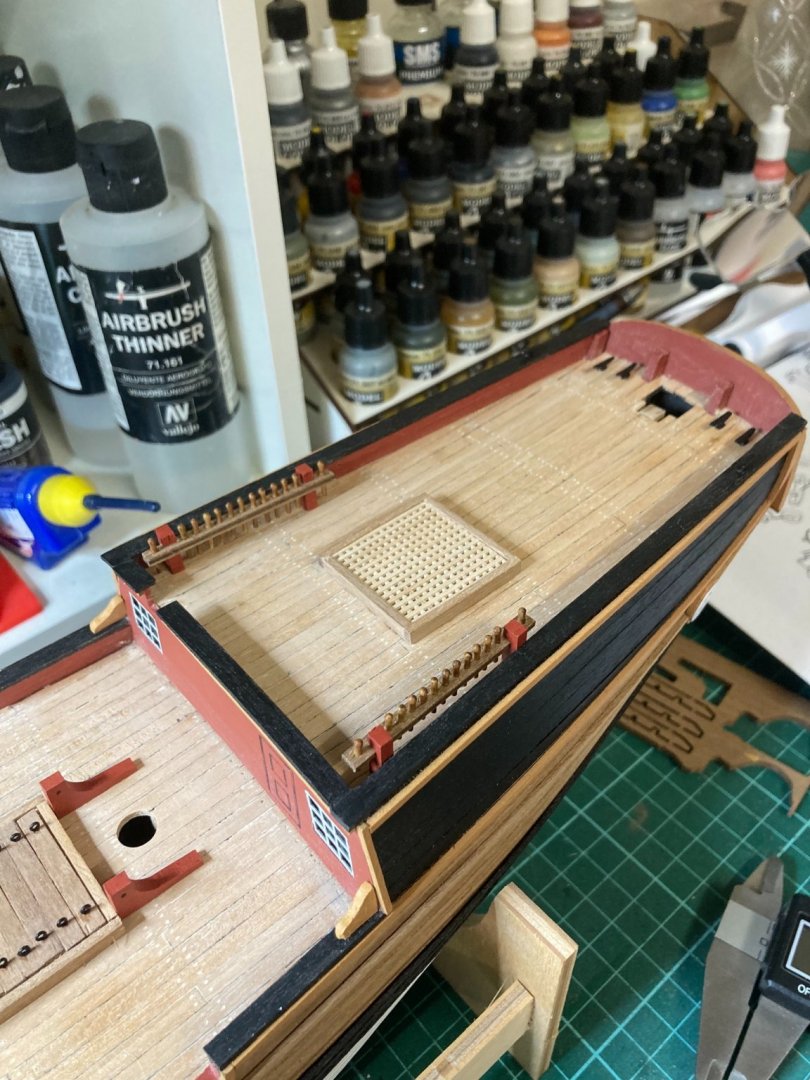
I had ordered a 1:64 scale binnacle and shot garlands from Vanguard Models in the UK. They arrived today in the mail; I’m really impressed with them! I have 25 2.4mm cannonballs left over from a previous build. I plan to cut the shot garlands into shorter lengths of five holes each and place them between the pairs of cannon.
-
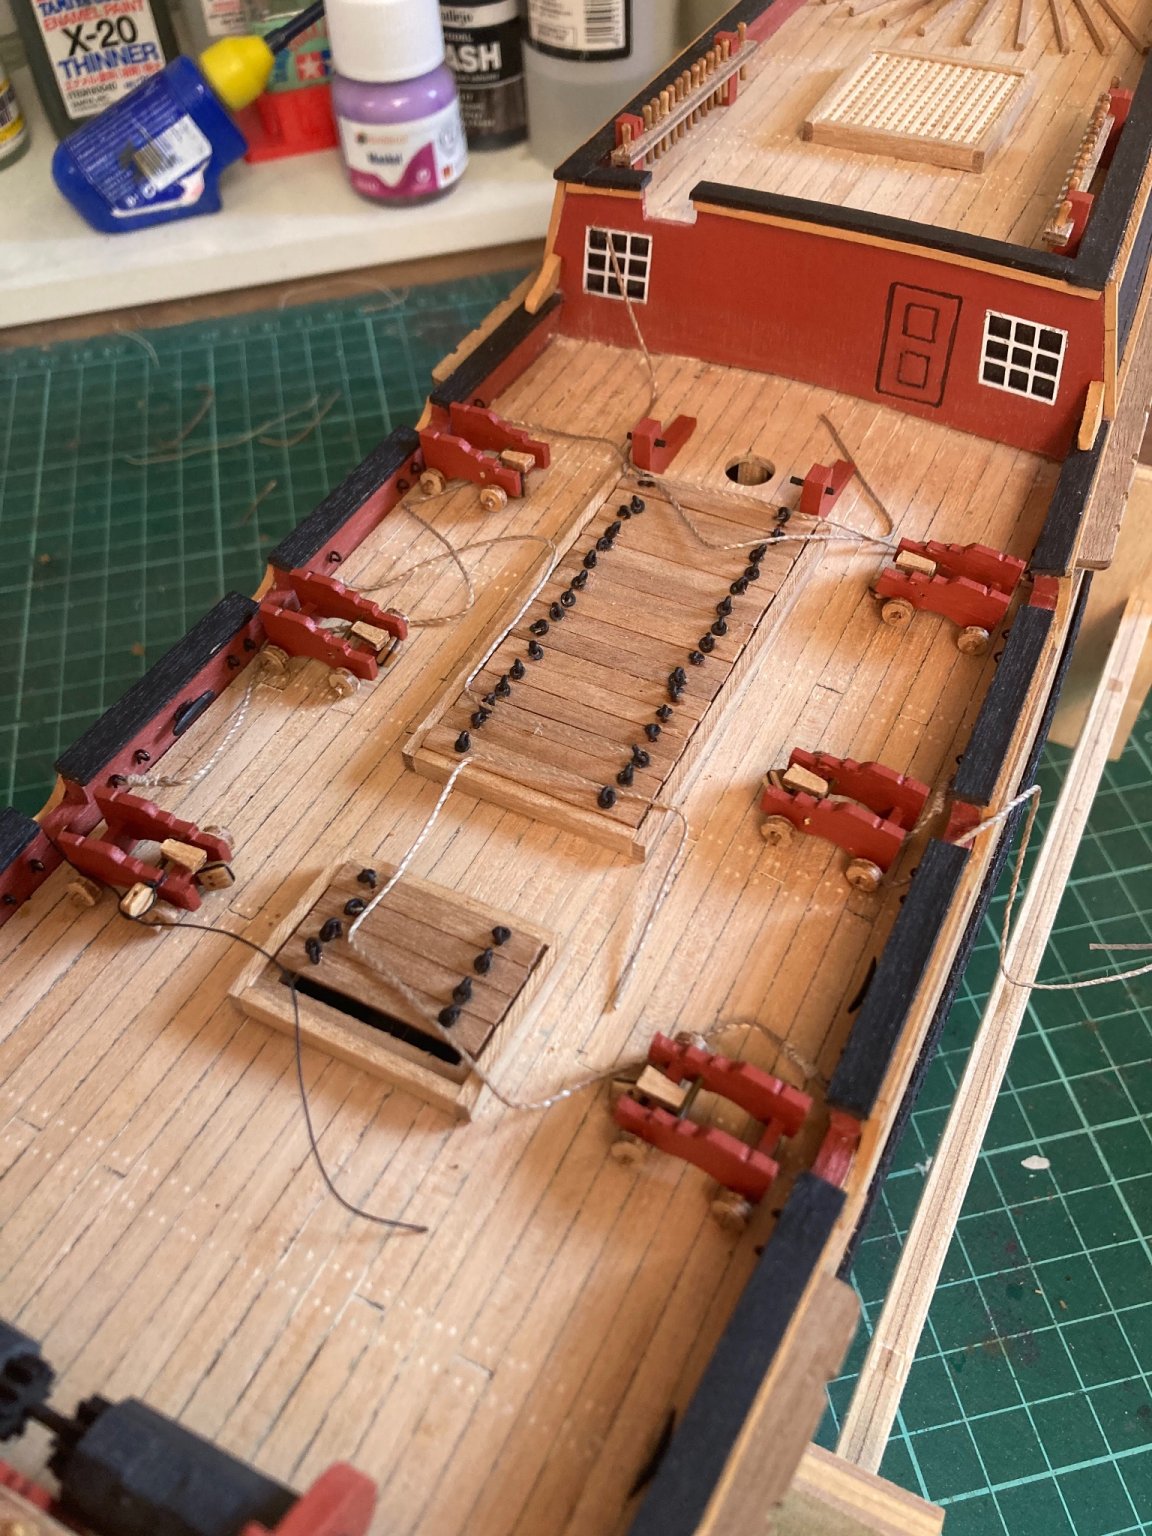
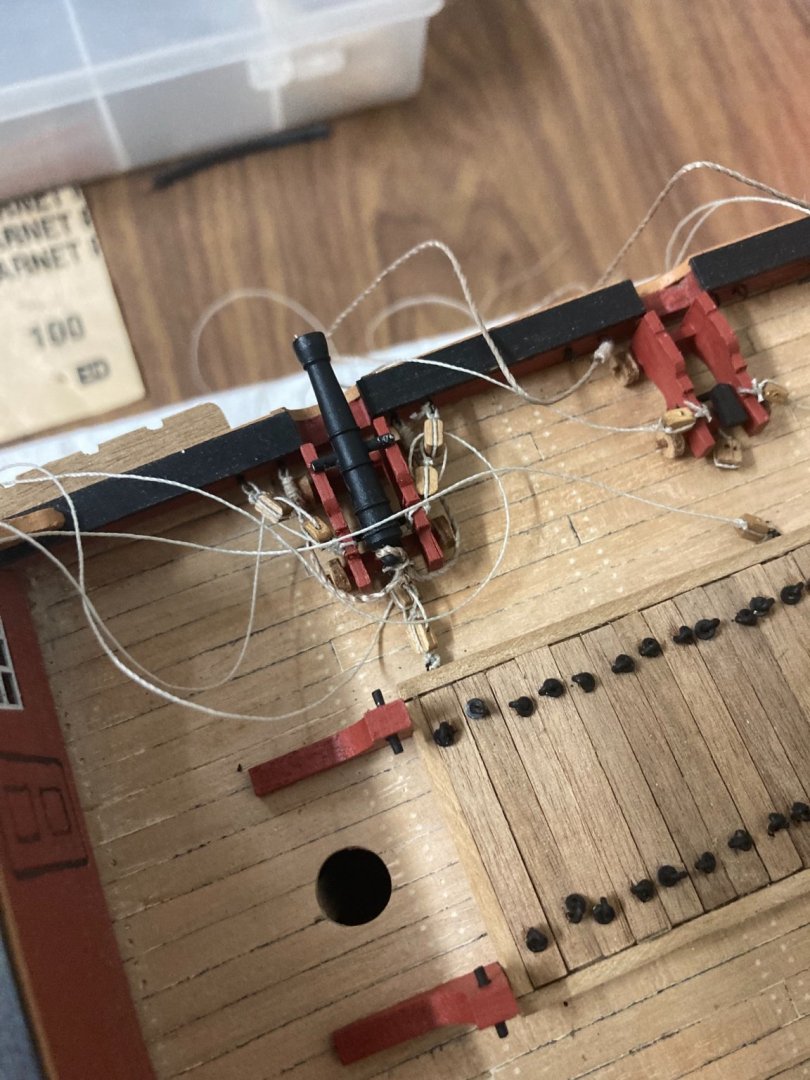
All six cannon are rigged. All they need now are the rope-ends trimmed and some coils added.
-
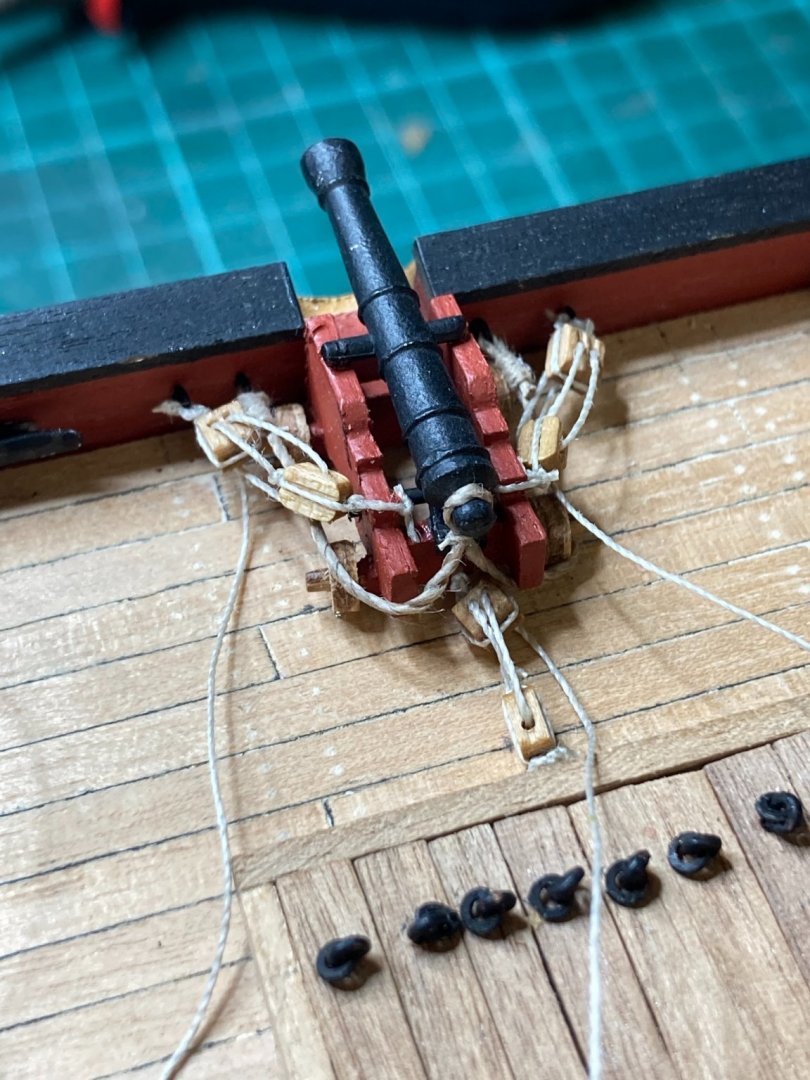
One 4lb cannon rigged; Five more to go. Rope coils to be added later. there simply isn’t enough room behind the cannon to rig the inwards tackle blocks at an adequate distance from each other. I couldn’t get any 2mm single and double blocks; 3mm looks a tad large, but I’m happy with how they look. Better than no blocks at all.
-
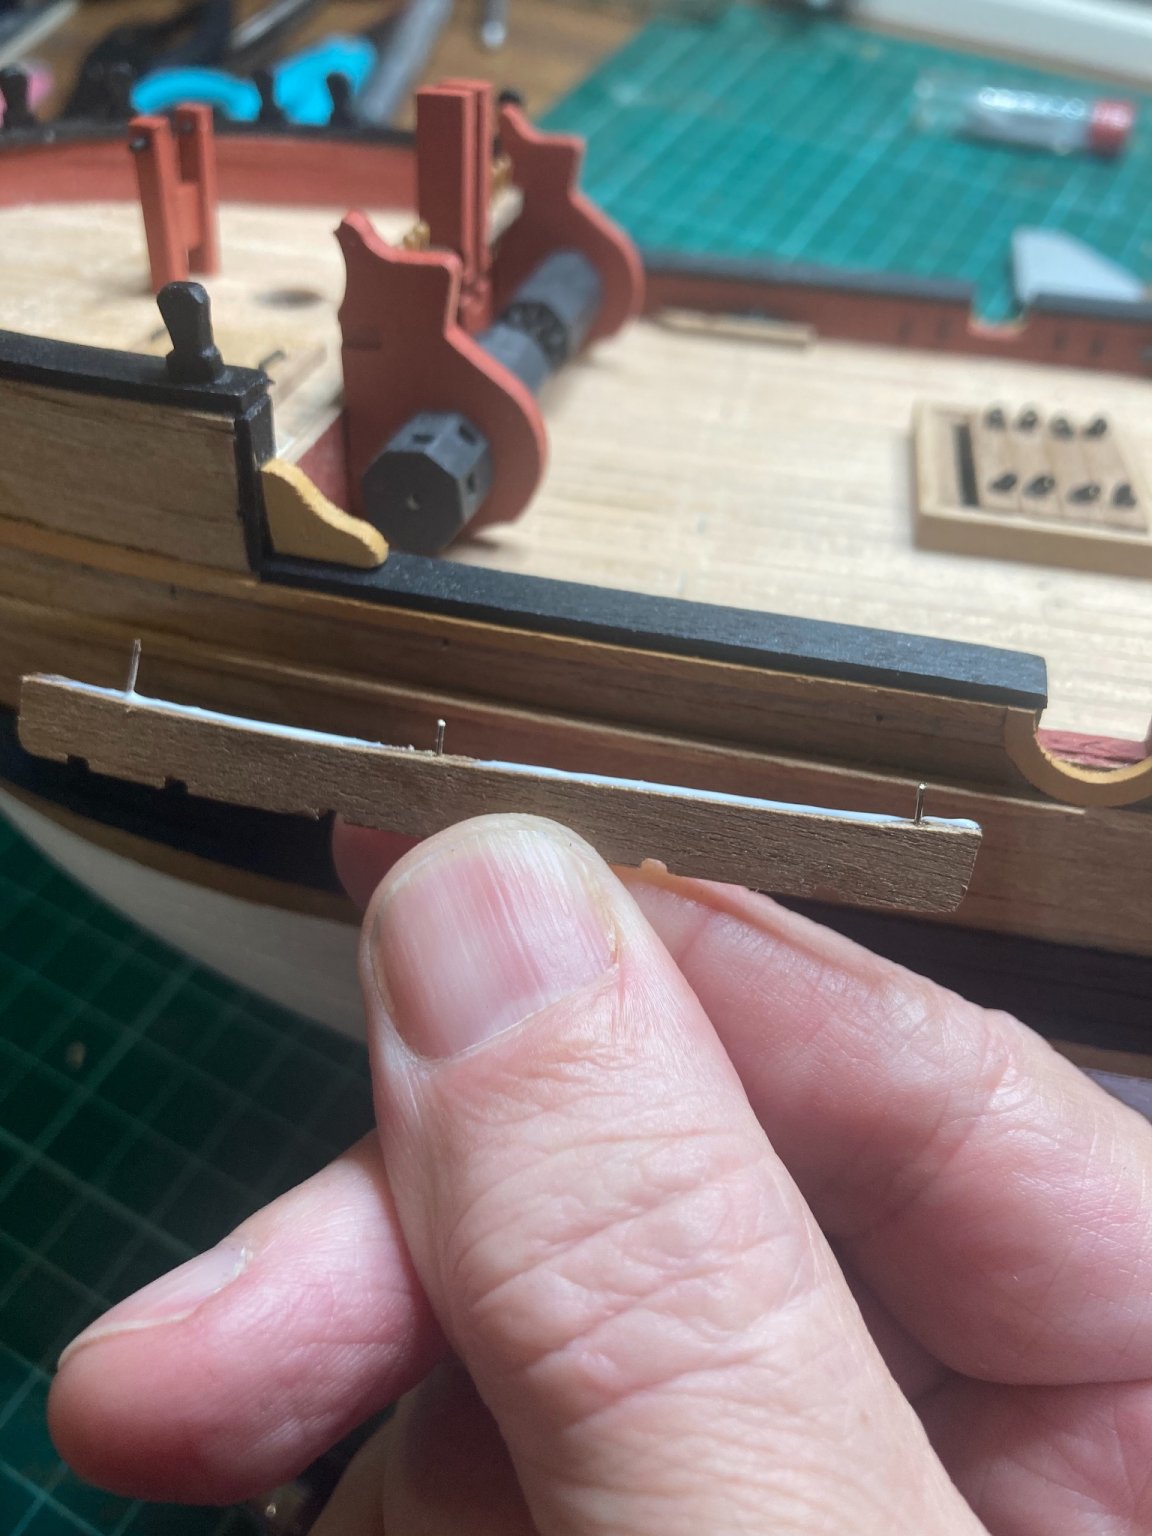
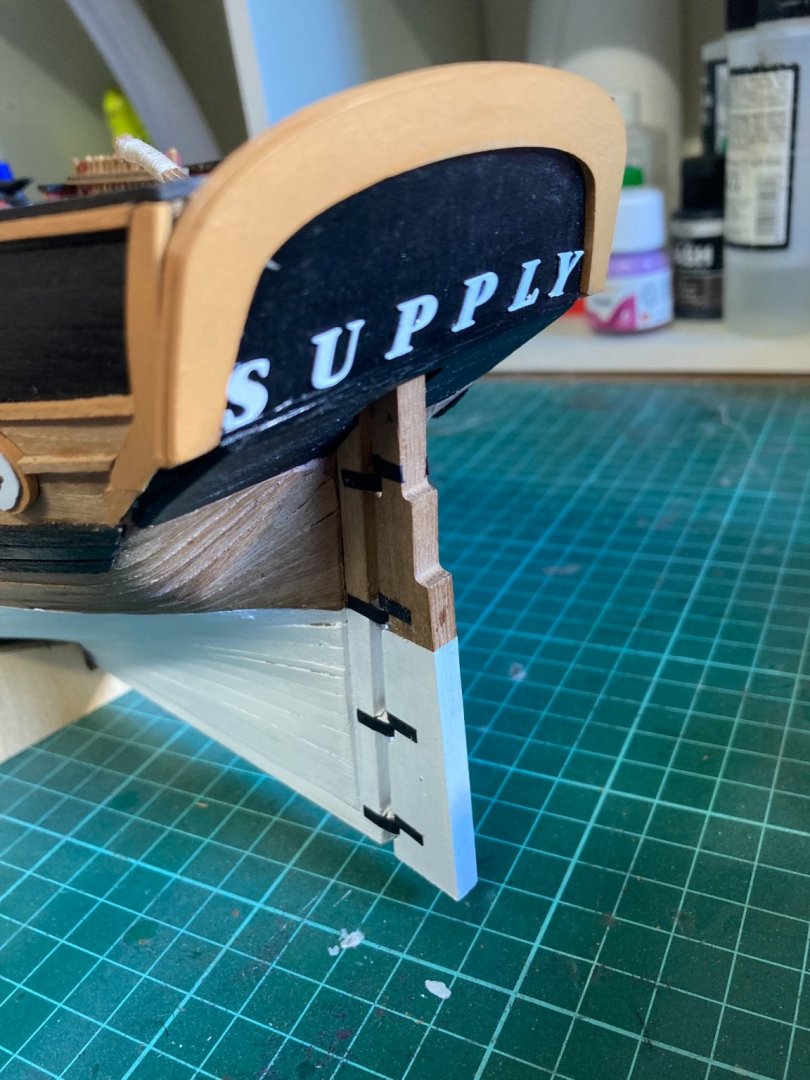
2mm x 20mm strips of black cartridge paper fitter as per the plans, simulating iron rudder-hinges. Once more, trying to decide whether to paint the lower ones white, or to just leave them as is. I haven’t acknowledged any followers lately, if at all. I very much appreciate all of you looking in occasionally. This forum is one of my favourite places on the internet. Today marks one year since I underwent L5-S1 spinal fusion surgery. I’m relatively young (52) and a current Air Force member, so I had a difficult time coping with chronic pain and future uncertainty. This model and this website have been an absolute highlight of a particularly crappy year. A heartfelt thanks to all of you for helping me look forward to something. I’m much better and my future’s looking bright. Kind regards.
-
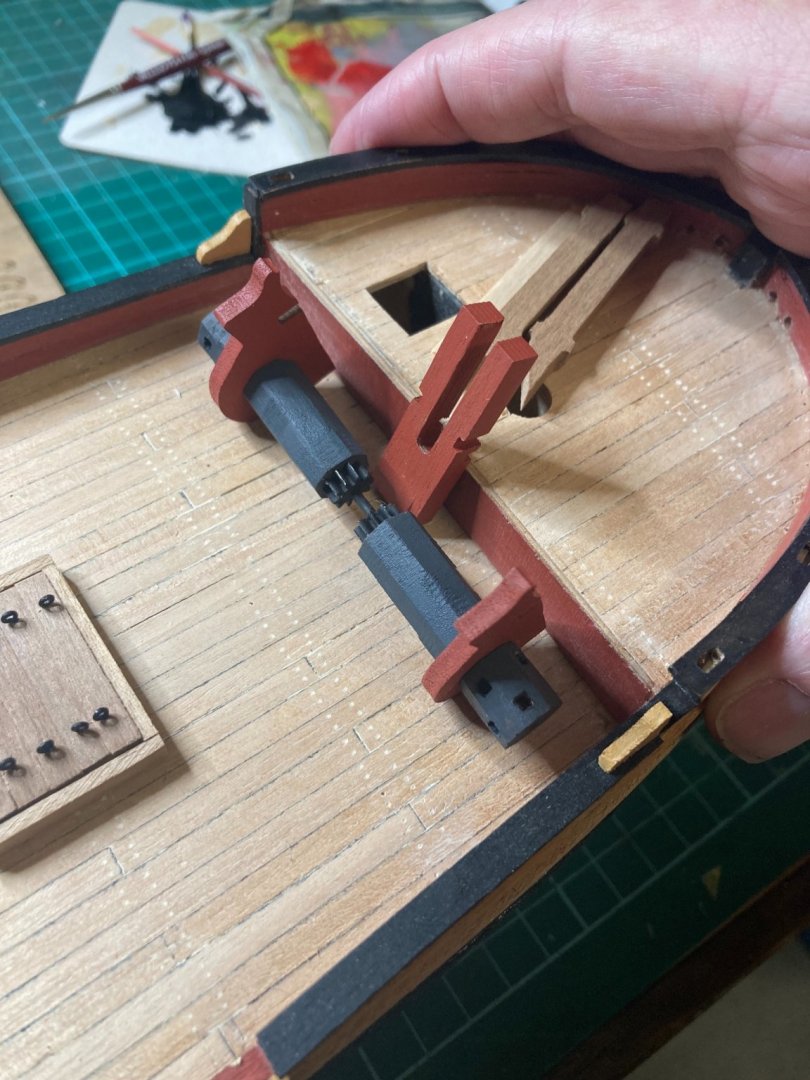
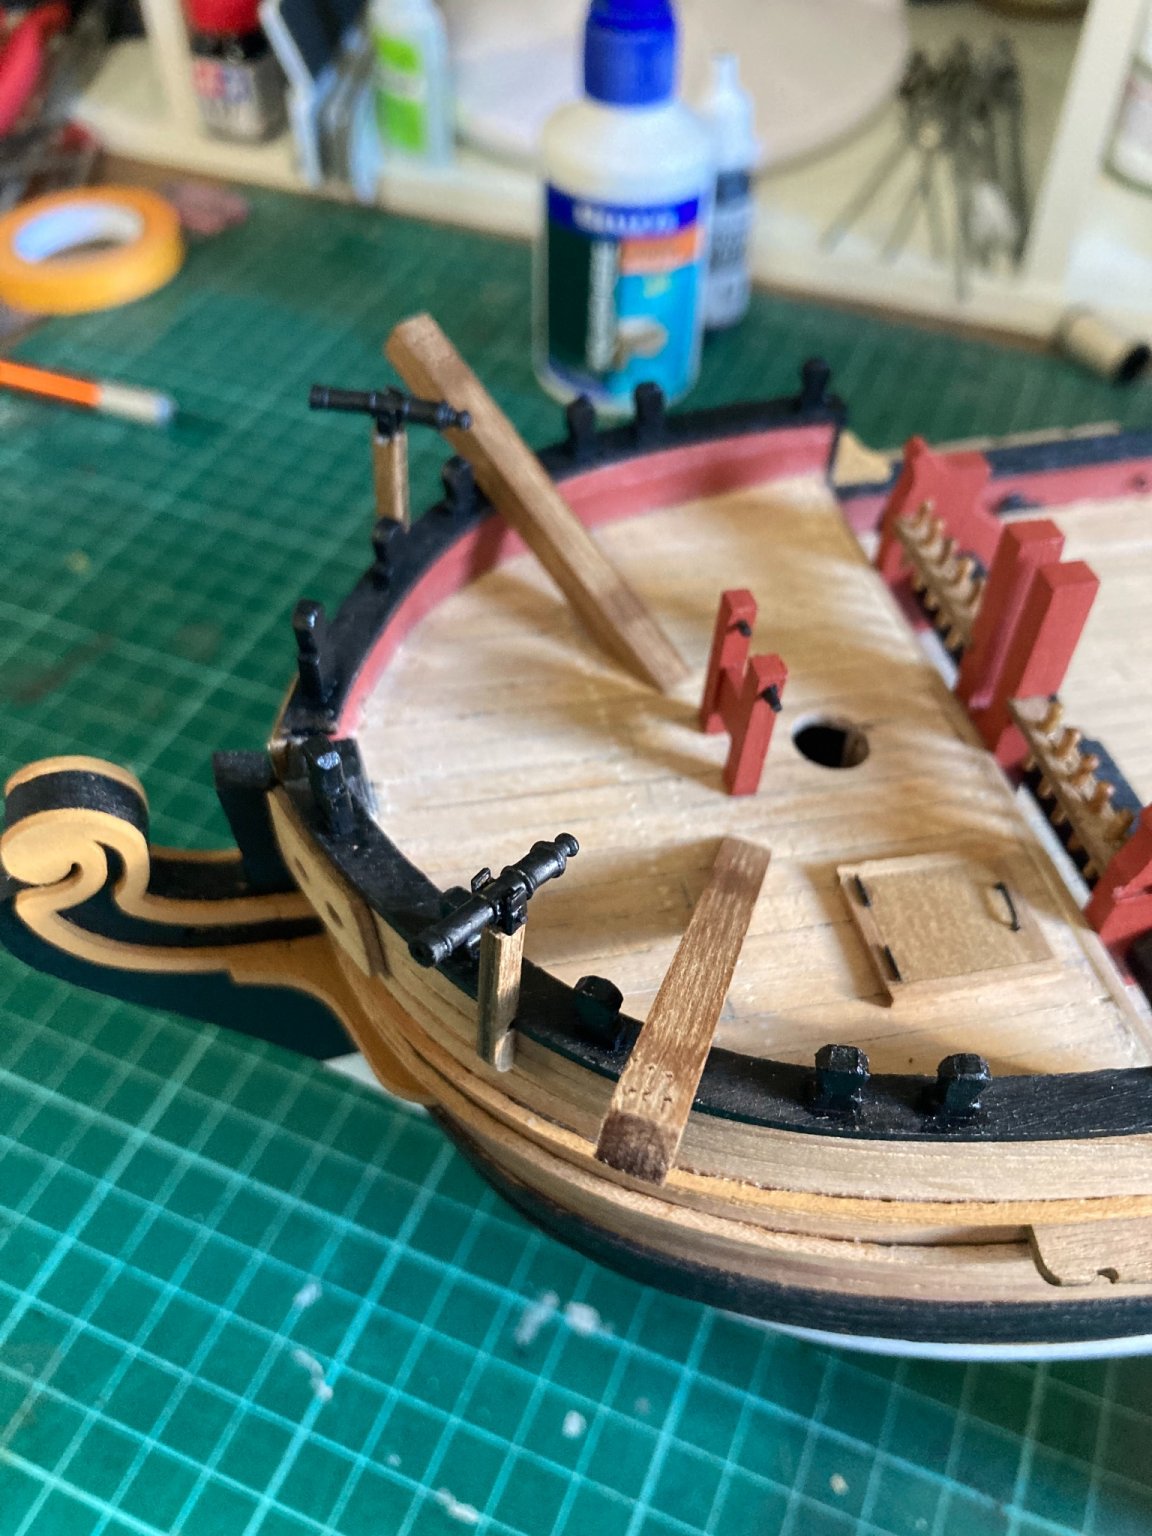
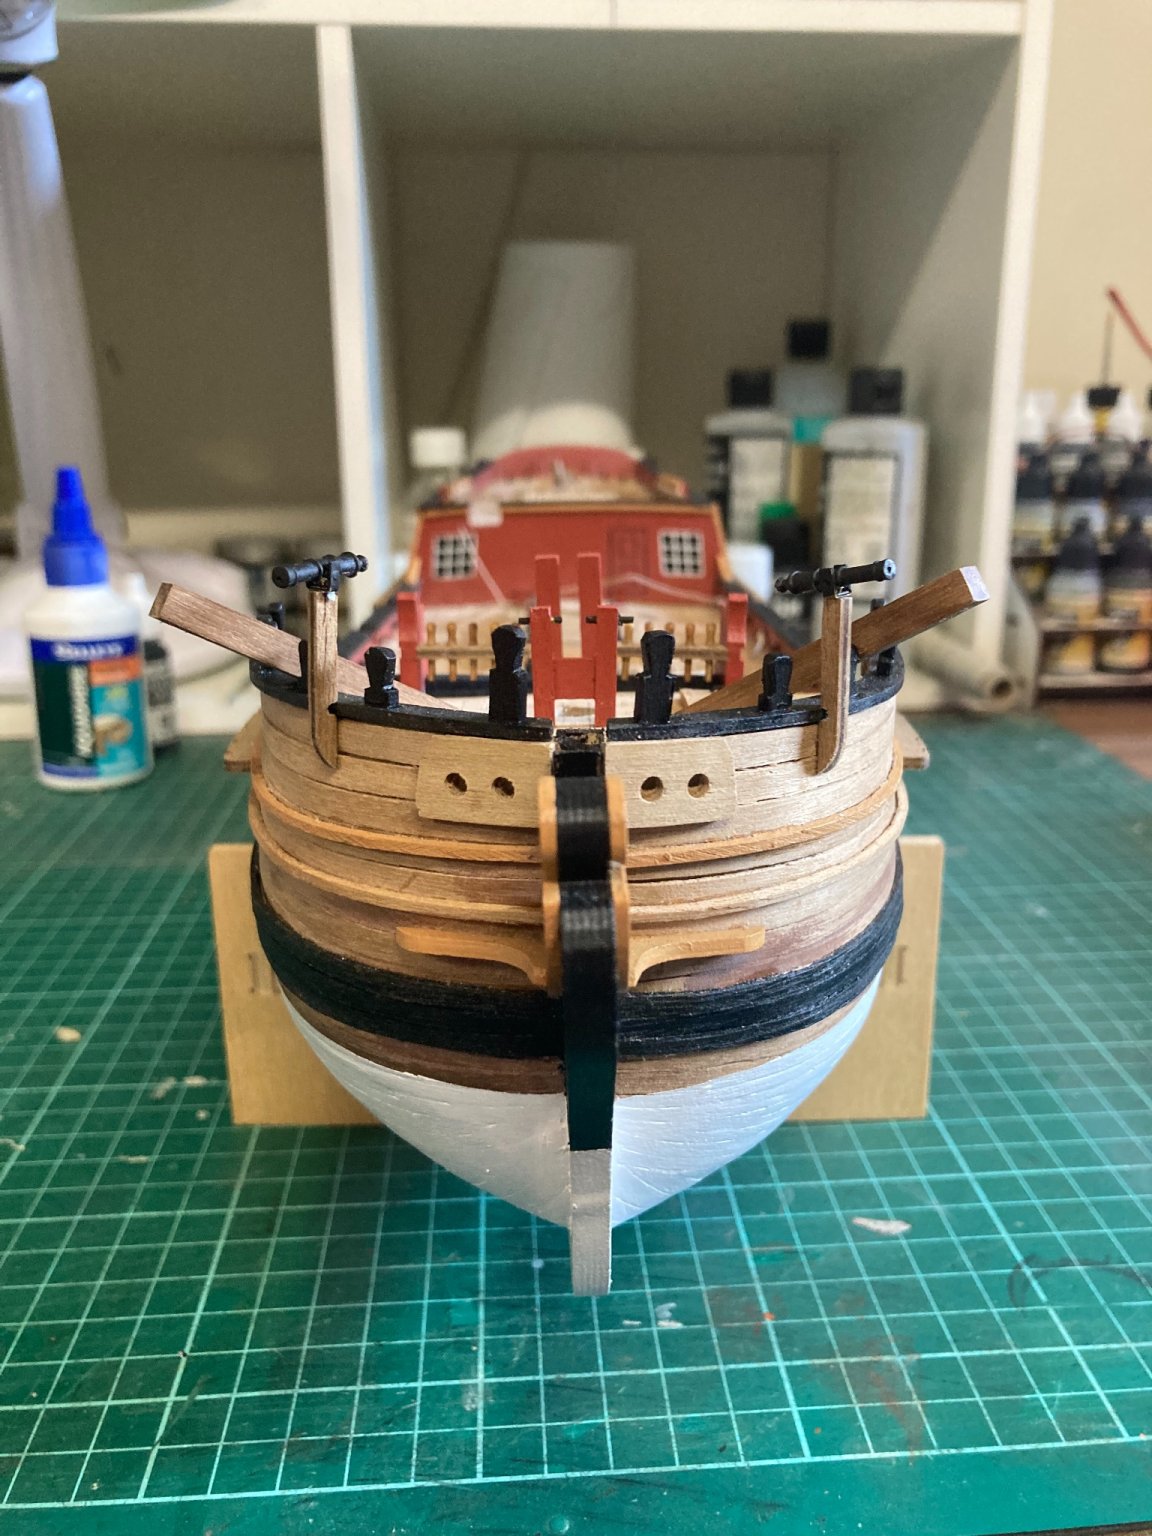
I’ve added the cat-heads by fitting a 0.5mm nickel-silver pin to the under-side and drilled a hole into the fore-deck. They’re even in angle and height, but the starboard bulwark is slightly higher than the port side. So one cat rests on the side-wall…one cat doesn’t. I’ll fit a wedge on the cap-rail under the cat-heads shortly to make them look more even. bow-chaser swivel-cannons fitted. Again, I was trying to decide whether the paint their pedestals red ochre, yellow ochre, black or to just leave them. I think I’ll leave them. I don’t want them to stand out too much.


-
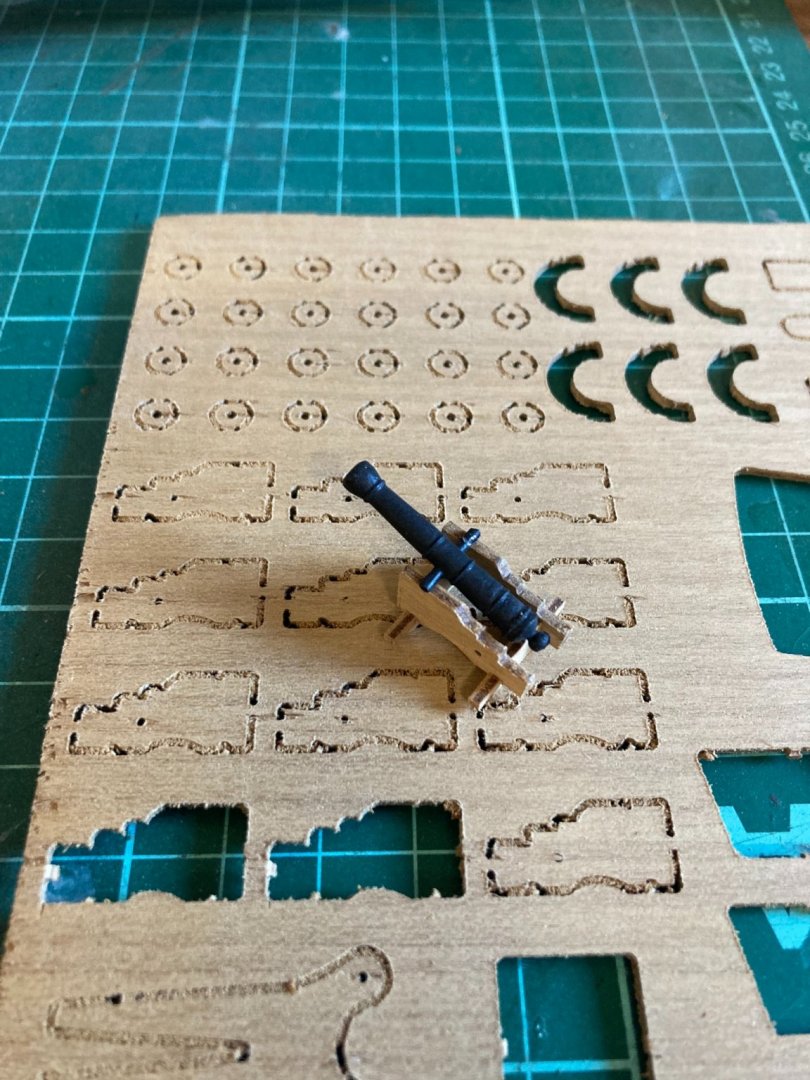
I’ve completed the six cannon carriages with no problems. The walnut ply supplied with this kit is of a good quality so they filed down very easily without splintering. I was concerned the axles would break off before they fitted into the (wheel) truck-hubs but, yeah..easy job. 1mm brass rod joins the left and right sides of the carriages and seems a bit oversized. But I’ve left them. The extra blocks I ordered for the cannon rigging arrived, and I’ve fitted 3mm double-blocks as in-haul tackle, but I’ve realised I’m out of extra 0.5mm natural rope. It can wait until Monday when the local hobby store re-opens after eight weeks of COVID lockdown. I haven’t decided if I’m going to paint the quoins…Red, black or left as walnut? Any advice? (I settled on black.)
-
The model’s had its first pieces of rope permanently attached- Cannon breech-tackle. The trucks piece together very well indeed. My only concern is how I’m going to get the axles to fit through the wheel-hubs. They’re very small and I think they’ll break before I sand them down adequately.

-
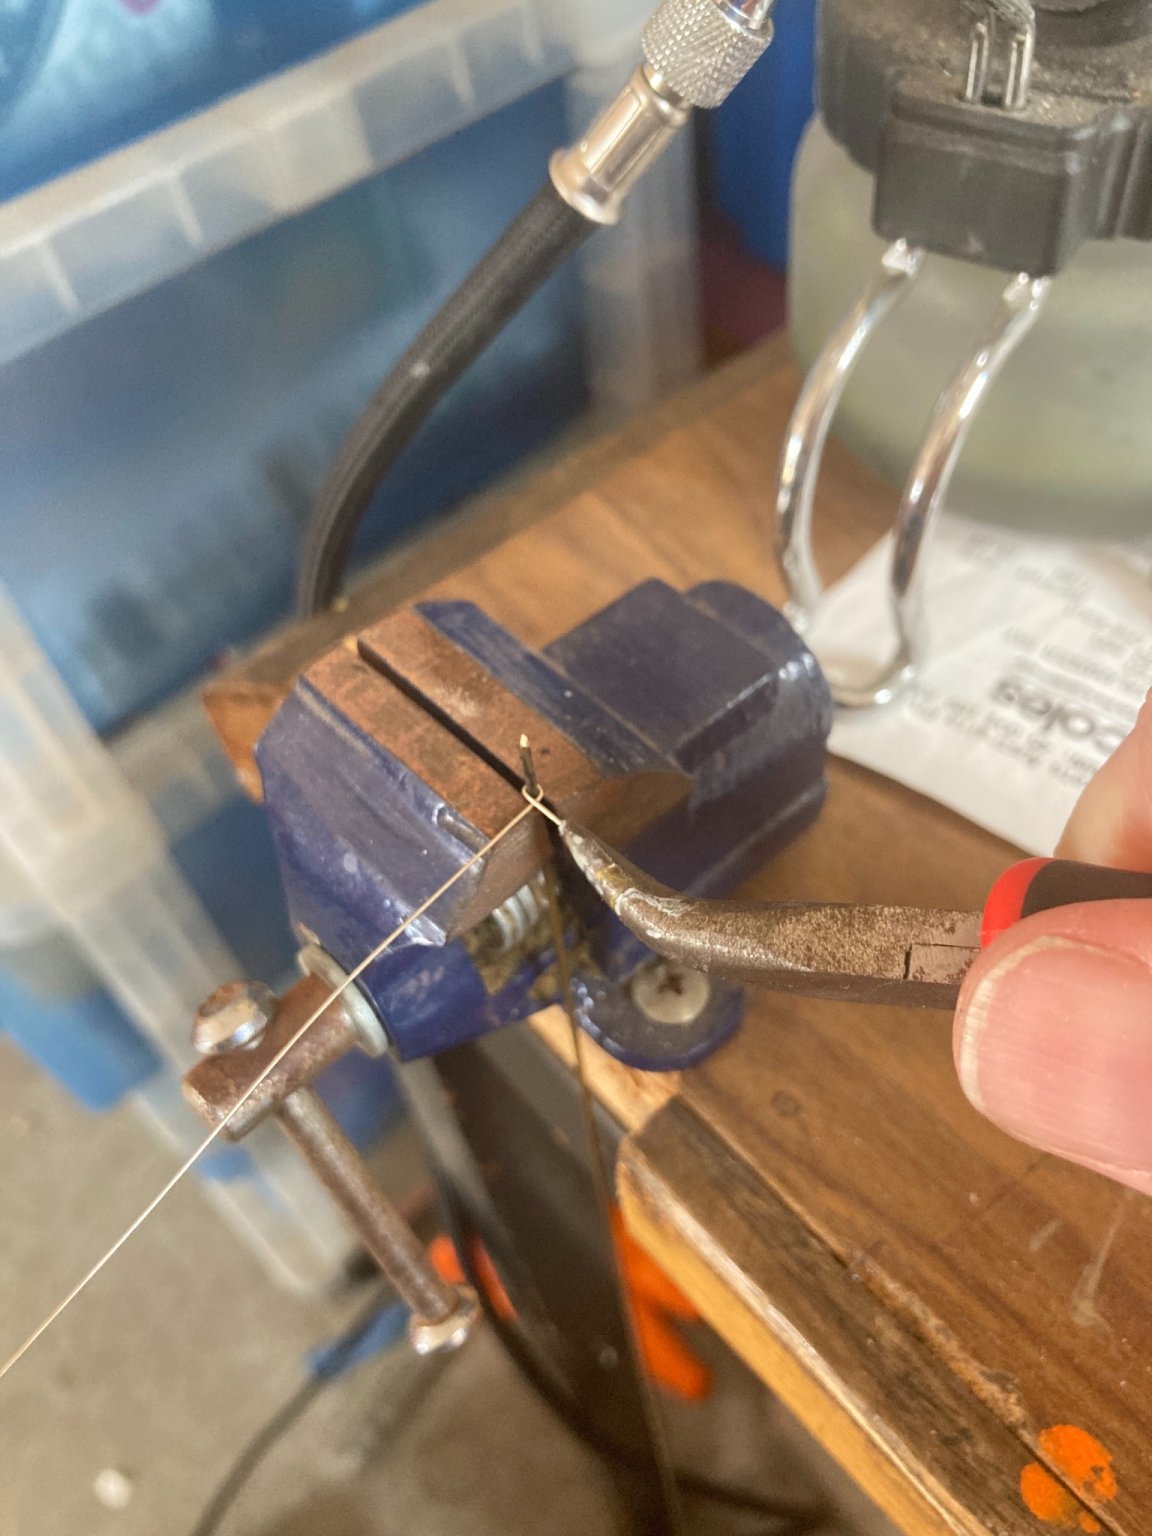
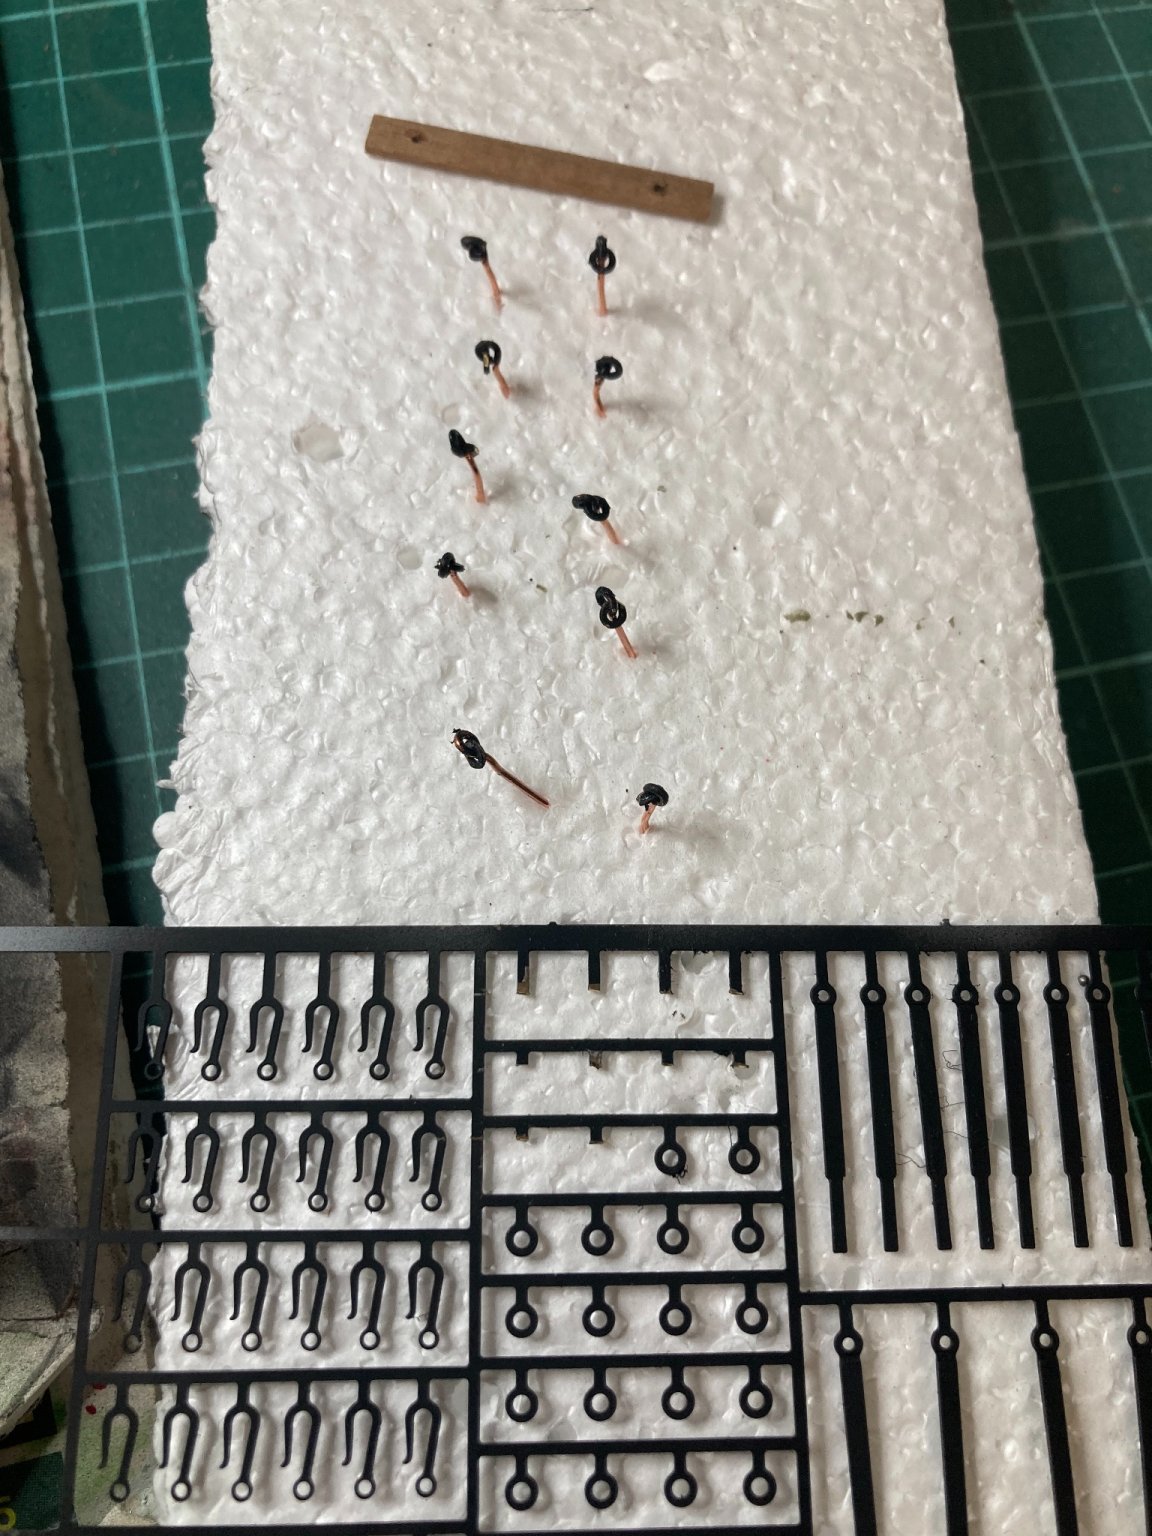
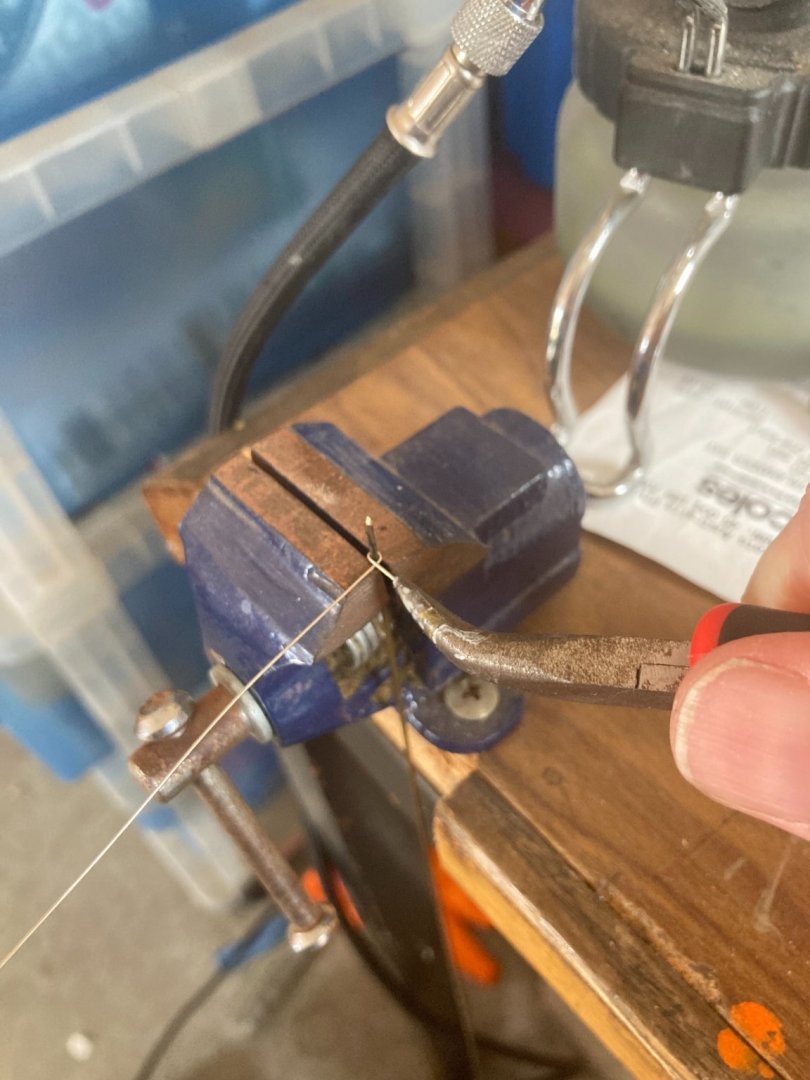
I’ve again deviated from the plans, as the kit isn’t furnished with train-tackle or breaching-ropes for the cannons. I used 1mm brass rod as a former and twisted the nickel-silver rod around it to form a loop. Then cut, drilled into the bulwarks, fixed with CA and painted iron black. The cleats are placed alongside them as per the plans. I’m still waiting for the additional blocks to arrive in the post.

-
The pre-cut chain-plates were a simple addition. No fettling required at all. I used 0.4mm nickel-silver pins fixed with CA and PVA on the wood to secure them. They’re not going anywhere.

-
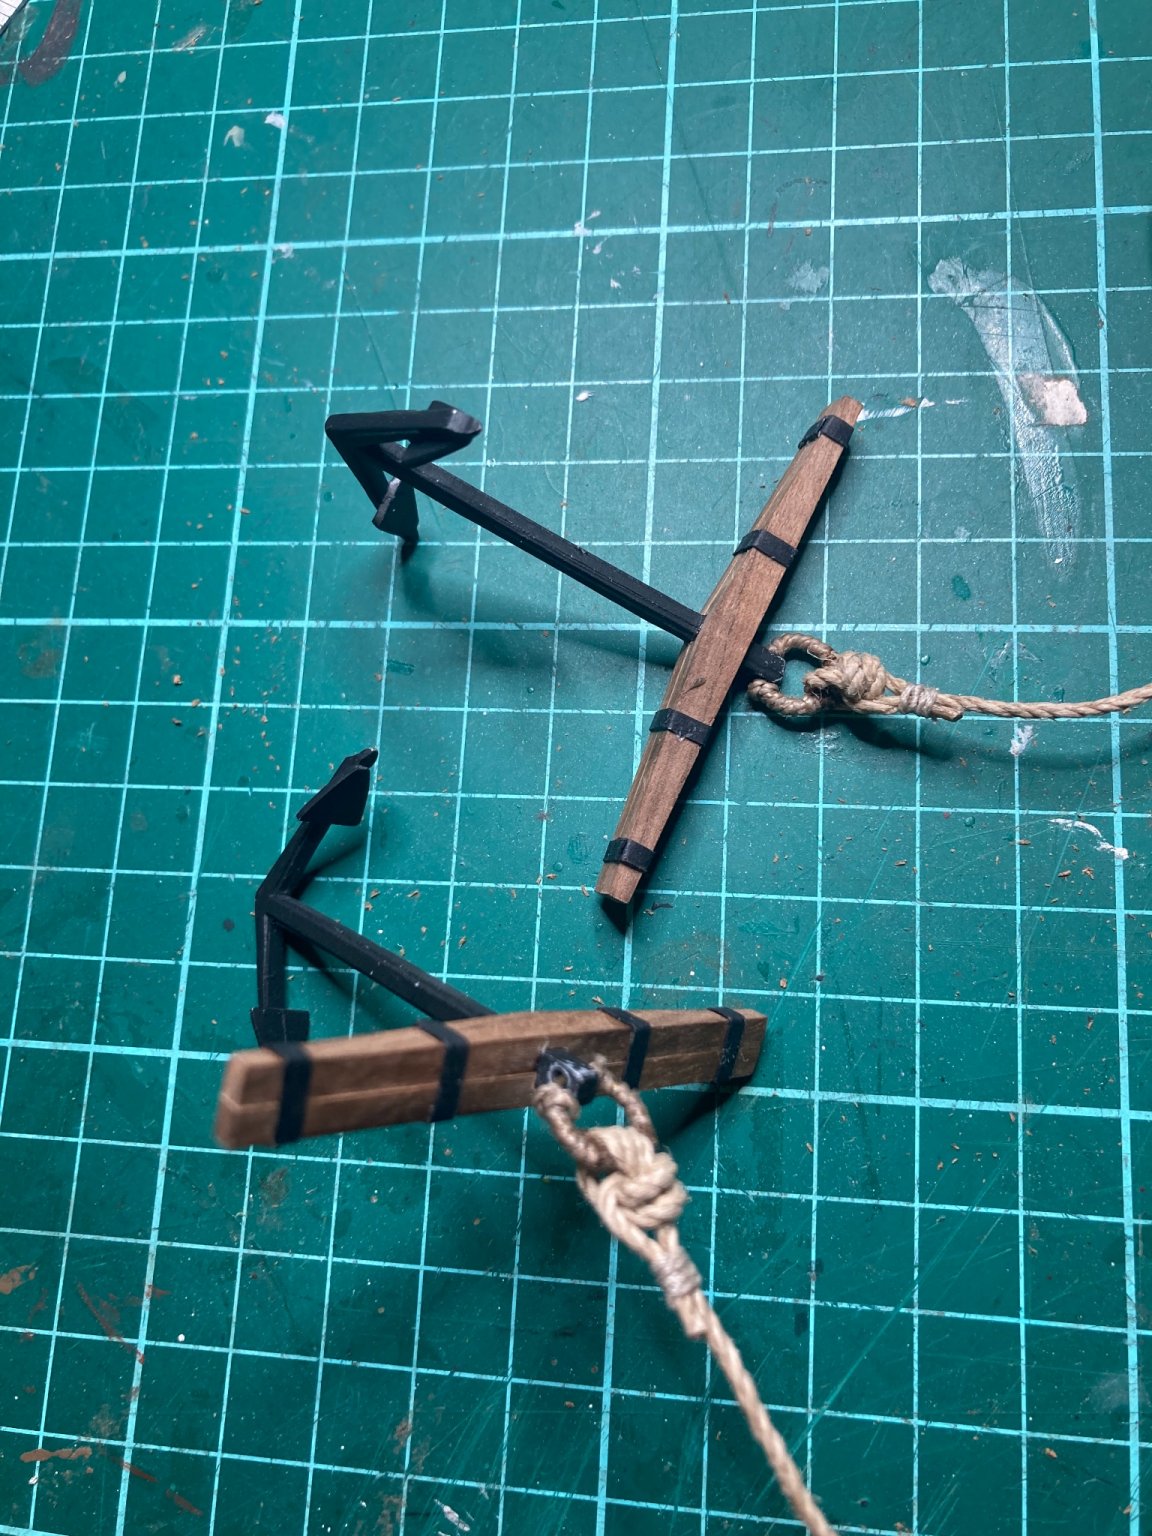
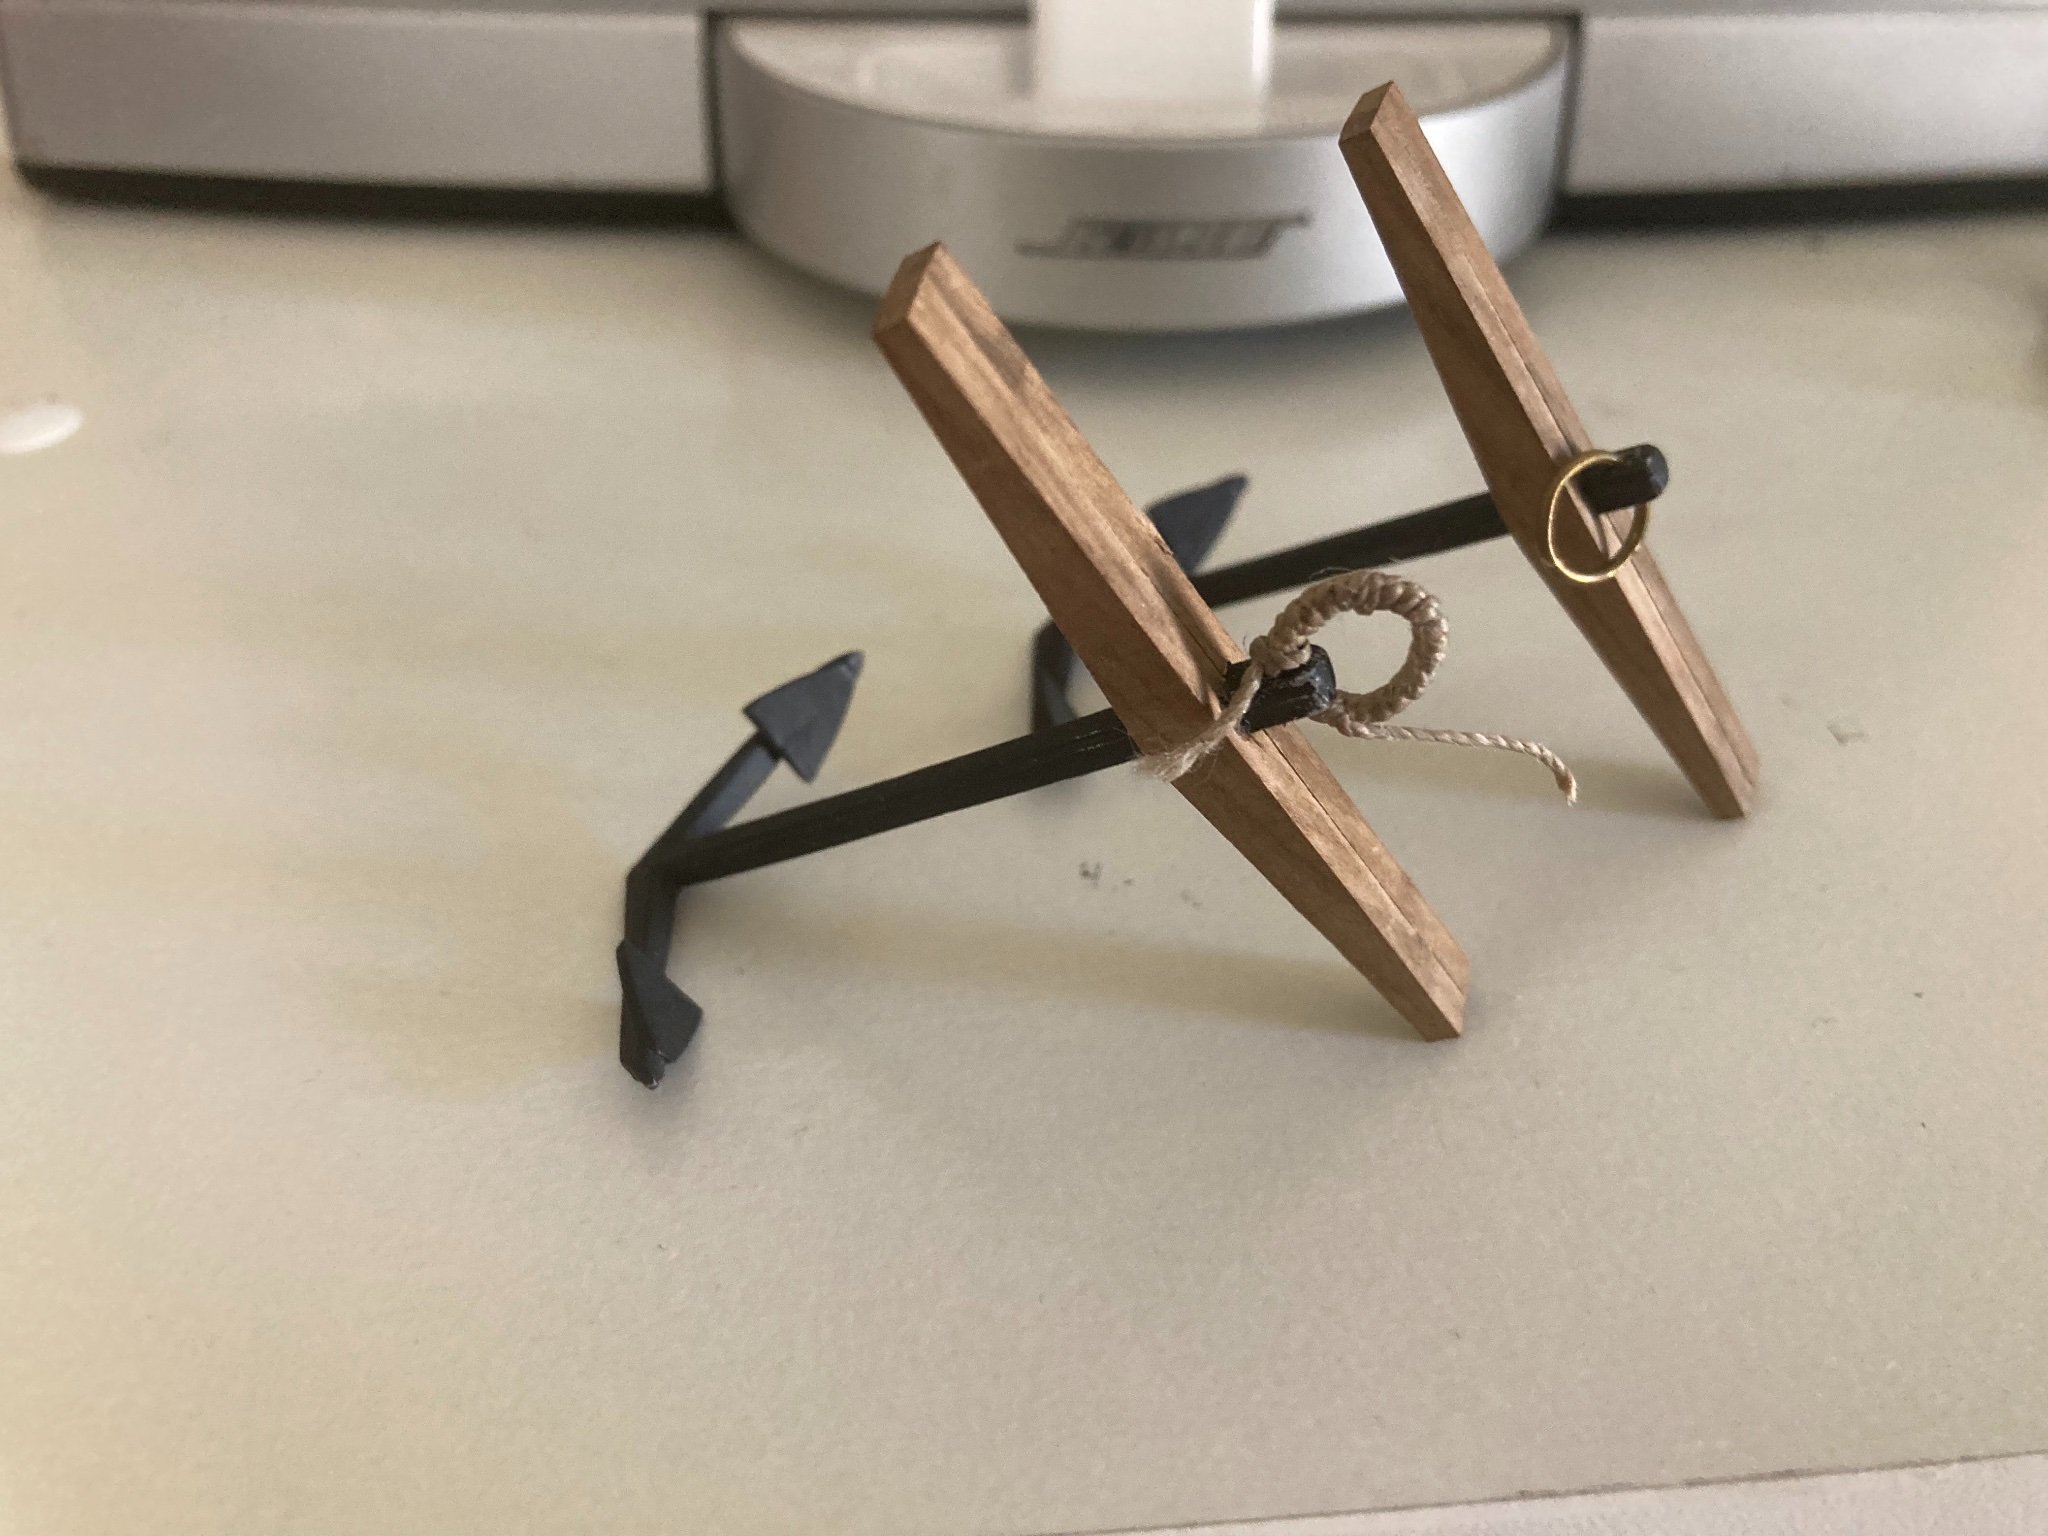
Puddening the anchor-rings and black cartridge paper for the stock woldings. anchor-bend knots using left-over 1.5mm cord from the previous build - Royal Yacht Caroline. To my eye, the anchor cable supplied by Caldercraft is too thick and too bright. This’ll do fine.

-
I had a response from my email to Caldercraft yesterday. Quote; “Thank you for your enquiry. I can assure you we are still in business and producing Caldercraft kits. At present shipping of static kits are 5-7 days from placement of order. We are still trying to recover from the past 18 months. Our kit stock was all sold in the first month of lockdown and we have been running to catch up ever since. Severe disruption in the supply chain has not helped. Regarding Surprise we had hoped to release the kit just before COVID but were unable to do so. It will not be released before next year. Miniature Steam (the Australian supplier) decided to withdraw from the market last year. I will remind our web editor to remove them. Kind regards, John ______, Director.” Saints preserve us! Delighted the dear Surprise is on the horizon, for all love! Time to save my doubloons. Float-a-boat in Ringwood, Victoria are the current Australian suppliers. Odd that Caldercraft didn’t mention that and I came across them by lucky accident. I’m a happy guy once again! More blocks in the mail for the cats…
-
Oh, my giddy aunt! I’ve had a reply from JoTiKa! Quote- “Dear Mr Marley, I can assure you we’re still in business and producing Caldercraft kits. At present, shipping of static kits are 5-7 days from placement of order. We’re still trying to recover from the past 18 months. Our kit stock was all sold out in the first month of COVID lockdown, and we’ve been running to catch up ever since. Severe disruption in the supply chain had not helped. Regarding HMS Surprise, we had hoped to release the kit just before COVID but were unable to do so. It will not be released before next year. Miniature Steam Models (Australian distributor) decided to withdraw from the market last year. I will remind our web-editor to remove them. Kind regards, John Wright. Director.” I’m a happy guy again. I’ve had my glass trained on the Surprise for literally years now. I’d better start saving my doubloons…
-
Oh, my giddy aunt! I’ve had a reply from the JoTiKa managing director today… Quote: “Dear Mr Marley, I can assure you we’re still in business and producing Caldercraft kits. At present, shipping of static kits are 5-7 days from placement of order. We’re still trying to recover from the past 18 months. Our kit stock was all sold out in the first month of COVID lockdown, and we’ve been running to catch up ever since. Severe disruption in the supply chain had not helped. Regarding HMS Surprise, we had hoped to release the kit just before COVID but were unable to do so. It will not be released before next year. Miniature Steam Models (Australian distributor) decided to withdraw from the market last year. I will remind our web-editor to remove them. Kind regards, John Wright. Director.” I’m a happy guy again. The Surprise is on the horizon! I’d better start saving my doubloons…
-
Puddening the anchor-rings. The pre-formed stocks are wonderful to work with. A couple of hoops of black cartridge-paper around them and they’ll be done. Easy-peasy.

-
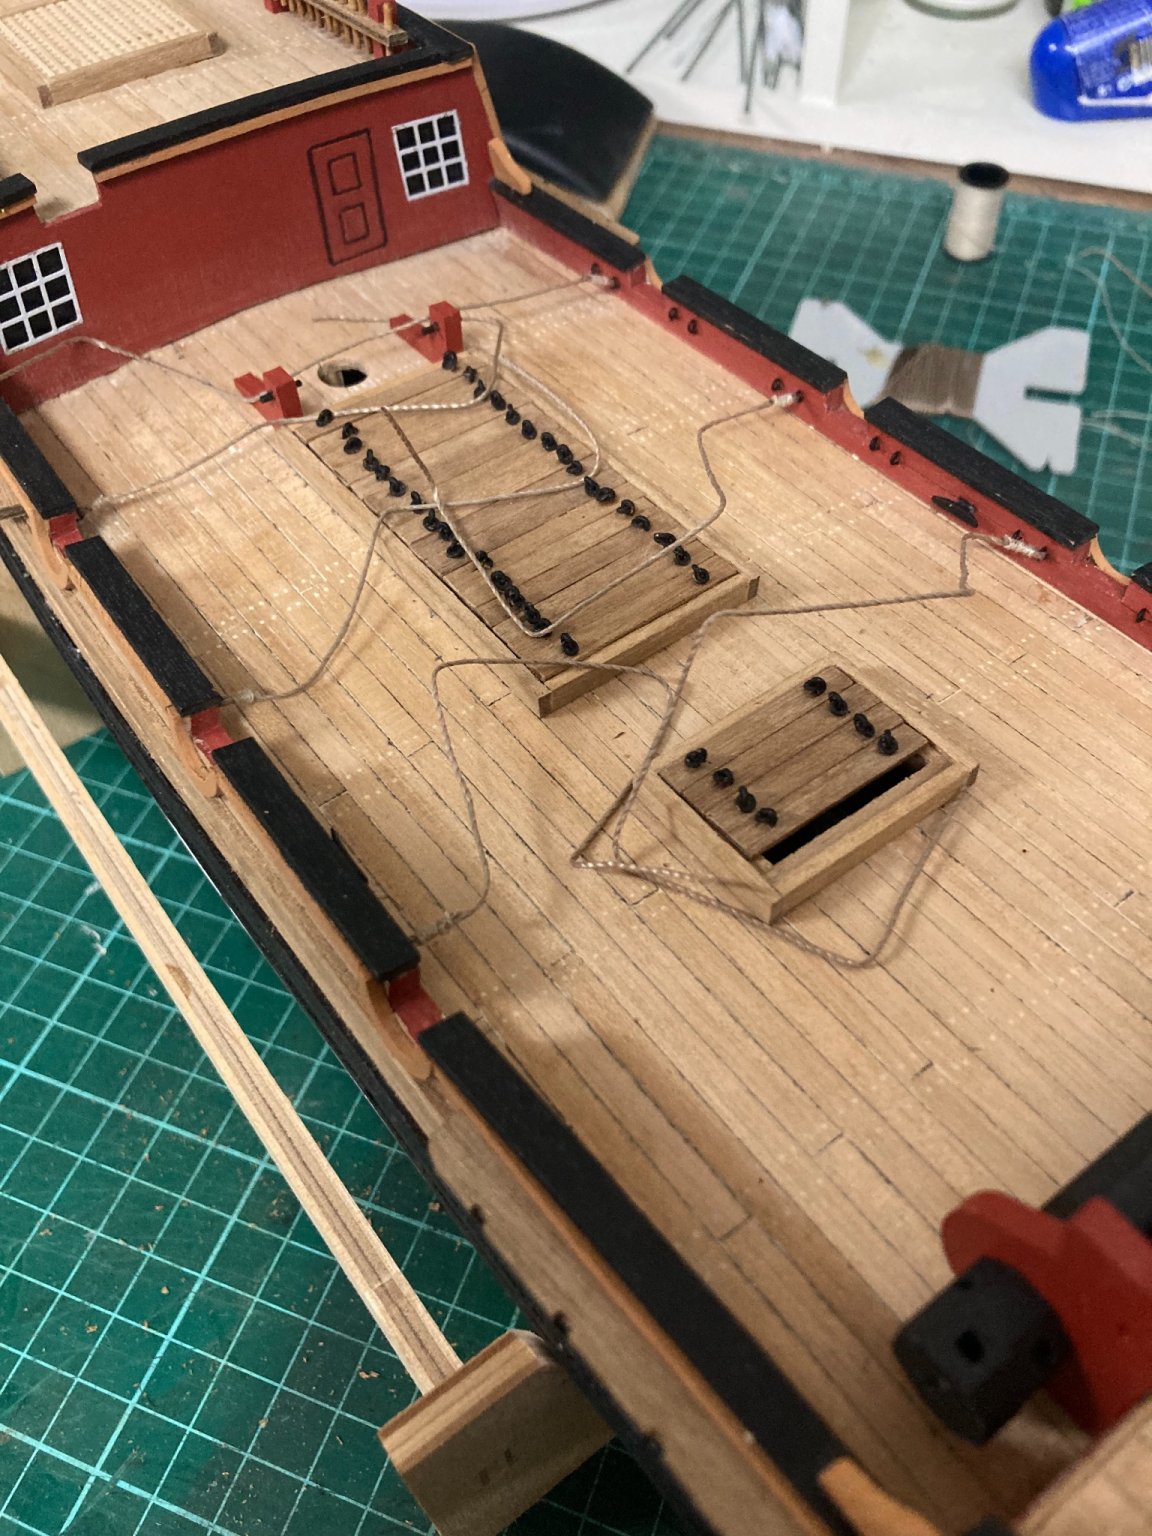
I’ve ordered additional walnut 3mm single and double blocks in order to rig the cannon more correctly. While I wait for them to arrive, I’ve removed all the hatch-covers had decided to add the brass hatch-rings to their copper loops while I can still access them. Poor photo, but you get the idea.

-
So, time for a rant. The Caldercraft website hasn’t been updated for literally years- Maybe fifteen, in fact. Their Australian agent, Miniature Steam Models (MSM) haven’t been agents of theirs for years either. I emailed JoTiKa (Caldercraft) enquiring where I could purchase additional fittings and more kits in Australia….They never bothered responding. I stumbled by happy accident upon a local (Australian) company I’d never even heard of before - Float-a-boat, in Ringwood, Victoria. Turns out, they’re the local Caldercraft agents and have been for years. Caldercraft- I want to buy your products, but your website needs to be correct and current. And I’ve been waiting for the release of your HMS Surprise kit for fifteen-odd years, now…. Your business model and customer service are pathetic. Vanguard Models HMS Sphinx is looking like a better alternative to your HMS Surprise. You’re loosing a customer. I want you to be successful in business, but you’re not doing yourselves any favours. Rant over. Back to my bench.
-
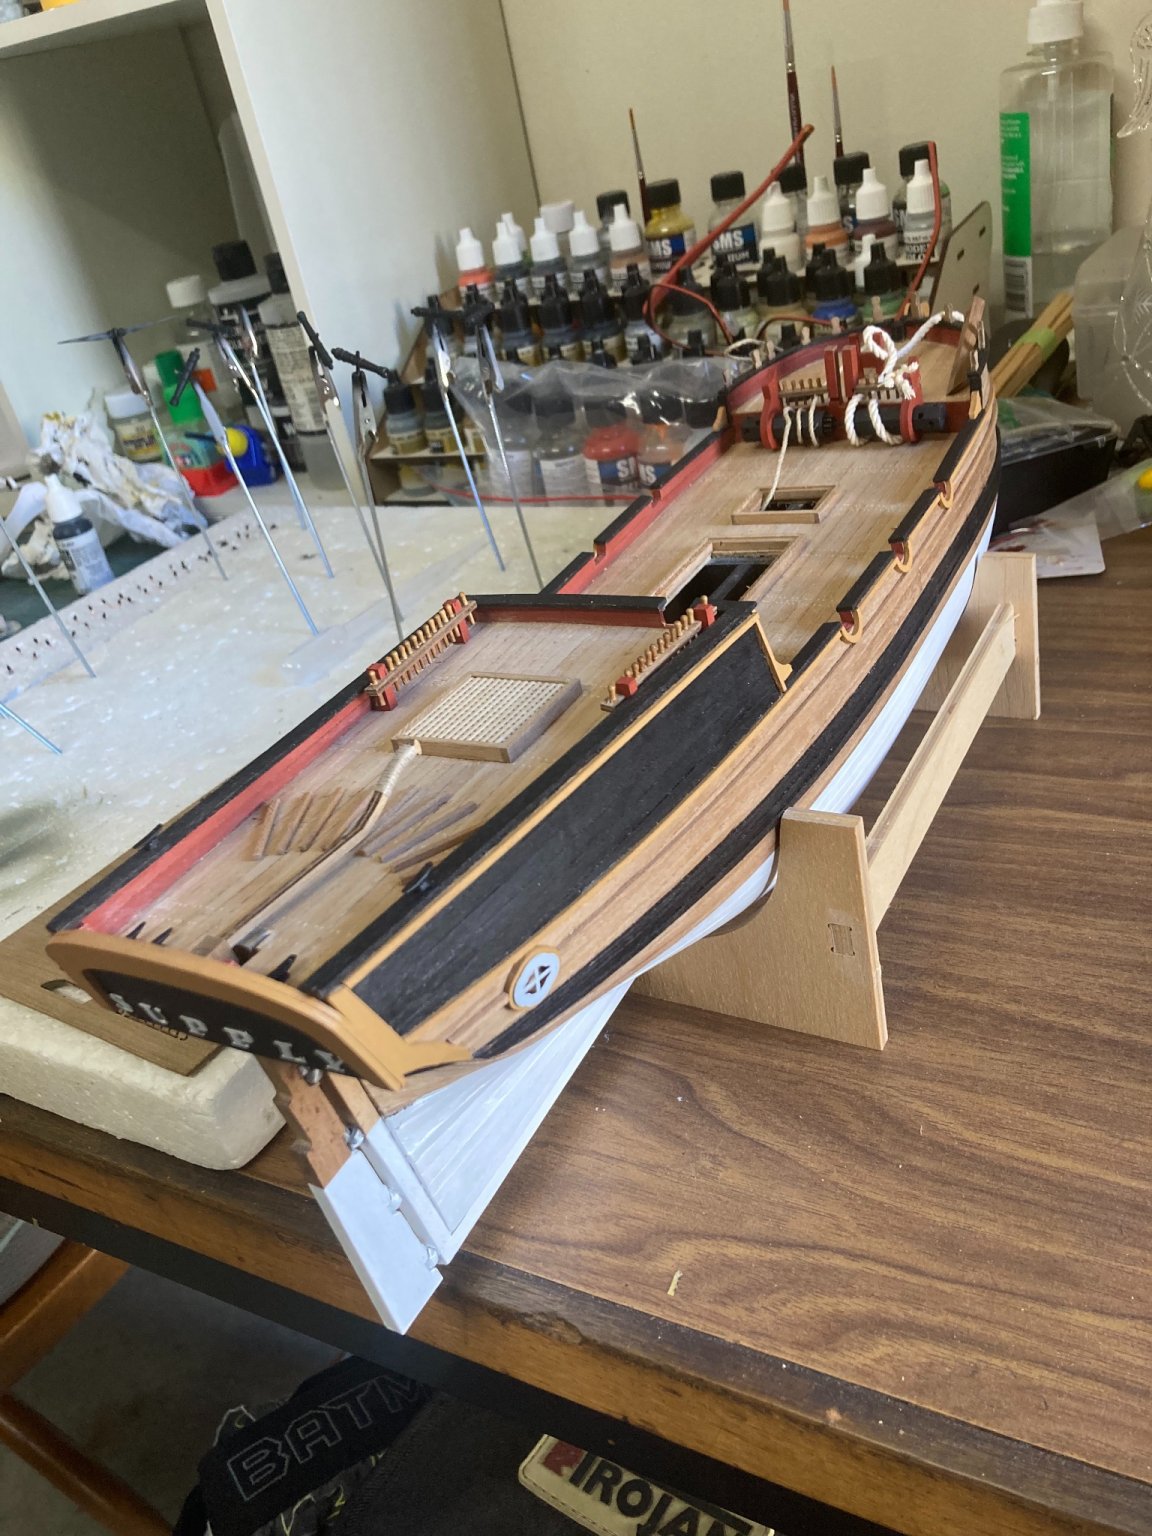
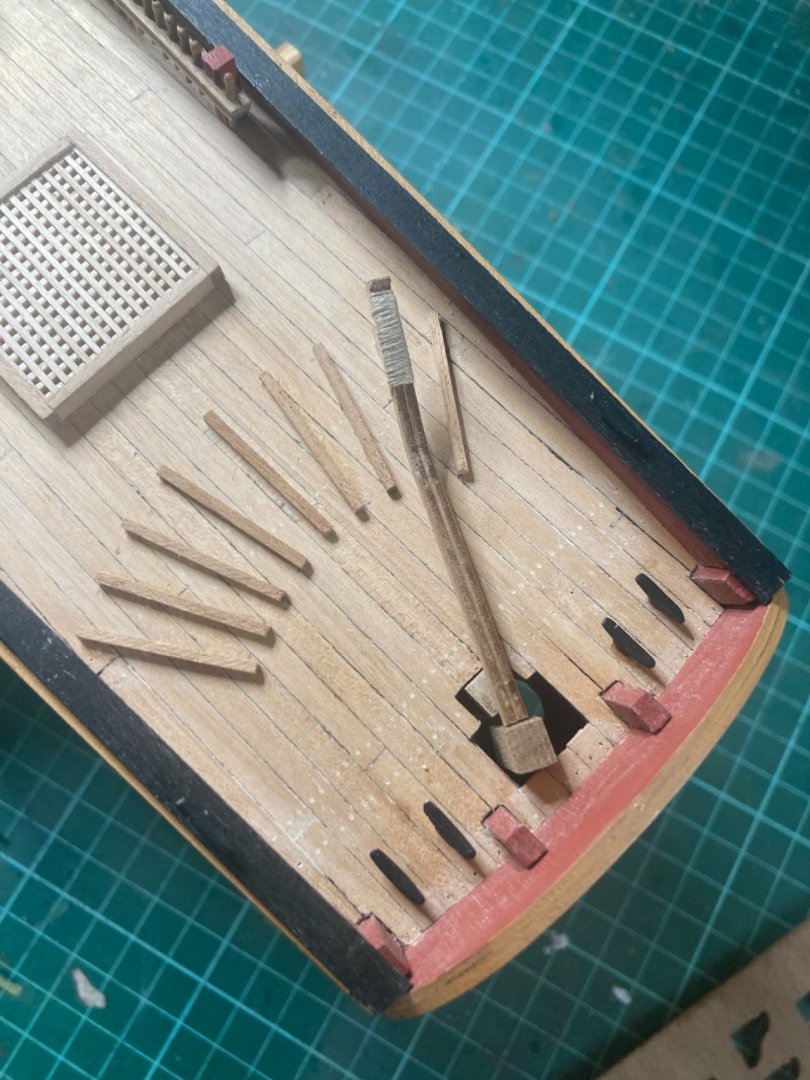
I’ve deviated from the plans and added anti-slip foot-rails under the tiller. It may not be accurate, but for the life of me, I can’t see how the helmsman could hold course in a slight rain with a slippery deck in hob-nail boots without them. All cut the same length, then placed one plank-width apart at the rear. The forward end simply aligns with the tiller angle when the rudder is swung left or right. I would have preferred a timber of half the height, but COVID lockdown and all… It’ll do, pig. It’ll do. the tiller itself is two pre-cut pieces, laminated together with PVA. I’ve added beige cotton as a handle. Fixed in place with a 0.6mm nickel-silver rod through the top of the rudder.
-
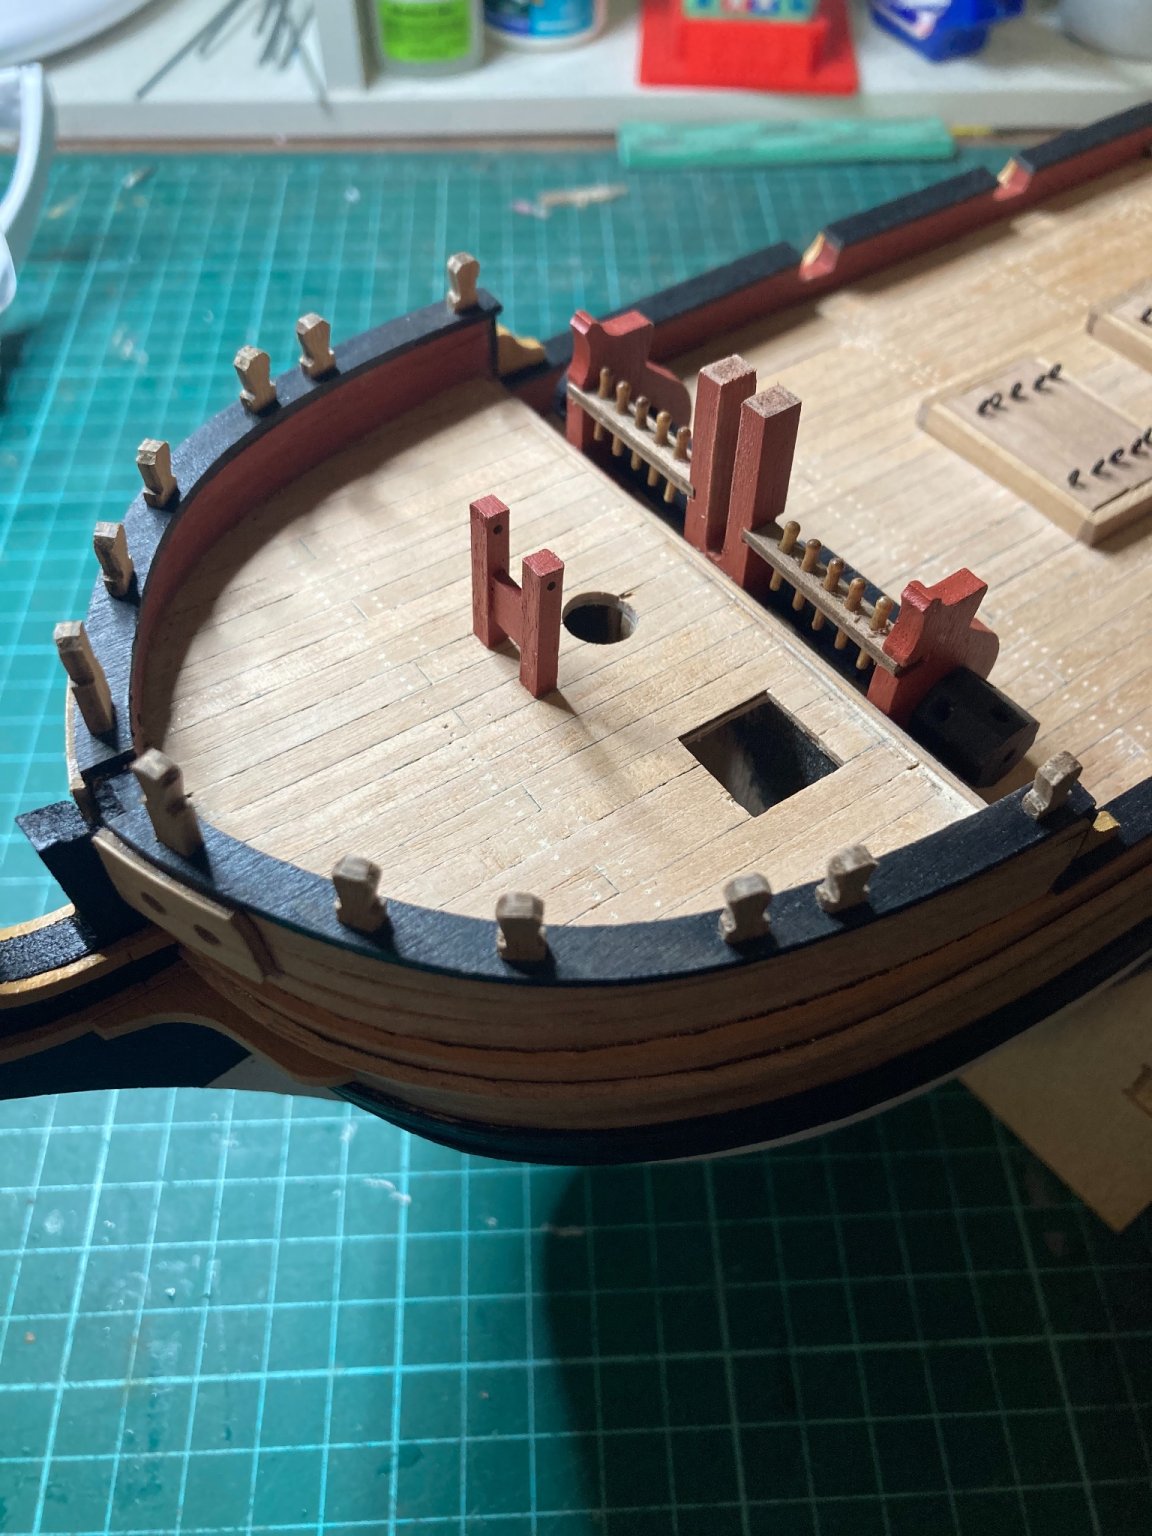
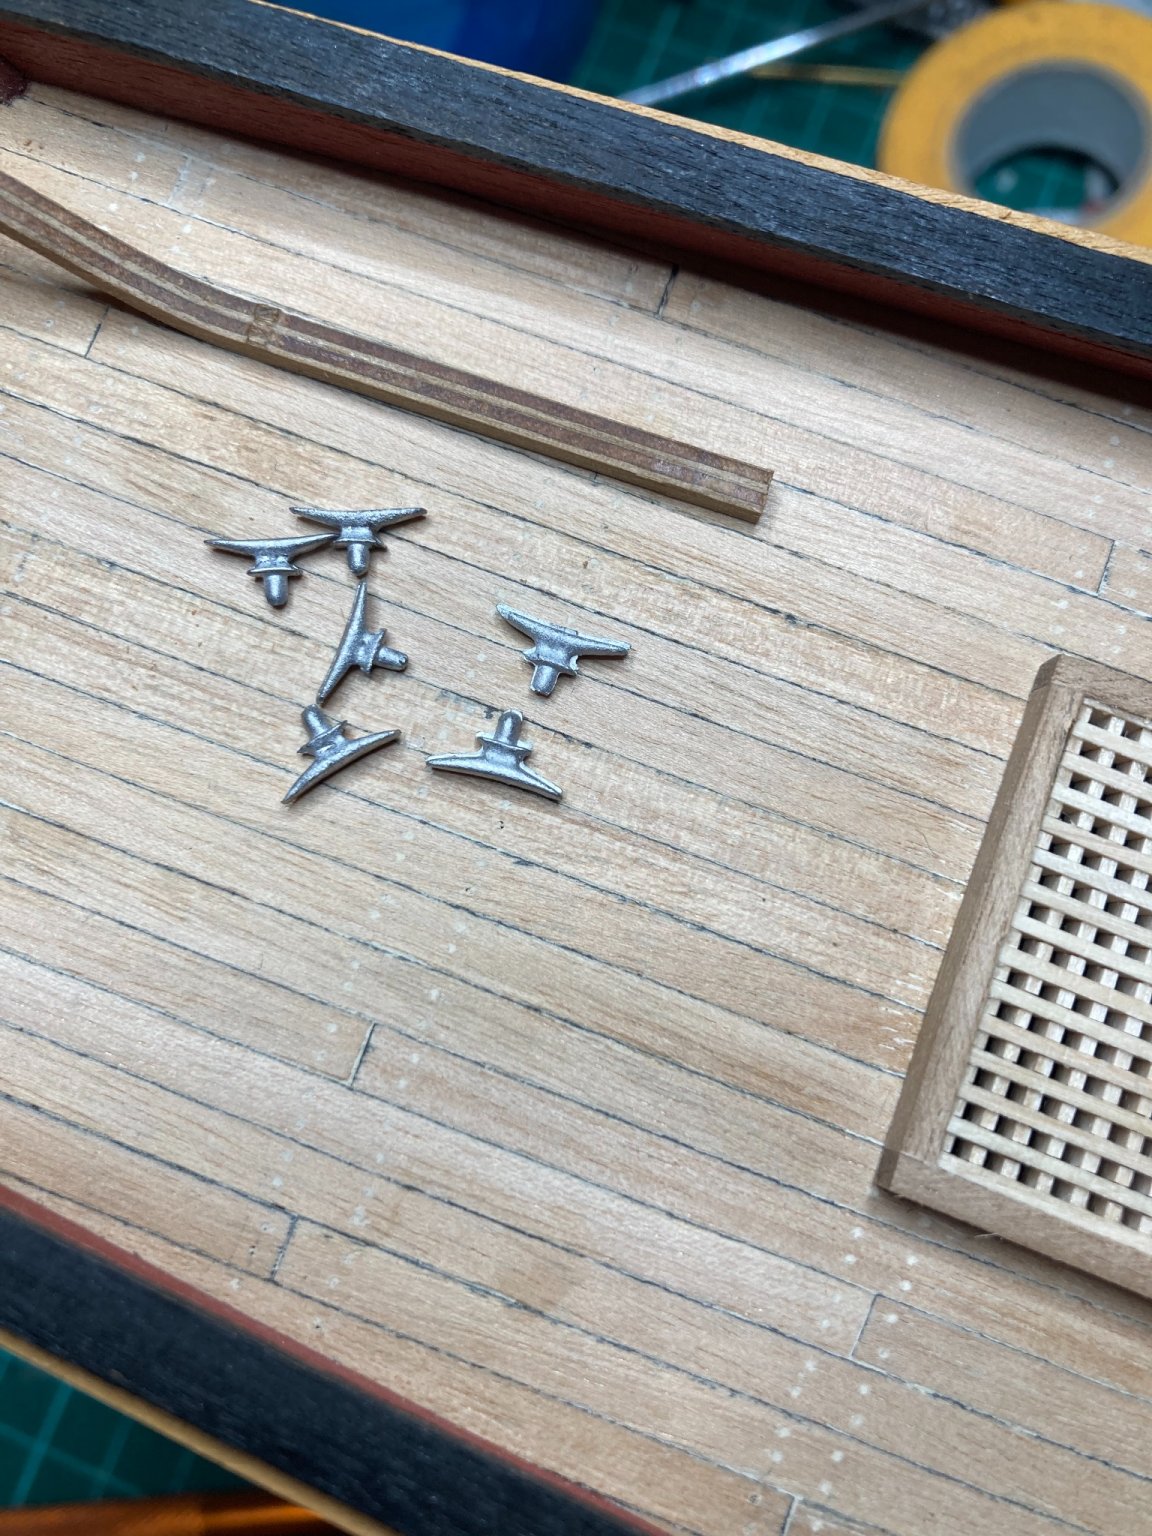
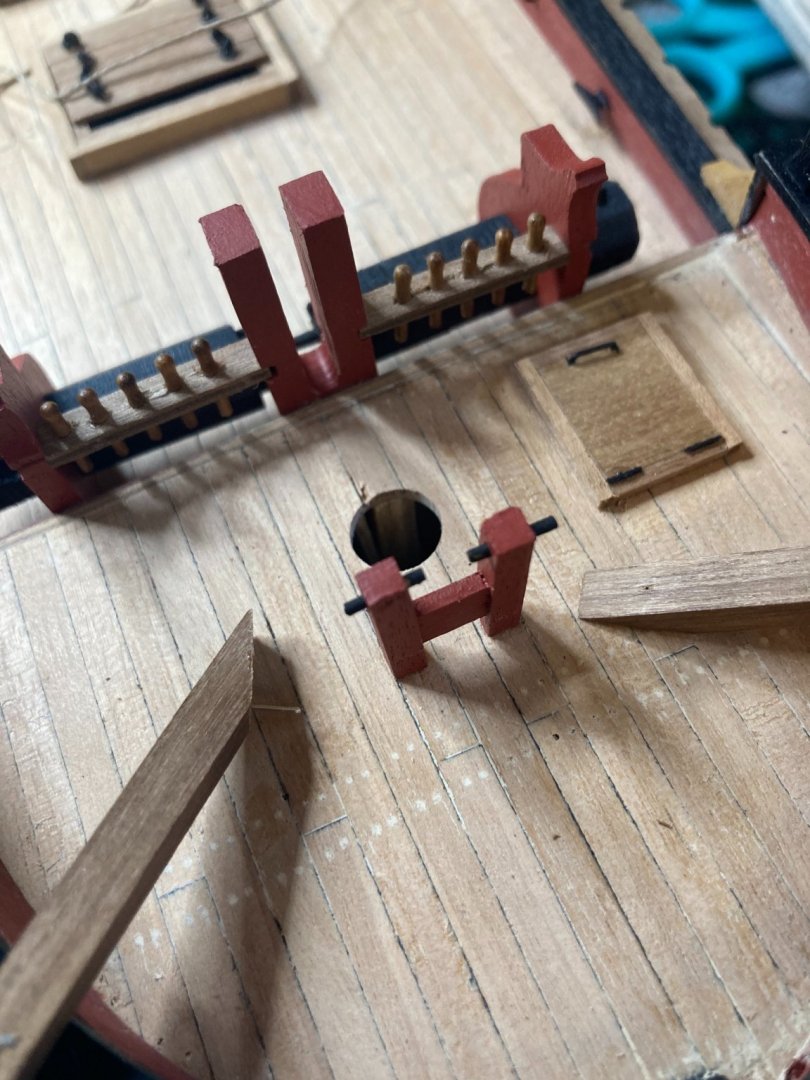
Poop-deck bollards fitted. A slight bit of fettling is all that was needed to fit them into the pre-cut recesses, edges chamfered and the bollards then PVA’d into place. I’ll paint them black to match the box-art.


-
Very nice indeed. What a simply beautiful model! Wonderful lines. Great detail you've provided for the rigging process. Cheers!
- 160 replies
-
- 1
-

-
- Alert
- vanguard models
- (and 1 more)
-
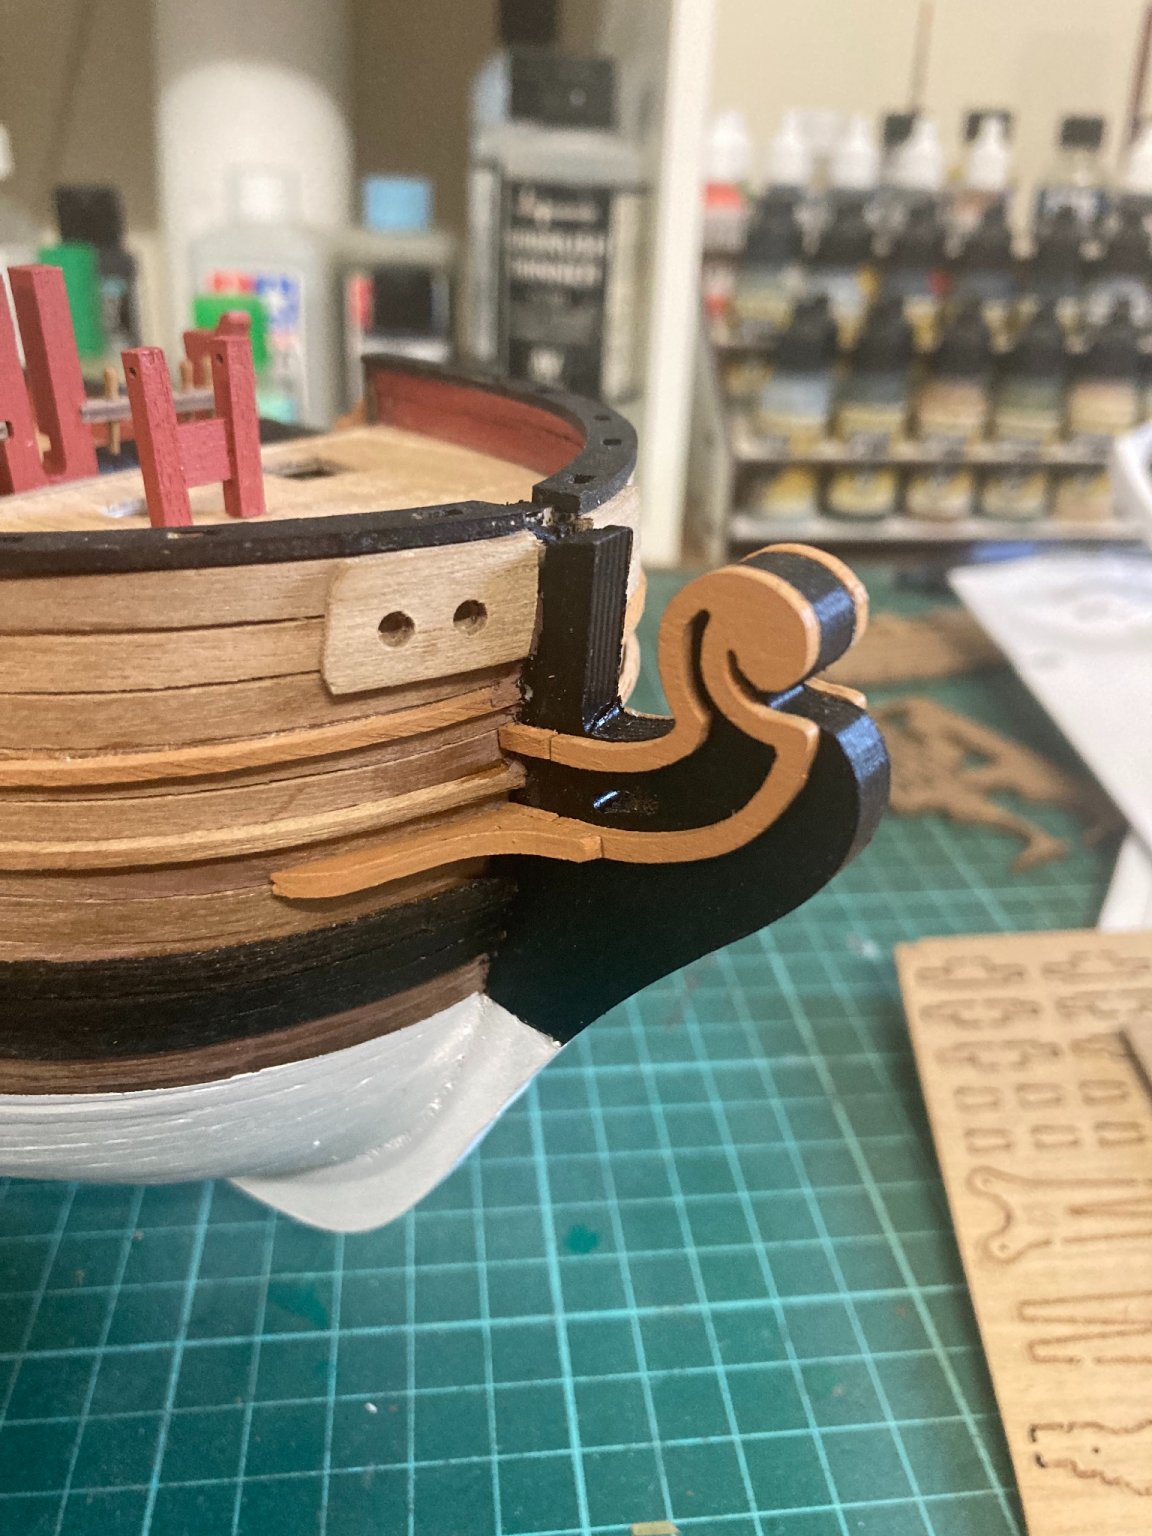
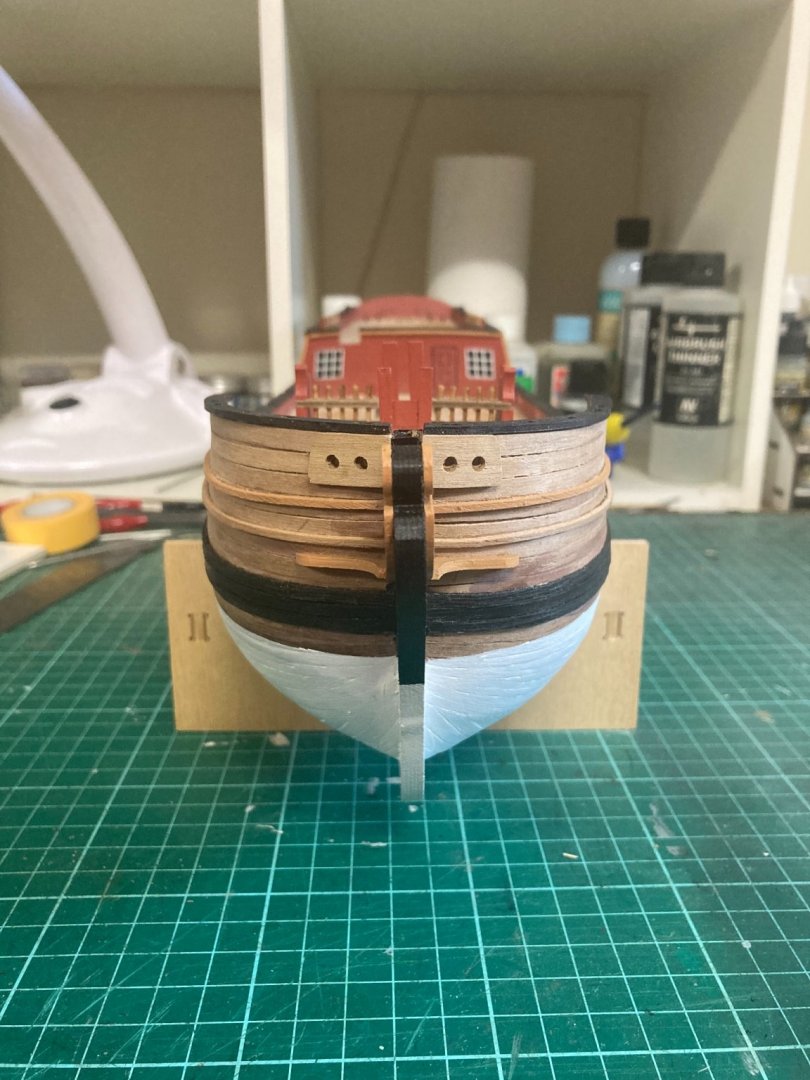
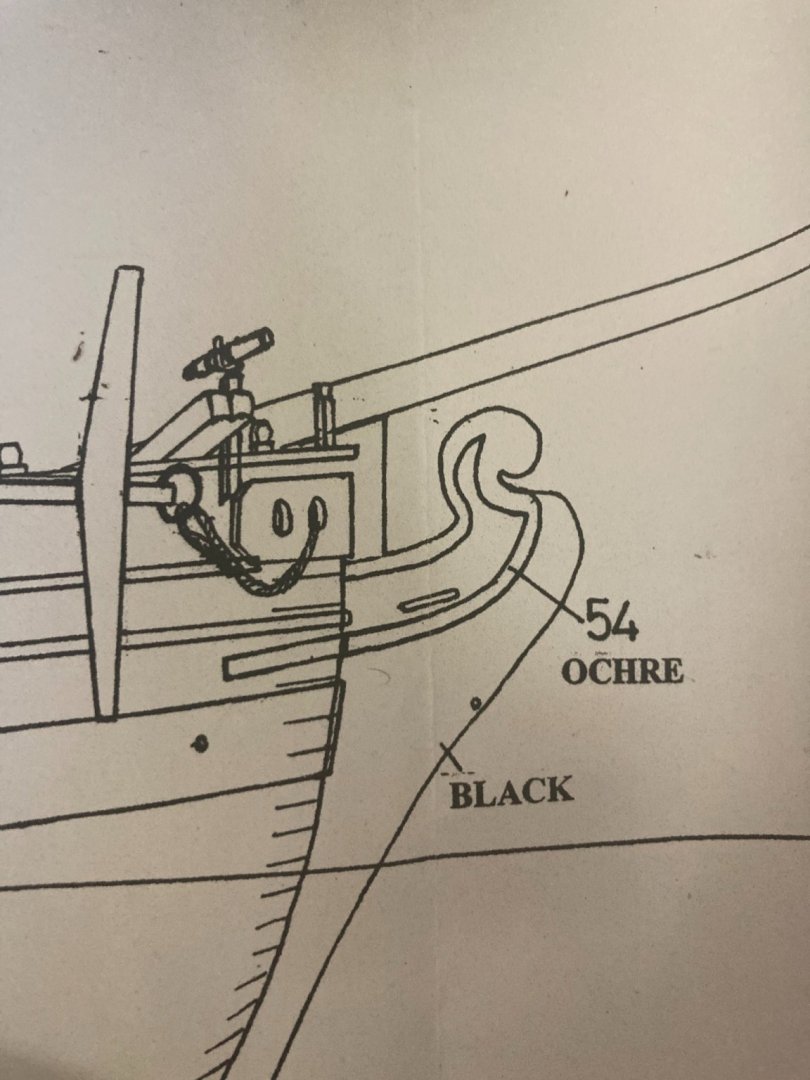
Bow rails and cheeks fitted. I extended the scroll-work to meet the bow with 3mm x 2mm walnut, sliced in half to 1.5mm x 2mm strips. Then I dry fitted the horizontal cheeks under the lower rail-strip to mark the bow contour, and filed to shape. The positioning matches the plan- The box-lid has the cheeks mounted on the main-wale. I couldn’t drop them that low if I wanted to.

-
The aft bitts, quarter-deck pin-rails and cast aft cleats were simple additions. the CNC-cut of this kit is amazing. Every day now, I’m delighted with the quality of this Caldercraft kit. The cast parts have flash, but they clean up easier than plastic kits. I’m really enjoying this build.

-
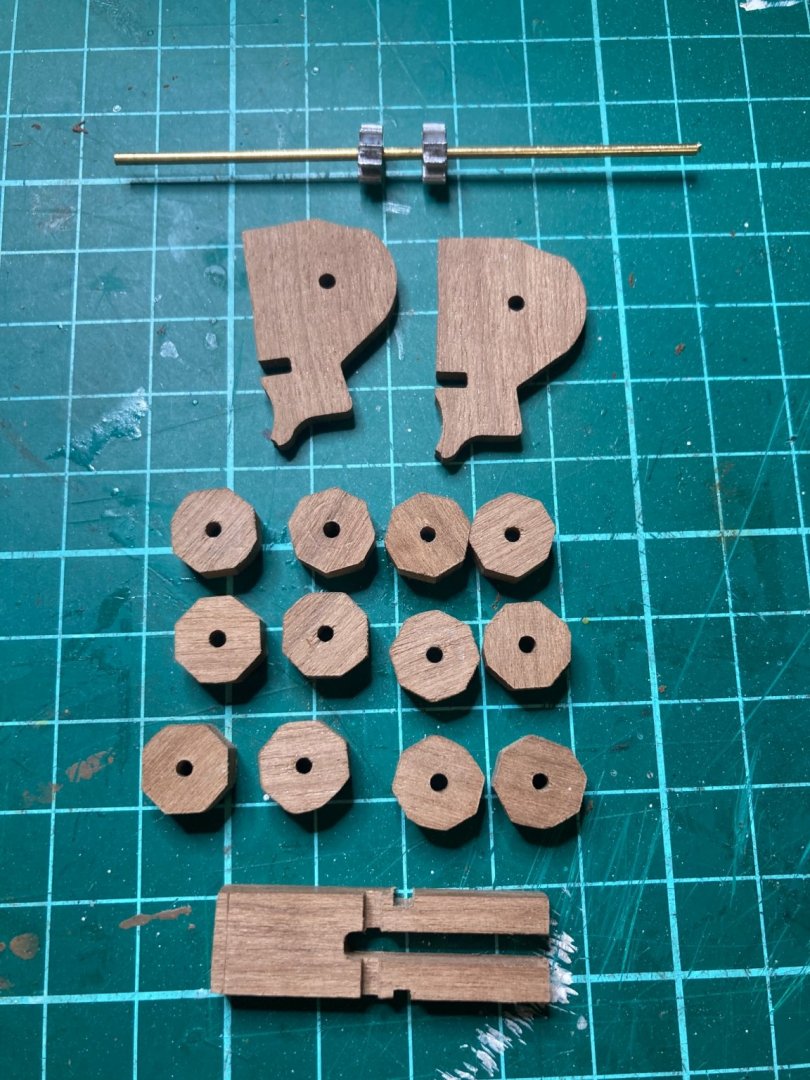
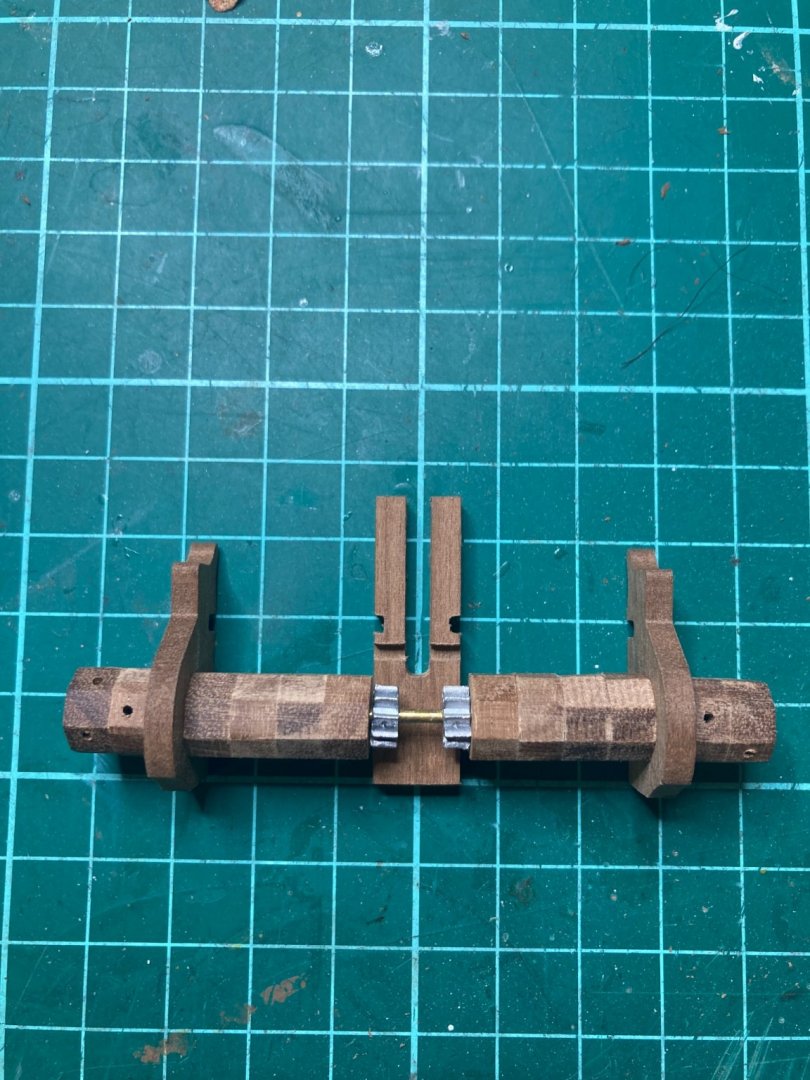
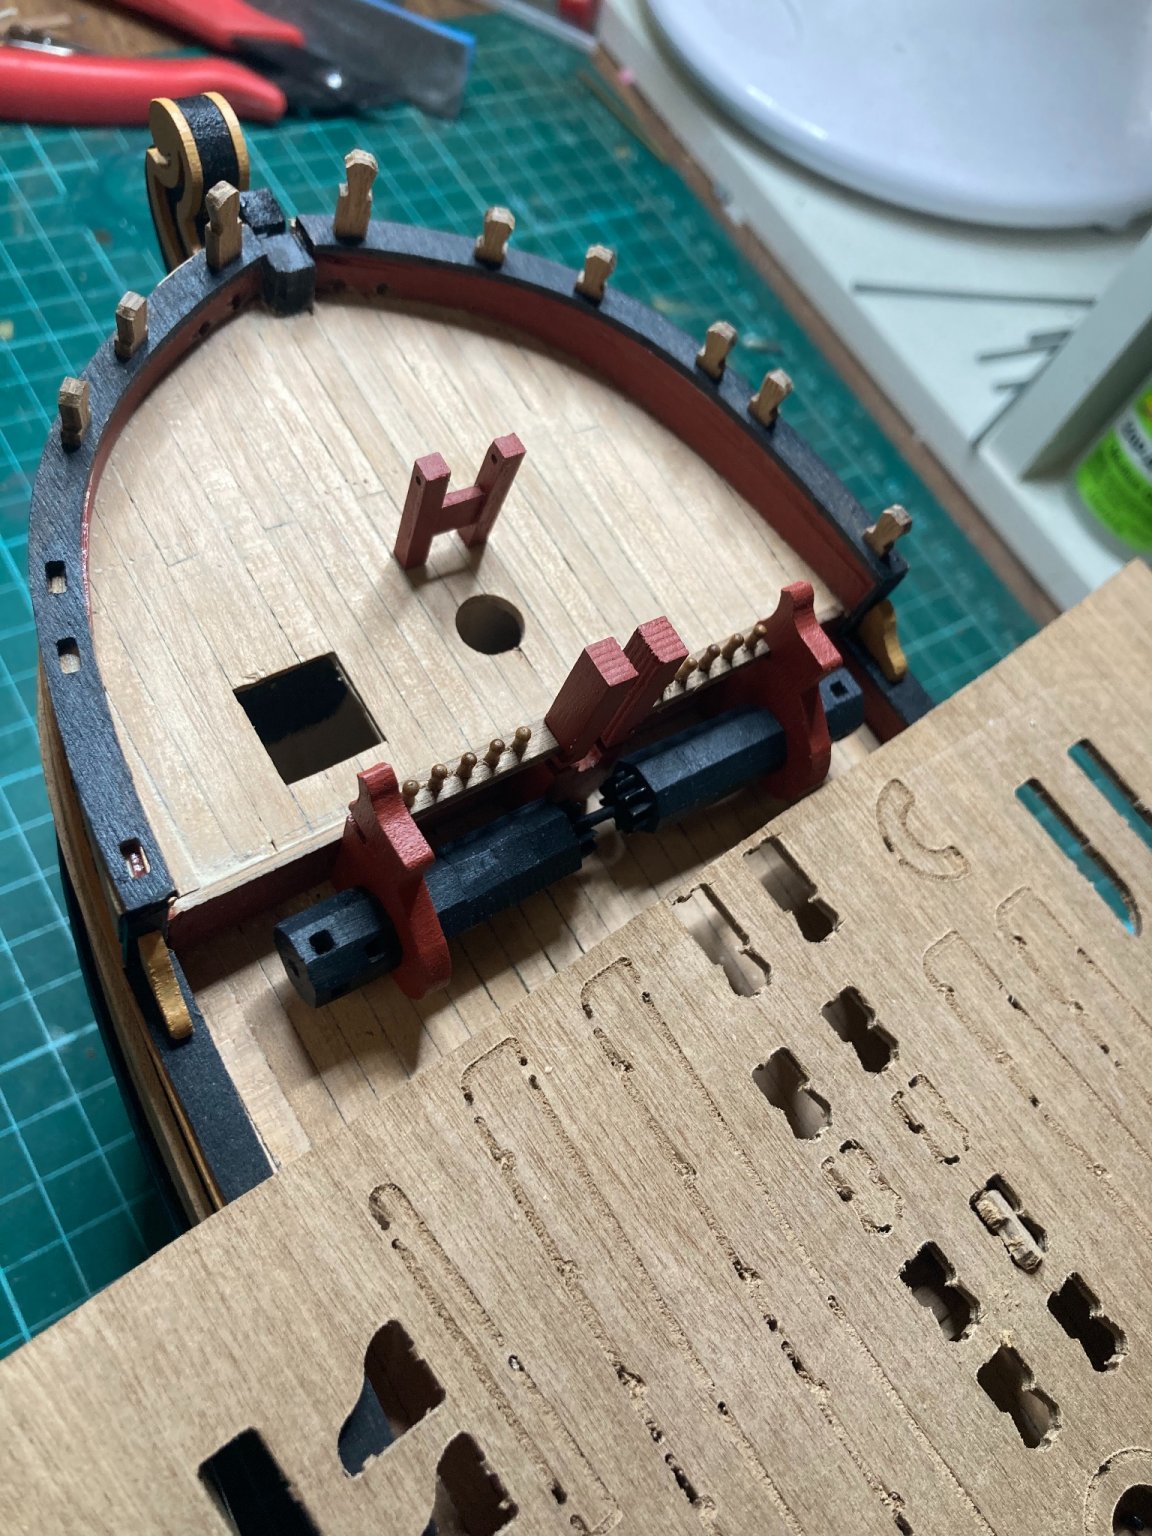
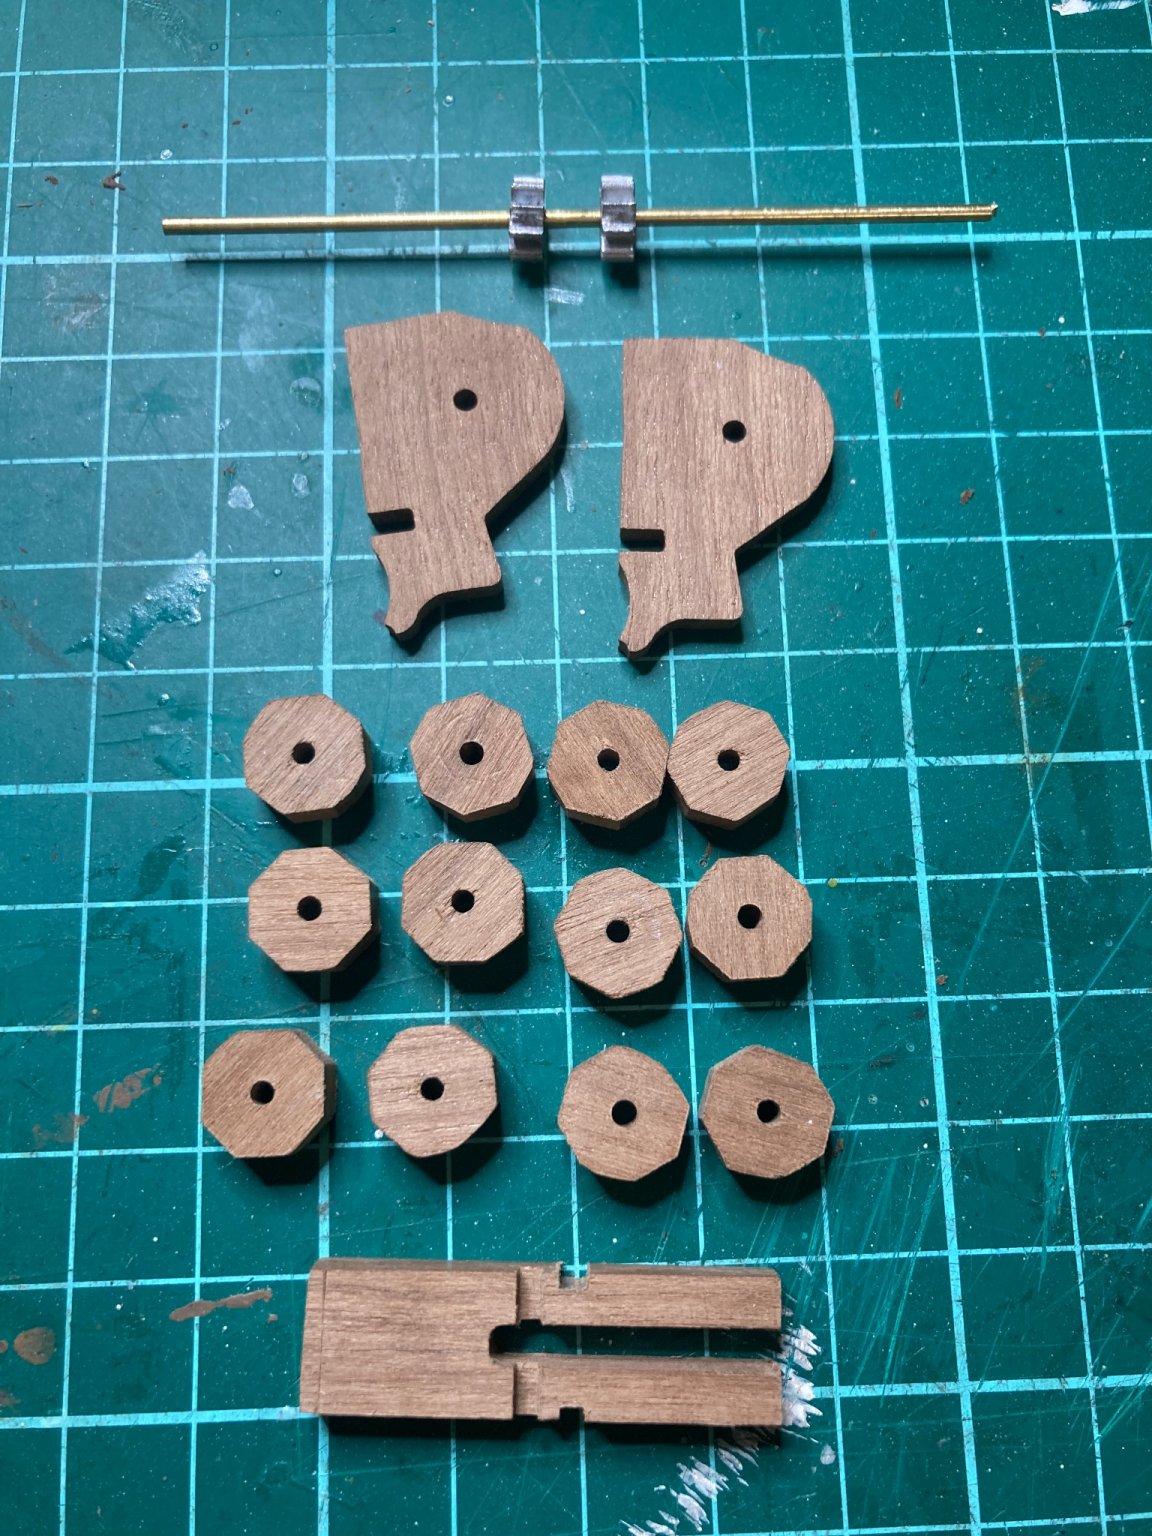
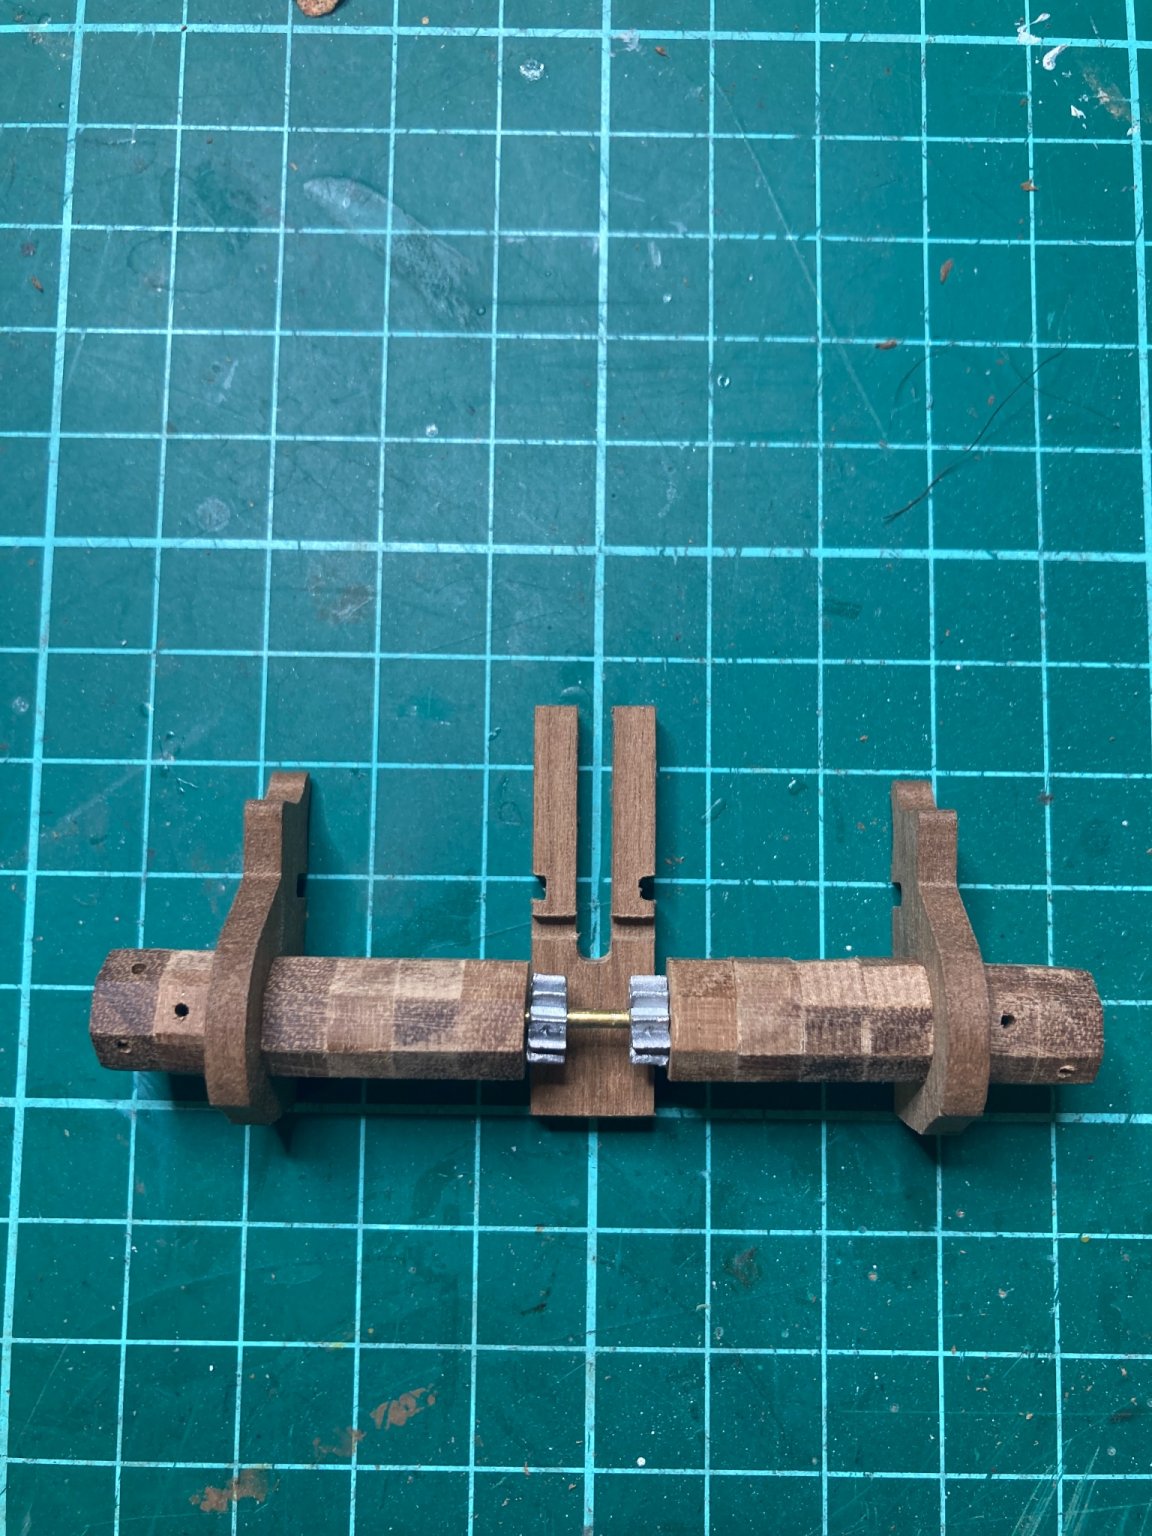
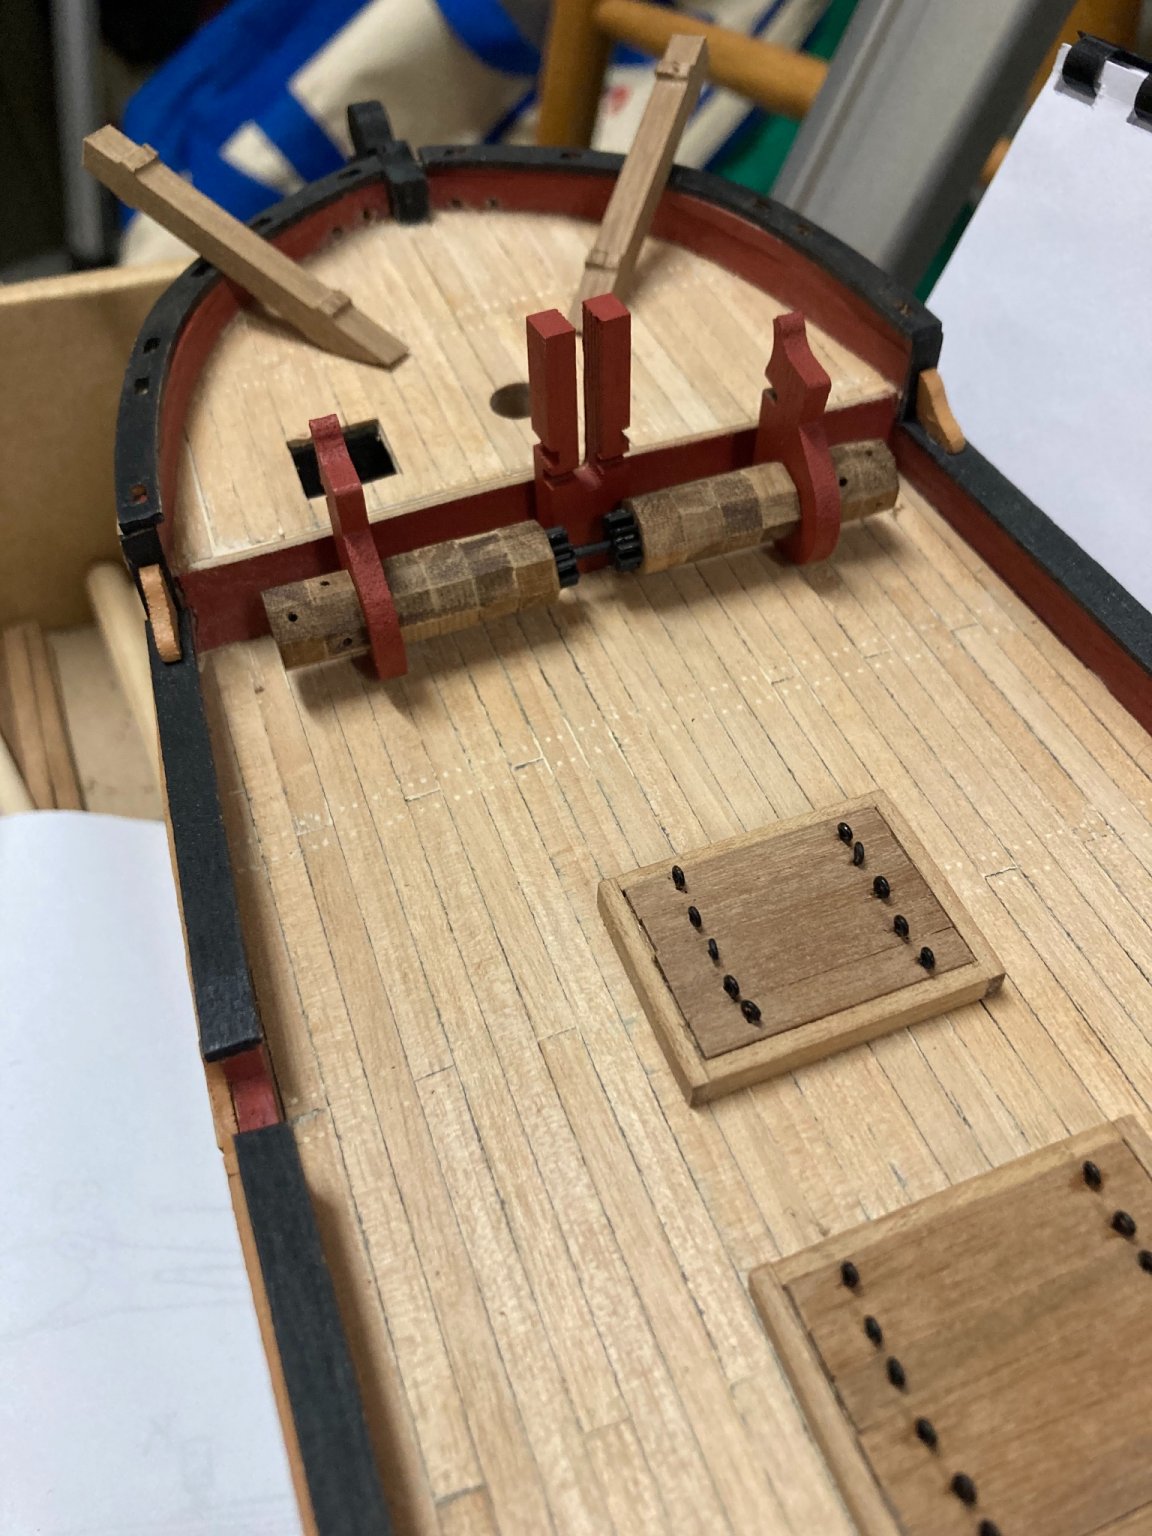
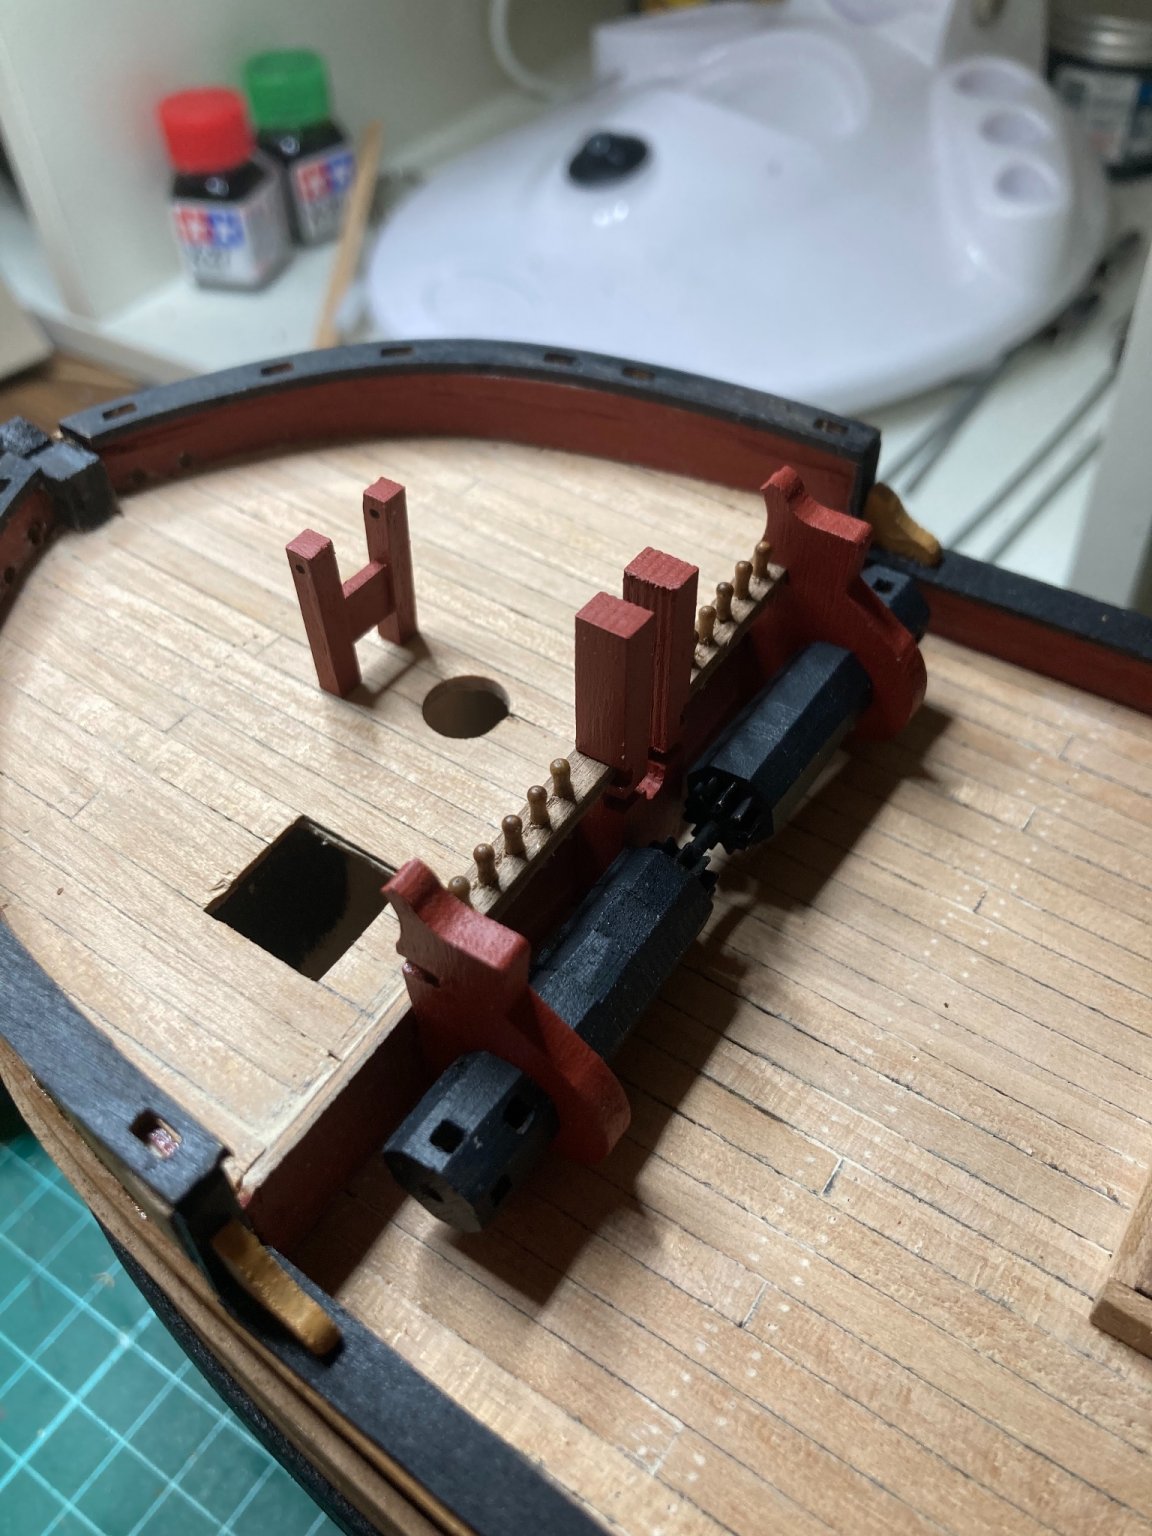
The windlass. Twelve octagons, on a brass shaft. I decided to not leave it walnut, because it wouldn’t have been made like that. It would probably be a log or fabricated from eight flat sides. But I didn’t want the drum painted red either. So I settled for grey: Black would be too black, I guess. I painted it RLM65 black-grey. It was too light for my taste. For the second coat, I made the drum a 50:50 mix of RLM65 and black and the iron cogs black. It turned out ok. I’ll fit the anchor rope and pawls later. I’ll possibly fit a bell later, once COVID lockdown is lifted and I can hold stuff in my actual hands instead of looking at a computer screen.