Jobbie
-
Posts
220 -
Joined
-
Last visited
Content Type
Profiles
Forums
Gallery
Events
Everything posted by Jobbie
-
Welcome, Andrew. Facebook is good, but not the greatest place for build logs, etc. This rabbit hole is sooo much deeper. I love it here.
-
 Better?
-
Hell yeah! Been there already.
-
This is all good stuff. I'll tell my daughter we're off to Eckersley's art supplies tomorrow. Who knows...The Minister of Finance may be coerced into going to Frontline Hobbies if I don't give them all the details prior to setting out. Haha!
-
Ok. I don’t like the look of the plank that’s 3 left-of-centre anyway.
-
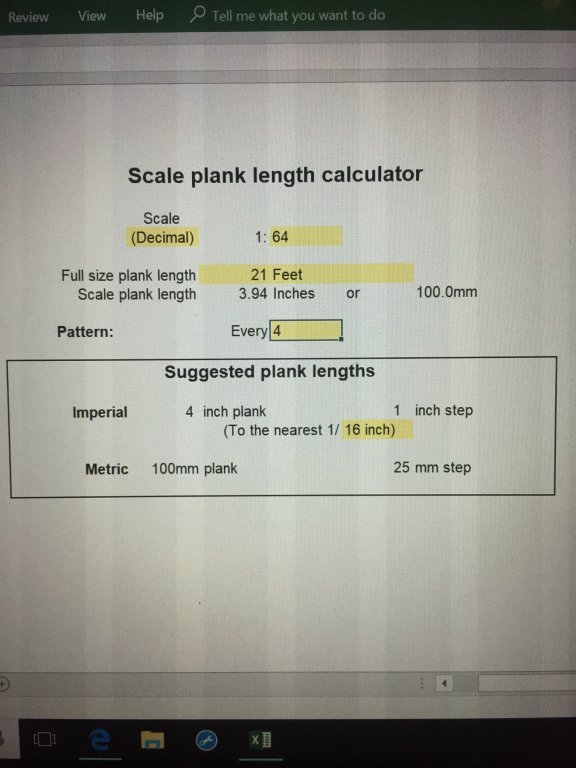
It’s just a quick representation of the required pattern for feeble-minded noobs like me. I found it useful for scale conversion.
-
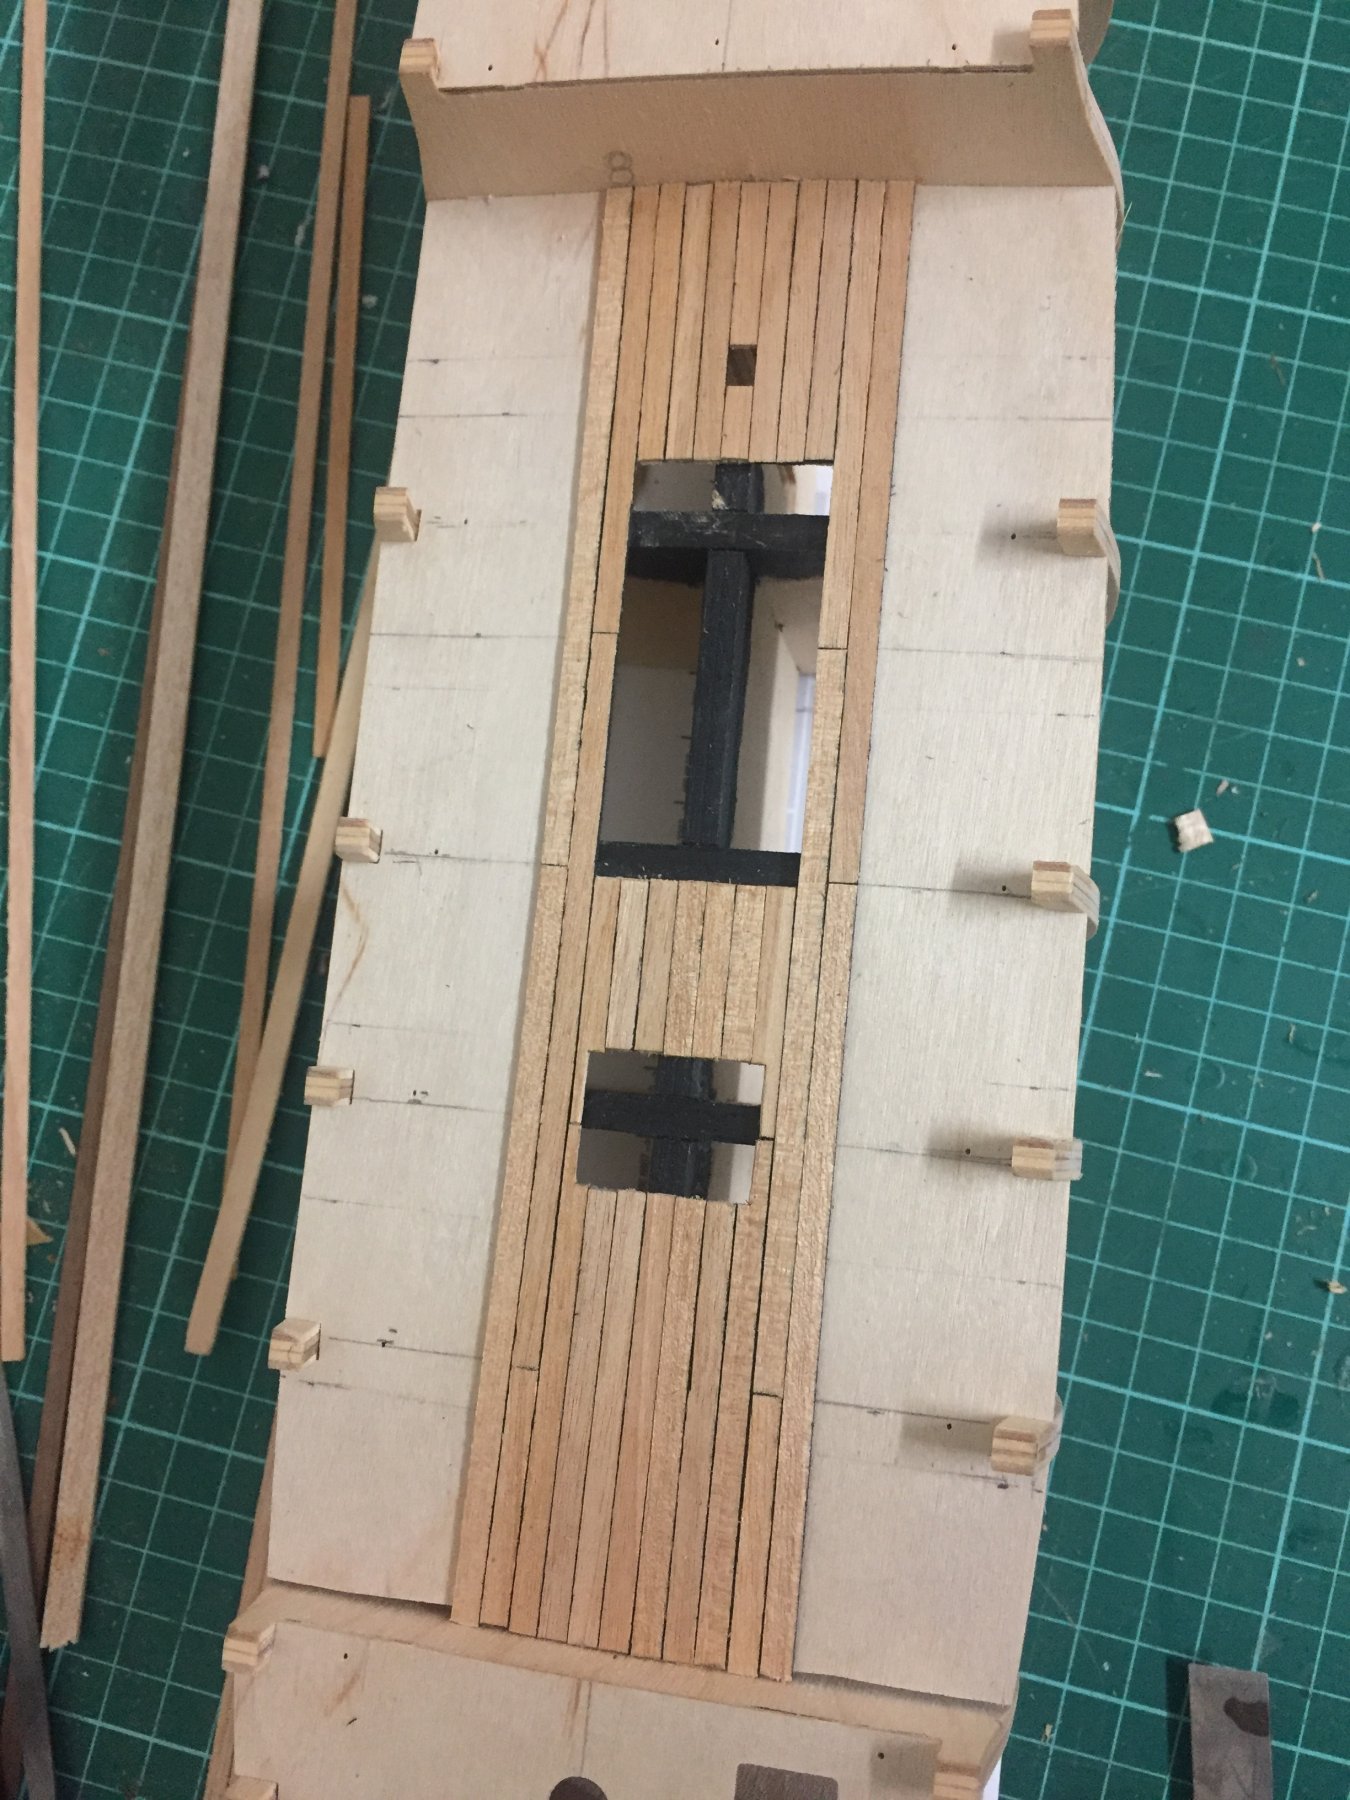
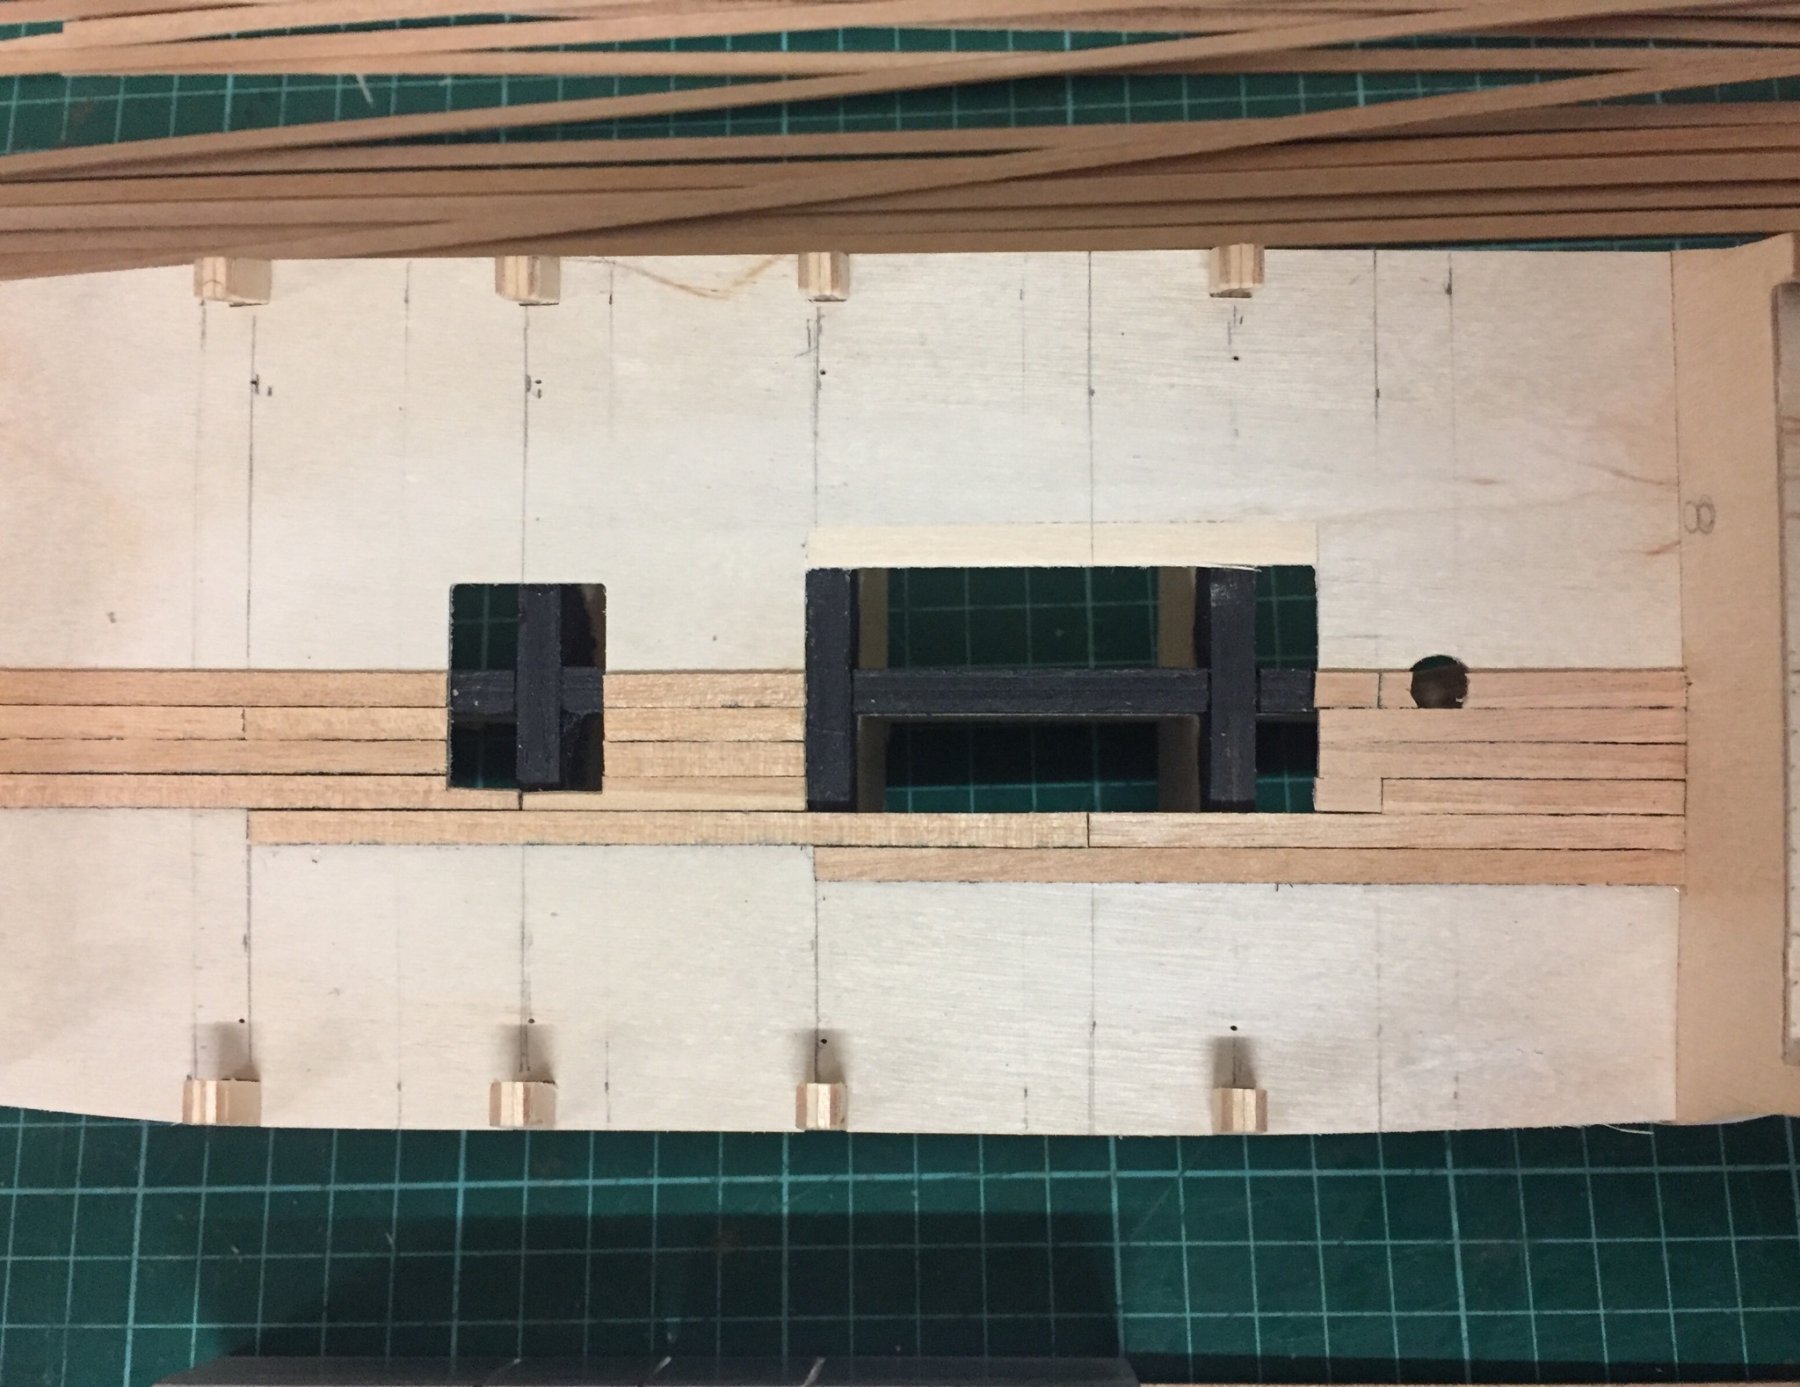
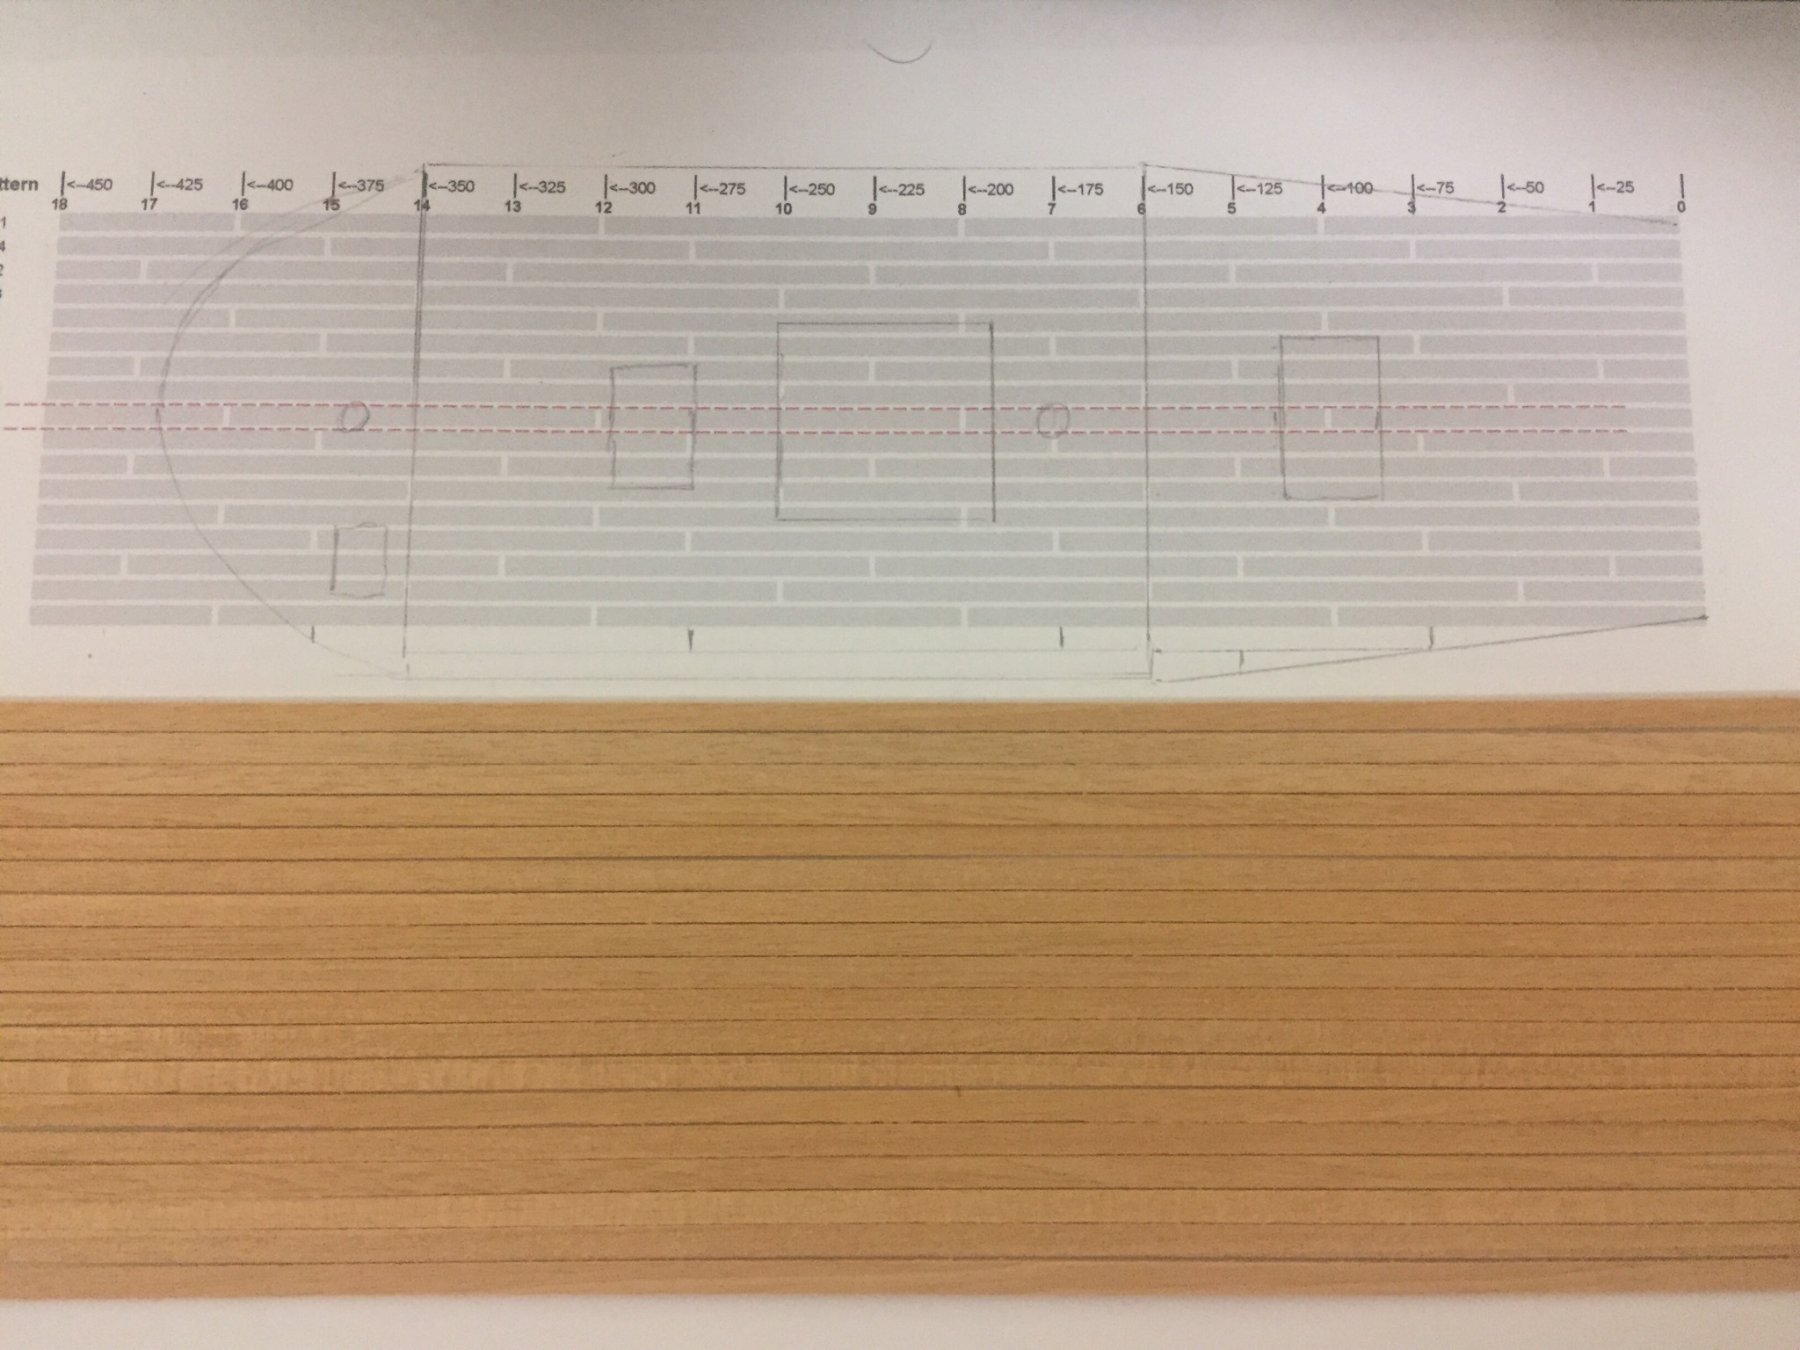
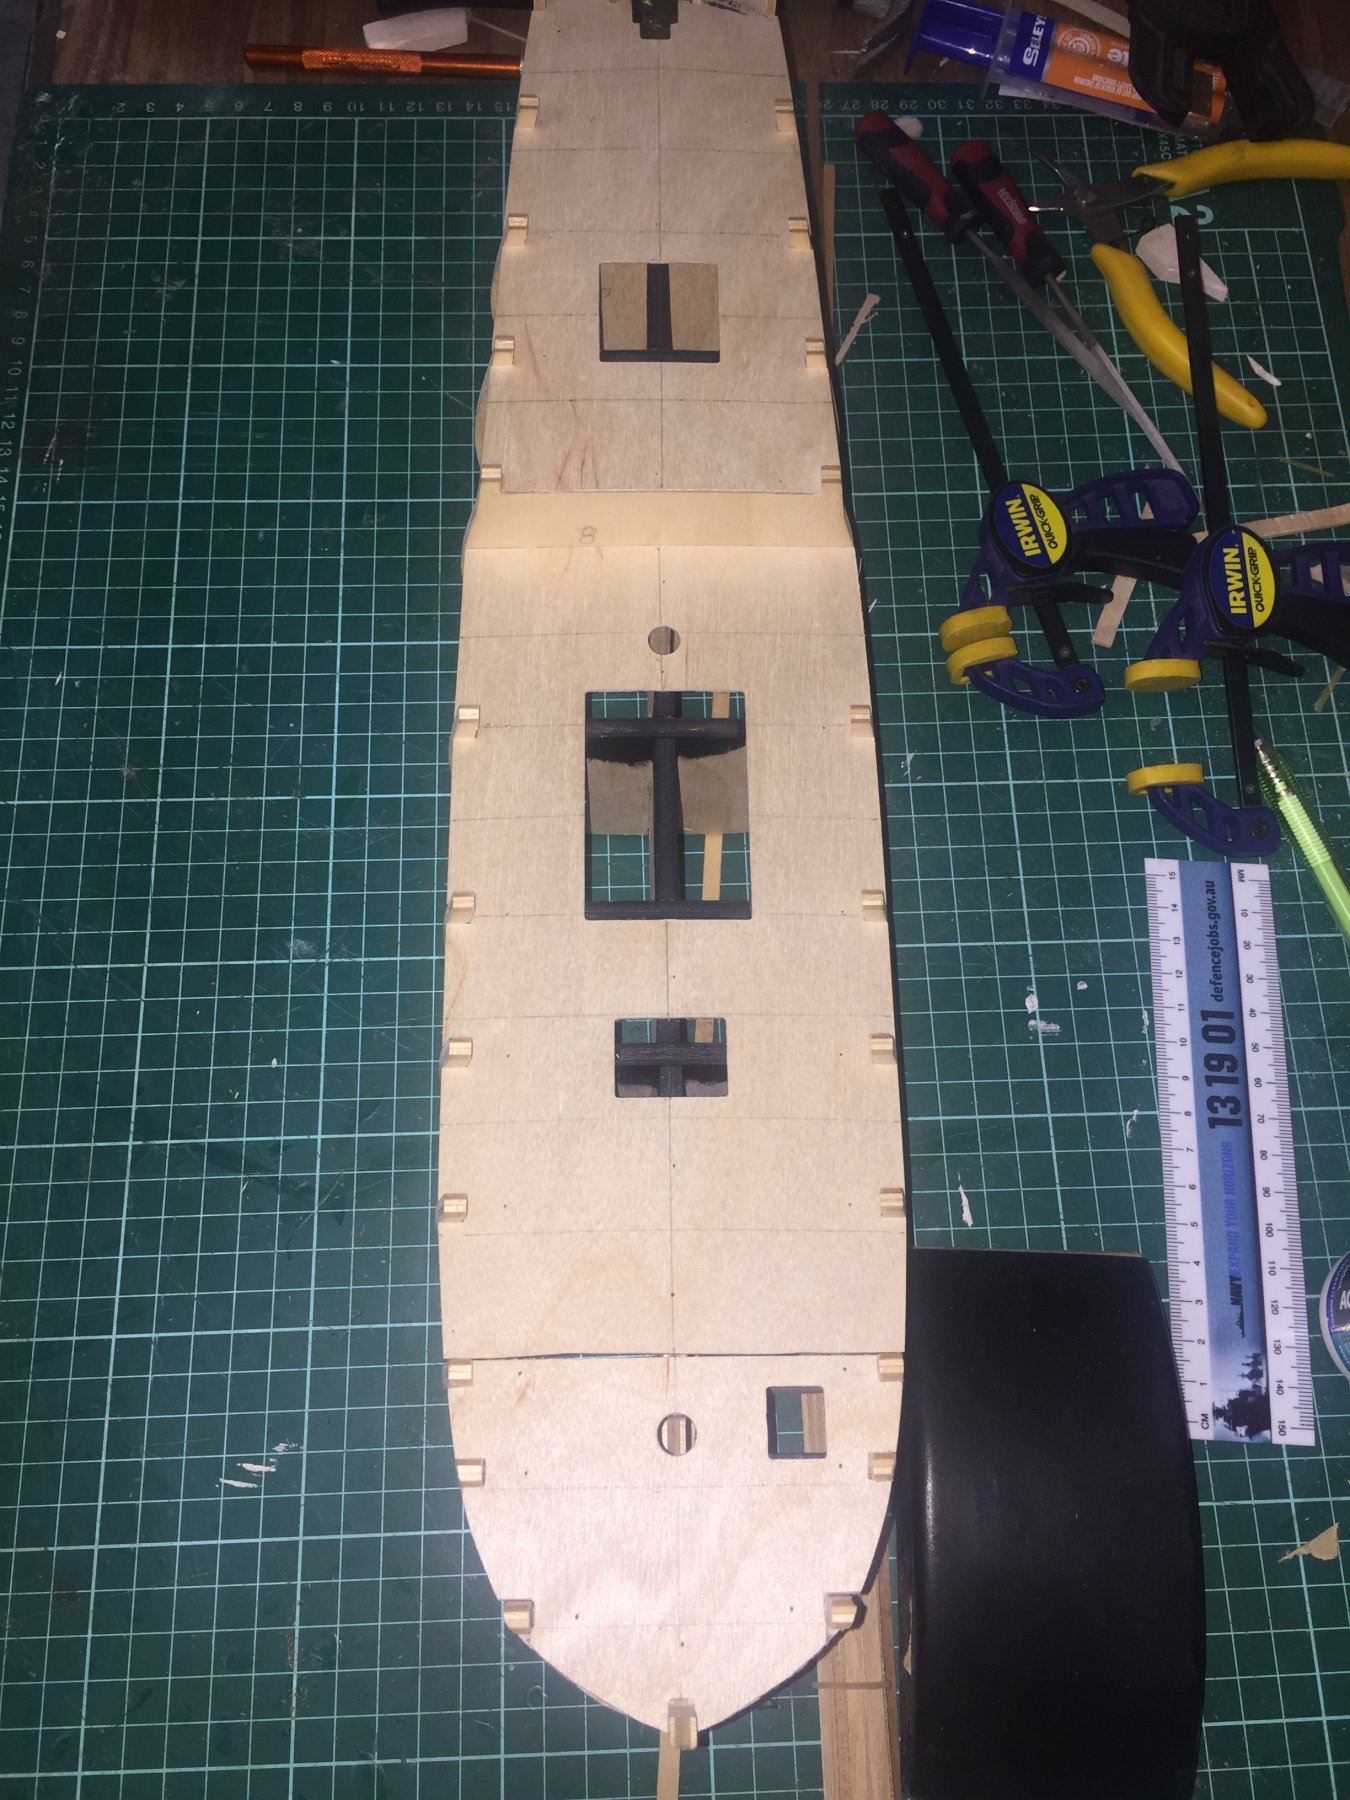
Well, I’ve gone and changed my mind again. Many more to come. (I’m glad you don’t have to watch how long it takes me to choose the next brand of tea at the shops, unlike my long-suffering wife.) I’ll plank the deck in a 3-shift pattern rather than a 4-shift, as per Danny’s advice. As a result, I’ve erased the 25mm butt-lines and redrawn 33.3mm butt-lines on the false deck. (4-shift = 100mm plank in quarter length, 3-shift = 100mm plank in one-third lengths.) I’ve also decided that I won’t fit continuous planking between hatches, etc. No logic involved, just a personal preference after looking at lots of other builds on this wonderful site. I’ve reduced the width of the main hatch by fitting a planking strip each side. I’m shortening the quarterdeck hole size by fitting a support beam at the rear to fit two planks lengthways. I’m using a sharpie permanant marker on one side and front face of each deck plank to act as caulking. I can’t find my regular chisel-point pen, so I used a normal bullet-point pen. I don’t like it, so I’ll buy a new one tomorrow. All of this makes for a rather messy deck at the moment. But I’m on my way! It’ll come good, don’t you worry about that.

-
Ideally, the lower sails would be taken in during an engagement to reduce the chance of them catching fire and being holed by canon fire. Grapeshot and bar would be used to make a mess of the rigging and sweep the deck of fighting men. A brutal, ugly affair. The direction and strength of the wind would play a huge part, with one ship trying as much as possible to deny the other any advantage.
-
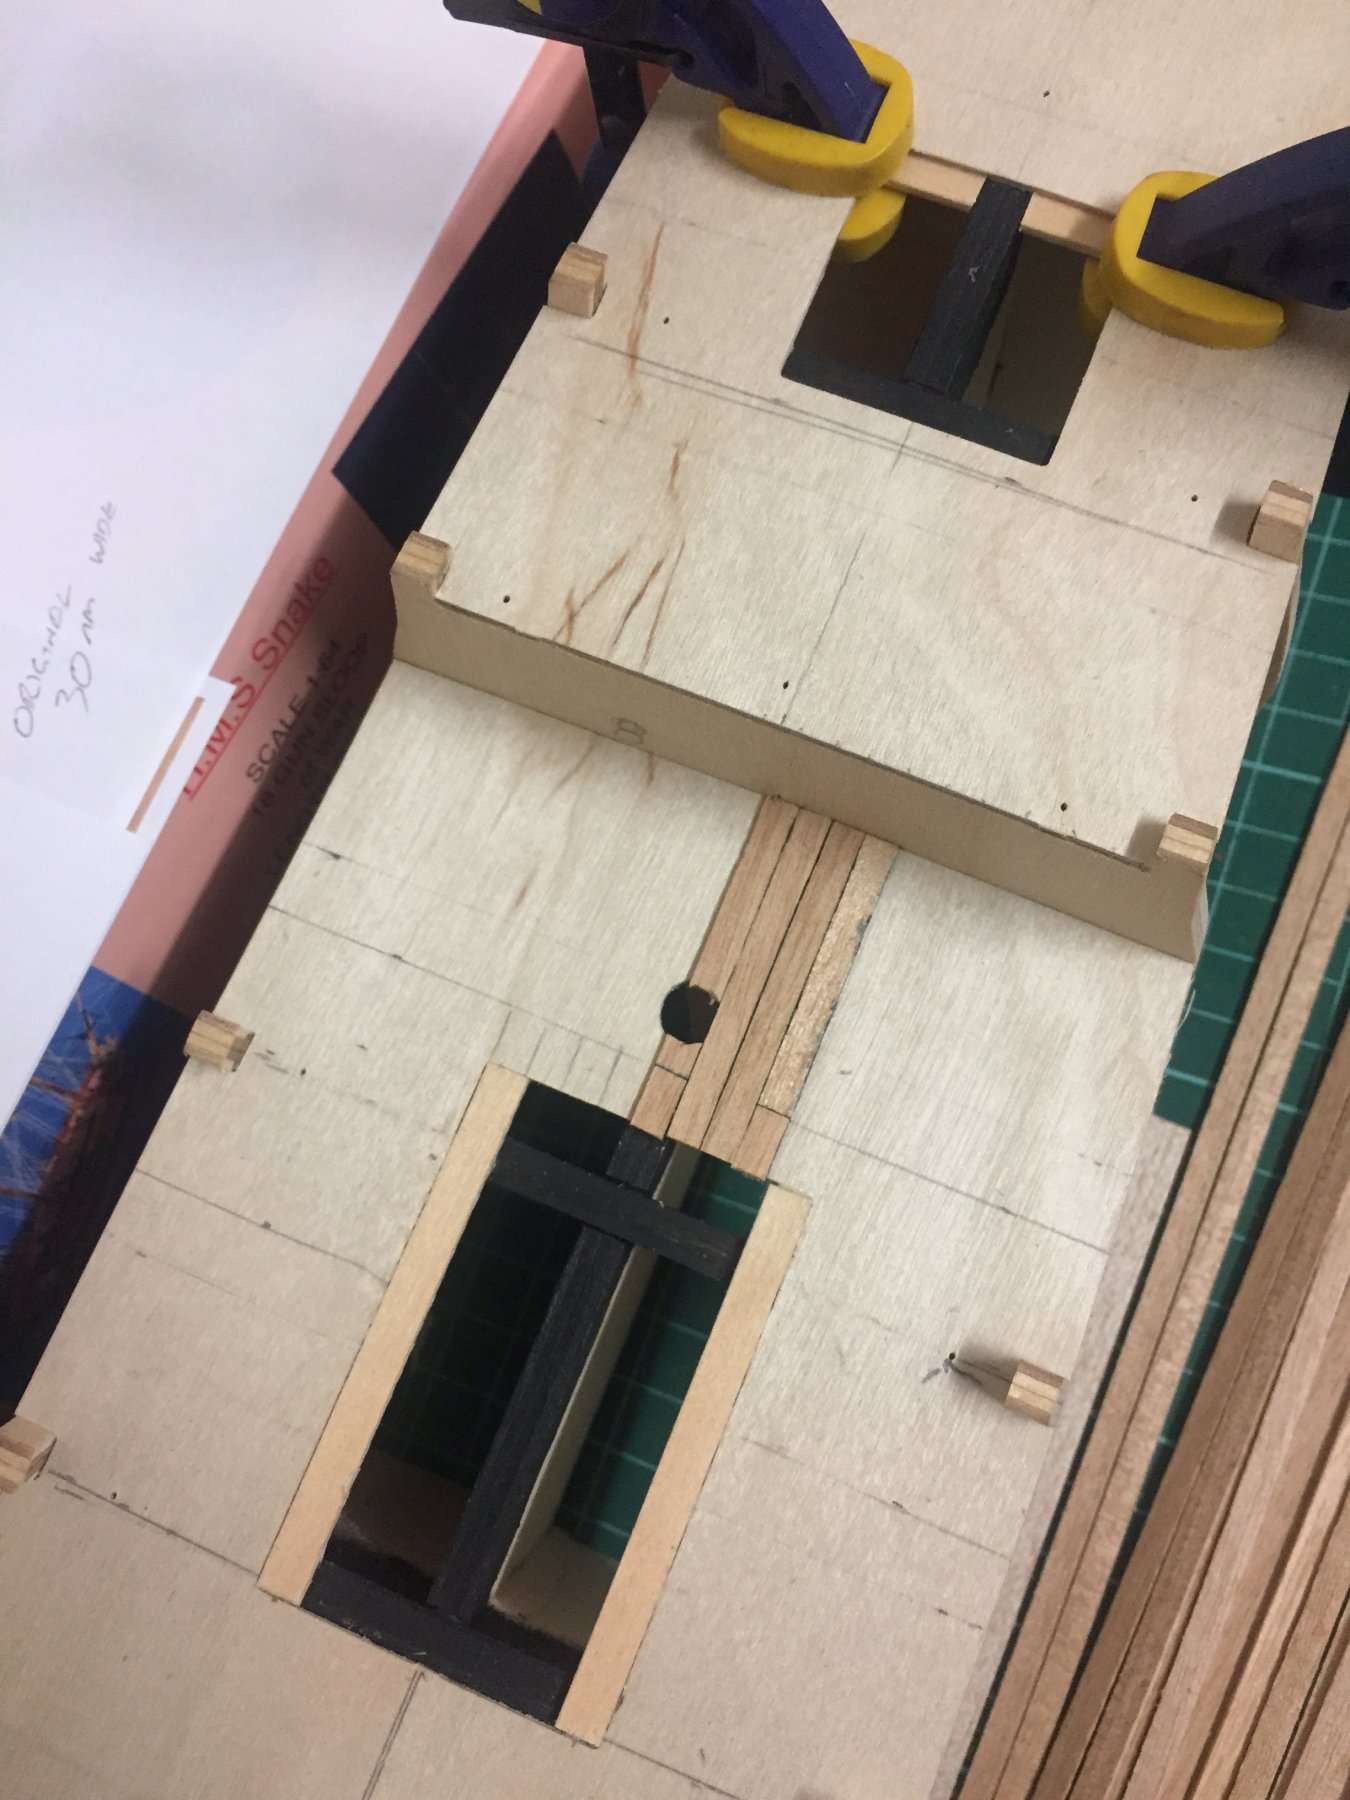
Brilliant feedback, gentlemen. Just what I was after. I was thinking about the hatches, gratings and intervals last night, and I totally agree with Thunder. I’ll make the planks that are less than 21 scale feet continuous. My intention was to build this kit totally out-of-box, but there are features that I believe to be incorrect, so I’ll try to improve on them. I believe the forward hatch hatch on the main deck is a companionway, so I’ll not cap it with four beams. I think it’s reasonable that beams as shown were utilised in foul weather, but they would be a bugger to remove and install any time a crewman had to go below. Instead, I’ll place a single hinged top-plate with an “iron” handle. Ideally, I would have preferred to install a false deck with a stairway, but I’ll just not bother. I’ll construct the main hatch as advertised, but I’ll reduce its width by one plank each side so there’s less interference with the canon’s train-tackle. I believe it’s essential that the main hatch remains as large as practicable because it is, as the name suggests, a supply vessel. I also believe it’s improbable that there is a grating on the quarterdeck. I’ll probably make a skylight, so I might reduce the size of the hole both in length and width. But I’ll ponder that a bit more over the next few days.
-
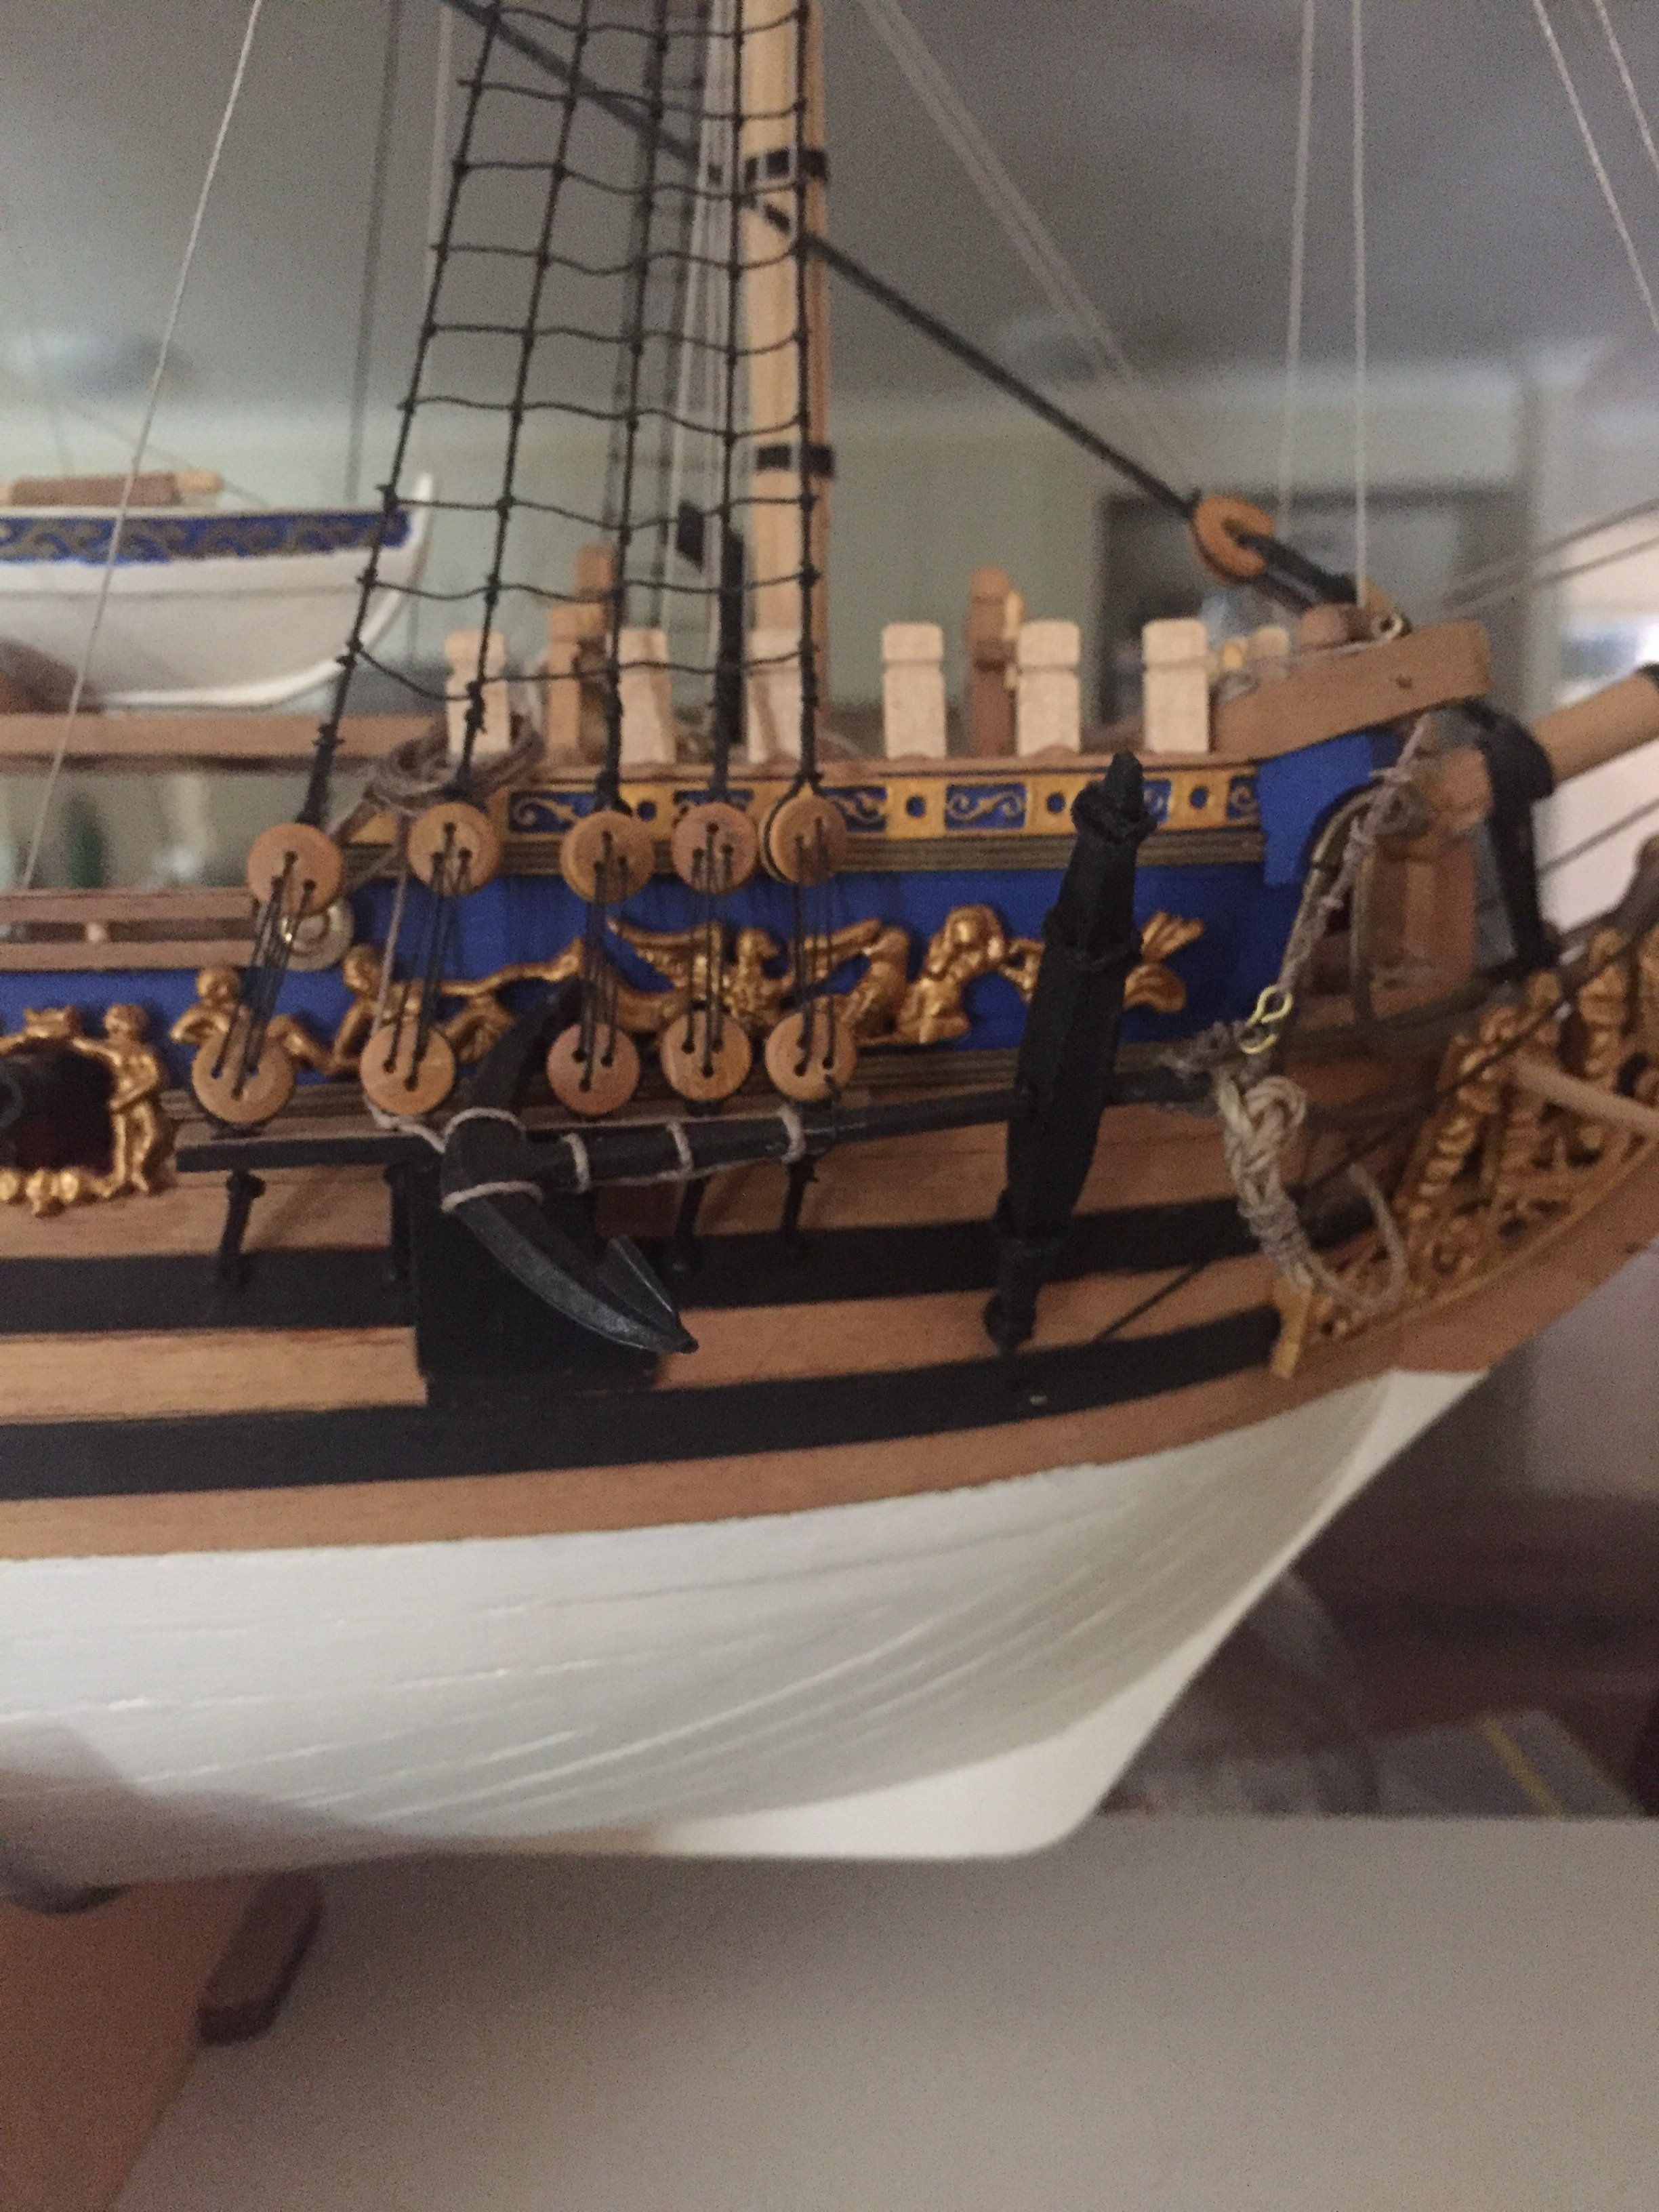
Very neat, Andrew. If I can get my Supply looking anything like yours, I’d be very pleased indeed. You’ve given me something to strive for.
-
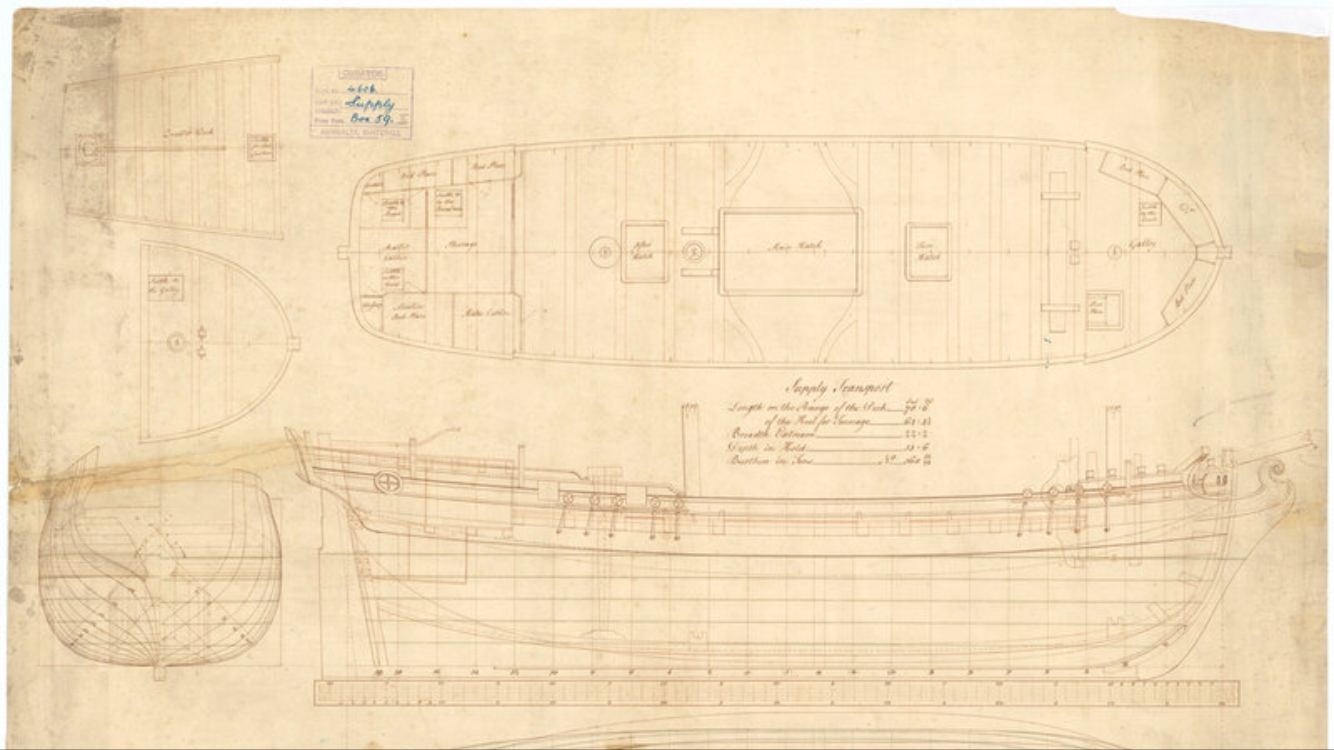
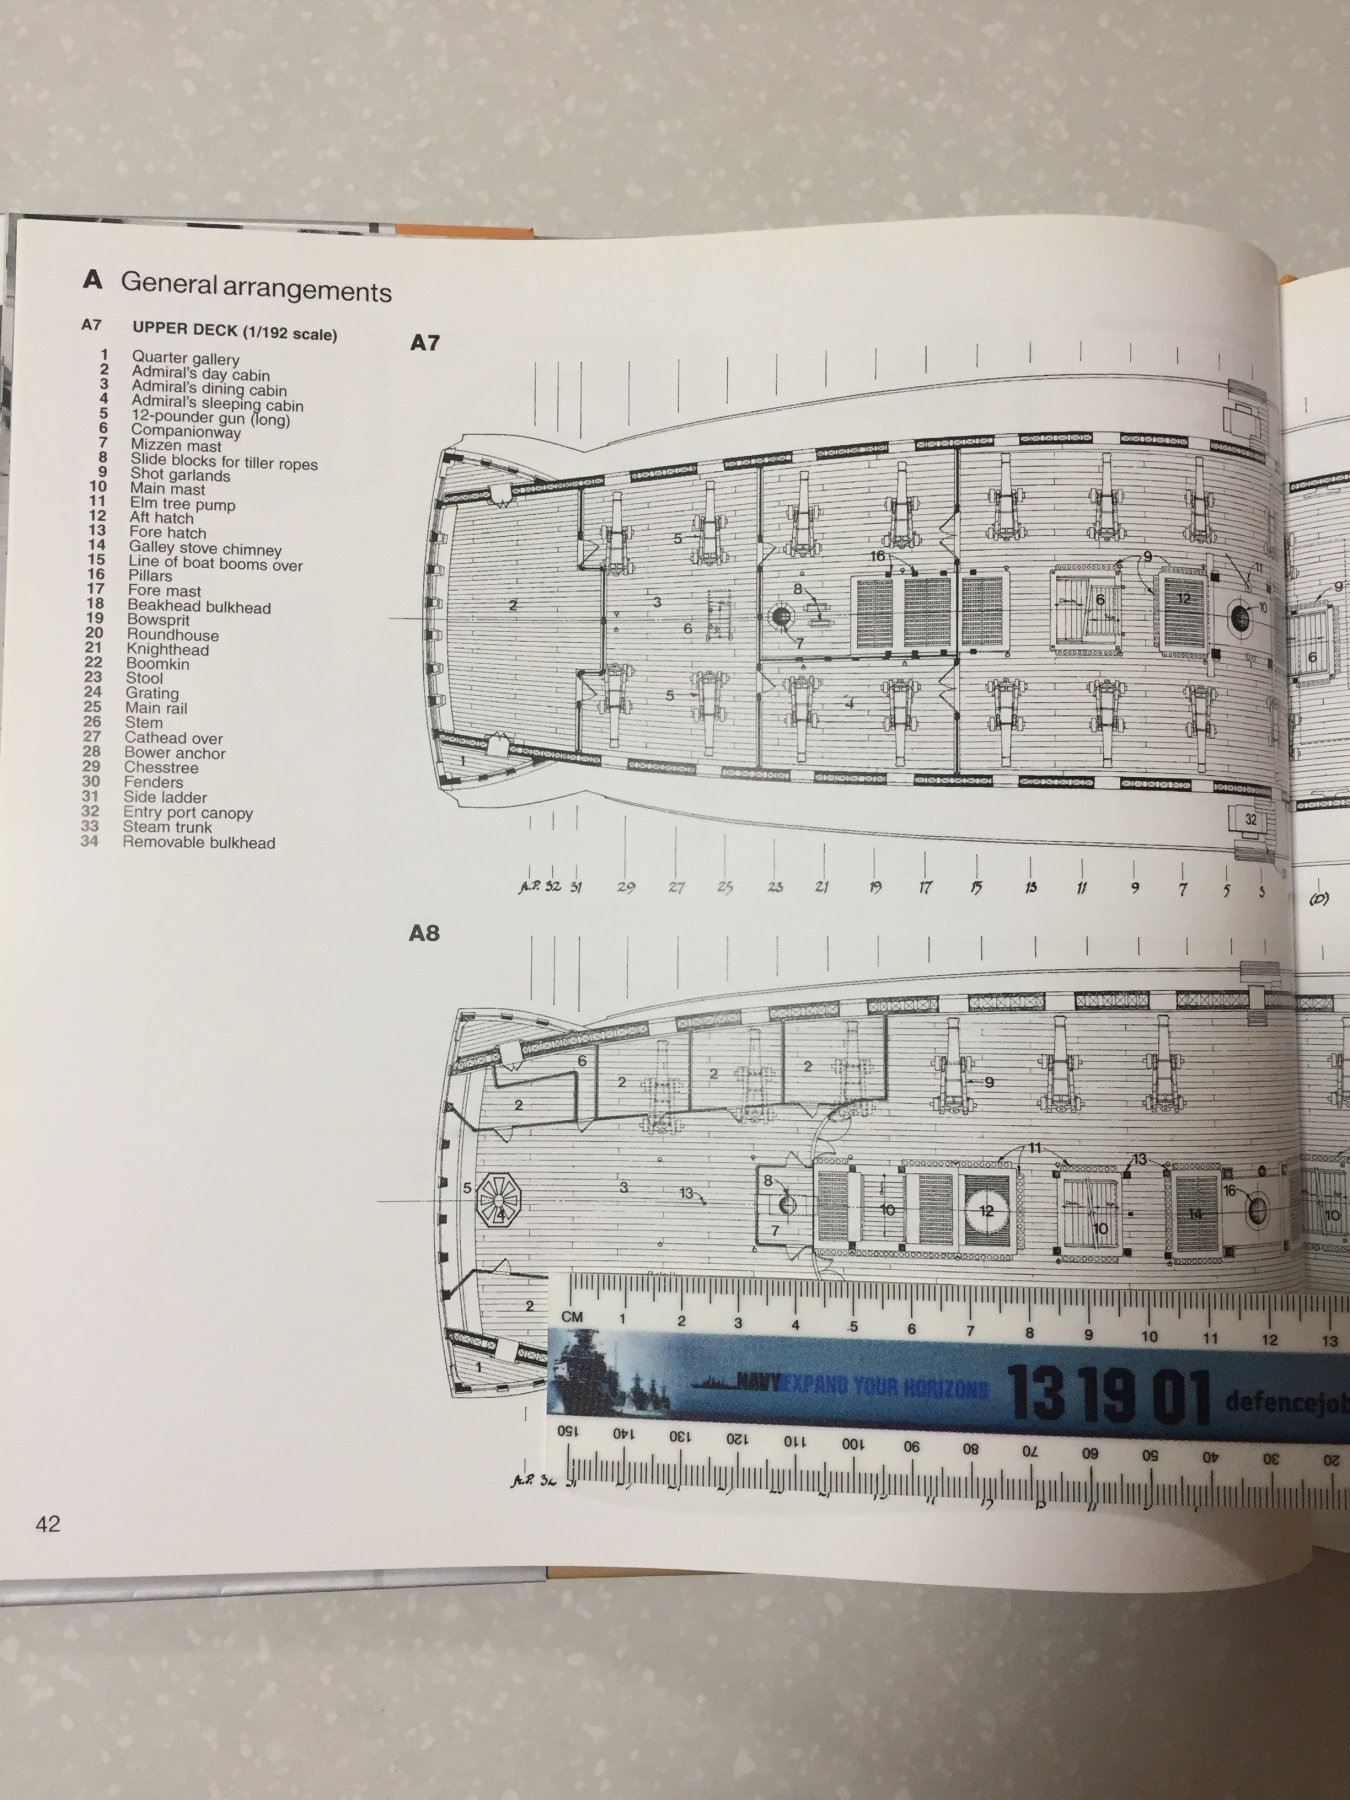
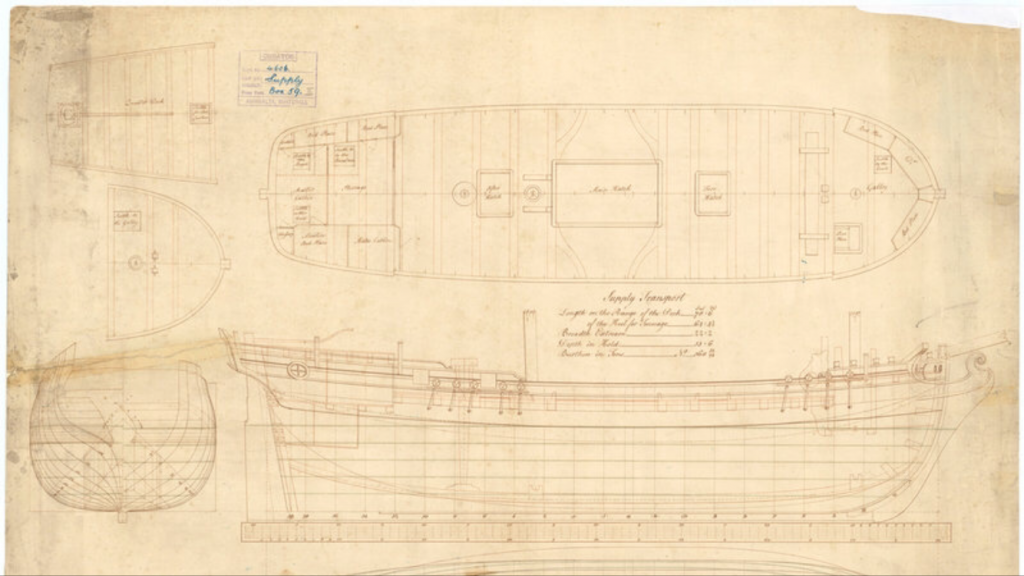
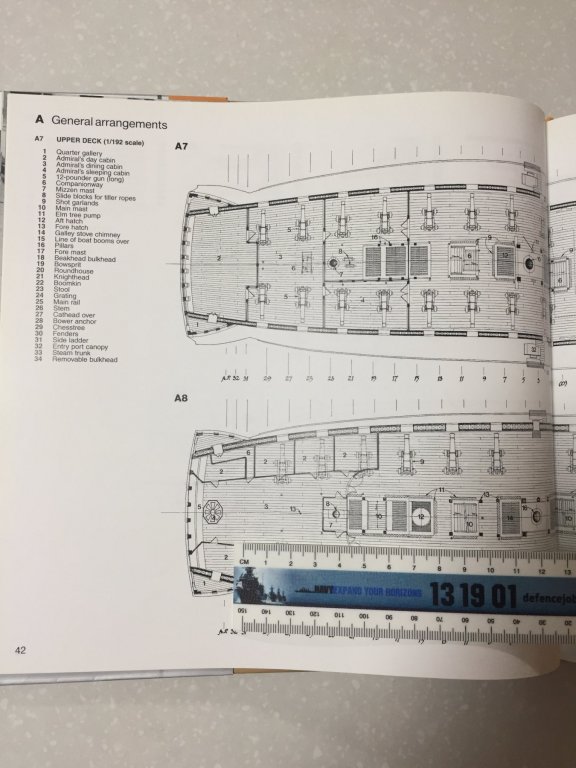
I’ve found this image of the original Supply plans within the model ship world forum. I’m going to reduce the width of the main hatch on my model slightly to match the plan. However, I can’t match the plan exactly. The quarterdeck would only be half the length. It’s already too late for that.
-
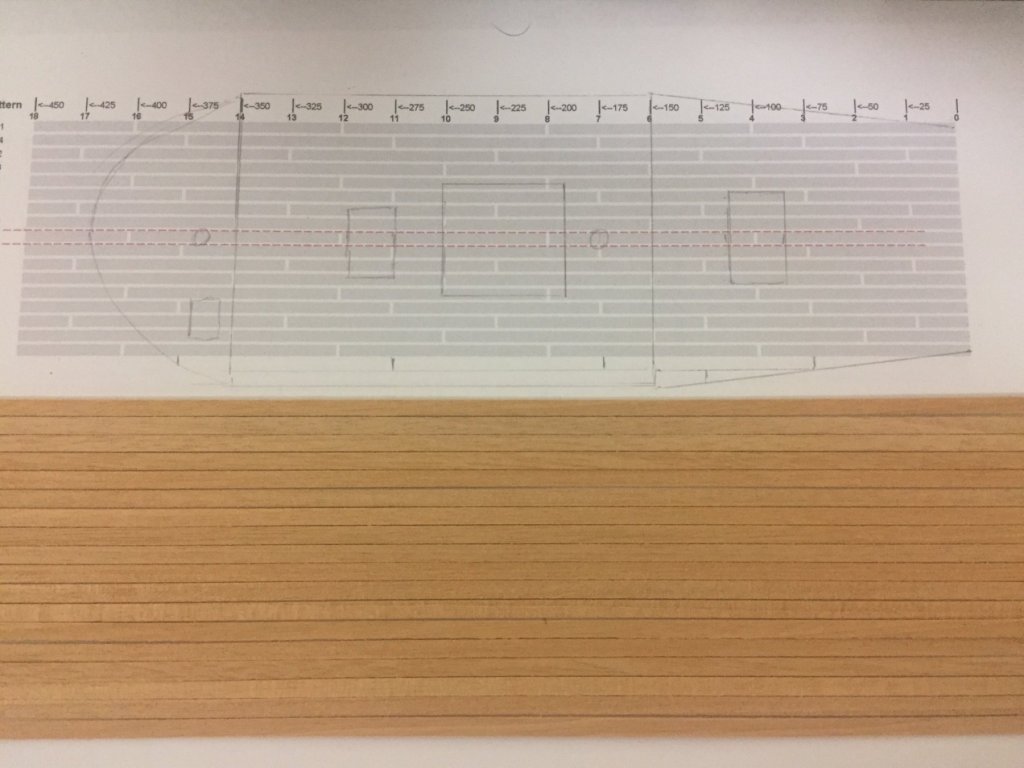
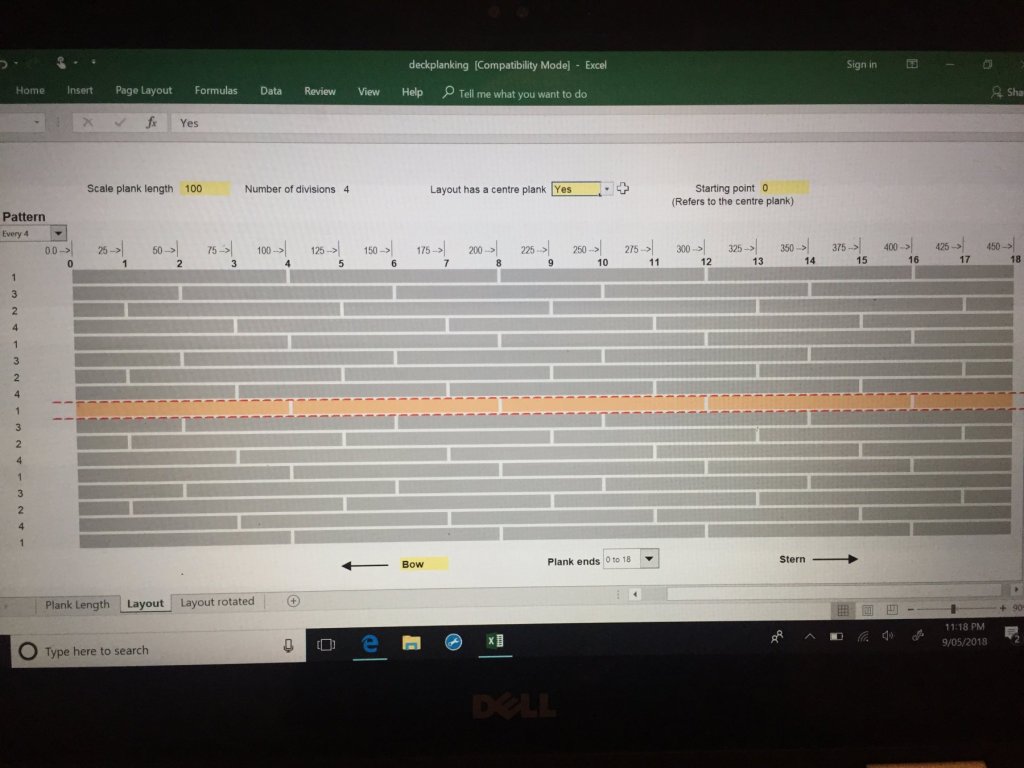
I’ve drawn a rough outline of the Supply deck on the planking utility. It’s not symmetrical, left and right of the king plank. I’m thinking of following the pattern on port only, then flipping it over to plank starboard. Would this be a heinous error? Is symmetry even a thing with decks?
-
I’m gobsmacked. That really looks fantastic. I love the lettering particularly. I assume you reverse the image, then print on wax paper and use that as a rub transfer? Which program allows you to flip the font?
-
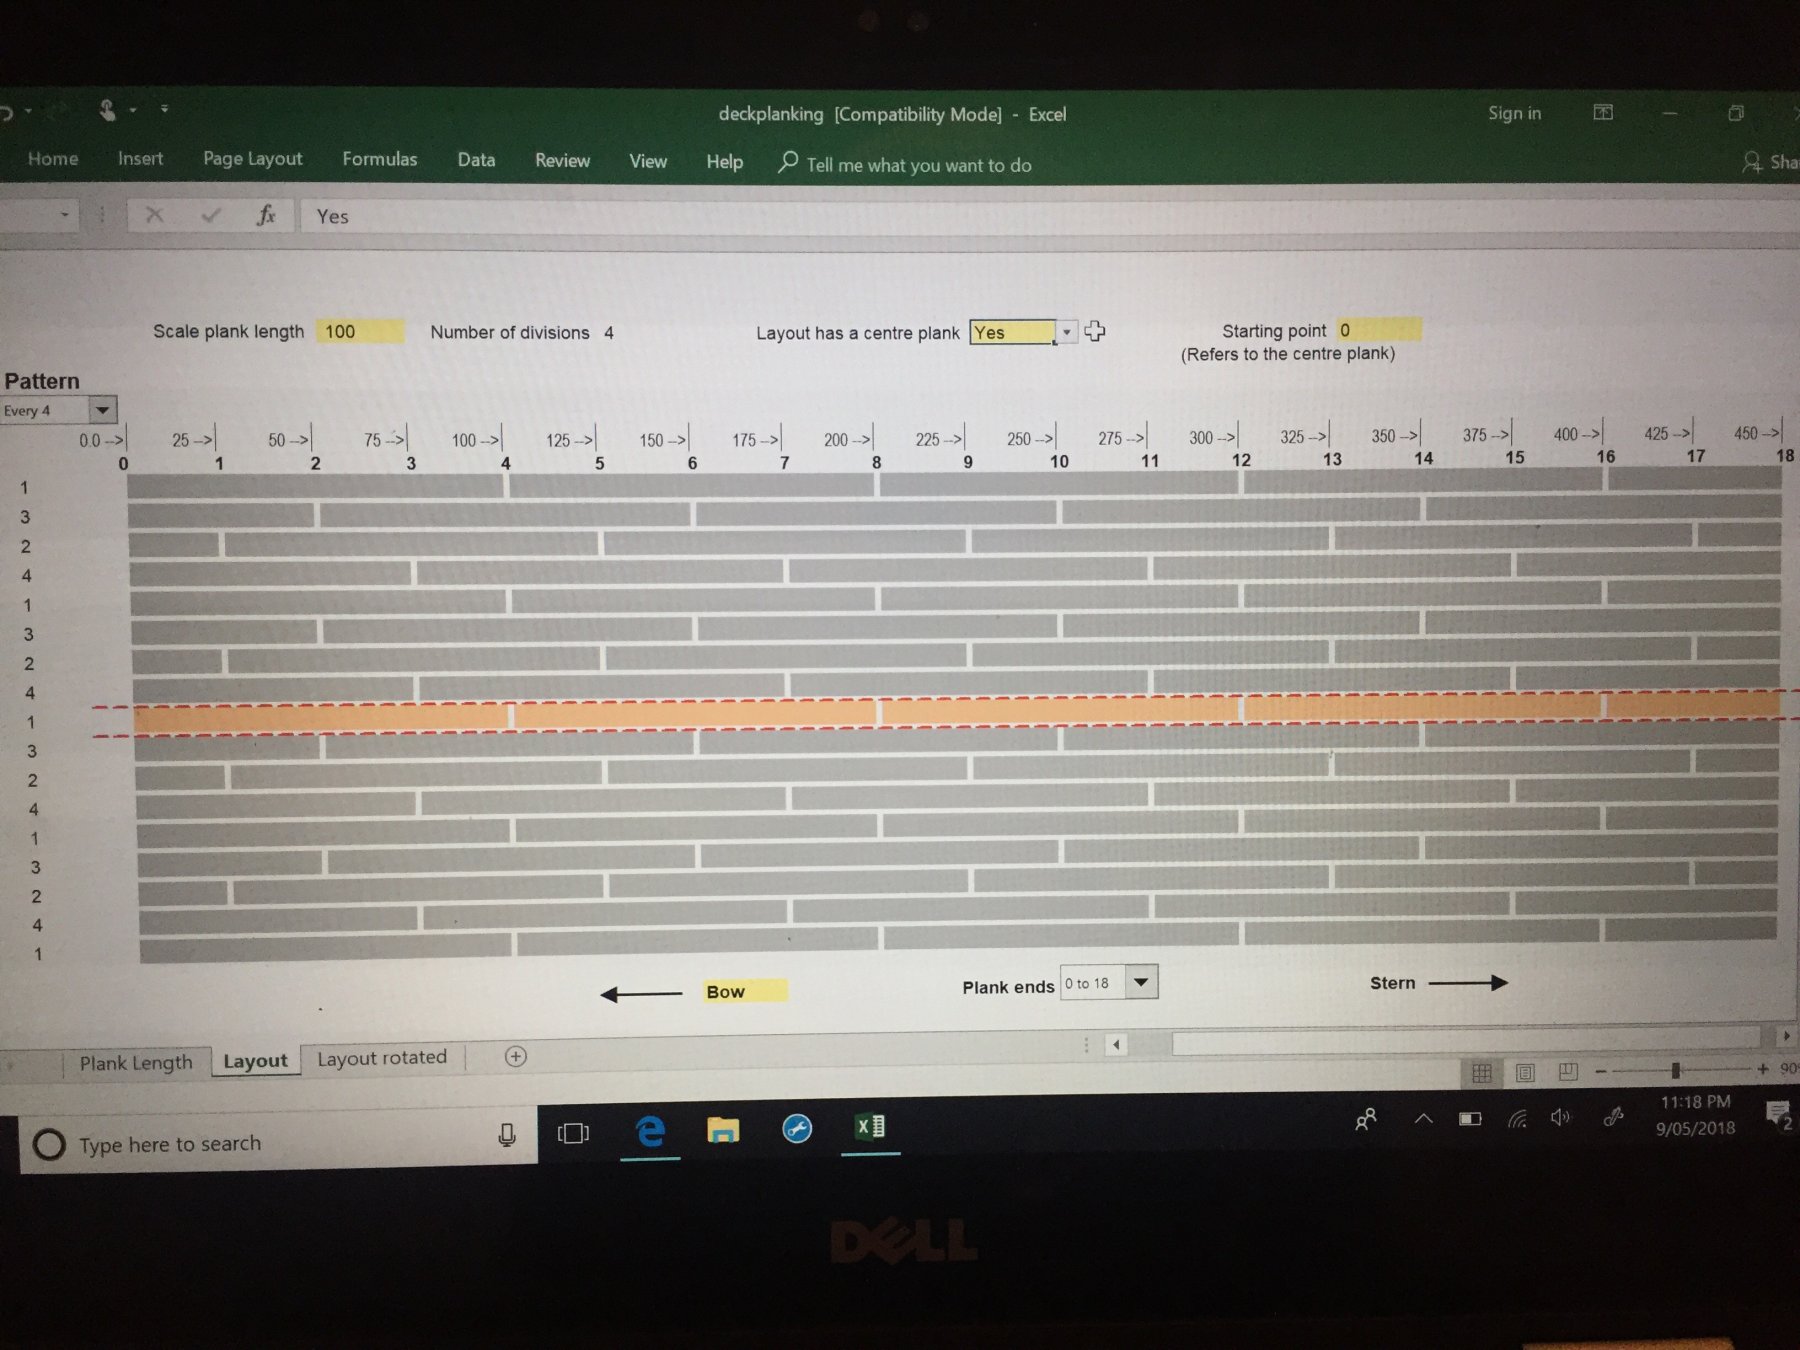
Plank intervals at 25mm, measured from the forward edge of the quarterdeck, look pretty much right to me.
-
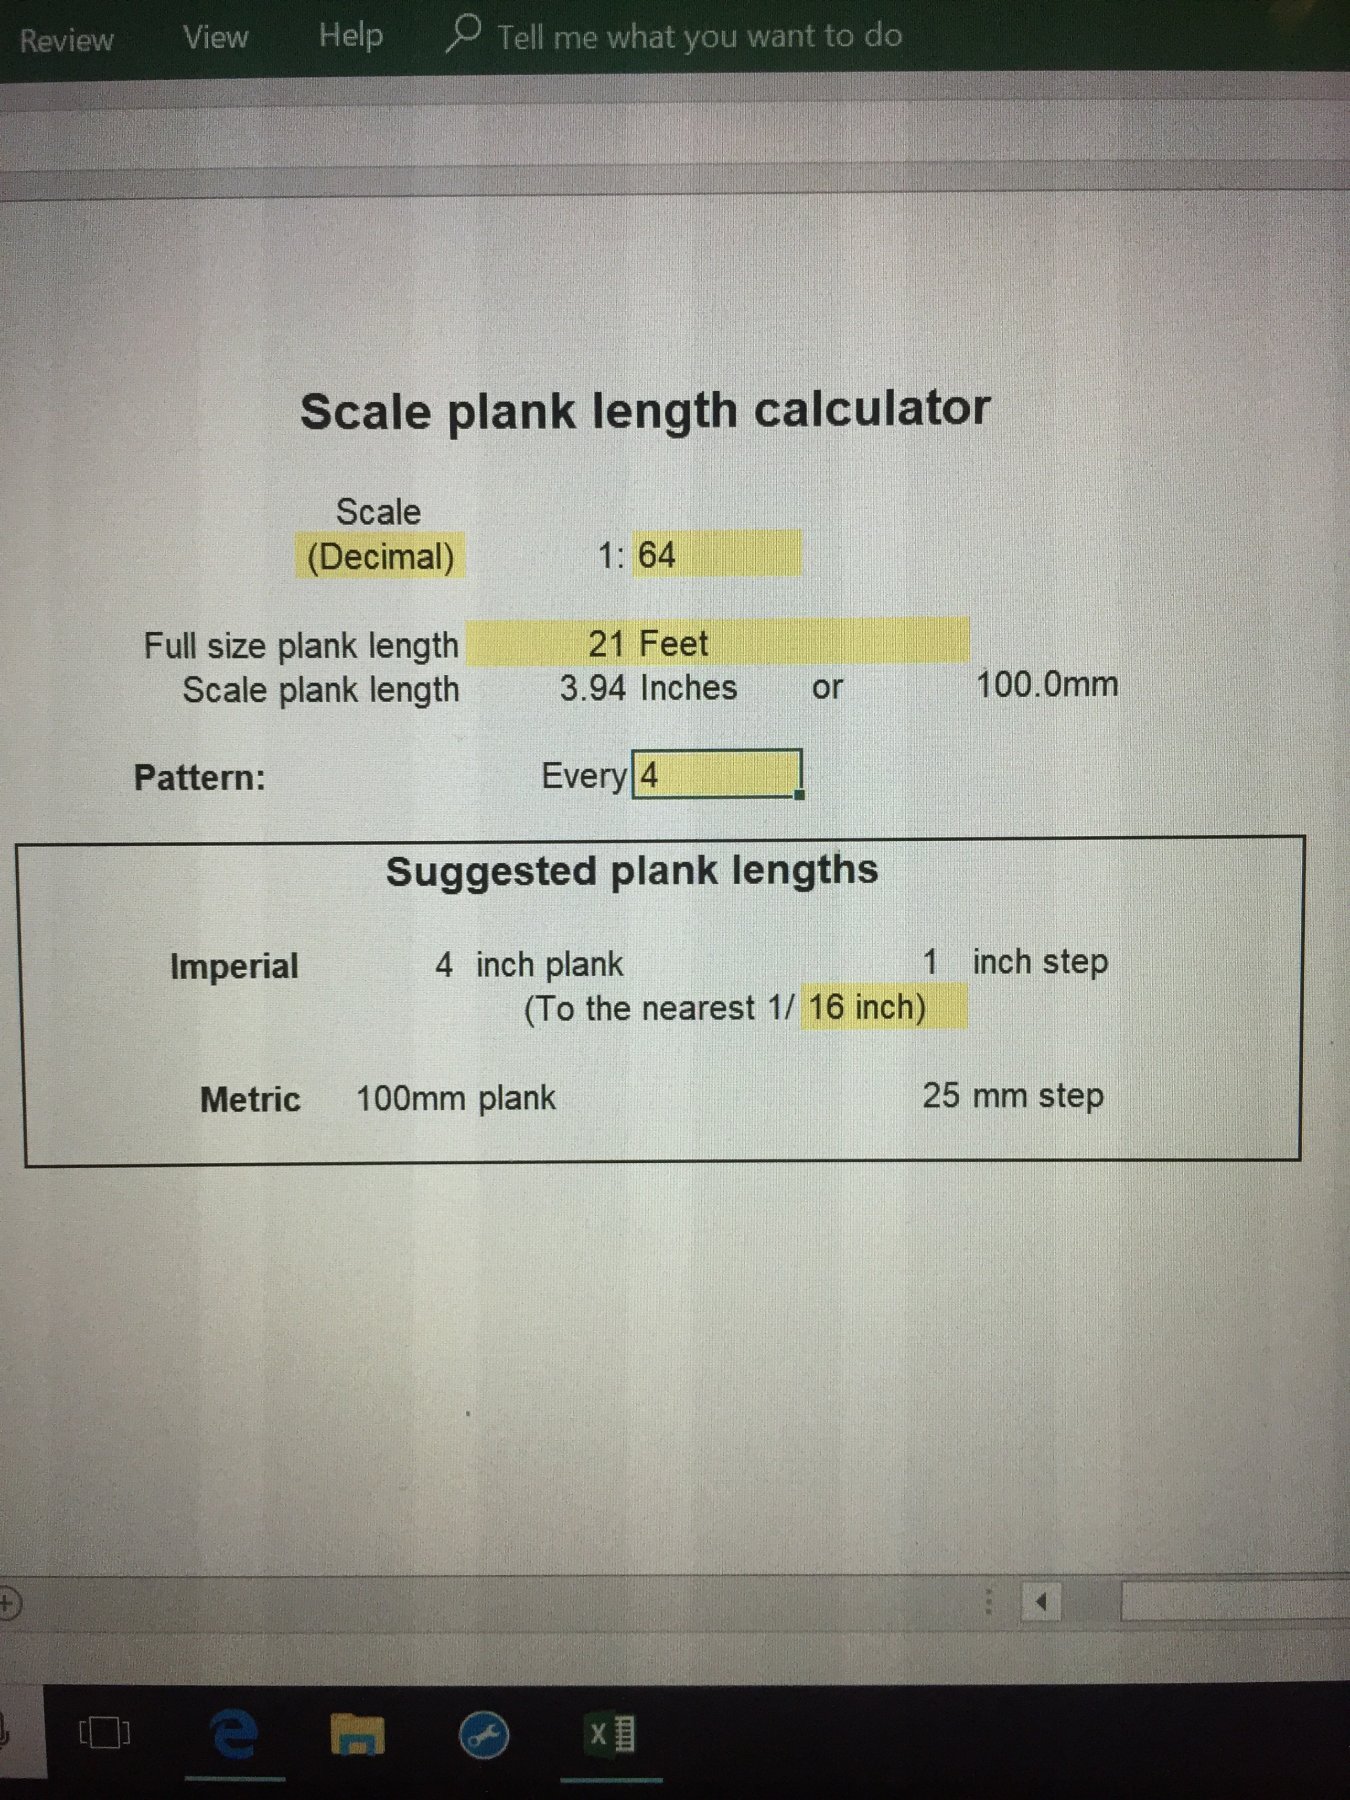
I used the excel deck planking utility here: http://modelshipworldforum.com/ship-model-framing-and-planking-articles.php at 1:64 scale, 21’ is 100mm. I’ll use a four-shift pattern, because it’s the one shown in the drawings of the Victory. 👍🏼
-
And now to consider deck planking. Having a search of other build logs, it’s generally accepted that the average length of the deck planks on British contemporary vessels is about 21 feet. I decided to double check that with the information I have on hand. Using the book John McKay’s “Anatomy of the Ship- The 100-gun ship Victory”, I measured the length of the planks in the very well detailed 1:192 scale drawings: 33.2mm. Converted to imperial= 1.28 inches. 1.28” x 192 (scale) = 245.76”. Divided by 12 = 20.48 feet. 21’ will do.
-
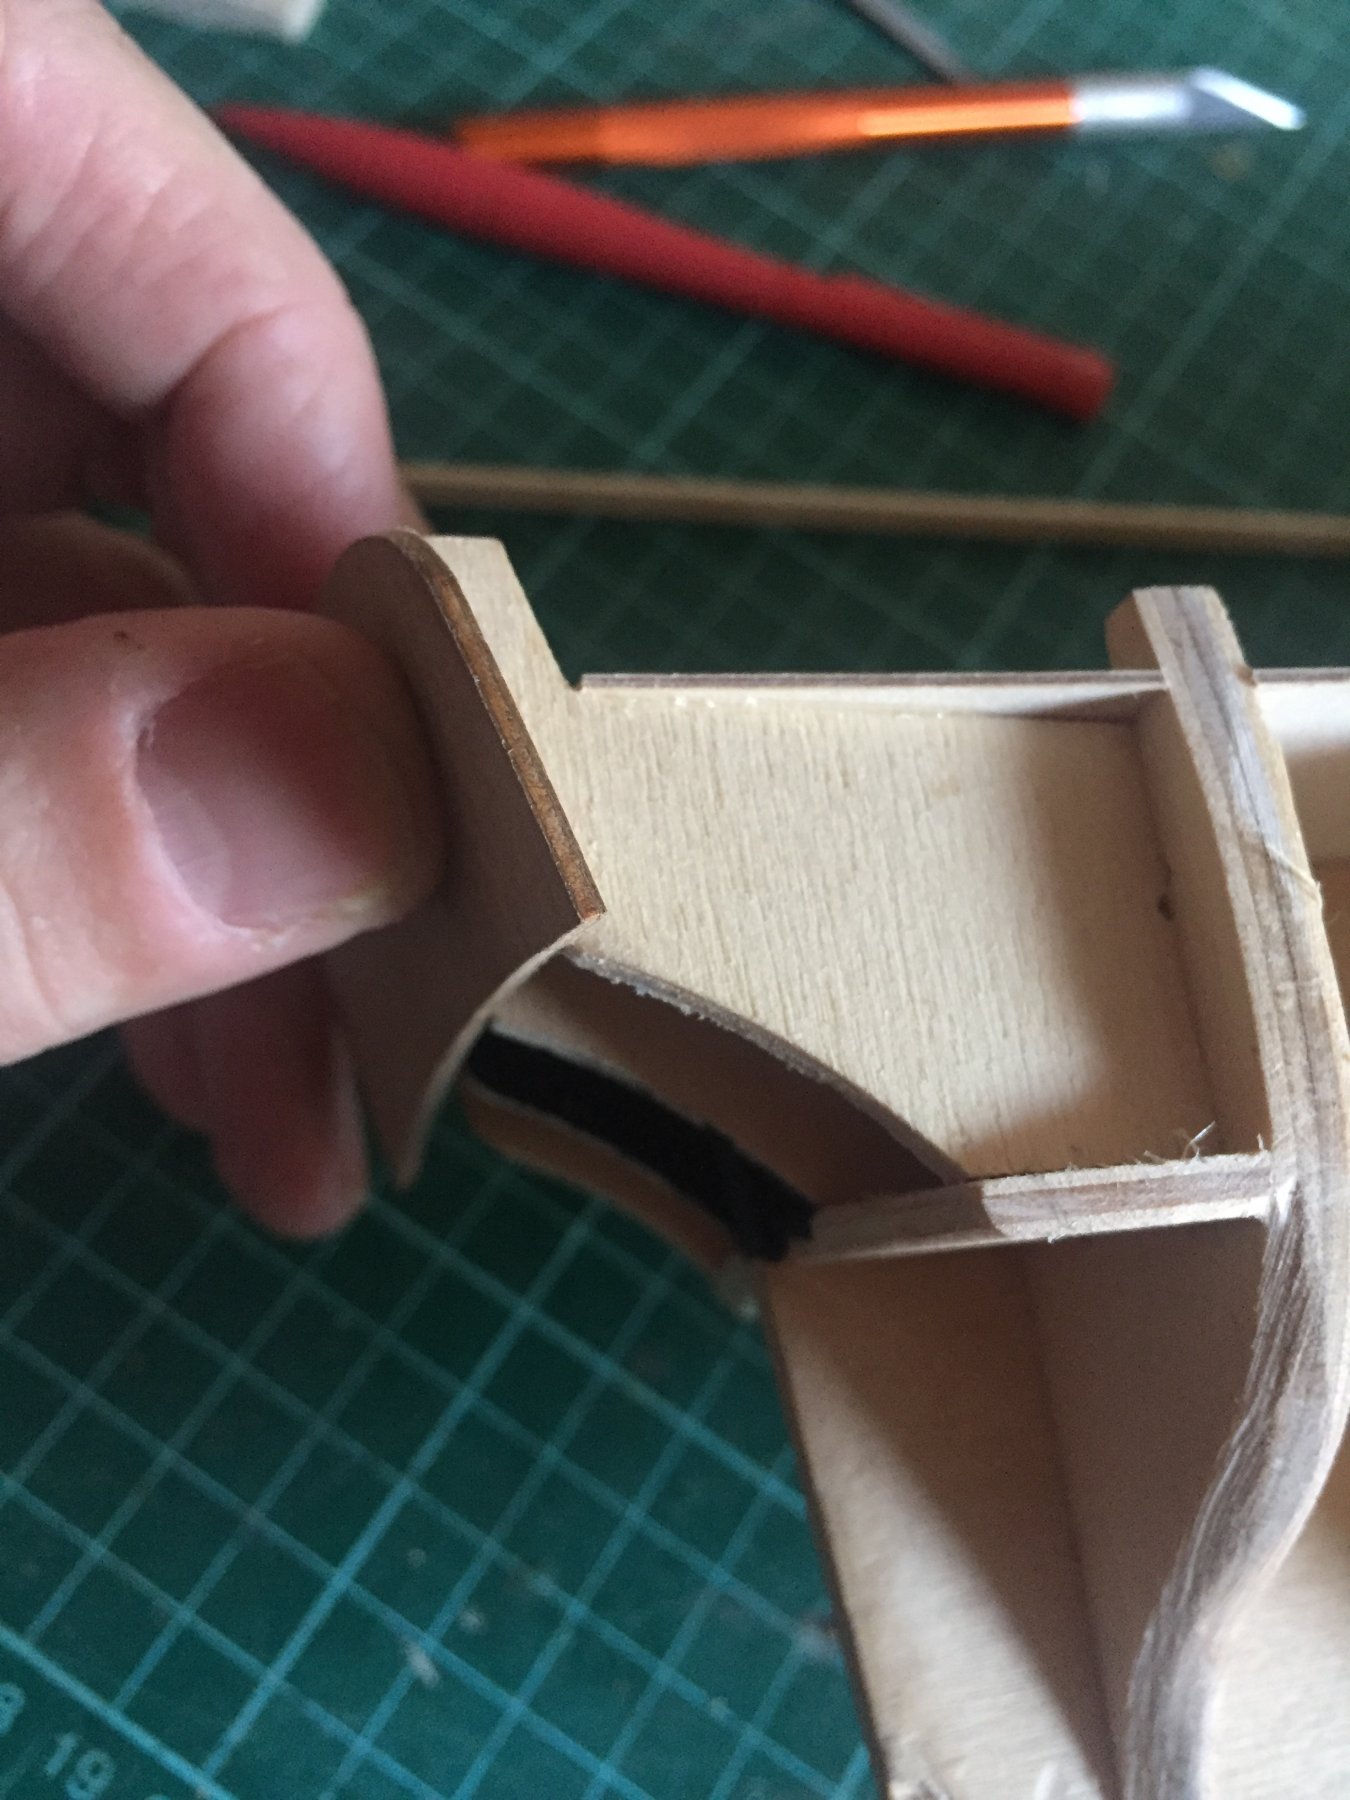
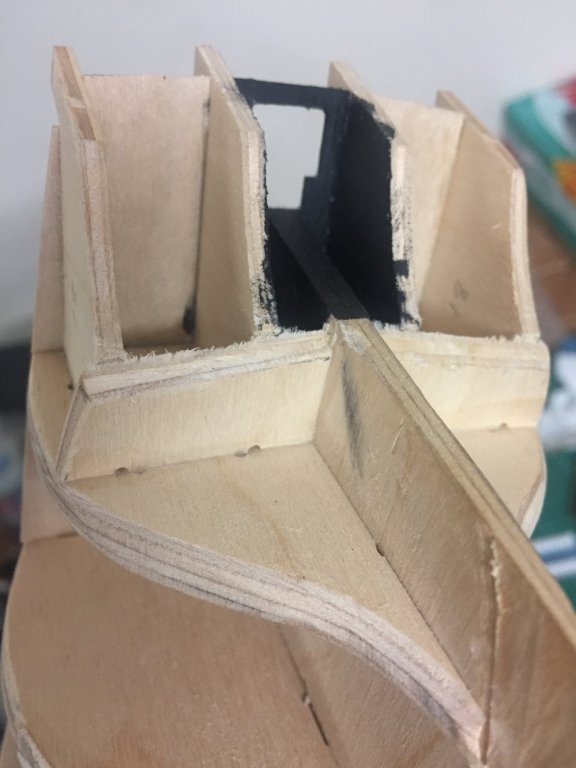
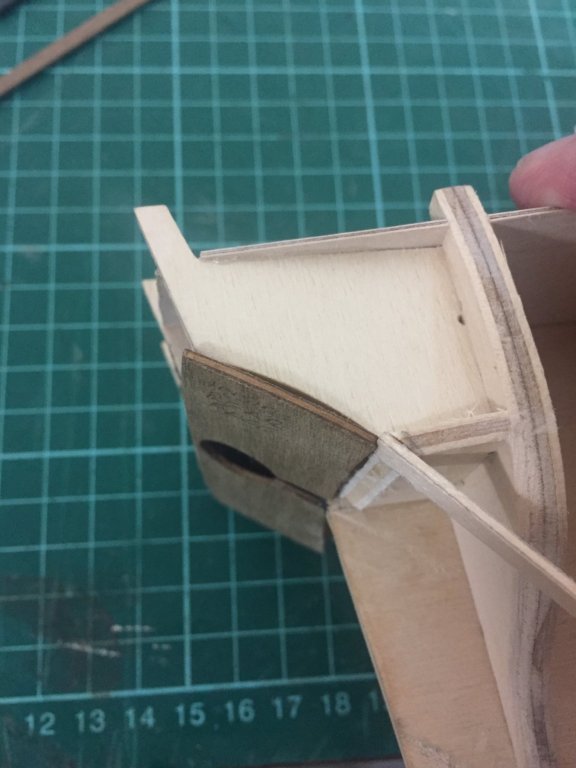
Bugger. I’ve nicked the stern post. 🙄 This view shows how the horizontal formers now undercut the stern pattern slightly to accommodate the planking width.
-
I’m also thinking of adding some more balsa contour fillers on the outside faces of the stern pattern edges. They may not be needed, but I’m concerned about fixing the planking at the rear edge of the hull.
-
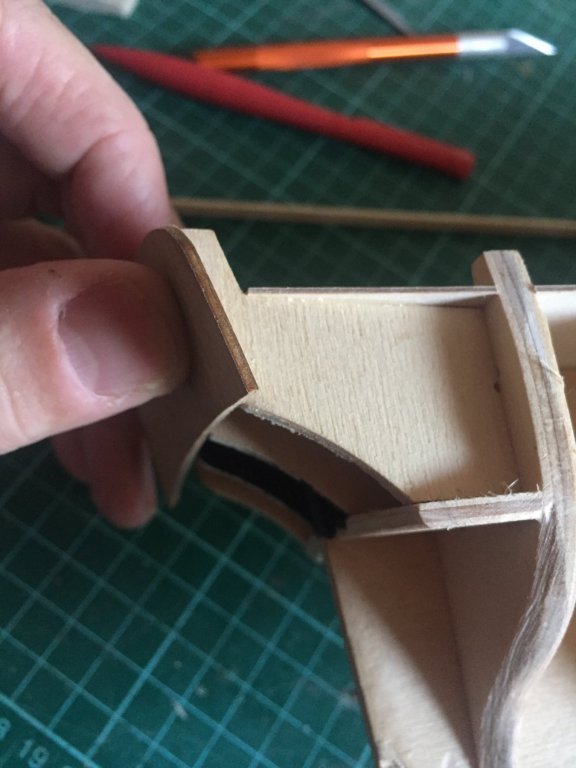
I’ve champhered the top edge of the counter-piece. As this stern counter will be covered with a walnut “second” planking later, I’ve trimmed the horizontal former back slightly less than the total thickness of the first layer limewood plus second layer walnut. I could always sand down later. I reckon this is close enough for now.
-
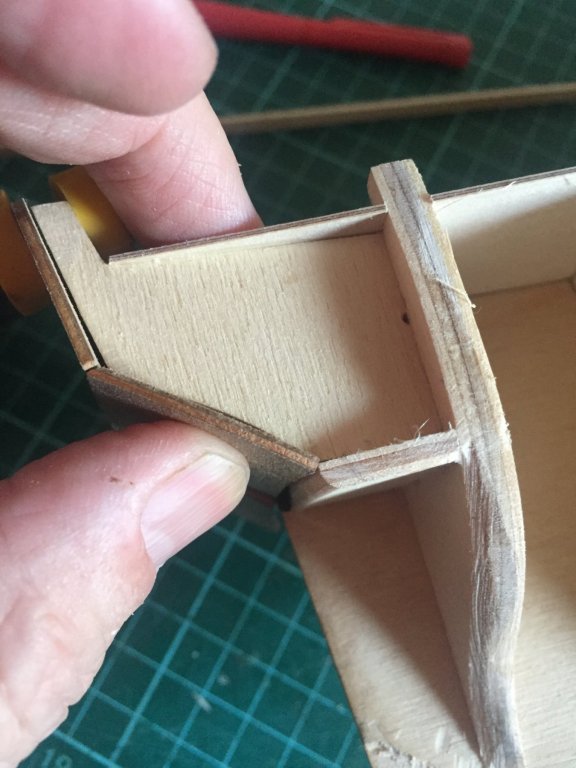
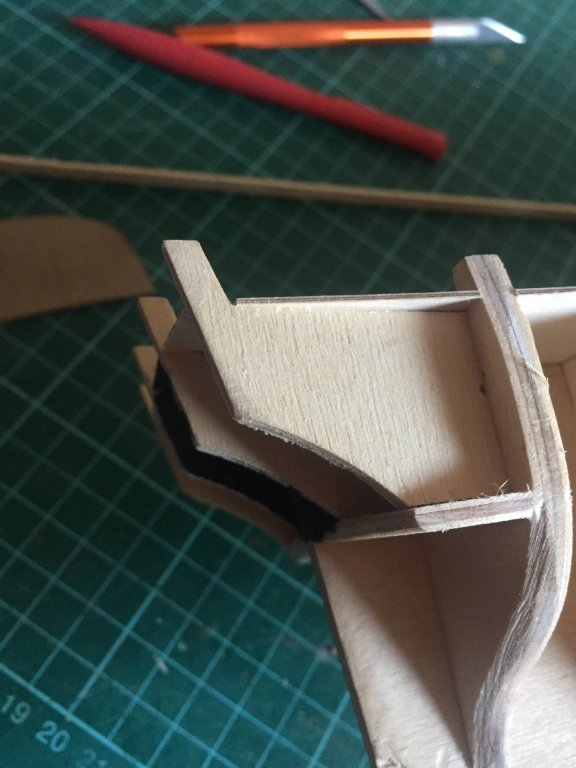
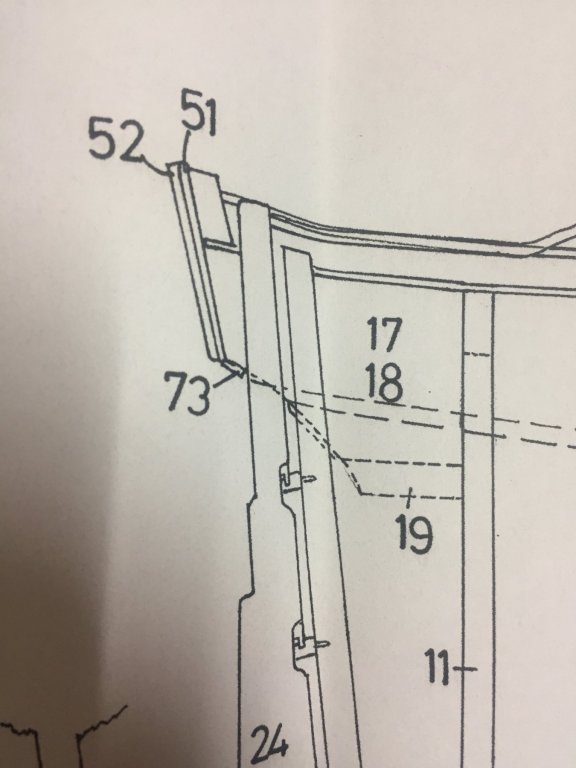
“With the stern fascia temporally fitted, the stern counter pattern can also be temporarily positioned.” The stern fascia and counter haven’t been soaked to obtain their nessesary curves yet, but I just need their width at this point. So a simple clamp will do. “The stern counter pattern should be fitted across the curved edges of the stern extensions so that its upper edge is flush against the lower edge of the stern facia previously fitted.”......”At the stern, the planks will run beyond bulkhead 11 and terminate either at the stern fascia & counter pattern or, as you progress down the hull, against the 5mm keel. When you are happy with the termination point of these planks, the stern fascia & pattern can be removed. In this way the planking can be allied to extend beyond the termination point, allowing you to neatly trim them back together when the facia & counter are refitted with the planking completed.” I want to trim the horizontal formers (parts 19) back the width of the first planking (1.5mm).
-
My attention is now drawn to the transom. The instructions read “Before progressing with the first planking, it will be of benefit to temporarily position the stern fascia (part 51) & stern counter pattern(73). Using plan sheet 1 for reference, start by positioning the stern facia across the stern pattern edges (17 & 18), such that the lower edge of the facia terminates at the change of angle of the stern extensions (The point at which the straight after-edge changes angle becoming a curve which runs into the after face of of bulkhead 11).
-
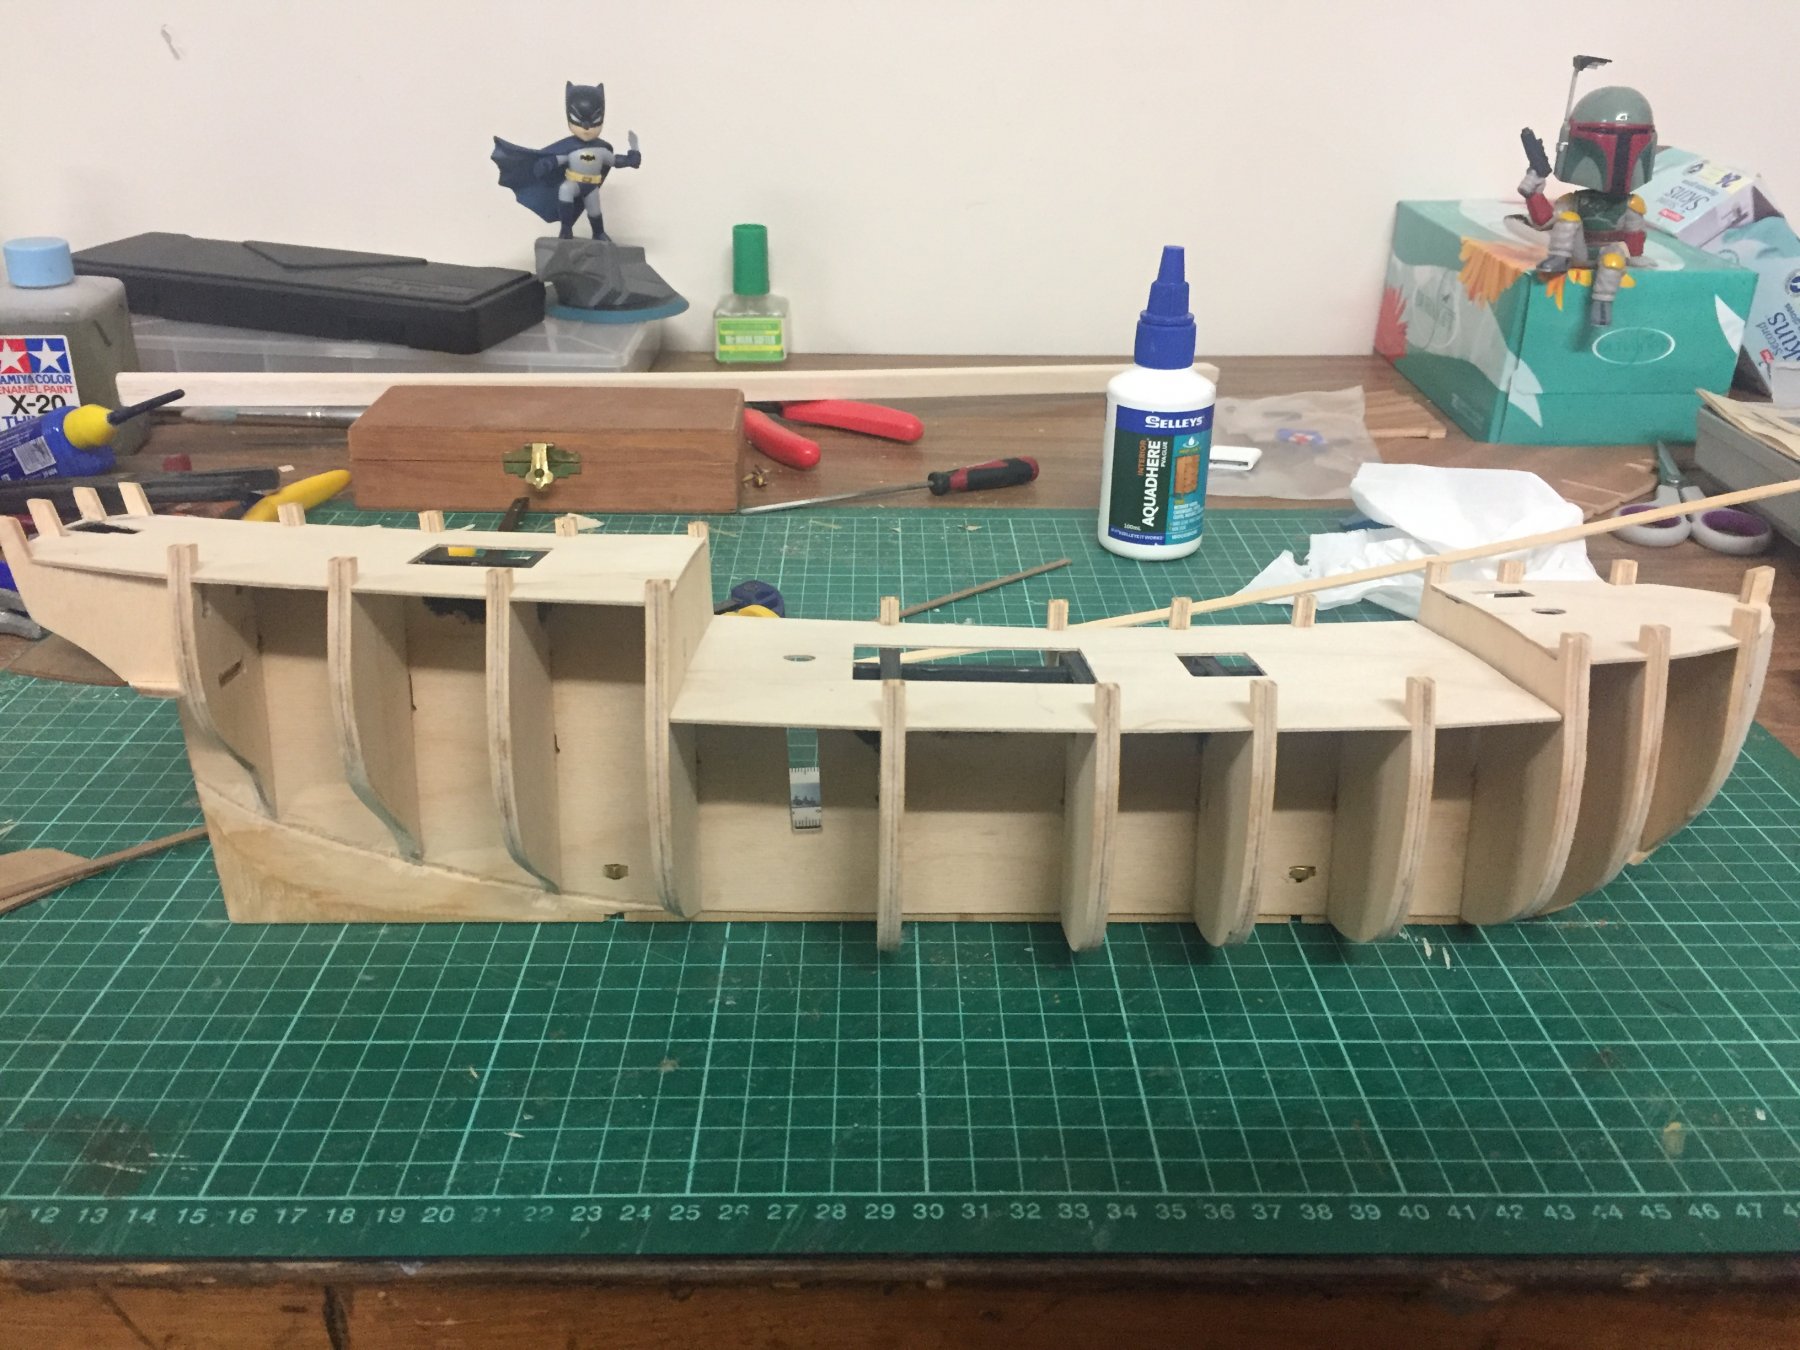
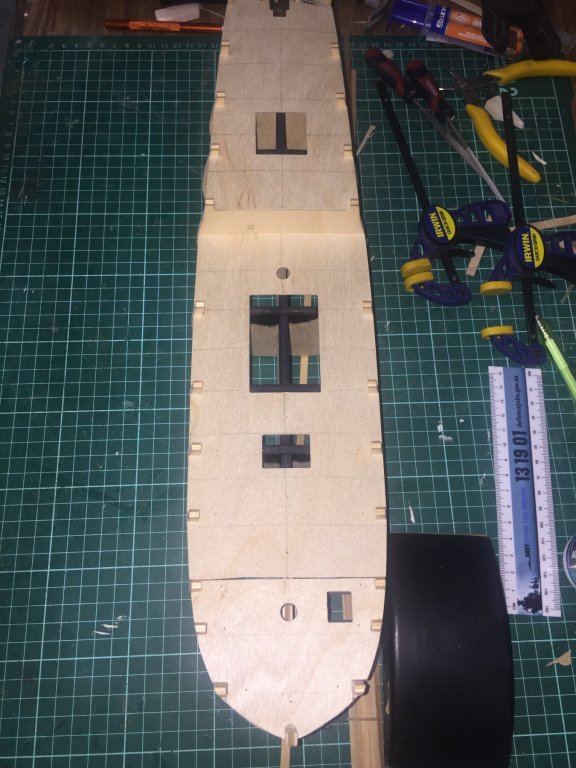
The decks are now securely glued in place and their holding pins removed.