
PhilB
-
Posts
71 -
Joined
-
Last visited
-
 Archi reacted to a post in a topic:
Nef by PhilB - scale c. 1:50 - Early Medieval Ship
Archi reacted to a post in a topic:
Nef by PhilB - scale c. 1:50 - Early Medieval Ship
-
Archi reacted to a post in a topic:
Nef by PhilB - scale c. 1:50 - Early Medieval Ship
-
thibaultron reacted to a post in a topic:
Medieval longship by bolin - FINISHED - 1:30 - based on reconstruction Helga Holm
-
thibaultron reacted to a post in a topic:
Medieval longship by bolin - FINISHED - 1:30 - based on reconstruction Helga Holm
-
mtaylor reacted to a post in a topic:
Gokstad c. 900 AD by bigpetr - 1:48 - CARD - viking ship
-
 Wow! That hull is looking good! Planning all the strakes with CAD really pays off. I'm eager to see the next steps.
 -
Old Collingwood reacted to a post in a topic:
10th-11th century Byzantine dromon by Louie da fly - FINISHED - 1:50
-
mtaylor reacted to a post in a topic:
10th-11th century Byzantine dromon by Louie da fly - FINISHED - 1:50
-
Cathead reacted to a post in a topic:
Nef by PhilB - scale c. 1:50 - Early Medieval Ship
-
Louie da fly reacted to a post in a topic:
Nef by PhilB - scale c. 1:50 - Early Medieval Ship
-
mtaylor reacted to a post in a topic:
Nef by PhilB - scale c. 1:50 - Early Medieval Ship
-
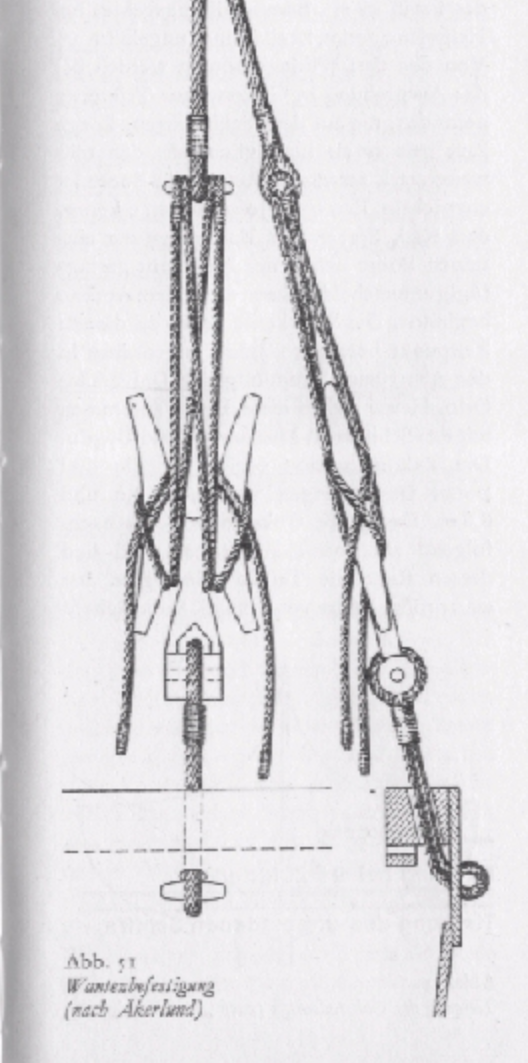
I should hasten to add that the forestay picture is not mine, I grabbed it off google to illustrate the idea of replacing the "butterfly cleats" with heart blocks. I hope that mine looks almost as good when it's done. Edit: on a related note, should I add some shoulder pieces near the top of the mast where the stays are attached? It's the forestay attachment on the borrowed heart block picture that made me think of it.
-
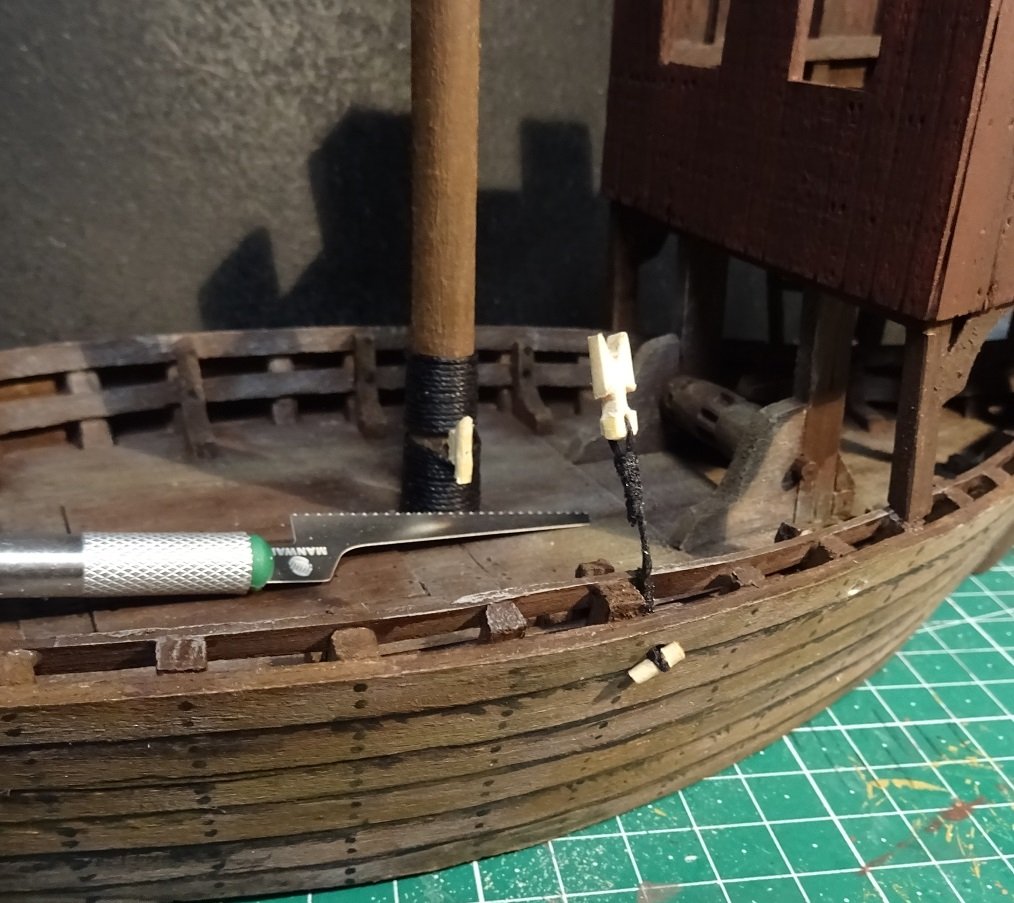
Well, as a test, I tried to make one "butterfly cleat". The key to getting the right shape without splitting the wood was to shape it first with a small Xacto saw. Still, it looks a little on the over-large and clunky side. Probably best to go with heart blocks - easier to shape, and less clunky-looking. So I'm thinking I should try something like this, though slightly smaller:
-
I suppose I could call it a "butterfly cleat" or a "dragonfly cleat" or something like that. I think I'll need another one on the forestay, at the very least. Or I could chicken out and use heartblocks. My first attempts at carving this double cleat all resulted in the basswood splitting down the middle. I may need to run a pin through the center to strengthen each piece before cutting the deep "V" in between the two cleats.
-
Looking great! I'm jealous of this wonderfully planked and framed hull. Will the frame still be visible once the ship gets a deck?
-
Actually, the windlass can still be used for anchor duty, as long as the rope is belayed around an appropriately placed beam. Surely there something there which can serve.
-
It's hard to tell if that is in fact a depiction of a stern rudder, or simply a failed attempt at perspective, as you often see in this period.
- 179 replies
-
- 2
-
-
- longship
- Helga Holm
- (and 1 more)
-
Same thing happened to me. Three times. The ship ran into something, all right - my clumsy hand. Brilliant weathering on the stempost and strakes.
-
I'm attempting to carve some cleats to set on each side of the mast - it's hard going! But I'll get there. Two questions: 1) I've seen some models with a beam just aft of the mast, and forward of the windlass. Is this beam used primarily for attaching rigging, or as a belaying point for hoisting the mainsail yard? 2) What do you call this double cleat thingy, that looks like a very important part of the longship rigging plan I'm thinking of trying to emulate?
-
How did you come up with the planking template? That's really impressive. Did it simply derive from the CAD work? I'm already thinking of trying to do proper planking on my next ship, but have never tried to use a CAD application.
-
A longship with a stern rudder? That does look unusual. Keep us posted.
- 179 replies
-
- 2
-
-
- longship
- Helga Holm
- (and 1 more)
-
I thought the bowsprit would be used to anchor the forestay for the mast. Is this wrong? Or only a later development? I agree that some of the period depictions appear to have the forestay anchored to the raised end of the bowpost.
-
What size cords for the rigging of a 1/50 medieval nef?
PhilB replied to PhilB's topic in Masting, rigging and sails
My order came in. I ordered: 1mm and 0.75mm in black for standing rigging, and 0.25 and 0.5 in beige for running rigging. At first glance, the 0.25mm is far too light. And even the 1mm is too light for some applications. This, from a complete novice shipbuilder. So I'm going to order some more: black goes up to 1,3mm, beige goes up to 2mm. I think I need black at 2mm, so I'll see if I can locate some. -
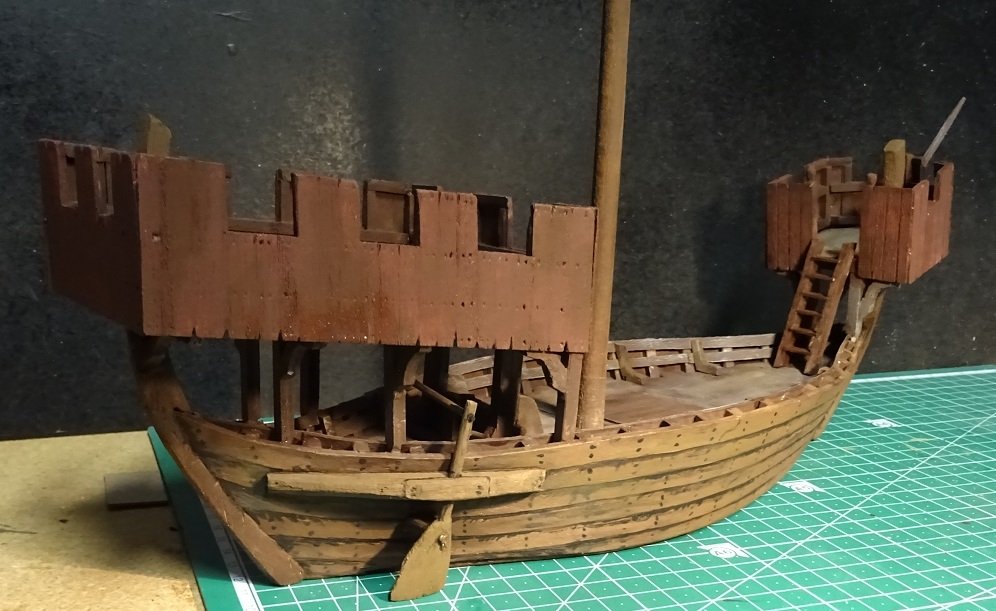
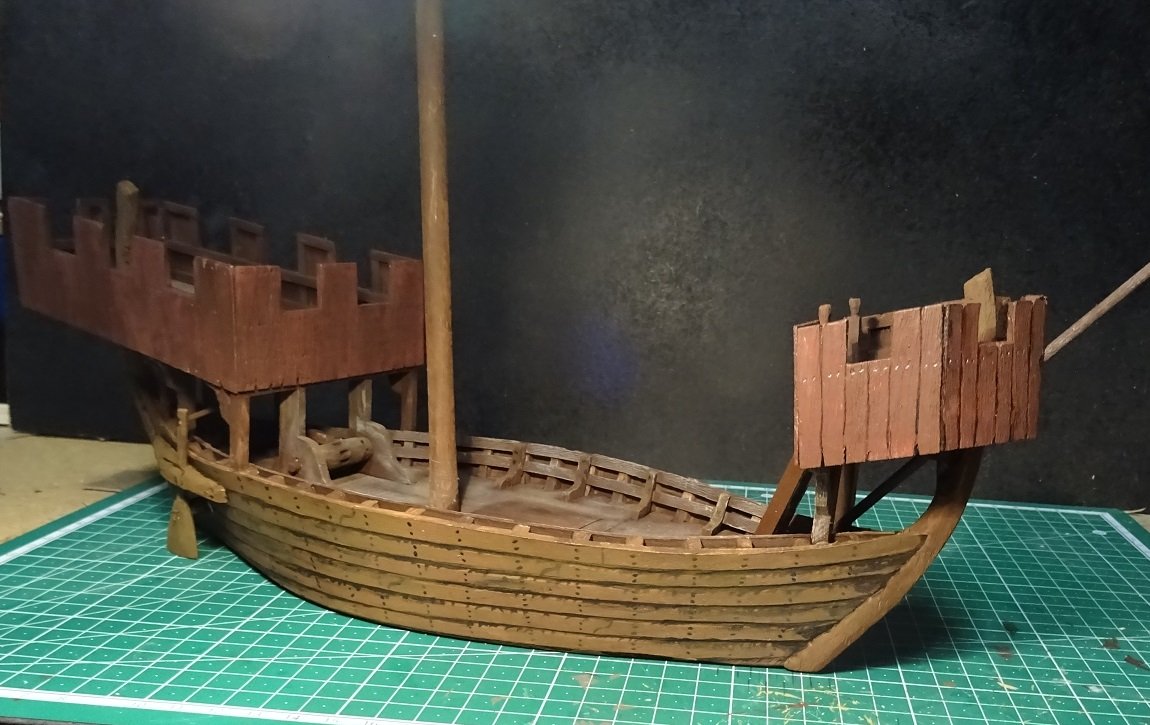
The side rudder is finished, and the glue is drying. I also finished two ladders, but one of them is too uneven and has to be discarded - gotta make another, for the sterncastle. I also gave the hull some painting love: dark caulking, and hundreds of dots for the trenails. A little drybrushing over the top, and it looks much better than before. Also, I received the Amati rope I ordered, looks great, but I can see I'll need some larger sizes. I ordered 0.25mm, 0.5mm and 1mm, but I think some 1.3mm or ever 2mm are in order.