


CPDDET
-
Posts
1,194 -
Joined
-
Last visited
Content Type
Profiles
Forums
Gallery
Events
Everything posted by CPDDET
-

Have a extra $100.00 to spend......
CPDDET replied to CPDDET's topic in Modeling tools and Workshop Equipment
I've learned a lot here. Thanks to all! -
Thanks Phil I feel like once I finish and paint the basic hull it will be like a fresh start doing the deck, masts and rigging. Learned a lot thru mistakes while doing the basic hull and can apply what I learned to finishing the model.
- 389 replies
-
- 2
-

-
- bluenose
- model shipways
- (and 1 more)
-
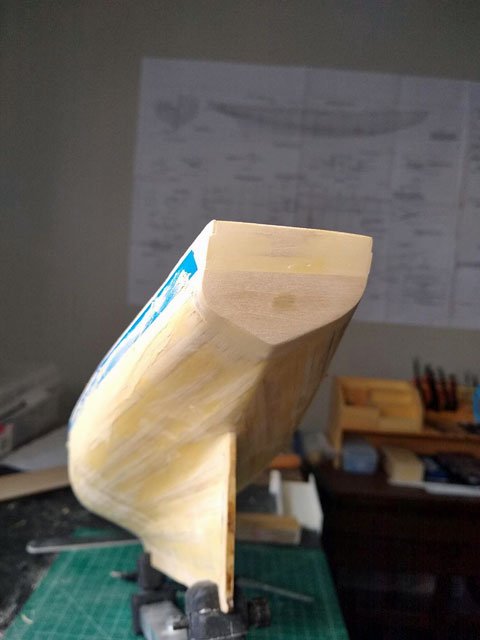
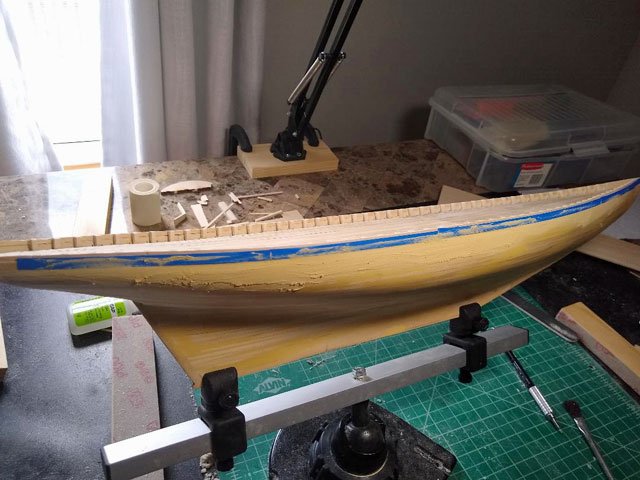
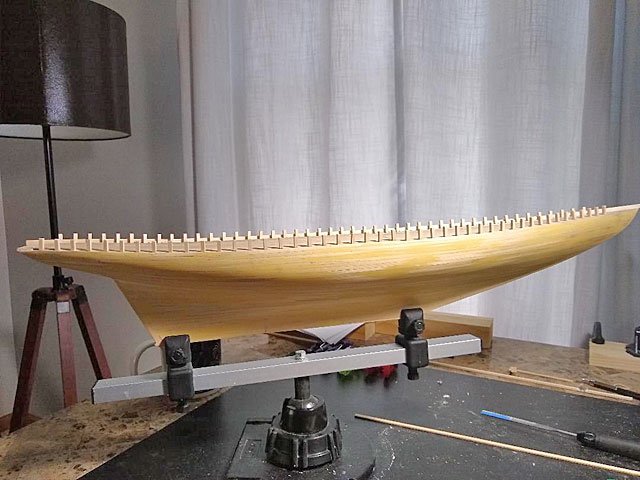
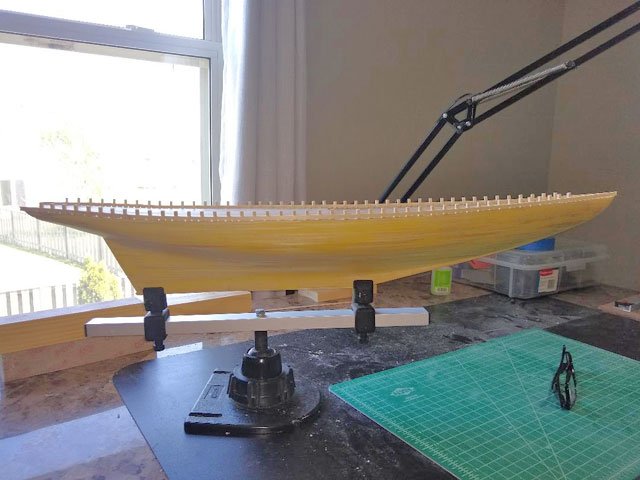
Been awhile since my last update. I now have about 175 hours in the build. After suffering some slings and arrows I will be following Hunt’s practicum more closely. While it’s been a bit busy around the house these past few weeks, I have managed to make some progress. I installed the upper bulwark and sanded all the false frame timbers so they are even with the top of it and put in the hawse timbers. I then did some work on the stern / transom. Not quite finished back there yet. Because of some sloppy sanding on my part, there were small gaps in a few spots between the lower bulwark and the top hull plank. So I carefully taped the lower bulwark just even with the bottom of the scupper openings. Mixed up some Elmer’s wood filler with a few drops of water to get it to the consistency of toothpaste and filled the gaps. Tomorrow I will remove the tape and sand the areas smooth. May have to clean out some of the scupper holes where some wood filler squirted through. Then it will be time to paint the inside of the bulwarks, false frame timbers and waterways. But before I lay a brush on the ship I will follow the advice of more experienced model shipwrights and do some testing. I’m going to try 3 different sealers that were recommended: Delta Ceramcoat, shellac and sanding sealer. I also need to experiment with the ratio of paint to extender to get a “milk-like” consistency.
- 389 replies
-
- 4
-
-
- bluenose
- model shipways
- (and 1 more)
-
Have a extra $100.00 to spend......
CPDDET replied to CPDDET's topic in Modeling tools and Workshop Equipment
Aye matey! -
Have a extra $100.00 to spend......
CPDDET replied to CPDDET's topic in Modeling tools and Workshop Equipment
You're absolutely right about that. I traded in my old analog one for a digital some time ago. Indispensable. -
Have a extra $100.00 to spend......
CPDDET replied to CPDDET's topic in Modeling tools and Workshop Equipment
More good info! -
Have a extra $100.00 to spend......
CPDDET replied to CPDDET's topic in Modeling tools and Workshop Equipment
Thanks for the tip! -
Have a extra $100.00 to spend......
CPDDET replied to CPDDET's topic in Modeling tools and Workshop Equipment
Never fear. The drill may come in the future when the need arises. I'm new to this art and don't yet wish to jump in with both feet. It's much to easy for me to get caught up in "buying rather than building". -
Have a extra $100.00 to spend......
CPDDET replied to CPDDET's topic in Modeling tools and Workshop Equipment
I really don't care for E-books. Just old fashioned I guess. I like the printed page. As stated, this is just a start of a referance library. Of course there will be other sources, such as others build logs and practicums. -
Have a extra $100.00 to spend......
CPDDET replied to CPDDET's topic in Modeling tools and Workshop Equipment
Thank you all for the great advice here., So many tempting tools out there! After giving it some thought I decided to invest in some books on rigging. This is something that I will be attempting quite soon on my current build (also my first build). Spent about $90.00 but it will be a good start for my rigging library. Rigging Period Fore-and-Aft Craft by Lennarth Petersson The Rigging of Ships: in the Days of the Spritsail Topmast, 1600-1720 by R. C. Anderson Rigging Period Ship Models: A Step-by-Step Guide to the Intricacies of Square-Rig by Lennarth Peterson The Art of Rigging by George Biddlecombe The Young Sea Officer's Sheet Anchor: Or a Key to the Leading of Rigging and to Practical Seamanship by Darcy Lever -
Have a extra $100.00 to spend......
CPDDET replied to CPDDET's topic in Modeling tools and Workshop Equipment
Good glass, wether it be filters or lenses, is expensive. -
Have a extra $100.00 to spend......
CPDDET replied to CPDDET's topic in Modeling tools and Workshop Equipment
Well, it looks like I'll order the electric plank bender, some cross lock clamps and a small modelers hammer. That will leave me enough to buy a 77mm circular polarizer for my wide angle lens. Photography is my other hobby. Between that and shipbuilding I'm going to need a lot more garage sales. LOL -
Have a extra $100.00 to spend......
CPDDET replied to CPDDET's topic in Modeling tools and Workshop Equipment
The plank bender sounds like a good investment. I managed on my Bluenose without it but there are some future builds I'm eyeing where it would be a big help. Any thoughts on this bending jig?
-
Made $100.00 at the garage sale and thought I would sink it into tools for shipbuilding. Since I'm a newbie I thought I would ask more experienced shipwrights about this. I have a good selection of cutting blades, tweezers, razor saw & miter box, jewelers pliers, mini Dremel and electric sander. Have paint supplies as well Maybe rigging tools (if they are really needed)? Will be starting that soon. Any input on "must have " tools would be most welcome and appreciated. Dave
-
Looks great! Hope my hull looks as good. Did you spray or brush?
-
I'm hoping by next summer for mine😋
-
Newbie paint questions...
CPDDET replied to CPDDET's topic in Painting, finishing and weathering products and techniques
Received an answer from MS. They tell me their paint can be thinned with water. If airbrushing, thin with alcohol. So if I'm brushing the paint do you more experienced modelers suggest water or alcohol? How thin should it be? I've heard elsewhere it should be the consistency of milk? Dave -
I'm following this closely. Nice job on the gammon iron.
-
Thanks for your kind words of encouragement, Dave. You're quite the philosopher!
-
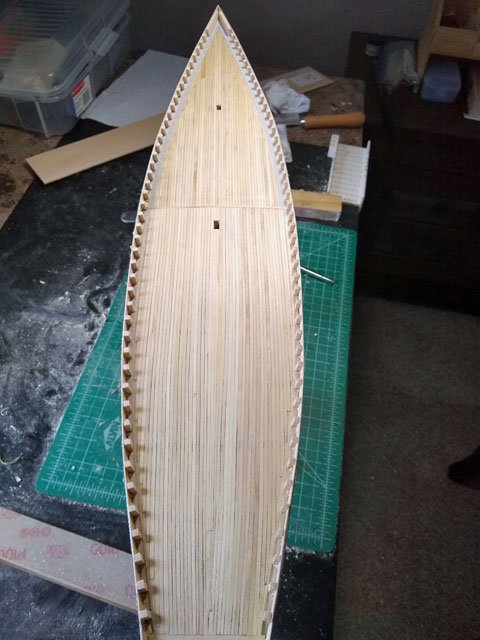
Following the same procedure I used on the port side, I managed to complete the starboard side. First cutting and gluing in the false frame timbers Then clamping the bulwark board, marking the scuppers, removing it, filing in the scuppers and finally gluing it in place. I see the mating of this lower bulwark board and the top hull plank isn't the best in some places. It's going to take some putty and sanding to get those areas looking good. But I'll have to be very careful not to "plug up" the small scupper holes with putty. But first I have to install the upper bulwark board and do some work on the transom to finish the hull. Then it's on to a bit of painting, a subject on which I'm completely ignorant. But I've posted questions to the group on the subject and getting lots of help.
- 389 replies
-
- 2
-
-
- bluenose
- model shipways
- (and 1 more)