


CPDDET
-
Posts
1,194 -
Joined
-
Last visited
Content Type
Profiles
Forums
Gallery
Events
Everything posted by CPDDET
-
 You're welcome to it, but there may be easier ways. I'm still a beginner at this.
 -
I'd love to know more about that plane you're using
-
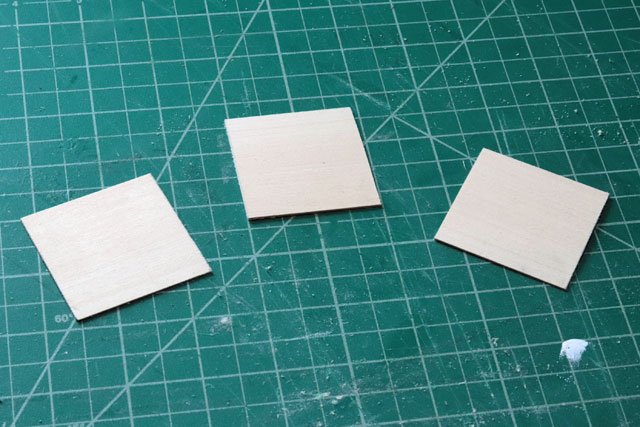
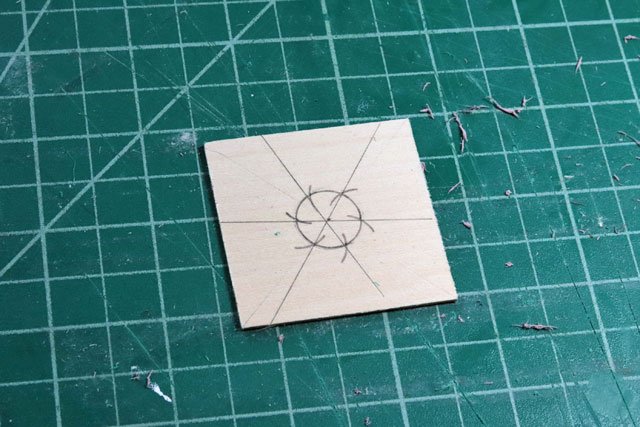
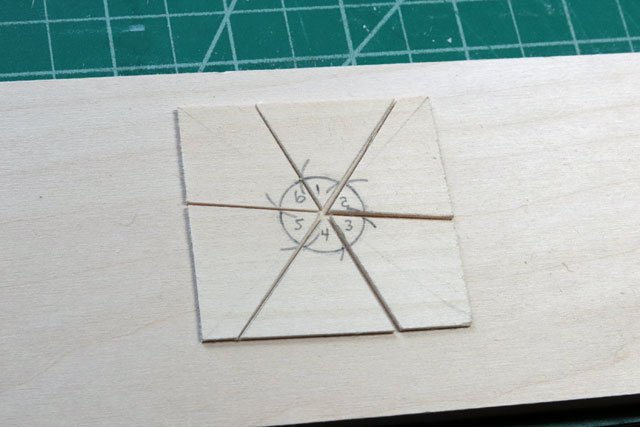
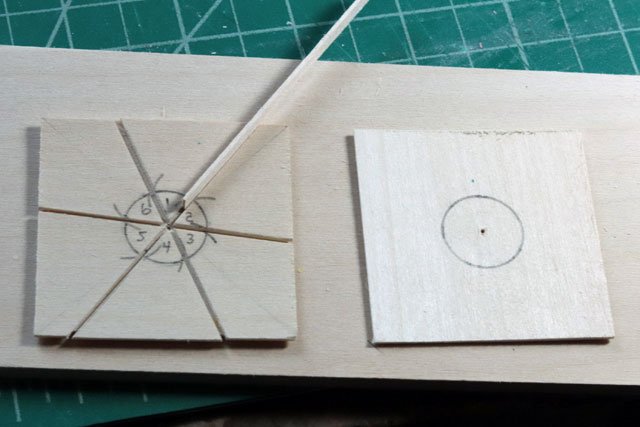
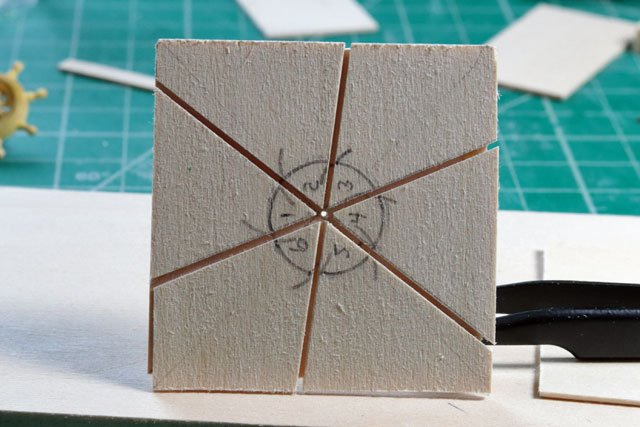
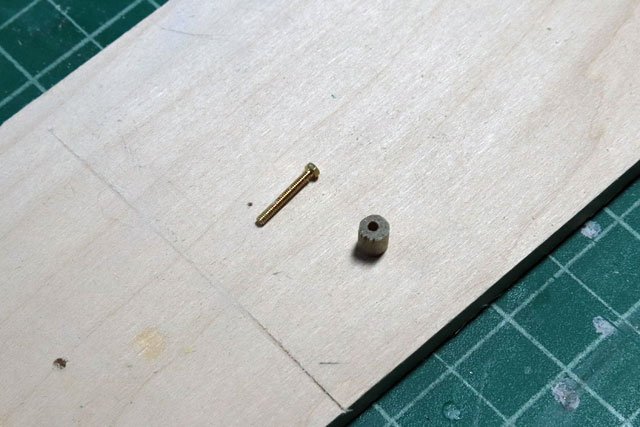
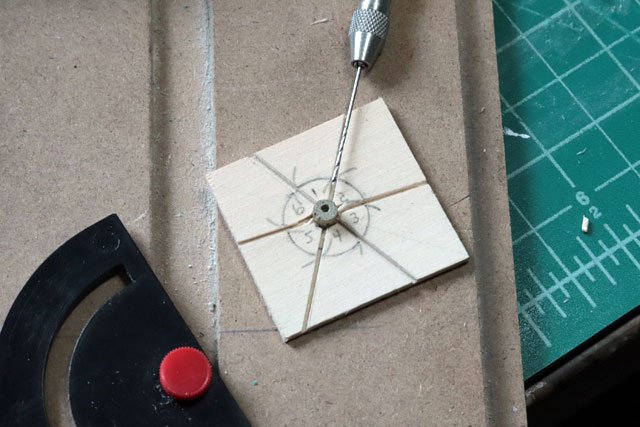
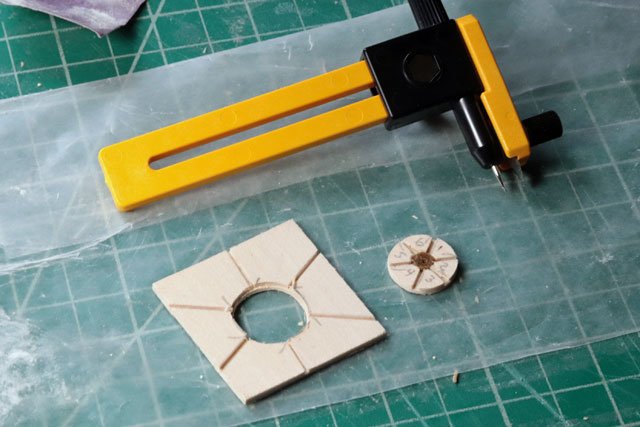
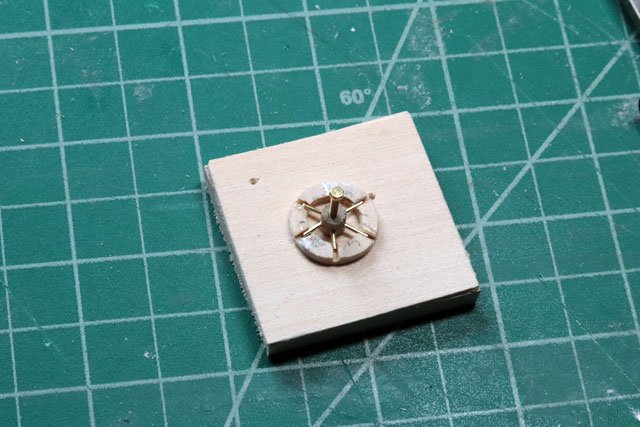
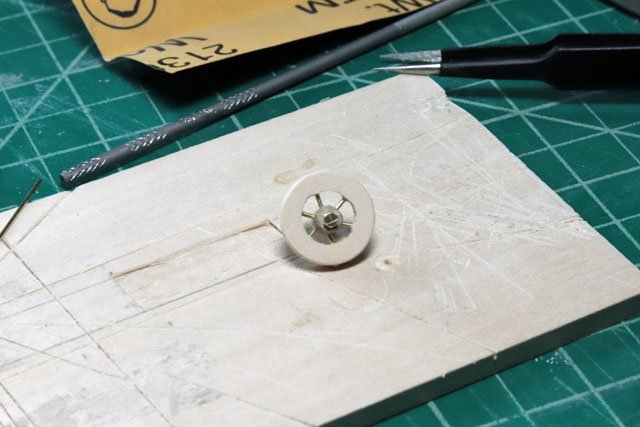
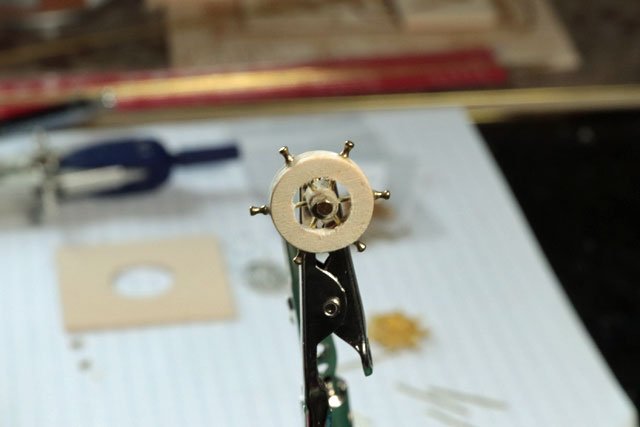
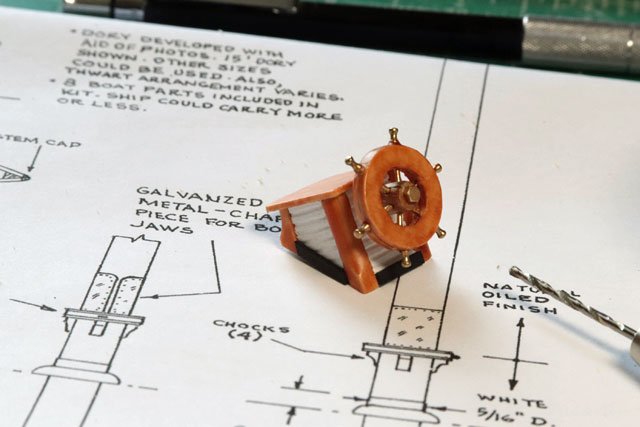
This took a bit of time but I really wanted to build my own wheel for my model. After a few failed attempts the following worked pretty well. I started with 3 pieces of 1/32 inch basswood. Drew the outside diameter on the first piece with a compass and divided the circle into 6 parts. Cut the square into 6 pieces Reassembled the 6 pieces, spacing the 1/32 inch apart, and glued them to the second square. I thought I would have to shave off 1/64 inch from the edge of each piece to keep the correct diameter with the spacing but it seems the hand saw kerf took care of that. Using my pin vice I drilled a 1/16 inch hole through a small piece of 3/16 inch dowel for the center hub. I drilled a 3/16 hole in the center of the 6 pieces and inserted the hub. Then, using the 1/32 inch gaps as a guide, I drilled 1/32 inch holes through the hub with a pin vice. Using a compass circle cutter I cut the “wheel” from the square. Placed small pieces of 1/32 inch brass rod into the groove and into the center hub holes. Tacked these in place with CA. Using the compass circle cutter I cut another “wheel” from the third piece and glued this on top with wood glue. Clamped and let dry overnight. Cut down 6 brass belaying pins and glued then into the six, 1/32 inch square openings for handles. Did some final sanding, staining and mounted it to the wheel house.
- 389 replies
-
- 6
-

-
- bluenose
- model shipways
- (and 1 more)
-
Crazy nice work, Richard. You continue to amaze.
-
Are these custom made tools? Standard tools adapted to a new purpose? Specialty tools made for this application?
-
Ain't it great when you figure things out and get excellent results? Nice job! Dave
-
Making nice progress! I understand your tearing out the original deck. After planking the hull on my Bluenose I tore out about 25% of it and re- installed. Dave
- 29 replies
-
- 1
-
-
- spray
- BlueJacket Shipcrafters
- (and 2 more)
-
So true, Richard. Not sure I can build a wooden ships wheel from scratch with hand tools but I'm looking forward to trying. Why do things the easy way when you learn so much more going the long route. Be safe and stay healthy! Dave
- 389 replies
-
- 1
-
-
- bluenose
- model shipways
- (and 1 more)
-
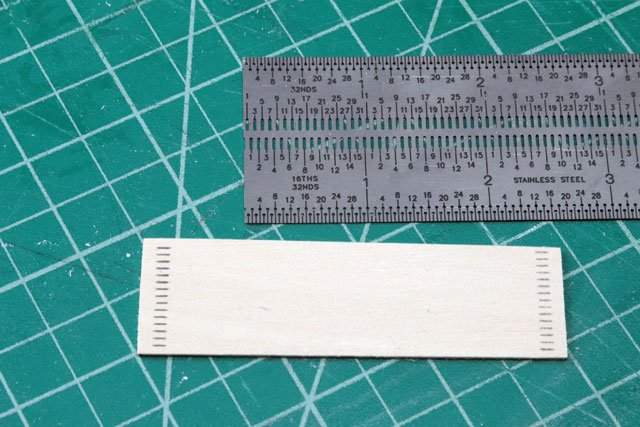
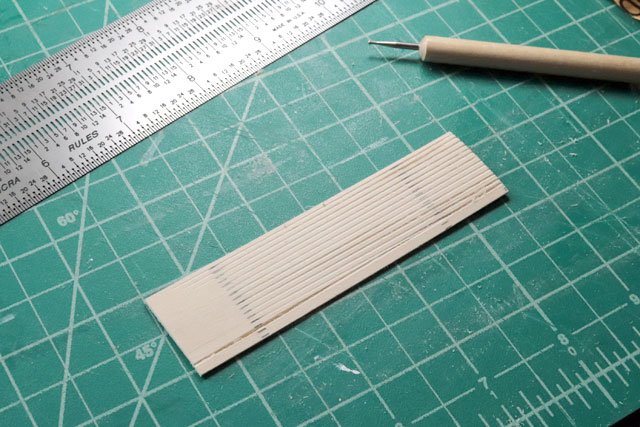
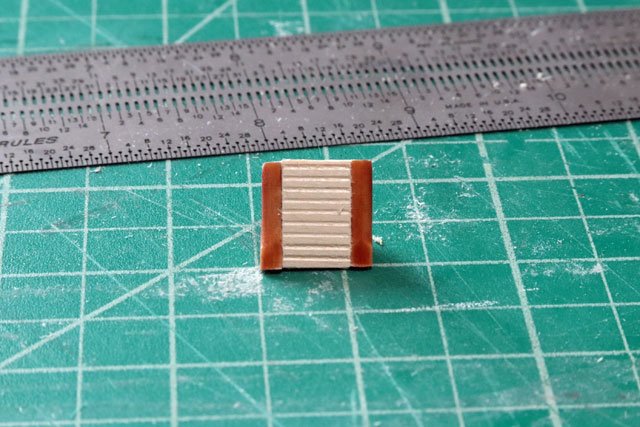
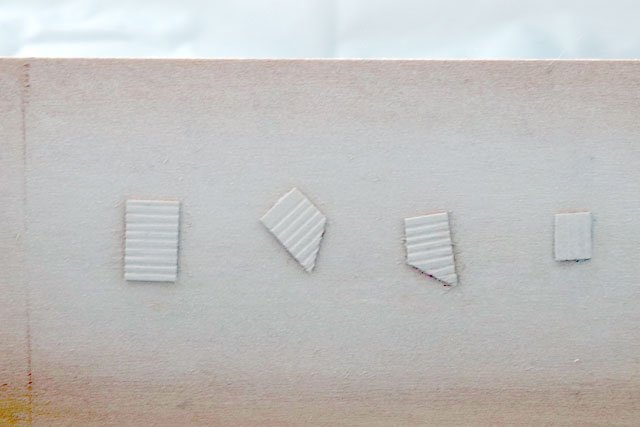
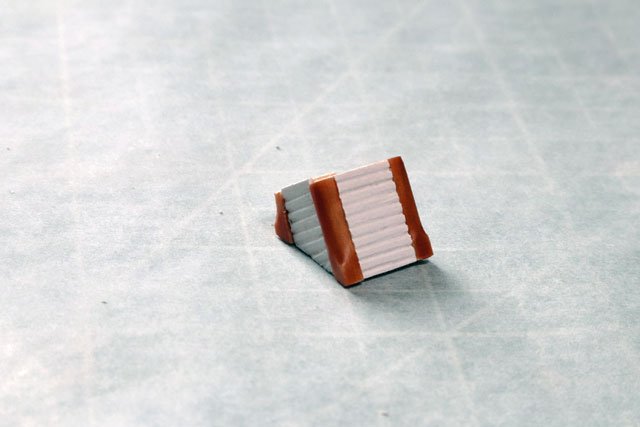
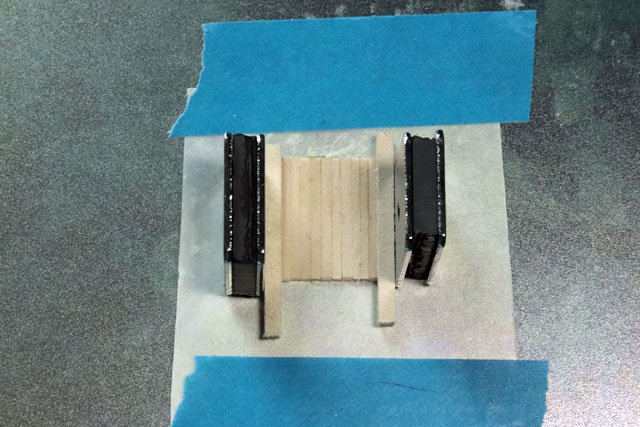
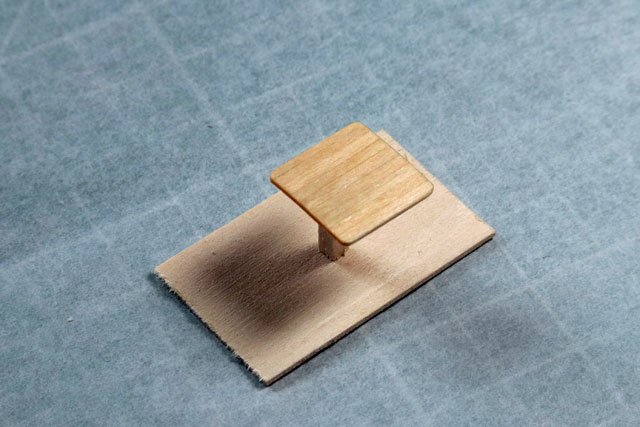
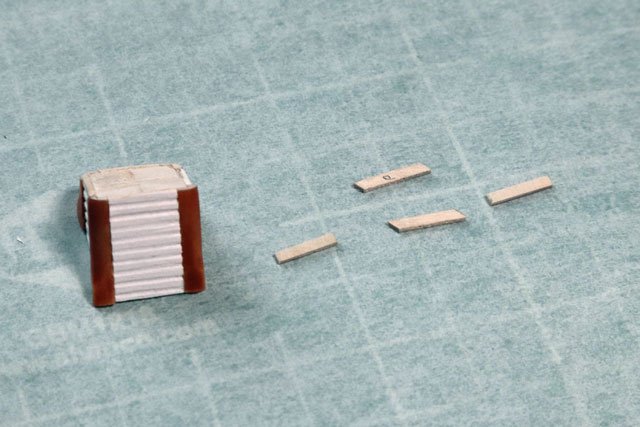
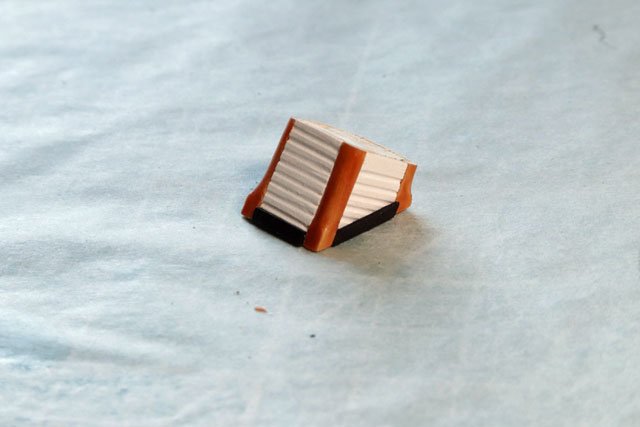
After finishing the corner pieces I decided to build the front, side and back panels. Instead of making these from thin strips and then trying to bevel them to show separation, I decided to simulate the individual boards. I used 1/16 inch thick basswood and, after marking them, I used a very small stylus to make the impressions. After rough cutting the pieces I used a round escapement file to smooth and deepen the score marks a bit more. Then did the final sanding and dry fit them. Then airbrushed the pieces, holding them down with double sided tape, and gave them 3 light coats of matt acrylic sealer Then glued the panels in place Since I was going to stain the top piece I wanted to build it from separate “planks”. I marked a piece of basswood and built a jig to get consistent pieces. Taping a piece of wax paper to a metal plate, I edge glued the “planks” with TiteBond and used magnets to clamp them. While the wax paper worked pretty good to keep the glue from sticking to the metal, I later found plastic wrap worked even better. After cutting to size and a final sanding, I mounted the piece on some scrap wood to make a stand. I used a very small about of CA so I could snap it off when I was finished. Then painted on a coat of wood conditioner. After 3 coats of Stain & Poly I was done. Next I cut 4 small pieces for the bottom trim Hand painted these and gave them 3 very light coats of matt acrylic sealer (spray can). Then glued them in place After a final sanding of the top and bottom to level everything out I added the top. I realize the bottom trim on the actual ship (Bluenose II) goes over the corner pieces but I wanted to show off the stained wood corners and decided to place the trim between the corner pieces. While this is a Bluenose kit, not a Bluenose II kit, I’m mixing the styles a bit. Since I will be looking at the ship for a long time, I want it pleasing to my eye. Now it’s on to the ships wheel. I hate britannia metal parts and need to figure out something else. I have ordered both a wood and bronzed wheel but may attempt to build my own. Seems like the further I get into this build the more scratch building I’m doing. Here in Illinois there is an order to shelter at home and all non-essential business will be closing at 1700, and that includes hobby stores. So I ran out and stocked up on various basswood sheets, strips and squares. I’ve been raiding the kit box and too sure of my inventory. Be safe, mates!!

- 389 replies
-
- 4
-
-
- bluenose
- model shipways
- (and 1 more)
-
Beautiful work, as always.
-
Yes, this can be an expensive hobby. But you could get an 18th century longboat kit for less than just plans for Bluenose.
-
Just amazed at your machines and your obvious skills in using them. Beautiful work!
-
Morning Joe, As I understand it her primary purpose was fishing. When racing, much of the deck fishing gear, as well as the small fishing boats she carried, were temporary removed. My build plans show which deck gear to install or omit for each configuration. Hope that clears things up. And thanks to all for the kind comments and encouragement. Dave
-
I'm building Model Shipways Kit 2130: Bluenose. While the Bluenose was both a fishing schooner and a racer, Bluenose ll is neither. By build plans allow one to build her as a racer or a fishing schooner: I've chosen the racer deck plan. So I'm just following the plans that came with the model. I can't vouch for their historical accuracy. In some ways I view this first build as a primer for future builds. It won't be as perfect as I would like but will be as good as my current skill set allows. As the build progresses my techniques and workmanship are improving, which is my personal goal. By the way, I've nothing against power tools. I'm just interested in learning old skill sets. Kind of like when I taught myself to shave with a straight razor several years ago. Dave
- 389 replies
-
- 1
-
-
- bluenose
- model shipways
- (and 1 more)
-
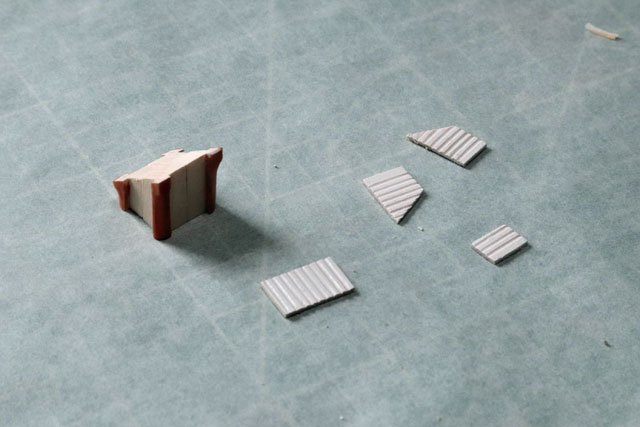
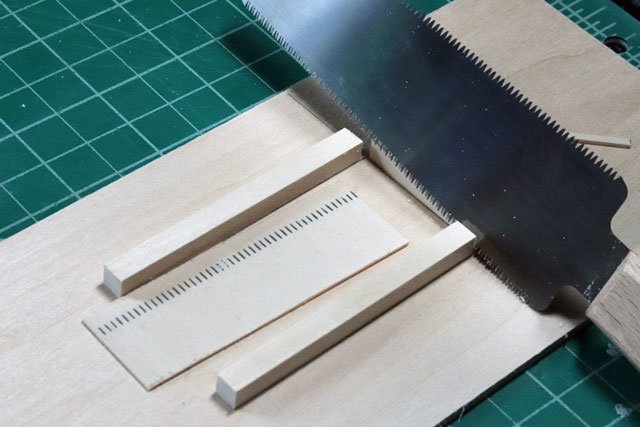
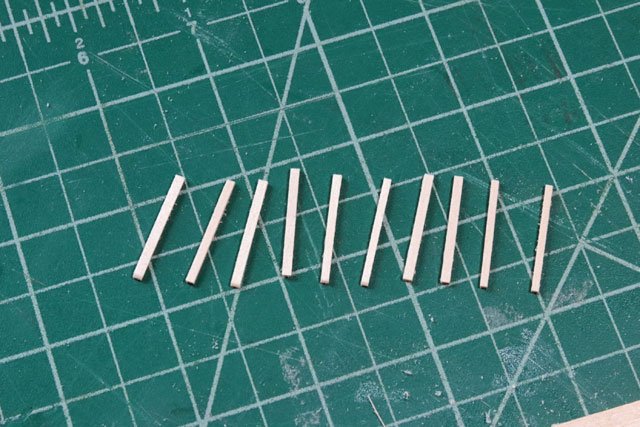
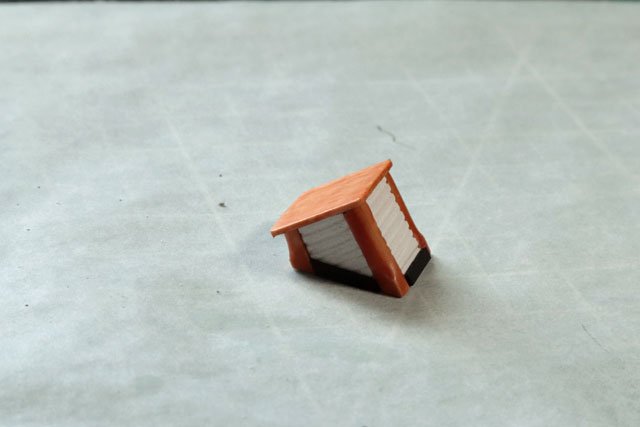
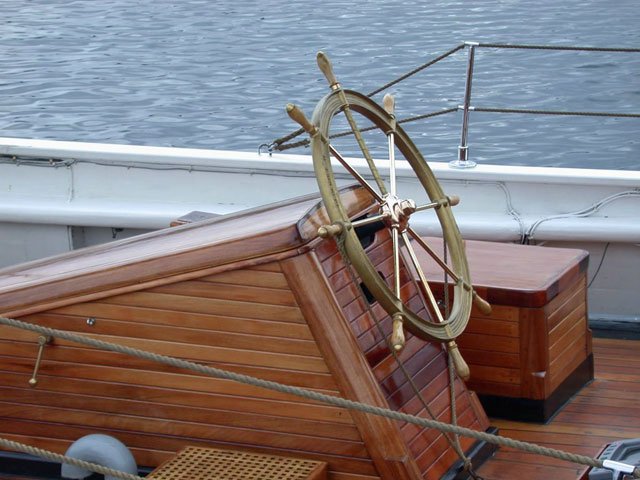
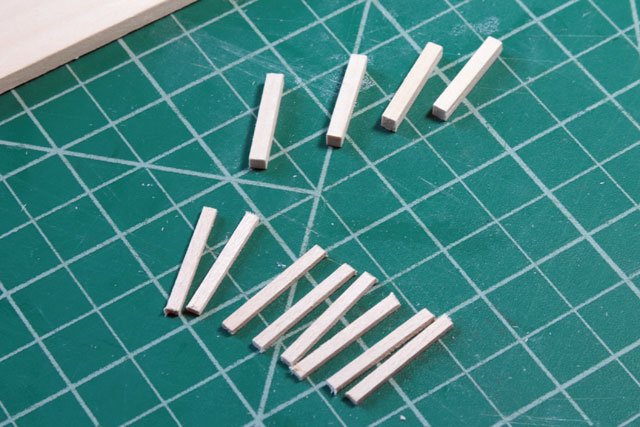
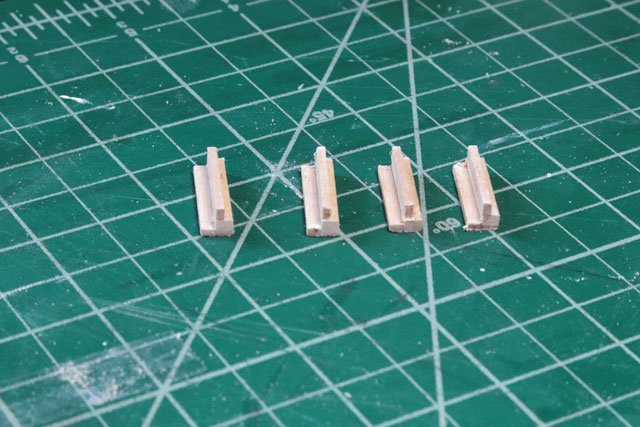
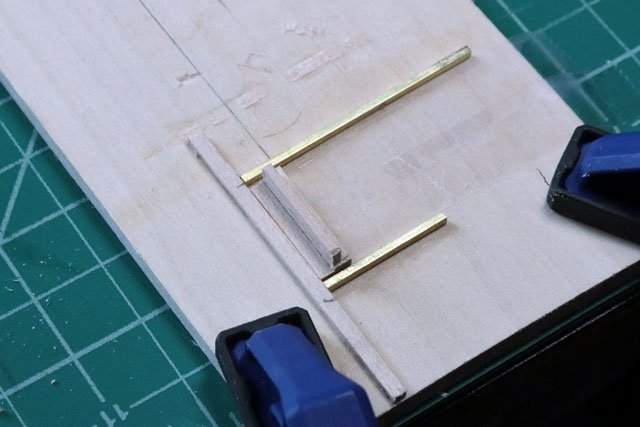
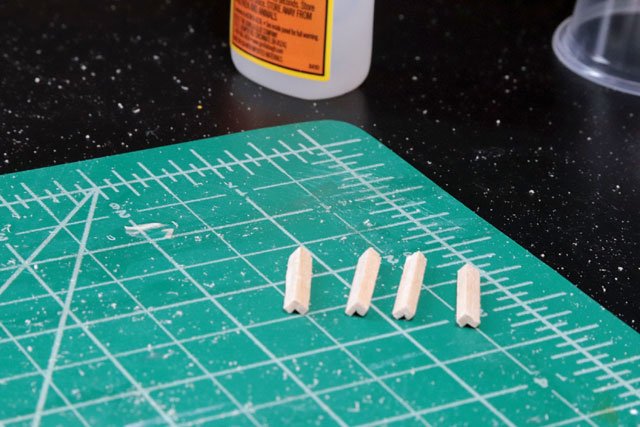
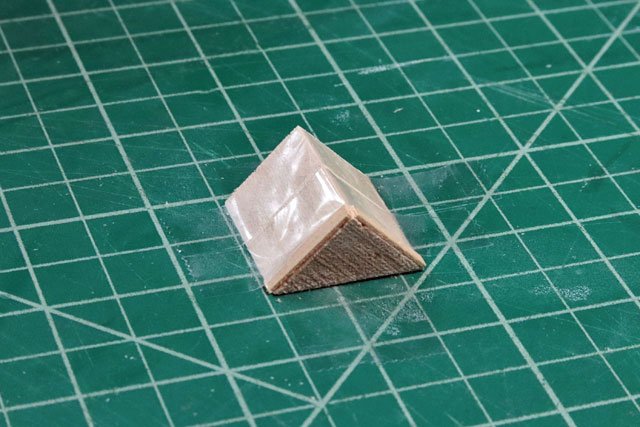
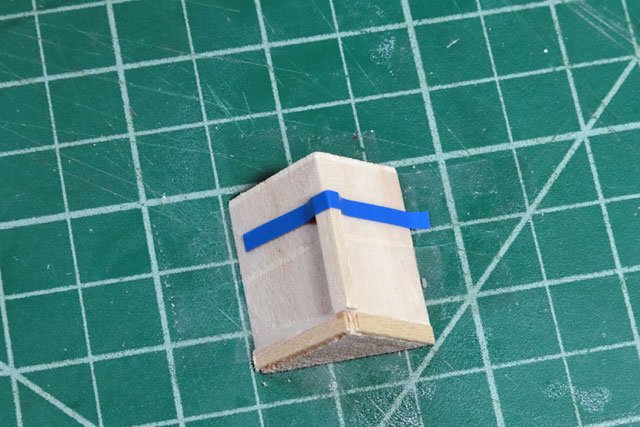
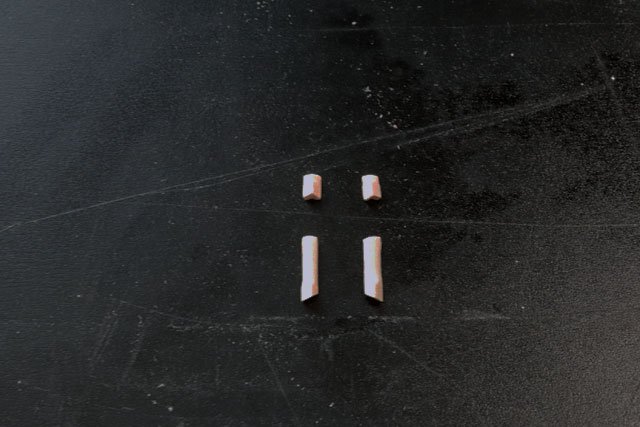
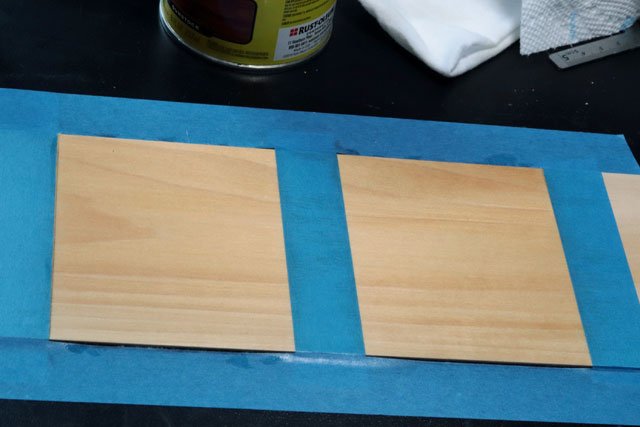
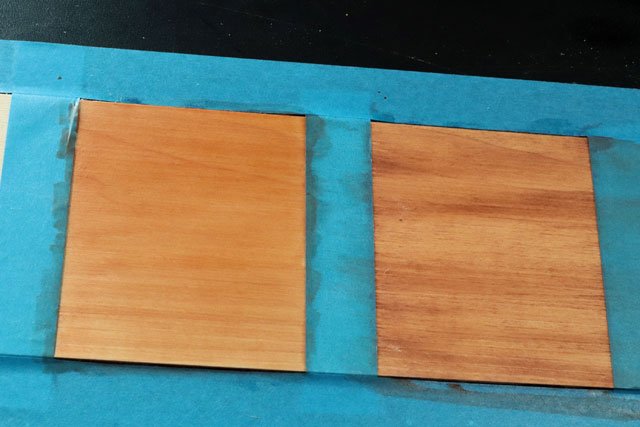
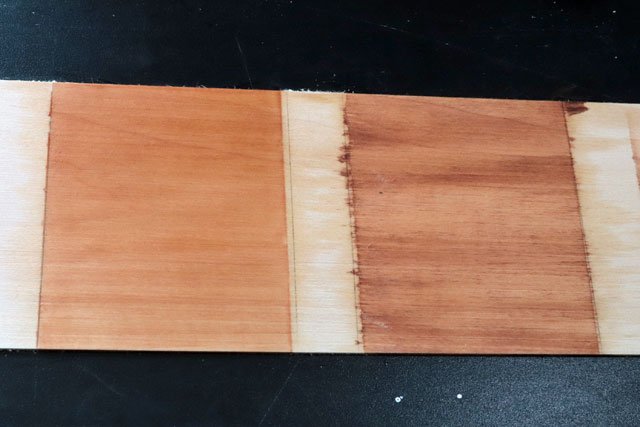
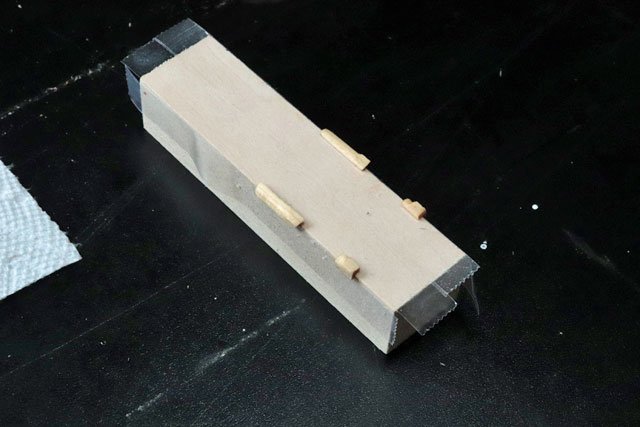
Starting the deck housings, beginning with the wheelhouse. Research shows 2 different finishes, one all varnished wood: And one painted white with varnished top and corners: Since the ship I saw in Kenosha last year had the painted white and varnished corners / top, I decided to go that route. I thought I would make the corner posts first. they are square at the bottom and rounded the rest of the way up. I had some 1/8 x 1/8 stock to work with and needed to cut that. So I first built a jig. I used some scrap 1/16 inch brass bar to limit the depth of my cuts and to help hold the piece as I cut it. Then cut 4 lengths of the 1/8 x 1/8 and 8 pieces of 1/16 to use as a guide for the saw. Glued 2, 1/16 inch pieces to each 1/8 X 1/8 piece. Places a strip of double sided tape in the jig, and cut along the 2 pieces of 1/16 with a razor saw. The 1/16 saw guide and the 1/16 brass bar allowed me to "notch" the 1/8 x 1/8 pieces. Since the 1/16 pieces were glued to the section being removed there was no need to "de-glue" anything. Cut a square block of basswood to form a small triangle and stuck that to the cutting mat with double stick tape. Glued some scrap pieces of wood at the bottom to act as a stop and put double stick tape over the rest of the jig. Dropped in one of the cut pieces to make sure it would hold securely. Worked great. The square bottom of each corner post needed to be 1/8 in high and the rest rounded. So I used 1/8 inch vinyl tape to mark where the scraper would start. Used a scraper to round off the top portions of the post and cut to length using the proper angles. Then tested 2 different staining methods. Sanded a piece of basswood with 600 and 800 grit and sectioned it off with painters tape. Then applied wood conditioner to both areas. The wood conditioner is supposed to help stop "blotching" in softer woods. Applied oil base stain to the right side and poly - stain mix to the left side As one can see, the oil base stain still came out blotchy but the poly-stain came out quite nice. Although the poly-stain took 2 coats to deepen the color. I then removed the tape and noticed some serious bleeding from the oil stain but almost none from the poly-stain. So I'm going with the poly-stain. Took another small block of basswood and applied double stick tape to hold the pieces to be stained. After 3 coats of the poly-stain the corner posts cam out pretty good. Now to start on the side, back and front white panels


- 389 replies
-
- 4
-
-
- bluenose
- model shipways
- (and 1 more)
-
I'm just starting my deck housings, begining with the wheelhouse. Will be stealing some ideas from you, although I'm attempting to do all my work with hand tools. So getting results even close to yours may prove to be difficult.
-
You're being too hard on yourself, as most of us are. But it's what drives us to improve our work. Very impressive workmanship! Dave
-
I've used the Pin Insertion Pliers with success when inserting small brass nails. These nails had a 1/64 inch head and we're quite short. Not a tool I use often but did a very nice job when needed. Dave
-
I've seen some very nice finishes using Watco Danish Oil. But the color choices are limited compared to traditional oil stains.
-
I'll be watching closely as my hope is to eventually move to scratch building with better wood. Thanks for sharing your work!
-
As for getting a crisper / smoother look on basswood. I'm having some luck using a sanding sealer before painting. And using an airbrush, rather than a brush, on this sealed surface provides a decent look. As the deck housings will require staining, I'm going to experiment with wood conditioner before staining.
-
Your well defined edges and smooth wood finishes make me think your using something other than basswood.
-
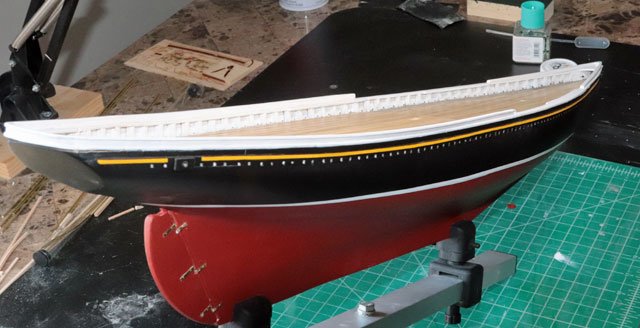
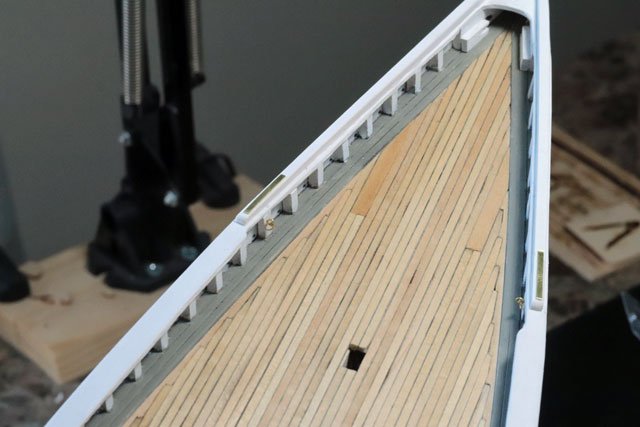
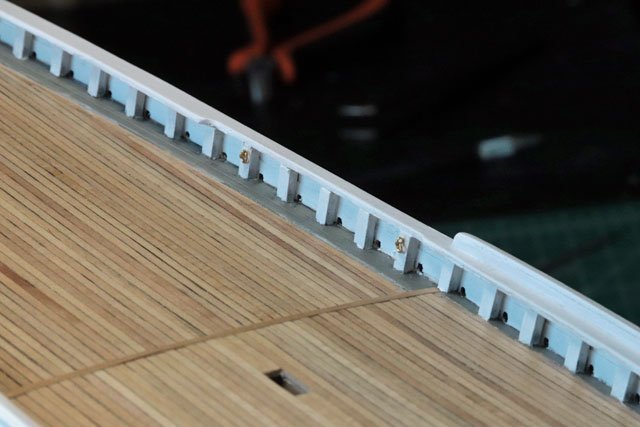
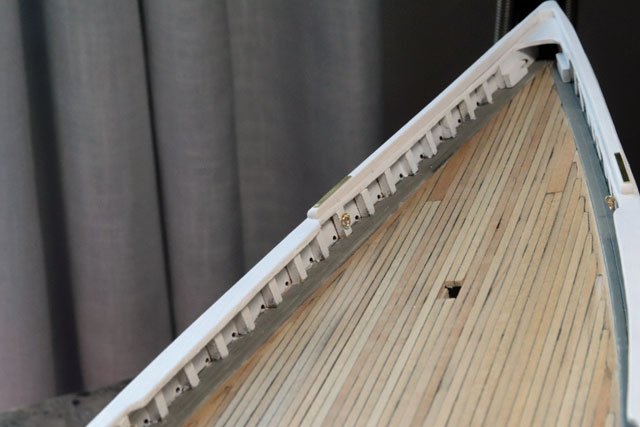
Haven’t posted for a while but the work continues. The Monkey Board, Monkey Rail and Buffalo Rail are done. Installed 6 ringbolts on each side as well as the anchor pads. I will leave these as brass (not painted) like I did the pintles and gudgeons. I will start building the deck housings next. Have some research to do on these first. Dave
- 389 replies
-
- 7
-
-
- bluenose
- model shipways
- (and 1 more)