CPDDET
-
Posts
1,194 -
Joined
-
Last visited
Content Type
Profiles
Forums
Gallery
Events
Everything posted by CPDDET
-

Swiss escapement file set on sale....
CPDDET replied to CPDDET's topic in Modeling tools and Workshop Equipment
Yep, 4 is a fine cut. I use them for finishing work or critical fittings. I have some other files for rough work. I also use a lot of 600 & 800 grit paper. Takes a bit longer but I find I use less wood filler to correct my over aggressive filing / sanding 😋. -
Swiss escapement file set on sale....
CPDDET posted a topic in Modeling tools and Workshop Equipment
https://www.ottofrei.com/Glardon-Vallorbe-Swiss-Escapement-Files-Set-Of-12-Cut-4-Fine -
Escapement files on sale: https://www.ottofrei.com/Glardon-Vallorbe-Swiss-Escapement-Files-Set-Of-12-Cut-4-Fine
-
I believe I bought my set of Glardon Vallorbe escapement files at Rio Grande, a jeweler supply house. But it may pay to shop around. Dave
-
It's about what I paid for my set of Swiss escapement files. Good tools don't come cheap.
-
I'm seriously considering purchasing a Byrne's saw. But the array of attachments is dizzying, at least to me. Perhaps those who have experience with this tool could expound on which attachments would be the most useful to start with. Dave
-
First let me say your workmanship and attention to detail is astounding, congrats on doing such fine work. One question. When creating your razorblade scraper is the molding shape done by eye, using some sort of template or perhaps drawn first with a stylus? Dave
-
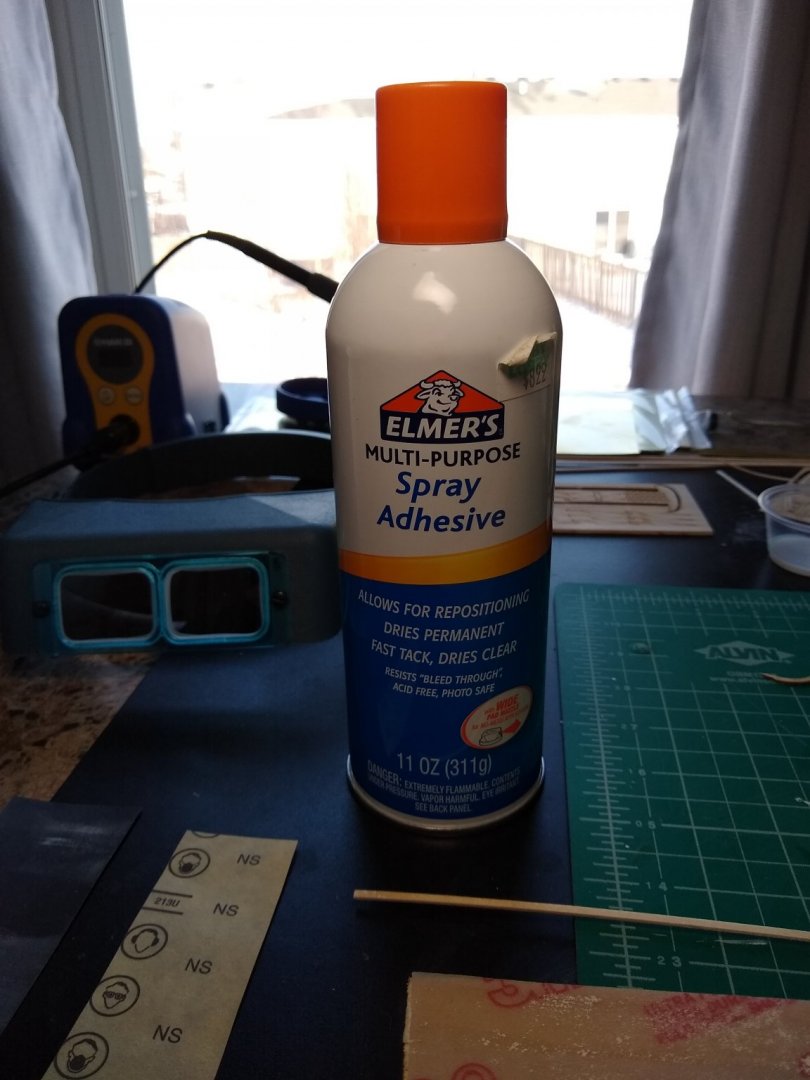
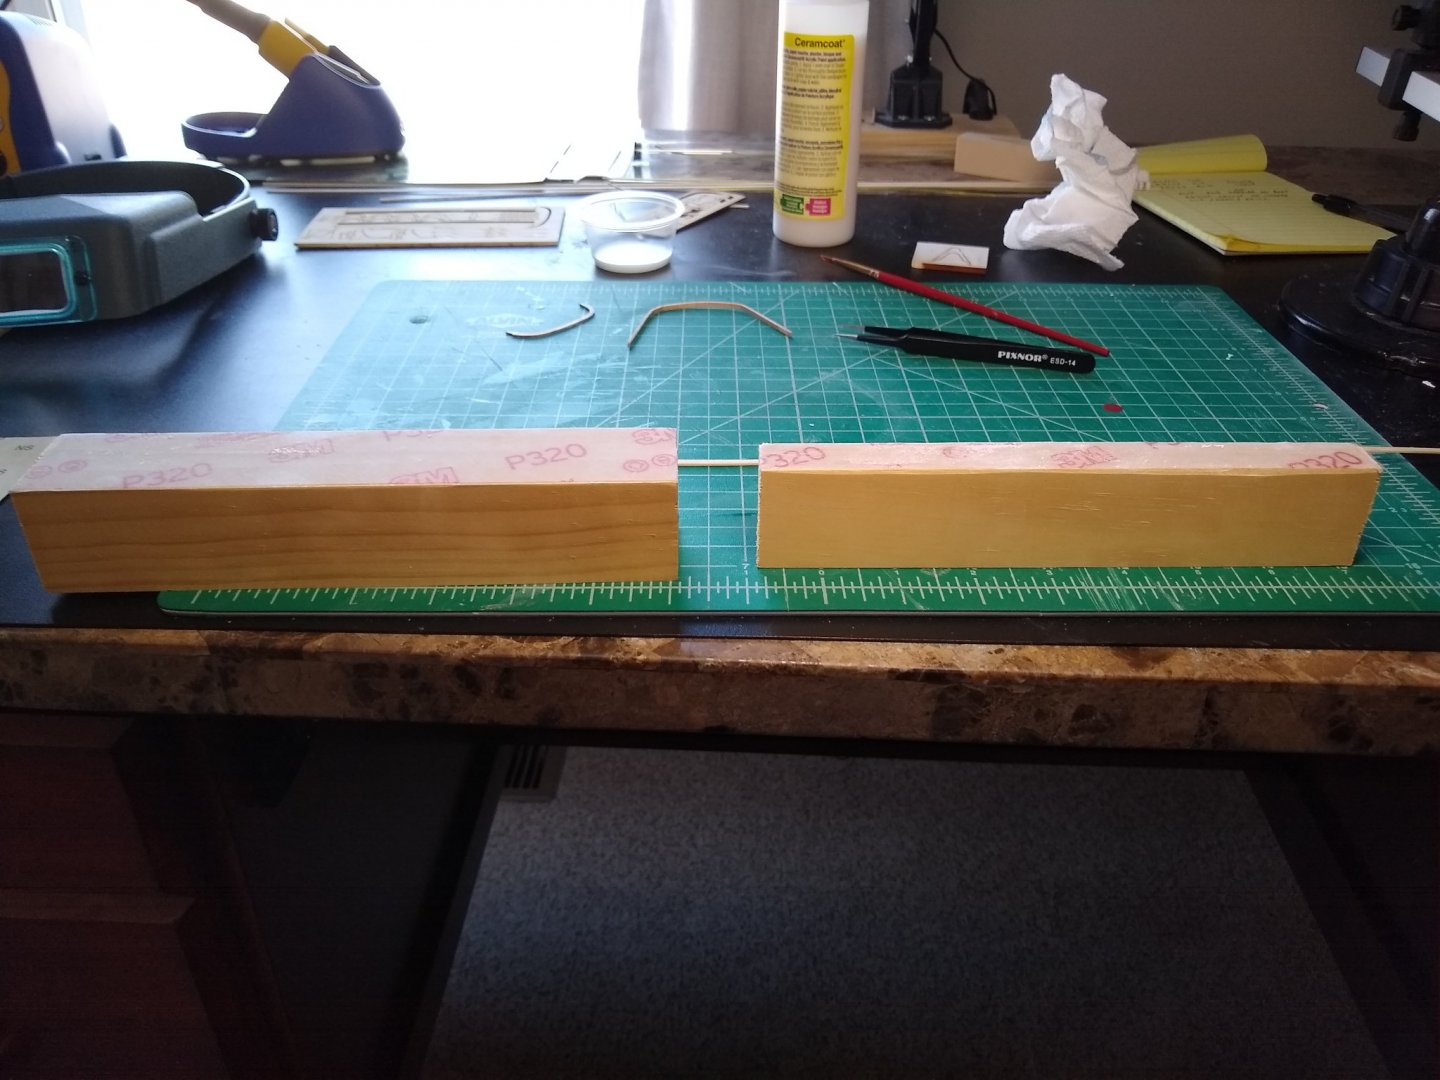
To aid in fairing my bulkheads I cut 3, 8 inch long pieces of 2x2 and 3, 8 inch long pieces of 1x2. Using spray adhesive I attached 3 different grades of 3M Ultra Flexible sandpaper: 100, 150 and 320 to the blocks. The 8 inch length allows faring of several bulkheads at once.
-
Sheet 2 of my plans, Model Shipways model, shows all except bulkhead "A" are trimmed on the aft side. "A" is not trimmed on the plans but your practicum may show it is. If your following Bob Hunts practicum you will eventually be removing the extensions completely. But you need them untill the bulwarks are installed. I cut mine completely off too soon and it caused a big problem. Read a few chapters ahead in the practicum and it will be clear. Dave
-
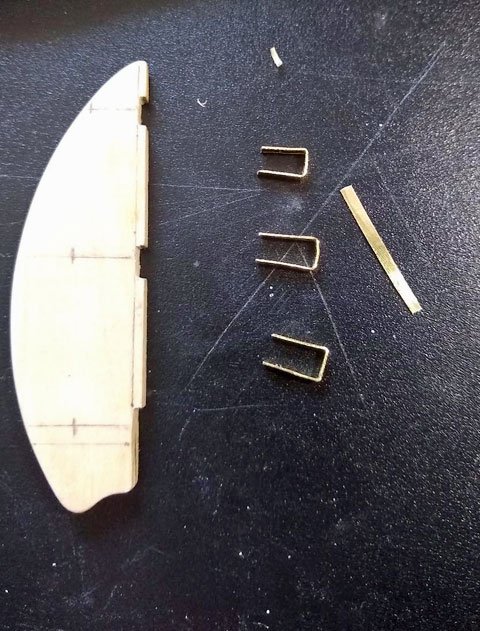
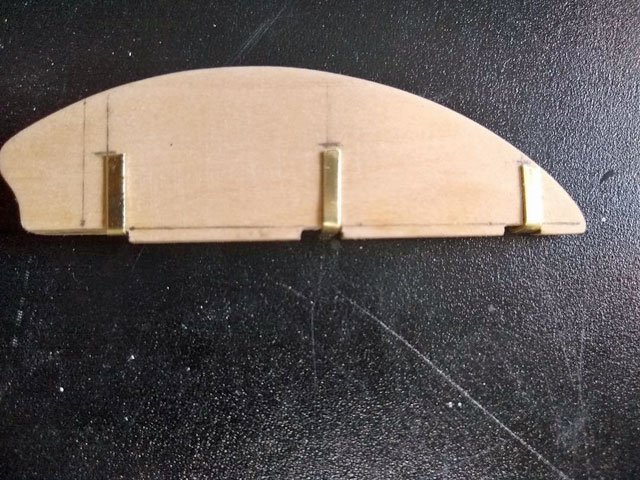
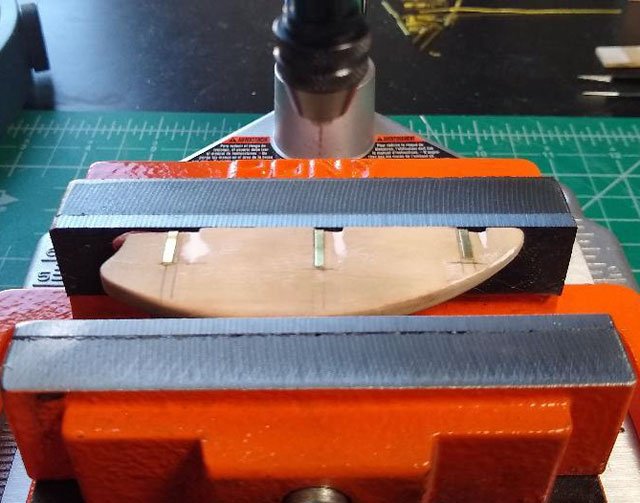
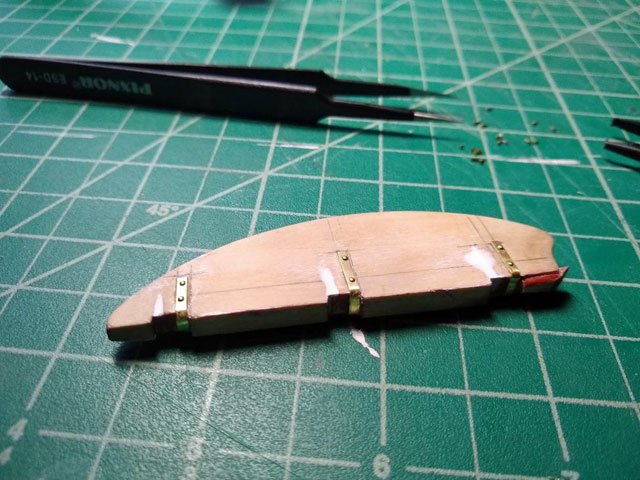
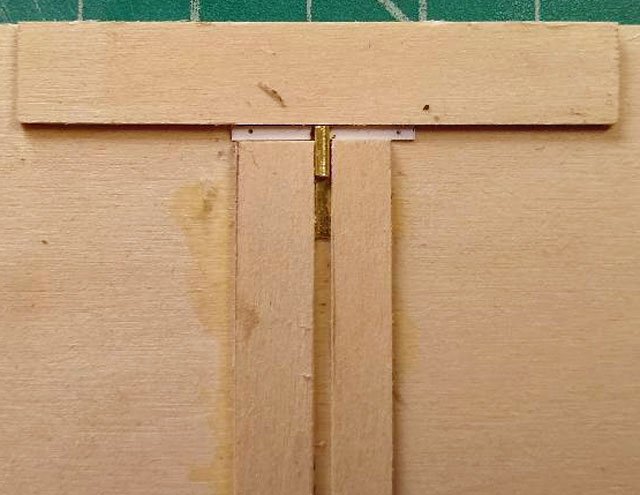
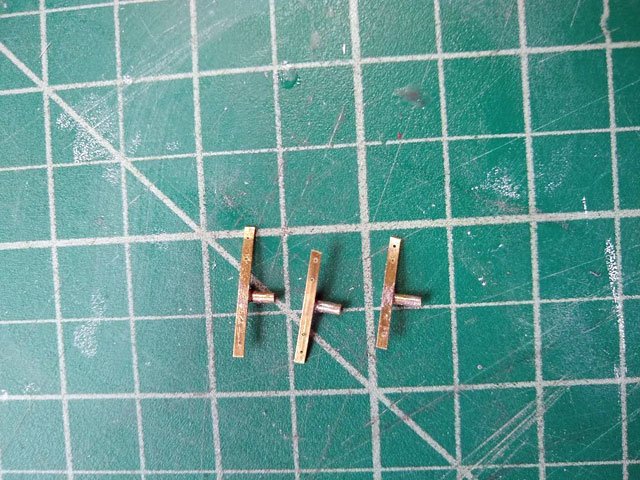
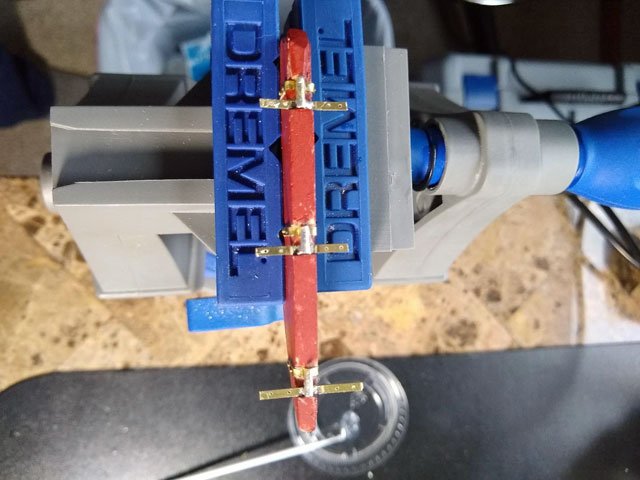
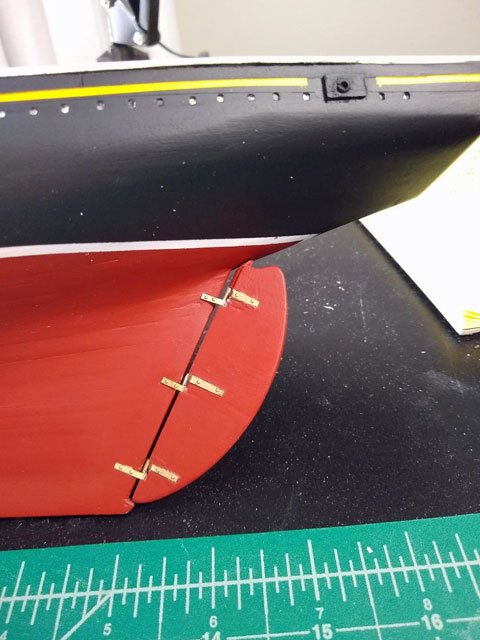
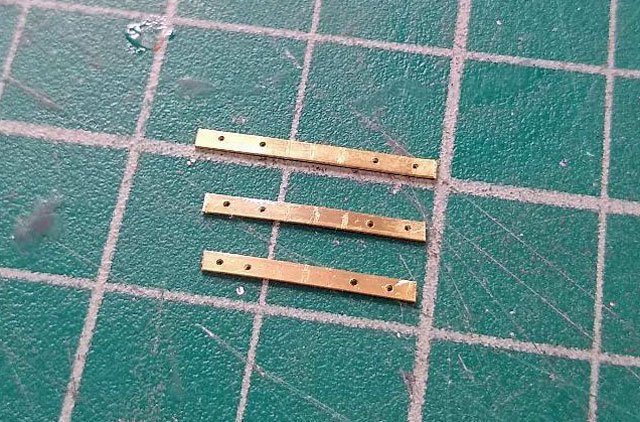
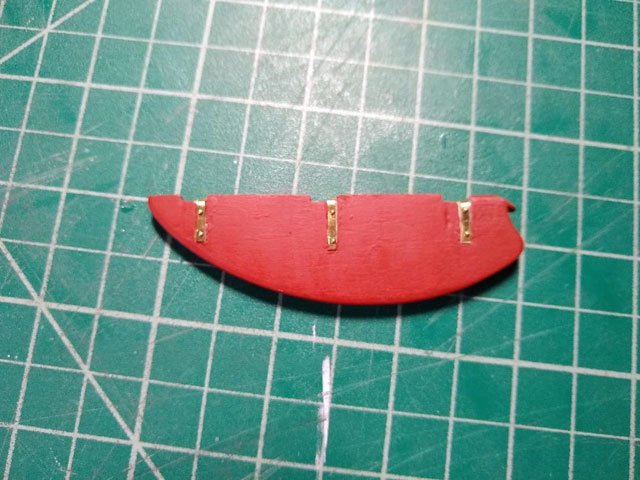
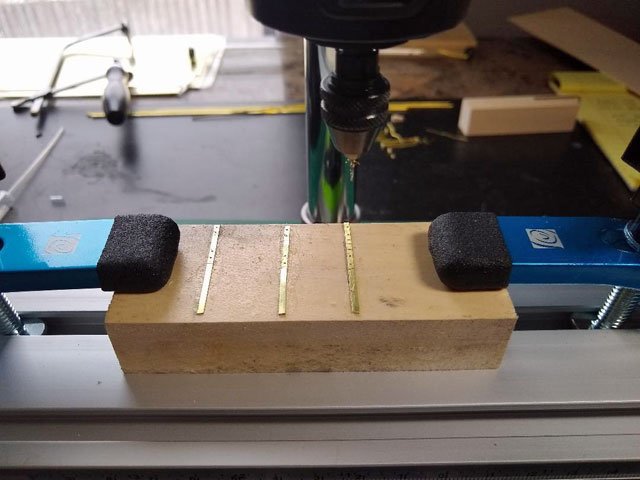
This process has seemed to take forever because of the holidays, gathering new tools, much trial and error and some pure laziness. But it’s finally done. I found working with metal vs wood is a whole different world. I did acquire a Dremel 4300, a Dremel workstation which forms a decent drill press and an inexpensive X Y table which fits the bolt hole pattern on the workstation. Also needed a soldering iron and extra drill bits. All a bit expensive, but needed. I have been following Bob Hunt’s practicum, somewhat loosely, but didn’t care for his idea to use black automotive pinstriping to simulate the pintles and gudgeons. I also looked at Dave’s (suburban shipbuilder) blog but didn’t feel I wanted to go as far as building a working hinge. I started by attaching the rudder to the ship with tape and marking the angle and length of the pintails and gudgeons. I decide to use 1/64 by 3/16 brass strips for the pintles / gudgeons, 1/16 round brass rod for the hinge and insert small nails to represent bolt heads. I then cut and shaped the brass pieces that would form the gudgeons And attached them to the rudder (I would later regret doing this) Placing the rudder in a vice and placing it on my Dremel workstation, I drilled 1/64 holes in the gudgeons. Using small nails with 1/32 heads, I placed one in each of the drilled holes. The shaft of these nails was a perfect fit into the drilled holes and, since I drilled just deep enough to get through the brass, sank nicely into the wood. The white stuff on the rudder is wood fill, fixing one of my many mistakes. I then painted the rudder and set it aside. I measured and cut 3 pieces of brass for the pintles. Being too small to hold by hand and drill, I took a block of basswood, applied sanding sealer and sanded it smooth. Then used rubber cement to hold the pintles to the block. This went under the drill and worked nicely to get the holes drilled without moving. The rubber cement came off easily. In order to get as close to a perfect 90 degree angle of the pintles to the 1/16 round brass rod, I built a gig to hold them in place while soldering. The white substance on the brass strip is water based white-out which acts like an anti-flux. Got that idea from a jewelers forum and it worked great. Now is where I ran into the problem mentioned earlier. Having already installed the gudgeons on the rudder, I couldn’t solder the pintles & rod to them without having the solder job I previously did come apart. So out came the CA gel glue. What I should have done was solder the pintles and gudgeons to the rod before installing. But what the hey, live and learn. I let this dry overnight, touched up the paint and then did the final install. I know the pintles and gudgeons are supposed to be black, but I really like the brass detail. And since this is my model they will stay that way.

- 389 replies
-
- 4
-

-
- bluenose
- model shipways
- (and 1 more)
-
Good to hear your back. Get those bulkheads right and you'll be off to a good start. Dave
-
This is on Sheet 4 of my plans.
-
I'll check my plans tomorrow and get back to you. Dave
-
Yes, you are challenging me to do better builds. And that's a good thing! Dave
-
Thanks for sharing your processes and techniques, beautiful work!
-
Thin hull planking
CPDDET replied to Gerarddm's topic in Building, Framing, Planking and plating a ships hull and deck
I believe wood veneer as thin as .6 mm is available. -
Jeff, one other thing I wanted to pass along. I've learned from experience that sometimes one needs to test a process before doing the work on the model. For example; I'm in the middle of attaching the rudder to the ship. This means fabricating the pintles and grugedons and attaching them. On scratch materials I'm testing epoxy, soldering, micro nails, drilling, shaping and so forth. Of course, some processes are straight forward. But if something seems complicated, it may be best to do a test run first. Take you time and if you feel rushed, put it down and take a break. Dave
-
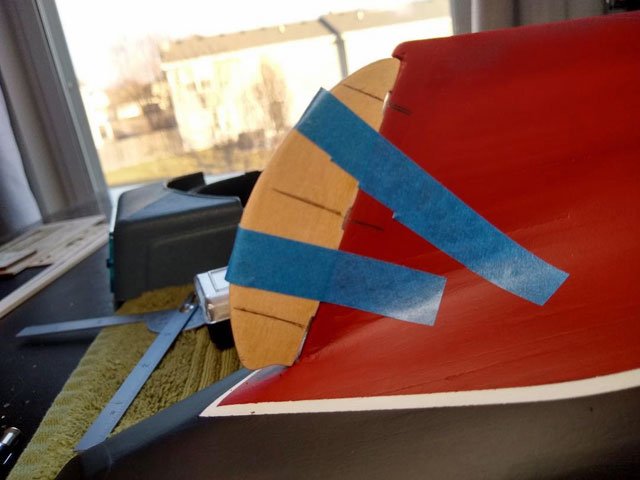
I decided to build my cap rail from 2 pieces of wood: one for the port side and one for the starboard. I purchased a 3" or 4" wide basswood board of the proper thickness, laid it on top of the bulwarks and traced a line for the arc. Cut the outside arc, then set my dividers for the proper width and drew the inboard line. Then measured from the plans for the two areas (on each side) where the rail is a bit wider and transfered those to the board. Then adjusted the inboard line to accommodate these wider parts and made the final cut. When drawing the outboard and inboard lines, be sure to adjust the width to accommodate the proper overhang. I think there are some pictures on my build log if you think this will work for you. Dave
-
Hey Jeff, welcome to the world of model shipwrights. I'm about 1/3 through my first build and thought I would pass along some things I've learned. The advice I received was to buy tools as you need them. Then buy the correct tool of the best quality you can afford. Your probably going to start with the keel and bulkheads. Look at as many build logs as you can and see what tools others have used for these steps before buying. Then do the same for each following step. Yes, it slows things down. But I'm finding patience is key with this hobby. I'm still adding needed tools as I go along but it does help spread the cost. If, at some point, you decide this isn't for you, you will only have invested in the tools and materials you needed to reach that point. And if you finish the model, you will be well equipped for the next. I also follow some of the other forumson this site. Like tools, jigs, painting ect. I've found lots of tips that will help me in future points with my build. Also there are many fine book on the build process of wooden models. I just acquired, as a Christmas present, both volumes of Ship Modeler's Shop Notes from the NRG website Good luck, and use this site to your advantage. Dave
-
Thanks Ricky! Things move slowly with this first build. It's a learn as I go and I don't always get it right the first time, forcing me to re-do a process: sometimes more than once. Tools and material needs also slow the first build. Buying as I move through the build causes delays as sometimes items can be back ordered, or I need to stop and save some money for the purchase. The constant delays can be frustrating but I'm not going to let it stop me from acquiring the proper tools and learning proper techniques for a decent build. Currently I'm working on the pintles and grugedons on the rudder. I'm on my 3rd try, using different materials and assembly. I'm on hold because I don't have a soldering iron. But I've done my research and the tool should arrive in a day or two. Patience is key. And some of the best advice I received when I began was to not buy a tool until it's needed. Buy the right tool and buy the best one can afford. One consoling thought is that by the time I finish this build I will have the tools, material and more experience in place for the next. Dave
- 389 replies
-
- 1
-
-
- bluenose
- model shipways
- (and 1 more)
-
The more research I do the more it bears out what you say, Mark. If want a drill press, buy a drill press, if you want a milling machine, buy a milling machine. Dave
-
Won't be long and I'll be in need of a bench top drill press. I've been looking at Proxxon and Microlux. Both have available XY tables, machine vice and chuck. The top rpm on the Proxxon is higher, 8500 vs 6500 for the Microlux. Proxxon claimed their drill press can be used for milling as well. Don't see that claim for Microlux. What's the opinion of those with experience with these tools? Dave
-
Would a bench shear work as well as a guillotine shear? I see Eastwood makes an 8 inch bench shear that has great reviews. But not having any experience with any type of shear I don't know. Dave
-
Thanks for the tips and clues, Richard. I'm a bit far off from getting to the metal work, but it pays to plan ahead. As well as helping to spread the cost of tools and materials. Dave