
robert952
-
Posts
920 -
Joined
-
Last visited
3 Followers


About robert952

- Birthday 09/27/1952
Recent Profile Visitors
2,641 profile views


-
 robert952 reacted to a post in a topic:
Muscongus Bay Lobster Smack by Stubby - Model Shipways - 1:24 Scale
robert952 reacted to a post in a topic:
Muscongus Bay Lobster Smack by Stubby - Model Shipways - 1:24 Scale
-
robert952 reacted to a post in a topic:
Muscongus Bay Lobster Smack by Stubby - Model Shipways - 1:24 Scale
-
robert952 reacted to a post in a topic:
Norwegian Sailing Pram by DocTom - Model Shipways - 1:12
-
robert952 reacted to a post in a topic:
Norwegian Sailing Pram by DocTom - Model Shipways - 1:12
-
robert952 reacted to a post in a topic:
Norwegian Sailing Pram by DocTom - Model Shipways - 1:12
-
robert952 reacted to a post in a topic:
Norwegian Sailing Pram by DocTom - Model Shipways - 1:12
-
robert952 reacted to a post in a topic:
Norwegian Sailing Pram by DocTom - Model Shipways - 1:12
-
robert952 reacted to a post in a topic:
Norwegian Sailing Pram by DocTom - Model Shipways - 1:12
-
robert952 reacted to a post in a topic:
Norwegian Sailing Pram by DocTom - Model Shipways - 1:12
-
robert952 reacted to a post in a topic:
Norwegian Sailing Pram by DocTom - Model Shipways - 1:12
-
 MikJ reacted to a post in a topic:
Lowell Grand Banks Dory by MikJ - Model Shipways - 1:24 - First Build
MikJ reacted to a post in a topic:
Lowell Grand Banks Dory by MikJ - Model Shipways - 1:24 - First Build
-
 Make room. I am jumping on board the log. Good luck on your build and do not be afraid to ask questions. And, yes, adding to the build logs, even it there's a bunch out there, on the same ship/boat, you will bring a fresh perspective as you proceed.
- 21 replies
-
- 1
-
-
- Lowell Grand Banks Dory
- Model Shipways
- (and 1 more)
-
druxey reacted to a post in a topic:
Ramble Intro
-
Welcome aboard.
-
Bought...but moved in?
-
NP. I know there wasn't a lot of use.
-
There was also a suggestion to add SMALL to the title if it was a model of a small vessel (not a small model). Example Dinghy by Robert952 - Midwest Model - 1:12 - SMALL Not critical, and not my idea. However, I do like looking at the small boats. Besides being great models for beginners, they give an opportunity for a lot of extra details.
-
Looks like a nice start the model. As always, model building has learning opportunities and problem solving when things don't 'work as advertised.' And it looks like you have a good handle on the process. I look forward to watching this build.
-
Mainly the weathering you have done on everything. The buildings are weathered very nicely. I tend to 'overweather' items. You show a light touch to make a nice effect. Seeing the Inman building progress was interesting. Similarly, the landscaping texturing is very nice on the tunnel and rock faces. For a small boat (dinghy) project on my planning board, I want to make it a diorama. Though the scale will effect my approach (it's 1:12 - doll house scale?), the way you layer shows me a techinique to use.
-
I pop in and do some lurking in this thread occasionally. Impressive work! I do see a few techiniques I can apply to my boat models. Thanks for the details on this log.
-
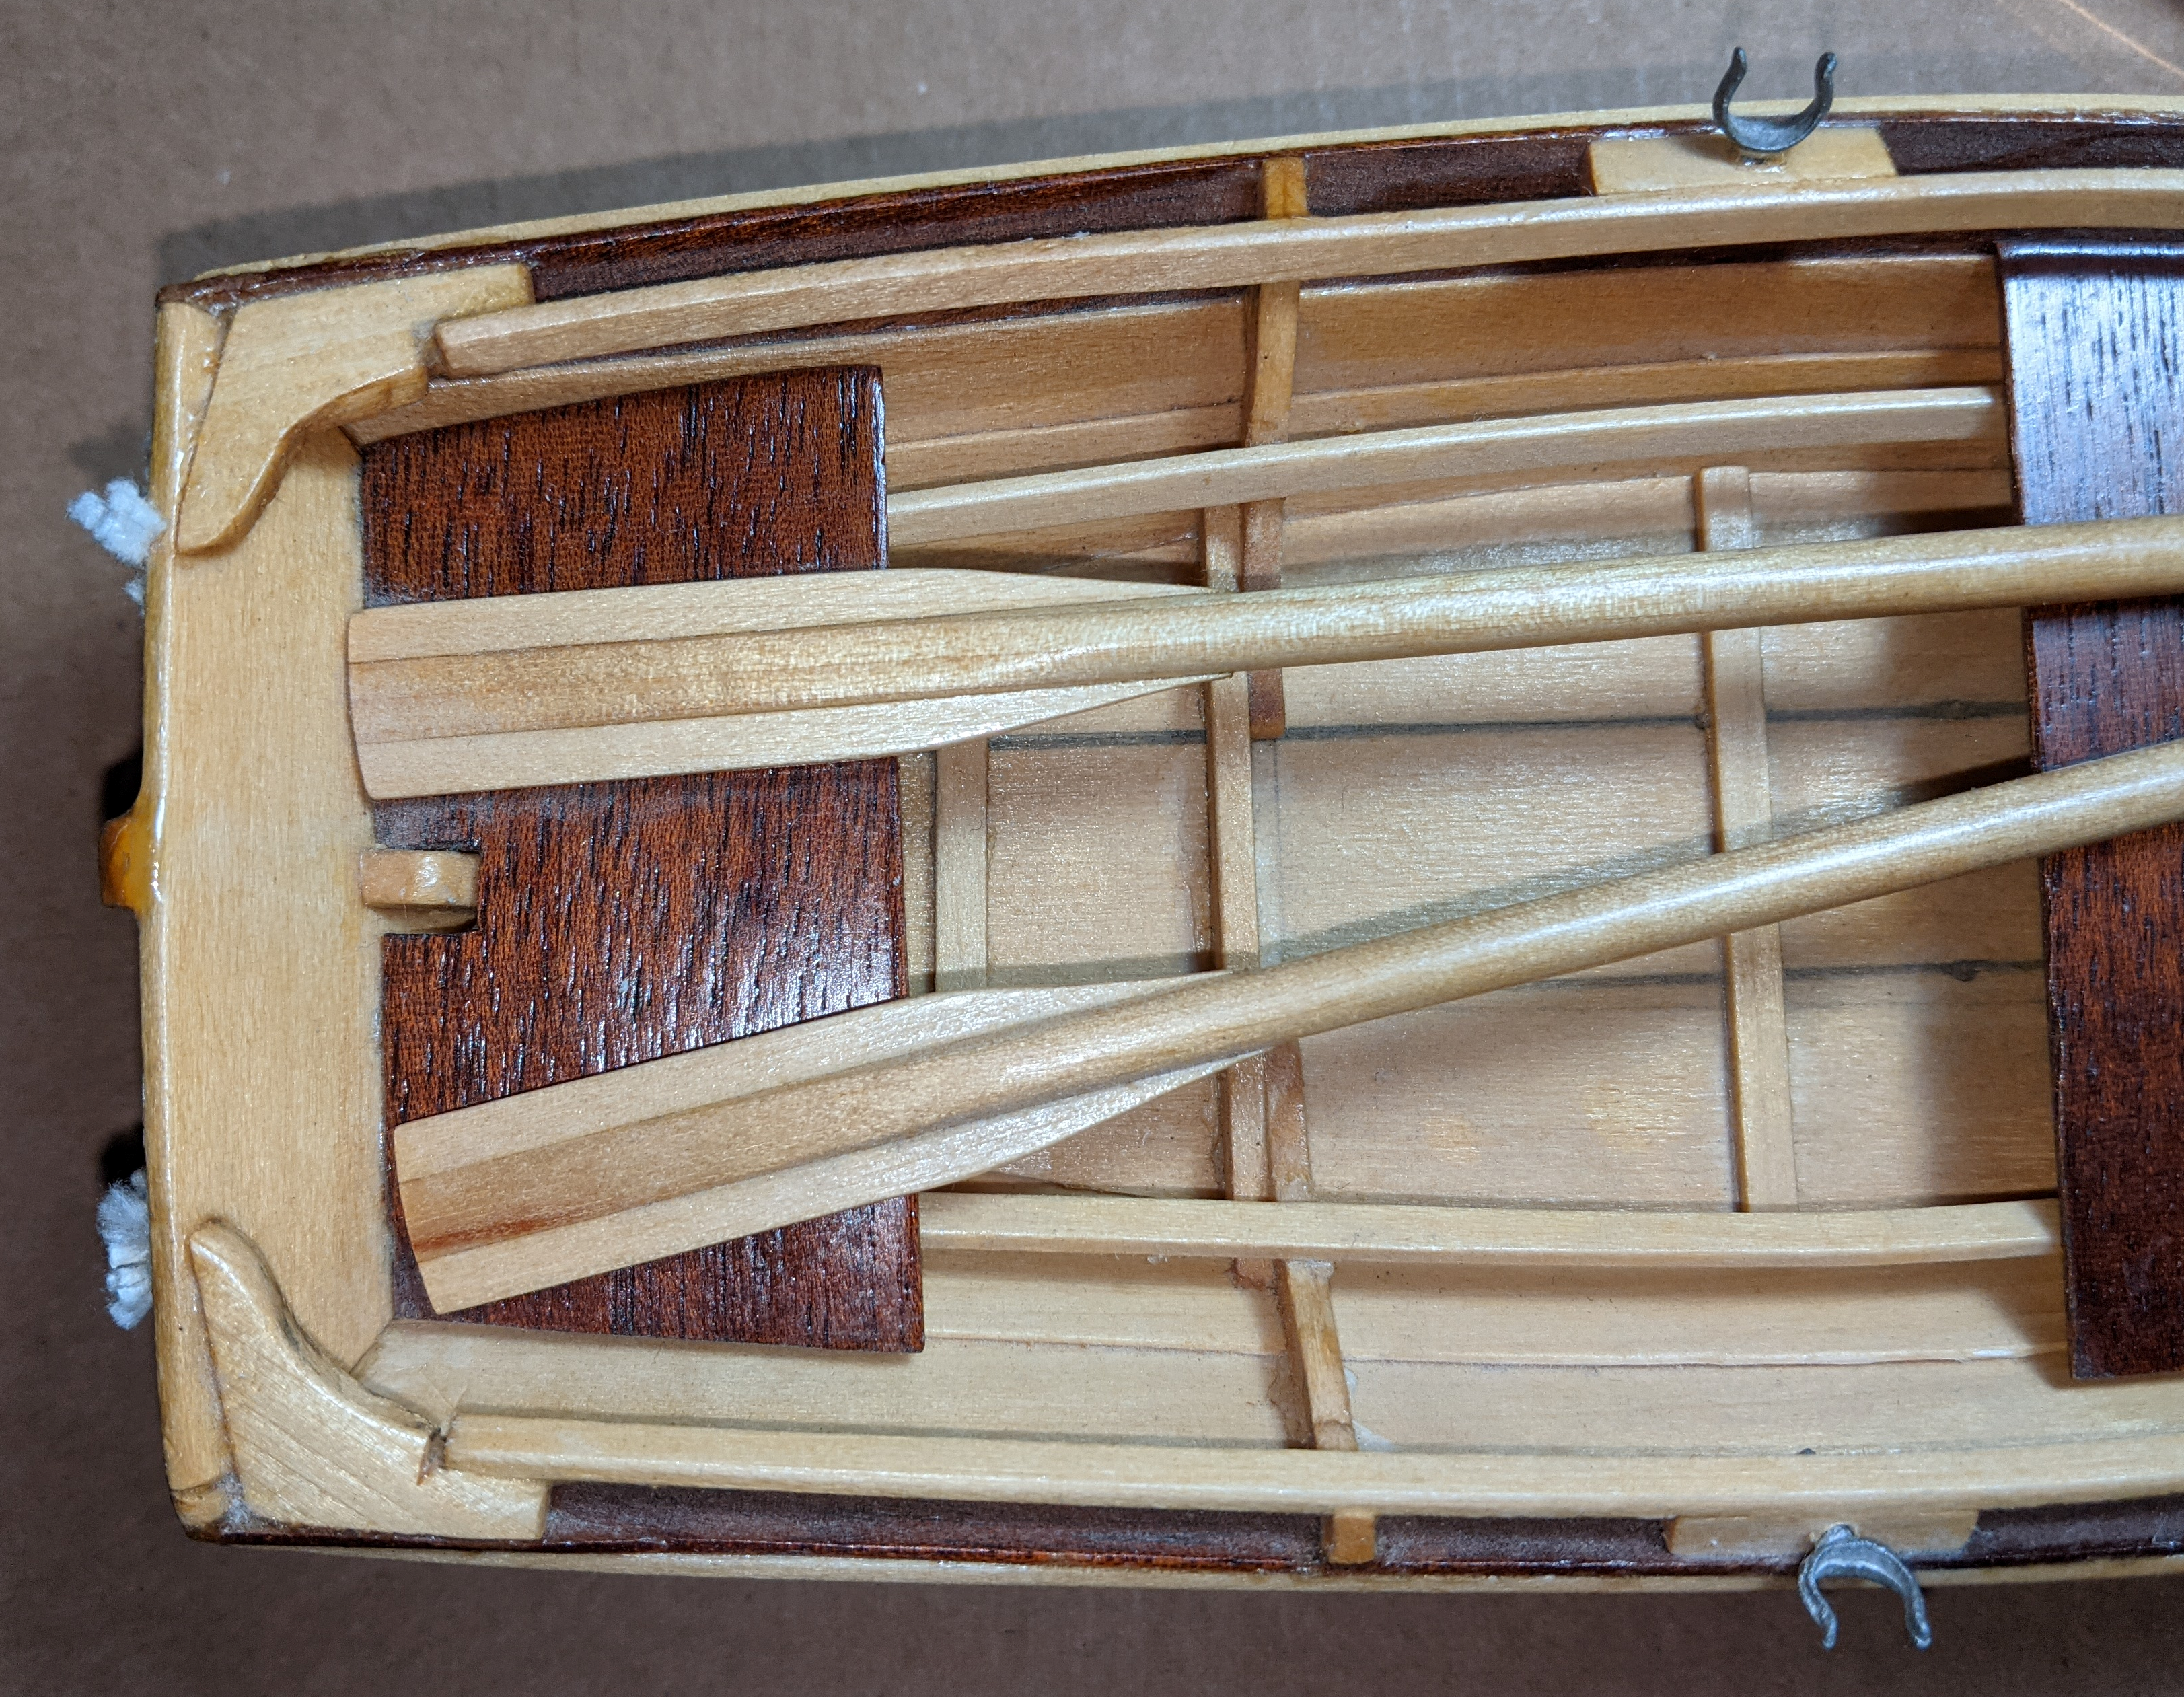
My humble opinion (and limited experience): I think cutting the filler planks for larger areas like you did in the top photo of the topic #11 is the better way to go. That is because I get too carried away with applying filler in gaps and end up with a mess. Your results may vary. I just think it's worth the time. The bottom photo in topic #12 where you see the filler 'plank' looks very nice to me and will probably need minimal sanding to smooth it out.
-
Nice looking project to work on. Following along with the log.
-
Nicely done. Great looking model. Congrats on finishing it.
- 167 replies
-
- 1
-
-
- Picket Boat
- Model Shipways
- (and 1 more)
-
I realized how often I look at your posts on this build as I peruse recent posts. I am jumping on board to watch the rest of the build. As with most projects there's problems we have to solve (like the deteriorated decal) that need unique solutions. Part of the challenge and rewards when assembling model.s The model looks good. I look forward to the rest of the build.
- 73 replies
-
- 7
-
-
-
- Steam Cutter
- Harriet Lane
- (and 2 more)
-
Both look great. I enjoyed reading along as you built your log here. Thanks for sharing.
-
I go back to the basic concept of what is of interest to me. I temper that with a bit of what will I learn or get better at skill set-wise. I won't be surprised if I pick out a non-ship model plastic model (or even metal) in the future as variety is the spice of life. I know I need to relearn and improve my plastic assembly, detailing and painting skills. So, that may be in my future, too.
-
Getting Started: From Dollhouses to the USS Constitution
robert952 replied to Jasennord's topic in New member Introductions
Welcome to the madness of MSW. Your tale is similar to mine. I still have a skelton hull about half-way planked of the Golden Hinde from Mamoli. I enjoyed what I did and what I learned from that work, but realize I had to get some of the basics under my belt. Start a log on your build. You'll find a lot of people who like to learn from others and share their experiences and expertise. (From me, you get more of the former than the latter.) Have fun. And remember: