Ab Hoving
-
Posts
695 -
Joined
-
Last visited


.thumb.jpeg.fc5d633a7b34428fcf19419a73d56d55.jpeg)
.thumb.JPG.4d3261ccae06041fa7cc2933fb43d577.JPG)


.thumb.jpg.891f66d64fd4486179970eca1dfee43e.jpg)


-
 _SalD_ reacted to a post in a topic:
HMS Sussex by Ab Hoving - FINISHED - A dockyard model from card
_SalD_ reacted to a post in a topic:
HMS Sussex by Ab Hoving - FINISHED - A dockyard model from card
-
bruce d reacted to a post in a topic:
HMS Sussex by Ab Hoving - FINISHED - A dockyard model from card
-
md1400cs reacted to a post in a topic:
Mary Rose by Baker - scale 1/50 - "Your Noblest Shippe"
-
Ryland Craze reacted to a post in a topic:
HMS Sussex by Ab Hoving - FINISHED - A dockyard model from card
-
Ryland Craze reacted to a post in a topic:
HMS Sussex by Ab Hoving - FINISHED - A dockyard model from card
-
Tumblehome reacted to a post in a topic:
HMS Sussex by Ab Hoving - FINISHED - A dockyard model from card
-
 Thank you @druxey, @bruce d, @Tumblehome, @Snug Harbor Johnny and @GrandpaPhil for your kind words. There were some remarks lately about the format I use showing my pictures. I usually photograph my models with my cell phone, send the pictures to my computer, cut them to have a better composition and reduce the size. That delivers png. pictures. I tried to upload the rough photographs on several forums, but only MSW accepted them as they were. Still, I don't see any difference between the looks of a png. and a jpg. I'm too old for that sort of stuff...
 -
 GrandpaPhil reacted to a post in a topic:
HMS Sussex by Ab Hoving - FINISHED - A dockyard model from card
GrandpaPhil reacted to a post in a topic:
HMS Sussex by Ab Hoving - FINISHED - A dockyard model from card
-
druxey reacted to a post in a topic:
Mary Rose by Baker - scale 1/50 - "Your Noblest Shippe"
-
 Baker reacted to a post in a topic:
Mary Rose by Baker - scale 1/50 - "Your Noblest Shippe"
Baker reacted to a post in a topic:
Mary Rose by Baker - scale 1/50 - "Your Noblest Shippe"
-
Ab Hoving reacted to a post in a topic:
Mary Rose by Baker - scale 1/50 - "Your Noblest Shippe"
-
Beautiful work Patrick. Respect.
-
Some Idea reacted to a post in a topic:
HMS Sussex by Ab Hoving - FINISHED - A dockyard model from card
-
Ab Hoving reacted to a post in a topic:
HMS Sussex by Ab Hoving - FINISHED - A dockyard model from card
-
Ab Hoving reacted to a post in a topic:
HMS Sussex by Ab Hoving - FINISHED - A dockyard model from card
-
Ab Hoving reacted to a post in a topic:
Mary Rose by Baker - scale 1/50 - "Your Noblest Shippe"
-
Ab Hoving reacted to a post in a topic:
HMS Sussex by Ab Hoving - FINISHED - A dockyard model from card
-
Thank you Chris and Bruce. Bruce: you make me blush by comparing my pottery with this master builder's great work. I cannot even stand in his shadow. Just fooling around...
-
Ab Hoving reacted to a post in a topic:
HMS Sussex by Ab Hoving - FINISHED - A dockyard model from card
-
Ab Hoving reacted to a post in a topic:
HMS Sussex by Ab Hoving - FINISHED - A dockyard model from card
-
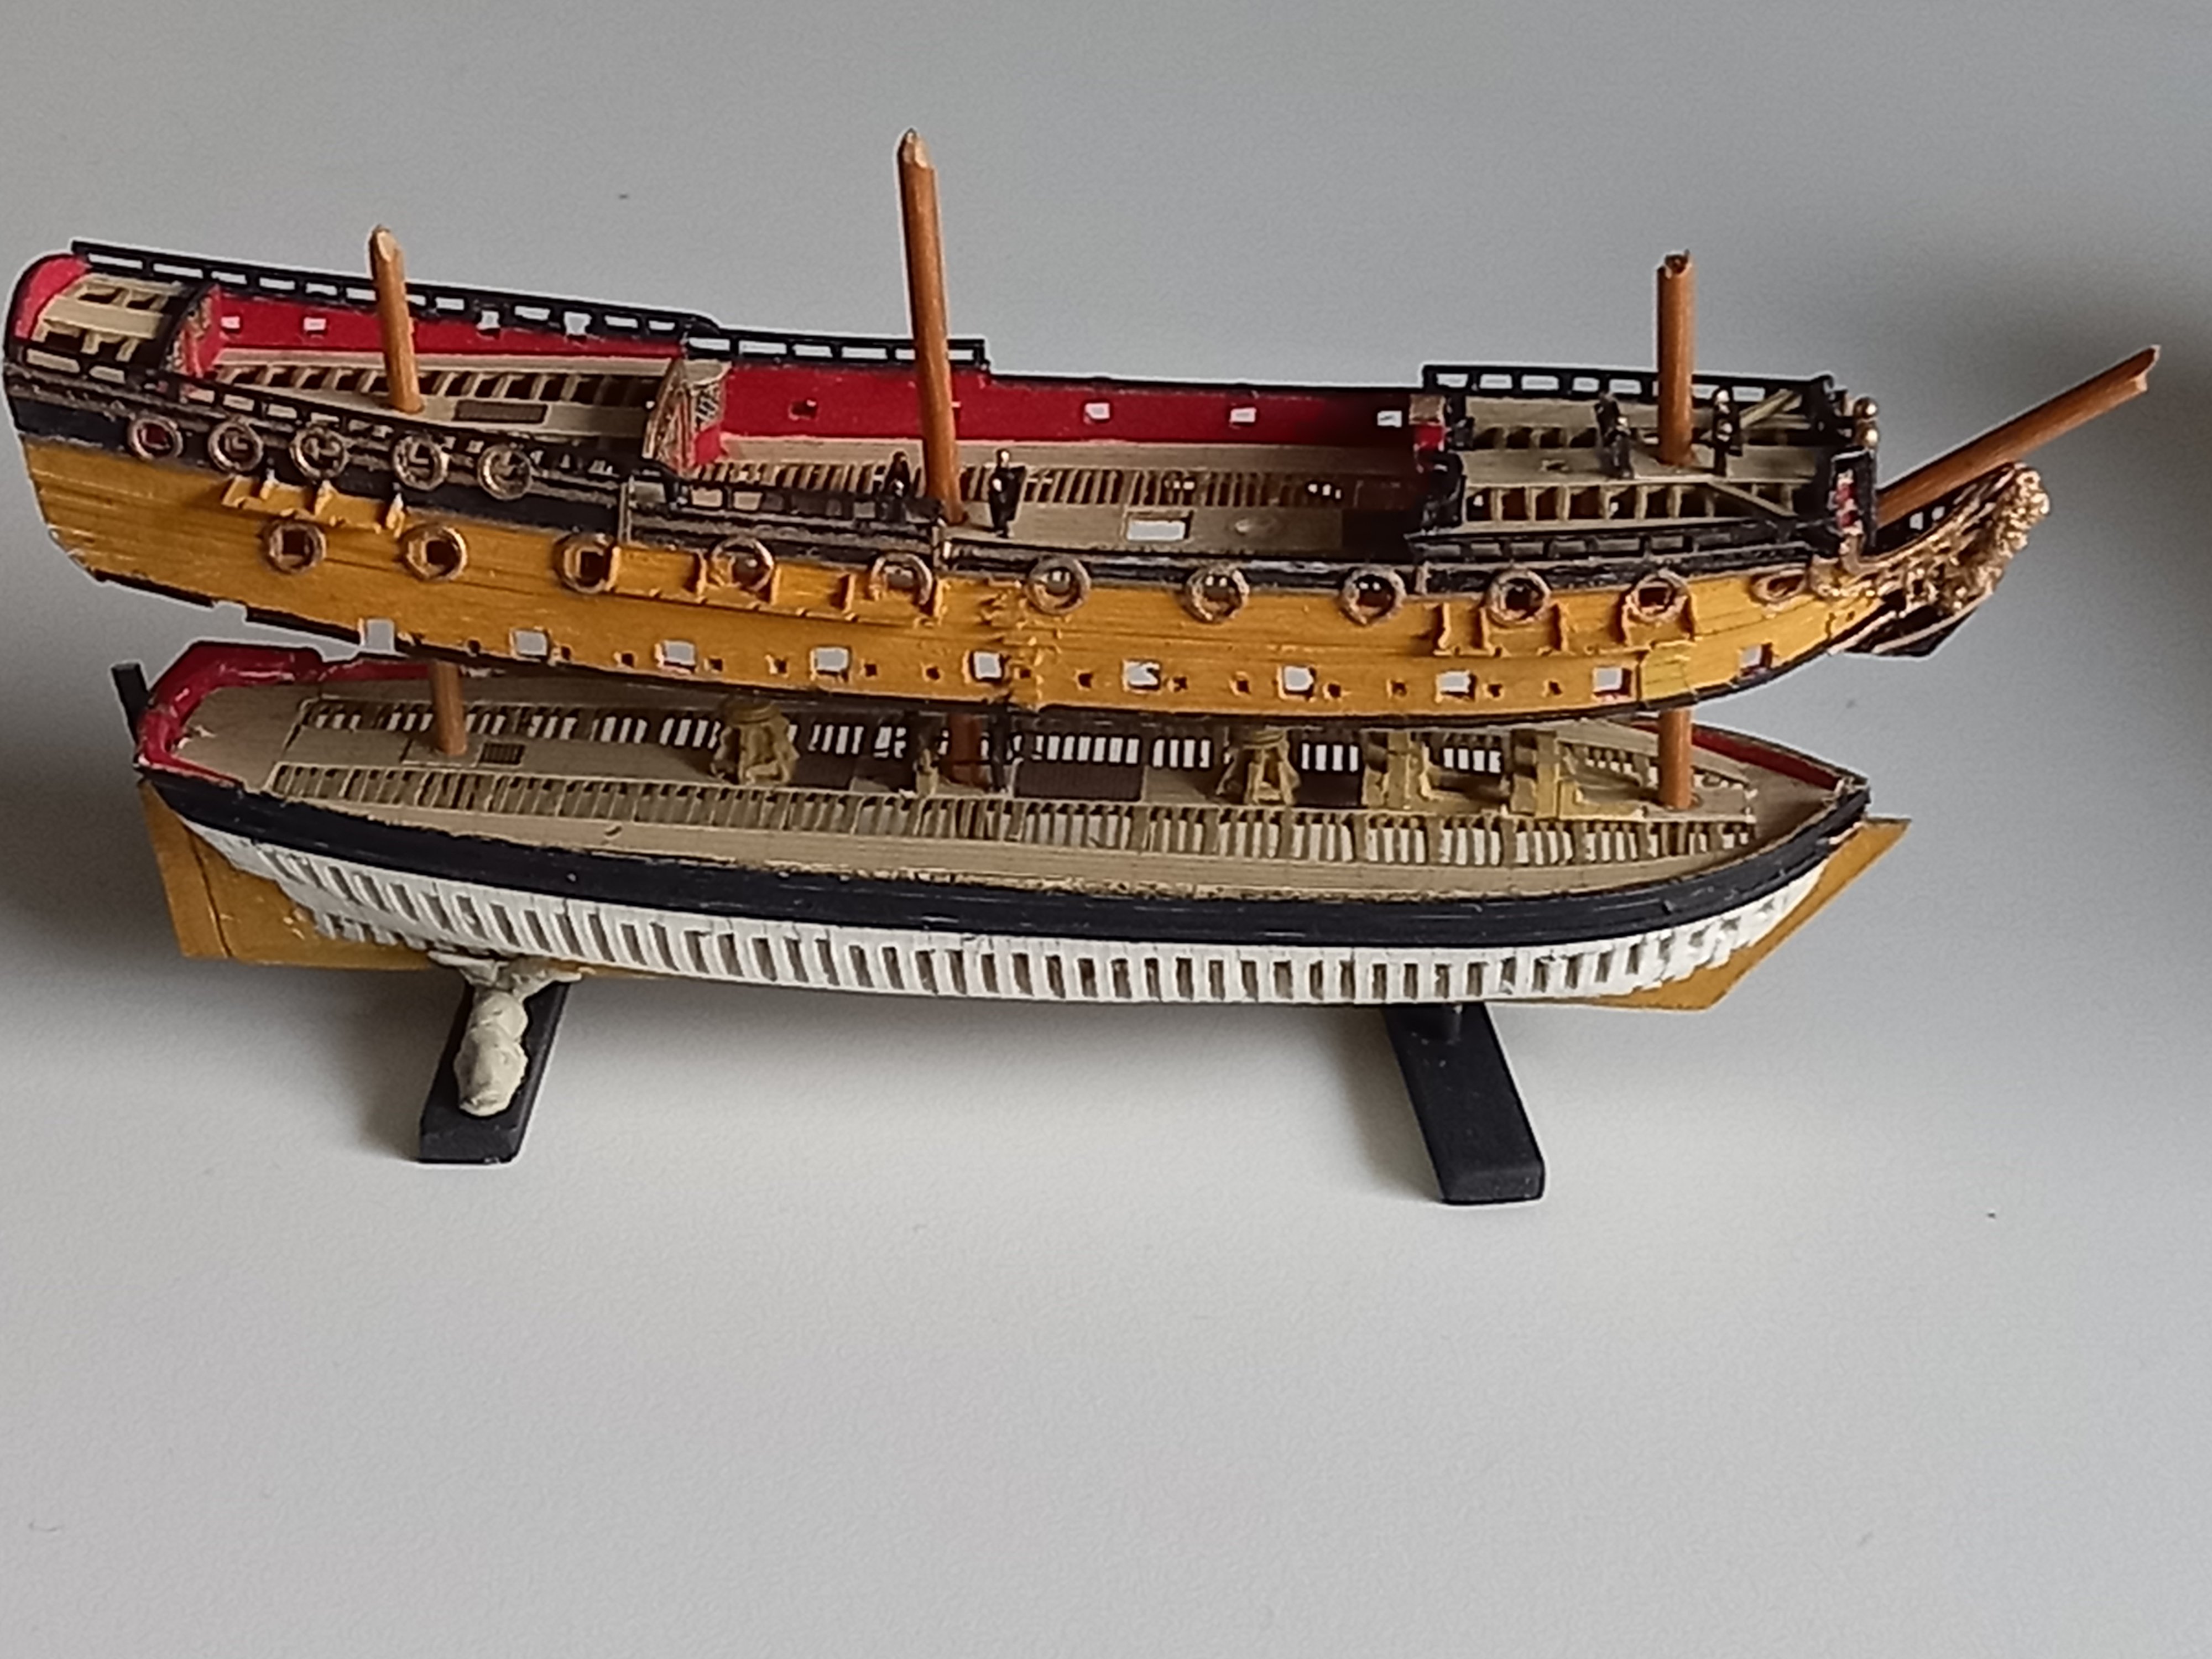
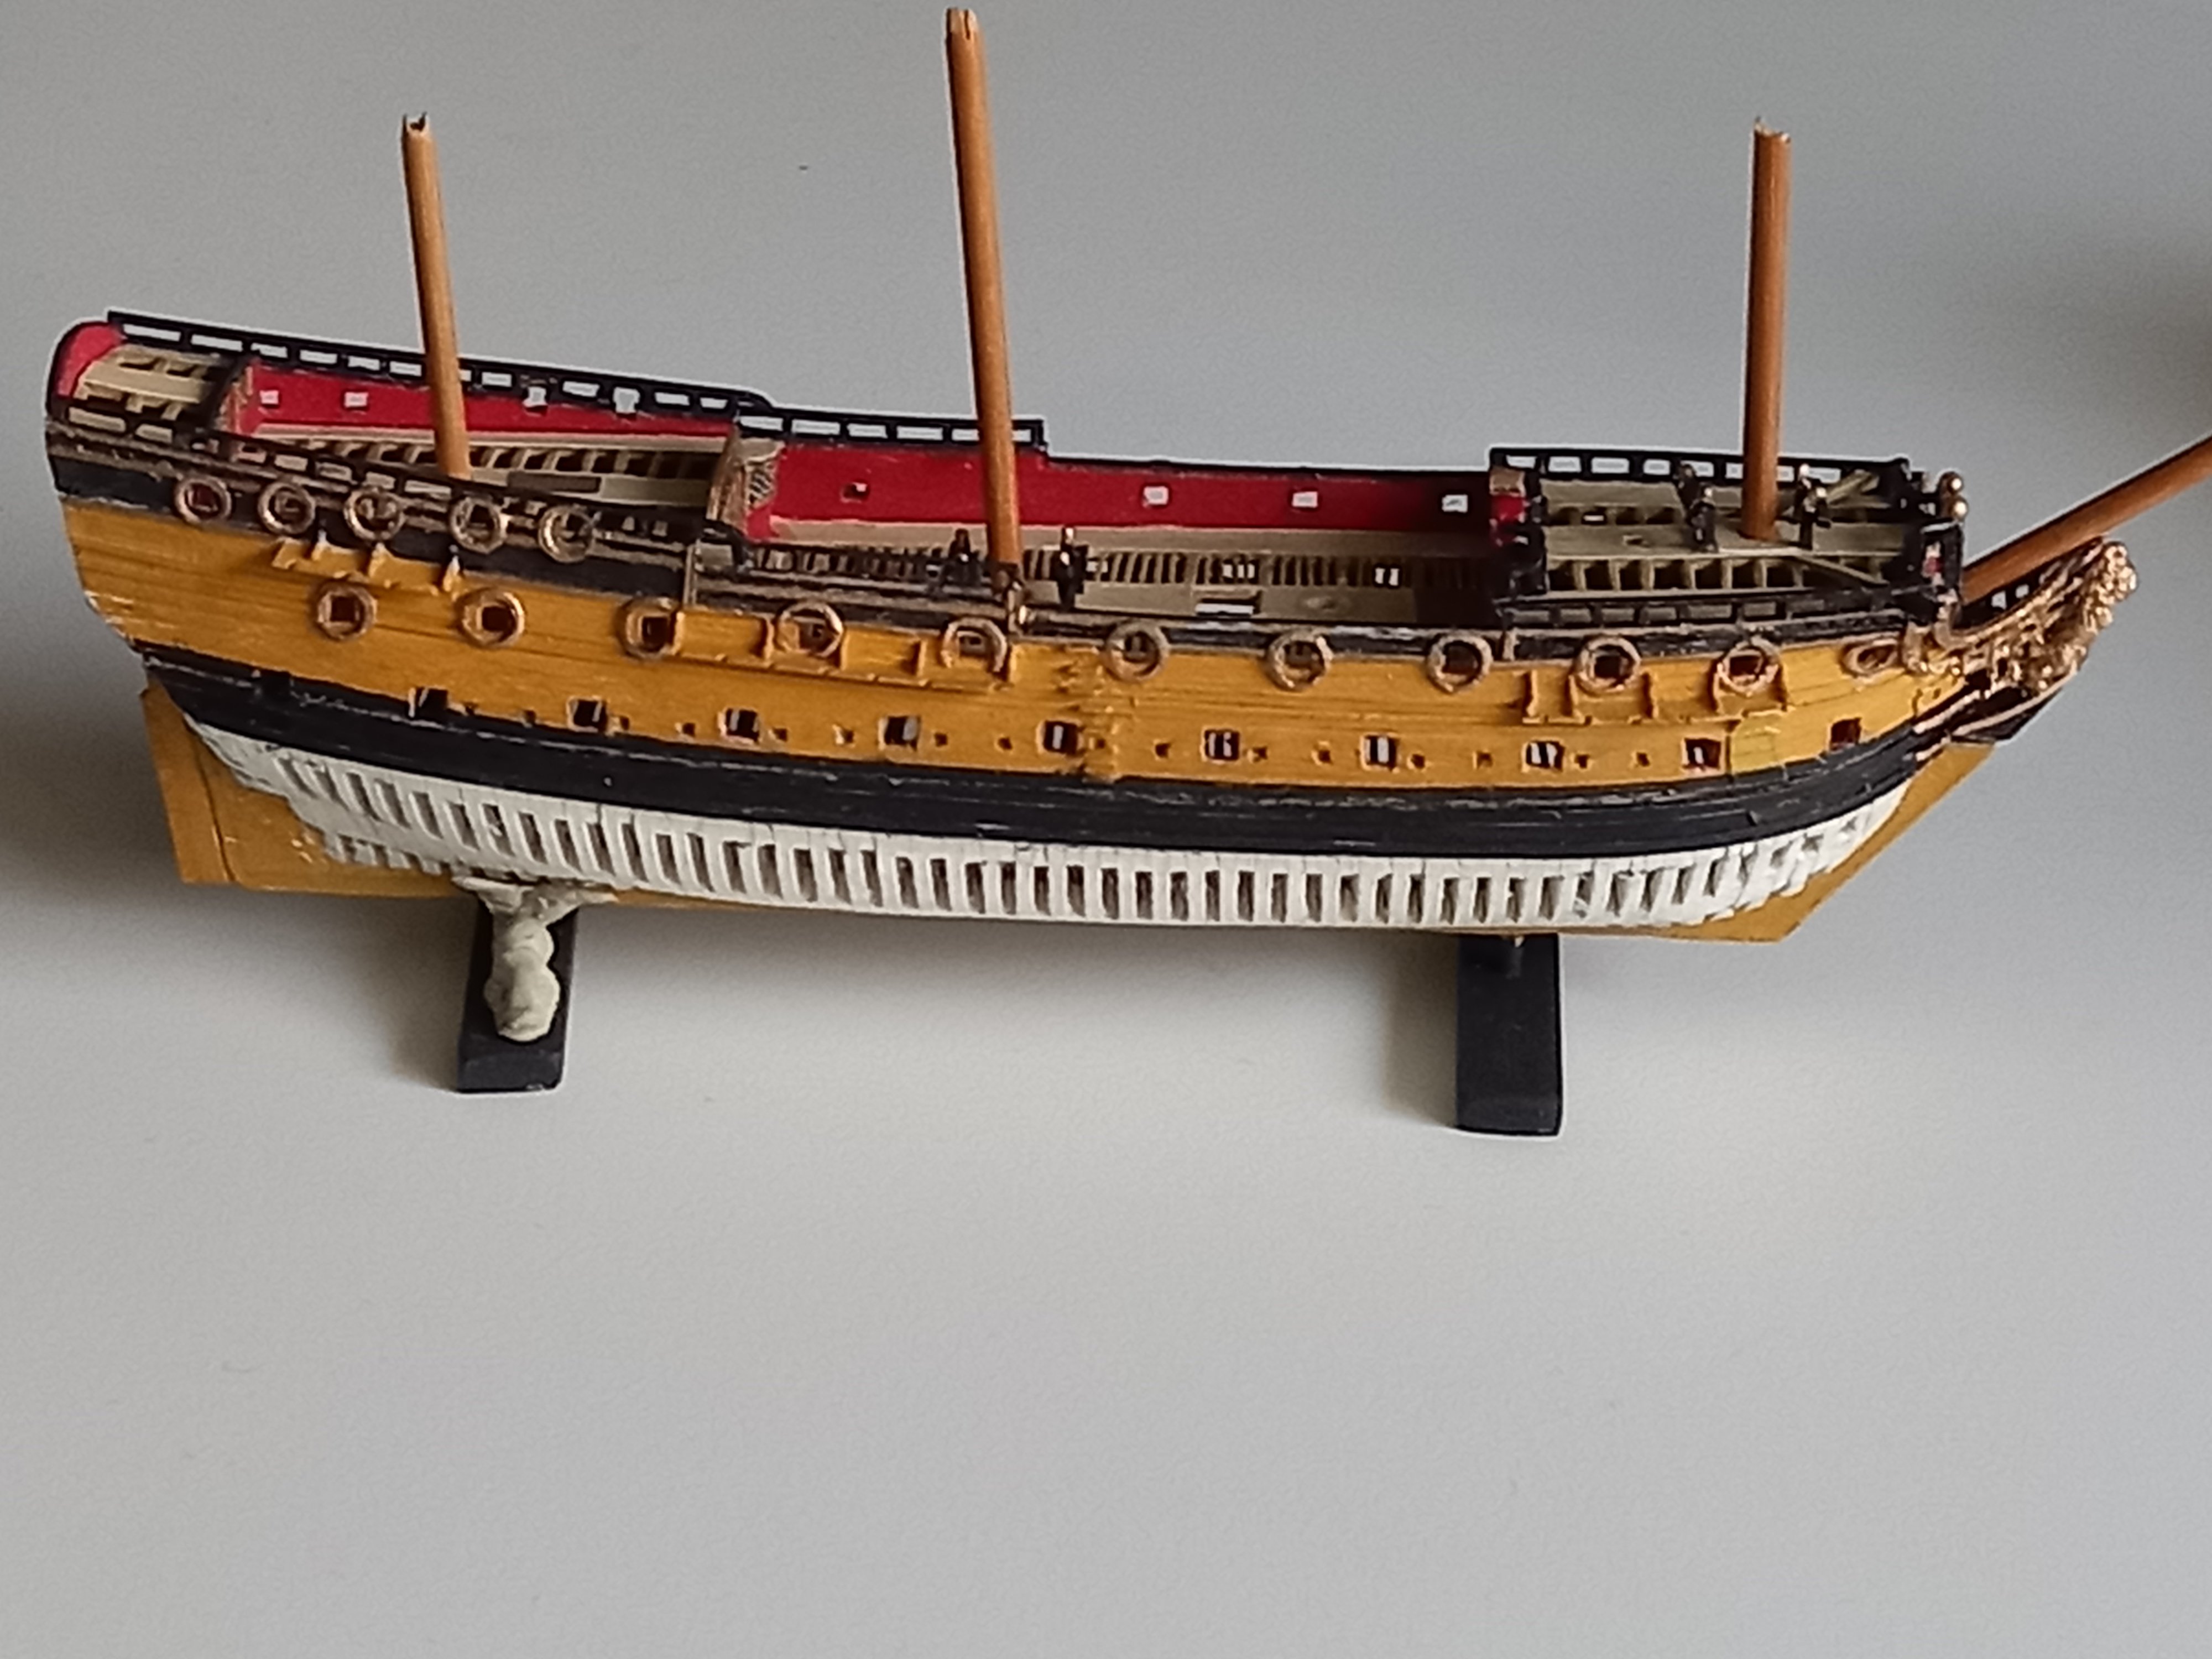
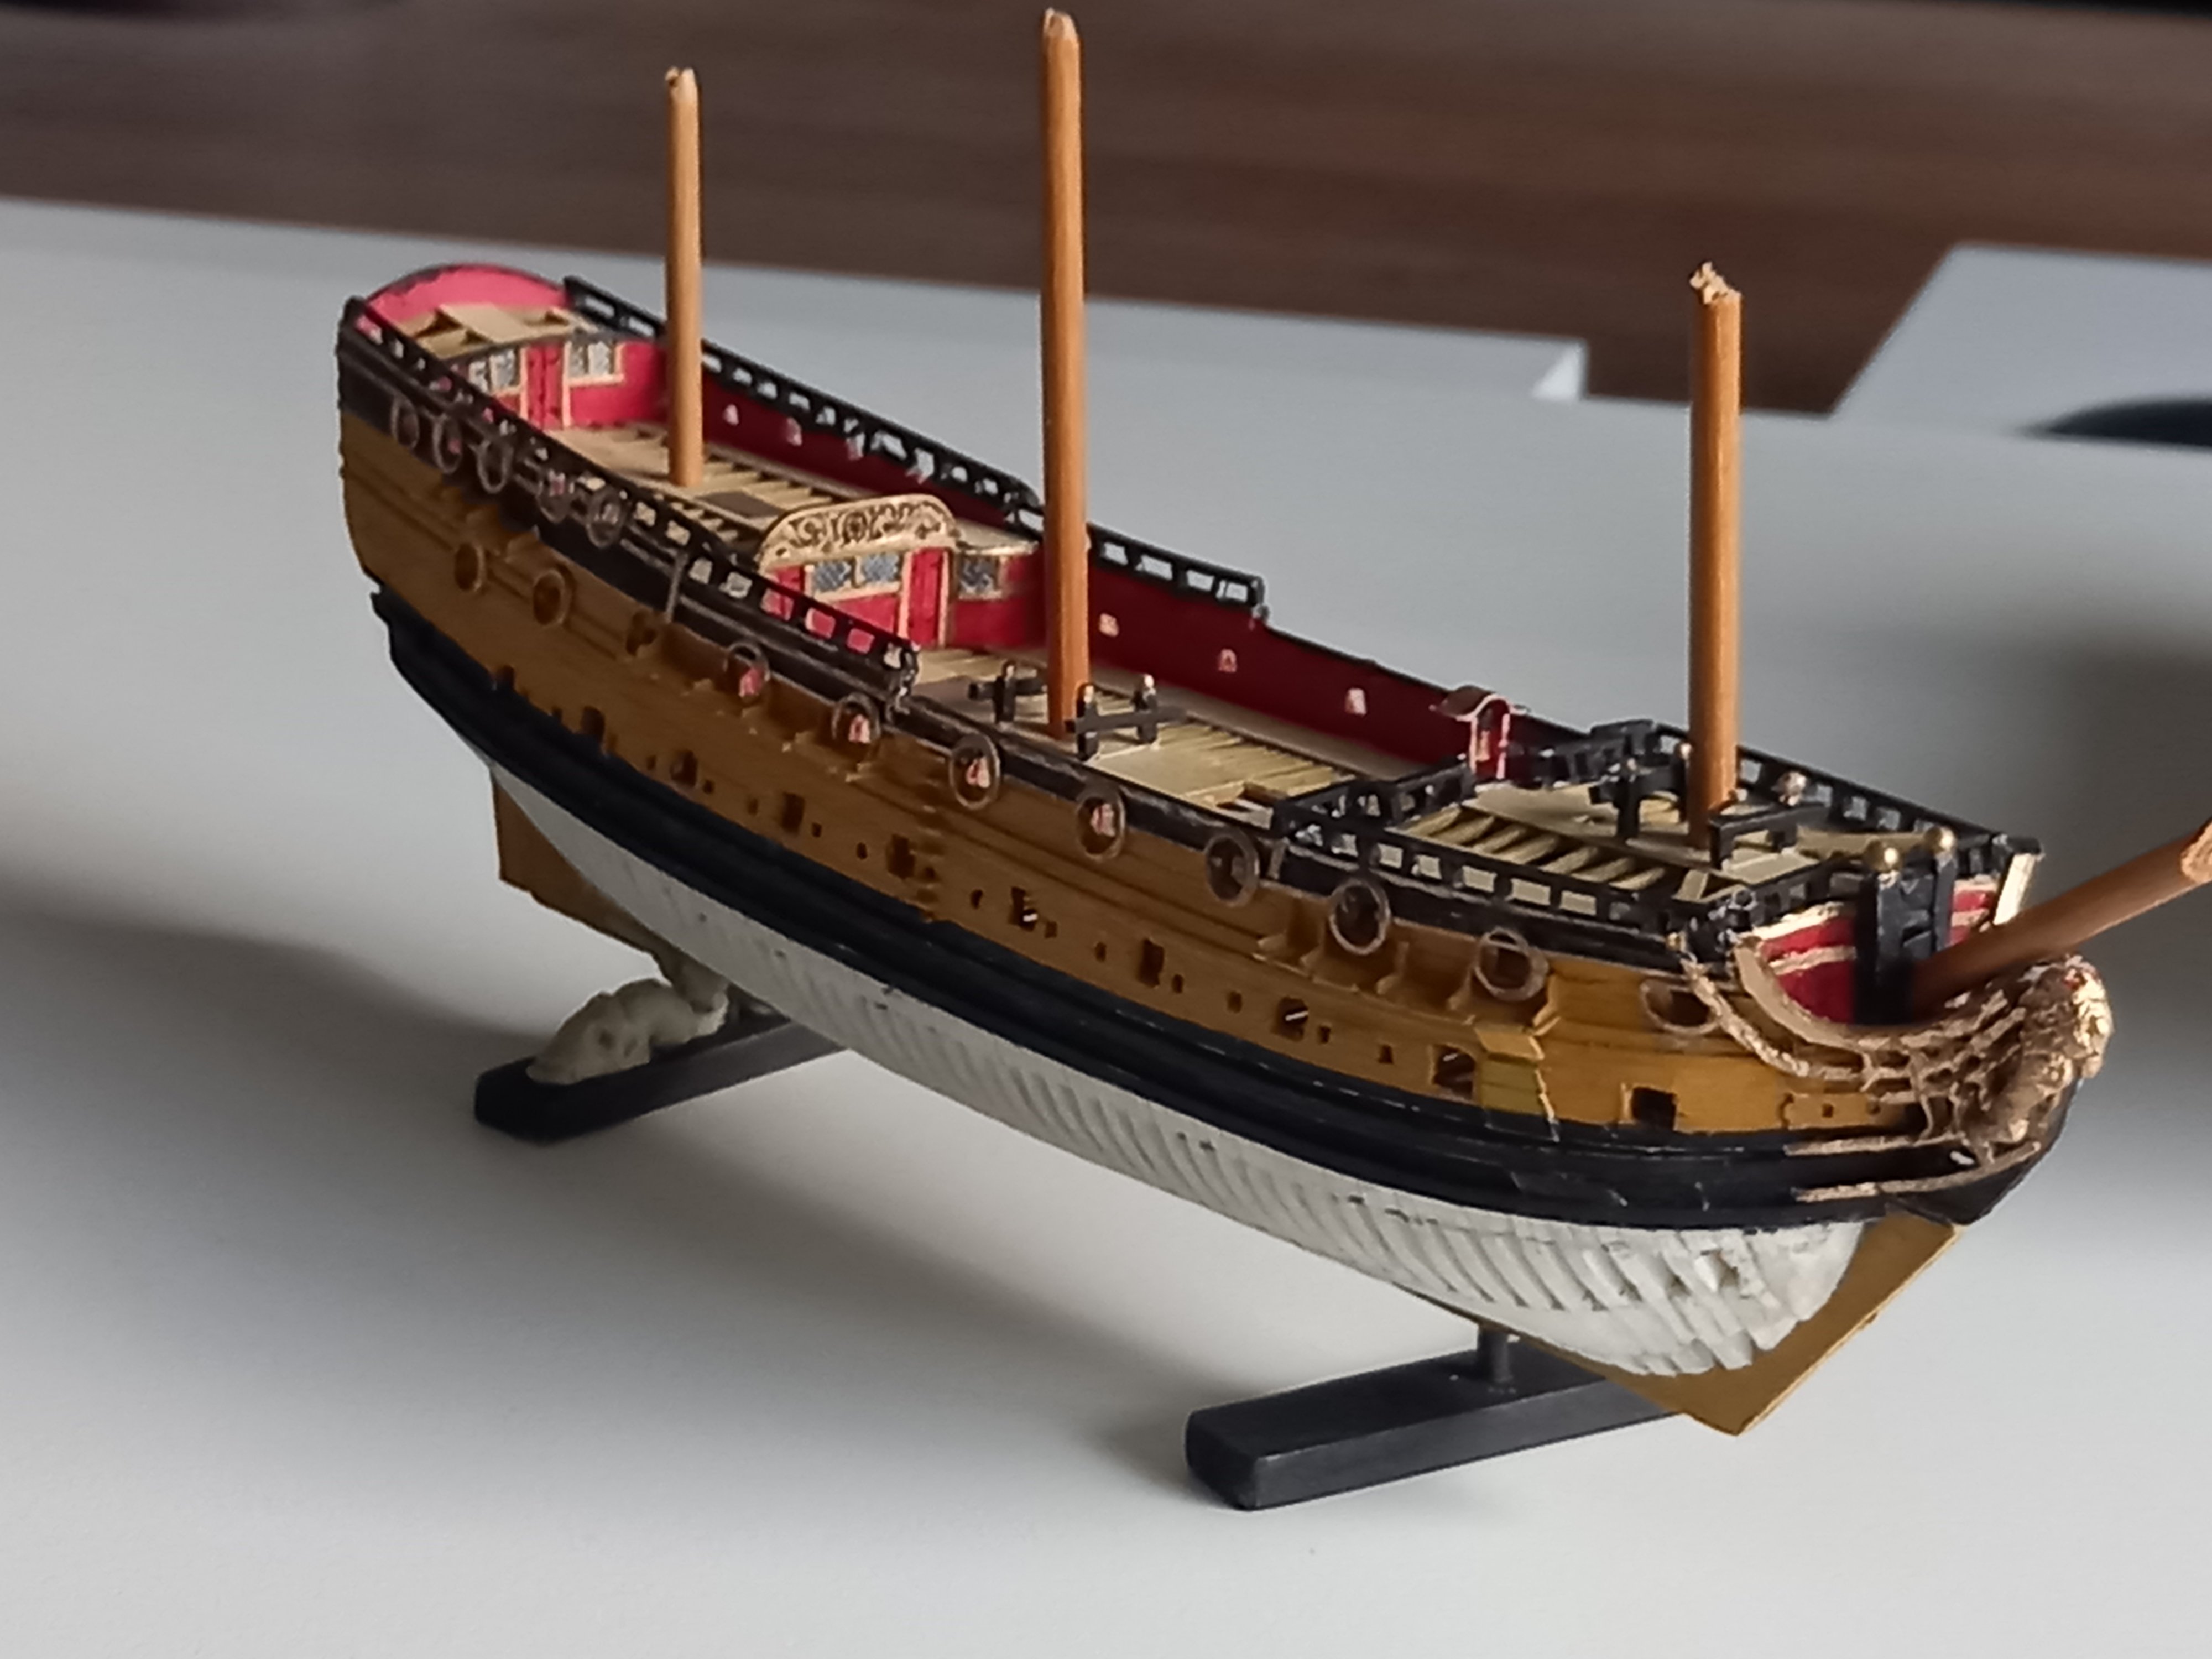
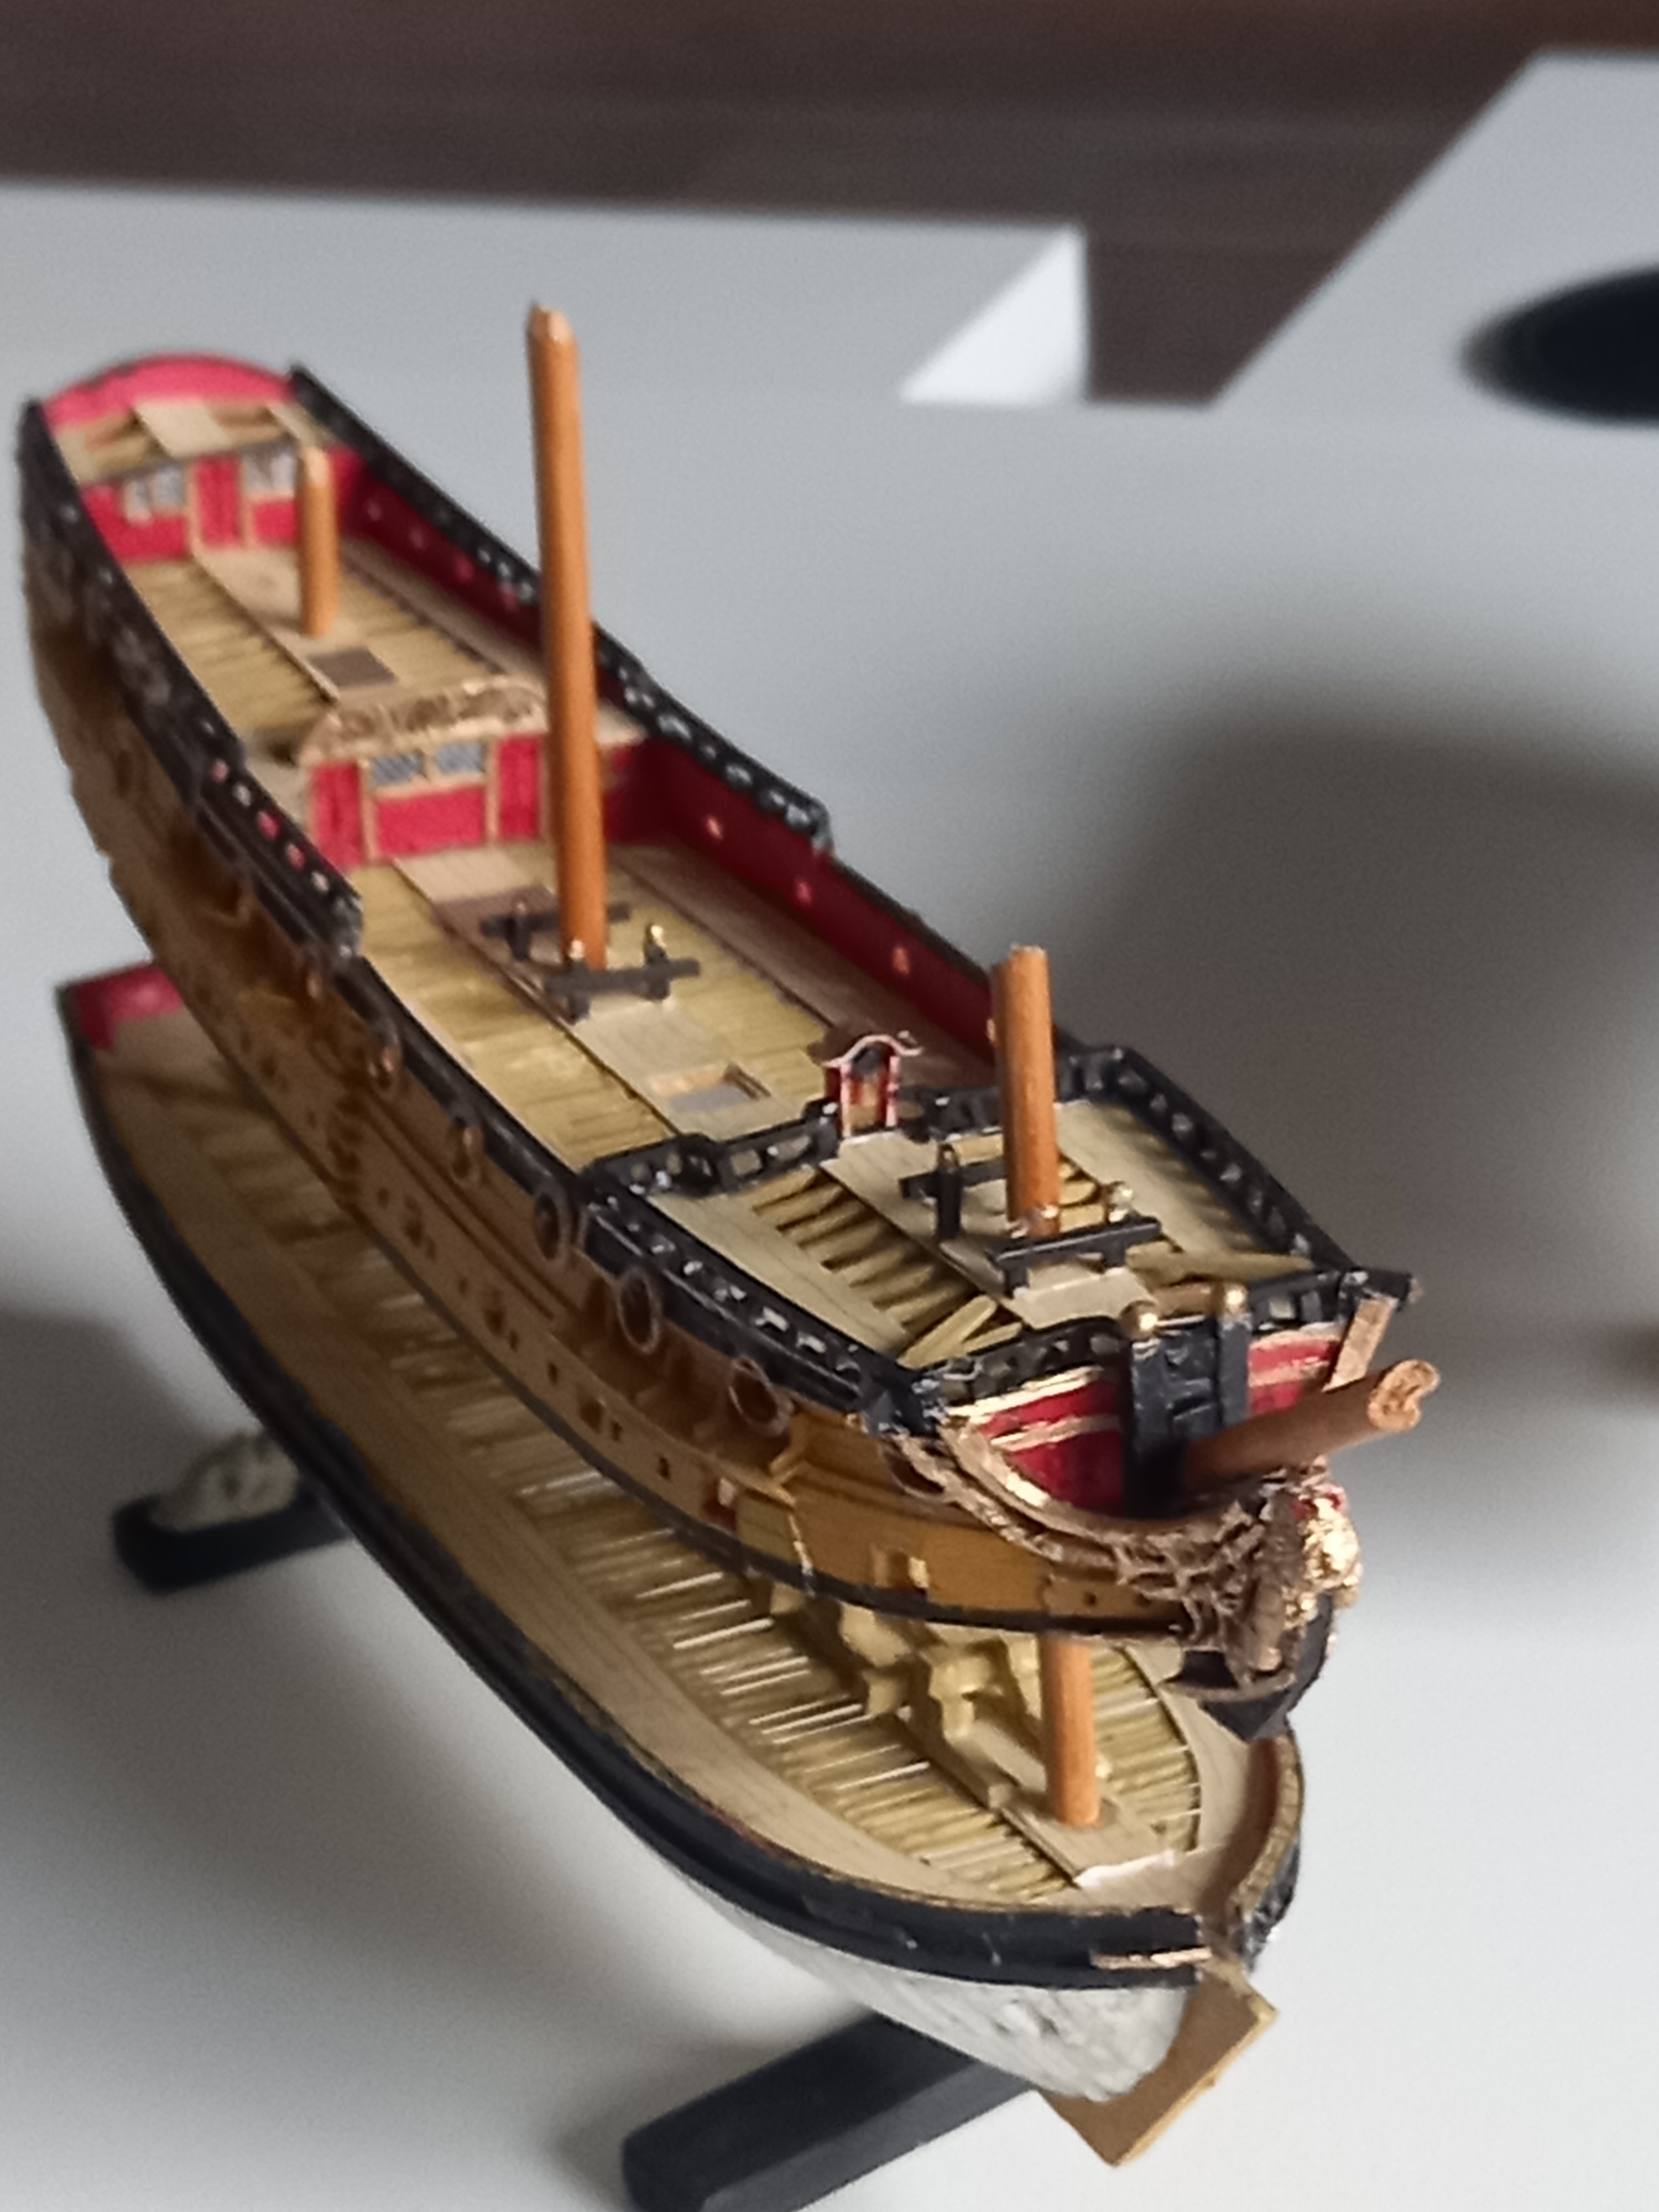
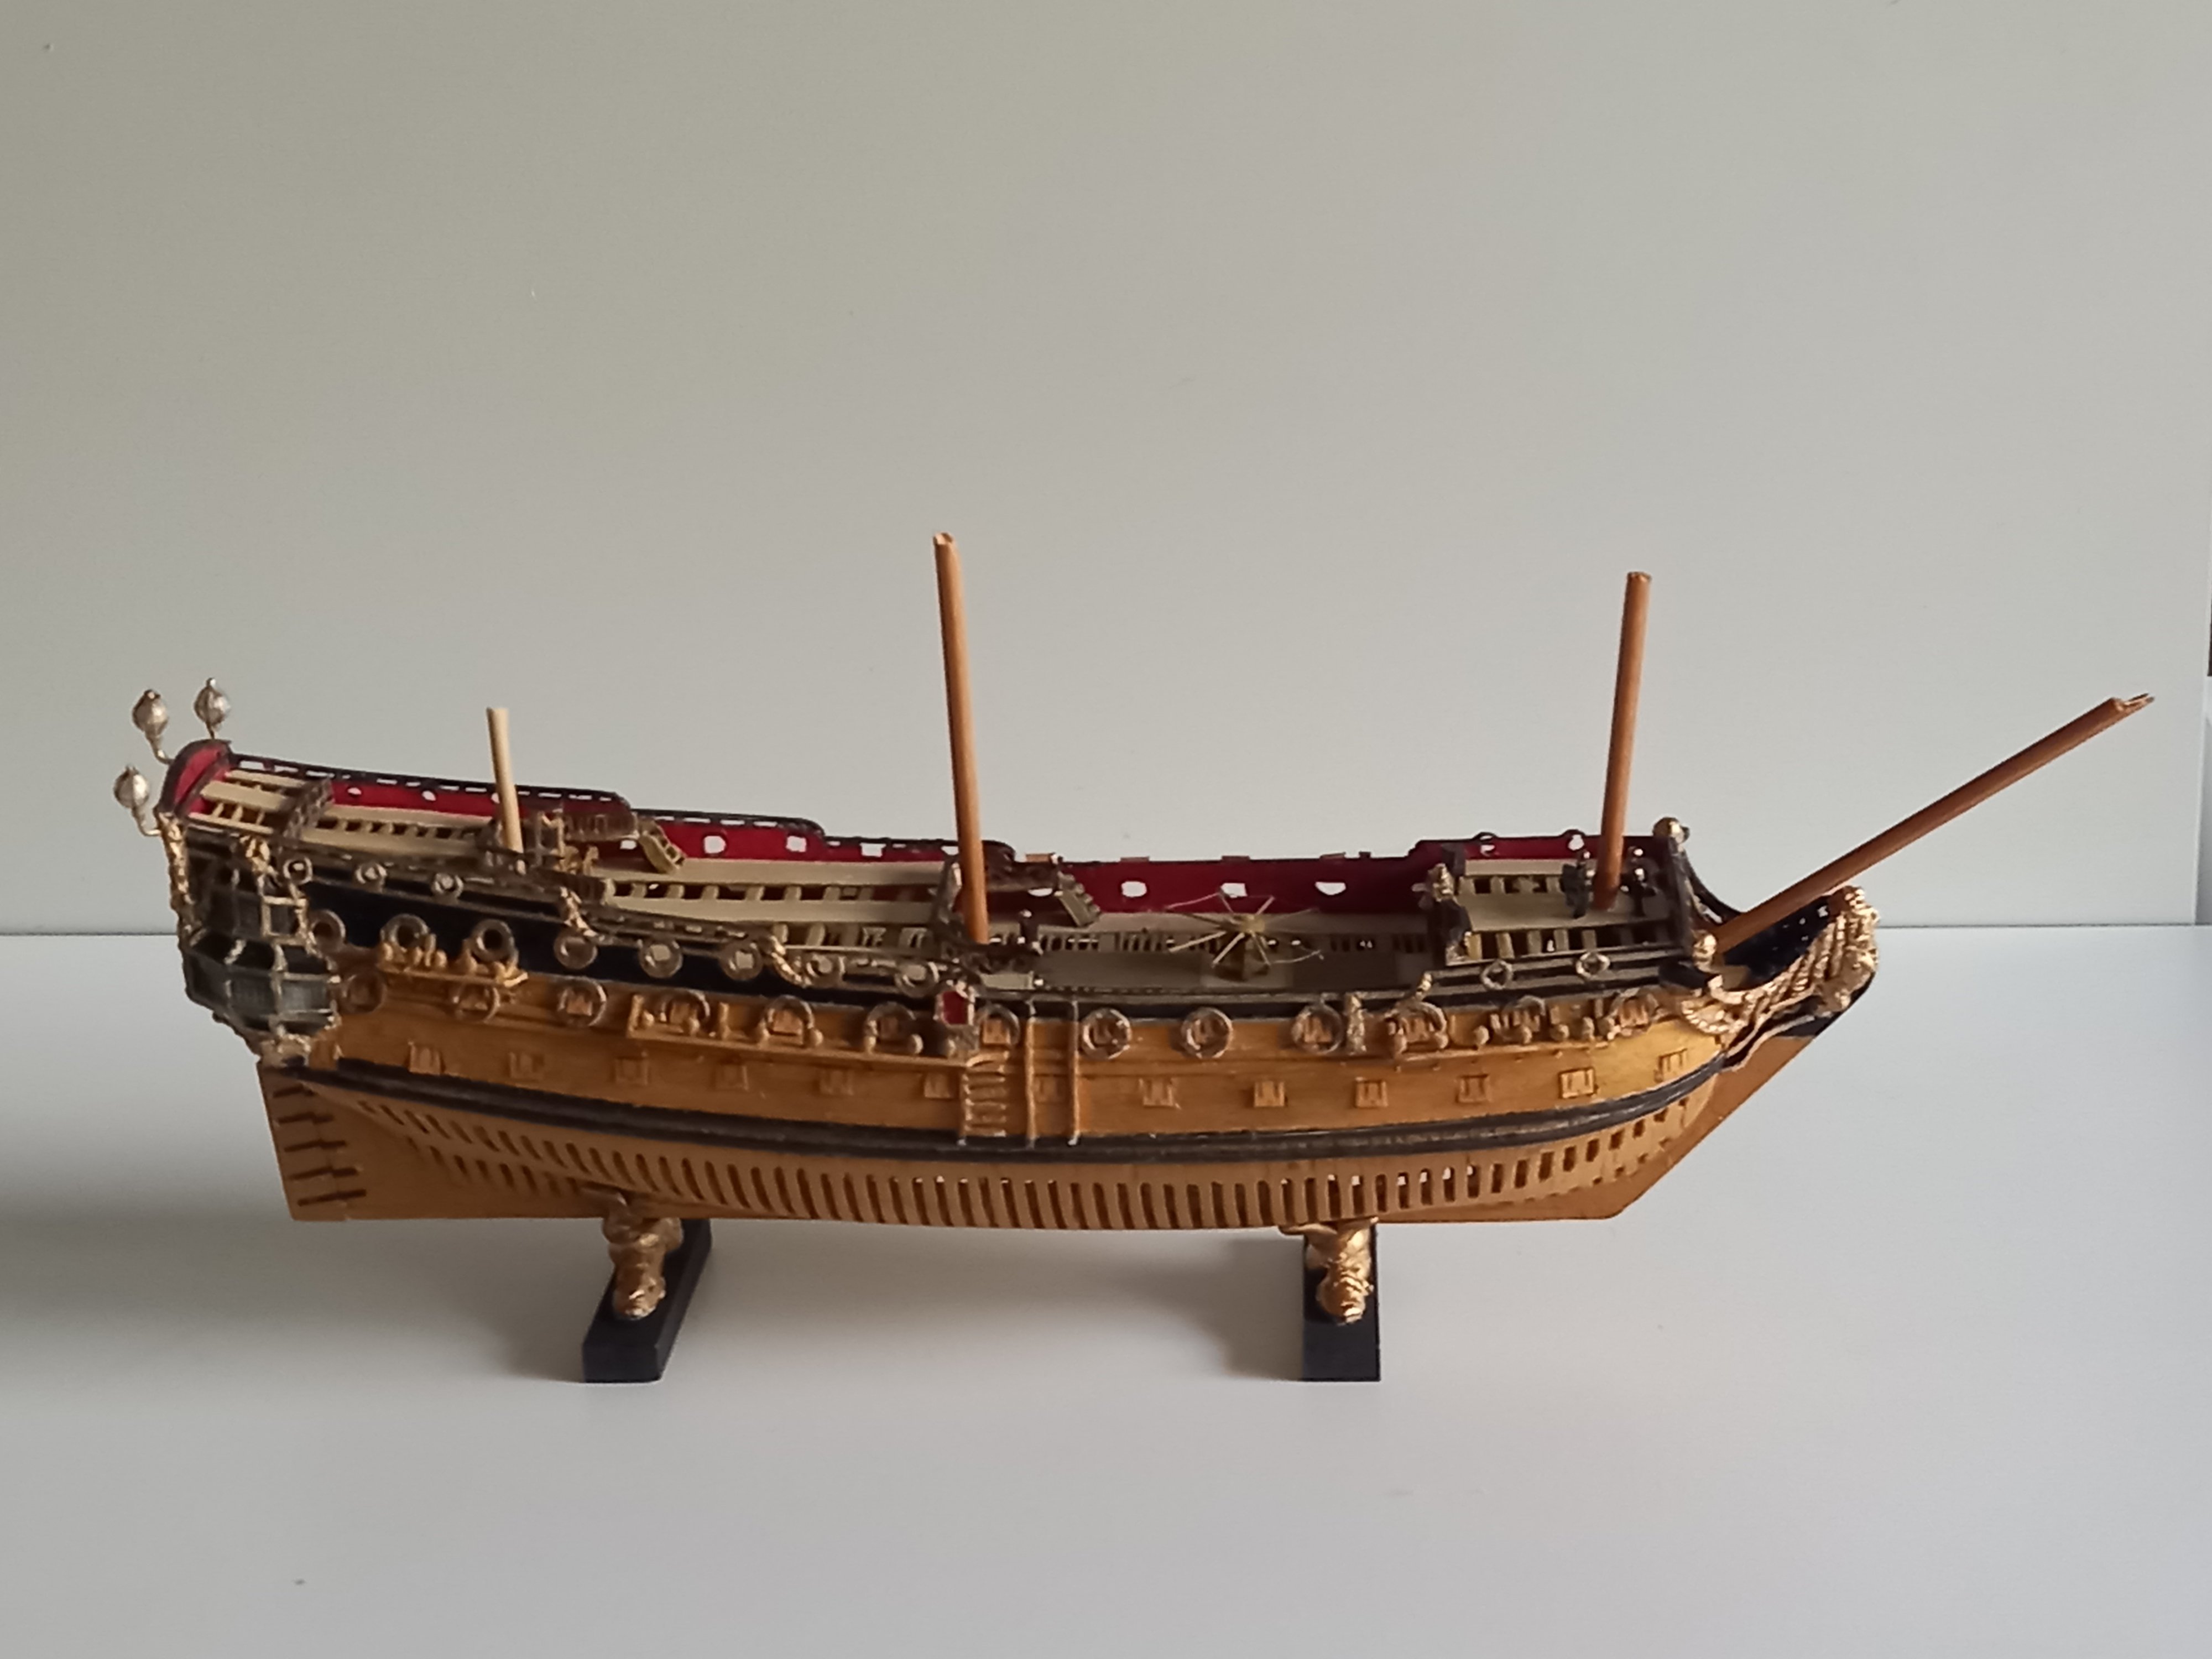
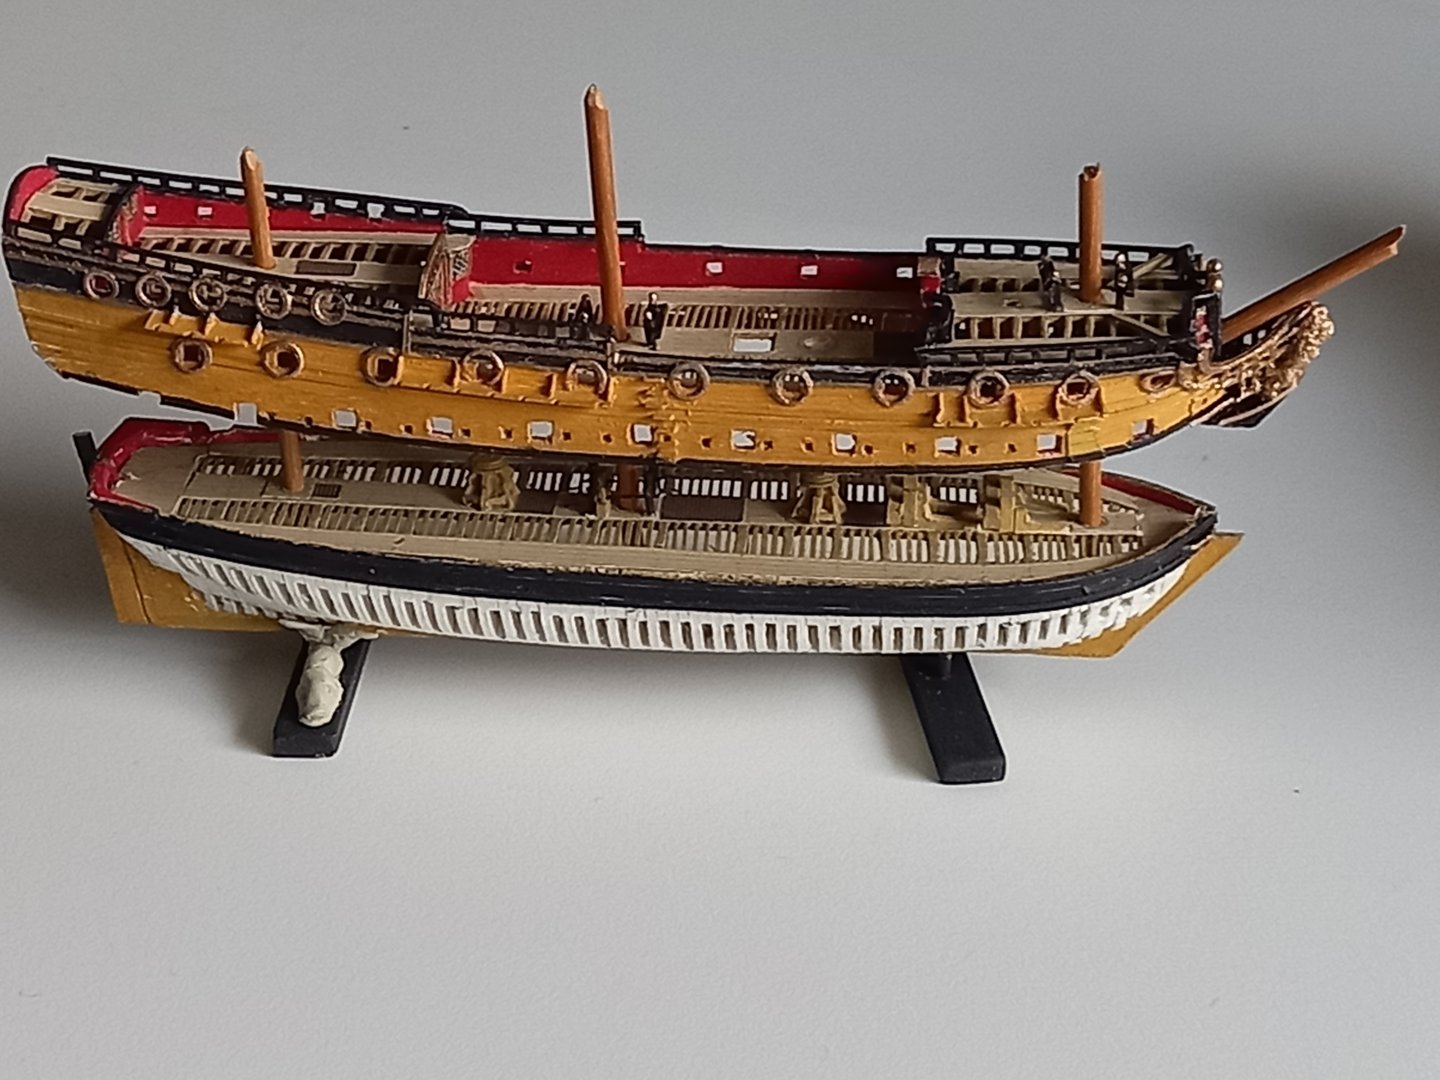
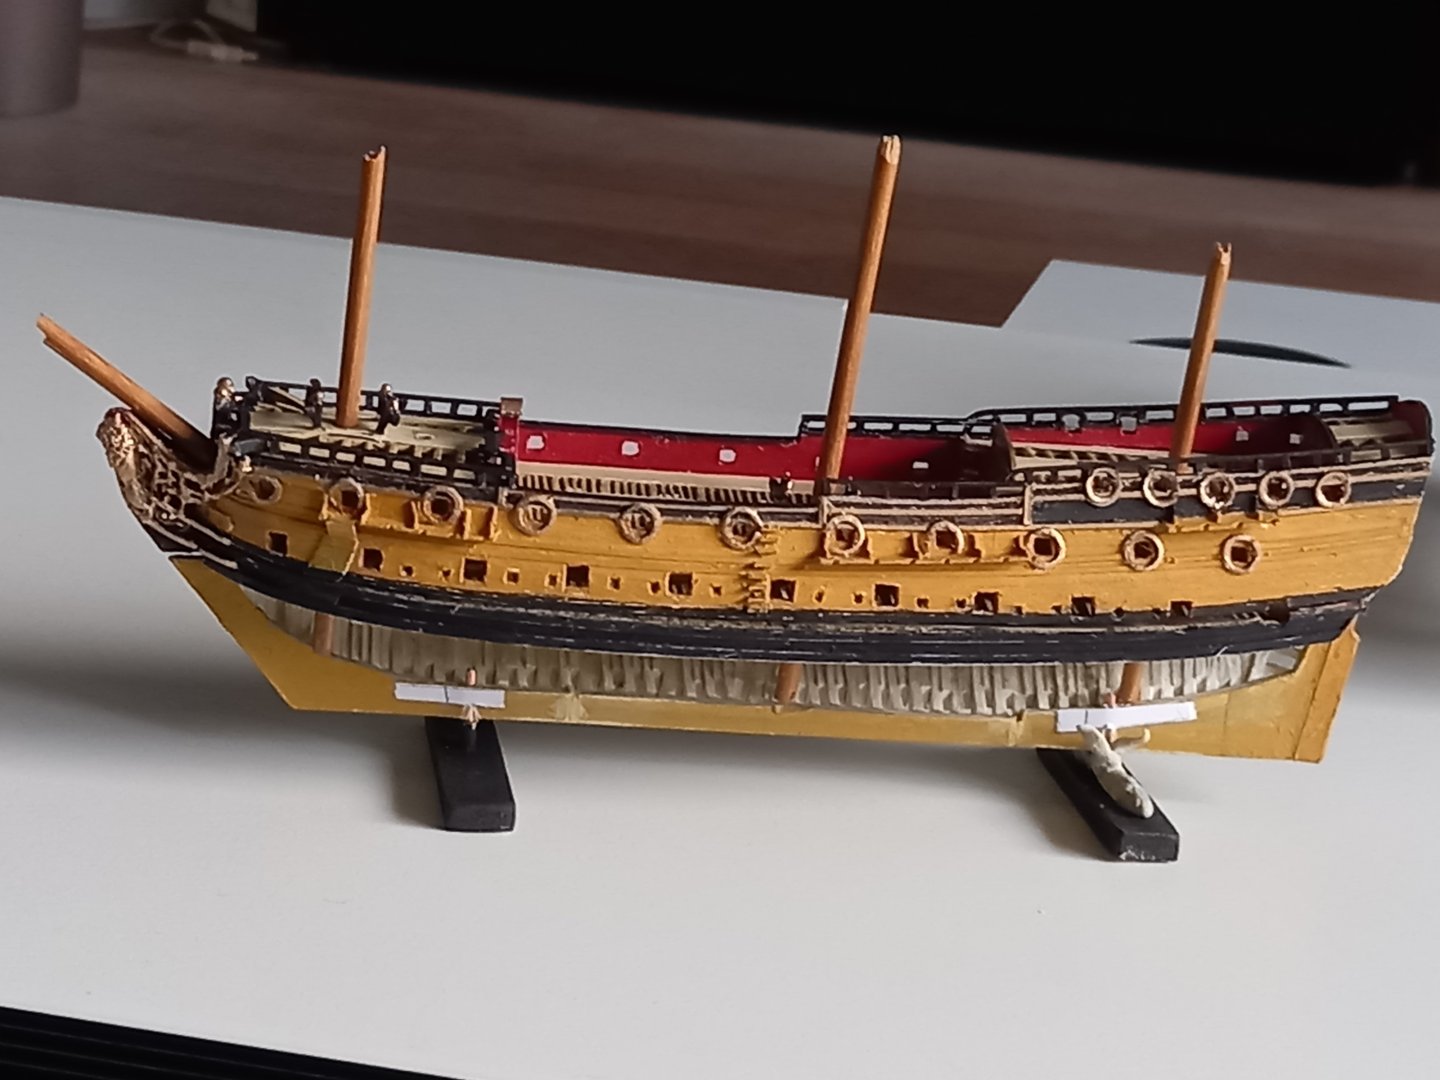
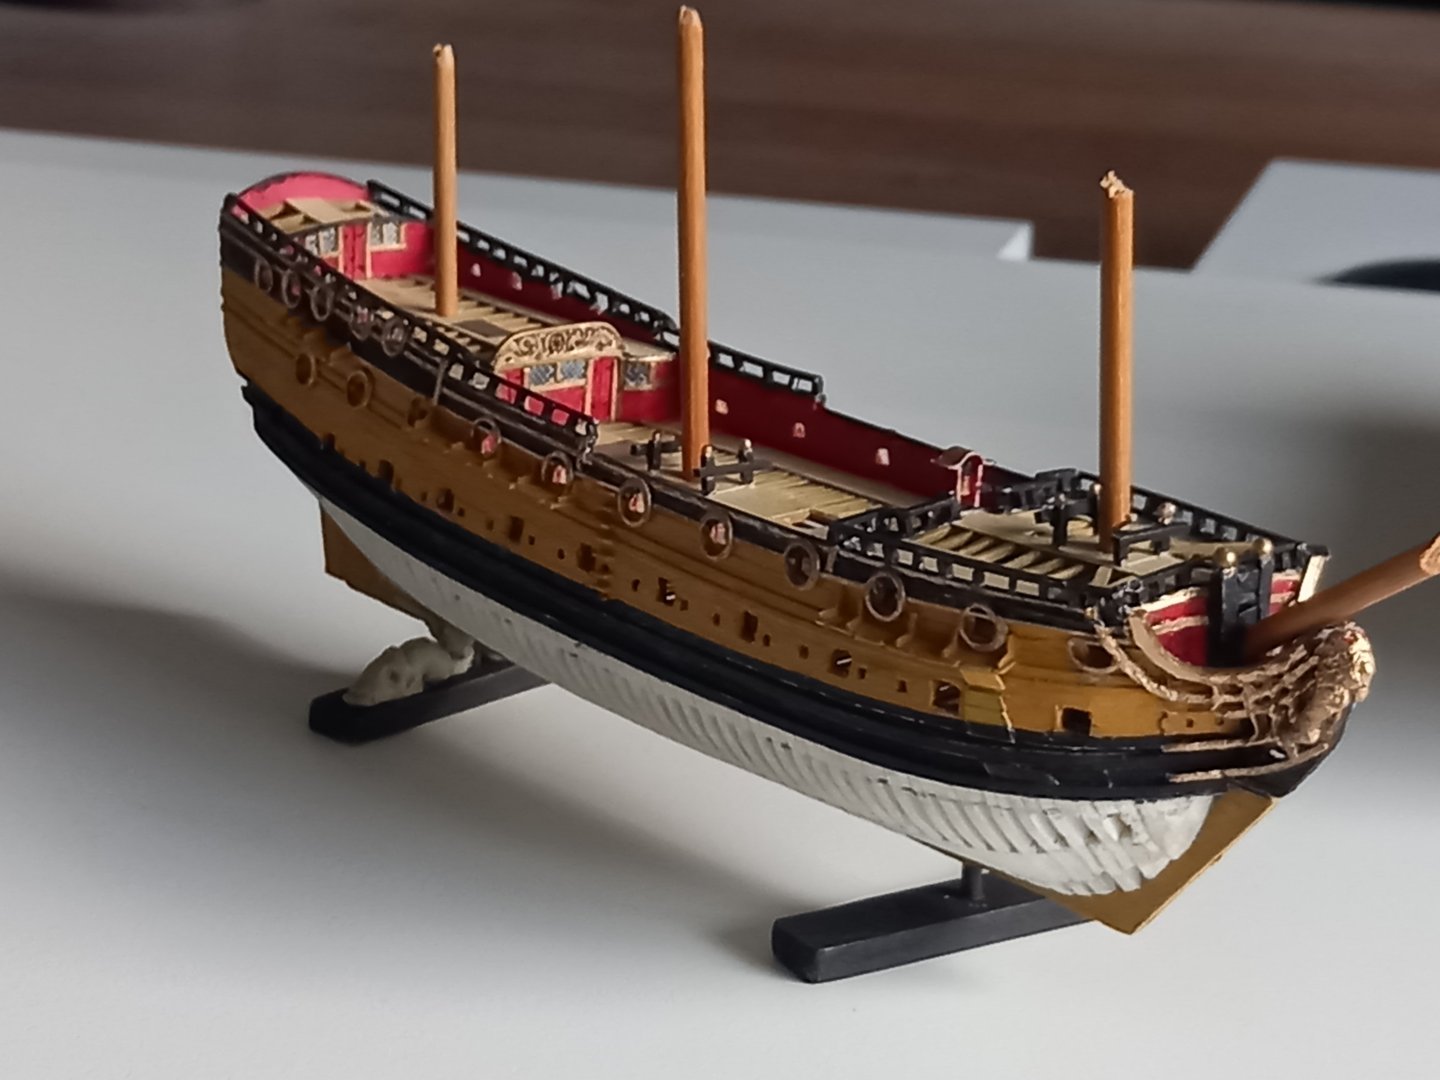
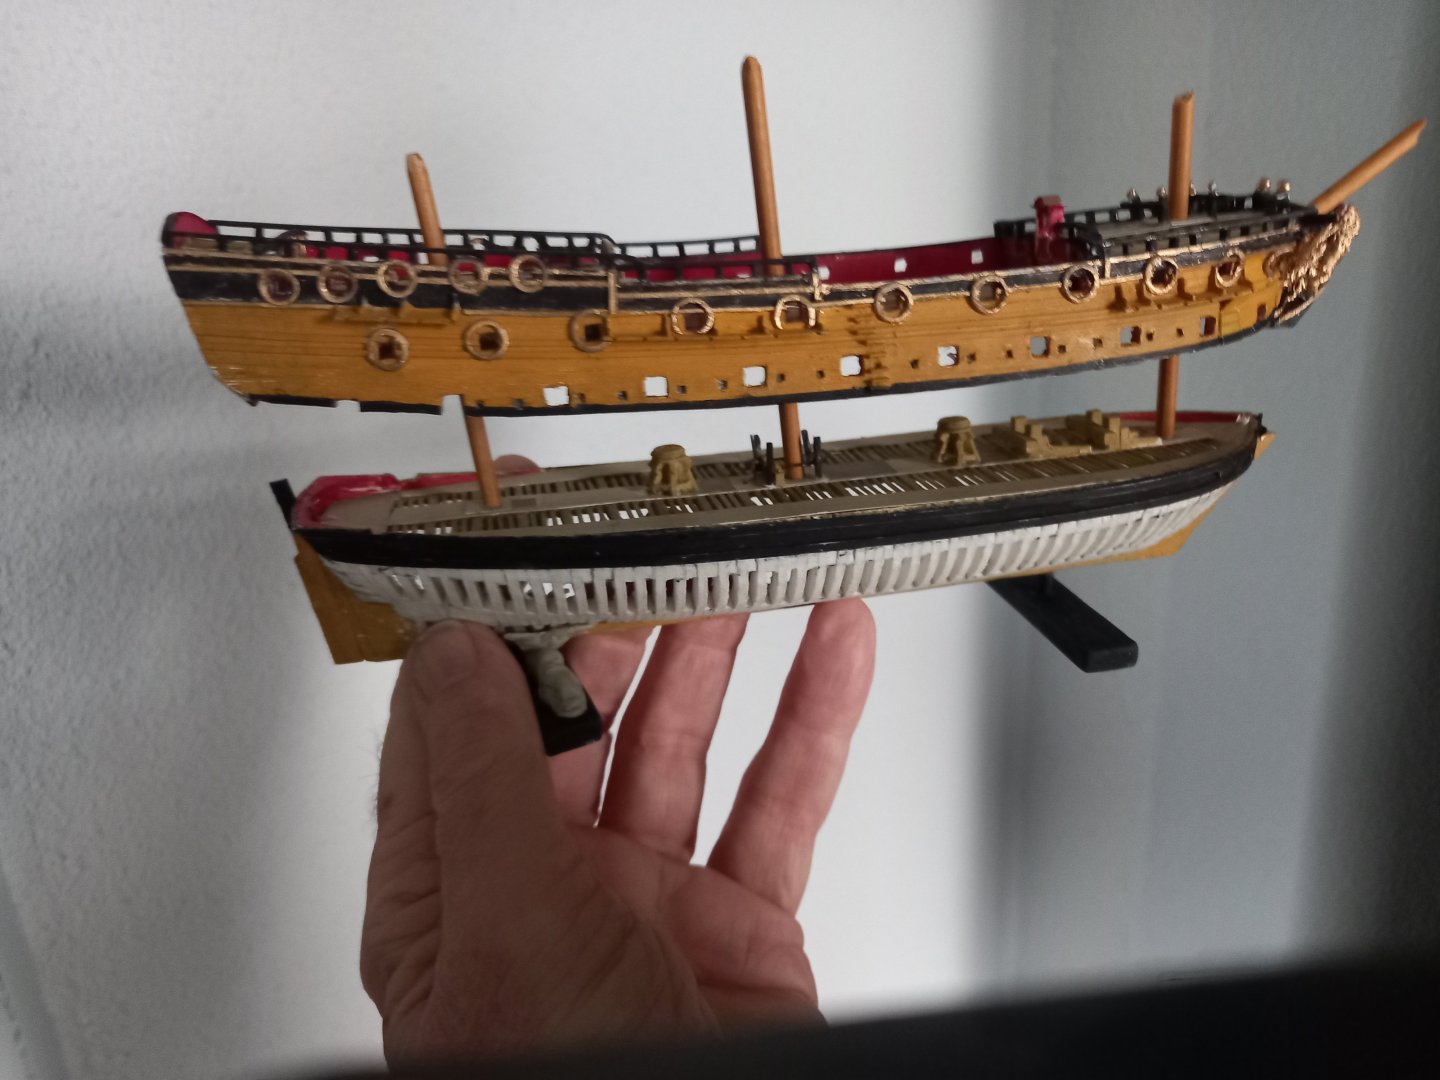
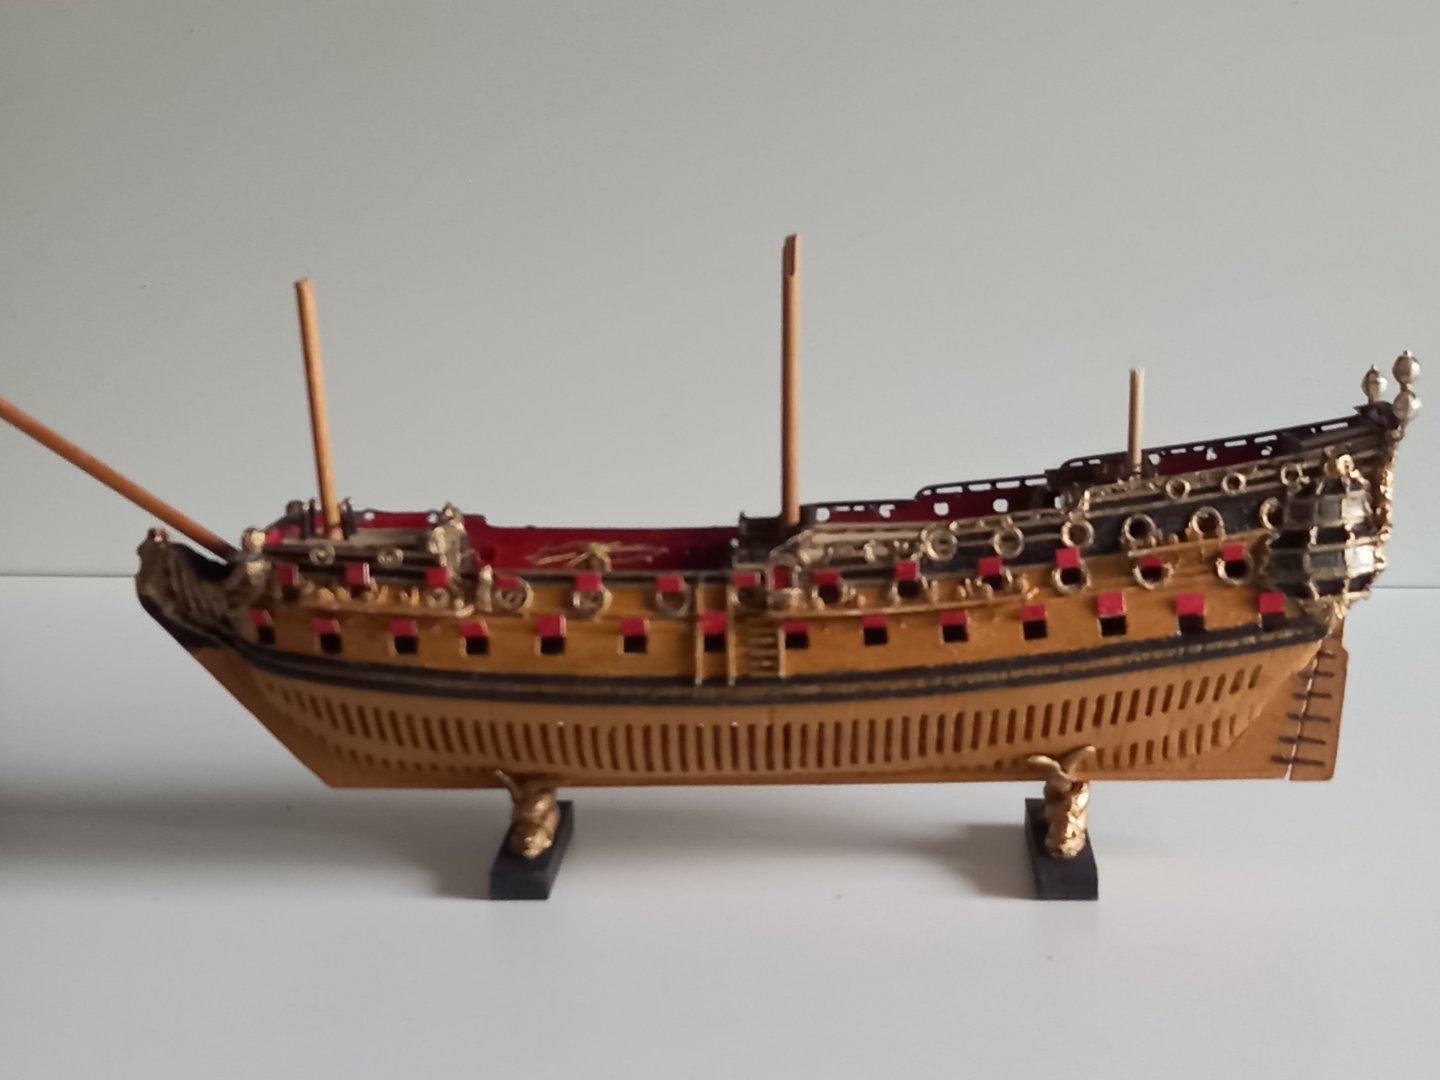
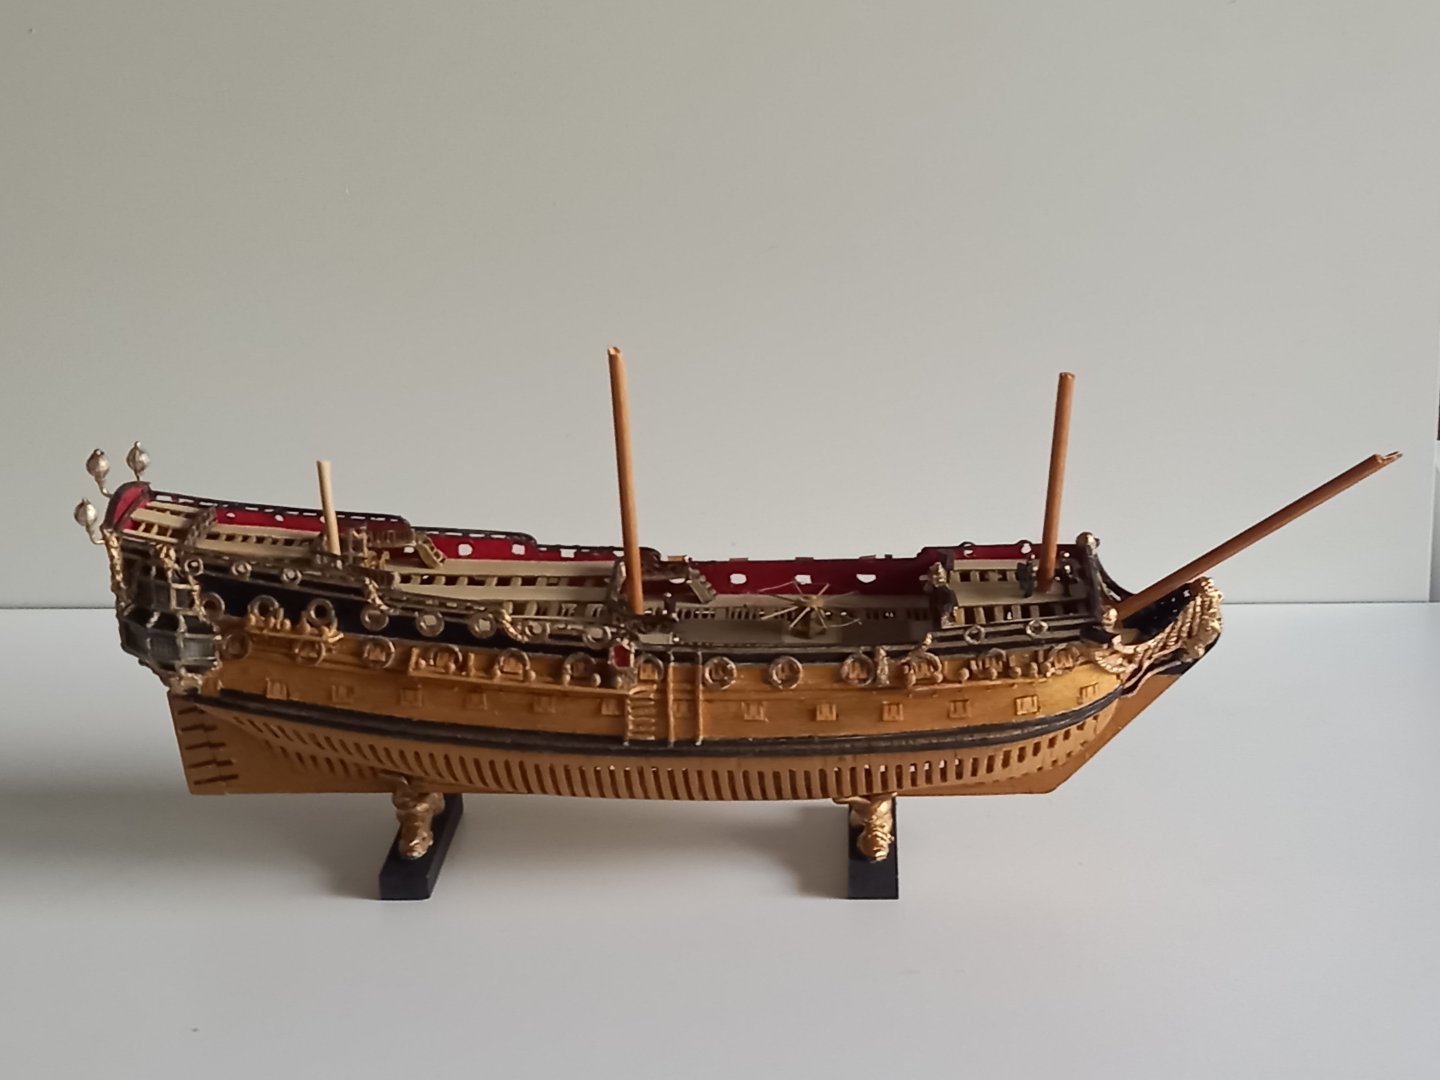
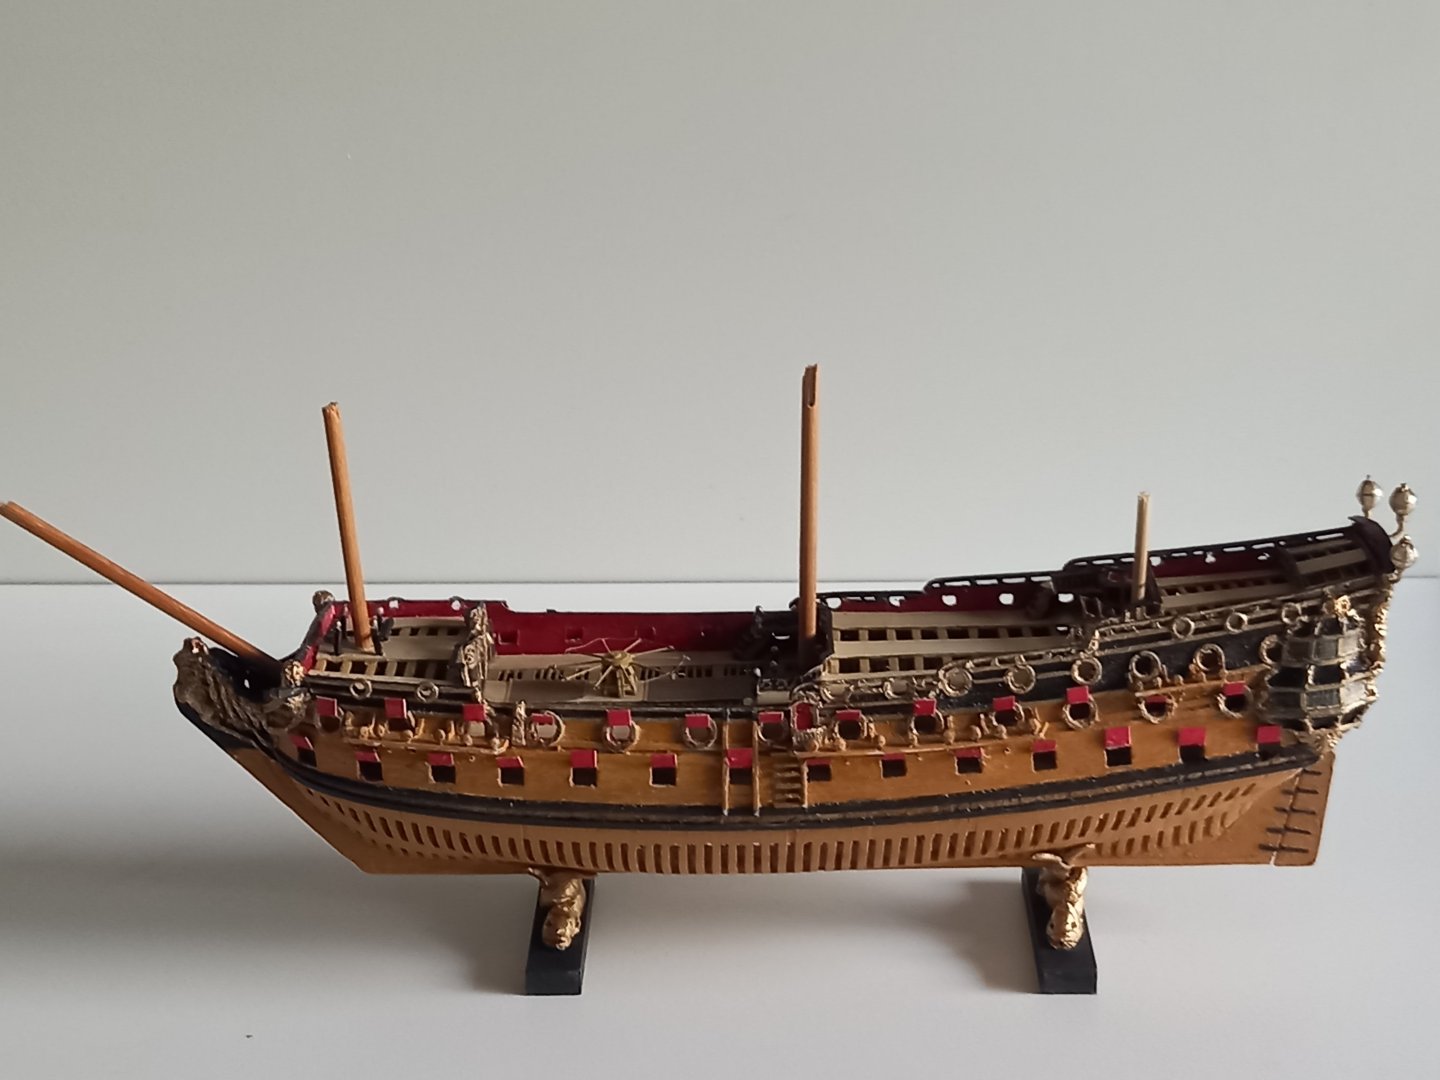
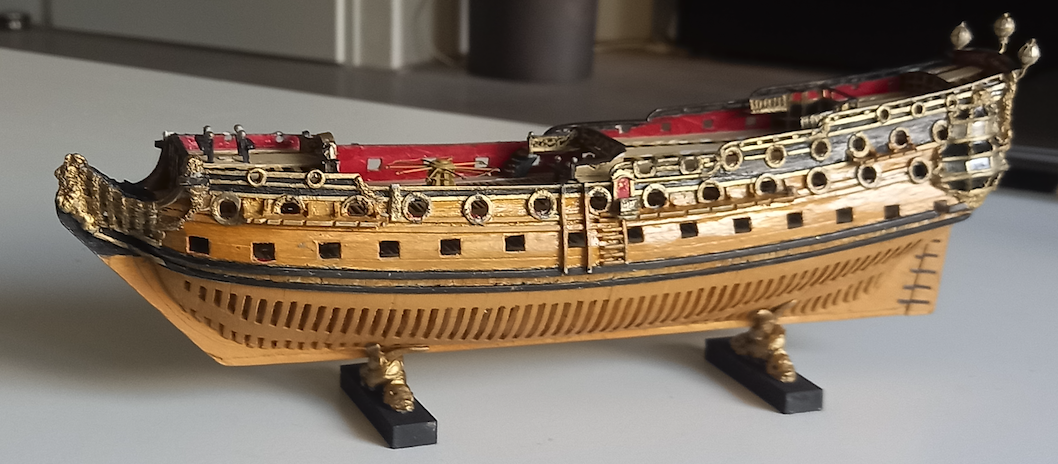
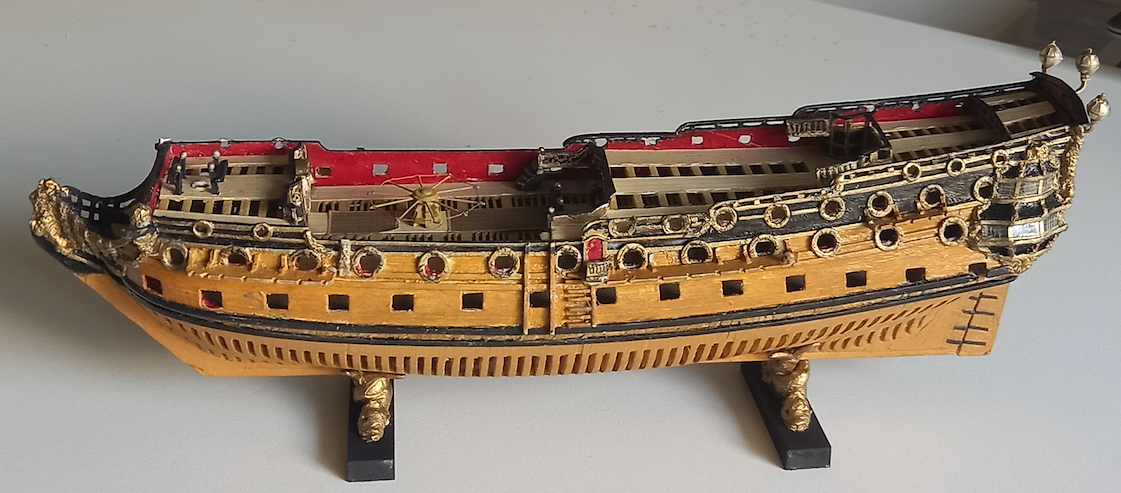
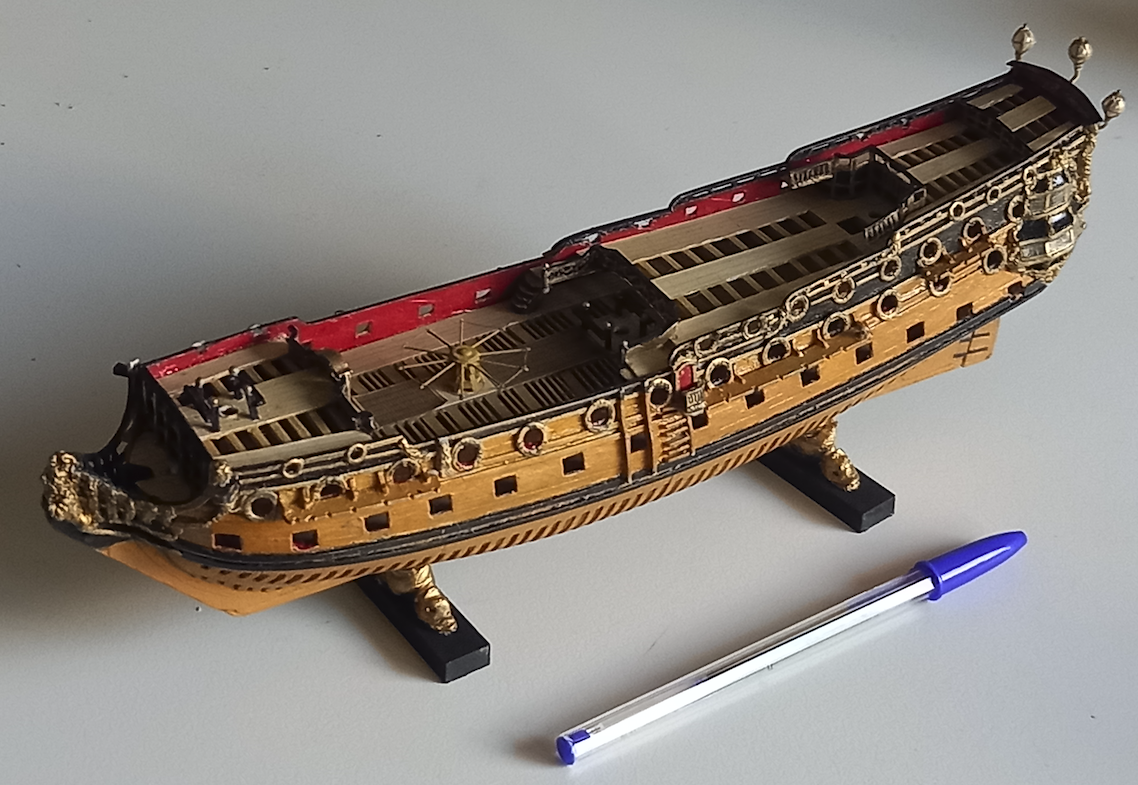
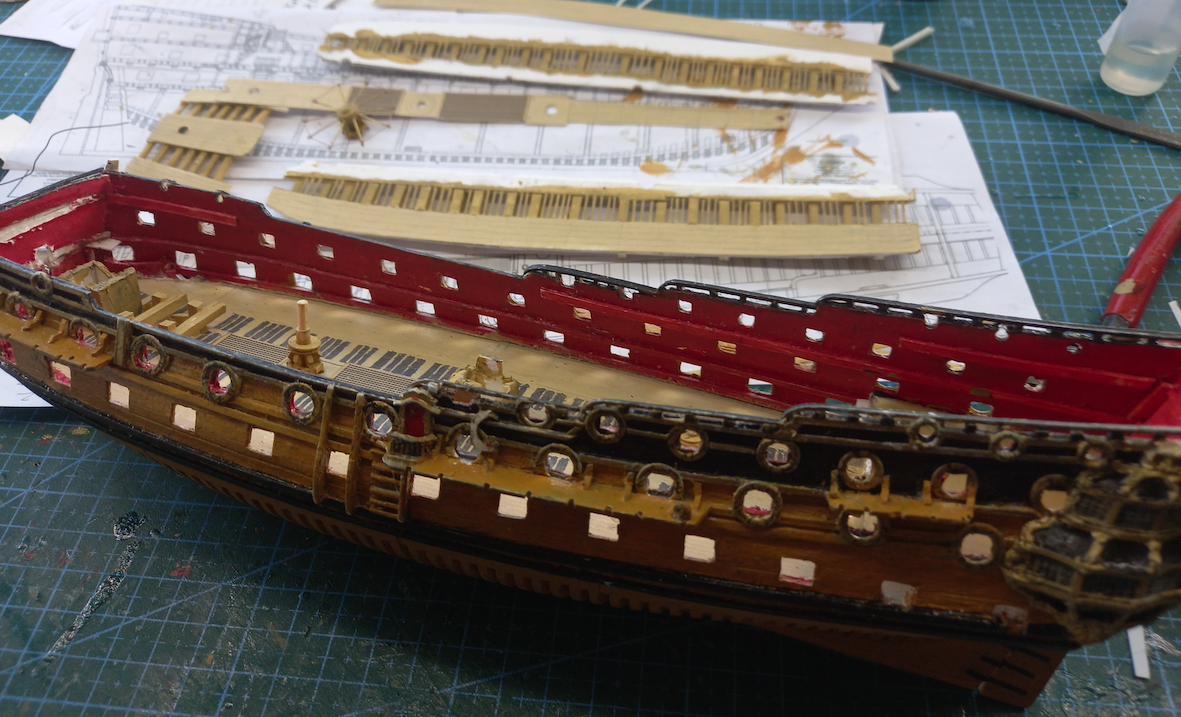
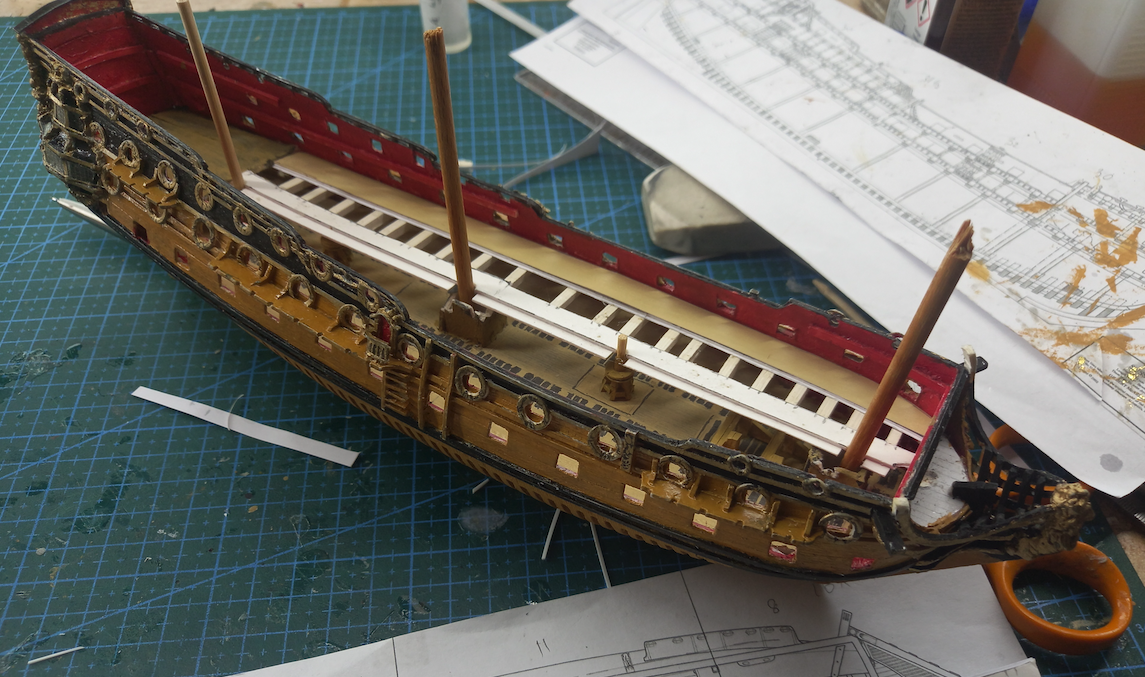
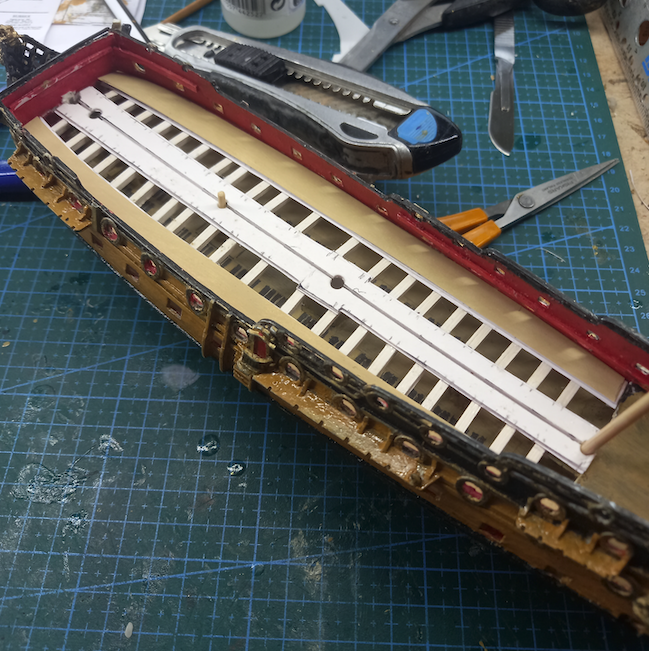
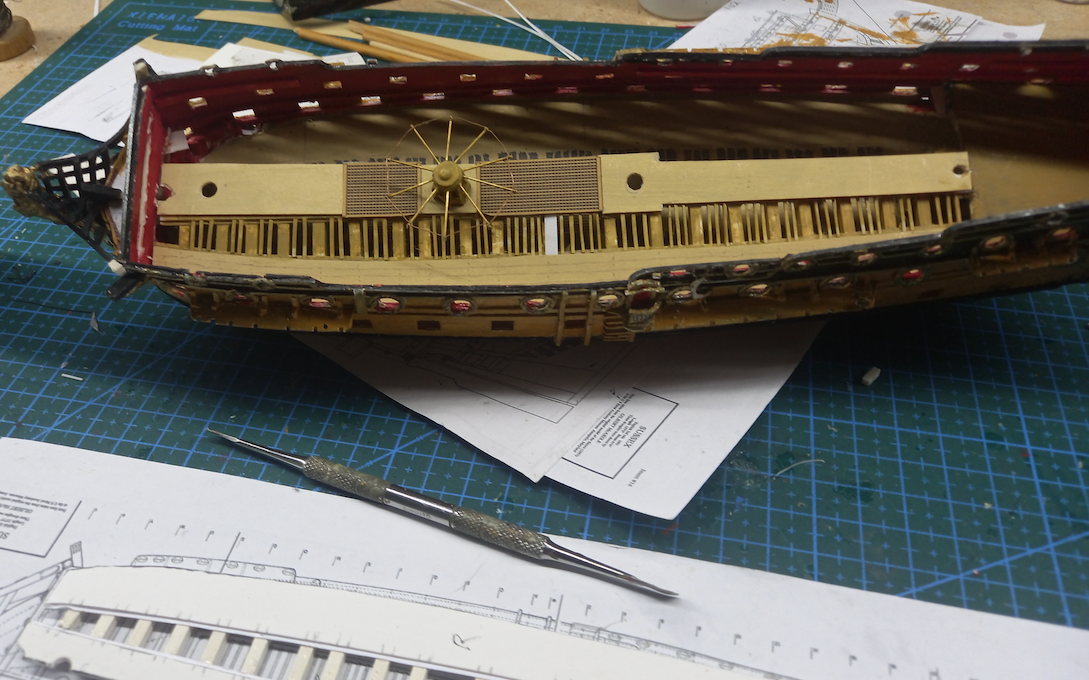
It has been a while since my latest posting. In case you thought I was out of business, well, I am not. I just forgot to anchor what I was building, so there was not much to tell. In fact I am working on two models at the moment. The Sussex I showed earlier in this thread was a third rate man-of-war. The Mordaunt however, my second try, was a fourth rate and therefore smaller than Sussex. I found the necessary drawings in Richard Endsor's magnificent book The Master Shipwright's Secrets. Here is to what it has come to so far: The model is not finished. Apart from the beak head, all the details like stairs, bitts, deadeyes, gunport lids and lanterns will have to be done. The stand is also a temporary one, just a left-over from my previous efforts with the Sussex. I could have finished it (and I certainly will later), but suddenly I felt inspiration to do a next-level experiment: I wanted to build an open dockyard model. So I did. This is the Tyger, actually a rebuild of the Mordaunt, both in open and in closed condition. As you can see I have a small problem here: I ran out of my stock of card of the right consistency and thickness. I know my colleague at the Rijkmuseum is working hard on gathering new material for me, but it takes some time, so I will have to be patient before I will have the opportunity to build the larboard half of the frames below deck level. Apart from that I will have to do the stern, both in the sides and above the transom, not to mention the usual details I mentioned concerning the Mordaunt. In case you are having problems with the size of the model (scale roughly 1/200), this picture might help: Hope to see you next time.


- 38 replies
-
- 17
-
-
-
Ab Hoving reacted to a post in a topic:
Mary Rose by Baker - scale 1/50 - "Your Noblest Shippe"
-
Ab Hoving reacted to a post in a topic:
Kawasaki Ki-61 Hien "Tony" by ccoyle - Halinski/Kartonowy Arsenal - 1/33 - CARD
-
Ab Hoving reacted to a post in a topic:
Kawasaki Ki-61 Hien "Tony" by ccoyle - Halinski/Kartonowy Arsenal - 1/33 - CARD
-
Thank you @Tumblehome, @ccoyle and @druxey for your comments and all the people for their likes. @Tumblehome: I usually make my pictures taken by my phone smaller because several forums refuse them because of their size. Incidently I tried to feed Modelshipworld with the original ones and... gee, it worked. Does it make any difference to you? @druxey: Sorry David, I really tried to slow down, but somehow it simply does not work for me. I was born to labor.. Now I start my search for a next sortlike project. I learned so much from this one that it would be a waste to forget it all and start growing daisies....
-
Yesterday I finished the dockyard model of the Sussex, 2 1/2 months after I started. It was a nice experience. English shipbuilding is a challenge for me, as I know next to nothing of it, but in t his case I just had to imitate McArdles's example. It was fun. Perhaps Emiel will make better pictures if the spirit comes over him. What will be next?


- 38 replies
-
- 21
-
-
-
What's wrong with hiding mistakes in model building? I make mistakes all the time and with every next step I try to cover up what I did wrong. Is that bad? At least it challenges my creativity. As long as one likes what he is doing every trick in the book is allowed.
- 18 replies
-
- 14
-
-
-
Thank you @Ronald-V, @amateur, @scrubbyj427 and @wefalck for your kind words. @wefalck: No, I did not describe the carvings. As you know it is all fake. I just press some two component putty into place and make blobs and dents with pointed and round sticks until it looks like carvings from a distance in my myopic eyes. For the bell I heated some blister plastic and pressed the massive side of a 1.5 mm drill into it. The material gave way in a nice bell-shaped way, I just had to cut it from the sheet. Amazing how much more time is needed to build at this scale compared with larger ones. Time and scale seem inversely proportional. There must be some law for it.
-
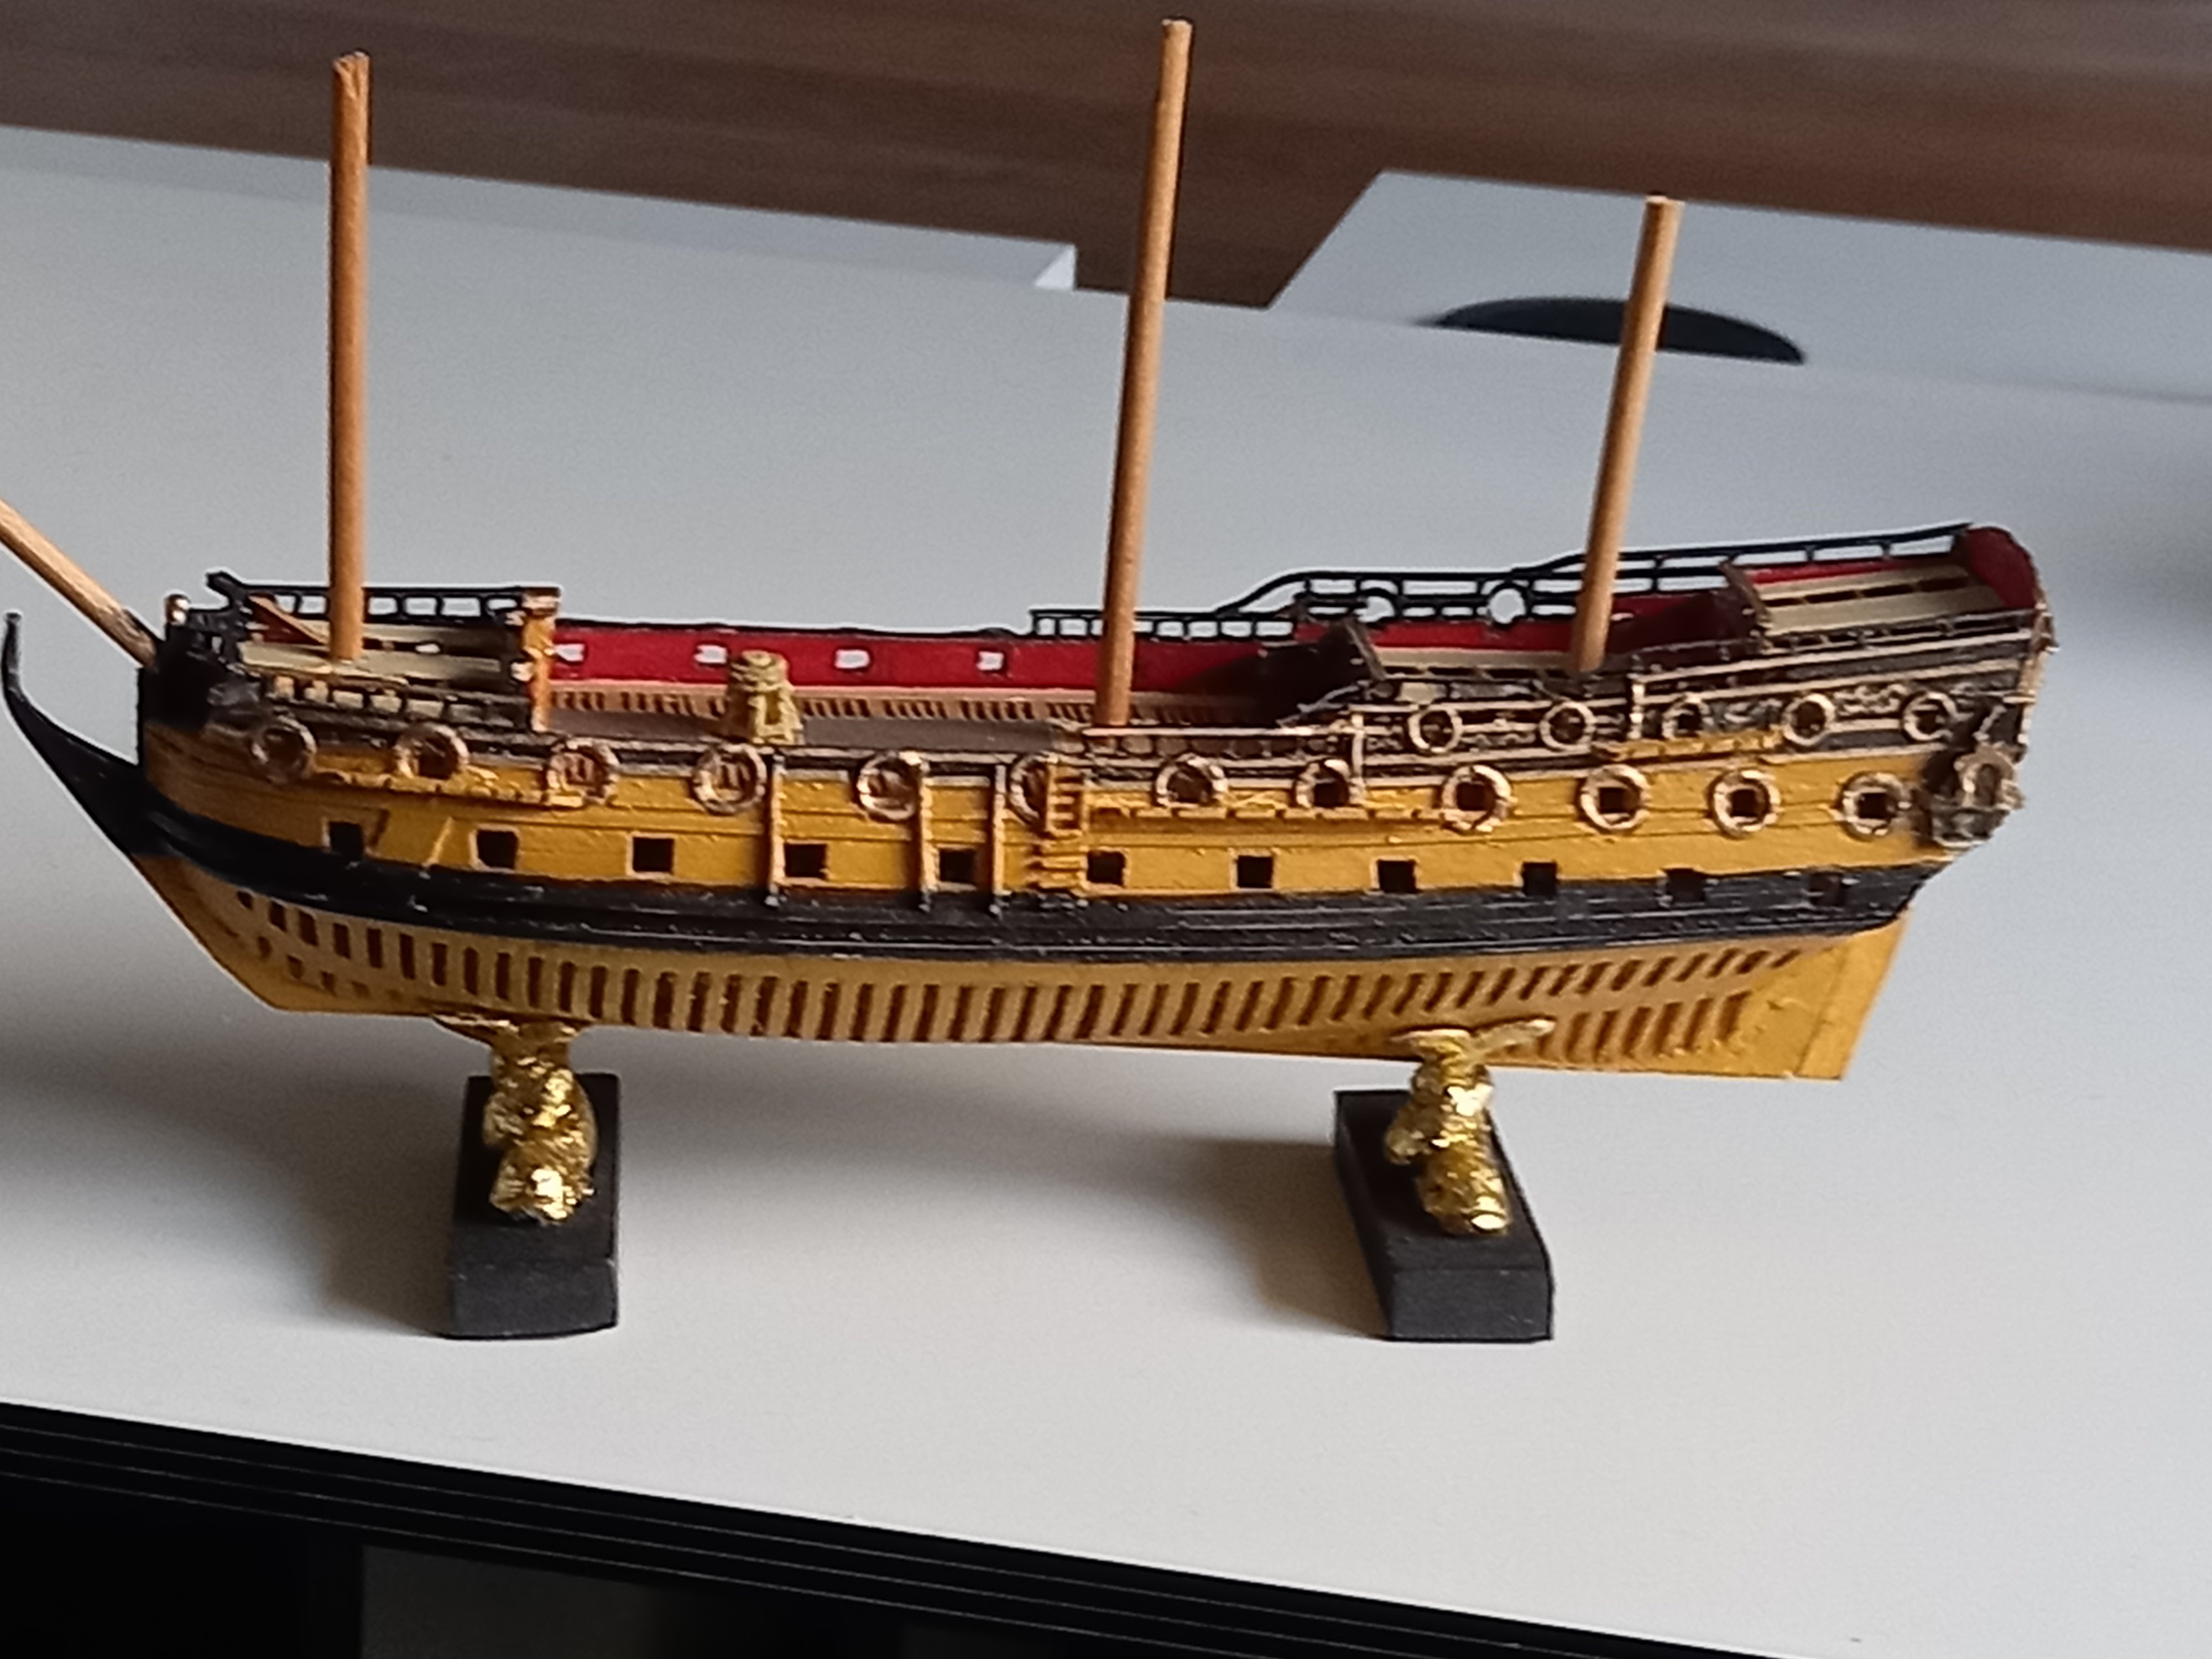
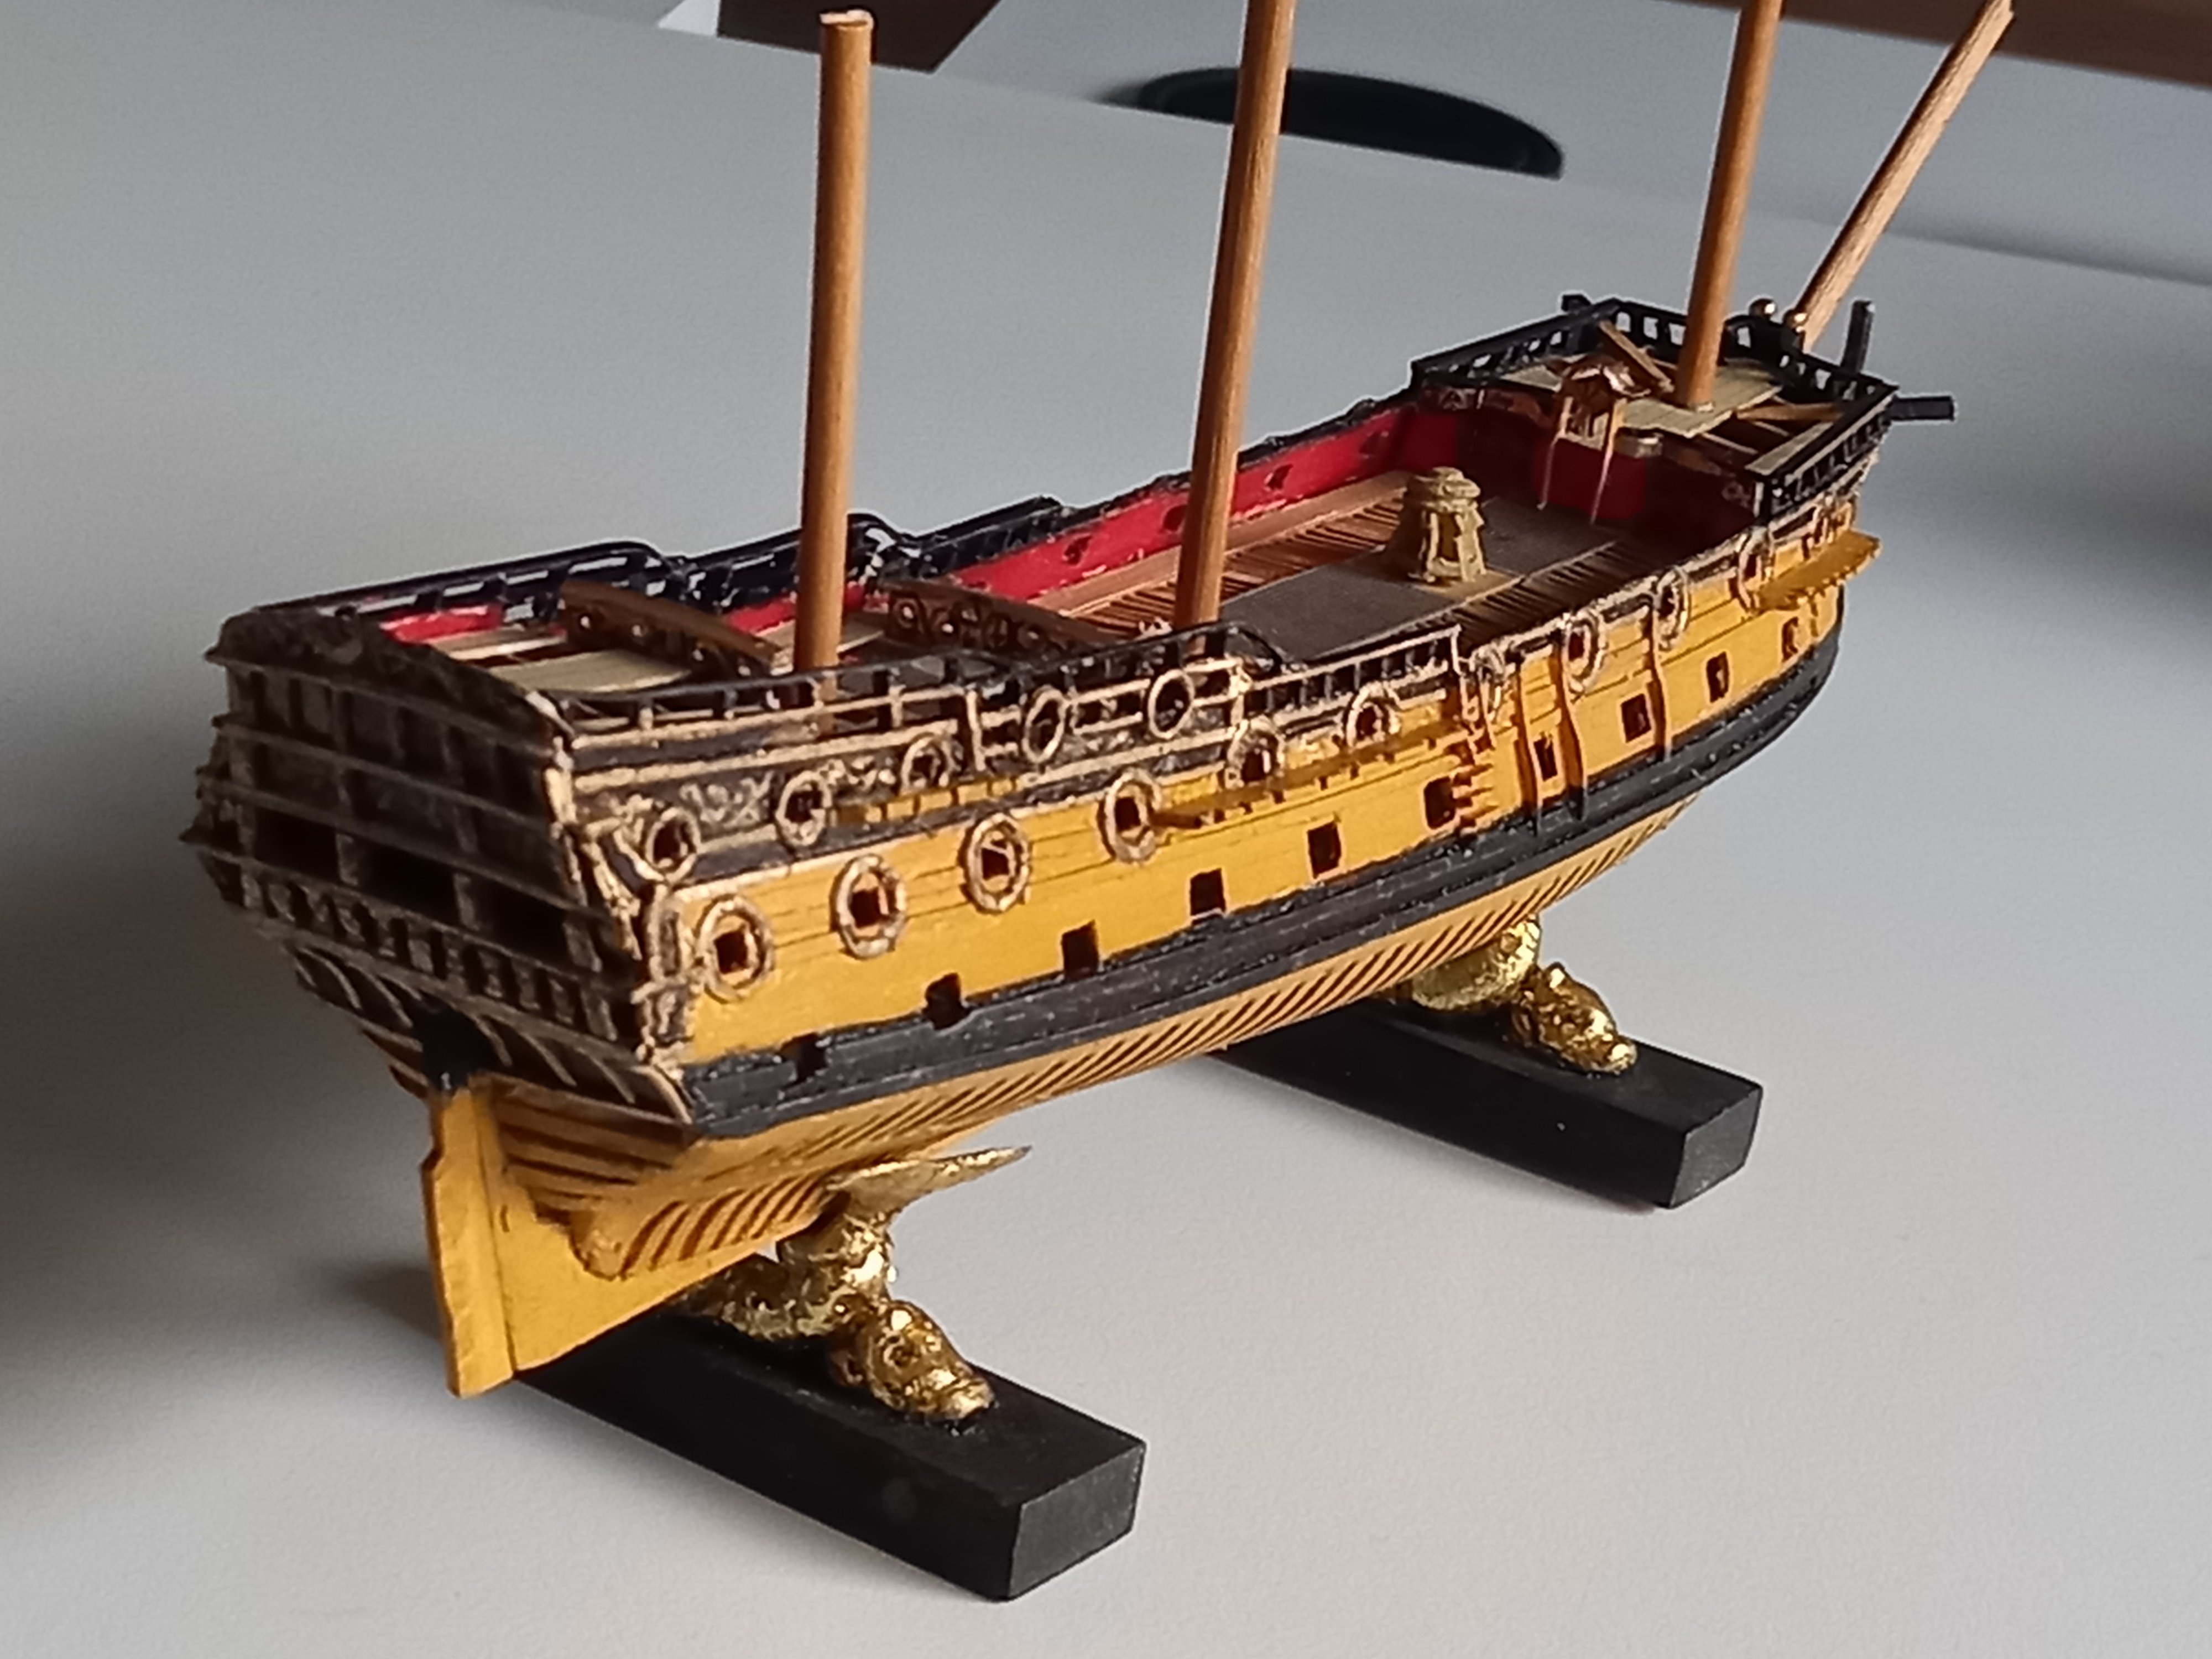
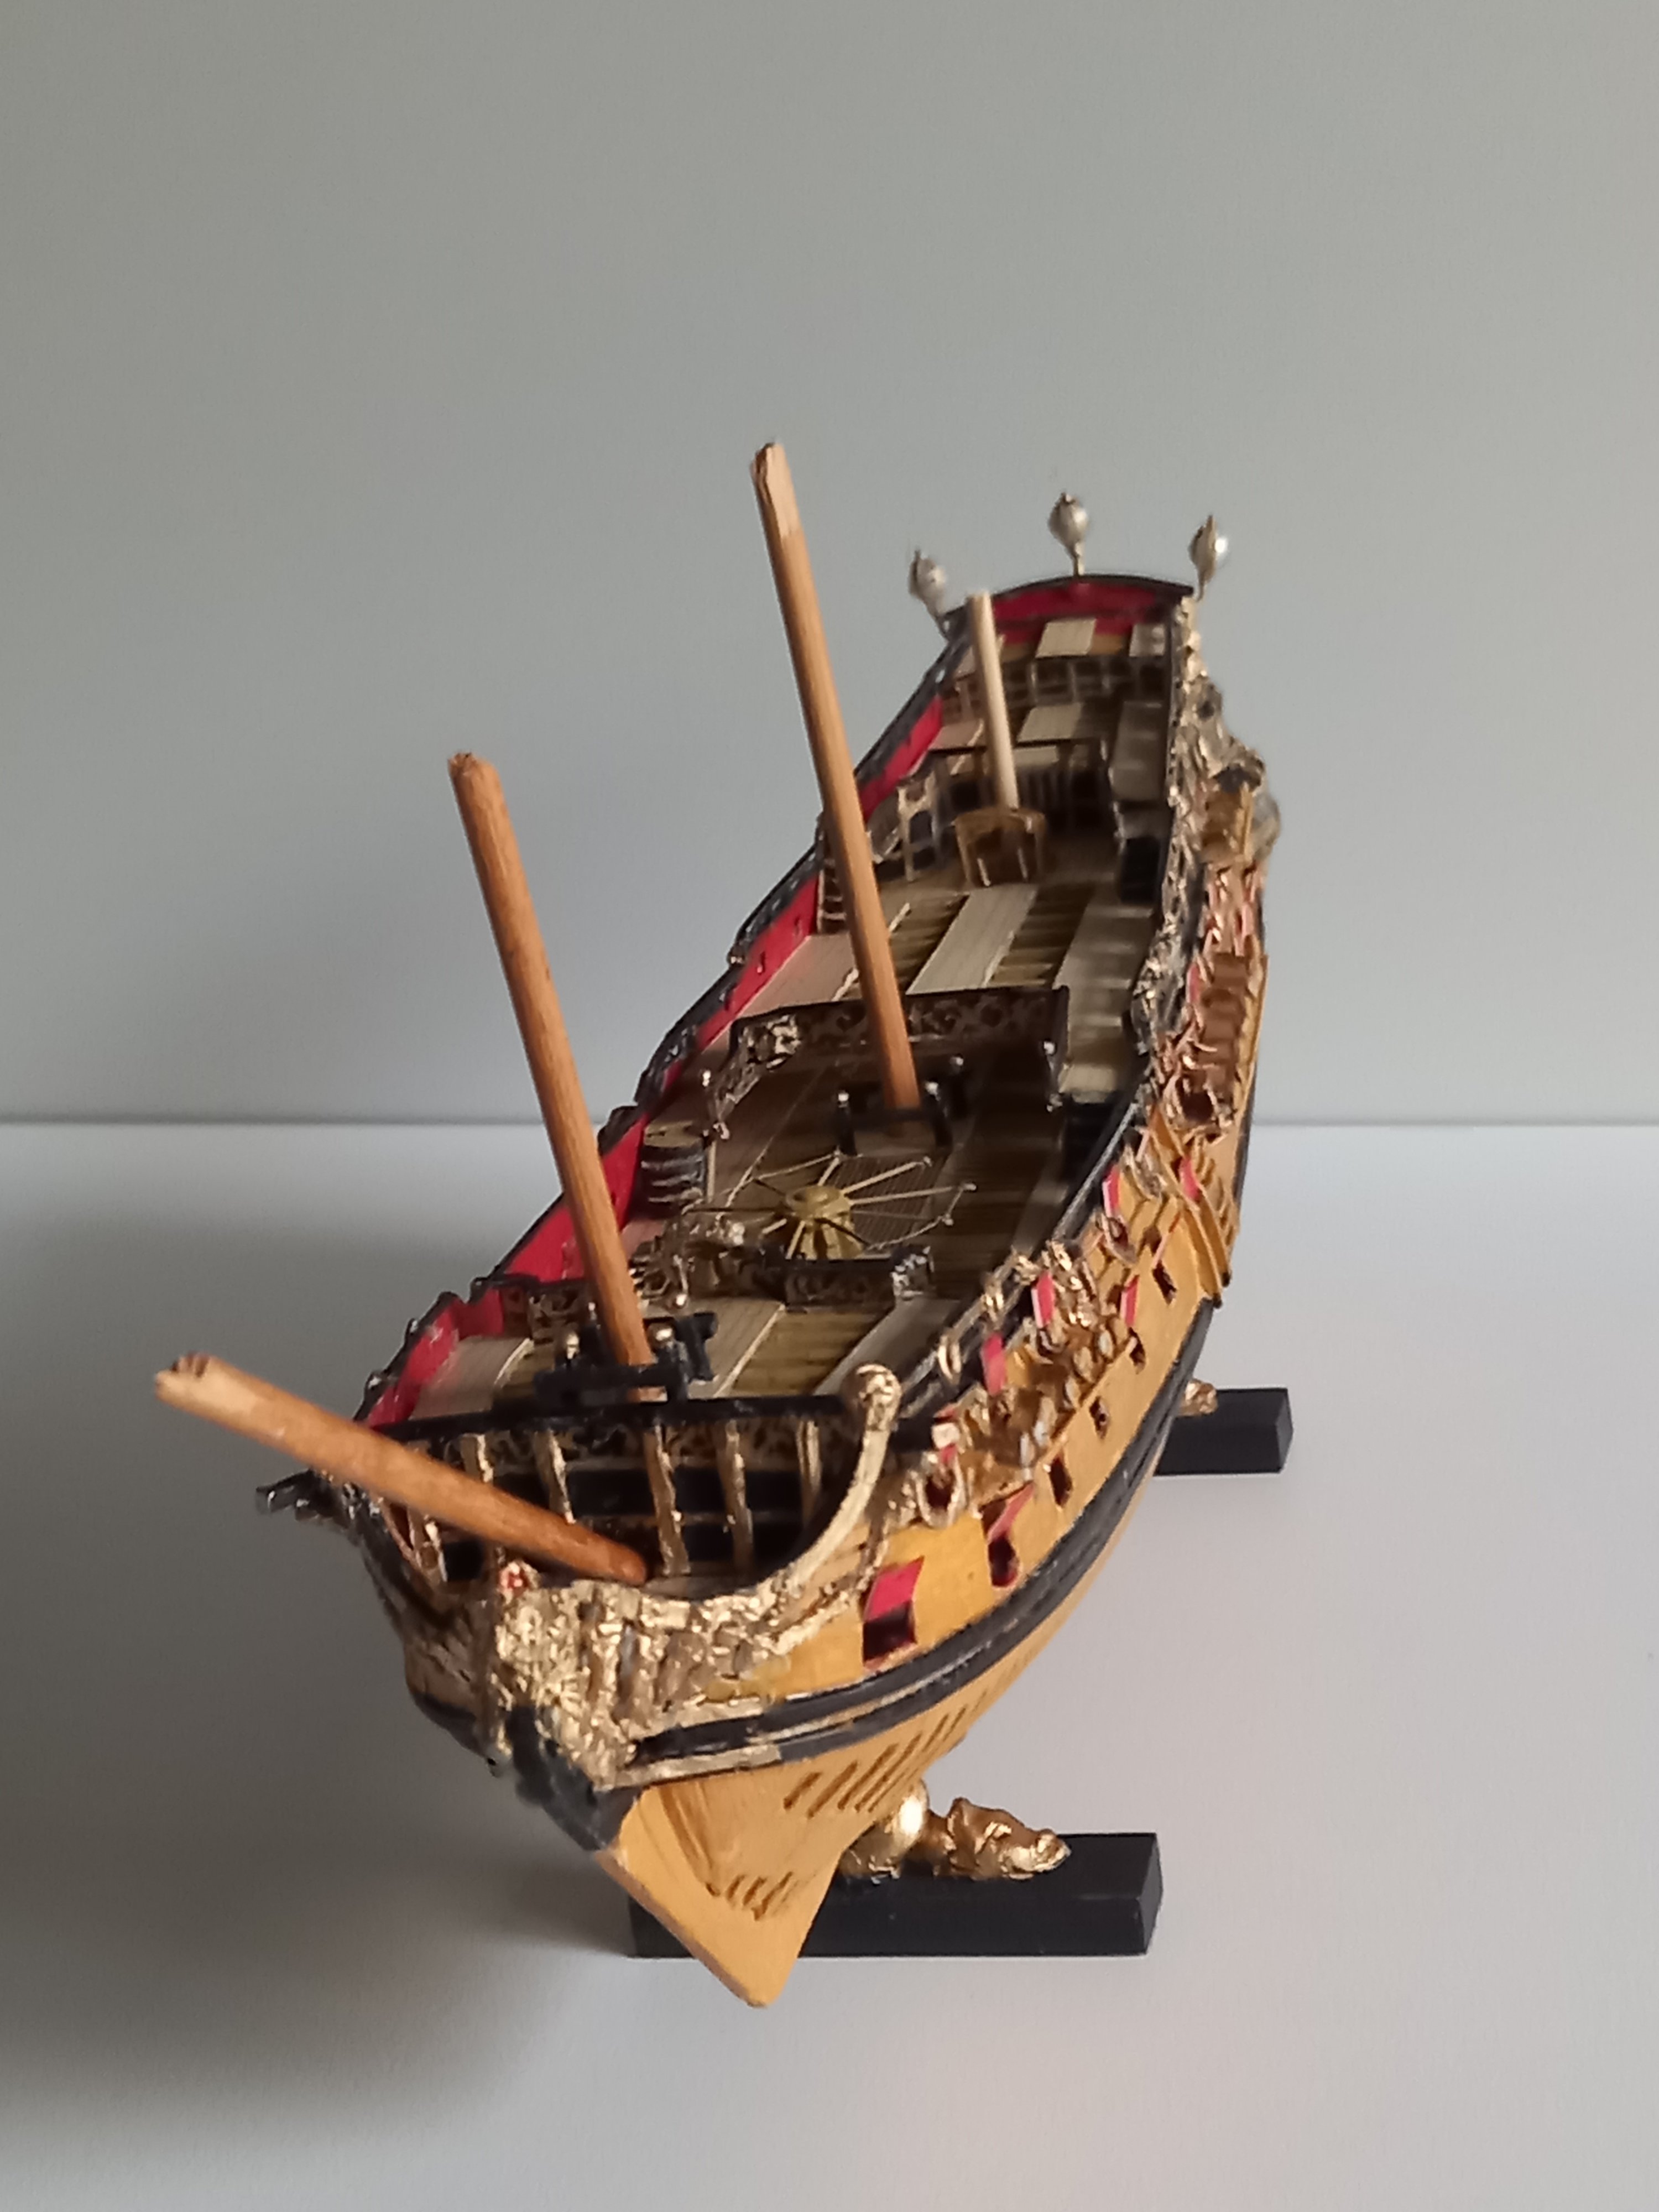
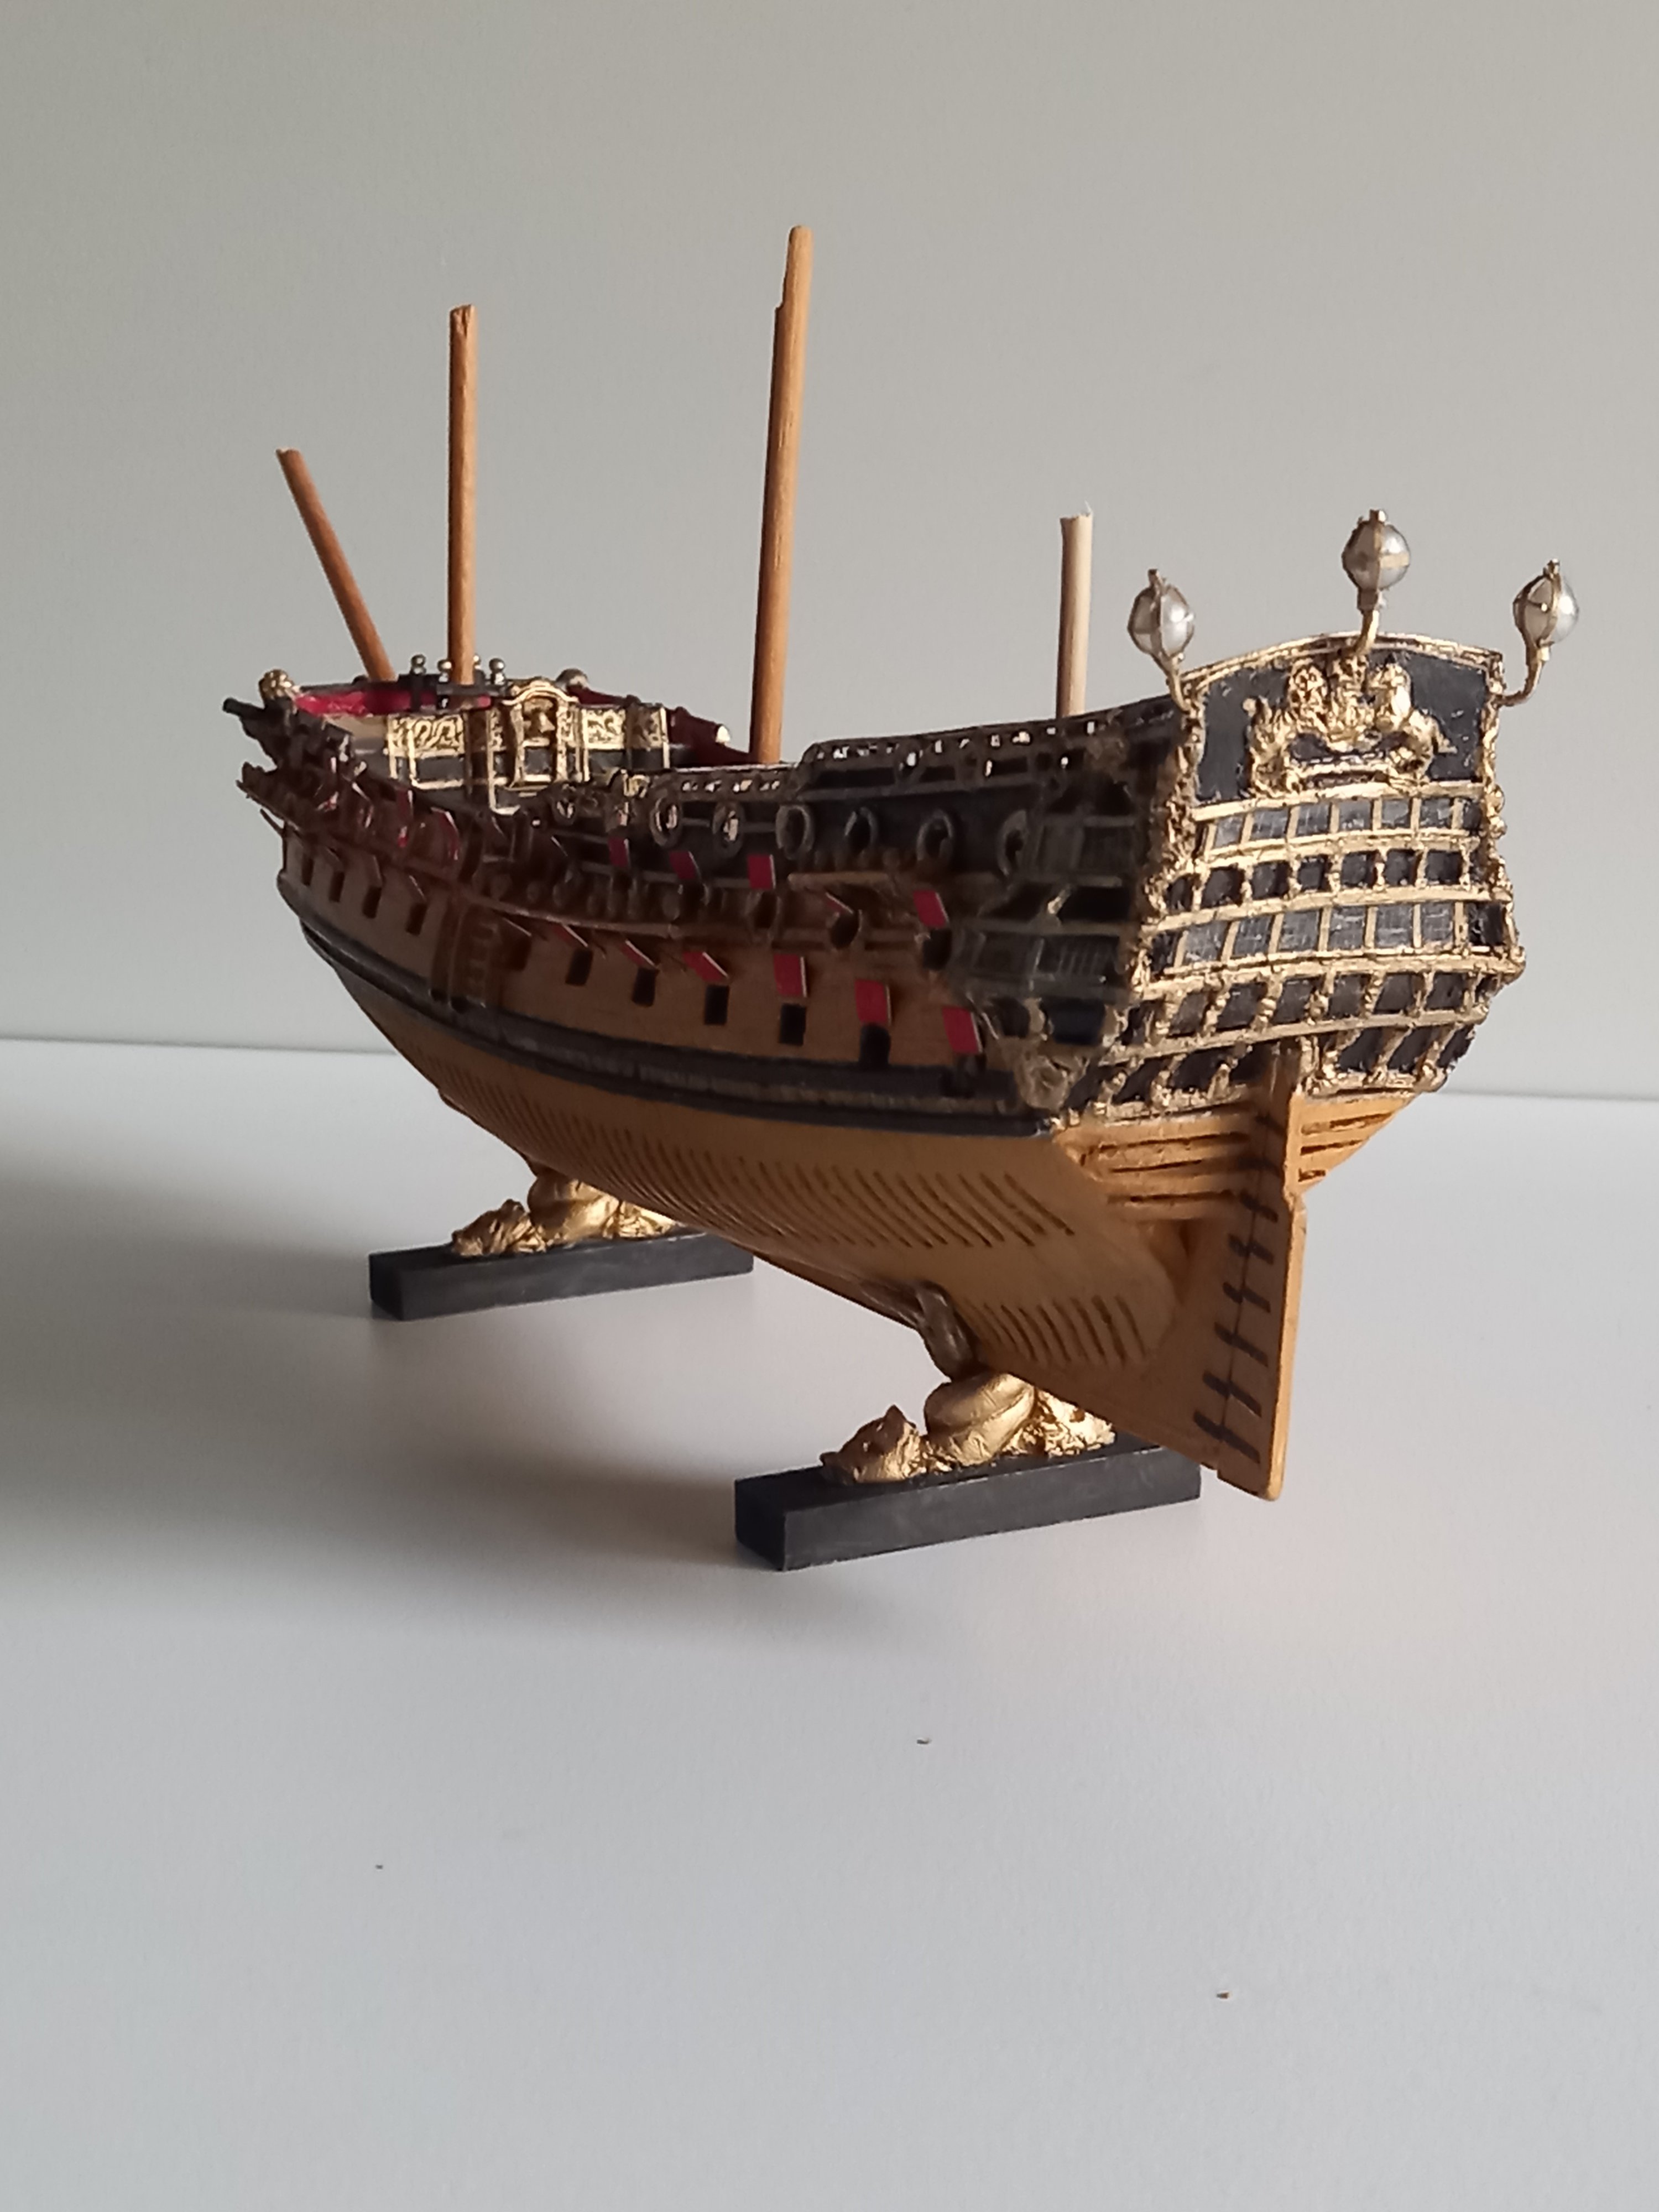
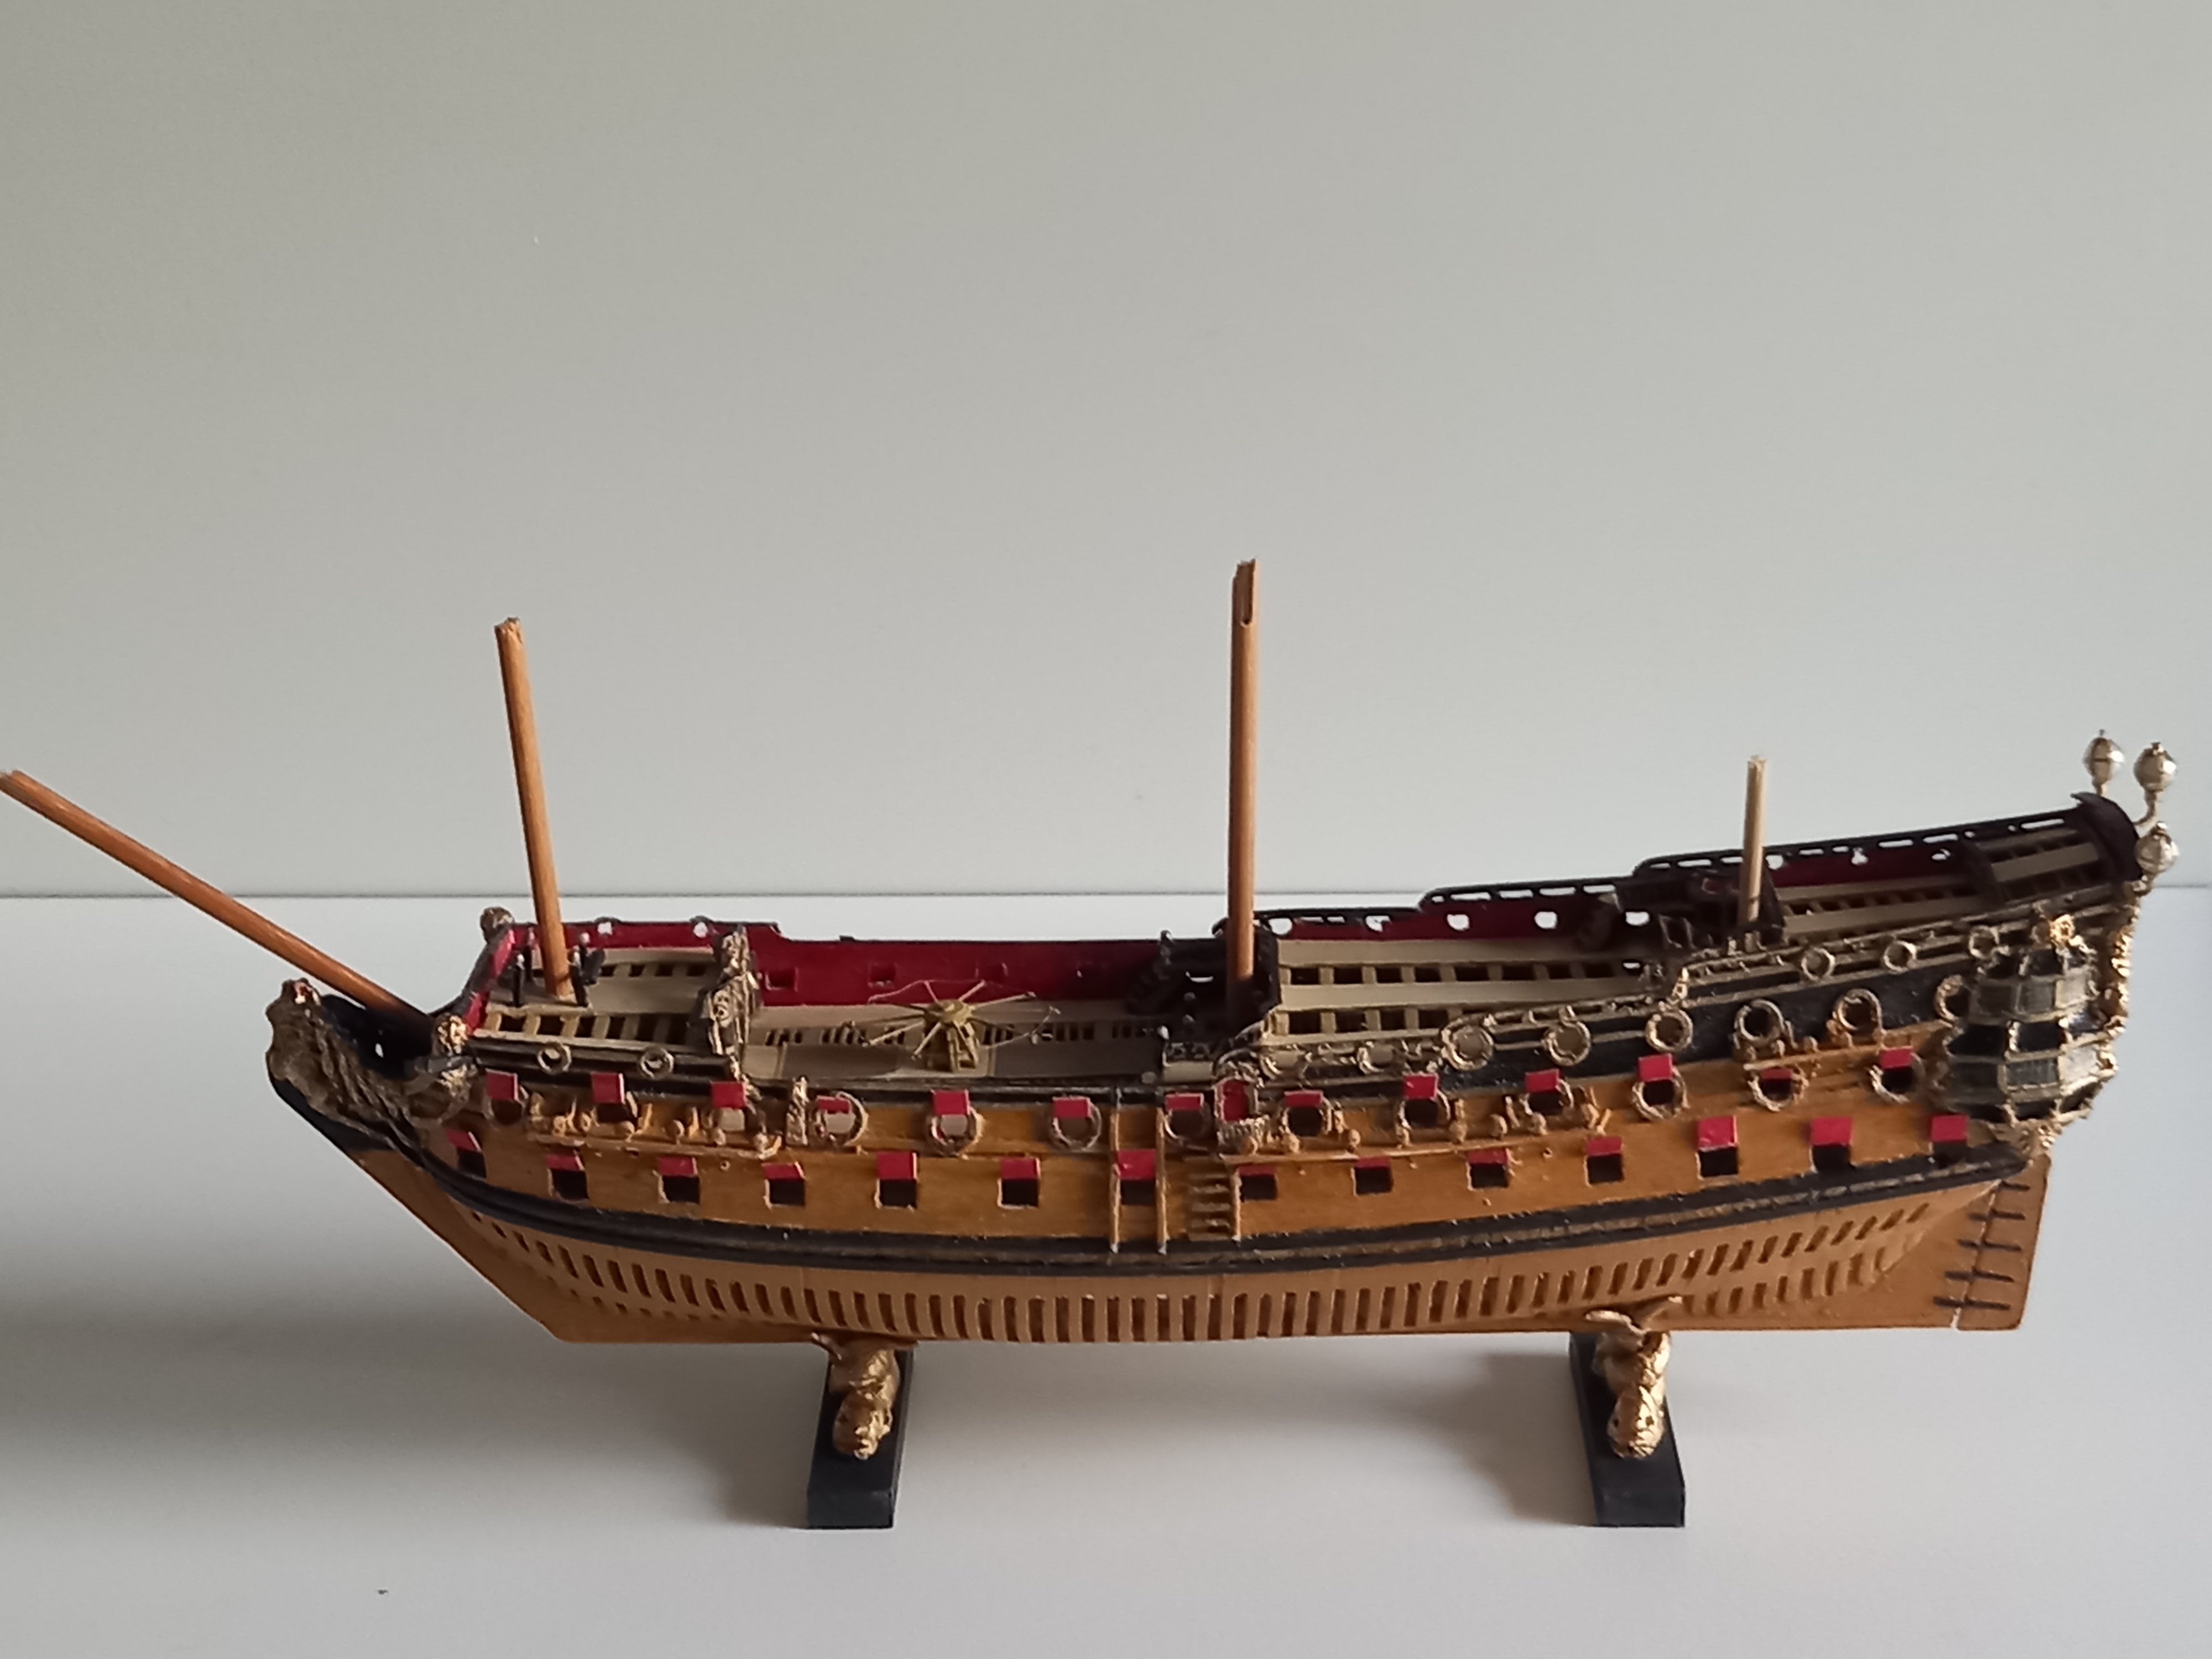
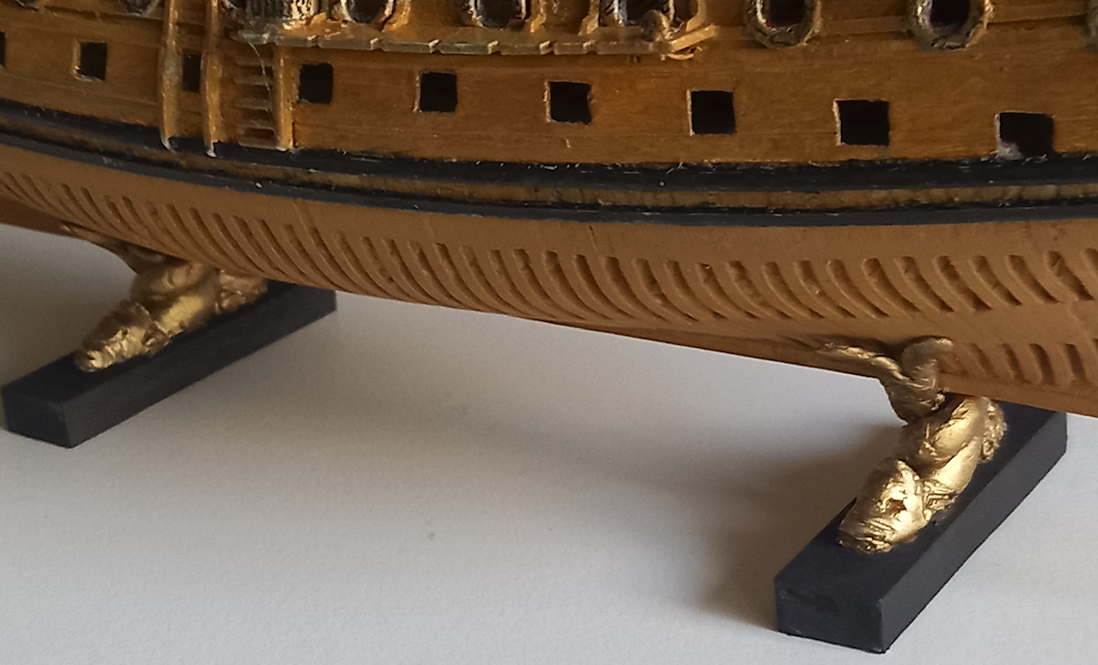
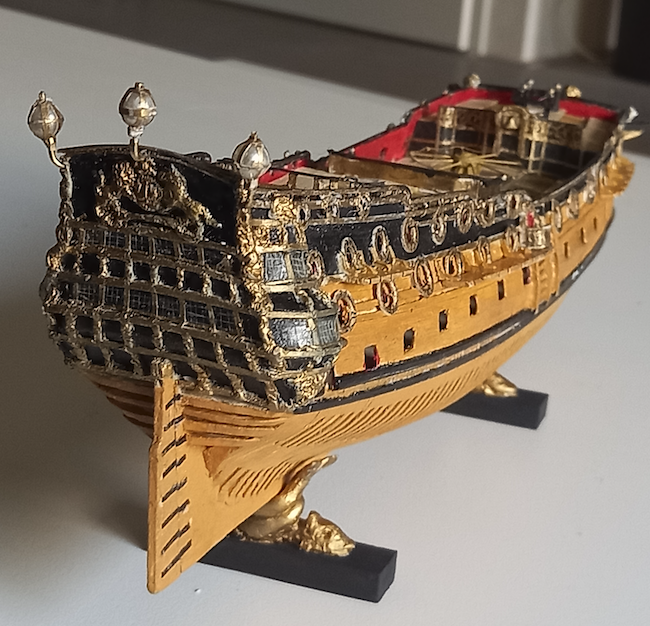
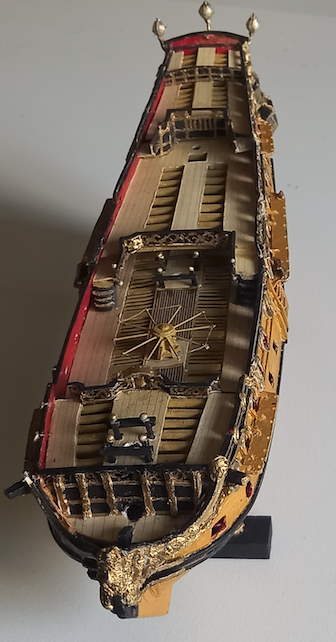
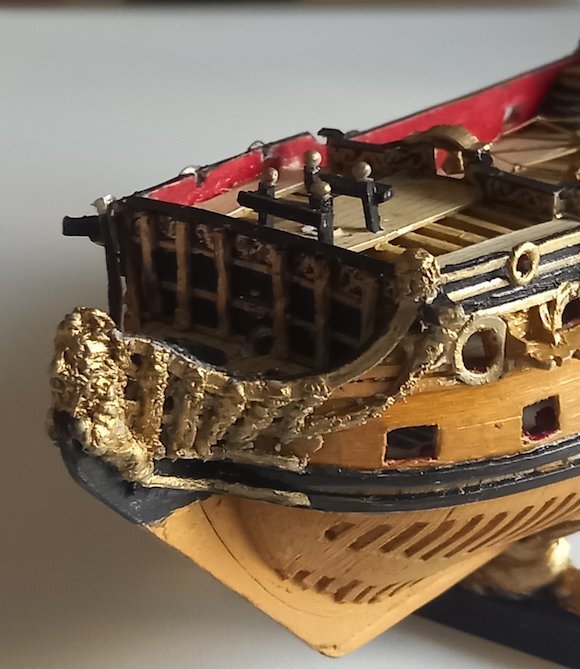
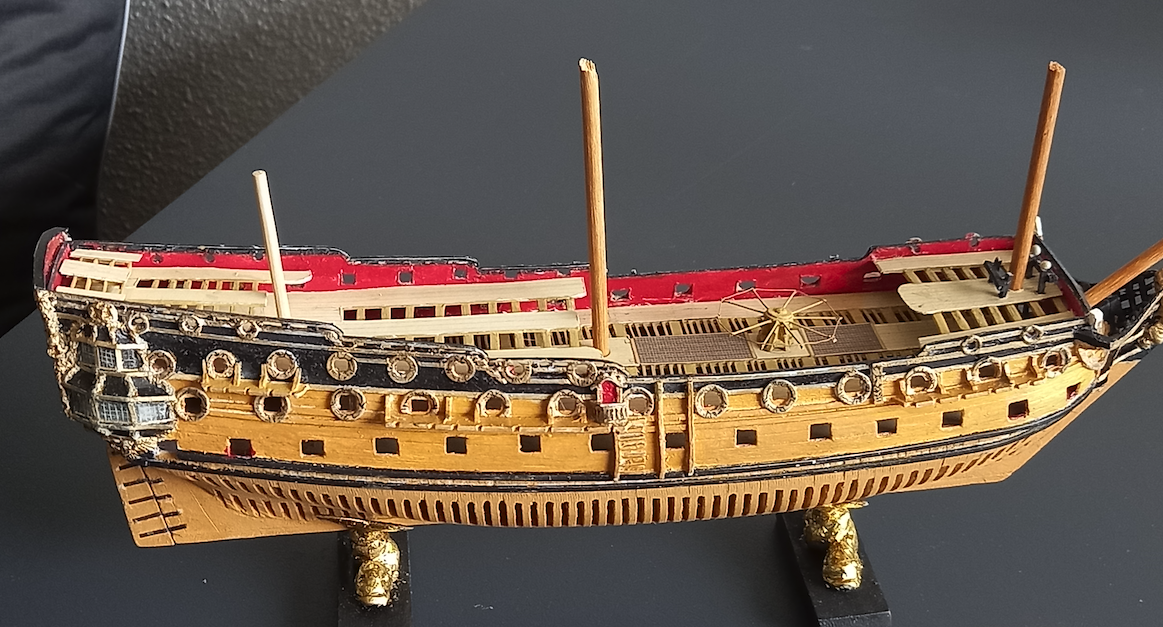
Almost finished. Slow progress. It seems that the smaller the object, the more time consuming it gets. But we're coming to an end. The lanterns are made of some pearls from my wife's necklace. Maybe she won't even notice the difference... I decided not to use pure gold for the decorations. Tests showed that the result is that some parts of the model scream: 'GOLD' and the rest seems dull in comparison I think this gold paint is more modest and good enough. Maybe a small touch up here and there with some brighter paint will do the job just as well. I adjusted the size of the stands. The former were too big, even though they were the second ones I made. I hope this fits better. Still much work to do on the dead-eyes and the gunport lids. If you are in doubt about the size of the model, maybe this gives an image: Hope to see you next time.
- 38 replies
-
- 20
-
-
-
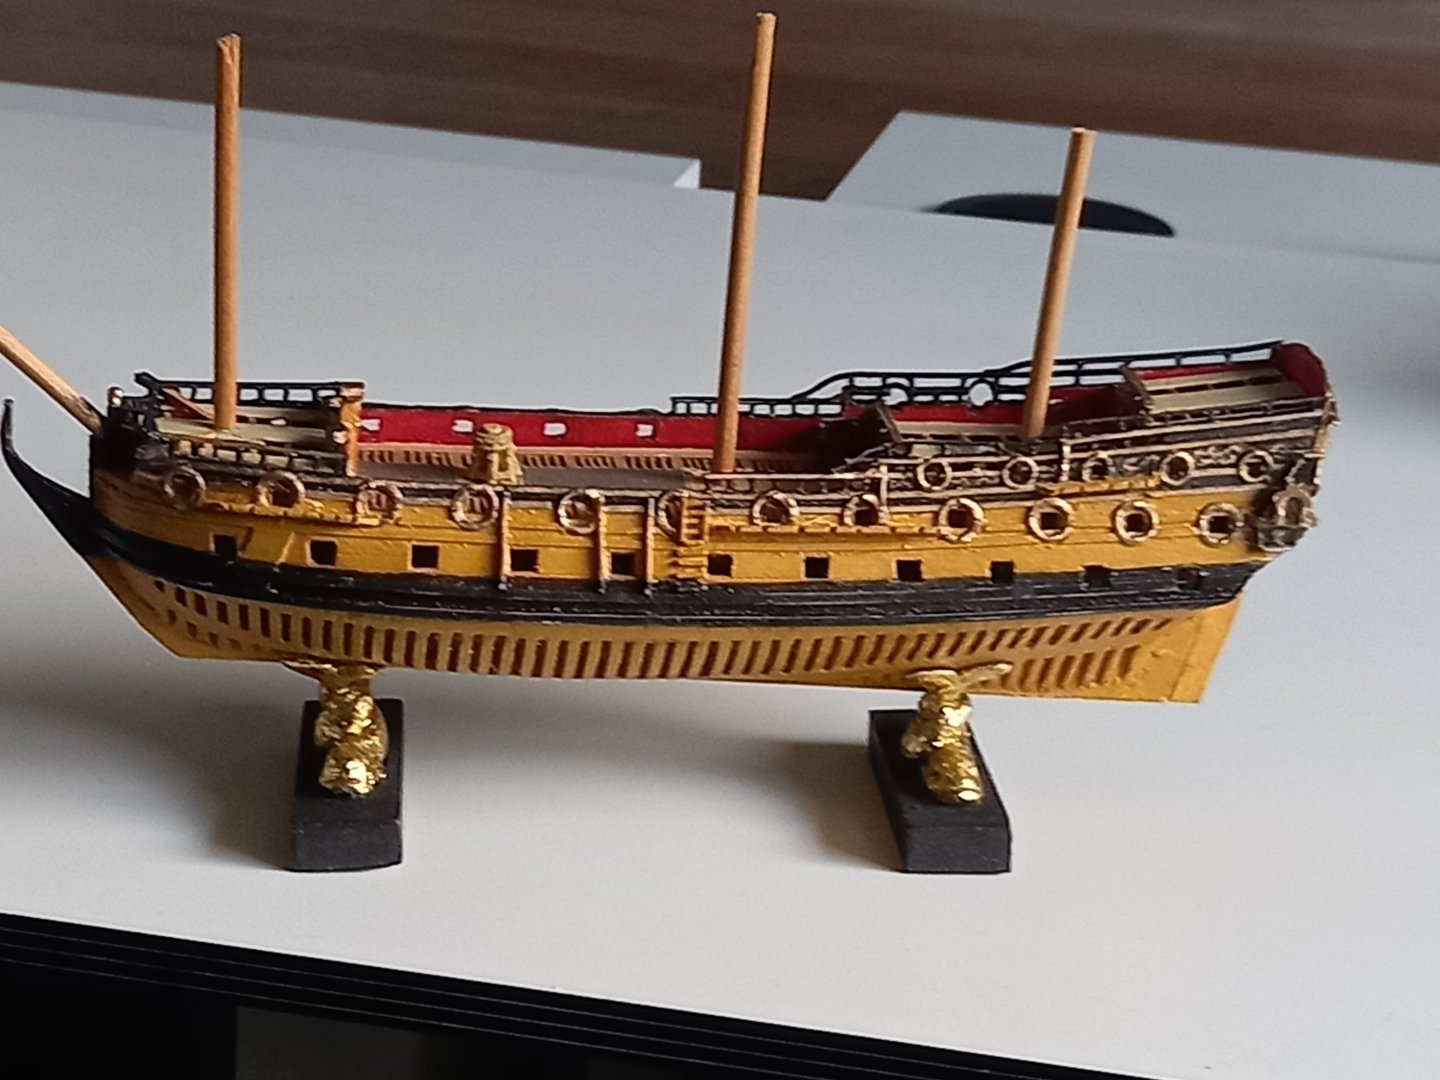
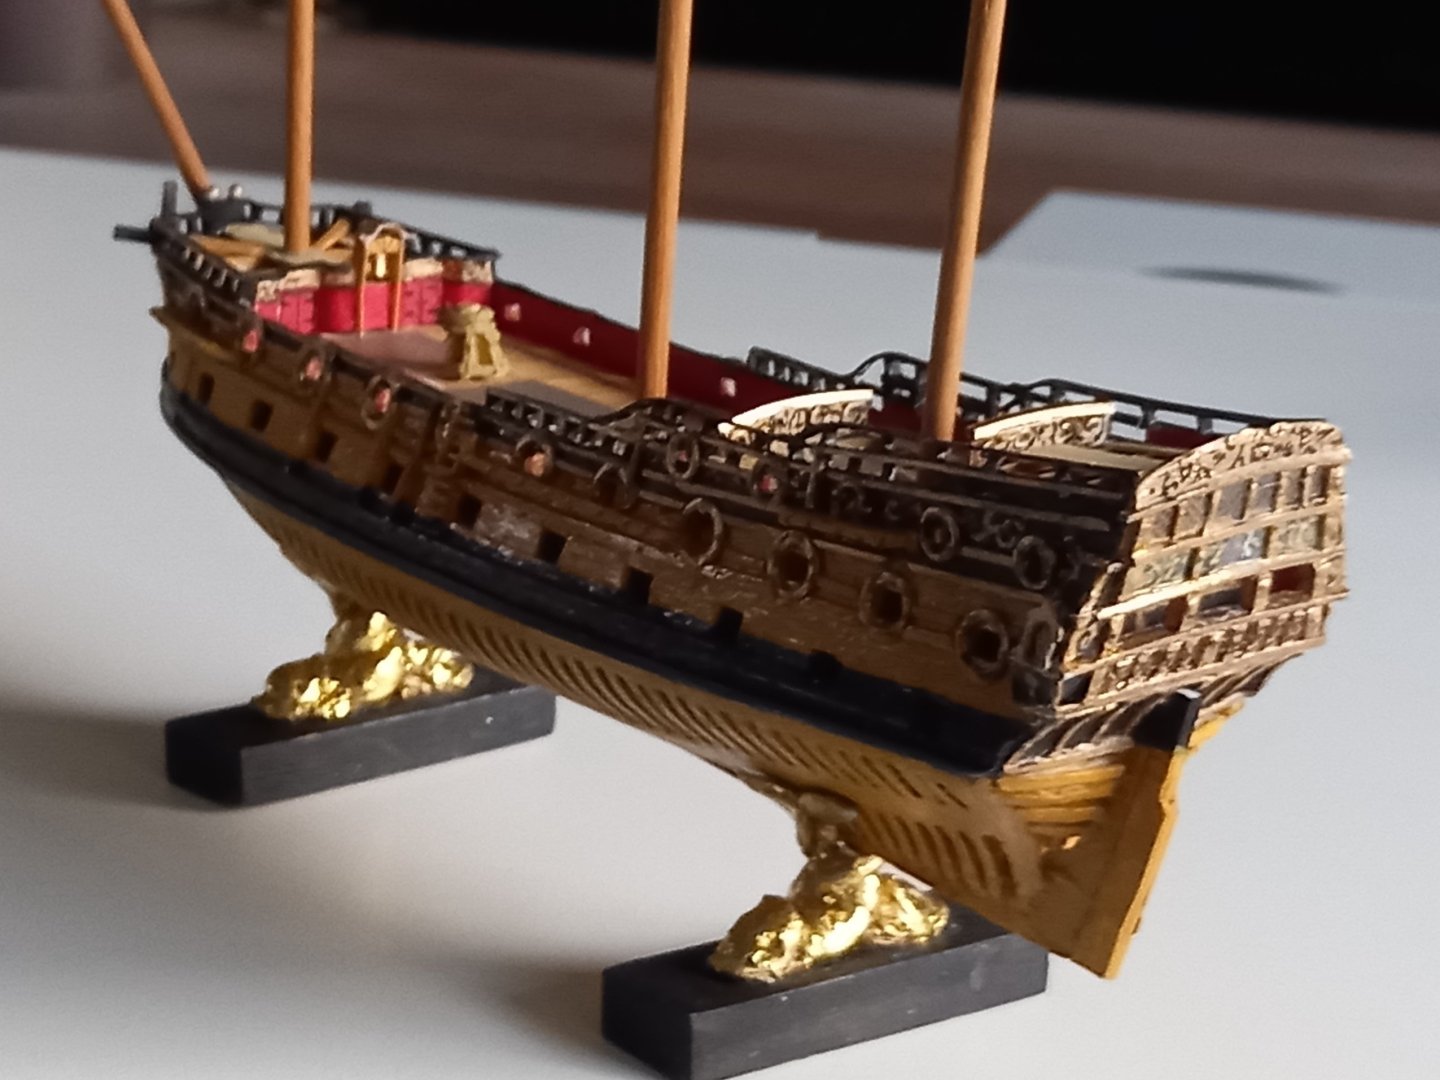
Much progress over the last fortnight. I removed the upper deck without damage and did the necessary details on the lower deck, like the (double) bitts, the gratings and the capstans. They will hardly be visible in the end, but it is always good to know they are there. I also tried to squeeze the model back in shape with a few sticks tied with an end of wire. It looked good, but with hindsight the mounting of the upper deck brought back the too wide sides. A failure. I treated the underwater part with shellac first so that it could be sanded easily to get rid of some fluff. I'm not sure about the color. In the back of my mind it should be a bit lighter than it turned out to be. Maybe I just have to get used to it. The mounting of the upper deck was a nice experience. I decided to split the deck into two halves, which could be mounted one by one. Because of the deck beams I had to roughly take down part of the supports I had created around the masts. Nothing of them will be visible in the end. The seam was covered by the 'planking', a sheet of prepared and painted paper. It all fitted to a T, but the deck turned out to be 2 mm too wide. Not something to lie awake at night but still... The capstan on the lower deck continued at the upper deck. The other decks were quite straightforward to model and mount. What rests are all the decorations for the bulkheads, the beak head and the sides, the dead-eyes, the lanterns and the lids of the gun ports. Nothing to get nervous about. What I do am nervous about is the gilding. As I told before I used gold paint so far, but I intend to add real gold leave. There was very little left from what I usually have in stock, so I went looking for a new booklet of 25 sheets. Expensive stuff (about 80 Euros), but at some Chinese site I spotted a package of 100 gold leaves for just 12 Euros! Too good to be true of course and indeed, when it arrived I did not like the tone of the color at all. I don't know what they mixed the gold with, but it is too flat and shiny for my purposes. I'm afraid it will make the model look cheap. Still I want to give it a (test)try, because I might tone it down a bit with some transparent paint, but the looks of the material make me shiver... Look for yourself, to the left the real gold, to the right the Chinese 'gold'. In the end we can conclude that it is indeed possible to build a 1/200 scaler dockyard model from card.


- 38 replies
-
- 18
-
-
-
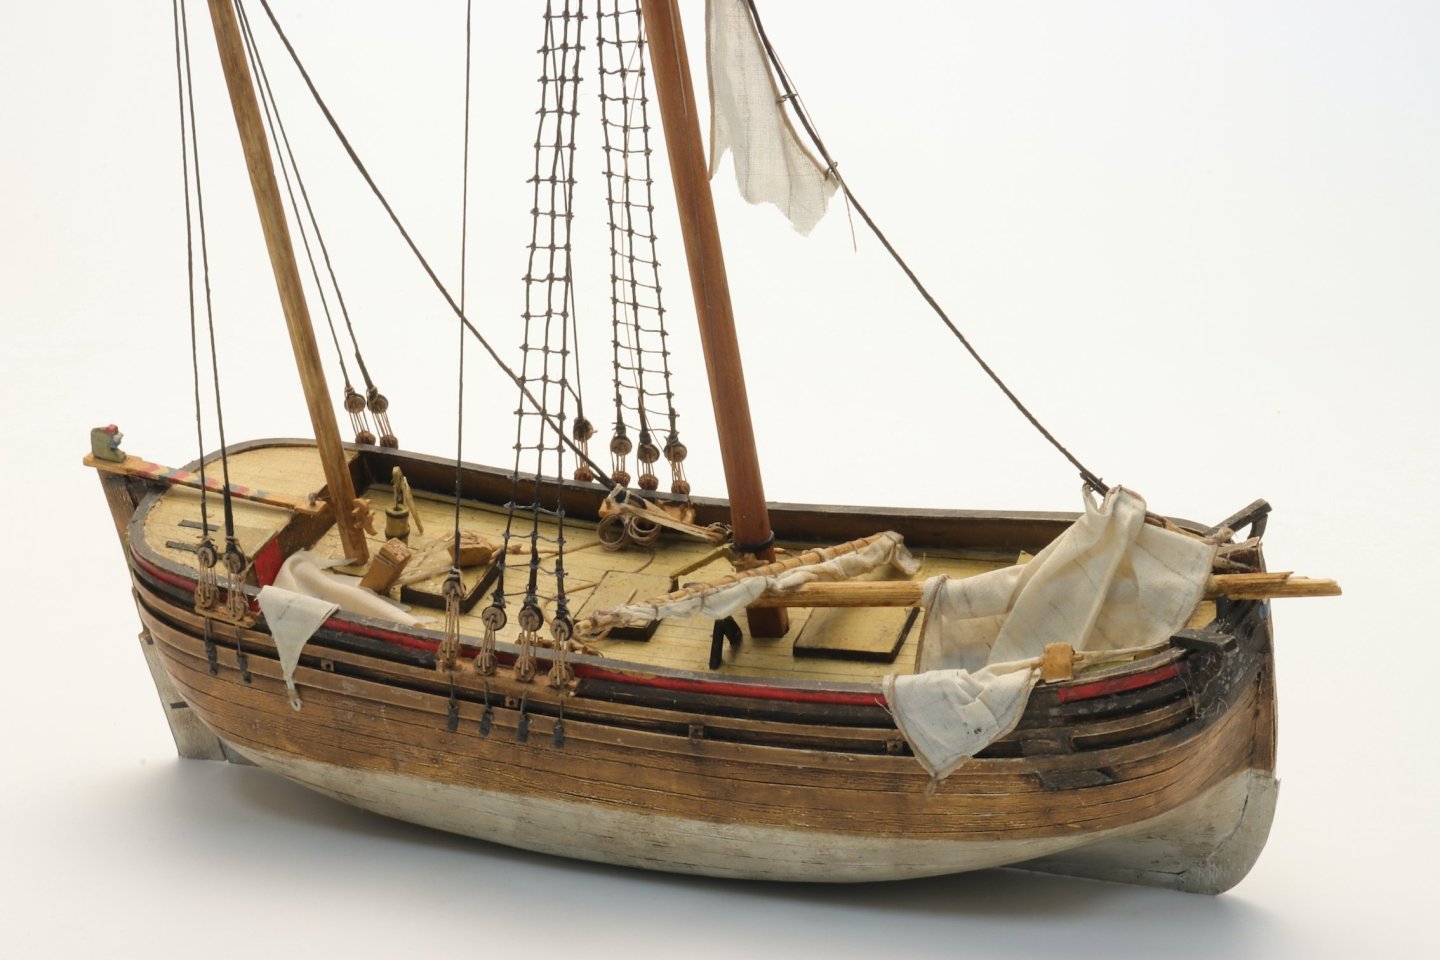
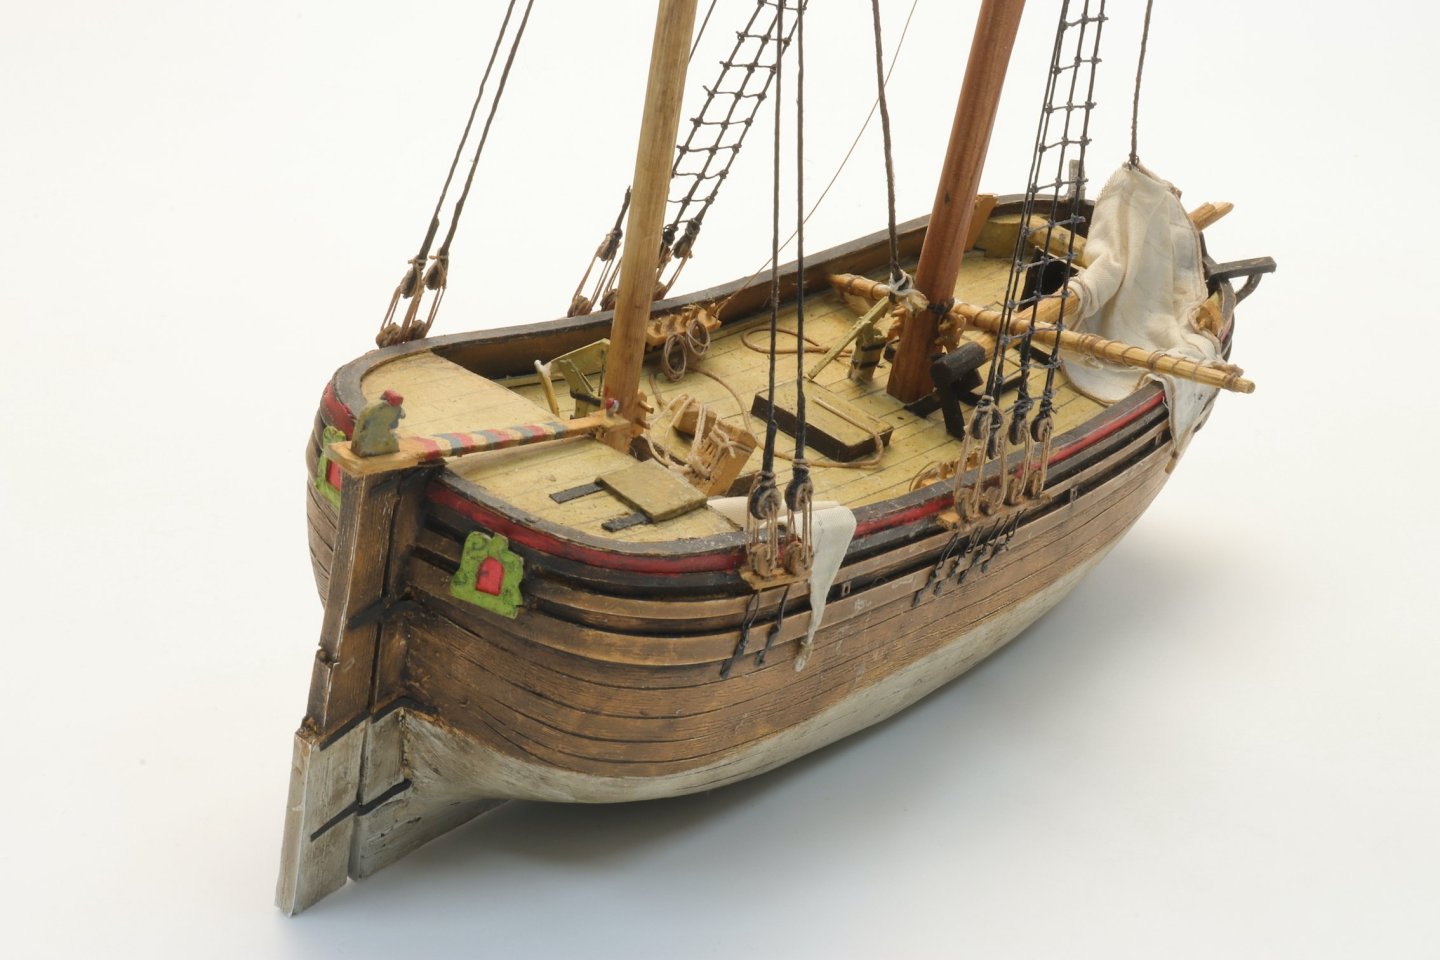
Here a small in between from my small series about ships at the end of their career. A simple hoeker wreck stranded at the beach. I think Emiel had more work creating this image than I did. Human figures by Artitec.

- 1 reply
-
- 20
-
-
-
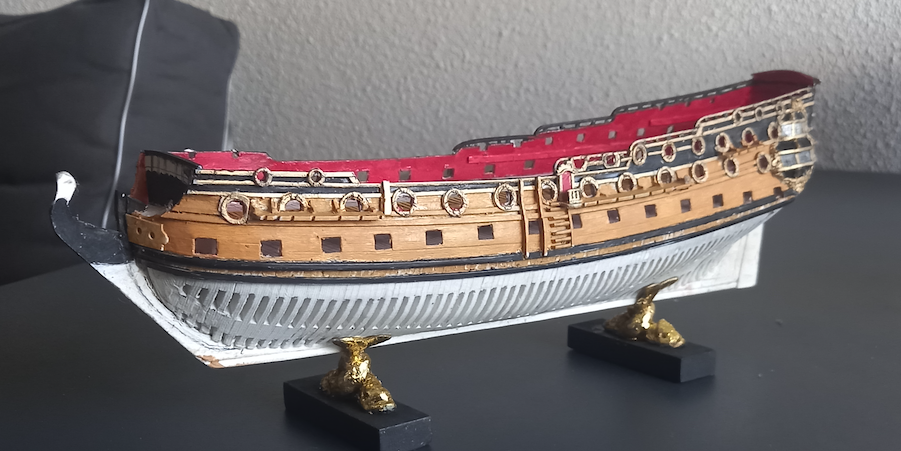
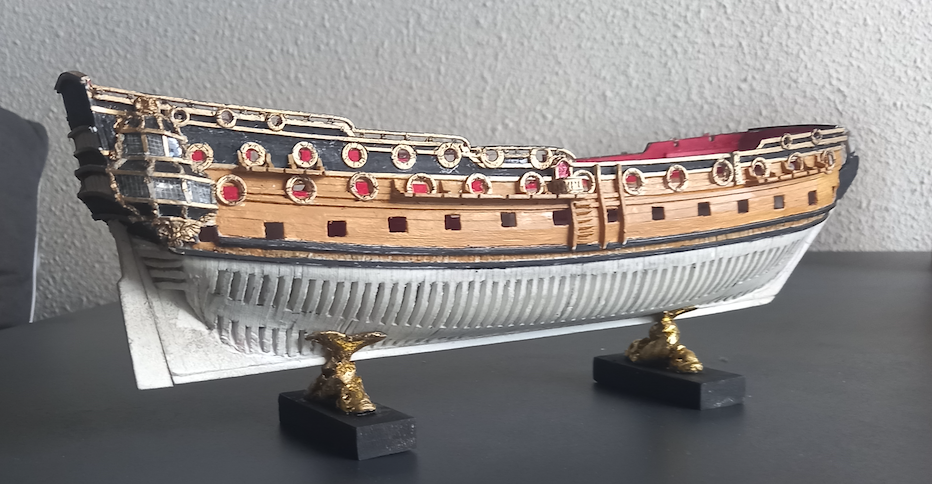
A small update. Work on the ship's sides continues. Hard times are to come. I fear I will have to remove the upper deck to dress the lower one. Besides I want to make it a bit narrower, so destruction is threatening. I'm not sure what to do with the lower hull. The sides of this sort of card color differently than the surface, because the paint seems to intrude the material. Perhaps I will use shellac first. This project grows like tree. I gilded the stands, but I find them a bit too shiny in comparison with the model, which has no gilding yet (only gold paint) and I have many hesitations for using real gold on it. I really am struggling to get rid of my love for worn out ships in this project. I seem to be a bit scared of brilliantly shiny images. But the build is a lot of fun.

- 38 replies
-
- 18
-
-
-
By the way, my compliments for your web site. I was not aware of the existence, because I never look at kits or reports about kit buildings (except for the ones I was involved in the development). Certainly not because of arrogance, but simply because there is not much for me to learn there. I am glad you guys exist and keep the hobby within reach for people who do not have access to all kinds of sources and materials. Keep up the good works!
-
Gee, yes, I remember. That was long ago, when I was still young and handsome. 🙂 Never saw this program. Quite well done actually.