


VictoryGuy
-
Posts
28 -
Joined
-
Last visited
Content Type
Profiles
Forums
Gallery
Events
Posts posted by VictoryGuy
-
-
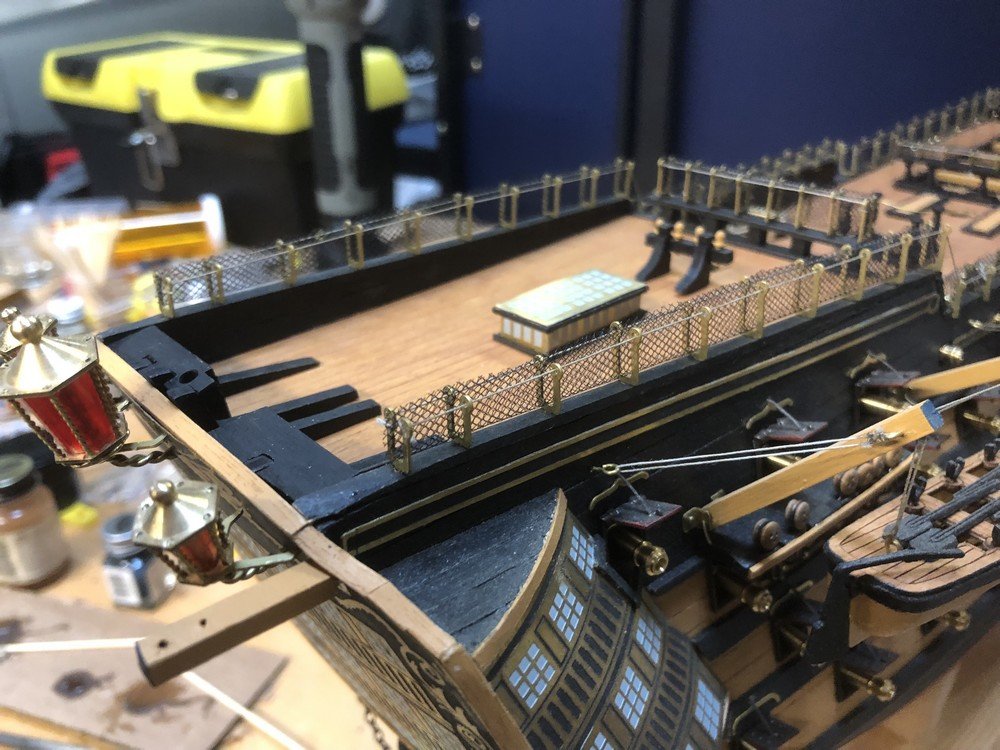
It's been a while since I posted an update as the summer/fall got away from me! I did manage to complete most of the final deck details including the stern lanterns and bulwark hammock netting (definitely the toughest part). Heading on to the masts & rigging next.
-
Thanks! I'm hoping to make better progress and not wait another 15 years to find issues!
-
I hope everyone is well!
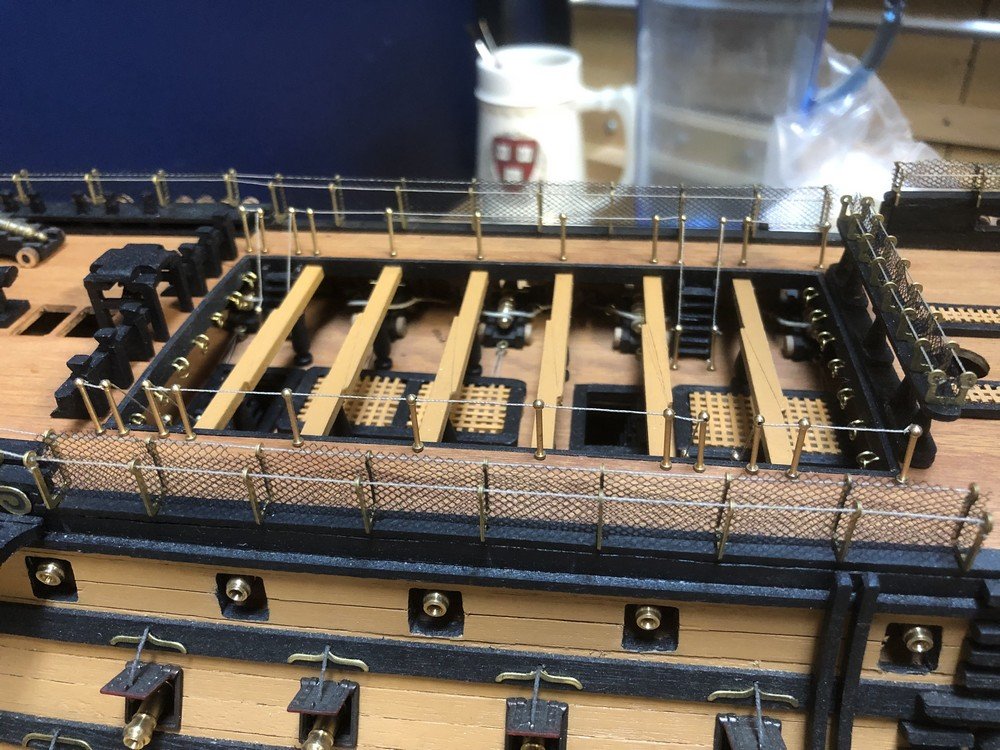
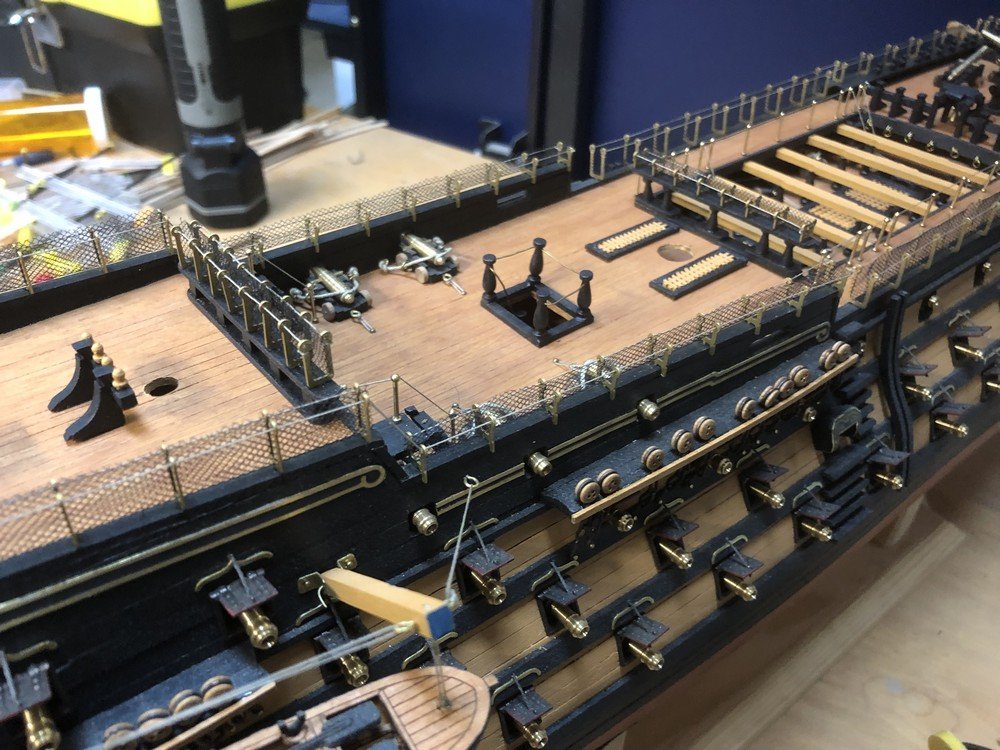
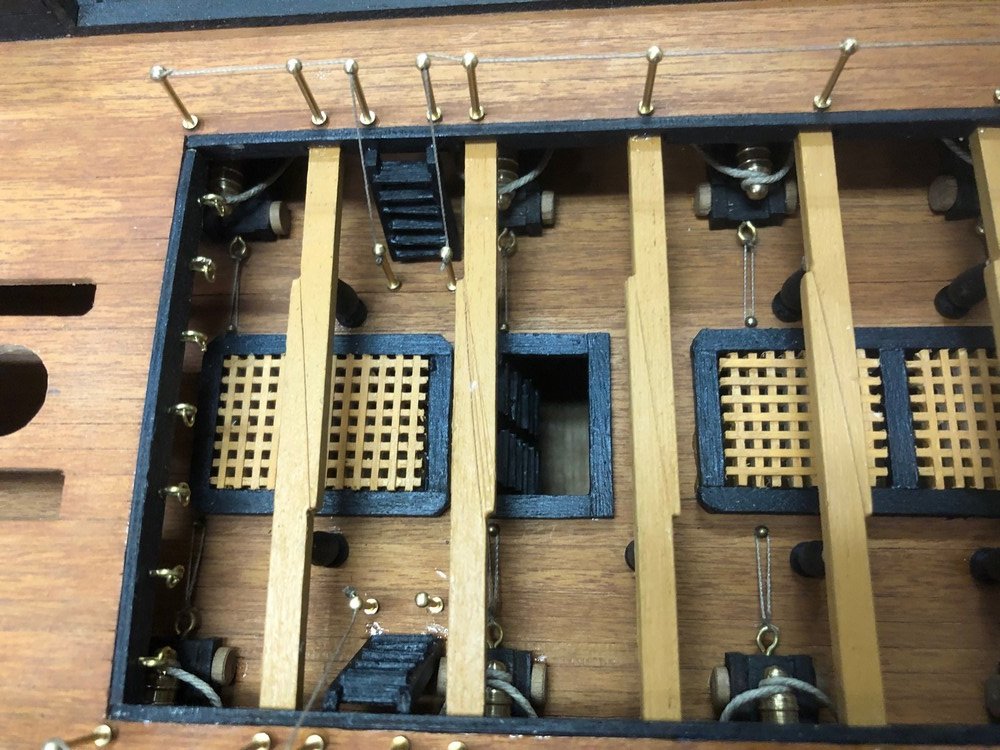
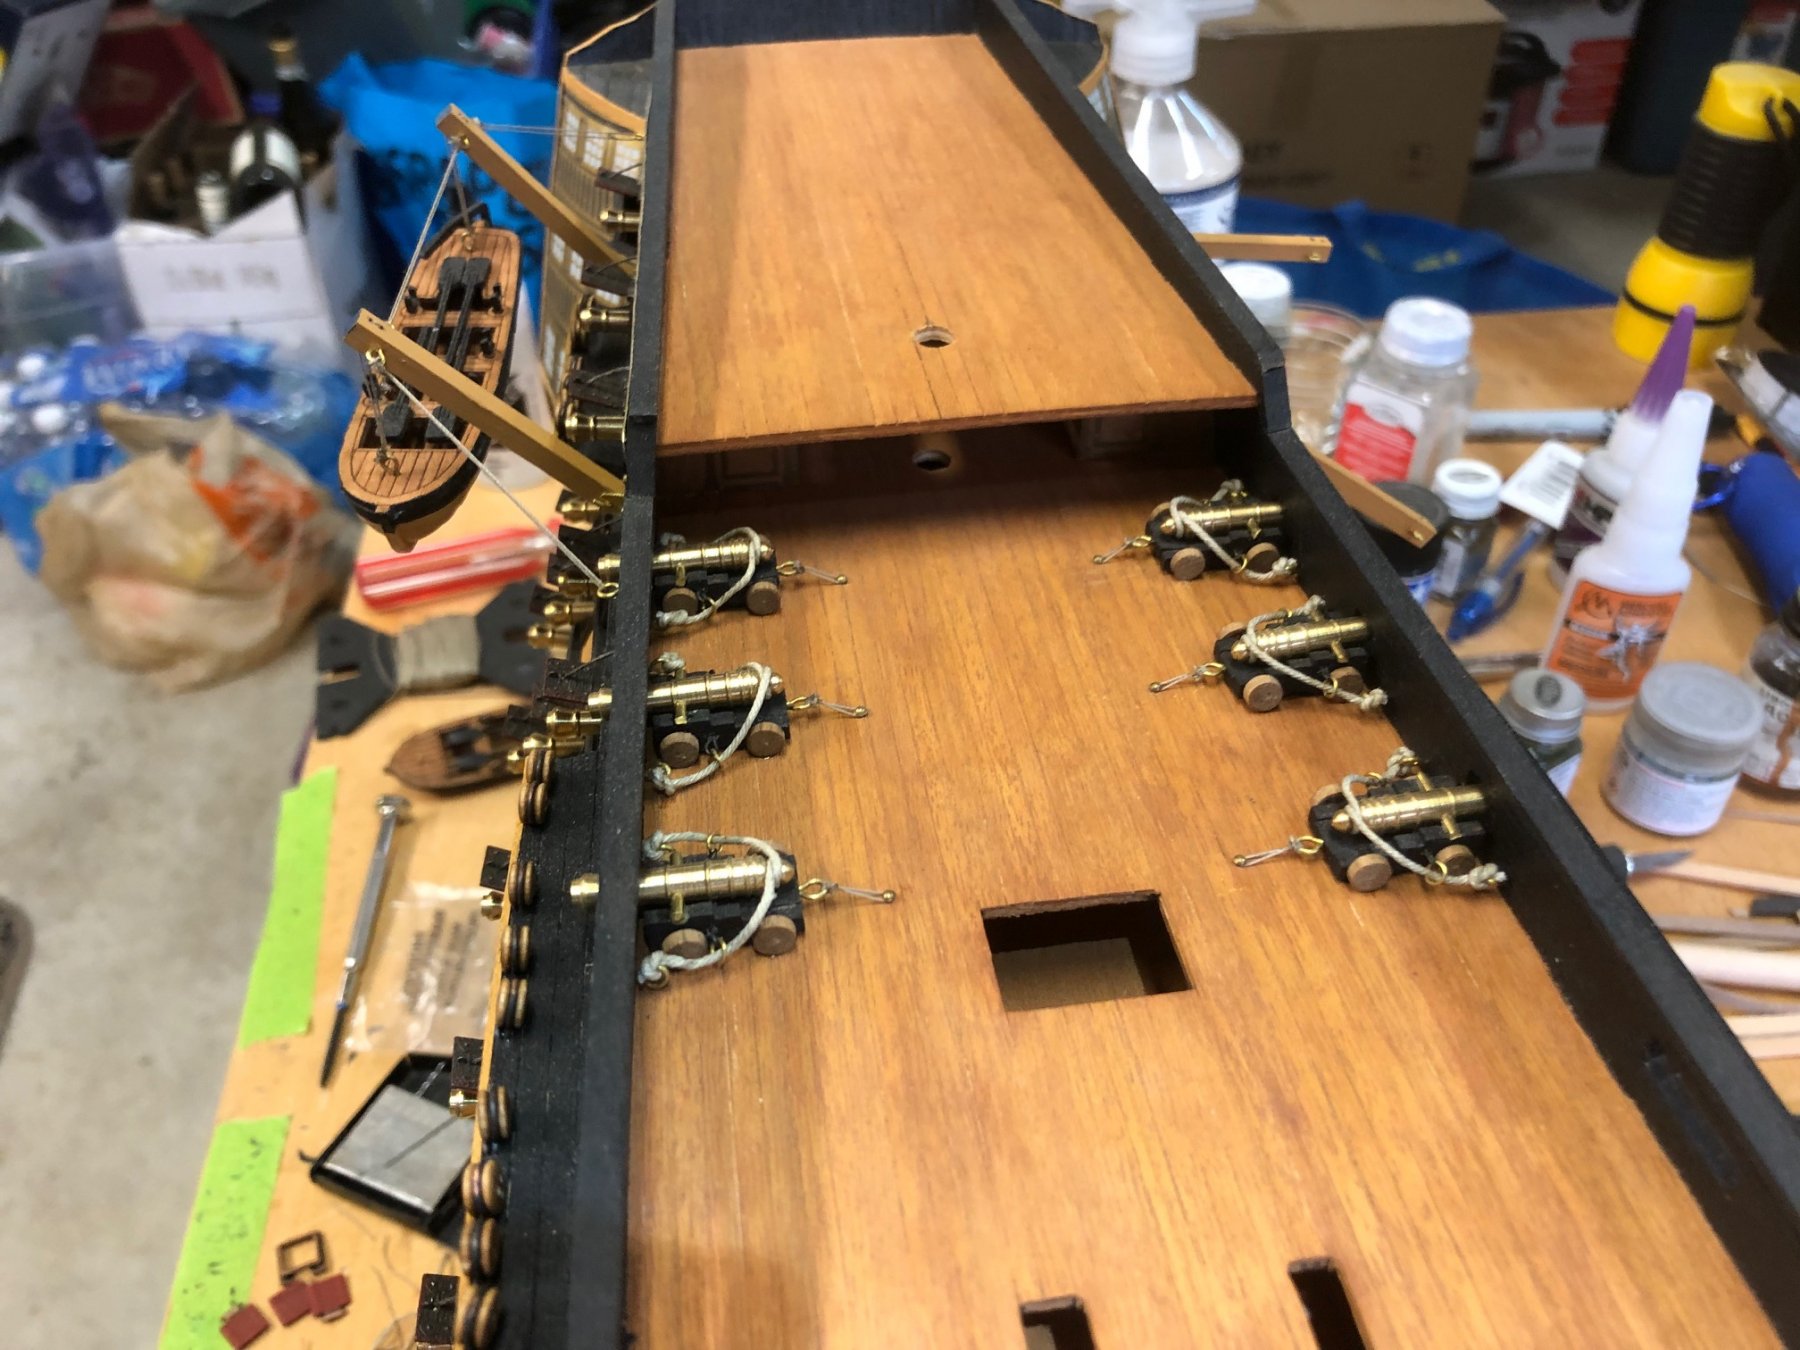
With the summer slow down I've been able to find some time to pick up the Victory project. I started work on the various deck components in the "waist". I finished several ladders, the cross beams, pillars and most of the railing. For the cross beams, I had to use the ends of my clamps to hold them up while the glue dried (image below).
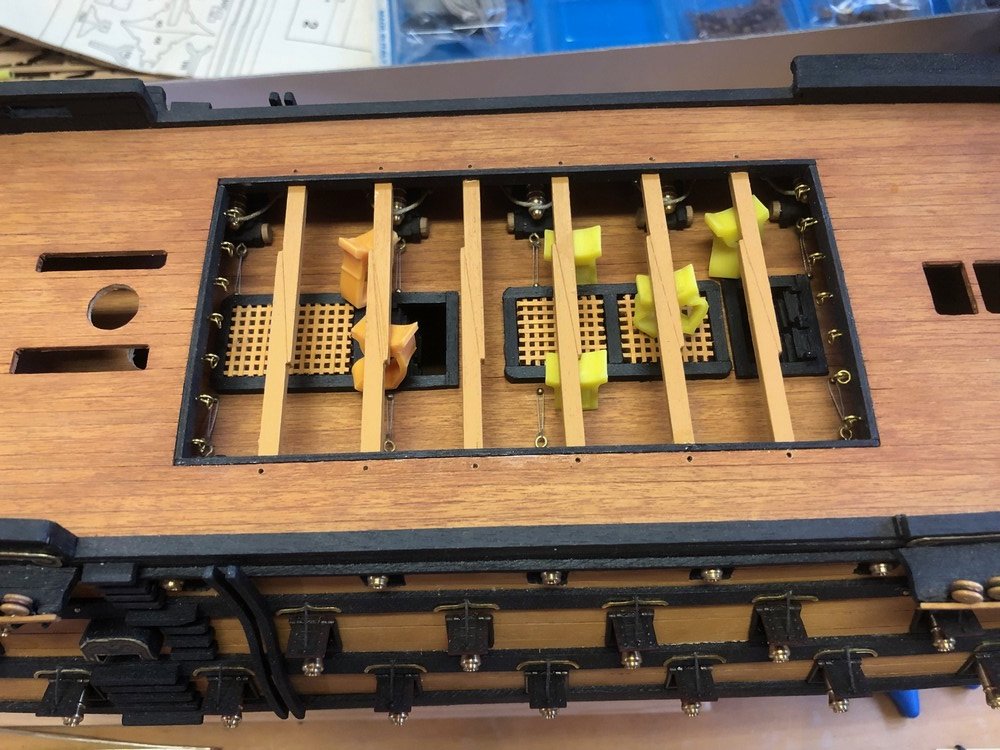
Here's the partially finished waist section with the brass railing stanchions and support pillars.
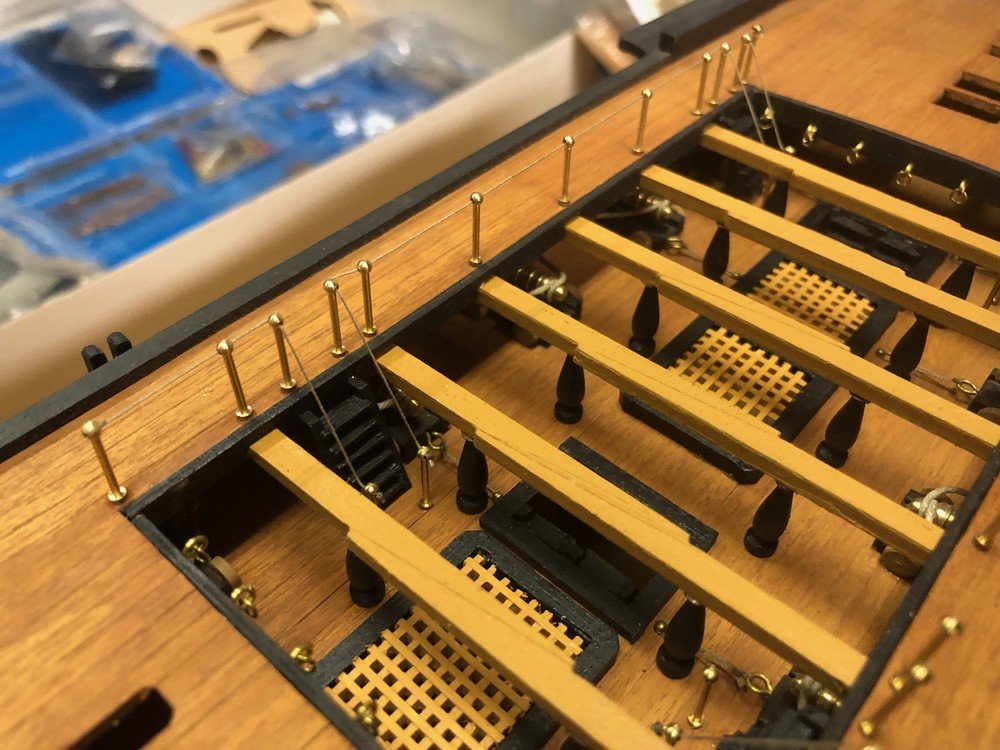
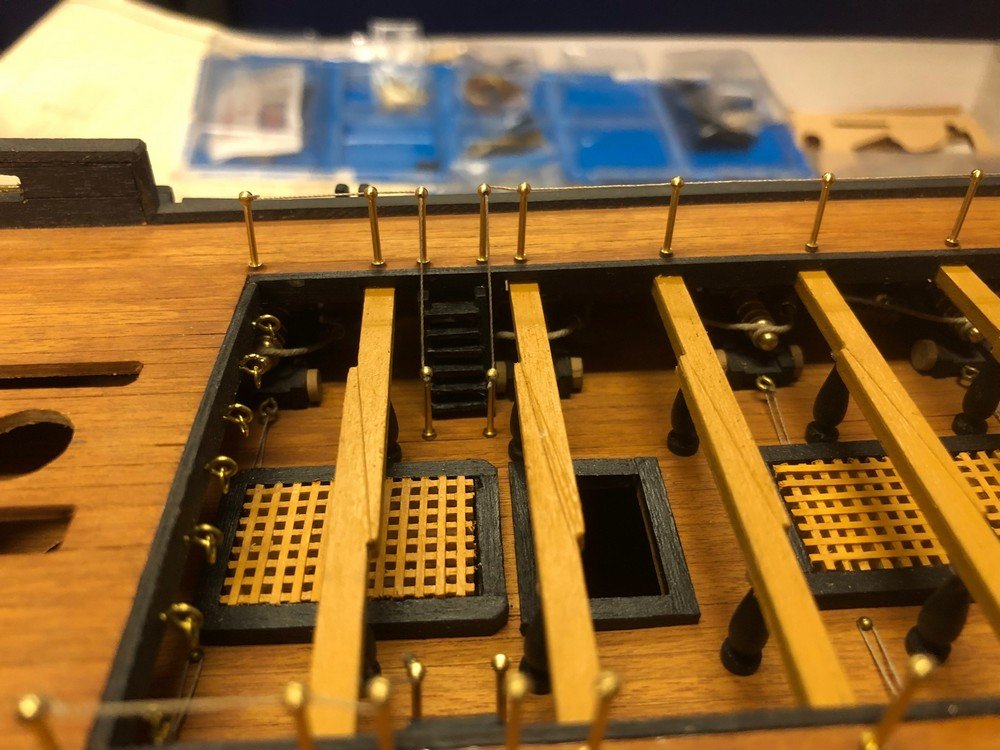
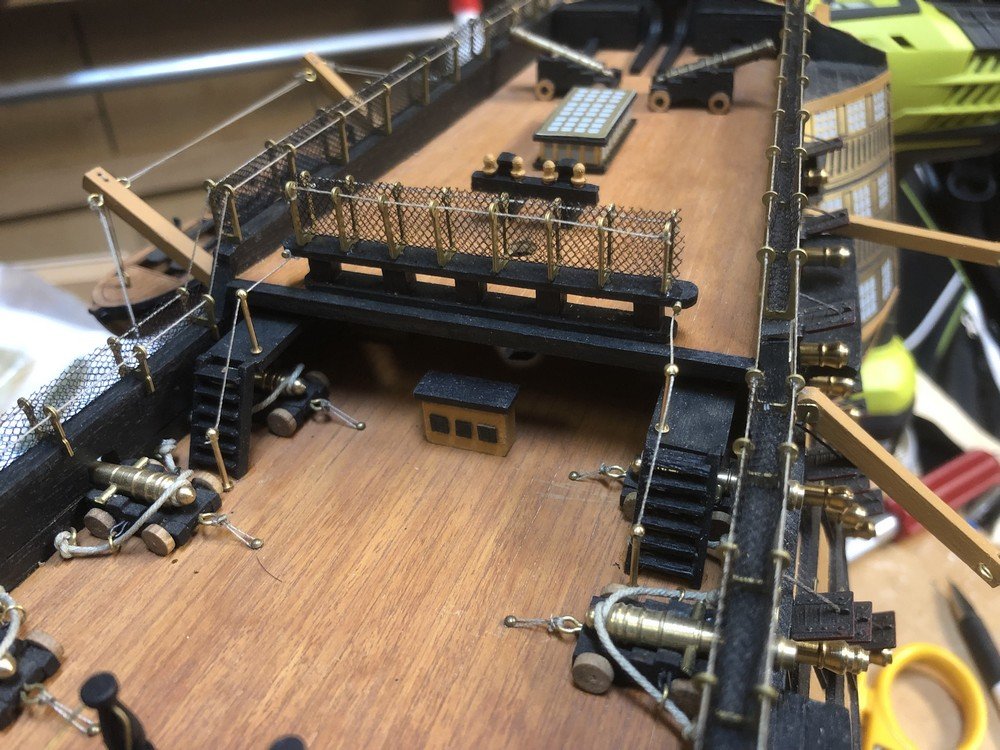
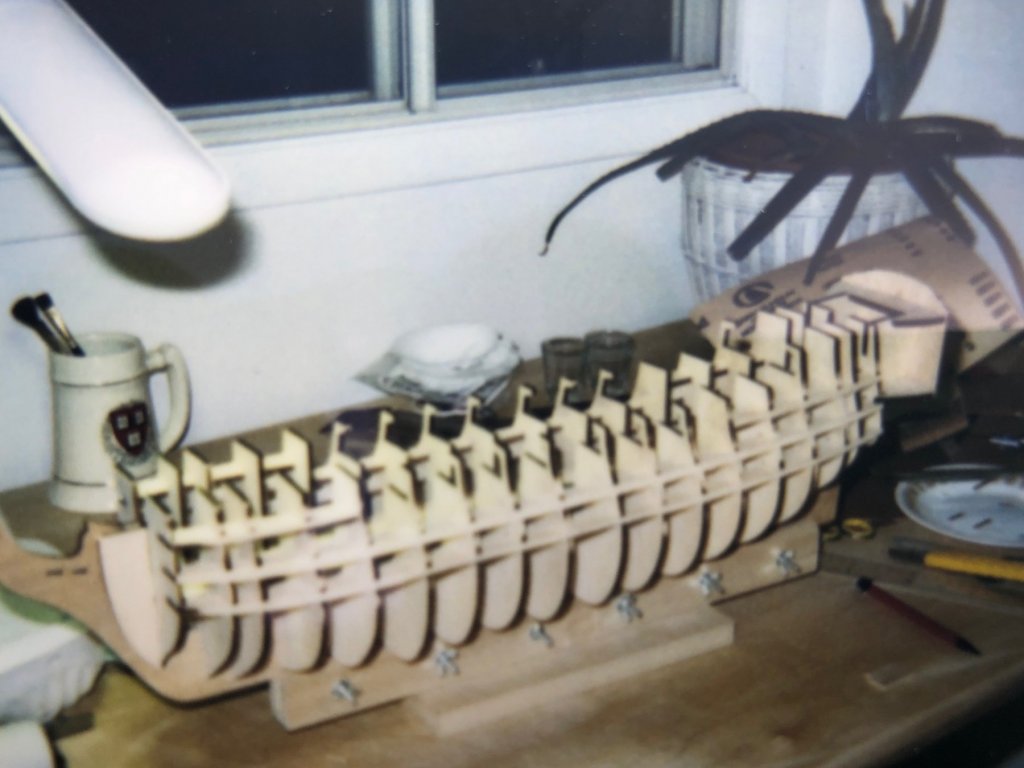
It's a little difficult to see in the photo below, but in completing the waist I realized I made an error about 20 years ago when I first built the basic hull sections (I started this build in the mid '90's but put it down for about 15 years....). The lower stairwells that lead deeper into the hull aren't able to reach the inside deck and are just "hanging in the air". The inner deck should have been much higher than it is. Not sure if this was my error or some flaw in the design, but all I could do was darken the stain inside the hull to make the interior darker and the mistake less noticeable.
- BenD and GrandpaPhil
-
 2
2
-
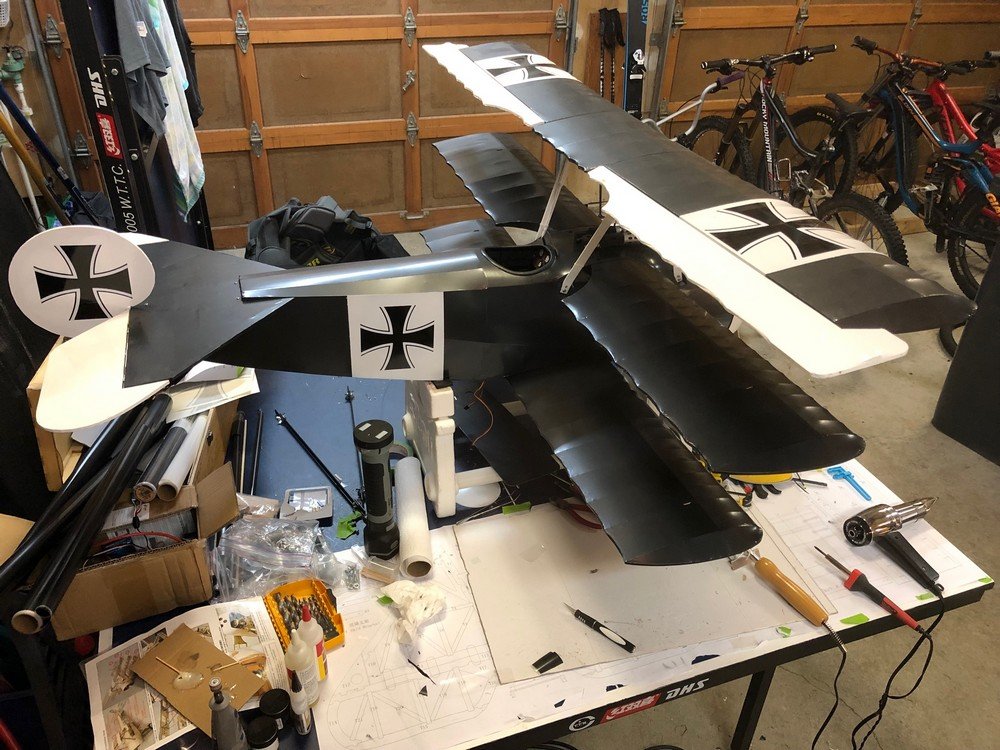
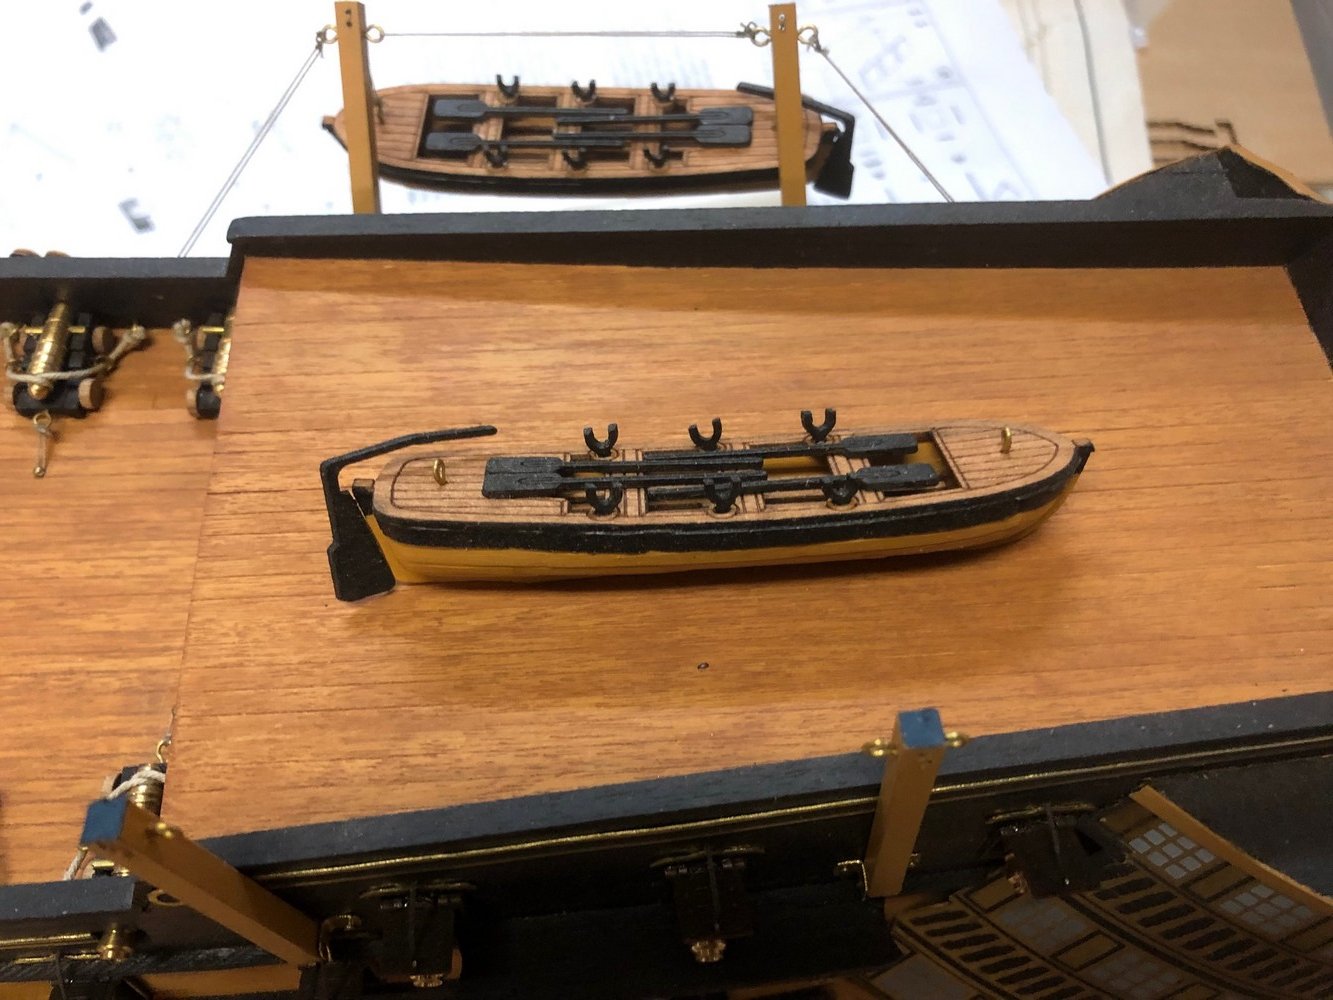
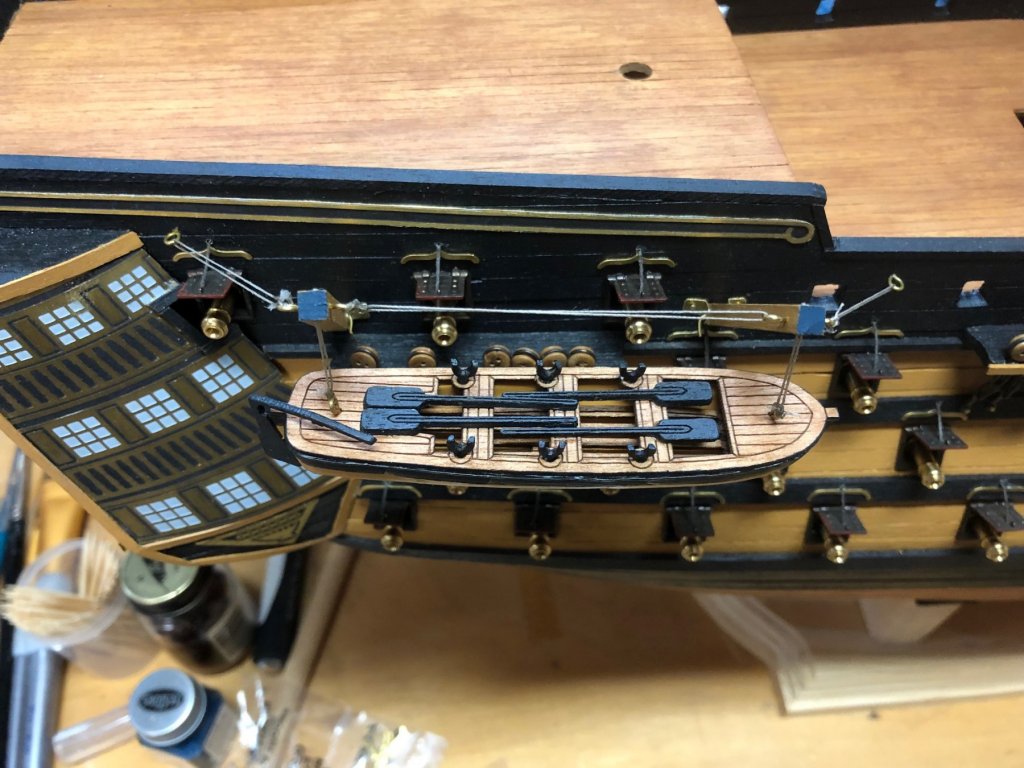
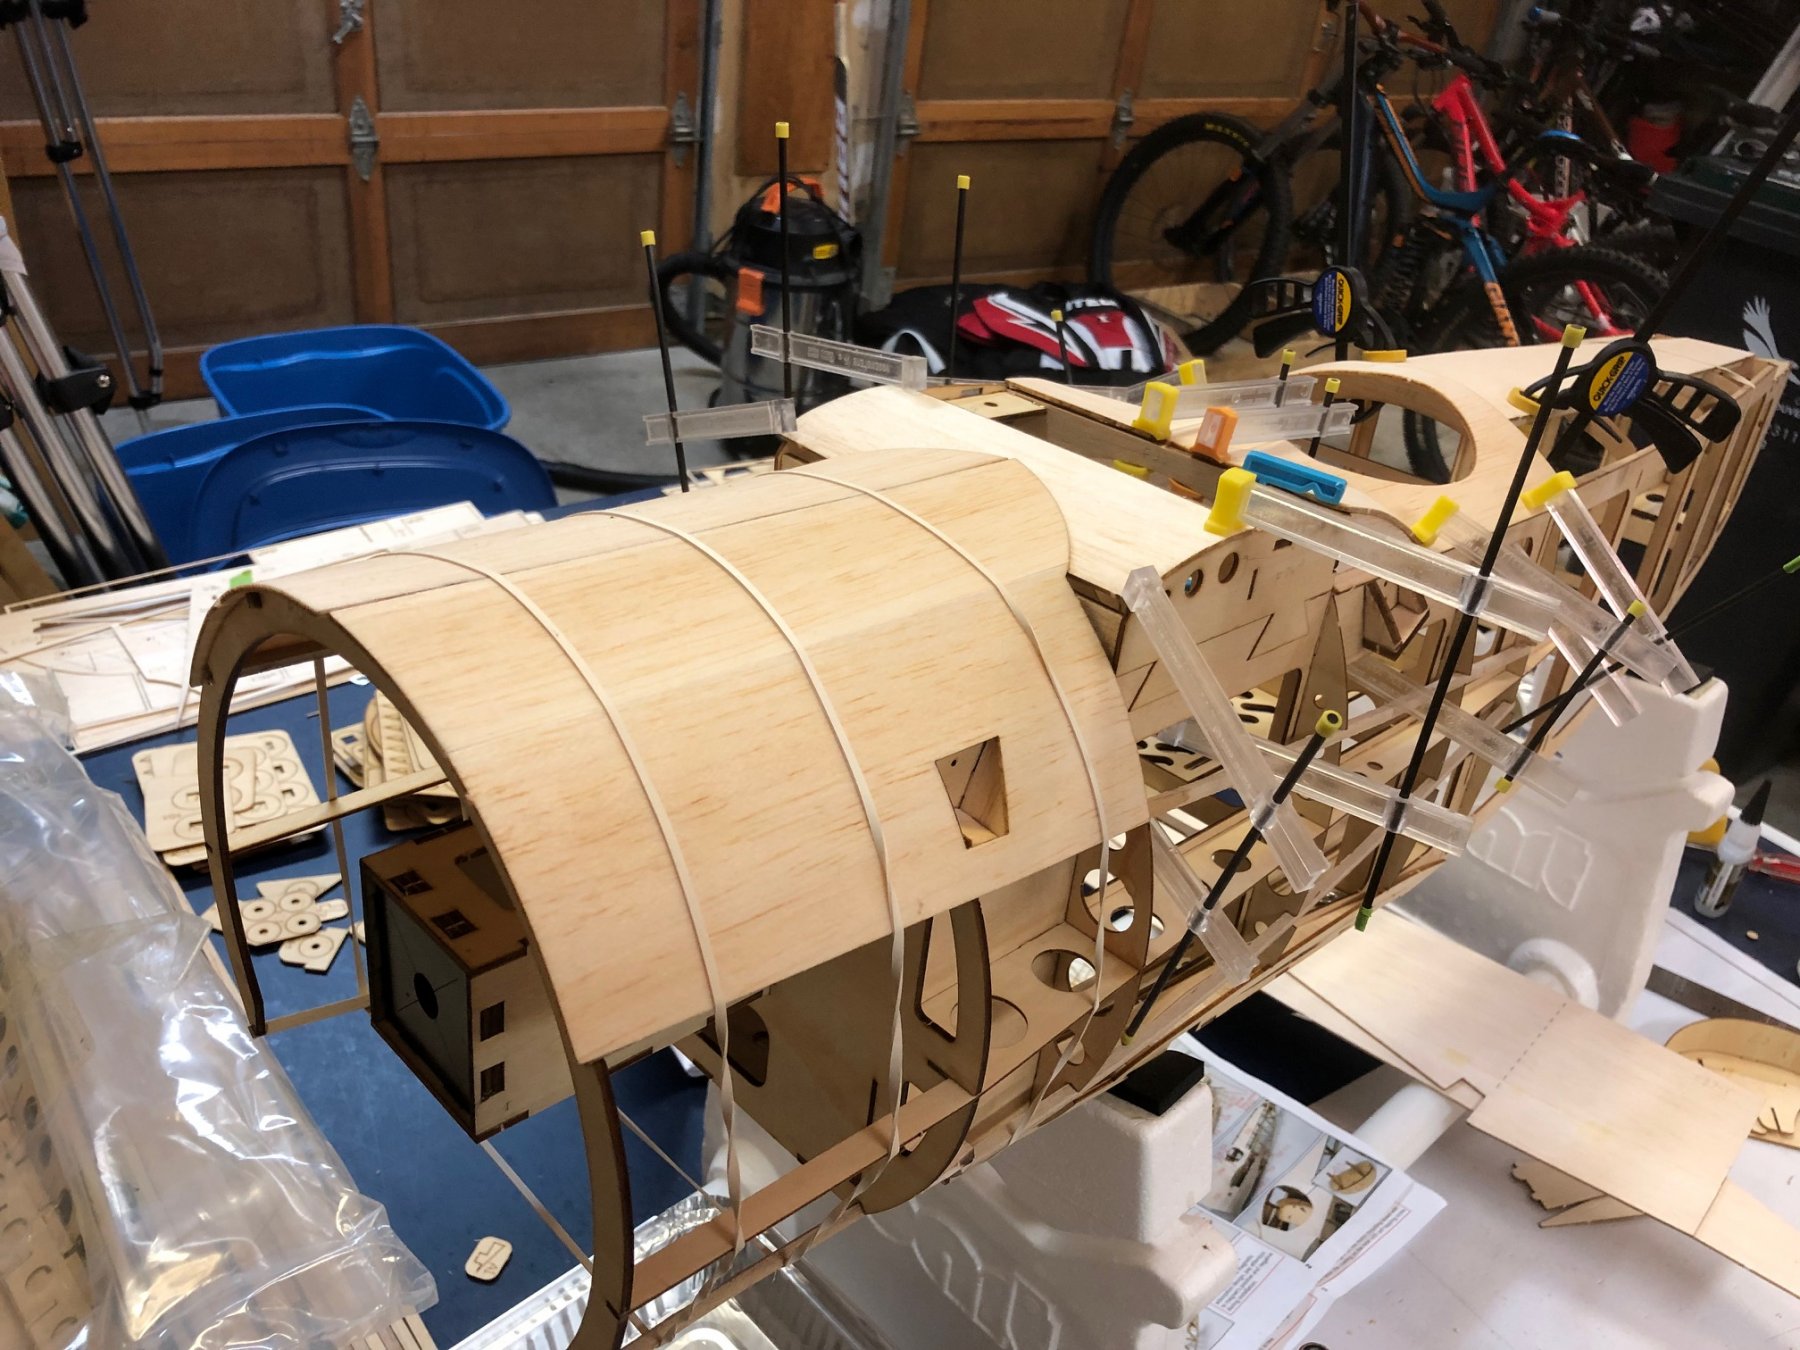
Hi All - I've finally just about finished my side "triplane" project and am starting to get back to the Victory. Hope to finish up the port side over the next couple months. I did manage to build another lifeboat (pic below). My side project became a bit of an epic distraction....here's a pic of the nearly finished plane. Going forward I'll just post Victory pics!
- Duanelaker and GrandpaPhil
-
2
-
Outstanding job! Looking forward to following the progress.
-
I've been very slowly finishing the port side of the Victory over the last couple months but I've been distracted building a Fokker Dr I triplane (i.e. Red Baron) with the kids. Plan to get back to the Victory once the plane's fuselage is done! Here's a pic about halfway through.

-
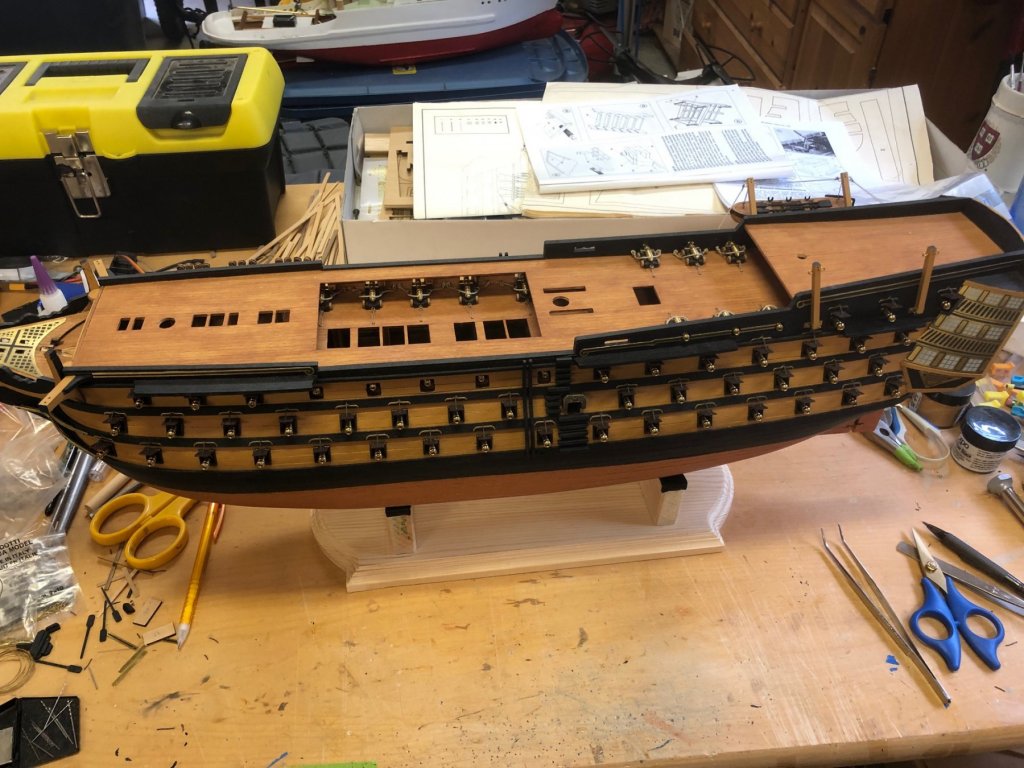
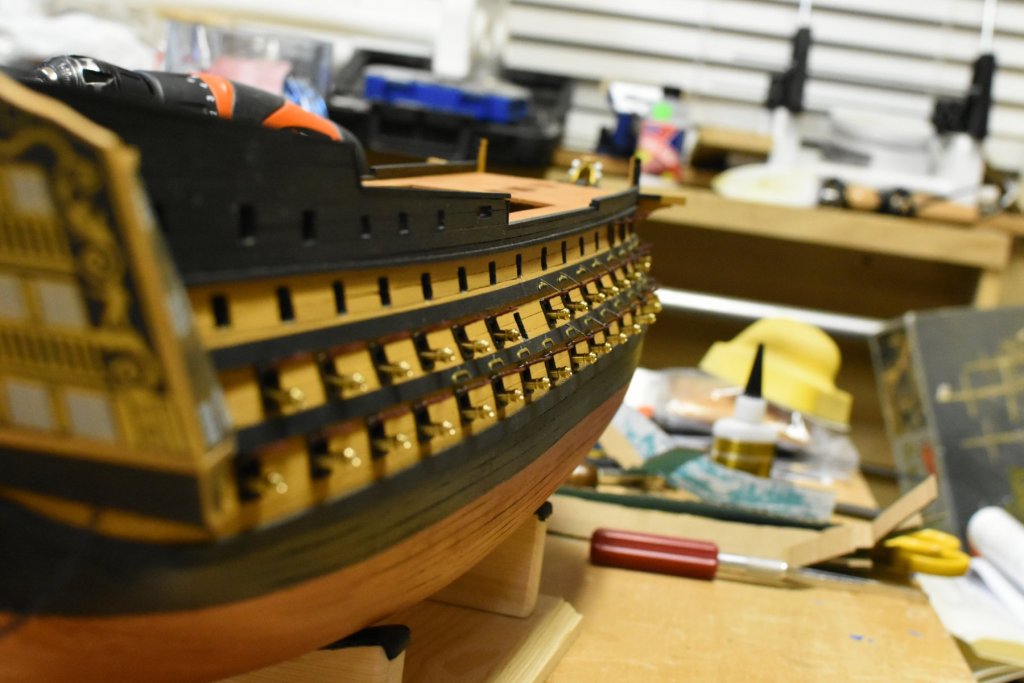
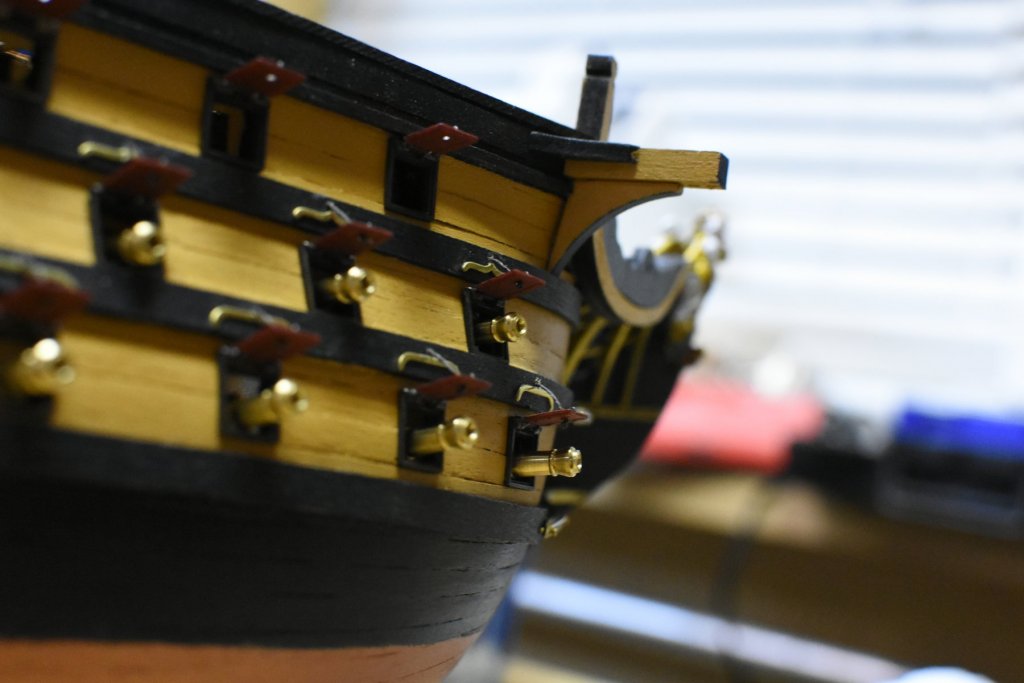
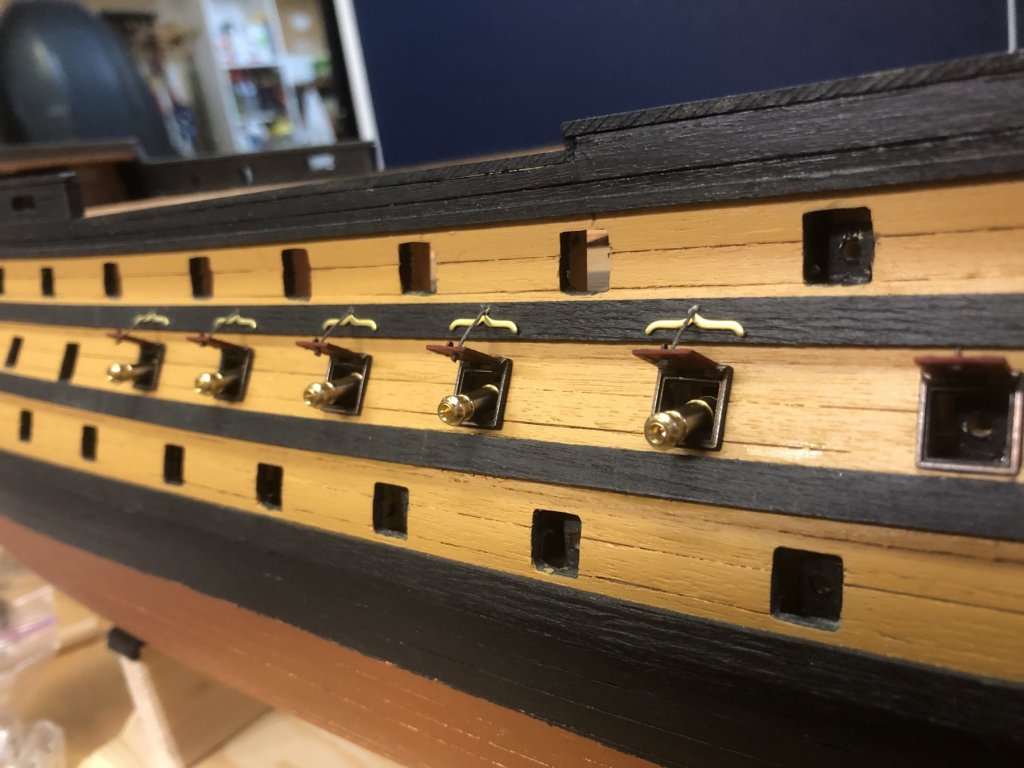
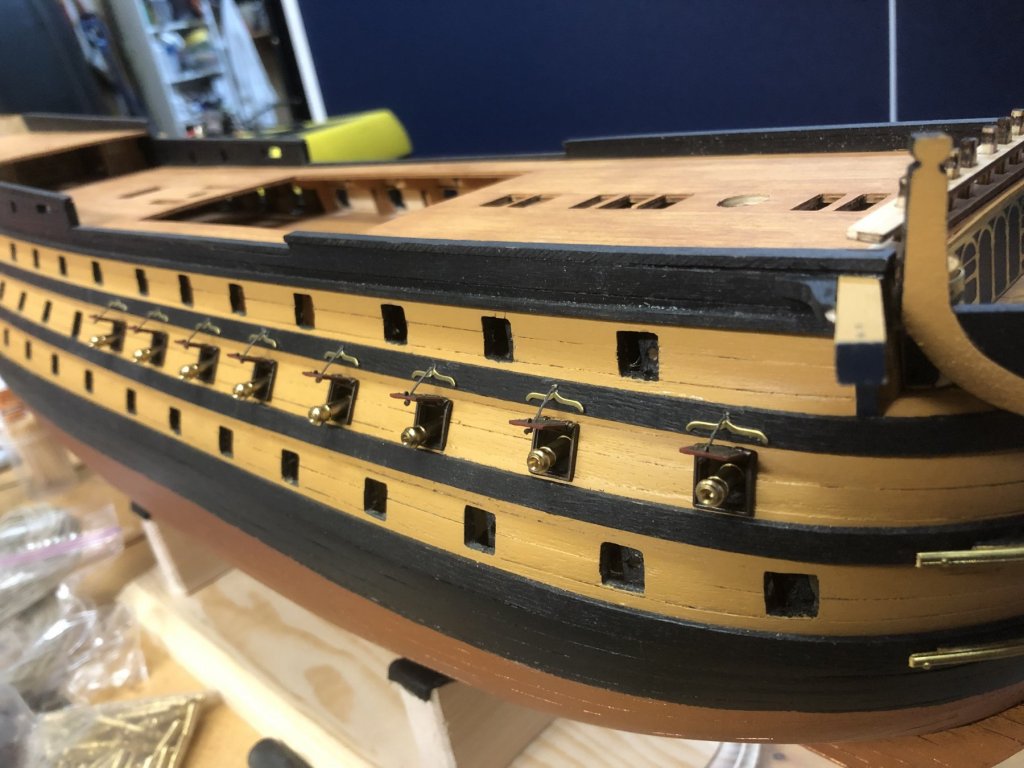
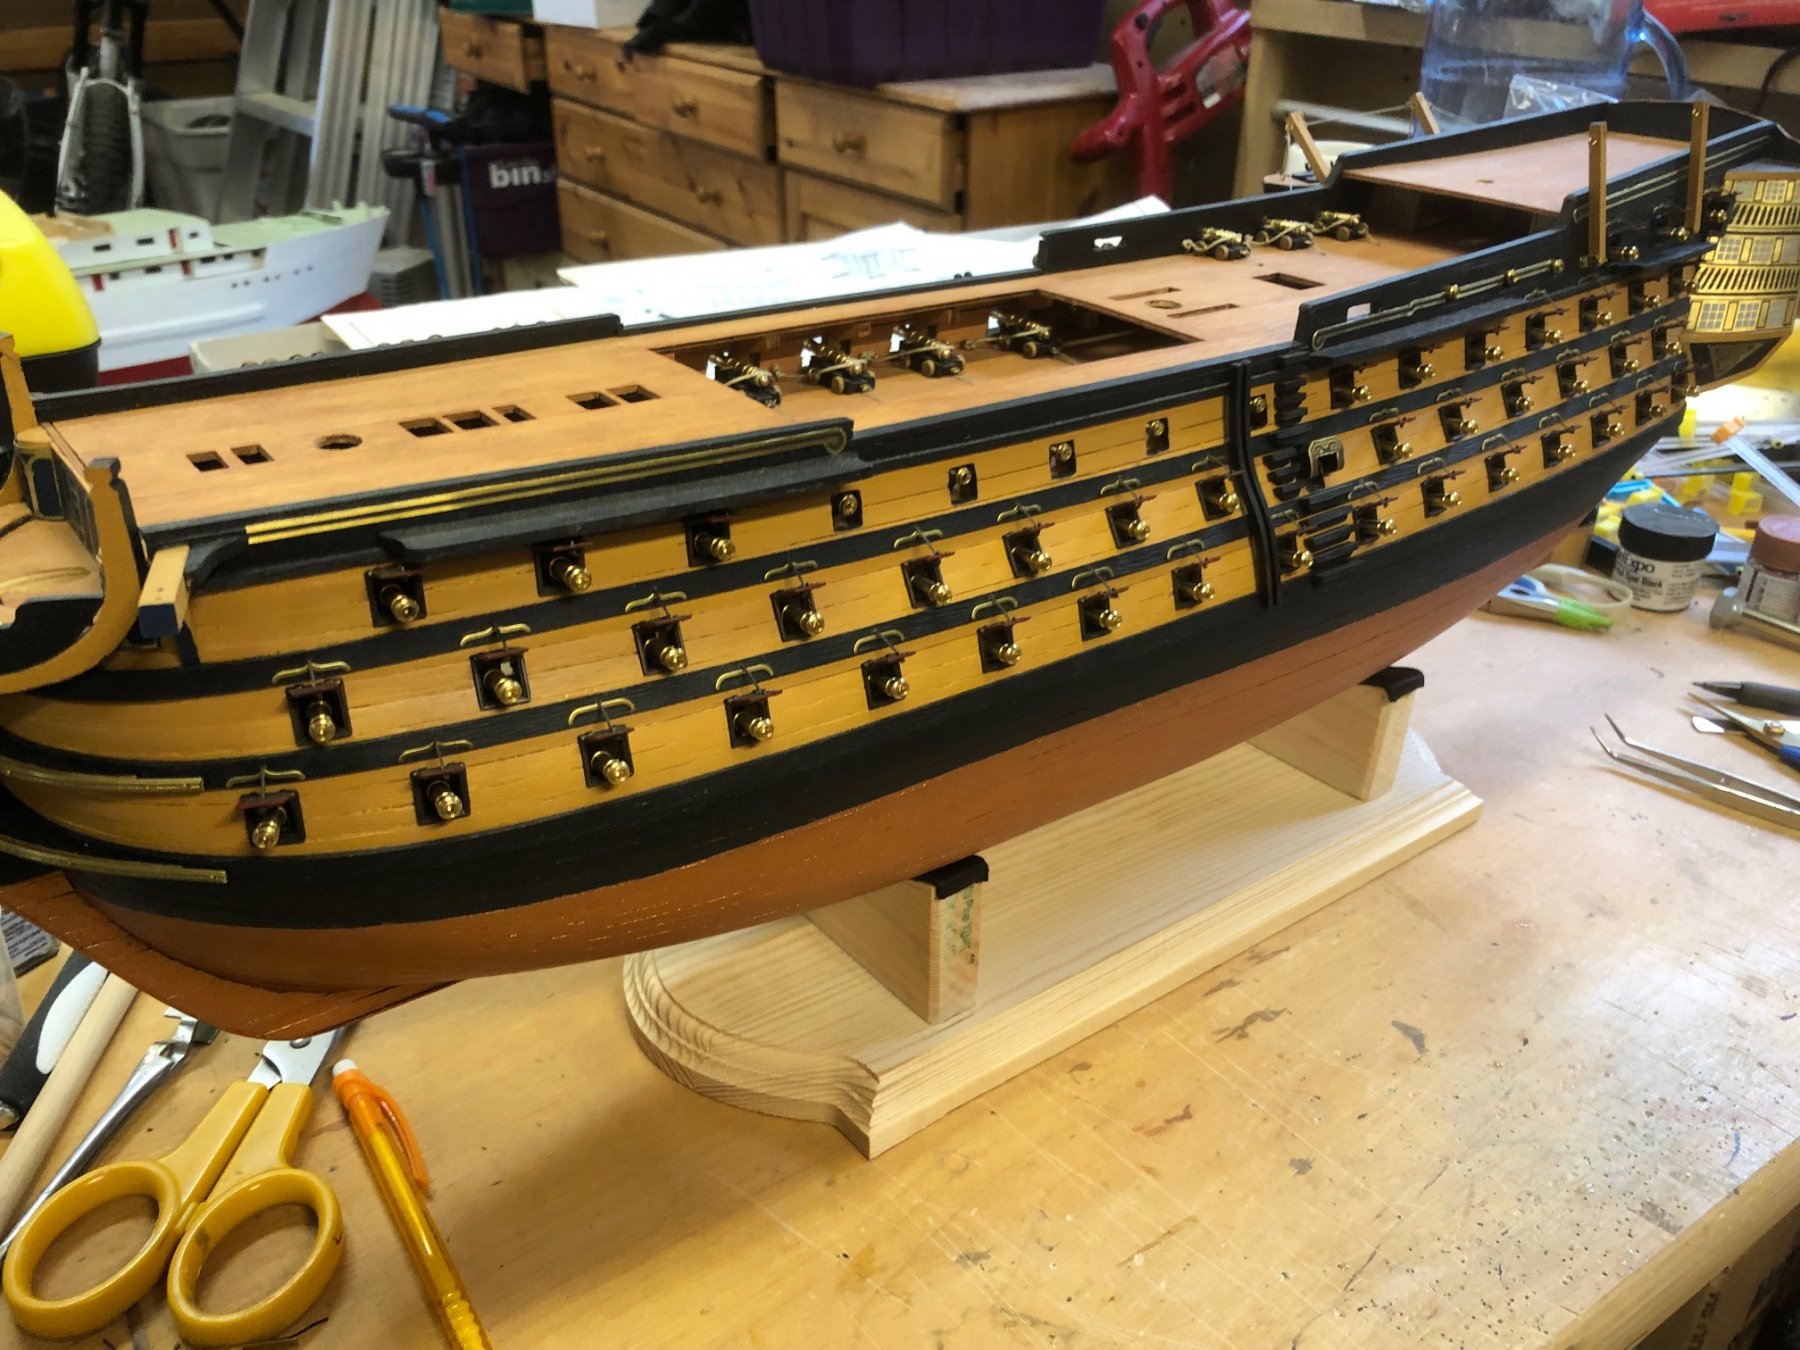
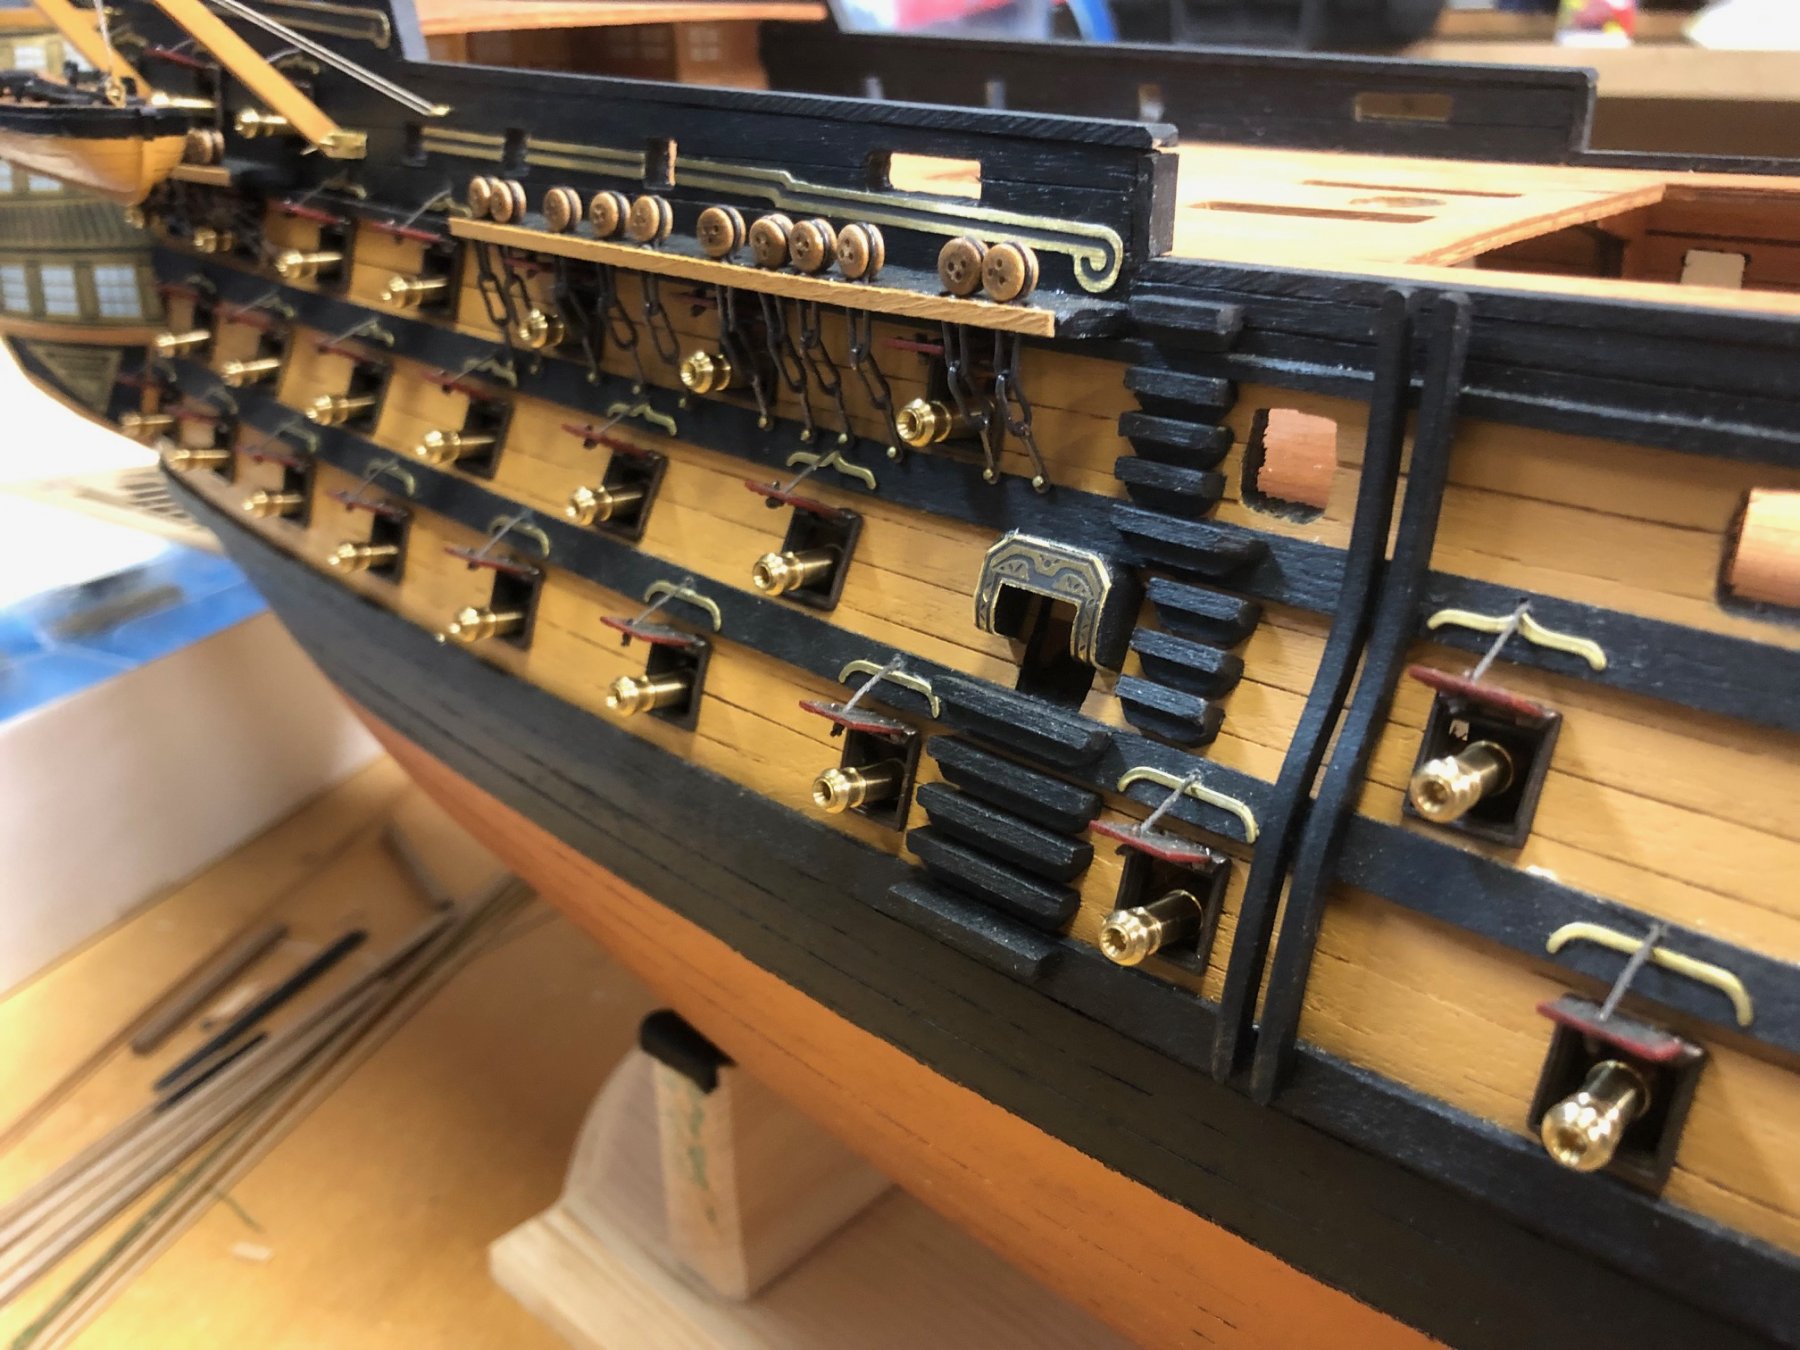
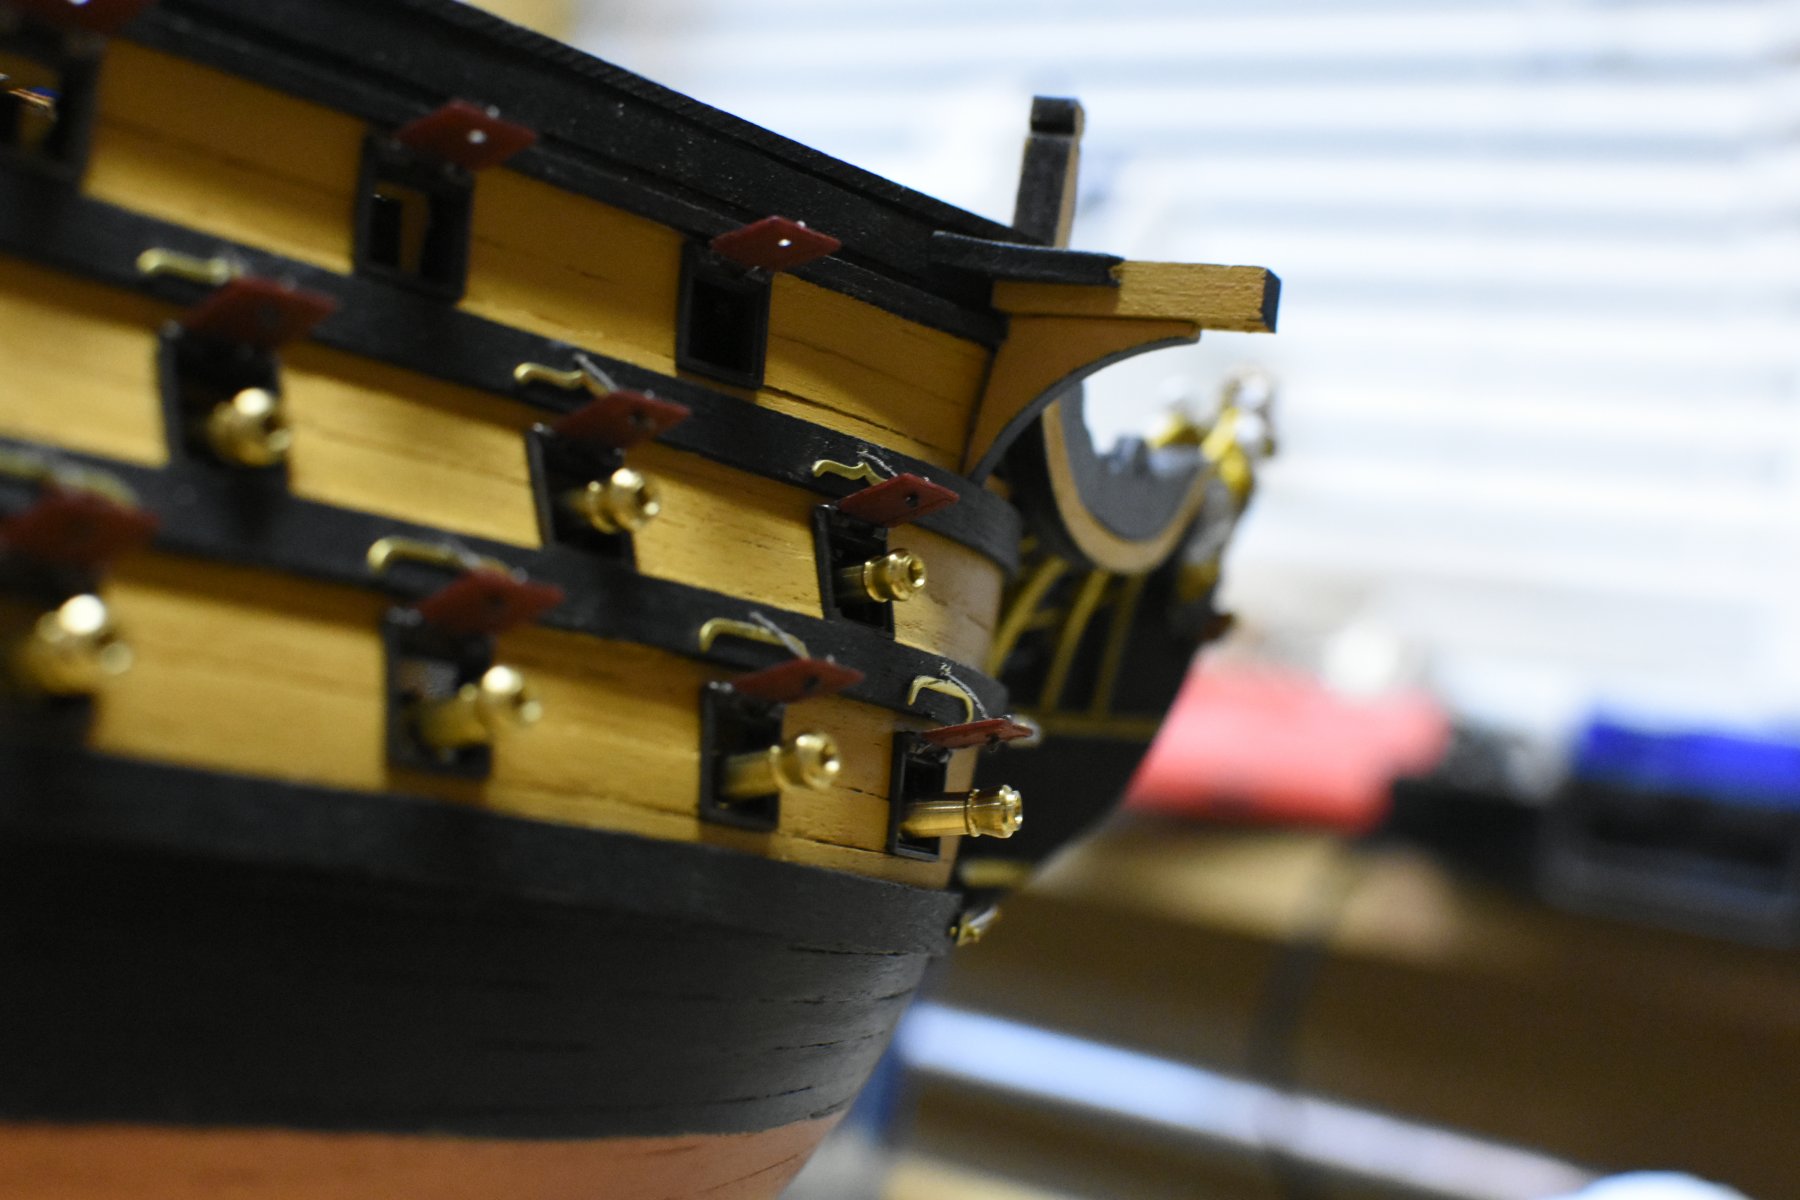
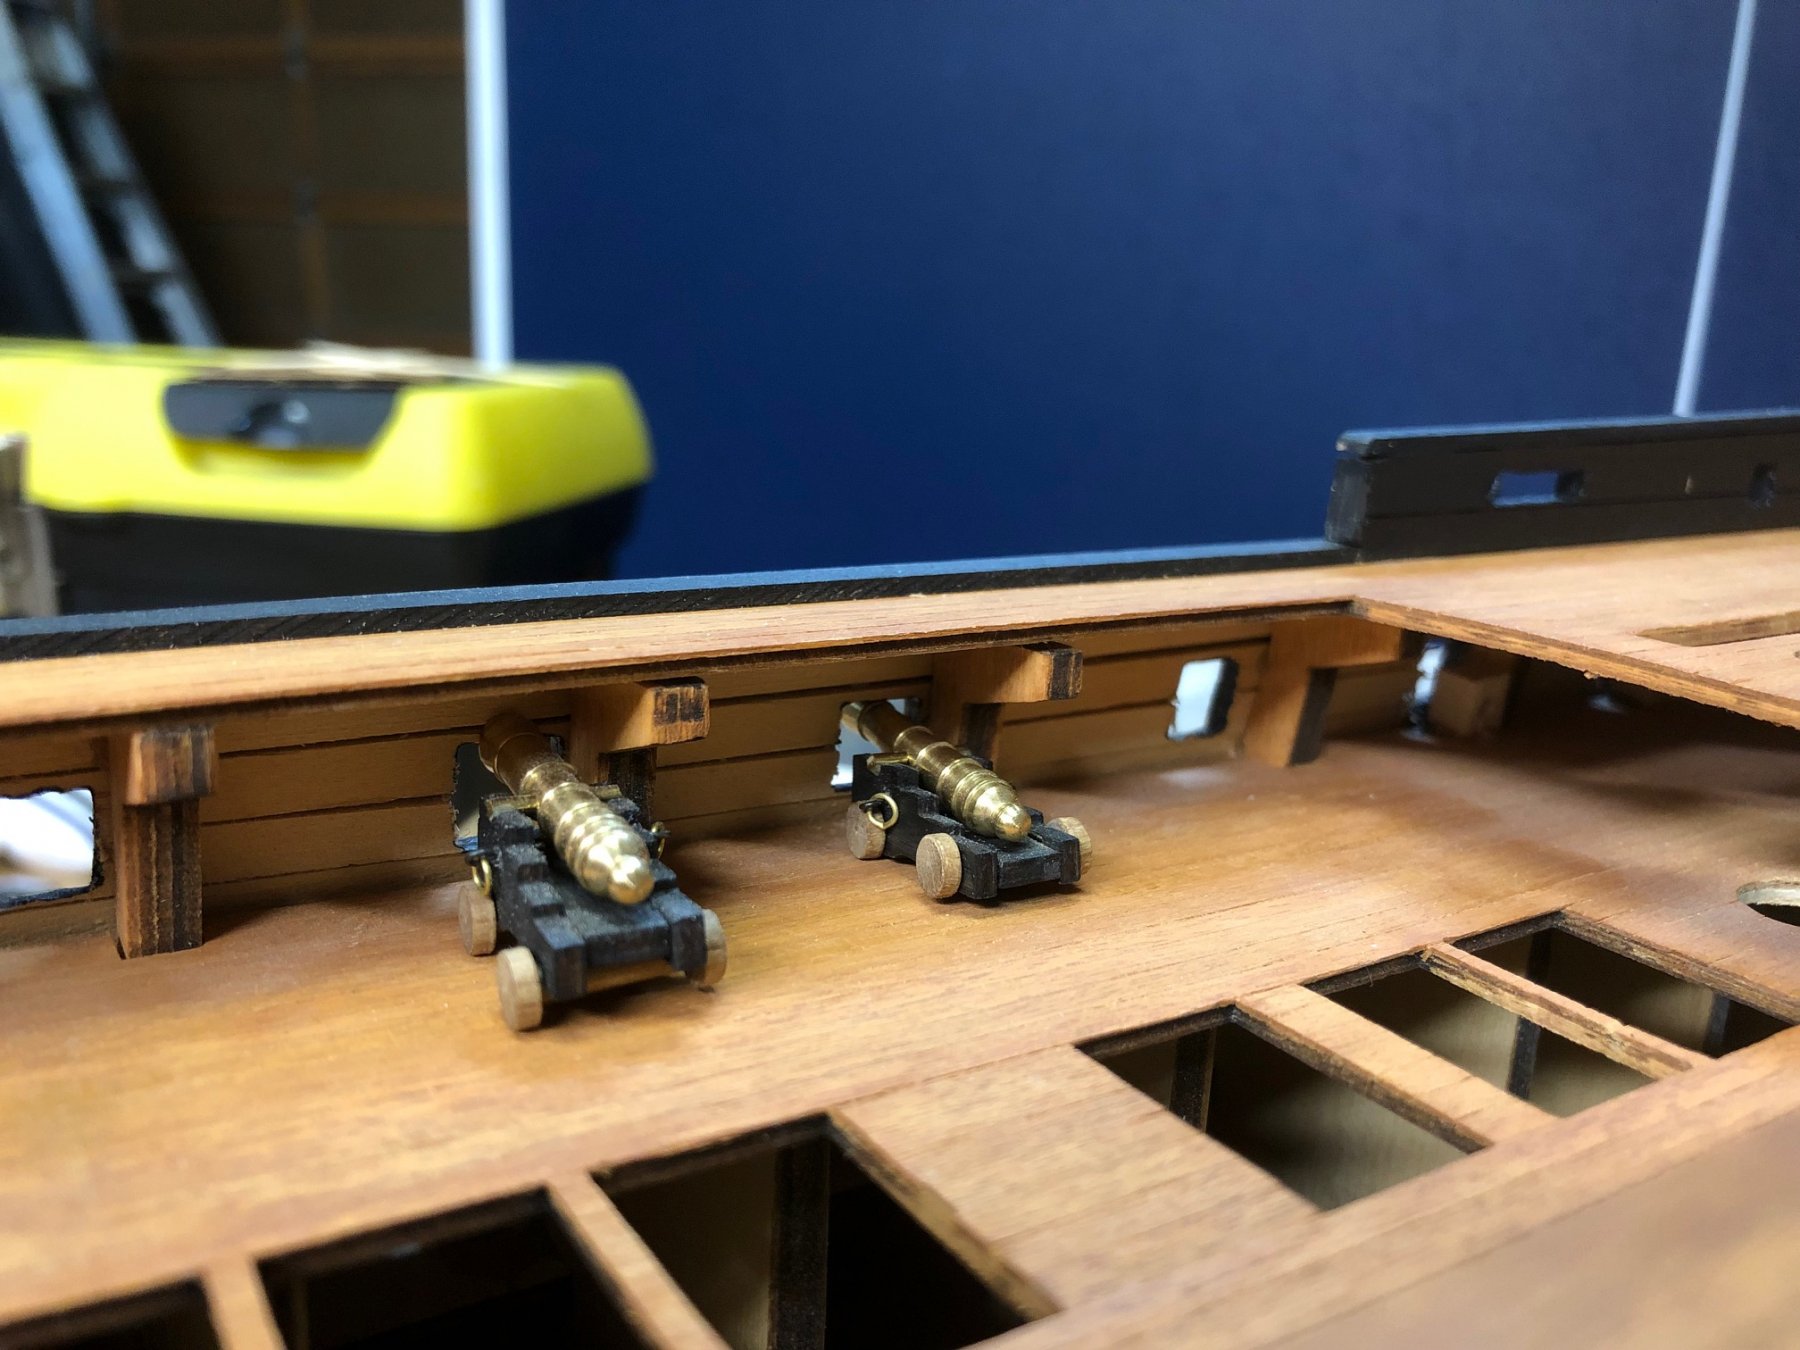
Lots of progress over the last few weeks but not much new stuff (since I'm just repeating the port side). I added all the port side gunport lids, ropes and drip shields, then finished installing the dummy barrels and the remaining deck cannons.
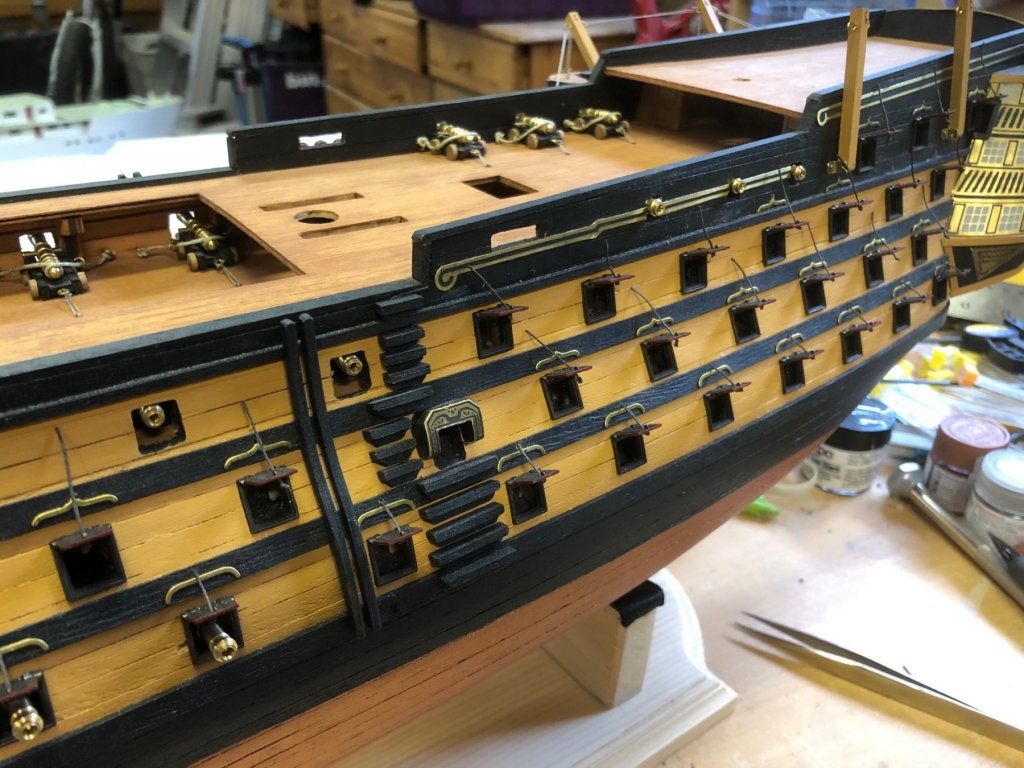


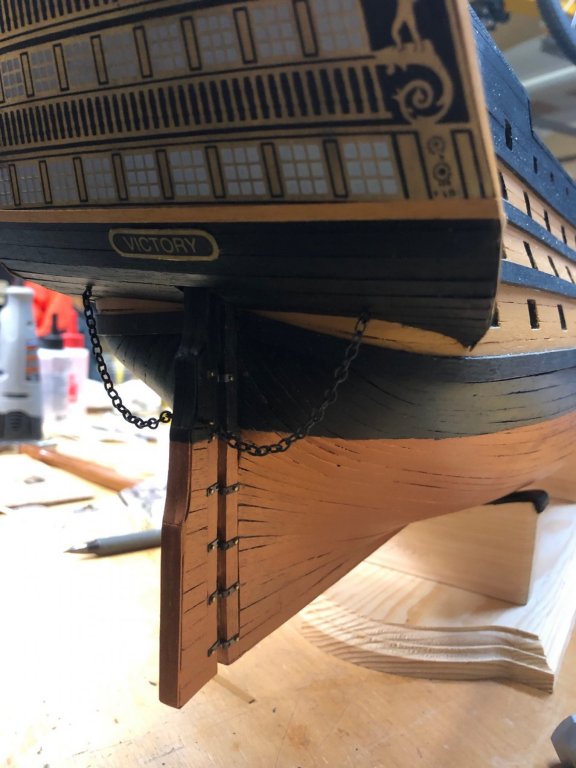
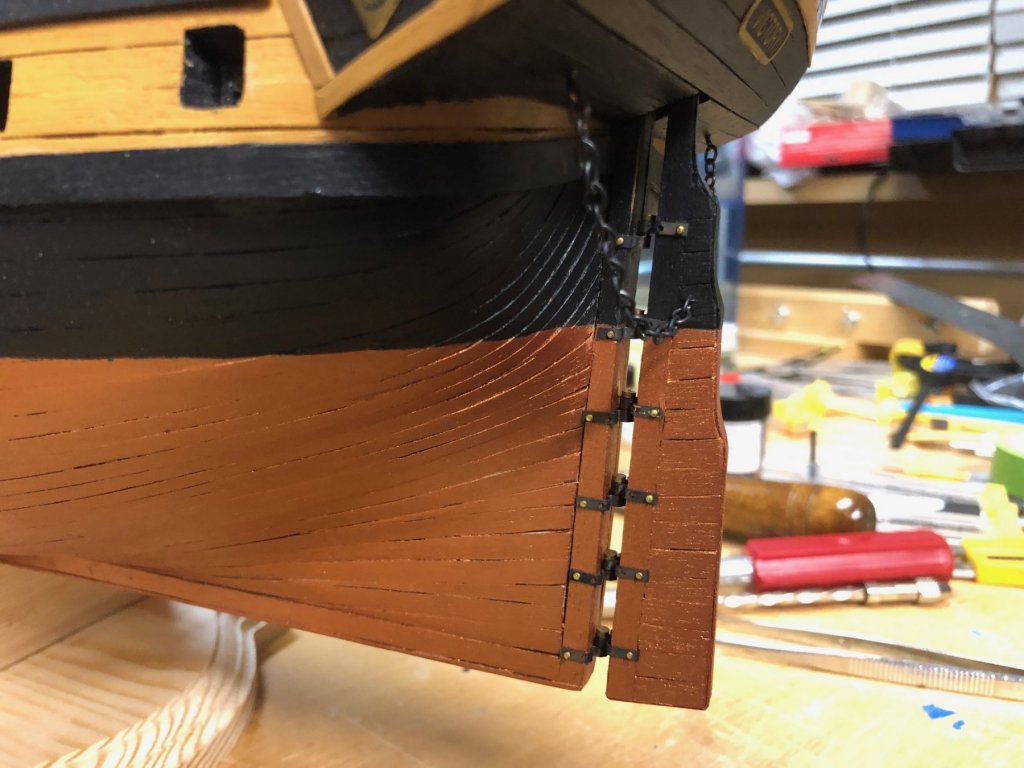
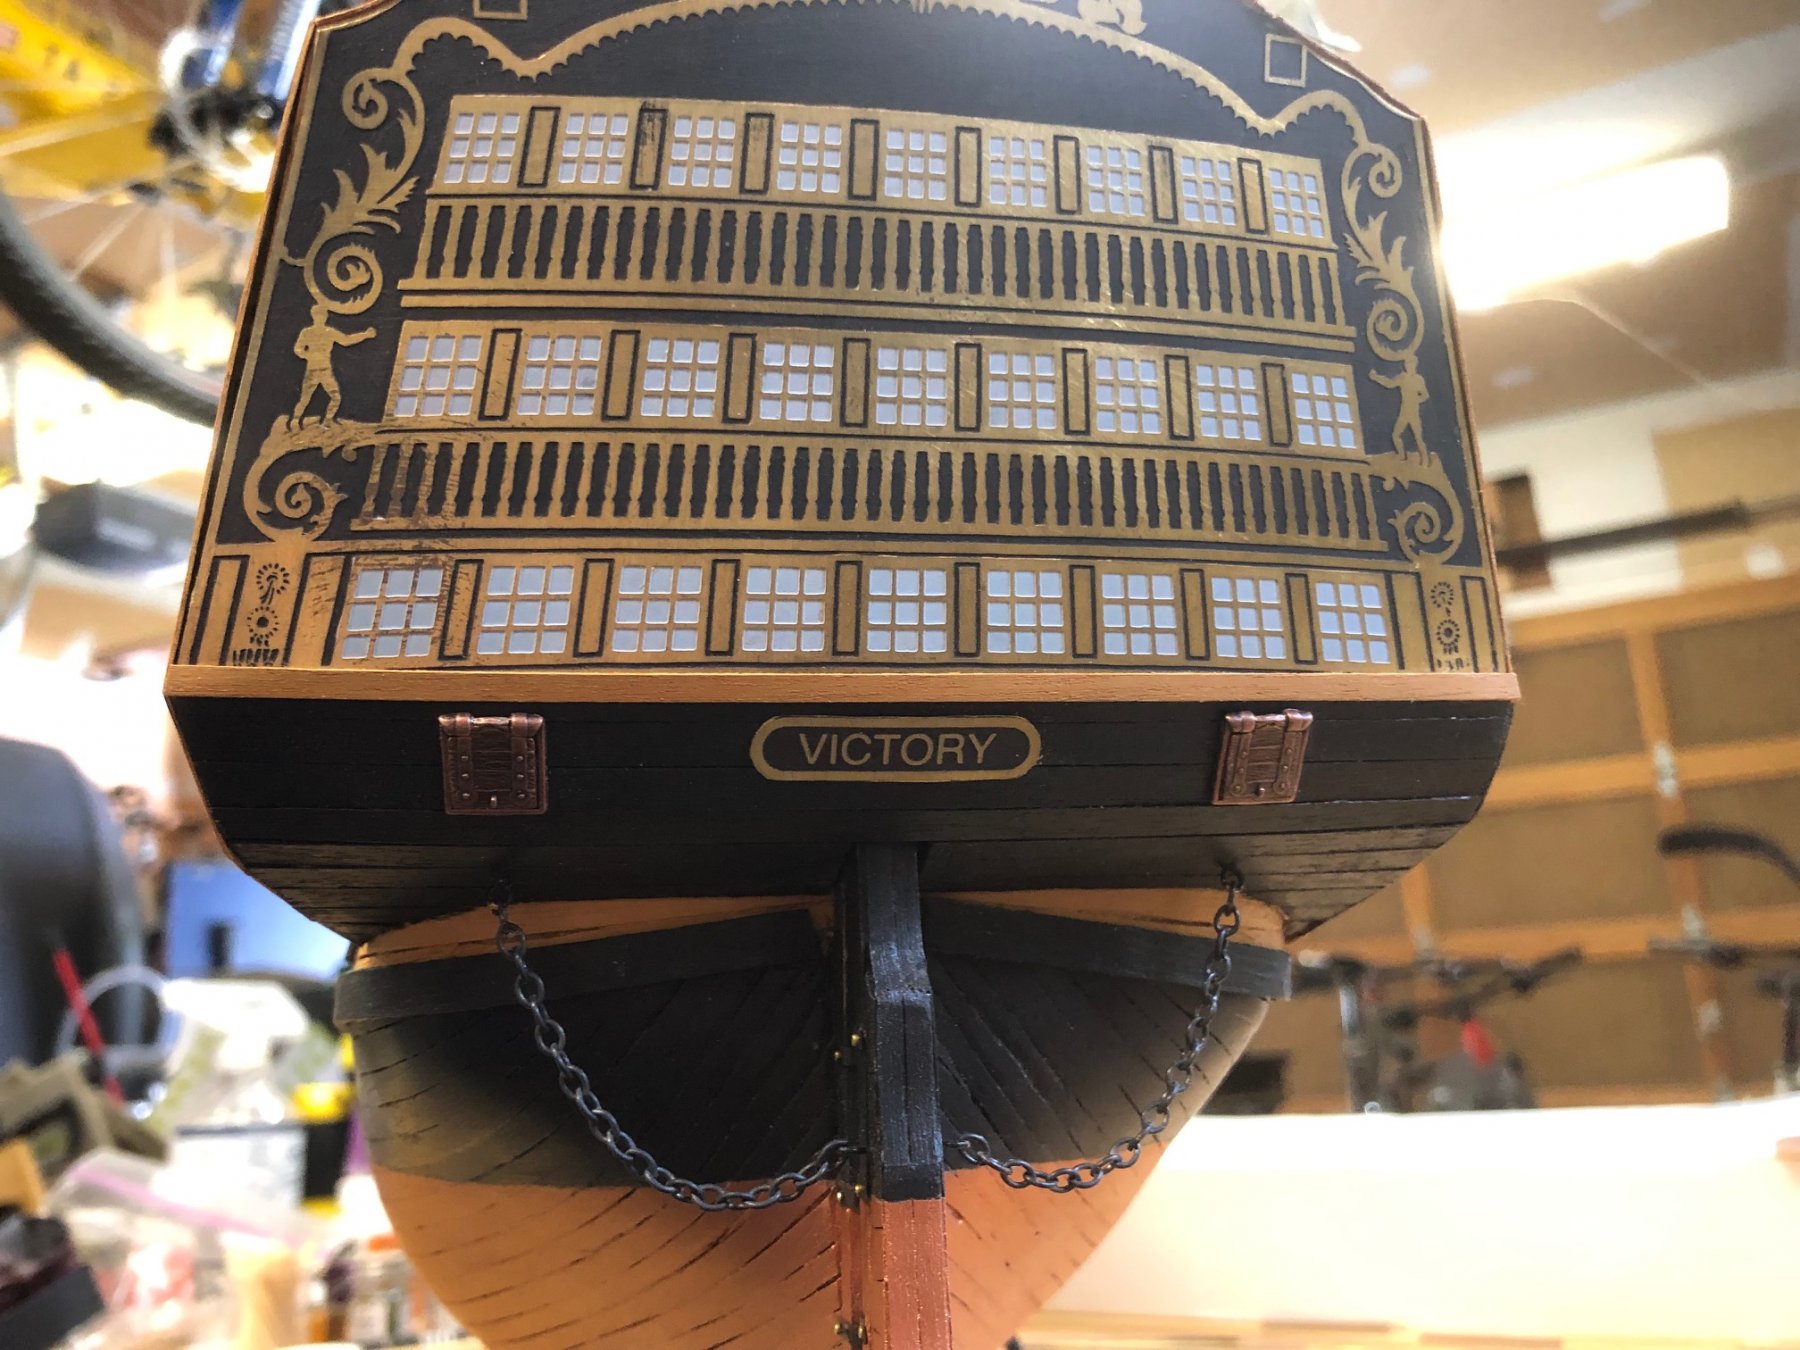
As a last gunport project I added the stern ports. I had to install them "closed" as I hadn't anticipated carving the ports when I built up the stern. Rather than carving into the stern after the fact to imbed the frames, I ground the metal off the back of the frames so I could mount them flush and in the closed position (I figure the stern cannons wouldn't have been used much and were probably closed most of the time anyway).

As a sidebar, while I was rummaging through some old photos I came across a picture from when I first stared the frames of the ship in the mid-90's (a polaroid, if you can believe it. I have no idea what that ugly plant is in the background....). Makes me feel old!
- GrandpaPhil, BenD and Duanelaker
-
3
-
Glad to help - if you need any photos of the Mantua plans or more specific images of the bulwarks and upper deck, just let me know.
-
Thanks very much, I appreciate the feedback! I was a little concerned the changes might not look correct, but it's amazing how the little things help to make it look more scale.
-
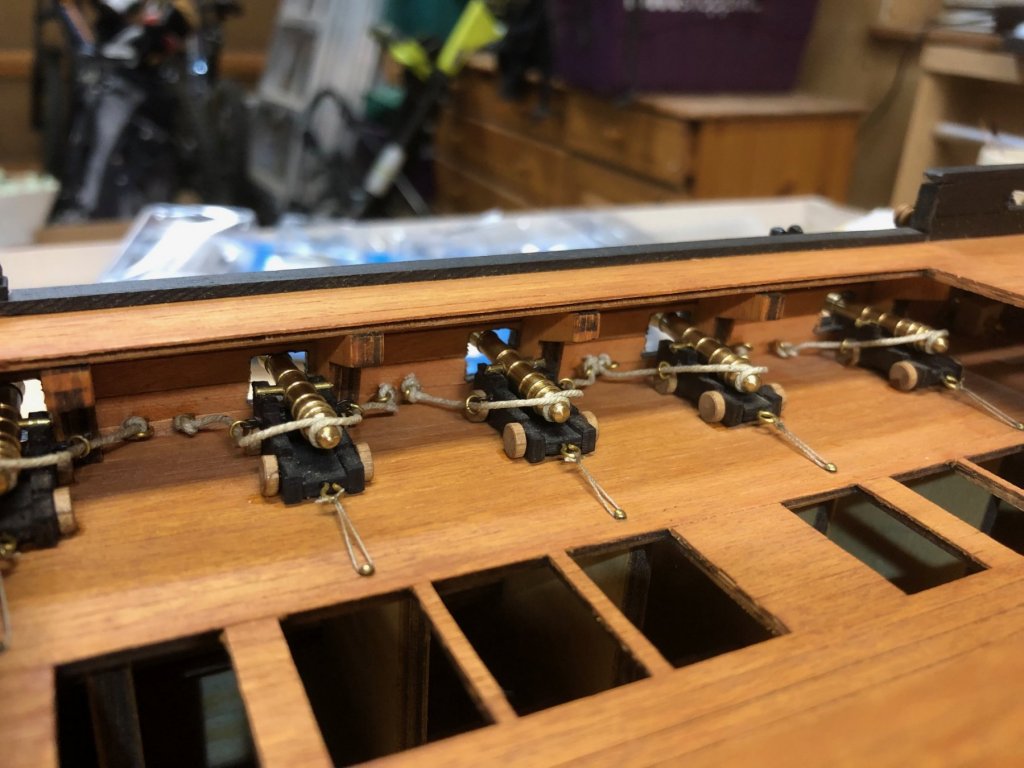
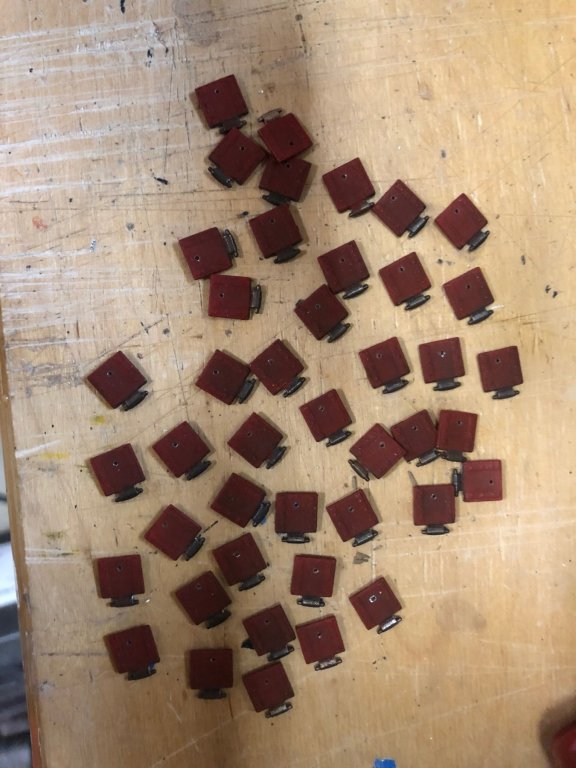
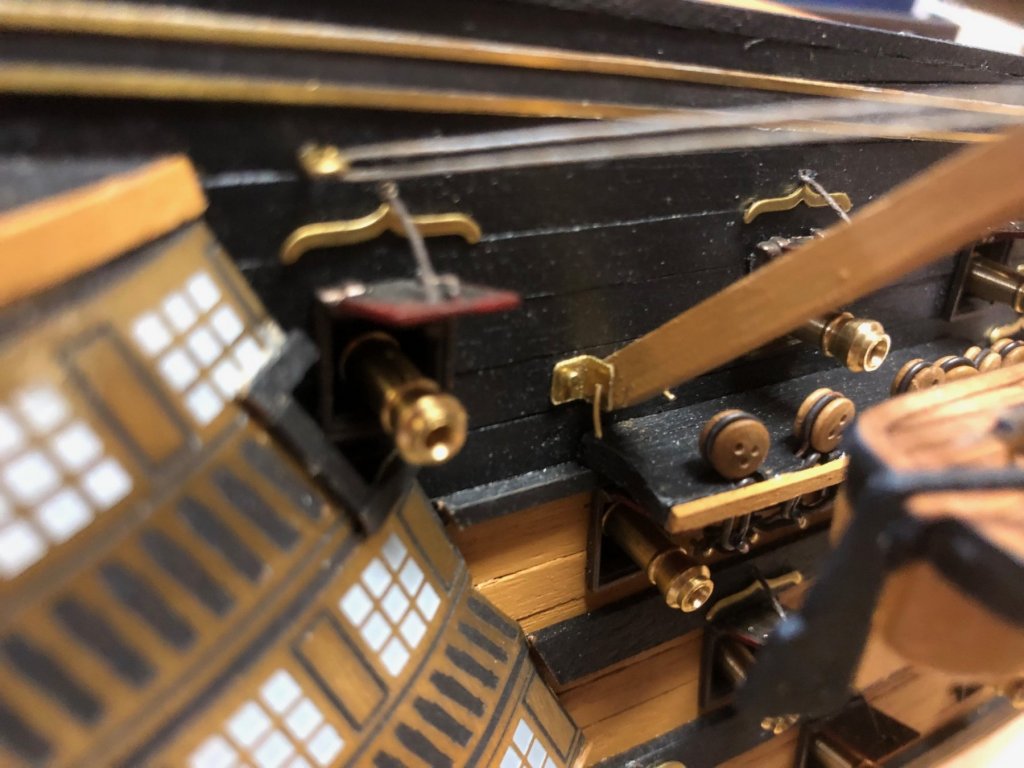
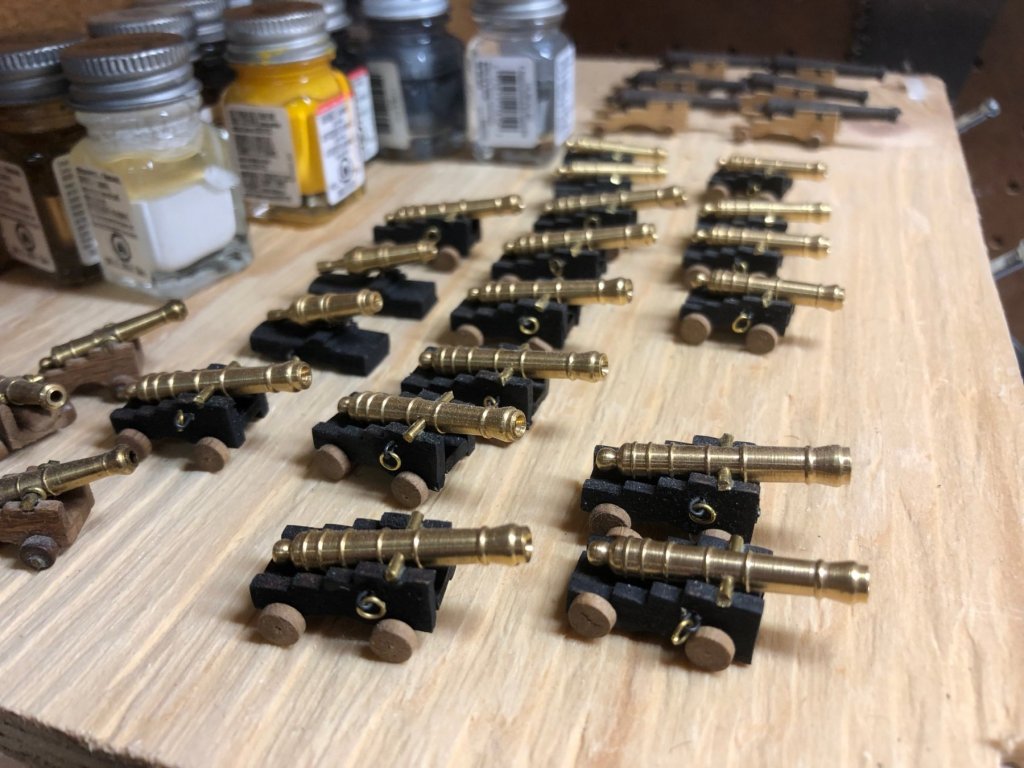
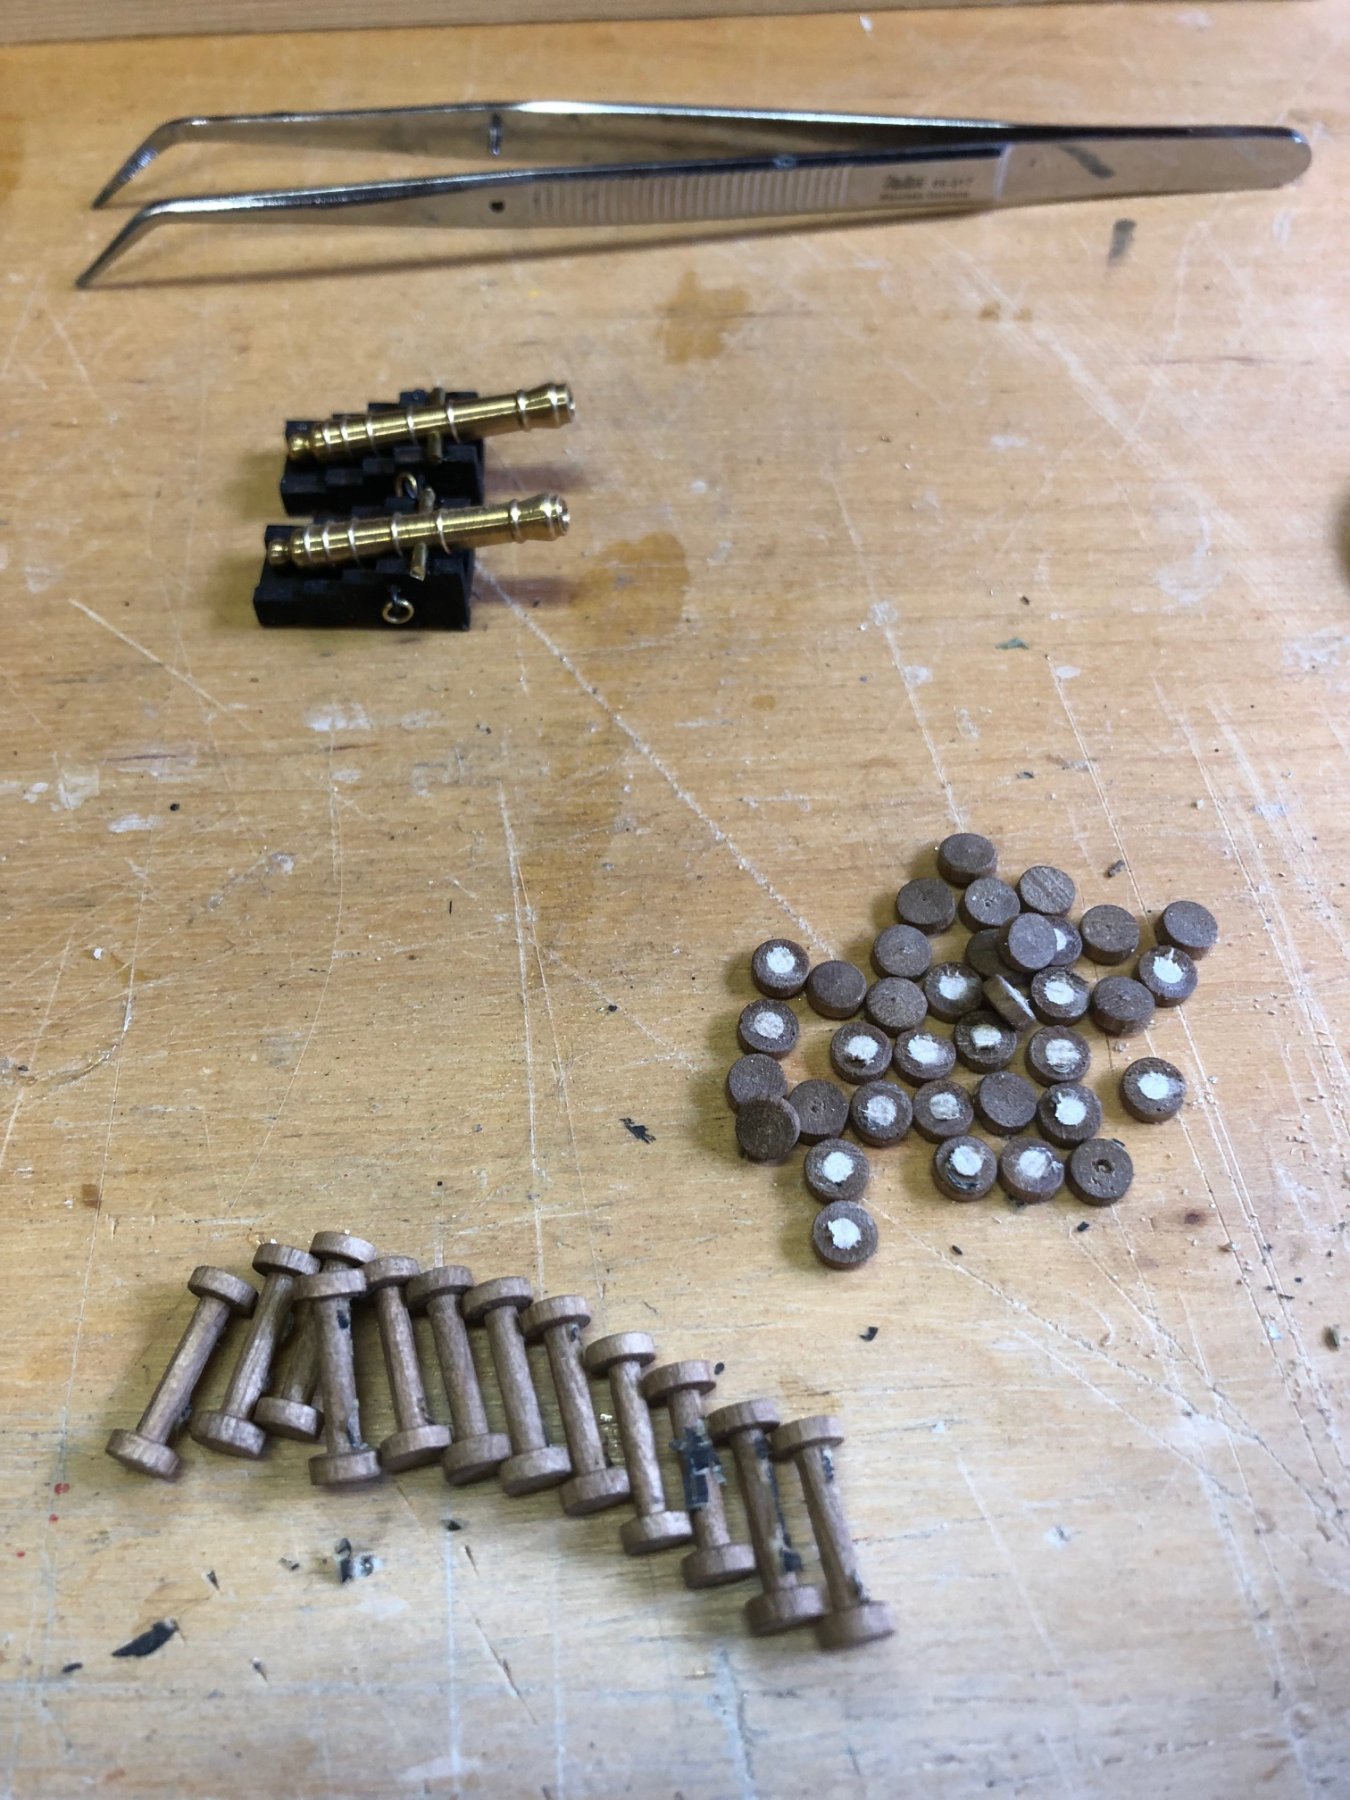
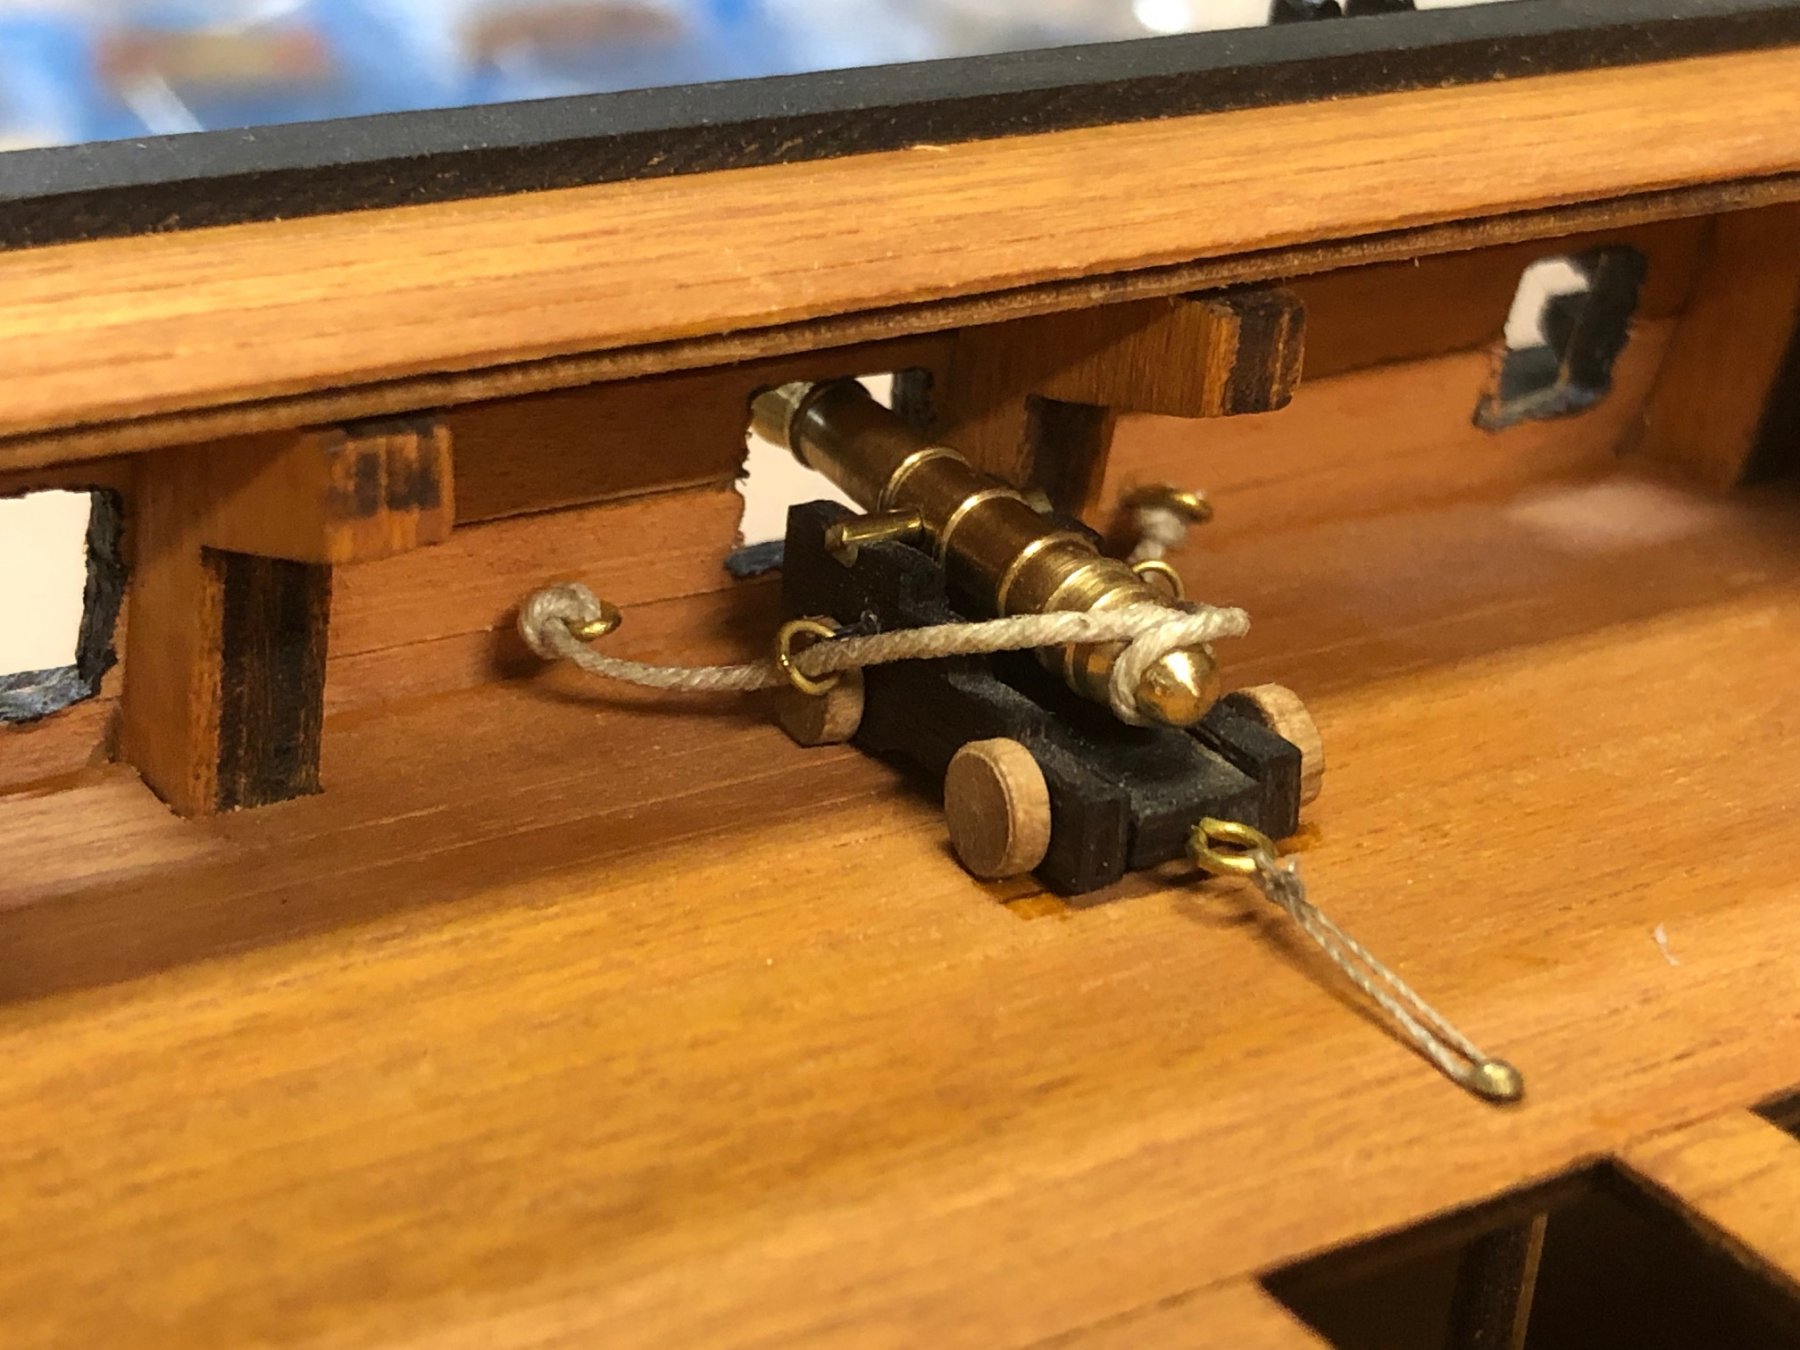
While I slowly work through all the port side guns, I decided to mount the deck guns while I still had room to work around all the deck components. As I discovered back in December, I needed to remove all the cannon axles and lower the guns slightly to fit through the cannon ports. That involved cutting 64 wheels off the axles and gluing them on the sides to drop them about 2mm. It's just enough for them to fit in a way that looks correct.
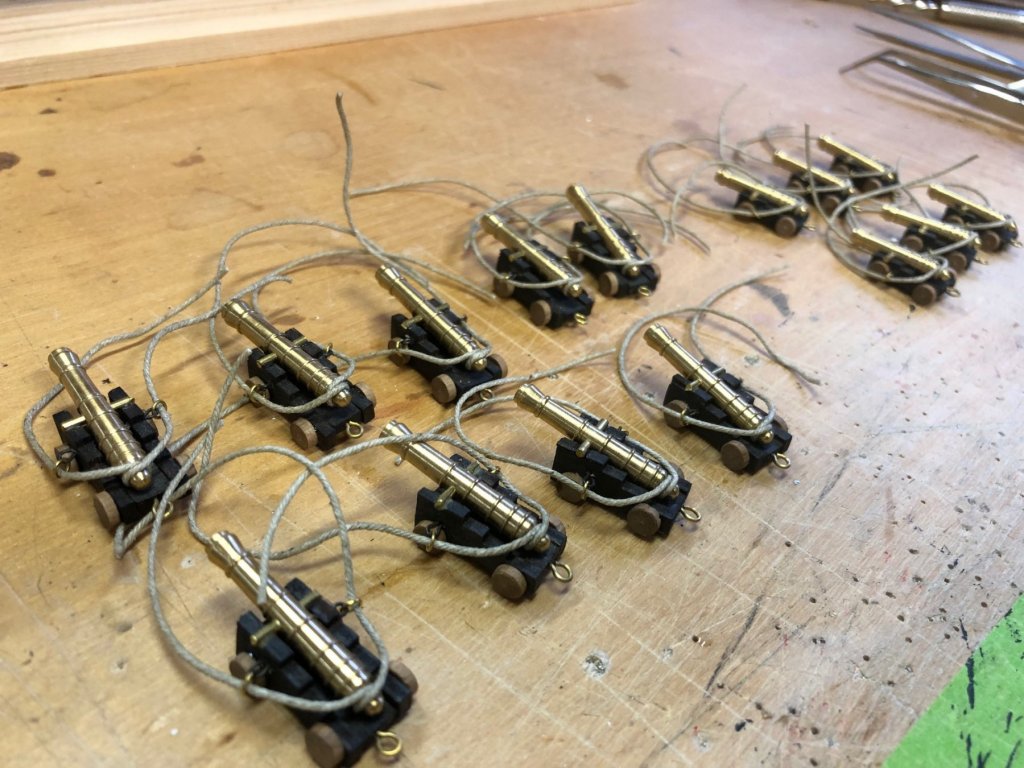
The kit tells you to use thread for all the tackle, and there wasn't any breech tackle. I thought it would be more realistic to make breech tackle so I found some spare twine that looked the part and wrapped it around the back of each cannon barrel, then used the kit thread for the train tackle. I attached the breech tackle to the hull with eyelets and the train tackle with a brass nail.


-
An outstanding build! Looking forward to following your progress.
Cheers,
Ken
-
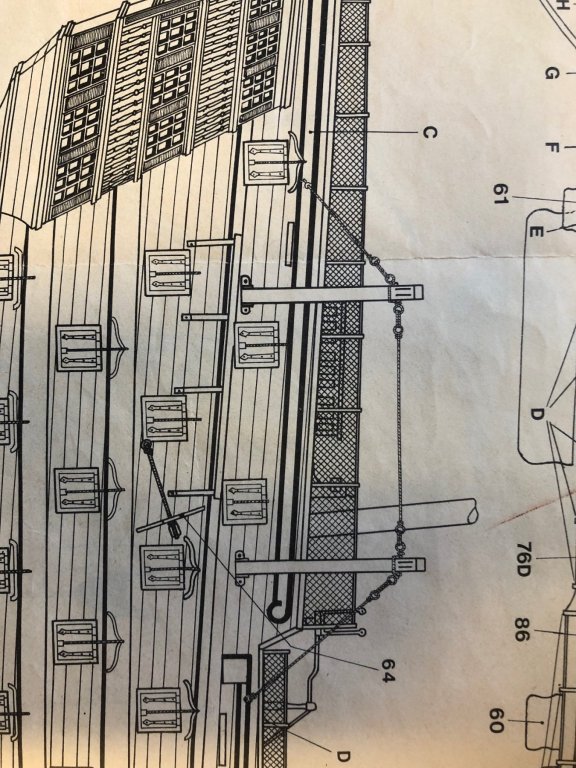
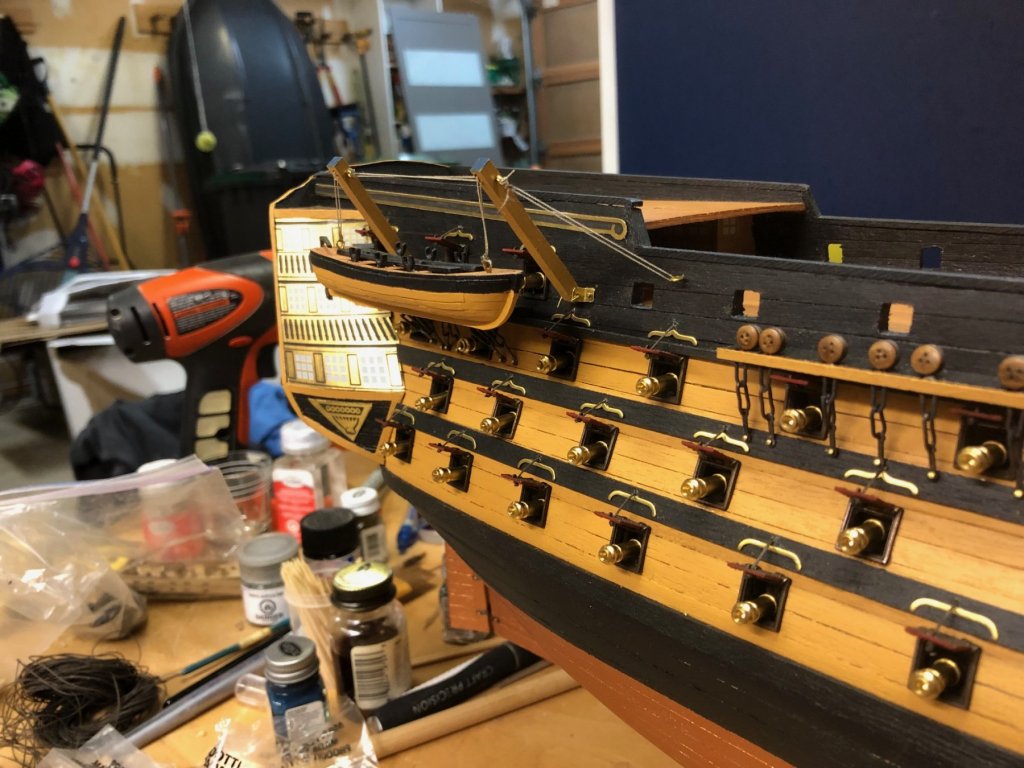
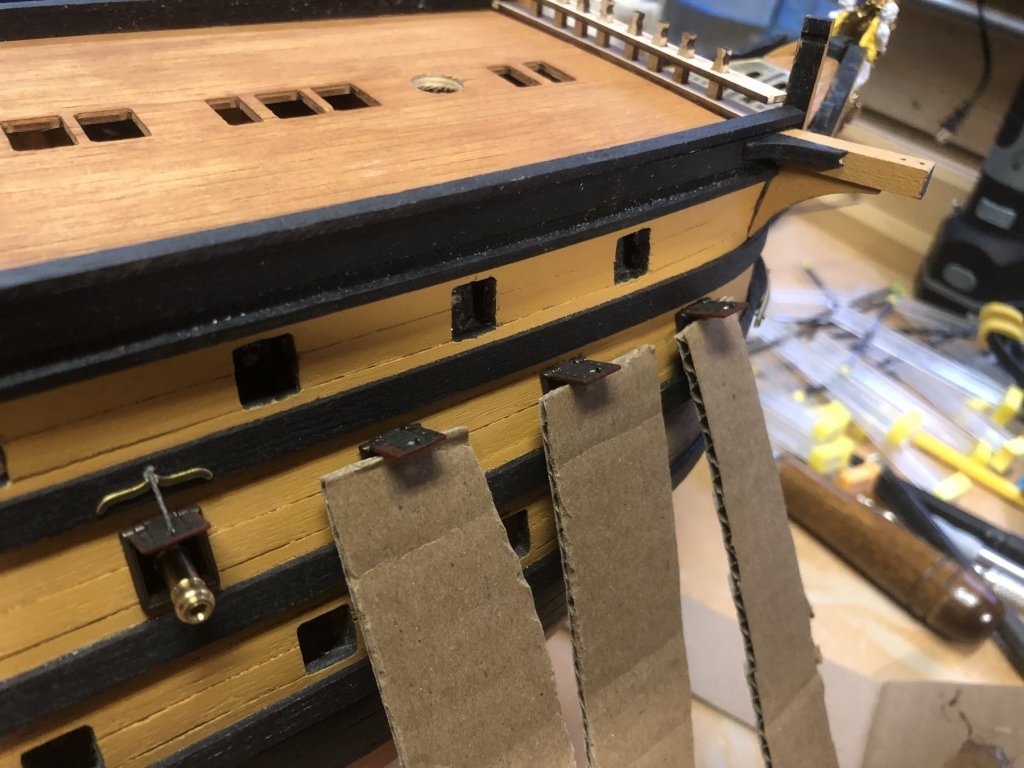
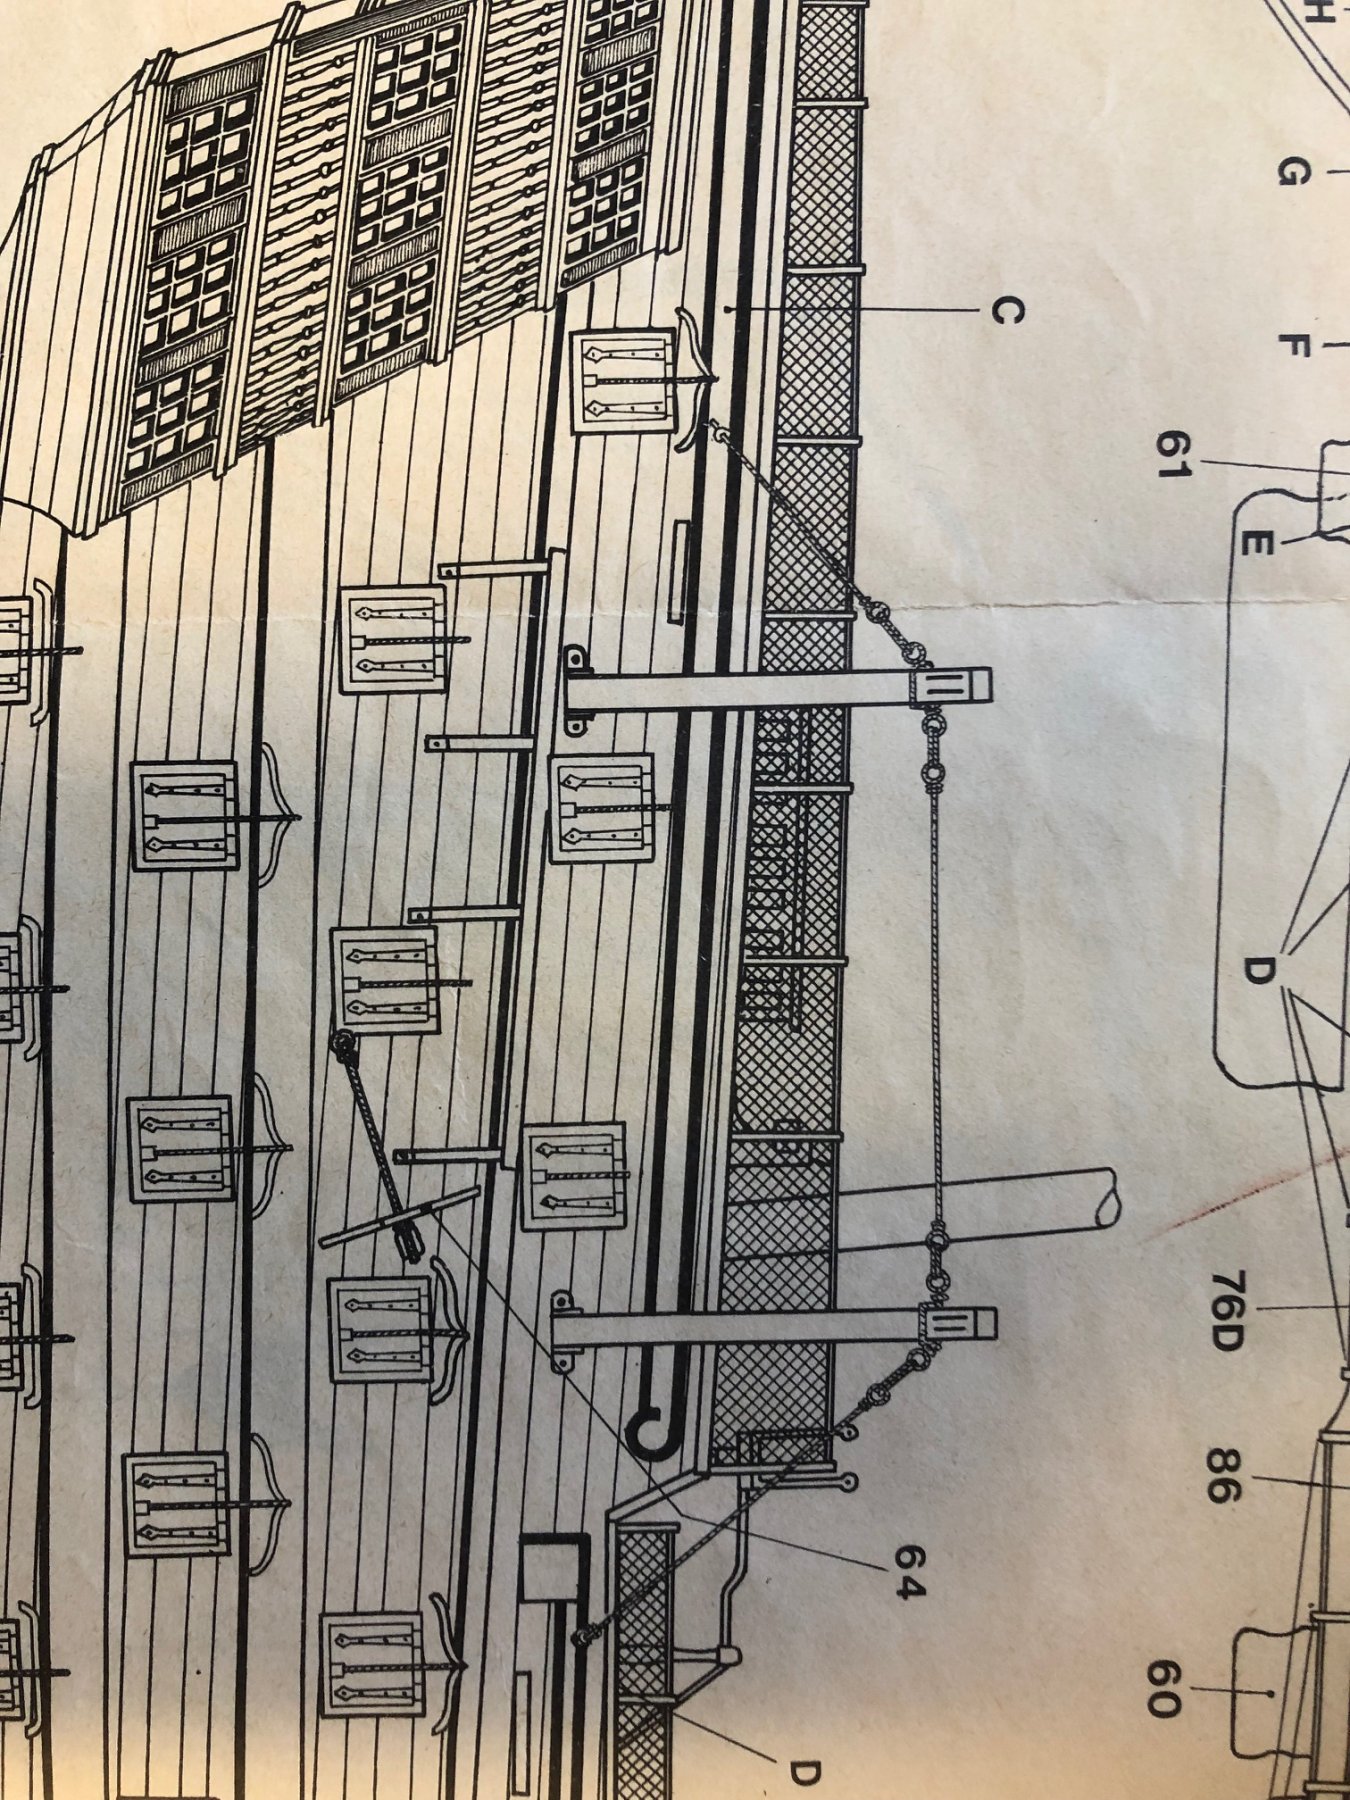
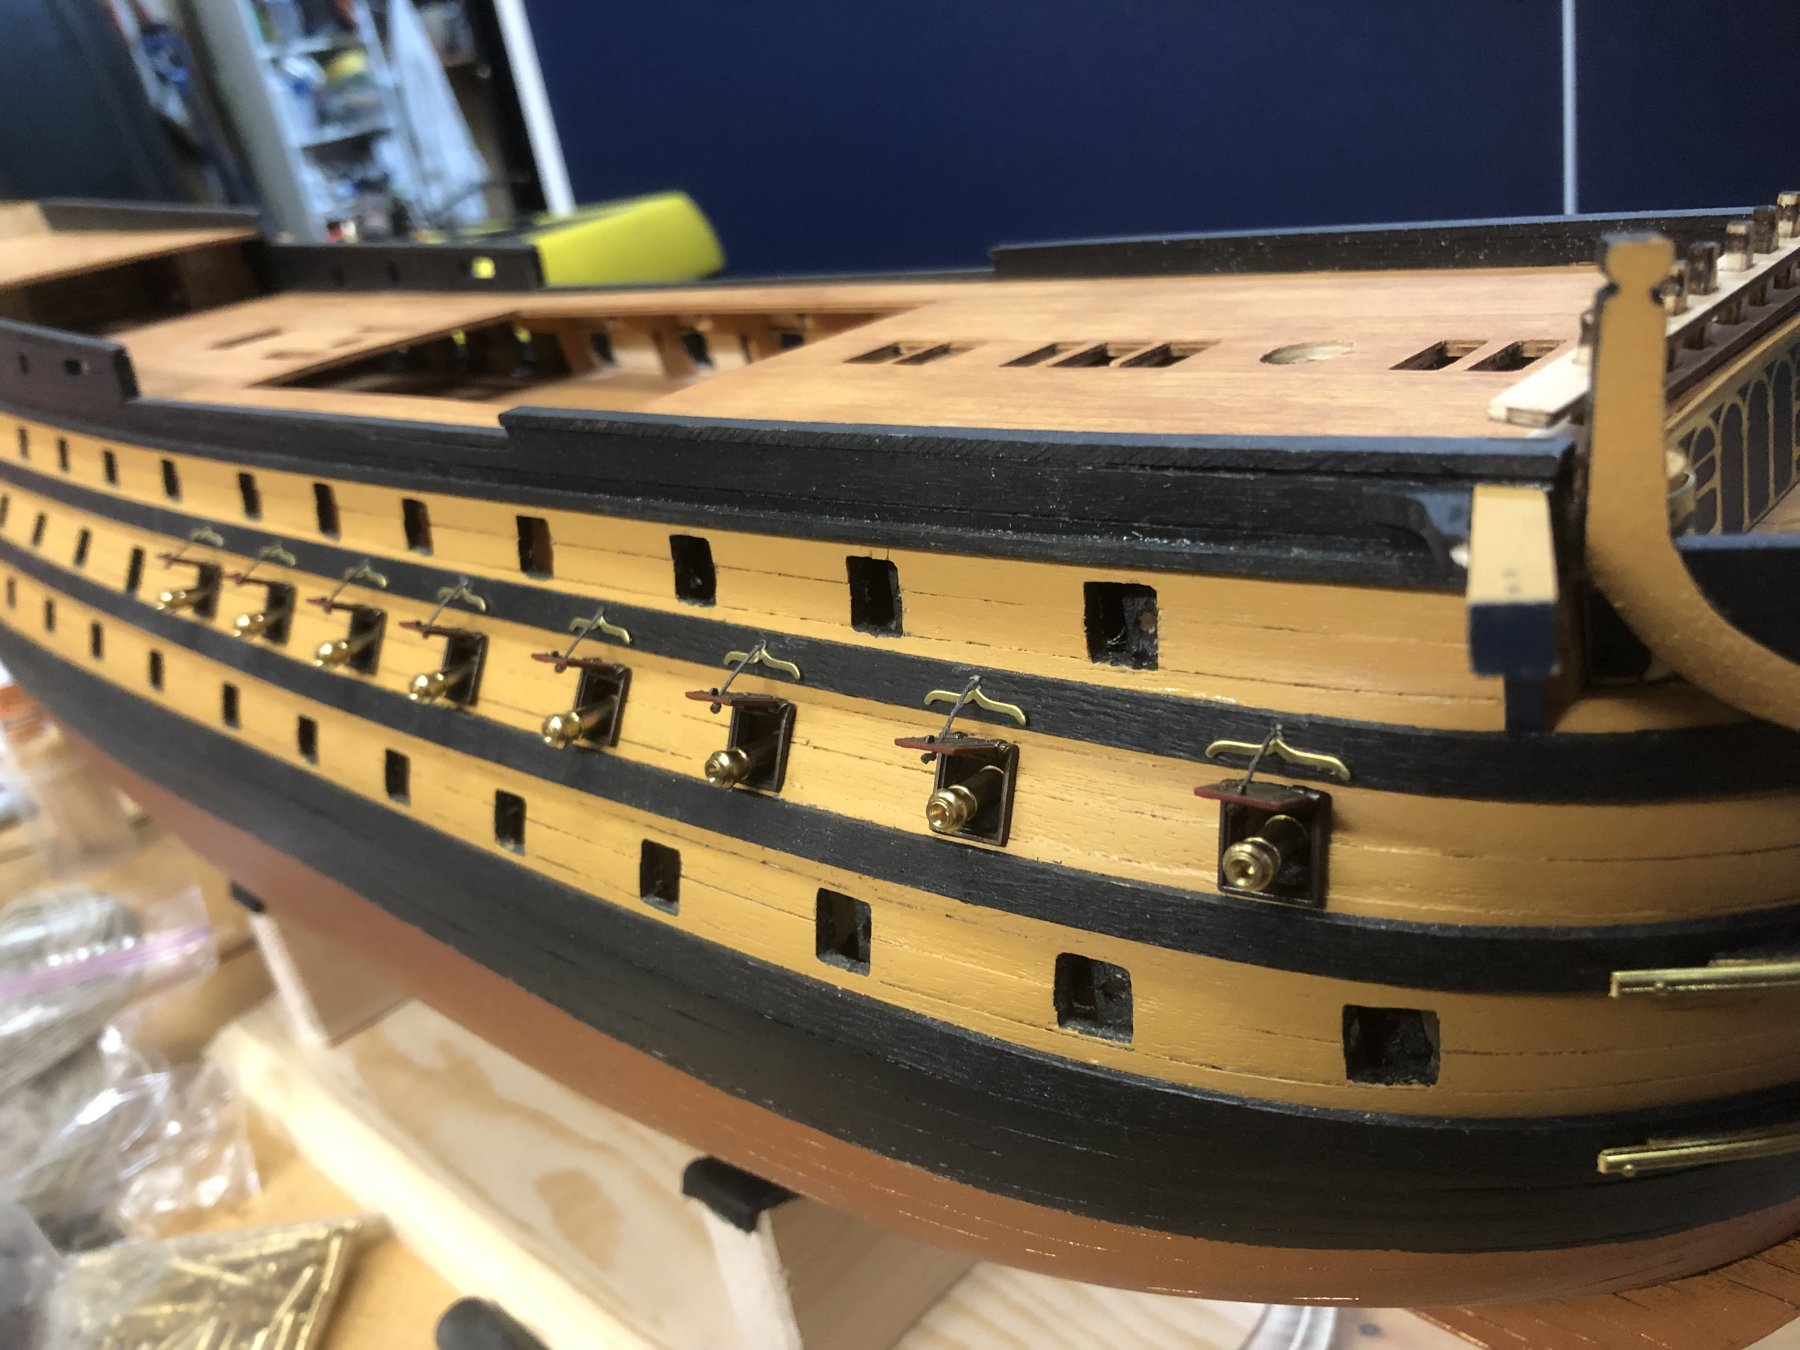
I started work on the hull decorations this week including the "sea gangway" (stair rungs, side door entrance and hauling sides) and some of the brass side decorations. I'm pretty much done with the starboard side and moving on to the gunport frames/lids on the port side now.

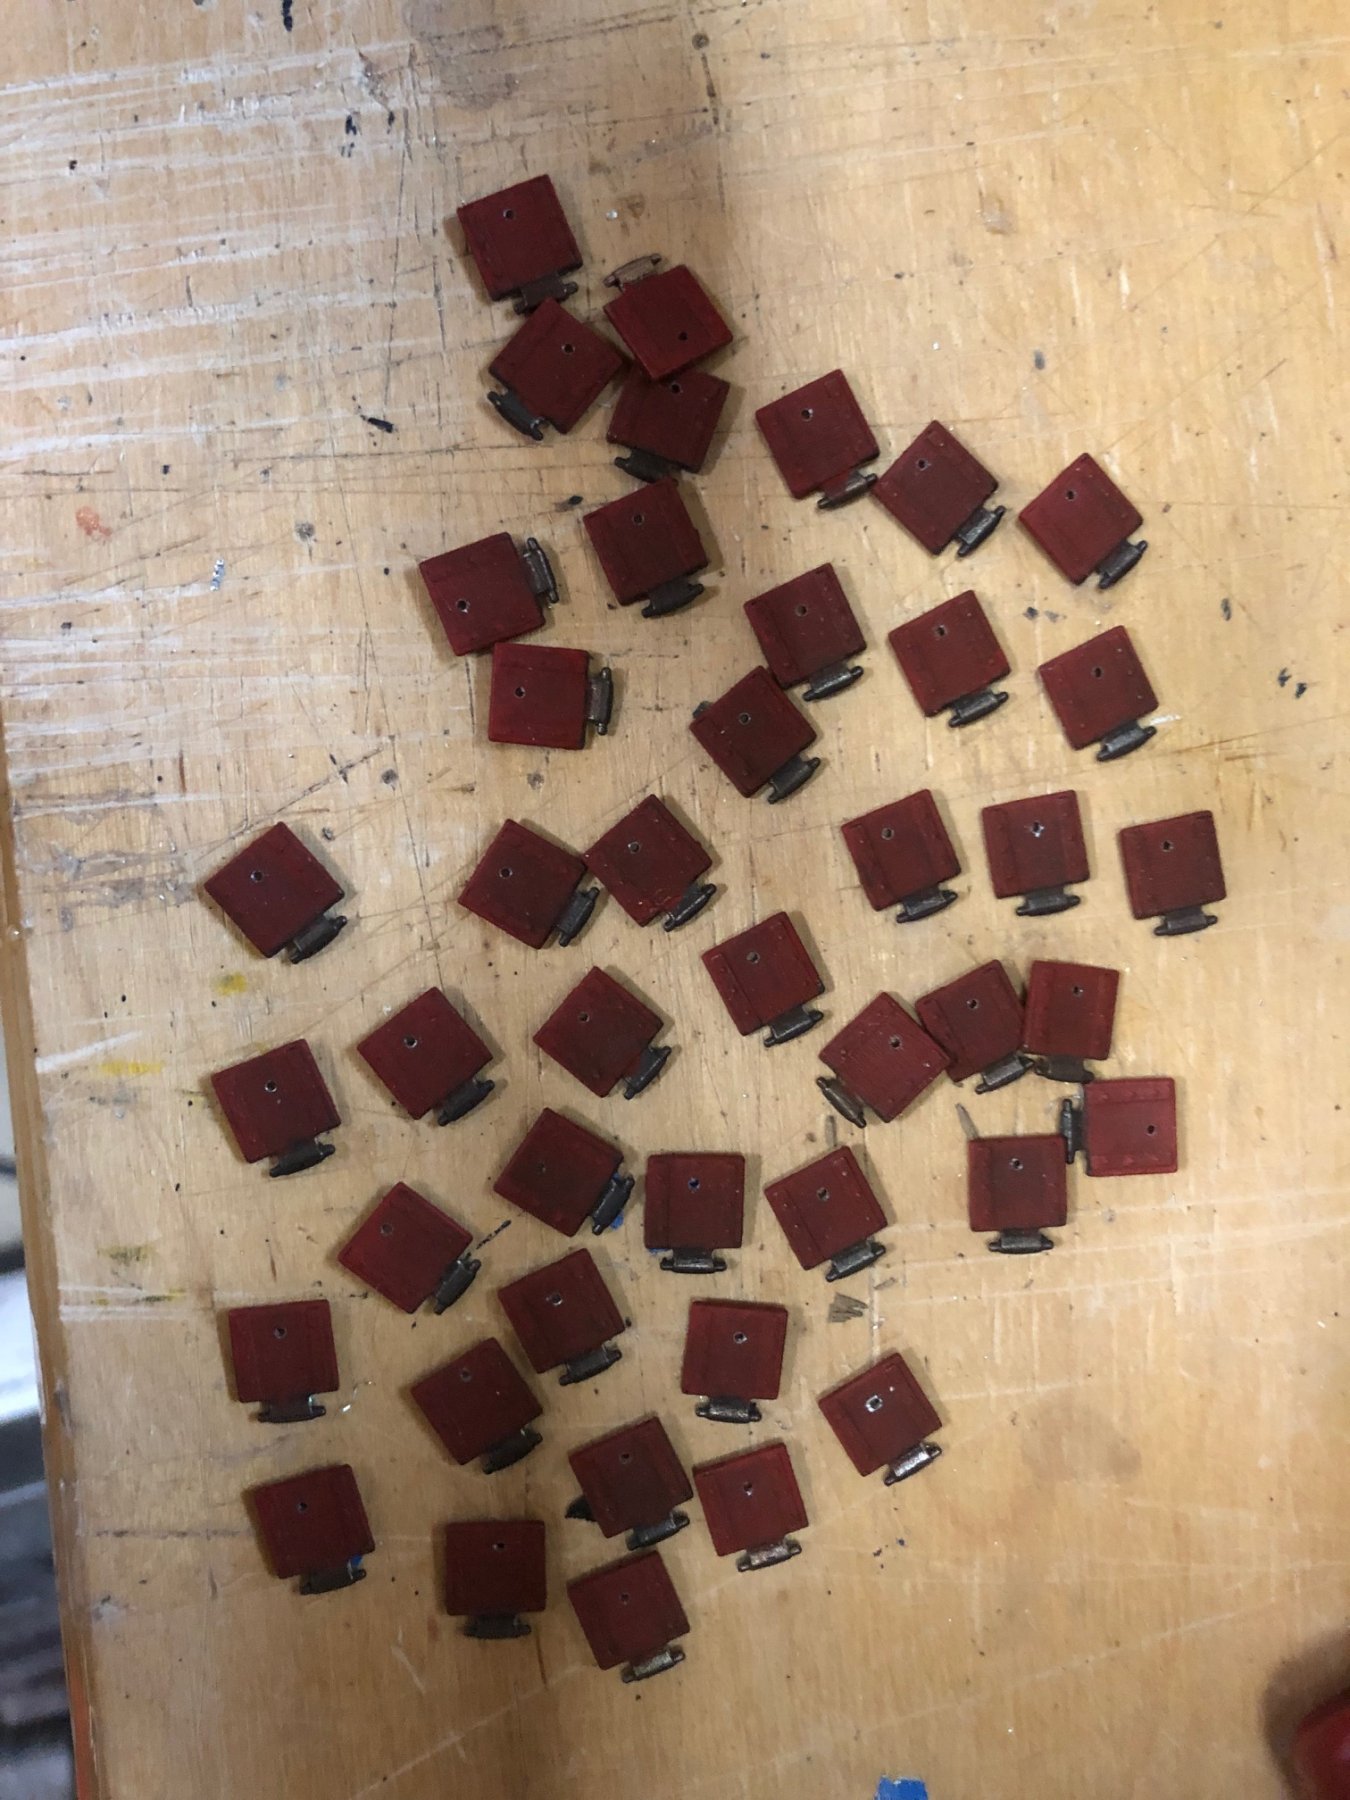
It took me a while to paint the lids, then drill all the holes for the ropes. The lids with the kit are not that well cast and need to have all the metal burrs and extra bits trimmed off with a knife or they don't fit the frames very well.
Port side ready for the cannons!

-
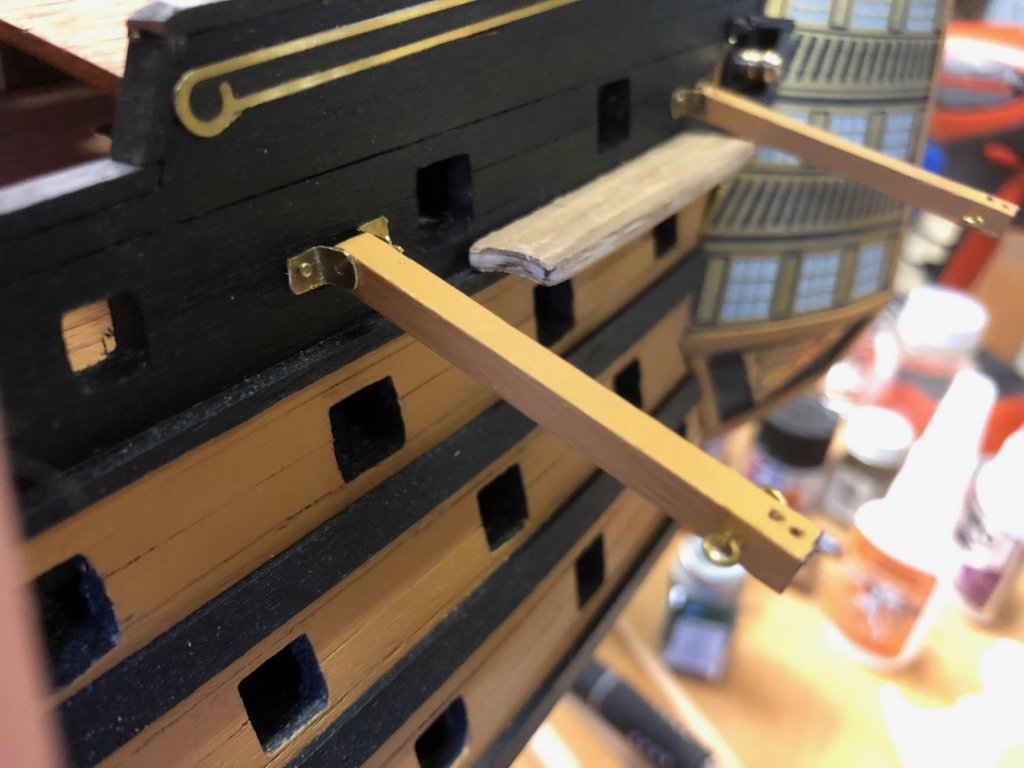
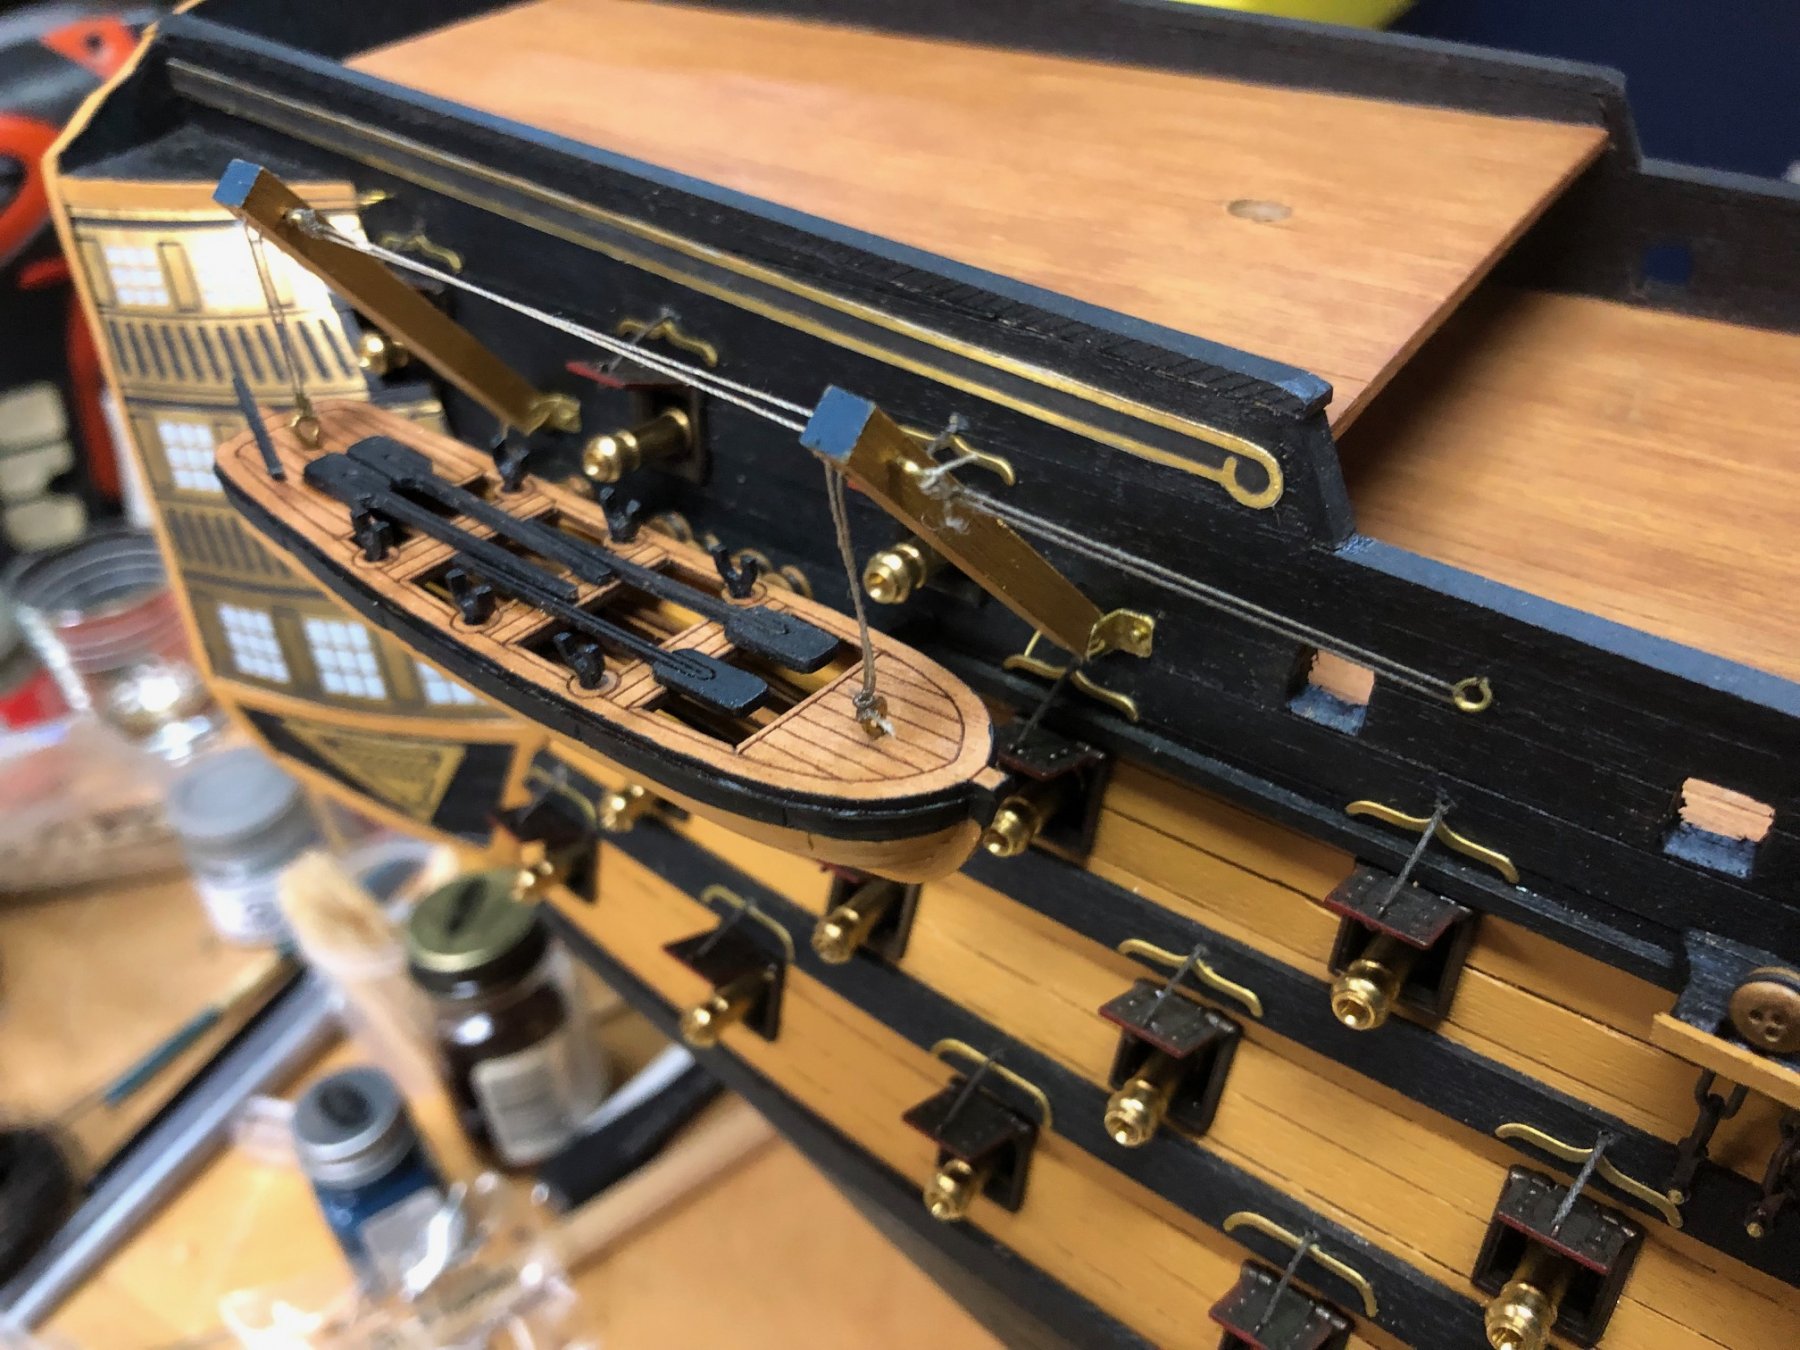
You bet! Below are the davit plans from the kit. They called for a few things I changed (the brackets they suggest were tougher to make as a single piece, so I just made simple L brackets for each side of the davit). The davits pole is 4mm X 4mm walnut. I cut them to 5.2cm long and rounded the end at the brackets per the plans to allow them to move up and down easily (the plans said they should be 4cm long but that length would have placed the boat too close to the hull and not allowed extra length to sand the ends).
Since the kit didn't come with any lifeboats it didn't provide guidance on rigging the lines to the boat itself. I would have liked to incorporate a block to make it more realistic but I couldn't get it quite right with the type of blocks the kit provided.
Here's a link to the lifeboat kit I purchased from a company in the UK. You might be able to use them as a substitute or to add more boats? They provide 6 boats of various sizes. The hulls are molded plastic, but I think they look OK once you paint them. (https://www.cornwallmodelboats.co.uk/cgi-bin/sh000001.pl?WD=victory lifeboat&PN=36530-HMS-Victory-1-98-Plastic-Wood-Lifeboat-Set--36530.html#SID=91). I think they sell an all wood version but they're 2x the price (as it was the version I bought were around £30, so not cheap!).
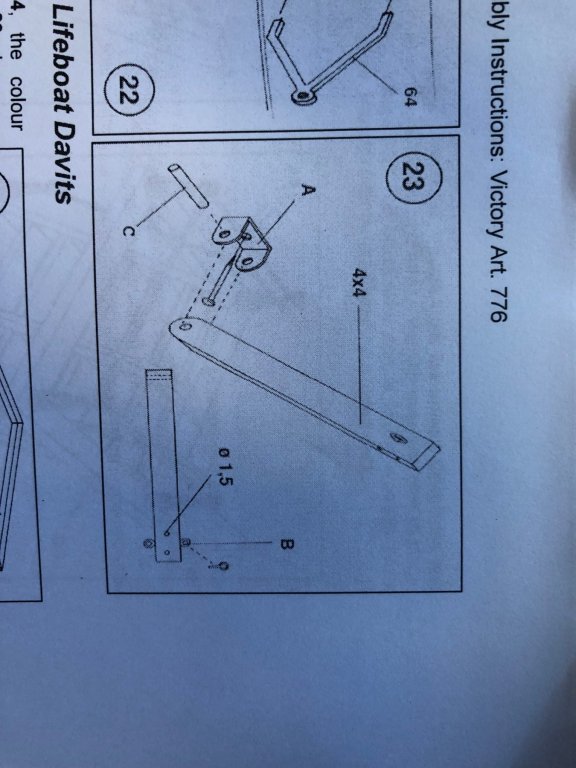
The L brackets I made are 7mm long X 4 mm wide. I drilled a hole just large enough to fit a brass nail for attaching to the hull, then put the brass wire through the brackets to hold the davit in place.

Port side davits ready for the next boat....I have to finish the channels and gun ports on that side first.
- GrandpaPhil and kier
-
2
-
I found some time this weekend to get back to the Victory and decided to keep working on the starboard side. A while back I bought the optional lifeboats for the kit, so I thought I'd take a shot at building/painting some of them. The davits proved a little harder then I thought. The kit makes you build the mounting brackets out of spare brass sheet metal. It took a bit of thinking to decide how to rig the lines and properly adjust the height of the davits and lifeboat itself (just this small piece of rigging makes me realize how tough it'll be to rig the rest of the ship someday!).

I made the mounting brackets adjustable using brass wire as pins. If I need to get the lifeboat out of the way in the future they should be easy to remove.
- kier and GrandpaPhil
-
2
-
Thanks guys, I really appreciate the comments. It feels good to be making some progress on the starboard side (until I remember I have to do the port as well!),
Cheers,
Ken
-
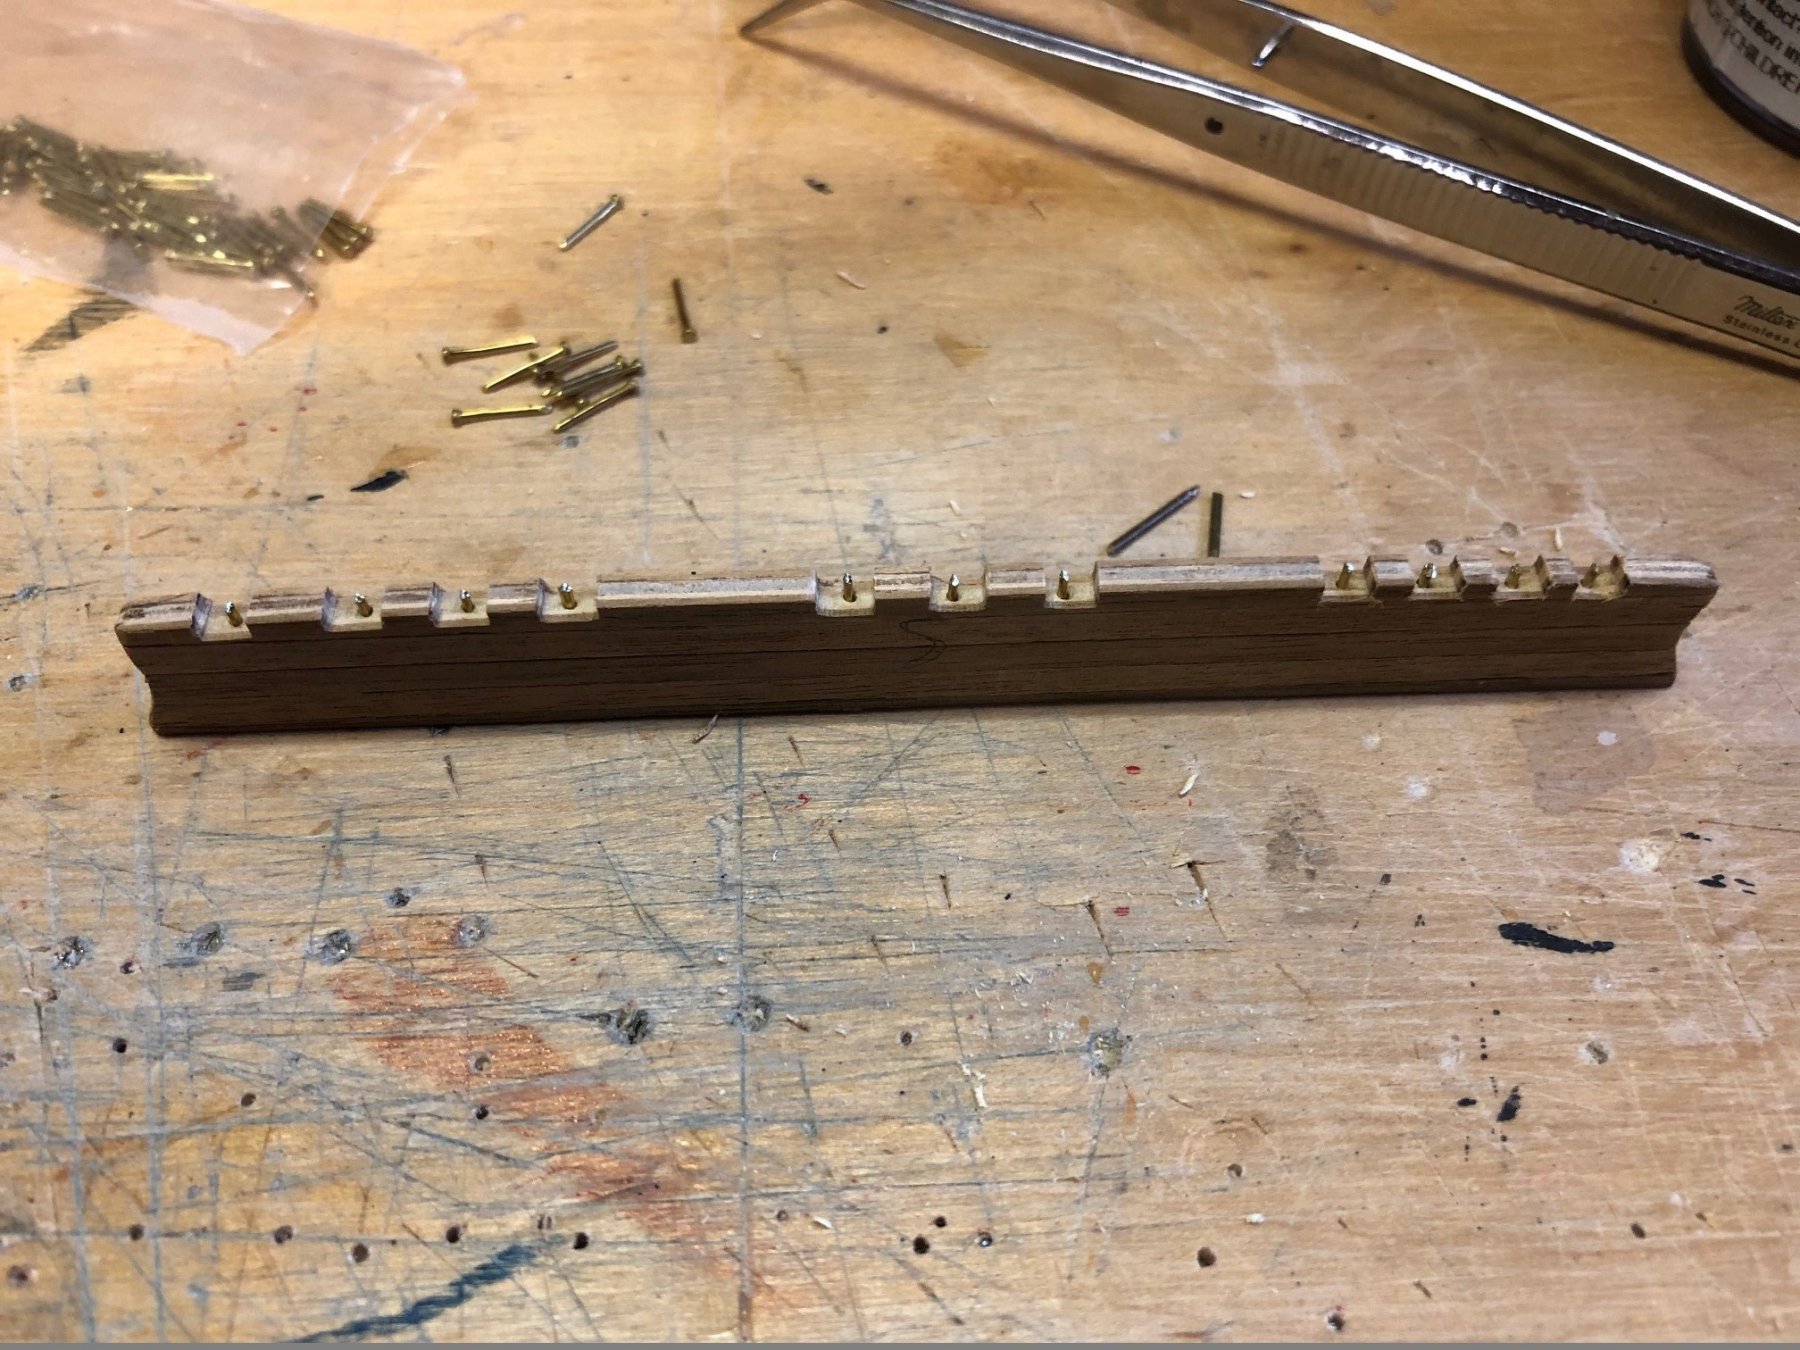
I built the channels and shroud chain plates for the starboard side. I had to figure out how to get the deadeyes and chain plate links to sit properly on the channel, so I got creative and used small nails in grooves to hook the metal deadeye straps onto (kind of like a coat hook). Once I installed them I ran a plank along the front of the channel to hold the deadeye and chain link in place. I can still move the deadeyes from side to side a bit to provide some flexibility when I thread the shrouds (some day...).
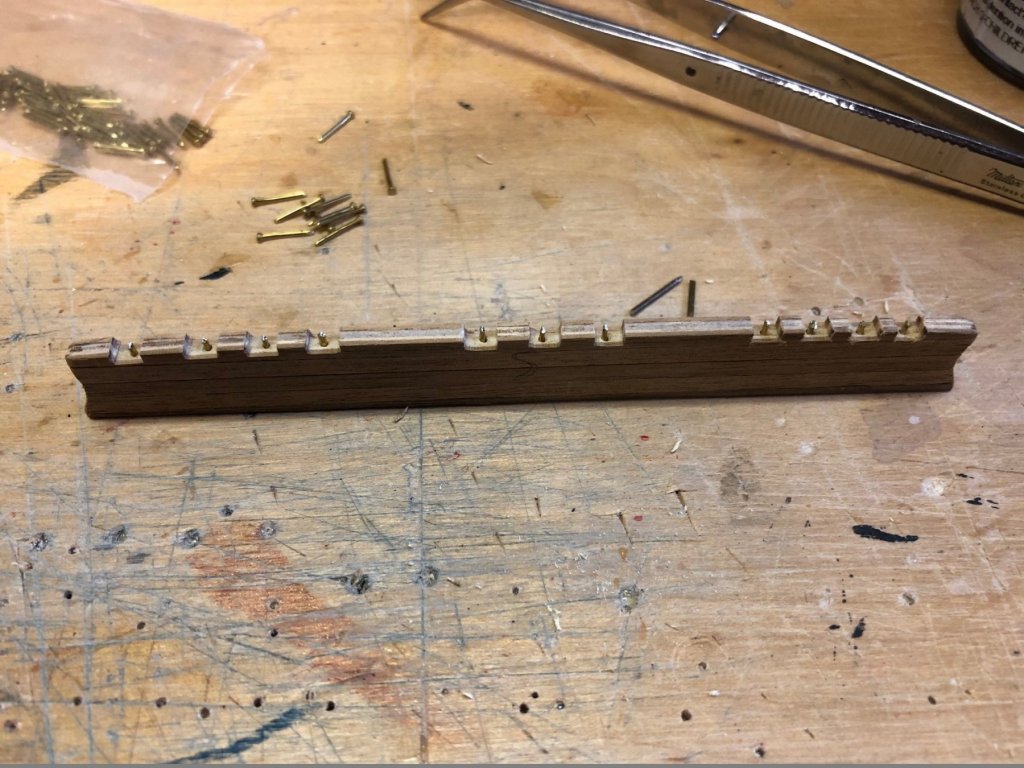
Here's the finished product once painted. I attached the chain plates to the hull with brass nails.
- Shipyard sid, kier and GrandpaPhil
-
3
-
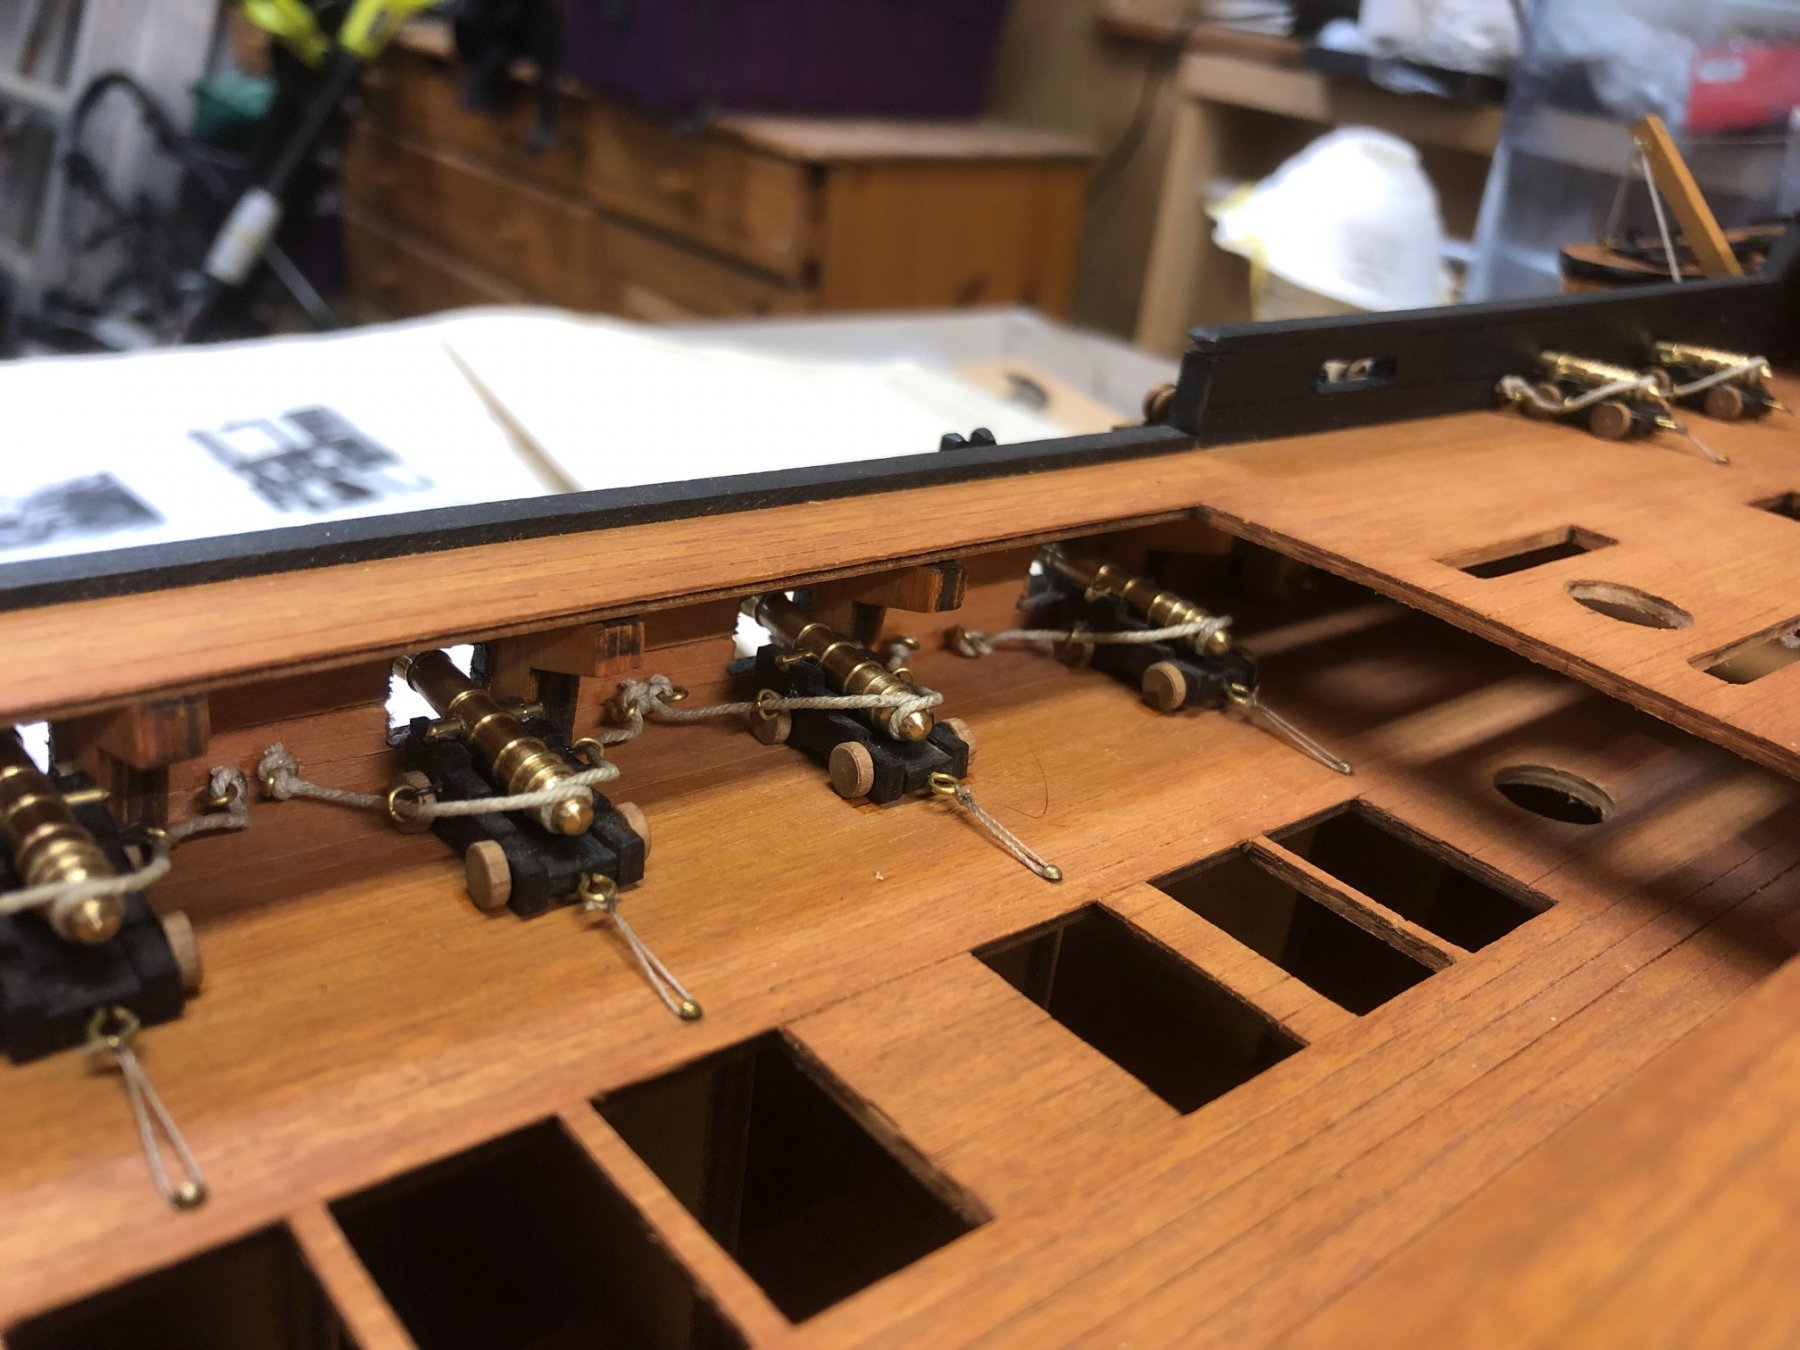
A little more progress on the cannons! I started the third deck but realized I need to build the channels before I can finish the upper cannons.
- zappto and GrandpaPhil
-
2
-
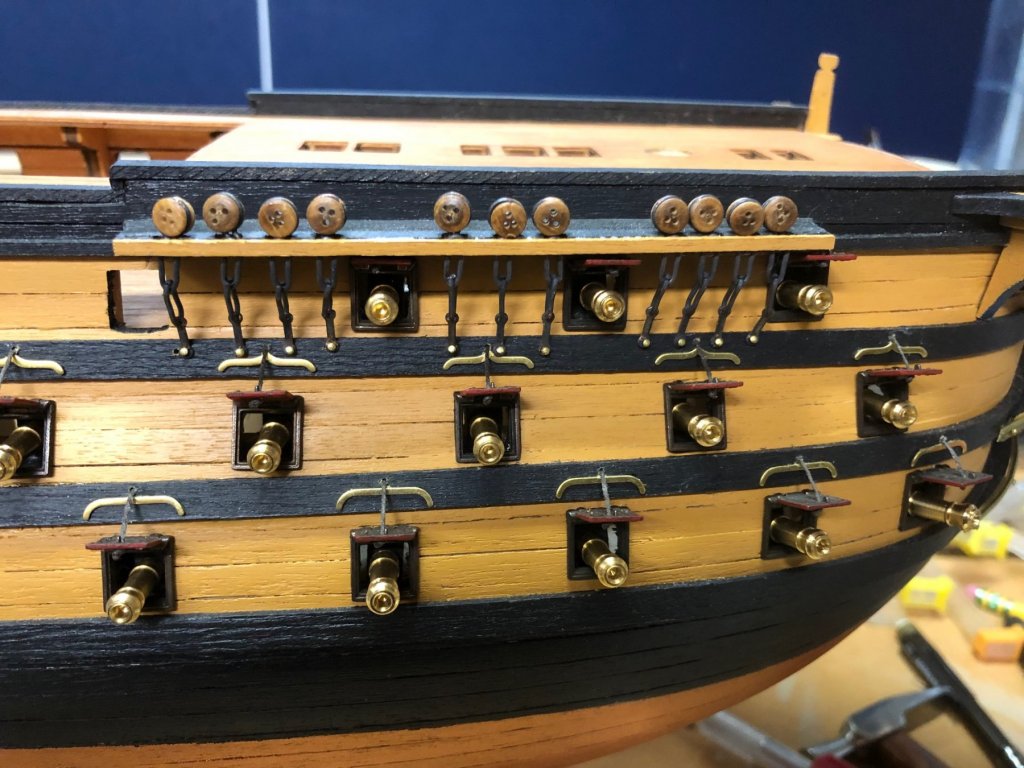
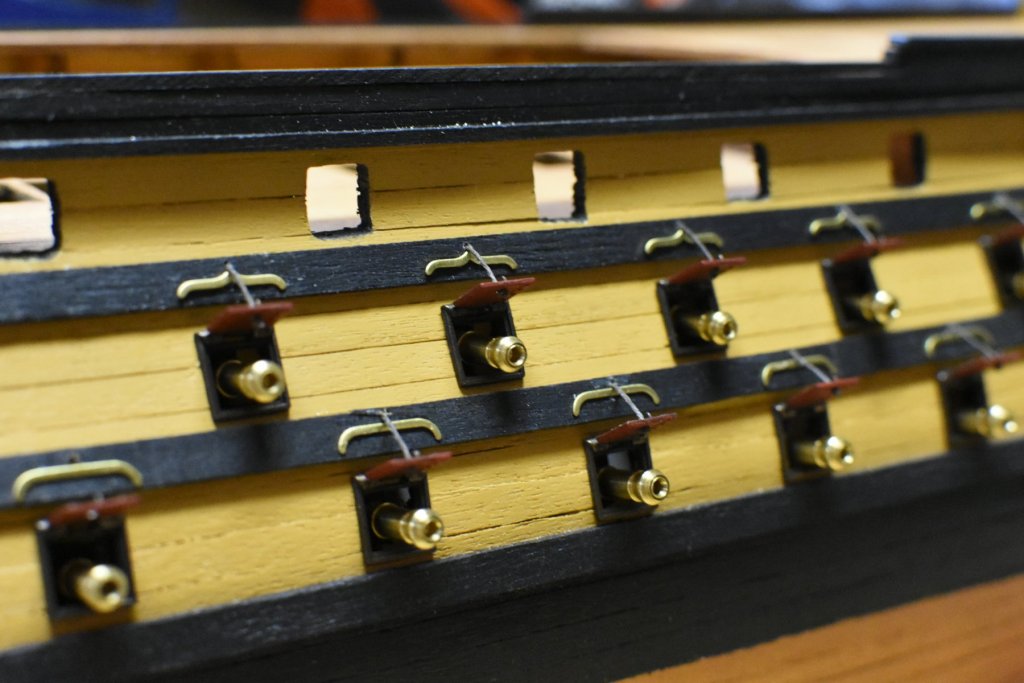
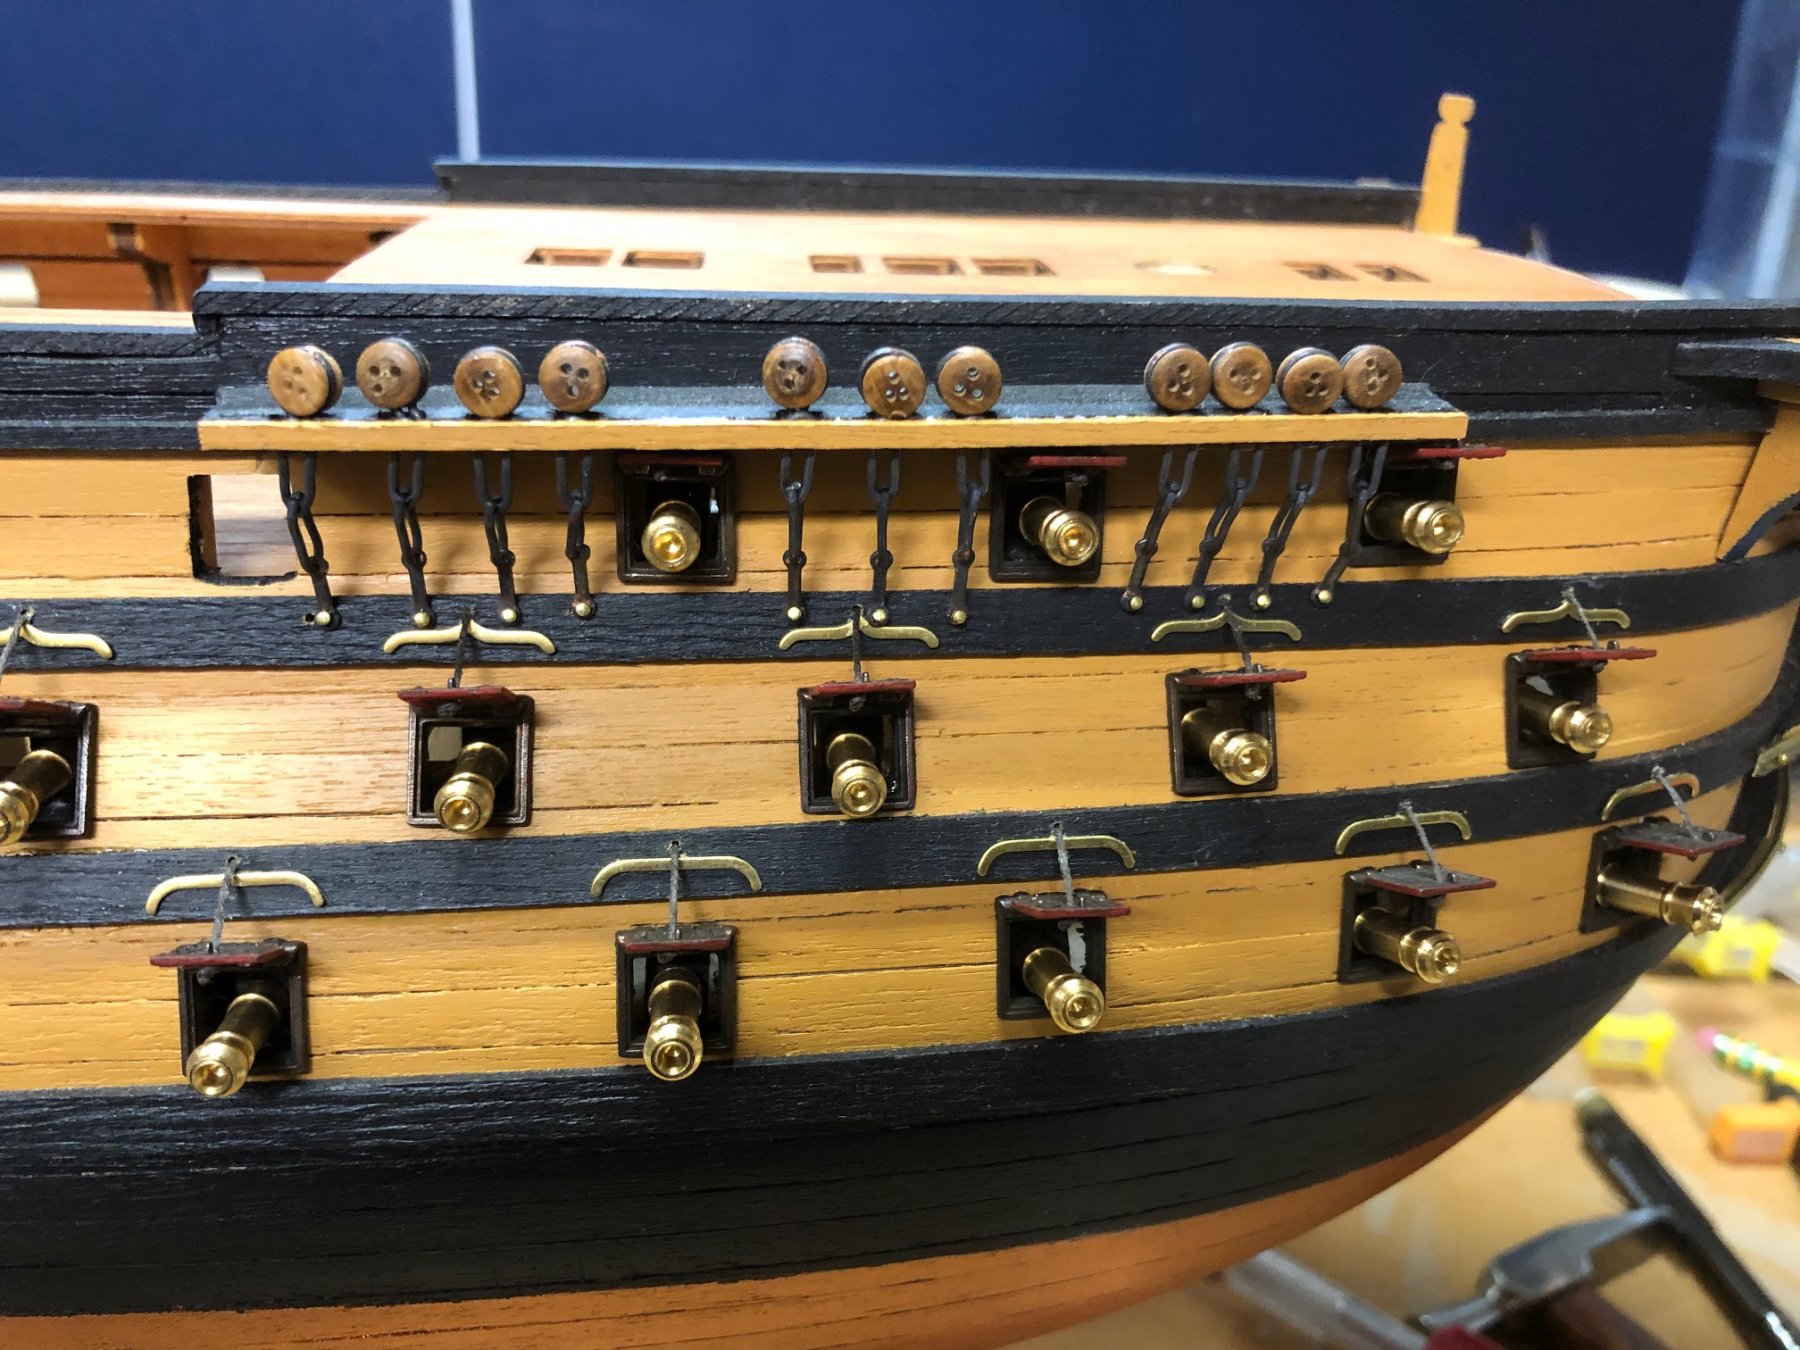
I spent some time over the holidays figuring out how I wanted to finish my gunports. To make them more "scale" and historically accurate I wanted to add 2 ropes to each port lid, however the bronze port lids with the kit are a bit problematic to drill holes through with the smaller, delicate drill bits, so I opted to only drill one hole in each lid and run a single rope. Not completely "scale" but I'm happy with how they're turning out. Now just 90 or so more to go!
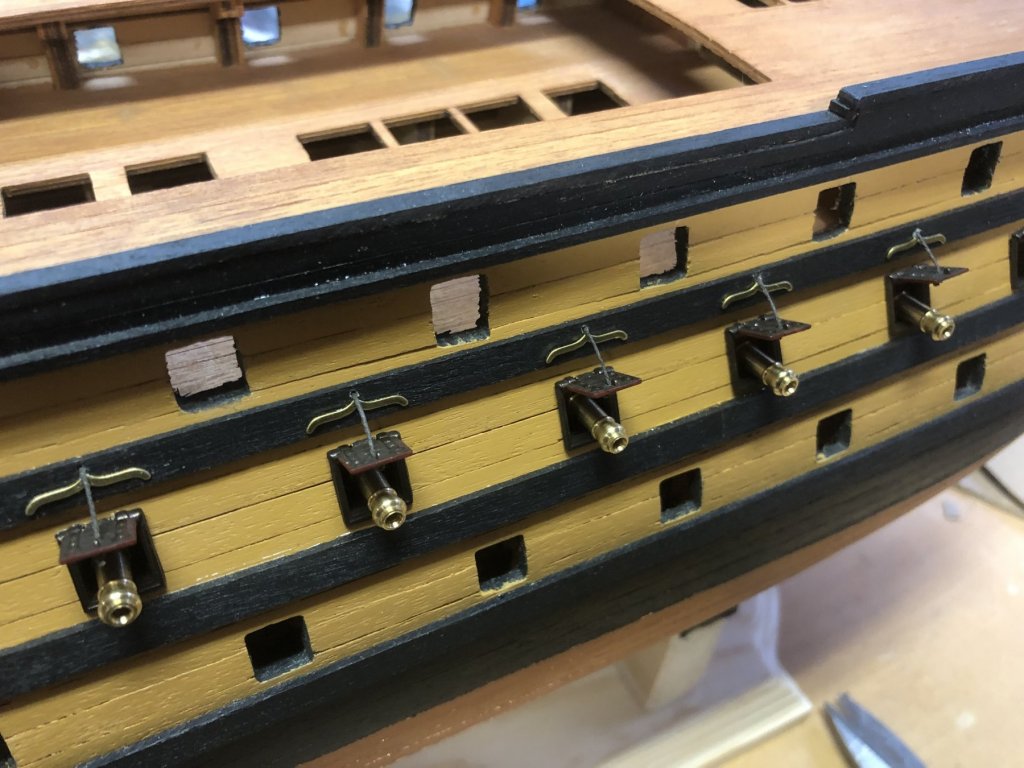
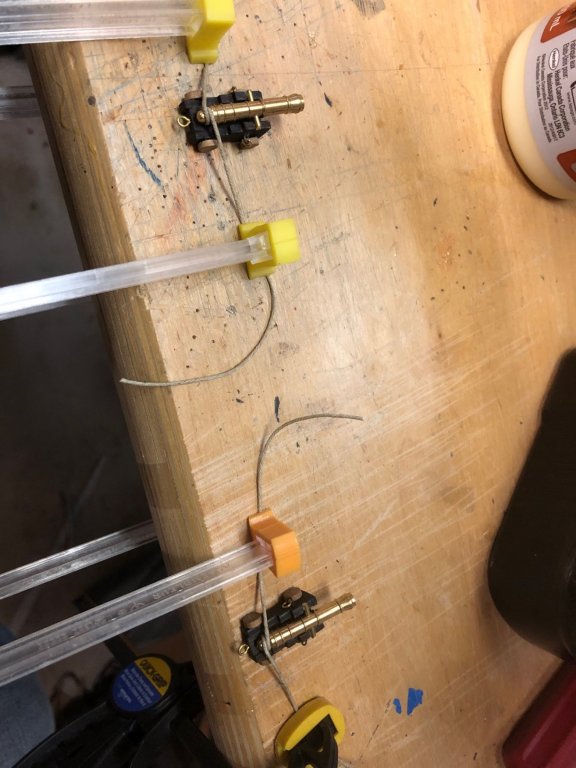
My high tech solution for holding the gunports in place while the glue dries.
- kier, GrandpaPhil and smarra
-
3
-
Thanks very much. Have a great holiday season and make sure you get back in the shipyard!
-
Finished planking, painting and installing the rudder and chains. Hope to make progress on the some of the deck features and gun ports over the holidays.

- zappto, GrandpaPhil and kier
-
3
-
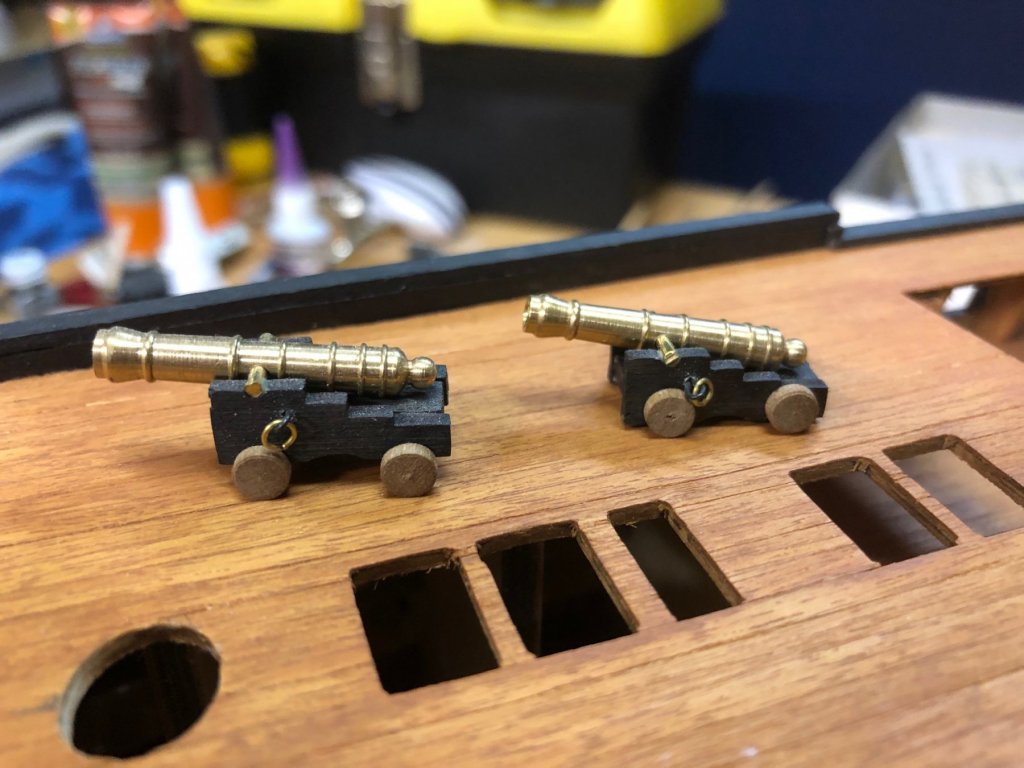
I got side tracked and decided to build some cannons to see how they'd fit on the deck (no reason other than I thought it would be fun to build them!).
It turns out I needed to lower them in order for the barrels to fit properly through the main deck gun ports. I decided to try removing the axles (cannon on the right in the pic below has the axles removed. The one on the left still has its axles). That lowered the cannon barrel just enough for it to fit nicely through the port (second pic below, cannon on the right). A big relief as I thought I might have to mess with the port themselves.

-
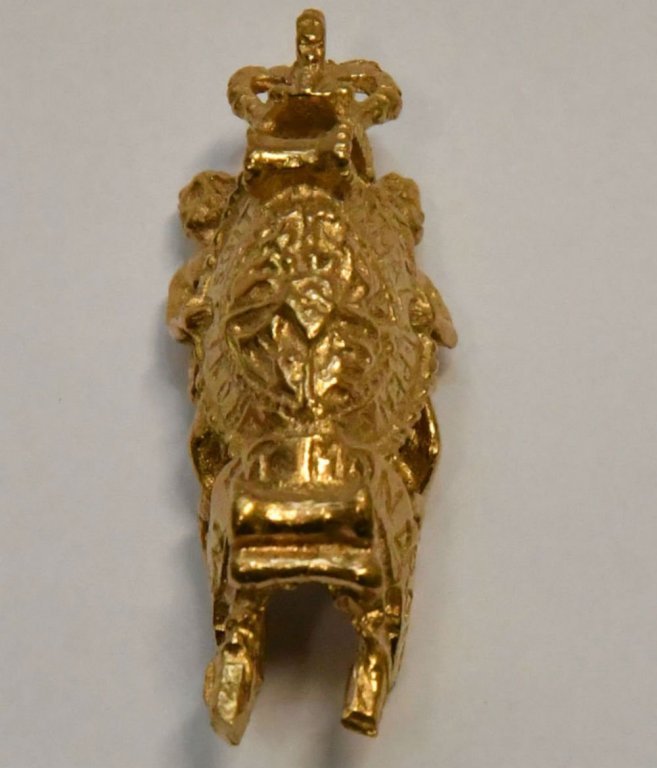
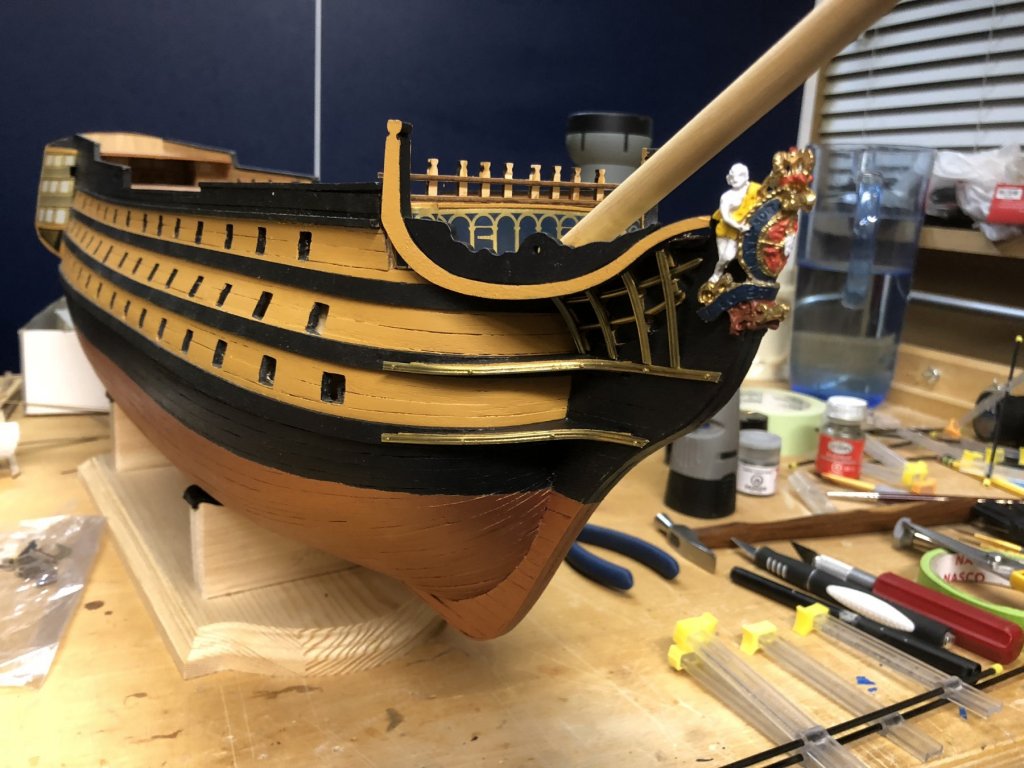
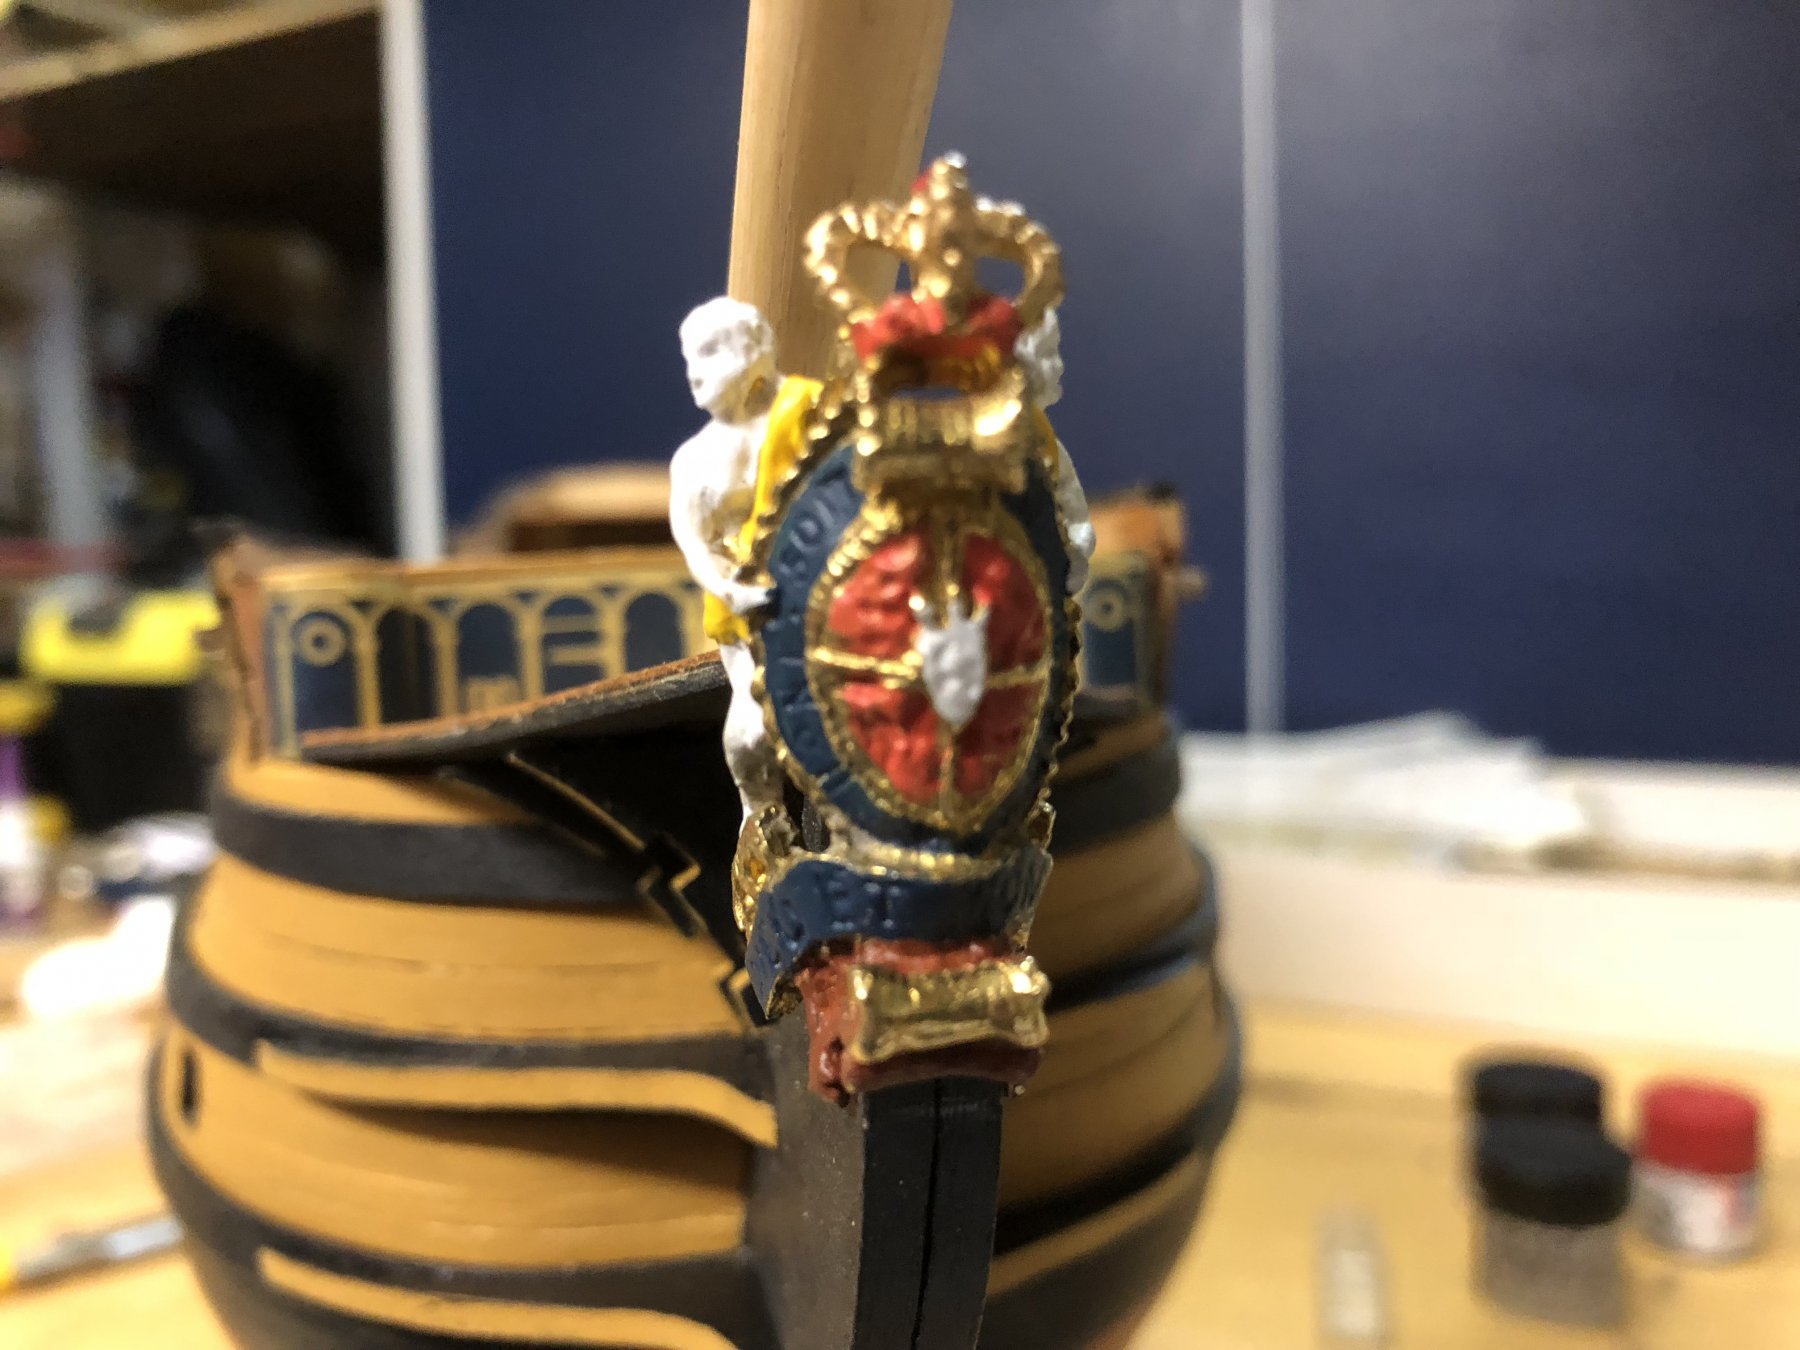
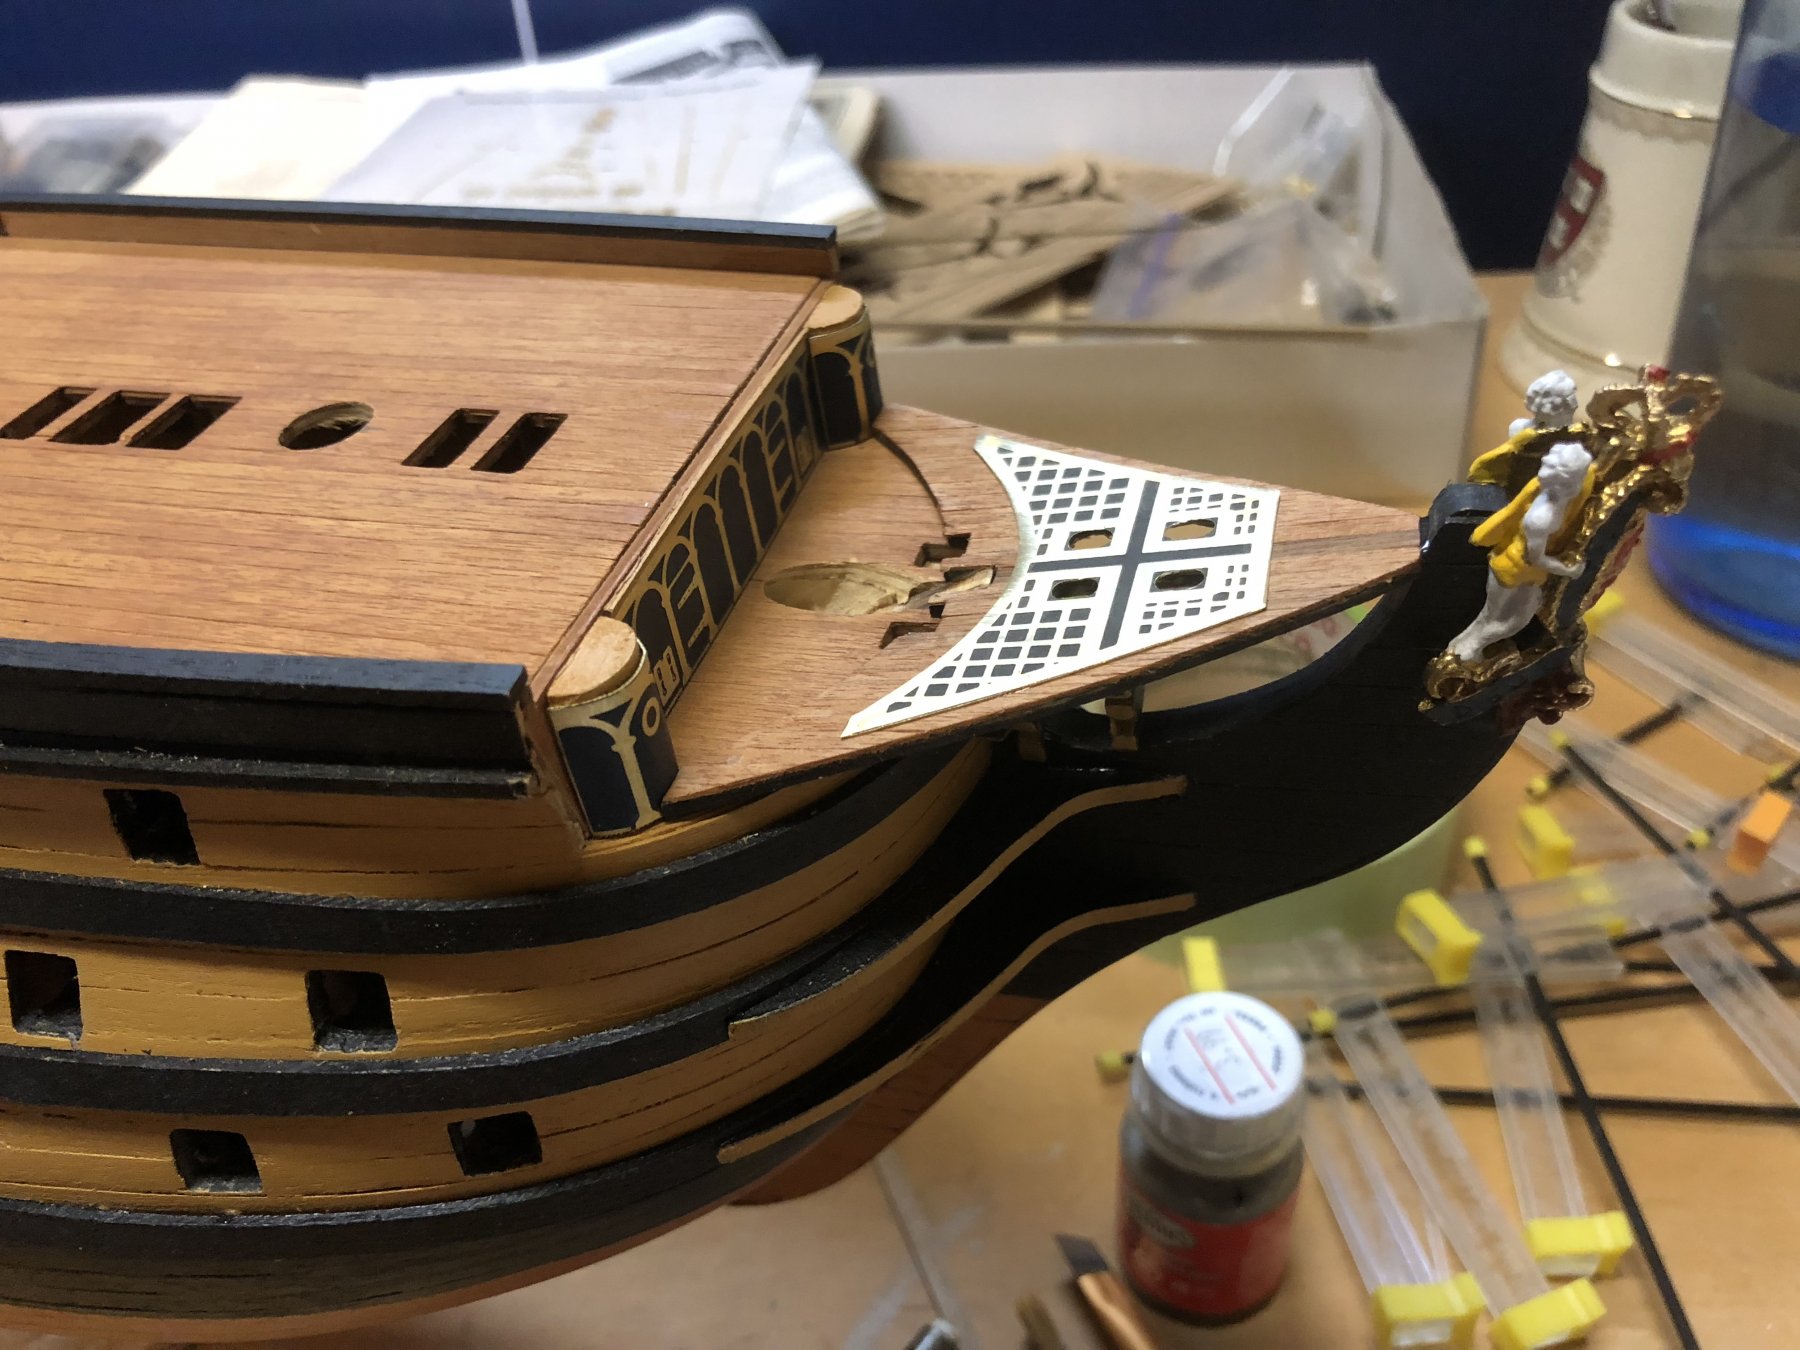
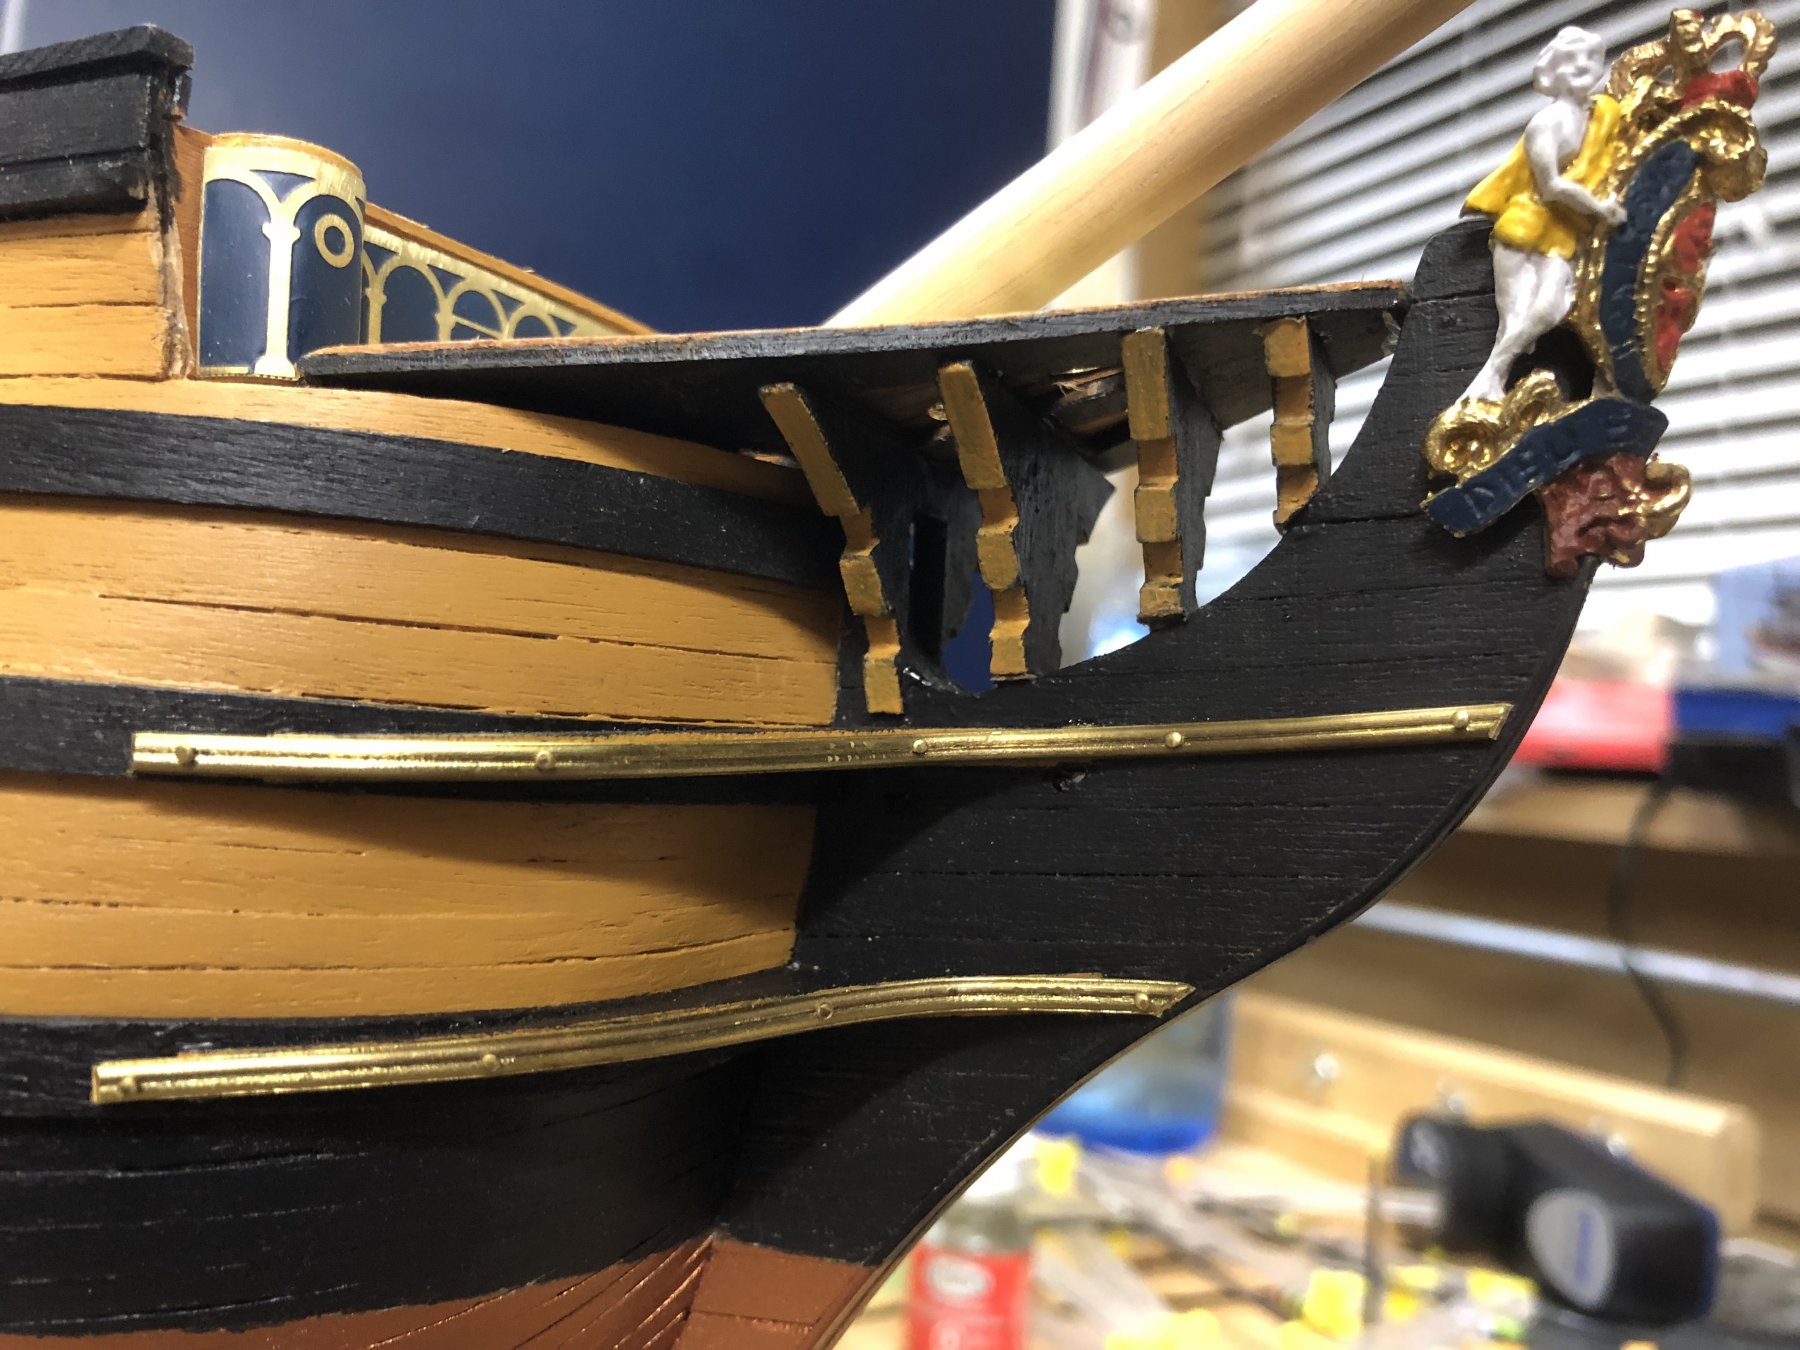
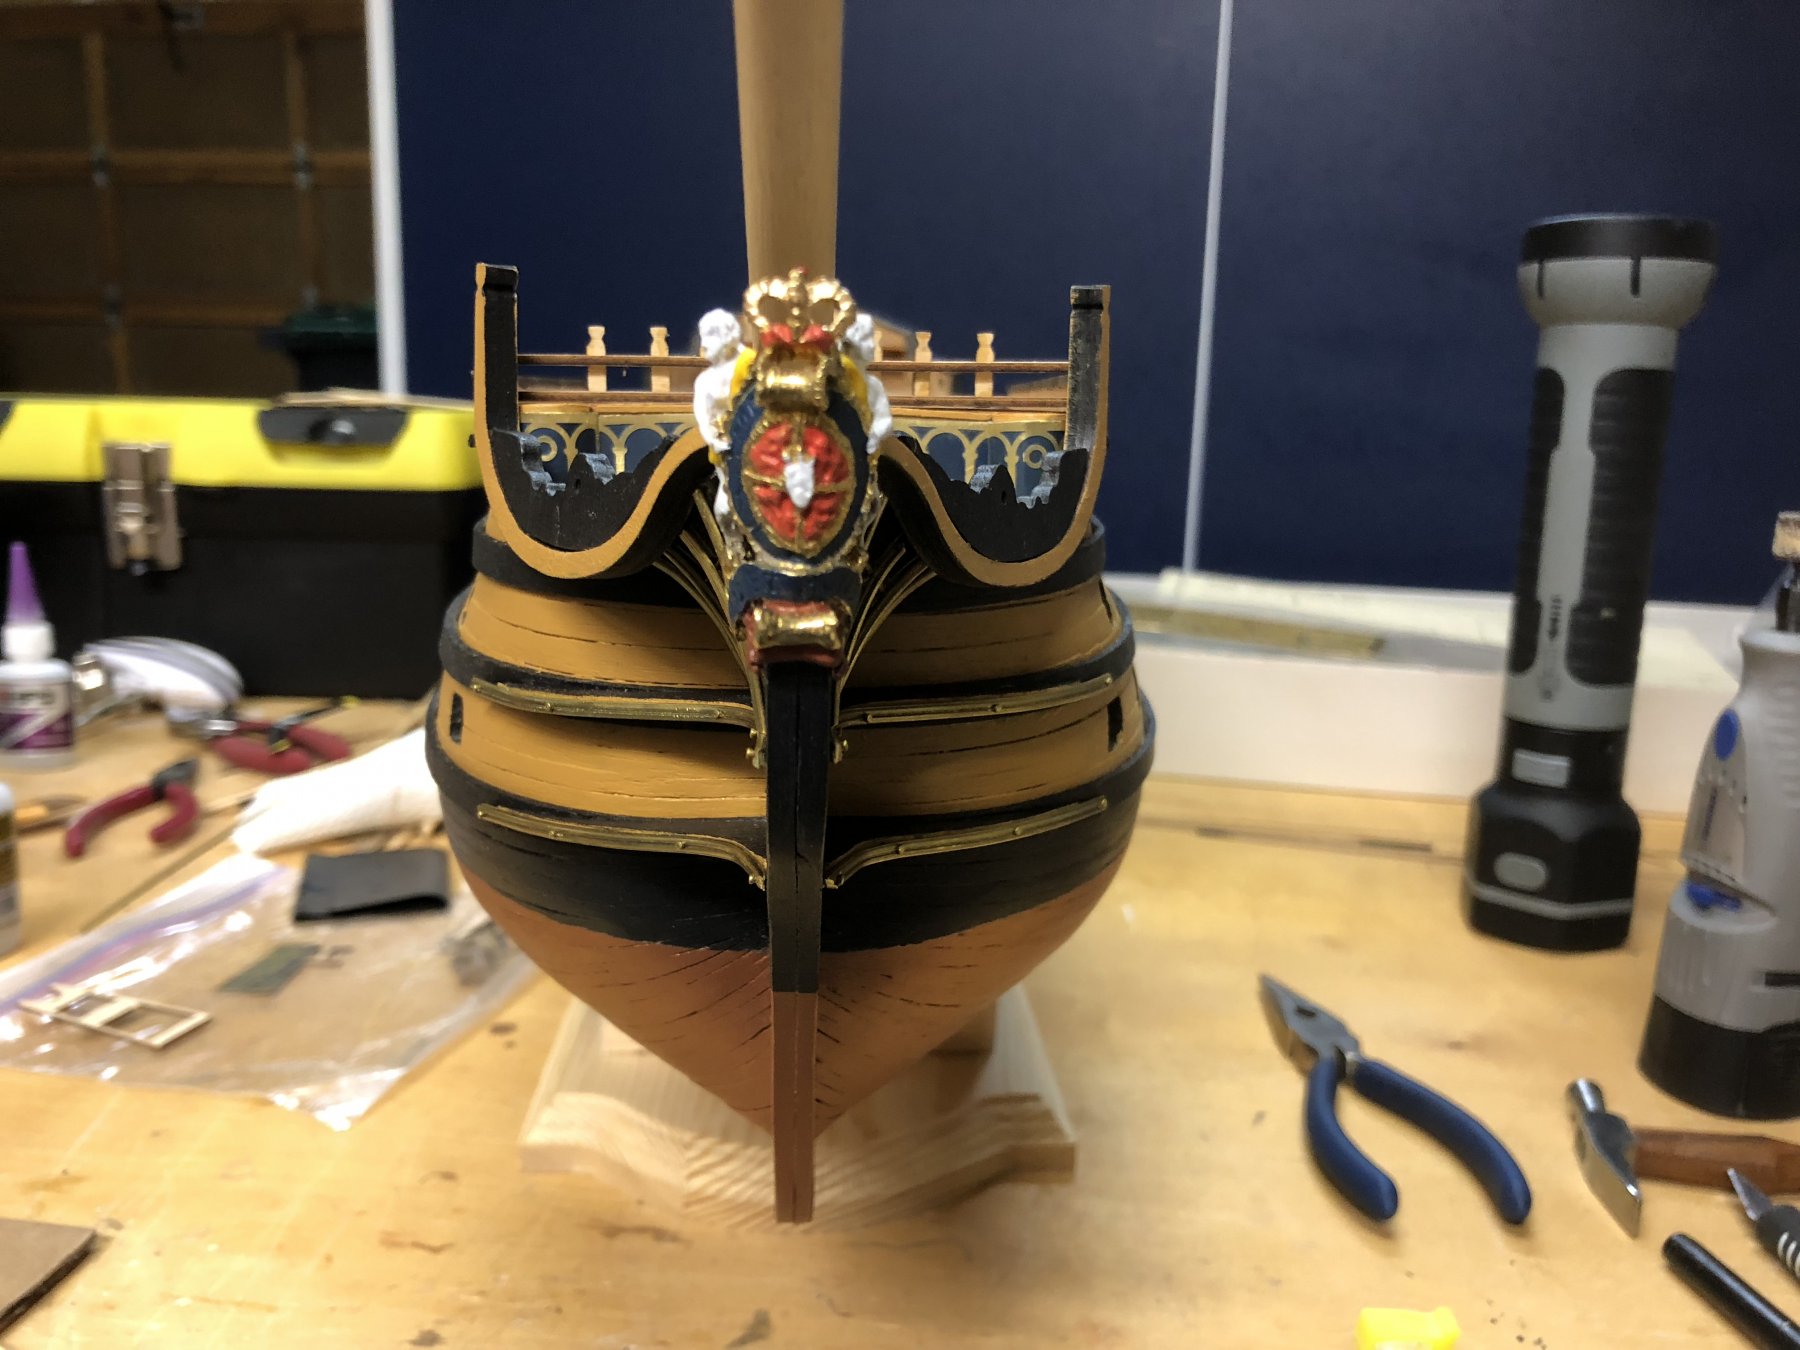
Made some progress on the bow section - started with the figurehead - here's the before & after
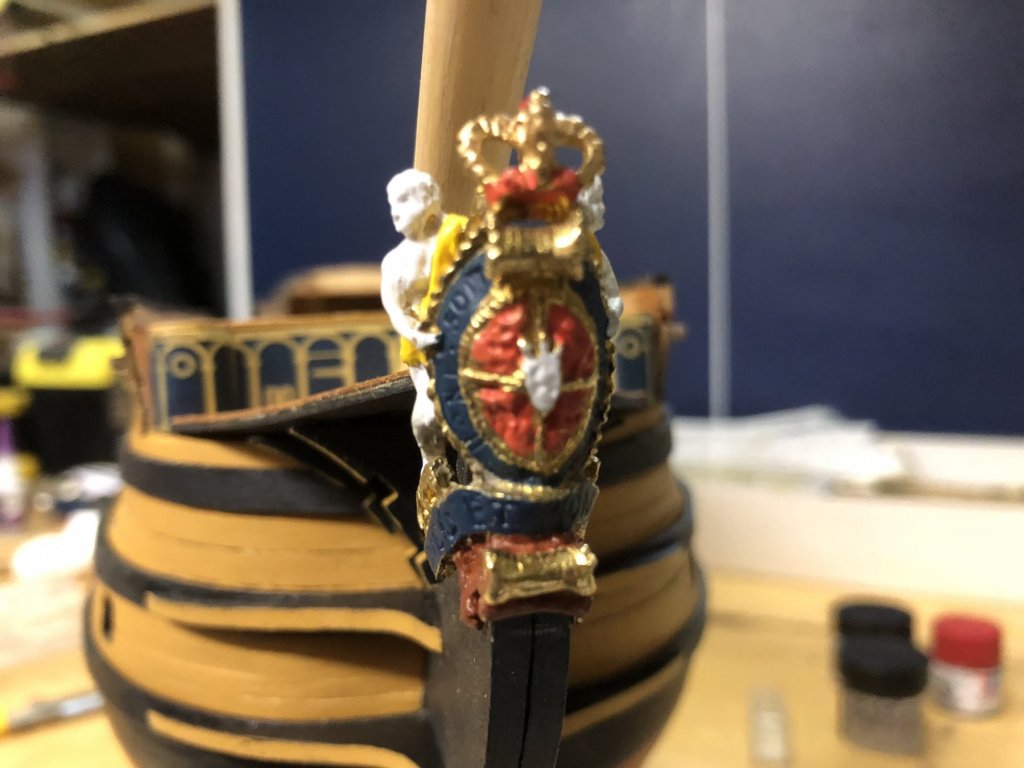
Built the transom deck, painted and added the bow "roundhouses".

Added sections under the transom deck. Bent and installed the decorative brass strips using small brass nails.

Added more decorative brass under the transom, plus the bow supports (which did a good job of hiding the imperfections in my brass pieces).


- kier, Shipyard sid and GrandpaPhil
-
3
-
Thanks very much Wallace, I really appreciate the support! Glad you like the colors! I'll keep updating my progress.
-
Outstanding work GrandpaPhil! I really like the gunport modifications. The ones that come with the kit are thin and not particularly scale. All the details you've added are a nice touch. So far I've just painted the inside of the lids red and wasn't sure how to jazz them up beyond that.


HMS Victory by VictoryGuy - Mantua - Scale 1:98 - First ship build
in - Kit build logs for subjects built from 1751 - 1800
Posted
Hi All - my apologies for the very long delay in posting and not replying to your posts. I've been distracted from the Victory over the last year by a full size boat (which has been far more work unfortunately......). A very belated thank you for the posts and your builds look outstanding.
I'm hoping to get serious on the rigging for my build this fall and will plan to start posting again. In the meantime I look forward to following your builds.