FingerSticker
-
Posts
46 -
Joined
-
Last visited
-
 popeye the sailor reacted to a post in a topic:
Cannon Jolle 1801 by ccoyle - FINISHED - Master Korabel - 1/72 scale - Swedish gunboat
popeye the sailor reacted to a post in a topic:
Cannon Jolle 1801 by ccoyle - FINISHED - Master Korabel - 1/72 scale - Swedish gunboat
-
popeye the sailor reacted to a post in a topic:
Cannon Jolle 1801 by ccoyle - FINISHED - Master Korabel - 1/72 scale - Swedish gunboat
-
popeye the sailor reacted to a post in a topic:
Cannon Jolle 1801 by ccoyle - FINISHED - Master Korabel - 1/72 scale - Swedish gunboat
-
tkay11 reacted to a post in a topic:
Revenge by FingerSticker - Shipyard - 1/96 - CARD
-
thibaultron reacted to a post in a topic:
Revenge by FingerSticker - Shipyard - 1/96 - CARD
-
GrandpaPhil reacted to a post in a topic:
Revenge by FingerSticker - Shipyard - 1/96 - CARD
-
CaptainSteve reacted to a post in a topic:
Revenge by FingerSticker - Shipyard - 1/96 - CARD
-
ccoyle reacted to a post in a topic:
Revenge by FingerSticker - Shipyard - 1/96 - CARD
-
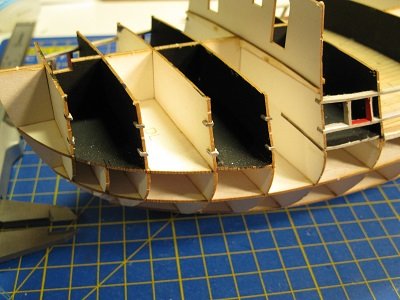
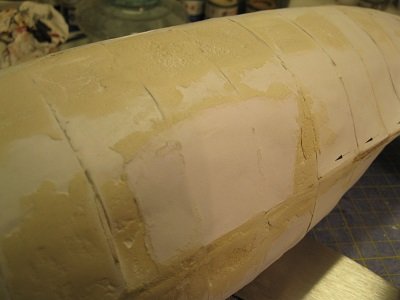
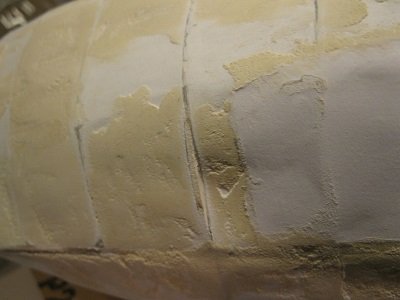
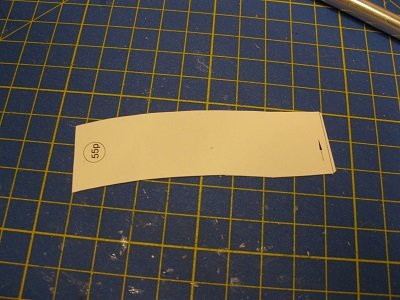
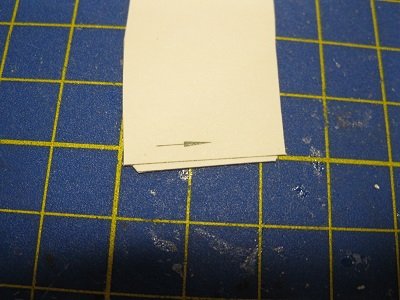
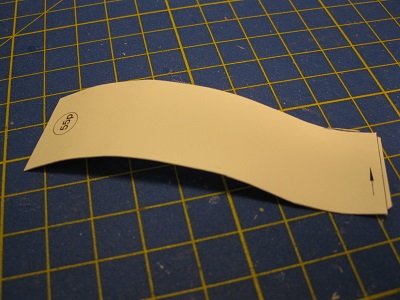
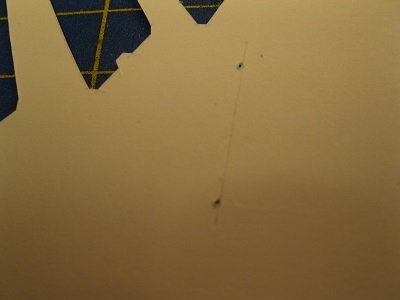
 Good evening, all! The smoke has cleared from the battlefield. I fear I must admit that upon the advice of my Commander In Chief, also known as 'Ur_who_shall_be_obeyed_at_all_times' I have withdrawn from that particular battlefield so that I can fight another battle another day. But first, many thanks for all the faithfuls, who continue to read my musings and give me at times a nudge in the right direction, just as I need it it most! Thank you, all. It IS most appreciated. It is why I show you all with the most detail I can muster. I believe that you don't learn as much from the best as you can learn from the worst. Secondly, I have come to realise that experience gained from constructing a card model of a 'modern' vessel, like a World War 1 battleship, does not guarantee that the skills learned there will be usable in all builds. When I worked on the HMS Iron Duke, adding horizontal strips worked wonderfully well prior to planking. With the Revenge, though, it didn't. It probably would have if I hadn't considered that card would need to be strengthened before laying down a second planking layer and used a water based dope for it. Water based dope not only softened and distorted the already installed first layer, but it also was made the card quite resistant to adherence of a filler. Which I thought I needed to use BECAUSE of the distortions. Having had some time to reflect on my thinking, the second layer of planking is going to be backed by 0.75 mm thick cardboard. 0.75 mm cardboard is pretty thick and sturdy. I actually don't see the need anymore to use a filler of any kind as long as the generic shape of the ship is good. And with 0.75 mm backing, the second layer is not going to sag so much (if at all) that you HAD to fill the distorted areas. In the same way, I don't think that the first layer needed additional strengthening. So all in all, not my finest hour on offer here at the moment, I'm afraid. But never the less it is my hope and expectation that even I can't screw up a well designed model so much that it can't be fixed!!! So onwards and forwards, then! Lesson one: because of the adhesion problems you deposit filler much thicker than you would normally do. And because you have thicker layers, you need to spend a lot more time sanding it down. Which creates more stresses on the card underneath to the point that the card comes away from the frame and is pushed inwards. On the left is a rescue attempt where a piece of paper is glued on top of the created hole, only to find that the section next to it is as badly stressed and will sink in too if you handle the model too much during sanding several times. Which would require more filler to fill the holes and more sanding and then you may have plugged that hole..... ... but then another one appears because of the additional handling. Note that if I had originally used the vertical supporting strips along the frames, this would have been prevented as the card is supported along the whole frame, not just in a 5 mm section. So mental note made: Use VERTICAL strips next time! Also the additional handling played havoc with the unprotected card at the top. Not a serious problem as all white area is going to be covered with one or two layers of card, but still. It would be nice if the covering card had something to cover/adhere to. Although by no means perfect, the overall shape of the model is decent enough to stop filling and sanding (or so I think) because I don't want to create more damage, in fear that it might have become irreparable. So I close off this section of the build (with the tail between my legs) and look forward to the next stage, the construction of some more gun carriages! Yay! Well, as an Austrian man in the US once said: "I'll be back!"
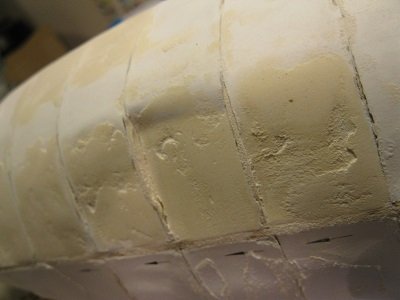

-
CaptainSteve reacted to a post in a topic:
Revenge by FingerSticker - Shipyard - 1/96 - CARD
-
CaptainSteve reacted to a post in a topic:
Revenge by FingerSticker - Shipyard - 1/96 - CARD
-
Goedemorguh, Marcel. Wees welkom!
-
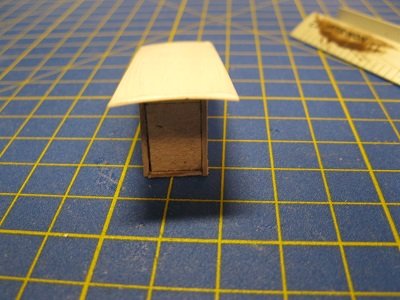
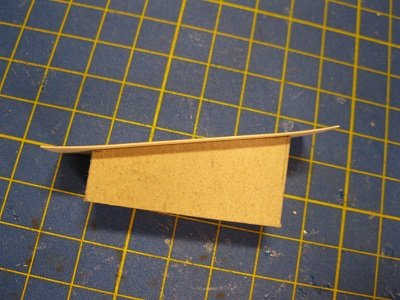
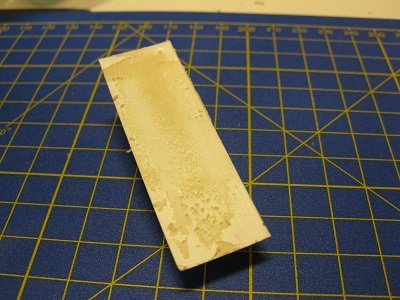
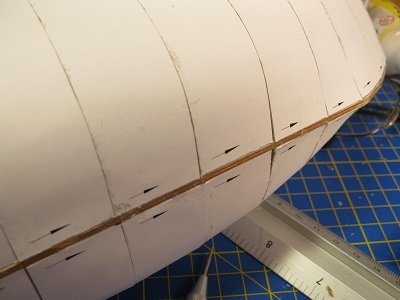
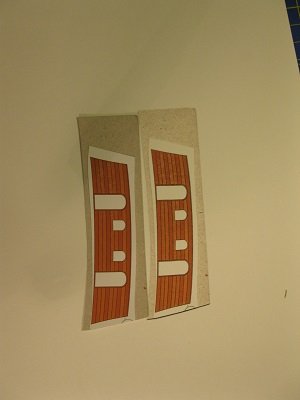
Good evening, all! Hope we all survived the holidays as well as can be expected and I hear this year that last year Richmond didn't get a white Christmas ..... again! If it makes you feel better, Richmond, neither did I .... again! 😢 To make matters worse, this new dope didn't make it fun at all, as Ron predicted, but more about the dope-situation later. There's a lot to show about the work that's been going on in Leicester, so without further ado ... I hope you all remember that i was going to check to position of the first planking layer with regards to the inside wall pieces. Most of them were quite spot on, another show that the design of this ship is A**! Using the windows in the inside card as datum points I got almost perfect fit on the aft section of the planking card. The front section was already in place and fitted well too. Just the middle section was out. Way out even. It was so bad, that I decided to perform some corrective surgery on that section, even though I said in the past that the fit would not matter that much. But if the windows are badly out of whack then the above lying railings will be out of whack too and it would be much easier to rectify the situation as soon as possible. So a quick flick with the knife in the right position and the offending section was cut away. You can see on the right, where the bottom of the red card lined up with the glue line, that there was a discrepancy of 1 to 2 mm. Using the windows as guide and glueing down the red card (after careful bending) gave a much better looking situation. It also gave an improved situation because the wall was slightly bigger than the red card so it would give a little ridge to use when glueing down the section to the forecastle area. That worked so well, that I decided to do the same for the right hand side, i.e. glue down the red card in the correct position before glueing the planking card into its position on the right hand side. But more about the right hand side later. This was the time that I thought it best to try out this new dope on the now completed left hand side. As I had no experience with this new fan-dangled dope that doesn't smell but is water based, I decided to create a little platform to try it out on card. A simple box with the sides kept free combined with a slightly oversized piece of standard card. Since it IS card and the dope is water based, I thought it best to try it neat, i.e. undiluted. The liquid was quite thick and opaque and smelled of nothing. So, at least that part was as expected. But it brushed down without a problem and stayed basically on top of the card. Since this is the strongest I can use this liquid, I was interested to see how much pull this would create on the card after drying. Which was not nearly as much as I expected or hoped for. I must admit I found the distortion underwhelming. When tapping the dried card with a pen it pinged slightly like a drum but nowhere near as much as I remembered from the old dope on my balsa aircraft. So, is this new dope like all the other replacements for environmental reasons, and not work as well as the intoxicating and 'dirty' old stuff? Or did I not use it correctly? (To be honest, not having tried the old dope on a card model like the one I am working on now, it could also be that dope (either version) doesn't work that well with card and cardboard.) I decided to follow the manufacturers ,made a 30% solution in a little tray and used that on a piece of card as well paper. Well, that worked! The card piece still showed a little amount of distortion as before but sounded a lot 'pingier' when struck with a pen, whereas the paper behaved as expected and rolled itself up during drying. I reckoned the dope needed the water to be absorbed more, i.e. get more into the card rather than just lay on top. That would be good, because I tried some filler onto the neat dope card. After drying I could rub off the filler just with one finger! Obviously this filler doesn't work on dope and to use it I would have to sand down the dope layer, which would probably also remove the strength improvement that I was after! Seeing the limited distortion on the card I felt confident to trial the 30% solution on the left hand side of the model. Well, it's not an unmitigated disaster. 😢 And the surface is tougher so that at least worked. It was only now that I realised that I did all trials with 0.3 mm card and the bottom pieces were 'only' 0.16 mm thick, so more like paper (0.08 mm) than the card and would therefore want to roll up more like the piece of paper in the trial. It should still be fine, since I needed to fill that side anyway to get rid of ridges and gouges. It will just need more filler to also fill the card depressions. I decided to continue the planking for the right hand side whilst considering what to do with that side coating-wise. I fitted the middle section this time first after glueing the red inside piece to the planking piece as I did on the left hand side, then offered it up to the side of the ship, bend the pieces by hand to get a snug fit then glued the piece down. I let that dry thoroughly before adding the forecastle front (part 62), which required a little more finger bending of the front of the planking sides to fit with the angles on the front piece. During the placing of the planking piece on the right hand side I found a number of frames that had been completely covered by the bottom planking pieces and left the ridges of this planking pieces unattached. Next time I will not use horizontal strips alongside the side of the ship but glue down a 1 cm wide strip of paper vertically along all frames which should give all sections a wide enough area to attach to on either side of the frame. And since both sides need a relatively heavy filler load anyway, I decided to learn a bit more about the dope. Was there a magic concentration that would work? I decided to try a new concentration, one that would lie in the middle of the ones already trialled (i.e. a 100% and a 30% mix). For the mathematically interested followers, I decided on a 65% solution, which I mixed up by transferring 13 ml of dope and 7 ml of water with a 5 ml syringe into a little container, mix it up and slap it on. There are still distortions after drying, less than before but still clearly visible whilst leaving a shine on the card, showing that there was too much of the dope being left on top of the card. The card is stiffer than it was with the 30% solution (the ping was higher in pitch) but stiff enough? We will have to see how this will affect the placing of filler but that is for later. On the whole, I am not impressed by this 'eze dope', even though I do not have a reference to place against it apart from some memories from the past when using 'stinky' dope on tissue paper. As said before I do not know whether it would work at all with thicker card so I might have just barged through an open door. That wouldn't be the first time, I can assure you! I am relieved that my 'desire' to experiment didn't lead to a total destruction of the model that I have been lovingly working on. And will continue to lovingly work on. First i will need to add the poop deck aft wall (part O) from way, way before, then I will trim the planking cards to lie flush where needed and then it will be a glorious battle between me and a pallet knife against a ship and a tub of wood filler with plenty of sanding during the rest periods. I'll be in touch once the smoke has lifted from the battlefield!

-
FingerSticker reacted to a post in a topic:
Revenge by FingerSticker - Shipyard - 1/96 - CARD
-
FingerSticker reacted to a post in a topic:
Revenge by FingerSticker - Shipyard - 1/96 - CARD
-
It is, Richmond! You must be psychic!!! 😆
-
What can I say, Jan. It was a work in progress ... No, it still IS a work in progress. 😥 But you're welcome, re: the suggestion. And don't worry about it taking time to perfect. In a couple of weeks it will become second nature to you. well, it took me a couple of months and since I'm not the fastest kid on the blocks by far....... 😉.
-
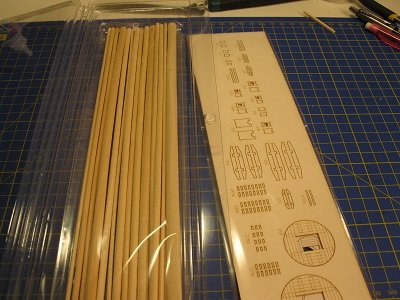
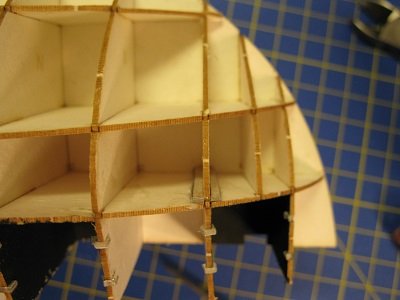
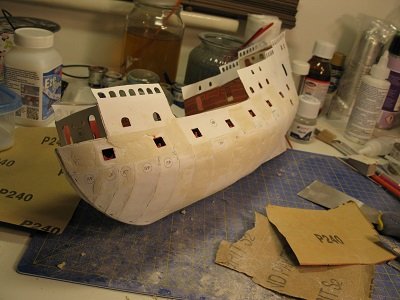
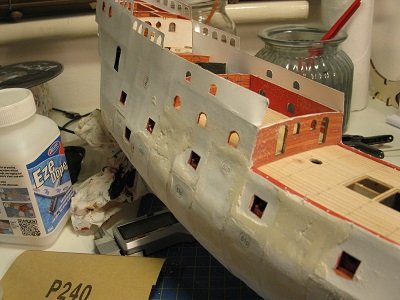
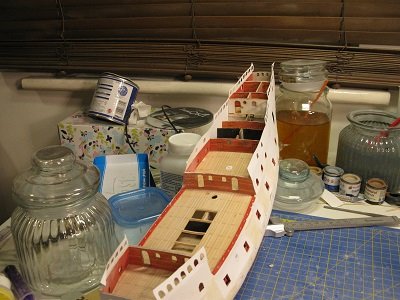
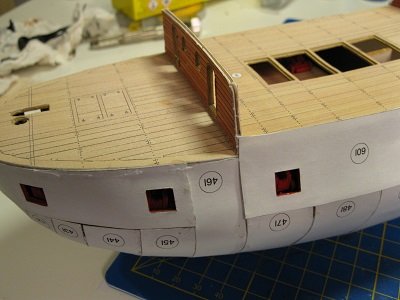
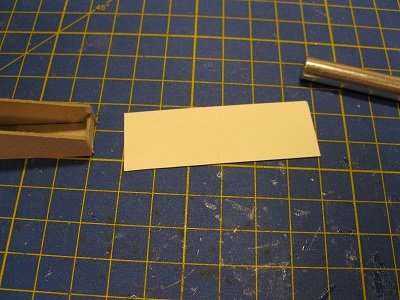
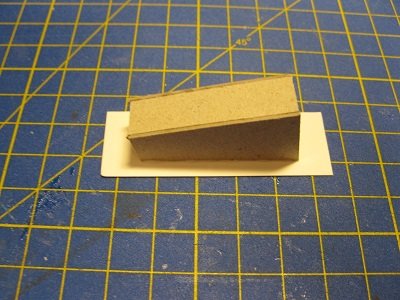
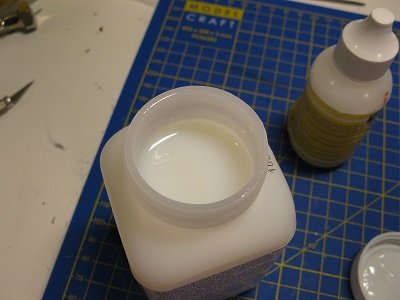
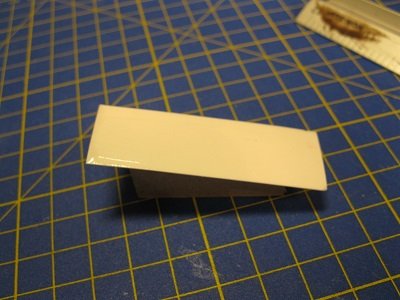
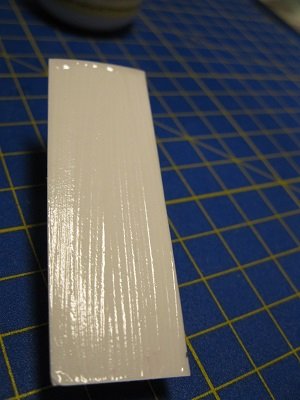
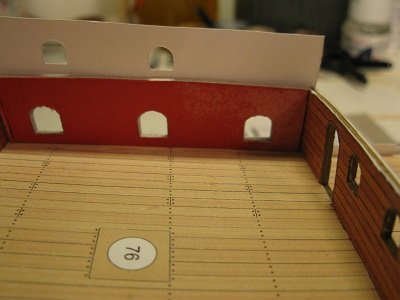
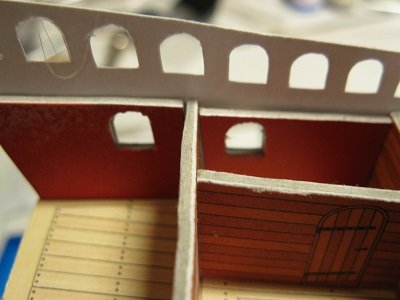
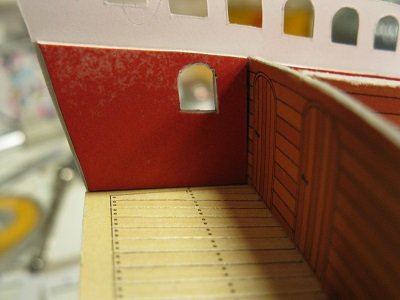
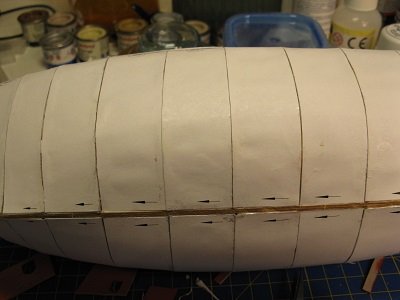
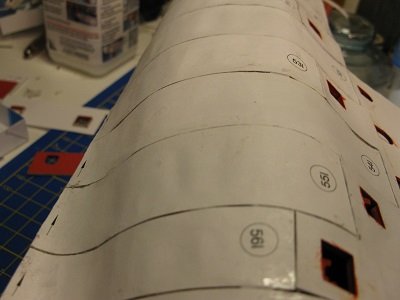
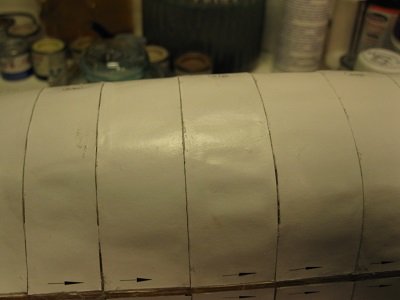
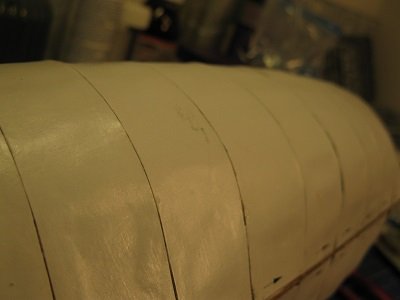
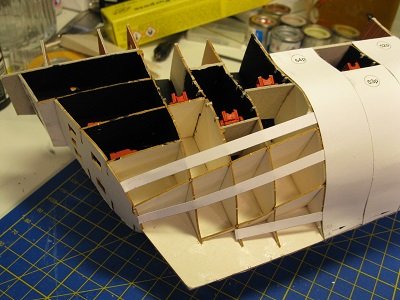
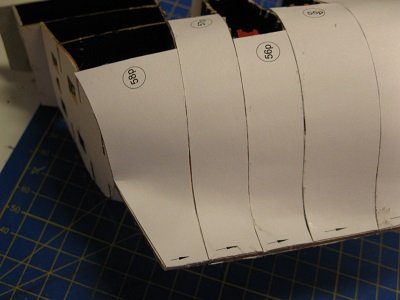
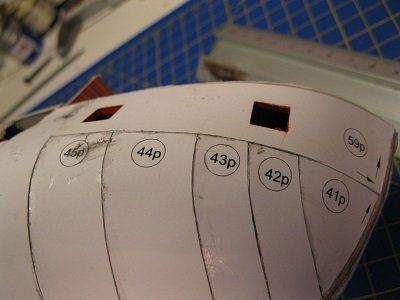
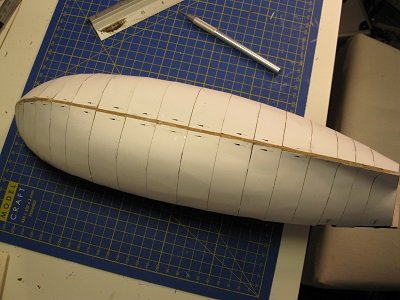
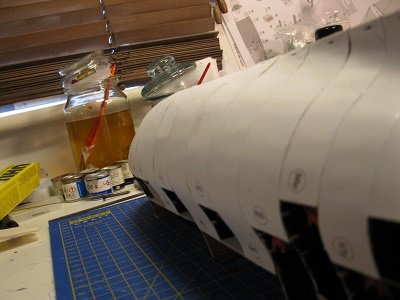
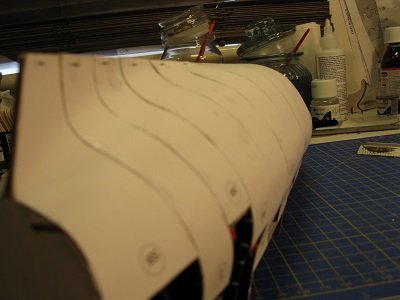
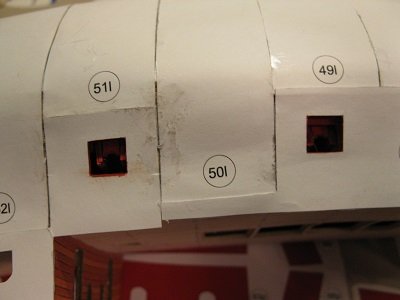
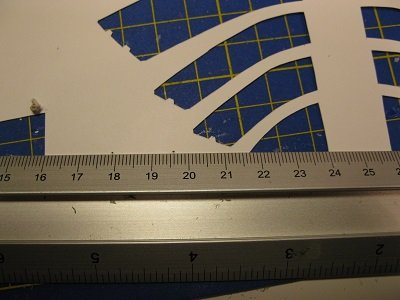
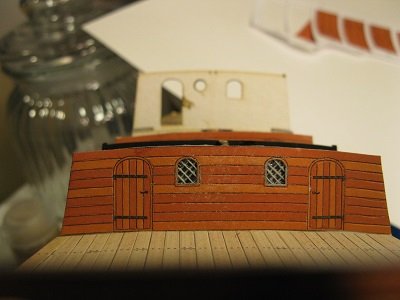
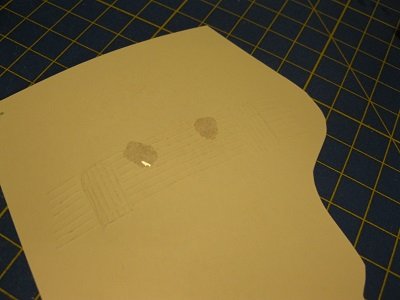
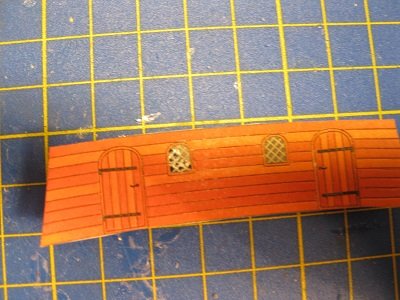
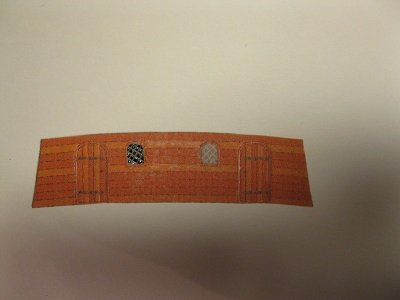
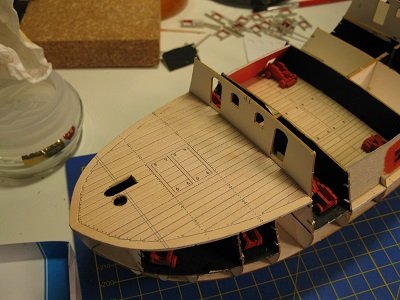
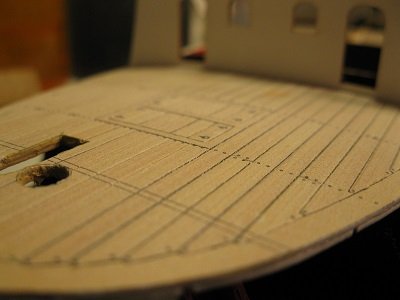
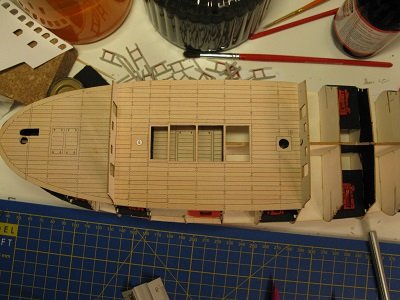
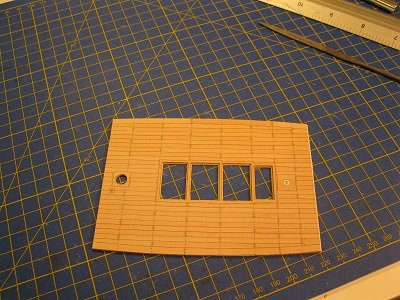
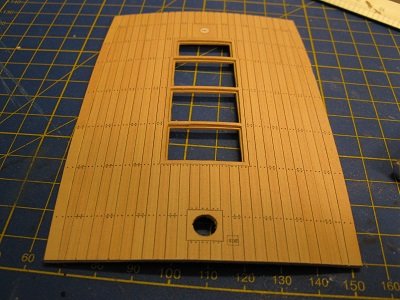
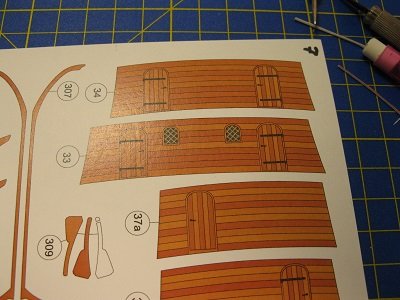
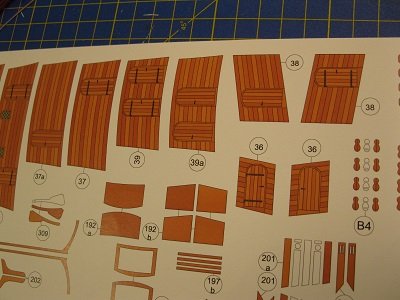
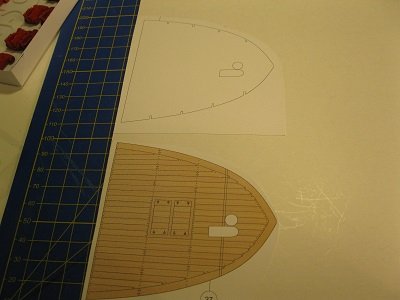
S novym godom, s novym schastyem, Kirill! Many thanks for looking in and and even more thanks for the site. I am sure to be needing a bit more detail info at later stages. And thank you, Richmond. It is a great help knowing that someone close by (when compared to the distance between our Earth and the sun 😋) Is keeping you on the straight and narrow! And also a hearty welcome to Rudolph! I thought it was time for an update. seeing that you otherwise might have to wait until the next year (doesn't that sound far away?). So without further ado, let's get cracking! Which is the whip stock, a contraption that started to be used at the time of the building of this lady and which allows the helmsman to keep an eye on the sails as he was swinging the rudder about. It consists of a simple base ... which is glued into place on the aft section of the main deck ... and the actual whip stock. which I constructed of 1 mm brass rod, which was then painted and glued into the base with some superglue. Having done that, it was finally time to lay down some planking. The planking is done in two stages, first an underlay of white card pieces, then followed by a laminated layer of coloured card strips. Because the frames are only 1 mm thick and there is every chance that during the construction some parts are a little bit out of alignment, I thought it best to use card strips, running along the frames, to give the planking pieces something to adhere to if the frame was out of whack. I used the thinnest card I could find and cut it into 5 mm wide strips which were then glued to the frames.. Then it was time to cut out the first planking piece and shape it with the fingers to roughly the right shape. Then a little glue and in it went. The fit was surprisingly good, even if I had to reduce the length of the bottom tab because it interfered with the bottom horizontal former. I was going to show you a photograph of it in place, but unfortunately all photo's taken during that session seem to have disappeared from the memory card. Sorry about that. I can pick up the story line at the beginning of the third day of planking. By that time, I had finished the left hand side, realised that even a 0.2 mm card is still showing up after glueing down the separate planking pieces and thus decided to switch to 80 gram paper strips for the right hand side. So I started the third day with this situation: and had to do four more strips like this, cut , take a little snip out of the bottom tab to clear the frames and making scoring from the back a lot easier and pre-shaping the piece to roughly the right shape. And that was really all. Using rubber glue gave me a window of several minutes for me to be able to rectify the position of the pieces to just the right spot before pressing it down. I didn't have any particularly nasty occurrences, nothing really went wrong. It all went quite smoothly. There is still a lot of work to do, though. Even though it is looking quite good, it isn't perfect so will need some filling and sanding to get a super finish. But since it is all card, I don't think that would be possible without first toughening the hull. I don't particularly want to use PVA because I don't want to wet the card in case it may distort and rubber glue would not 'sink' into the card therefor would not strengthen in. And the surface is way too big for superglue. But then I remembered the balsa planes that I constructed when I was a little nippier. You had a framework of balsa strips and pieces onto which you glued pieces of tissue paper. Those pieces were then smeared in with dope and after drying the shrunken dope had pulled all the tissue taut and made it hard enough to use as a drum. So I ordered myself some dope but whereas I remembered the heavy stinking cellulose compound they nowadays have a water-based version, which apparently doesn't stink and is much better for the environment. Not having used that stuff before though, it is going to be an interesting time. BUT, before that, there was a remaining matter of finishing off the planking. The results above were for the bottom planking bits. The upper bits are bigger pieces that are supposed to slot in the positions created by the lower pieces. A bit like a jigsaw. Only three pieces. How difficult can it be to get three measly shapes in the right position, eh? Truth be told, I had already glued in the first sections at the front after I had done the first six bottom pieces. And they turned out alright, so no sweat, right? Hmmmm. where I first thought that the shape of the created hull was ok, after glueing down the upper sections, I am not that sure anymore. There seems to be several alignment issues and where I used the door hole in the aft section to align it to the deck and I followed the left open positions by the bottom pieces, the fact that there is clear gap between the aft and the middle section shows that life isn't that simple. Which is good in a sense, because now I have to do some more thinking. I only glued down the left pieces and then didn't glue the front of the front section so there is still some movement possible. In itself it shouldn't be a big problem, because there will be thick layers of card deposited to the inside and the outside of the bulwarks and it should be relatively easy to cut out new openings for windows and doors in the planking pieces if need be but how can I work out whether they are in need of trimming? I decided to take a step back and use the fore mentioned inner bulwarks pieces to determine how well the sides fit. So that's where we are currently at. I am waiting for the glue to dry on the inside bulwarks so I can cut them out and use them as a sort-of template to check the fit of the left upper planking pieces and to use them when glueing down the right hand pieces too. When that is done I will slobber a 'large' amount of dope on the planking cards to toughen them up, then start filling the holes and nooks and crannies and whatnots and then remove most of the filler until we are all happy. Well, it's a plan. A silly but good plan, perhaps, but still just a plan, never the less. How will it turn out? Only the New Year will know! Have a great New Year's feast, ALL!!


-
Hoi Jan, I remember this from my build as well. You might be able to reduce the problem by scoring from the back, i.e. instead of making a valley fold you make a mountain fold. If the lip or tab is to be folded backwards, as is most often the case, then it is often better to mark the fold position from the front (printed side) of the card by pressing down with the the point of your awl in line with the fold line and then turn the card over and score the section from depression to depression at the back of the card. This will reduce the damage/disturbance of the printed layer. Here are some pictures of a quickly drawn example part with tabs. The last two pictures show the damage done to the card by scoring at the front (penultimate picture) and the back (last picture). I tend to remember it like this. If the part is to be folded BACKwards (away from you), the fold must be done at the BACK. I hope this will help.

-
FingerSticker reacted to a post in a topic:
Hr.Ms. De Ruyter by amateur - Scaldis/JSC - 1:250 - CARD
-
FingerSticker reacted to a post in a topic:
Hr.Ms. De Ruyter by amateur - Scaldis/JSC - 1:250 - CARD
-
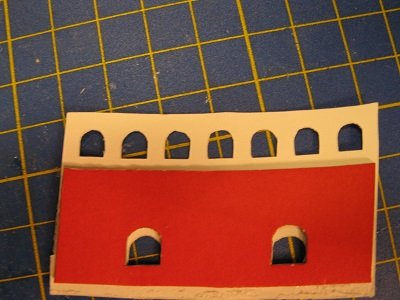
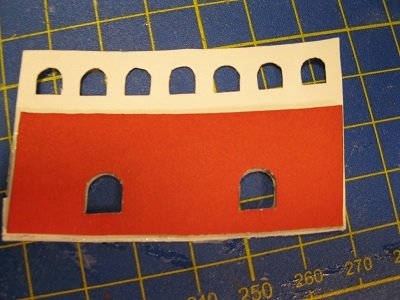
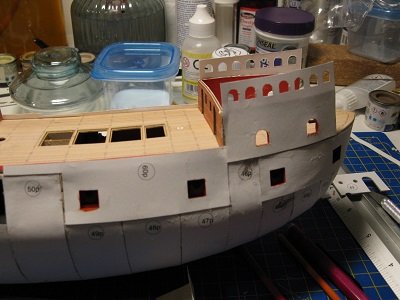
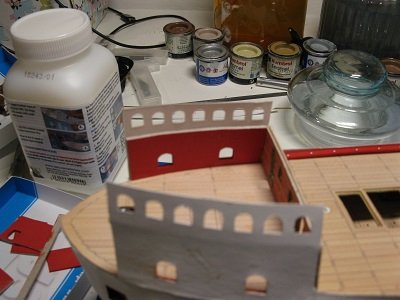
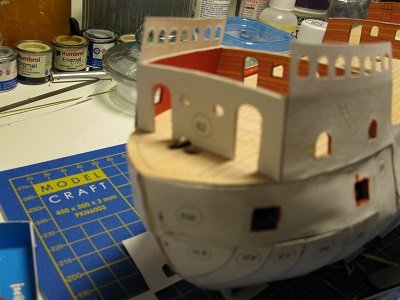
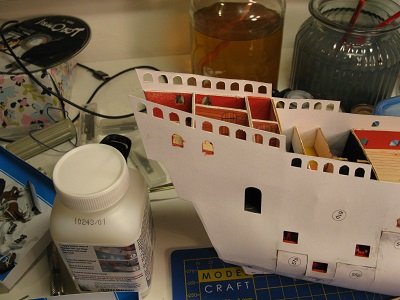
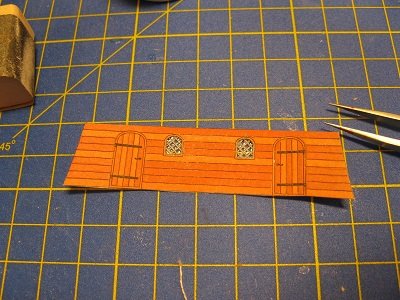
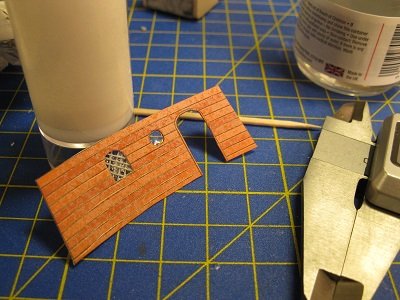
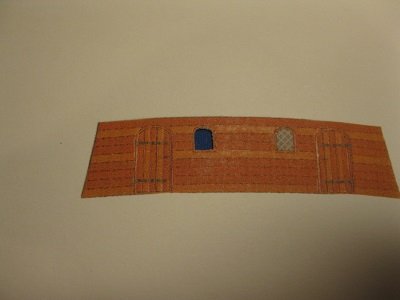
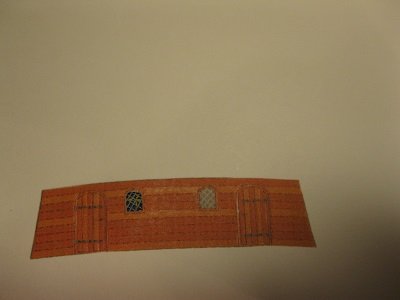
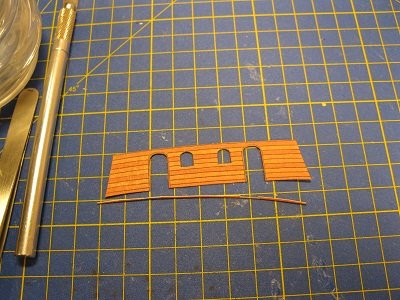
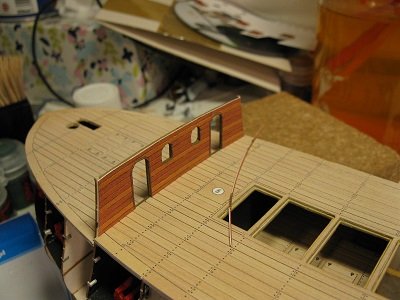
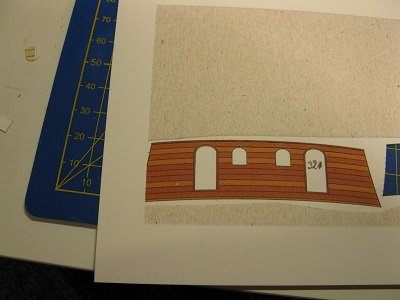
Good afternoon all. With the festive season upon us, I thought it best to update you all on the progress so far, possibly until the new year. That all depends on how much (little) time I will get during the break to work on her 'Loveliness'. But first, Chris, Ron, Phil and Richmond. Thank You for your continued persistence in giving me the 'thumbs'. 😄 As always, it is much appreciated! But time'zz a waistin, so letzz get on with it! Using the method from the previous update, I started transferring the technological breakthrough to the actual piece. You can see the effect of the handiwork when shown against a light background and a dark background and with a dark background it is quite similar to the printed window on the right apart from it looking a lot better! So dark backgrounds it is, then! The second window was treated the same way and the wall was installed. The next wall was a simple score and cut out job and quickly installed. Perhaps a bit too quick, because the previous picture showed how that wall seemed to be bumped up on the right hand side when compared with the left hand side. This was, OF COURSE, only noticed AFTER the glue had dried. The photo shows that the right hand side is not in contact with the floor anymore. I guess careless handling when the glue was still wet was the cause, or it may be that the curve of the floor was more on the right hand side. I don't think it is a big problem though. That section only hold the whipstaff/kolderstok assembly and the above deck will have a little enclosure over it to keep the helm operator/stuurman from getting wet so most of that wall will be hidden. I will have to cut the top of the card down, though, so it is inline with the frame to allow the deck to lie flat. Still, it was something I should have noticed earlier, though. The last wall was the one for the Captain's quarters and contained two windows, one like we have seen before and a round one. The normal window on the left would be treated as before and for the round one I had a plan. A simple 3.5 mm brass ring glued on top of it and a clearfix-ed window at the back. There was only one slight problem. My stack of brass bits was in a previously mentioned box, which was previously left behind by the movers when we moved house, and subsequently thrown out by the following cleaning people. So a new set of rings was ordered from Ebay, which may arrive on Thursday next week or in the beginning of the New Year. Apparently there is a festive holiday period coming our way!! Since the wall section was only for the internal wall, I decided to go ahead and install that for the moment. If the deck above it is already laid down before the rings arrive, I will just add the ring to the outside of the wall. Should still look good enough, especially because the view of the internal section will be restricted. So I used clearfix to make me a window and then added the other window as before. That 'windowing' sure gets a lot easier the more you do it!!! I had to cut off a little of the bottom of the section for it to fit in with the openings in the frame, but nothing major. Then all what was left to do is to install the internal walls, which fitted quite well. And that is where I got to so far. Thank you for your kind attention, AND ... from 'Ur_Who_Shall_Be_Obeyed_At_All_Times' and me, Till the next time!!!!! Adrie.


-
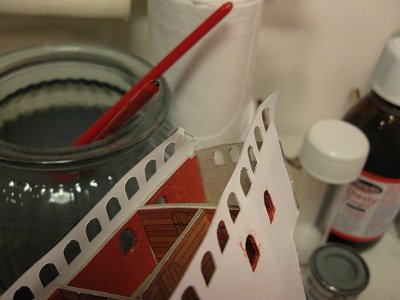
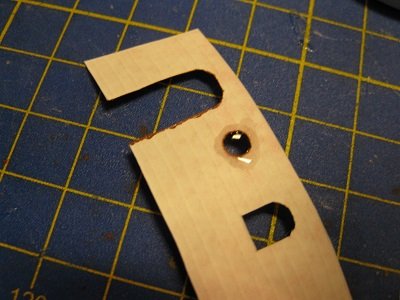
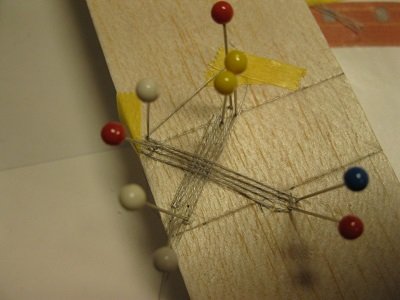
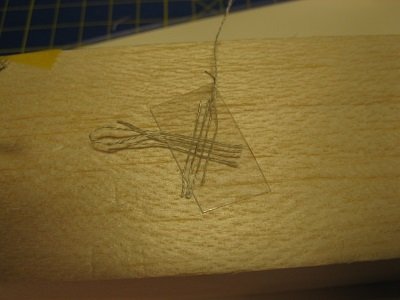
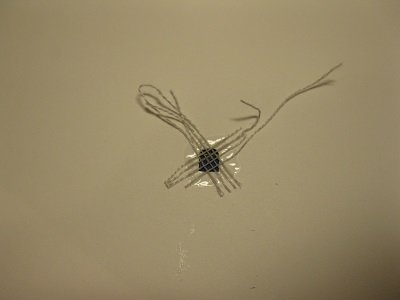
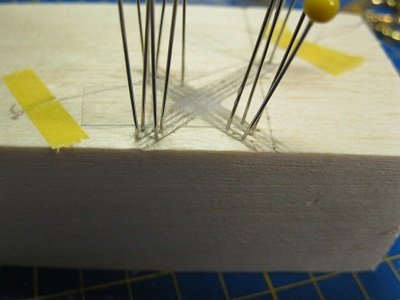
Good evenin_all! Not as much to update you all as I had hoped, but progress was made, never the less. I'll start with the original plan, i.e. put a few blobs of thin CA onto the back of the card .... ... let that dry and then start cutting out the black window bits. Result? Not that good, to be honest. In fact it looks pretty horrendous. The bits that remain are all marked and the cutting is way too uneven. I reckon that it might be that the CA was still too thick so it won't penetrate the card but lay on the back of it, making clean cutting difficult without actually protecting the front of the card. Regardless of the root cause, I did not think that this was a viable solution, especially considering the number of windows I would have to do. So it was back to the drawing board. I decided that I needed a replacement for the window frames. But if I make a frame out of brass or plastic rod, then it would show two layers with one diagonal layers placed on top of the other diagonal layer and even with a thickness of a 0.5 mm rod, it would be quite visible. And look horrendous again. If only I could find frame material that was a lot thinner, say 0.1 mm? Say, the thickness of uhhh thread? Like ... A jig was quickly constructed from a piece of balsa and some pins. I first marked the balsa with the framelines, each 1 mm apart and started the 'rigging' with a grey coloured thread (grey as the lead that would hold the separate windowglass pieces) and then slid a piece of acetate underneath the rigged thread and applied a mix of water and PVA (50/50) with a small brush. Once the first 'glueing' had dried, I repeated that two more times. Then the 'construct' was cut loose ... and glued to the back of a trial piece which had the complete window removed. So far it was looking a lot better and definitely all do-able. So I 'loaded' the jig again after making some adjustments to the pins ... ... and decided that what was looking good could look even better. I applied some clearfix to the back of the window with a toothpick and let that dry. The clearfix formed a layer between the threads, resembling the window panes. And that is where I currently am at, waiting for the loaded jig to dry, so I can repeat the glueing two more times but this time I will use it on the proper piece. Then reload the jig, etc, etc, etc. And that all for a section that will be as good as invisible once the decks are all in place. But at least I have something now that - A will look better than the untreated pieces and B - is definitely repeatable to do. So I is very heppy now. Till the next time!
-
Hi Chris. I think you are being too harsh on yourself. It helps a lot if the model that you are working on is well designed. I have seen Sjors' and Anja's struggles with their wooden model and a good design (and using good materials) IS very important but at the end of the day, the box (or booklet in case of a card model) that is in front of you, will be the same box that is in front of someone else and what you make of it depends solely on your skills. So shall we meet in the middle and just state that you AND the kit manufacture both are making a 'smashing-ness included' model?
-
Hi Chris. I guess it would be too much to ask to get a snapshot of the model in here featuring one of your fingers, just to ram home how 'big' this model really is? From experience I know how difficult building a good looking model is when the model is small. And I think this is a 'wee' model which makes the overall look so much more difficult to achieve …... AND at the moment it looks smashing! Adrie.
-
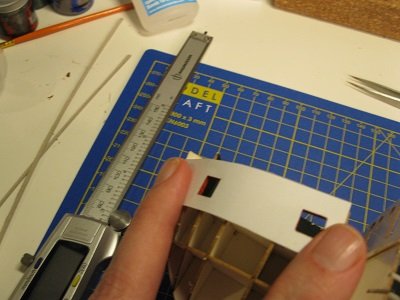
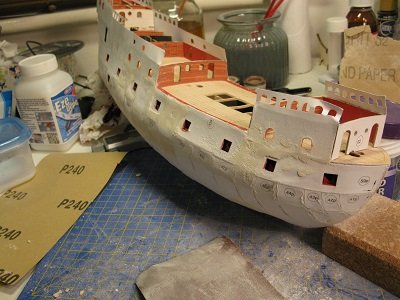
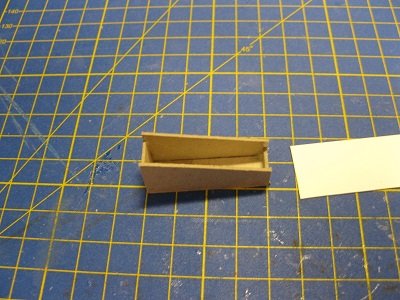
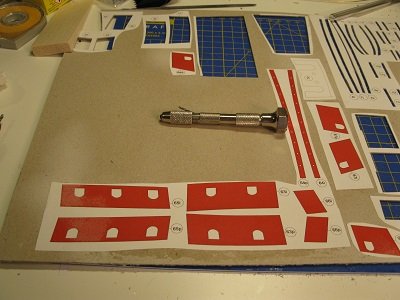
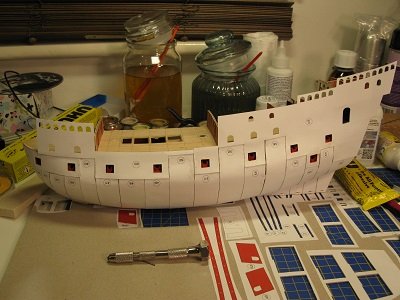
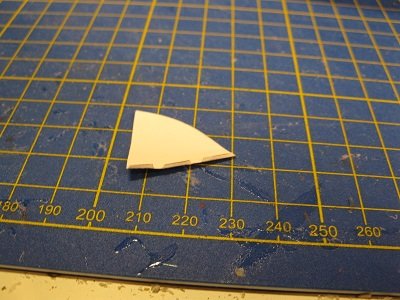
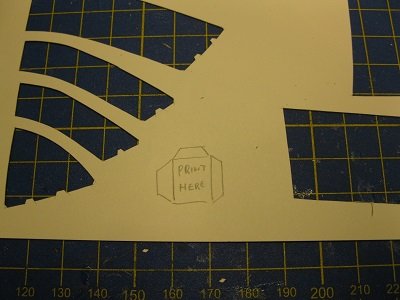
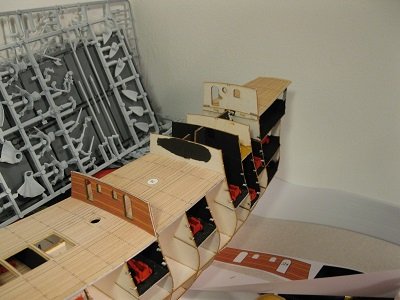
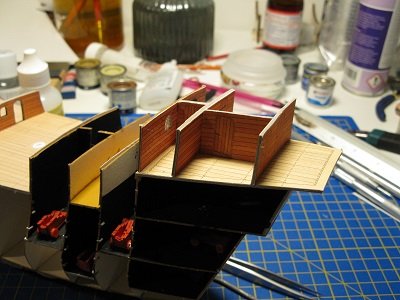
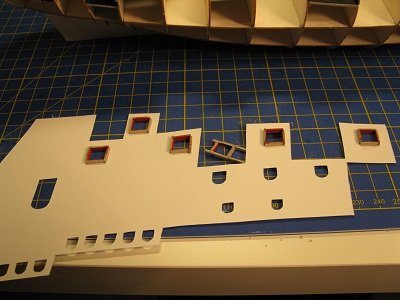
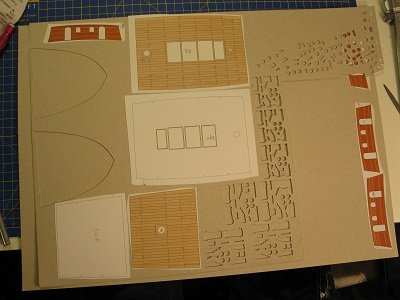
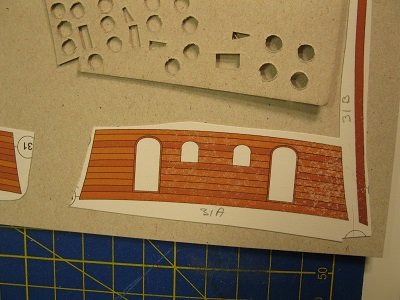
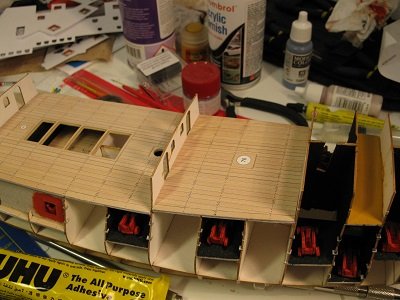
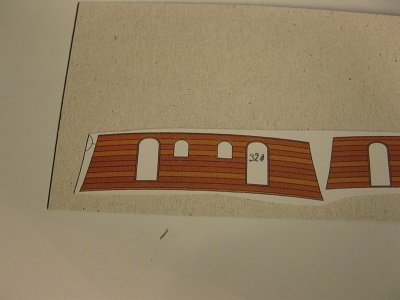
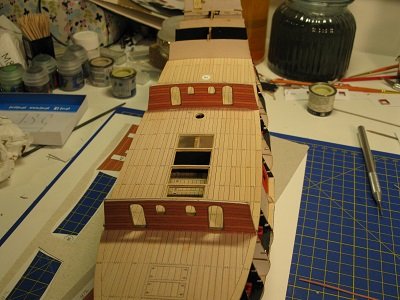
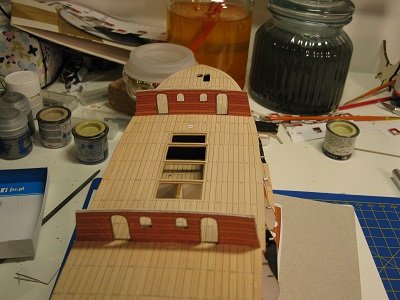
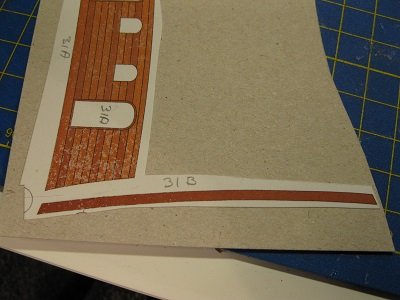
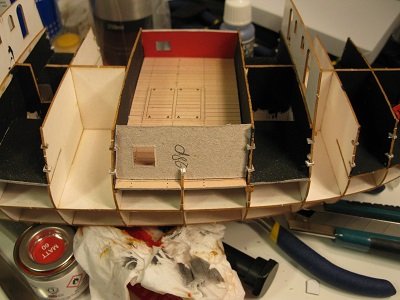
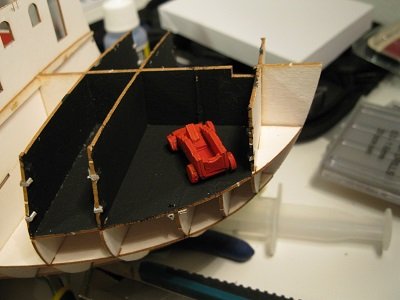
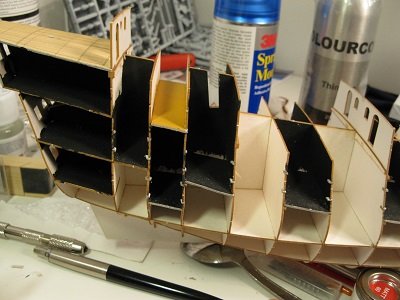
Evenin_all! First off, many, many thanks for the likes from you all! But it's been a while since my last update so let's get cracking, shall we? I continued with the gun carriages for the gun deck. Using the recently enhanced planking sides as templates the carriages were placed in the correct position, or as close to it as possible, with quite a bit of PVA glue stuck to their wheels. Once the PVA glue set, I then transferred a couple of drips of thick-ish superglue around the wheels to ensure they won't come loose in a hurry. Whilst that was drying, I cut out the front parts of the main deck and glued them together using spray mount. The assembly was then scored with my trusty awl to bring the planks out and curved over the big jar. I then placed it on the model and noticed that I did not need to trim anything, it was fitting that good. So a few beads of PVA along the edges of the frames and in it went. The other decks were laminated on 0.5 mm card again. And then I had a brain-freeze. I could try and cover it up as a wicked plan to sort out this problem (which I didn't have) but at the end of the day, it was a bit (a bit???) of stupidity on my part. You see, in the above picture you can see the brown shapes on the right and top of the picture? They are covers for the frames that are sticking out. And they were to go onto the frames as is. NOT laminated to a 0.5 mm card! Then something else went wrong, namely that one of the cover pieces somehow got splashed. You can see how the ink on the right hand side became mottled. I don't know how or when this happened and at first I thought that it might be okay as the a-pieces are supposed to go on the inside of the frames so would be less visible. I was pondering if my stupidity required fixing but whilst thinking about it and how best to sort it, I continued with the main decks. After scoring of the planks the top and bottom pieces were dry fitted. Or at least i tried to dry-fit them but they were too long. Taking the hole for the mast in the middle section as datum point and measuring the distances with a caliper, I worked out that the middle deck needed 0.4 mm cut off of the back of it and another 0.7 mm off the front. I decided to cut the top piece first and once I got that fitting snugly, I would glue the top to the bottom piece and use the top as a template to cut off the oversize bits off the bottom piece too. This way I wouldn't risk alignment issues between the two pieces. You can just about see the oversize section on the right hand side. But once that was cut to size after glueing together, I curved the deck and slid it into place. Still fitting well so a few beads of glue on the frames and down it went! The aft section of the deck was done as described above and again it needed a little clearance. But it still went down well in the end. During all this I decided that i was going to repair my stupidity. But since I didn't have an A3 all in one printer I didn't do a start copy of all sheets. Instead it would have to be almost piece by piece. For a trial I colour copied the middle section of the deck (just because that was lying around at the time). The result was ... hmmmmm. The real piece is on the right and the scanned copy (apart from having shadow issues) was a lot lighter! Yet the wall coverings .... A lot, lot better and in fact good enough to use. What's the difference between the deck piece and the walls? No idea. But then, the printer is a bog standard all in one printer so I never expected it to need to do things like this. So I started the repair with the thus copied piece, which had the openings cut out, the planks scored and then a little sliver needed to be taken off it to fit well. I was going to do the same with the other wall sections when ..... I noticed that not only does the printer not know light from dark, it also scans incomplete as I found out when I was about to score the second piece. So another scan needed on 220 g card. Better this time. Good enough to use. I decided from a aesthetics point of view to 'repair' the mottled wall as well. I did this by simply scan-printing the front wall section onto normal paper, cut that out and glued it on top of the mottled section. Can you tell the difference? I know I can't. But both sides have now been done. which leave me with one question. Where should I place the following part? The part marked 31b doesn't show on the assembly drawing and the width is wider than the bottom width of part 31a. I asked Shipyard for guidance and hope I will get that before I have to glue down the fore deck. Otherwise I might just.... uhhh .... feed it to the carpet monster? Anywayz, that's all I have done so far. Next in line are two more wall coverings and then the Captain's quarters dividing walls. Part 33 has some of those pesky windows so I will trial out how to open them up. I am thinking of putting a blob of superglue on the back of the windows to stiffen the card, let it dry and then use a new blade to punch out the black window bits. I would normally then glue some acetate behind the windows but as the wall it goes onto is a blind wall, I will need to think of something else. But more about that later. Have a good evening!! Adrie.


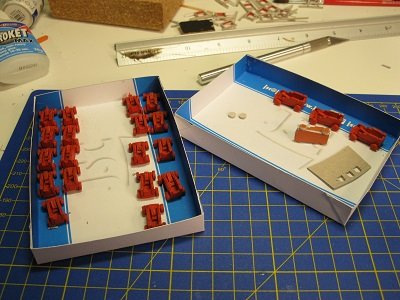
-
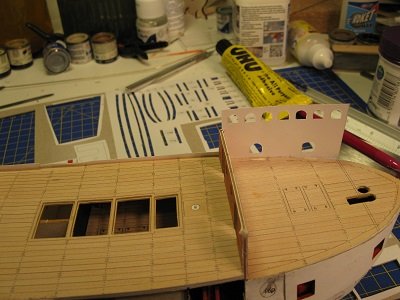
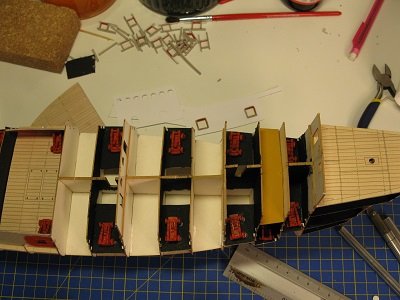
Good evening, all! I guess it is time for a little update. But before that a genuine thank you to those who have reacted to my posts. It is , ezz oalwaizzz, mucho appreciado. But enough of showing off my (non-existant) language skills and let's have some piccies. First I continued the removal of the frame posts. But because I removed those strips I also had to glue down the internal ship walls in the mid section, as they used the strips to 'lean' against. And then it was snip - snip with my faithful cutter to remove the front side wall. And now the big carriage can swing about unhindered. Just a little lick of additional paint .... ... and you can't really tell that the wall had been there in the first place! Now that the repair was done, I could (finally) continue with the remaining three gun carriages of which I am finishing the last one tonight! YAY! I know there were 'only' 22 to do at this stage but with 17 parts to cut out for each, then glue 6 back on the card and cut them out again, it was really 23 parts for each carriage. My 'favourites' were the 4 sides of the carriage. But they're now all done (apart from 2 wheels and a lick of paint so we can move on to the next part, which is the front section of the main deck. Two layers, each laminated onto 0.5 mm card to be cut out, glued on top of each other and scored like I did the lower deck part 2. But because this deck is 'out in the open' I decided to follow Chris and Dan (amongst others) and sprayed to top section with matt varnish for additional protection and a matt finish. Of course I can't glue the deck on yet. I'll have to glue down the carriages first for which I will use PVA first and then, after drying, I will secure it with thick-ish superglue. The problem with most paints and glues is that painting weakens the glue bond, and since there is an enamel pint on the rim of the wheels of the carriages and I do NOT want those carriages to come loose when I try to install the gun barrels on them, so I will secure the bond with a touch on superglue. Just in case, you know? And that will be tomorrow's task. Just one thing to mention. You remember that I ordered the sail set from Shipyard online and that they arrived pretty quickly? I used the same website model minus vessel dot com to find a current email address for them and used that to ask a question about the sails. I asked the question on the 7th and received a response on the 10th. And it was a very nice response too! Wielkie dzięki, Marta, if you happen to look in! Annnnyyyyyyywayzzzz, that was about it, so for now, a lovely evenin_all! Adrie
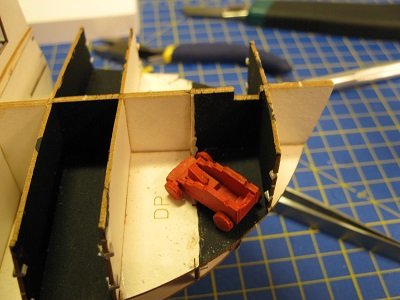
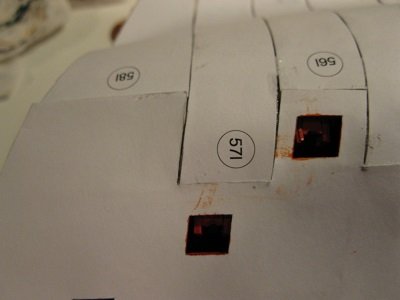
-
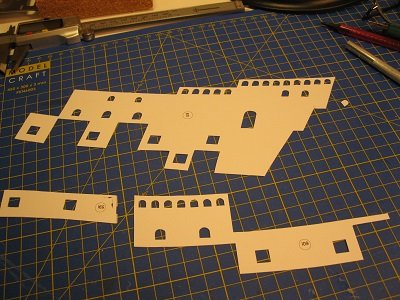
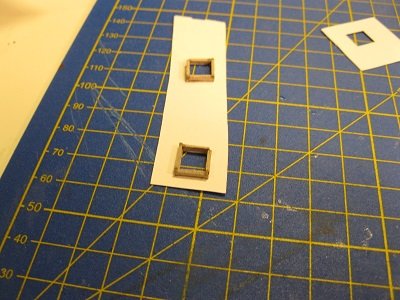
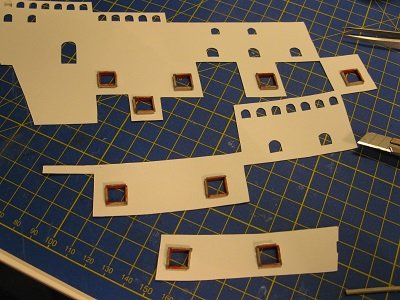
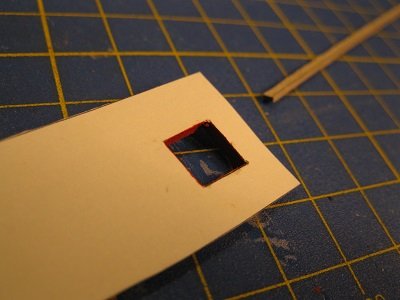
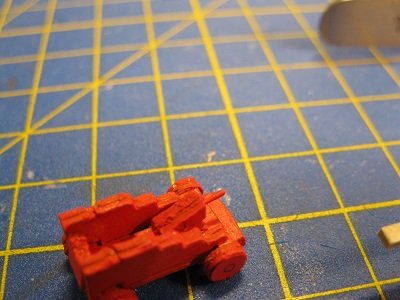
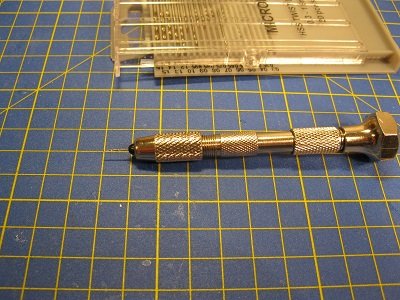
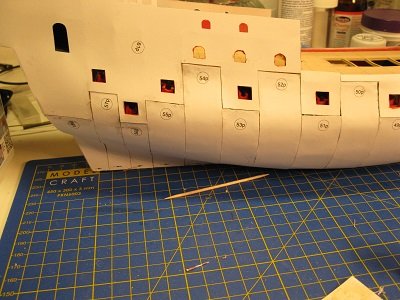
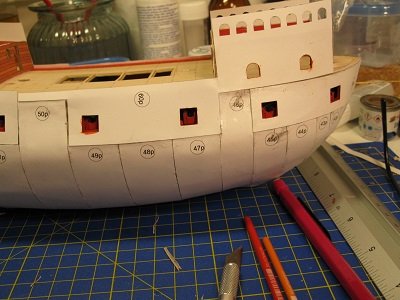
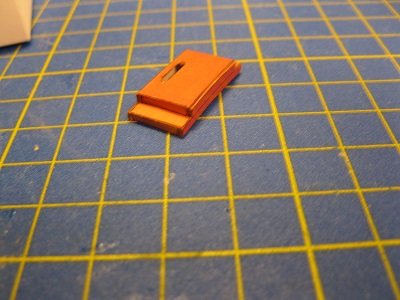
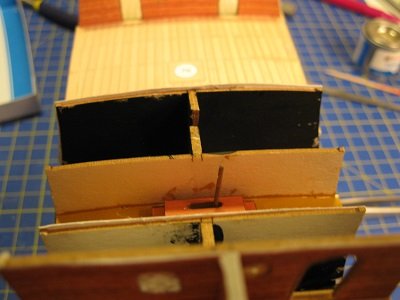
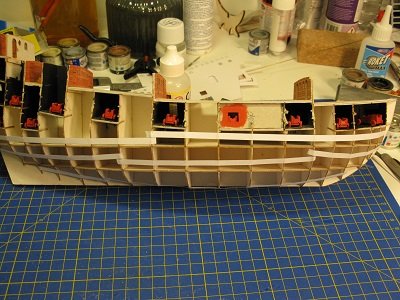
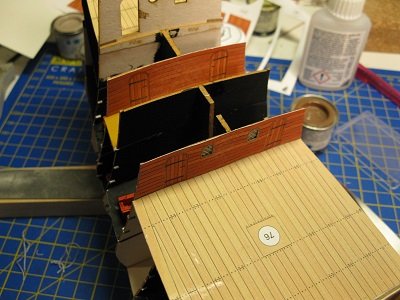
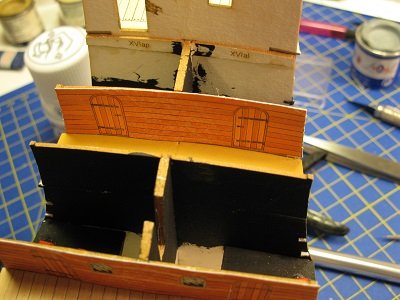
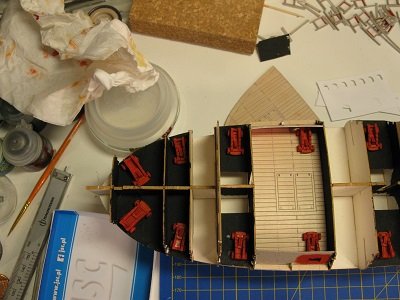
Good evenin_all! As always, thanks for the thumbs, they are much appreciated. Today's report is mostly about repairing. But first I wish to present to you the new arrival at my address. Tara ..... And with the hand drill and a 0.5 mm drill I was able to 'pin the carriage', i.e. drill a small hole in the wedge block, cut off a little piece of 0.5 mm brass rod, superglue it into the drilled hole, wait for it to dry, drop a drop of PVA onto the rod, wait for that to dry then paint it all red, like> The drop of PVA is to 'thicken up' the end of the brass rod to make it look less like a thin rod and more like a grip shaped for a hand. I've done two of these for now since I will use them in the places where someone might possible see the back of the gun carriages, i.e. on the already installed deck 2, depending on how many gratings I will install on the deck above it. I was thinking of leaving most of them open but will see how the gratings come out and how it will look with them installed or left out. All the other carriages on the gun decks will not be 'pinned' as you can't possibly see the back of them, once in place. The ones on the weather decks will be so amended, though and I am looking at the appropriate drawings to see if I can add some ropes and tackles on the ones in full sight. probably not, as it may be too fiddly for my fingers, but I am keeping an open mind here. Anywayzzzz, The repairs now. I cut out the remaining openings in the upper first planking parts since I didn't fancy doing that after I had glued the gun port frames onto the back of the pieces and cut 9 mm lengths off the 2 mm wide strip of 1 mm cardboard as shown previously. I cut out 4 per position, align them along the edge of the holes and glued them down with PVA. Once they were all glued down and the glue had dried, I then started painting the frame posts red with the humbrol enamel and let that dry. Yes, I know that there is another layer of planking going to go on top of the white card but I still didn't want too big a mess with the red paint and if you carefully brush if from the back, you get an almost spotless effect at the front of the card. Then it was time to start snipping off the supplied gun port frames and try out the planking layer in their place. It looking good! The next stage is to cut away the top of the second frame on the above left photo But before I do that, I want to strengthen the remainder of that frame, which I did by using some of the 2 mm strip that I used before and gluing them under the gun deck like so. Hopefully that will be enough keep it all together when I start ripping out the top section. But for now I will let the glue dry thoroughly and start work on the white planking cards for the right hand side. Oh, and Richmond, I am sooo sorry. Apparently the British rowers cheated and took a plane from Warsaw to Heathrow, meaning that I had some more new arrivals. Quality is looking good again, which makes me happy and the mizzus is happy that I listened to her and did as she said. So we're all happy here now! And on that bombshell ...... See you all laterzzzzz. Adrie.