lraymo
-
Posts
235 -
Joined
-
Last visited
Content Type
Profiles
Forums
Gallery
Events
Everything posted by lraymo
-
Ohmigosh, Keith, I am so sorry to hear this incredibly sad news. I haven't been on for awhile, and was reading all the great posts and viewing your latest pics of the ship (which is gorgeous), and then saw this terrible news. Ditto with everyone else, to continue this build in honor of your son, but only when it feels right. My condolences are with you in this extremely hard time. Lynn
-
Hi all. Just checking in to see how the rest of the MSW world is doing. I've been really busy for awhile now Also, I got stuck in trying to make chainplates (my files don't seem to do much in trying to trim down the strip of brass they are made from, and I seem to have lost a set of files that might work!) Anyway, I hope to get back to work in the near future, but thought I'd see what you are all up to!
-
Gorgeous! It looks wonderful... and this is your FIRST build? Wow, I'm blown away!!!
- 362 replies
-
- 2
-

-

-
- Amati
- Lady Nelson
- (and 2 more)
-
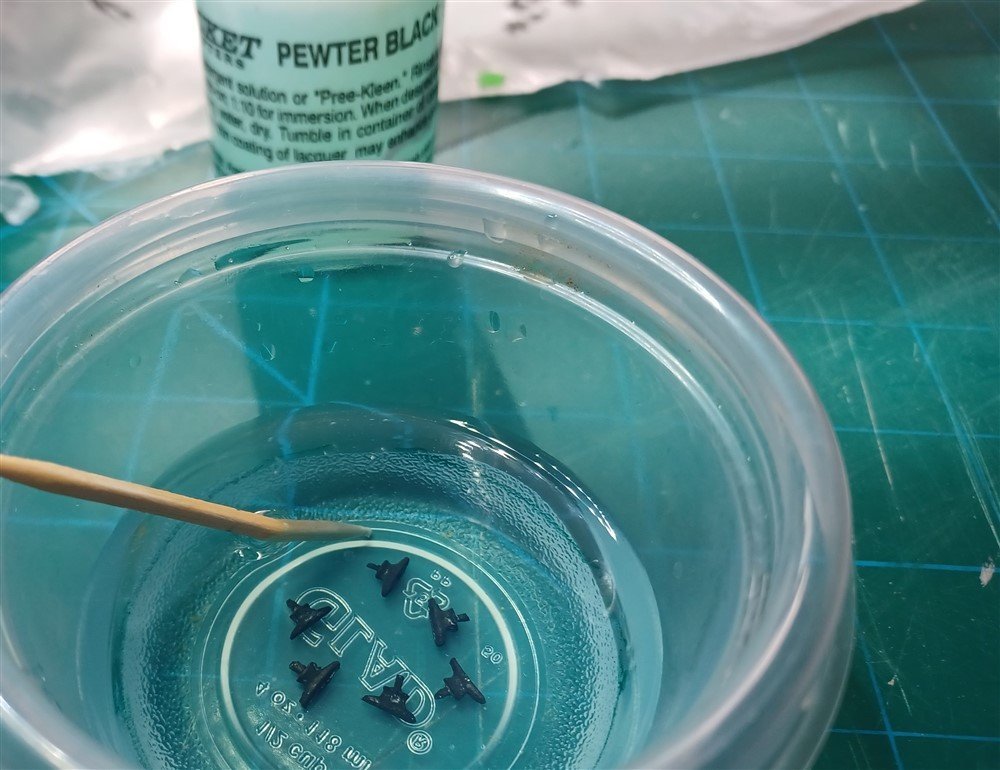
It worked!!! I am happy with my decision to wash the black paint off the 6 cleats I need to attach to the stanchions, and then use the Pewter Black solution from BlueJacket! It took a little time to wash off the paint, but then the solution went to work, and I'm happy with the result. So I've attached the newly-blackened cleats to the stanchions, and I've finished the splash rails and the two fairleads. Happy with my progress, but totally aware of how hard it is to work with tiny parts and CA glue. My precision (or lack thereof) makes me hope that no one will look too closely at the finished product! But for now, I'm happy just to continue learning how to proceed with each new step! Precision will come later! I was surprised (and pleased) with how fast the blackening solution did its job!
-
Eric, the BlueJacket people were very responsive to my email. They responded right away with an email that included an order form for the solution, which I went ahead and ordered. And reasonable prices too. Thanks!
-
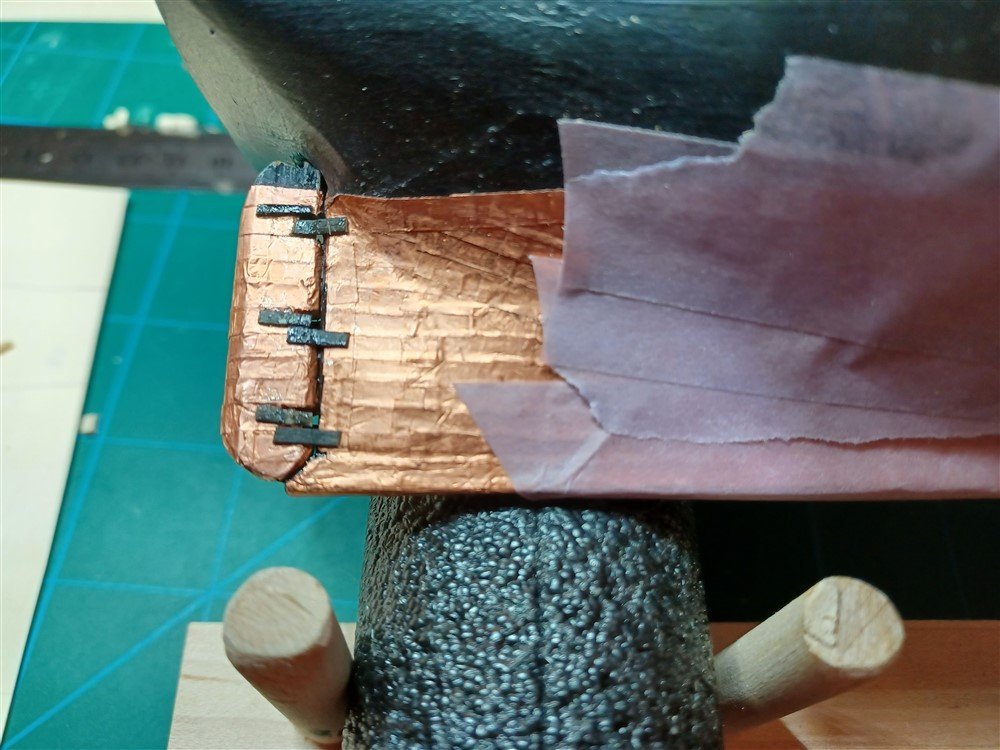
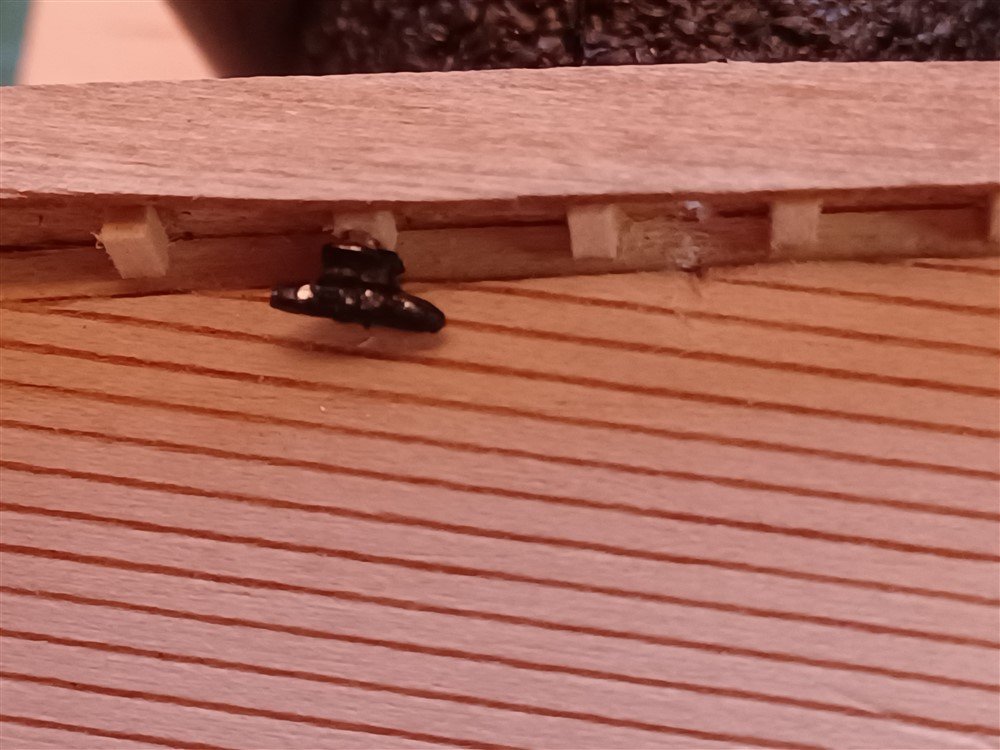
Thanks for the info. Eric, thanks, I tried to order the PN0051 from the BlueJacket website, but couldn't find a way to order it, so I sent them an email. Meanwhile, I did a "dry-fit of the current painted cleat I have, and realized two things. 1) the cleat is much to big for this model (it's 1/4", and I see that I can order a 3/16" ceat from Model-Shipways, which I have requested), and 2) the black paint is flaking off, so I'm really looking forward to blackening the cleats and most the other Britannia pewter castings that came with the kit! This cleat looks too big (sorry it's not quite in focus)! So until I get smaller pieces and the blackener, I'm going to move on to other deck fittings, etc. Oh, and pay no attention to the stanchions and waterway to the right of the cleat... more sanding and clean-up needed!
-
Thanks! I'll be painting these (as soon as I return from my round of golf!!!) Thanks, Ithink the problem is that these are not brass! Thanks, It's very possible these are not brass! Oops! I appreciate the information about the chemical process, and the advice for blackening solutions for different substances. the one I have does, indeed, look like windshield-washer solution, which is most likely the problem, since these cleats are "Britannia castings", which I just assumed were brass. Oh well. I will now just paint them, and hope it works!
-
So I had to step away for a bit... first there was the Final Four (Go KU), then the Championship (Yay Jayhawks!). And of course, time taken to watch the Masters (great to see Tiger walking, and congrats to Scheffler!) Then I started my new retirement gig... I am volunteering at our local golf course (which comes with free golf! Whee!) Anyway, back to ship building. I was excited to start work on the blackening of the cleats, but I'm incredibly disappointed! Instructions say to paint the cleats after they have been installed on the stanchions, but my fingers aren't that steady, so i made a little "holder" and swabbed each with the Brass Black solution. I am really confused now. I was expecting a black paint-like solution, but instead, it came out as a clear, somewhat blu-ish solution, and didn't make any difference in the color of the cleats. I was really hoping the Brass Black would color them all black, so I'm not sure what I've done wrong. Thoughts?

-
Wow, Keith! Absolutely breathtakingly beautiful! I am really amazed at the incredible detail, from everything on the deck to the massive work on the rigging! Fabulous! I can't even imagine getting to the level of skill you have, but its inspiring!
-
Hi Dave, I'm enjoying your build. Your ship looks great!
- 362 replies
-
- 4
-
-
-
- Amati
- Lady Nelson
- (and 2 more)
-
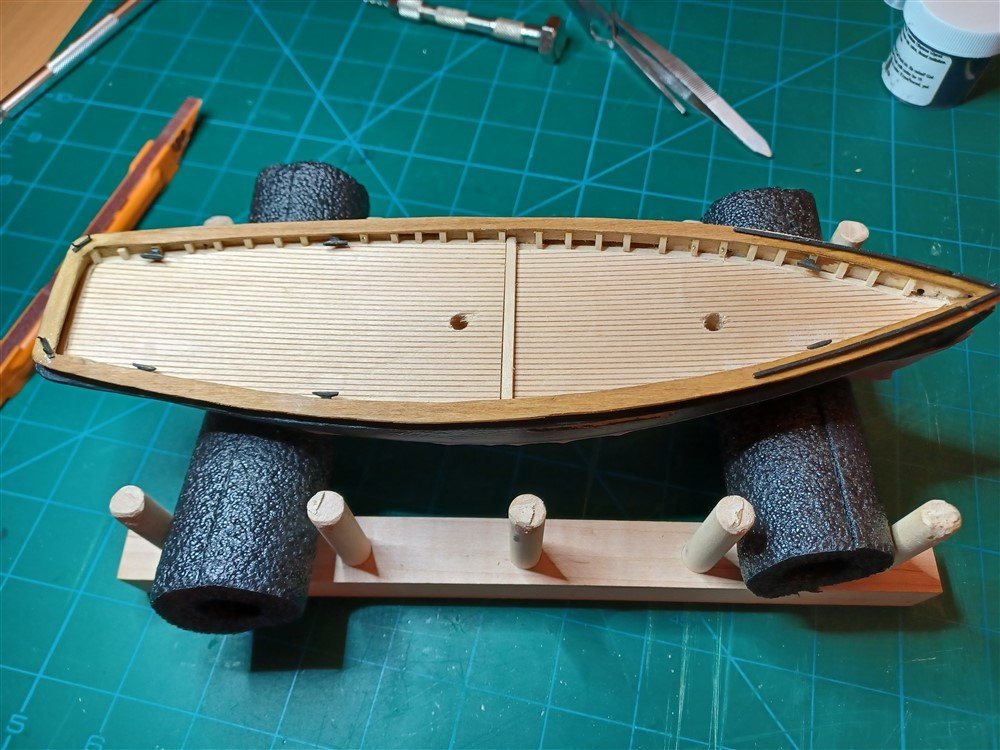
Great discussion on hole punches, cutters, and gun tracks! I actually purchased the circle cutter AND a punch, (they should be delivered today), and I'll try both. The alignment issue worries me with the punch, but with practice, it may work! Meanwhile, i'll be using the Brass Black (to be delivered in the same pkg today), on the little fittings that get installed on the stanchions, while wrestling with the cap rail. The first attempt didn't work (I cut it out in one piece, but the wood kept splitting). So I'm ending up with two side pieces and one at the back. The starboard side installation went ok (one small split that will be covered by the splash rail), but I'm having trouble gluing the port side. Wood glue didn't work, so I'll be using CA next. It was a pain trying to "freehand carve" these rails, so I am happy with the starboard rail so far, and hoping the port rail will be ok too!
-
Excellent! Thanks for the info and the link!
-
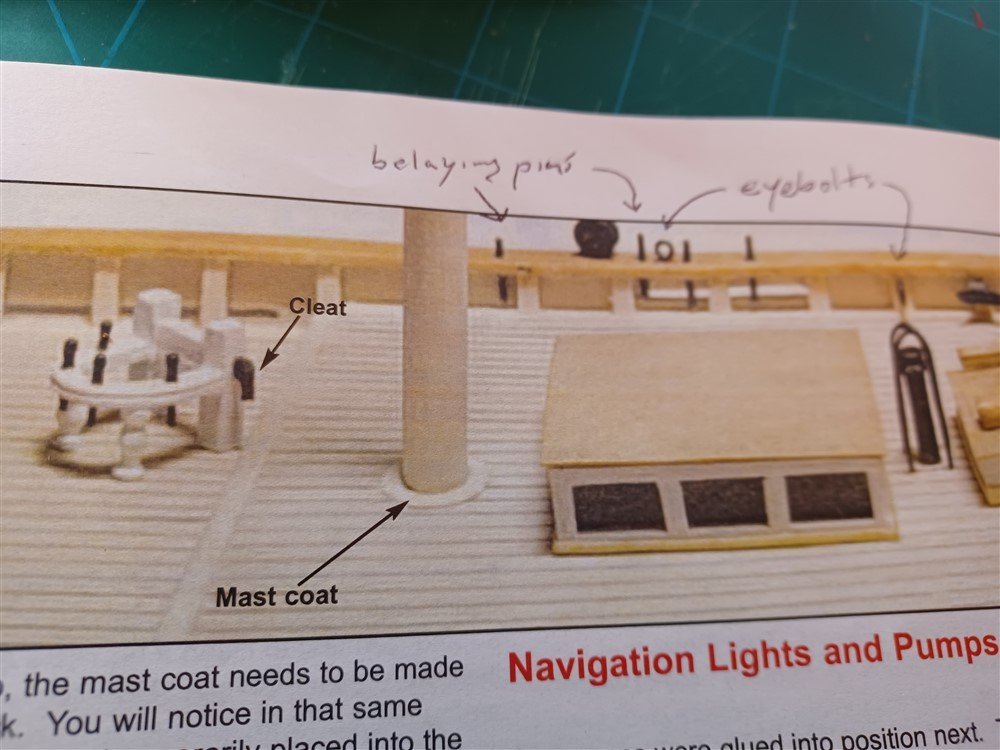
Great idea about using tape when drilling the smaller holes. Thanks, and I will remember that. Ok, now for my next two questions: 1) Instructions say to paint the brass eyebolts and belaying pins. I tried to paint the eyebolts black, but the paint just rubbed off, and left a couple black specks where I installed the eyebolts. How do i paint these tiny brass pieces? (I strung the eyebolts on a needle, painted them, but the paint flaked off as soon as I started working with them!) 2) It also says to cut the "mast coat" from a piece of manila folder. How do you all cut a perfect circle, with another perfect circle inside it? See below for my unpainted eyebolts and very raggedy mast coat. Any suggestions would be helpful! This is what I am trying to achieve... This is what I ended up with... arrgghh, not so good!
-
I was inspired by these photos - wondering what life was like on a Navy ship at the time. And to @mtaylor, thanks for the info about "serious faces". That makes sense, and i sortof forgot about the military aspect of it (my apologies). So I did a quick google search of https://military-history.fandom.com/wiki/USS_Tennessee_(1865) and found this snipet: "Seaman George Low jumped overboard and rescued a fellow sailor from drowning, for which he was awarded the Medal of Honor ". It really brings a tiny bit of the crew to "life" for me. Completely fascinating!
-
Very cool collection of photos! Makes me want to know much more about life on the Tennessee and learn about its history... although I'll have to put that research on the back burner till I have more time (i.e., after I complete the Phantom!) I especially liked the kid and dog. And the band! Thanks for posting these!
-
Thanks Brian, Eric, Keith for the tool, jig, and drill bit suggestions! I've saved the URLs for the tools (Garrett Wade has lots of interesting items!) One question: The Forstner drill bits look like they would come in handy, but where do I find small-diameter bits? On Amazon, most of the sets seem to start at 1/4". Are these bits usually only used for larger holes? Or would/could they be used for smaller diameter holes (1/16", 1/8", etc)? Or would the smaller holes not really need this type of bit? (I am a big fan of tools that make things easier!)
-
Love the pictures of the officers and the crew! These are great (although there must've been a rule to look "serious" for the camera!) I know you were using these as construction photos, but I think its equally fascinating to see the crew!
-
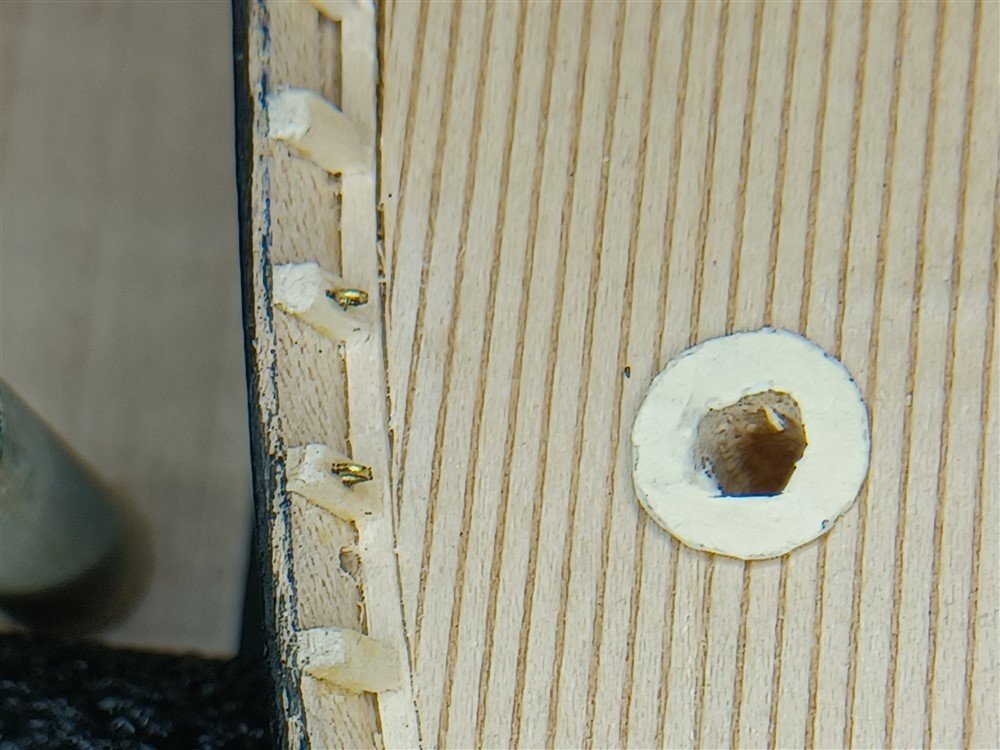
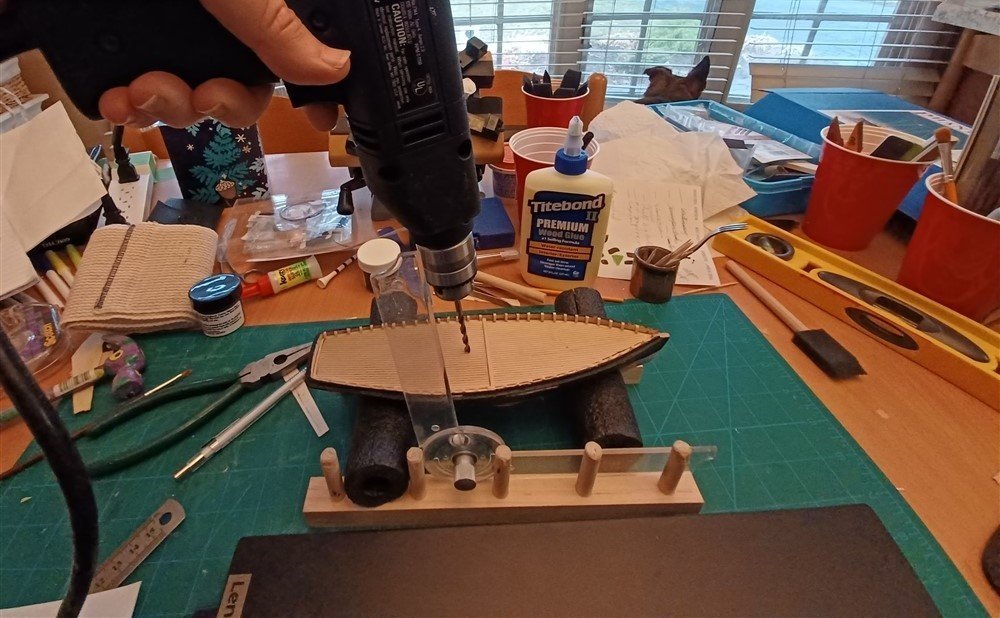
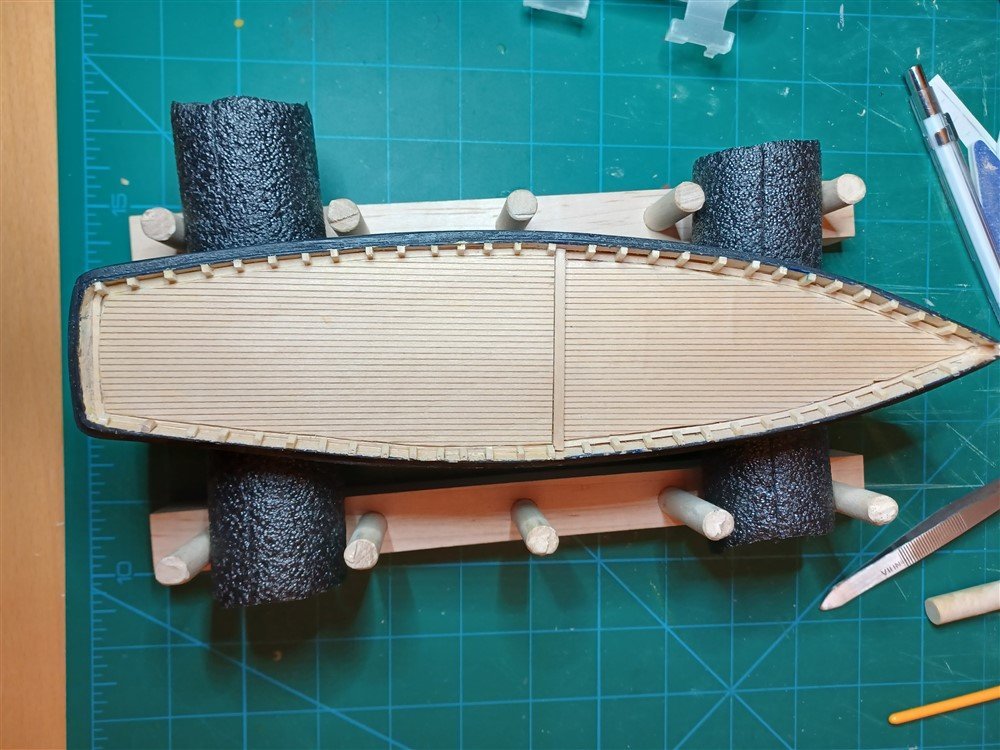
Thanks for the kind words! I ended up drilling the holes before reading your post about the Forster drill. I will have to look that one up. Meanwhile, I practiced on a block of wood till I felt comfortable with my drill. I ended up drilling with a small bit, then increased in size, and finally with the mast-sized bit. i was struggling with getting the right angle, but my physical therapist friend lent me her "tractograph" (apparently its used to measure knee and foot angles), and it worked out well! See below, but I am quite happy with both masts, after just dry fitting them into the holes! It's not perfect, but close enough for me! Thanks Brian, this sounds like a cool tool! Let me know how you like it! I used a combination of your suggestions! I'll have to clean up one of the mast holes, since the drill left a couple of splinters, but its not bad, and some sanding will fix it. Thanks for your instructions, I appreciate it!
-
Thanks Keith for the advice! I will happily go practice on a 2x4!
-
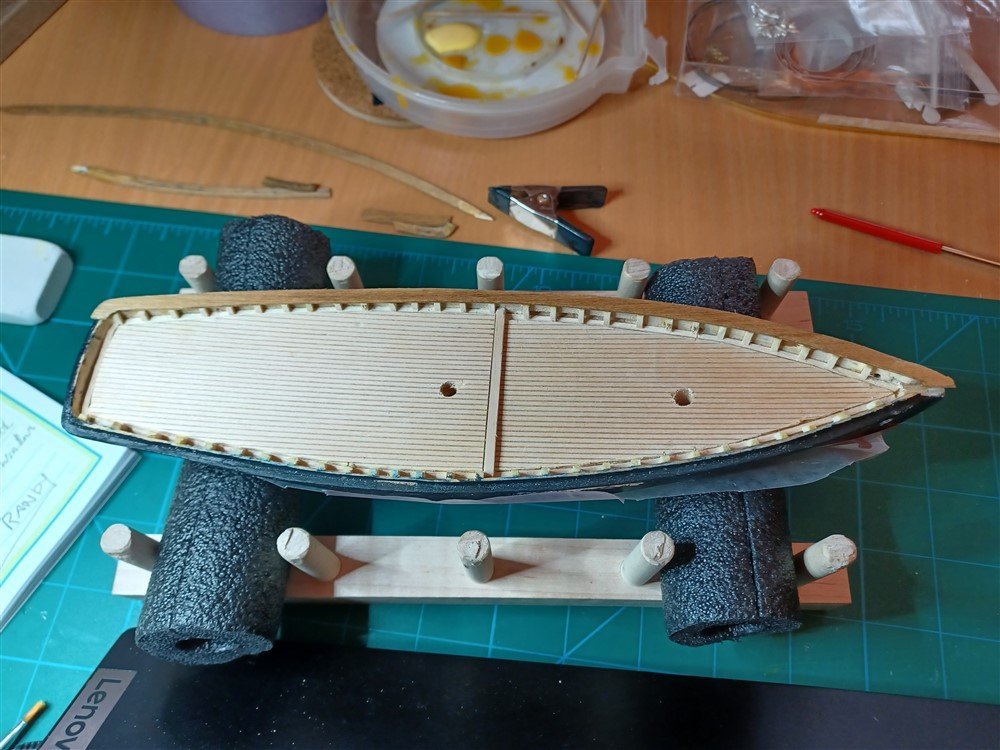
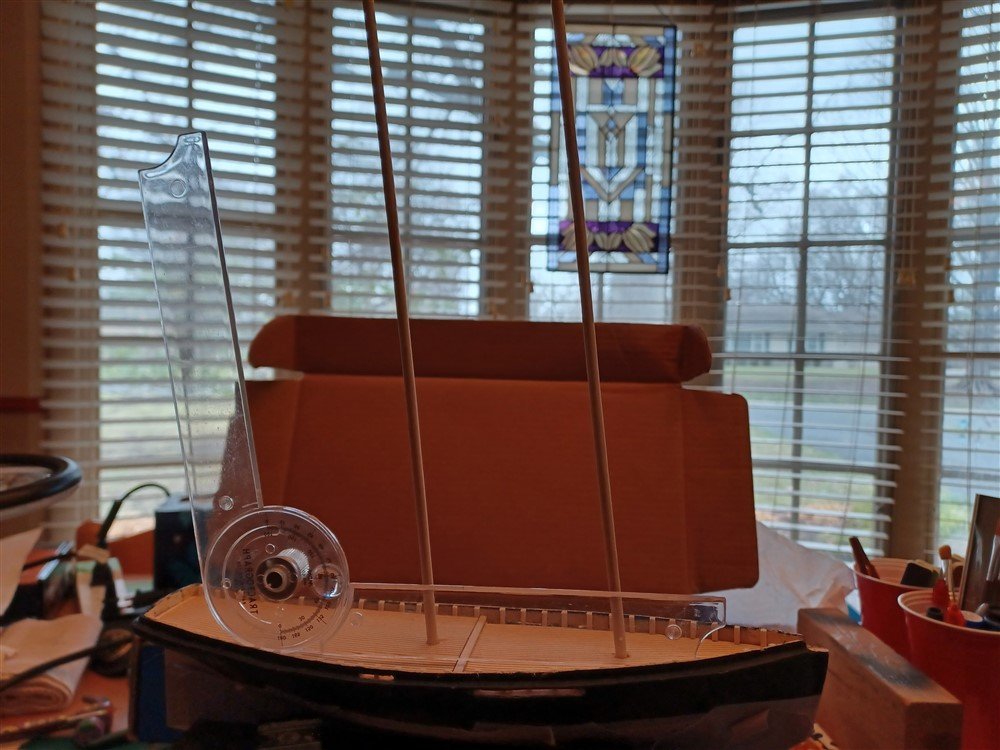
Still hurting some, but getting better. Thanks for asking. So I'm on to the next issue, and need to enlist the help of MSW! I've figured out the mast rake angle, but how do I go about drilling this? I don't trust my "freehand & eyeball" method shown below! 🤪 Any suggestions on how to make a proper jig? And how far into the hull do I drill?
-
Stanchions. Time-consuming but made so much easier with the Northwest Short Line CHOPPER! I love this little tool! (Thanks, Eric, for recommending this! It continues to be very handy!) https://nwsl.com/products/the-chopper
-
Thank you Keith and Eric, for your perspectives! I was thinking somewhat along those lines, thinking the "casual viewer" wouldn't notice much difference if they didn't look too closely! And all my friends who would see this are definitely "casual viewers"! (And at this point in my skill level, I consider myself a "casual modeler" as well!) I'd love to get to the point where I could make beautiful, metal hinges that looked great, as well as plating with rivets, and gorgeously sanded wood! But its just not there yet, so the optical illusion will have to do (and i like the parts about the modeler giving the viewer a "gentle nudge" and that it can look cool from a normal viewing distance!) I was a bit scared to confess my deception, and hoping MSW wouldn't throw me out for it, but both your comments make me feel happy! I actually like how its turned out, and I'm learning much that will help me in the future! Thank you both again!
-
I tried to make the pintles and gudgeons for the rudder, using the brass strip supplied. It was much too difficult, given I'm still in pain, and my fingers couldn't deal with the tiny size. Then I read another instruction that said I could use paper! So I cut small strips from a manila folder, painted the strips black, and tried to form the pintles/gudgeons from that. Again, no such luck. I could create the hinge, but found it impossible to attach to the rudder (probably because my notches in the rudder weren't big enough). So I did the next best thing... I cheated! And I am ok with it! I simply glued the tiny painted strips onto the rudder, making it LOOK LIKE they are actual hinges! If I felt better, I would re-do this, but right now, its better for my mental health to just move on! BTW, 3rd day at the chiropractor seems to have helped quite a bit, and I'm hopeful next week will bring more relief!