Check out our new MSW Sponsor Innocraftsman
×


lraymo
-
Posts
297 -
Joined
-
Last visited
Content Type
Profiles
Forums
Gallery
Events
Everything posted by lraymo
-
Excellent! Thanks for the info and the link!
-
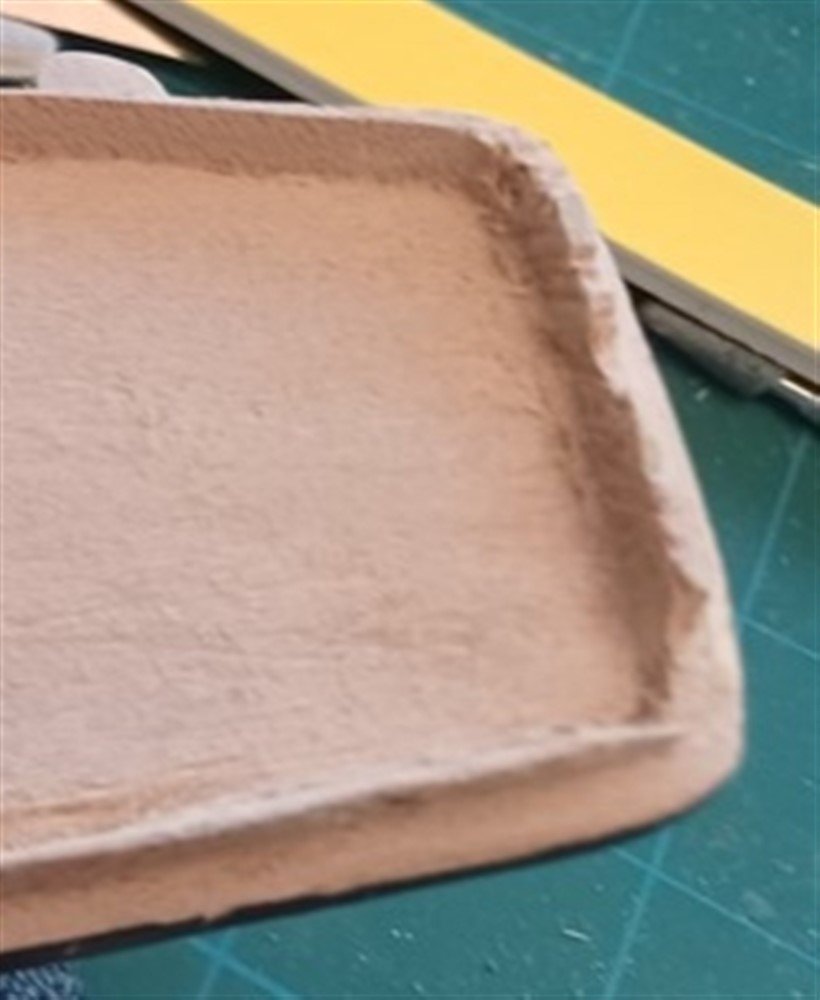
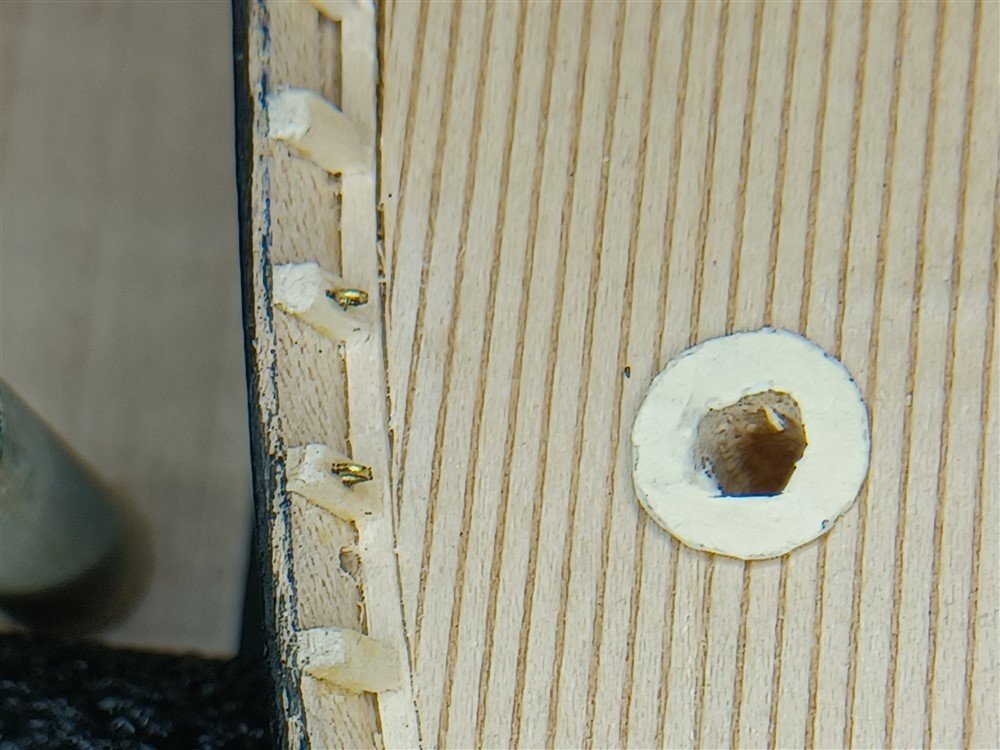
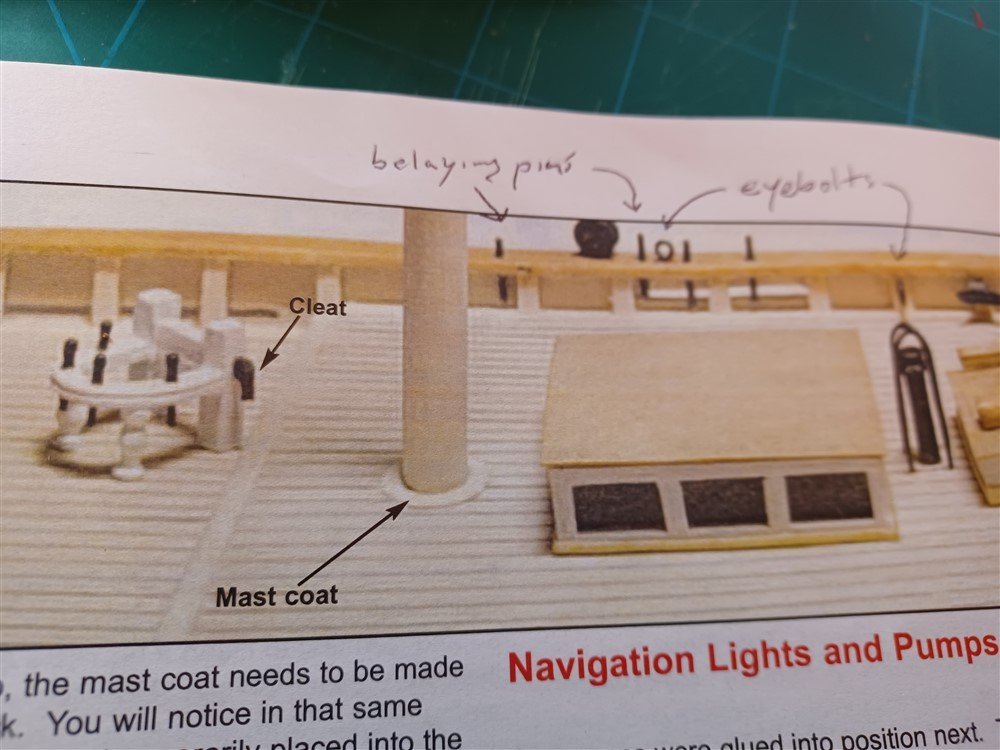
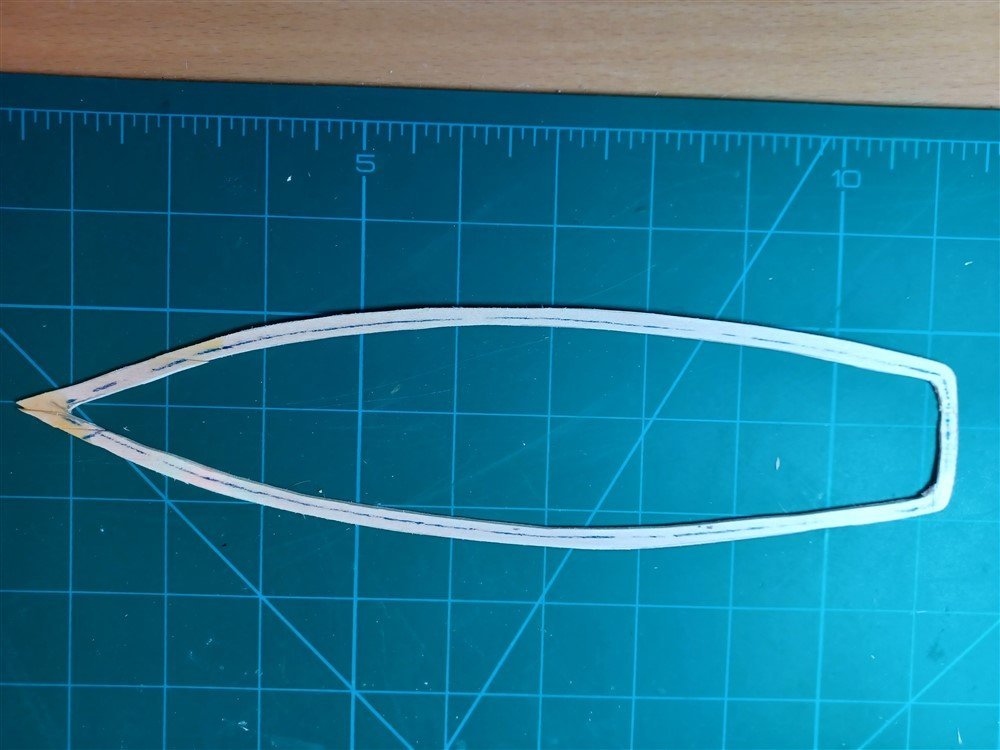
Great idea about using tape when drilling the smaller holes. Thanks, and I will remember that. Ok, now for my next two questions: 1) Instructions say to paint the brass eyebolts and belaying pins. I tried to paint the eyebolts black, but the paint just rubbed off, and left a couple black specks where I installed the eyebolts. How do i paint these tiny brass pieces? (I strung the eyebolts on a needle, painted them, but the paint flaked off as soon as I started working with them!) 2) It also says to cut the "mast coat" from a piece of manila folder. How do you all cut a perfect circle, with another perfect circle inside it? See below for my unpainted eyebolts and very raggedy mast coat. Any suggestions would be helpful! This is what I am trying to achieve... This is what I ended up with... arrgghh, not so good!
-
I was inspired by these photos - wondering what life was like on a Navy ship at the time. And to @mtaylor, thanks for the info about "serious faces". That makes sense, and i sortof forgot about the military aspect of it (my apologies). So I did a quick google search of https://military-history.fandom.com/wiki/USS_Tennessee_(1865) and found this snipet: "Seaman George Low jumped overboard and rescued a fellow sailor from drowning, for which he was awarded the Medal of Honor ". It really brings a tiny bit of the crew to "life" for me. Completely fascinating!
-
Very cool collection of photos! Makes me want to know much more about life on the Tennessee and learn about its history... although I'll have to put that research on the back burner till I have more time (i.e., after I complete the Phantom!) I especially liked the kid and dog. And the band! Thanks for posting these!
-
Thanks Brian, Eric, Keith for the tool, jig, and drill bit suggestions! I've saved the URLs for the tools (Garrett Wade has lots of interesting items!) One question: The Forstner drill bits look like they would come in handy, but where do I find small-diameter bits? On Amazon, most of the sets seem to start at 1/4". Are these bits usually only used for larger holes? Or would/could they be used for smaller diameter holes (1/16", 1/8", etc)? Or would the smaller holes not really need this type of bit? (I am a big fan of tools that make things easier!)
-
Love the pictures of the officers and the crew! These are great (although there must've been a rule to look "serious" for the camera!) I know you were using these as construction photos, but I think its equally fascinating to see the crew!
-
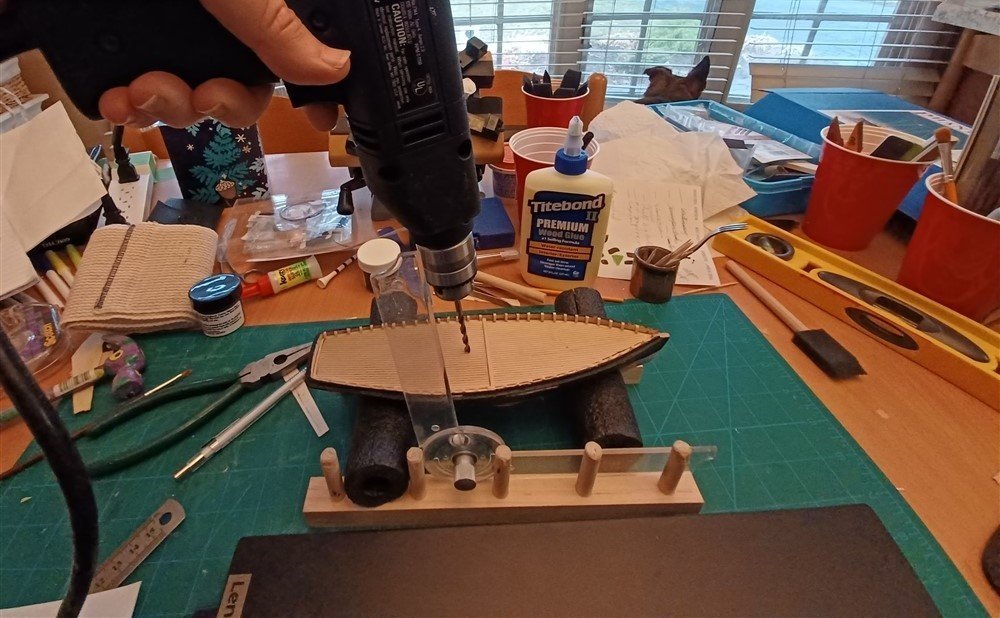
Thanks for the kind words! I ended up drilling the holes before reading your post about the Forster drill. I will have to look that one up. Meanwhile, I practiced on a block of wood till I felt comfortable with my drill. I ended up drilling with a small bit, then increased in size, and finally with the mast-sized bit. i was struggling with getting the right angle, but my physical therapist friend lent me her "tractograph" (apparently its used to measure knee and foot angles), and it worked out well! See below, but I am quite happy with both masts, after just dry fitting them into the holes! It's not perfect, but close enough for me! Thanks Brian, this sounds like a cool tool! Let me know how you like it! I used a combination of your suggestions! I'll have to clean up one of the mast holes, since the drill left a couple of splinters, but its not bad, and some sanding will fix it. Thanks for your instructions, I appreciate it!
-
Thanks Keith for the advice! I will happily go practice on a 2x4!
-
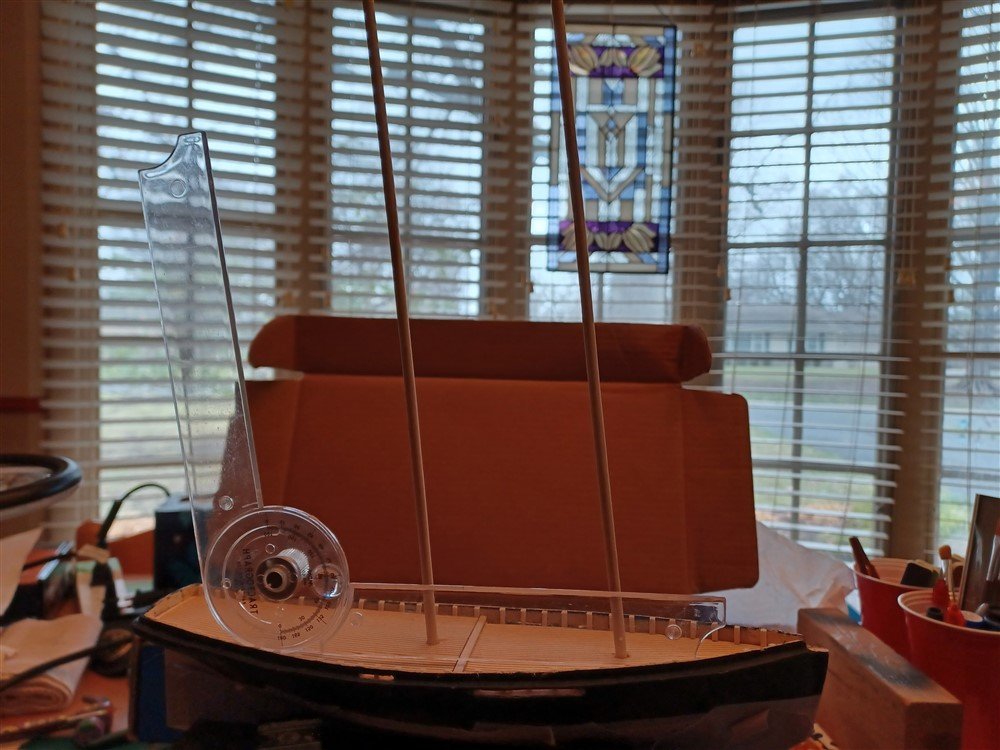
Still hurting some, but getting better. Thanks for asking. So I'm on to the next issue, and need to enlist the help of MSW! I've figured out the mast rake angle, but how do I go about drilling this? I don't trust my "freehand & eyeball" method shown below! 🤪 Any suggestions on how to make a proper jig? And how far into the hull do I drill?
-
Stanchions. Time-consuming but made so much easier with the Northwest Short Line CHOPPER! I love this little tool! (Thanks, Eric, for recommending this! It continues to be very handy!) https://nwsl.com/products/the-chopper
-
Thank you Keith and Eric, for your perspectives! I was thinking somewhat along those lines, thinking the "casual viewer" wouldn't notice much difference if they didn't look too closely! And all my friends who would see this are definitely "casual viewers"! (And at this point in my skill level, I consider myself a "casual modeler" as well!) I'd love to get to the point where I could make beautiful, metal hinges that looked great, as well as plating with rivets, and gorgeously sanded wood! But its just not there yet, so the optical illusion will have to do (and i like the parts about the modeler giving the viewer a "gentle nudge" and that it can look cool from a normal viewing distance!) I was a bit scared to confess my deception, and hoping MSW wouldn't throw me out for it, but both your comments make me feel happy! I actually like how its turned out, and I'm learning much that will help me in the future! Thank you both again!
-
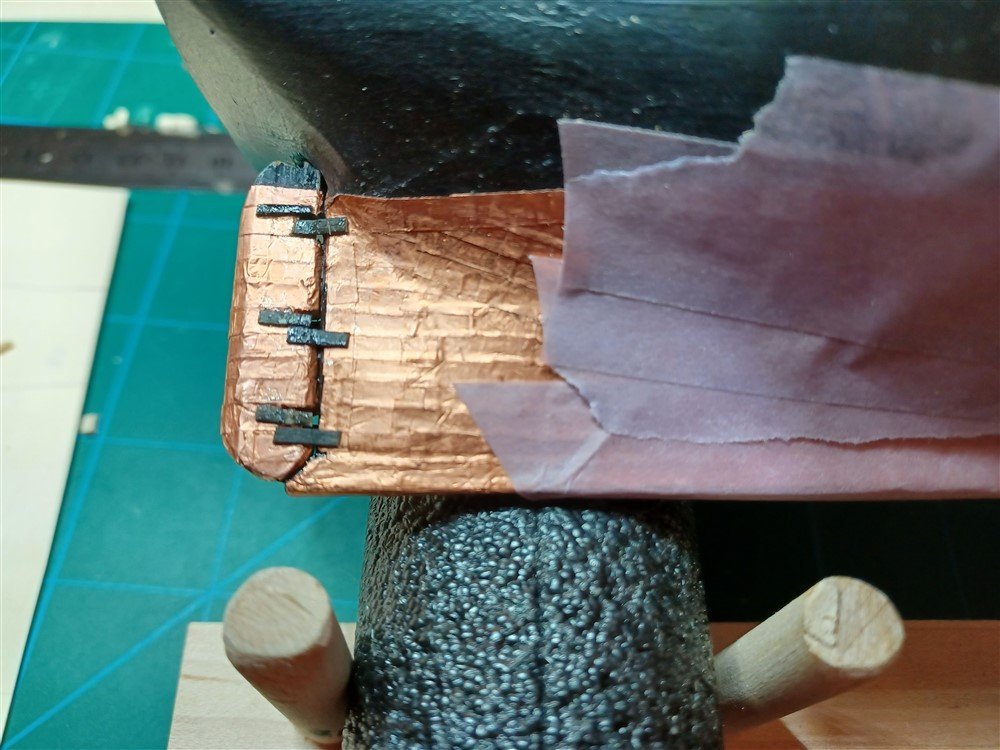
I tried to make the pintles and gudgeons for the rudder, using the brass strip supplied. It was much too difficult, given I'm still in pain, and my fingers couldn't deal with the tiny size. Then I read another instruction that said I could use paper! So I cut small strips from a manila folder, painted the strips black, and tried to form the pintles/gudgeons from that. Again, no such luck. I could create the hinge, but found it impossible to attach to the rudder (probably because my notches in the rudder weren't big enough). So I did the next best thing... I cheated! And I am ok with it! I simply glued the tiny painted strips onto the rudder, making it LOOK LIKE they are actual hinges! If I felt better, I would re-do this, but right now, its better for my mental health to just move on! BTW, 3rd day at the chiropractor seems to have helped quite a bit, and I'm hopeful next week will bring more relief!
-
Just discovered your build log! Nice work so far... I'll need to follow along!
- 362 replies
-
- 2
-

-

-
- Amati
- Lady Nelson
- (and 2 more)
-
When I get to the stage where I need to work with blocks, I will be coming back to your log for a tutorial! Everything looks good!
-
Thanks Keith, Eric, for the words of support. I finally got some relief at a chiropractor appointment today, and will go a few more times to get the issues resolved. But very sorry, Eric, that you're in pain. It's not a fun club to be in! And sounds like you might be down for awhile, for which I am sorry, but hope you heal up as fast as possible!
-
Scuppers created. Had to "redo' the waterway for the fore port & starboard scuppers, bg ut it turnned out ok. I've had lots of time to work on the ship, ever since I somehow hurt my back and side last week. Lots of pain, alleviated by pain pills, which make me tired (and keeping me off the road)... so mostly I've been working on the Phantom between medical appts. Ugh. Hoping tomorrow's chiropractic appointment gives me some relief. But at least I can work on the ship the last few days, and I'm happy with the results/progress so far!

-
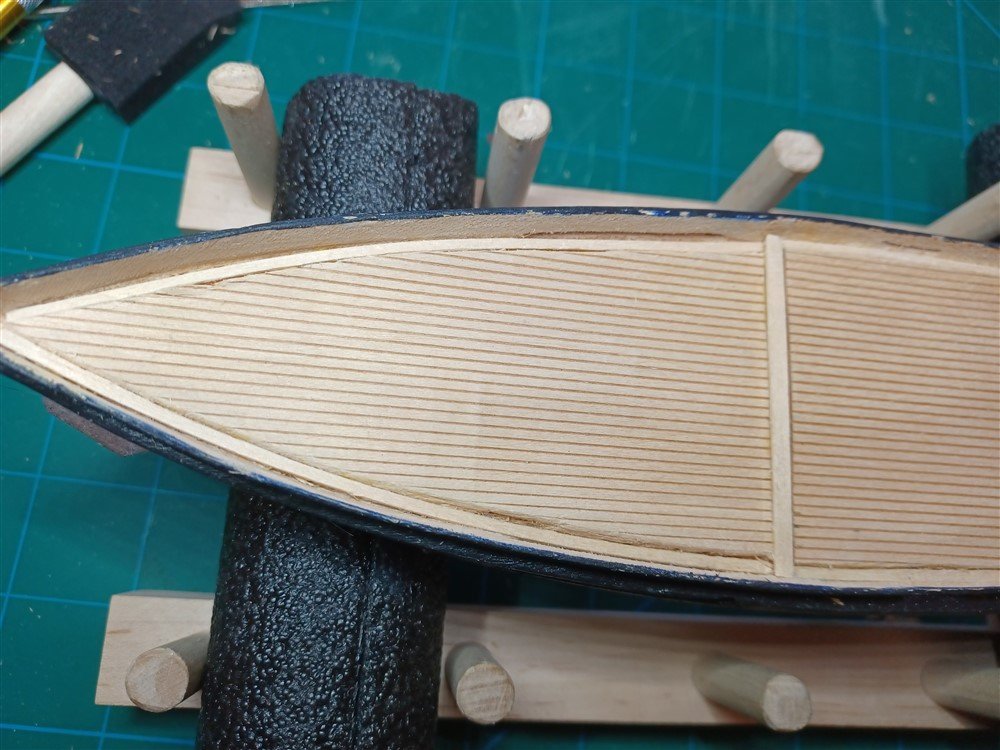
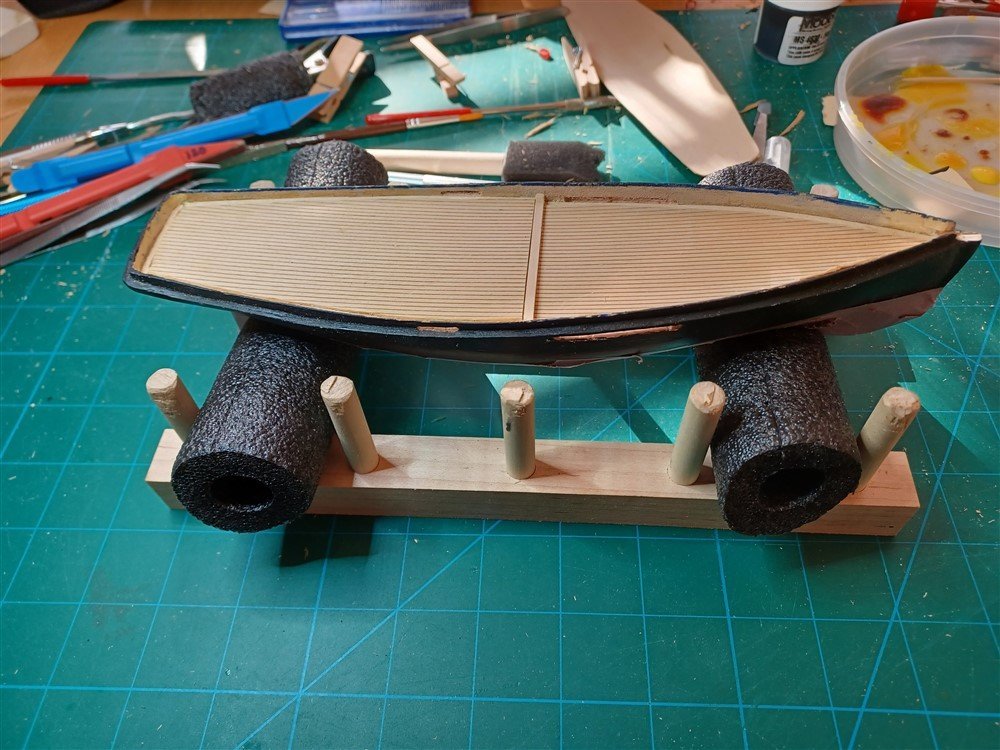
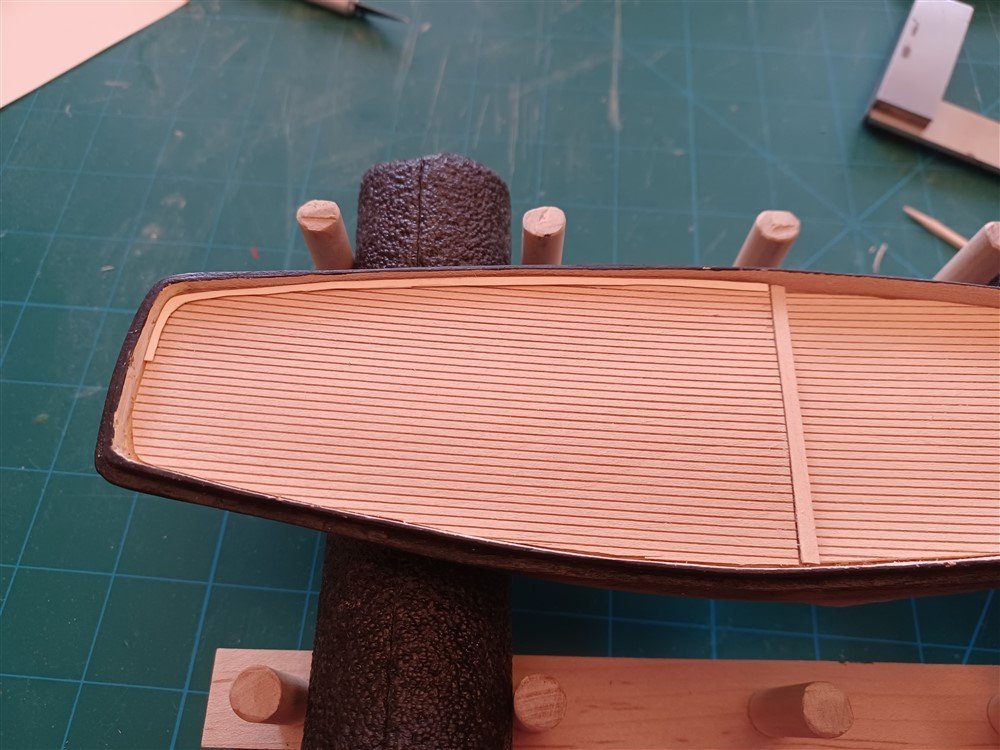
The waterway has been installed! Needed to do alot of tweaking on this. if I had just put the waterway strips (basswood 1/32" thick) on top of the deck, I realized I would be left with very little room for the stanchions (apparently I didn't sand the deck down far enough!). So I cut away part of the deck to make a channel for the waterway. But still, this didn't leave enough room for stanchions. So I went ahead and recessed the channel lower than the deck, (which I thought made sense, since the water would drain better anyway!), and installed the waterway in its recessed channel. I think it looks ok, and a fairly good fix rather than having to rip up the deck, sand the hull down, and order new decking material to start over. For a fix, I like how this came out! (except along the stern, but hopefully some wood filler will cover some of the flaws!). This was lots of extra work, but fun to figure out how to fix it. I also dry-fit the bowsprit to make sure the notch in the bulwarks was the right size. Scupper holes are next, now that I'm satisfied with the deck and waterway!
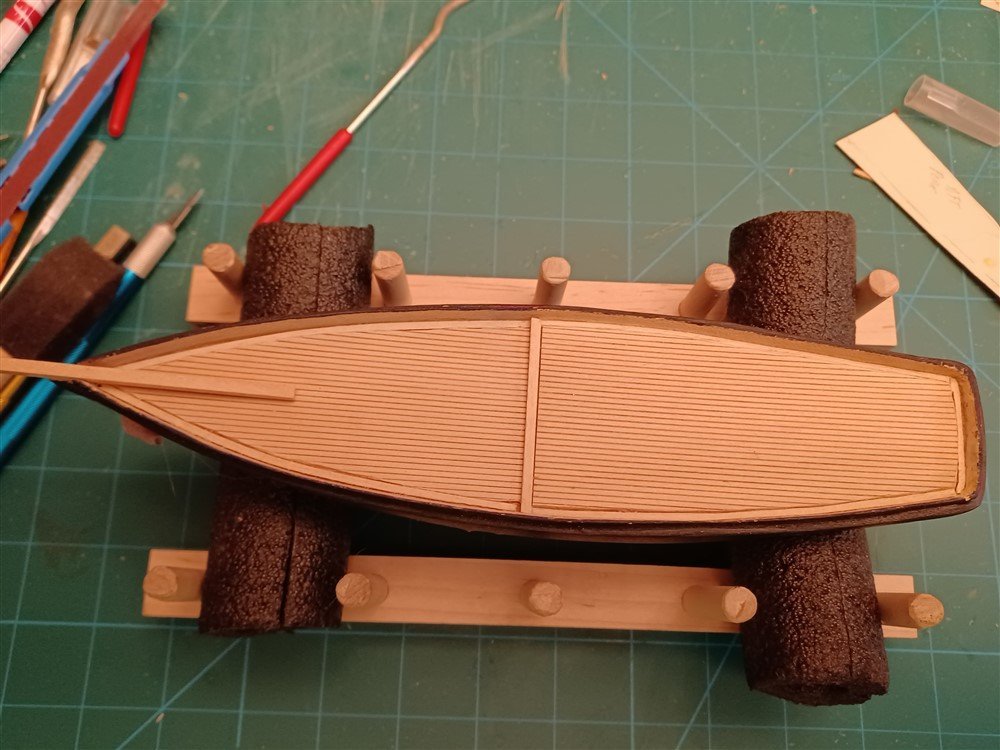
-
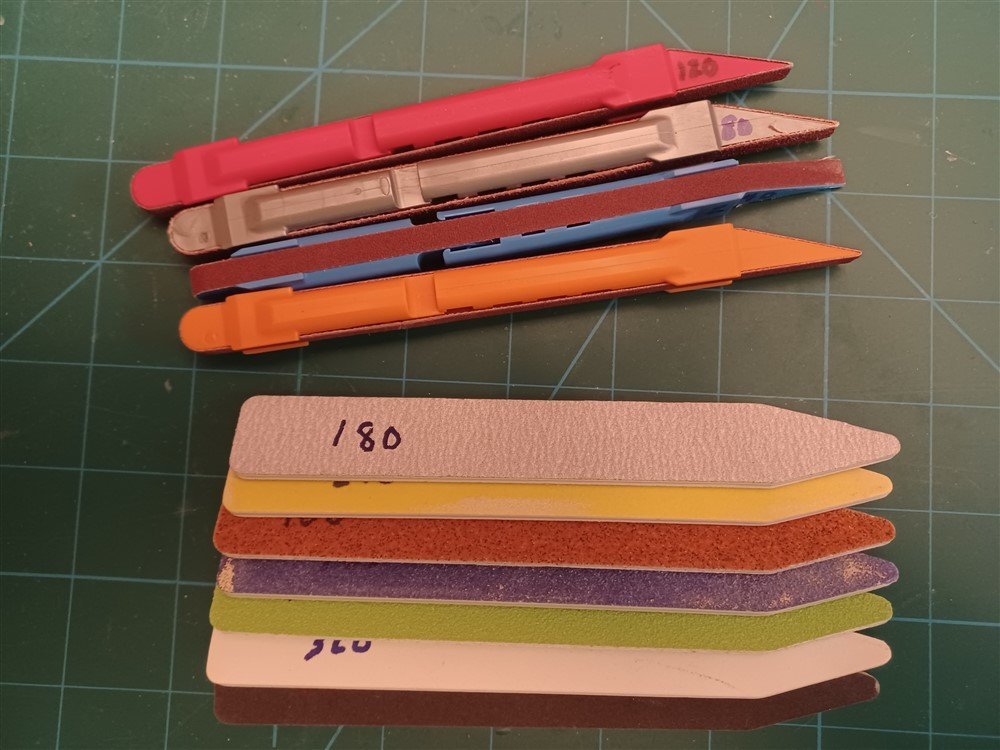
Keith, I went on a bit of a shopping spree for sanding sticks! bought these foamboard sticks, and then these plastic "band" sticks with replaceable sanding bands. Very cool, I like both kinds!
-
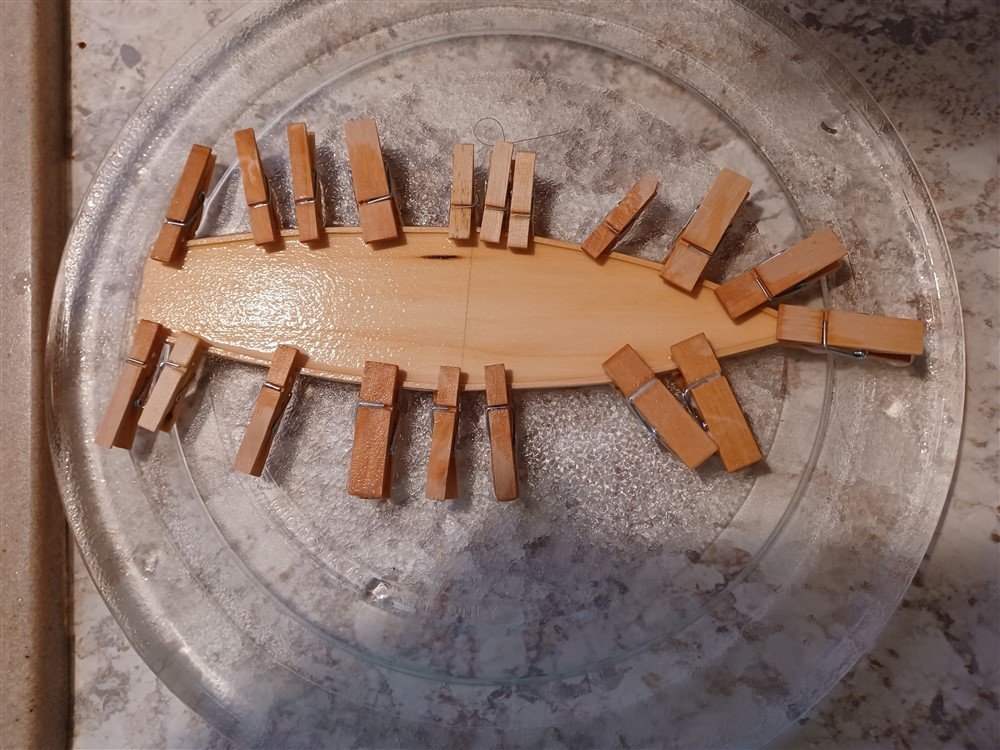
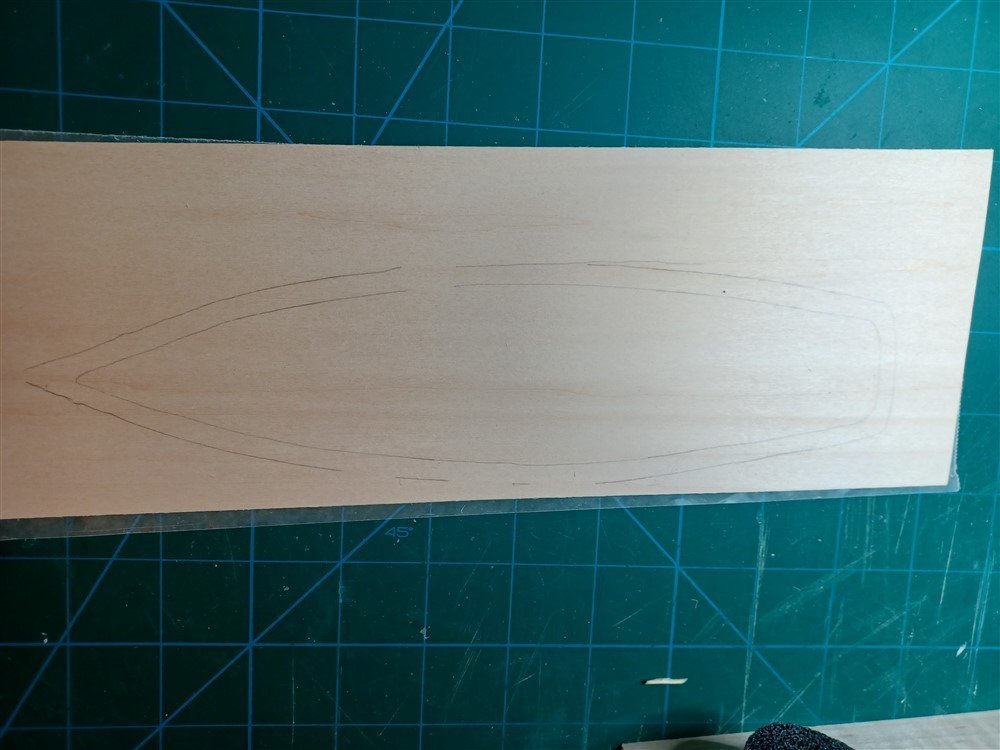
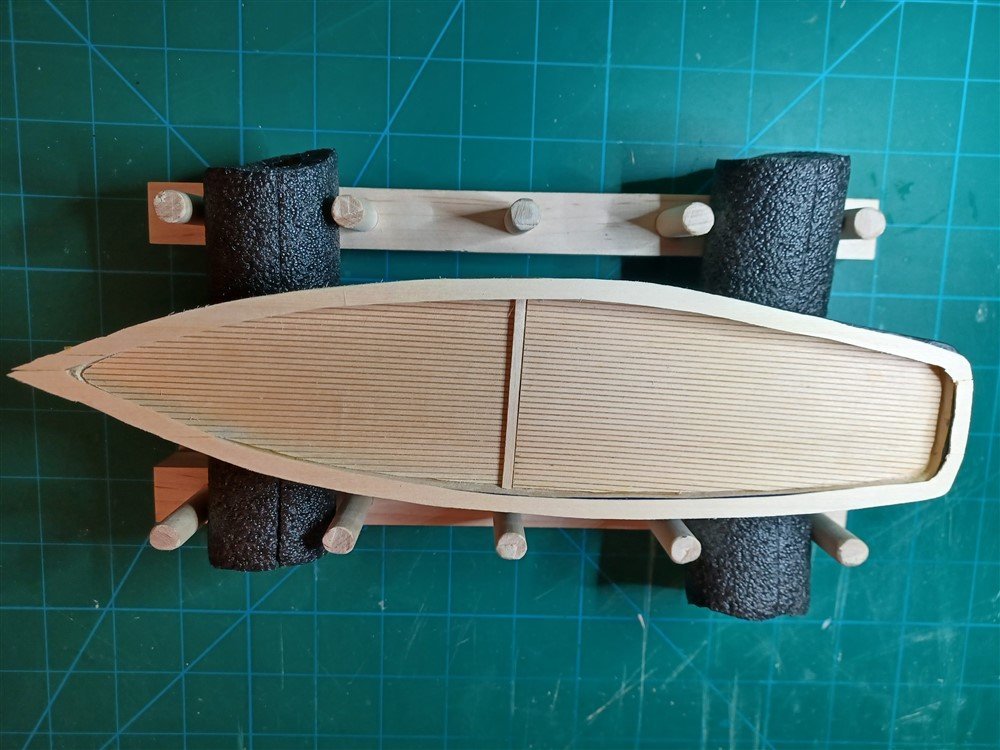
Lots going on here on this snowy day in Kansas City. I wanted to re-do the waterway in wood, rather than manila folder (thanks Keith for the idea). I didn't have any 1/16" x 1/32" strips, so I cut down a couple of 3/32" x 1/32" strips from the kit to the right size. Those strips in the kit were designated for the cap rail, but the cap rail is supposed to be 1/8" thick, so I am re-purpose-ing them for the waterway! Meanwhile, the author of the instruction manual suggests taking a piece of 1/32" thin basswood sheet and cutting out a continuous cap rail. So I traced the contours of the bulwarks onto the basswood sheet. The cap rail is supposed to be 1/8" wide but the author said to make it bigger, which I did. I can tweak the width as I "finish" it! Then I used a sharp blade and cut freehand the cap rail in one piece! I was happy with the result, even though it split a couple times. And I'll have to sand it down to the correct width. Using the middle "scrap" piece, I bent my newly-created waterway strips along the outside as a form, and then soaked it in hot water hoping it will keep the curved shape of the deck. (In keeping with the "kitchen-as-workshop" theme, I am using the microwave dish as a platform to soak the wood!) Last pic is the dry-fit of the cap rail, which will take alot of sanding and finishing still, but I'm hoping it will be ok. And of course I need to do the stanchions somewhere in-between the waterway and the cap rail! After posting this next pic, suddenly I have a desire for fish for dinner! I simply laid the cap rail on top of the ship. It will take alot of work to get it in its "finished" form.
-
Keith, I'd like to take credit for ingenuity, but it's actually what the instruction manual says to do! I like your suggestion much better, though, and I'll look into it. Seems it would make it easier and would look better too! (Not sure why my pics have a pink tint... I don't like the camera on my phone... I may invest in a better one!)
-
Wow, looking good! Love the Cap Rail. What size strips are you using?
-
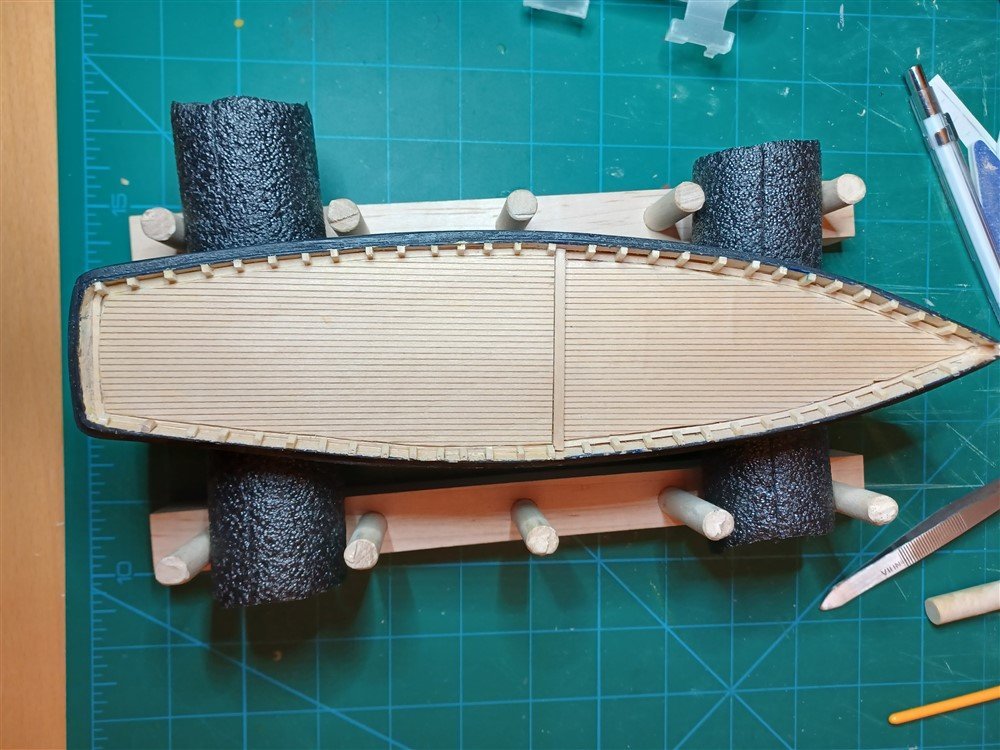
Bulwarks are thinned, deck is in place, and step is installed. Trying to do the waterway now, made out of manila folder, but my ability to use a blade "freehand" to create the 1/16th inch wide waterway is suspect. This first attempt (I will install 4 sections, fore and aft, port and starboard) is just placed in for show, but is not glued, and I think I will redo it. The side that's against the bulwarks is good but getting a matching 1/16" edge is proving troublesome.
-
Ohmigosh! These look fantastic! Ditto with the other commentators... not sure how these can be improved upon! They look perfect already!
-
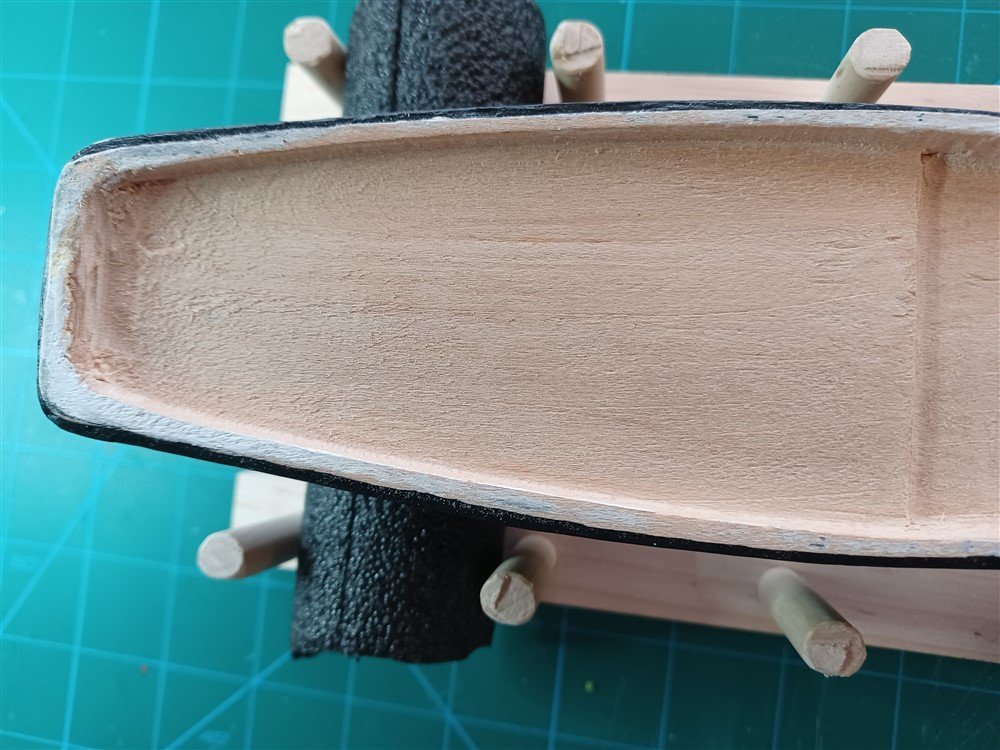
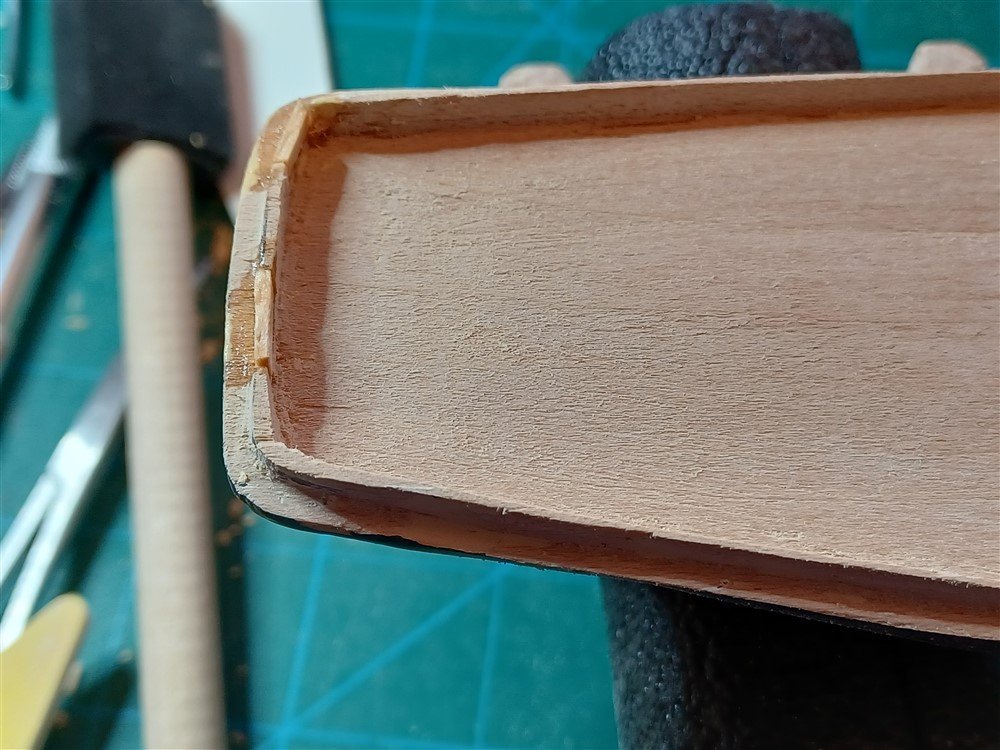
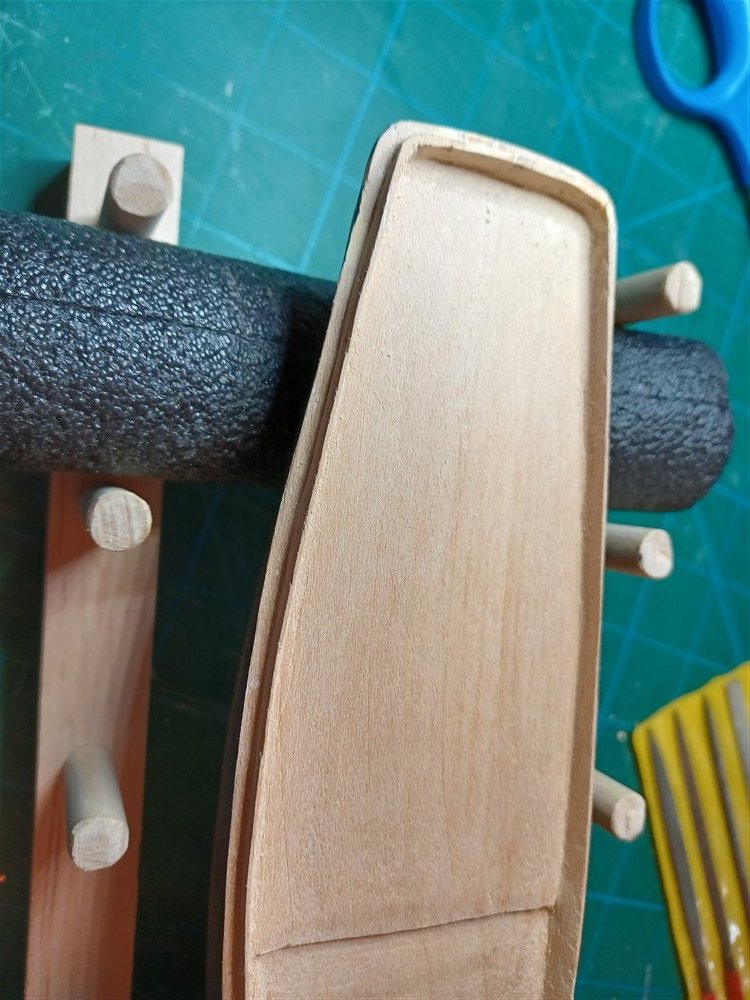
I was going to call this "Epic Fail", but I remembered you guys told me not to be too hard on myself! And actually, considering how the hull came out of the box, I am happy with the amount of "thinning" of the bulwarks I was able to do, before screwing up the stern! Here's the story. Thinning was going along fairly well, till I chopped up the stern. It just kept breaking off in little chunks as I tried to carve out the wood. So I "fixed it" by trying to create a bulwark out of extra pieces of wood and wood filler. The last picture shows the progress so far, and I've sanded the stern. It's not perfect, but its ok for now, and I've moved on to the bow, where I've managed to break up as well. So more wood filler and crazy glue in my future. And hopefully, my next post will show a completed bulwark, fixed on both ends, sanded, and ready for the decking! By the way, I purchased a set of sanding sticks! What a lifesaver! This is what I started with: This is where things went awry... I tried to fix the stern with little pieces of scrap wood, crazy glue, and wood filler And finally, this is where it stands today. I'm happy with the "thinning" so far. Sorry for the non-rotated pic. It won't let me rotate it for some reason!