Check out our new MSW Sponsor Innocraftsman
×


lraymo
-
Posts
297 -
Joined
-
Last visited
Content Type
Profiles
Forums
Gallery
Events
Everything posted by lraymo
-
That pump is sooo tiny! And it looks so good! Have you ever been to the Steamship Arabia museum in KC? You could see the pump on display!
- 732 replies
-
- 5
-

-

-
- Lula
- sternwheeler
- (and 1 more)
-
We were slammed with blizzard conditions and more than a foot of snow yesterday! It's one of the biggest snowstorms we've seen here in Kansas City in awhile! The roads were treacherous, ice, freezing rain, then hours and hours of snow. People are digging out today, but travel is still dicey. Fortunately, I don't have to leave the house for a couple days! Glad it was better in your area!
-
PS - survived the first night of the storm. Cathead (Eric) - any issues in your part of the state?
-
I love your romantic story! And thanks for clarifying the history, although I loved that story too!
-
Thanks! Keith, I was on a cruise through the inside passage, and then spent a few days in Denali Natl Park. An amazing place! Saw lots of bear, moose, and other wildlife. The only downside was the excursion I took on the very first day, where we did a zip-line thru the treetops in Ketchikan, but I was going too fast and smashed my foot into the tree at the end of the first line! 7 more lines to go, along with 3 swinging bridges, before I could get back down, and back at the ship, I found out my ankle was broken. Spent the remainder of the trip in a big boot, and had surgery the day I got home! All is well now. I don't think I was anywhere near where you lived, but i think your 45 year marriage to an Aleut woman is very cool! As Cathead said, we're being slammed by ice & snow. I imagine living in Alaska, you know all about extreme winter weather! I'm as prepared as I can be (flashlights, food, candles), but if the power goes out, I have no other heat source, so I'll just be wrapping up in multiple coats! Cathead, I've missed all of you on this forum! Looking forward to getting back into the model, but this weekend might be iffy! The freezing rain just started, forecast to be massive ice-storm all afternoon and evening, and then a foot of snow. Fortunately I don't need to leave the house for a couple days, but we're all worried about the ice and snow causing power outages, and with tomorrow supposed to be a white-out blizzard, that would make it hard to the crews to start fixing the power! Has the snow & ice started where you live? Stay warm, stay safe. I'm thinking of staying inside till APRIL!!!
-
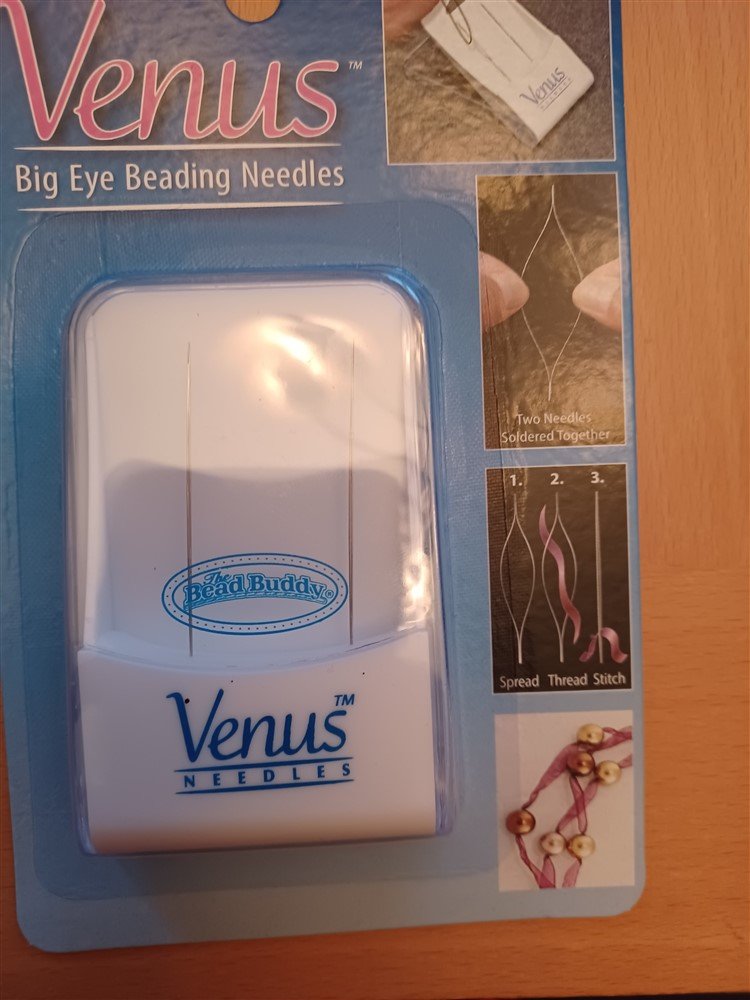
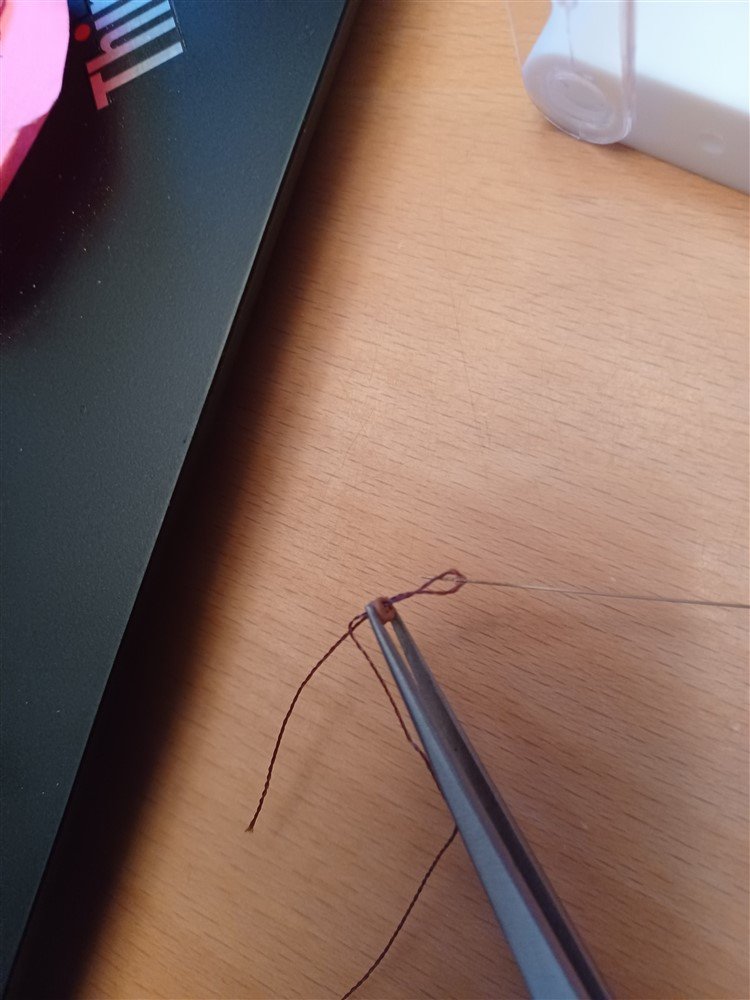
Hi guys, thanks for the feedback. I actually went to a fabric/craft store, and found these strange-looking "threaders" used primarily for beading. Tried it out, and it works just great! (although I can't imagine how i'll do this on the actual ship, but I'm a long way off from that task!) In the second picture below, I used the .008 thread supplied with the kit, and it's working. I don't know what will happen when I have to use the .028 thread, but again, that's for another day! And Keith, Alaska was gorgeous when I visited in the summer, but I wouldn't have wanted to be there in the winter! Brrr! Although I loved snow when I was a kid!
-
PS - just got new golf clubs! Looking forward to springtime!
-
Hi Keith, yes, I really missed talking to you! You and the others have always been so supportive, and I felt bad just walking away, but things were hard for awhile (relationship issues, etc). Things are alot better now, and I realized just how much I enjoyed the modeling, along with you and the others on this forum! So my goal is to get back to this, although I'm a long way from finishing this ship! Thanks for the info about the threaders. I'll have to get some, and probably get a third-hand too. We're headed for some big snow this weekend, so I'll be spending lots of time inside, happily working on this!
-
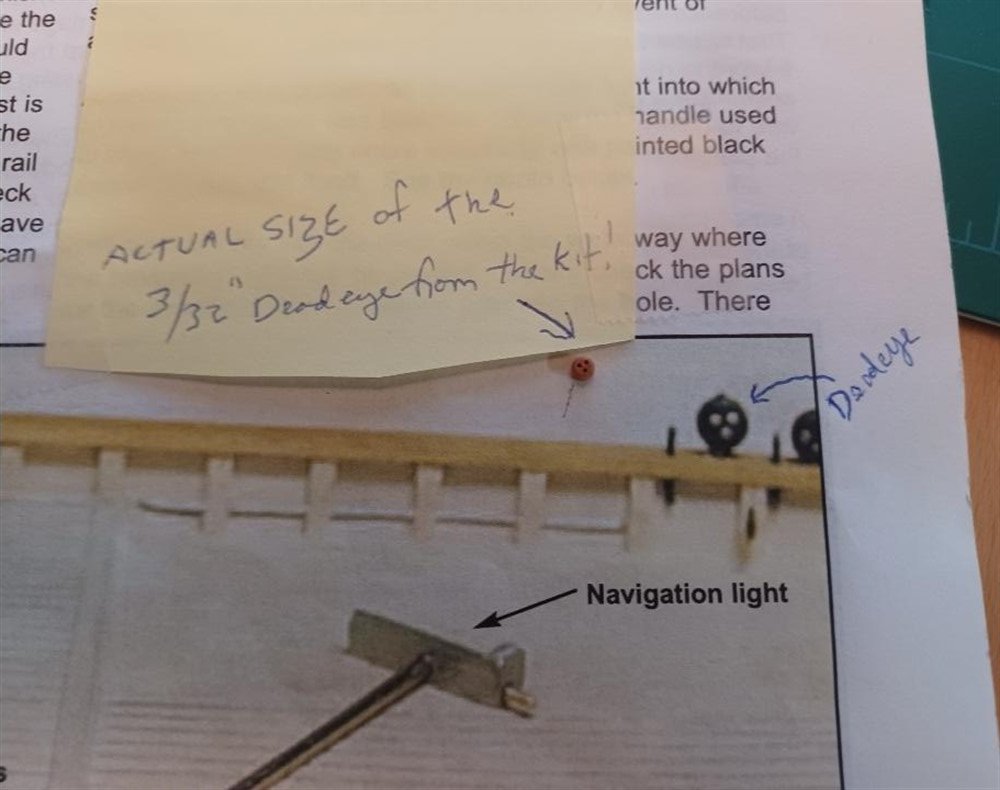
This is what I was referring to. The deadeyes and their holes are SO tiny! How does anyone do this?
-
Hello @Keith Black, and all the other modelers who were so helpful to me a couple years ago! It's been awhile since I've been here... lots of "life stuff" happened along the way, and I stopped working on my ship. But I've really missed building it, and whenever I thought I'd try again, I would find I was completely stuck on the next steps! So I'm going to try again. But now I need help! I'm trying to thread some rigging through the deadeye. But these deadeyes are so tiny, and the holes so small, that a regular sewing needle won't fit through the hole, much less pull the thread through. What's the secret? What tools do I need to accomplish this? Thanks. I've really missed this forum, conversing, and seeing what you've all been up to!
-
Ohmigosh, Keith, I am so sorry to hear this incredibly sad news. I haven't been on for awhile, and was reading all the great posts and viewing your latest pics of the ship (which is gorgeous), and then saw this terrible news. Ditto with everyone else, to continue this build in honor of your son, but only when it feels right. My condolences are with you in this extremely hard time. Lynn
-
Hi all. Just checking in to see how the rest of the MSW world is doing. I've been really busy for awhile now Also, I got stuck in trying to make chainplates (my files don't seem to do much in trying to trim down the strip of brass they are made from, and I seem to have lost a set of files that might work!) Anyway, I hope to get back to work in the near future, but thought I'd see what you are all up to!
-
Gorgeous! It looks wonderful... and this is your FIRST build? Wow, I'm blown away!!!
- 362 replies
-
- 2
-
-
-
- Amati
- Lady Nelson
- (and 2 more)
-
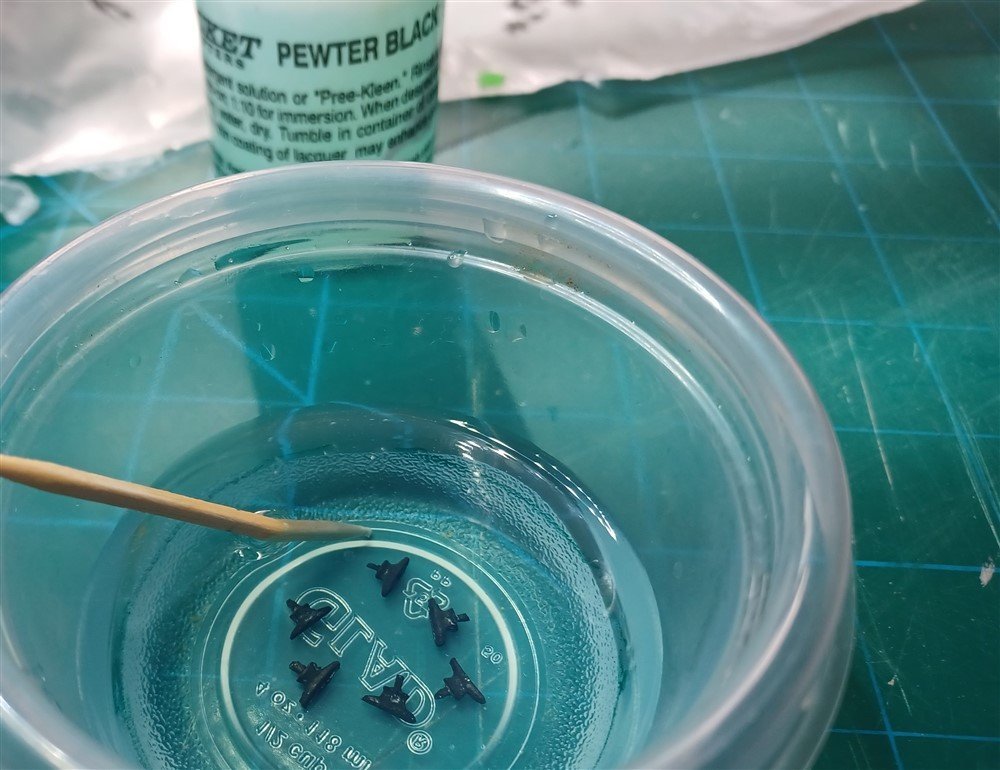
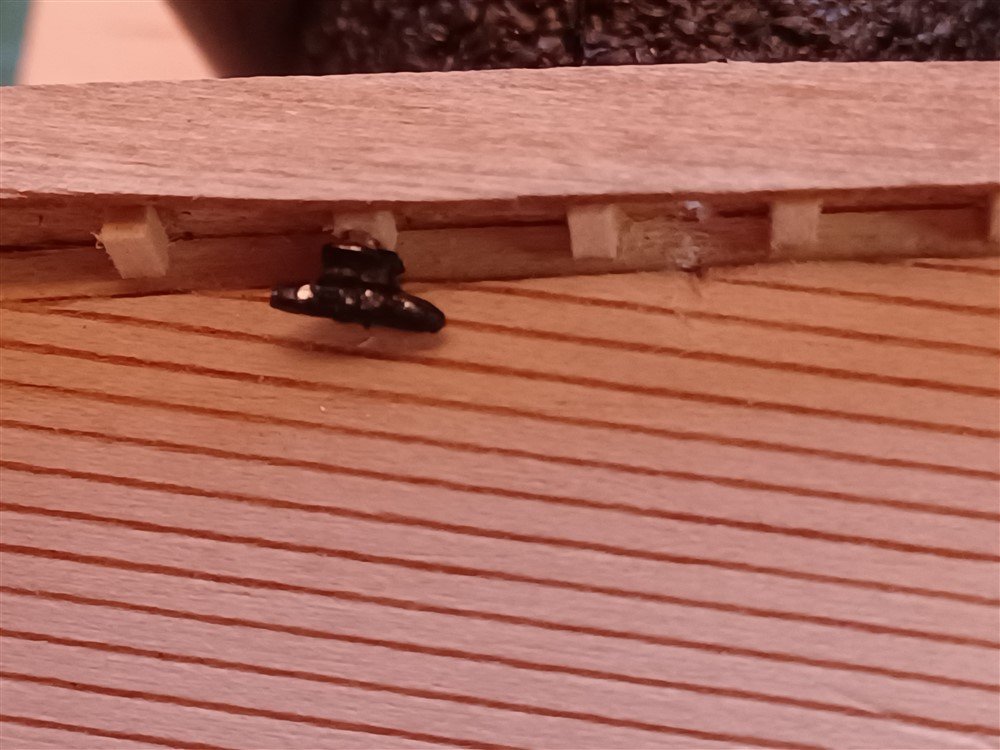
It worked!!! I am happy with my decision to wash the black paint off the 6 cleats I need to attach to the stanchions, and then use the Pewter Black solution from BlueJacket! It took a little time to wash off the paint, but then the solution went to work, and I'm happy with the result. So I've attached the newly-blackened cleats to the stanchions, and I've finished the splash rails and the two fairleads. Happy with my progress, but totally aware of how hard it is to work with tiny parts and CA glue. My precision (or lack thereof) makes me hope that no one will look too closely at the finished product! But for now, I'm happy just to continue learning how to proceed with each new step! Precision will come later! I was surprised (and pleased) with how fast the blackening solution did its job!
-
Eric, the BlueJacket people were very responsive to my email. They responded right away with an email that included an order form for the solution, which I went ahead and ordered. And reasonable prices too. Thanks!
-
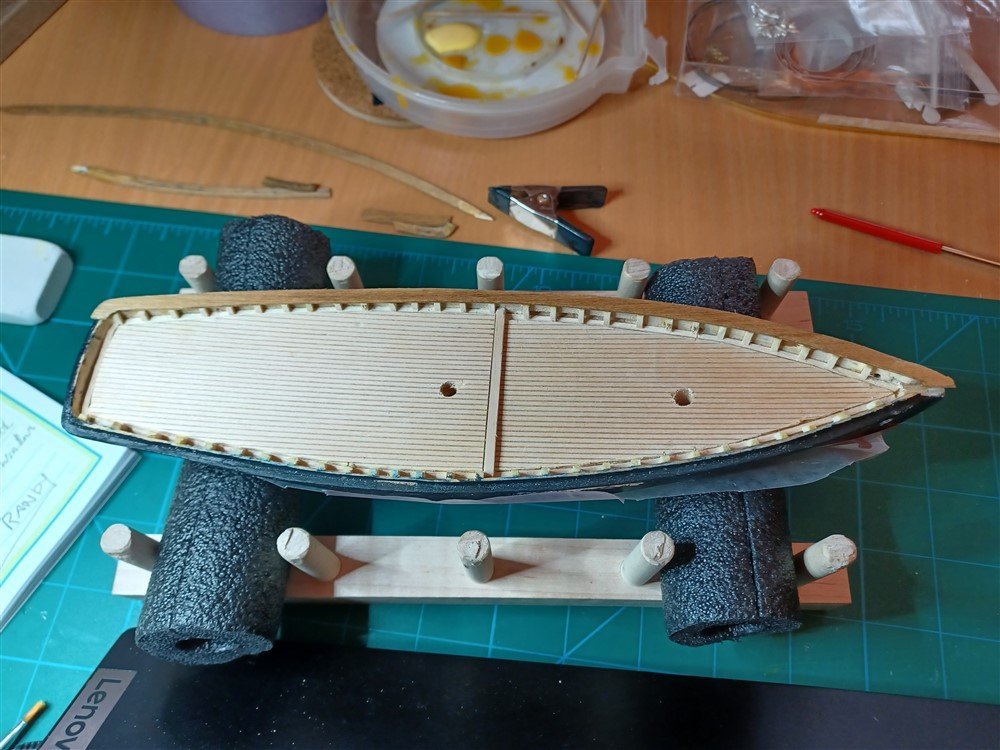
Thanks for the info. Eric, thanks, I tried to order the PN0051 from the BlueJacket website, but couldn't find a way to order it, so I sent them an email. Meanwhile, I did a "dry-fit of the current painted cleat I have, and realized two things. 1) the cleat is much to big for this model (it's 1/4", and I see that I can order a 3/16" ceat from Model-Shipways, which I have requested), and 2) the black paint is flaking off, so I'm really looking forward to blackening the cleats and most the other Britannia pewter castings that came with the kit! This cleat looks too big (sorry it's not quite in focus)! So until I get smaller pieces and the blackener, I'm going to move on to other deck fittings, etc. Oh, and pay no attention to the stanchions and waterway to the right of the cleat... more sanding and clean-up needed!
-
Thanks! I'll be painting these (as soon as I return from my round of golf!!!) Thanks, Ithink the problem is that these are not brass! Thanks, It's very possible these are not brass! Oops! I appreciate the information about the chemical process, and the advice for blackening solutions for different substances. the one I have does, indeed, look like windshield-washer solution, which is most likely the problem, since these cleats are "Britannia castings", which I just assumed were brass. Oh well. I will now just paint them, and hope it works!
-
So I had to step away for a bit... first there was the Final Four (Go KU), then the Championship (Yay Jayhawks!). And of course, time taken to watch the Masters (great to see Tiger walking, and congrats to Scheffler!) Then I started my new retirement gig... I am volunteering at our local golf course (which comes with free golf! Whee!) Anyway, back to ship building. I was excited to start work on the blackening of the cleats, but I'm incredibly disappointed! Instructions say to paint the cleats after they have been installed on the stanchions, but my fingers aren't that steady, so i made a little "holder" and swabbed each with the Brass Black solution. I am really confused now. I was expecting a black paint-like solution, but instead, it came out as a clear, somewhat blu-ish solution, and didn't make any difference in the color of the cleats. I was really hoping the Brass Black would color them all black, so I'm not sure what I've done wrong. Thoughts?

-
Wow, Keith! Absolutely breathtakingly beautiful! I am really amazed at the incredible detail, from everything on the deck to the massive work on the rigging! Fabulous! I can't even imagine getting to the level of skill you have, but its inspiring!
-
Hi Dave, I'm enjoying your build. Your ship looks great!
- 362 replies
-
- 4
-
-
-
- Amati
- Lady Nelson
- (and 2 more)
-
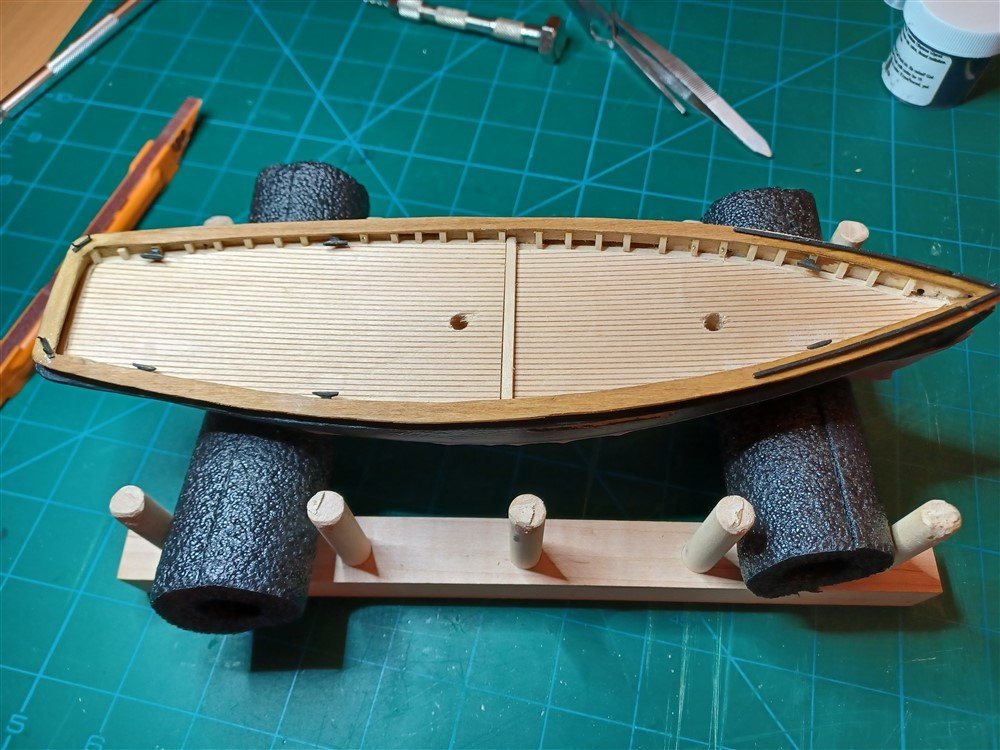
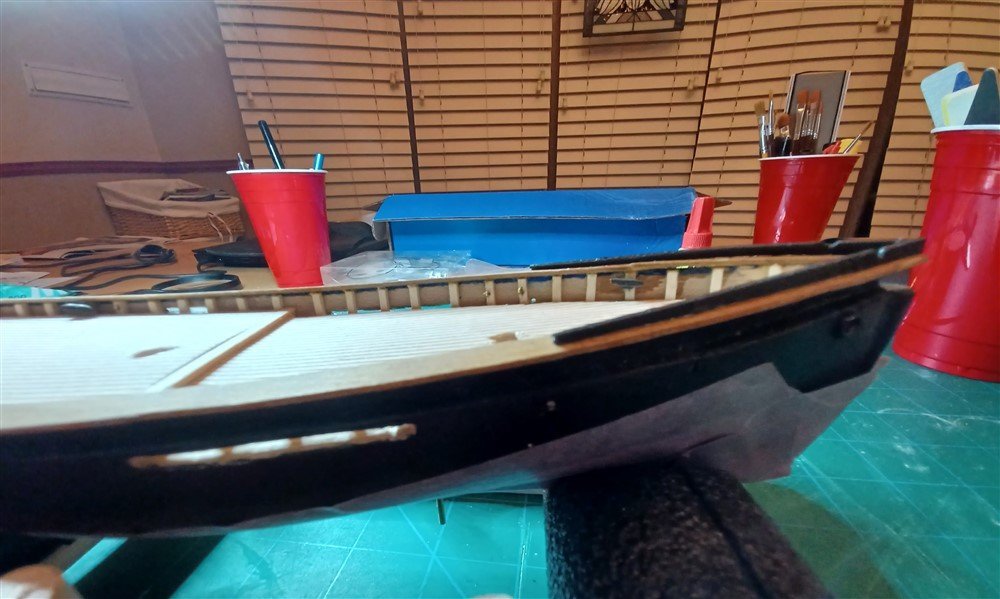
Great discussion on hole punches, cutters, and gun tracks! I actually purchased the circle cutter AND a punch, (they should be delivered today), and I'll try both. The alignment issue worries me with the punch, but with practice, it may work! Meanwhile, i'll be using the Brass Black (to be delivered in the same pkg today), on the little fittings that get installed on the stanchions, while wrestling with the cap rail. The first attempt didn't work (I cut it out in one piece, but the wood kept splitting). So I'm ending up with two side pieces and one at the back. The starboard side installation went ok (one small split that will be covered by the splash rail), but I'm having trouble gluing the port side. Wood glue didn't work, so I'll be using CA next. It was a pain trying to "freehand carve" these rails, so I am happy with the starboard rail so far, and hoping the port rail will be ok too!