lraymo
-
Posts
297 -
Joined
-
Last visited
Content Type
Profiles
Forums
Gallery
Events
Everything posted by lraymo
-
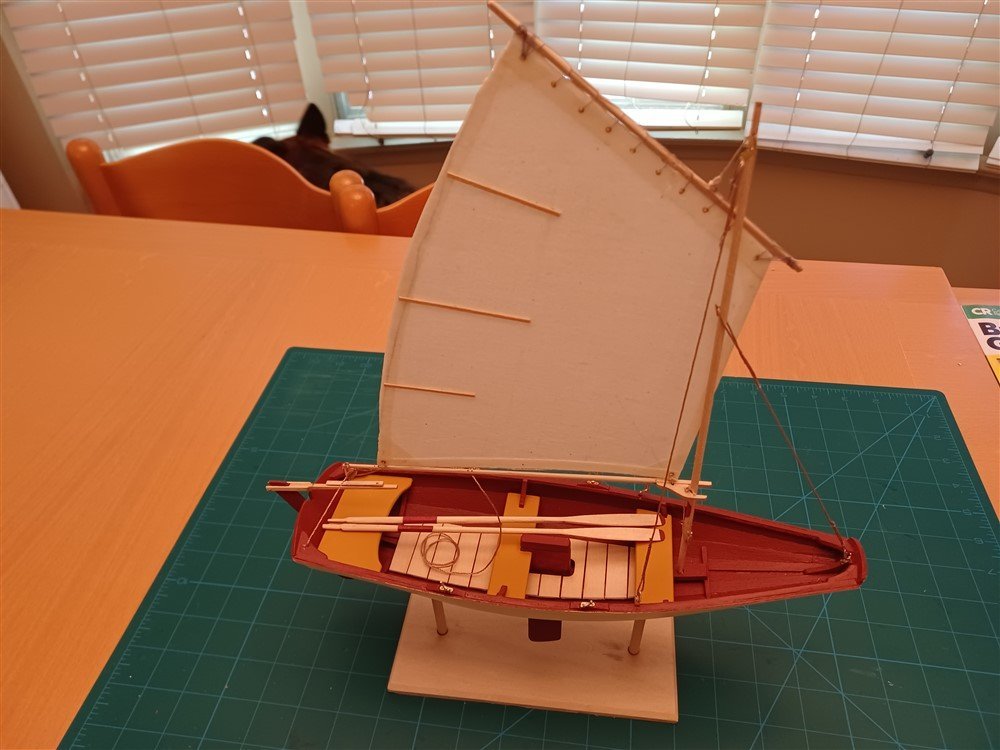
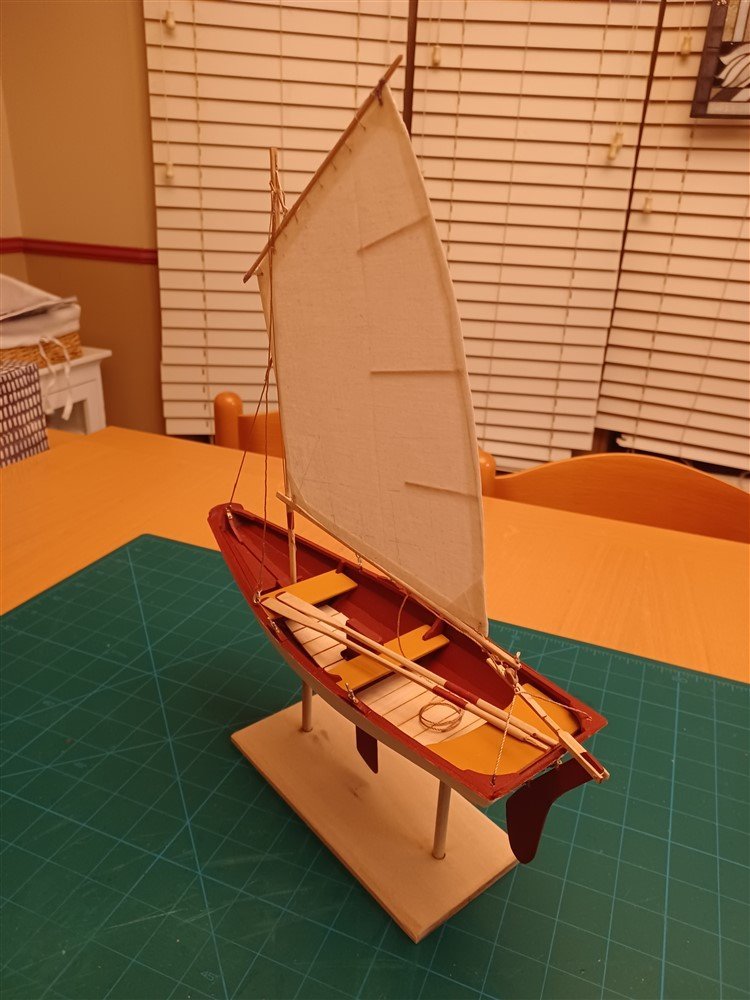
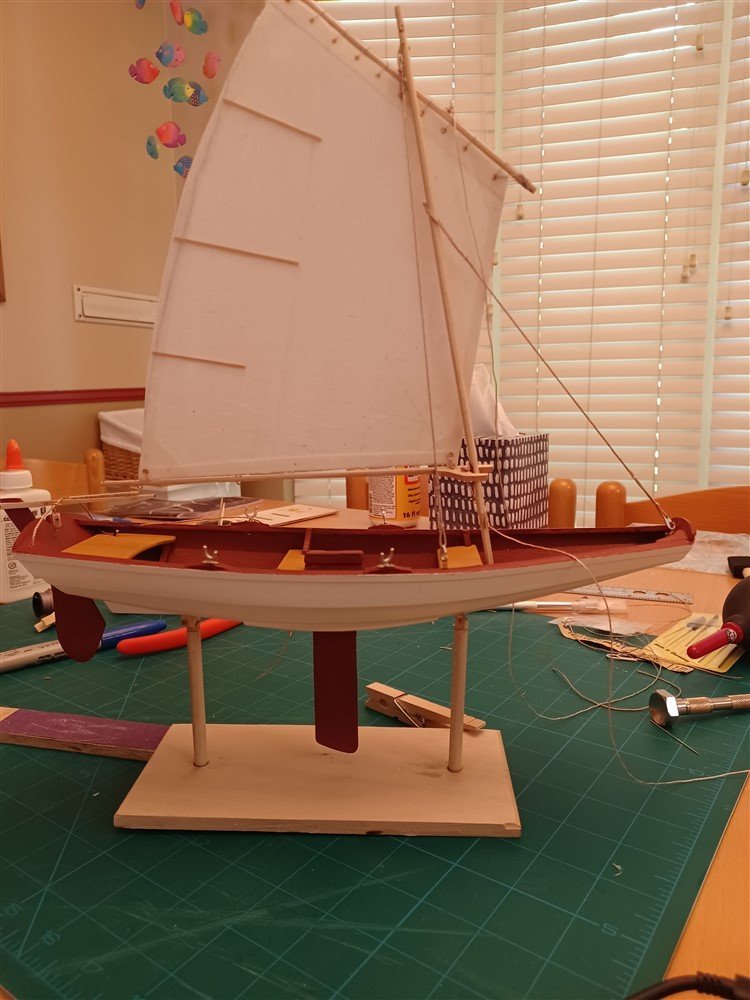
It's DONE! After a little flurry of work to re-do the rigging, it's all come together, and its done! Wheeeee! Happy that it's finished, but a little sad too, as i've enjoyed doing it and communicating with you all as I've gone thru this process. Thanks to everyone for the likes, comments, and the encouragement. You kept me going! Special thanks and a shout-out to: @Keith Black - your kind words and humor were a highlight! @druxey - thanks for all the encouragement! @Tigersteve - thanks for the recommendation - the Model Shipways Phantom is on its way and will be my next build! @Cathead appreciated your words of wisdom regarding finishes and other build advice! And thanks to many others who have commented and watched my progress. It has been very much appreciated! I've learned so much, and I can see all the flaws in this build, but I am happy with it, and will take what I've learned into the next project! (and the dog has been helping me out too )
- 160 replies
-
- 8
-

-
- Model Shipways
- norwegian sailing pram
- (and 1 more)
-
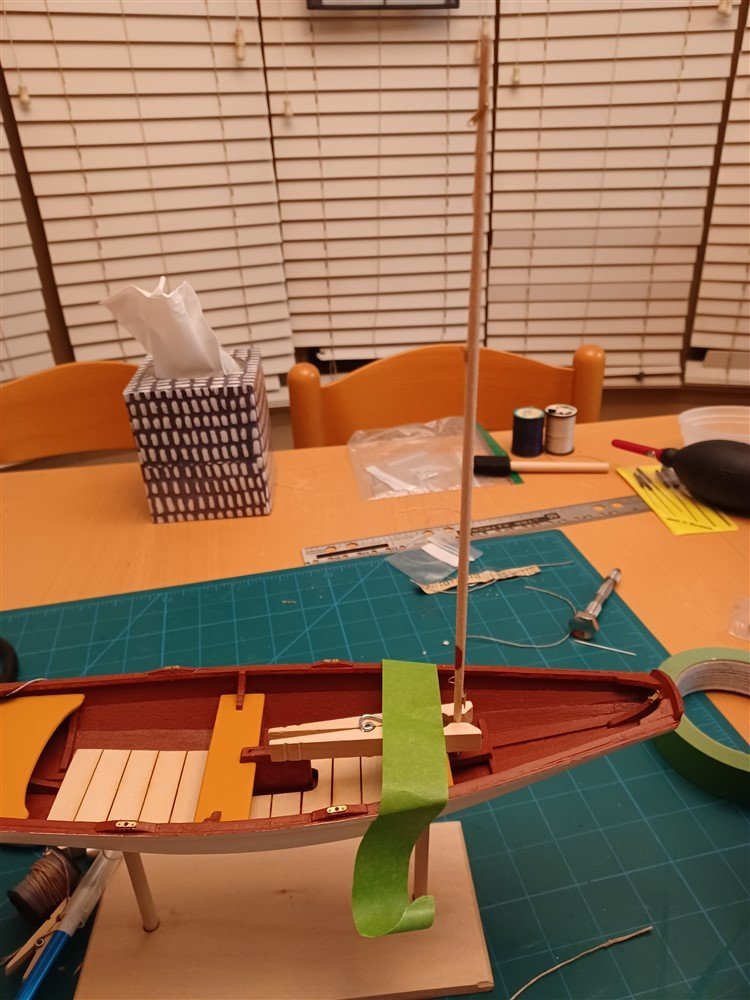
Keith, I think I will have LOTS of sweet fruit after all the work on this Pram! Teehee! Steve, I really like the "look" of the Pilot Boat, and its a much better price! But where can I find the practicum? I searched this site, but couldn't find anything from him on the Pilot Boat, although I found numerous other postings/writings/blogs of his. (Admittedly, I am not very adept at finding things online!) (Update - I just realized the "practicum" pdf's are included with the Instructions in the kit!) Starting over with the mast. Vertical is better now!
- 160 replies
-
- 3
-
-
- Model Shipways
- norwegian sailing pram
- (and 1 more)
-
I've considered both the Longboat and the Muscongus Bay. I really like the "look" of a ship with rigging and masts but no sails. What do you guys think of the "US Revenue Cutter, BlueJacket wooden model ship K1106A" US Revenue Cutter, BlueJacket wooden model ship K1106A (agesofsail.com) Is this too complex for me? I like the "look" of it, but I have no idea how complex this kit is, or if I have the needed skillset to accomplish this build. Your thoughts? (Of course, I'm jumping way ahead of myself. I'm still struggling with trying to get ONE mast installed vertically on the Pram!)
- 160 replies
-
- 2
-
-
- Model Shipways
- norwegian sailing pram
- (and 1 more)
-
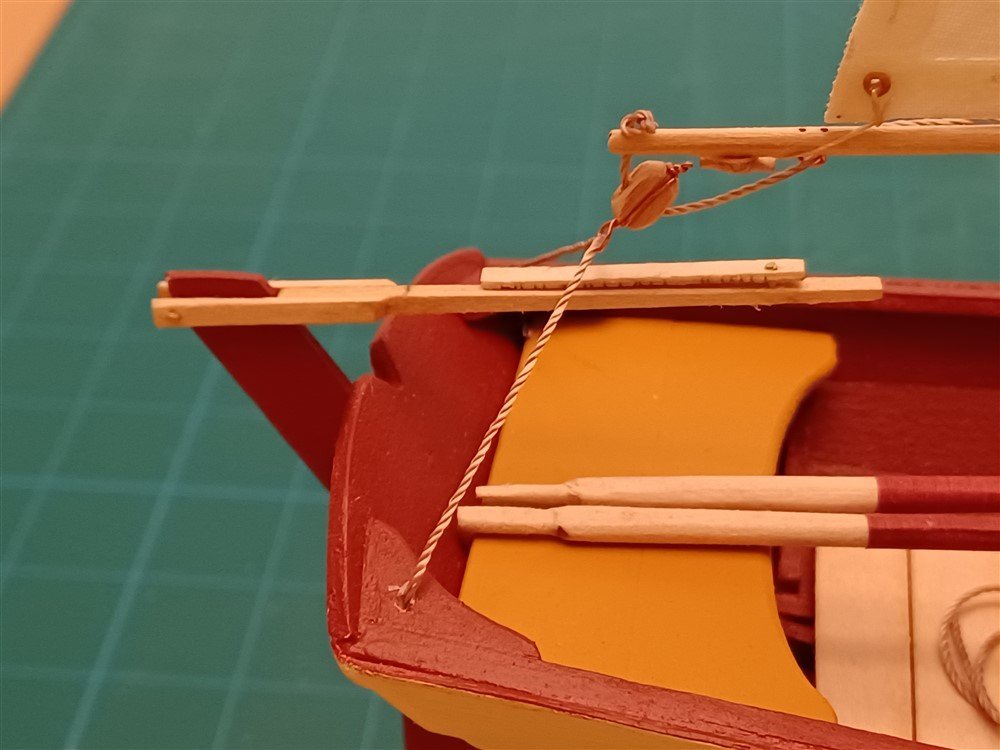
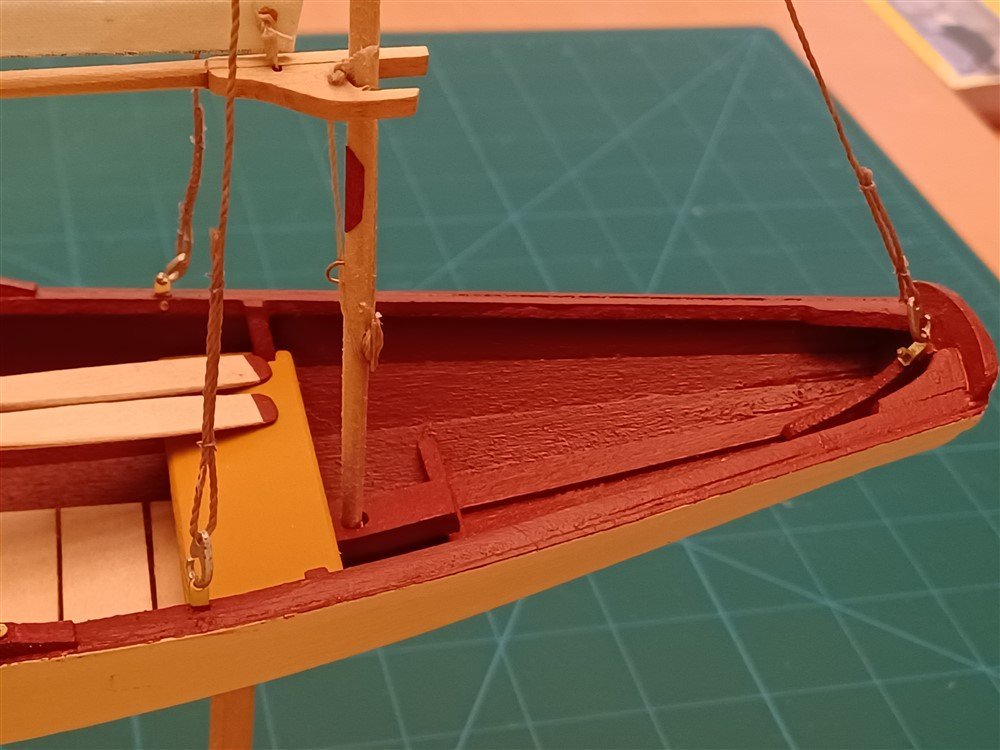
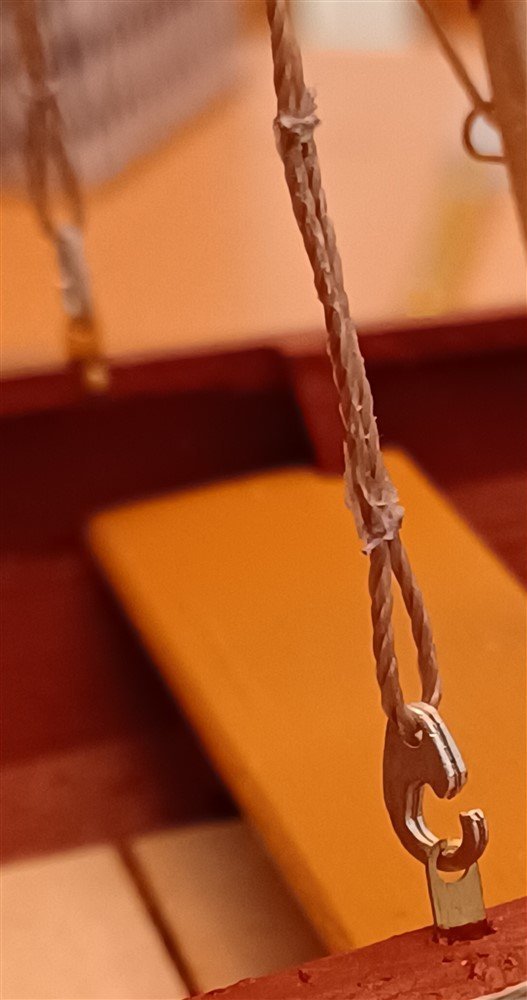
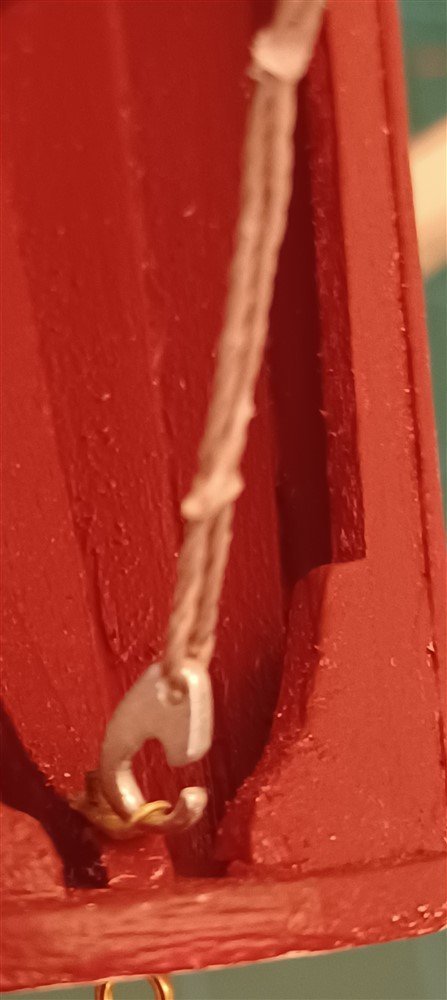
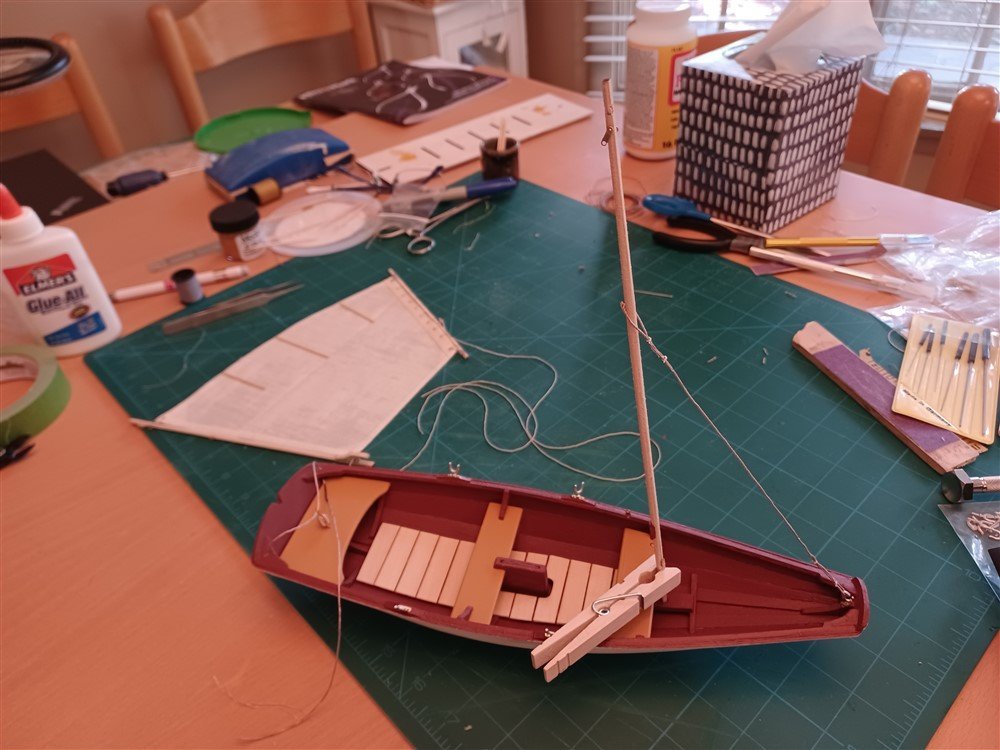
Well, I'm not having fun today! but you all may be laughing at my current troubles! I tried to put the whole thing together, excited that I was almost done with this. But in looking at the picture below, the discerning eye will notice that the Halyard line is completely disconnected and serving no useful purpose! Mostly because the mast is not vertical, which throws everything off. When I tried to raise the sail the bottom left was dragging the boat bottom, and the sail was skewed. Using a little bit of CA, I glued the gaff to the mast (completely wrong!) just to see if I could place the sail in the correct position to get an idea of what is was supposed to look like, and to try to somehow salvage what I've already done. However, after realizing there are still multiple problems (for instance, there's not enough room between the boom and the traveler line), I believe I'm going to have to take the rigging apart, re-do the mast to be vertical, and try again. Ugh. But I have enough rigging line to do it over, so I will forge ahead. I am happy with how the ropes around the front and back stays turned out, and I like how the block turned out. But I will need to re-do all the rigging. Trying again is fun, right? Things I like: Back stay, Front stay, Block Full view of Troubled Pram! (hopefully will be fixed when I re-do the mast!)
- 160 replies
-
- 5
-
-
- Model Shipways
- norwegian sailing pram
- (and 1 more)
-
Thanks for the feedback regarding the Fair-A-Frame. I'm definitely NOT going to be getting it! It's great to have this forum to turn to when in doubt!
- 160 replies
-
- 2
-
-
- Model Shipways
- norwegian sailing pram
- (and 1 more)
-
Thanks for the suggestions... and yes, I am having fun at this! One question. The Muscongus Bay recommends getting the "Fair-A-Frame". I don't know what that is, and when I read about it, it seems its more for "plank-on-bulkhead". But the Muscongus is plank-on-frame, so I'm wondering how it would work, and if I really need it. I'm just not sure how I would use it. Thoughts? And i looked at the Vanguard models. They look interesting too. I might have to do one of those after the Muscongus Bay!
- 160 replies
-
- 2
-
-
- Model Shipways
- norwegian sailing pram
- (and 1 more)
-
This has been quite a learning experience. I'm getting close to finishing, and I want to say thanks for everyone's help and encouragement along the way. I still have a bit more to do, but its getting there. I'm thinking about what to do next. When I started this adventure, I was "inspired" after seeing a model of the "Cutty Sark". I love the look of the 3-masted schooner and its lines are beautiful. But after these two beginner models, I realize I am no where near the skill level it would take to make one of those schooners. The kit alone costs over $500! Yikes! I can barely manage these $49 kits! So I'm wondering if I have the patience and commitment to this hobby to continue what looks like it will take years of practice and many more models of increasing complexity before I can attempt the schooner. Any thoughts appreciated. I'm just in a pensive mood today, and again, thanks. This is an incredible forum!
- 160 replies
-
- 6
-
-
- Model Shipways
- norwegian sailing pram
- (and 1 more)
-
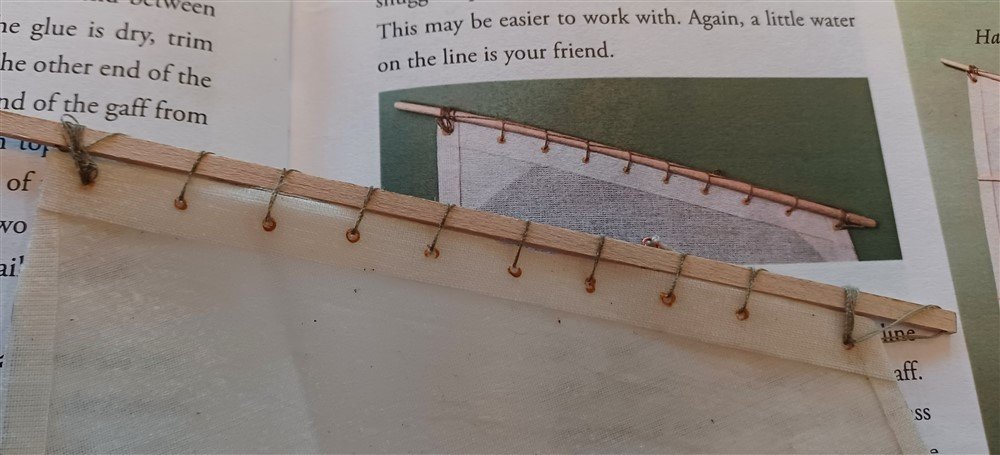
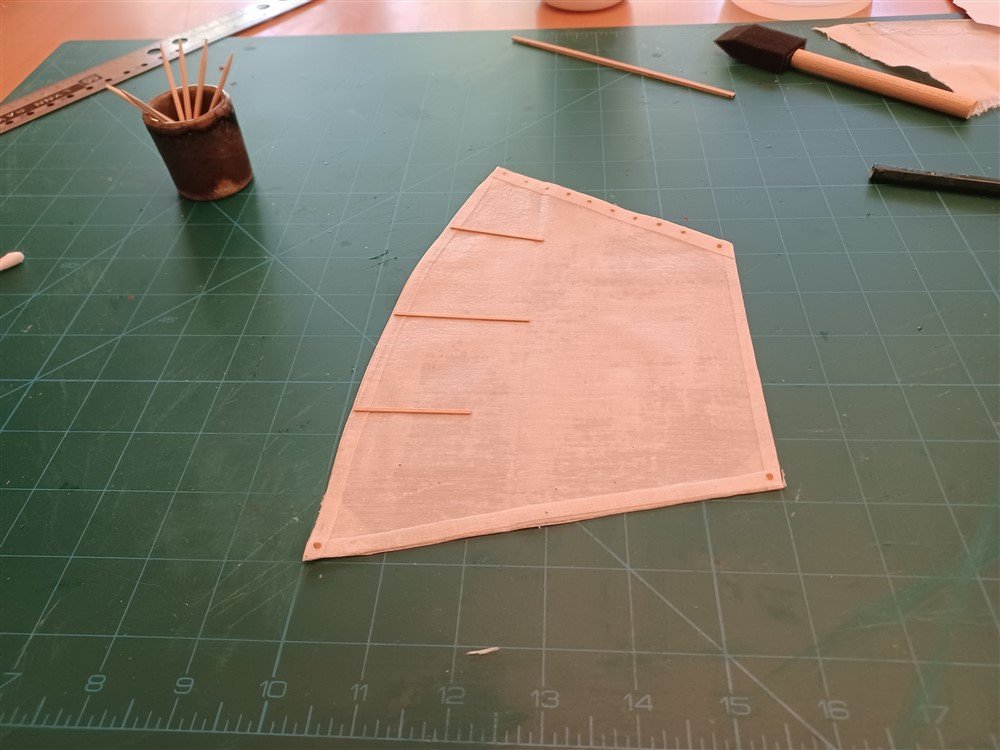
Based on all your feedback, I've redone the Lashing and Lacing, and tried to round off the spar. Front and back now look alike, and seem to match the picture in the instructions! FRONT OF SAIL: BACK OF SAIL:
- 160 replies
-
- 6
-
-
- Model Shipways
- norwegian sailing pram
- (and 1 more)
-
Thanks Cathead and druxey. I will deconstruct the whole thing and try again. First, as Steve points out, I will round the spars. Then I'll re-do the Lacing, with your helpful descriptions, Cathead. And druxey, I re-read the instructions and it make smore sense now. Onward and upward! Someone once said that making mistakes is how to learn. I'm learning a lot with these steps!
- 160 replies
-
- 5
-
-
- Model Shipways
- norwegian sailing pram
- (and 1 more)
-
Steve, you are correct! I missed that section in the instructions (or maybe i was just too tired when I read that paragraph!). I have enough thread to try to undo the lashing/lacing, and round the spar, and put it back together again. I also forgot to round off the "boom" spar too. Hmm, I see a bunch or re-work in my future! Any thoughts on what the back side should look like? Should it match the front side? I didn't know how to do the threading to make it come out the same on each side. Thanks for the feedback.
- 160 replies
-
- 2
-
-
- Model Shipways
- norwegian sailing pram
- (and 1 more)
-
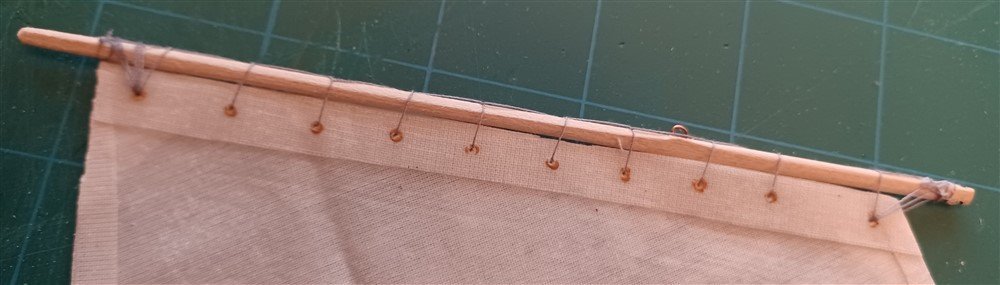
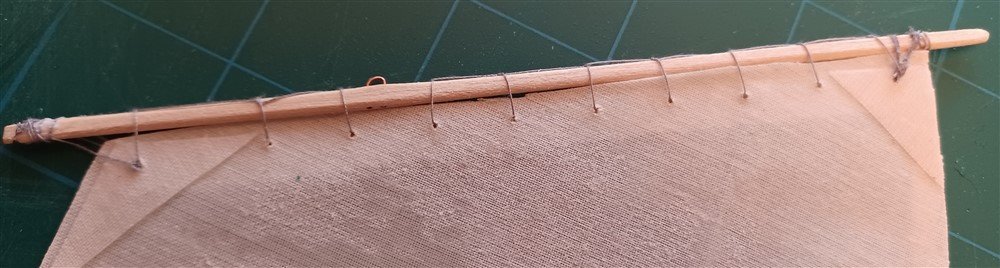
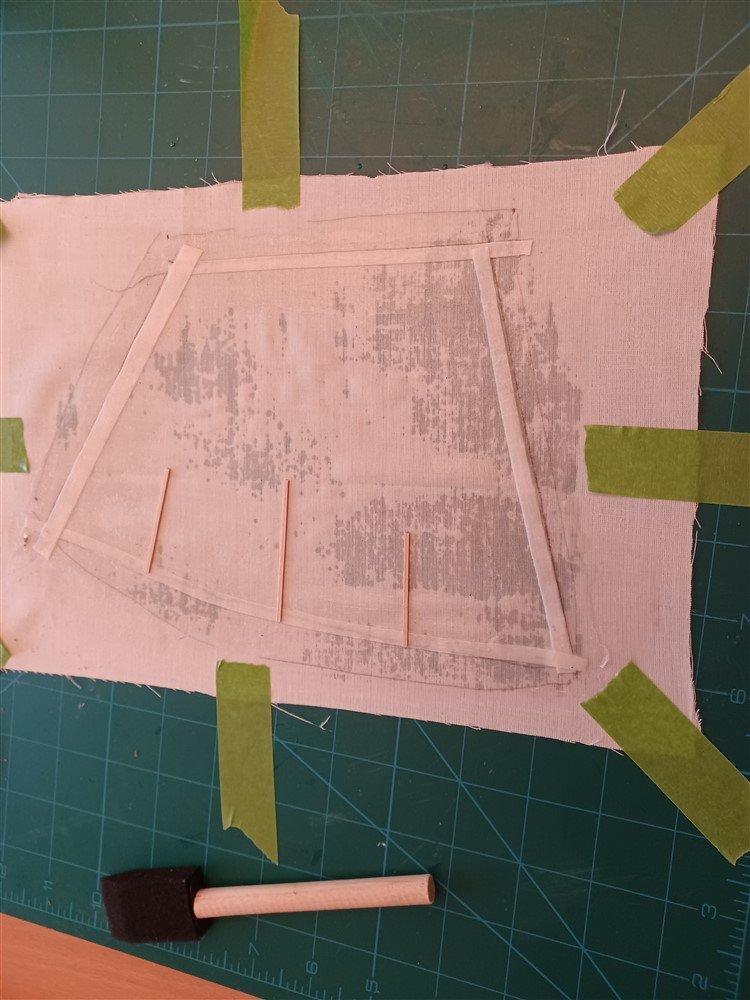
Started the rigging. It looks simple enough, but its more complicated than I thought. I'm not entirely sure what I'm doing. The Lacing was difficult. With a lot of grumbling and some strategic placement of glue, I was able to wrestle with the thread enough to make the Lacing look like it does in the instructions, at least on the Front side. But the Back side doesn't look nearly as good, and yet I couldn't figure out any other way to lace the thread. Oh well, I will continue on. Front side of sail: Back side of sail: (I'm not sure its supposed to look like this!)
- 160 replies
-
- 1
-
-
- Model Shipways
- norwegian sailing pram
- (and 1 more)
-
Looking good!
-
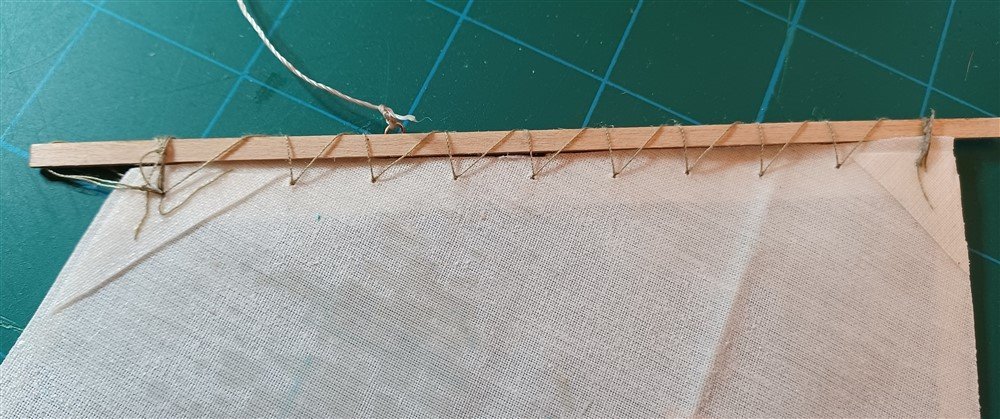
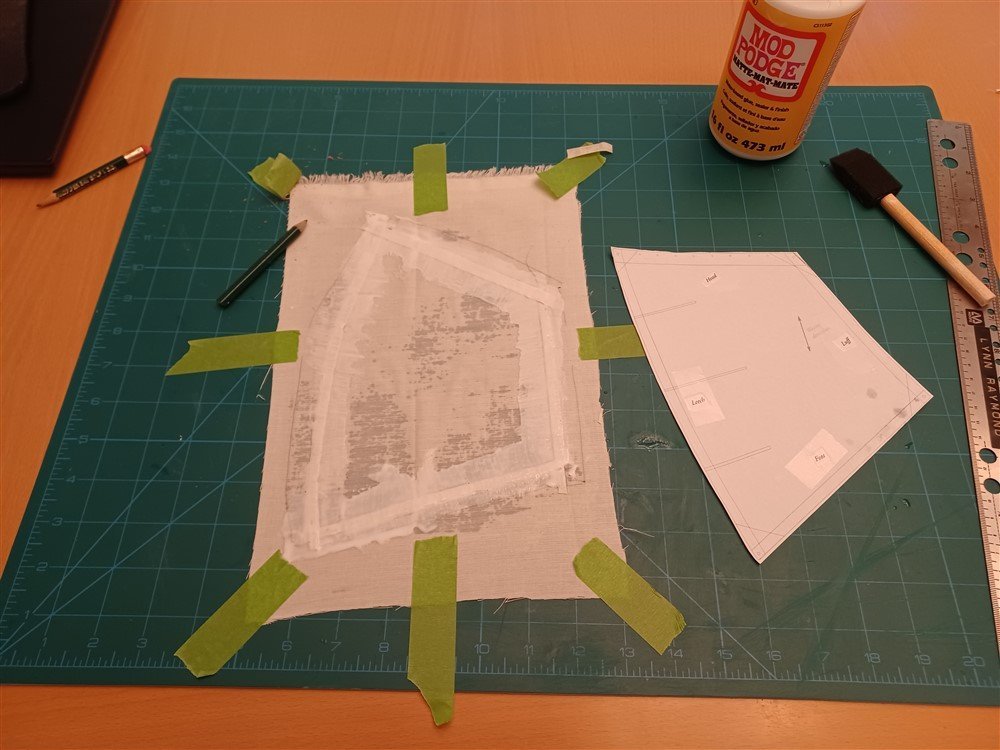
Just now getting back to work on the sail! I was nervous, but using some tips from the various blogs, its turned out ok so far. Used Mod Podge to coat the sail fabric (instructions said to use watered-down glue, which is what Mod Podge claims to be), and it worked out well. Also, realized too late that someone had mentioned pencil marks are hard to erase after coating. So now I have a few permanent pencil marks. So far, so good. Next is tackling all the rigging. I will need to read the instructions a few more times, as I'm still not sure about it, and I'll need to revisit some of the blogs to get a feel for what needs to be done! The sail is complete!
- 160 replies
-
- 5
-
-
- Model Shipways
- norwegian sailing pram
- (and 1 more)
-
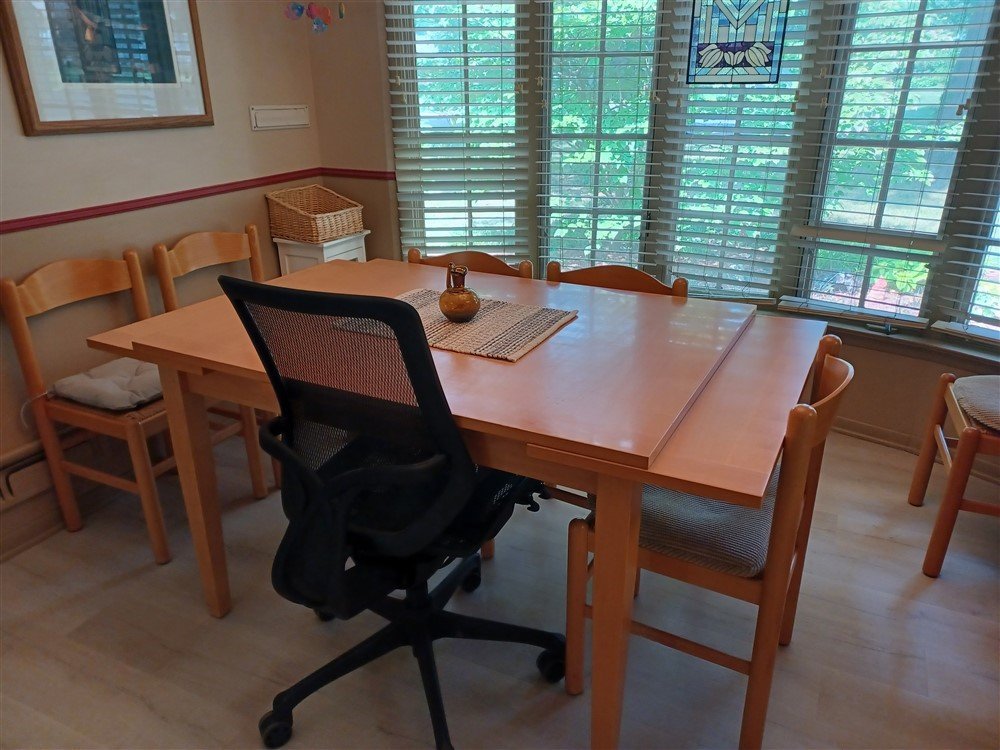
Hi Keith, yes, doing fine, and thanks for asking! Progress had stalled for a bit, while other life issues got in the way, but working towards getting back to it! Had to remove/relocate the workshop (a.k.a. kitchen table) to accommodate guests, but slowly getting back to modeling. Workbench prior to guests: Ready for guests to arrive, but alas, model work had to stop!
- 160 replies
-
- 4
-
-
- Model Shipways
- norwegian sailing pram
- (and 1 more)
-
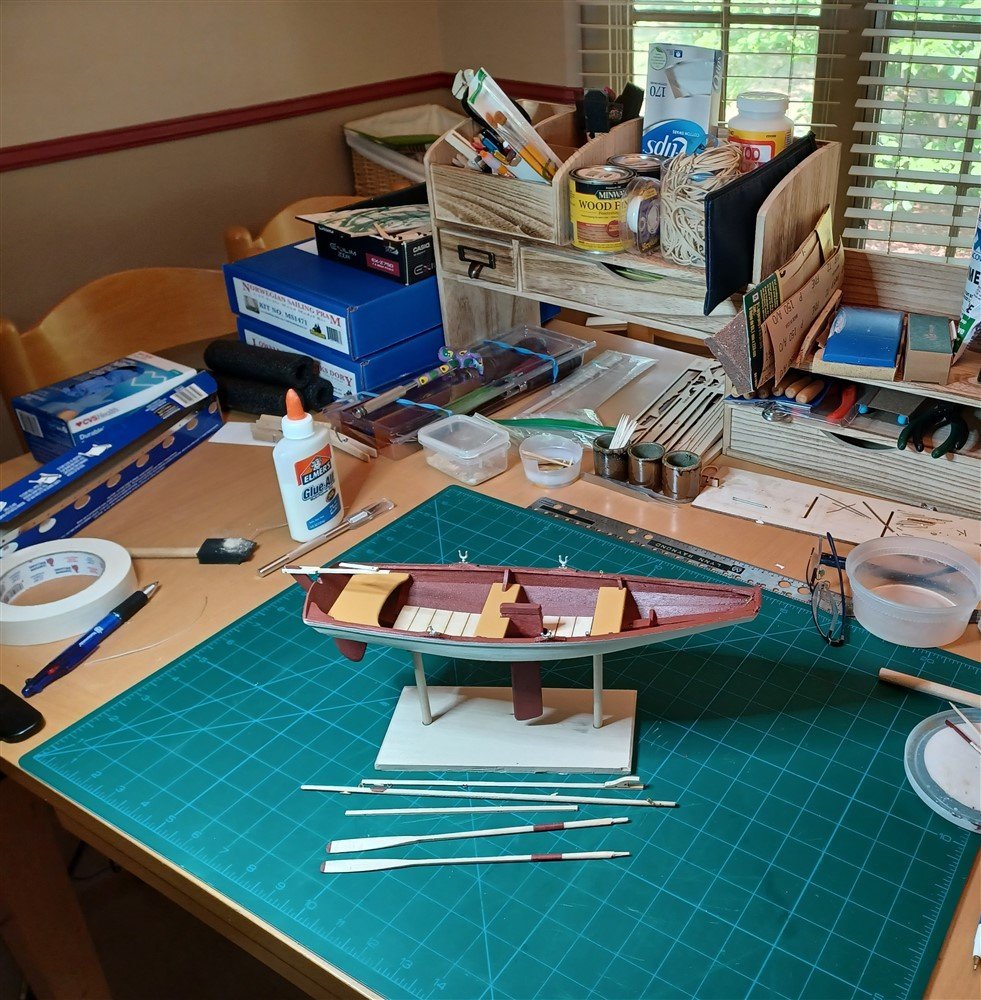
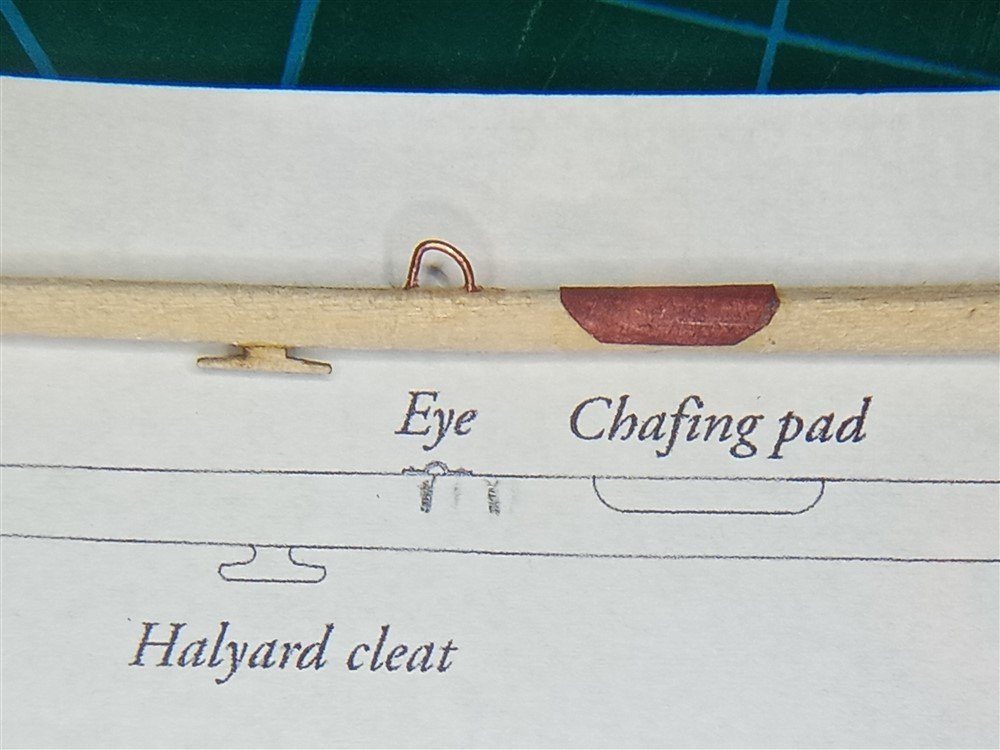
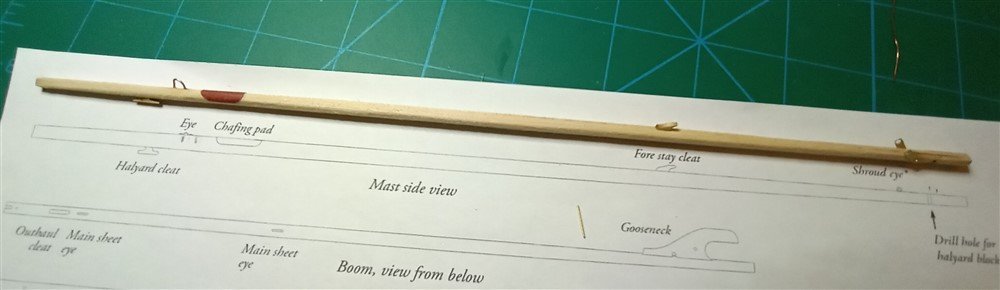
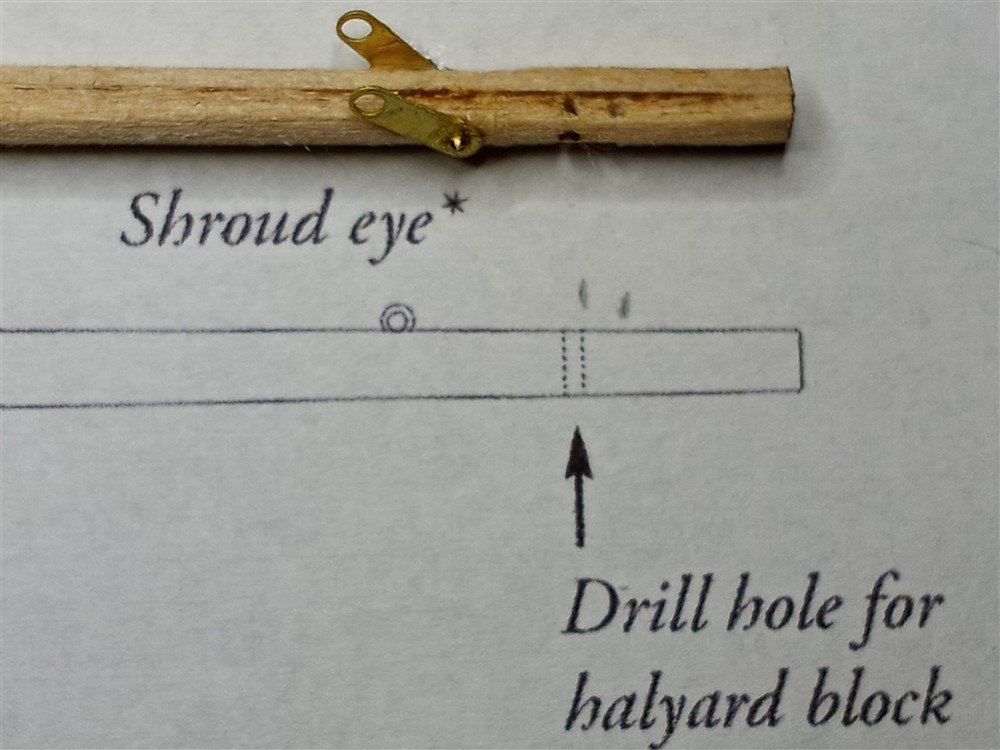
It's been a busy "life" week, so just now getting back to the model. Finished the mast. I wasn't completely sure about the fittings. I created the halyard sheave (to the best of my ability without splitting the wood!). But I wasn't sure about the "shroud eye" (I just assumed that was where the straps for the back stays were located,so I glued them in, complete with bolts!) And it says "drill hole for halyard block", so I assumed that was the pre-drilled hole in the mast from the kit? Anyway, I think I've finished the mast, unless I've missed something. Next is the boom and gaff. Slowly getting there.
- 160 replies
-
- 4
-
-
- Model Shipways
- norwegian sailing pram
- (and 1 more)
-
Thanks Keith and Eric, for the explanations! I hadn't considered then question of whether I was building for the sake of the model or trying to replicate real life! I think I just assumed the kit was focused on what the ship would look like in real life, and I think that's the look I was hoping for. But I like Eric's idea to not mix & match. You both have given me alot to think about. For the Norwegian, I'll finish it up in brass, since I'm almost done with the metalwork. But going forward, I'm going to be doing research on whatever ship kit I get, and try to go for realism. At the moment, I'm considering getting the 3rd ship in the series, after I finish this one, since I need sooo much more practice in building up skills! thanks again! And btw, thanks Eric, for the kind words you left on DPhilBrick's build log about my blog questions!
- 160 replies
-
- 4
-
-
- Model Shipways
- norwegian sailing pram
- (and 1 more)
-
Hi DPhilBrick... looking good! I used the rubber band method too. Nice job so far. (And thanks, Cathead), for the mention!)
-
Ok, my question is this, regarding brass blackening. Are you saying that all brass pieces should be blackened? Nails too? Or is there a standard for what kinds of pieces need to be blackened? I read several threads on how to blacken (looks like there are several products out there that can be applied to brass to blacken them)... but how does one determine which pieces should be blackened? Thanks!
- 160 replies
-
- 2
-
-
- Model Shipways
- norwegian sailing pram
- (and 1 more)
-
Druxey, yes I did! I remembered you gave me that advice, and I adopted it! Thanks, and it worked like a charm!
- 160 replies
-
- 2
-
-
- Model Shipways
- norwegian sailing pram
- (and 1 more)
-
Finally drove the remaining nails into the rudder gudgeons, rudder, and one oarlock pad. Lost a few more nails (slippery little things!), but I've ordered a pack of 100 nails so I should be able to finish the rest of the oarlock pads, and whatever else comes up. I also ordered the hemostat, which should help me hold on to these tiny pieces! (thanks, Keith, for the suggestion). In driving the nails, I scratched some of the transom, and had to repaint a bit. Also, I didn't trim off enough of the nail in some spots and pushed it out the other side. Lessons learned. Be sure to trim off enough of the nail, and be more careful (i.e., patient) when working on tiny items! Next step... the (gulp) mast!

- 160 replies
-
- 4
-
-
- Model Shipways
- norwegian sailing pram
- (and 1 more)
-
Ahh, Retired Postmaster! That makes much more sense! Happy retirement, and enjoy the Pram!
-
@Retiredpm, I just looked at your Dory. Very nicely done! I had fun with mine, and it was quite the learning curve, as I am a rank beginner! I think you will enjoy the Pram. I am encountering all sorts of issues along the way, as you can tell, but its all part of the learning curve. Have fun! And all the build logs have been (and still are) very helpful along the way! (On a side note, I am also a "retired project manager" (if that's what your username is referring to!)
- 160 replies
-
- 4
-
-
- Model Shipways
- norwegian sailing pram
- (and 1 more)
-
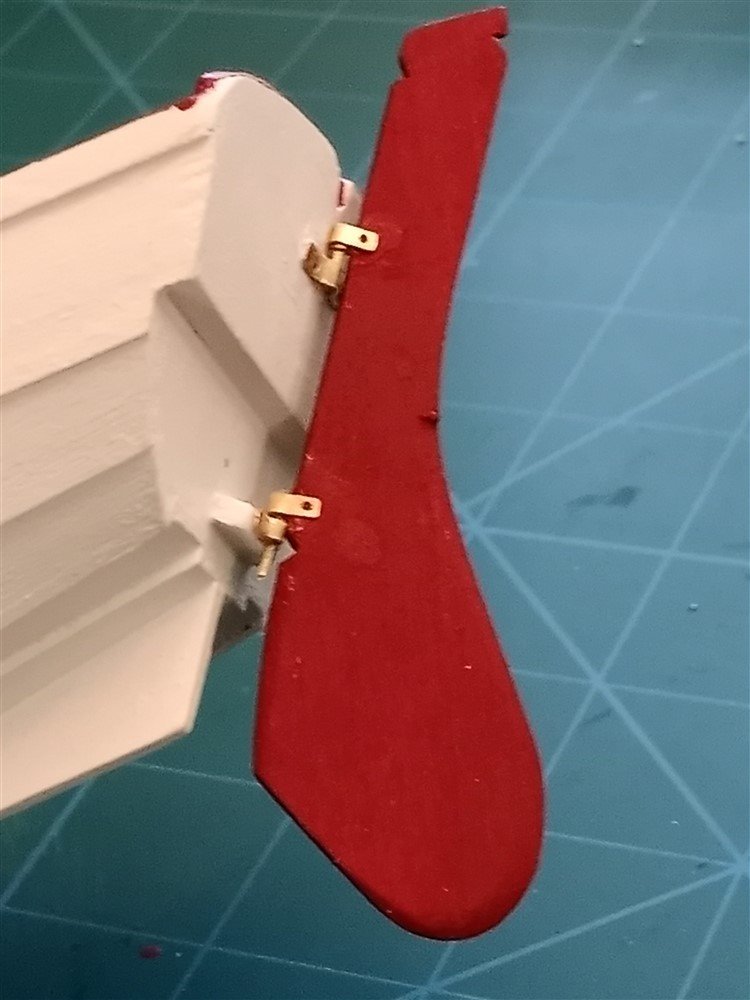
Thanks, Steve, Druxey, and Keith, for your encouragement! I am doubting my abilities, but as you all say, it's all part of the process. So today, I attached the pintles to the rudder, and I can actually connect the rudder to the transom. Small steps!
- 160 replies
-
- 7
-
-
- Model Shipways
- norwegian sailing pram
- (and 1 more)
-
Keith, you are so funny! I appreciate your posts and your encouraging words! When I was thinking I'd have to quit, one of the things that made me continue forging ahead are the comments from you and others on this forum, and I would miss them! (I went ahead and ordered the nails!!!) I will also look into the hemostats. Interesting tool!
- 160 replies
-
- 2
-
-

-
- Model Shipways
- norwegian sailing pram
- (and 1 more)
-
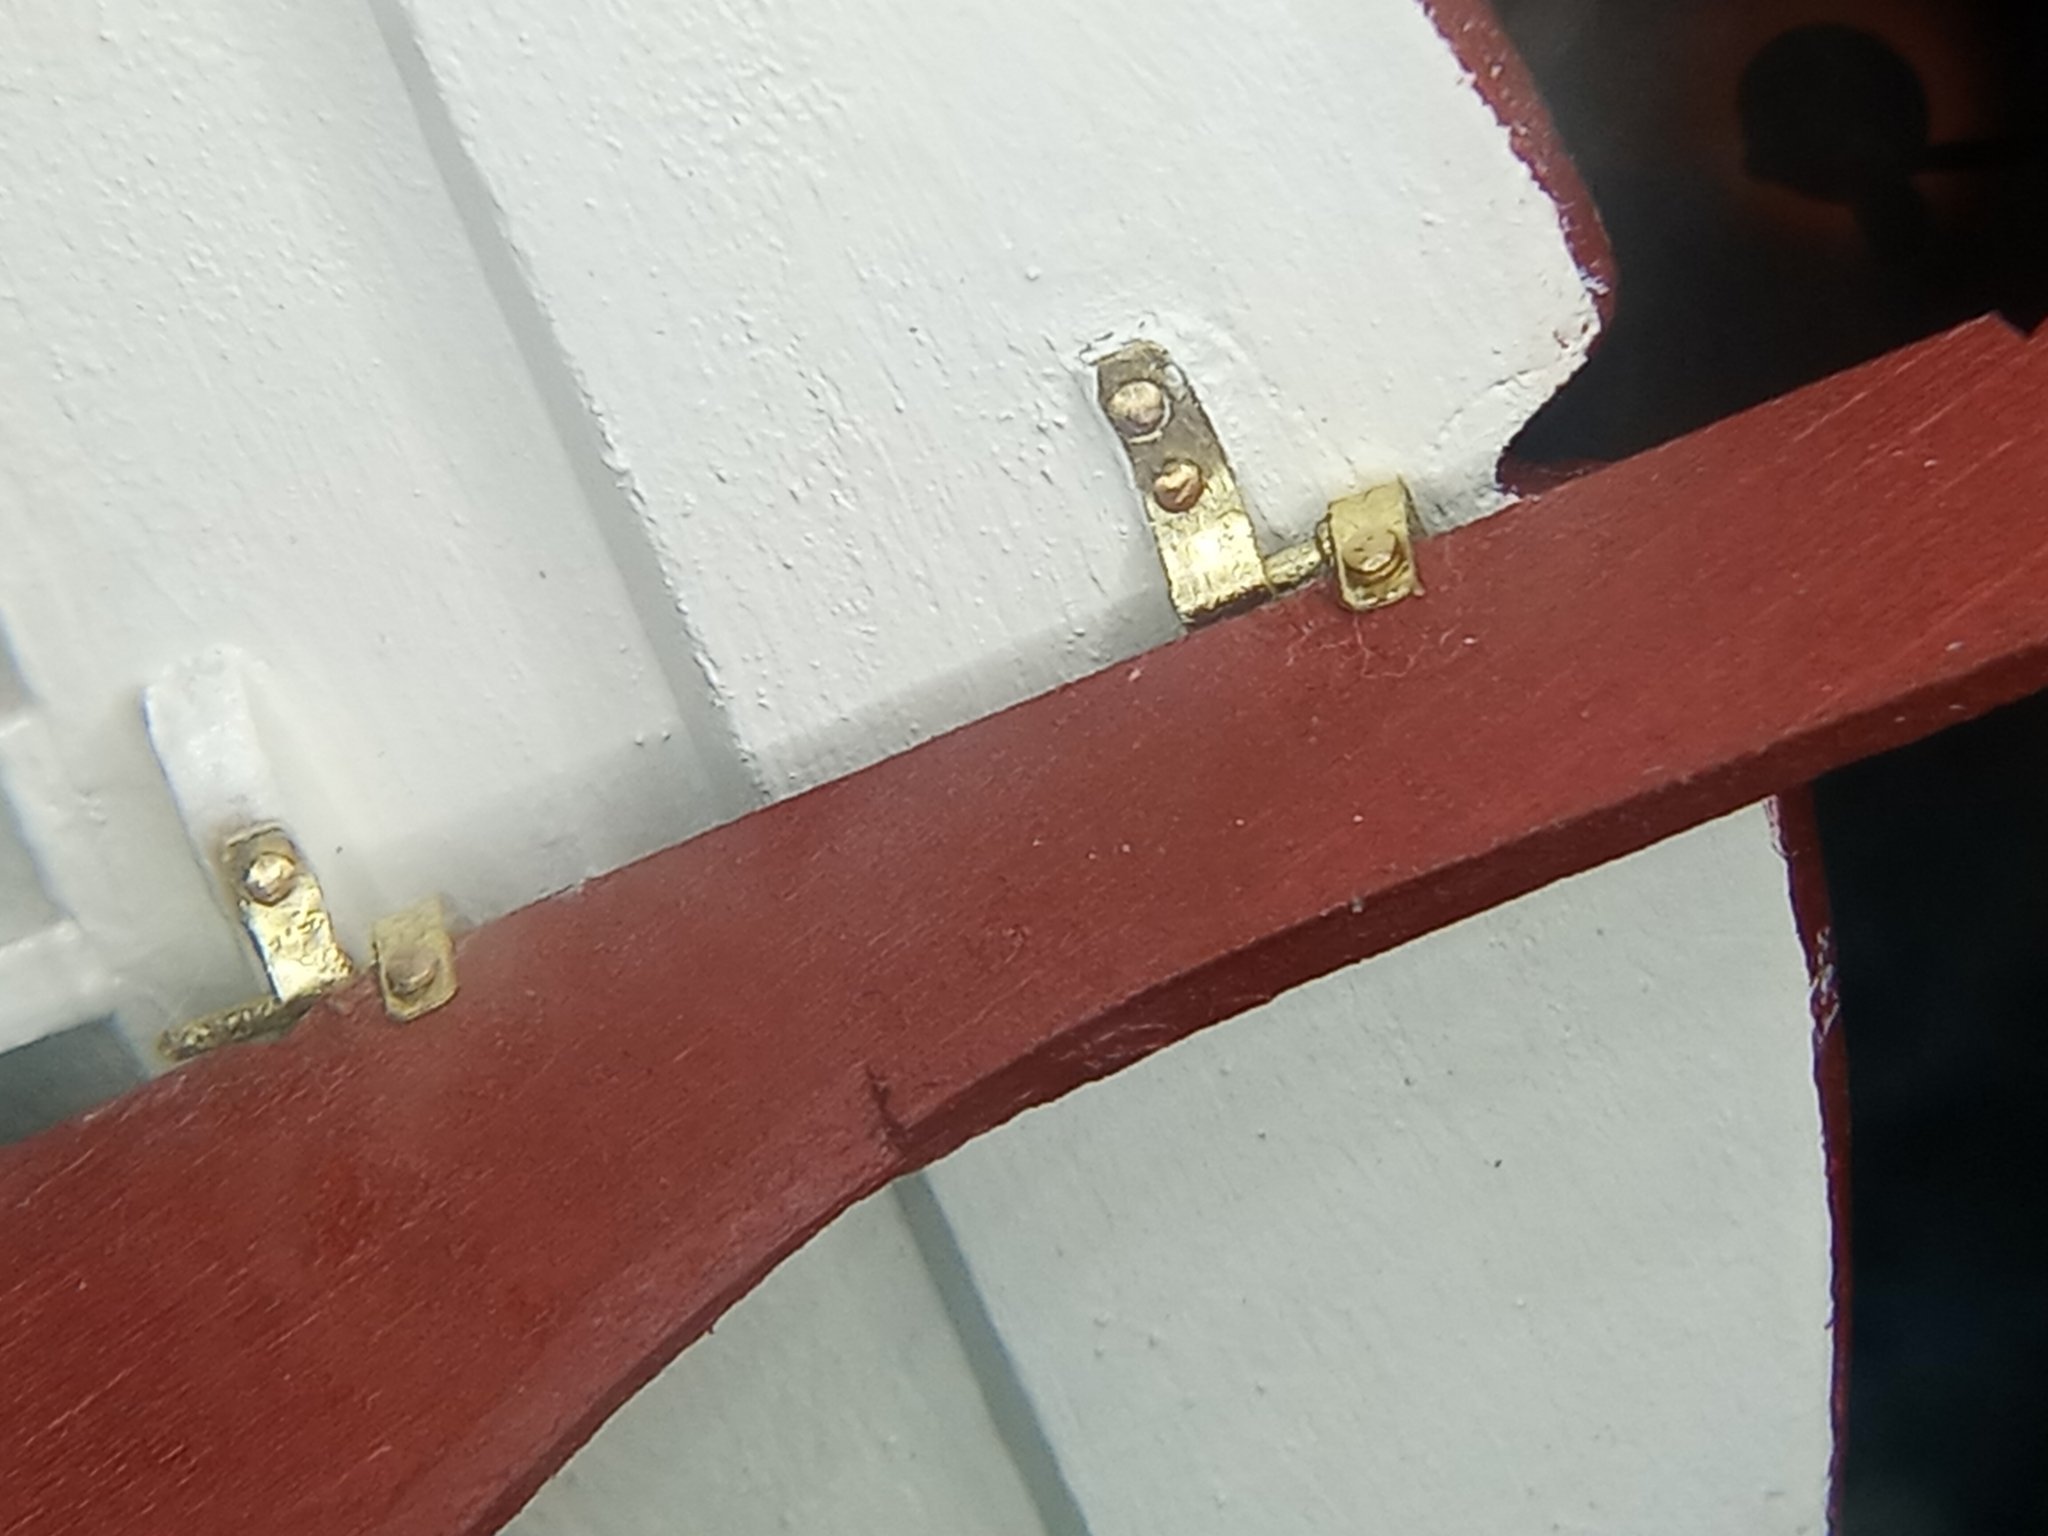
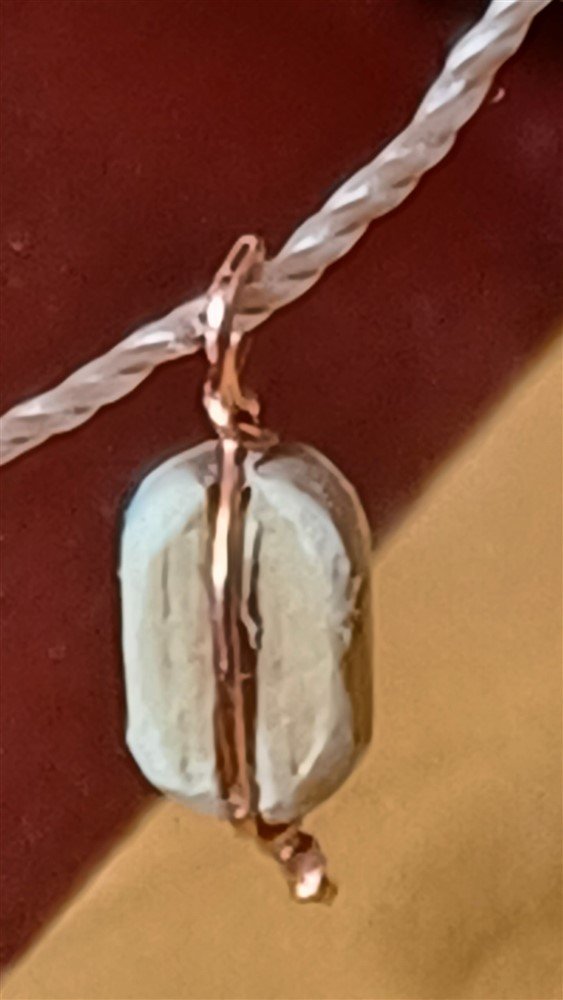
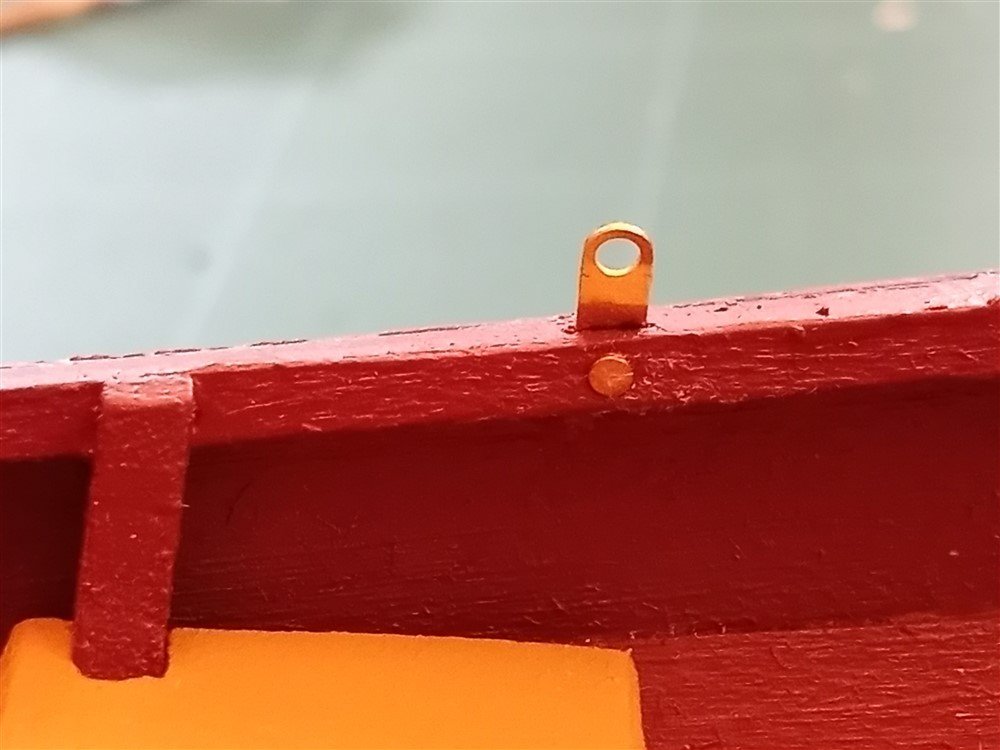
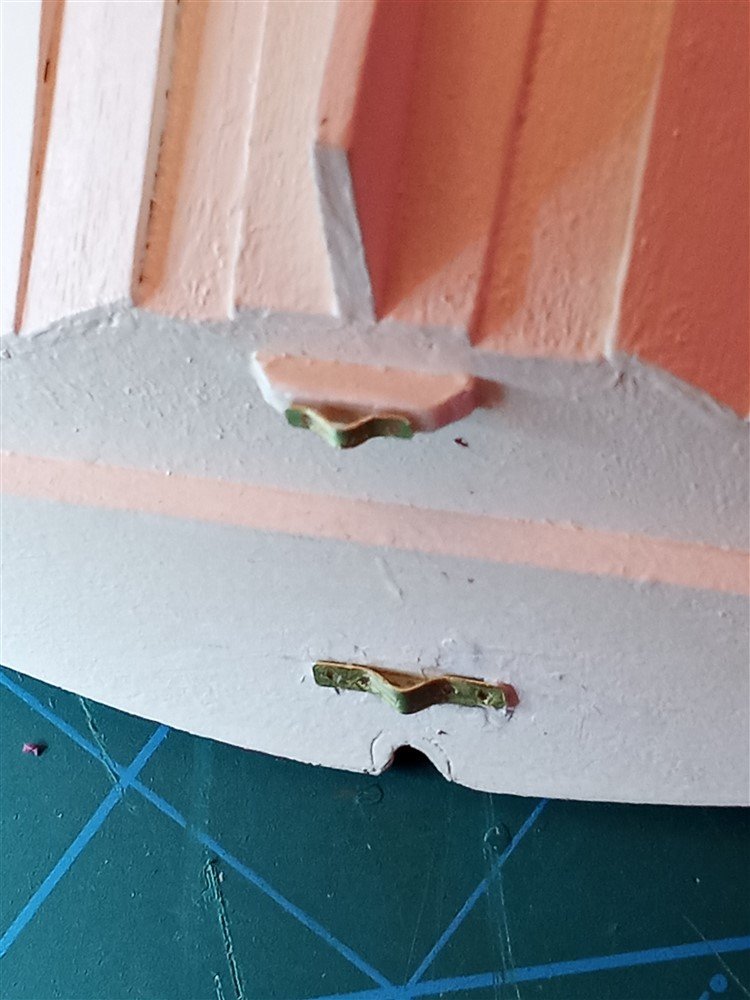
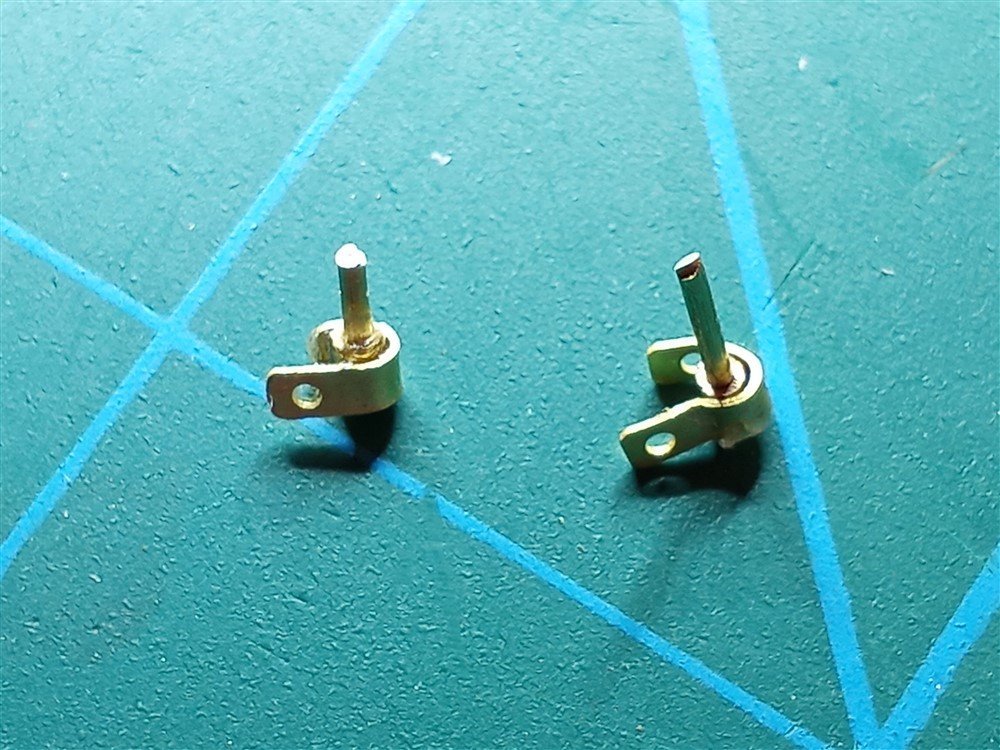
Moving forward slowly! The stay plates went in with no problem, but the rudder gudgeons were really difficult. I tried seven or eight times to make the gudgeons. Cutting the (now annealed) tubing wasn't difficult, but gluing it to the little metal strap was extremely difficult for me. I kept gluing the completed strap & tube assembly to the transom, but then trying to line up the holes in the tubes didn't go well, and I kept pulling the tube away from the metal strap. I re-assembled the pieces, but I never succeeded in getting them attached as a unit. So I disassembled everything, scraped off all the CA glue, and put the straps back on with a "bend" that will hold the rudder pintles, rather than the little tubes. (I saw it done this way in another blog, and it looks like it can work) I have to admit I was really discouraged at this point. I just don't seem to have "steady hands" that can deal with such small pieces! So I moved on to the pintles. These seemed to work a bit better, although the sides are uneven, but I hope I can attach them to the rudder without issue. Meanwhile, I noticed that the kit seems to call for about 22 brass nails, but only 16 came with the contents, and I lost one when it fell/rolled off my work table! So, I am going to wait till all the fittings are installed, and then determine which plates/straps/etc actually need a nail to look good. Since only one side of the rudder will be seen, depending on how I display it, I can save a few nails that way, but I'm short at least 5 nails. I did notice that I could buy more brass nails, so I may do that as well! This is an exercise in patience, as I started to question my ability to work on such a small scale. But hope springs eternal, so I'm moving onward!
- 160 replies
-
- 6
-
-
- Model Shipways
- norwegian sailing pram
- (and 1 more)