
HOLIDAY DONATION DRIVE - SUPPORT MSW - DO YOUR PART TO KEEP THIS GREAT FORUM GOING! (Only 36 donations so far out of 49,000 members - C'mon guys!)
×


lraymo
-
Posts
297 -
Joined
-
Last visited
Content Type
Profiles
Forums
Gallery
Events
Everything posted by lraymo
-
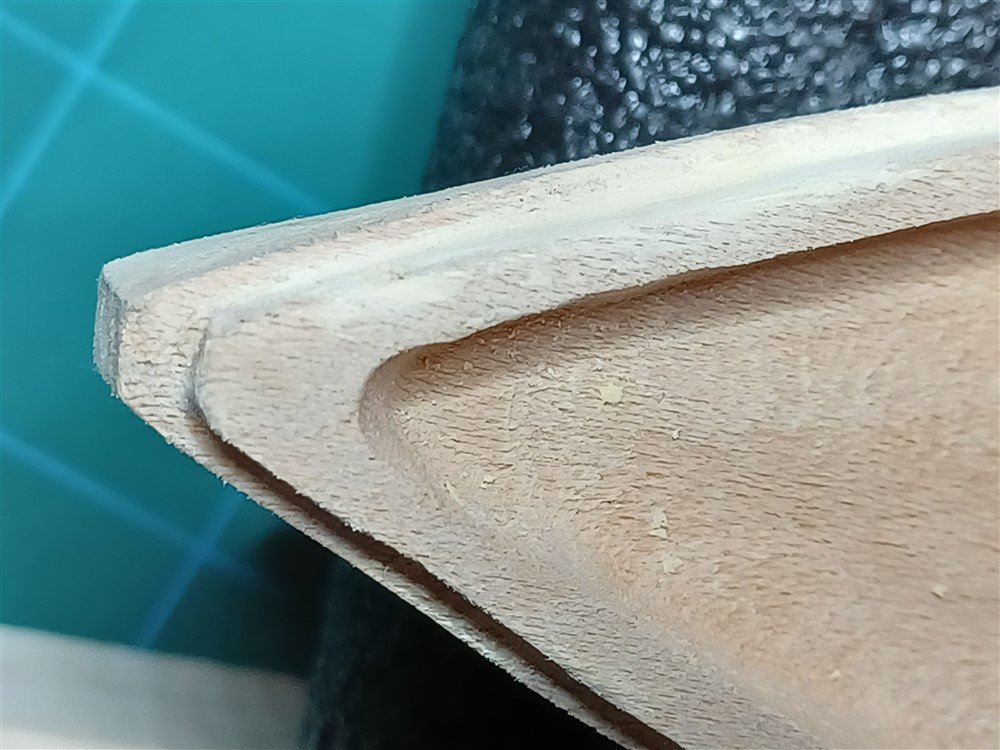
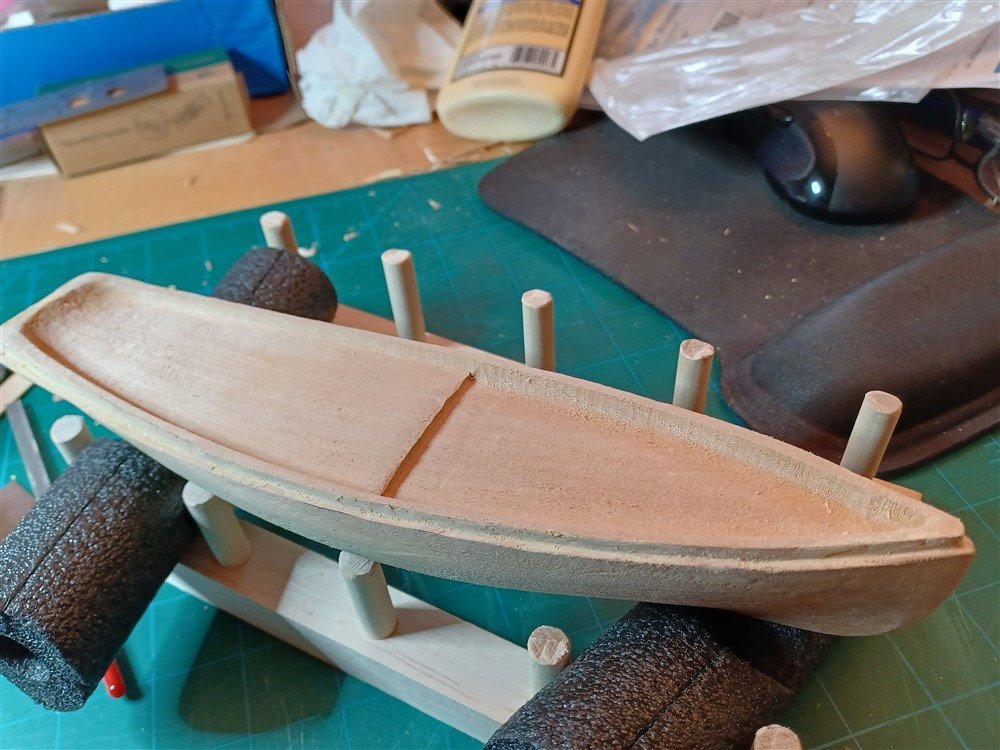
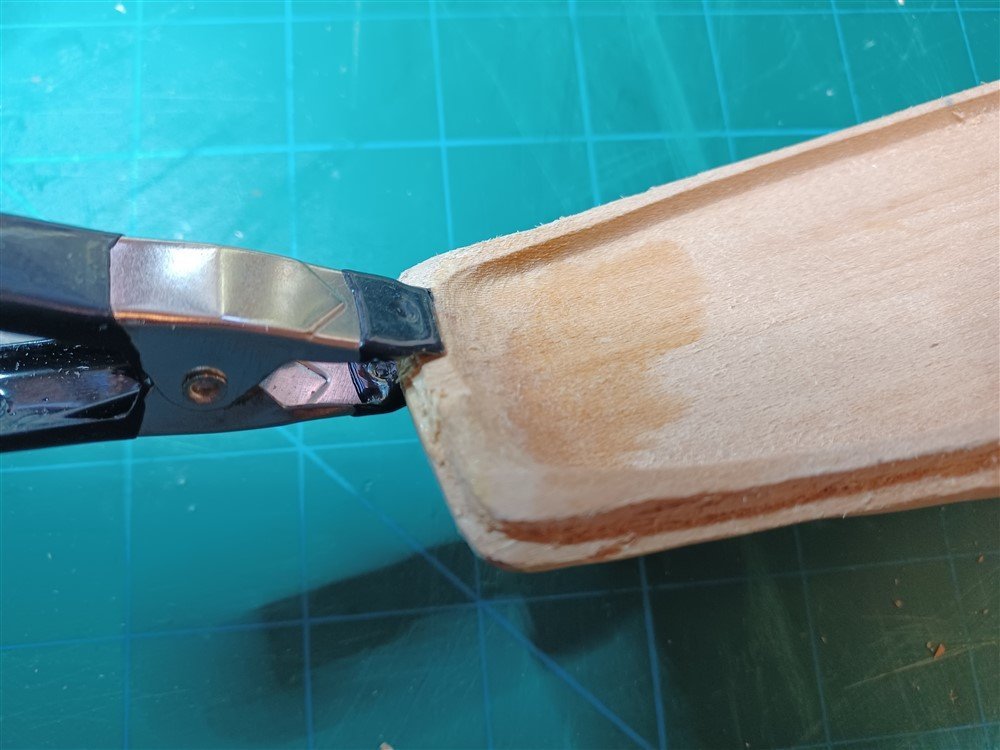
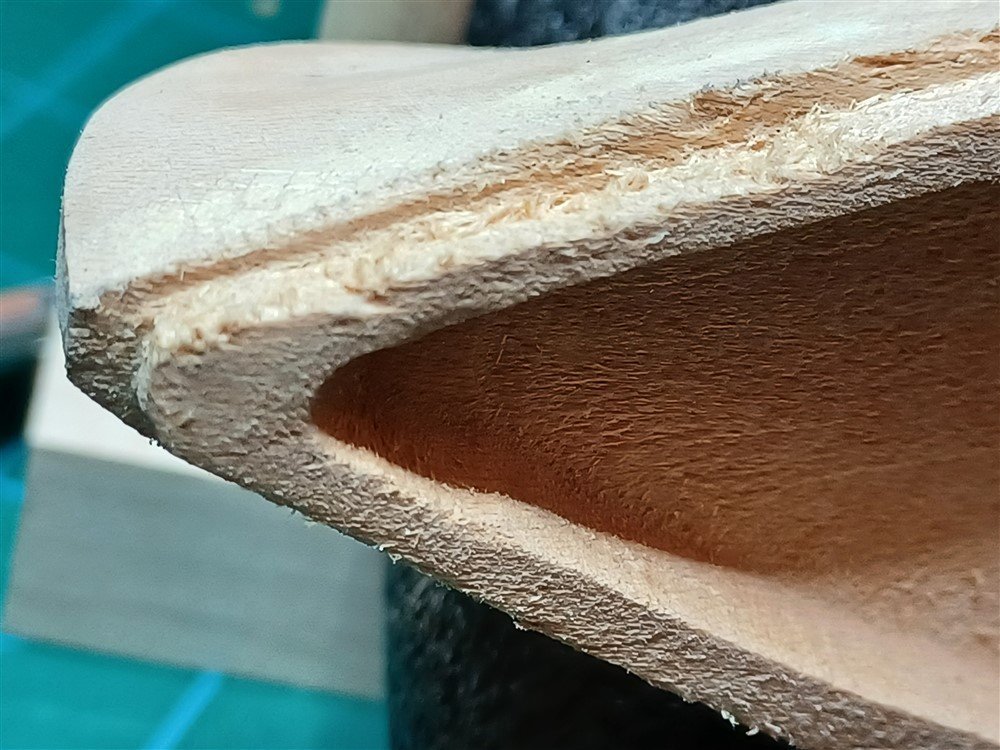
Finally finished the "Step", using several different blades, needle file, sandpaper, and wood filler to help smooth out the edges. It's not perfect, but it looks ok to me, so I'm moving on. Thanks for all the suggestions and the encouragement! This was slow going, and I'll probably do a bit more filing, but it's essentially done. Next up is the sternpost, stem, and keel (made it to page 4! Whee-ha!) Fixed the stern The bow looks better now too!
-
Thanks again for the suggestions. I had my first carving mishap with the knife. Went completely through the bulwark. Glued and clamped to fix, and I'm hoping I'll still be able to carve, file, and sand through the glue, as there's still more excess wood to remove from the area! For now, going to let it dry and try again tomorrow! It will be interesting to see if I can make this all look good, but I am hopeful!
-
Thanks Keith! I was encouraged because the file you suggested is the exact one I picked to use when the package arrived! I haven't made any discernable progress yet, but I'm working on it. Can't believe the "step" part is so hard for me, as I know there are much more difficult areas ahead. Ah, but then I remember it's all a learning experience! Now, off to experiment with getting a smooth surface!
-
I love the smooth finish on your hull! And the coppering looks like its going on well.
-
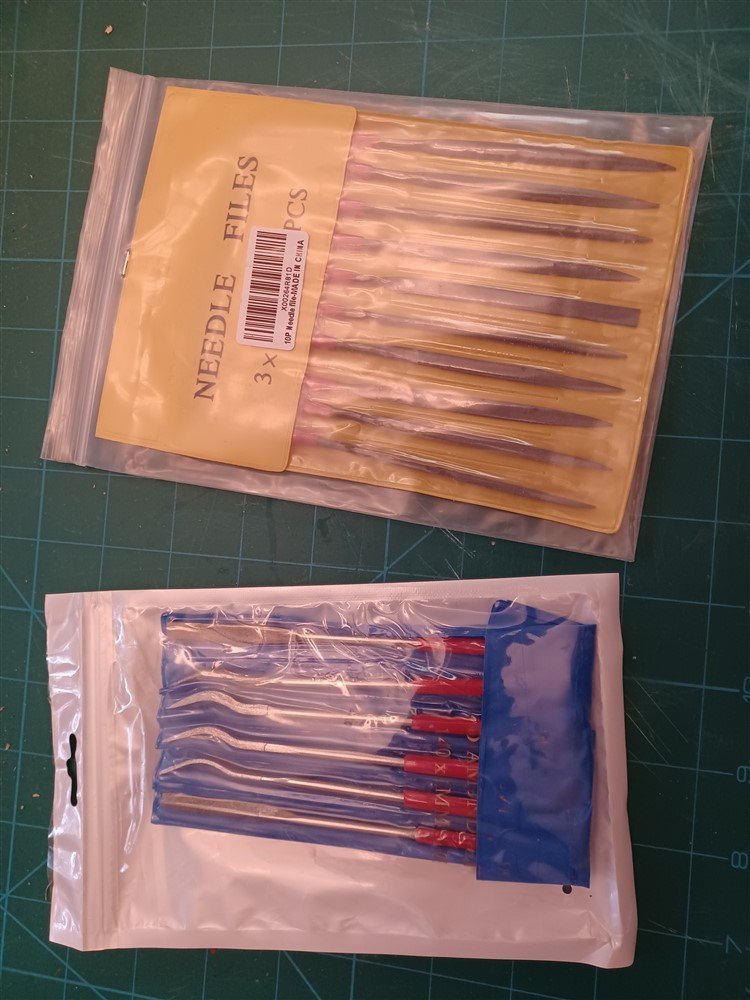
My new needle files arrived. I am not really sure how to use them, and carving the step is very rough... not sure how to get the smooth, finished surfaces I see in other posts. But this is just the first pass. I'll try to use the files to smooth it out... and may try some wood filler to create a smoother finish!
-
Thanks Keith, I will order some of these. And thanks Bob, that's a really good suggestion! (I can see how I will need to do this!)
-
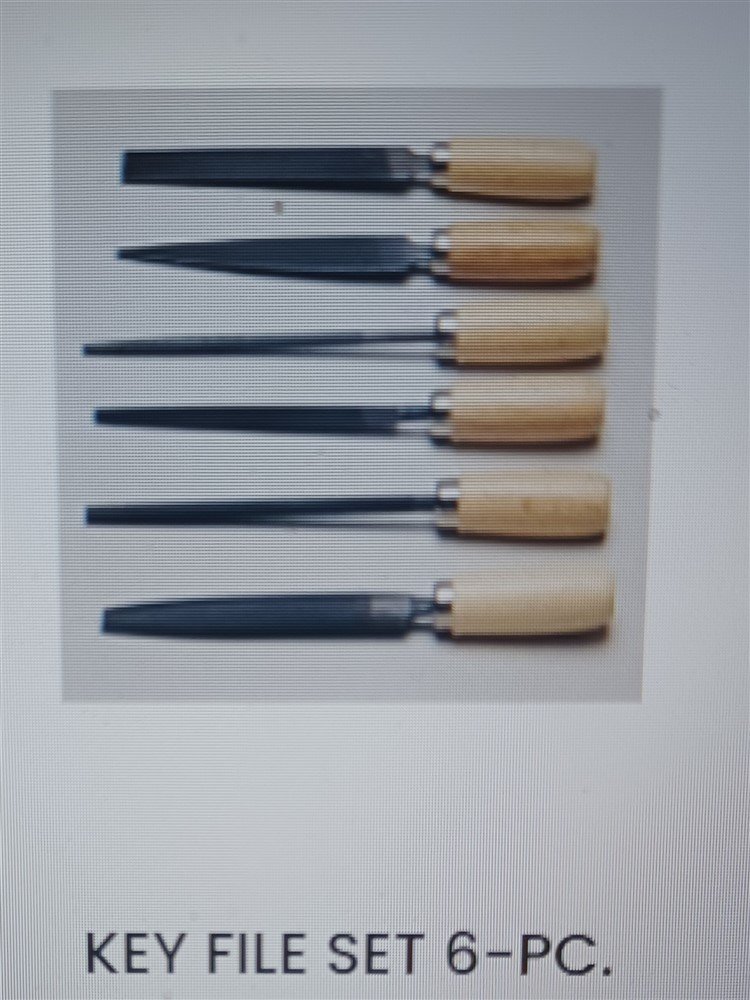
Hi Keith. I bought this "key file" set. Are these considered jewelers files? I agree, sandpaper is going to be tough to get this done right!
-
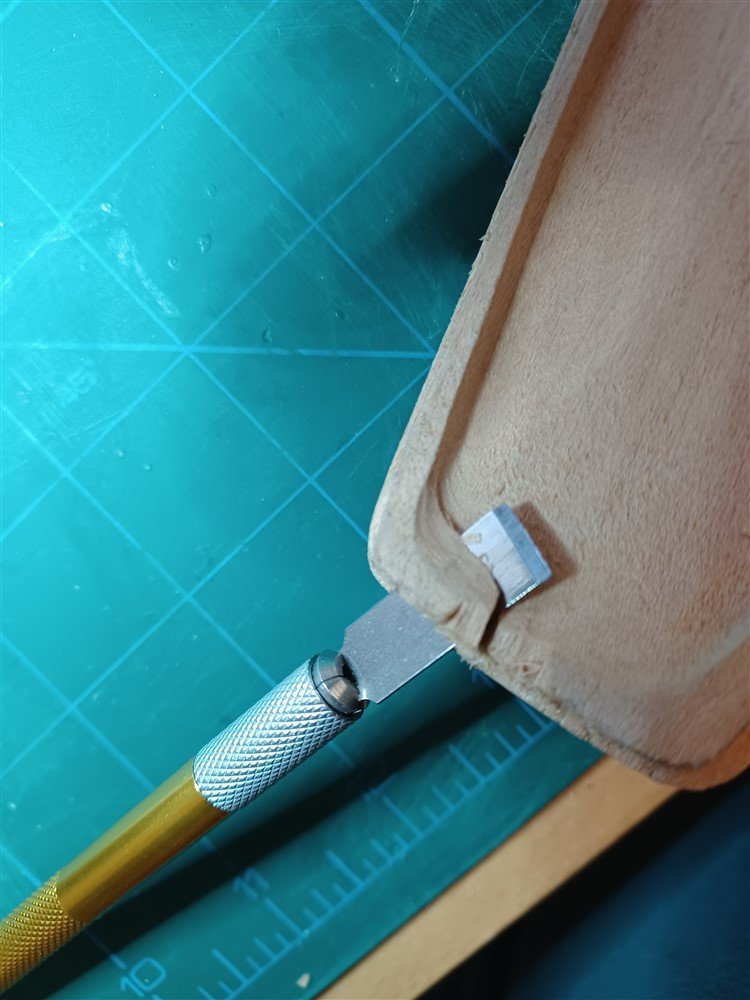
Starting to carve the step. Realizing I'm not very good at carving, but feeling ok about it, since I've never done this! Just finished the initial pass on one side. I can see there will be LOTS of sanding and touch-up to make this look ok, but at least I've started. Much more work to do on the step, but for now, I'm off to play pickleball!
-
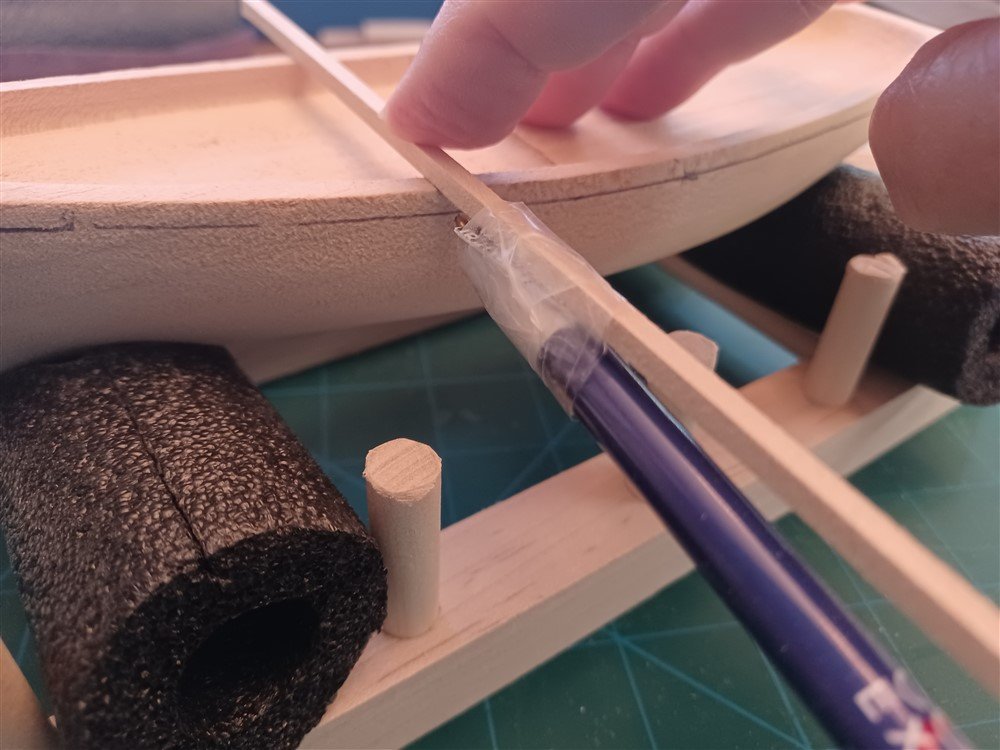
Creating my own tools... to draw the carving line for the step. Using a very precise method of scotch tape and a pen, I was able to scribe a line 1/8" below the top of the bulwarks. (I'm sure there are tools I could buy to accomplish this!) Now I'm off to begin carving (gulp!)
-
Wow, it's looking good! You are so much farther along than I am... which helps me see what my next steps should look like. Way to go!
-
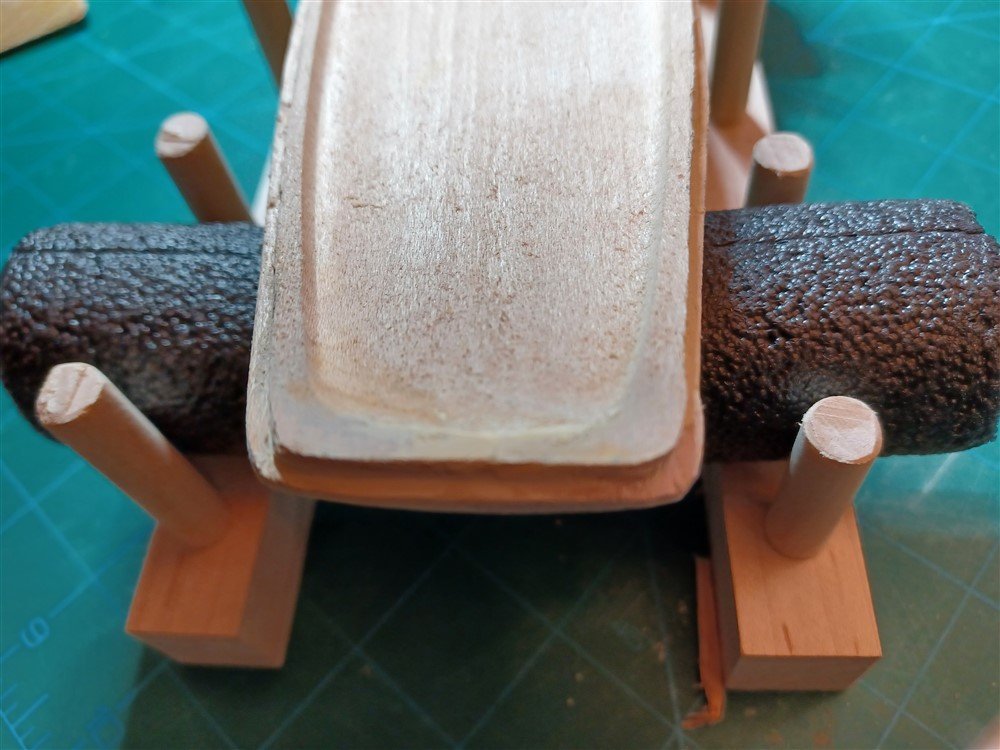
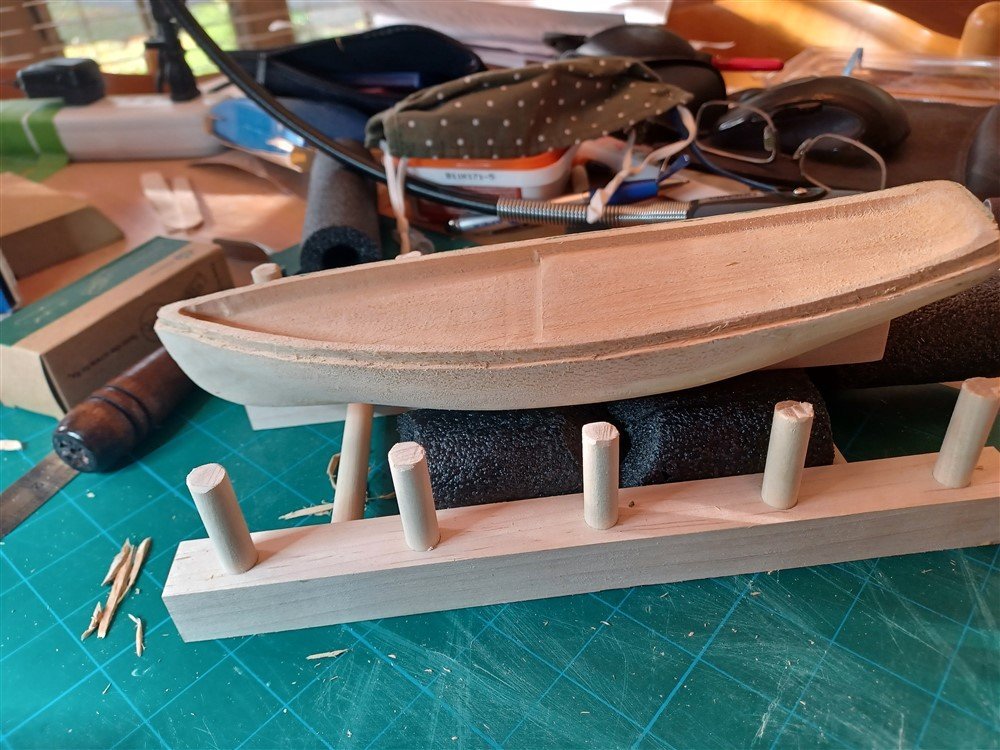
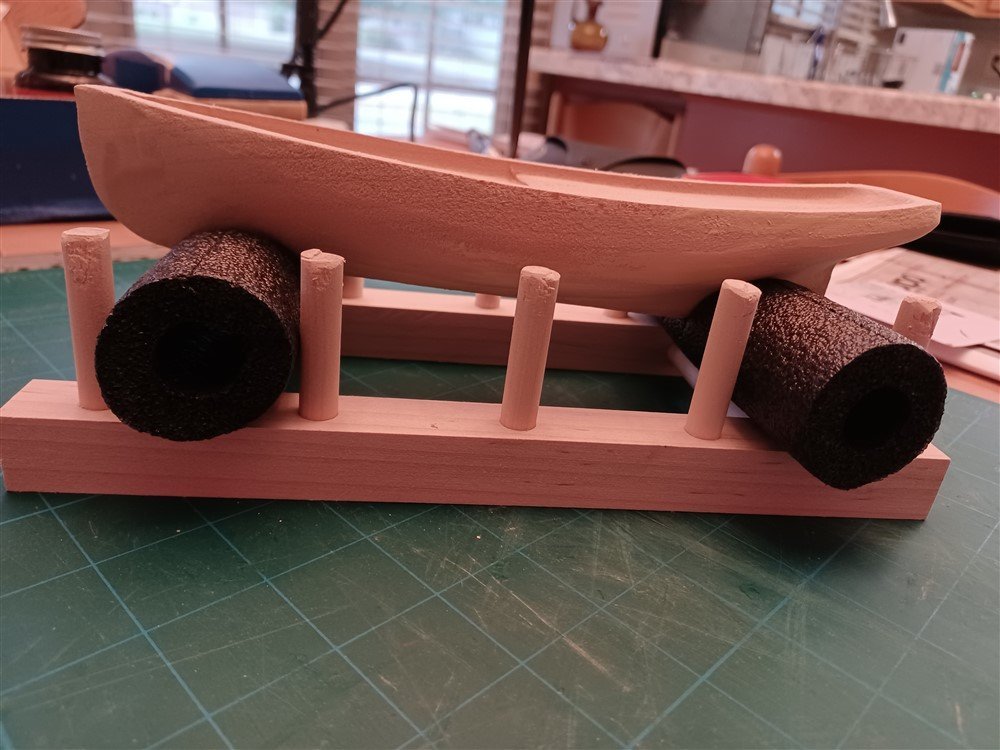
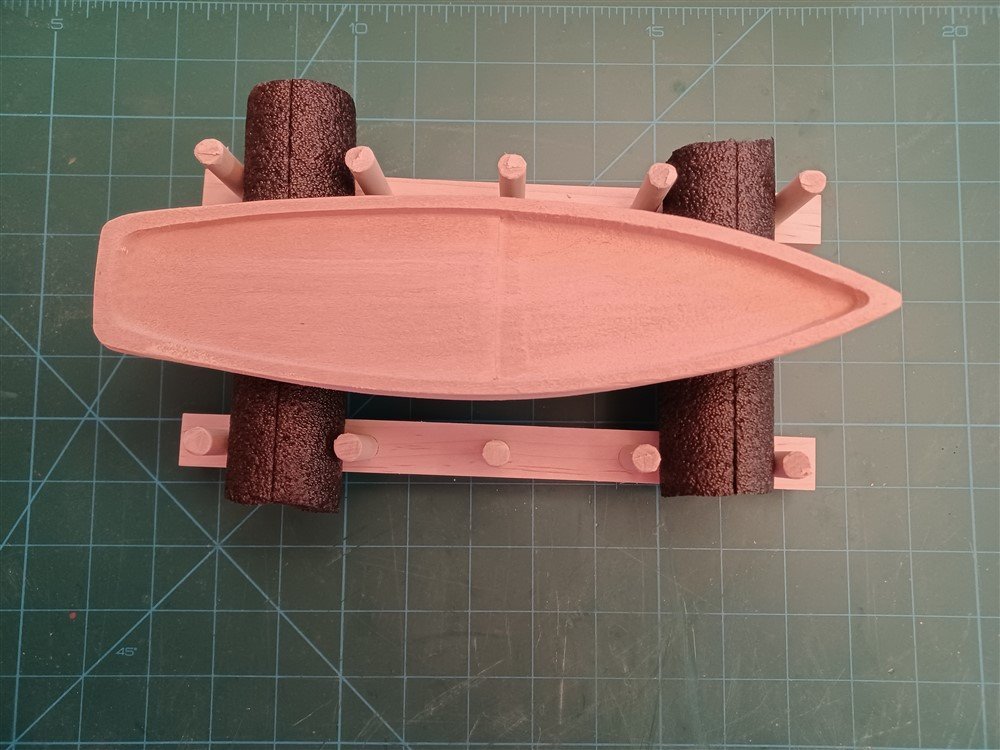
Very slow going, as I have too many other commitments going on! but I am making some tiny progress. Created a ship holder out of a trimmed down dish holder and some pipe insulation. Also tried out my new dremel tool to shape some of the hull, sanded off too much and made some gouges, and filled in alot with wood putty. Waiting for everything to dry so that I can sand it smooth, and probably will call it "good" since the overall shape looks ok to me. Then I'll carve in the "step" mentioned on page 3. (Can't believe I've only made it to page 3, but clearly this will keep me busy for weeks & months to come, so that's a good thing!)
-
@crjmjh Thanks for the kind words. Your Dory looks terrific!
-
Thanks everyone, for all the information. I see that I had completely forgotten terms I learned in the first two builds! Of course, the instructions make much more sense, now that I know what they are talking about! My bad... I'm going to go back and relearn the terms before proceeding. (Thanks for your patience with me!) And Cathead, I totally agree with Keith, its an excellent diagram!
-
Thanks Skibee! Hi again, Keith & Steve! This might be a slow build, since I have other things to attend to, but I wanted to get started, and I appreciate the company as I start on yet another huge learning curve!
-
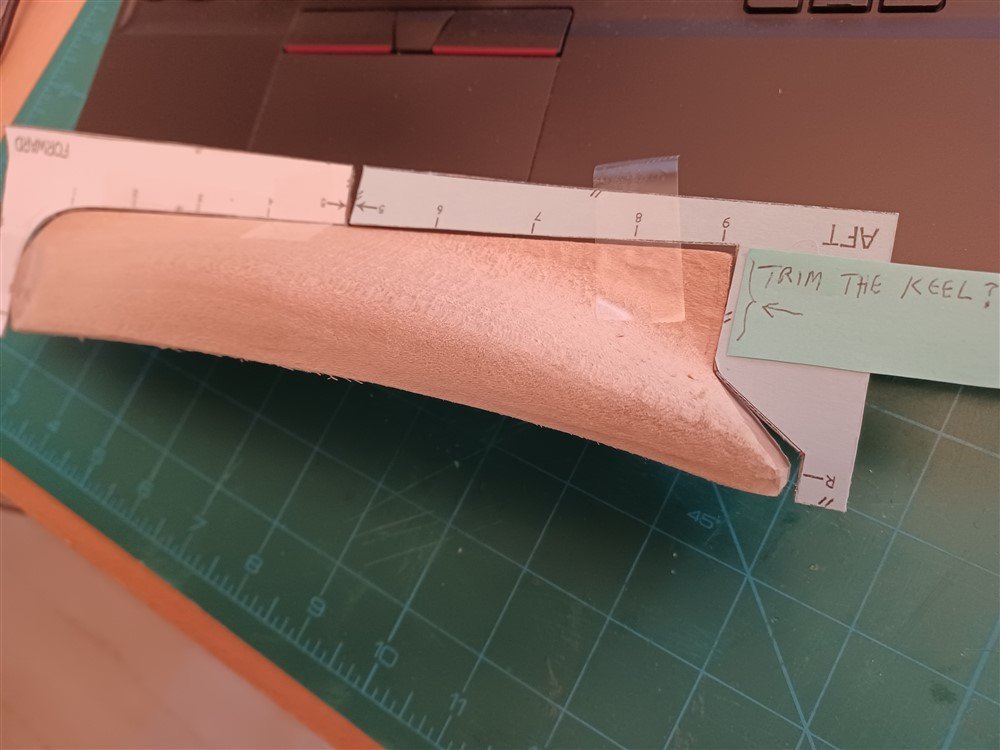
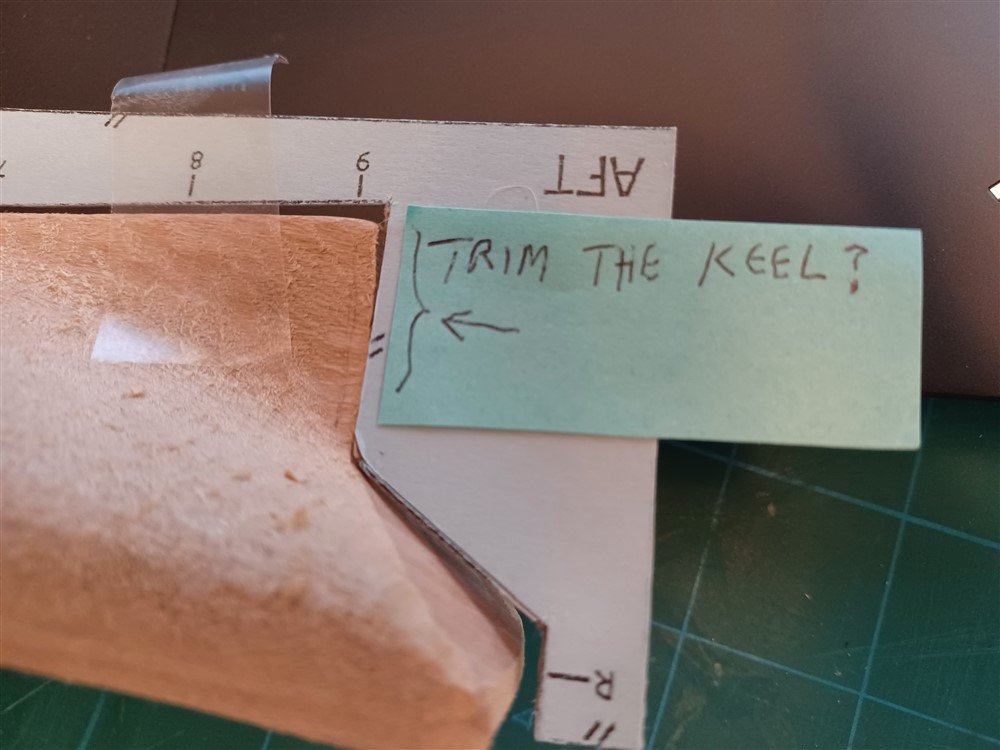
I knew I'd have questions right away! So the hull measures about 1/8" too long (as noted in the instructions). But the instructions tell me to remove this extra 1/8" from the stern? When I put it up against the templates, it looks like I should remove this extra wood from the KEEL, not the stern. Is this correct? Should i remove the excess from the KEEL, instead of the stern? It seems reasonable to trim the KEEL to match the template. But want to ask you all if this is correct?
-
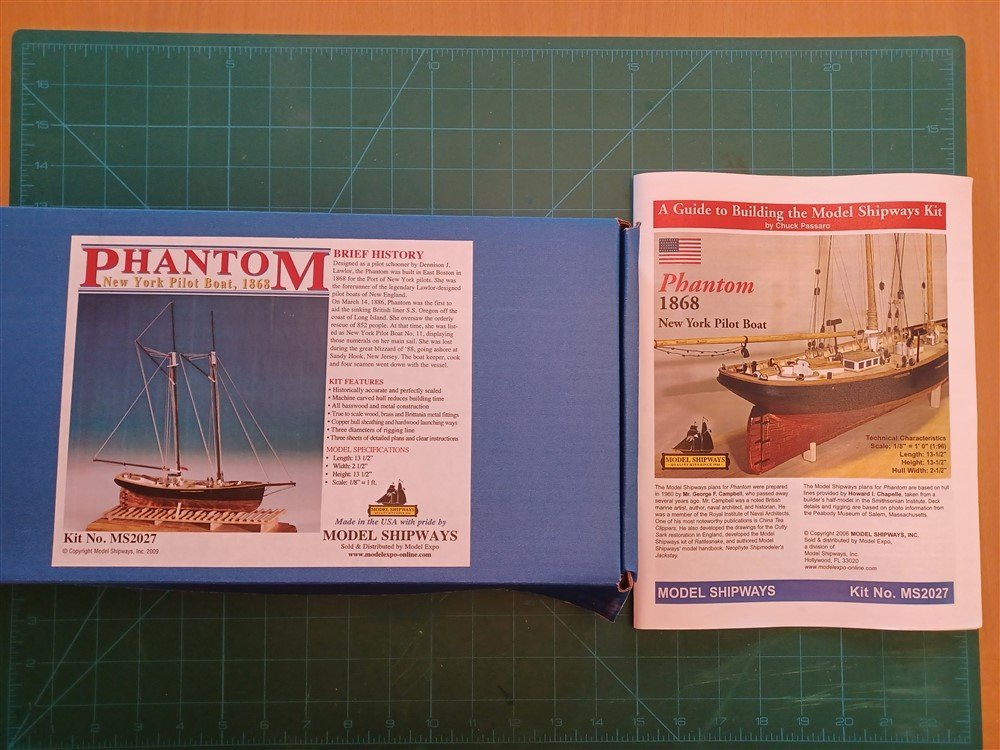
I started the Phantom! Check out the new build log:
- 160 replies
-
- 3
-

-
- Model Shipways
- norwegian sailing pram
- (and 1 more)
-
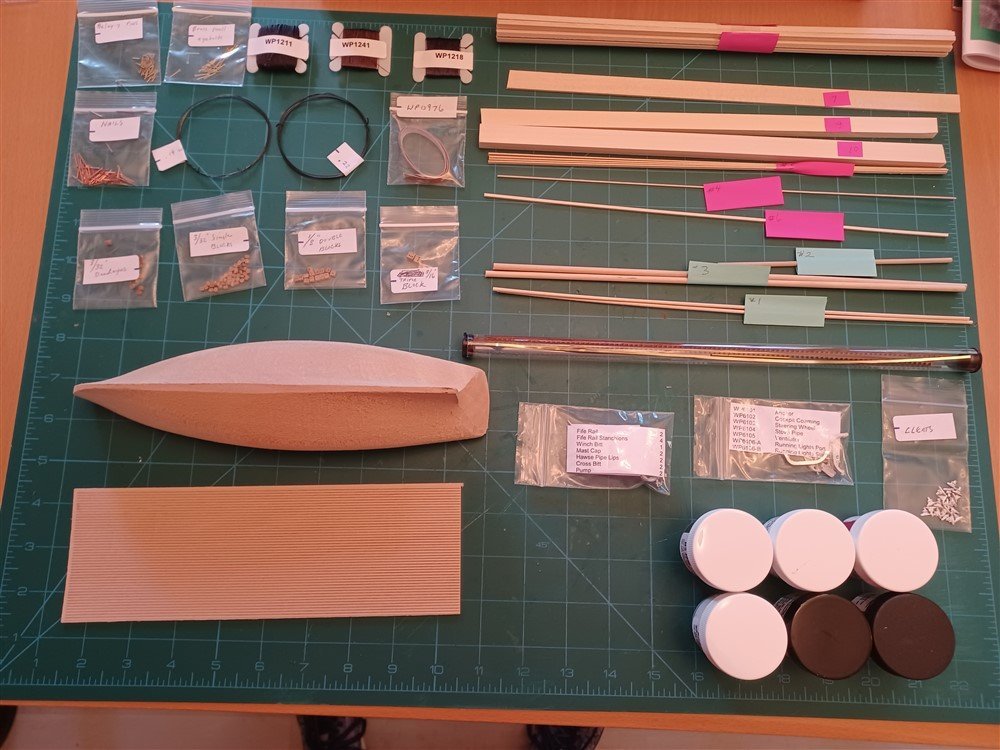
Starting my 3rd model! I know I'll have LOTS of questions for the forum about this one, but I'm excited to begin! First step, check out the kit contents and do a complete inventory. So far, so good!
-
I haven't started my Phantom build yet, but yours is looking really good! I'll be referring back to it often when I begin! Nice job on all the sanding, cutting, whittling!
-
I started reading the instructions for the Phantom. Looks like I'll be doing a lot of rounding, shaping, etc, so the drill will come in handy (I need to start practicing!) Speaking of practice, my golf game needs a lot of it! But I enjoy it, and every game there's that "one amazing shot" that keeps me coming back to it!
- 160 replies
-
- 2
-
-
- Model Shipways
- norwegian sailing pram
- (and 1 more)
-
Keith, thanks for explaining the procedure! I understand what you're saying now. And, as part of my household tools, I actually do have a drill. It goes forward and backward, and the speed is regulated by the pressure I put on the trigger, so I'm assuming it can be called a variable speed drill. I will begin practicing with it! (Mostly, I use it to drill holes for picture hanging, or other little home repair jobs around the house, although I'm not very "handy" when it comes to house maintenance!) Thanks again for all the encouragement. My new Phantom model kit arrived today. I'll probably take some time off before starting it, as the Kansas heat & humidity has finally abated somewhat, and the plan is to play a lot of golf in the nice weather!
- 160 replies
-
- 3
-
-
- Model Shipways
- norwegian sailing pram
- (and 1 more)
-
Ok, NOW I get it! So in your photo above, you held a jewelers file against the round dowel to shape it. That seems hard to do, freehand. I'm assuming you held the file in your hand, maybe supporting it somehow. OR did you hold the ndrill in your hand, and move it against some sandpaper or a file? Or was it a two-handed operation - where you had the drill in one hand, and used the file in the other hand? I thought I had it, but now I'm confused again! (By the way, the gun looks great!)
- 160 replies
-
- 2
-
-
- Model Shipways
- norwegian sailing pram
- (and 1 more)
-
I confess, I'm not quite sure how to use a drill to shape masts and spars. How is it used? (Clearly, I will need lots of practice, since I can't even visualize how to use one yet!).
- 160 replies
-
- 1
-
-
- Model Shipways
- norwegian sailing pram
- (and 1 more)
-
Hi Steve. Just noticed you were building the Dory. She looks beautiful! So clean, crisp, and the paint looks great! Wow!
- 70 replies
-
- 3
-
-
- Lowell Grand Banks Dory
- Finished
- (and 1 more)
-
I bought a dremel rotary tool (with a flexible shaft extension), but I haven't used it yet. Would it serve a similar purpose as the cordless drill?
- 160 replies
-
- 2
-
-
- Model Shipways
- norwegian sailing pram
- (and 1 more)
