
HOLIDAY DONATION DRIVE - SUPPORT MSW - DO YOUR PART TO KEEP THIS GREAT FORUM GOING! (89 donations so far out of 49,000 members - C'mon guys!)
×


lraymo
-
Posts
297 -
Joined
-
Last visited
Content Type
Profiles
Forums
Gallery
Events
Everything posted by lraymo
-
Thanks Keith, for your advice! For painting, I am using the regular bristle brushes that came in the kit. But good eye noticing the foam brush! I'm also sanding the oars, and I'm using the foam brush to "brush off" the shavings as I'm going along. 🙂 I also appreciate your words on the sander. I'll hold off... it costs more than the Dory kit!!! And thanks for the kind words! I'm enjoying this, and really happy I started with this little boat! Someday I'll get to my dream of building a three-masted schooner with rigging and sails, but I need to learn so much more before I attempt it!
- 85 replies
-
- 3
-

-
- Lowell Grand Banks Dory
- First Build
- (and 2 more)
-
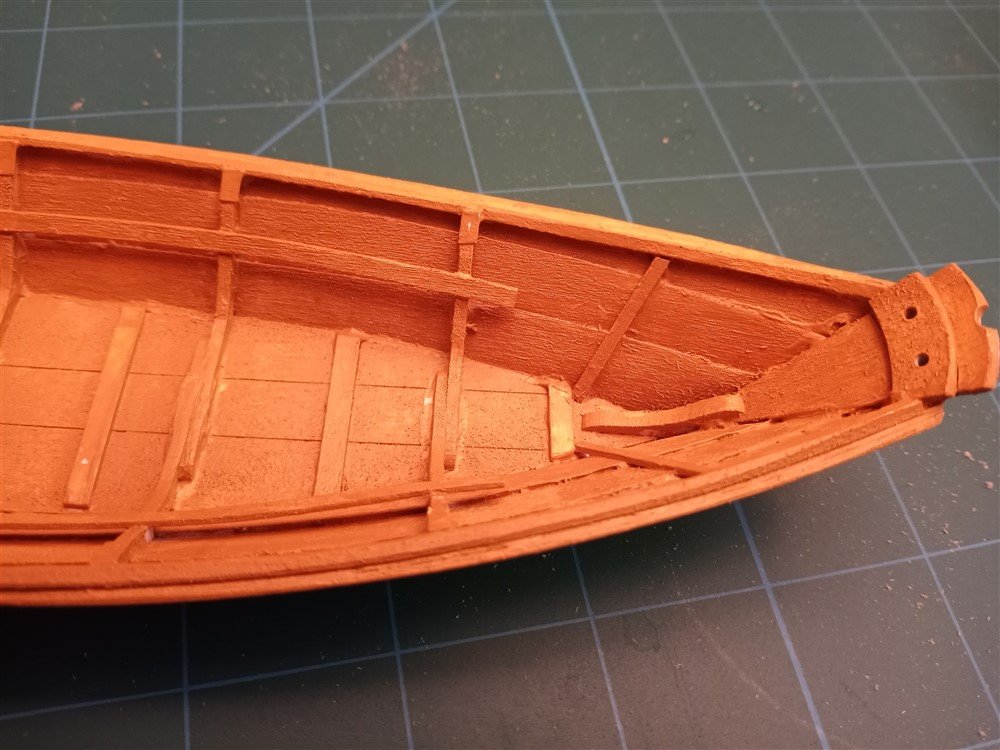
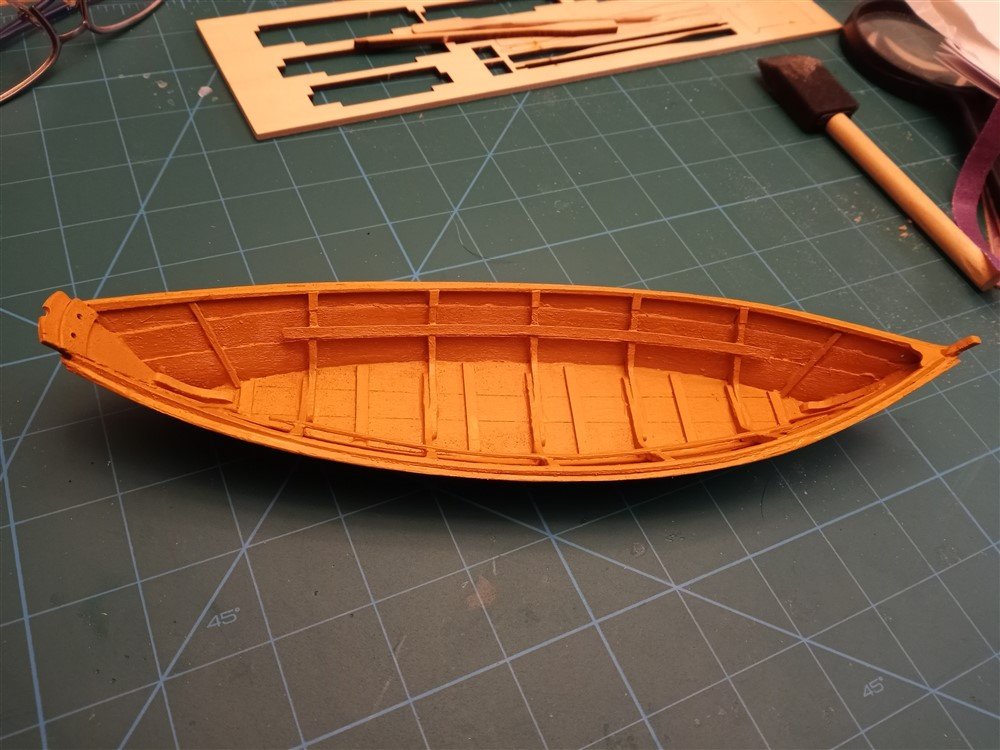
Started the painting process. White primer, 1st coat, 2nd coat. The main thing I am learning, (for my next build!) is to be waaay more careful in applying glue! The excess glue is really showing up with the paint. After primer, I tried to scrape some of the blobs off, but didn't have much luck. The first coat looked really blotchy, but the 2nd coat is looking better, and I think it will be ok after the 3rd coat, as long as (again) no one looks too close! At this point, is there anything I can do to remove the excess? I found a "reciprocating micro sander" that I could buy on Amazon, thinking i could "sand off" the excess glue, but not sure if this is a reasonable purchase at this point in my beginning shipbuilding. Any thoughts? Is this a helpful tool? First coat also shows excess glue as well as ragged planks too! 2nd coat is better, but hoping 3rd coat will even out the paint. I just wish I could eliminate the excess glue blobs. But, its all part of the learning process, and I will be CAREFULLY applying glue going forward!
- 85 replies
-
- 5
-
-
- Lowell Grand Banks Dory
- First Build
- (and 2 more)
-
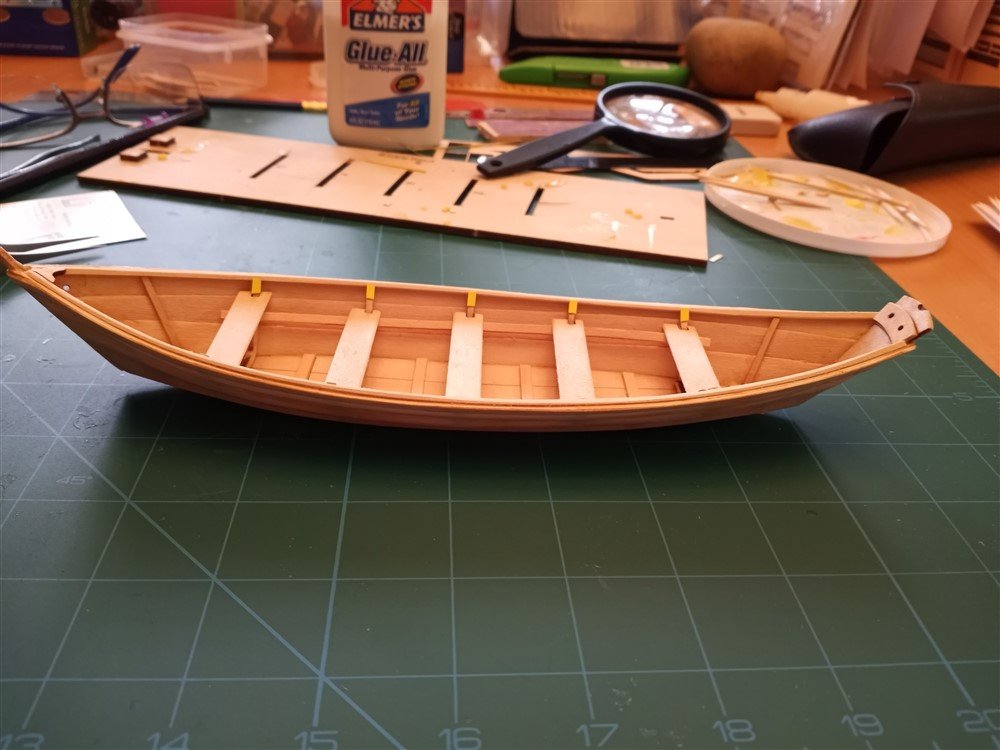
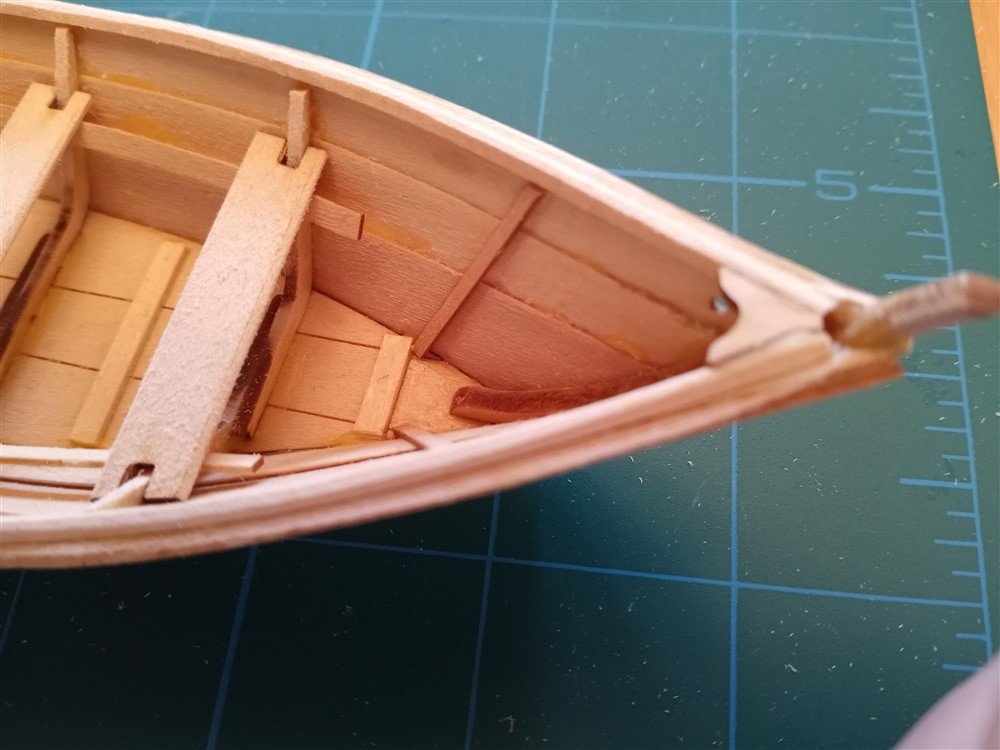
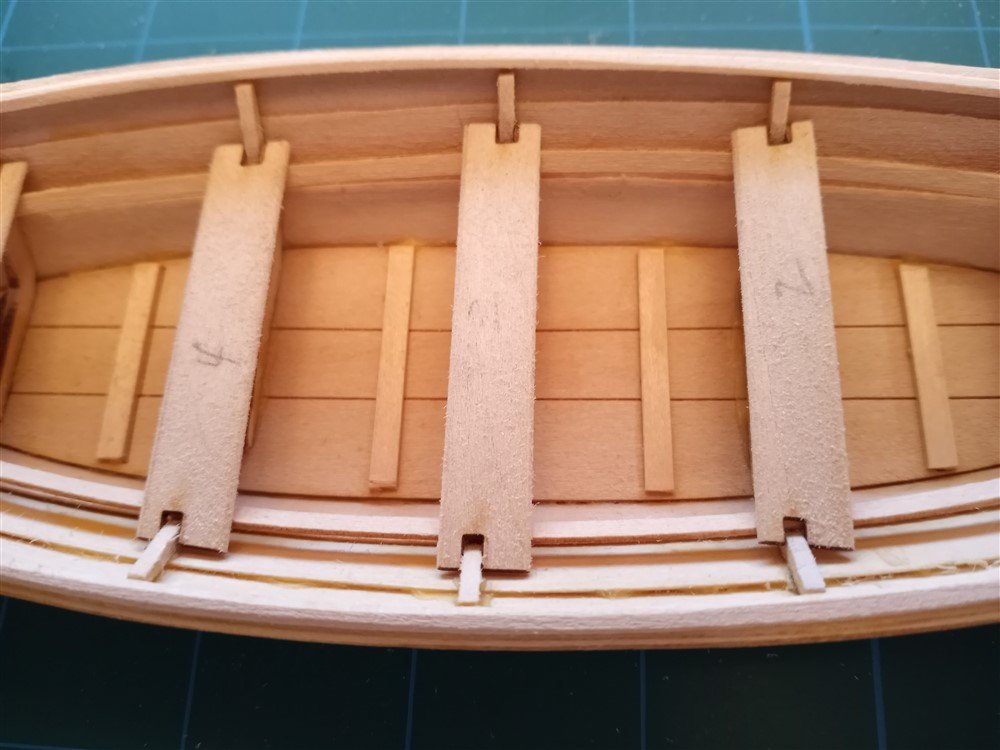
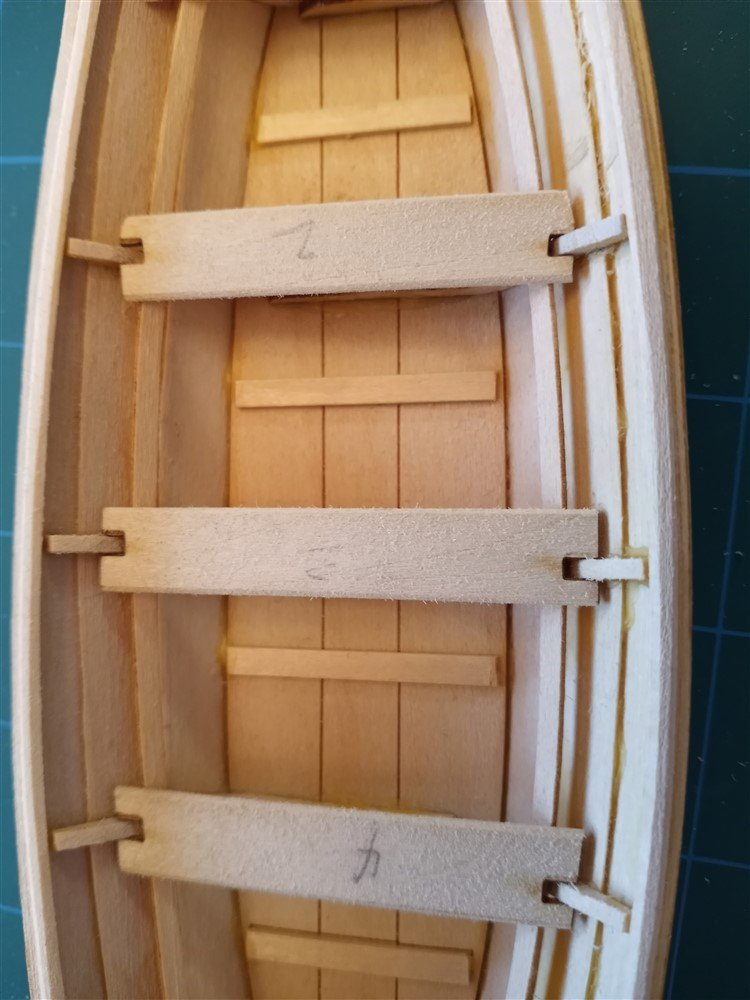
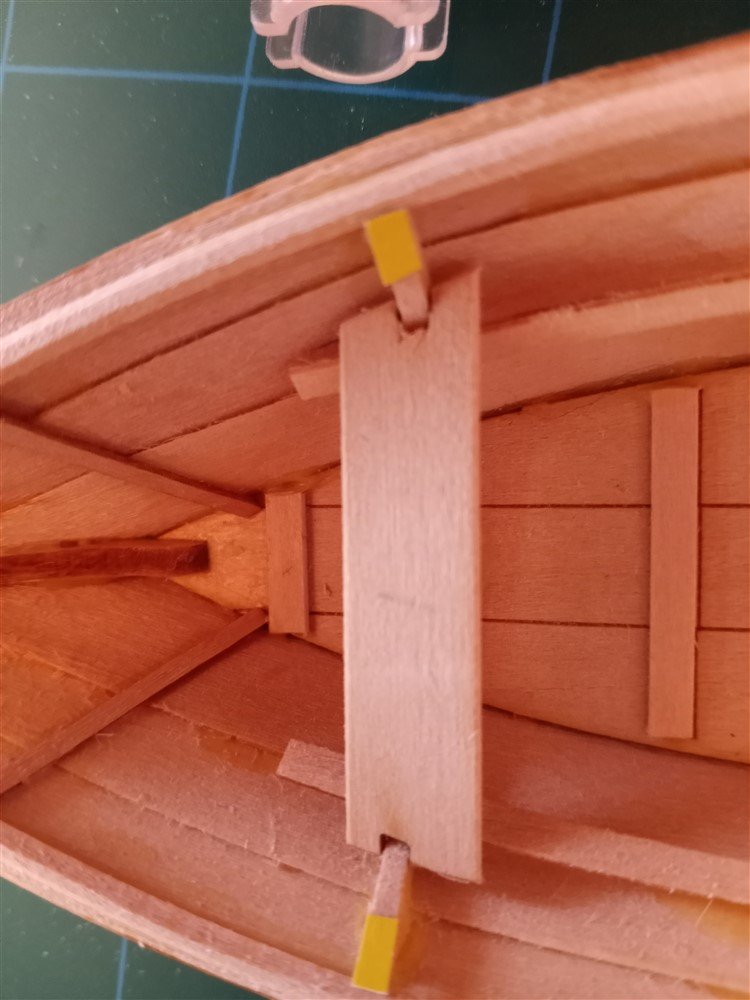
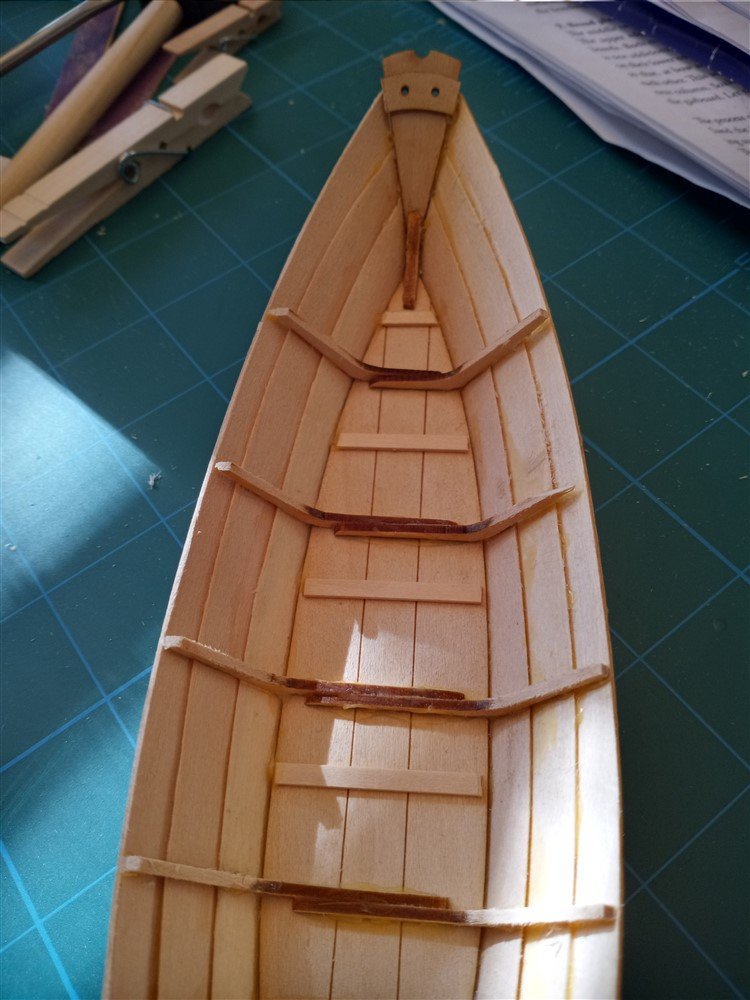
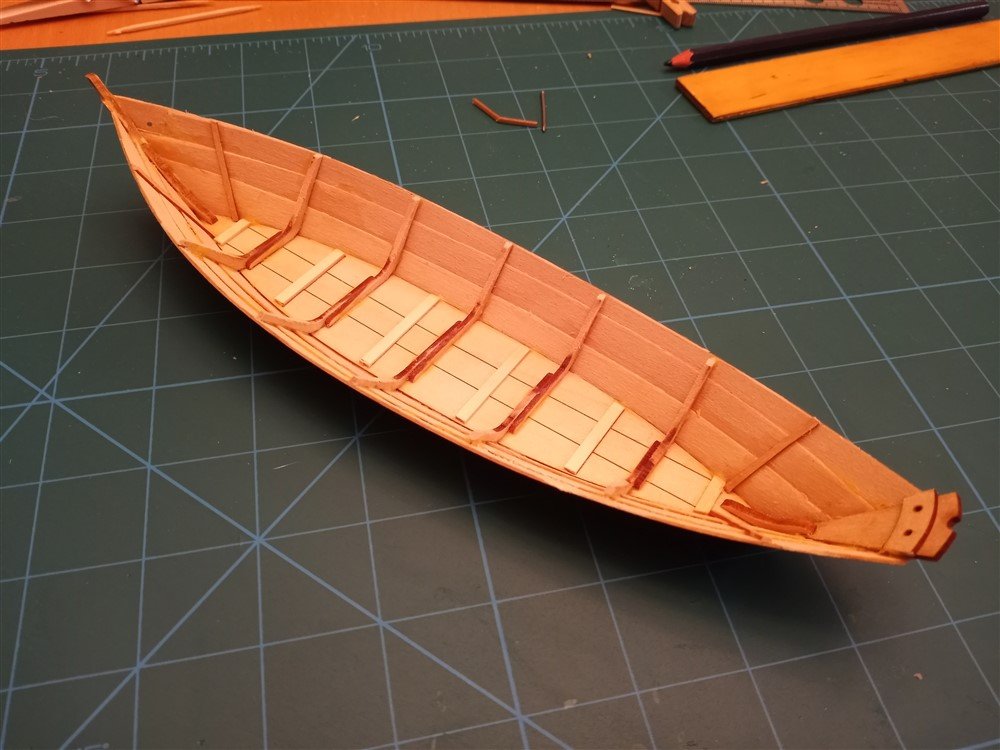
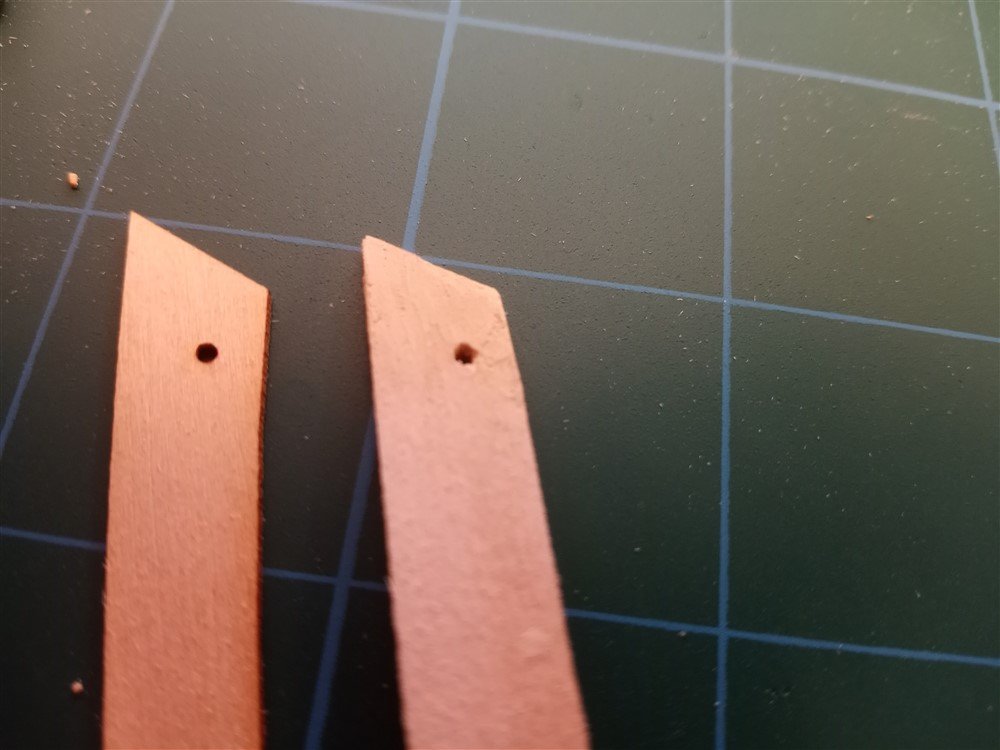
Almost ready to paint. Can't believe I've made it this far! Attached bands, risers, gunwale, breast hook, and frame head irons. (those were difficult. I used a yellow playing card to make the little pieces, and without the right tools they aren't exactly identical, but I wanted to practice doing tiny piecework.) I'll need more practice. Inserted thwarts (just to see if they would fit). Thwarts 2 and 4 came out of the kit looking identical, so I trimmed the sides to fit the opposite ends of the boat. Also, thwart 1 was too long (I made Frame 1 too narrow), so i carefully took some length off the thwart, only to realize that the actual problem was that the notch that fits around the frame wasn't deep enough for my narrow frame. So I increased the notch depth, and it fits better now (but nerve-wracking to mess around with it!) Next step - prime everything (I have a spray can of white primer), and then begin the painting process! And lots more to do after that... oars, cap rail, tholes, becket. But it's well on its way!
- 85 replies
-
- 5
-
-
- Lowell Grand Banks Dory
- First Build
- (and 2 more)
-
You're right, Keith! It looks better from a normal viewing distance! So I put on the bands and the risers, tried to sand it down to look like the picture in the book, and then cut back the frame tops to get ready for the gunwale. I'm trying to be a bit more careful, and a lot more patient! But giving up for tonight, as my eyes are bleary from staring at this! I already wear progressive lens glasses, but I may need to get some magnifiers too! Tried to show my close-up like the pic in the book. I ended up doing more sanding on the top of the sheer, after seeing this pic. n And finally, for tonight, cut back the frames to get ready for the gunwale. I'll need a large segment of time to work on fitting the gunwale, and its just too late to start now! And I may take some time to try to remove all this excess glue while I'm at it!
- 85 replies
-
- 5
-
-
- Lowell Grand Banks Dory
- First Build
- (and 2 more)
-
Hi Cathead, I sure hope that's true, because there's a multitude of mistakes on this! But I appreciate what you are saying, and yes, I am VERY happy that this kit was only $49! (And with tools, since I didn't have any, it seemed like the best choice!) So I went ahead and replaced part of the broken frame with a newly carved piece, and it seems to look ok. And as you said, the end result hopefully will result in a good "overall impression", if people don't look too closely at the details! (I have friends who are amazed that I'm even attempting this!) A little bit crooked, but hoping no one will notice!
- 85 replies
-
- 6
-
-
- Lowell Grand Banks Dory
- First Build
- (and 2 more)
-
@Ryland Craze@Keith Black Once again, thank you for your encouragement! I really didn't think there was much I could do, but you've inspired me! I'm using yellow wood glue, so i'll try the wet Q-tip idea. And I lost the broken piece, but I think I can carve a new one, so I thank you for your suggestions, and I'm feeling better about going forward!
- 85 replies
-
- 4
-
-
- Lowell Grand Banks Dory
- First Build
- (and 2 more)
-
Your precision is incredible. I have LOTS to learn, and your work is really inspiring!
- 433 replies
-
- 5
-
-
- open boat
- small boat
- (and 1 more)
-
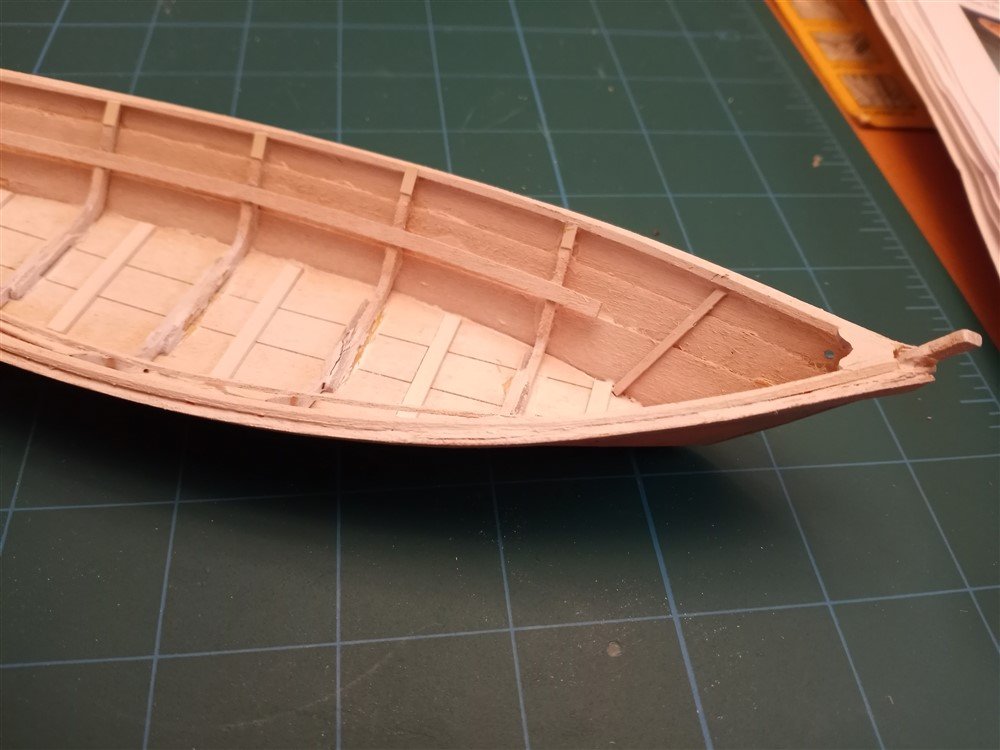
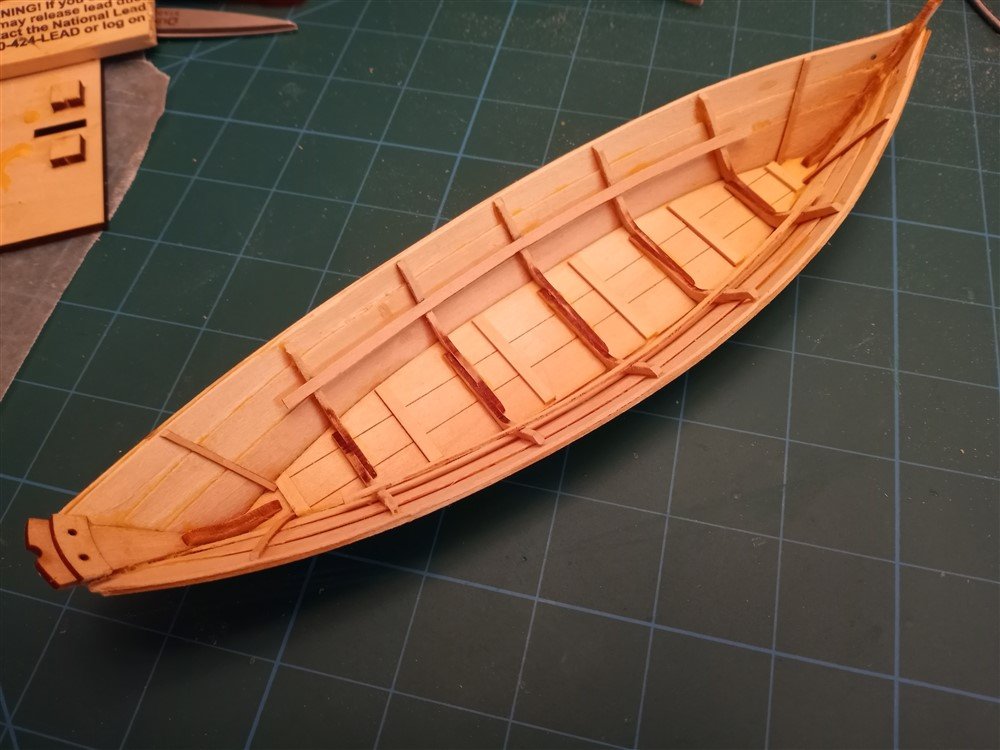
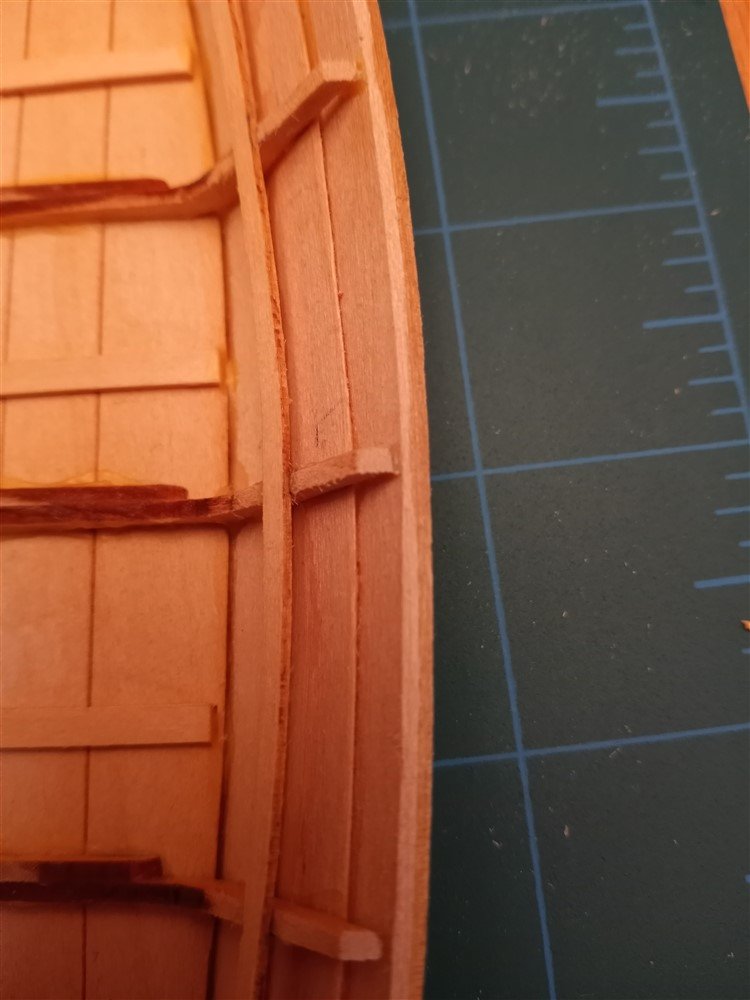
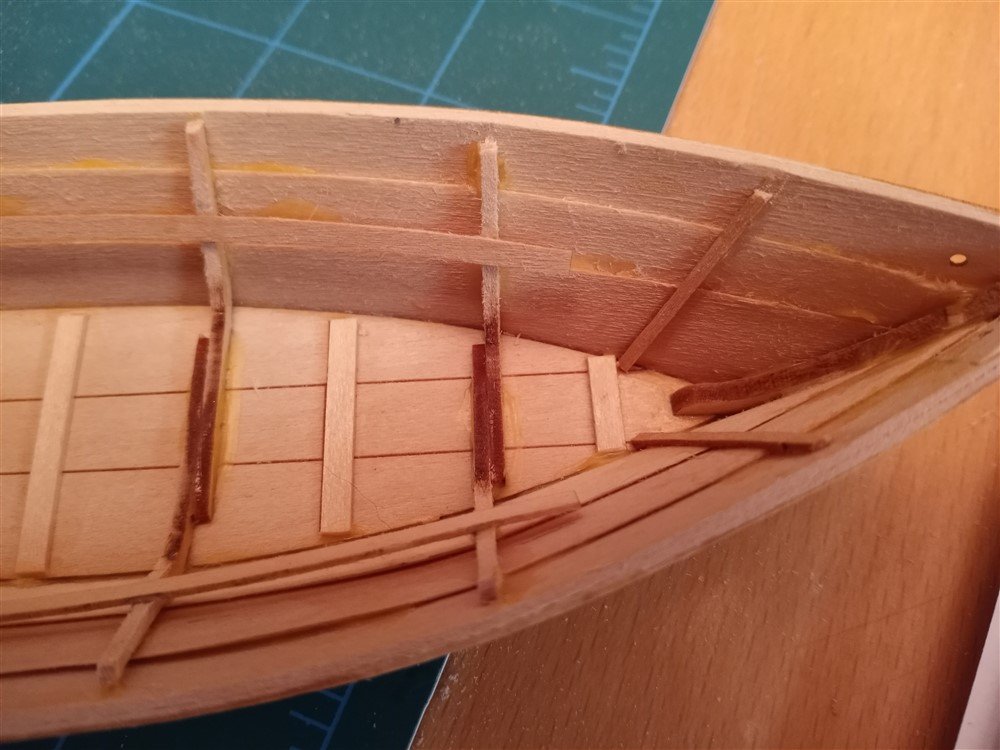
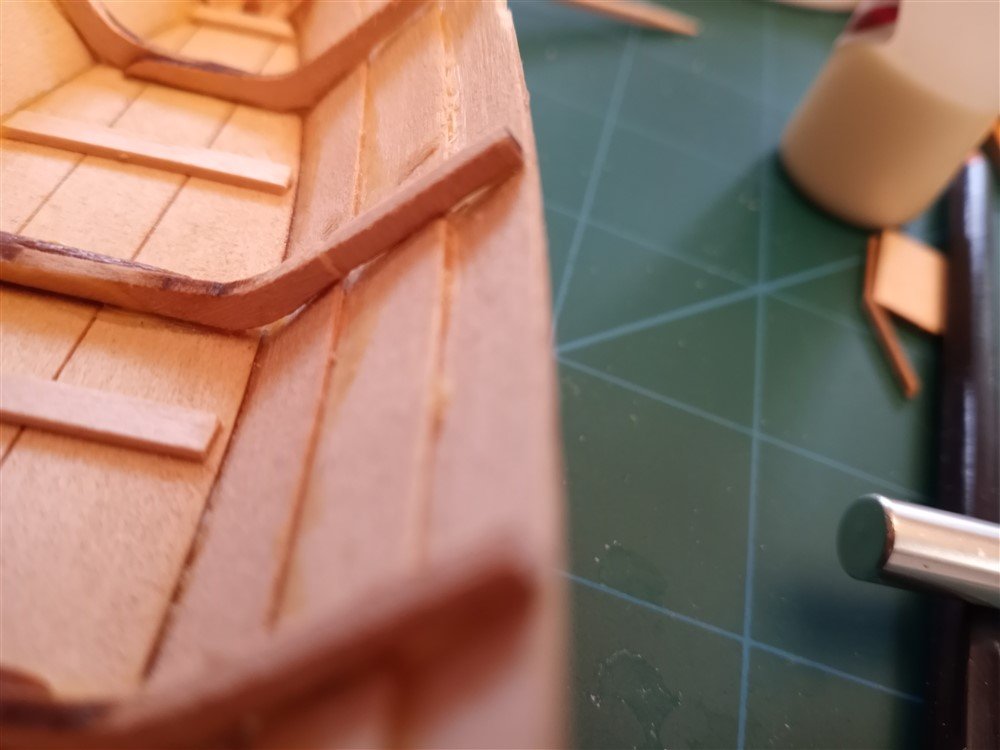
I’ve finished the planking. Didn't look too bad at this point, or so I thought! Made the little “false stem” too. But freeing the frames from the frame tops proved a bit more difficult. Broke a frame in the process. At this point, after attaching the side cleats, I took stock of my progress. It's not good! Broken frame, lots of excess glue blobs, strakes that don’t attach to the frames, frayed wood planks, and many other imperfections. At this point, it’s looking really bad... And what I am learning about myself is eye-opening. I know I’m not a perfectionist, and that’s ok. But I always thought of myself as a patient person. Not so! I wanted to “get this done”, so I didn’t take time with gluing, or taking care of the frames, or staying patient with the process. I kept thinking it’ll be “good enough”… Not sure I can salvage or fix any of this, but I'm hopeful that by continuing, some of this will be resolved (or covered up!) with the gunwale and cap rail going forward. And I think some additional wood filler and creative sanding will help too! (The good news is that if I turn it sideways, and don't look too close, it looks better!)
- 85 replies
-
- 5
-
-
- Lowell Grand Banks Dory
- First Build
- (and 2 more)
-
Whew! I'm sure there will be many more mistakes on which to learn and practice "fixes"! Thanks for the encouragement!
- 85 replies
-
- 4
-
-
- Lowell Grand Banks Dory
- First Build
- (and 2 more)
-
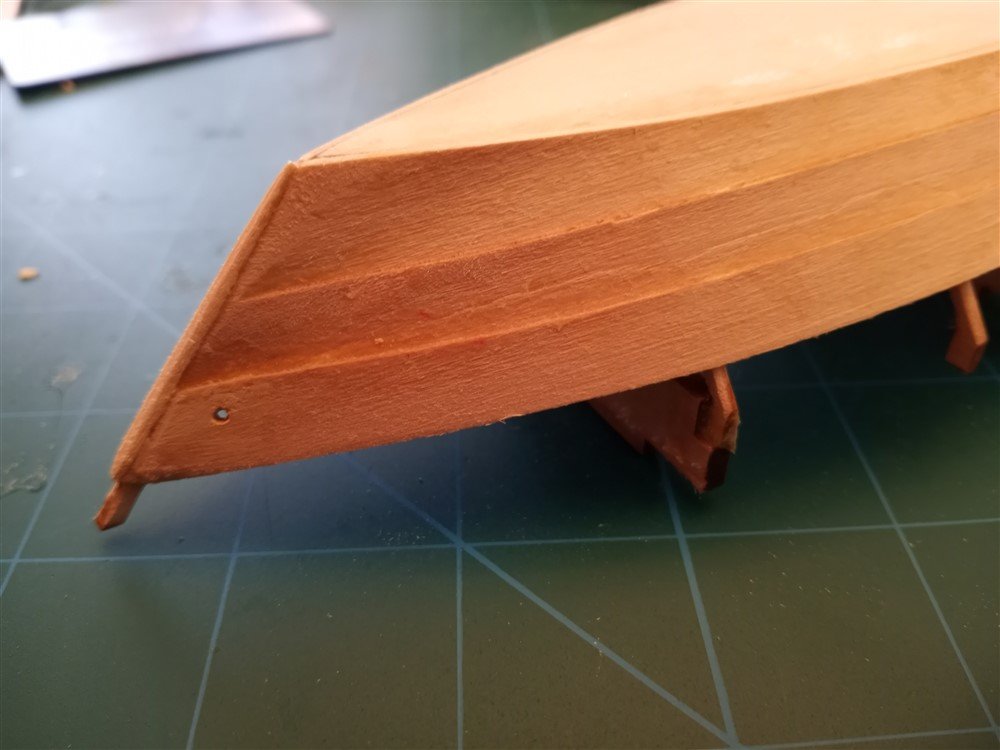
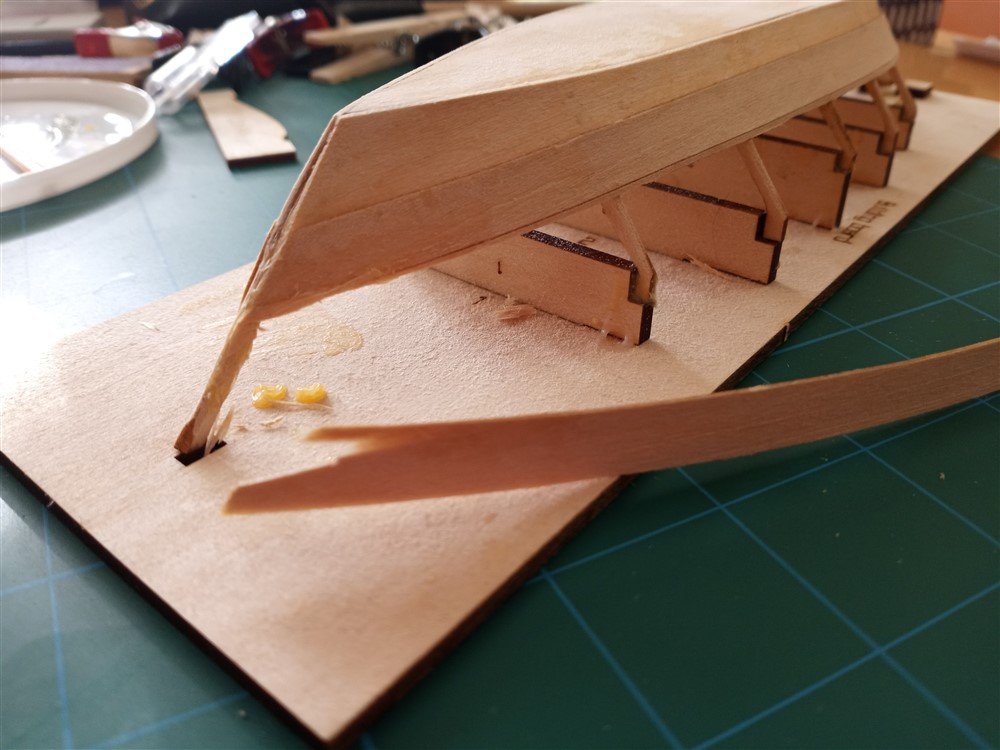
Ok, I've done my best to "fix" the end of the sheer strake. It's not perfect, but I am satisfied with how it turned out and I can go forward now and finish the planking. My hope is that final sanding and paint will cover a multitude of sins!
- 85 replies
-
- 6
-
-
- Lowell Grand Banks Dory
- First Build
- (and 2 more)
-
Thanks druxey! This will be interesting!
- 85 replies
-
- 2
-
-
- Lowell Grand Banks Dory
- First Build
- (and 2 more)
-
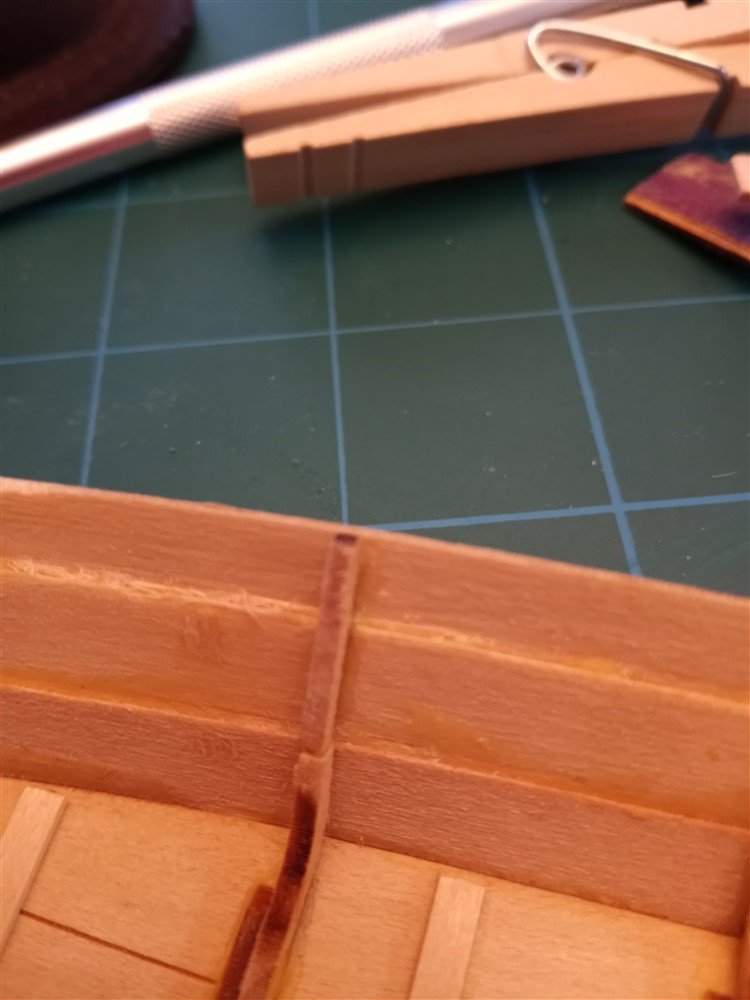
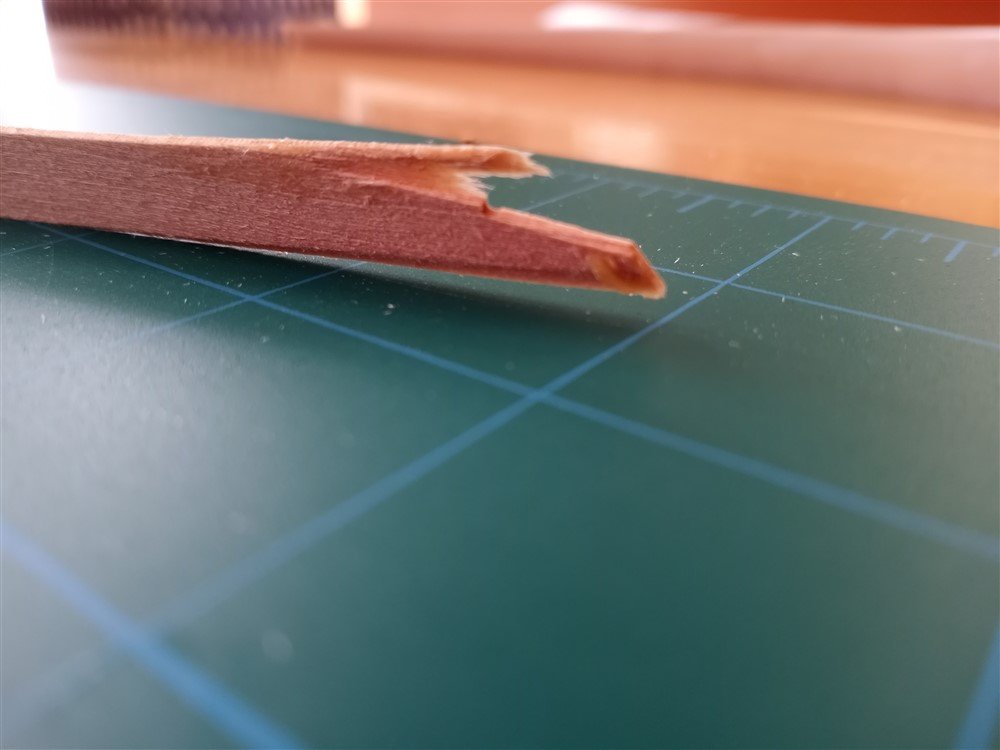
Thanks @druxey and @dvm27. I need to learn patience!!! Is there anything I can do to fix this?
-
Help!. My first MAJOR mistake... I broke the Sheer Strake! Right at the bow where the hole for the becket is, I glued the sheer strake too low on the bow, so I tried to remove it. I had used the yellow wood glue, and tried multiple applications of isopropyl alcohol, but when I tried to lift it off the broad strake, it broke. Any ideas on what I need to do to fix this? (Will Model Shipways send me a new piece? Can I use wood filler or putty (neither of which I know how to use)? Looking for advice.. I'm really discouraged... What can I do? You can see that part of the sheer is still glued to the broad strake. I really made a mess of this! And is the alcohol supposed to work on Yellow glue? Or just the white? Thanks for any suggestions!
- 85 replies
-
- 2
-

-
-
- Lowell Grand Banks Dory
- First Build
- (and 2 more)
-
Beautiful! I'm looking forward to doing "rigging" someday. Hope it can be done as well as yours! This is a fabulous ship!
- 263 replies
-
- 2
-
-
- Medway Longboat
- Syren Ship Model Company
- (and 1 more)
-
Hi Bob, I am following your progress closely, as I am just starting my modeling with the Lowell Grand Banks Dory. I continue to go back to your Dory blog to see how its supposed to look! And my plan is to follow in your footsteps to do the Norwegian Sailing Pram and then the Muscongus Bay (which is looking great!). Keep up the great build logs, as I am counting on them for inspiration and guidance!
- 52 replies
-
- 2
-
-
- Model Shipways
- muscongus bay lobster smack
- (and 1 more)
-
Wow! Now I see what actual planking looks like! Amazing!
- 433 replies
-
- 3
-
-
- open boat
- small boat
- (and 1 more)
-
niwotwill, your ship is amazing! The metalwork alone is stunning, but your miniature work and attention to detail are incredible. I'll be coming back to your build log just to "watch and learn", although my newbie skill level is far below attempting anything like this! (I'm impressed with the rope-making! I may have to try this sometime!)
-
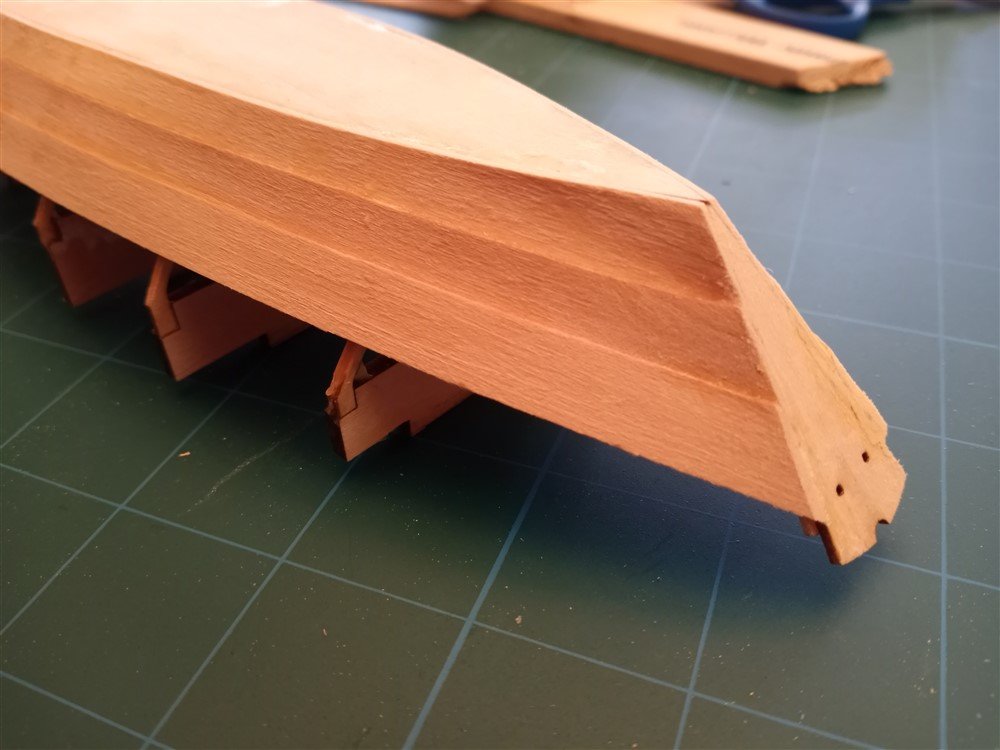
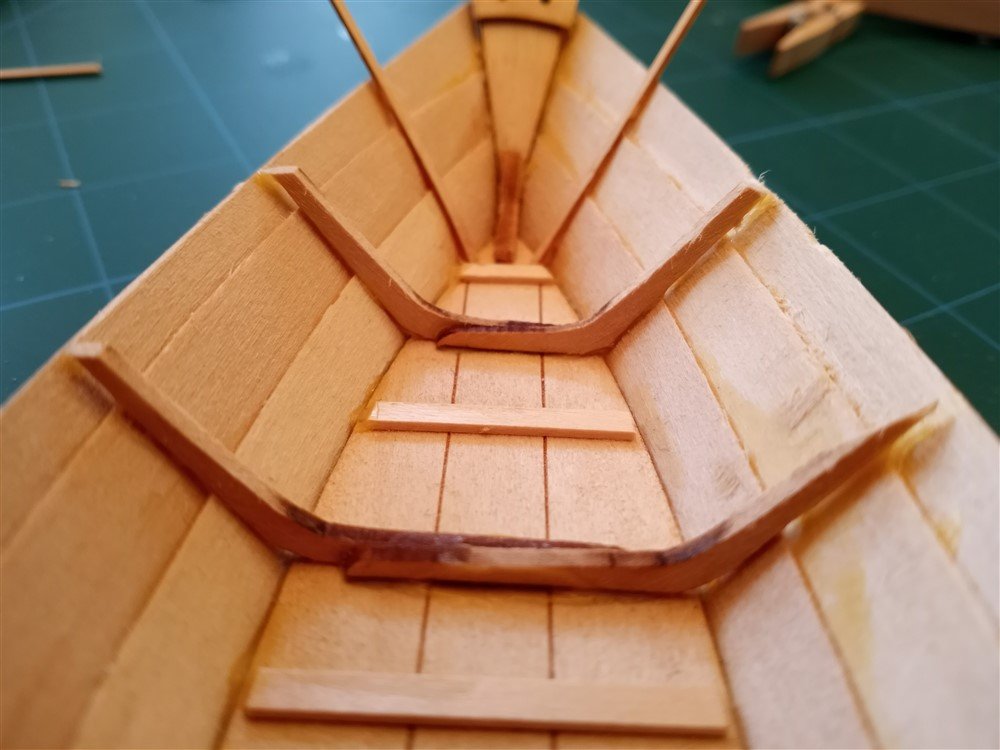
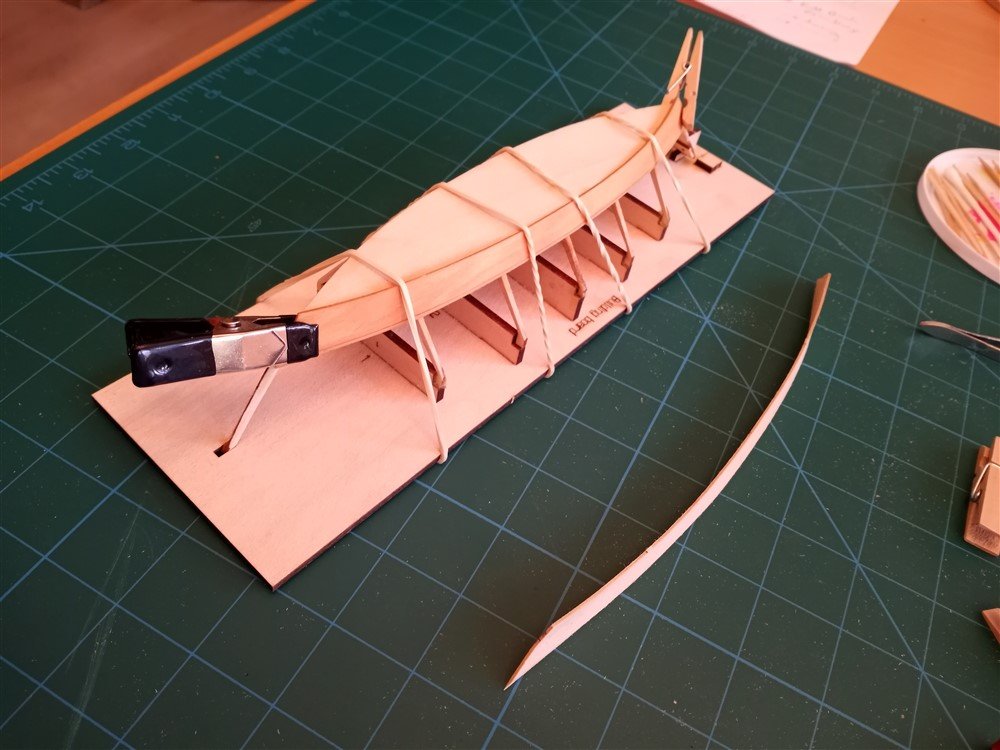
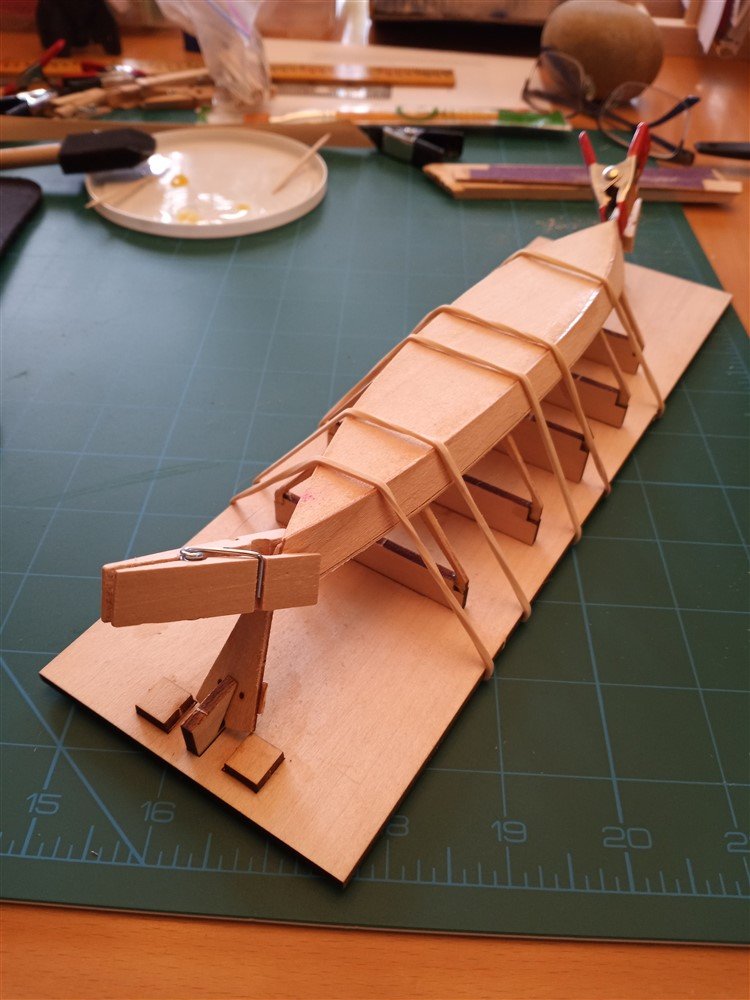
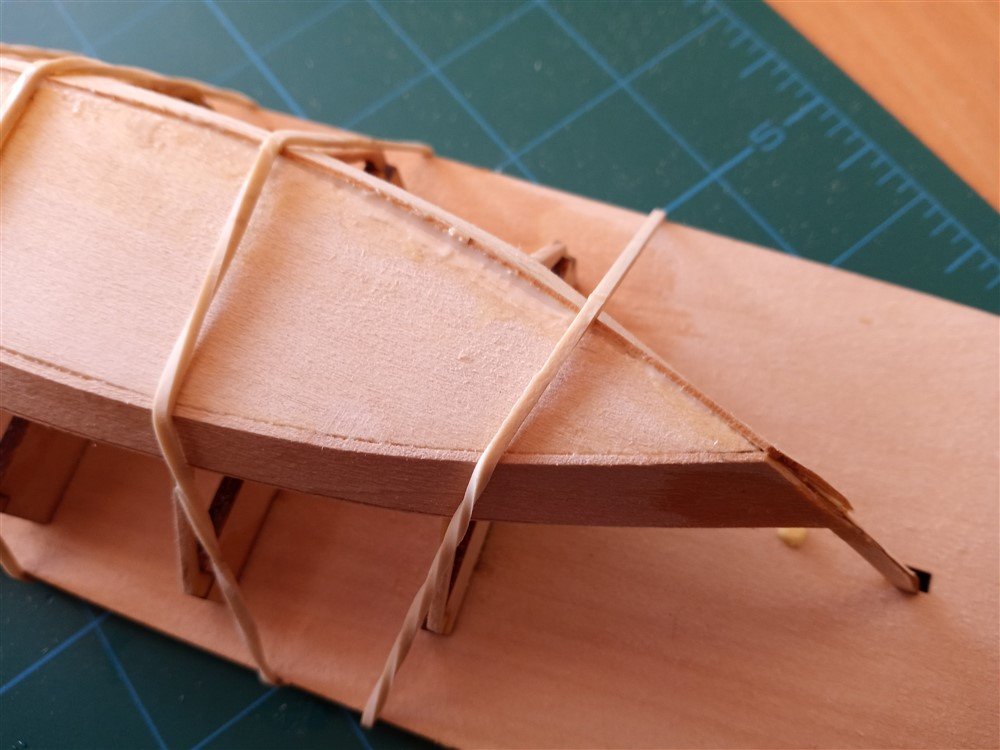
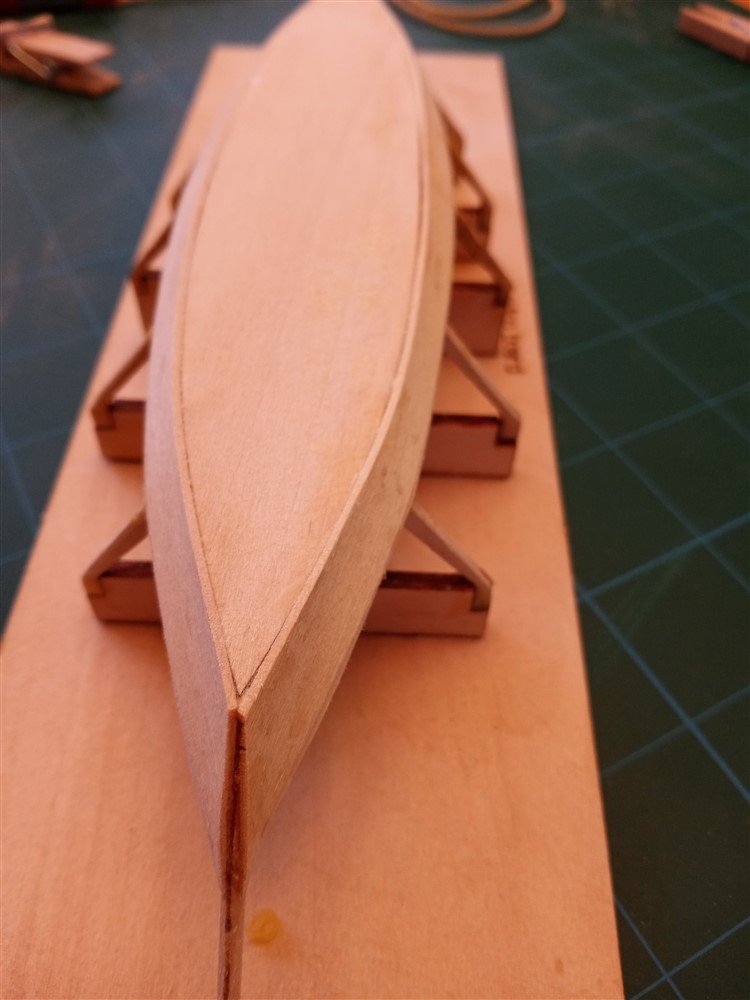
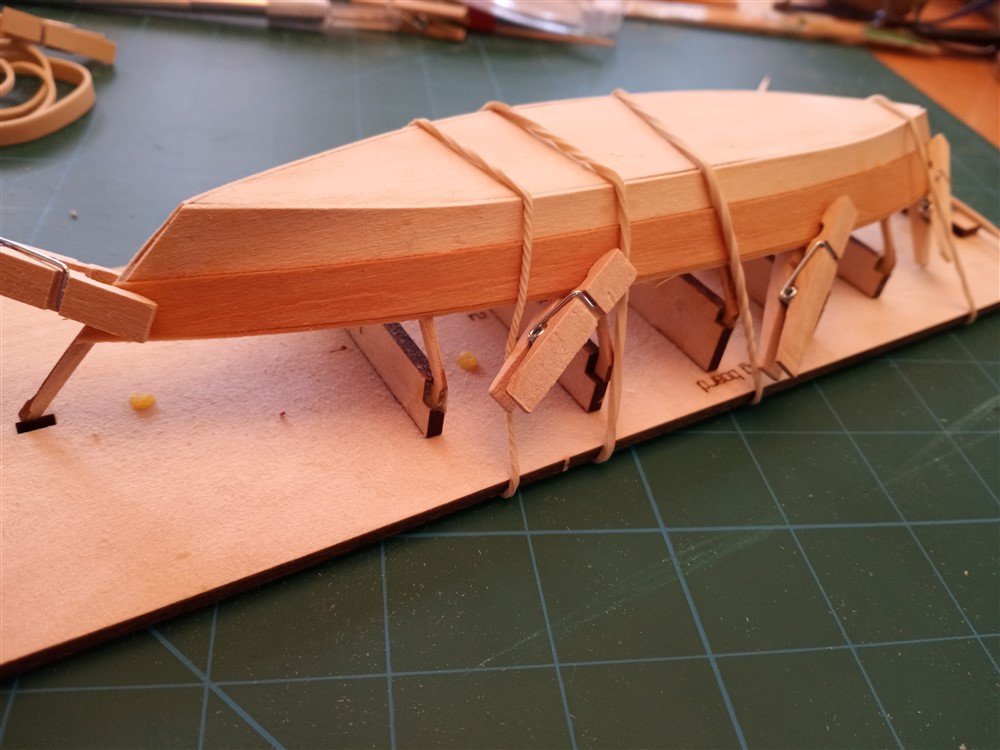
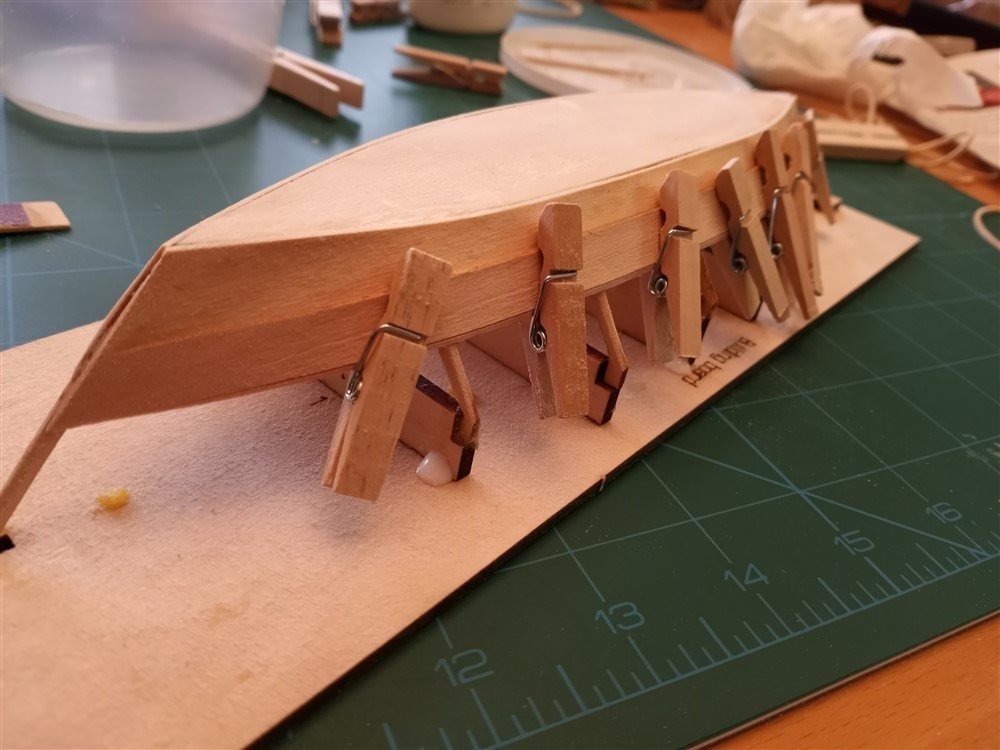
Steps 7, 8 and 9… getting there. Not getting to do as much on the model this week. It’s amazing how fast these “retirement days” fill up with other stuff to do! Bending the garboard planks went fairly well. Gluing this first plank was a challenge. And as you can see, I made a mess of it! But I was happy with how it turned out, after sanding everything down. Although itn looks like it has separated from the bottom, its been tightly glued. I'm hoping the final painting will cover up this gaff! At this point I was beginning to feel a bit more confident. Bending the Broad plank wasn’t too bad… I poured hot water from my Kuerig coffee maker onto a dinner plate, and let the wood soak for about 7 minutes. And gluing, although stressful, seemed to go a little better than the first planks. I had found all these little clothespins at Target, which are really helping to secure things. I’m happy with how this one side turned out. Now I need to do the other side. The only problem so far... the transom is getting beat up in the process! I now plan on leaving it alone till I finish the planking, then I can hopefully sand/glue/fill any dings or problems at that time. Stay tuned! And thanks, everyone, again for all the words of wisdom and the "likes". I've started looking at all your current projects and I am humbled, after seeing your incredibly complex models, that you would take time to comment on my little boat! I'm really impressed with this community!
- 85 replies
-
- 6
-
-
- Lowell Grand Banks Dory
- First Build
- (and 2 more)
-
Wow, what a gorgeous ship! Thought I'd take a peek at your current work, since you've been so kind with your comments on my first little model. Your ship looks amazing!
-
@Keith Black Ha! It's all I can do to work on this little model. No woodworking/refinishing of kitchen tables for me! Placemats cover a multitude of sins!
- 85 replies
-
- 1
-
-
- Lowell Grand Banks Dory
- First Build
- (and 2 more)
-
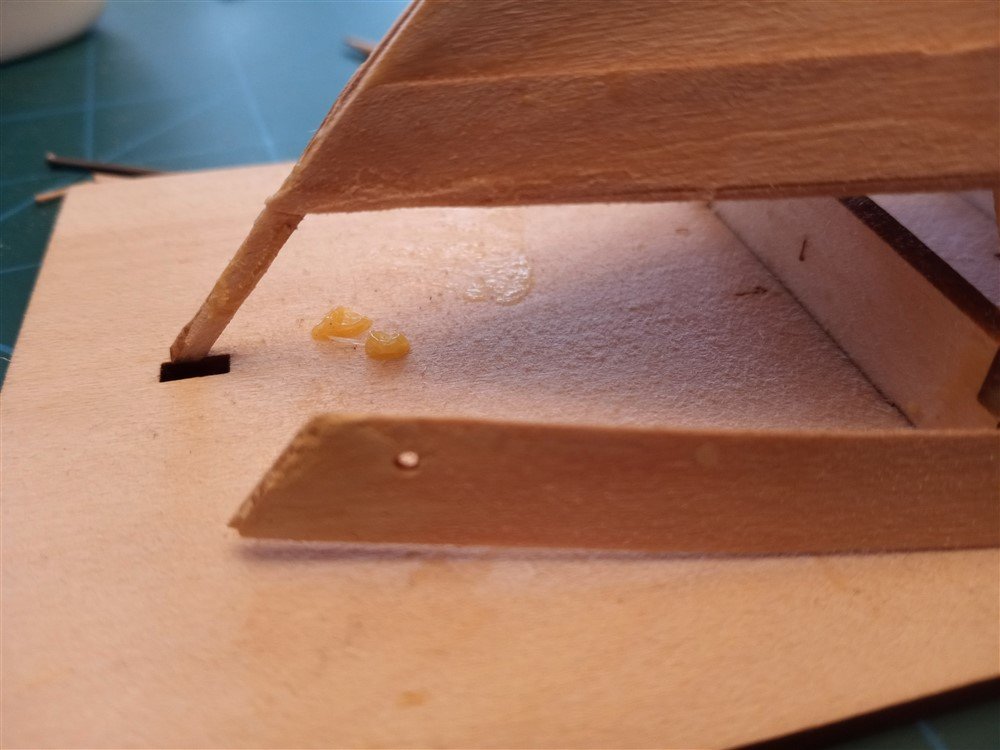
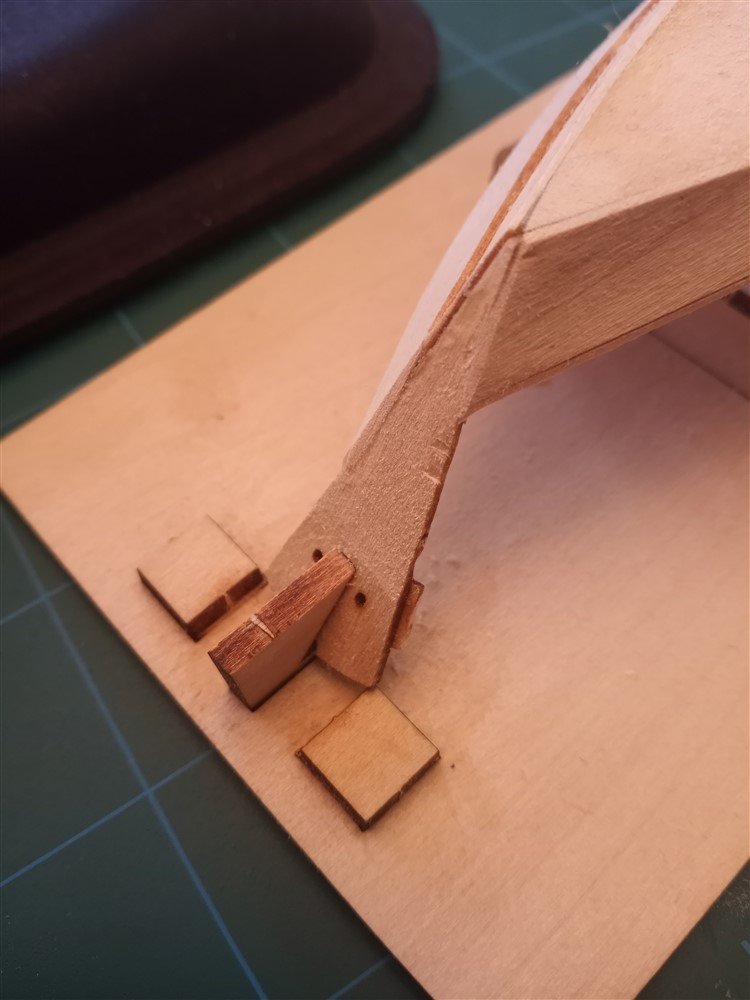
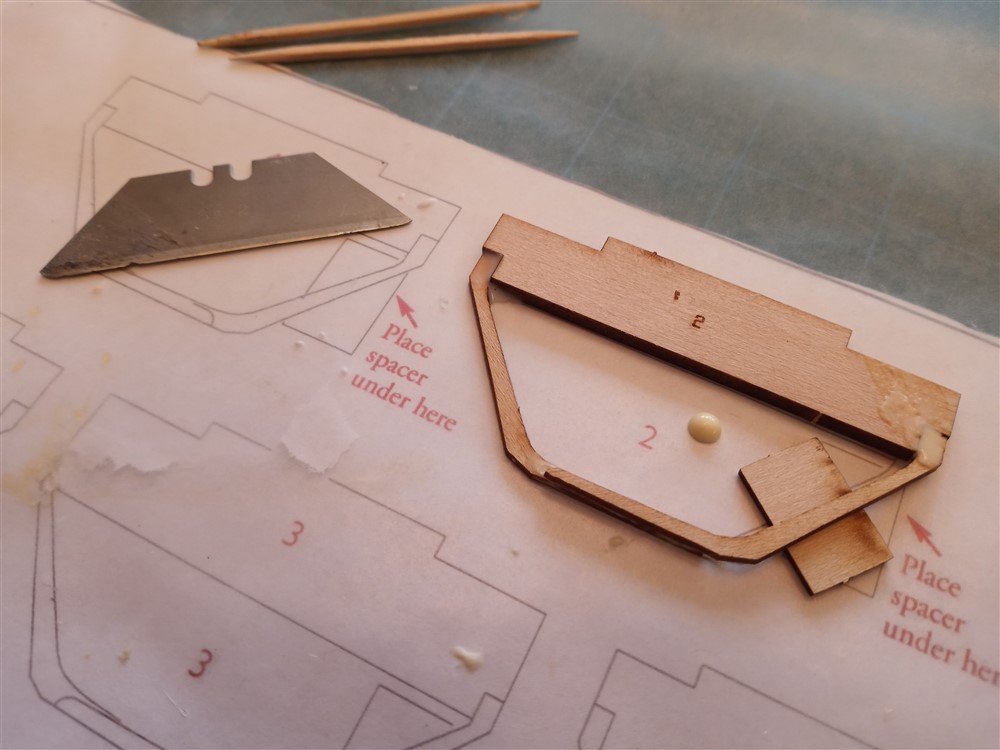
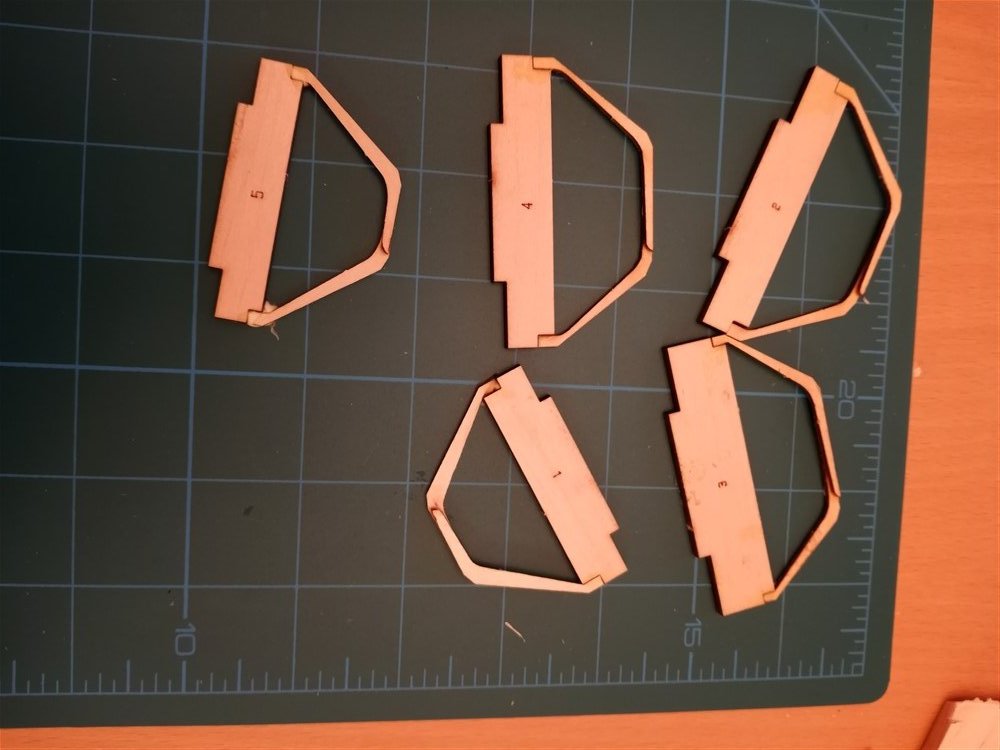
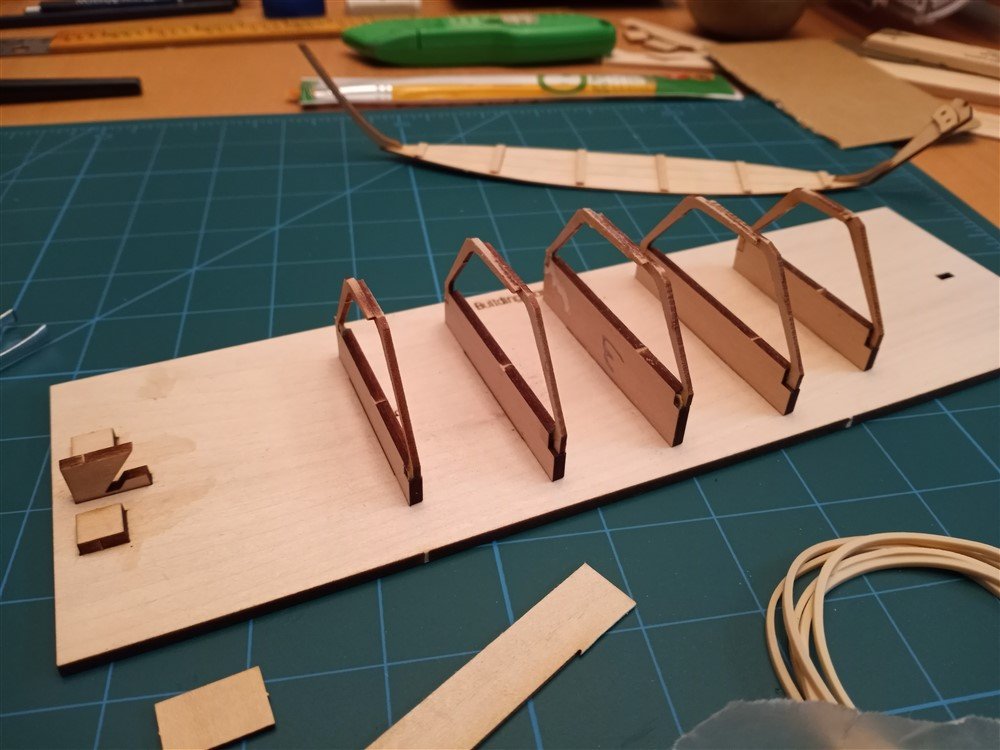
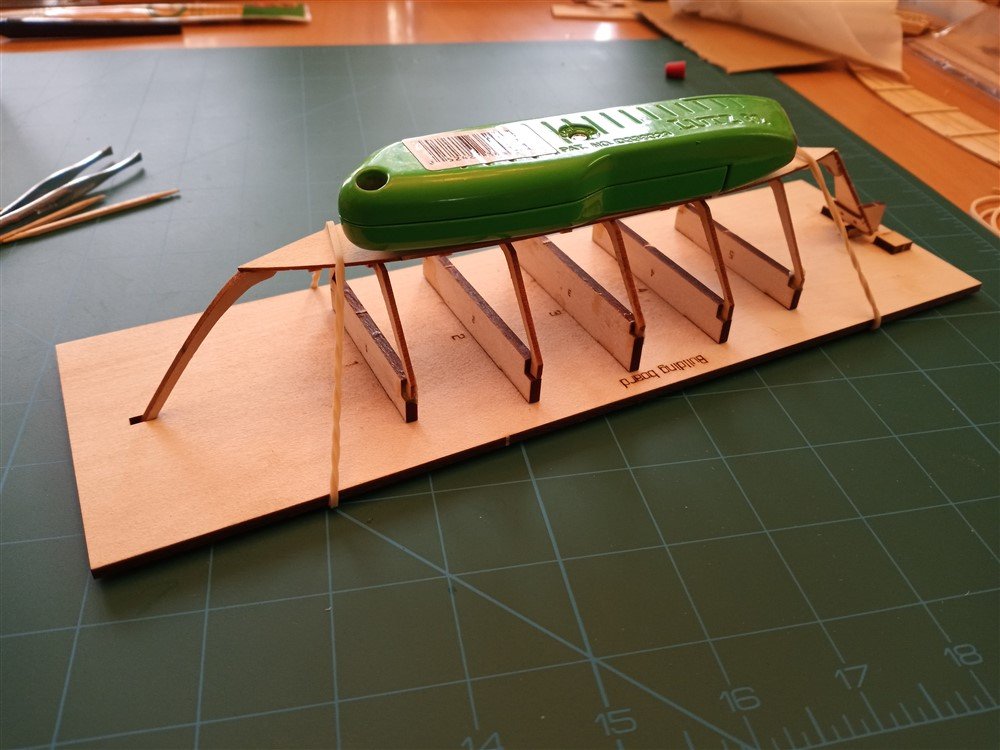
Starting steps 4, 5 and 6. I was nervous (again), but went ahead with the frames. I’m glad I used the drawings on page 5 of the instructions. Page 4 wasn’t sized exactly right. I’ve been using wax paper under everything to catch any excess glue (and to avoid gluing my model to my new cutting mat!) And then, I used a single blade from a box cutter to slide under the frame to disengage it from being glued to the wax paper! I didn’t worry too much about excess glue on the frame tops, because those will be cut off later. Meanwhile, I learned an important factoid. Apparently, if you spill some isopropyl alcohol on your nice kitchen table, it removes the finish completely! (Oops!) Hence the new cutting mat! Time for the building board. Tried to sand the char off the top. Wasn’t as successful as I wanted, but I didn’t want to break anything. Everything still seems incredibly fragile! I’m hoping the planking will give the model some “substance”! Step 6 – letting it dry. I added some weight to the top to make sure it’s all glued well. AND I switched to using yellow wood glue (which came in the kit). It seems to work better for me. The very scary “planking” is next, but letting this dry overnight before I have to face my fears!!!
- 85 replies
-
- 6
-
-
- Lowell Grand Banks Dory
- First Build
- (and 2 more)
-
I wish I could learn this trait! I get so anxious to see the next step! Your build log has really been helpful in showing me what's next and what its supposed to look like! thanks! (Oh, and I'm going to steal your idea of "staining the thwarts"... they look great!) Of course, it will take me quite a while to get to that point in the build, but I'm already checking out stain colors!
- 85 replies
-
- 2
-
-
- Lowell Grand Banks Dory
- First Build
- (and 2 more)
-
Thanks Keith, I've also used the Q-tips.. mostly for applying isopropyl alcohol when I've made mistakes!
- 85 replies
-
- 2
-
-
- Lowell Grand Banks Dory
- First Build
- (and 2 more)
-
Thanks Ryland. The glue tips are helpful, as is the description of the laser beam! I'll have to pay attention. I was thinking I was putting too many pictures up... I'm only on step 3, but hopefully the details will help other newbies!
- 85 replies
-
- 2
-
-
- Lowell Grand Banks Dory
- First Build
- (and 2 more)
-
Thanks turangi, I'll try that method going forward!
- 85 replies
-
- 2
-
-
- Lowell Grand Banks Dory
- First Build
- (and 2 more)
