
HOLIDAY DONATION DRIVE - SUPPORT MSW - DO YOUR PART TO KEEP THIS GREAT FORUM GOING! (Only 36 donations so far out of 49,000 members - C'mon guys!)
×


lraymo
-
Posts
297 -
Joined
-
Last visited
Content Type
Profiles
Forums
Gallery
Events
Everything posted by lraymo
-
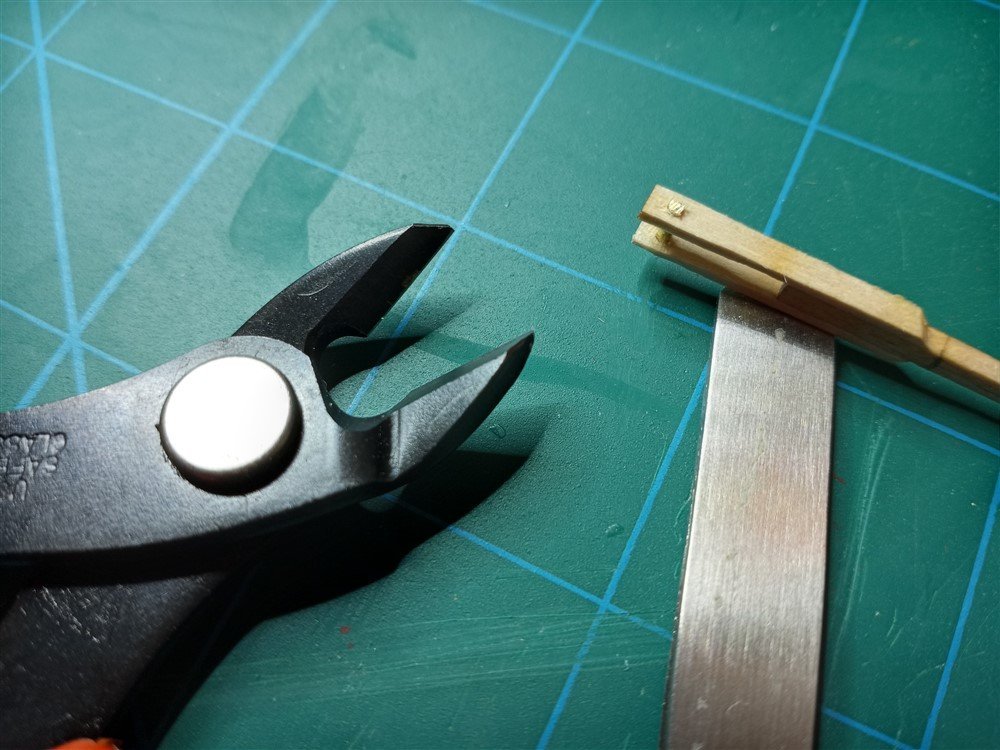
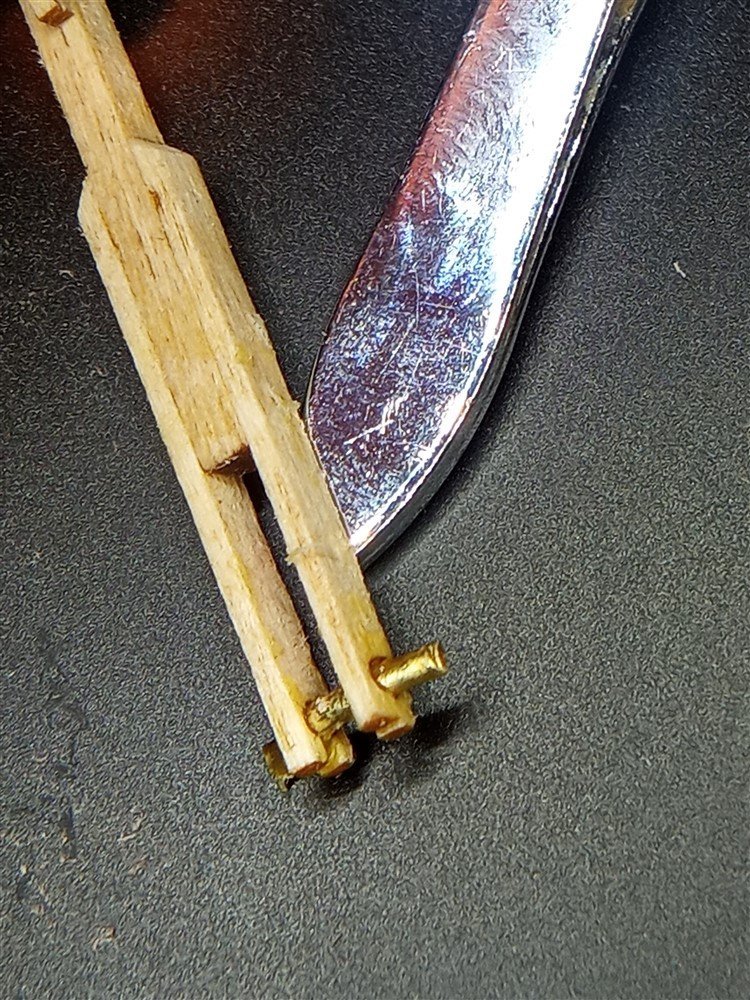
You aren’t going to believe this story!!! I went to the local Hobby Haven (its a model shop frequented by people (mostly men) who are VERY serious about their modeling), and I asked about the annealing process, and showed them the brass rod and tube I am needing to work on. A guy who was buying something overheard me talking about needing to heat up the brass, and said, “hey, I’ve got a torch in the truck, I’ll do it!”. Turns out, he’s a plumber, and we walked out to his BIG work truck in the parking lot where he pulled out a torch and some pliers. He fired up the torch, spent about 2 minutes heating the brass, cooled the pieces in a puddle on the asphalt (its been raining a lot!), and drove off after I thanked him profusely! Not only am I extremely happy that he did the work for me, but now that I’ve seen it done, I am not so scared of it, and believe I can tackle it in the future, if needed. Also, I purchased a flush cutter while I was in the store. So I used the cutter to trim the tiller a bit more (it looks more like a rivet now), and then I attached the fore stay plate, sawed an appropriate bit of tubing to represent a hex nut, and glued it all in using CA. It’s a little bit crooked, the bend could’ve been better, and its not precise, but I am THRILLED to have done my very first piece of metal work! Thanks to all of you for your great advice and encouragement! I’m forging ahead!

- 160 replies
-
- 4
-

-
- Model Shipways
- norwegian sailing pram
- (and 1 more)
-
Strange indeed! I also found this set on Amazon. Ceramic tile, tweezers, etc for $34.50. So I'm getting closer to it! Still VERY nervous about actually doing the annealing, though. https://www.amazon.com/gp/product/B073FZRY59/ref=ox_sc_act_image_1?smid=A3QWCV2337YR2W&psc=1
- 160 replies
-
- 1
-
-
- Model Shipways
- norwegian sailing pram
- (and 1 more)
-
Keith, thanks for the video. Very good info. I'll be watching it a couple more times to really understand. And strangely, when I click on the Amazon link above, it still comes up with $21.99. Cyberspace is weird!
- 160 replies
-
- 1
-
-
- Model Shipways
- norwegian sailing pram
- (and 1 more)
-
I may have hit a wall. So I'm going to ask a bunch of questions, regarding the need to "anneal" the tiny brass rod and tiny brass tube in my kit. I did some online research, and it says I need to heat the brass till it turns cherry-red, then cool it by placing in a basin of water. And then clean up the pieces. So I will buy a creme brulee torch (I don't have one), but I can get one from Amazon for about $21. Does this one look ok? Amazon.com: Kitchen Torch, blow torch - Refillable Butane Torch With Safety Lock & Adjustable Flame + Fuel gauge - Culinary Torch, Creme Brûlée Torch for Cooking Food, Baking, BBQ + FREE E-book, 1 Can Included: Home Improvement To actually do the annealing, I have the following questions: Baking sheet - can I just put the tiny brass pieces on a baking sheet, and then torch them till they turn cherry-red? If I blast them, will the flame push them around on the sheet? In other words, do I need some sort of special tweezers to hold them while I blast them? And what kind should I get, as to not burn myself when I try to pick up the pieces. Once they have been super-heated, do I just need to pick them up (with the aforementioned special tweezers) and put them in a basin of water to cool them down? Rather than a baking sheet, do I need to use a ceramic plate? If so, what kind and where can I find one? What's the best way to clean the pieces (if needed). Am I on the right track here? Is this the correct process? Just trying to understand everything I need to do. Thanks!
- 160 replies
-
- 2
-
-
- Model Shipways
- norwegian sailing pram
- (and 1 more)
-
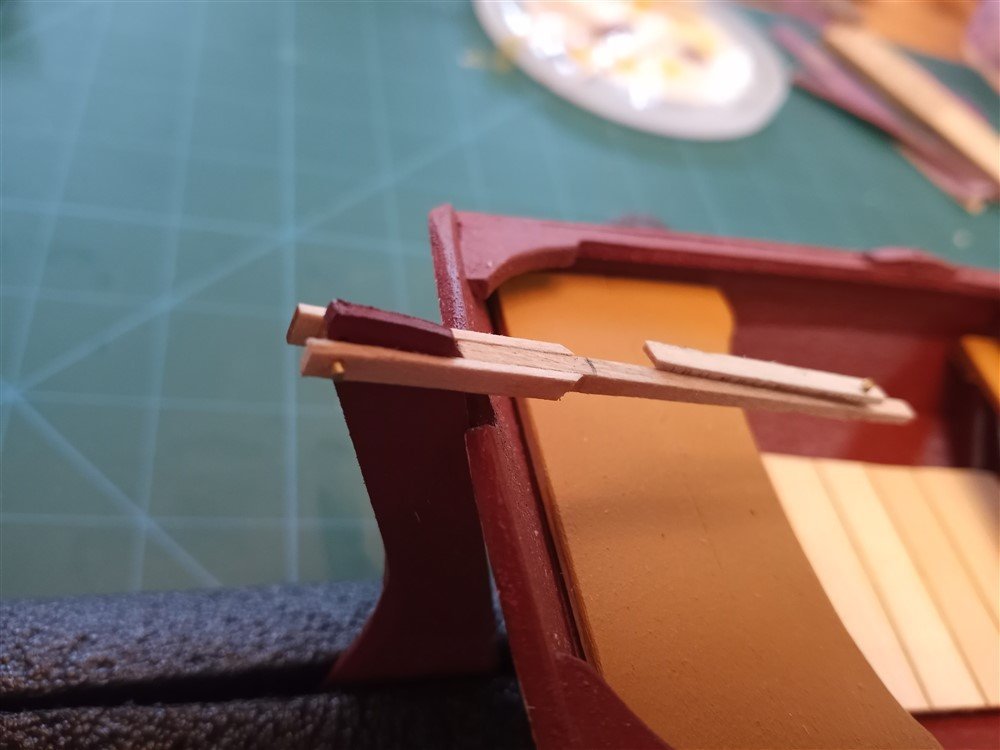
Thanks, I'll be perusing amazon! I've finished the tiller, having gone as far as I'm willing to go! I added the extension (after about 8 re-dos!). The final "pin" isn't in the end of the extension, but I propped it up, and I think it will look ok going forward. My next challenge, which is quite scary, is the annealing of the remaining brass rods and brass tube. Apparently I need a blowtorch, a ceramic plate, and some cutters that can handle tiny pieces of brass tubing. I need to screw up the courage to work with a blowtorch! I may try to borrow a mini torch from some friends, or maybe even try using a kitchen creme brulee torch, if that will work, but I'm WAAY out of my element when it comes to working with flame and butane fuel! Any suggestions would be welcome!
- 160 replies
-
- 5
-
-
- Model Shipways
- norwegian sailing pram
- (and 1 more)
-
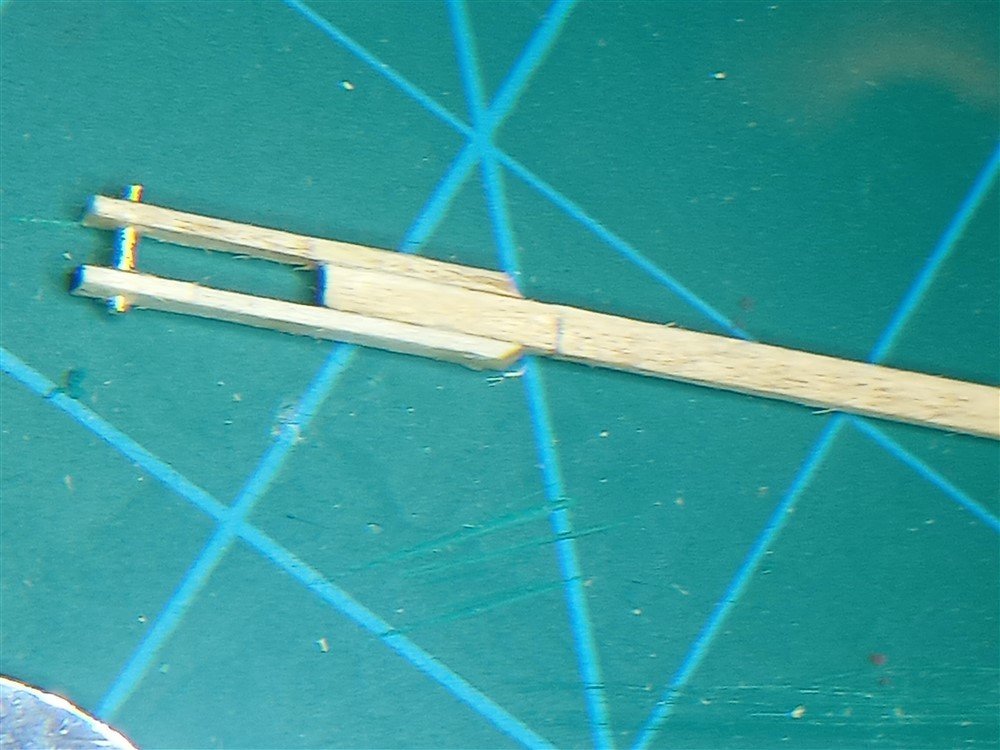
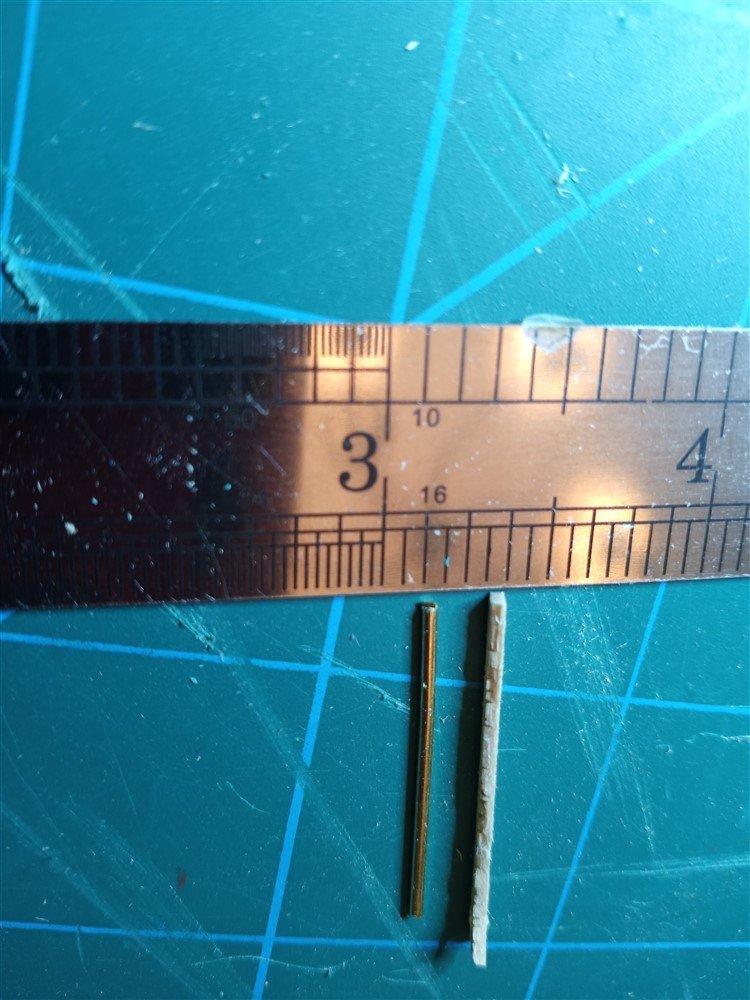
Second try. Tiller turned out much better, although the brass rod is still too long (my wirecutters couldn't get close enough to the wood). Used superglue to secure the rod, filed down the rod ends, although didn't really make much of difference... but didn't want to keep working on it, concerned I might break something! The bigger problem is the tiller extension. The instructions say to use the 1/16" diameter rod as a pin in the end of the extension. However, the thickness of the extension is also 1/16". By using a drill bit that can accommodate the rod, it splits the wood, since they're both the same size. I'm thinking of just using a bit of the supplied 1/32" diameter rod... but giving up for tonight! Thanks for listening! And for providing all the good suggestions!
- 160 replies
-
- 3
-
-
- Model Shipways
- norwegian sailing pram
- (and 1 more)
-
Keith, i love your suggestions! I just ran out to the local hardware store to get a caliper! I'll drive out to the local Harbor Freight store tomorrow for the other tools and knife set. Thanks! I'm re-doing the part, per Tigersteve, but I won't attempt the rivet at this point. It's a lovely rainy day here, a nice time to work on this. I've soaked the tiller in isopropyl alcohol, taken it all apart, and now I'm making new replacement parts and will attempt to re-assemble the whole thing, with the correct hole/drill sizes, and not trying not to split the wood this time. Tnanks again!
- 160 replies
-
- 3
-
-
- Model Shipways
- norwegian sailing pram
- (and 1 more)
-
Thank you, thank you for these great suggestions! Druxey, I'm going to do as you said, and I can see a trip to the local hobbyshop is warranted, as I will need broaches, mini butane torch, jewelers saw, etc. and Tigersteve, re-doing this will give me an opportunity to practice what I need to do! I'm going to go for it! Thanks!
- 160 replies
-
- 2
-
-
- Model Shipways
- norwegian sailing pram
- (and 1 more)
-
Thanks for the advice. Here's my current problem... in assembling the tiller, I used a pin vise and drill (i bought that same set from MicroMark, and also a #55 drill bit)... but the instructions didn't say what size drill to use. It just said "drill a small hole", so I used the #55. The hole went well, but when I tried to insert the brass rod, it split the ends. I glued it all back together (I know it doesn't look very good), and then I tried to "flatten out" the ends to make a rivit. That didn't work either. It sortof bent the rod in between the wood. My wire-cutters "pinched" the end, which may be why I couldn't flatten the ends. I'm thinking I need broaches (to ream out holes after I drill them). And I don't really know what to use to make the rivit or to cleanly cut the rod. I only have a regular hammer (much too big!), and wirecutters. I think I need better tools! Any advice on what more to get? It's getting frustrating, I think mostly because I don't have the tools I need. Ah, the joys of learning! I photographed this at an angle to show the split wood. And I was able to use my magnifying glass AND the zoom on the camera to get up close, so you can really see what a mess I'm making! Ugh!
- 160 replies
-
- 3
-
-
- Model Shipways
- norwegian sailing pram
- (and 1 more)
-
Wow! Absolutely beautiful! Amazing precision and detail!
- 433 replies
-
- 4
-
-
- open boat
- small boat
- (and 1 more)
-
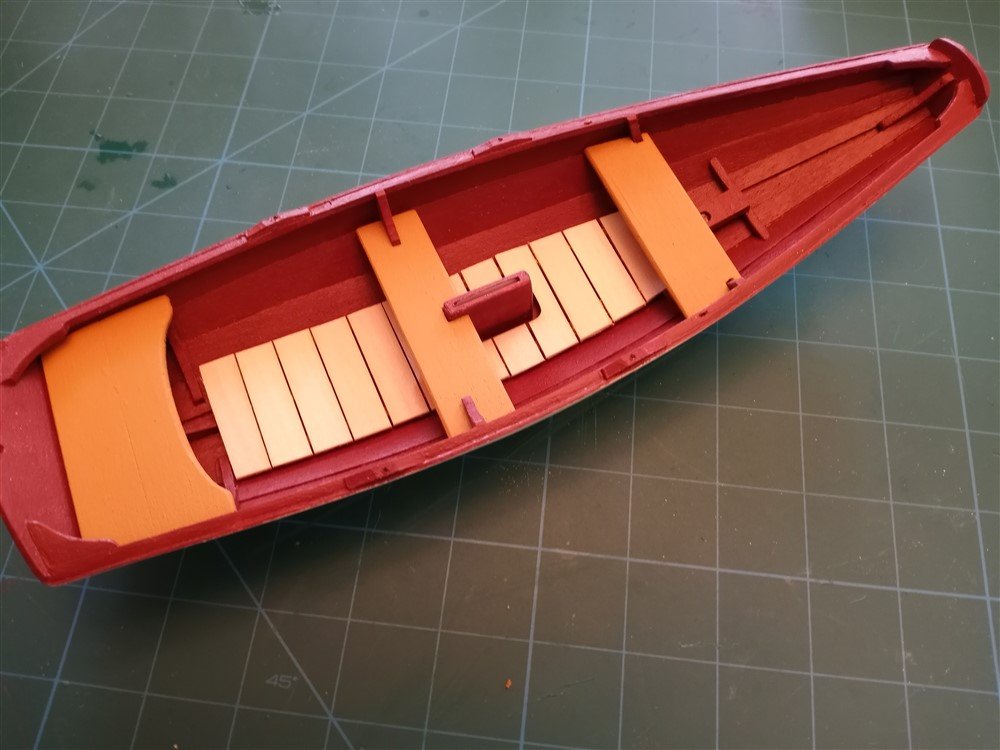
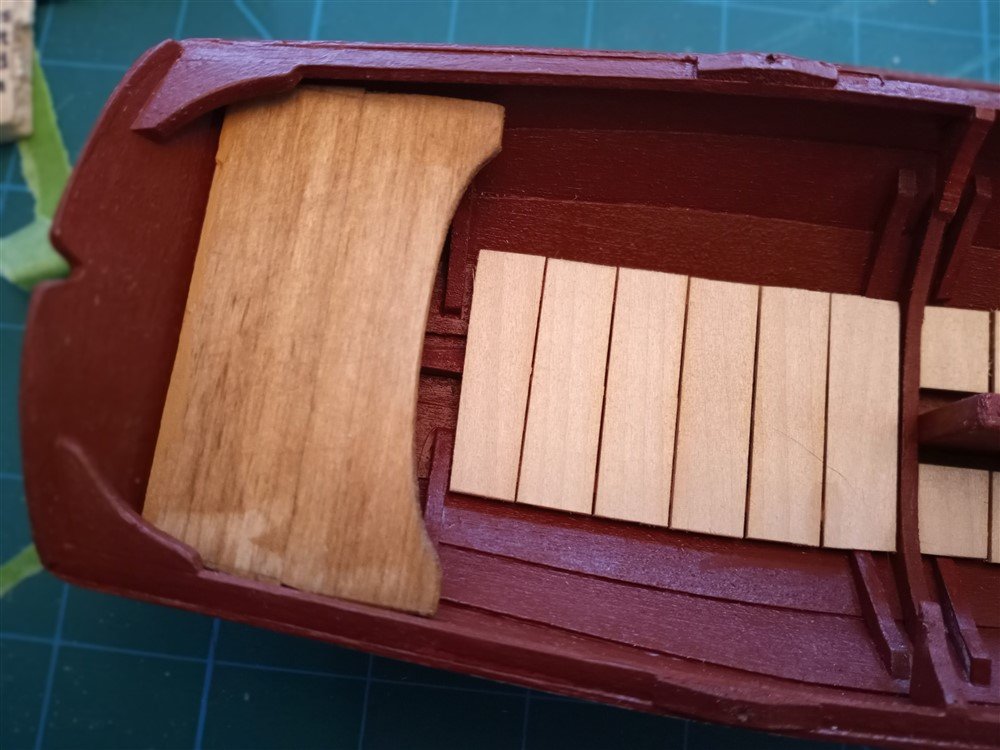
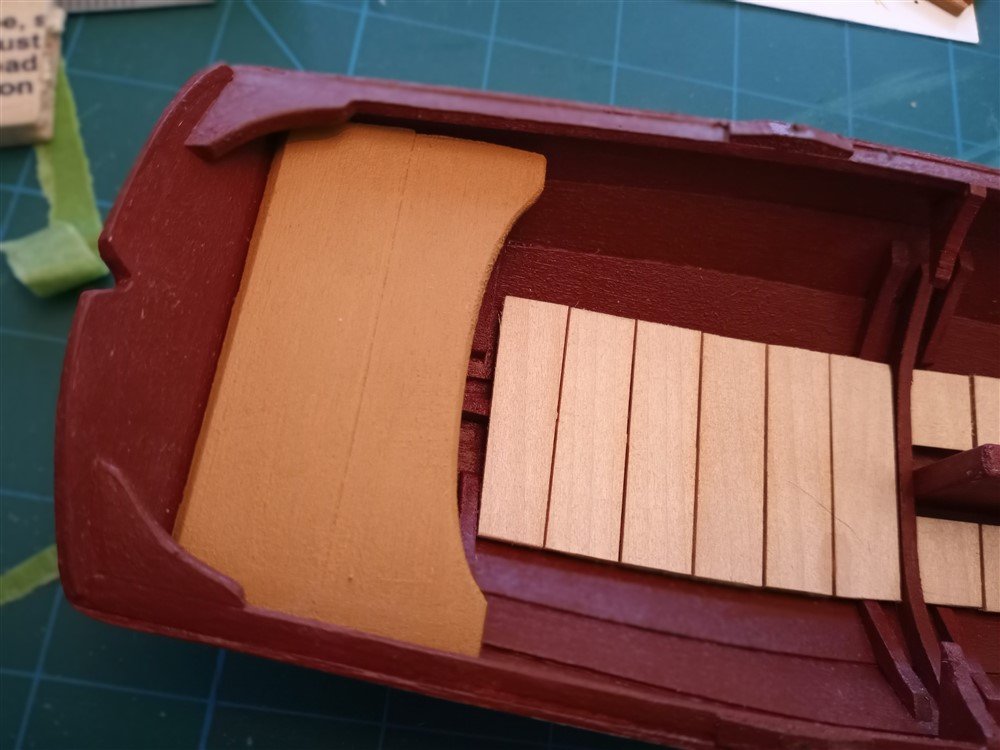
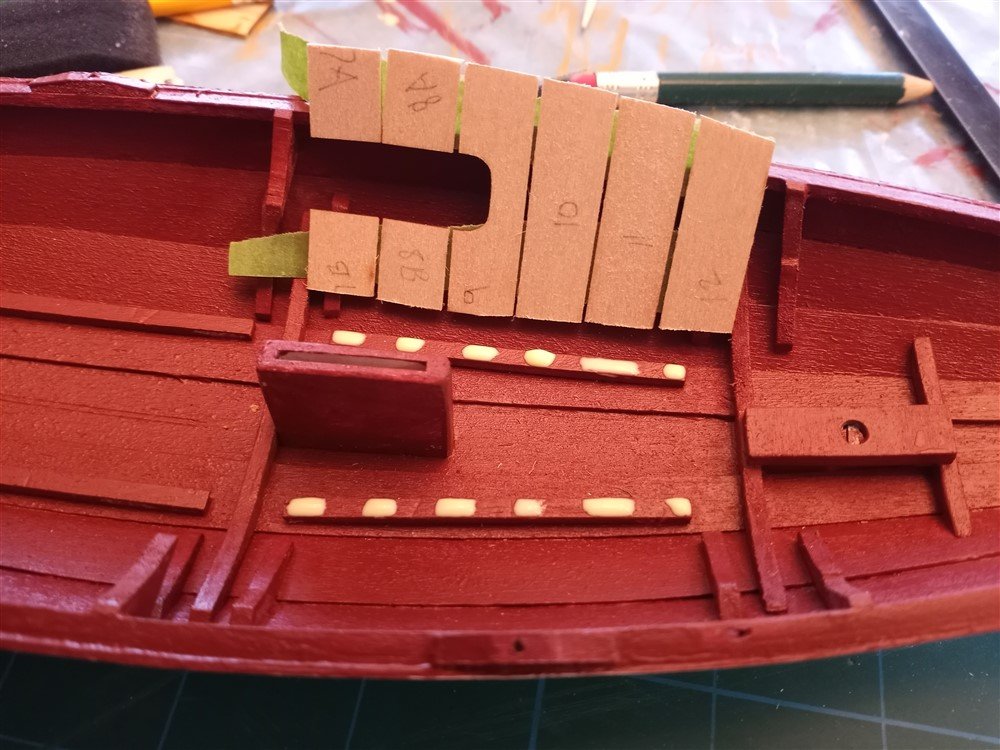
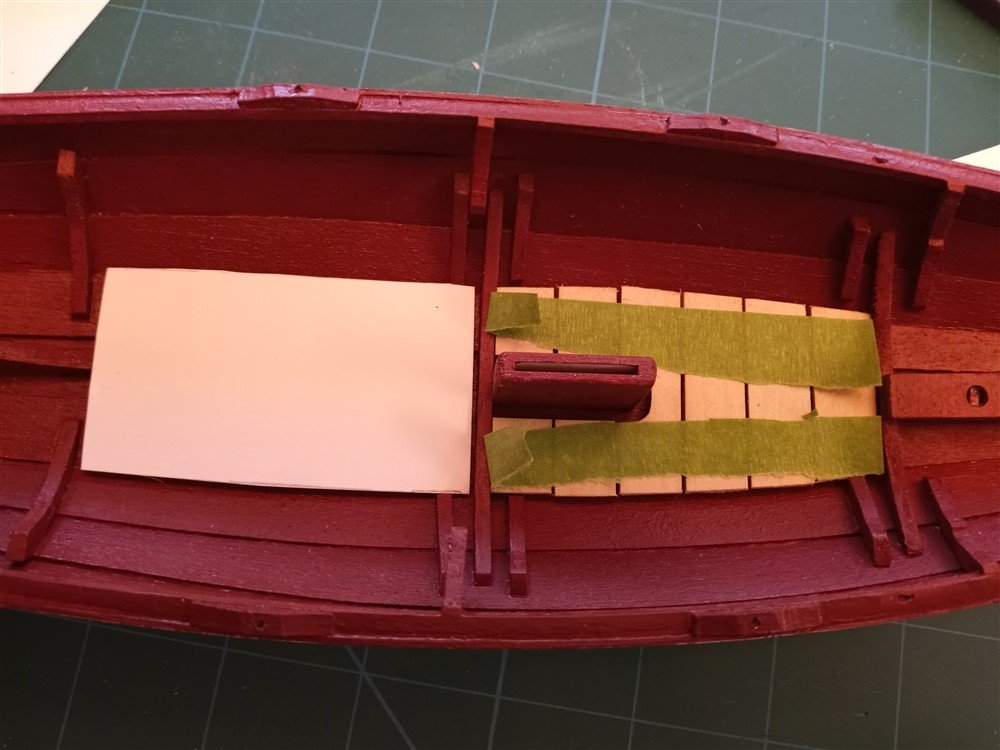
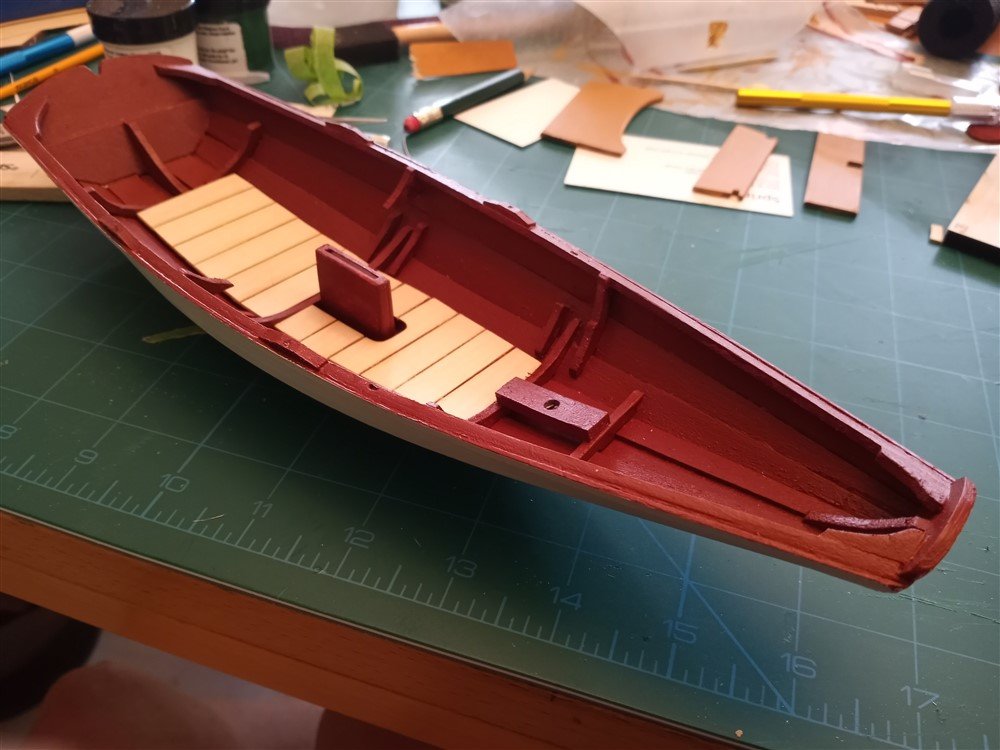
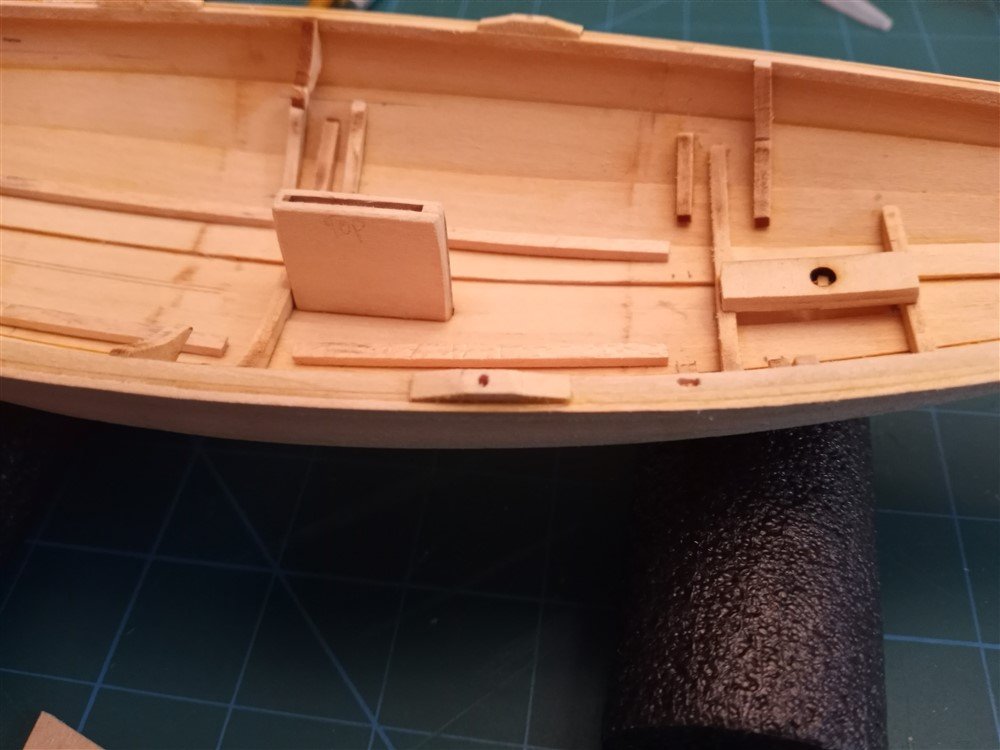
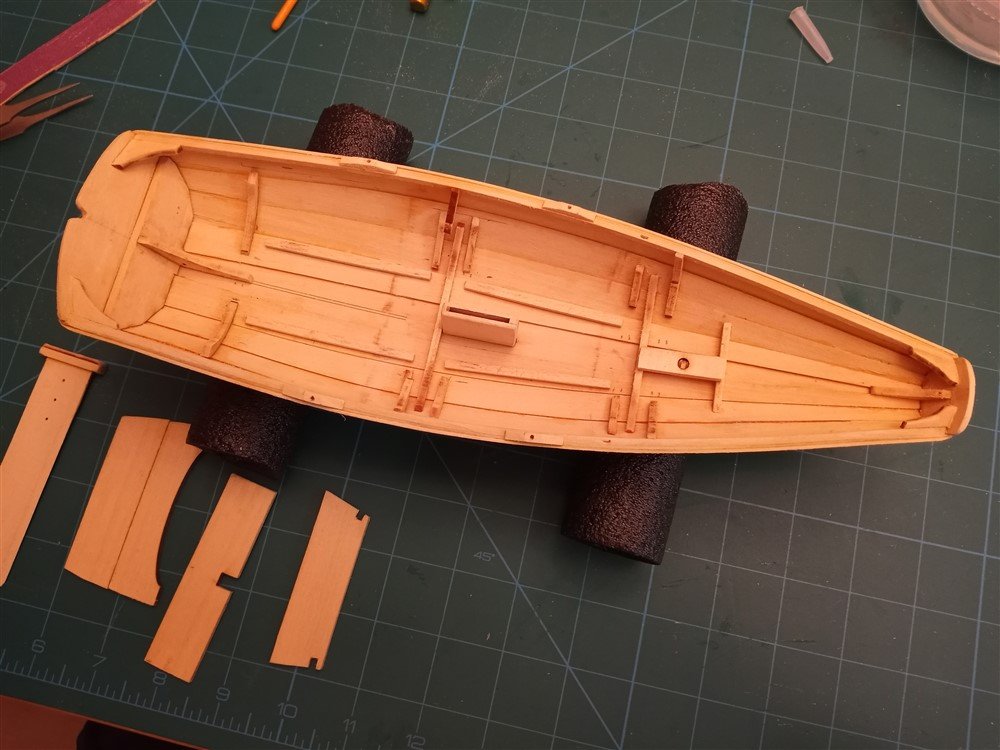
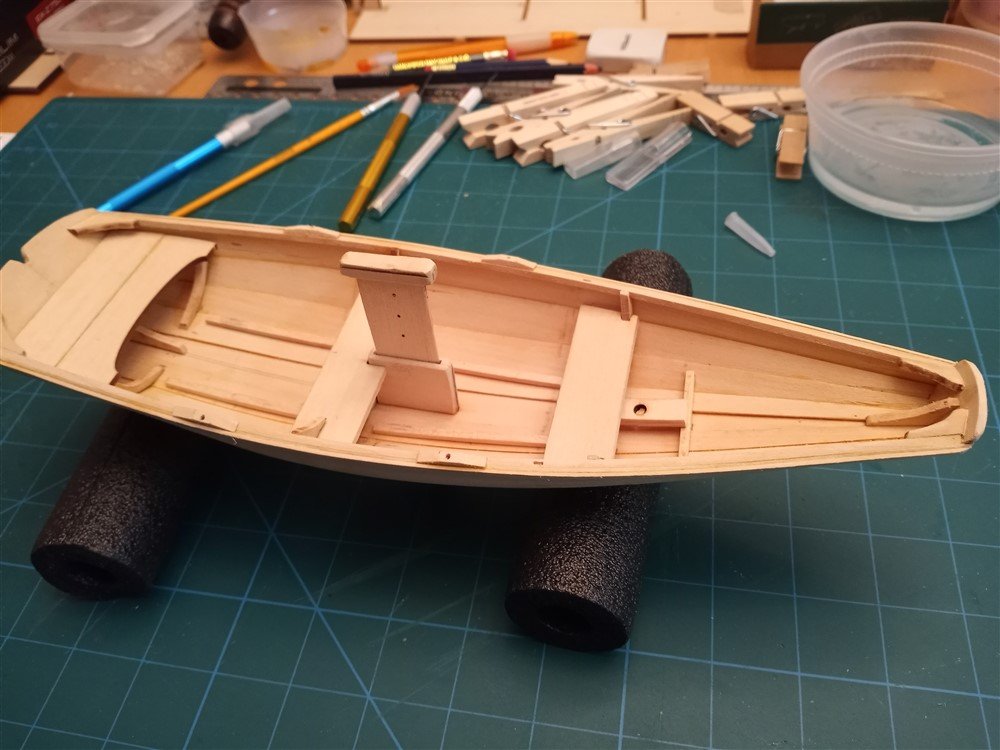
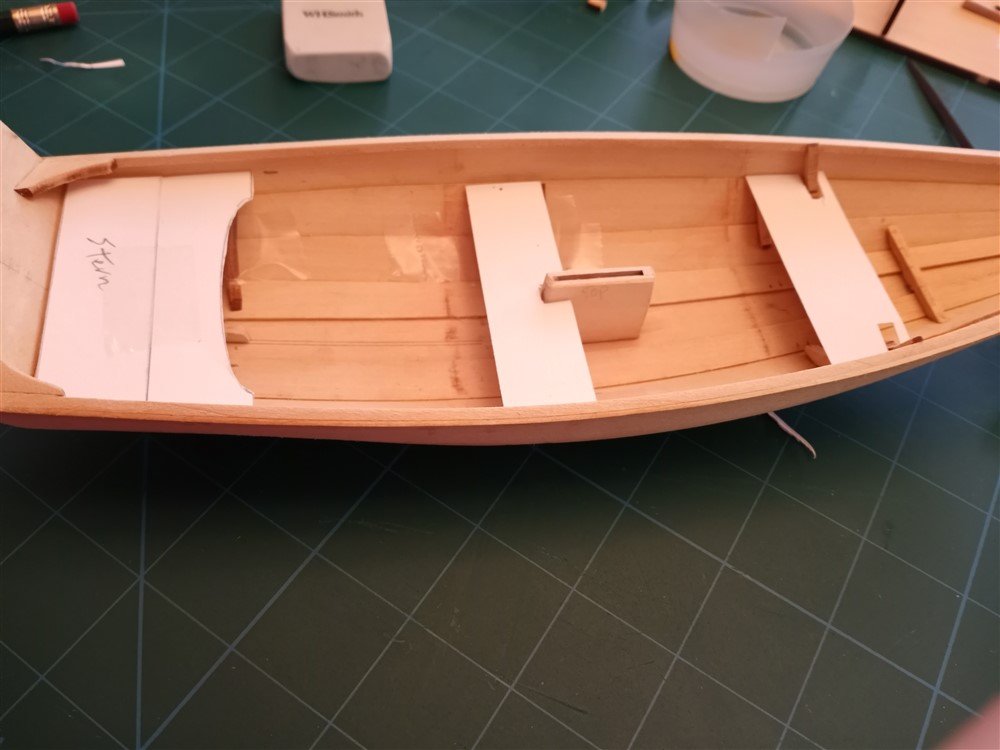
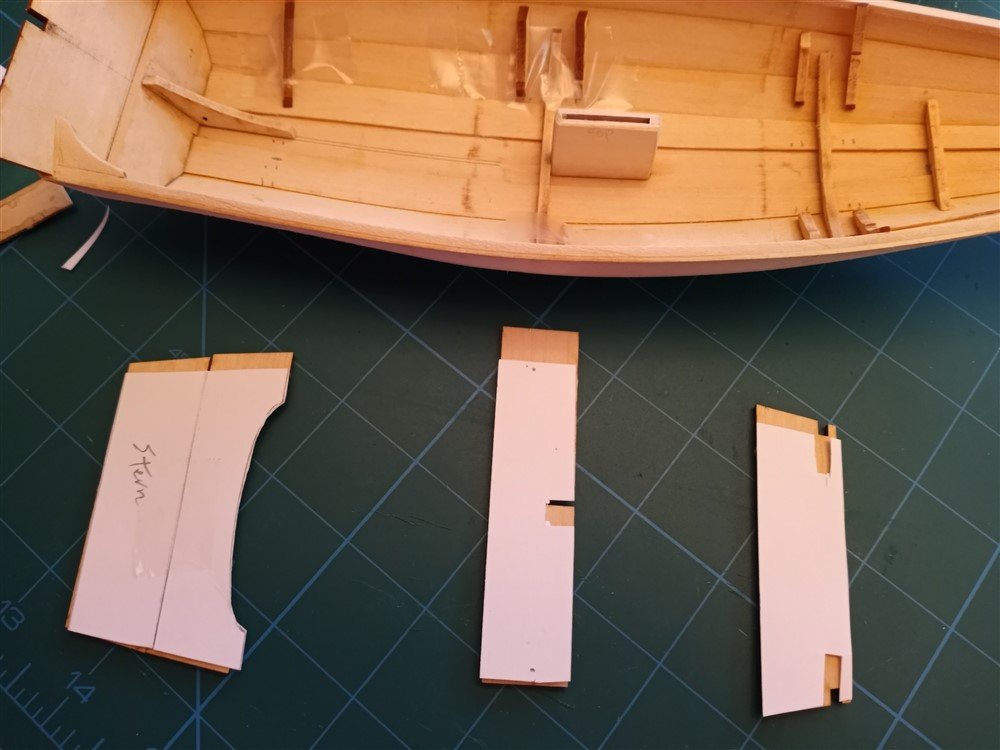
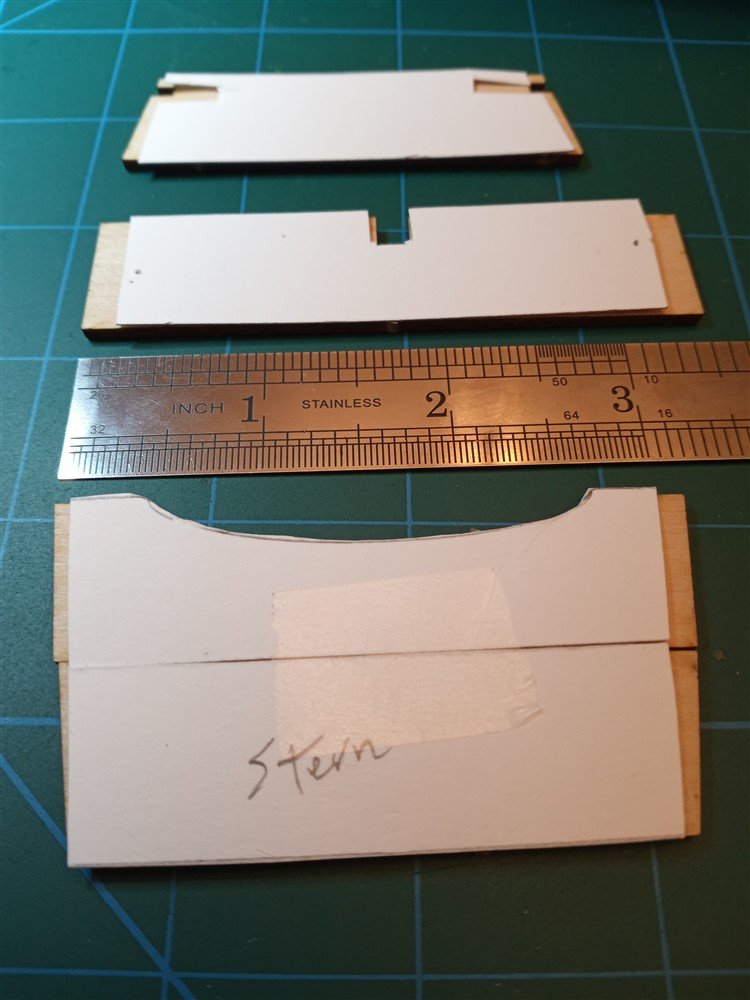
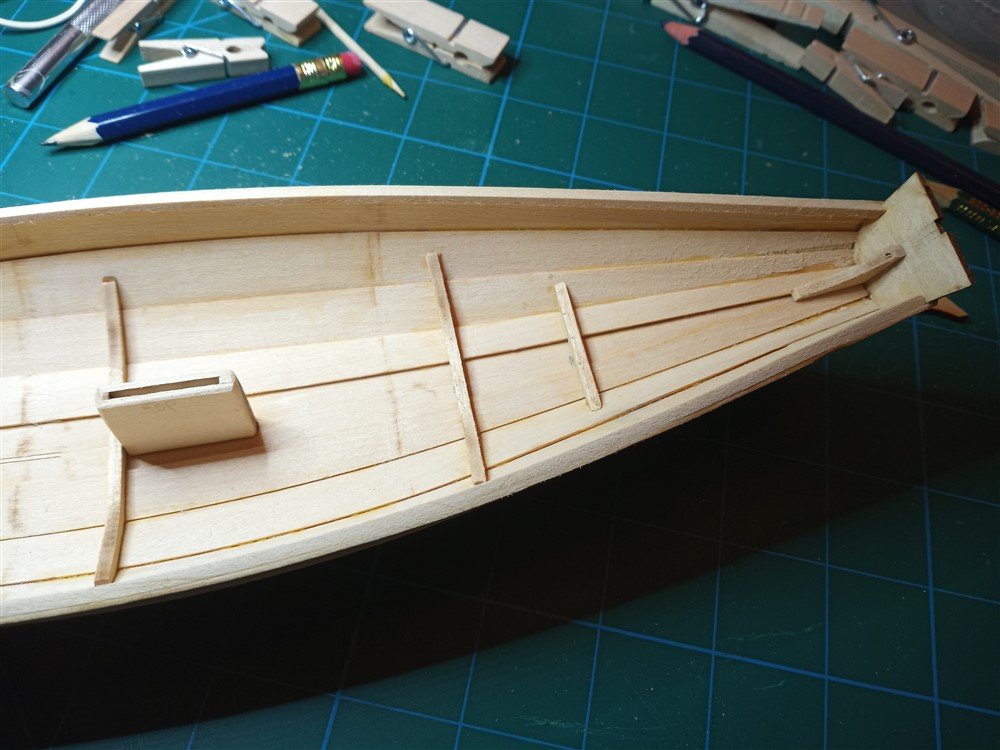
Ay yi yi! Lots going on with this pram! Started painting, using the paints from the kit. Pleased with the Warm White outside of hull, and with the Clear satin finish as well. Used the Copper Red inside the hull. Then came the floor boards. First, I had to trim off about an 1/8" on both sides of each floor board. Then, not feeling very steady-handed, I laid out the floor boards upside-down on some painters tape (for easy removal), and glued them as a "unit" into place. Creating another template for the aft floorboards, I needed to trim these as well, and again, used tape to install these as a "unit of 6" rather than 1 at a time. Experiment 1 - tried some "Minwax Golden Oak" stain on the stern sheets. Didn't like it, so turned it over and tried to do a better job of staining the other side. That didn't work either! Experiment 2 - Painted the stern sheets with the Yellow Occre from the Dory kit. Liked the effect, so went ahead and painted the thwarts as well, and beveled and re-sanded the stern sheet too. Worked to bring back the "flush mount" which I had achieved originally, but after using the opposite side for painting, I couldn't get it sanded enough (I was afraid I would sand too much off), so I left it as is. I'm ok with how it turned out, though.' Meanwhile, reading ahead, the author talks about "driving home" some bolts. Question - since these bolts are thin as needles, how do you "drive these home"? Use a thimble to push it? Use pliers to grip the bolts and push it into the wood? Is there a small tool/hammer to use? Your advice? One more question: I love reading everyone's blogs and seeing the pictures, but are there any YouTube videos which show details of rigging, masts, and metal work? I've done some rudimentary searches, but haven't found any. As always, thanks for your feedback! Experiment 1 - I didn't like the white-ish mark left by the stain on the side of the stern sheet Experiment 2 - liked the paint, but now need to re-sand and re-bevel the stern sheet. Current status - Liked the look of the completed paint job. And getting ready to start working on the tiller and (gulp!) some of the metal work! Fingers crossed!

- 160 replies
-
- 5
-
-
- Model Shipways
- norwegian sailing pram
- (and 1 more)
-
Your Dory looks wonderful! Love the color. The Dory was my very first introduction to wood modeling, with a huge learning curve. Loving how yours is turning out!
- 70 replies
-
- 2
-
-
- Lowell Grand Banks Dory
- Finished
- (and 1 more)
-
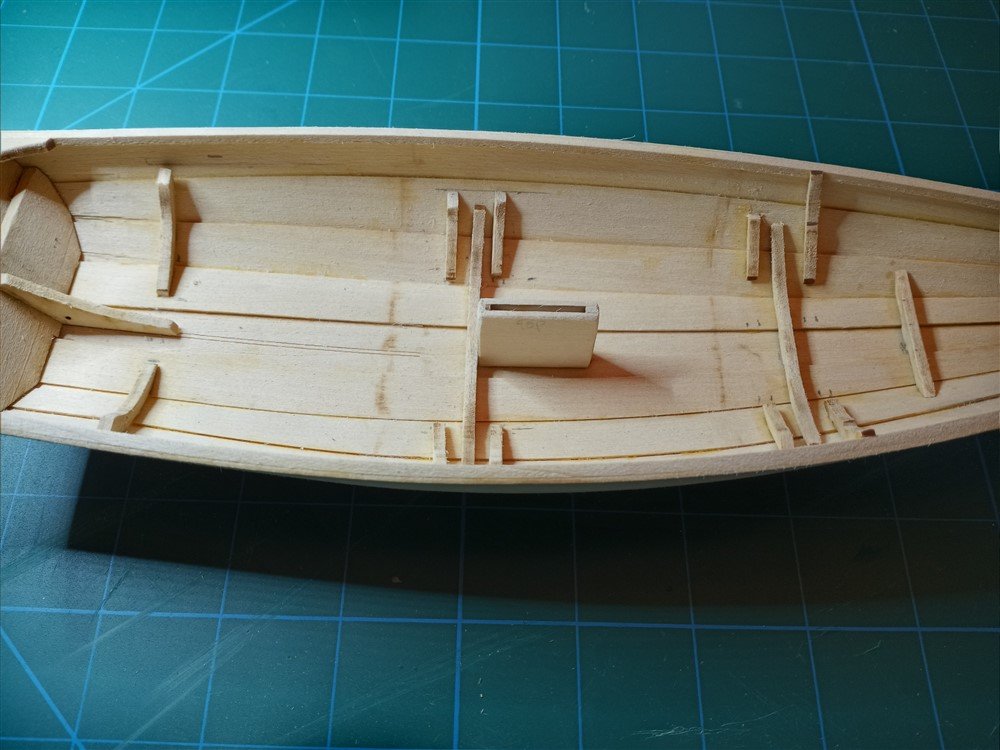
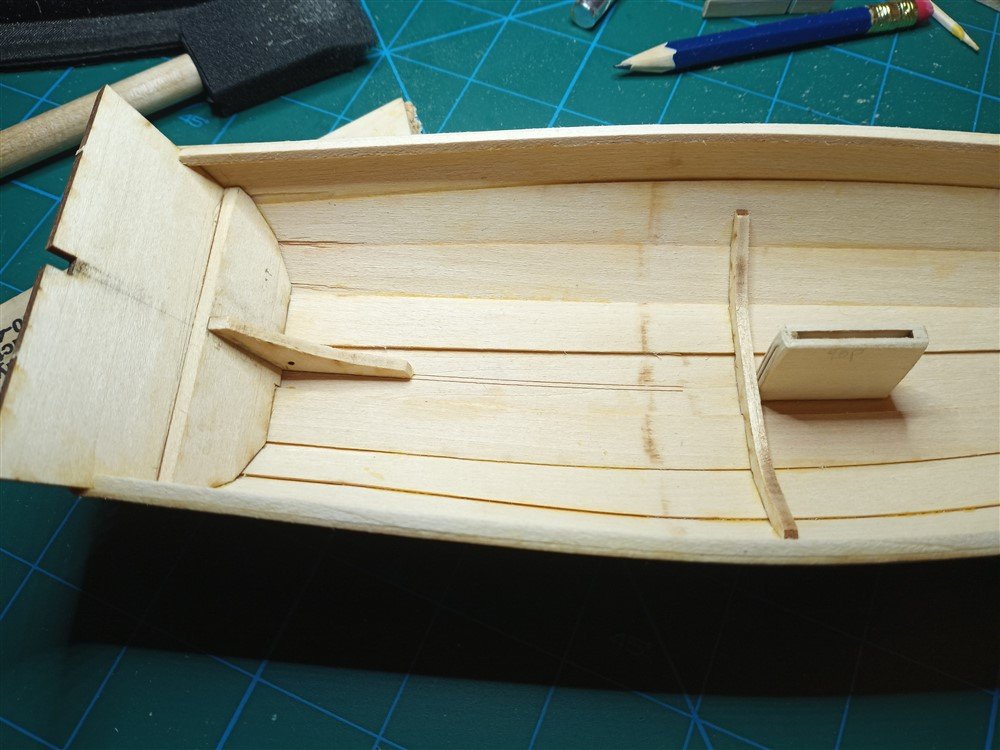
Wow, almost ready to paint! Added rudder gudgeon pad, rowlock pads, rub rails, and dagger board. Thwarts and stern sheets done. Midship thwart knees completed. Just need to prepare the rudder, shaping & sanding, then I can start the painting process. Whew! Of course, there's still much left to do after painting... sails, rigging and metal work all look daunting, so I will enjoy the painting while gearing up the nerve to move to that next challenge!
- 160 replies
-
- 6
-
-
- Model Shipways
- norwegian sailing pram
- (and 1 more)
-
Thanks Ryland! I ordered the blade from hobbytown. There's actually a store here, but several miles from my home, and with $1.99 shipping, its easier and cheaper to just have it shipped. Thanks again, and I'll be keeping this place in mind when I need more tools!
- 160 replies
-
- 3
-
-
- Model Shipways
- norwegian sailing pram
- (and 1 more)
-
I found a solution... not sure its correct, but my tweezers were able to punch thru the inwale, and enabled me to continue using the saw blade to make the little slots. Still not sure I've got the right saw blade, though.
- 160 replies
-
- 4
-
-
- Model Shipways
- norwegian sailing pram
- (and 1 more)
-
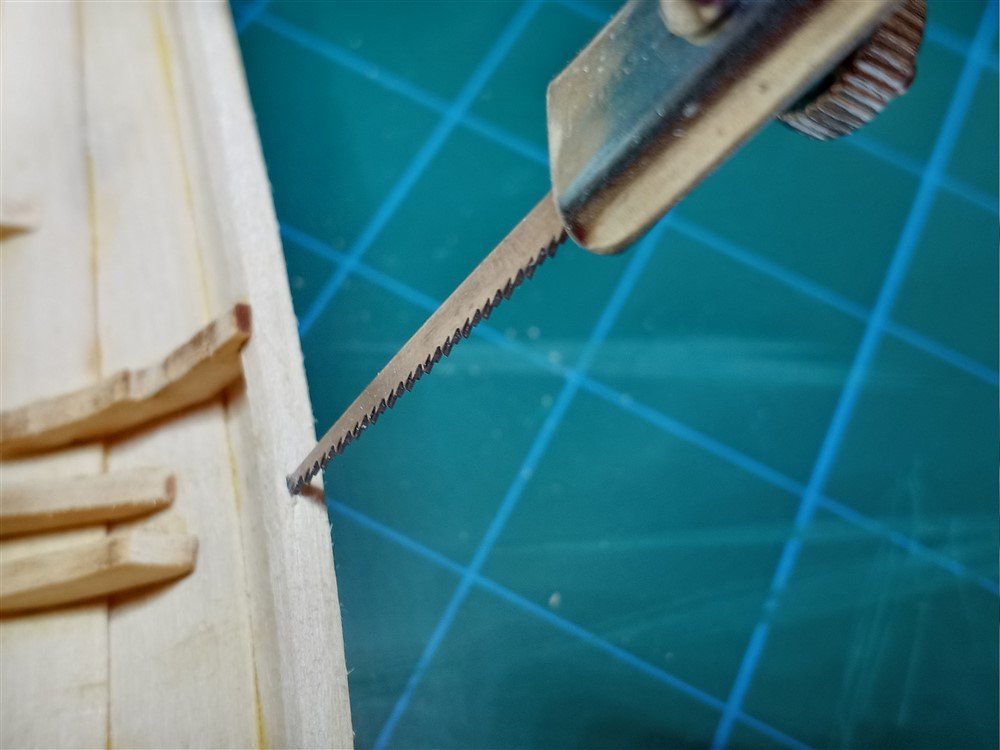
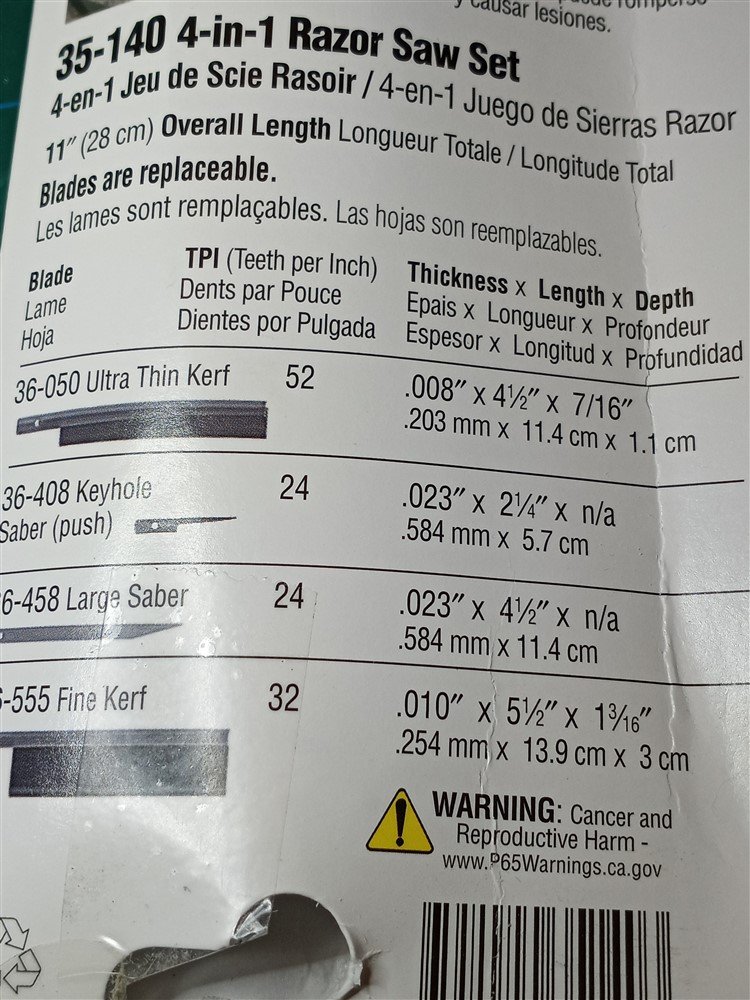
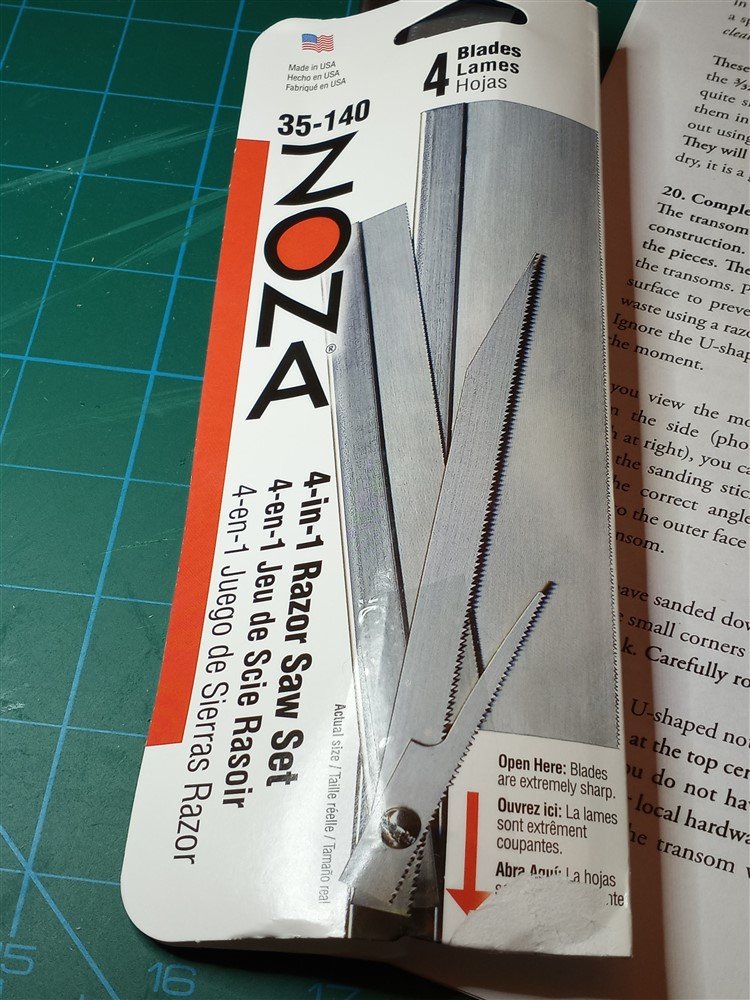
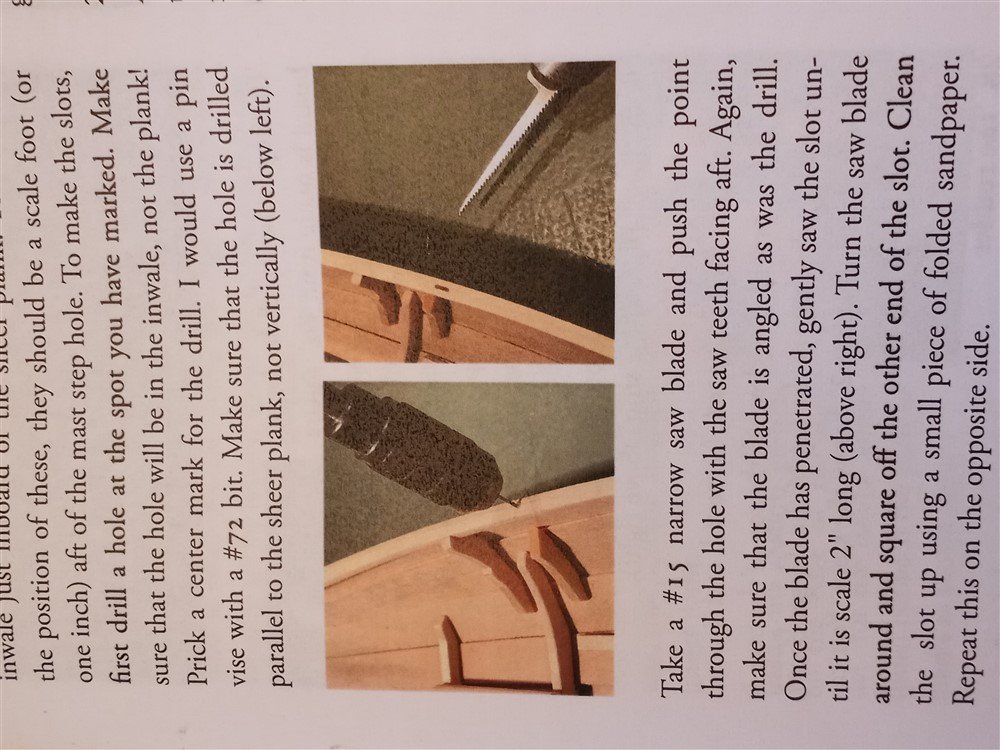
Uh oh, I'm stuck! Am I doing this correctly? To create the chain plate slots, it says to drill a hole into the inwale (using a #72 bit), and then take a #15 narrow saw blade and push the point through the hole. I drilled the hole per the instructions, but I am having trouble "pushing" the saw blade thru the tiny hole. I am afraid of breaking the inwale. Question 1 - is my saw blade the right size? (see my pics of the tool package). It's called a "keyhole saber (push)", but I don't know if that's the same as a "#15". Question 2 - is there a technique to "pushing" a saw blade thru the hole? I've been giving it as much force as I dare, but it hasn't gotten very far thru the inwale, and I'm scared to push too much harder. Your thoughts? trying to "push" the saw blade through - but its not working very well My tool the "keyhole saber" description... is that the same as a "number #15 saw blade"? Instructions...
- 160 replies
-
- 1
-
-
- Model Shipways
- norwegian sailing pram
- (and 1 more)
-
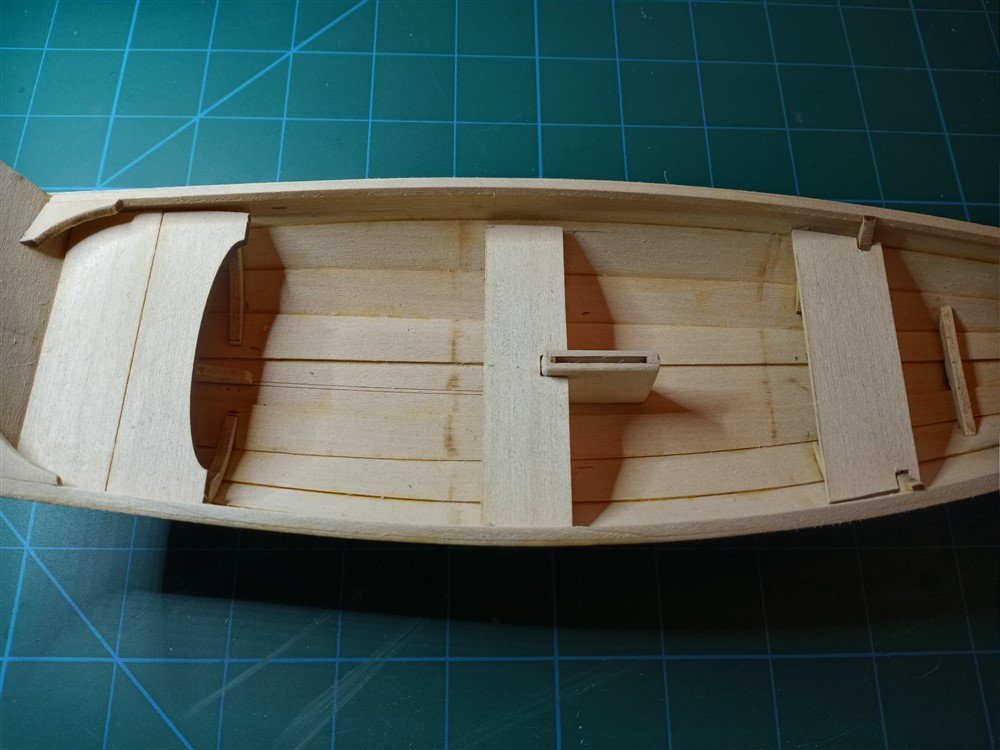
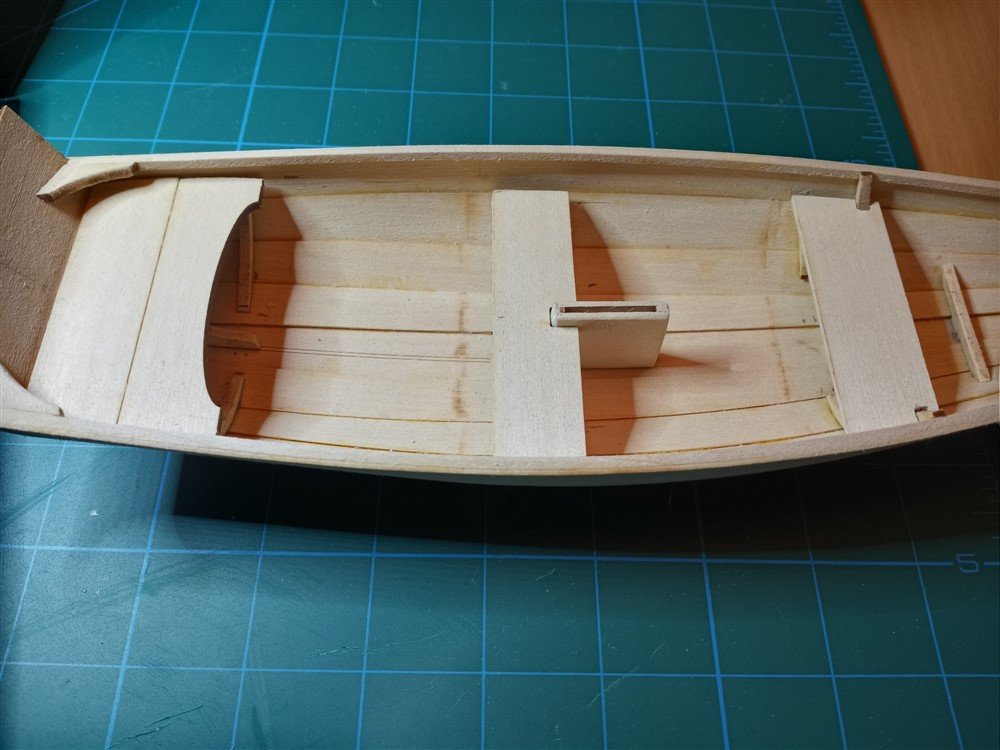
Keith, thanks for the encouraging words! I looked at the MicroMark tool, but then used pieces of cards as druxey and Cathead mentioned to create a fan-like template to use, so I'll save money for now. I thought my templates were ok, but after installing the thwart frames, trimming down the thwarts, and doing a dry fit, I realized the midship thwart was first (too short now, but still works), and second, too low in the boat. I had two choices... either remove and re-attach the frame at the right height, or put a spacer under the thwart, so that it sat level. I chose the simpler fix... which was easier, (and probably not helping me learn more about undoing mistakes, but I was getting tired!), so I added a couple of scrap pieces as "spacers" under the thwart, and it seemed to work. These frames and thwarts were a challenge. My templates didn't work out exactly as planned, and I removed a bit too much of the midship thwart, and my frames were less than perfect... but for now, its ok, and I'm learning. How do you guys get perfectly clean char removal? Every time I see your ships, the pieces are beautiful! And what's the difference between beveling and softening? The book says to bevel (which I understand), but then says to "soften" the edges. Isn't that just a light sanding of the bevel? Just curious. Thwart frames installed Dry Fit (midship thwart is too low) Add spacers to bottom of thwart Fit is better (although I trimmed a bit too much off the sides!)

- 160 replies
-
- 6
-
-
- Model Shipways
- norwegian sailing pram
- (and 1 more)
-
Druxey, haha! Maybe i need to invent a "wood stretcher" as a retirement project! I found a "contour shape duplicator" with metal spines that could supposedly be used to capture angles, but the reviews weren't very impressive. So I'll try the card idea before I purchase anything! Thanks!
- 160 replies
-
- 1
-
-
- Model Shipways
- norwegian sailing pram
- (and 1 more)
-
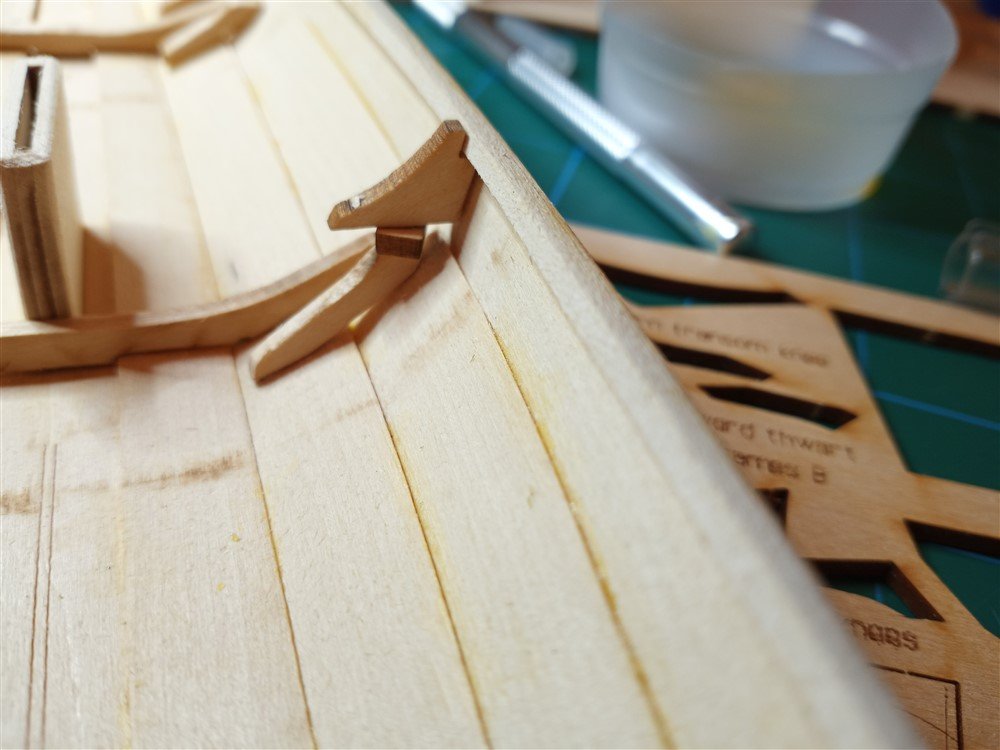
Too hot to play golf (100 degree heat index today) , so back at it! I started the thwart frames, but realized nothing in the instructions showed me the correct height of the top of the frame! And since the middle one (er, midship thwart) has a knee on top of it, I wanted to make sure I got the measurements right. So I balanced the frame, a scrap piece of wood the same size as the thwart, and the knee... on the side of the ship and marked where I can glue the frame! For an initial dry fit, I couldn't use the actual thwarts... they are all too long. I'll have to trim anywhere from 1/8" to 1/4" from the sides of each. So I used my old business cards (i KNEW they'd come in handy someday!), and I made rough templates for the fit. Then, realizing I still needed to determine the correct placement (height) of the frames, I scotch-taped the frames in, so that I could put the card templates on them, to determine where and how the thwarts will fit. These are all rough estimates and rough drafts of the templates. Now I'll go back and make more precise measurements, more accurate templates, and begin the process to true everything up and glue it all in. Whew, talk about a learning curve! Also, I am having a hard time getting the proper angles for the thwart frames to fit snugly against the planks. Is there any sort of "tool" that can help determine weird angles? I suppose I could use another business card (I have hundreds!) and manually do a trial and error fit, till I get a good template, but thinking there must be a tool to help somewhere, maybe? Thanks for all your help in this endeavor!
- 160 replies
-
- 5
-
-
- Model Shipways
- norwegian sailing pram
- (and 1 more)
-
Thanks for all the encouragement! I was getting down... but you've helped me put this in perspective. I'm not a perfectionist and I'm trying to learn patience, so this is a hobby that is stretching my limits! (Of course, golf gives me the same "teaching moments" too!) And you've given me some helpful tips as well. I'm off to do knees, frames, and cleats! I'm using yellow wood glue. I may try using the white glue when i really don't want anything to show. You are all Master Craftsmen and looking at your models, I just can't imagine how I could ever get to your level. But I've got to tell myself I've only just begun! Thanks everyone!
- 160 replies
-
- 4
-
-
- Model Shipways
- norwegian sailing pram
- (and 1 more)
-
Your build log is a Master Class in craftsmanship! Beautiful!
- 433 replies
-
- 4
-
-
- open boat
- small boat
- (and 1 more)
-
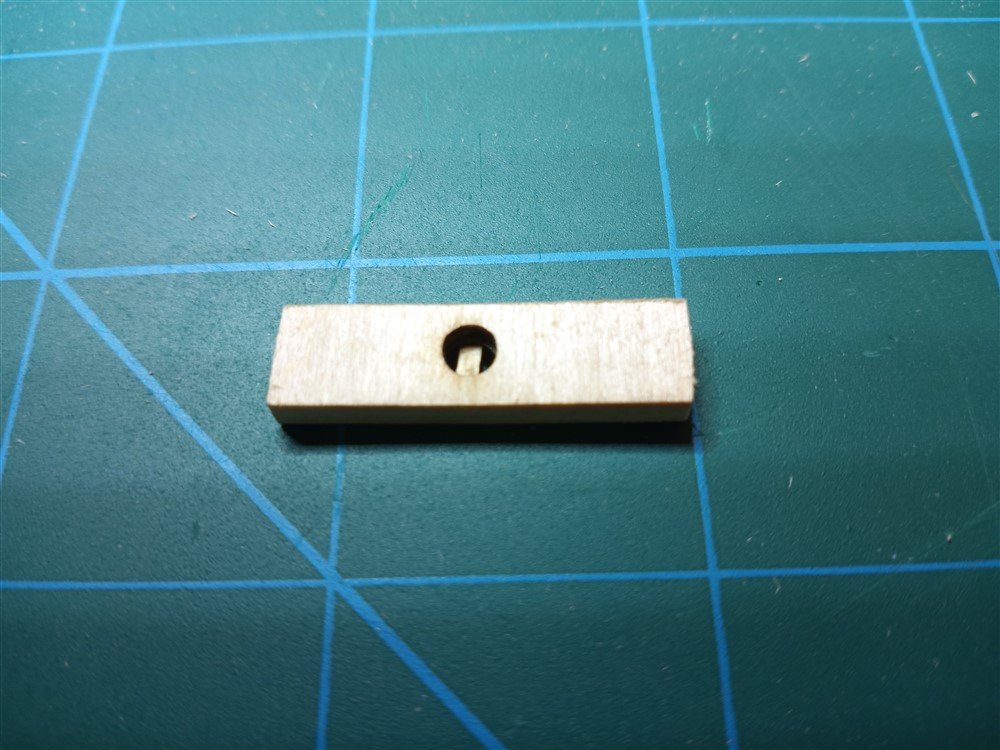
It's taking me so much longer working on this (the Dory seemed to go faster!). For one thing, I'm discouraged with my lack of expertise... the frames aren't exactly vertical and there's still glue residue on the planks (I've washed away excess glue, but I can't seem to remove the residual yellow glue stains). The only thing going well are the inwales, that seemed to go on fairly easily. And I'm hoping the eventual painting will cover some errors. I also managed to break the bottom piece of the mast step, but fixed it and since both pieces had a hole (and the bottom piece is supposed to be a stopper for the mast)... I used a small piece of scrap, same width as the step, to create a stop. Hope this works! Time seems to be an issue too, but only because my other hobby (golf!) is taking up some serious modeling time!
- 160 replies
-
- 5
-
-
- Model Shipways
- norwegian sailing pram
- (and 1 more)
-
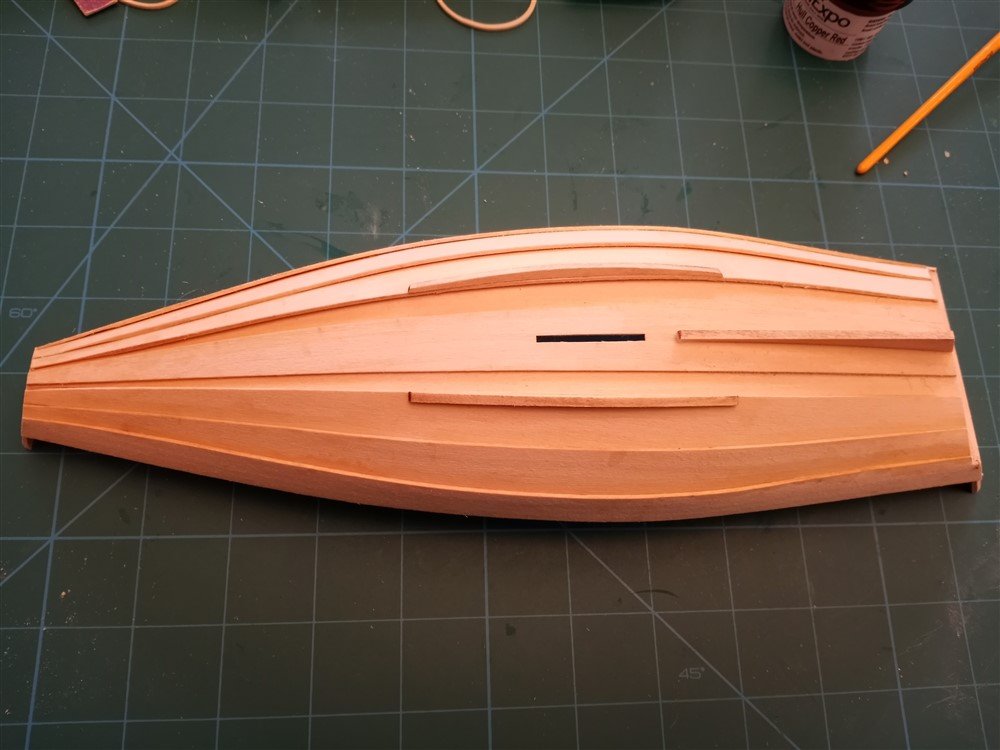
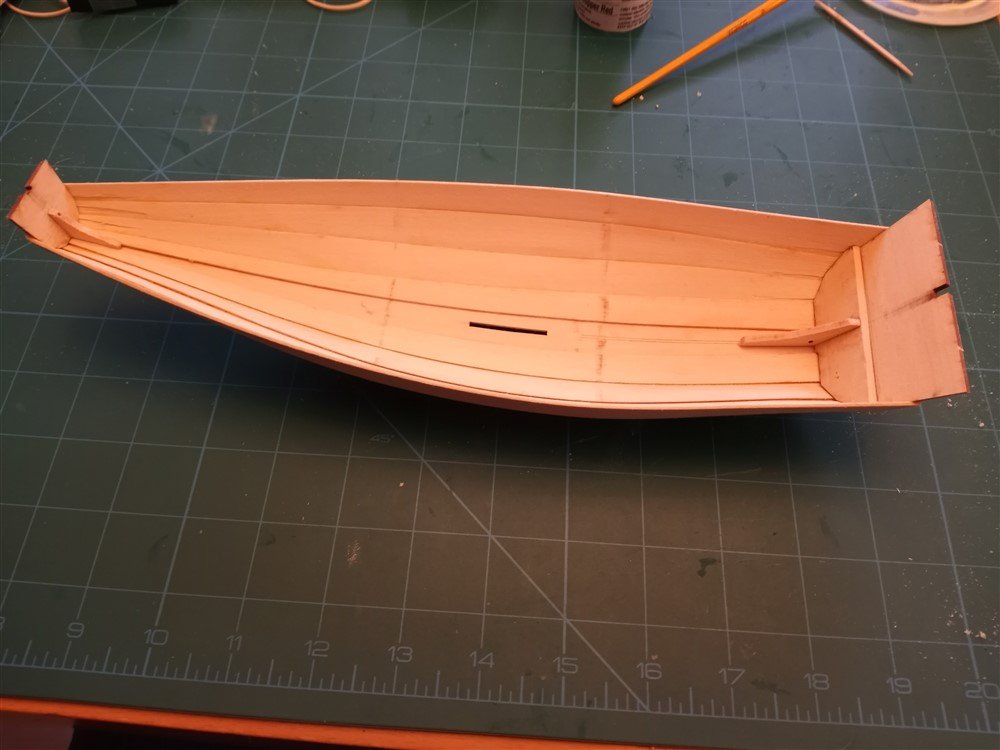
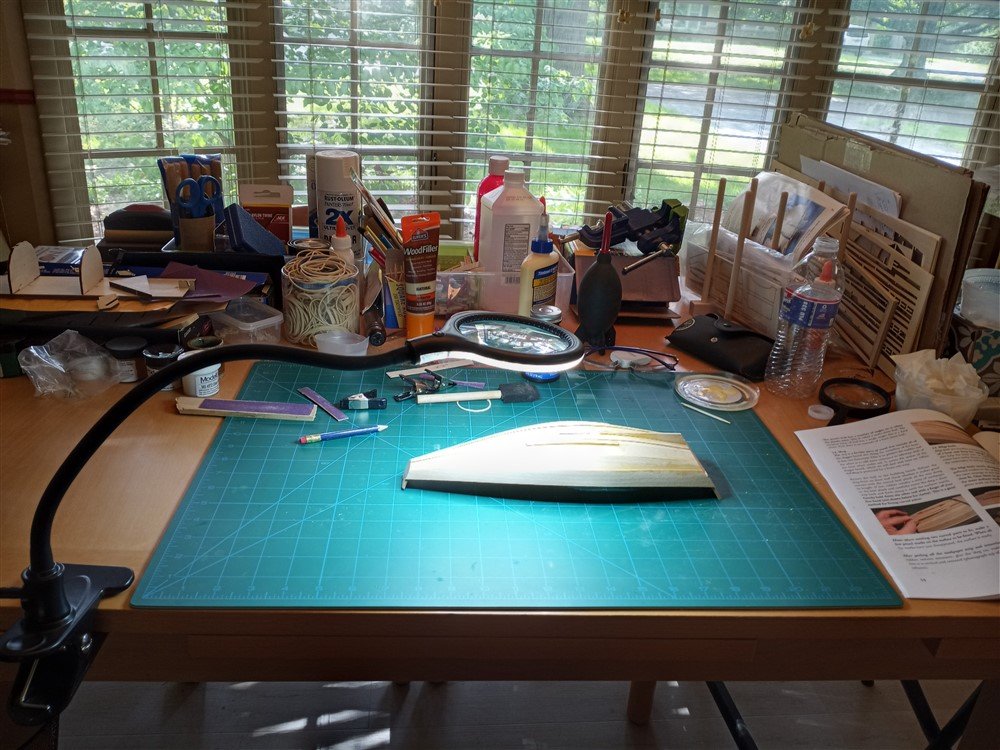
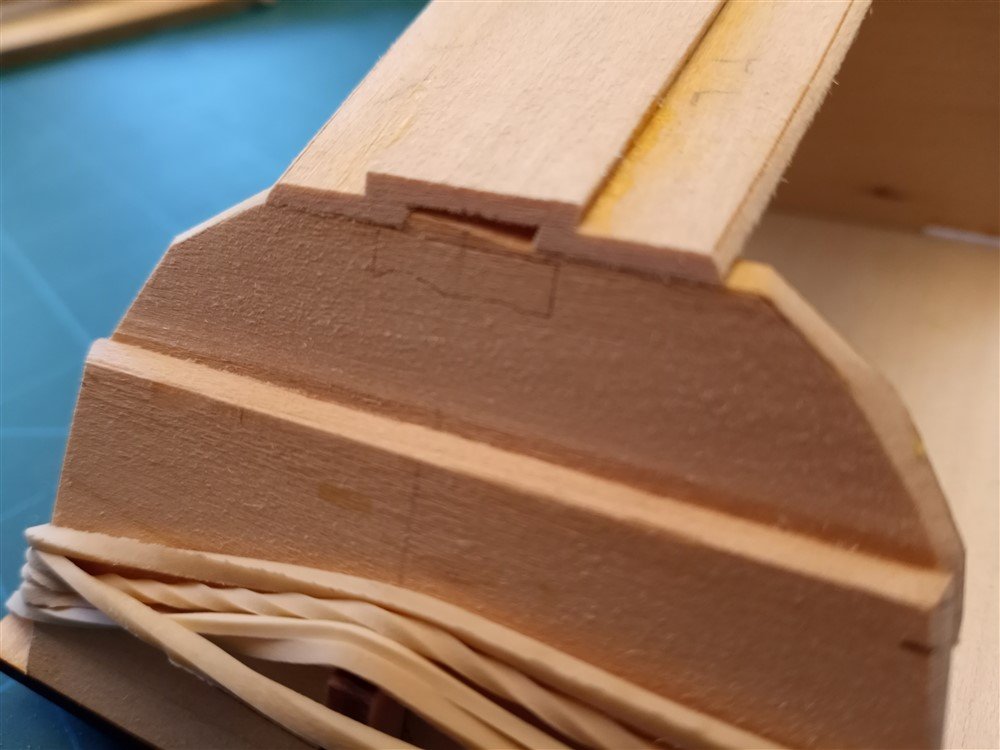
Planking is done! I tried to be better about cleaning up excess glue. I thought the planks were going on fairly easily this time (as compared to the Dory), but I noticed that the rabbets must've been too big, because you can see them near the bow on the inside of the hull. And the bow is slightly crooked, which I hope will fix itself when I trim the extra wood from it. Meanwhile, my new magnifying lamp has arrived, and my kitchen table "workbench" is now complete!!! If I have a party at the house, though, I'll have to find a place for all this stuff!

- 160 replies
-
- 5
-
-
- Model Shipways
- norwegian sailing pram
- (and 1 more)
-
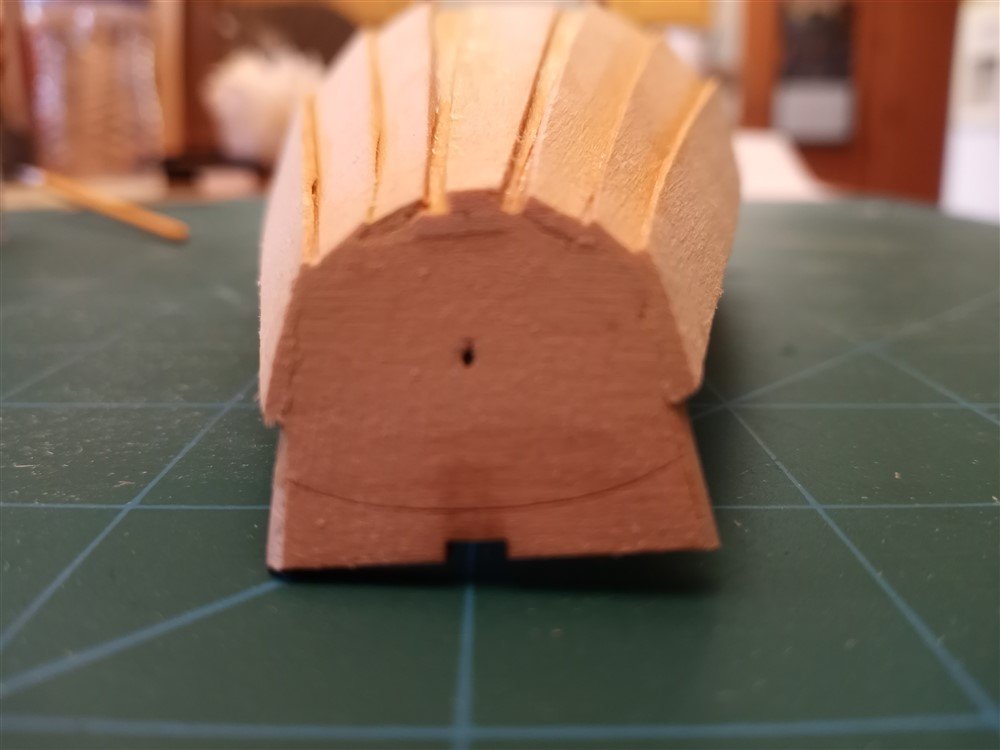
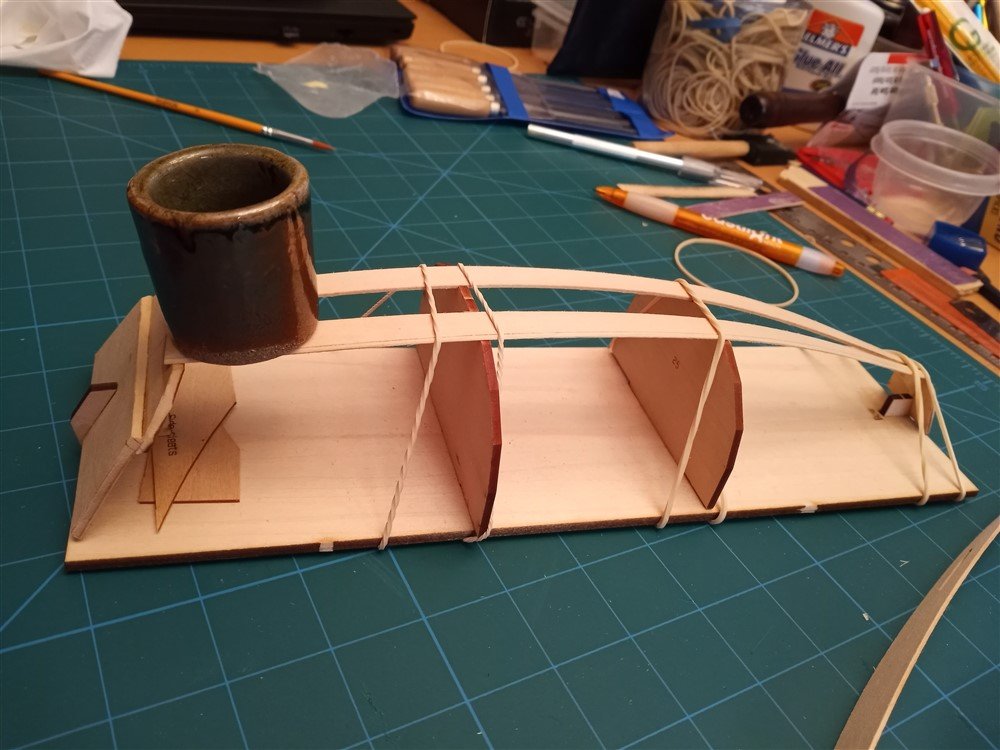
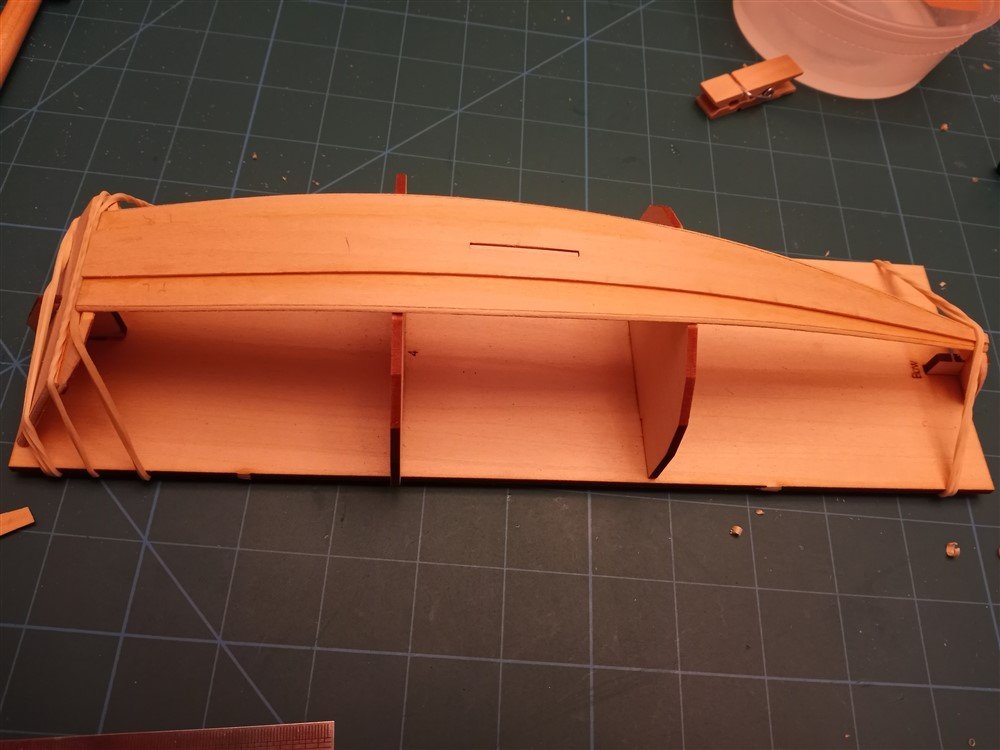
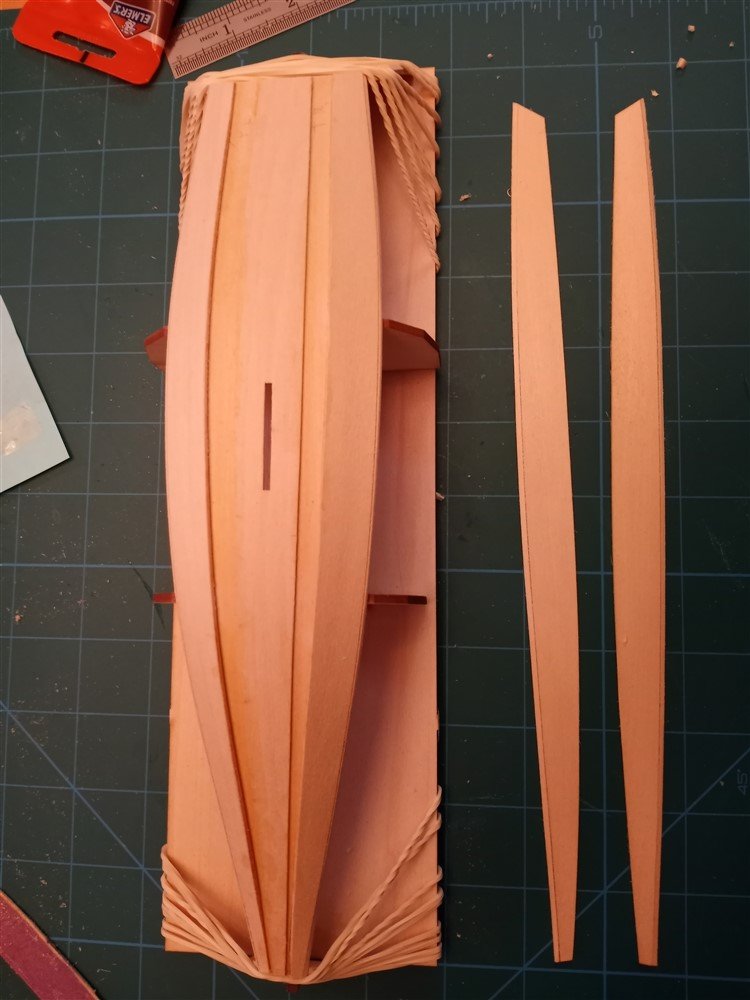
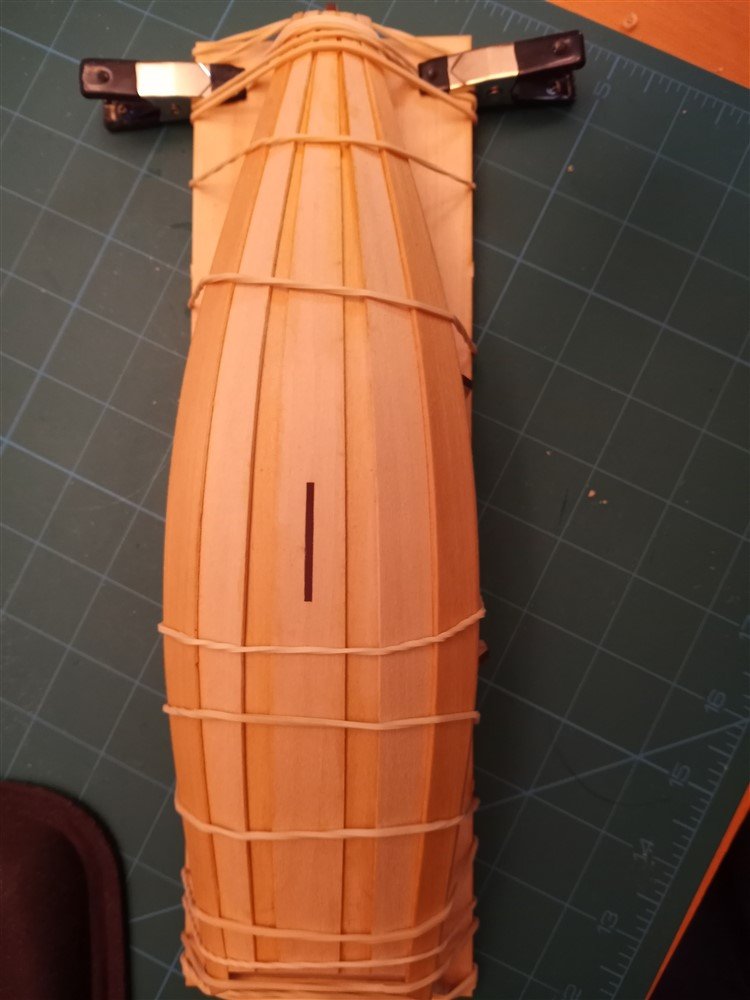
Tools arrived, and I've gone to work on the planks! Pictures: 1-Gluing the bottom planks - needed some weight on the ends, and this little candle-holder worked well. 2-Keel & bottom planks done 3-stern transom with issues... not sure what was supposed to happen , but I'll use wood filler to close the gap between the bottom planks and the keel. Also, the planks don't quite meet where they're supposed to on the transom, but so far, it doesn't seem to affect the other planks 4-garboard done 5- bending second strakes, will glue in tomorrow It's beginning to look like the hull of a ship! Looking forward to continuing, but next purchase MUST be a lighted magnifiying lamp! My eyes are tired. Any suggestions on a good magnifying lamp?
- 160 replies
-
- 3
-
-
- Model Shipways
- norwegian sailing pram
- (and 1 more)