HOLIDAY DONATION DRIVE - SUPPORT MSW - DO YOUR PART TO KEEP THIS GREAT FORUM GOING! (Only 20 donations so far - C'mon guys!)
×
jpalmer1970
-
Posts
408 -
Joined
-
Last visited
Content Type
Profiles
Forums
Gallery
Events
Everything posted by jpalmer1970
-
 That's a great idea for the knotted handrail - excellent work
- 562 replies
-
- 3
-

-

-
- vanguard models
- alert
- (and 2 more)
-
Great work for your first wooden kit Richie. It seems AL have revamped this kit which is good - and hopefully the instructions have been greatly enhanced from the old version. A single layer planked open boat is a challenge for any new builder as you can't hide any planking mistakes under a second layer! Well done with you work so far.
-
Hi Bill, Looking forward to seeing your progress with this build.
-
Excellent work. You have made lots of great additions to bring this build to a very high level.
- 562 replies
-
- 4
-
-
-
- vanguard models
- alert
- (and 2 more)
-
Looks good. I have this on a 'maybe at some point' list so I look forward to seeing how you go with the build.
-
I plan to have a build log for it, where I will hopefully reap the benefit of advice and guidance from more experienced scratch builders. It may be a couple of months before I am up and running with it but please do look in 👍
- 122 replies
-
- 2
-
-
- Artesania Latina
- Pen Duick
- (and 1 more)
-
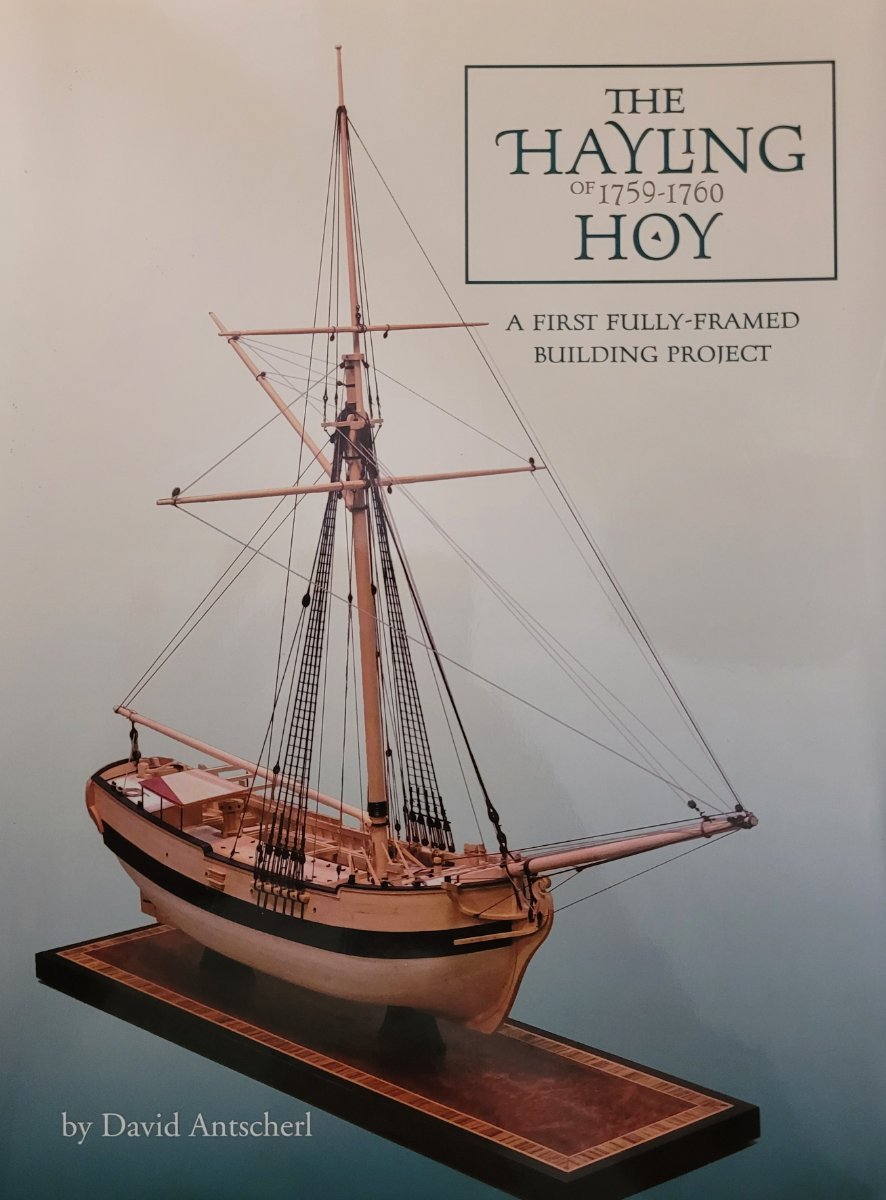
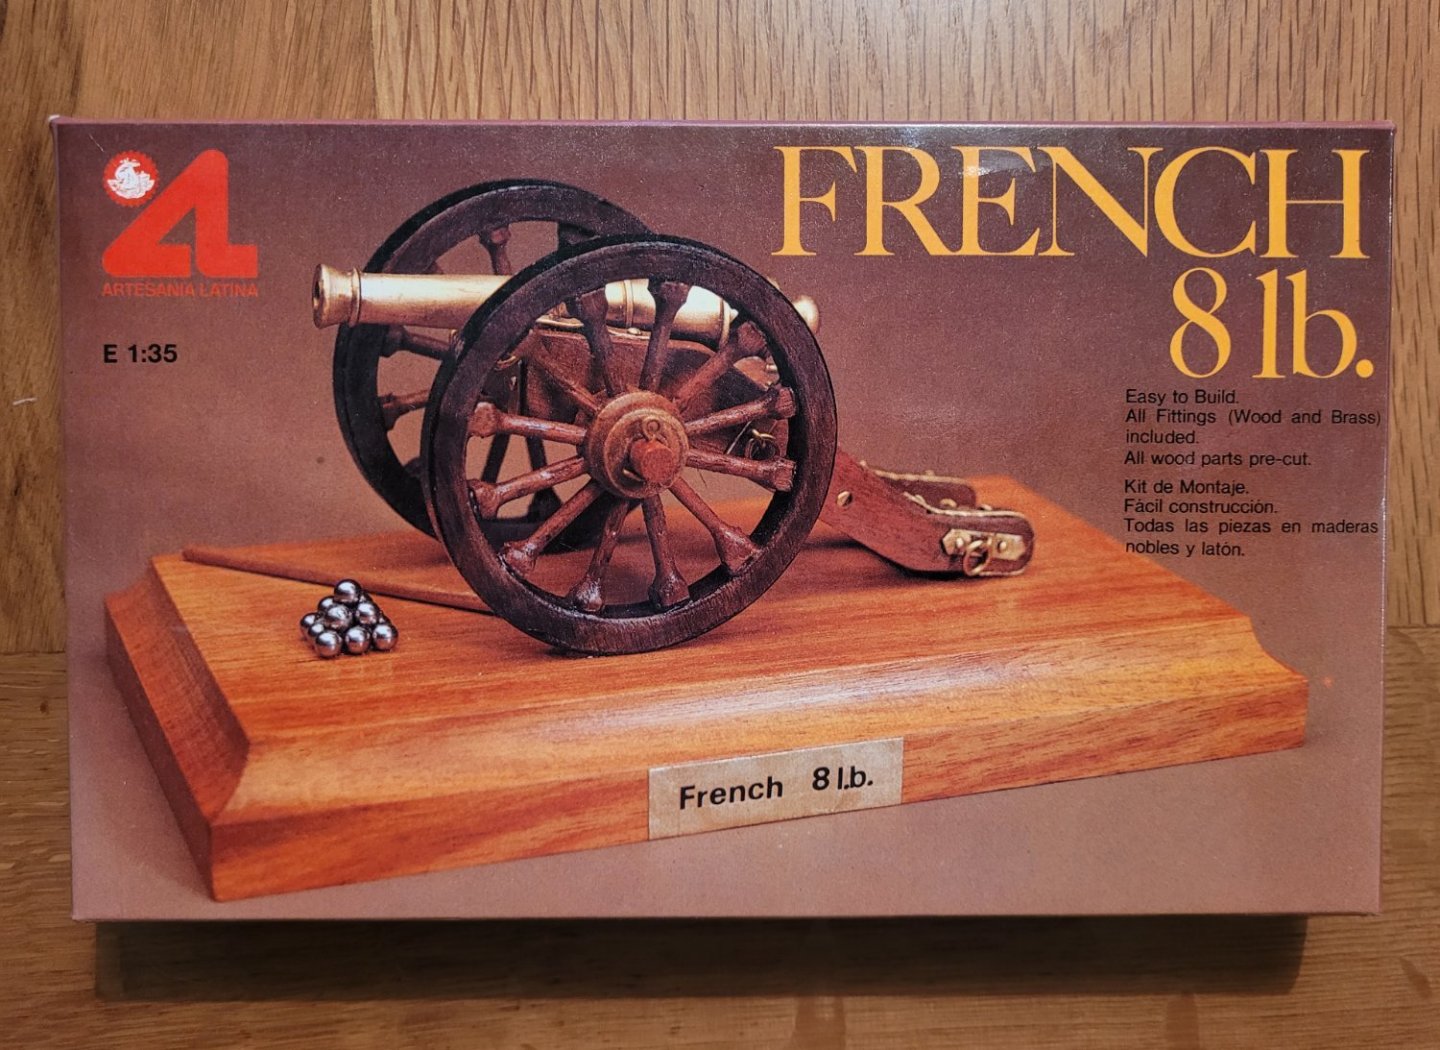
Next on the list is a very quick build of a Napoleonic French field gun. After that I will be returning to ship building and I'm going to try my hand at a scratch build of the Hayling Hoy. I must admit to feeling somewhat out of my depth with this as it will be a completely new level or woodwork for me. I have bought the required tools I need such as a thicknesser and scroll saw but have no idea how to use them properly 😀 I foresee that there will be a lot of sawdust and do overs. The Hayling Hoy will be a very long term project for me which works well because I don't really have a lot of space to display more models!

- 122 replies
-
- 5
-
-
- Artesania Latina
- Pen Duick
- (and 1 more)
-
Thank you for all the kind words. I realised this morning that I had actually omitted to glue on the little round ball that sits on top of the ensign staff - so the case will have to come off again tonight so that I can put that in place! 🙄 At least it gives me another opportunity to get wipe the case down again afterwards to remove the fingerprints! 😃
- 122 replies
-
- 1
-
-
- Artesania Latina
- Pen Duick
- (and 1 more)
-
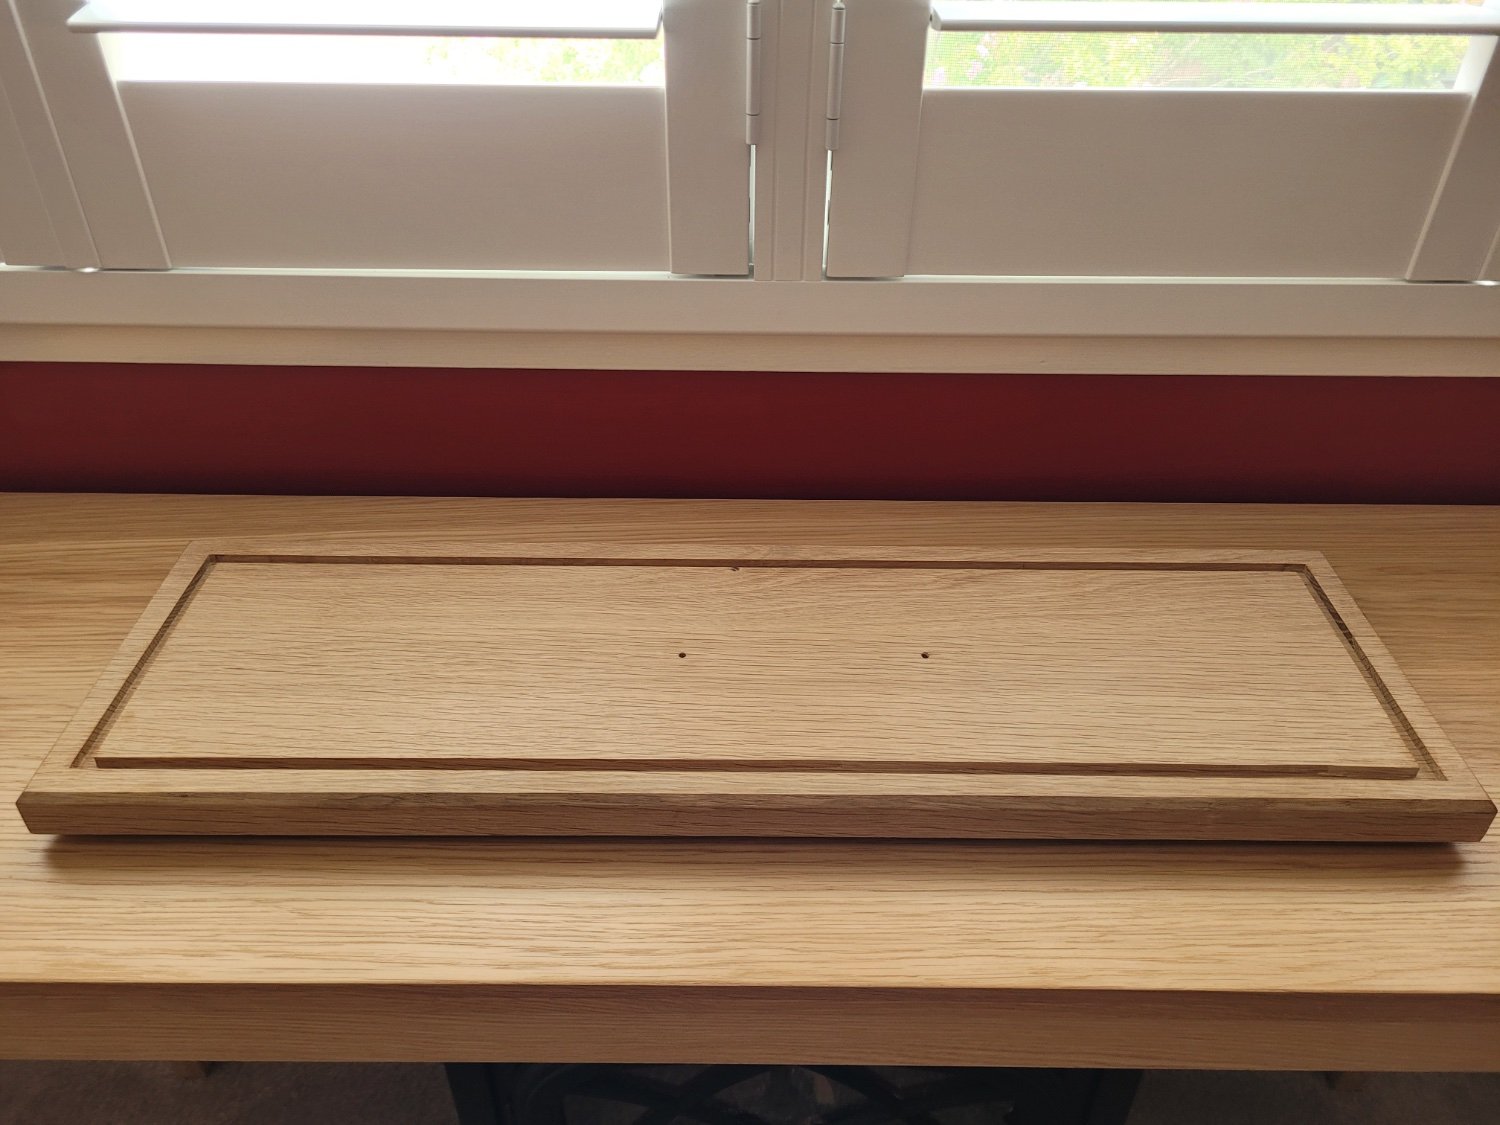
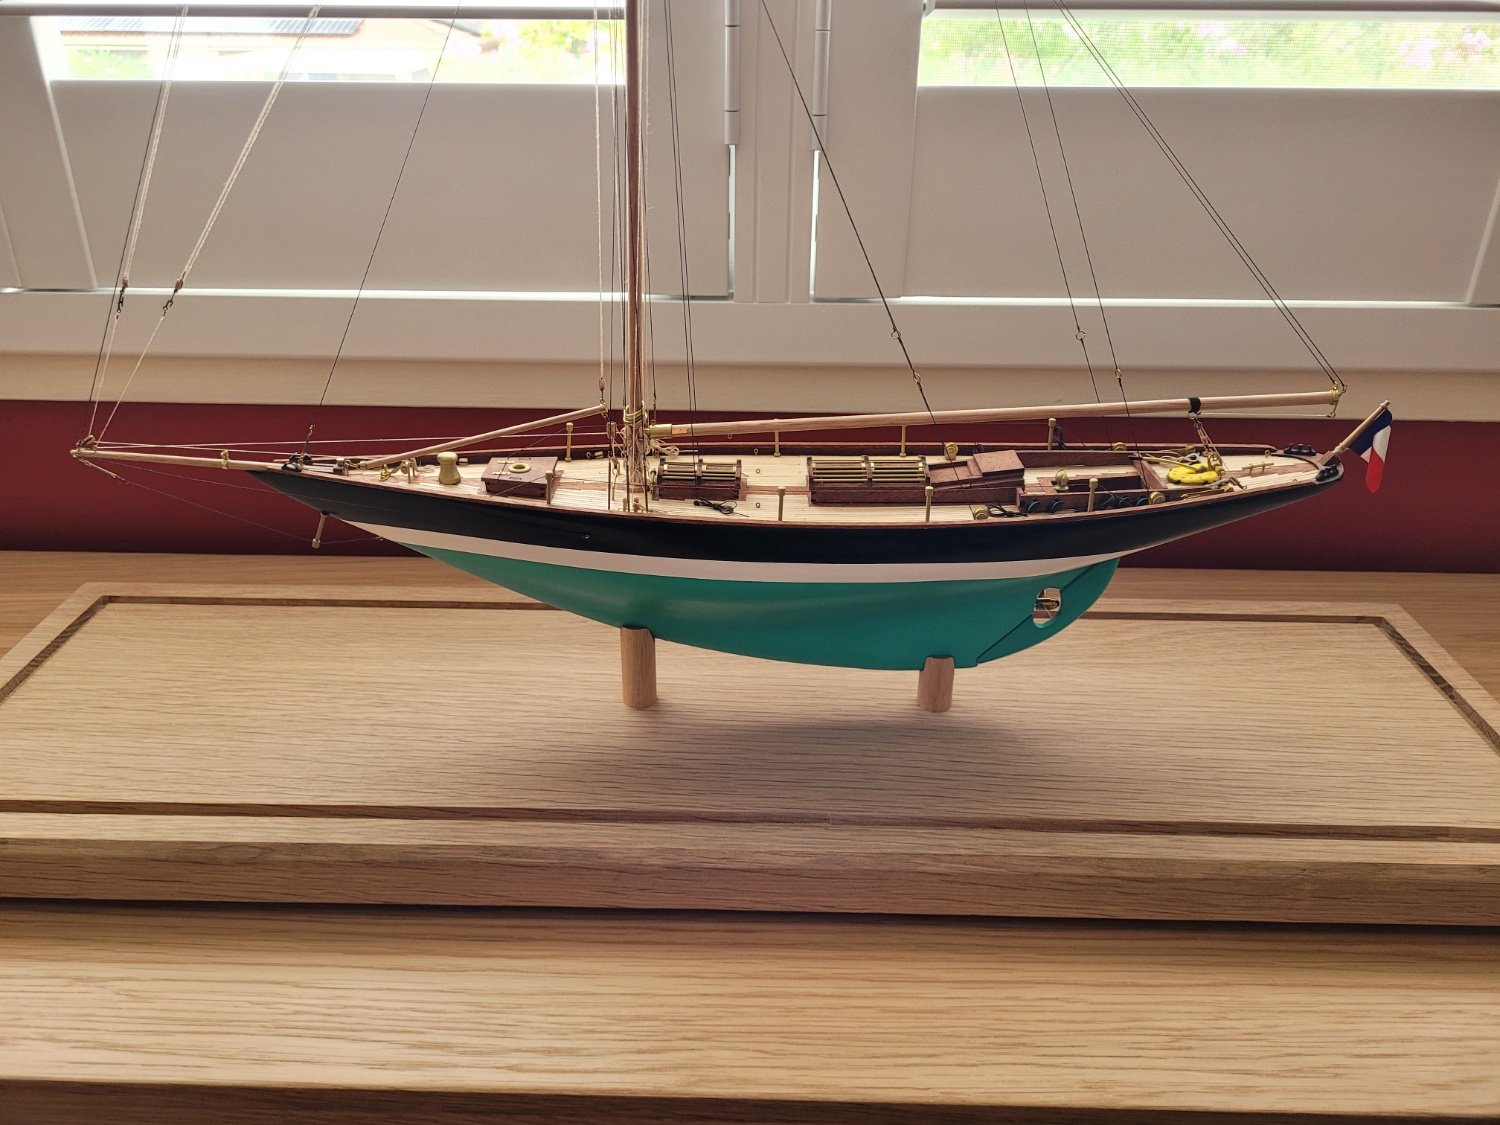
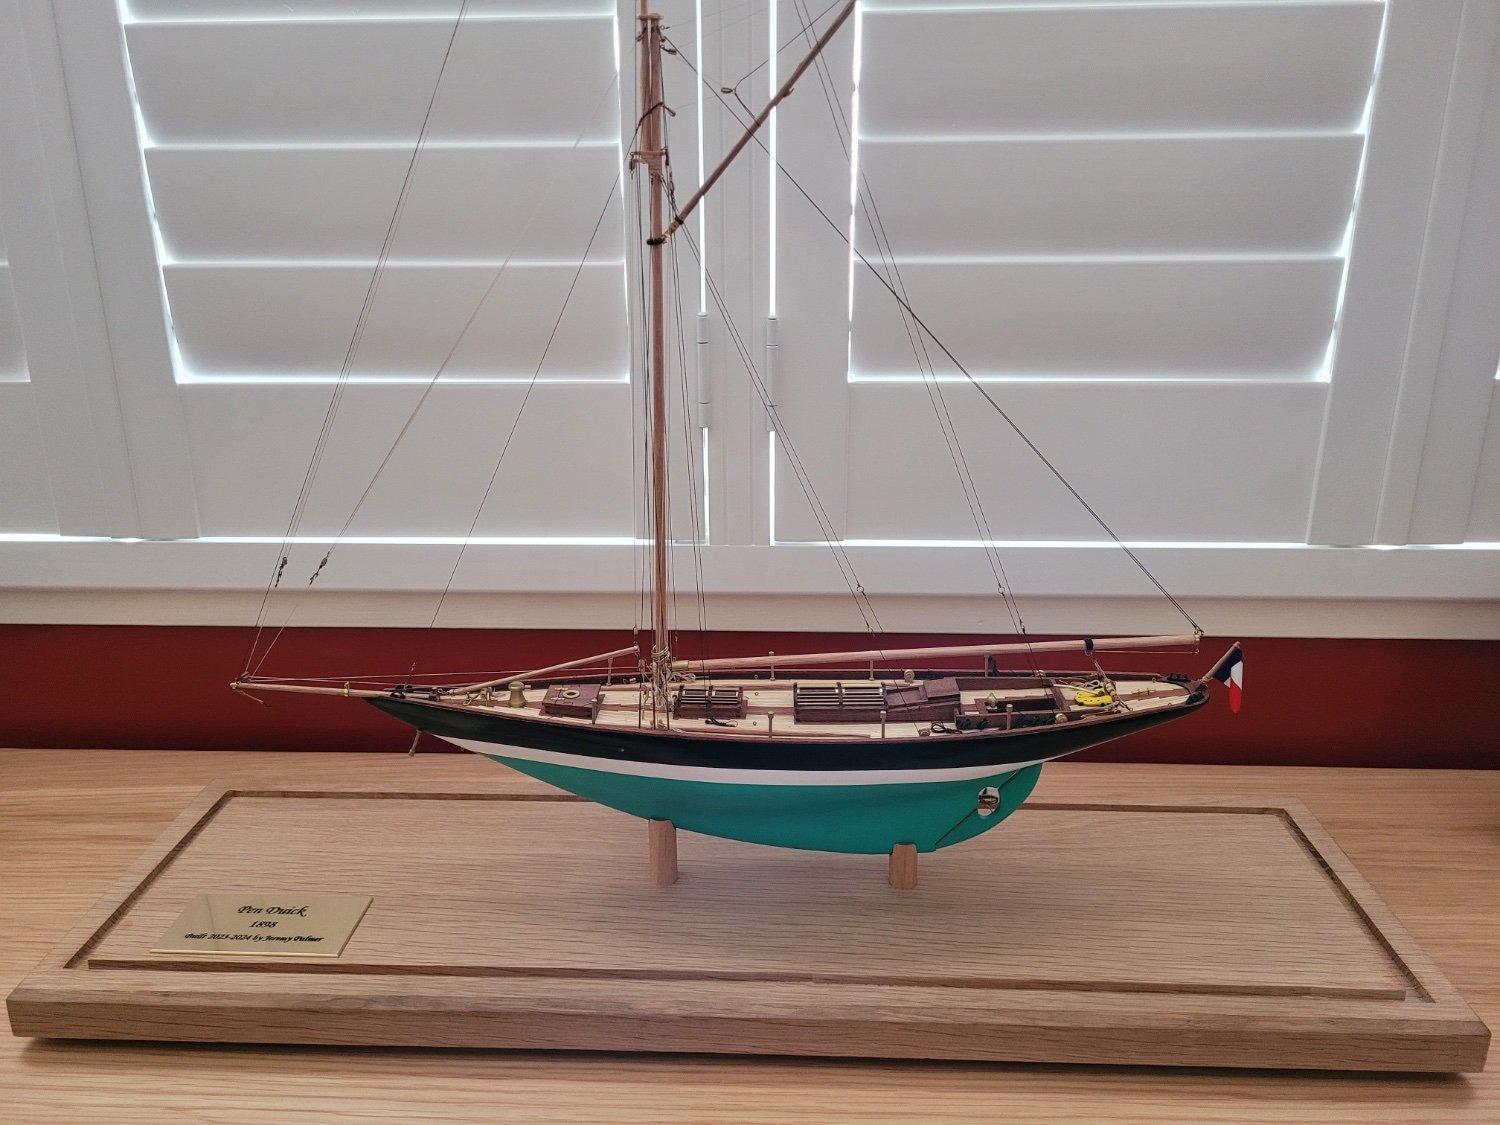
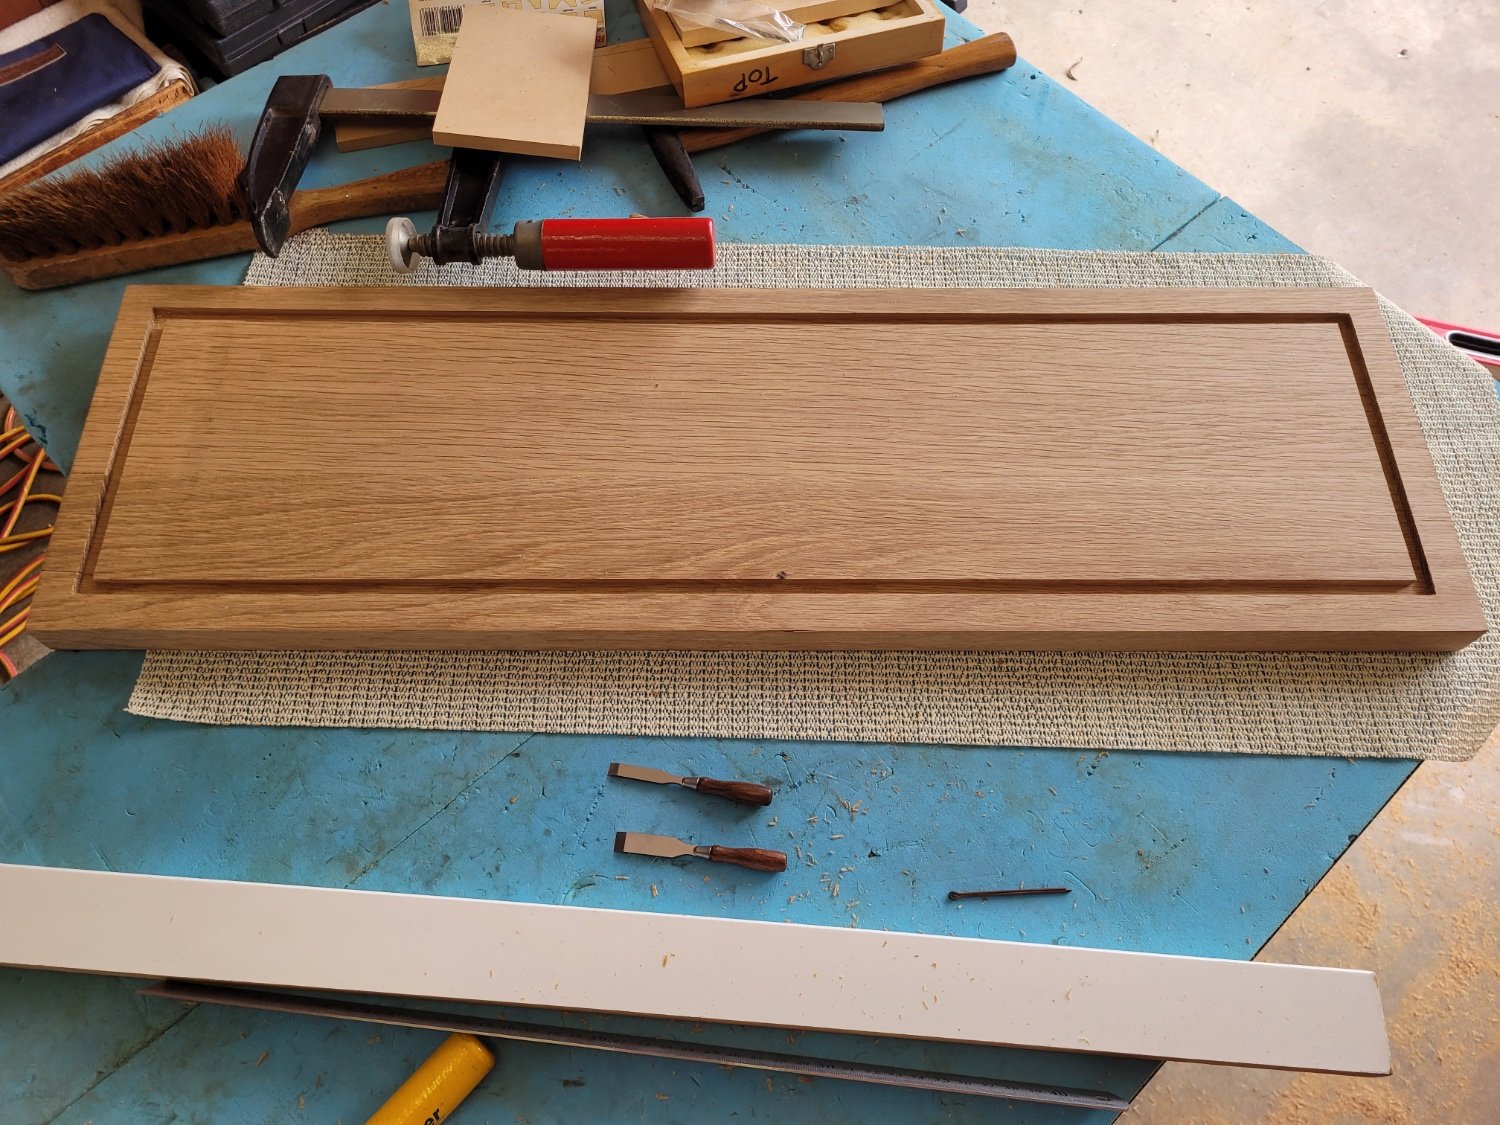
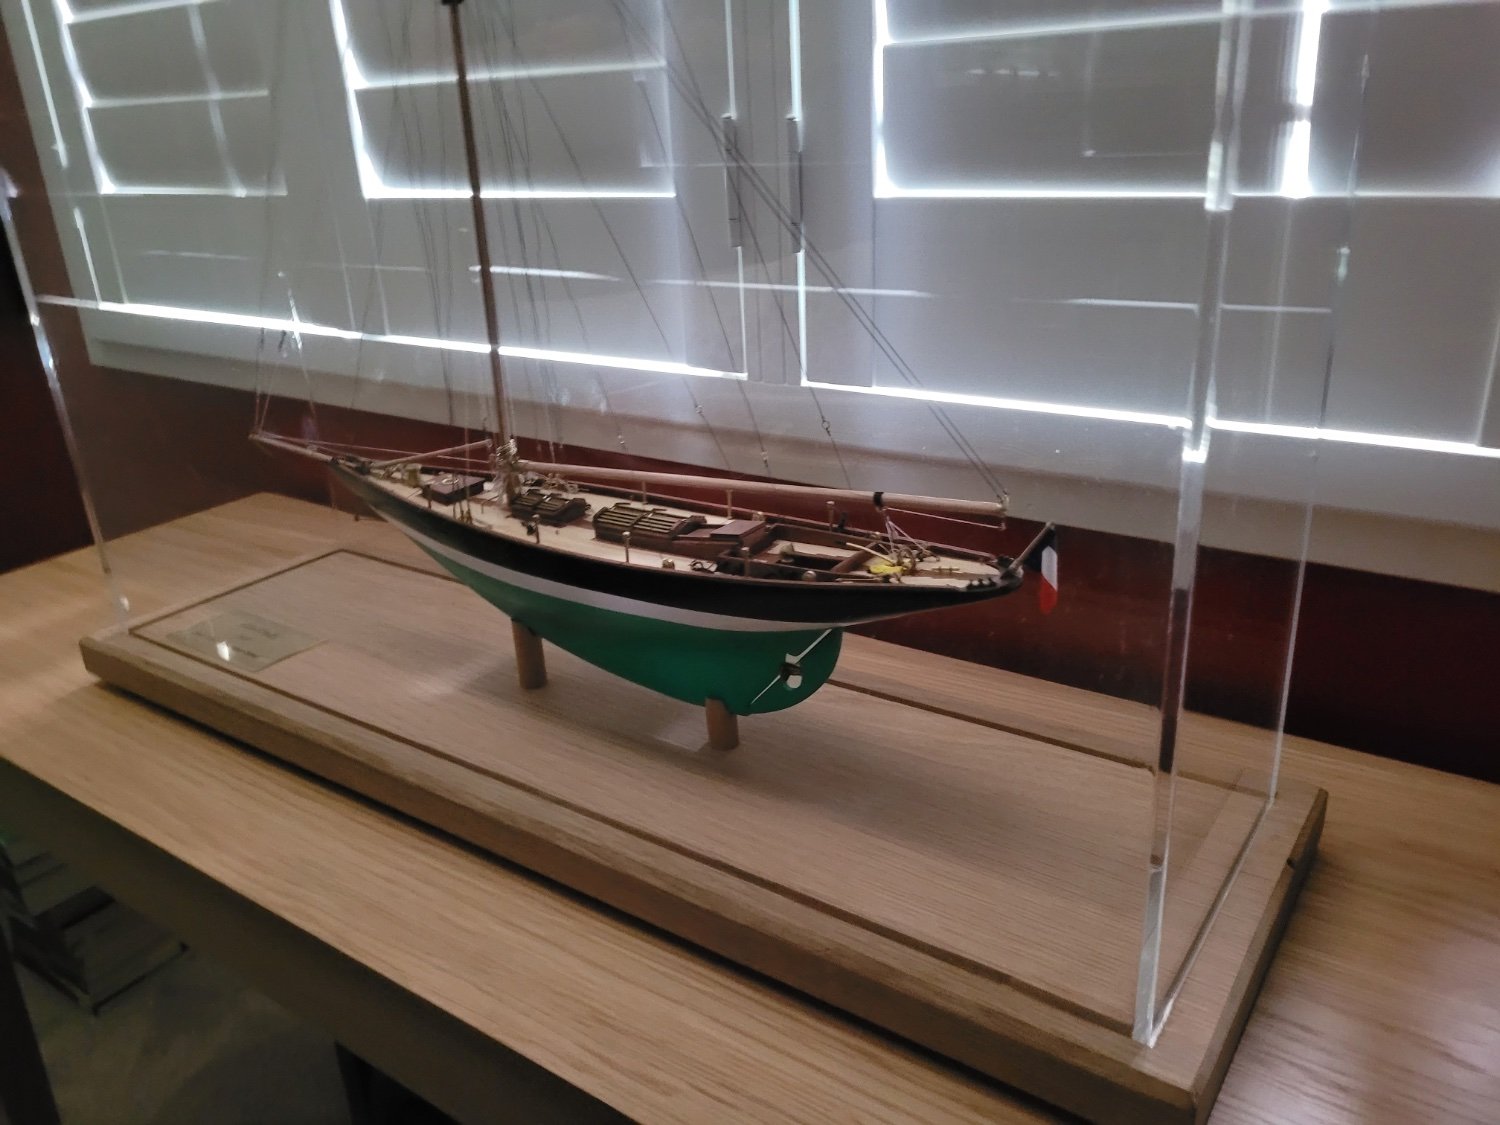
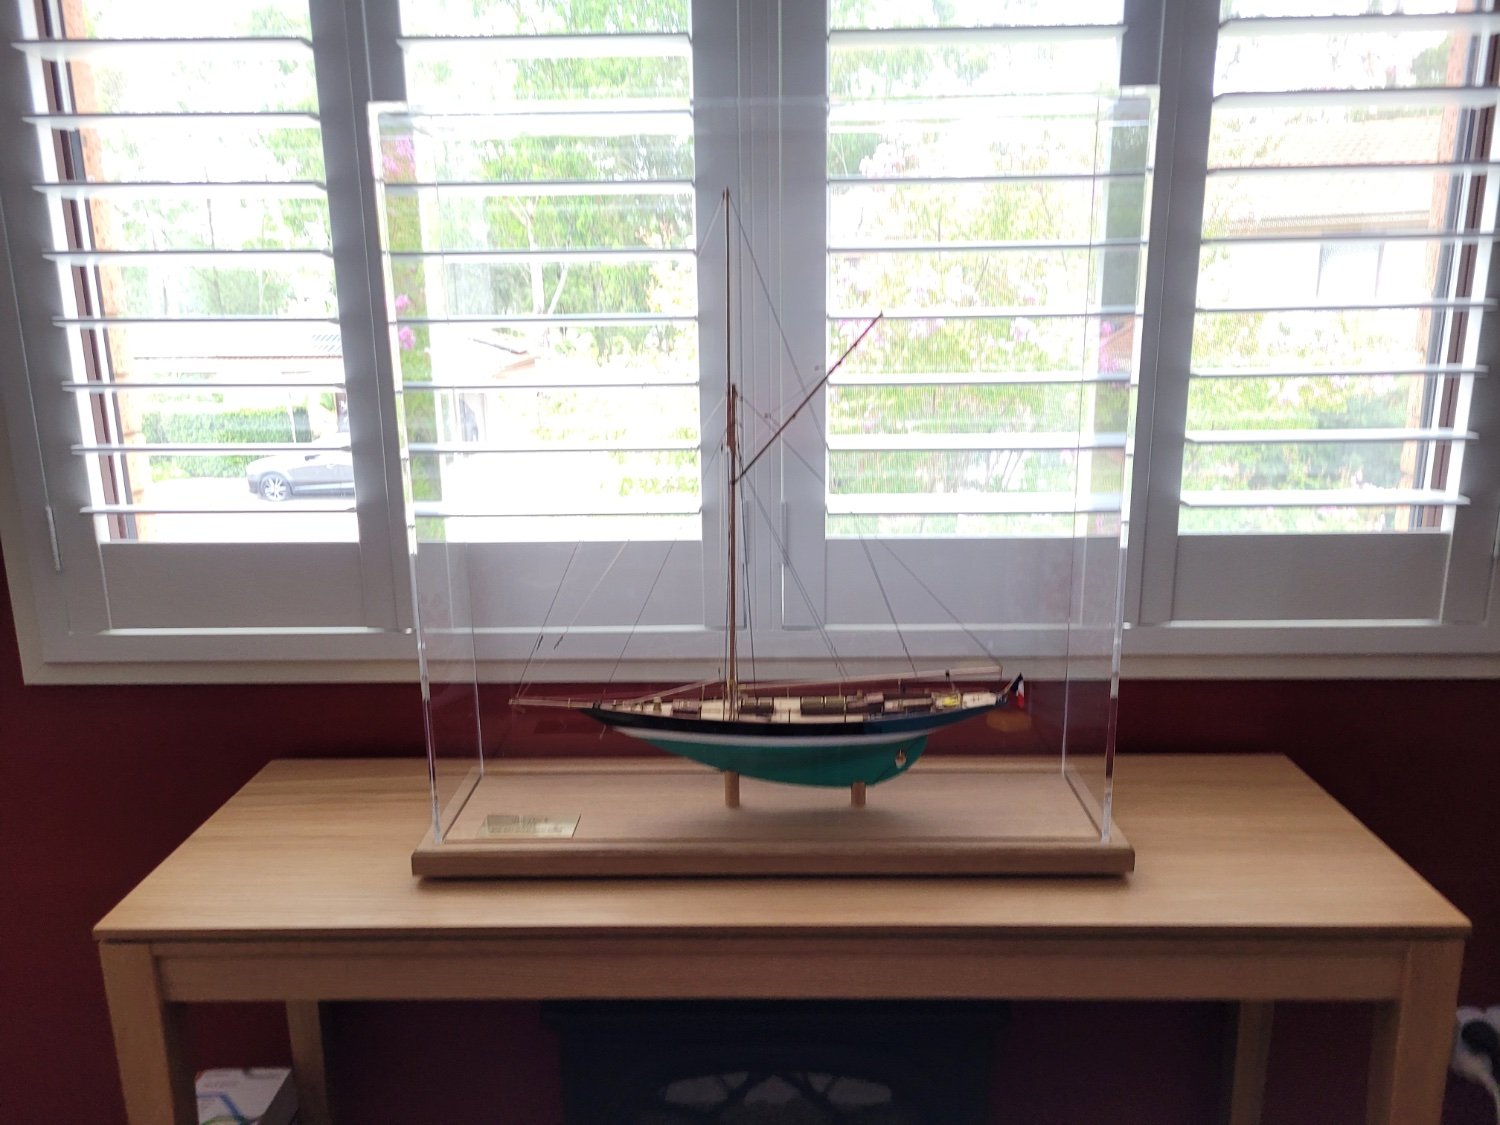
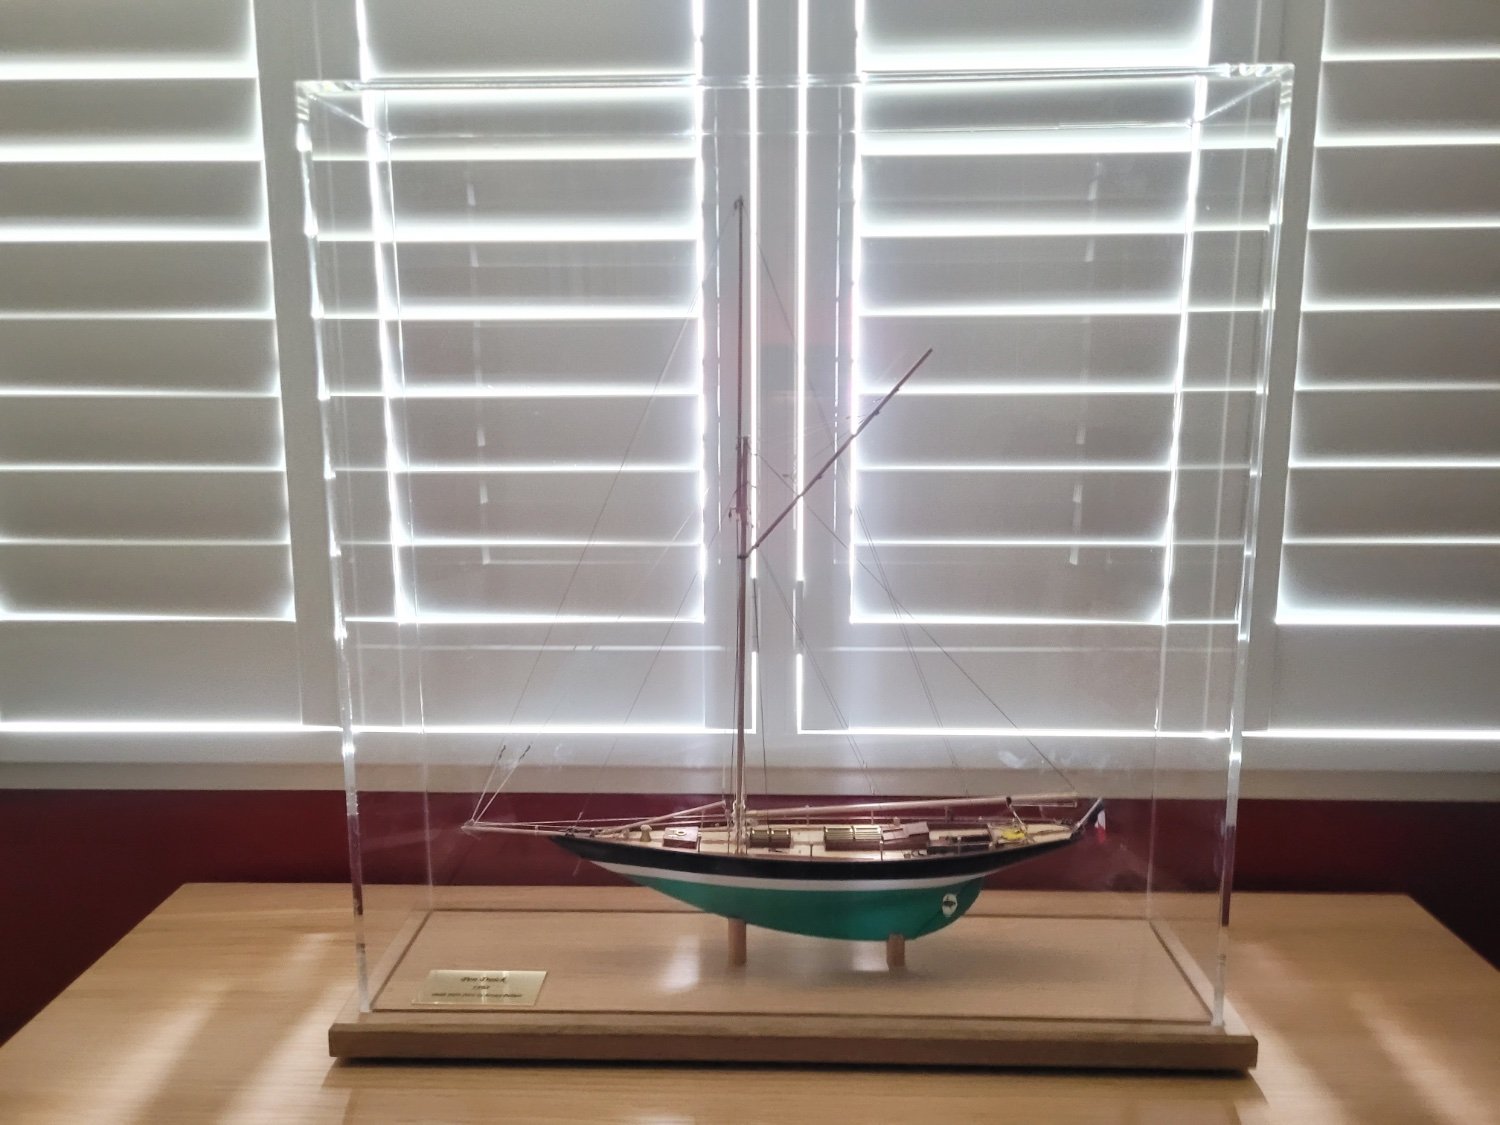
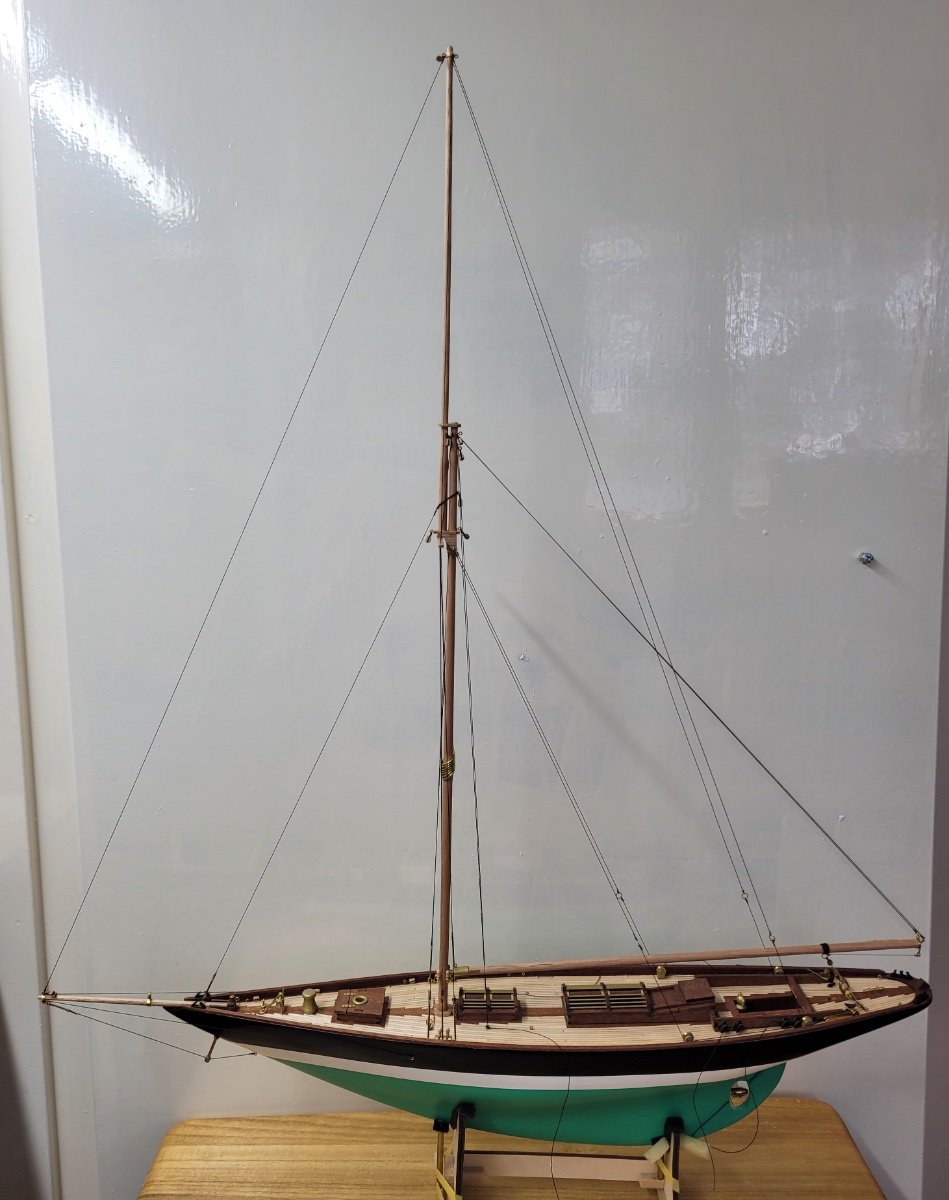
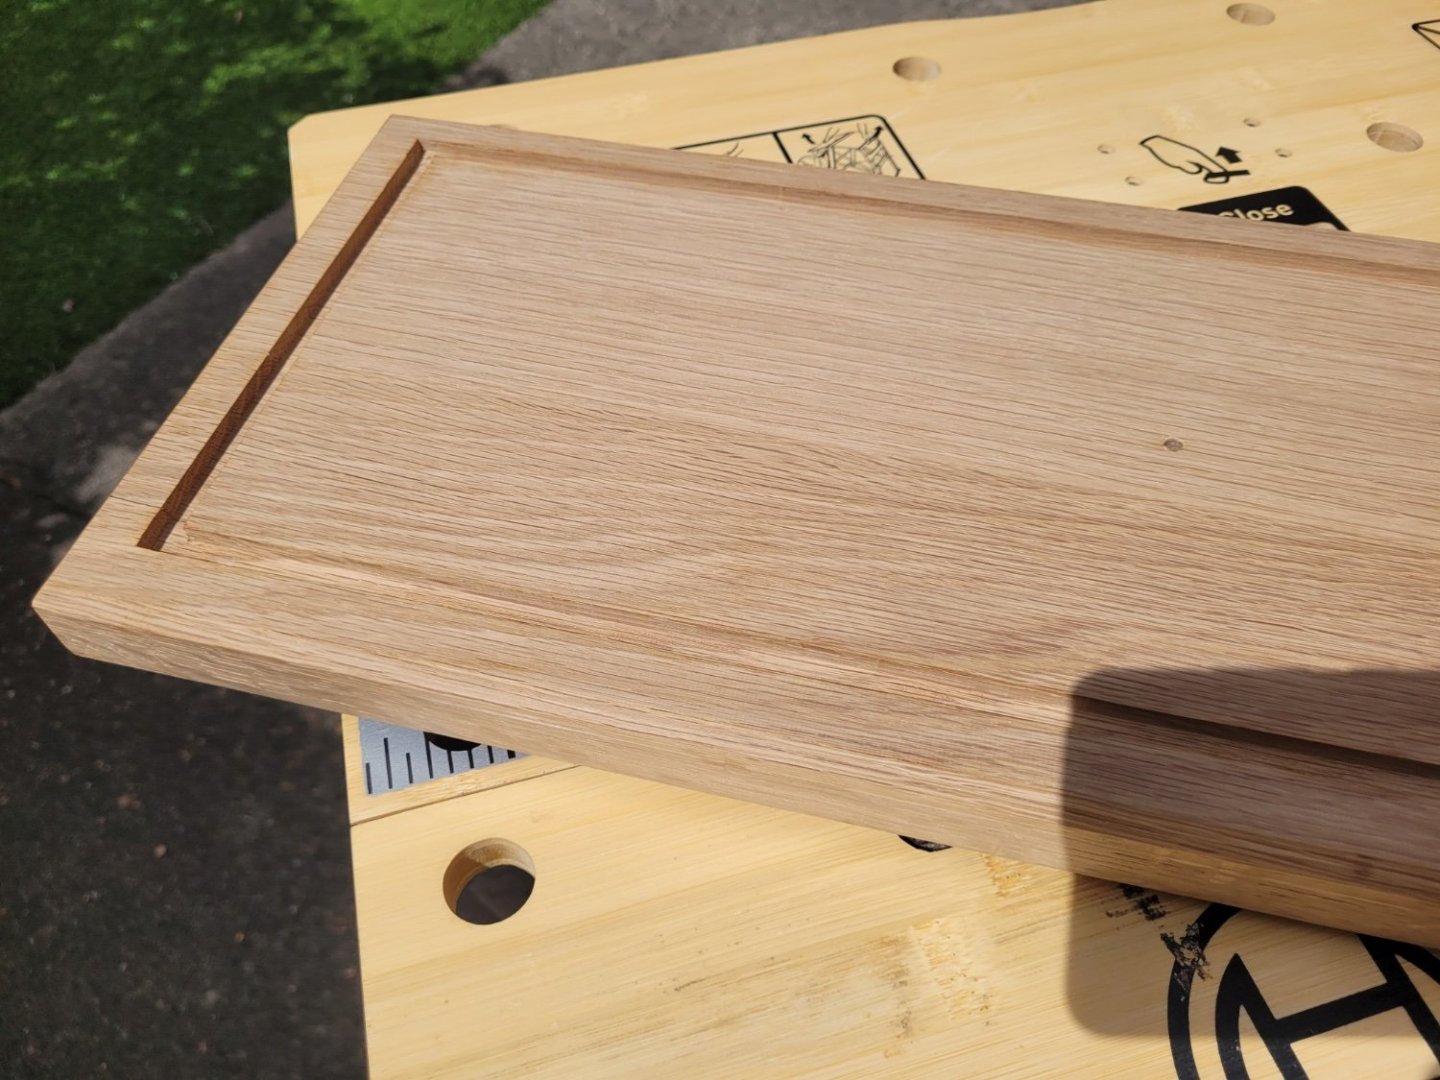
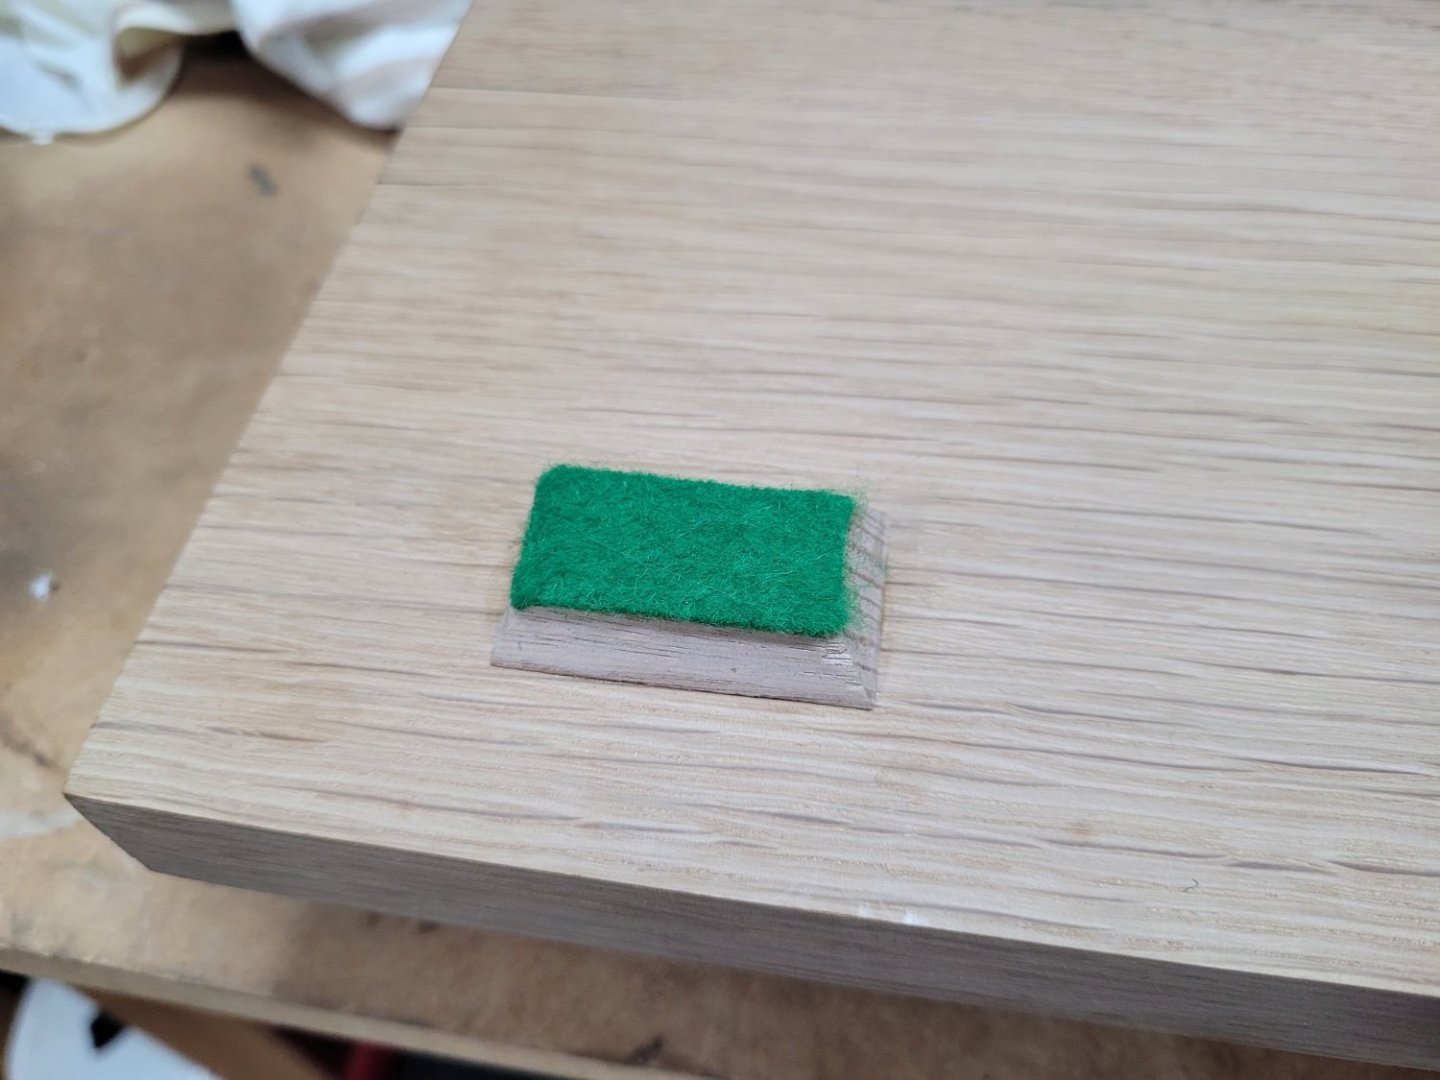
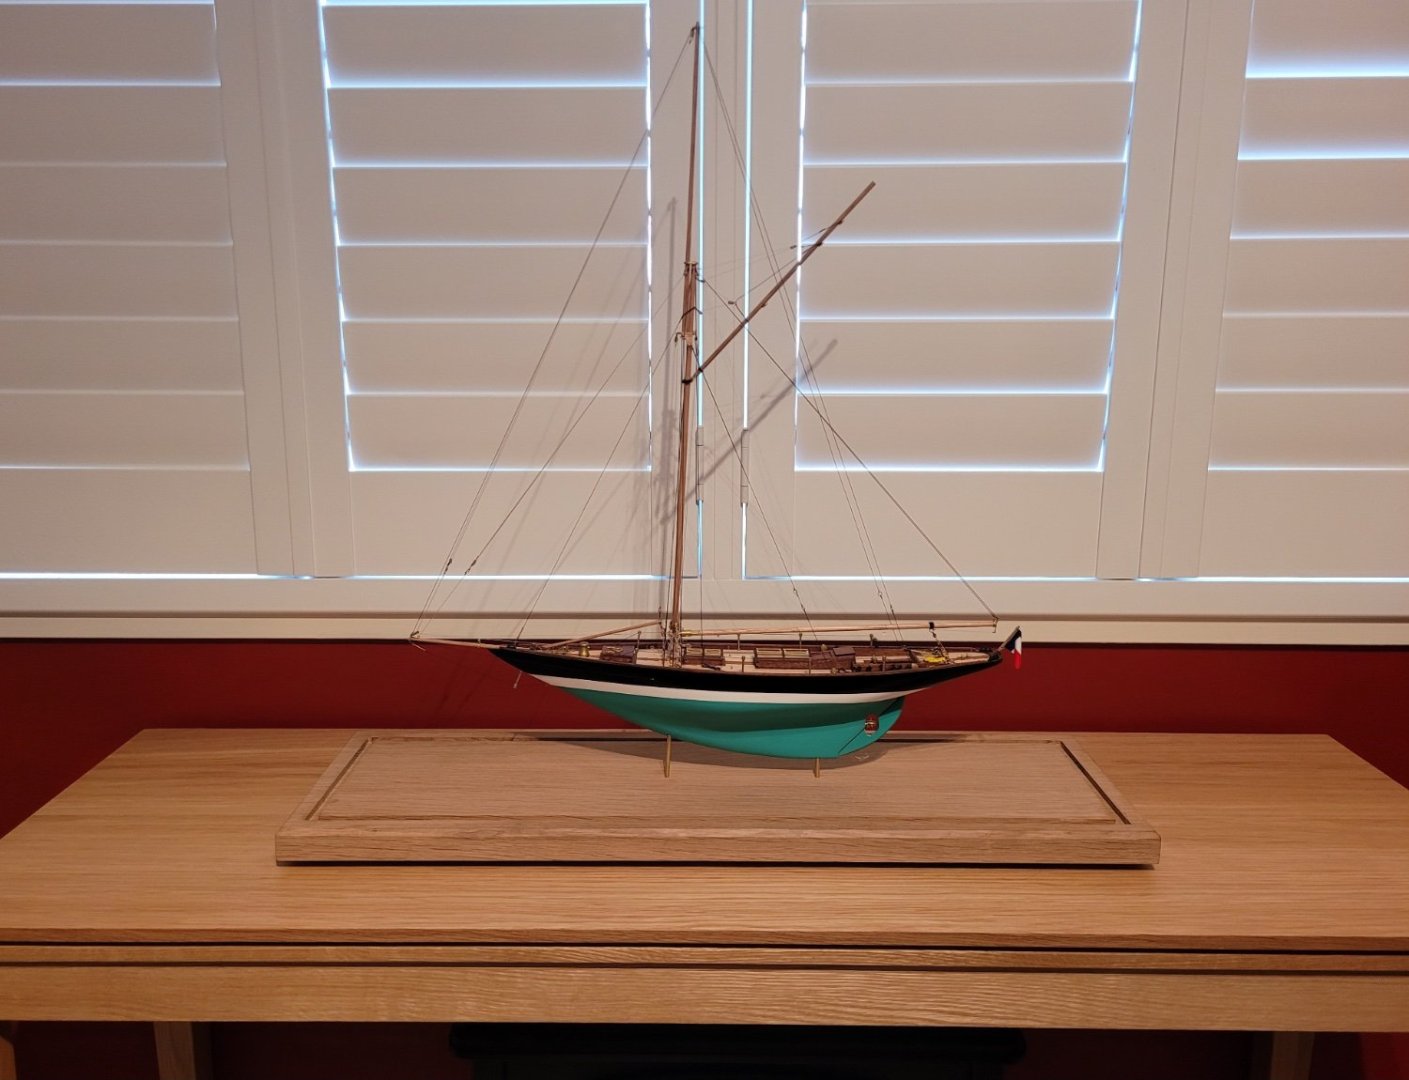
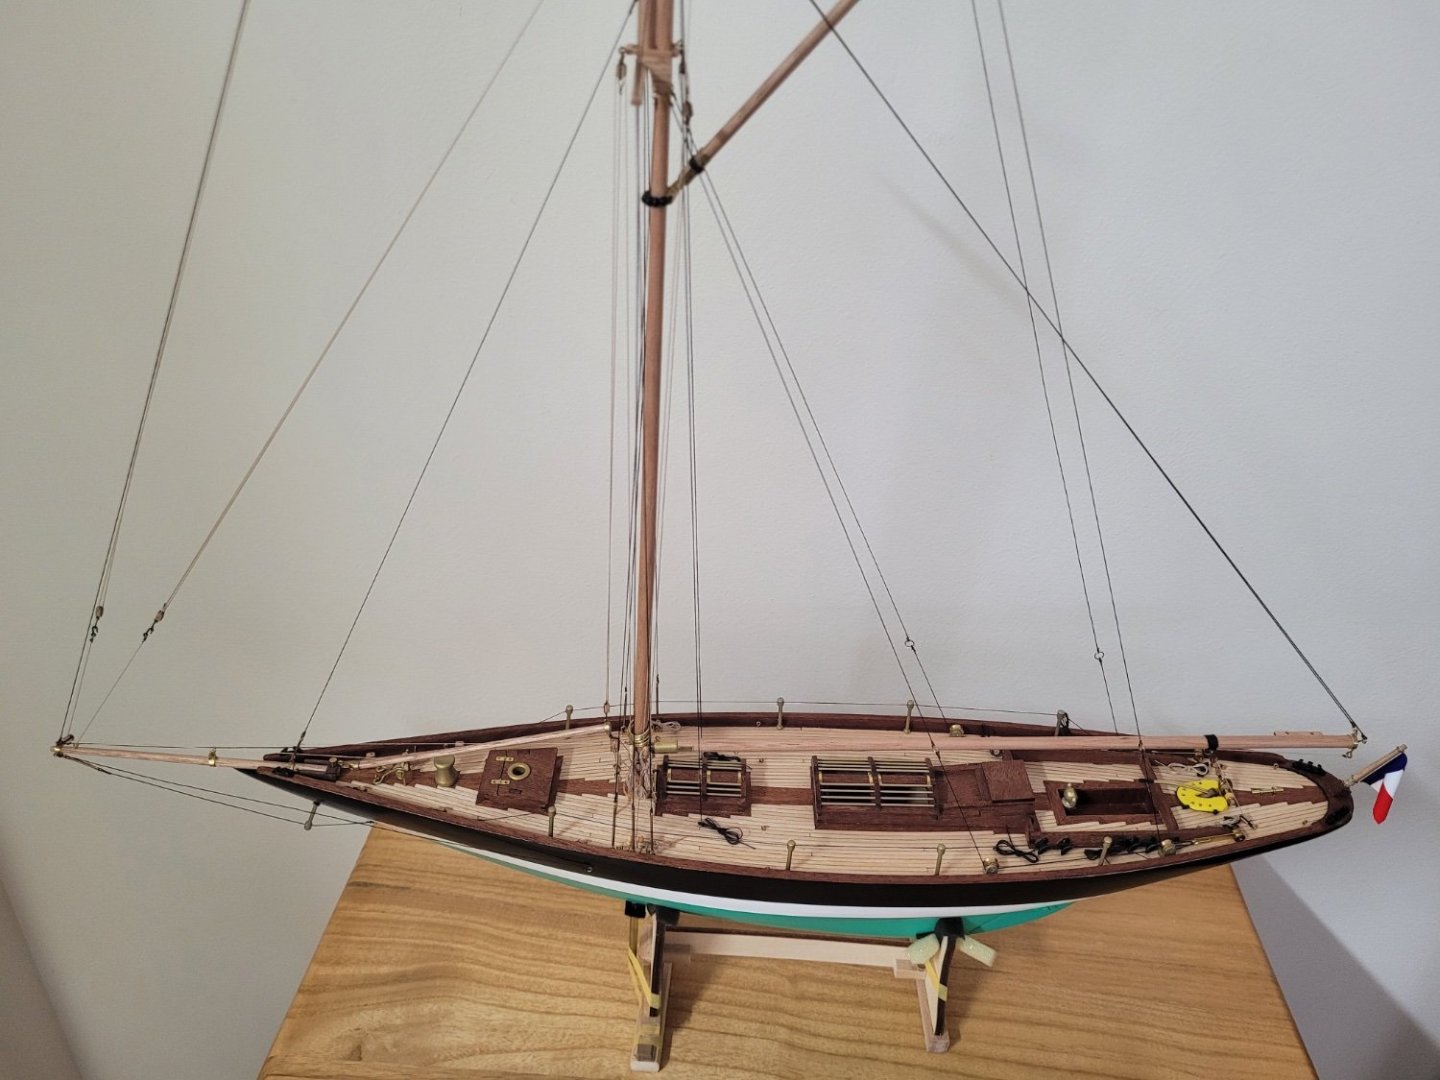
Yesterday I was able to undertake the routing required to shape the base board. My father-in-law kindly assisted with this (it's his router!) and we carefully marked out the external dimensions of the display case on the base board. As the acrylic is 6mm thick I used a 7mm router bit to make a 6mm deep channel in the base board into which the case could slot. The initial attempt was close but not quite right and so I had to widen the channel by 1mm towards the outside of the board on all sides in order for the case to slot into place nicely. To be honest we were both rather surprised we had managed it without too many problems! The corners of the slot were cleaned up with some small chisels and then the top of the board was given a good sanding. To make the base board a little more pleasing to look at I also chamfered a 45 degree angle around the top edge. I also attached the six oak feet that I had previously made, and added some self adhesive felt to the bottom of these to stop the base scratching the table on which it is placed. The next job was to drill the holes into which the brass rods could slot to hold the model in place in the board. It seems I hadn't quite installed the brass rods exactly parallel to the waterline when I put them in the hull off the model many months ago and so the holes in the baseboard needed to be slightly offset from vertical. I wondered about adding a coat of wop to the board and so tried a sample area underneath. The wop made quite a difference to the colour of the oak giving it a rather yellow hue which i didn't actually like, so I decided to leave the natural wood as is. I also cut down the wooden pedestals I had made so that there was around a 15mm gap between the keel and the base board once the model was mounted on the pedestals. The pedestals simply slipped over the brass rods and some double sided tape held them fast on the base board. The brass rods extend about 18mm into the base board and hold the model in place very securely. I also put some double sided tape on the back of the name plaque and placed that on the base board and took a few pictures of the model before adding the display case. It was then a question of taking off all of the protective film from the case and doing my best to get rid of any finger marks and dust. I'm not sure how the protective film is attached to the acrylic but it once it has been removed it gives the case a lot of electrostatic attraction to dust, hairs and all other sorts of little bits of debris which makes getting it clean and mark free quite a task! I felt like I was just moving the dust around but eventually it came out looking good. I carefully lowered the case over the model and into the slot on the baseboard and wiped off all of the fingerprints from the case. I then started to take pictures of the completed model for the gallery and it was at that point I realised that I had omitted to place the sprit and the yard on the deck, and so I had to carefully remove the case, put the two spars on the deck and then recover the model. Another round of fingerprint removal was needed before I could recommence taking pictures again. 😀 So I am now calling this one completed. I would like to thank everyone who has looked in on my build log, thanks also for the likes and comments, suggestions and ideas, and encouragement. Some final thoughts on the model, the Artesania Pen Duick is a great model of a historic yacht. If you have made any AL models before you will know that the kits provide a good basis for a model but the fixtures and fittings are a little sub par. Certainly with these older AL models the instructions are also pretty minimal. The biggest hurdle to overcome was the practically non existent rigging information, and a lack of detail in the sparse information that was provided. The rigging of the model turned out to be fairly simple to do in practice, but it was quite hard to work out what was required and how everything connected. It is also a fairly good sized kit with a length of 543mm, so it doesn't take up too much space but at 1:28 scale the fixtures aren't too tiny to work with. If you have built any model ships previously you won't have any problems with the Pen Duick, and it does make a nice change from the 18th century warships! If you are happy to buy some replacement parts to help make the build easier and at the same time better, then you can end up with a great model. Thanks once again for your interest in this build. Jeremy


- 122 replies
-
- 9
-
-

-
- Artesania Latina
- Pen Duick
- (and 1 more)
-
Thanks for the kind words and encouragement Bryan and Thukydides. I finished working on the base today and so hopefully tomorrow I will get everything together and finally have the model on display!
- 122 replies
-
- 2
-
-
- Artesania Latina
- Pen Duick
- (and 1 more)
-
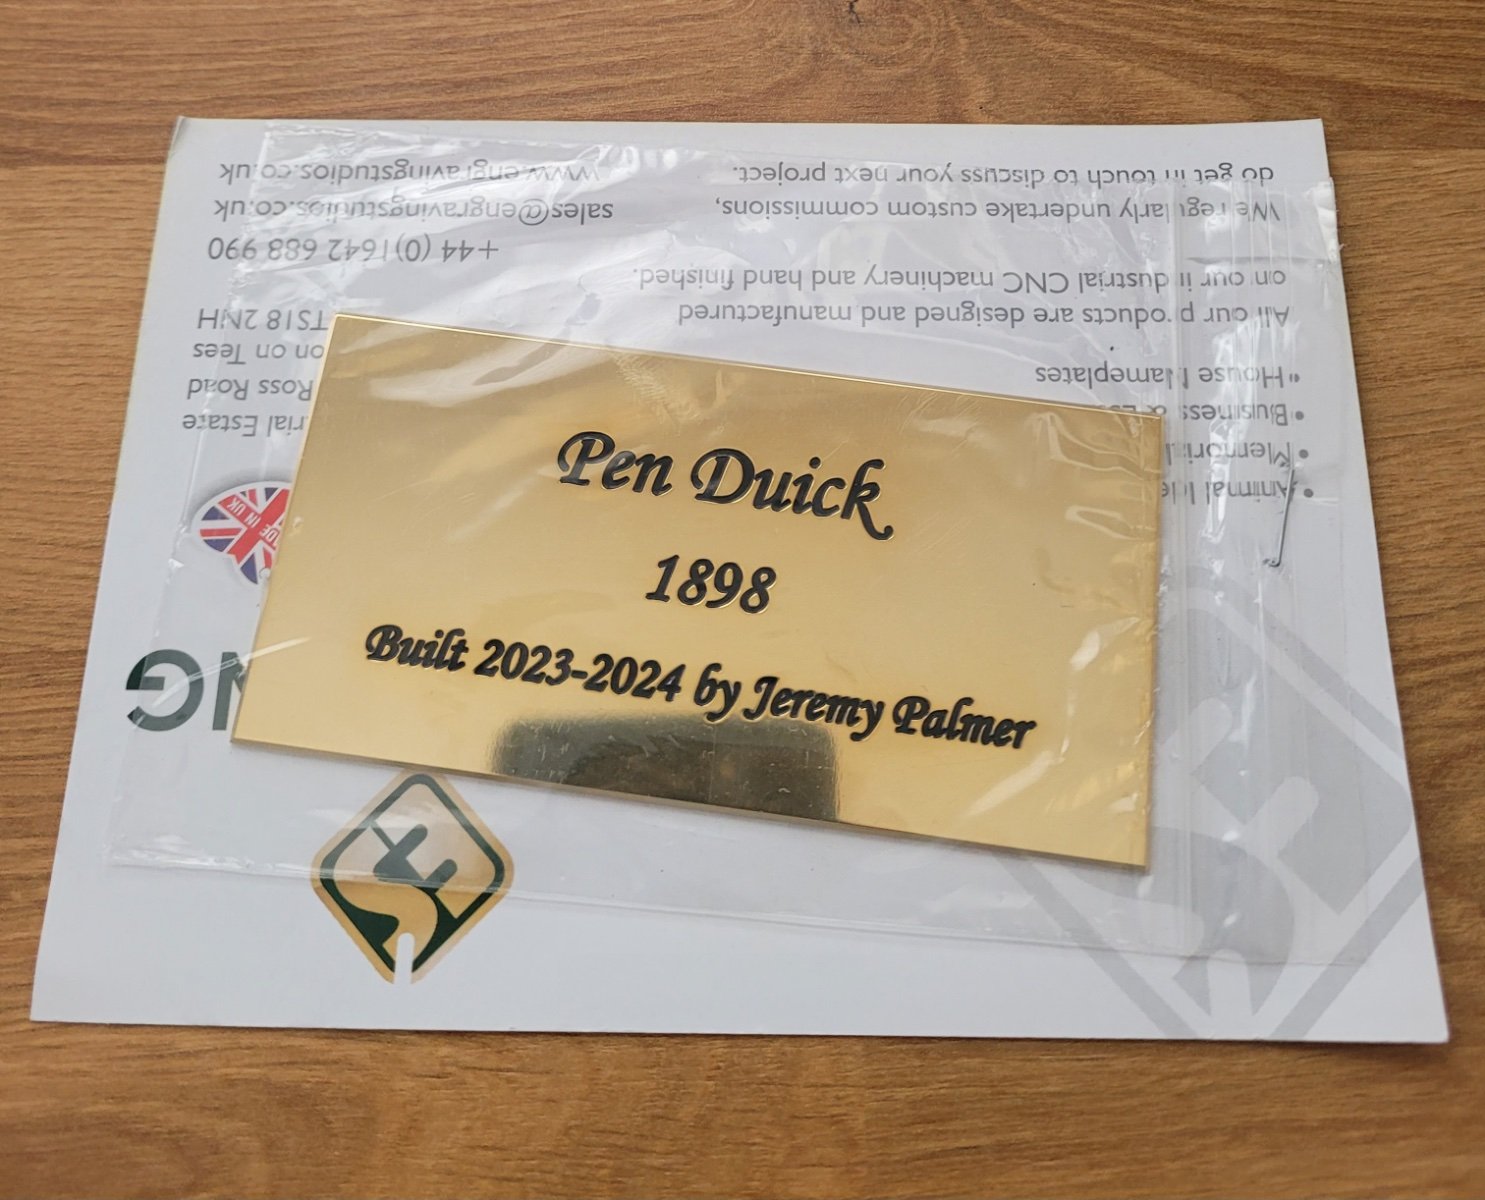
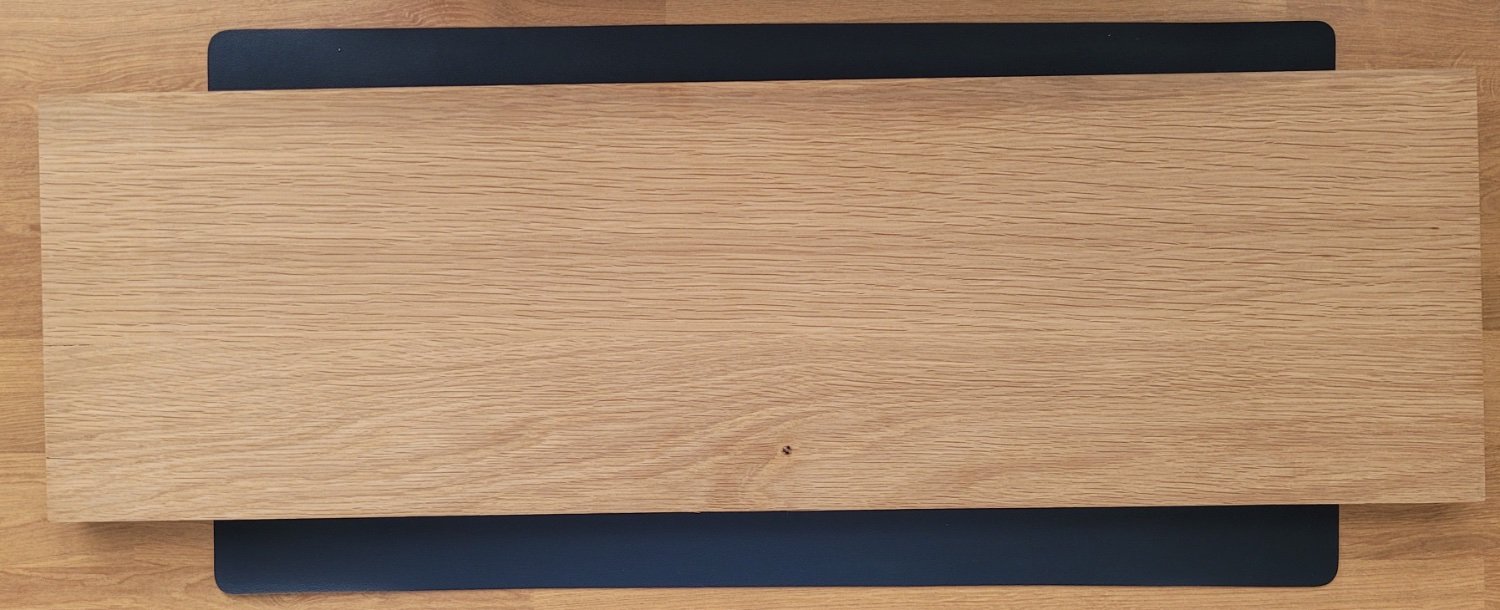
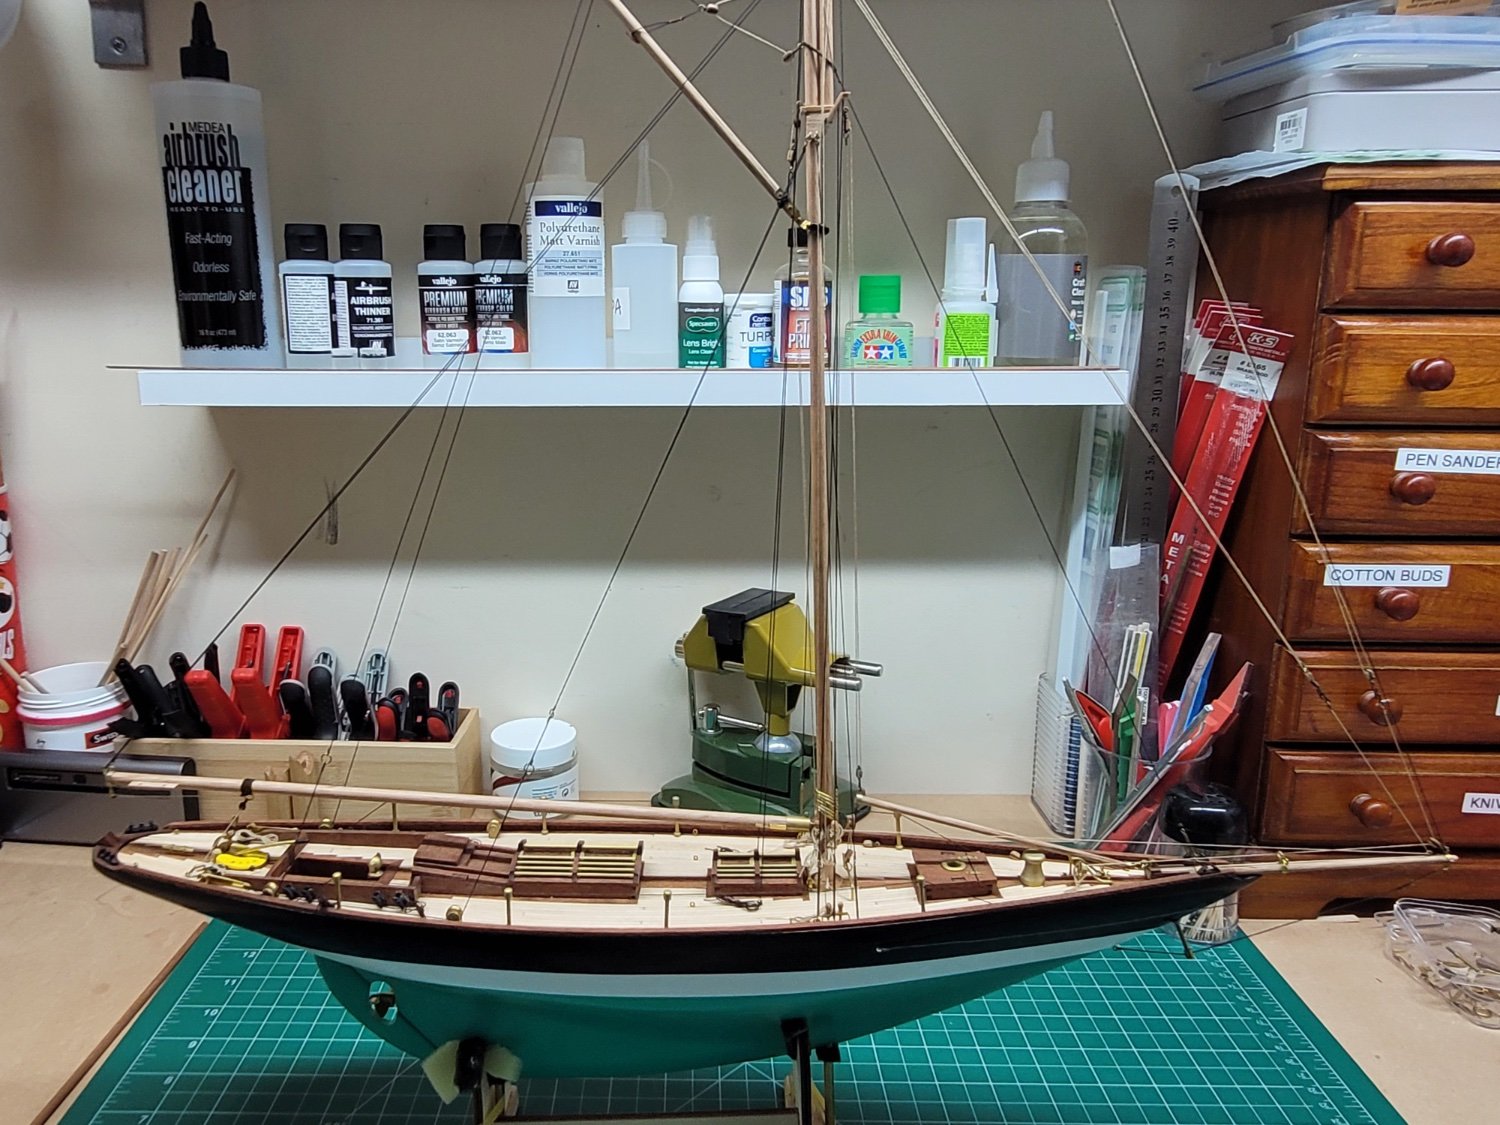
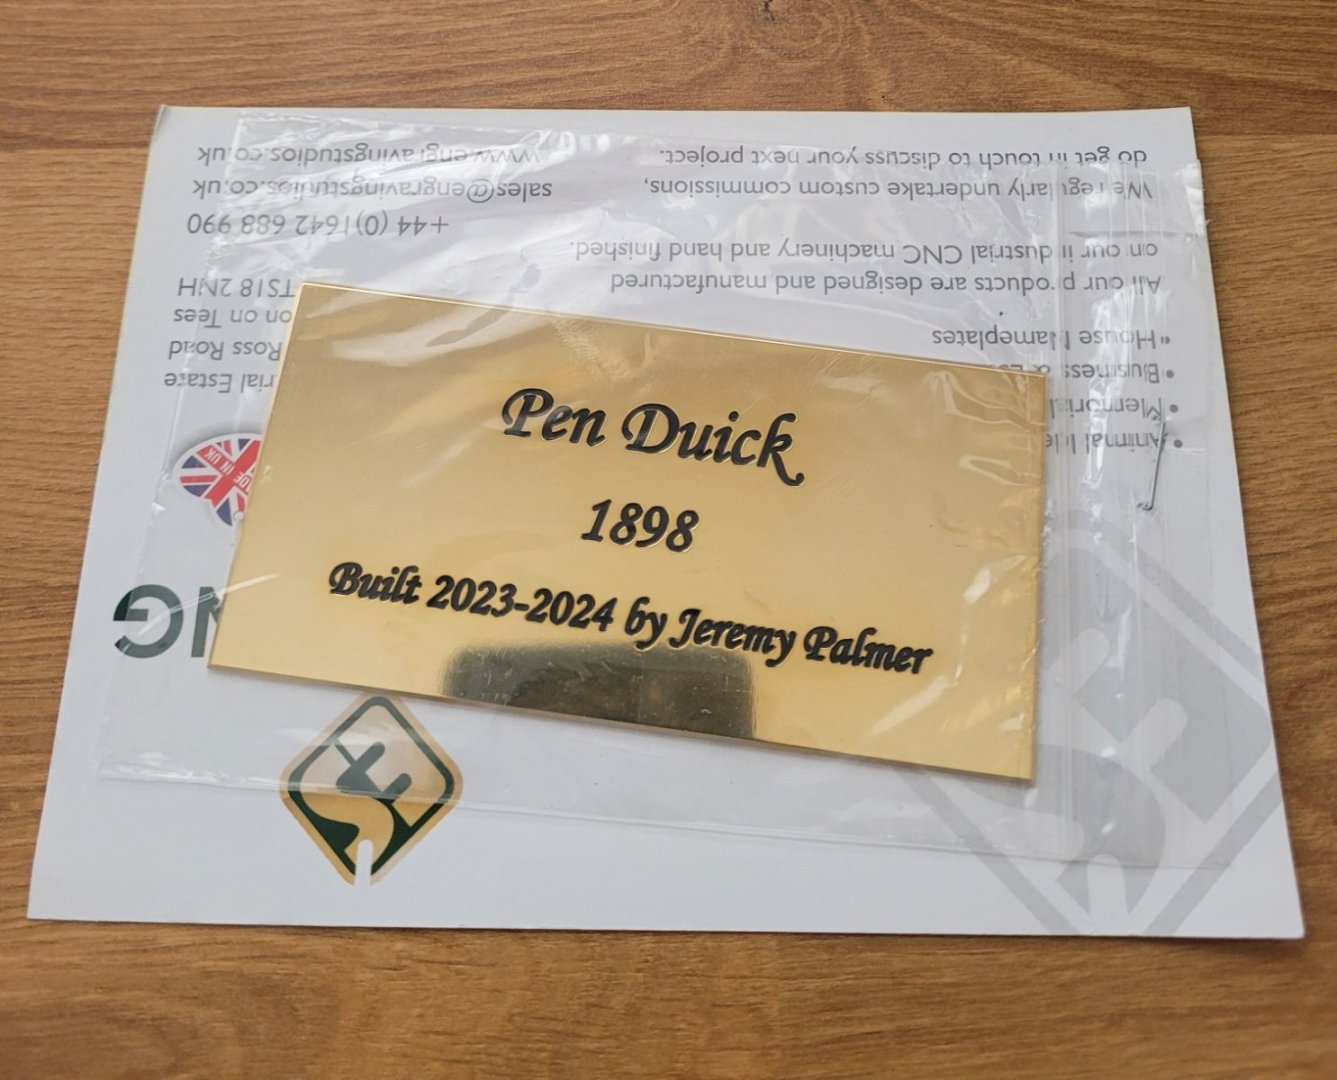
I have been focussing on the display case over the last couple of weeks. I had previously purchased a nice piece of American oak for the base board of the case and I am fortunate enough to have a neighbour with a well equipped woodworking shed who was able to turn the somewhat rough looking length of wood into a very presentable piece of oak. He ran it through his thicknessers, cut it down to size and squared it all off etc. So far I haven't decided whether to add any coats of wop or other finish to it as I quite like the current look. I also used an offcut of some Tasmanian oak I had to make 6 little feet for the base board so that it stands 10mm off the table on which it will eventually be placed. The feet will be glued and screwed to the base once I have finished the rest of the work on the base itself. I also arranged for the manufacture of an acrylic cover made from 6mm thick acrylic. It is a five sided case that can just be lifted on and off the base board. The dimensions for the case are 180mm wide by 690mm long by 720mm tall. This took a couple of weeks to be made at a local factory and I was able to collect it earlier this week. I haven't unwrapped it just yet as I'm trying to keep it as clean and scratch free as possible! The plan is to rout a 4mm or 5mm deep slot in the baseboard matching the dimensions of the case so that the base of the case can sit in the recess nicely where it will be held safely in place and can't be knocked askew. I also hope to add a nice chamfer to the edges of the base board just to make it a little more pleasing on the eye. Mounting holes for the brass rods will also need to be drilled in the base board to hold the model securely in place. Hopefully they are all things that can be done this coming weekend. I have also received a nice brass plaque (3 inch x 5 inch) I ordered online with the name of the ship and the build details. This will be placed on the base board inside the case. There has been very little work on the model itself, apart from a little touching up of the paint here or there and a check to make sure that the rigging is still correct and everything is in place. I am trying to avoid moving it in fear of knocking something about now I am so close to the end!

- 122 replies
-
- 5
-
-
-
- Artesania Latina
- Pen Duick
- (and 1 more)
-
Hello and welcome !
-
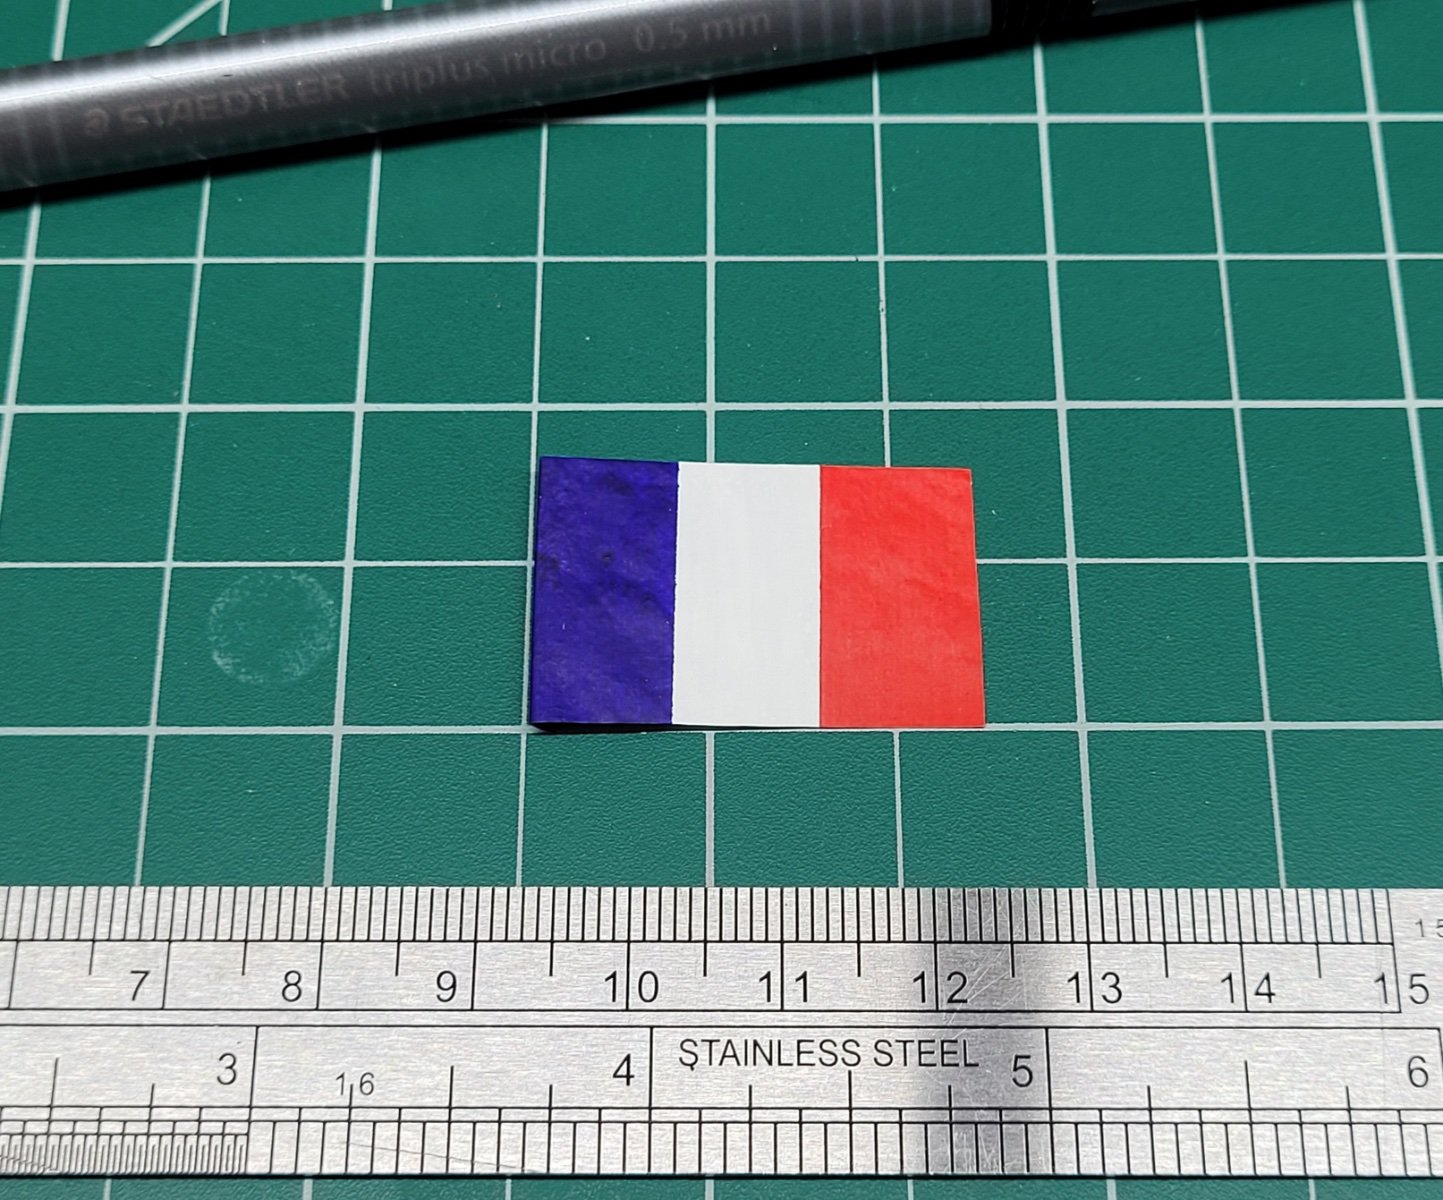
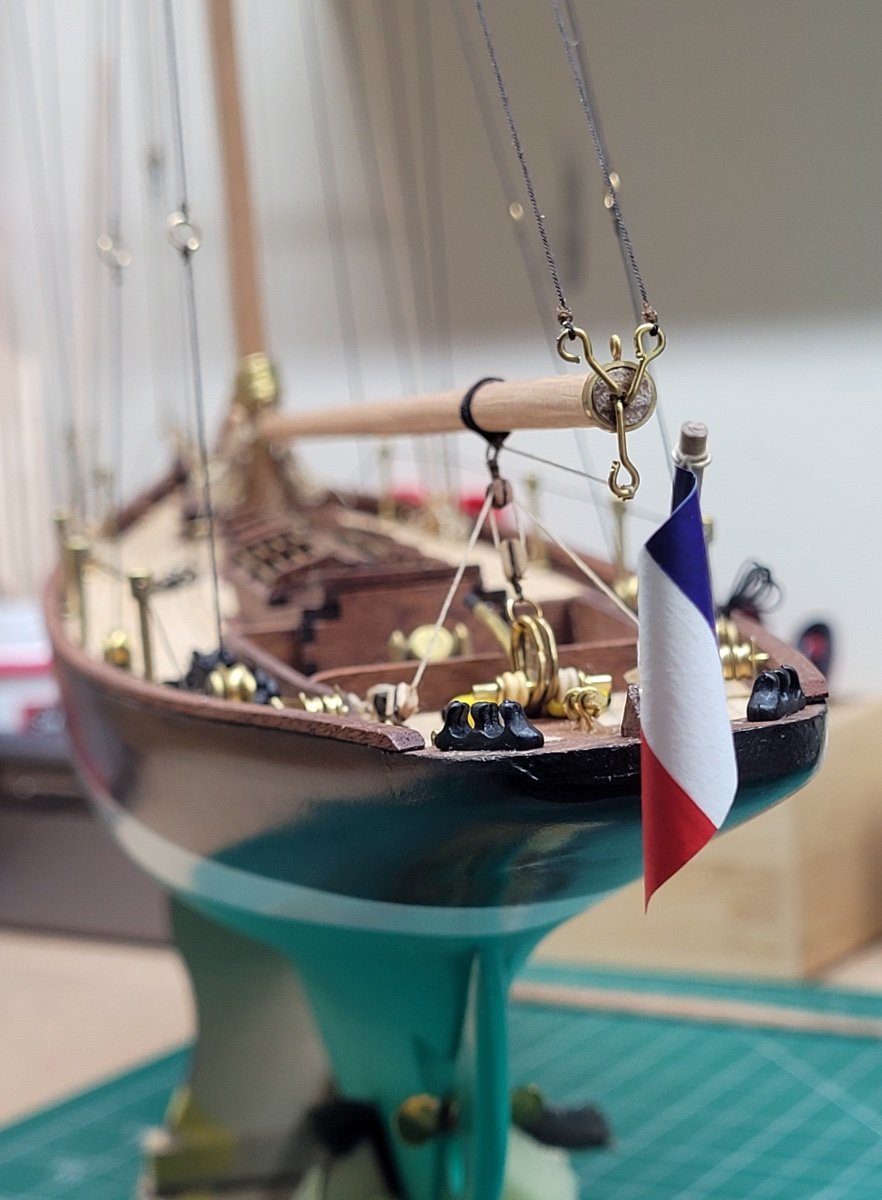
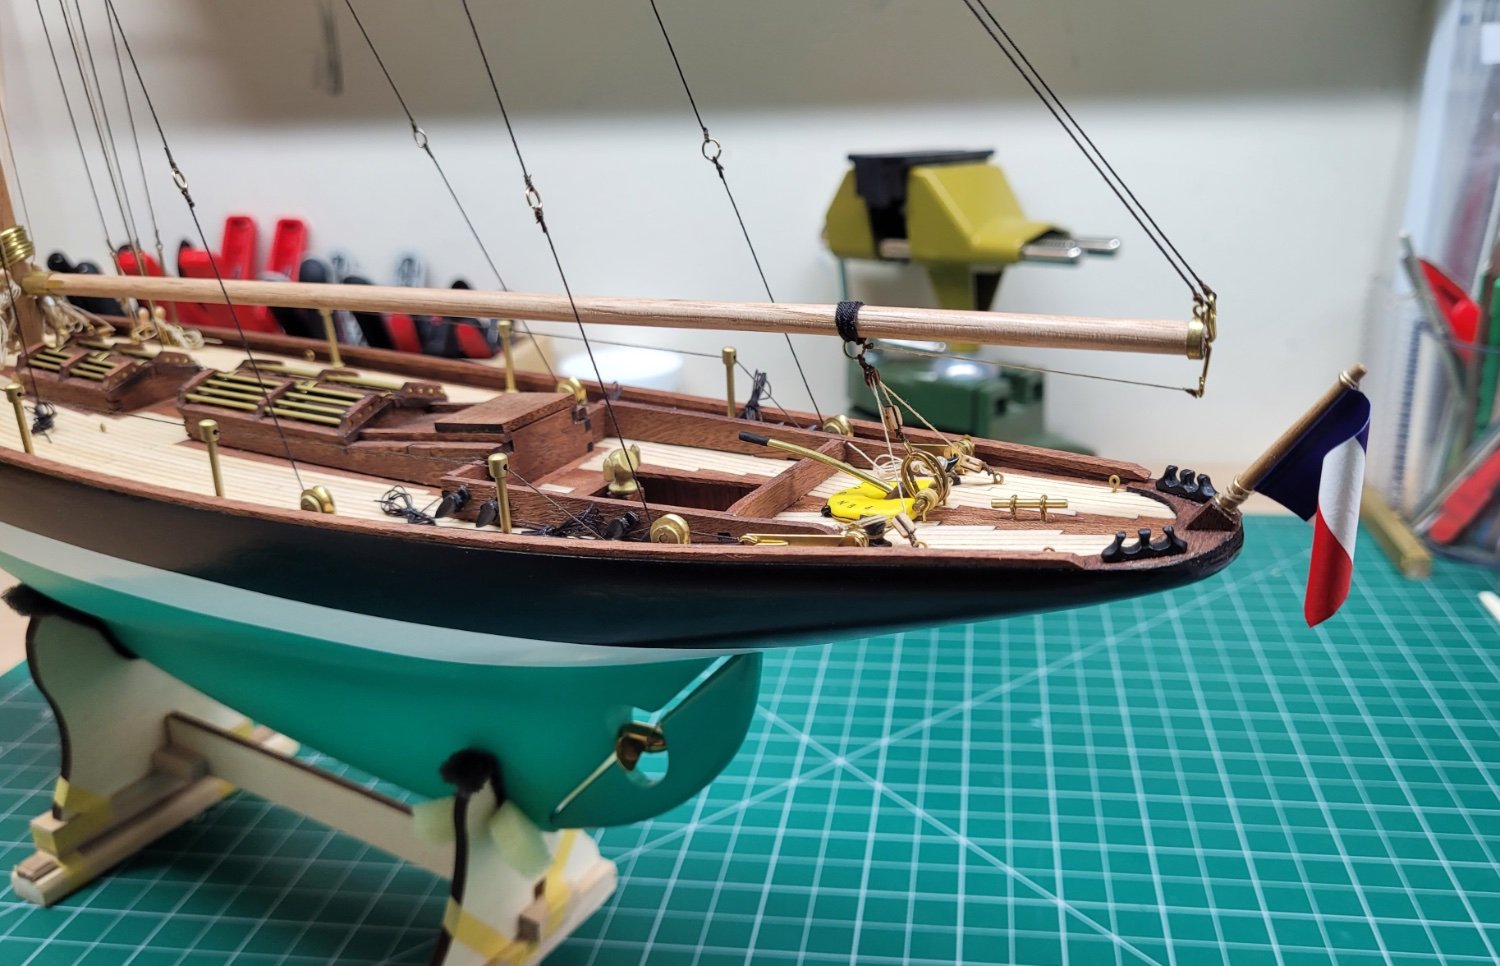
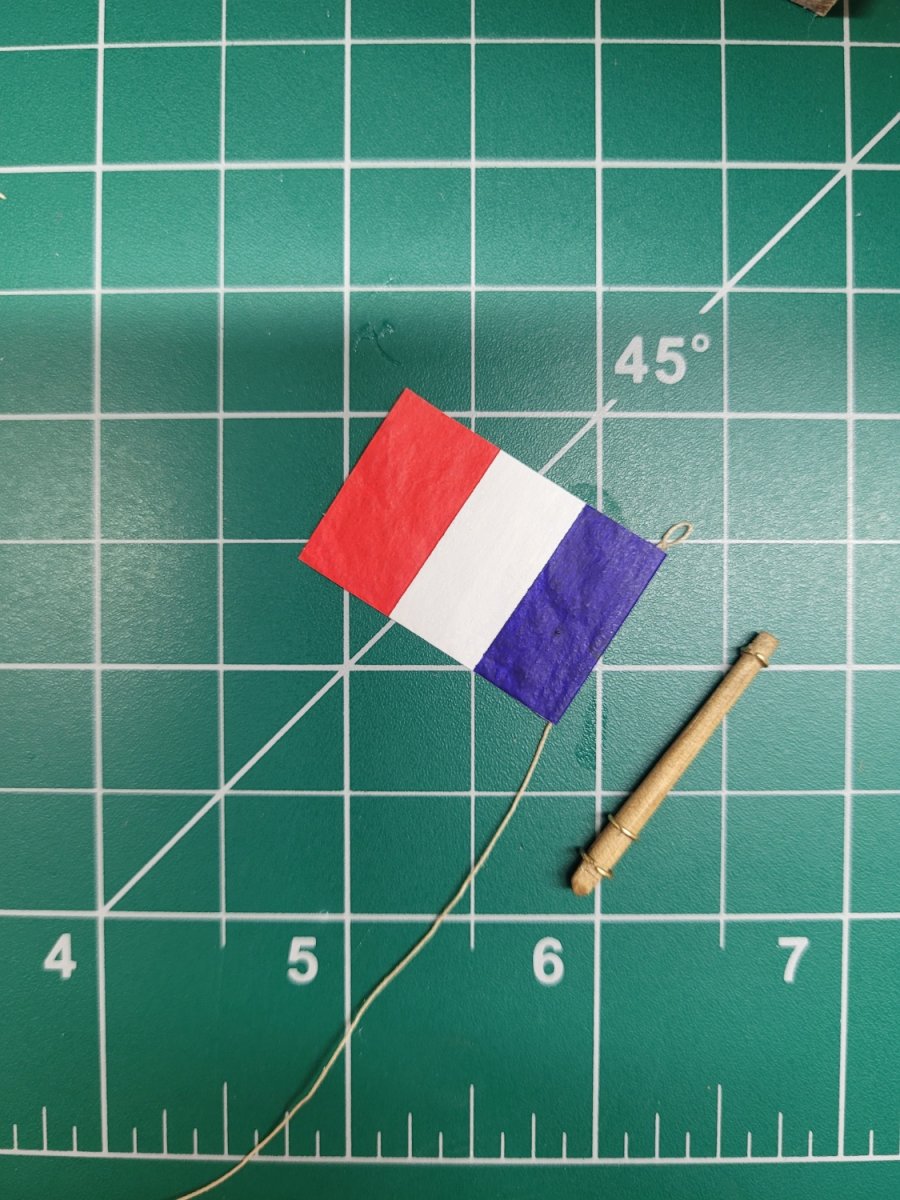
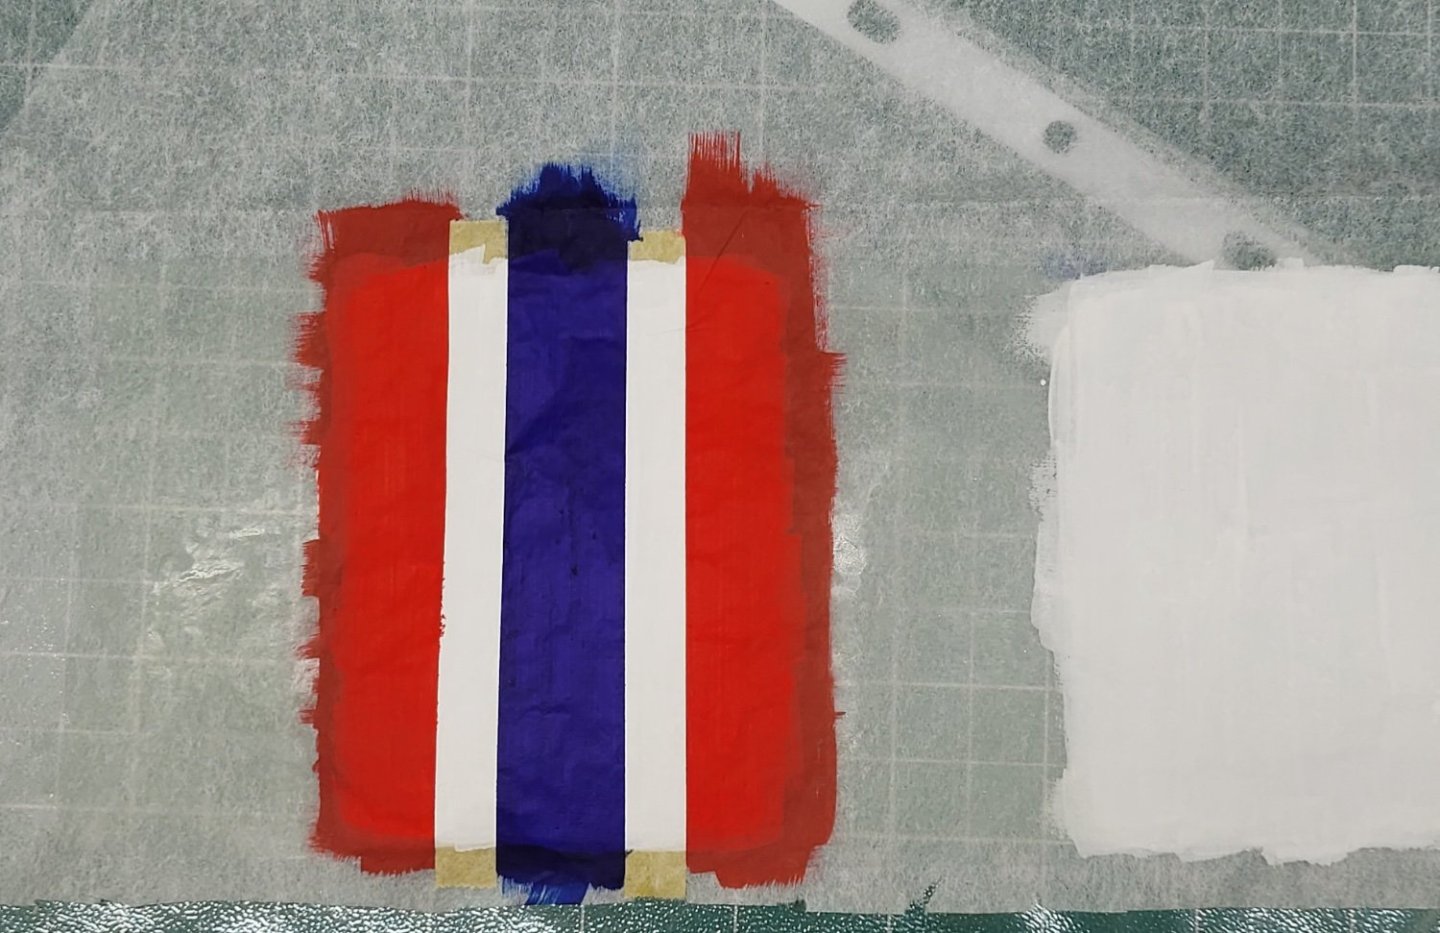
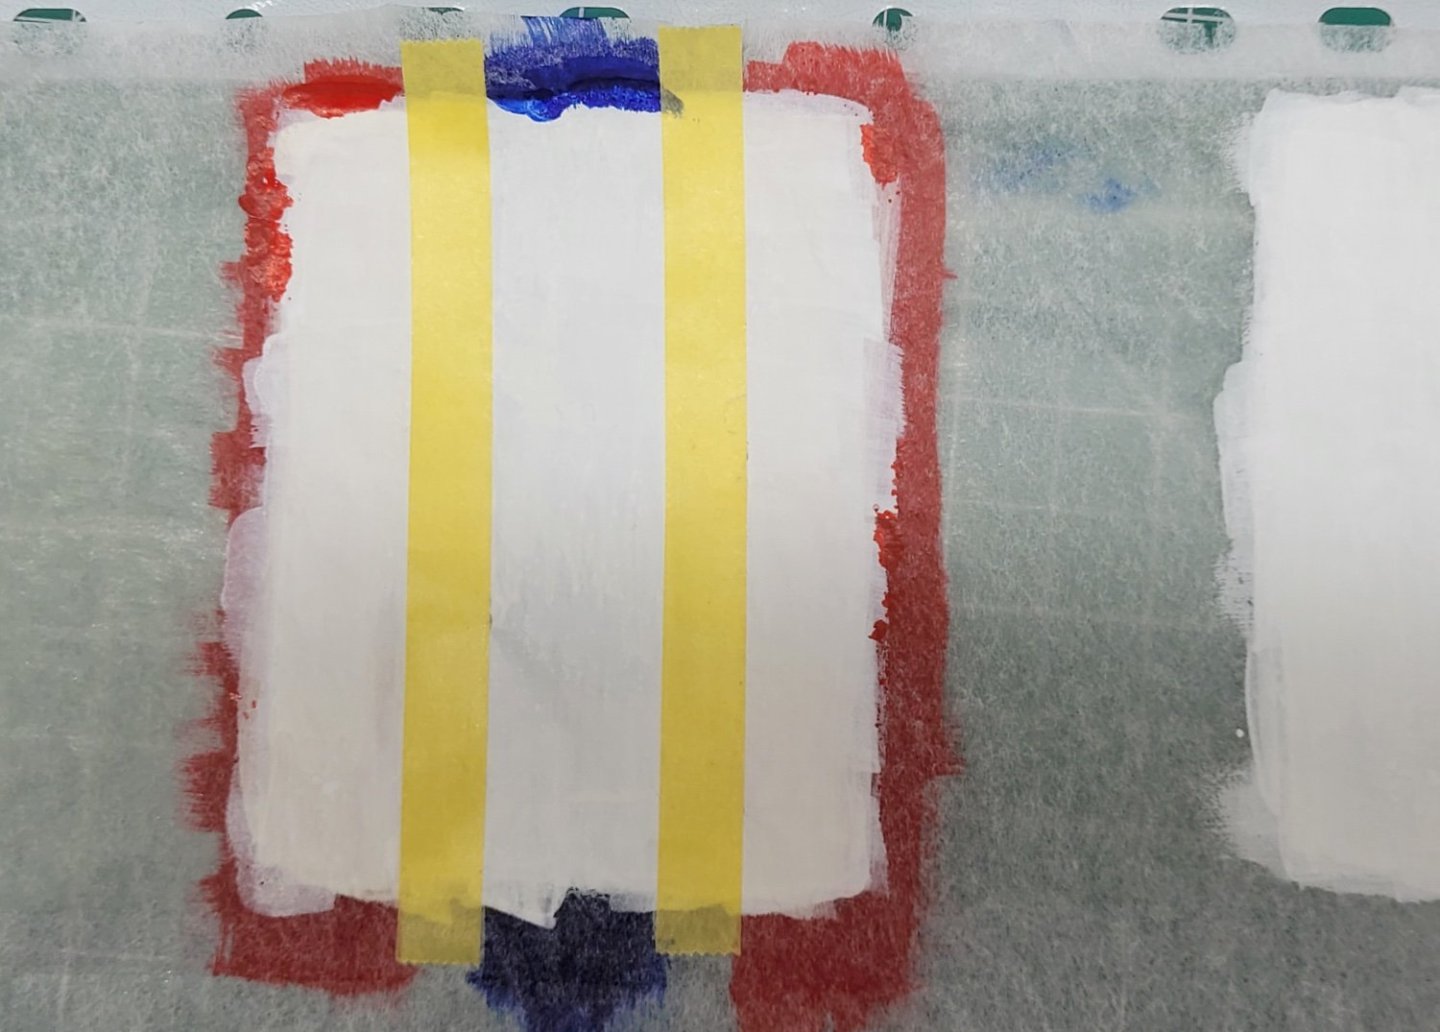
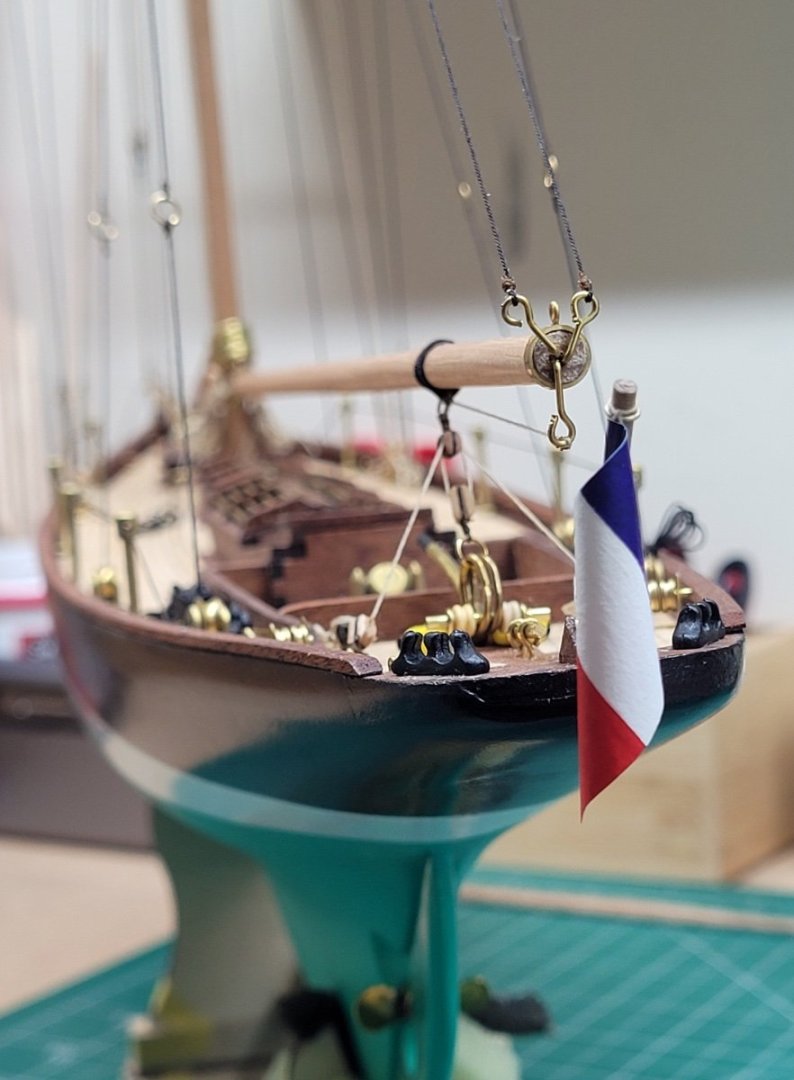
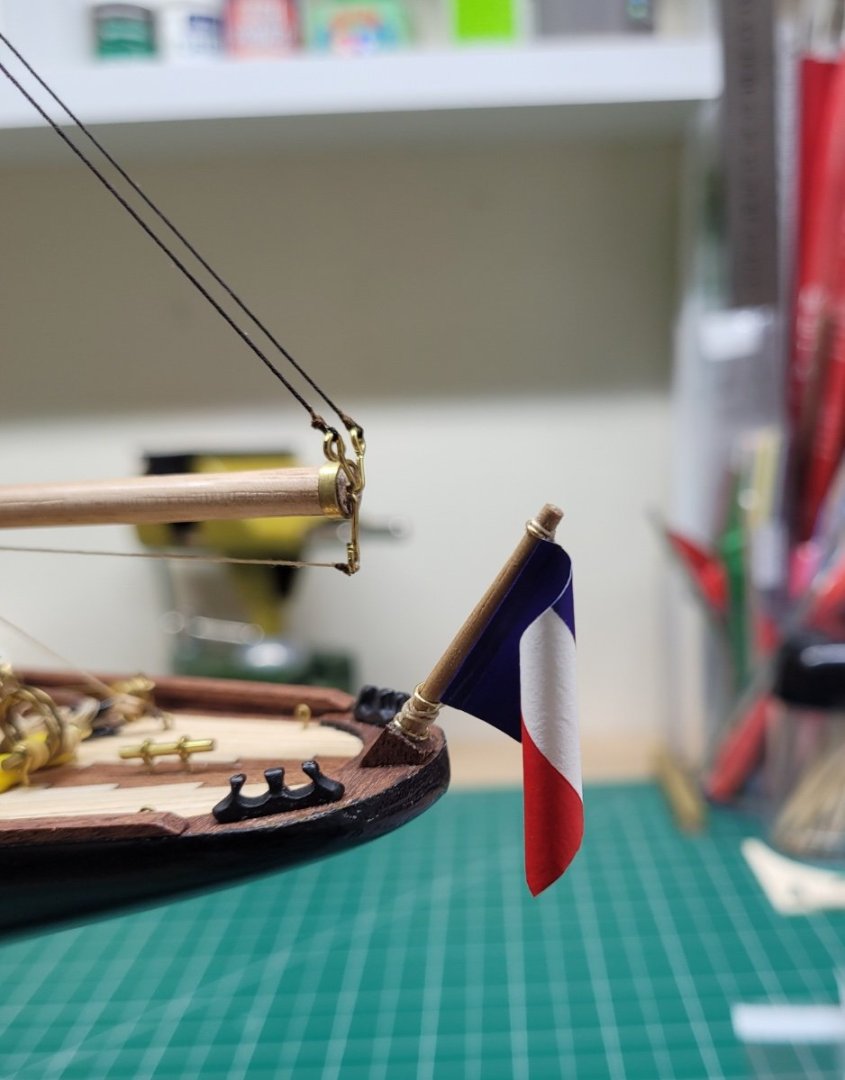
The first step in making the ensign was preparing the modelspan. I cut a section of the material and stretched it over a frame made from an old box and then applied a solution of watered down PVA glue across the material to strengthen and stiffen the paper slightly. Once that had dried I then applied three coats of Vallejo white paint over a large area of the paper. Once that had dried the paper was then turned over and three coast of white were applied to the second side of the modelspan. I have found to my cost before that making just one flag isn't a good idea if re-dos are required, and so my plan this time was to apply the paint in such a way that I would be left with multiple versions of the ensign. I had thought that the French ensign was simply three equal sized sections of red, white and blue but it turns out that isn't the case - in fact the proportions are blue 30%, white 33% and red 37%. Apparently this helps make each section look equal in size when the ensign is fluttering in the wind - you learn something new all the time! So having painted a large part of the background white I then marked off two white sections with some 10mm tamiya tape - these would be the white central portion of the ensign. I then applied three coats of Vallejo red and blue paint to the modelspan going well past the ends of where the ensign would finish so that it could then easily be cut to size. This was then repeated on the second side of the modelspan. I had thought French Blue may have been the correct shade but it looked very bright to my eye so in the end I opted for Imperial Blue. I ended up with enough painted modelspan to make about ten ensigns in all! I cut the modelspan in half through the central blue section and trimmed one part down to the size I wanted my ensign to be - 30mm x 20mm. The staff for the ensign was made from a length of 4mm oak. This was firstly reduced to 3mm diameter on the lathe before being tapered at one end to 2mm diameter. Three brass split rings were cut to size and glued around the staff as shown in the kit instructions. A loop was made in a piece of Syren tan 0.2mm line to fit around the top of the ensign staff and this length of line was then glued in a fold of the blue portion of the ensign. All that was then required was to slip the loop over the top of the ensign staff and tie it off towards the bottom before trimming away the excess line. I then spent a little time rolling and coaxing the ensign into a shape that looked a little like it was just hanging in the still air - I didn't think it would look right to have it flying proudly in the wind on a yacht without sails! The ensign staff was then glued into place on the stern of the model. This pretty much wraps up all of the construction of the model but there is still a little more work to do in touching up paintwork and checking the rigging etc before I can call it finished. I also have to work on the base for the display case and prepare that for mounting the model.


- 122 replies
-
- 6
-
-
-
- Artesania Latina
- Pen Duick
- (and 1 more)
-
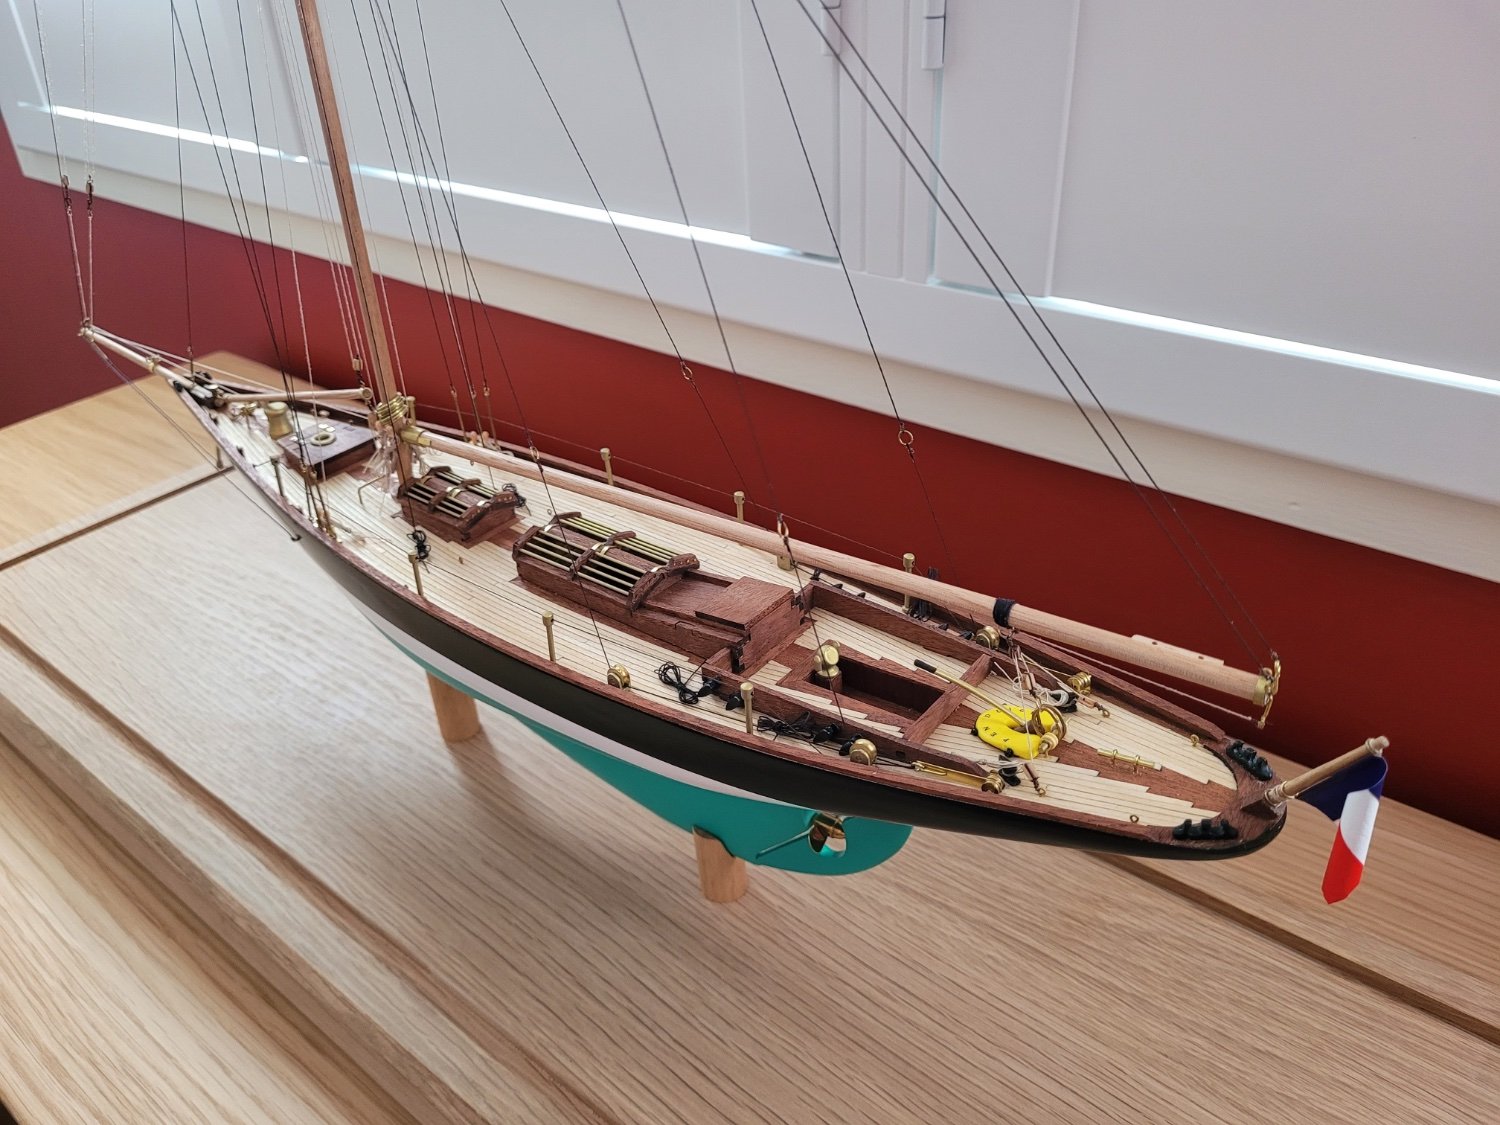
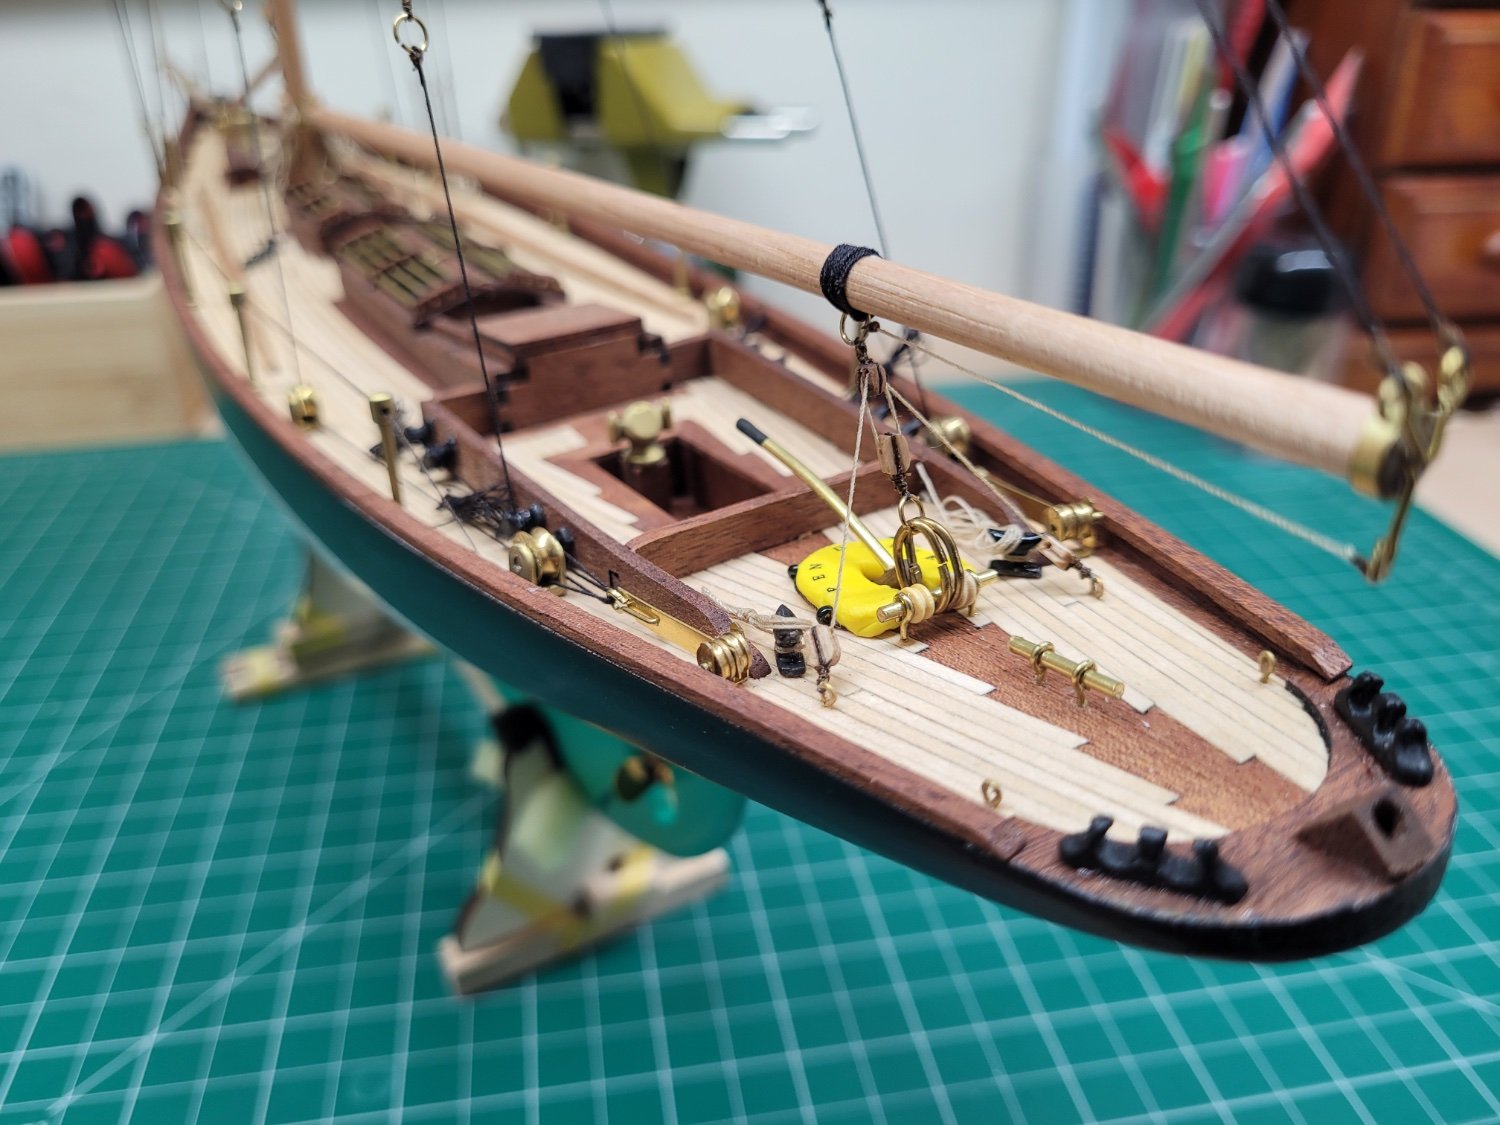
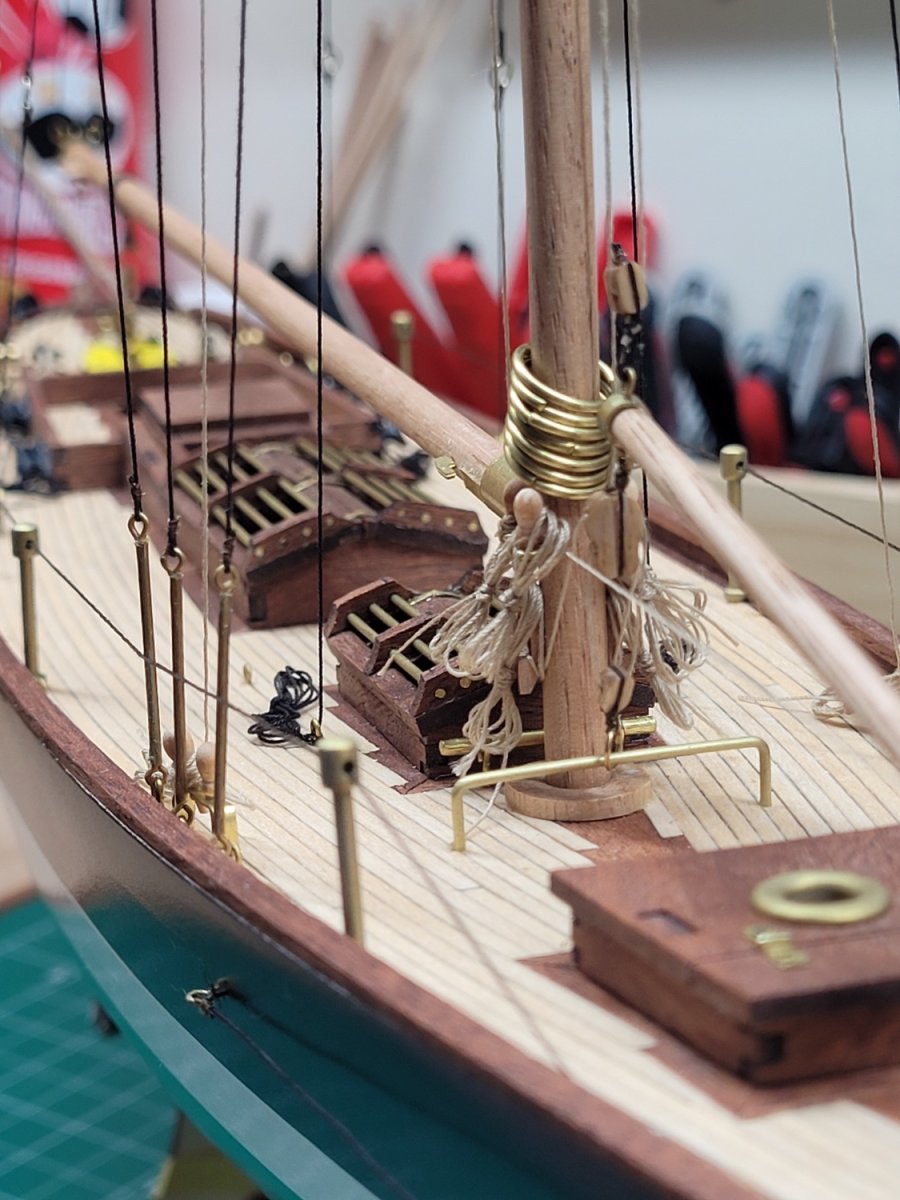
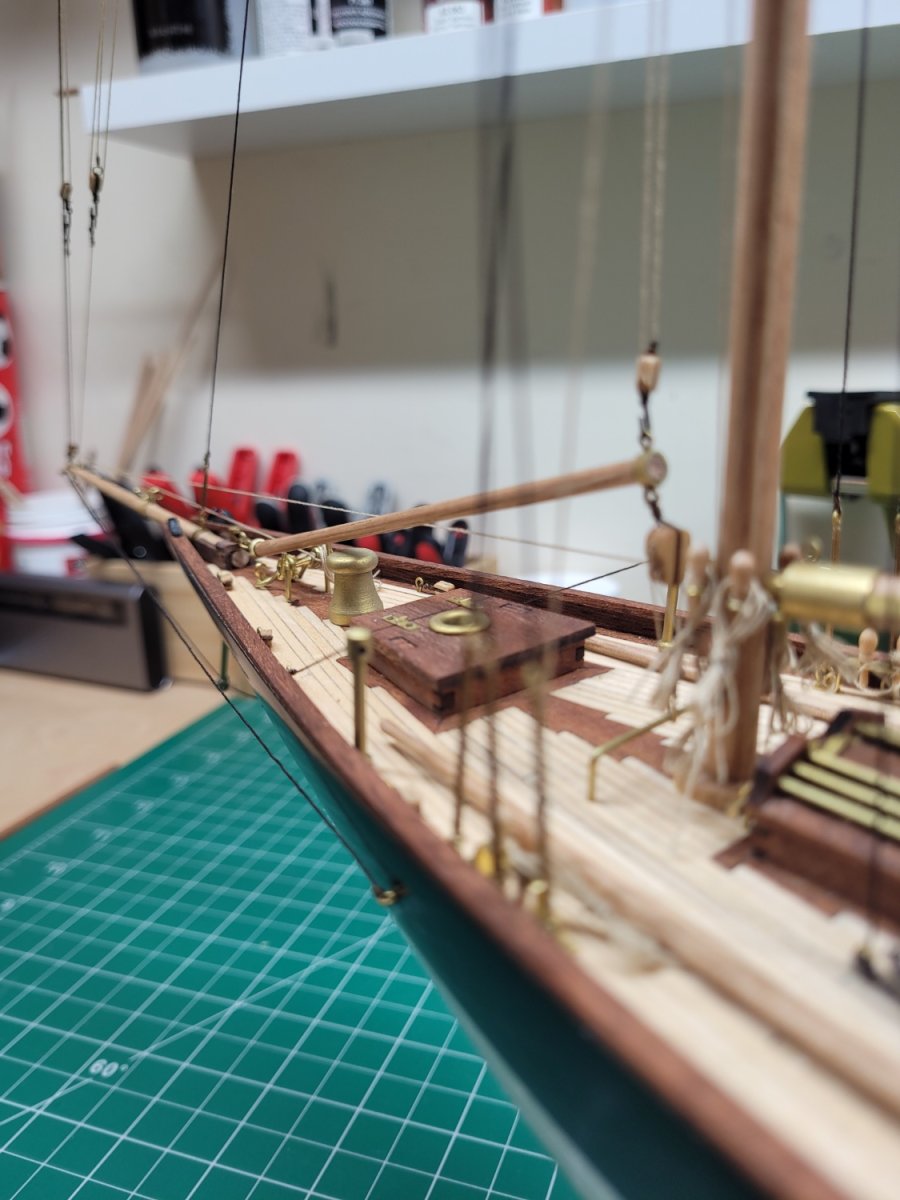
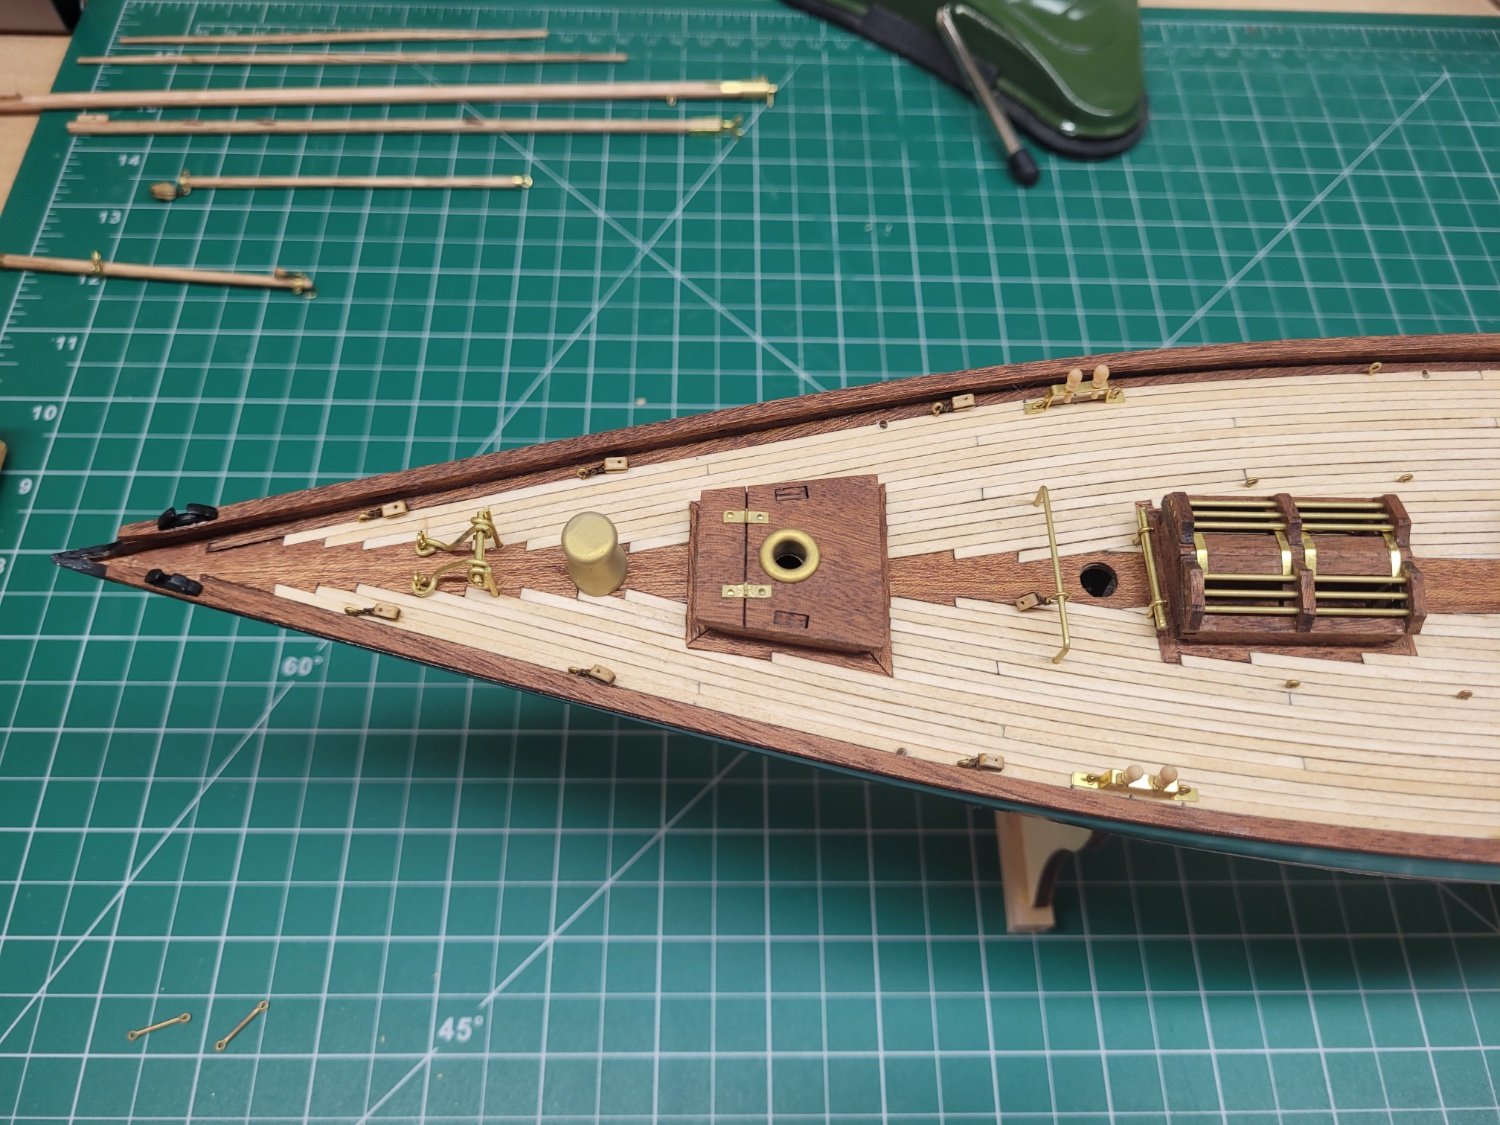
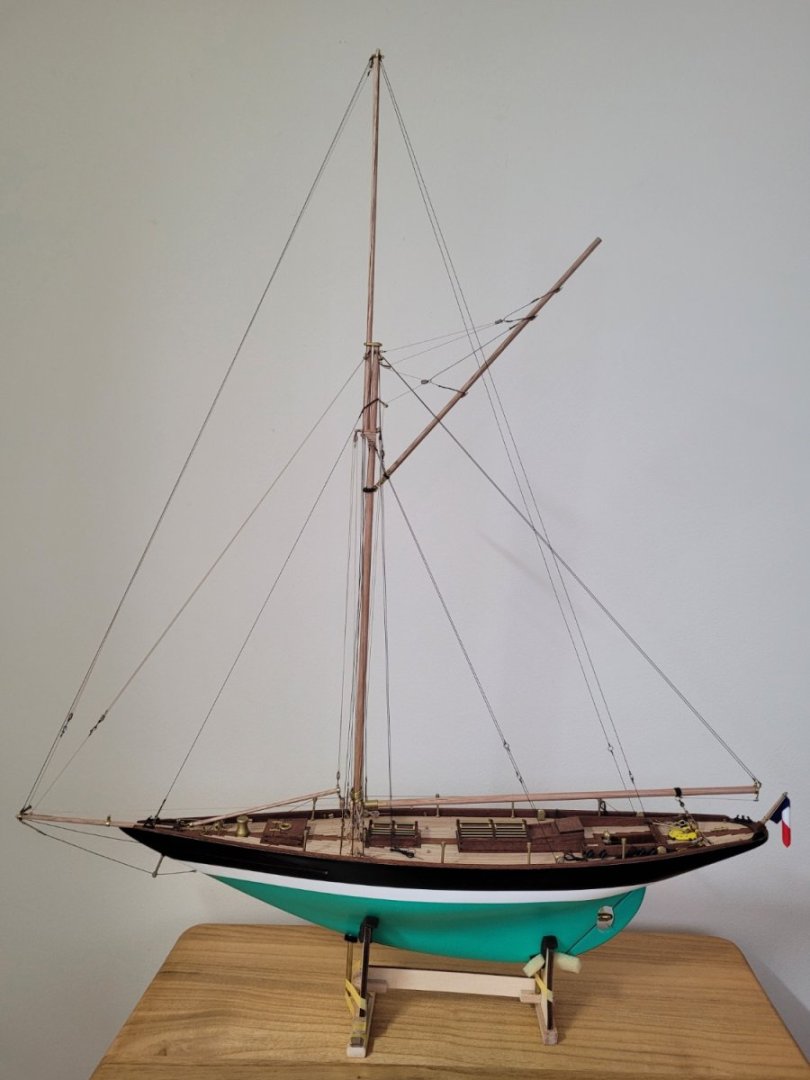
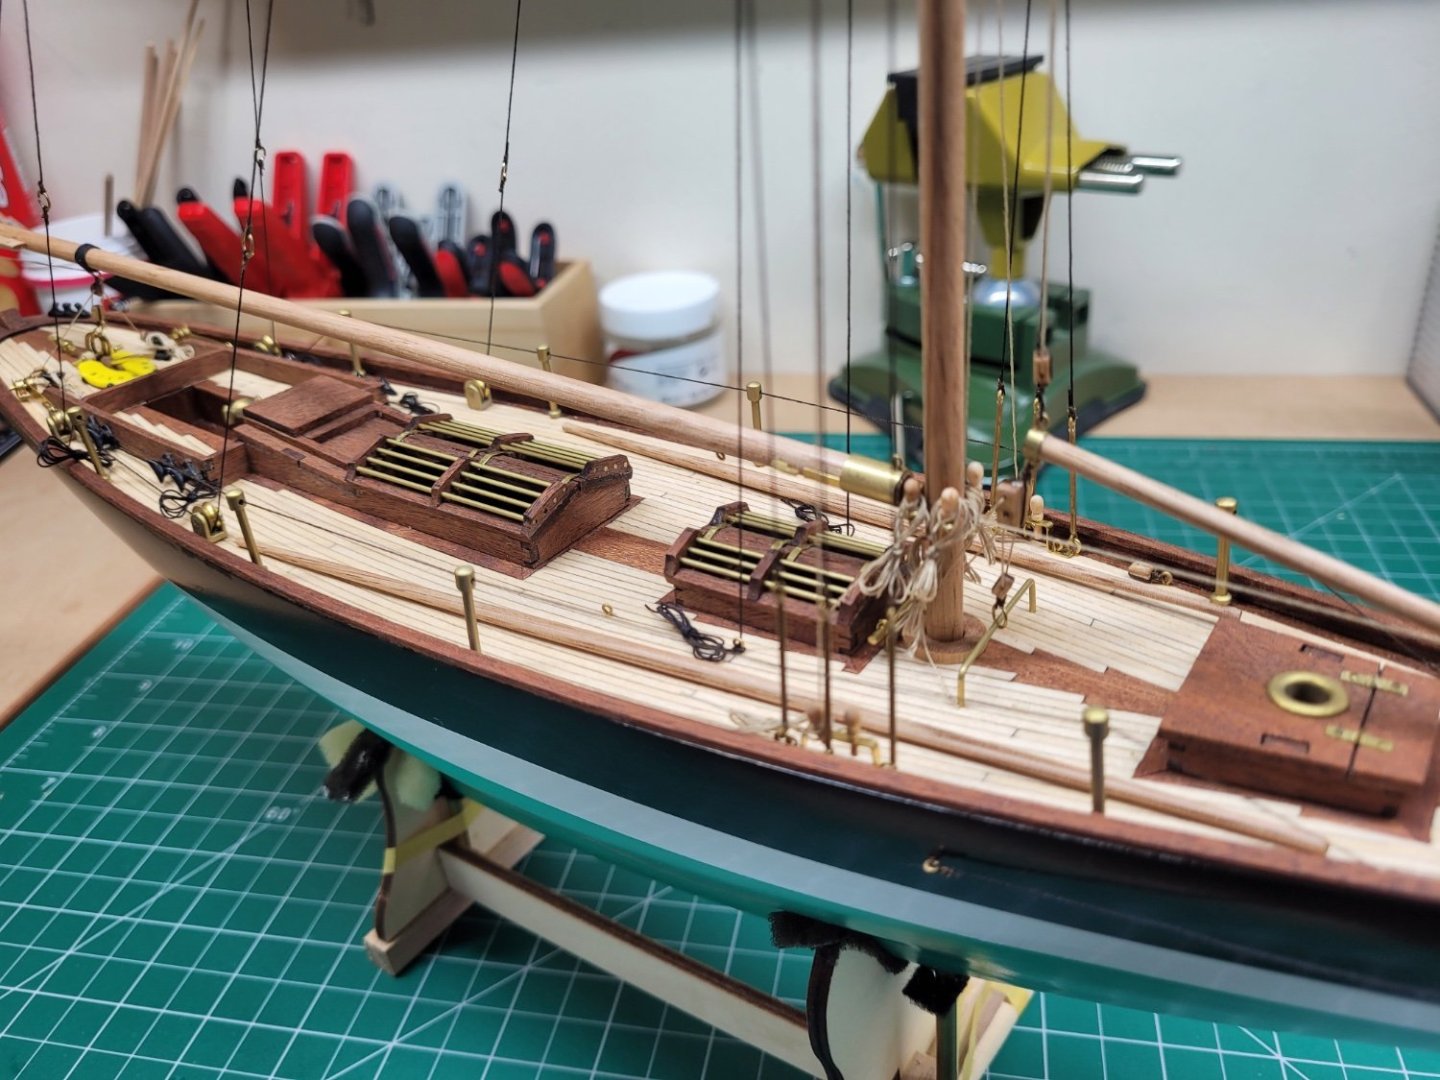
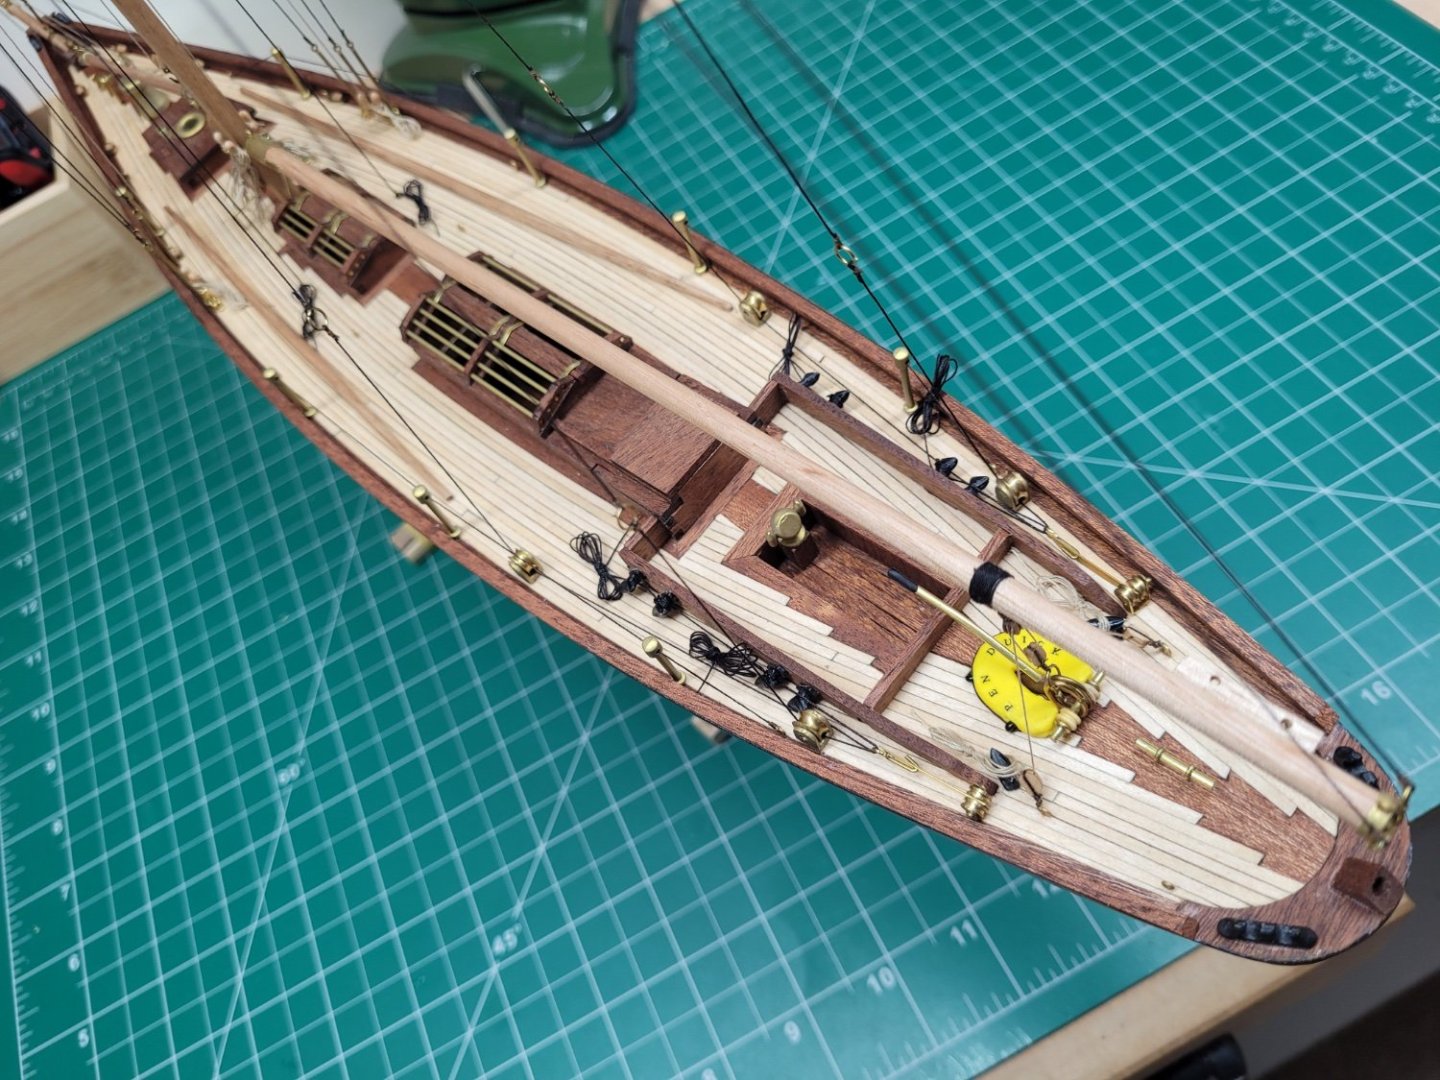
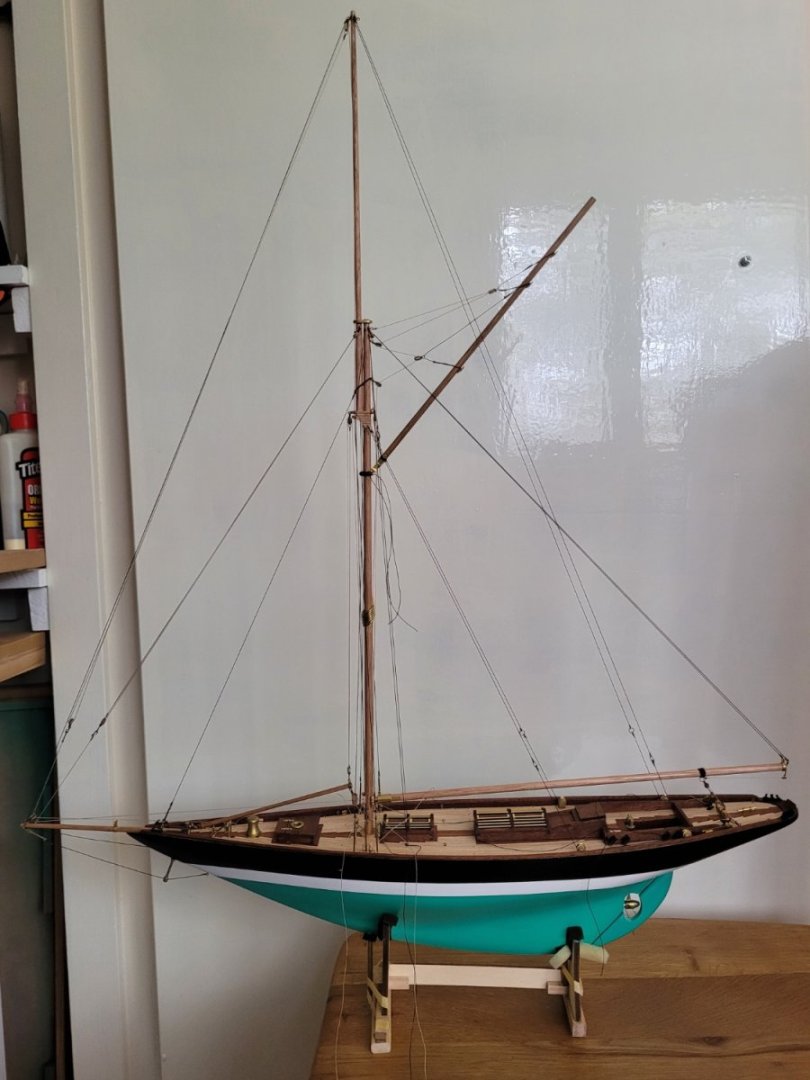
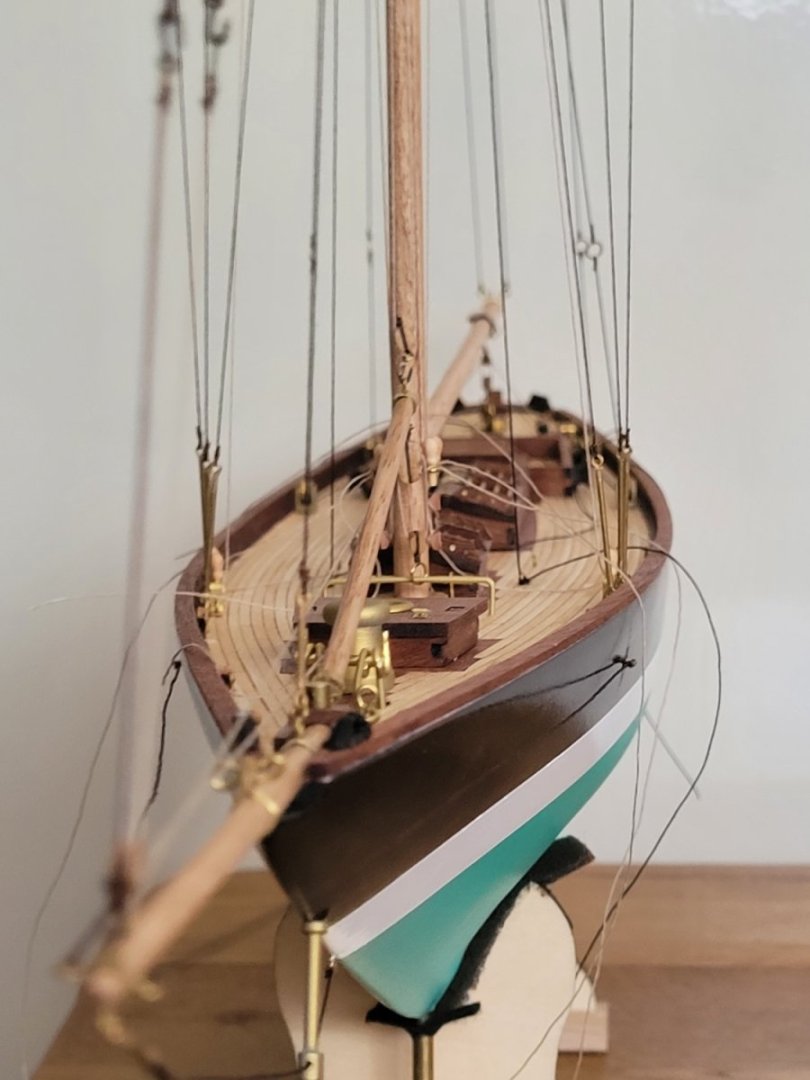
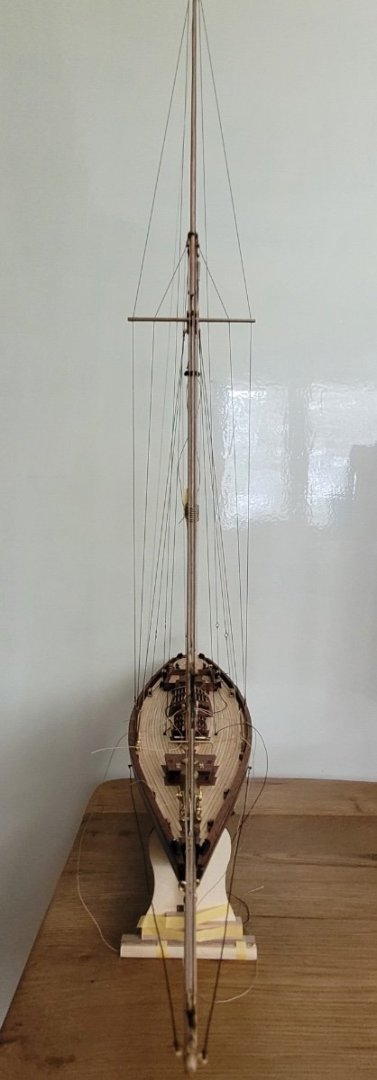
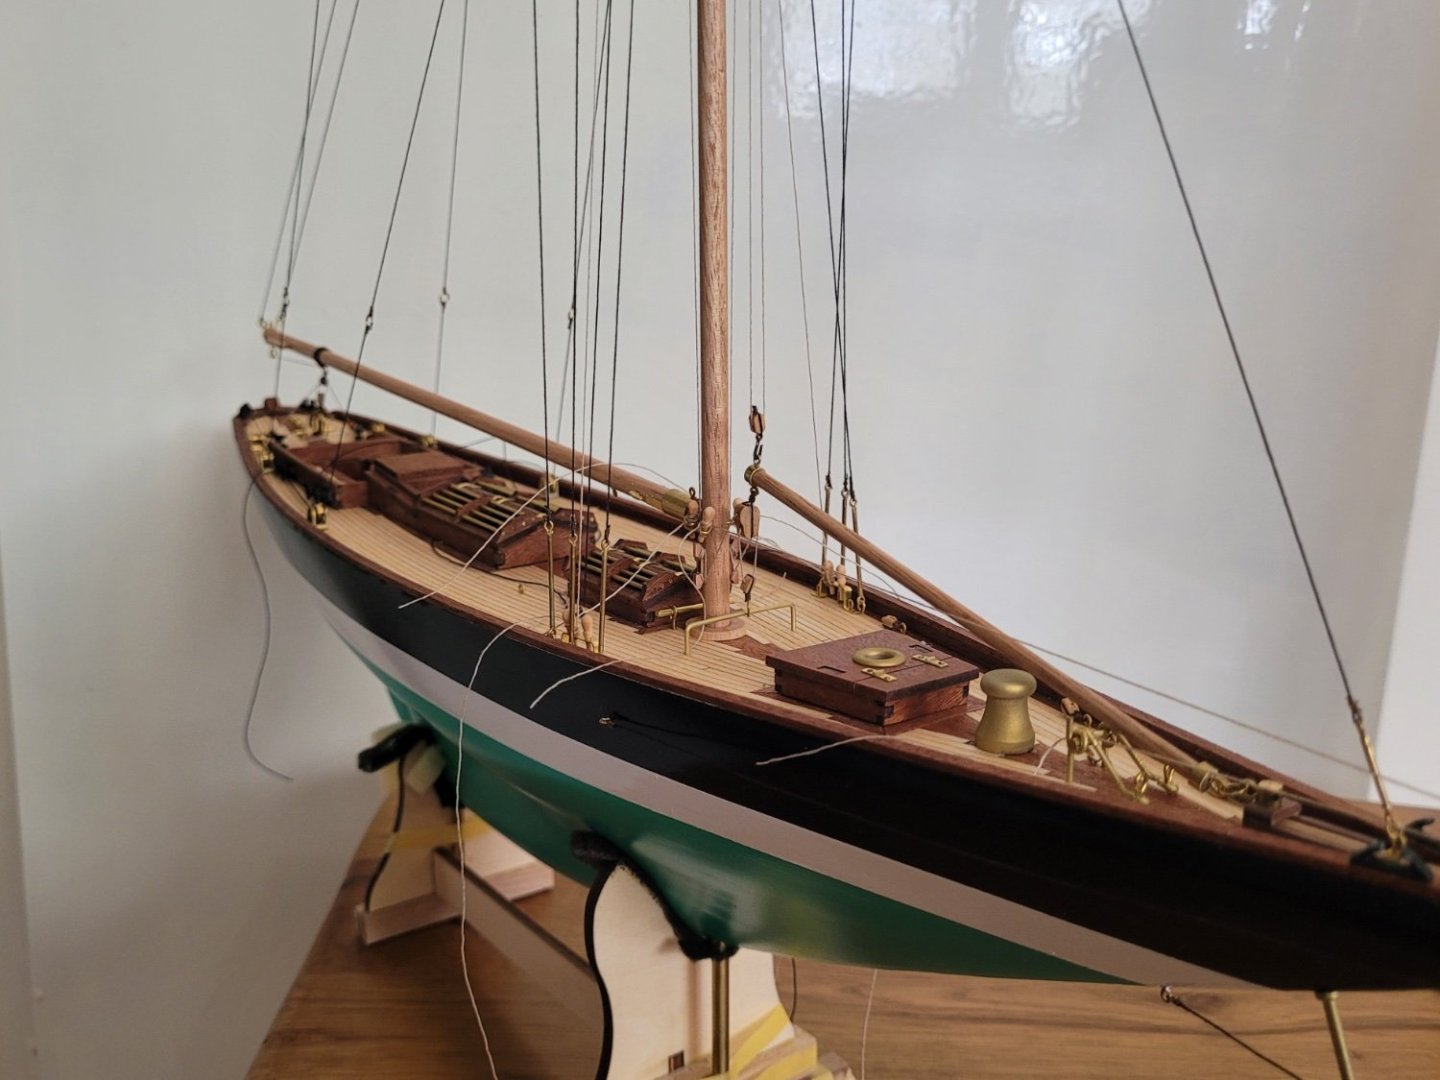
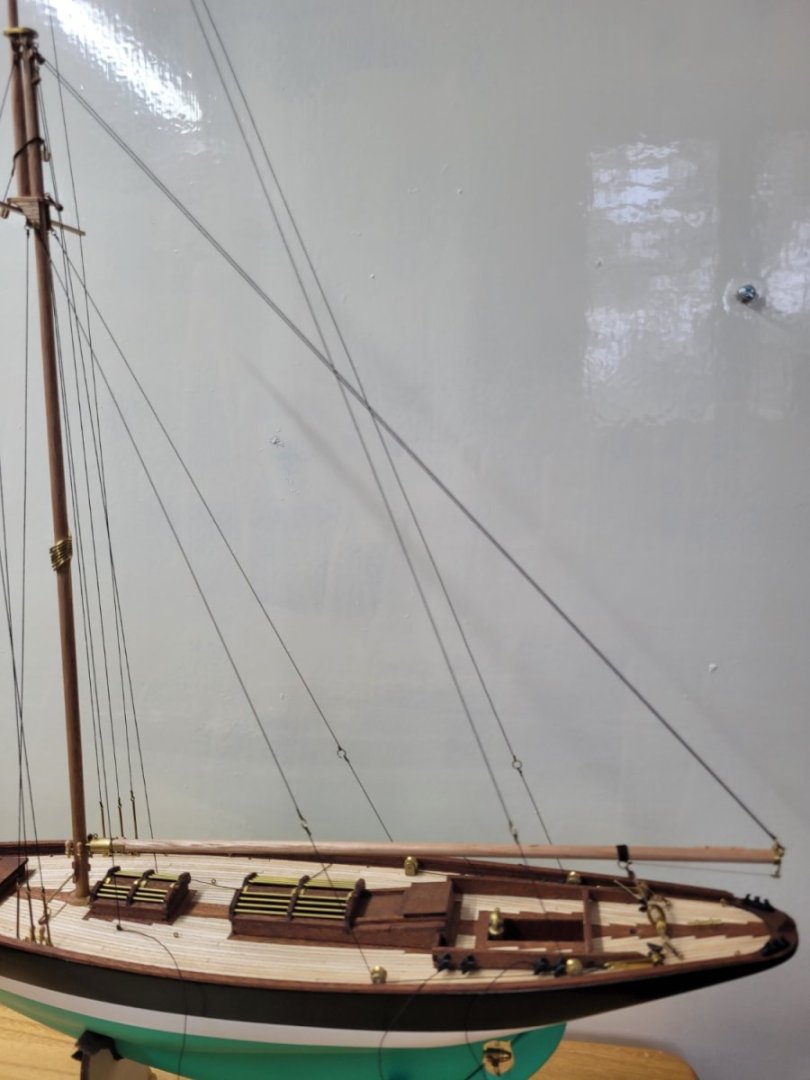
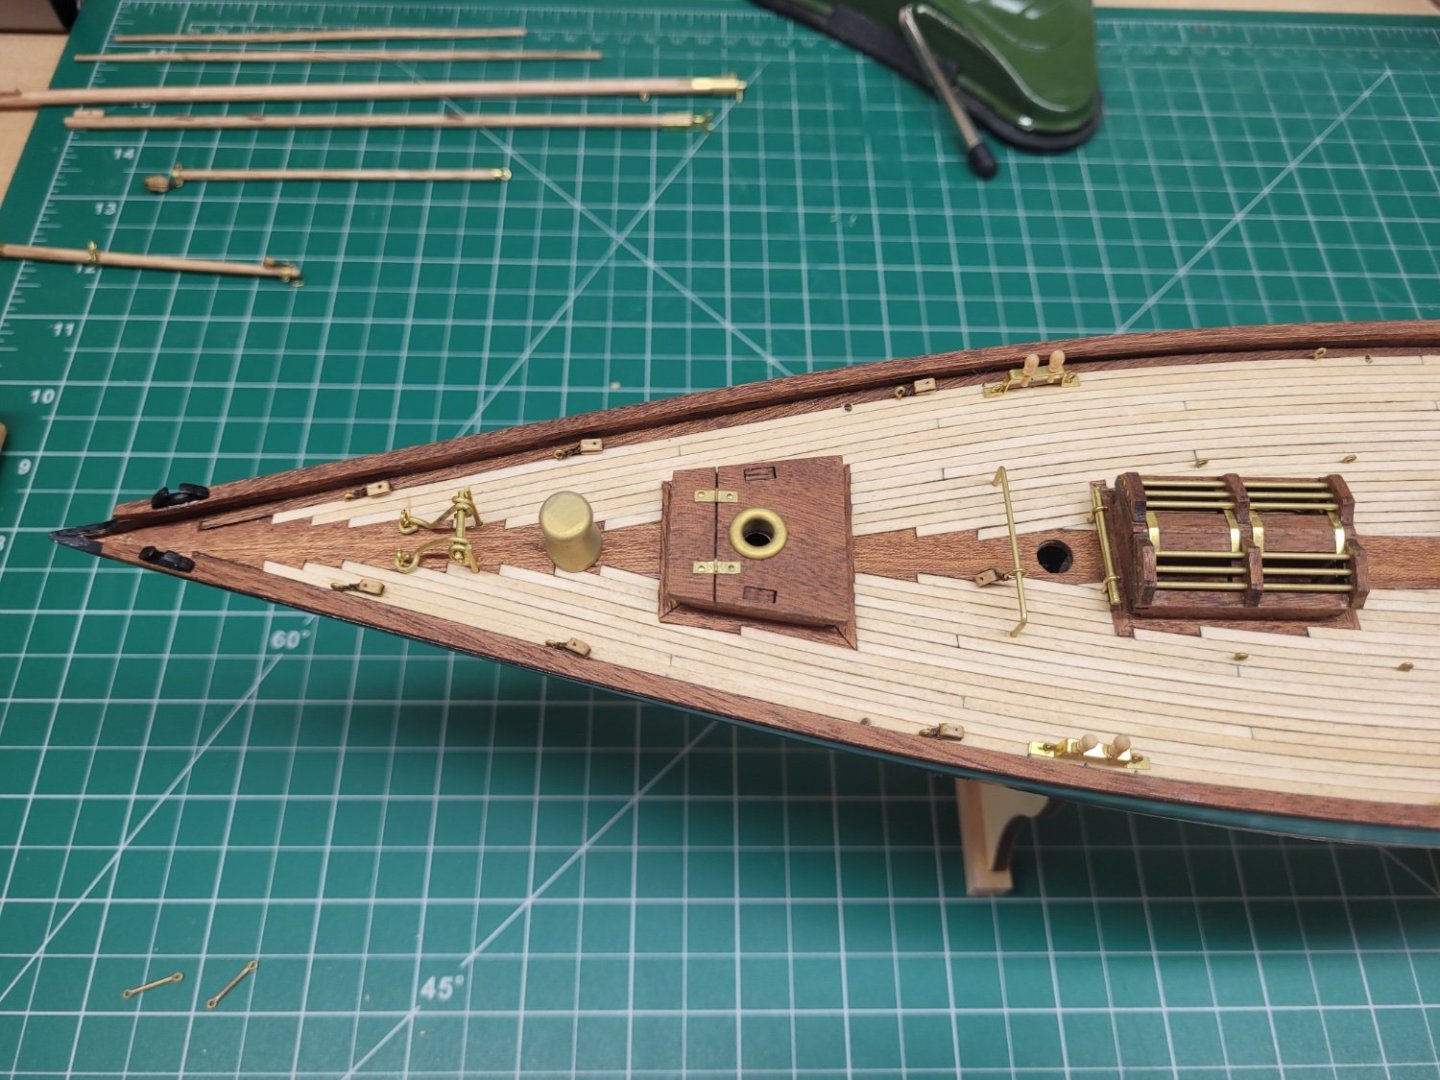
I decided that I couldn't really rig the sprit and the yard on my model without including sails as my understanding of the kit instructions seemed to indicate that these two spars are basically attached directly to the gaff topsail. I therefore decided that these two spars would be stored on deck, which was nice and easy! The next step in the build was a general tiding up of the rigging. I firstly made sure that all the rigging lines were secure and the knots varnished and then I trimmed away any excess rigging line. I then set about making rope coils in both the brown and tan Syren rope (6 brown and 11 tan). To do this I used a simple jig or four pieces of thin brass rod mounted into a piece of spare wood. These four brass rods then acted as a guide around which a length of line could be wound in a figure 8 fashion before being tied off with a couple of half hitches. One end of the line was then trimmed next to the knot whilst the other end was left about an inch or so in length. This gave me a coil of line with one end left hanging from the coil. These coils could then be hung on belaying pins or glued to the deck where the standing rigging was tied off. I then moved onto the installation of the side rail stanchions. There are four of these fitted each side of the deck and I previously painted these in the brass Vallejo paint and predrilled the holes for them before the deck had become cluttered. It was therefore an easy task to drop these stanchions into place. The side rail (or rope) itself was made from 0.20mm brown Syren rope and was secured at each end to an eyebolt inserted into the deck. I also released the mast hoops from the piece of tape that had been holding them out of way on the mast. Finally I installed the tiller and my latest (and last attempt) at the lifebelt. As mentioned previously this was made from some yellow plasticine and I had added four small parrel beads on some of the 0.20mm Syren brown rope around the edge. I also cut out and attached my very small decals showing the name of the yacht 😀 I am getting very near the end of the build now and really all that is left to do as far as the model itself s concerning is to make the pennant mast and install the ensign. A paper French ensign is included with the kit but I will try making my own from some Modelspan as this should hopefully make it look a lot more realistic. Here are a few more images of the model as she stands at the moment.


- 122 replies
-
- 7
-
-
-
- Artesania Latina
- Pen Duick
- (and 1 more)
-
I think that is a great summary of my approach here. I am sure Artesania Latina have greatly dumbed down the complexities of the rigging, but then they don't really provide any details about what they have done!
- 122 replies
-
- 2
-
-
- Artesania Latina
- Pen Duick
- (and 1 more)
-
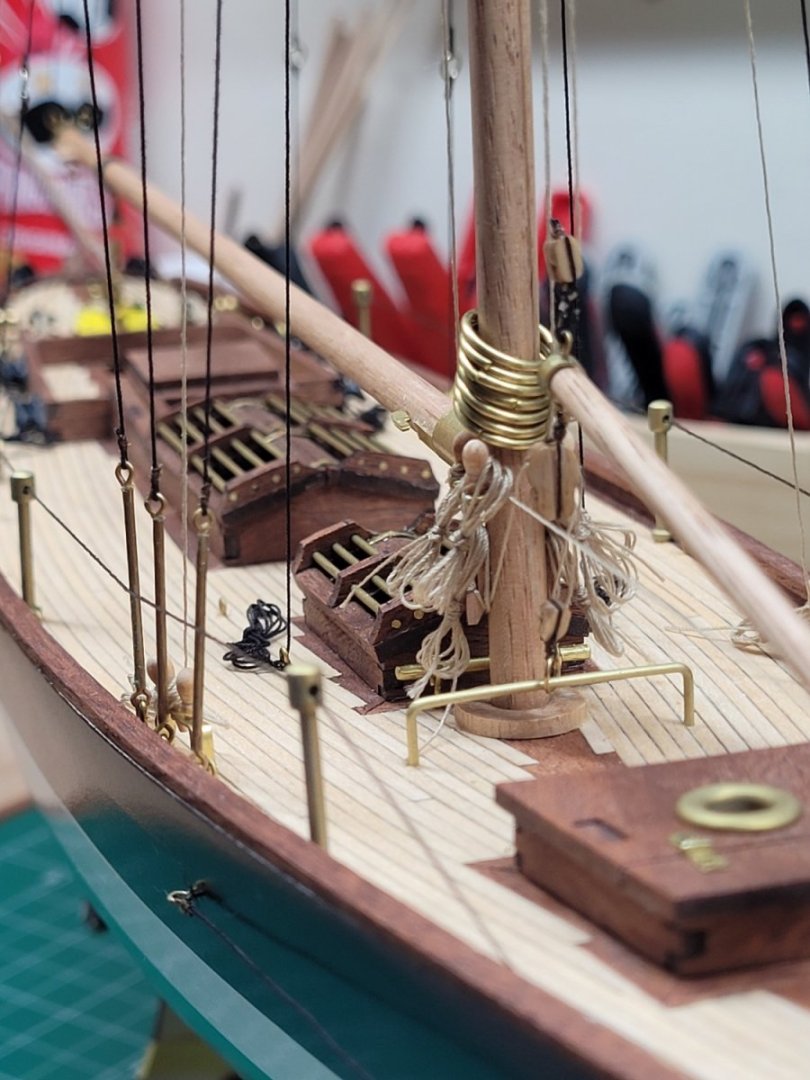
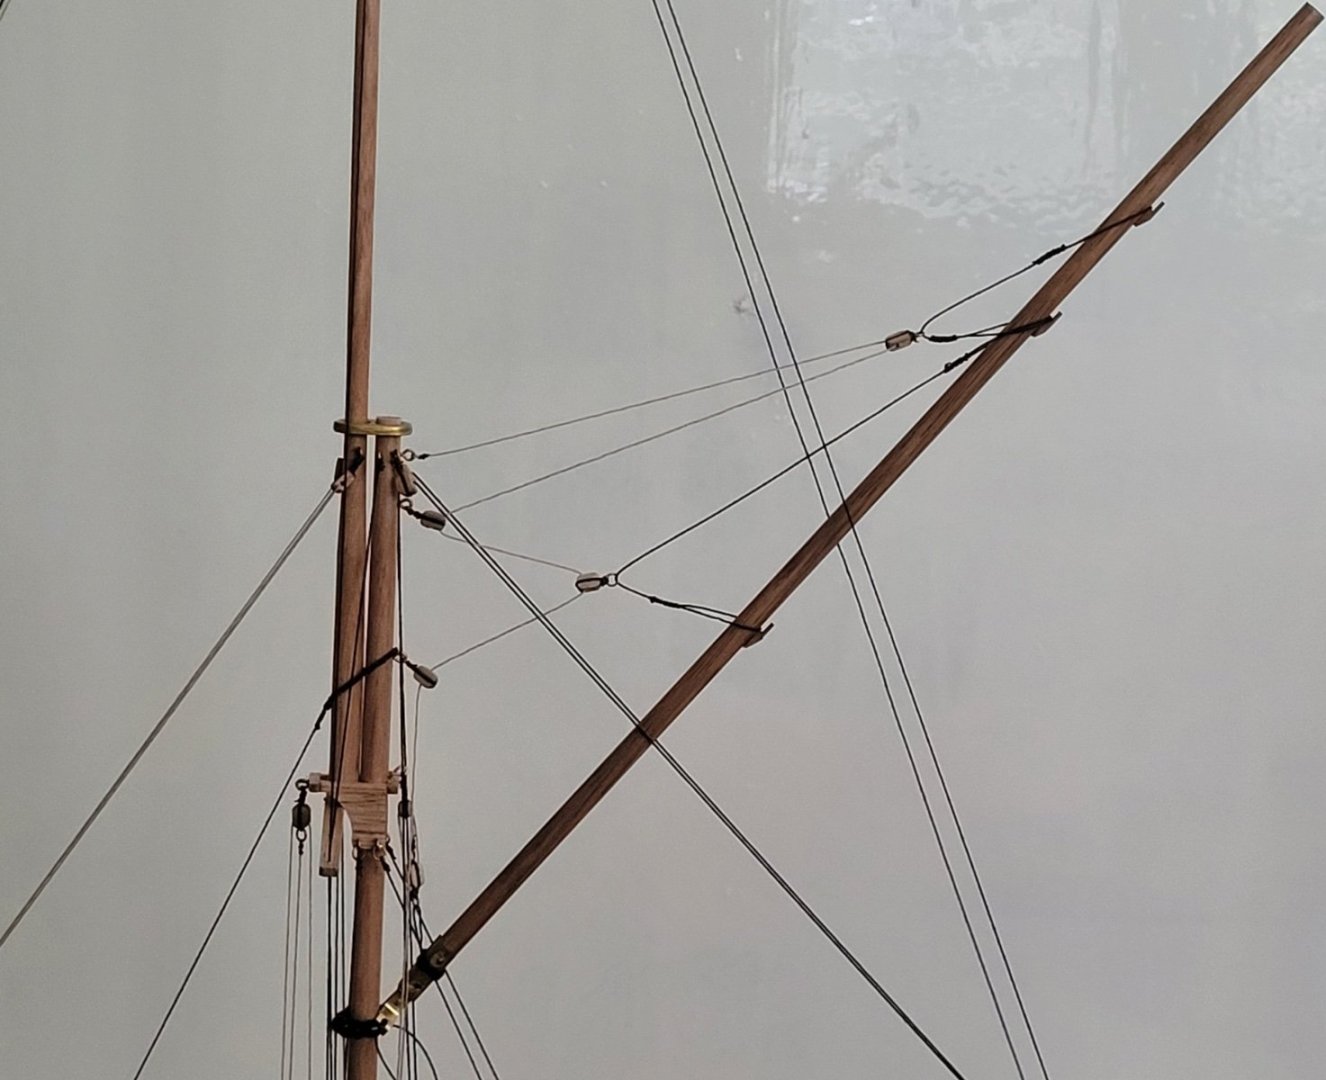
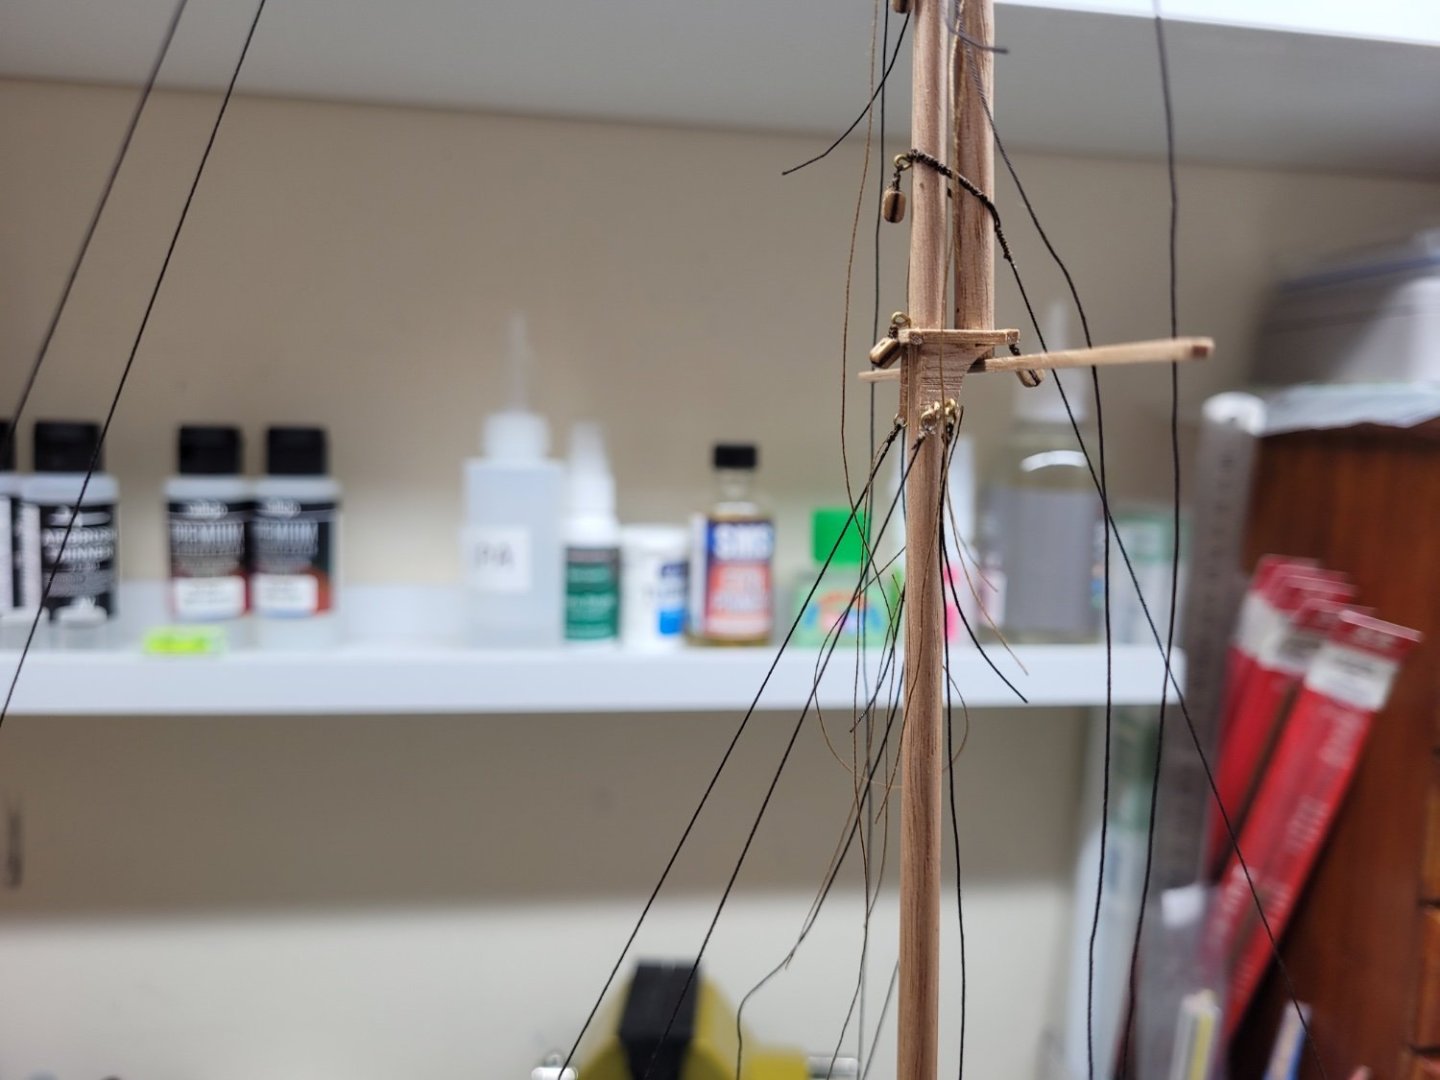
I spent the best part of a morning poring over the basic rigging plans provided with the kit trying to work out which lines I could still include without adding sails to my model. I realised that I had made a mistake with a couple of the blocks I had previously fitted on the mast as it became apparent that these were also the starting point for a couple of lines. I therefore has to re-rig two of the blocks with a small ring on the other side to which a running rigging line could be attached. As mentioned previously the plans show that some blocks are to be attached to rings sewn into the sails themselves and to get around this problem I decided to attach hooks to the end of the rigging lines, figuring that these could hook onto rings in the sail just as easily. This therefore allowed me to rig those lines and omit the sail - I simply hooked the two hooks for the top and the bottom of the sails together. It is probably far from nautically accurate but it seemed to be a sensible alternative to me. I did this for the tack and halyard for the jib and also the tack and halyard for the flying jib. The rest of the running rigging was fairly straight forward, though I did deviate again from the instructions in regard to the blocks attached to support the jaws of the gaff. The instructions show a single block attached to both sides of the jaws through which the throat halyard runs to a block on the mast. This seemed pretty complicated and my reading of John Leather's The Gaff Rig Handbook showed that there were various other ways the throat halyard was rigged to the mast - I decided to attach a length of line across the gaff jaws on which a single block was attached via a ring. The throat halyard then ran through this block and supported the gaff jaws as normal. On previous builds I have always struggled finding a good way to secure the parrels or trucks securing the gaff jaws around the mast. I had previously found it difficult to secure the line holding the parrel beads tightly enough and also have some way of making a secure knot. Previously I had simply tied one end of the line to the gaff jaw, threaded on the beads and tried to tie the other end of the line off on the other gaff jaw. This time around I decided to pass the line though the inside of both ends of the gaff jaws and then I threaded the beads onto one of the ends of the line. I then took the other loose end of the line and threaded that through the beads from the other direction and then each end of the line was then threaded from the outside of the gaff jaws through to the inside. The ends of the line were then looped around the mast and I tied the lines off together at the rear of the mast. The knot at the back of the mast is obscured by the end of the gaff and so should not be seen. I am sure this isn't necessarily the best way to do this but it is certainly a better way that my previous attempts. All the lines were tensioned and tied off and the knots were given a dab of varnish. I am pleased to have been able to complete the installation of the rigging despite the lack of help provided by the kit instructions. Luckily none of the visitors to my house have an expert knowledge of sailing, so whilst my solutions may not work in practice I think they will pass muster for the casual observer! 😀 The next task is to cut away the excess lengths of lines and then add the false rope coils to make things look a little more ship shape.


- 122 replies
-
- 6
-
-
-
- Artesania Latina
- Pen Duick
- (and 1 more)
-
Great work Thukydides. It is a laborious process but the end result is certainly impressive! 👍
- 562 replies
-
- 3
-
-
-
- vanguard models
- alert
- (and 2 more)
-
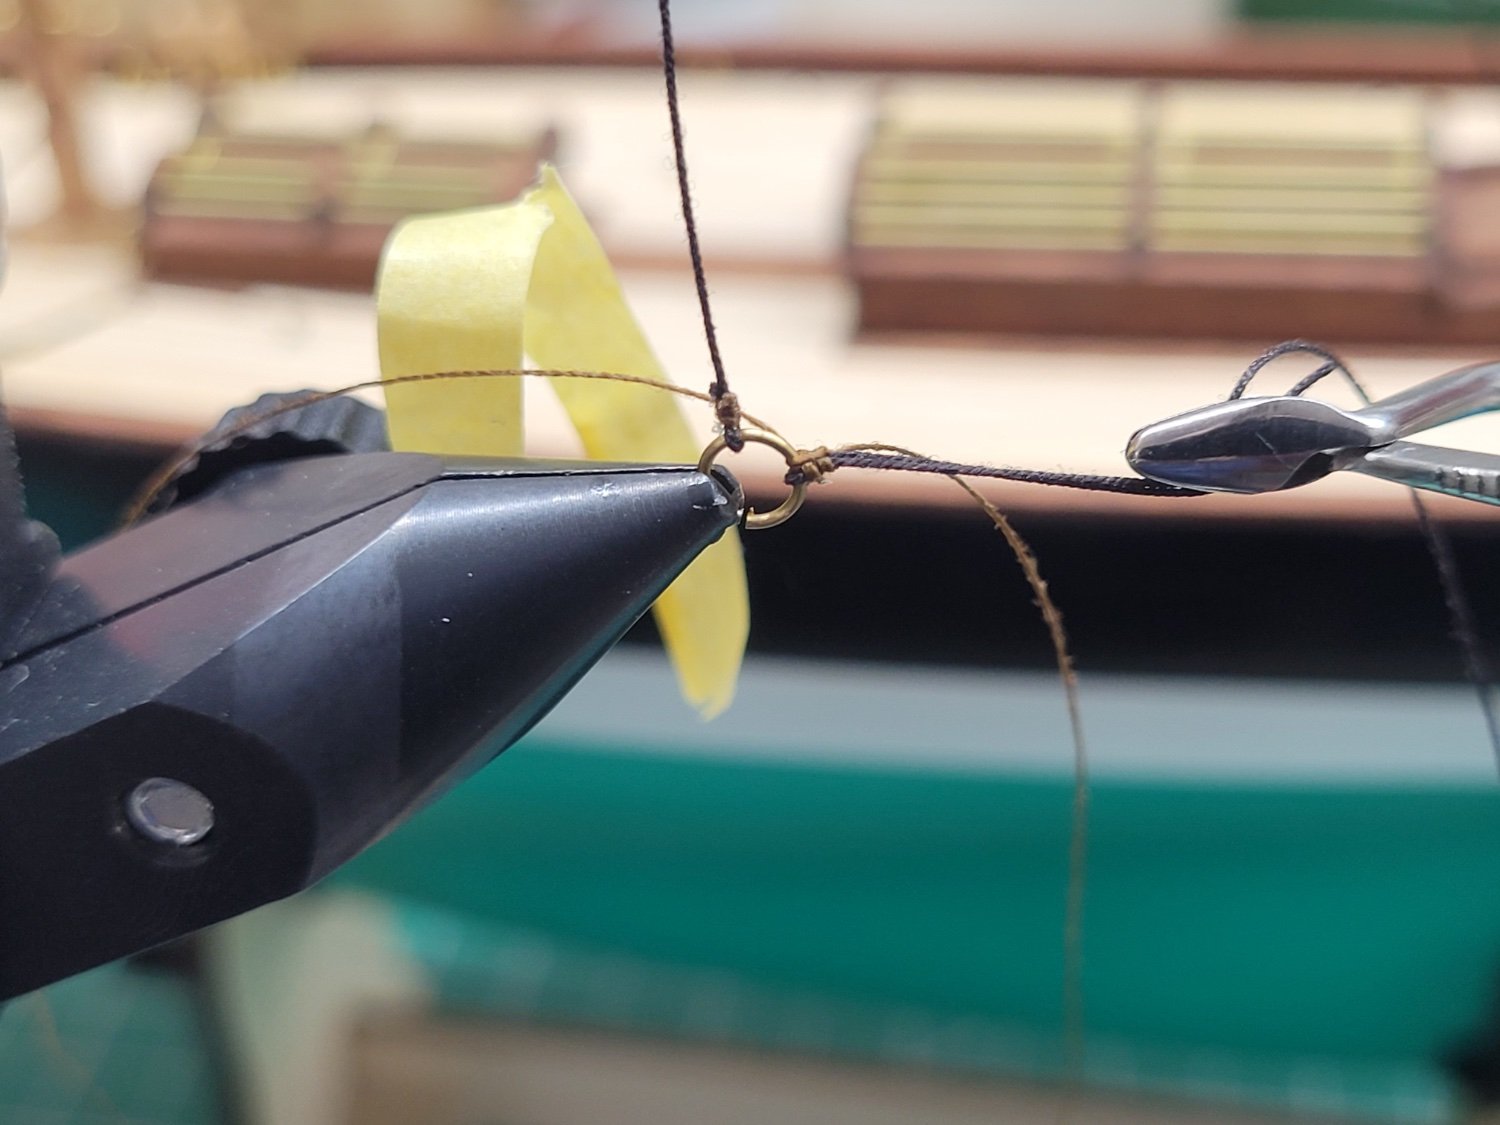
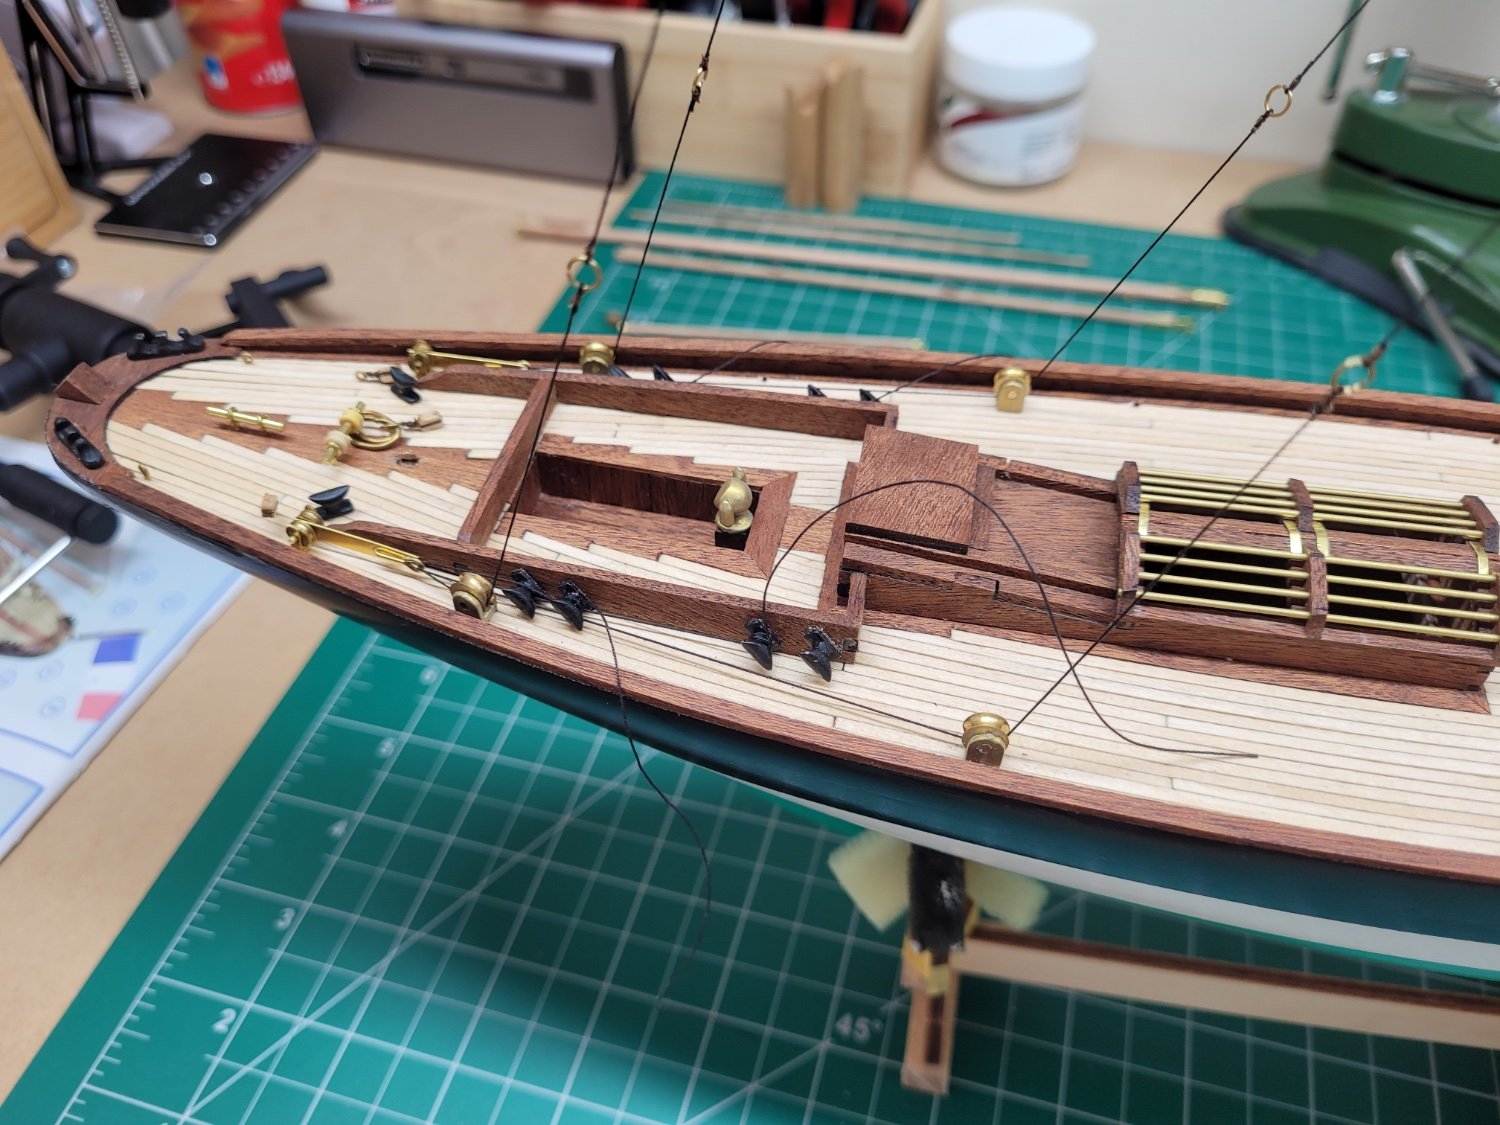
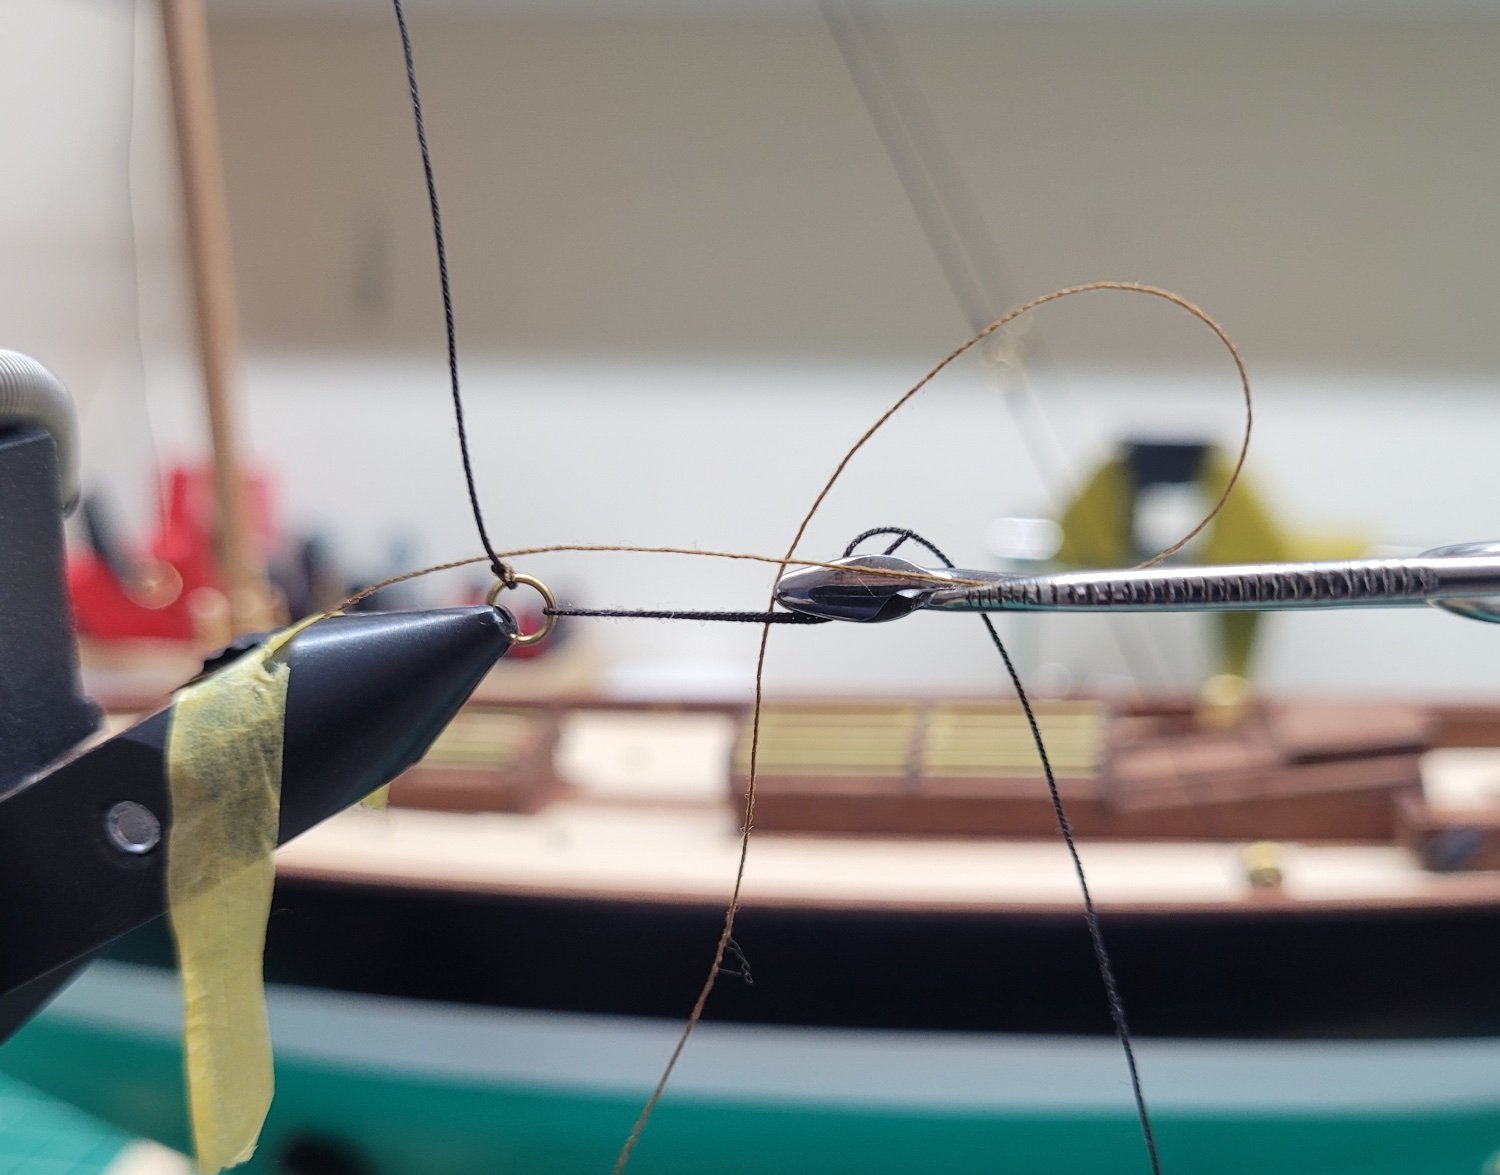
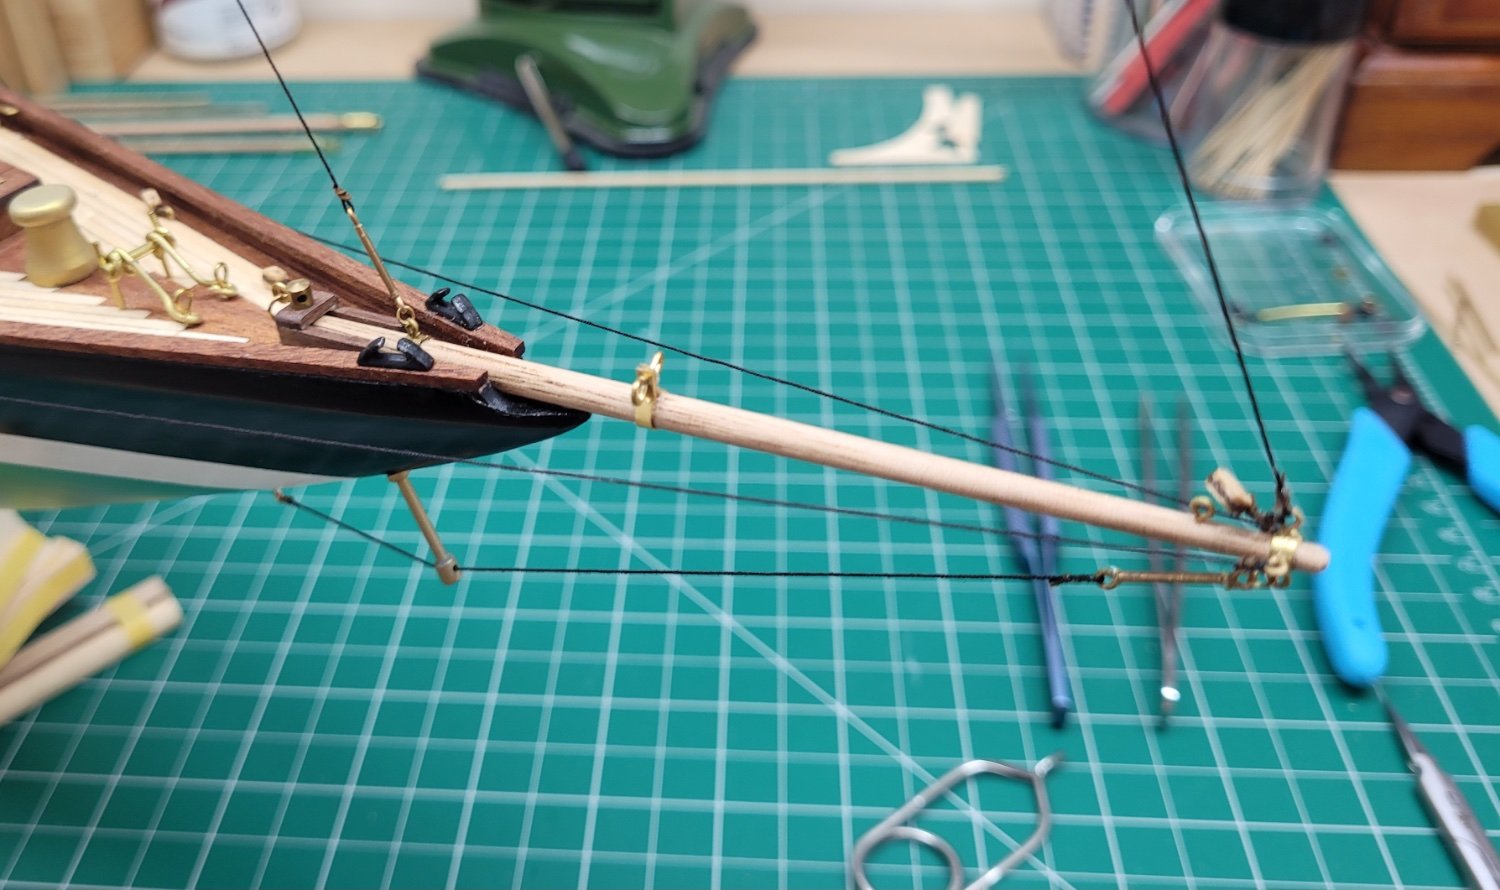
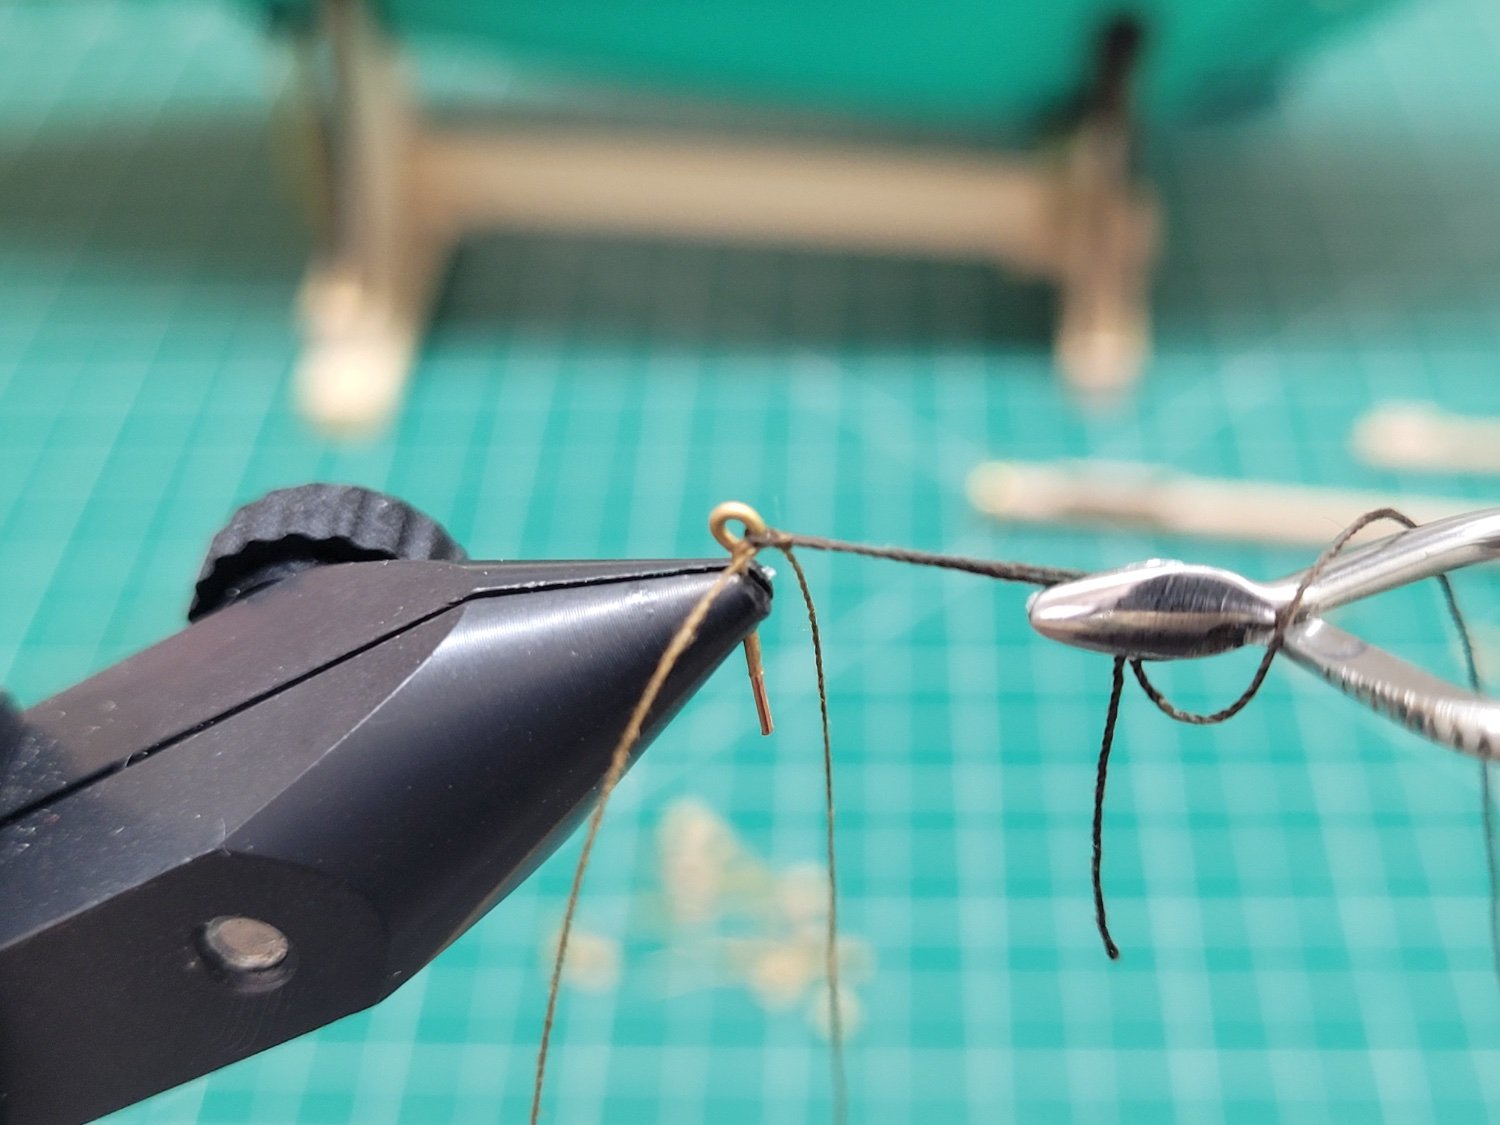
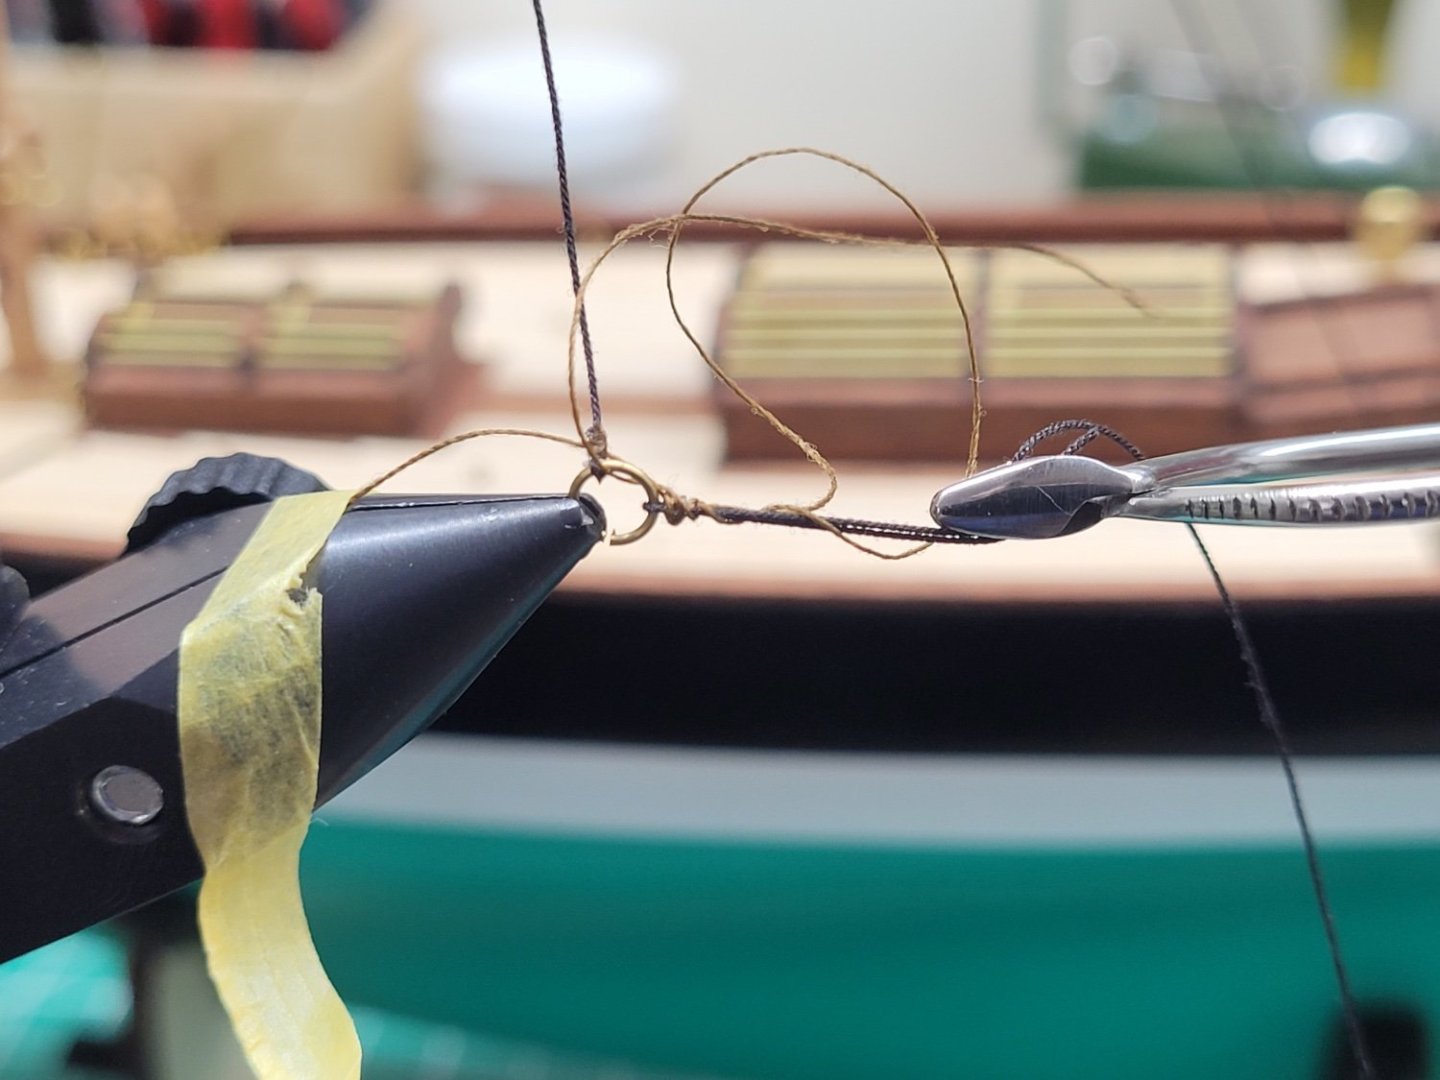
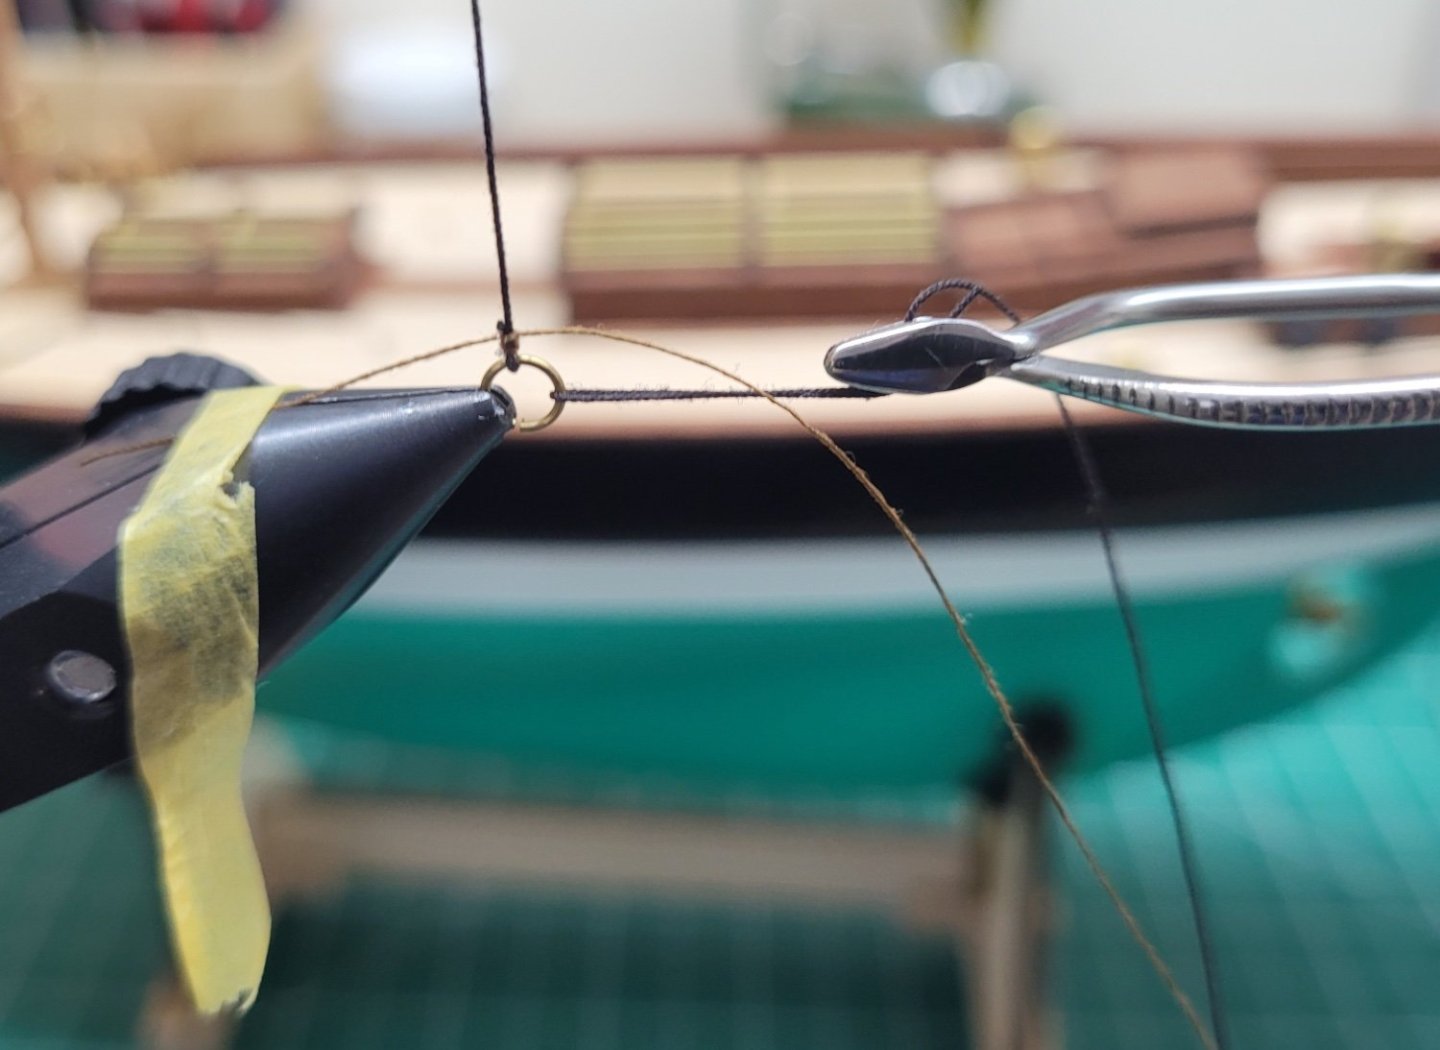
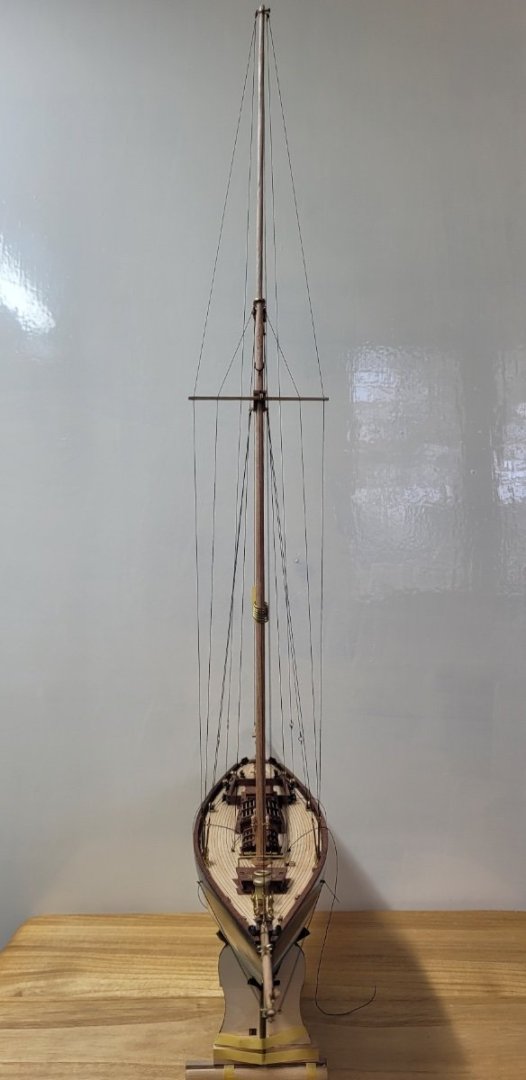
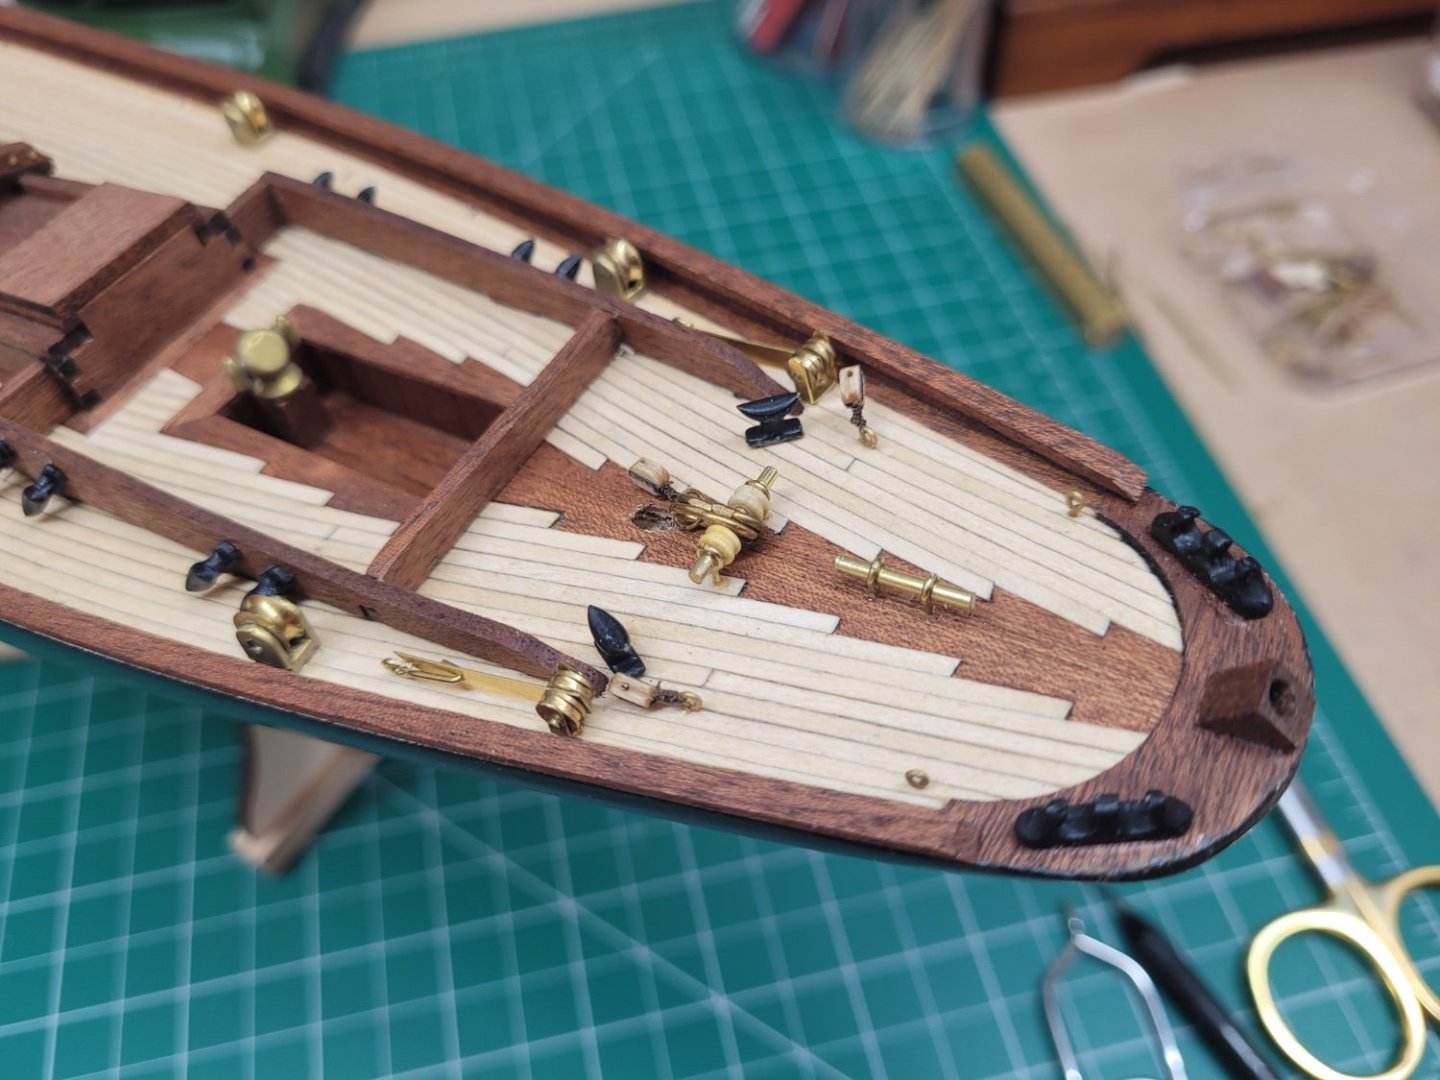
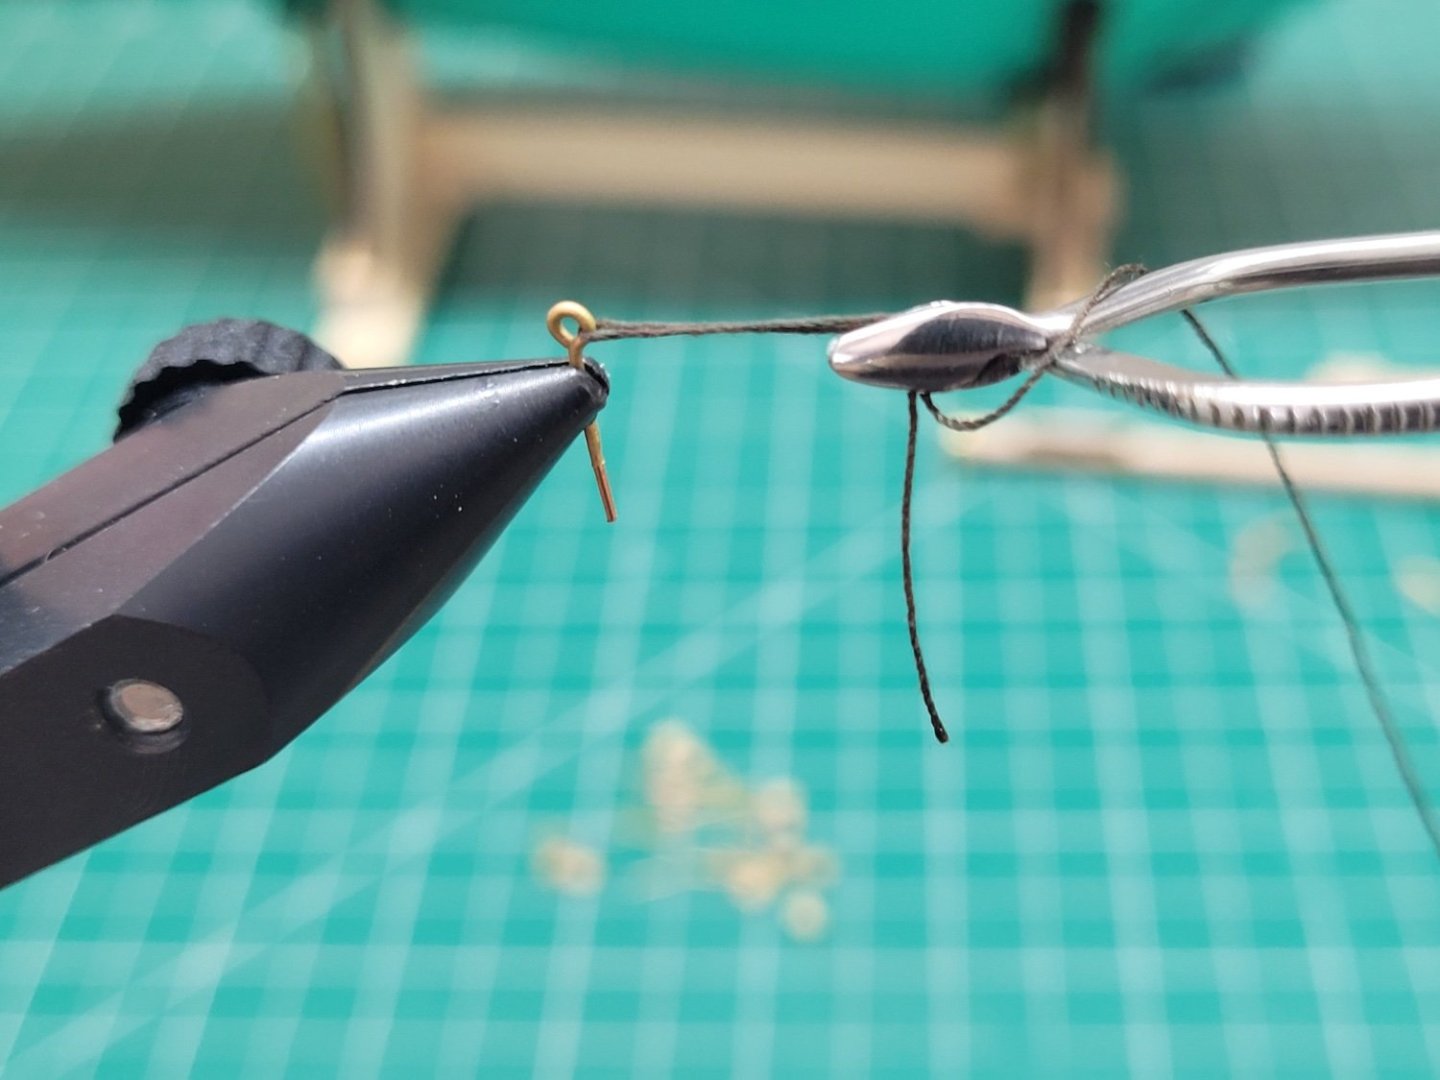
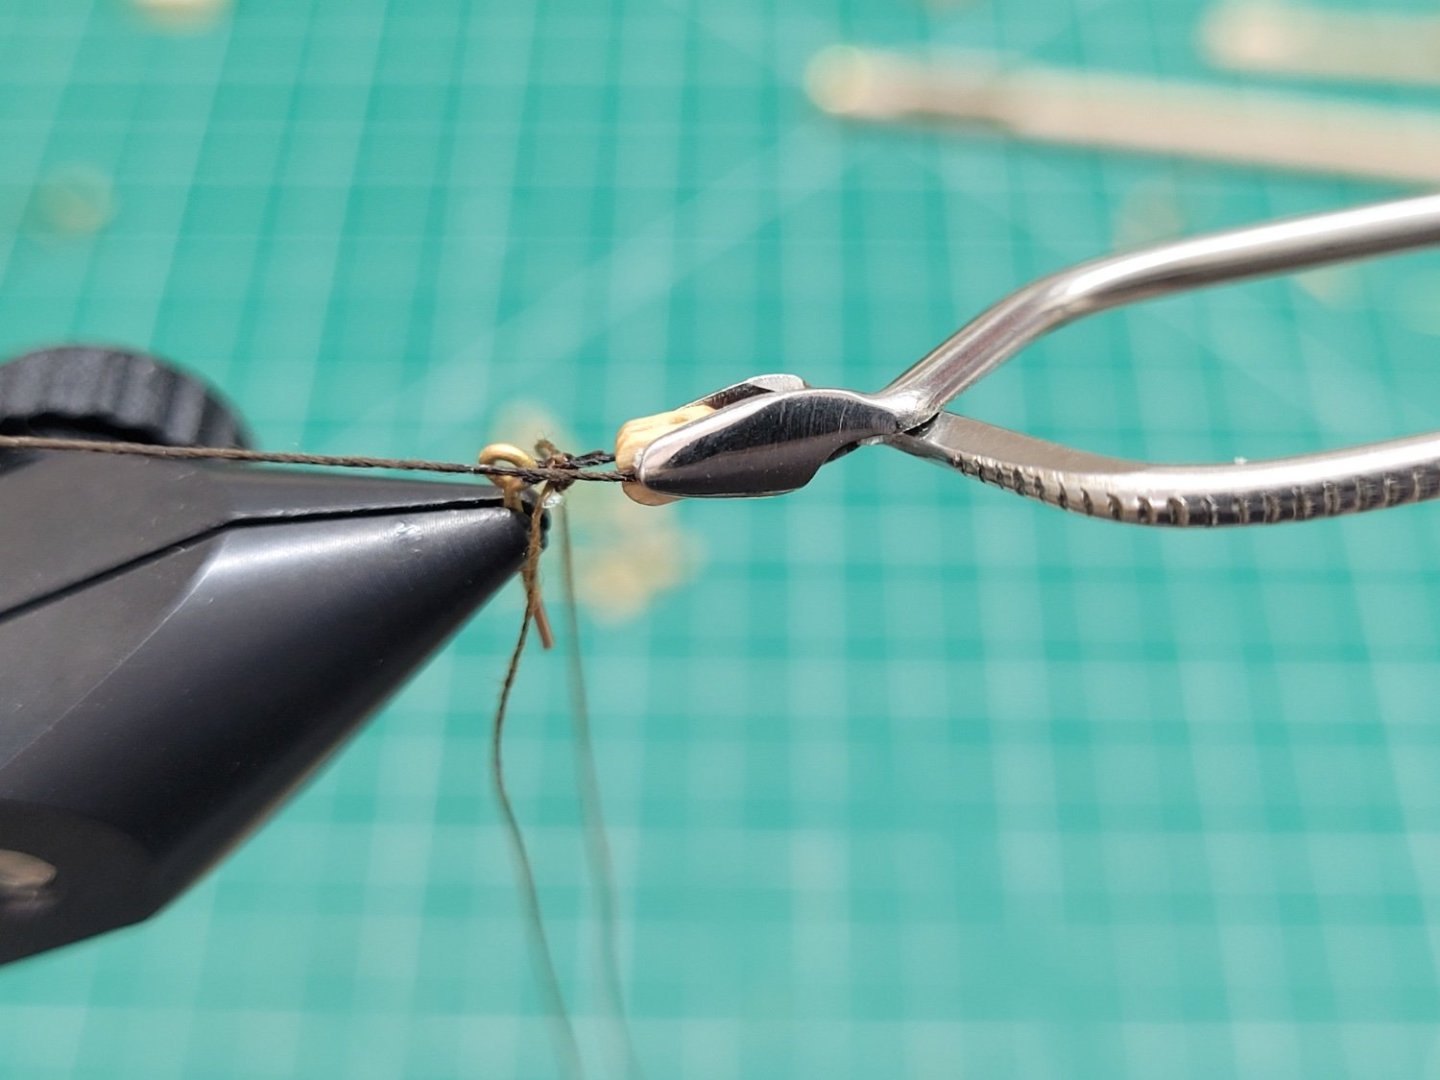
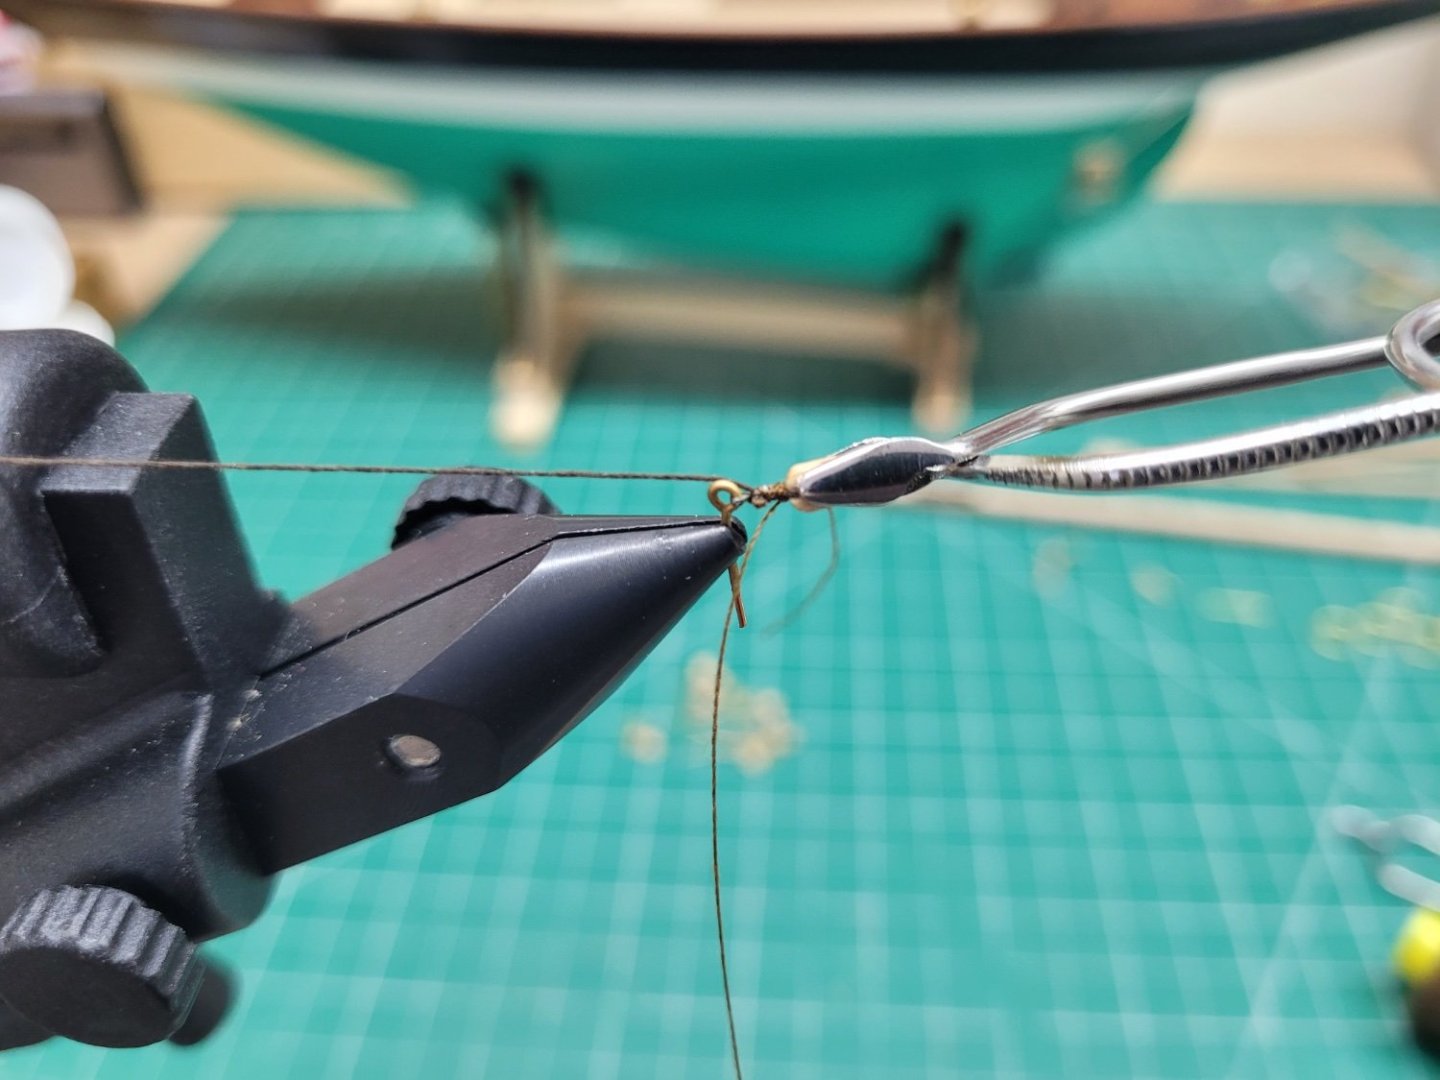
Happy New year everyone! I glued the bowsprit and the mast step in place. The mast itself was only inserted into the hole in the deck rather than being glued in place. I should be able to fix it rigidly in position using the standing rigging. The rigging thread supplied with the kit isn't that great so I swapped it out to use some thread from Syren, 0.30mm brown thread for the standing rigging and 0.20mm tan thread for the running rigging. I began with the bowsprit which was all fairly straight forward. I don't know the nautical names of all of the various lines so I can't use them when describing what I did so please accept my apologies for any confusion that may arise from this. There are three lines running from eyebolts fixed to the hull to the tip of the bowsprit, one on either side of the hull and one at the fore, and these presumably give the bowsprit stability in those directions. I should perhaps explain at this stage how I secure these lines in place on the model. Rather than using the multiple overhand knot method as described previously I have found that it is easier to use a simpler method in these circumstances given that there is far less room to work so close to the model. The following images show the method I use, in this instance when securing line to a split ring for one of the backstays. Firstly the rigging line is doubled through the split ring (or eyebolt/holt/block etc). A length of the thinner brown Mara thread is then used to seize the line to the ring. This is laid along the rigging line and temporarily secured with some tape on the left hand side. A loop is then made in the Mara thread and the loose end is then wound around the rigging line and the line of Mara thread six times, working back towards the split ring. The loose end of the Mara thread is then passed through the loop and both ends of the thread are slowly drawn tight. The knot is secured with some varnish and left for a while before the long ends are trimmed away. Although the pictures show this being completed in the vice it is possible to carry out the same method just using your hands to hold the lines and this is how I do it when securing the shrouds to the mast or chainplates, for example. The running backstays were the next items to be rigged. There are two either side, one secured to an eyebolt at the top of the lower mast and the other secured to an eyebolt at the top of the topmast. These were tied off on cleats fixed to the cockpit coaming. I then installed the forestay and the royal stay from the masts to the bowsprit. There are three shrouds on either side of the mast and two of them run through the spreader bar fixed to the base of the topmast. These were all secured to the chainplates on the deck. With the majority of the standing rigging installed I was then able to return to each of these lines and adjust their tension so that the mast was held securely, had the correct angle of rake to the rear, and was vertical when looked at from the stern or prow. The instructions then suggest the boom is installed and whilst the inventory suggests that there is only one line used as the topping lift (on the port side of the mast), the illustration in the picture manual show that there are two lines used for this, one on either side of the mast. I decided to follow the pictures and installed topping lifts on both sides. I also installed the spanker boom sheet at the rear of the boom to hold the boom securely in place. All of these knots securing these lines to their relevant cleats etc have now been varnished to make them a little bit more secure and the excess line mostly trimmed away. I will return to them towards the end of the build to put coils of thread over them to represent the excess line - I find it far too difficult to coil line in situ on the model. Unfortunately things seem to get a lot more complicated from here onwards. I have noticed that some of the images in the instructions show that rings or blocks are attached directly to the sails and that the rigging lines then attach to these in turn. As my model isn't going to have any sails I need to think of a workaround for this as I would still like to have some of the running rigging represented. I may perhaps seize some hooks to the ends of the running rigging lines and then I can hook them to eyebolts etc, that was the running rigging can be present but the sails omitted. There are some lines that seem to be sewn directly to the sails, such as the jibsail sheets, so I may just have to omit those from my model. Here are some pictures showing the progress so far.


- 122 replies
-
- 7
-
-
- Artesania Latina
- Pen Duick
- (and 1 more)
-
G'day from Melbourne, Australia!
jpalmer1970 replied to binchicken's topic in New member Introductions
Welcome to MSW ! Good luck with your project. I am sure you will receive lots of useful advice. -
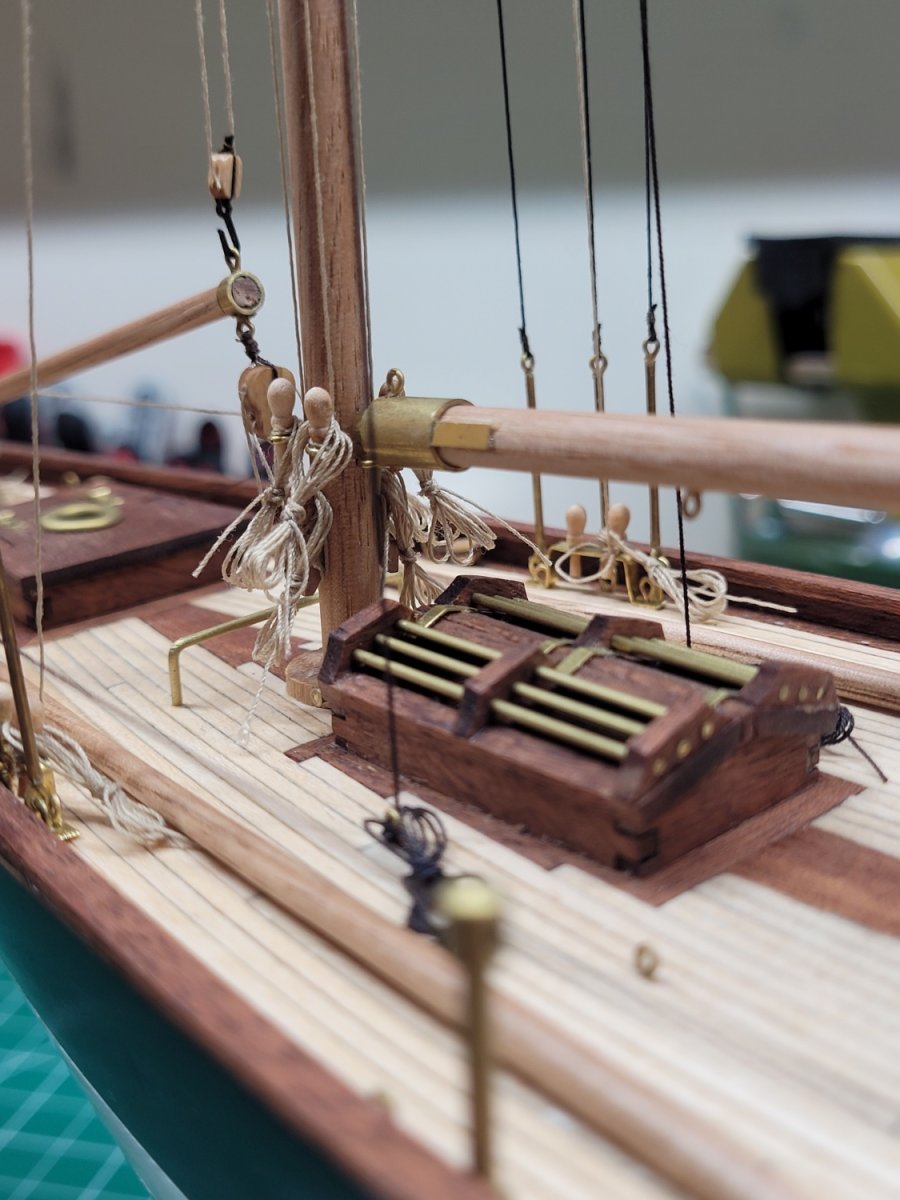
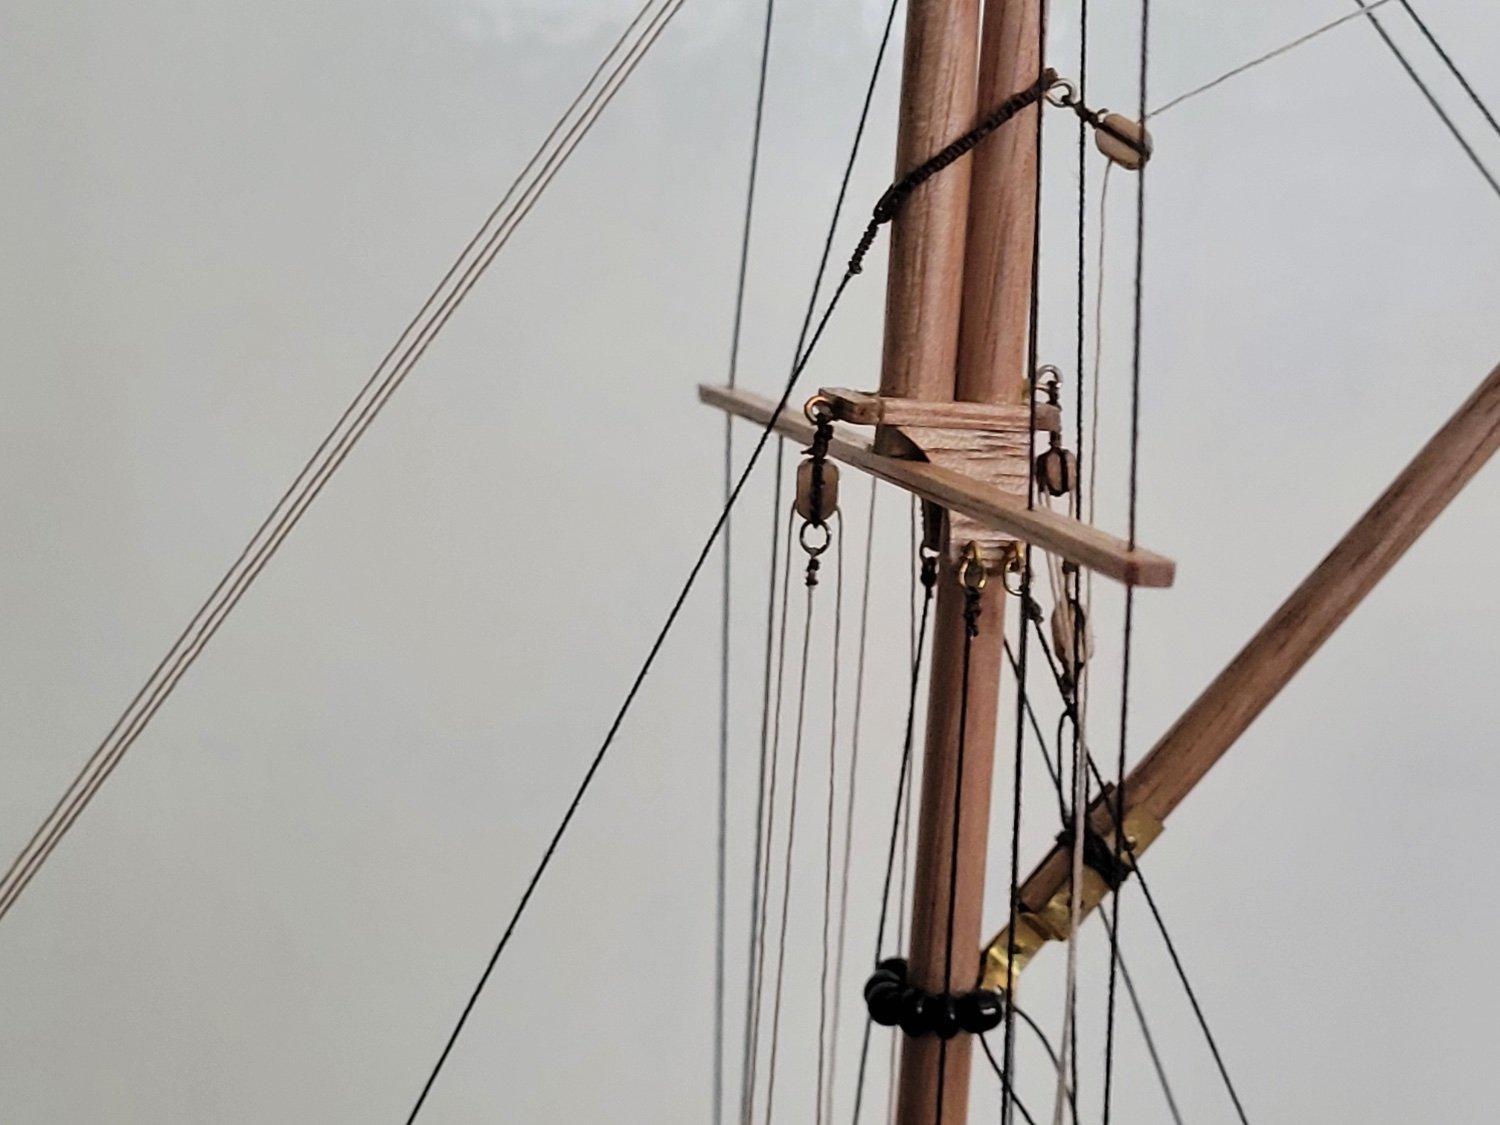
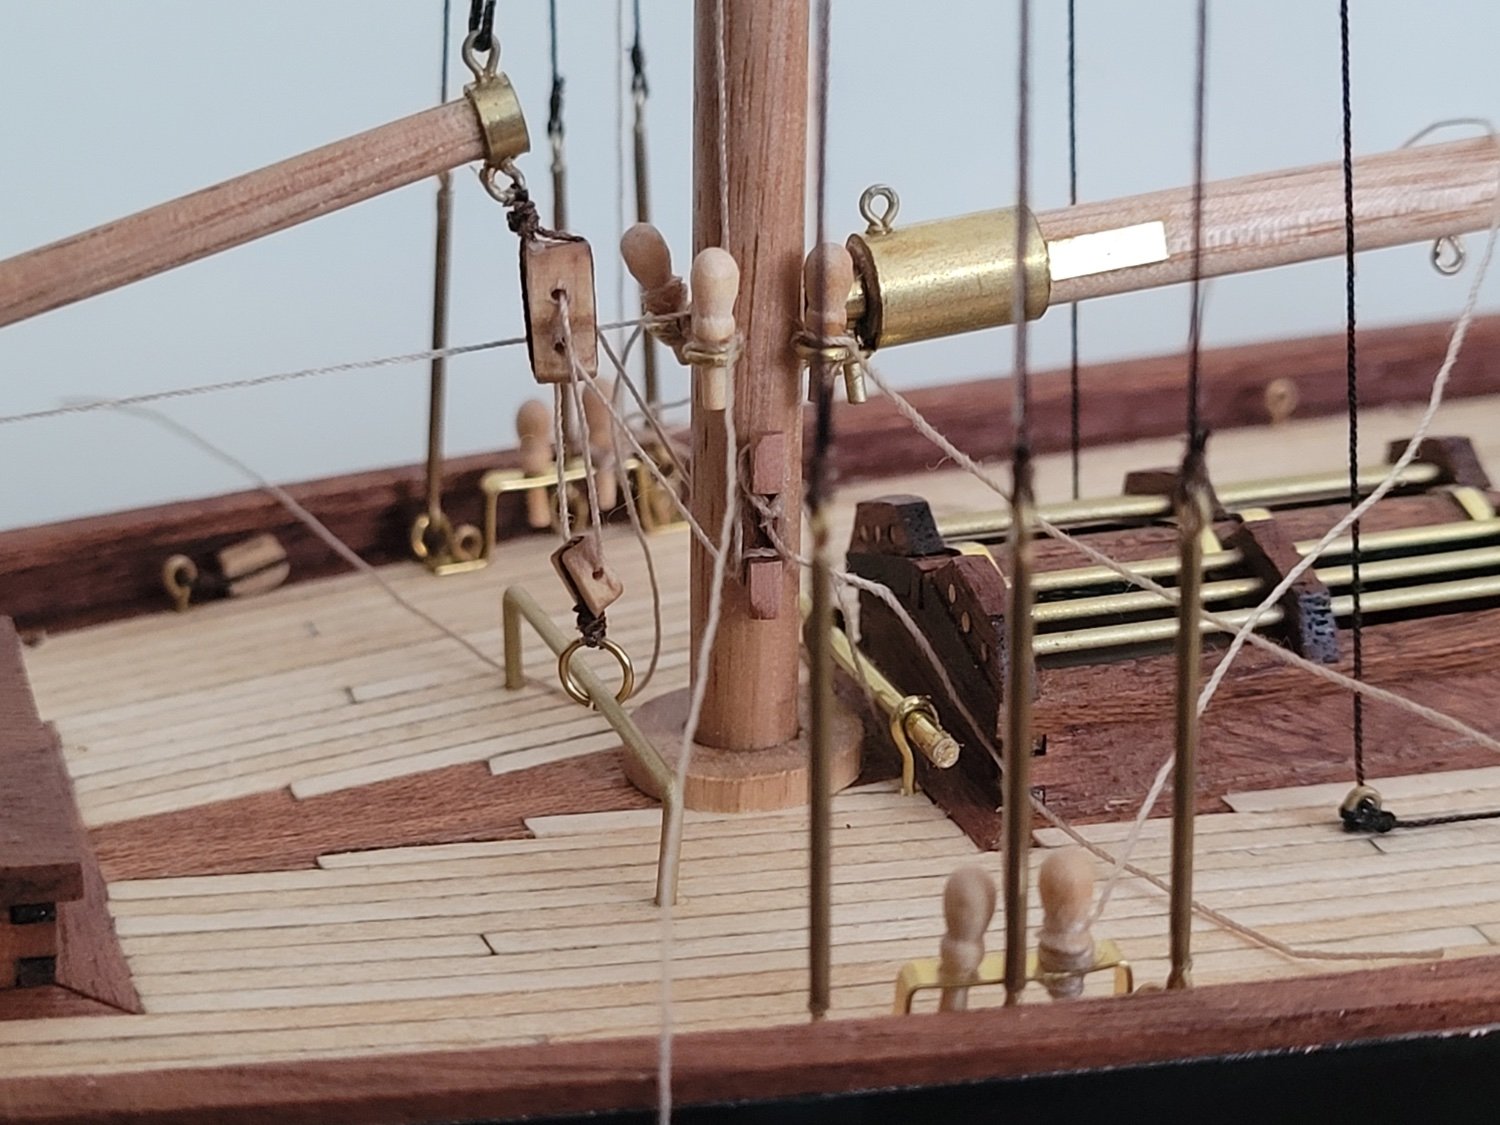
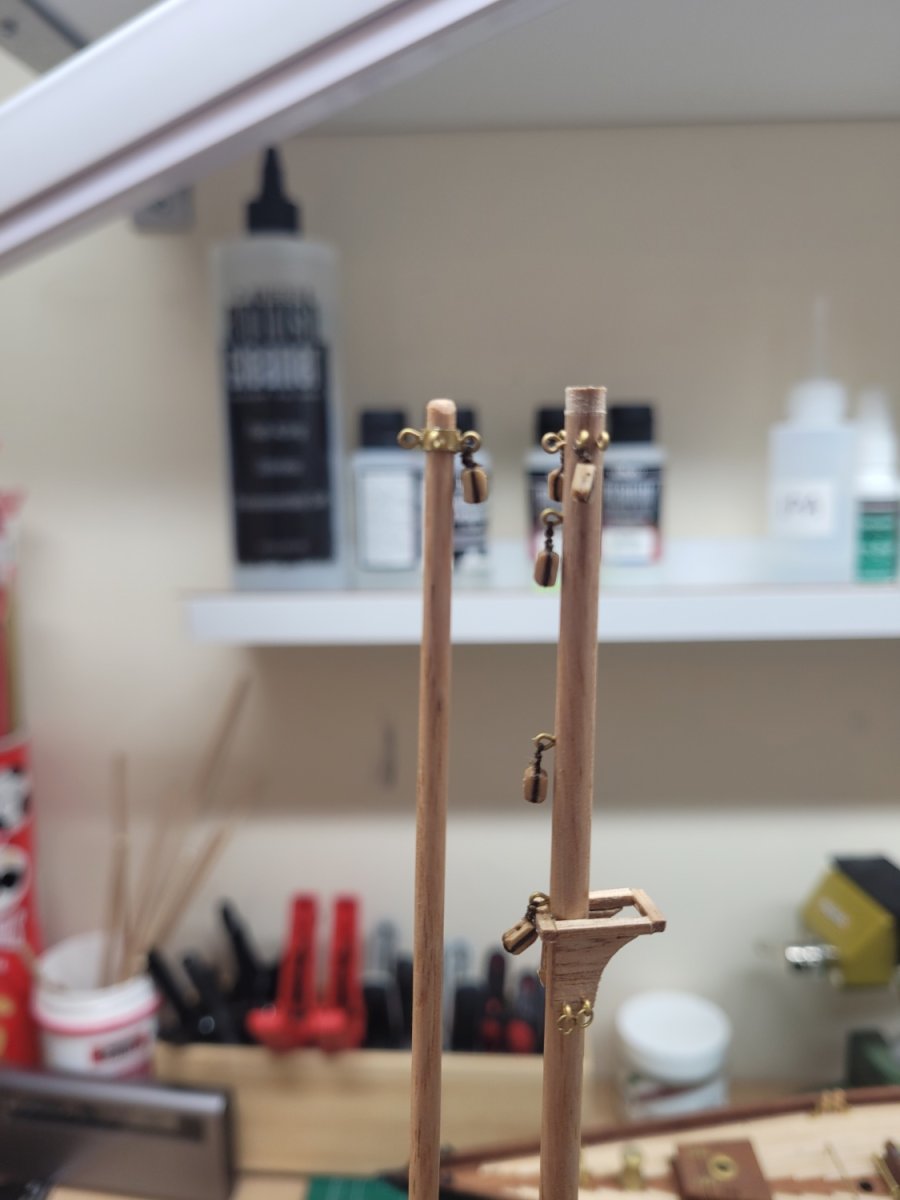
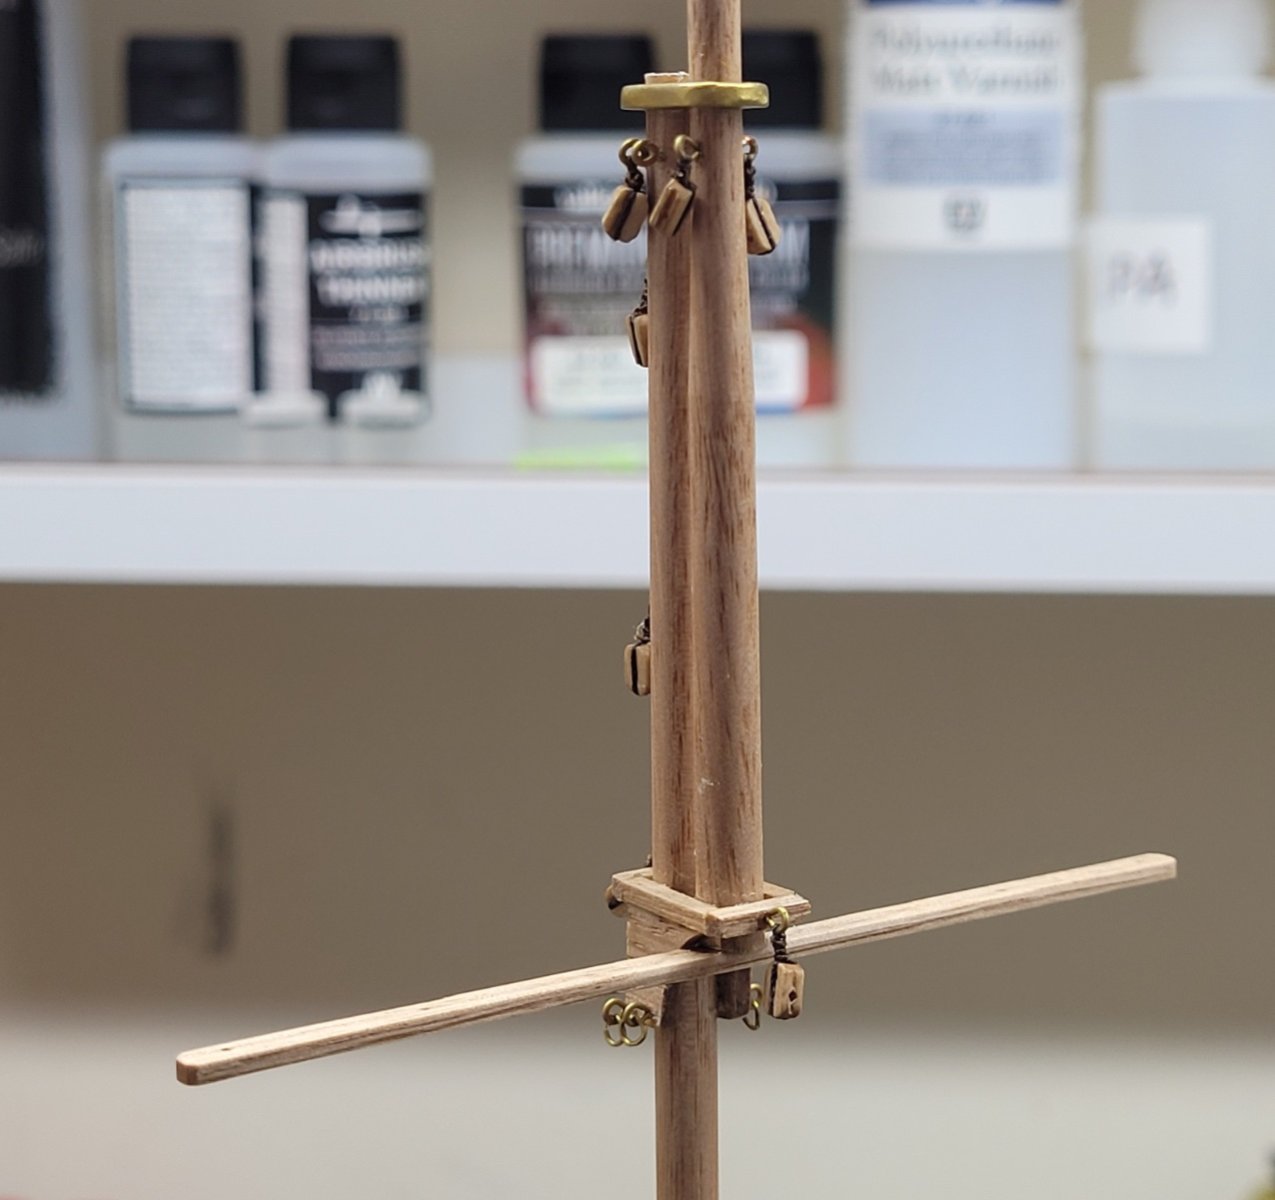
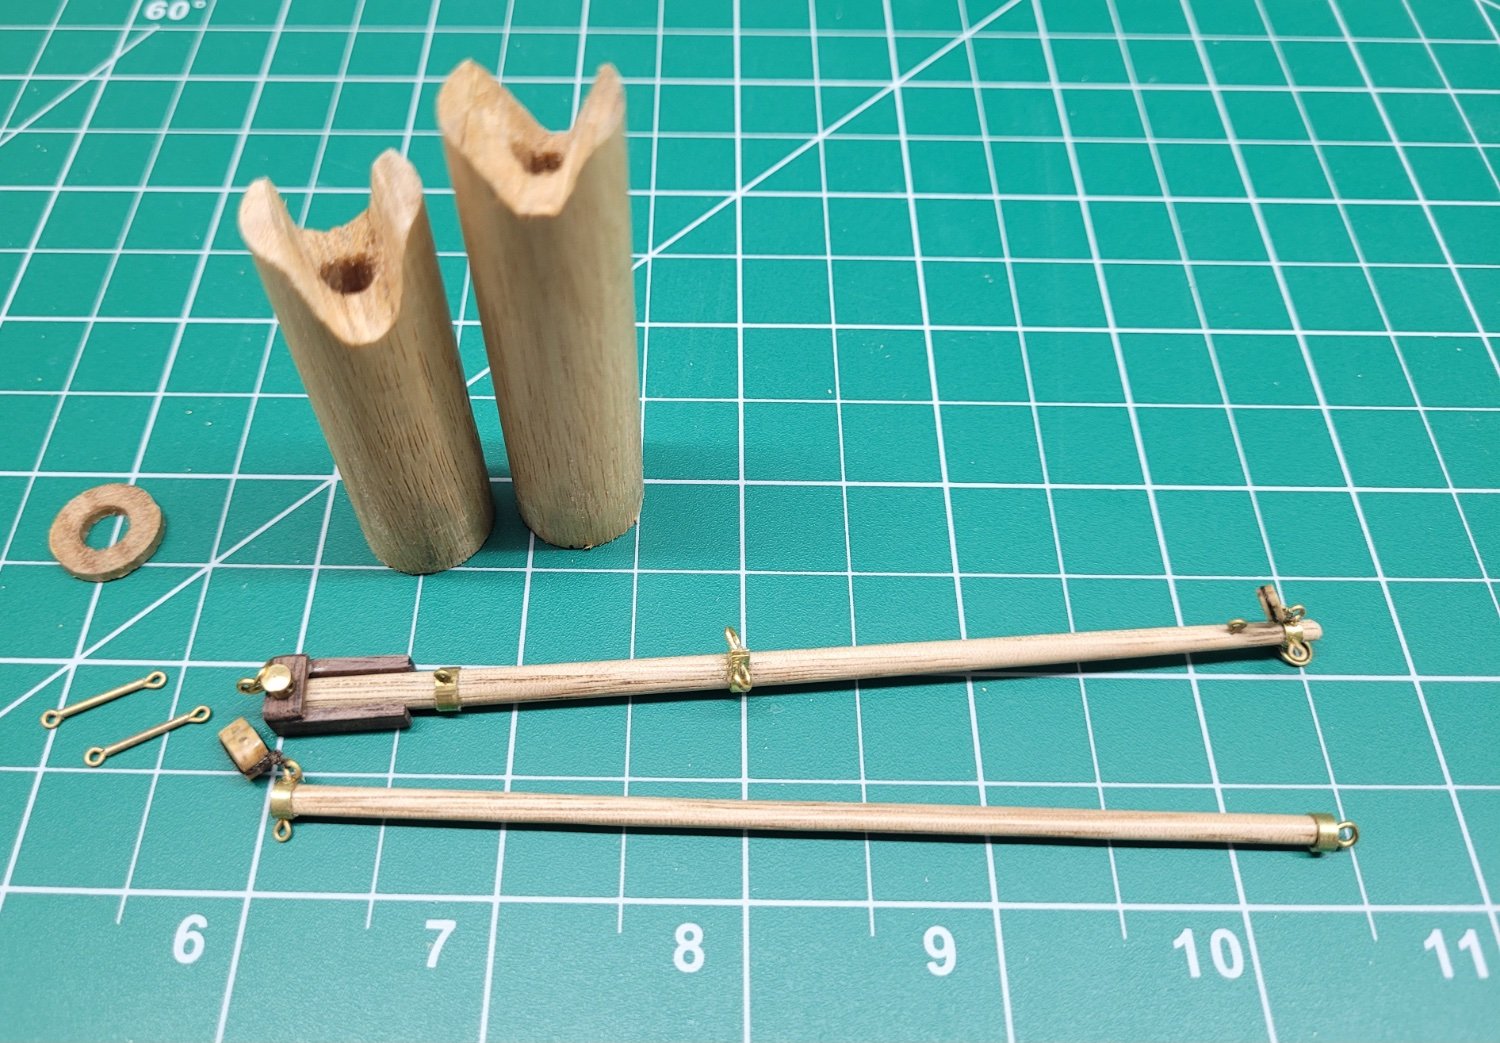
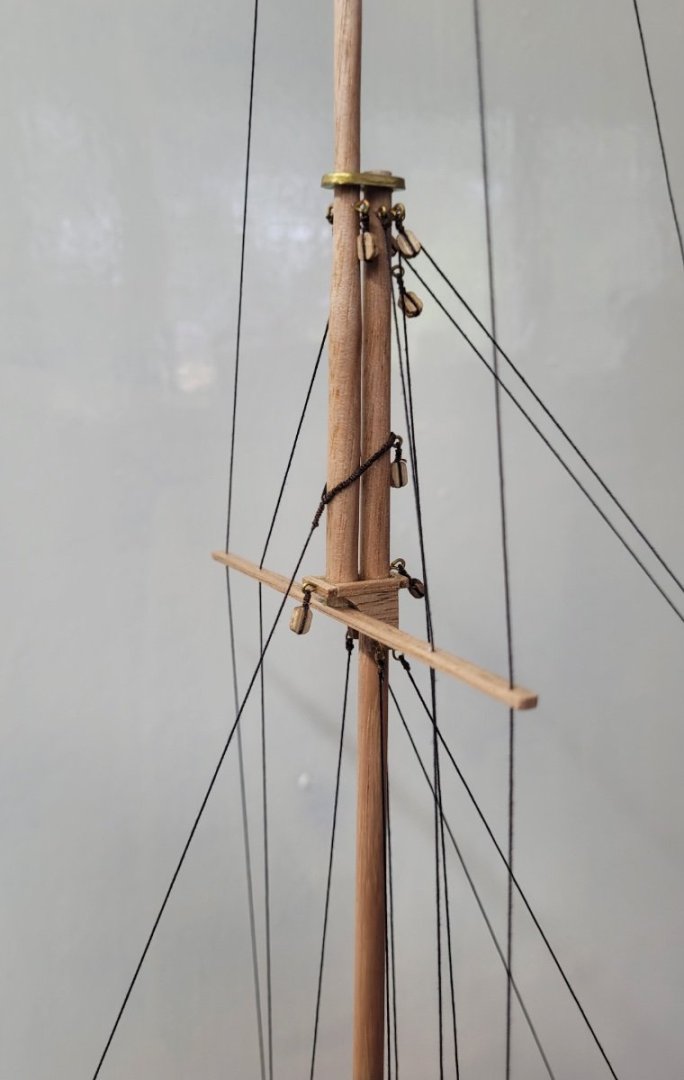
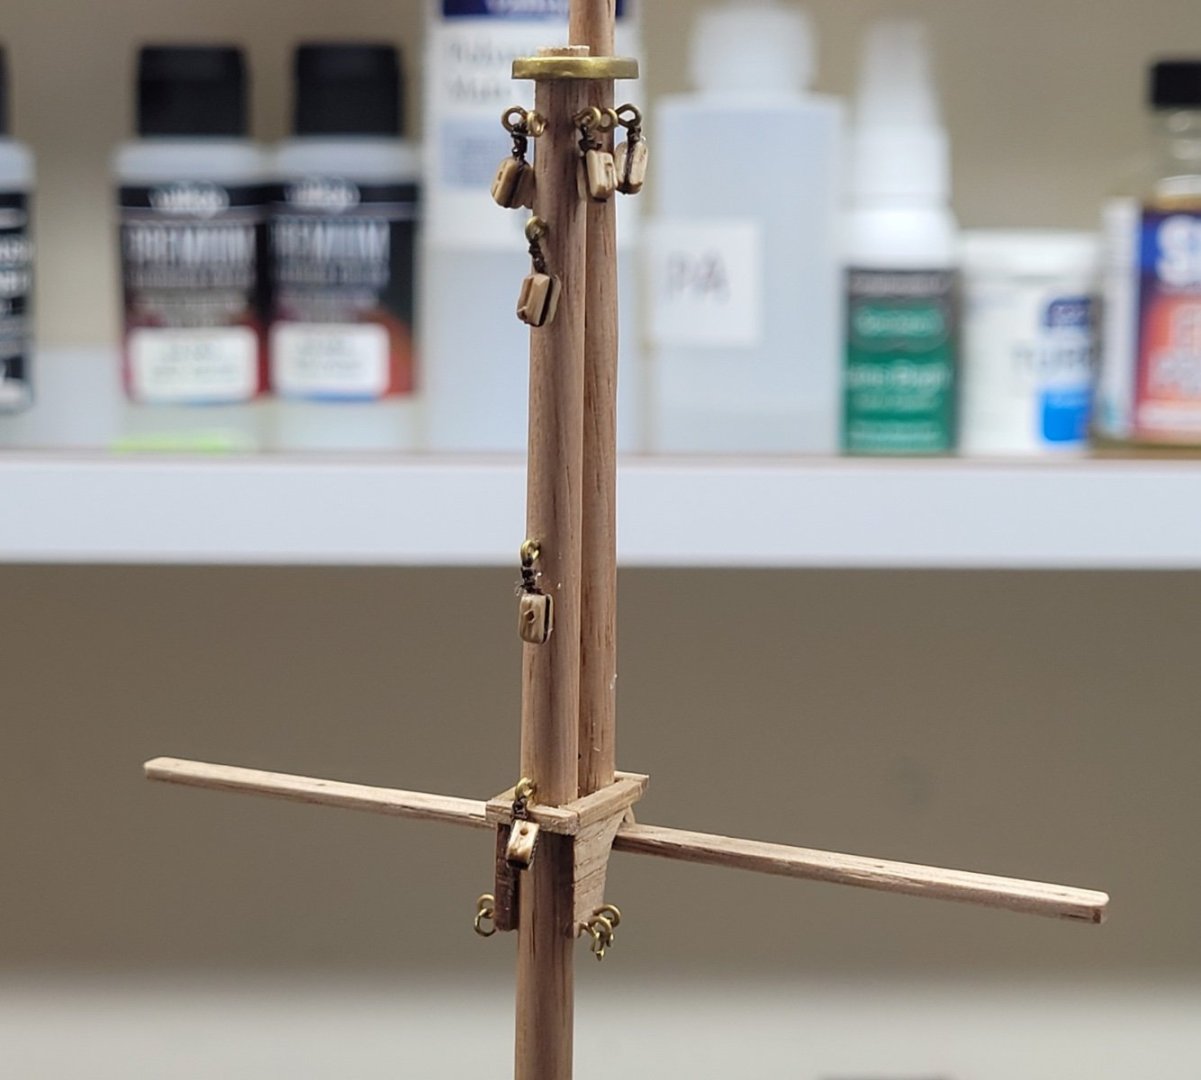
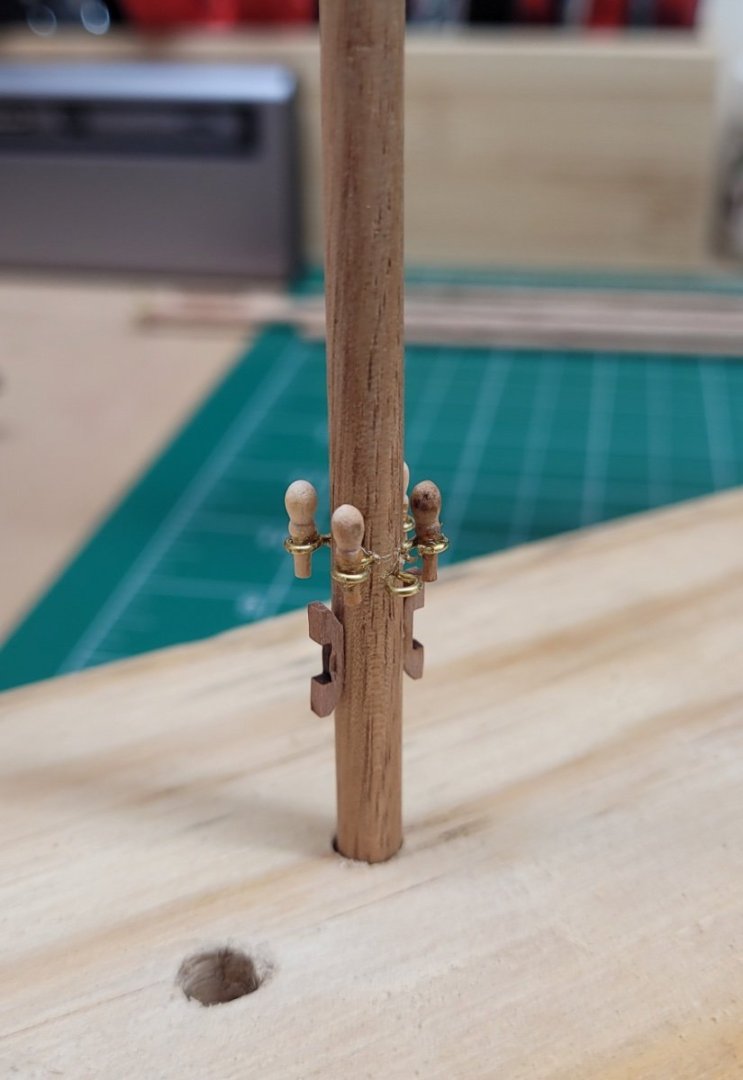
I have been able to make some good progress with the build in the last few days - it is amazing how much more time you have when you don't have to go to work 😃 I finished stropping all of the blocks and then attached them to the mast, the various spars and the deck. There weren't actually that many of them to do compared to Alert so it didn't take long at all. I also attached the topmast to the lower mast and added the spreader bar. I also added the eyebolts that hold the belaying pins at the base of the mast and two cleats, the latter items again filched from some spares from previous builds. The instructions suggested adding the thick lead cleat castings as used on the deck to the mast but these just looked too clunky to my eyes, hence the swap to the wooden versions. Here are some images of various parts of the lower and topmasts before and after gluing them together. One tricky Item to make was what the instructions call the lee fange spanner boom which is situated to the rear of where the tiller will be placed. It holds a block that holds the boom sheet and is made of a piece of brass rod 1.5mm in diameter which sits in two eyebolts in the deck. Attached to the rod are two glass beads which the instructions name as trucks and in between the trucks sits the two brass hoops I made earlier to which the block is attached. The problem that arose was that the glass beads have a 1mm wide hole in them and so cannot slip over a 1.5mm diameter brass rod! It is also not possible to widen the hole in the beads by drilling or filing, as unsurprisingly the beads shatter pretty easily! In the end I swapped the beads out for two wooden rollers or sheaves which could fit on the brass rod - another example of the pretty poor planning from Artesania Latina. It always pays to keep lots of spare parts and little items on hand even when you intend to stick pretty much to the kit specs! I also decided that I didn't like the pedestals I had made a few months ago so I made another pair, this time using pieces of 16mm Tasmanian oak dowel. All I had to do was cut the slots to match the hull shapes and give the pedestals a couple of coats of wipe on poly. The pedestals will eventually be reduced in height but I will firstly need to get the baseboard ready before I can do that. The baseboard is also made from oak so I am hoping that it matches nicely with the pedestals and the masts and spars. I also had to fabricate a couple of smaller turnbuckles for the rigging of the bowsprit and the forestay, and these were down in the same manner in which I made the chainplates - gluing eyebolts into a short length of brass tube. So the next task is to fix the bowsprit and the mast in place and then the rigging will start. I have decided not to include sails on my model and I'm not sure if that will help or hinder the rigging process. The Artesania Latina instructions for rigging the model are not clear at all unfortunately. There are a few line drawings on the back of one of the plans and some photos of parts of the rigging in the manual but I think I will have to work it out as I go along.


- 122 replies
-
- 7
-
-
- Artesania Latina
- Pen Duick
- (and 1 more)
-
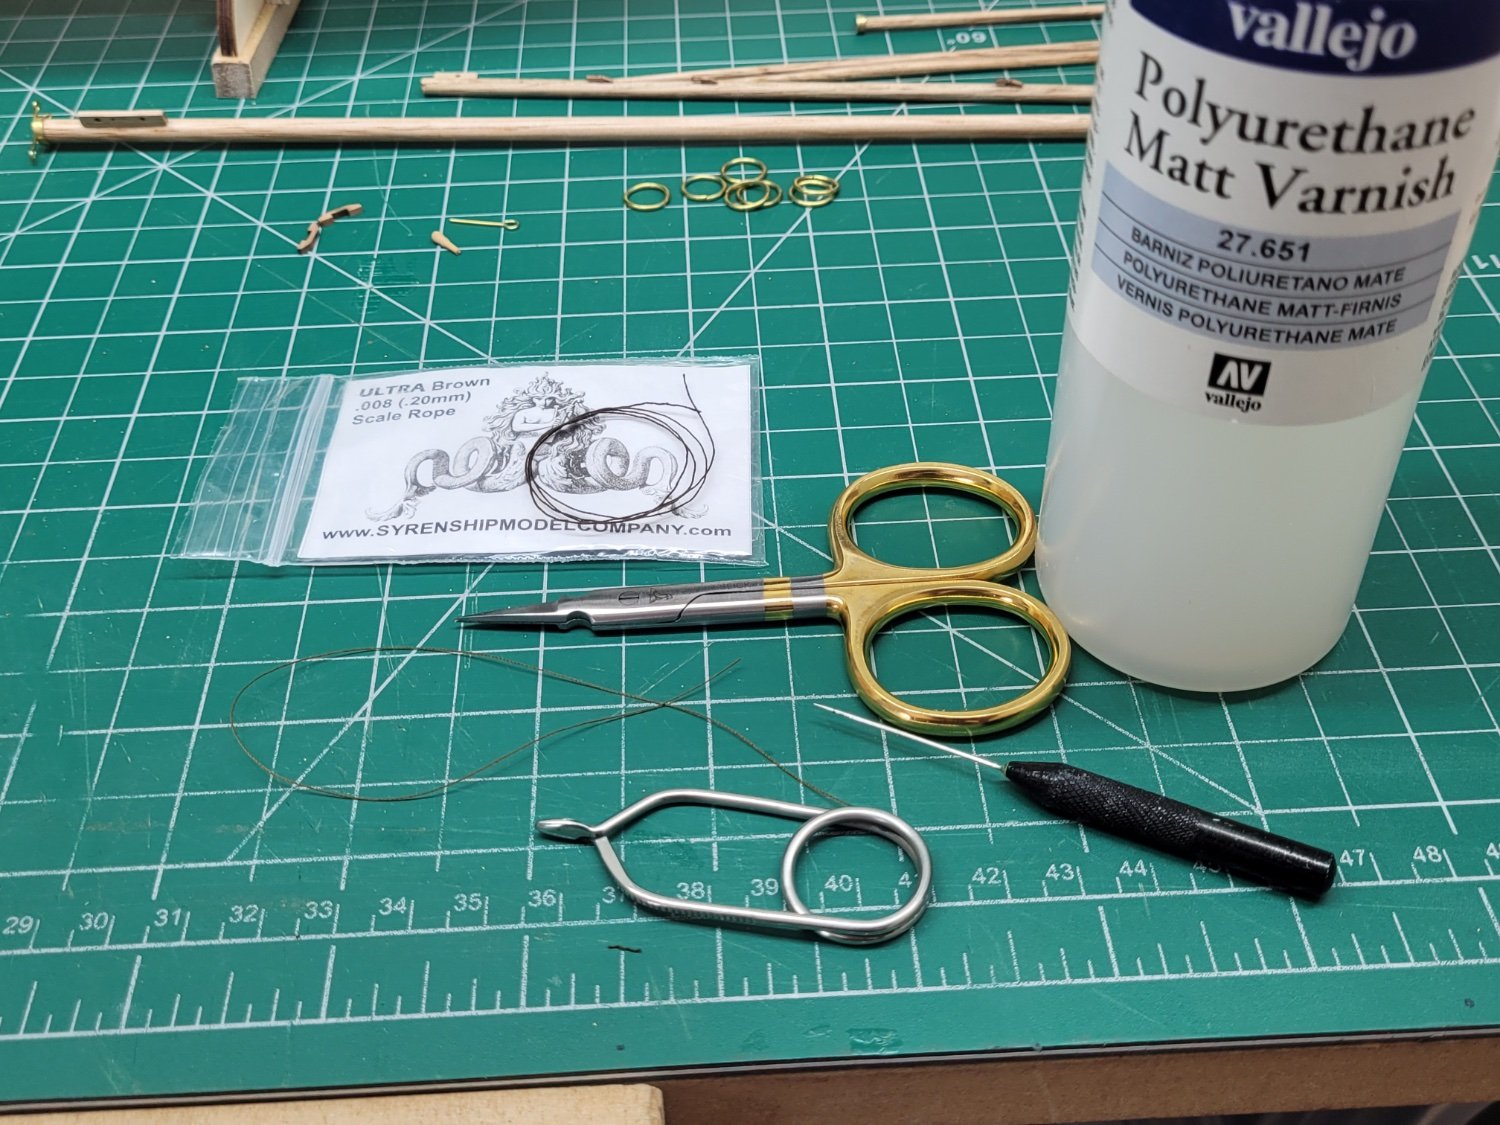
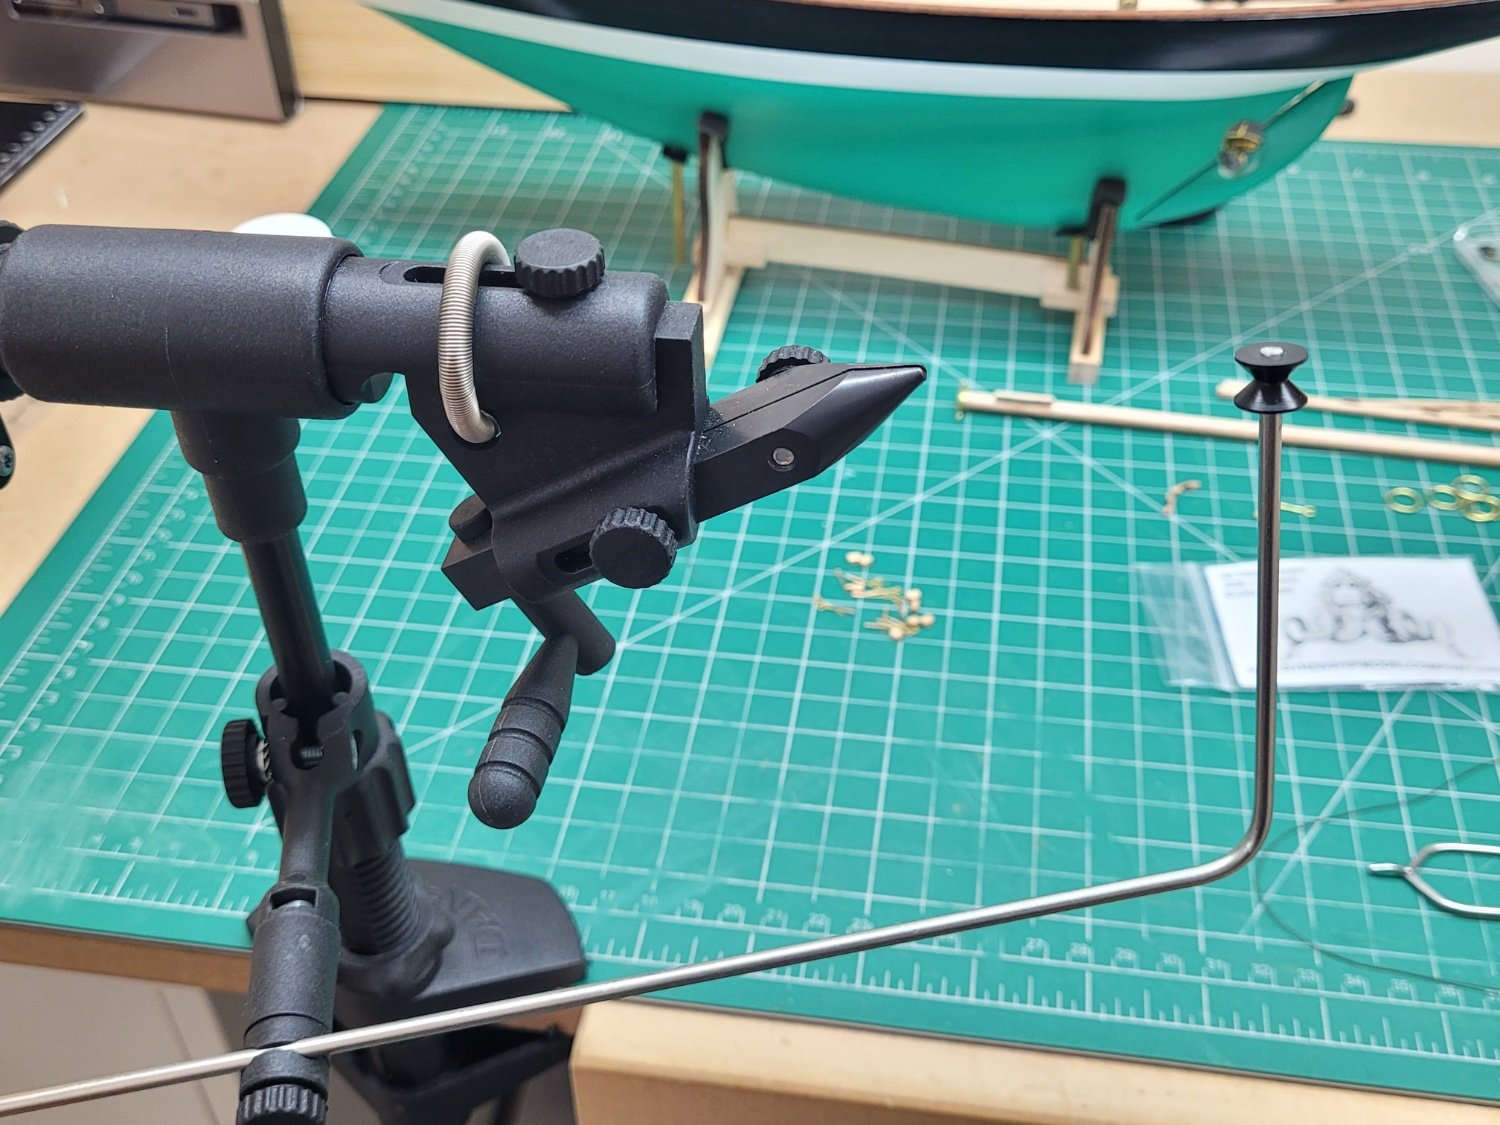
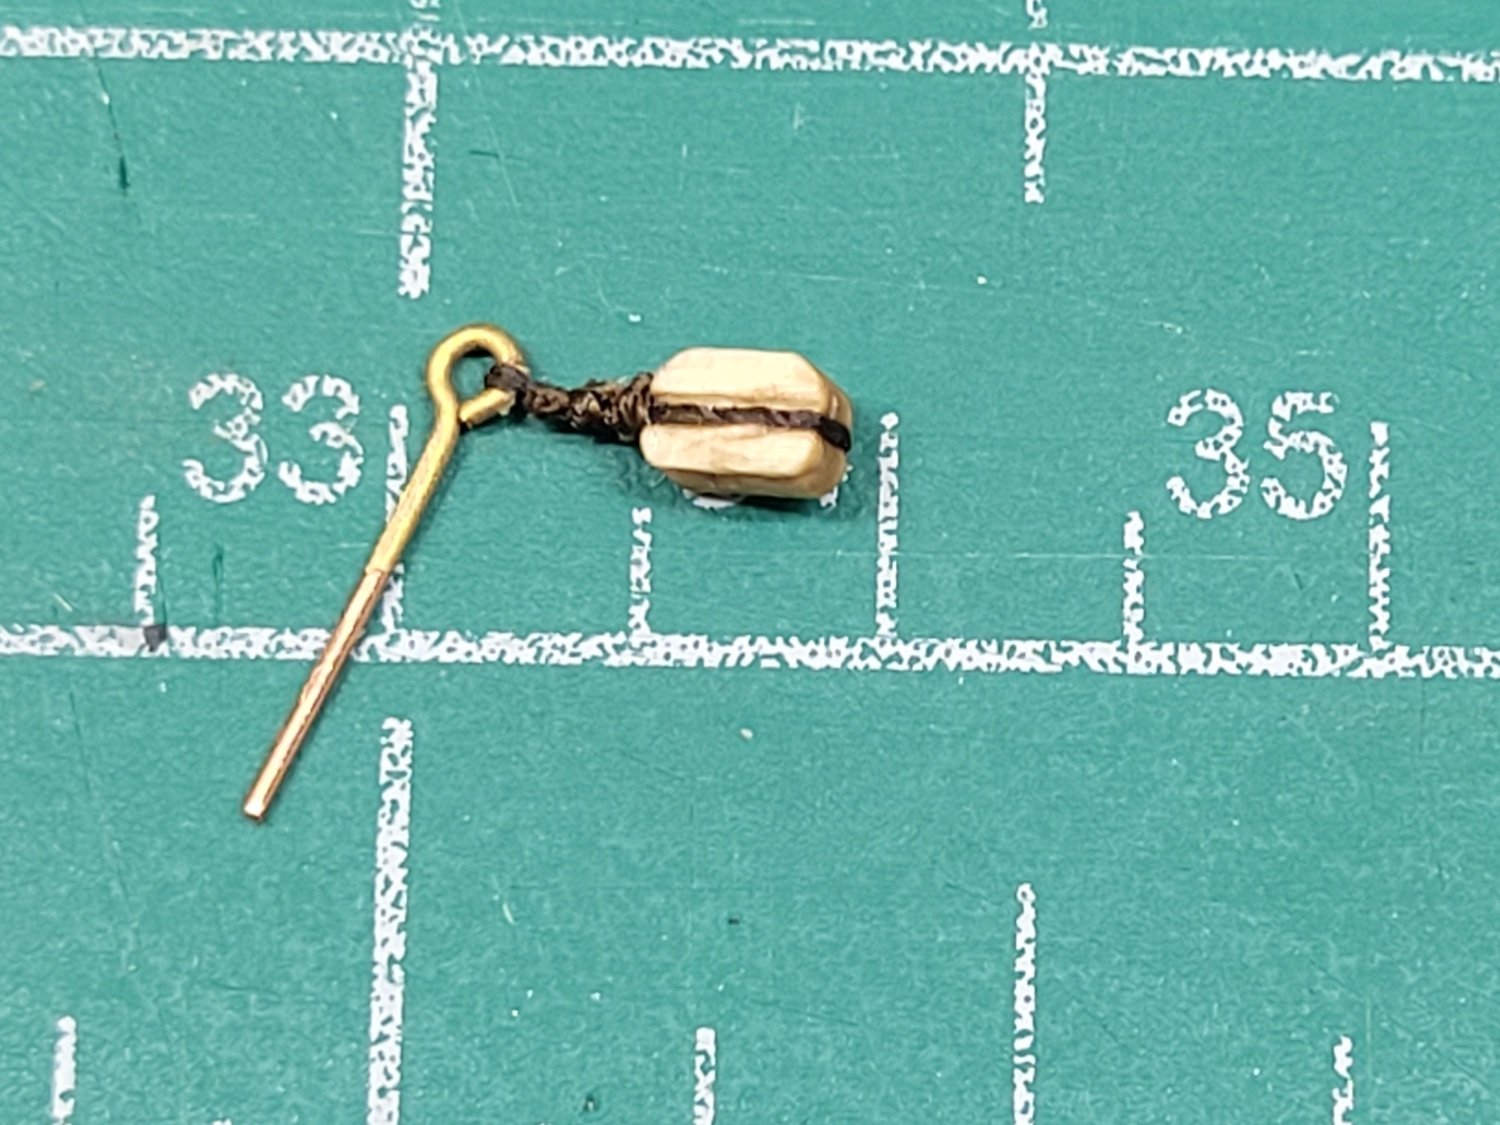
I started work on stropping the various blocks that need fixing to the deck and the masts and spars. I thought I might detail the process and tools I use for this in case it is of assistance to anyone. I am lucky to have a variety of fly tying tools which do double duty for fly tying as well as this sort of rigging work with my model ships. I certainly find the rotating fly vice a great help in holding small items with its adjustable jaws. It is also much more solid than a set of quad hands or a third hand type tool. I also use some hackle pliers to securely grip small items or thread, I have a good pair of sharp scissors for accurate trimming work, and some varnish and a needle to secure the knots when completed. Of course it isn't necessary to have a fly tying vice but I would certainly always use it in preference to other options, especially as it has this movable arm attachment which is very useful for holding the hackle pliers in any chosen position. The blocks that are provided in the kit are a little chunky so I have swapped them out with 3mm pear blocks obtained from Vanguard Models. I am also using some of the Syren 0.20mm brown thread as the strop and some Guterman Mara 120 thread to secure the strop. Before starting any of the work with the blocks I make sure that the hole in each block is nice and clear by running a small drill bit through the hole to clear any obstructions or rough edges. I begin by holding the eyebolt in the jaw of the vice and threading the 0.20mm rope through the eye and securing both ends with the hackle pliers. A length of the Guterman thread is then placed over the two strands of the strop and secured underneath with an overhand knot. A second overhand knot is then tied on top of the strop rope and then another one back underneath the strop. I then add a little dab of varnish to these knots before opening the hackle pliers and trimming off the short end of the strop rope. This is done near, but not too close to, the knots. The long length of strop rope is then threaded around a block and this is held in place with the hackle pliers. These are positioned so that there is a gap of a few millimetres between the eyebolt and the end of the block. The length of strop rope is then brought over to the left of the eyebolt so that it is parallel to the section that has already been secured with knots. The Guterman thread is then placed over both lengths of the strop and a series of overhand knots are added, alternating them above and below the strop rope. I try to position the knots next to each other, rather than on top of each other, so that they proceed down the strop towards the block which results in the block being held tightly and securely. Finally a double knot is tied adjacent to the block and then further varnish is added to secure the knots in place. I don't trim the remaining excess lengths thread for some hours to ensure that the varnish has had time to set. This ensure that the knots won't unravel if I am a bit enthusiastic with the scissors when I do eventually trim the ends away. Here is the finished eyebolt and block ready to be added to the model. I want to thank everyone for the interest you have taken in my build of Pen Duick so far. I wish you all a very Merry Christmas and hope you have a great New Year! Jeremy


- 122 replies
-
- 6
-
-
-
- Artesania Latina
- Pen Duick
- (and 1 more)