HOLIDAY DONATION DRIVE - SUPPORT MSW - DO YOUR PART TO KEEP THIS GREAT FORUM GOING! (Only 20 donations so far - C'mon guys!)
×

jpalmer1970
-
Posts
408 -
Joined
-
Last visited
Content Type
Profiles
Forums
Gallery
Events
Everything posted by jpalmer1970
-
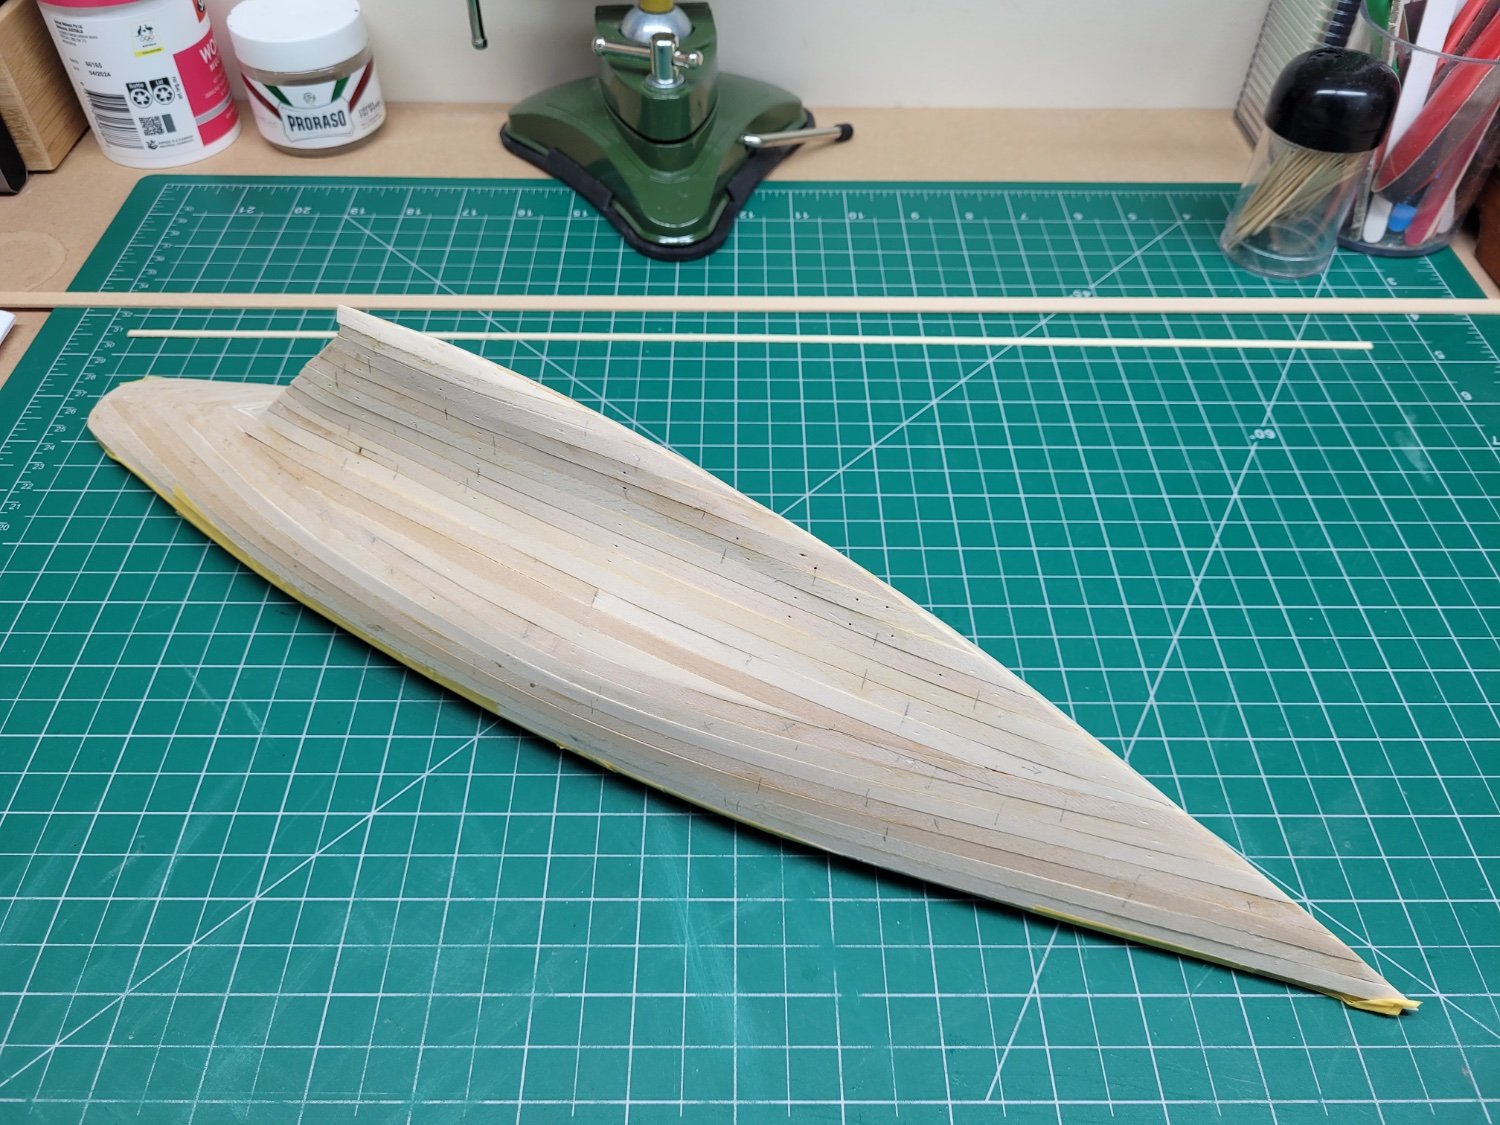
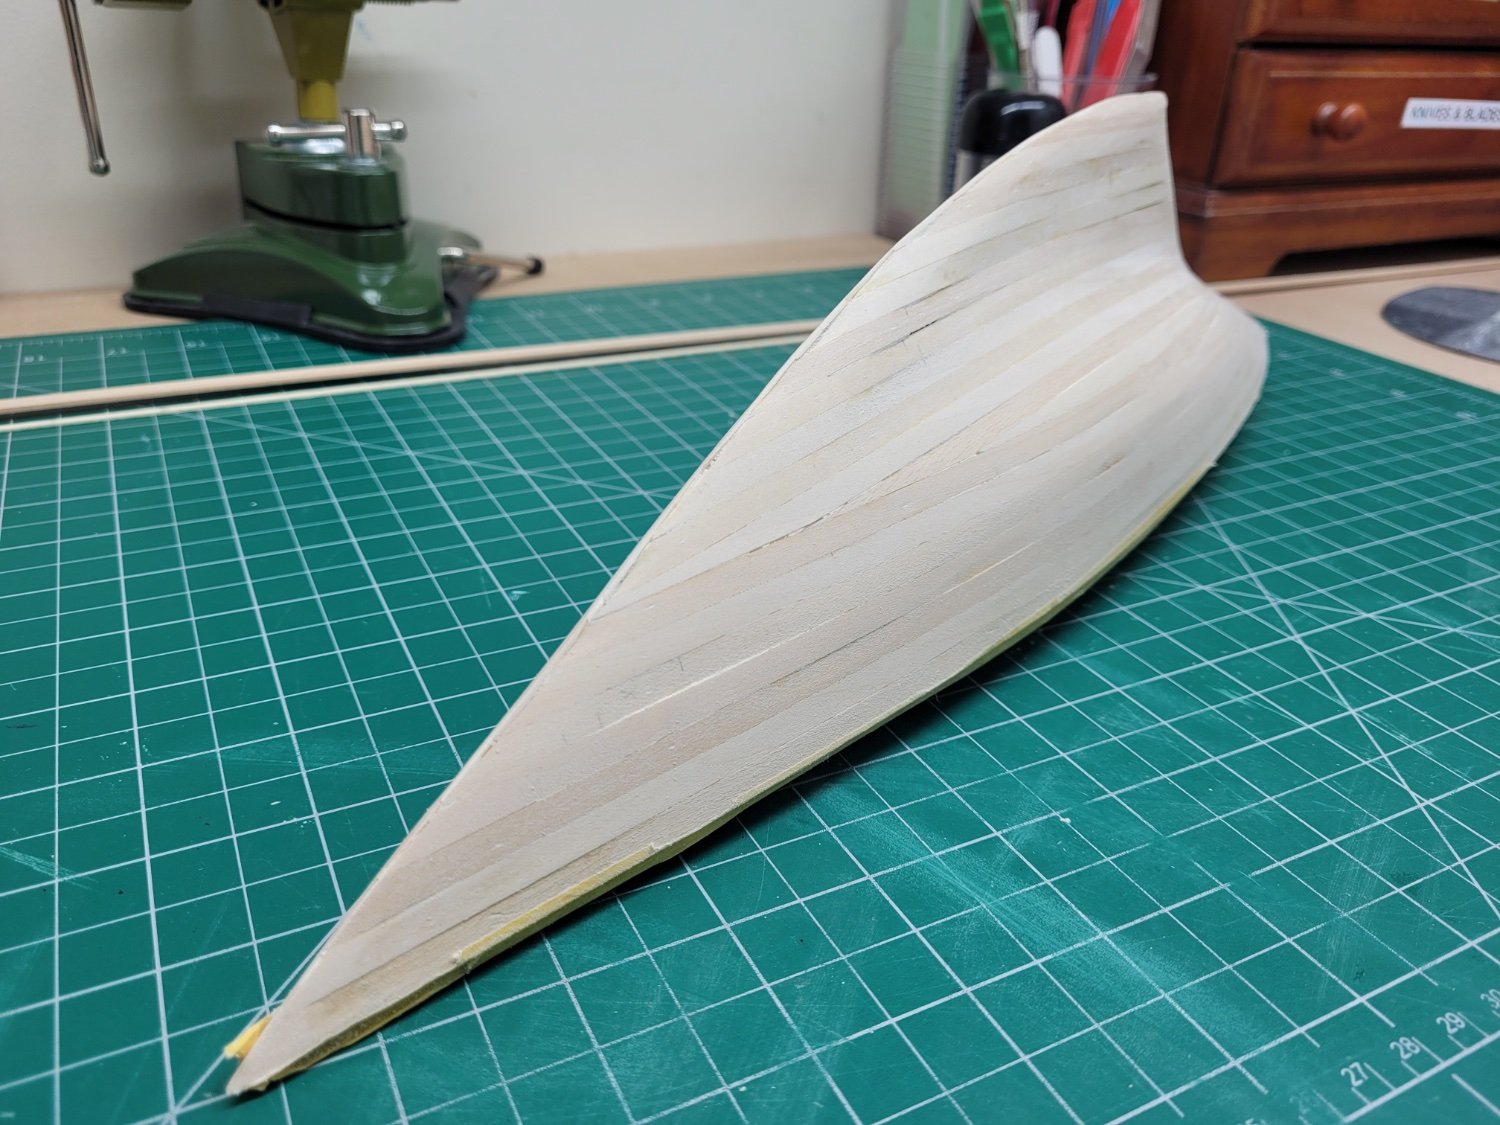
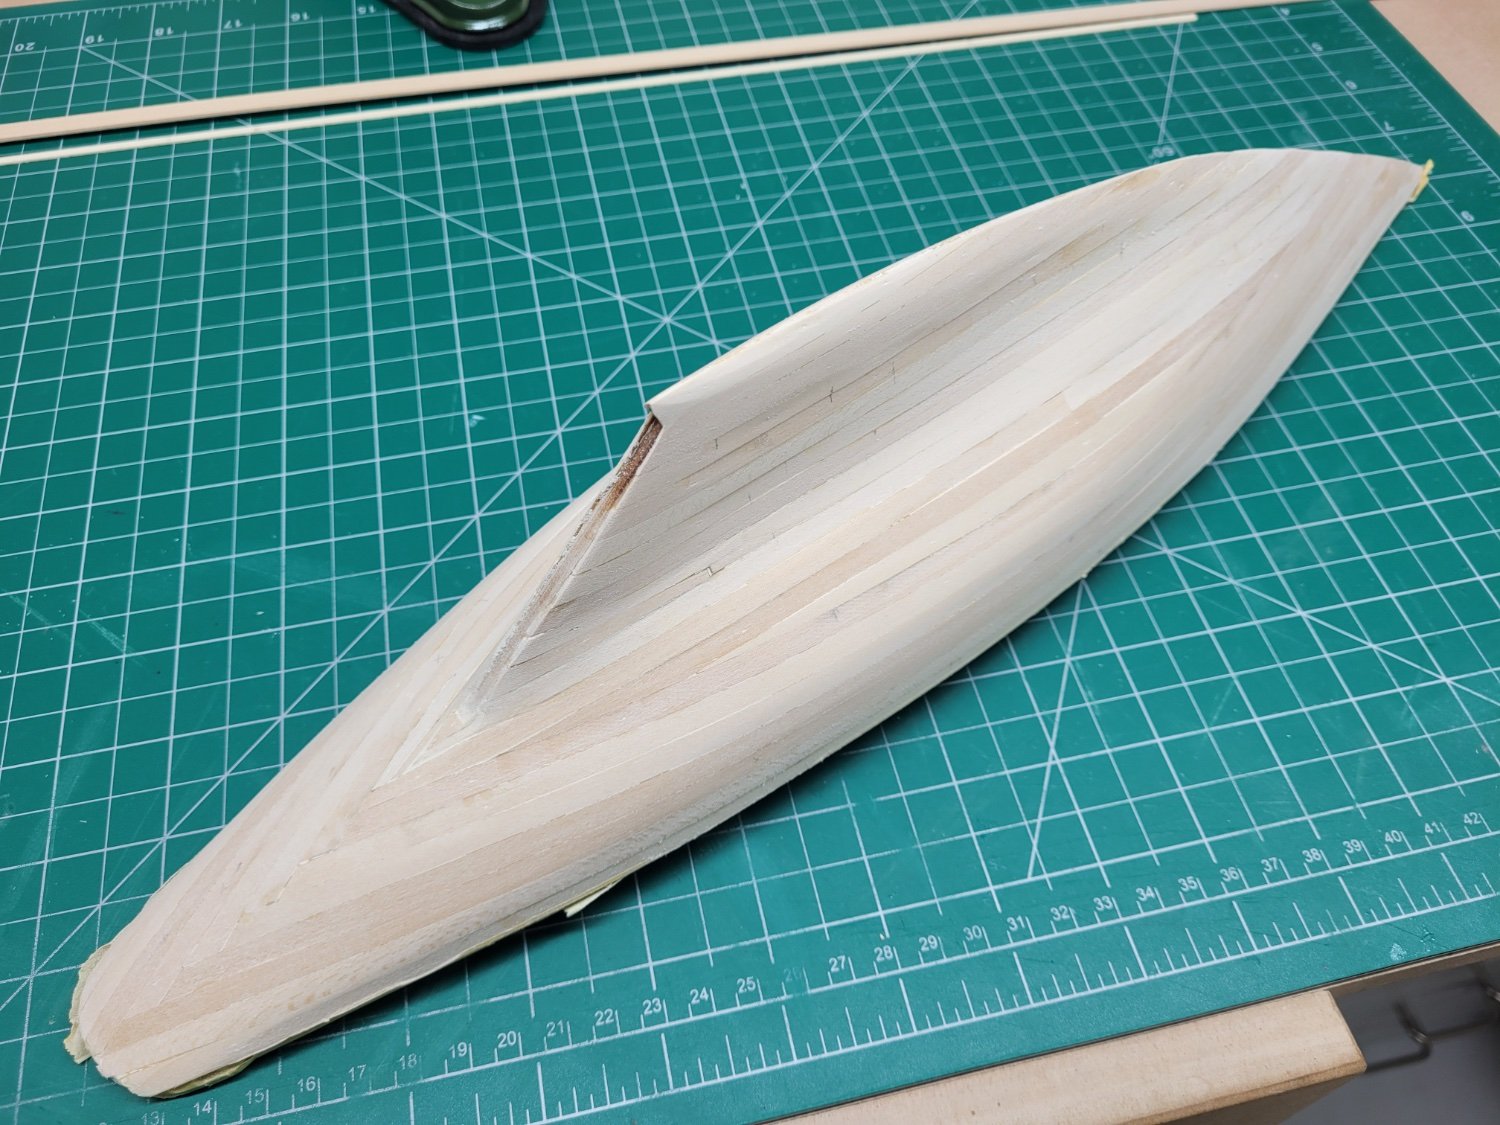
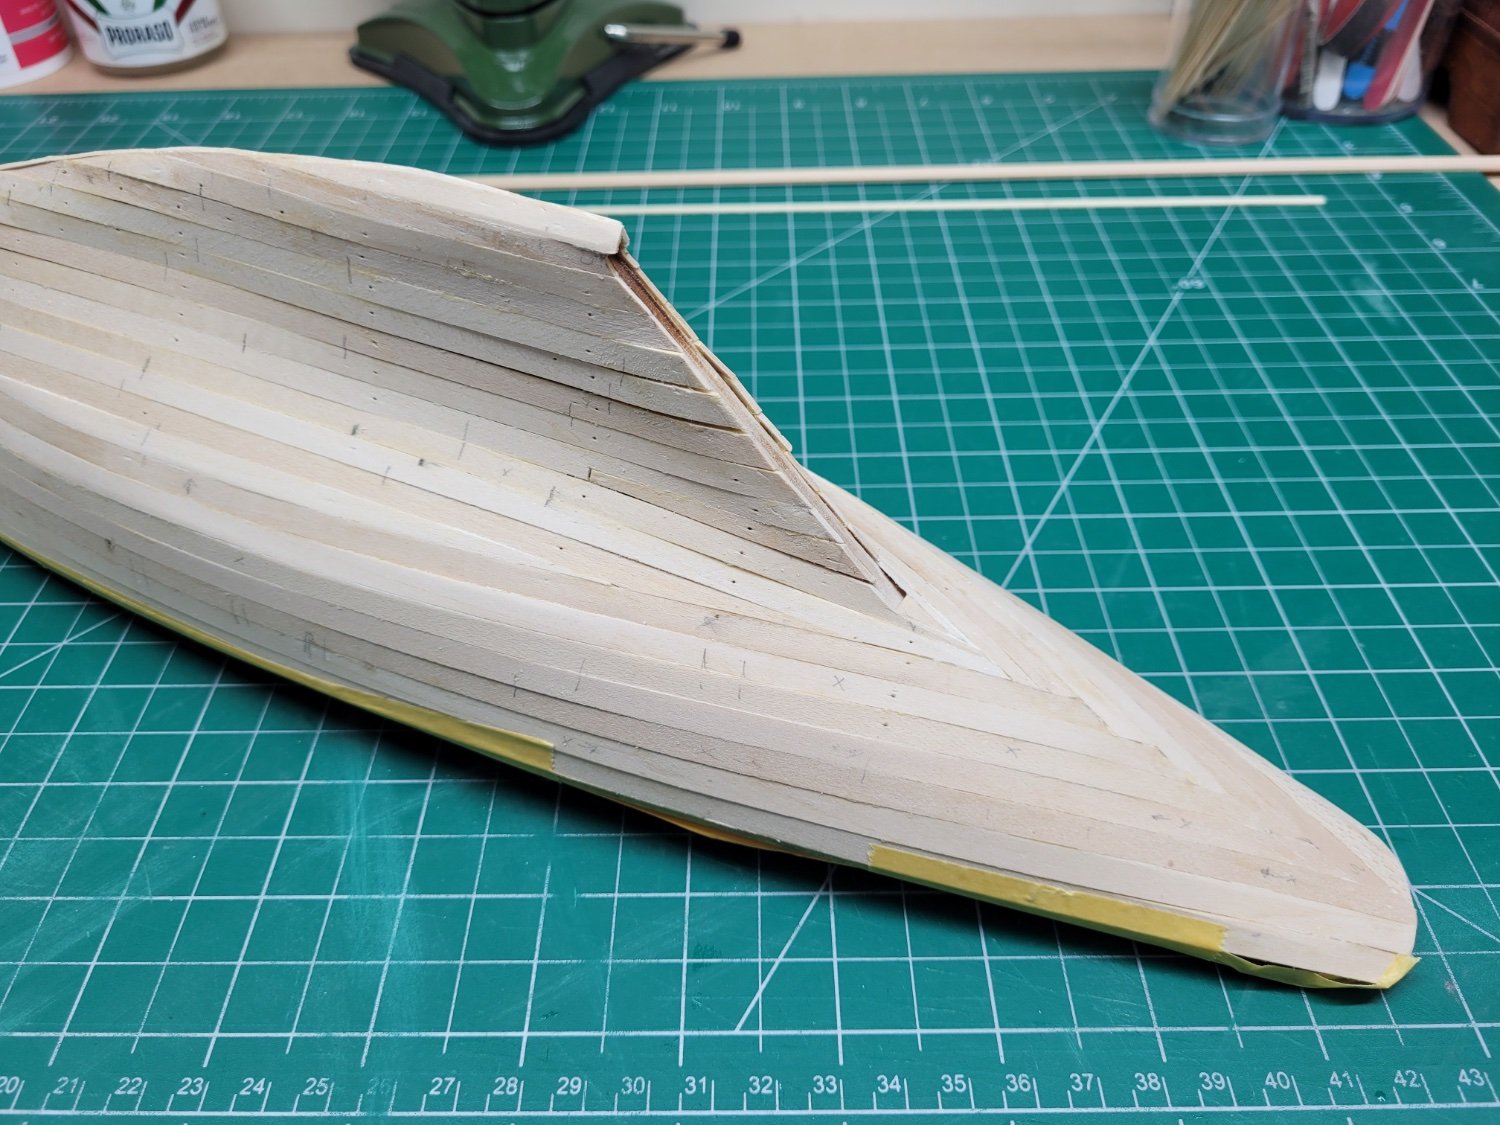
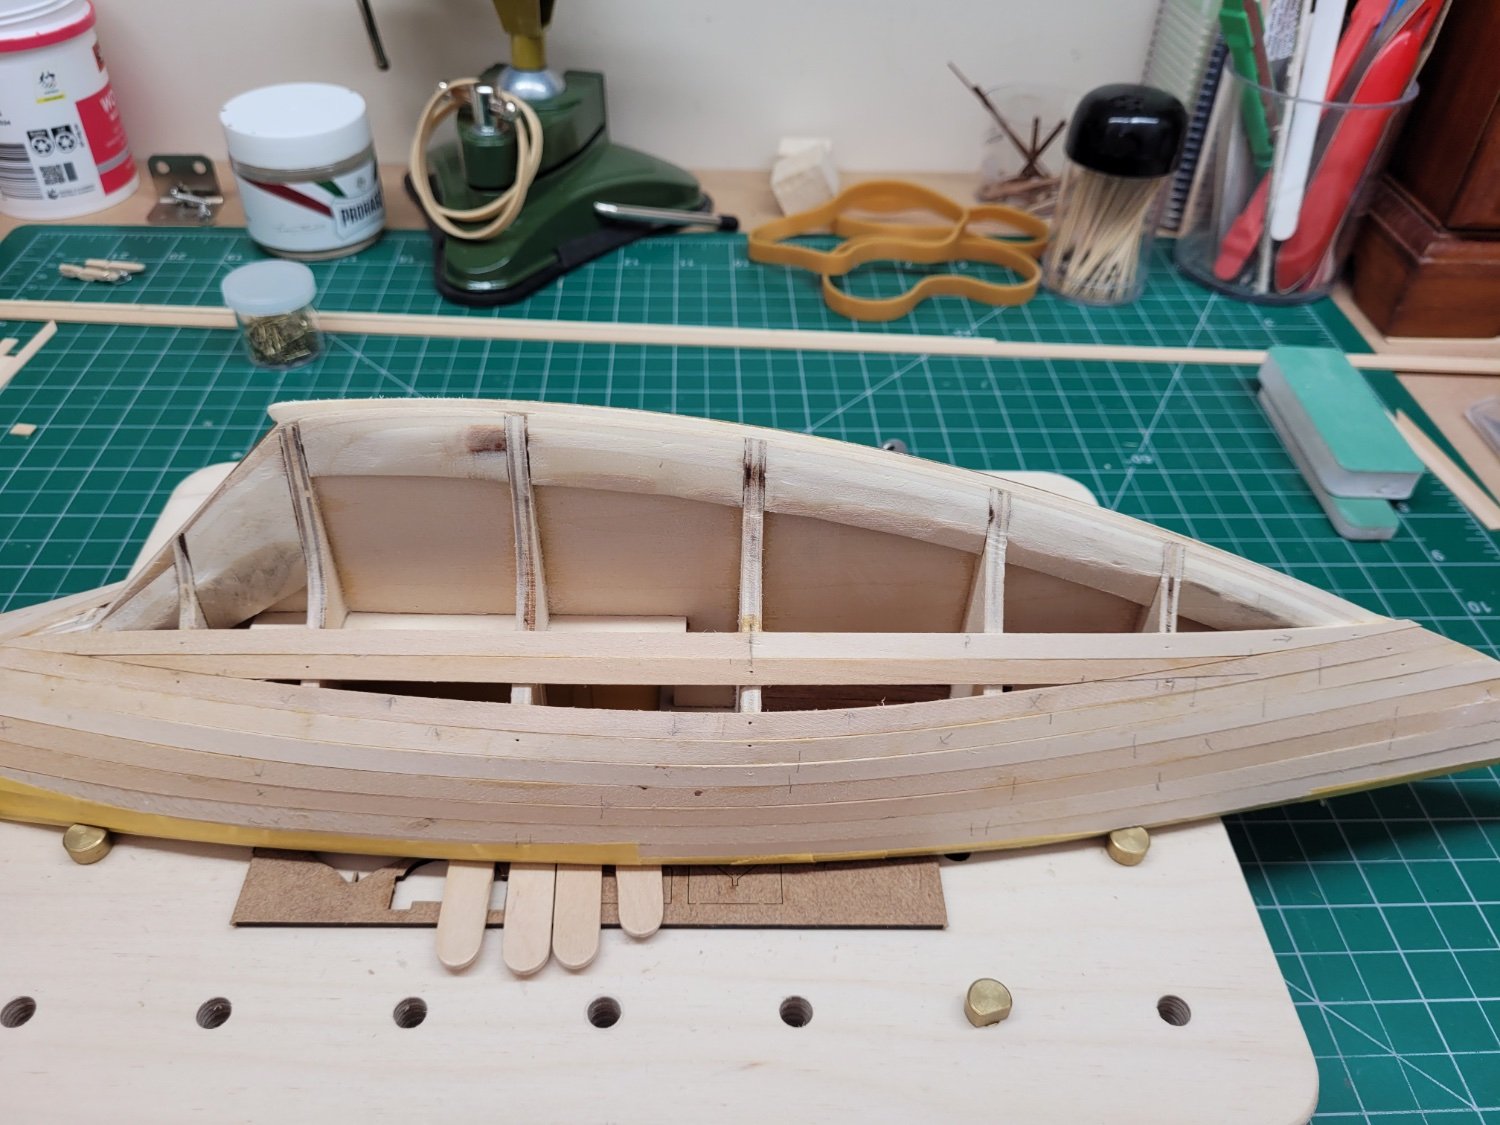
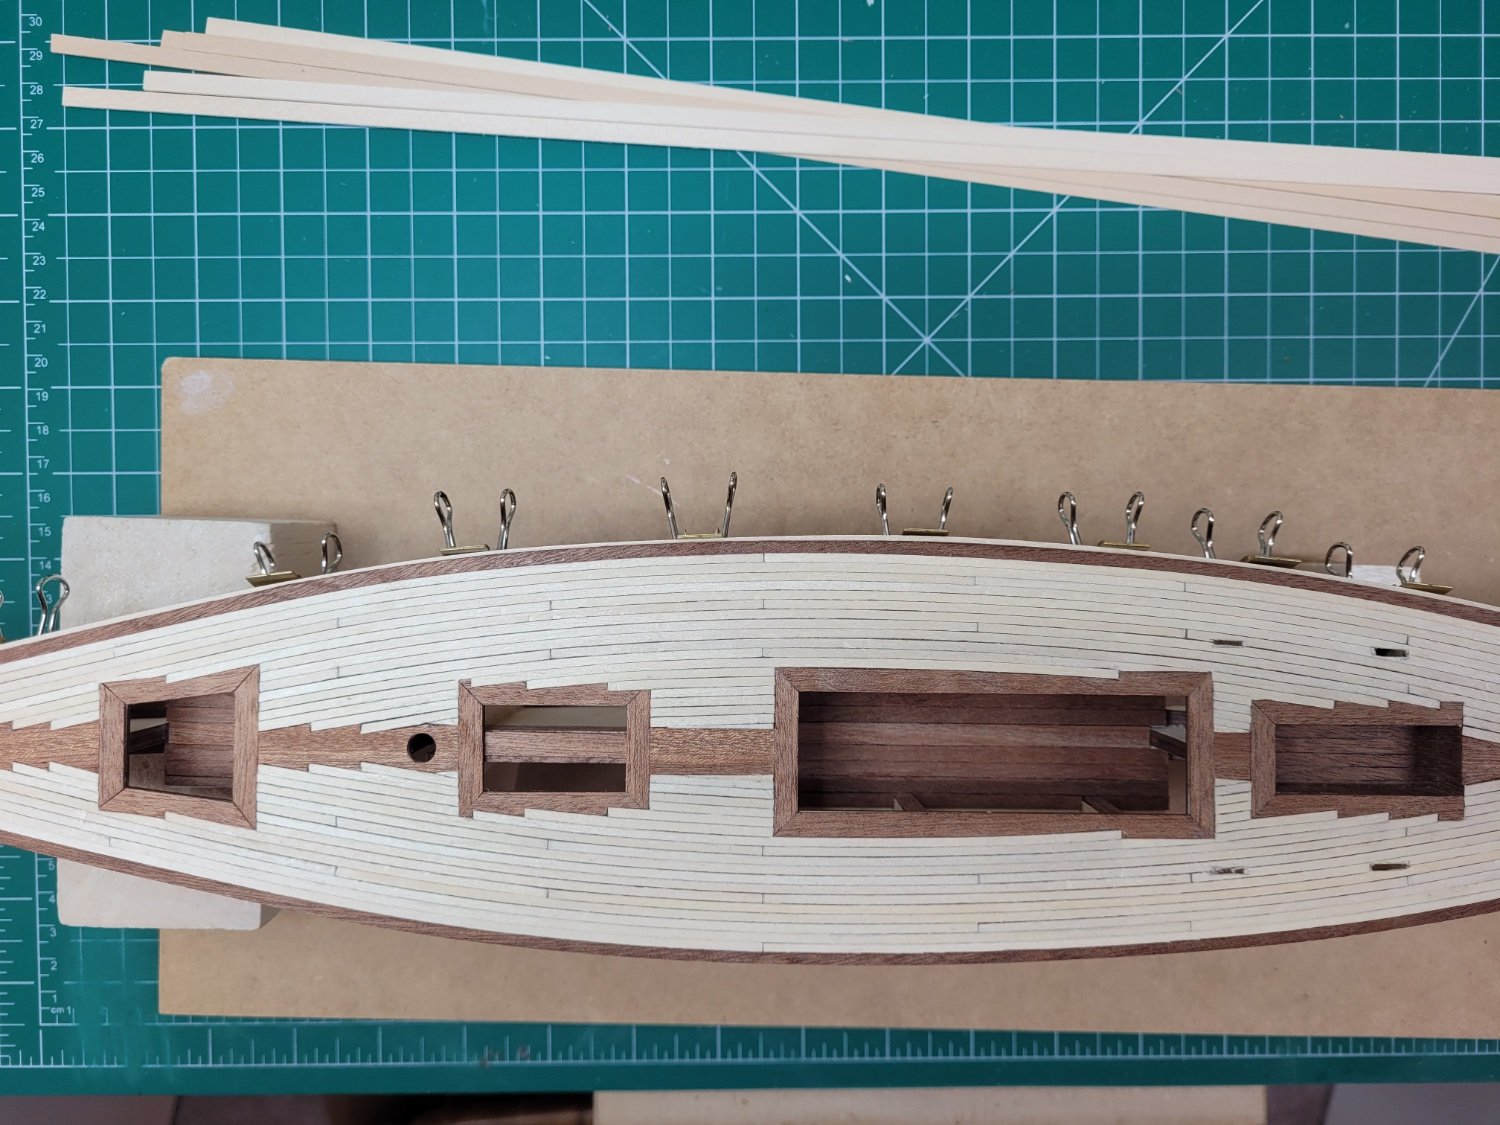
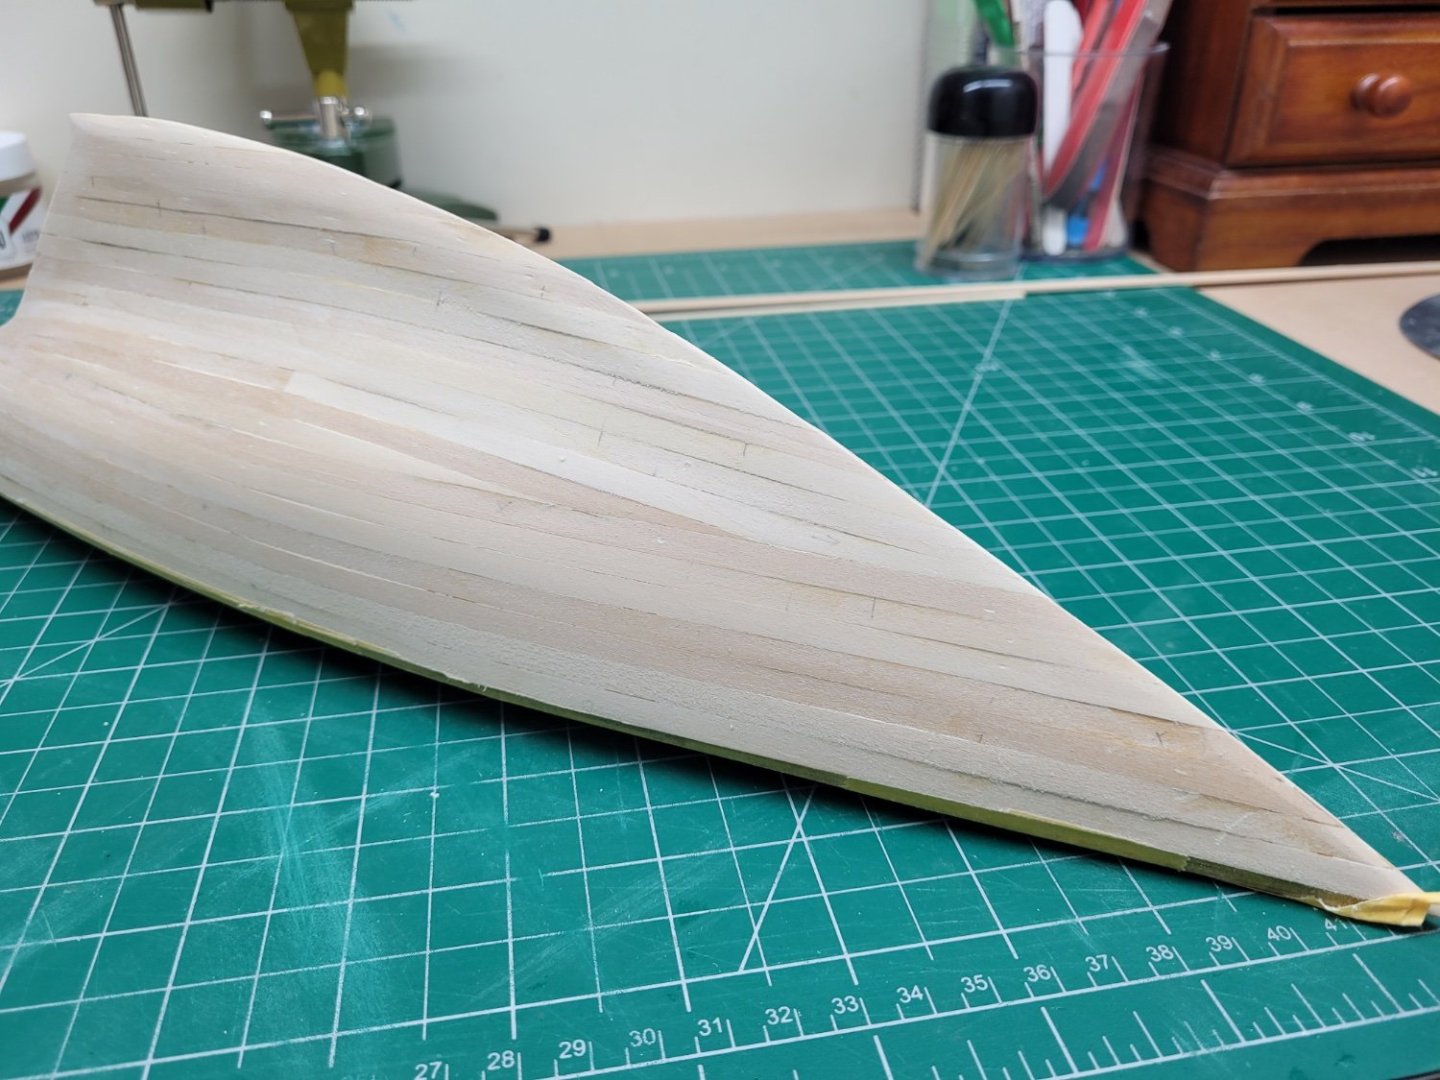
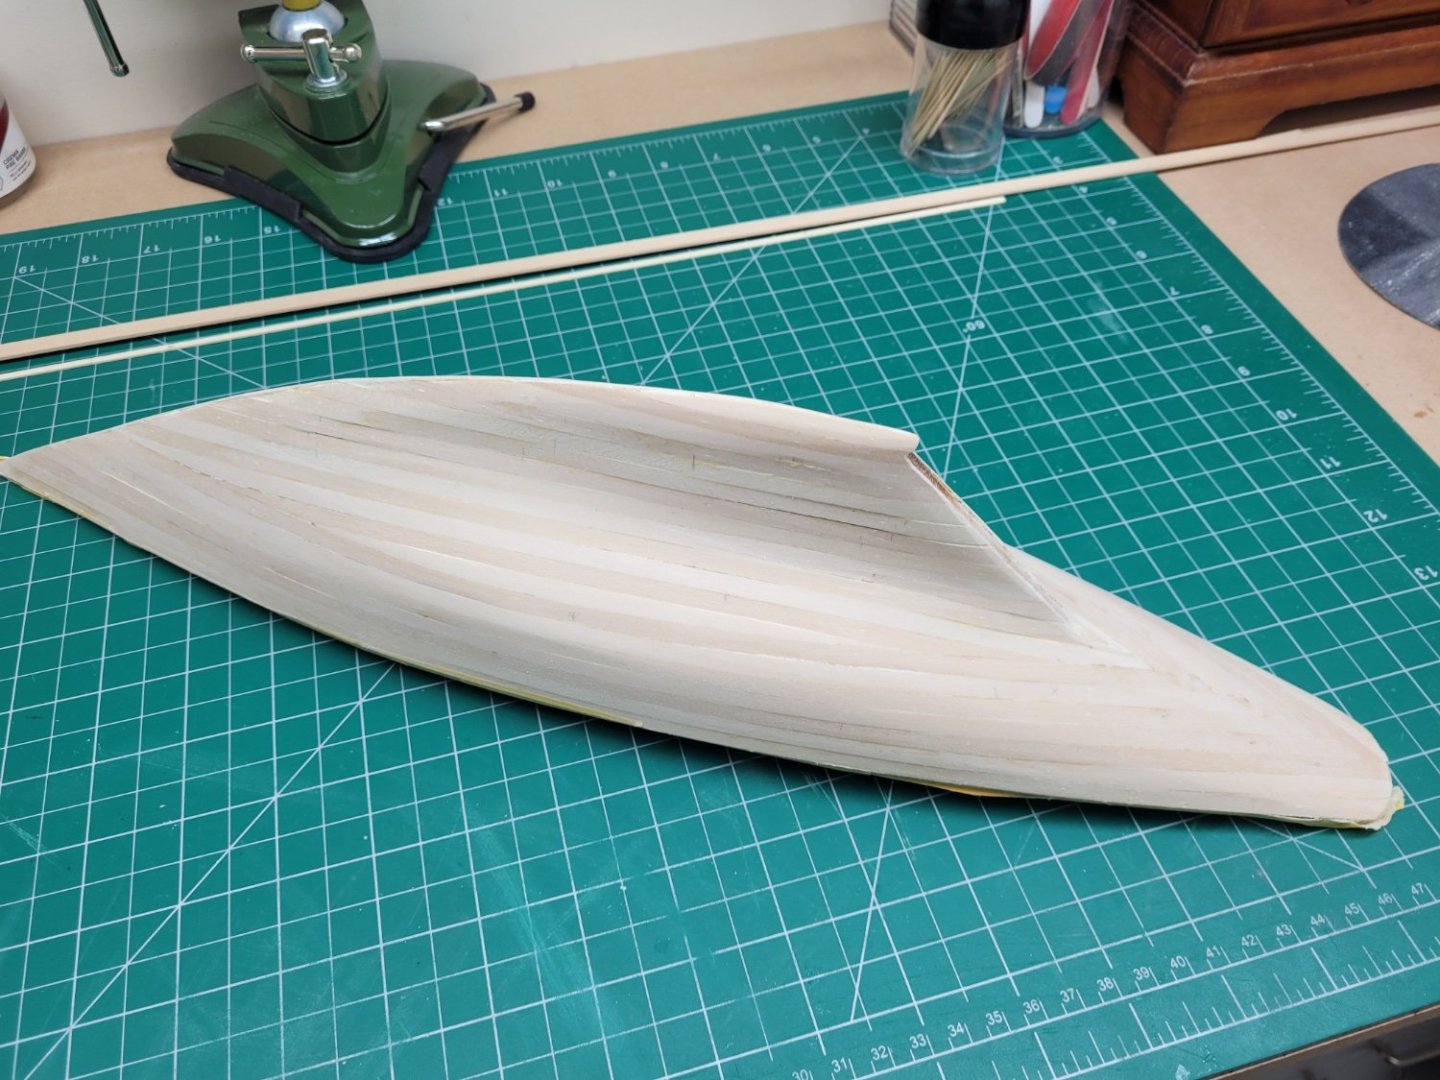
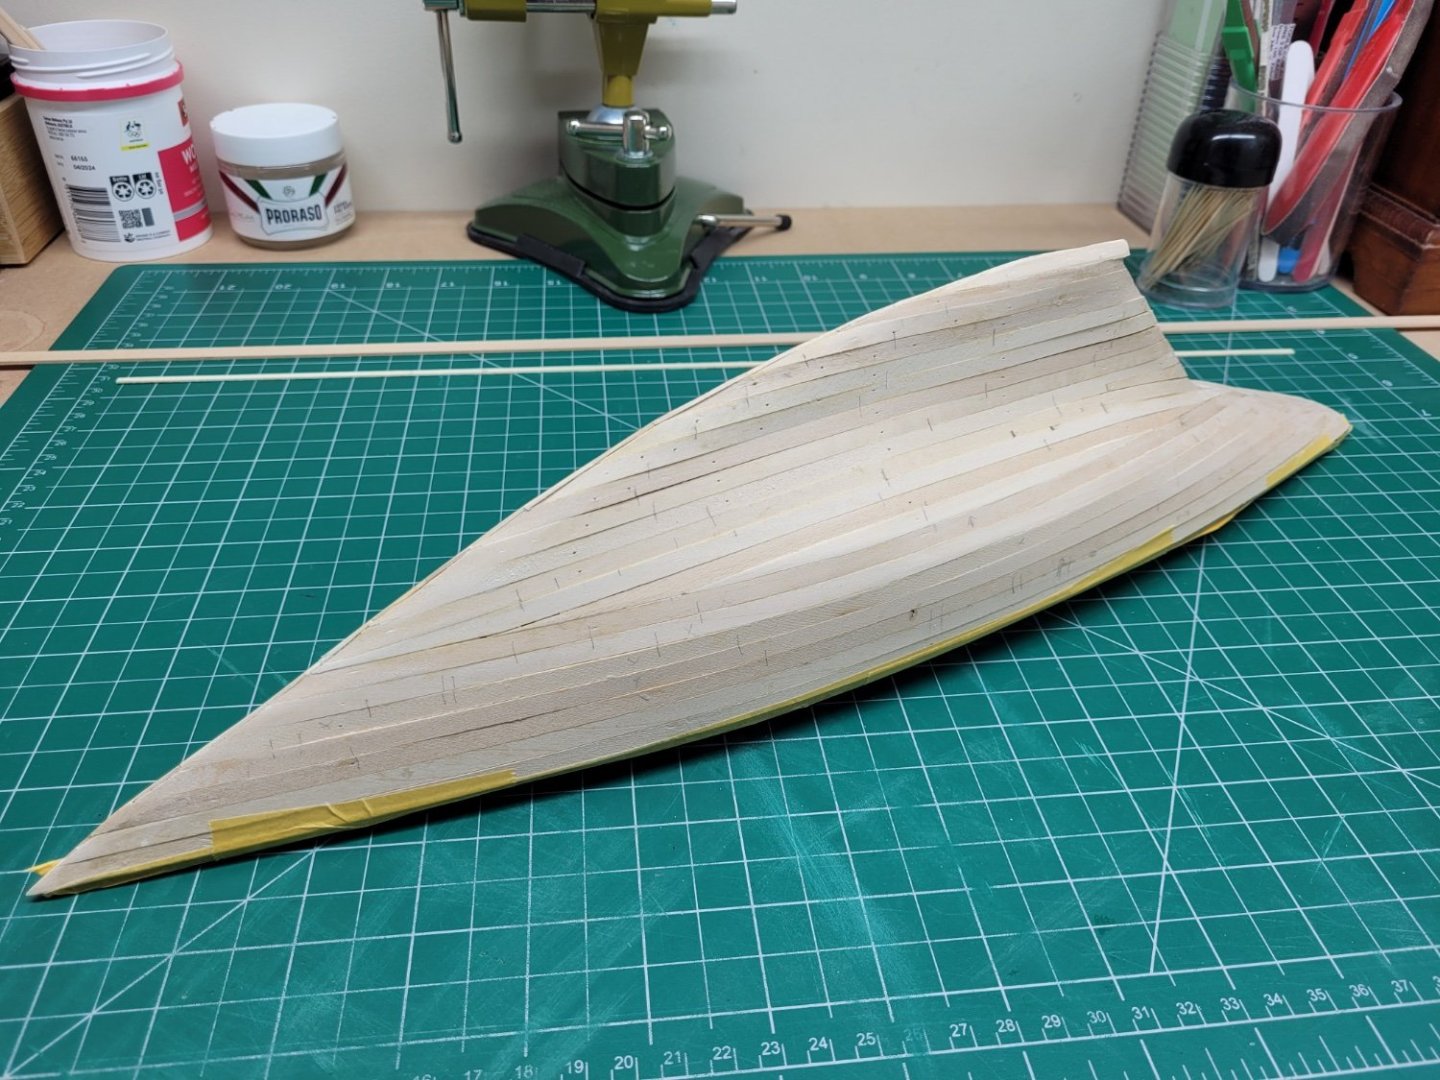
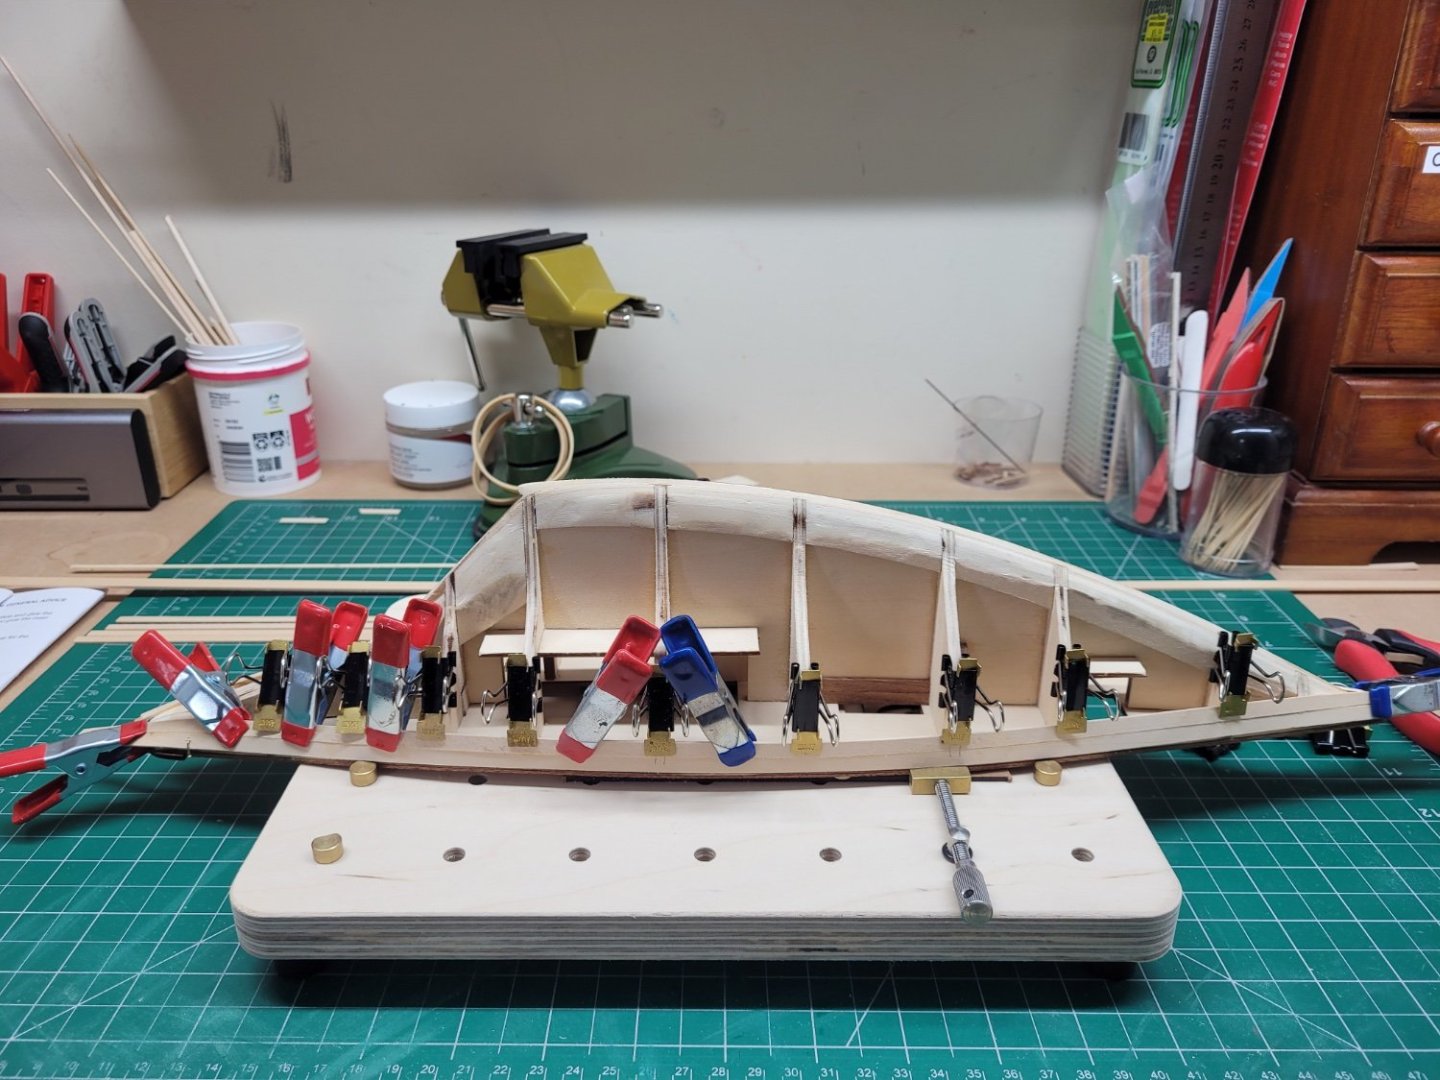
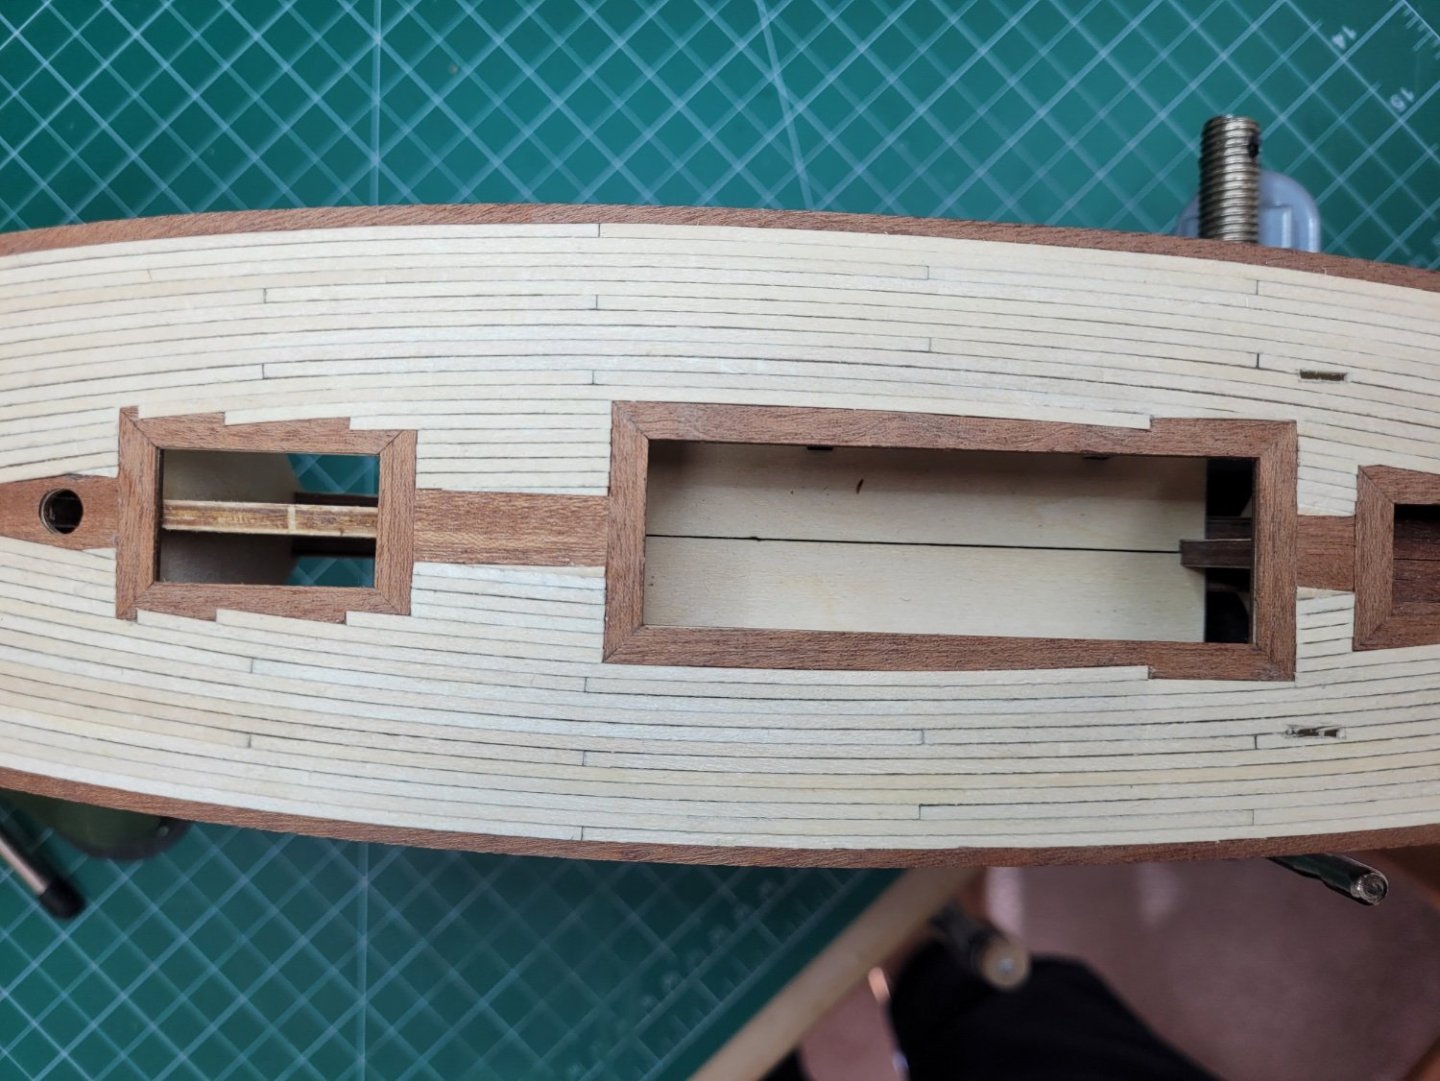
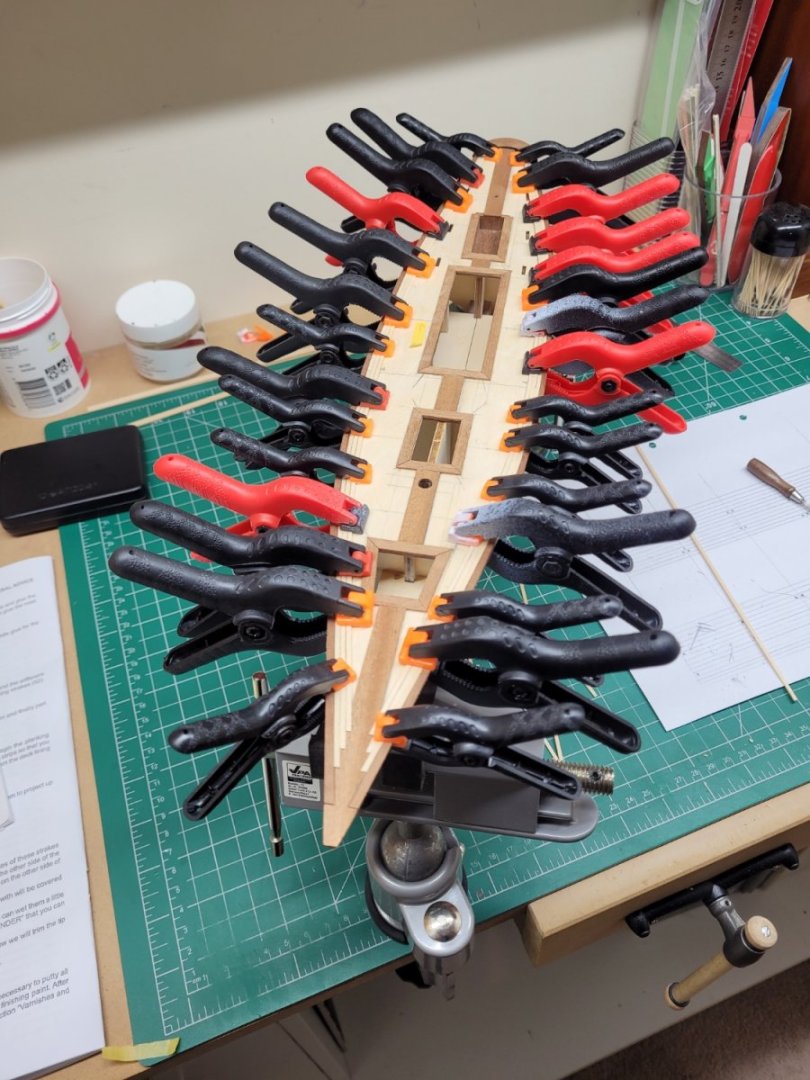
 Hello, A quick progress update - the hull planking has now been finished. The last few rows of planking were pretty easy to do as they were just fairly straight runs of planks with very little bending or curving required. The trickiest part was allowing for the change in curve of the keel line but that wasn't too difficult to do by firstly working out the correct angle to cut using plank offcut templates. I noticed that there is a bit of gap in the planking on the starboard side of the hull about five rows up from the keel. I'm not sure how I missed that at the time but I guess my clamps didn't hold the plank exactly where I was hoping them to! Never mind, but it isn't something to worry about as there will be some filling required in various places so that should hopefully sort that out. There are, of course, a few bumps and lumps in placed where my initial fairing may have been a little off, or perhaps there was some variation in plank thicknesses etc, but again that is something that can easily be sorted with a bit of sanding (and filler). For the initial sanding I used my new hand sander that I recently purchased from Amazon. It has a selection of interchangeable bottom sections which allow you to alter the profile of the sander. It takes 125mm round velcro backed sanding discs and I was able to find a set of 40 discs also on Amazon which ranged from #120 grit to #3000 grit. I used the straight edge, concave and convex profiles with #120 grit paper for a very quick initial sand and then moved up to #240 just to smooth things out a little more. The purpose here was to get the hull roughly to the required shape so that I could then work out which areas needed any filler and whether any high spots needed further sanding down or not. The next job is to add some wood filler where required and then go over the hull once more with a much wider variety of grits and shapes to refine the hull contours as much as possible. The stern planking also needs some work as I have left this a little long at this stage so I will need to thin this out and blend it into the rearmost bulkhead to get a graceful curve. I also haven't yet added the bulwark planks and these will need to be fitted before the final hull sanding can be undertaken, but before I can even do that I also need to scrape the deck planking and get that nicely finished. Unfortunately, as it is winter here and I really only get to work on model in the evenings and weekends I'm probably not going to be able to get outside and do any further sanding now until next weekend.


- 122 replies
-
- 10
-

-
- Artesania Latina
- Pen Duick
- (and 1 more)
-
Absolutely fantastic craftsmanship and skill.
-
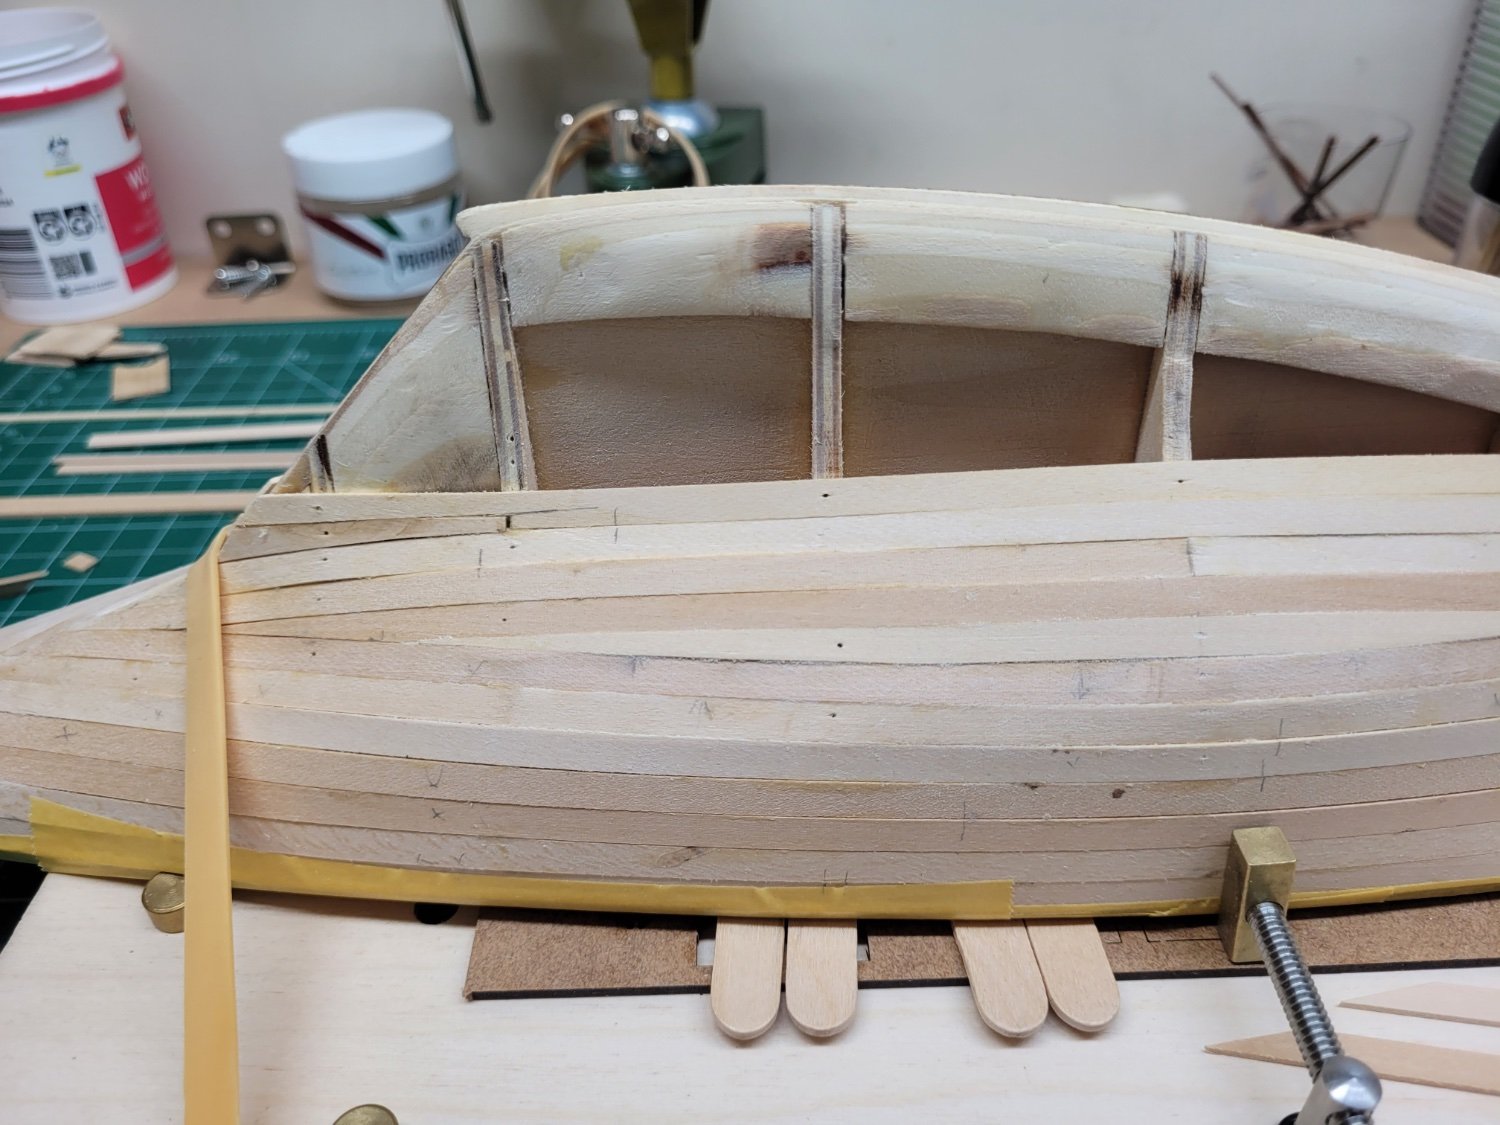
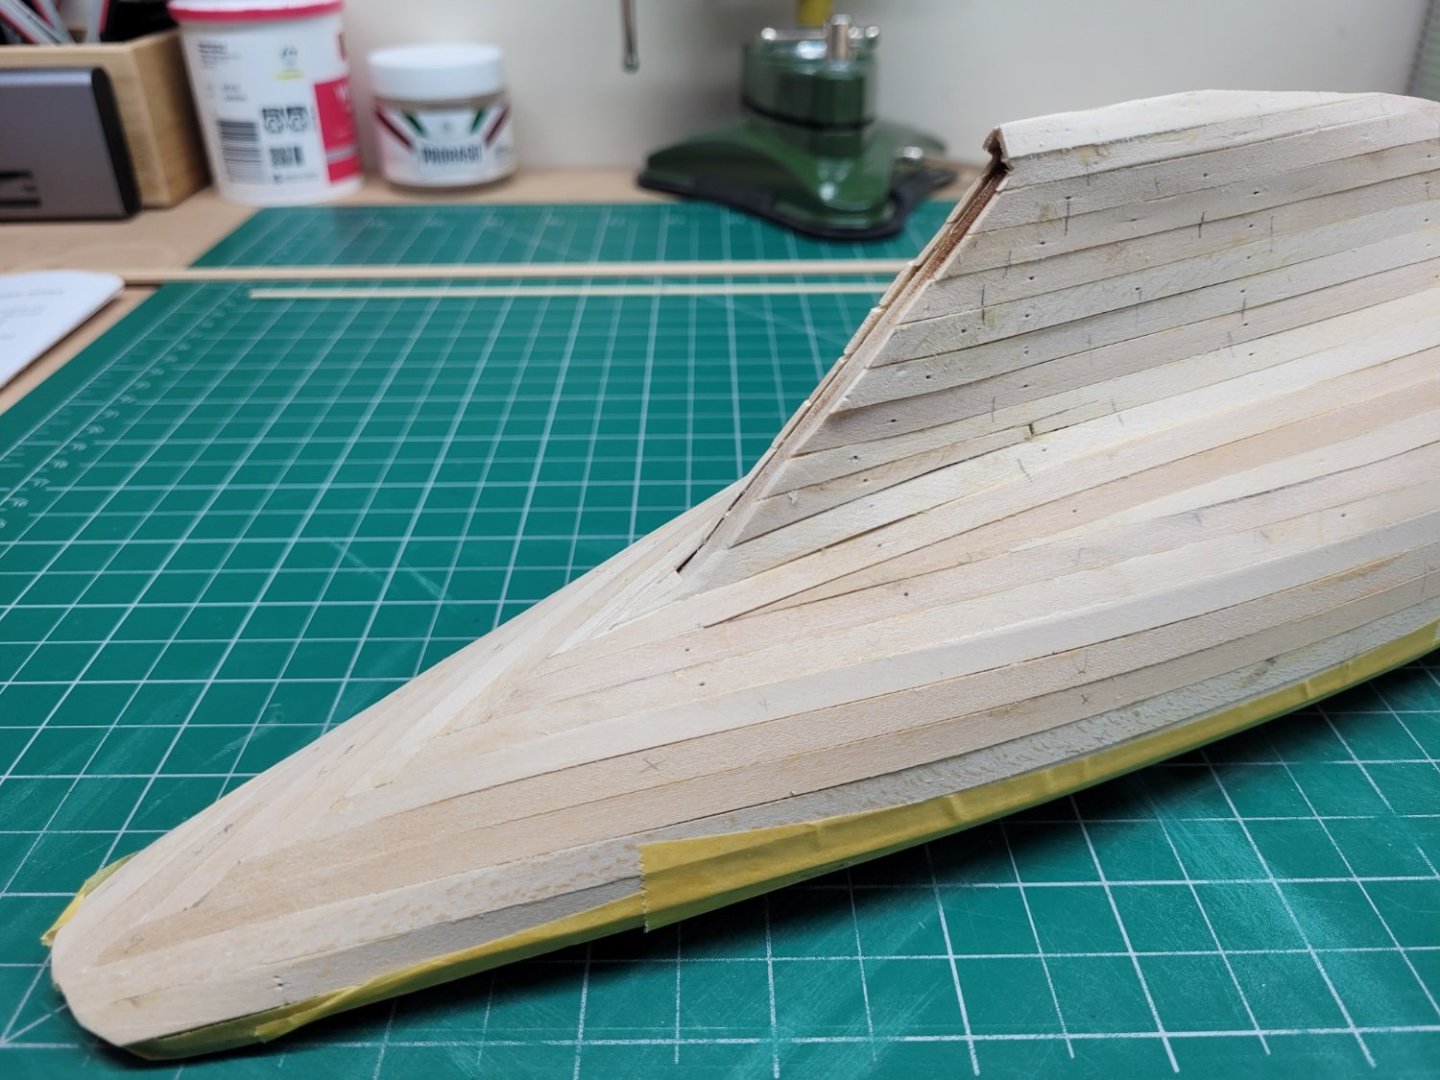
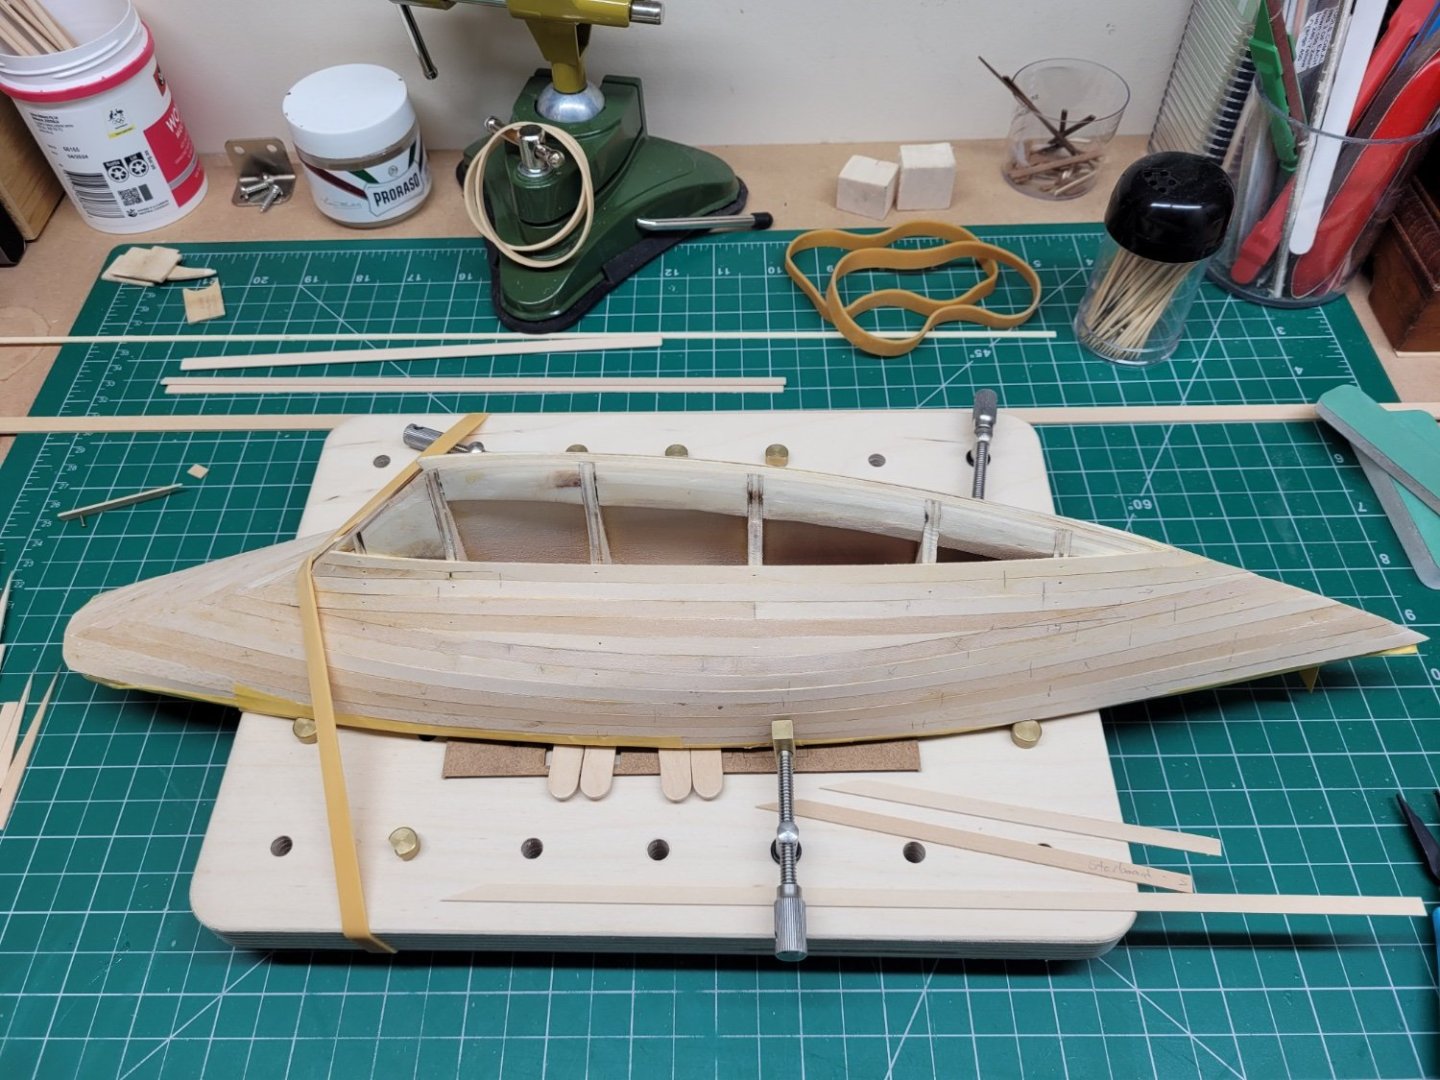
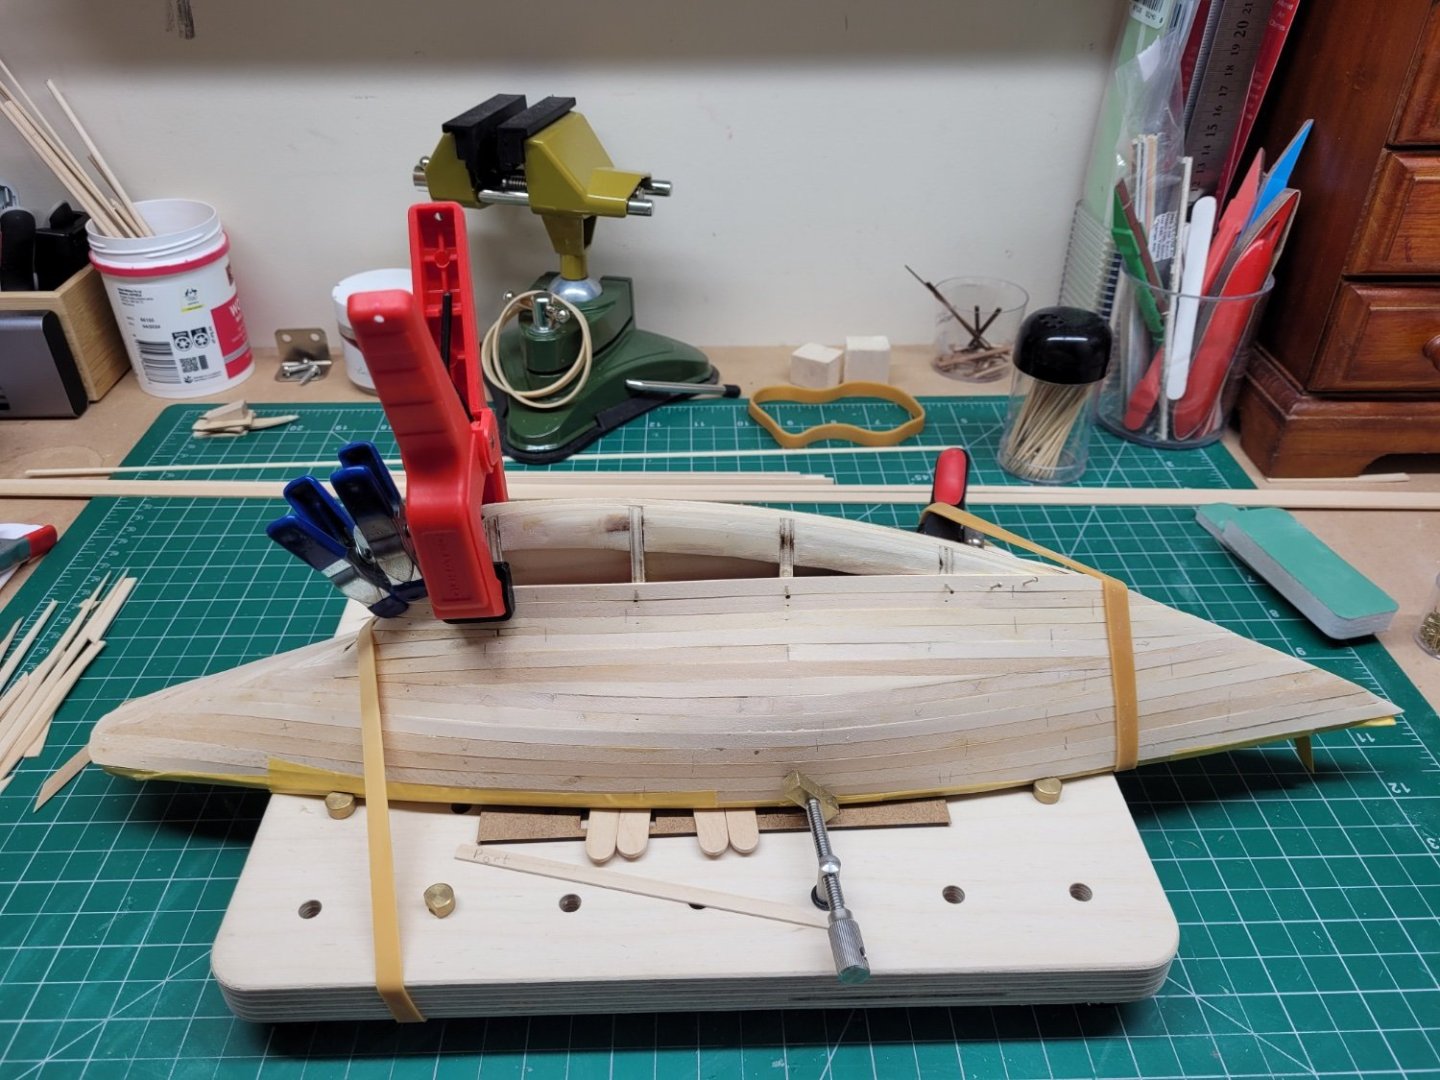
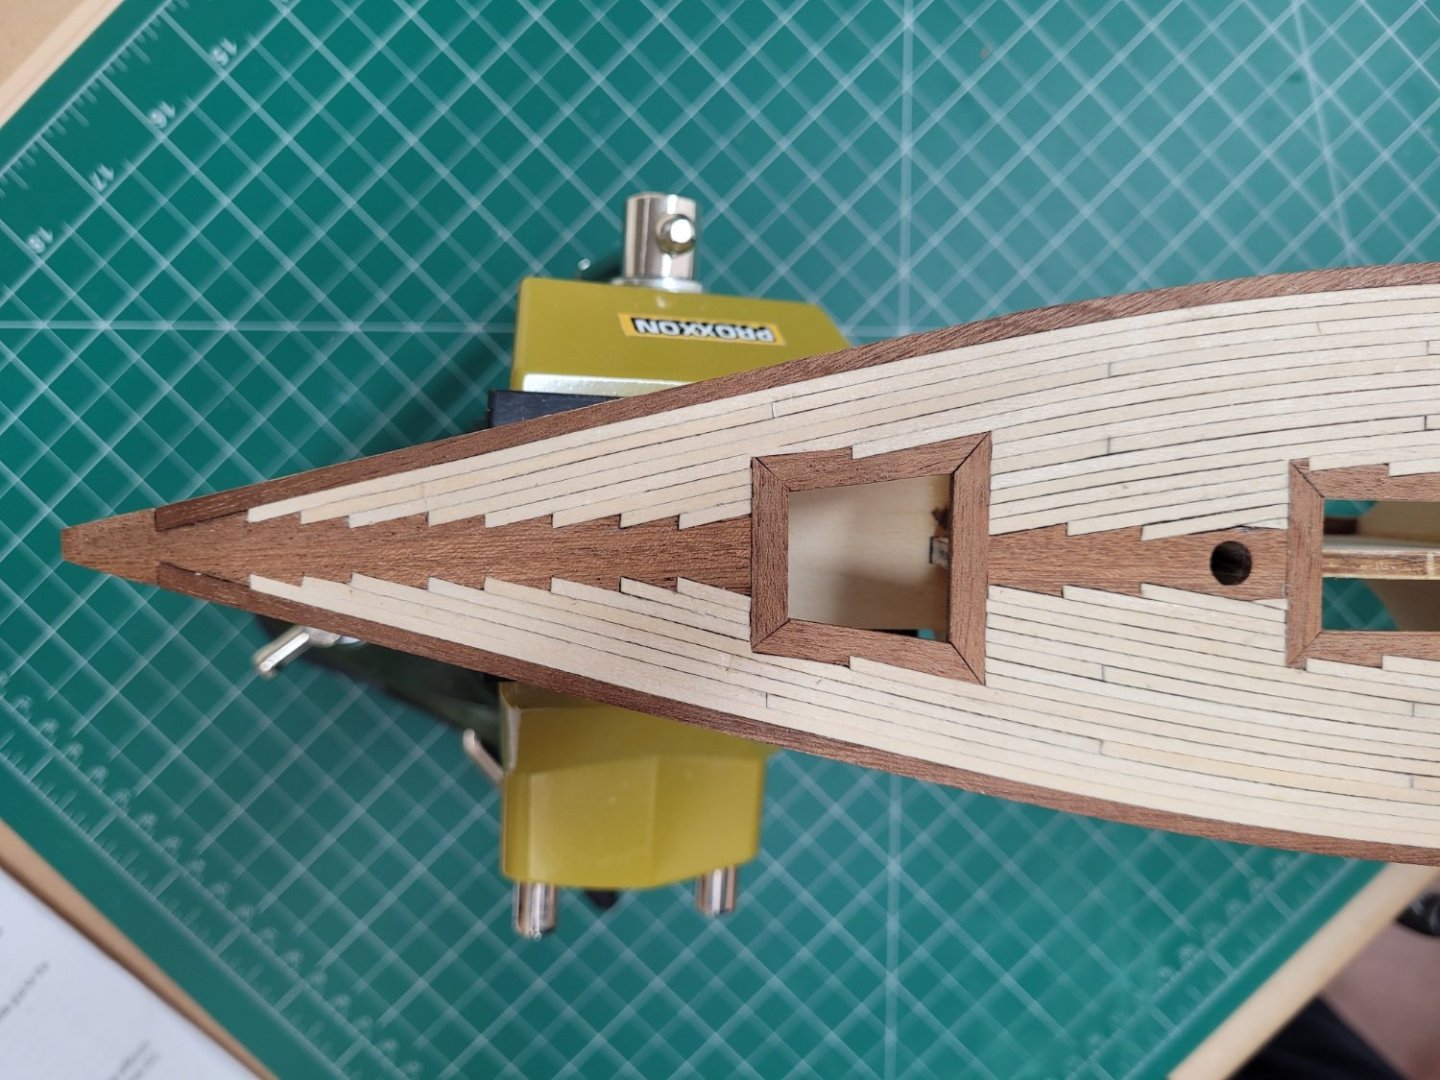
Hull planking has been continuing, albeit somewhat slowly. I found that the first five rows of planks sat nicely against the bulkheads without needing any persuasion to remain in place. However, with the planks of rows six and seven I saw that some edge bending was needed as this was an area of the hull where the 'rounder' shape of the midships contrasted more noticeably with the thinner stern and bow. I used a travel iron (filched a long time ago from my wife's sewing supplies) to apply heat to the planks to bend them to the required shape. When I went to add the planks for row eight I saw that there would be quite a considerable bend required from there onwards due to the curve of the hull, so I decided to cheat a little at this point and I added in a shorter plank in the midships section to flatten out the curve somewhat. I positioned this where it lay naturally against the bulkheads and left a 5mm gap at the widest point amidships so that a spiled plank could be fitted into the gap between it and plank seven. I was then able to add another full length plank to each side of the hull which easily followed the contour of the hull without requiring any edge bending. After fitting similar planks on the other side of the hull I then filled the gap on each side with a shorter plank cut to shape to close the gap between planks seven and eight. I know good planking techniques says you shouldn't end planks in a point and I wouldn't have done it this way if the hull was going to be left as bare wood. The Pen Duick hull is going to get a full paint job (after a lot of sanding and filling) so hopefully when I am finished you won't even be able to tell it is wooden! One further plank was then added to each side of the hull to bring the planking up to the area where the hull orientation changes at the stern and the keel rises more vertically. When adding the first plank on this keel section I saw that in order for it to lie naturally against the vertical part of the hull at the rear of the keel a small stealer was needed at the rear. This was easy to fit and gave me a mostly flat run of planking from there onwards up (or down!) the keel. I have added a few more rows of planks and have about five or six more to go before the hull is finished.


- 122 replies
-
- 7
-
-
- Artesania Latina
- Pen Duick
- (and 1 more)
-
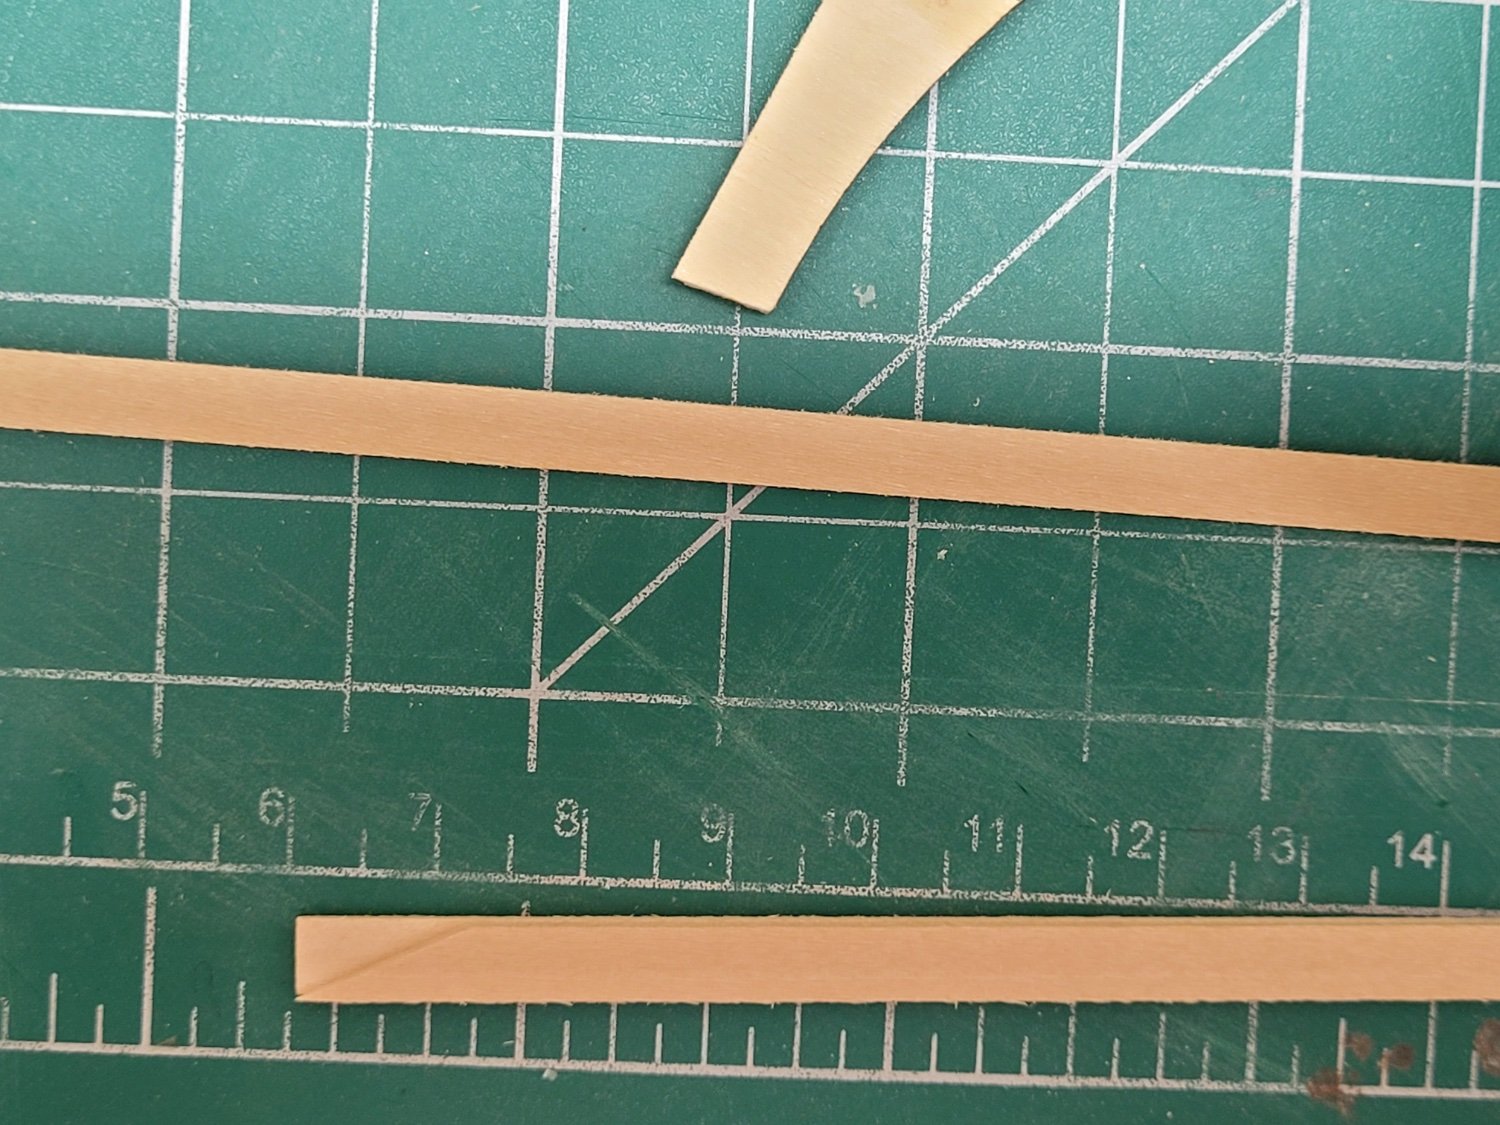
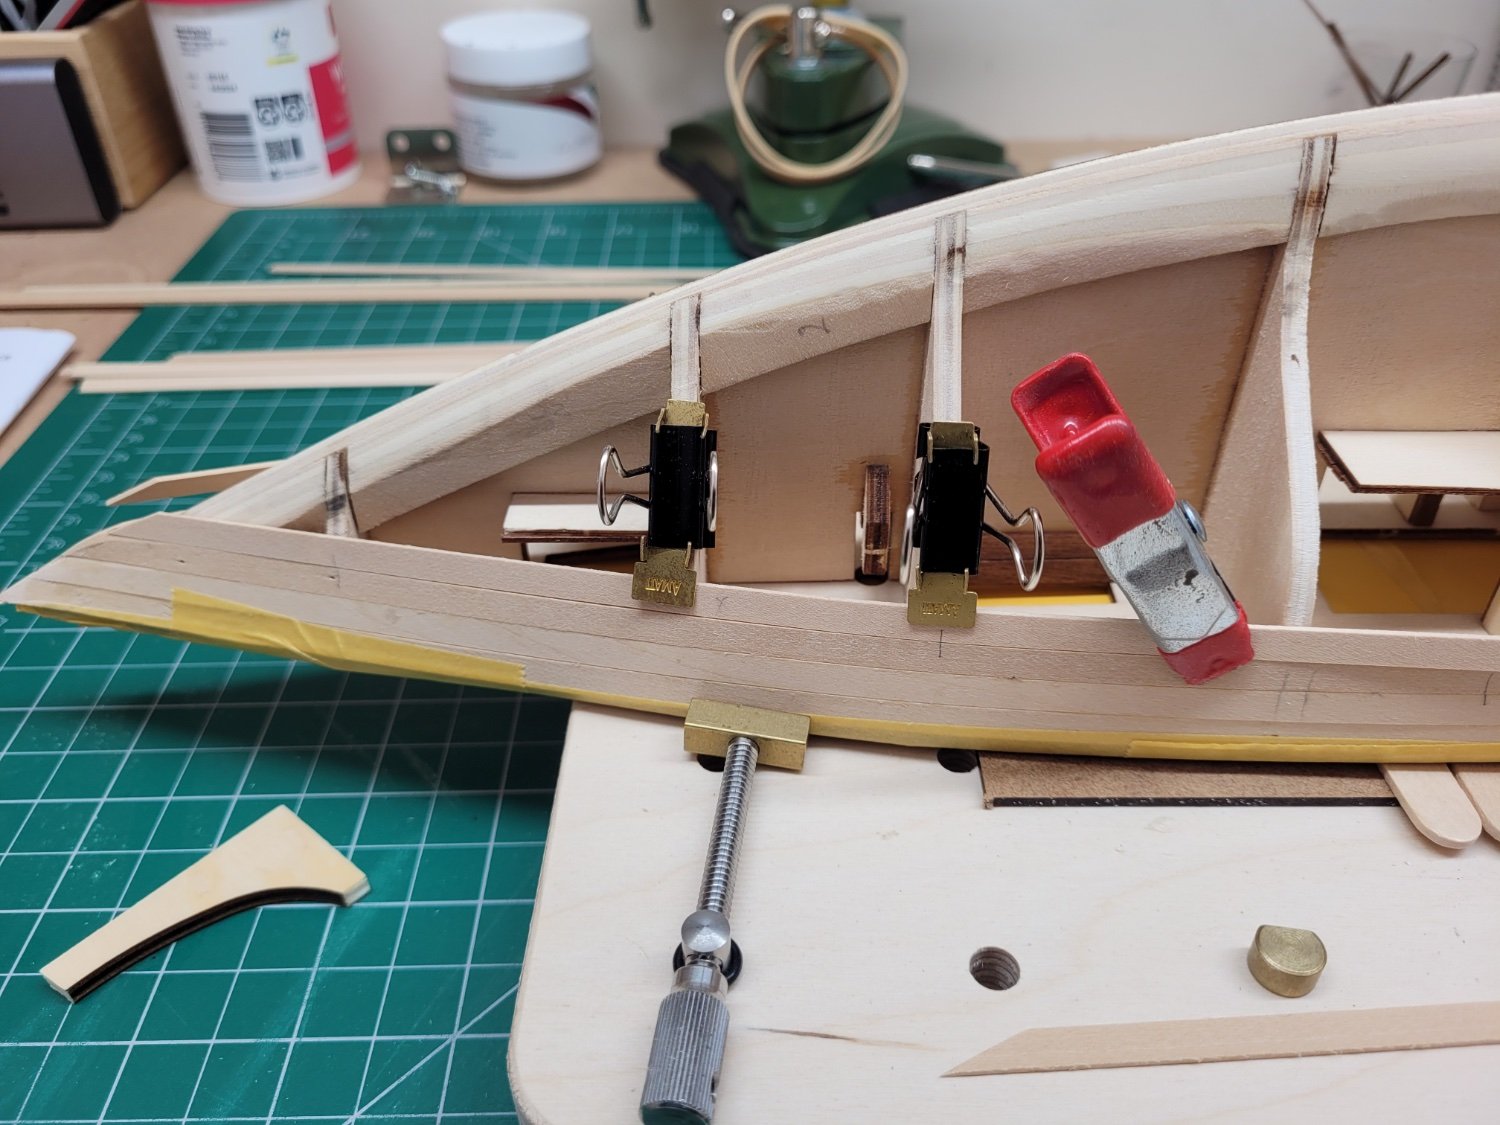
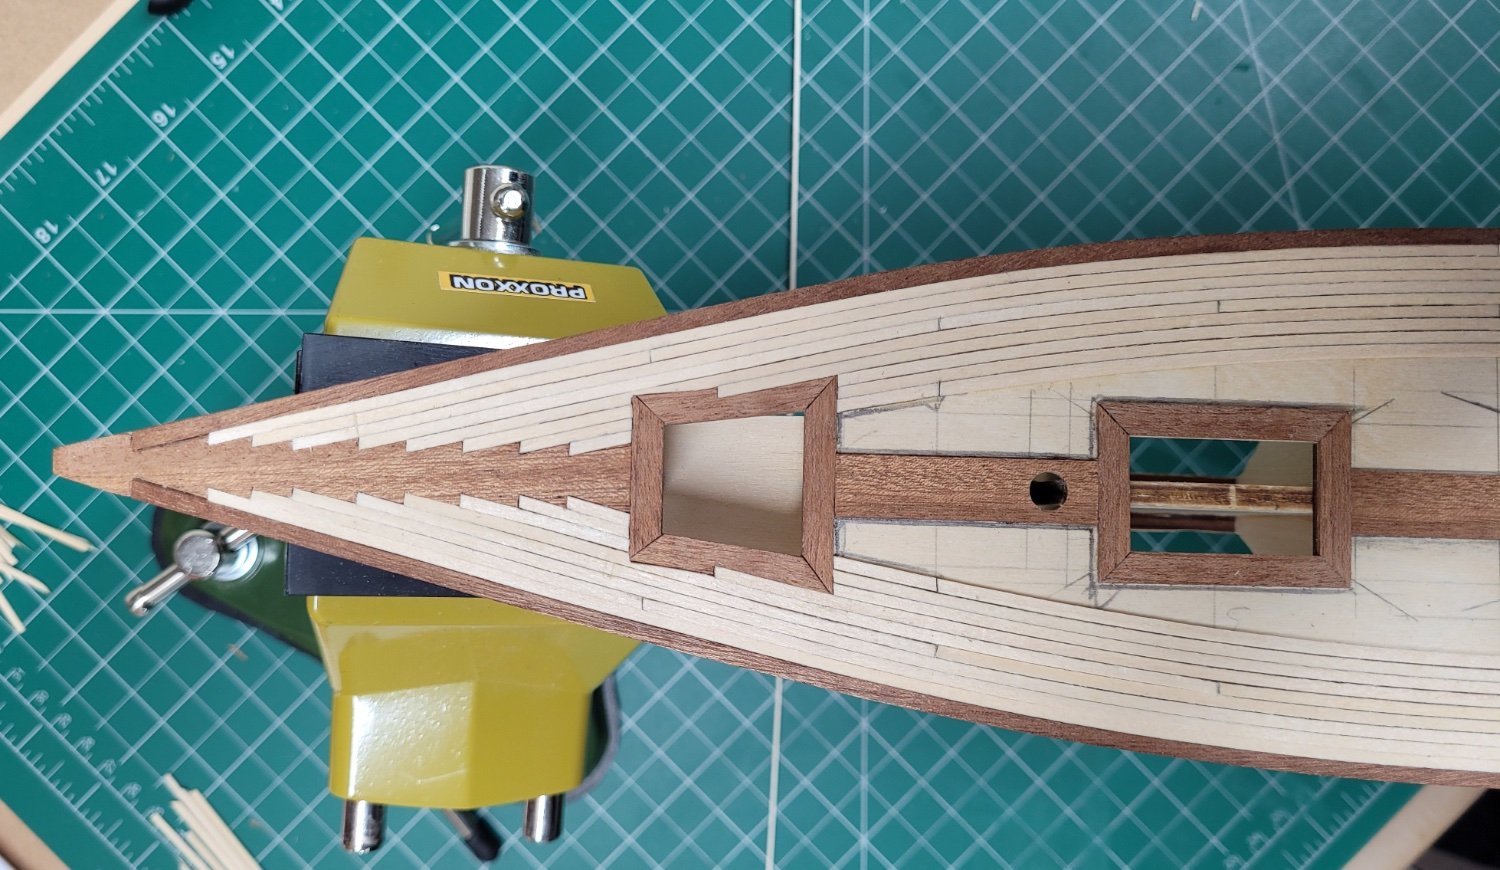
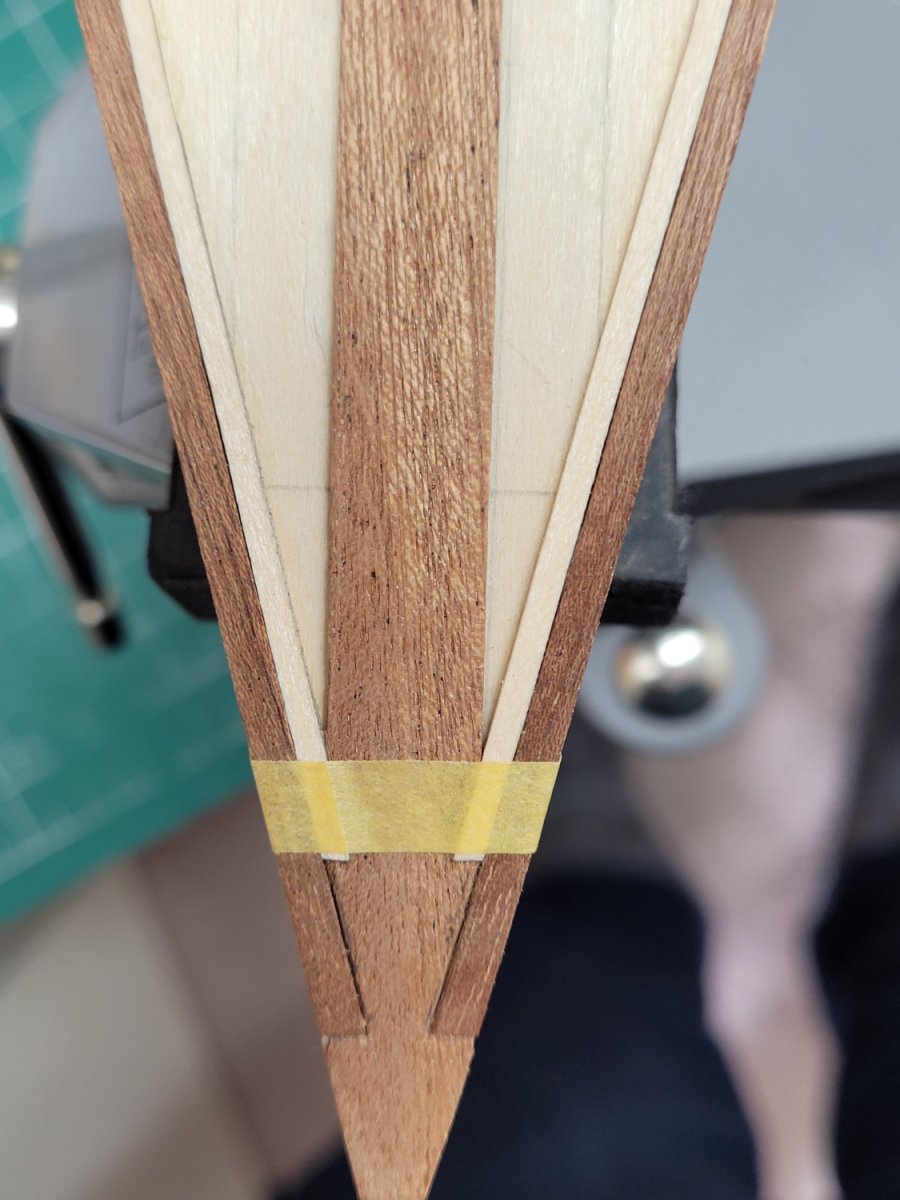
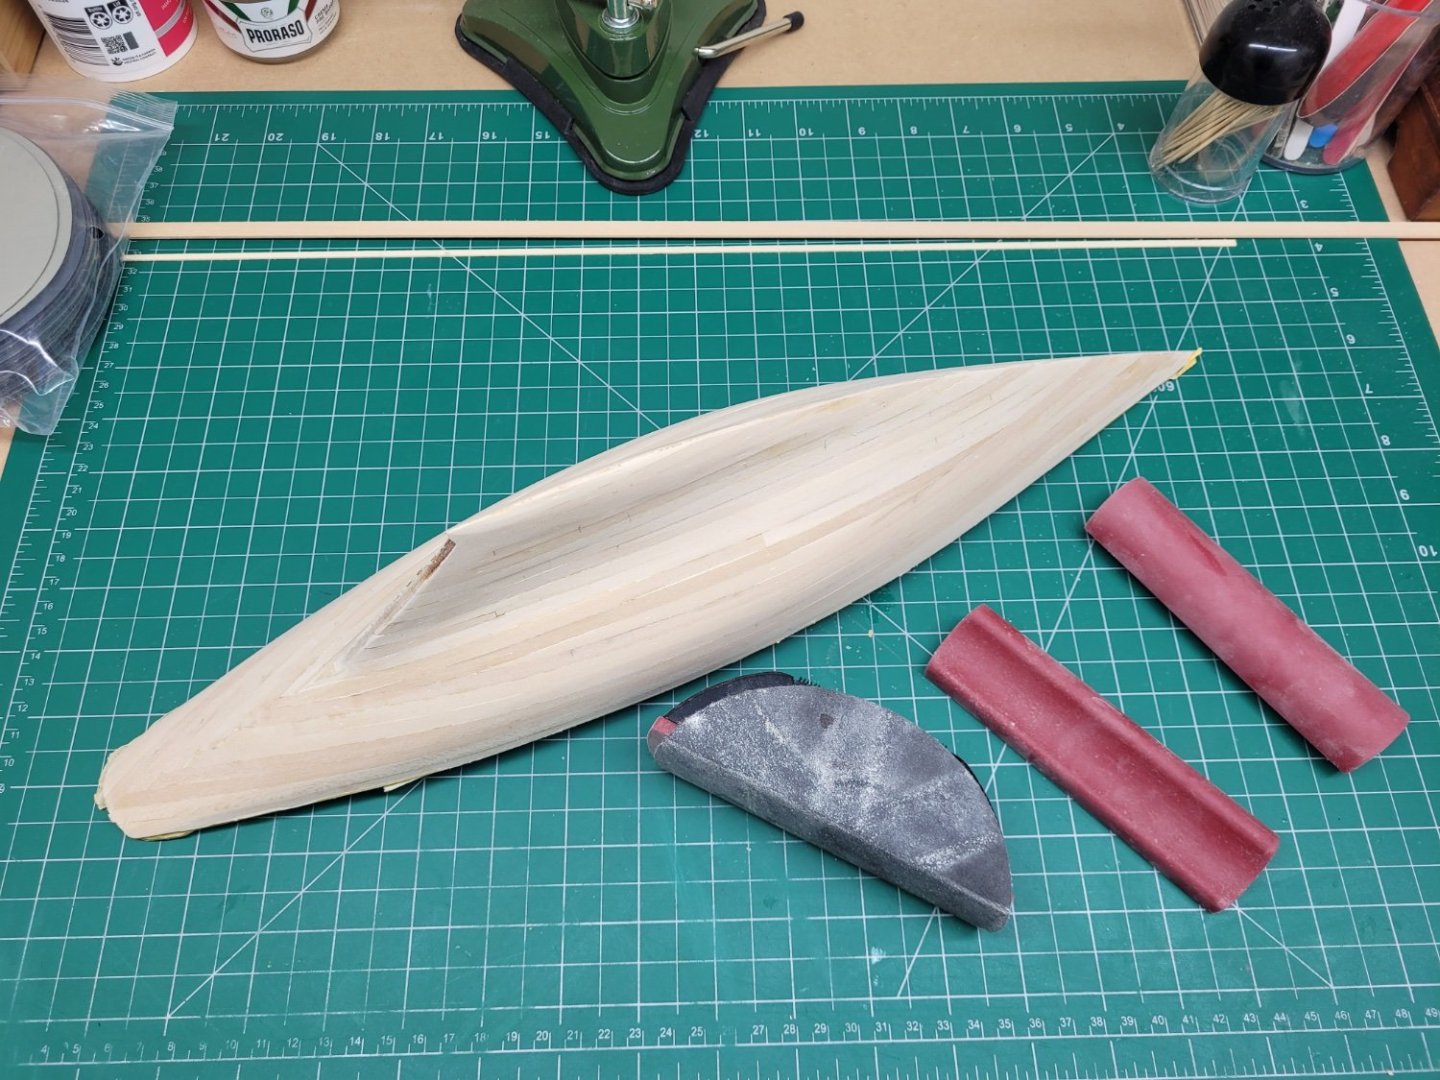
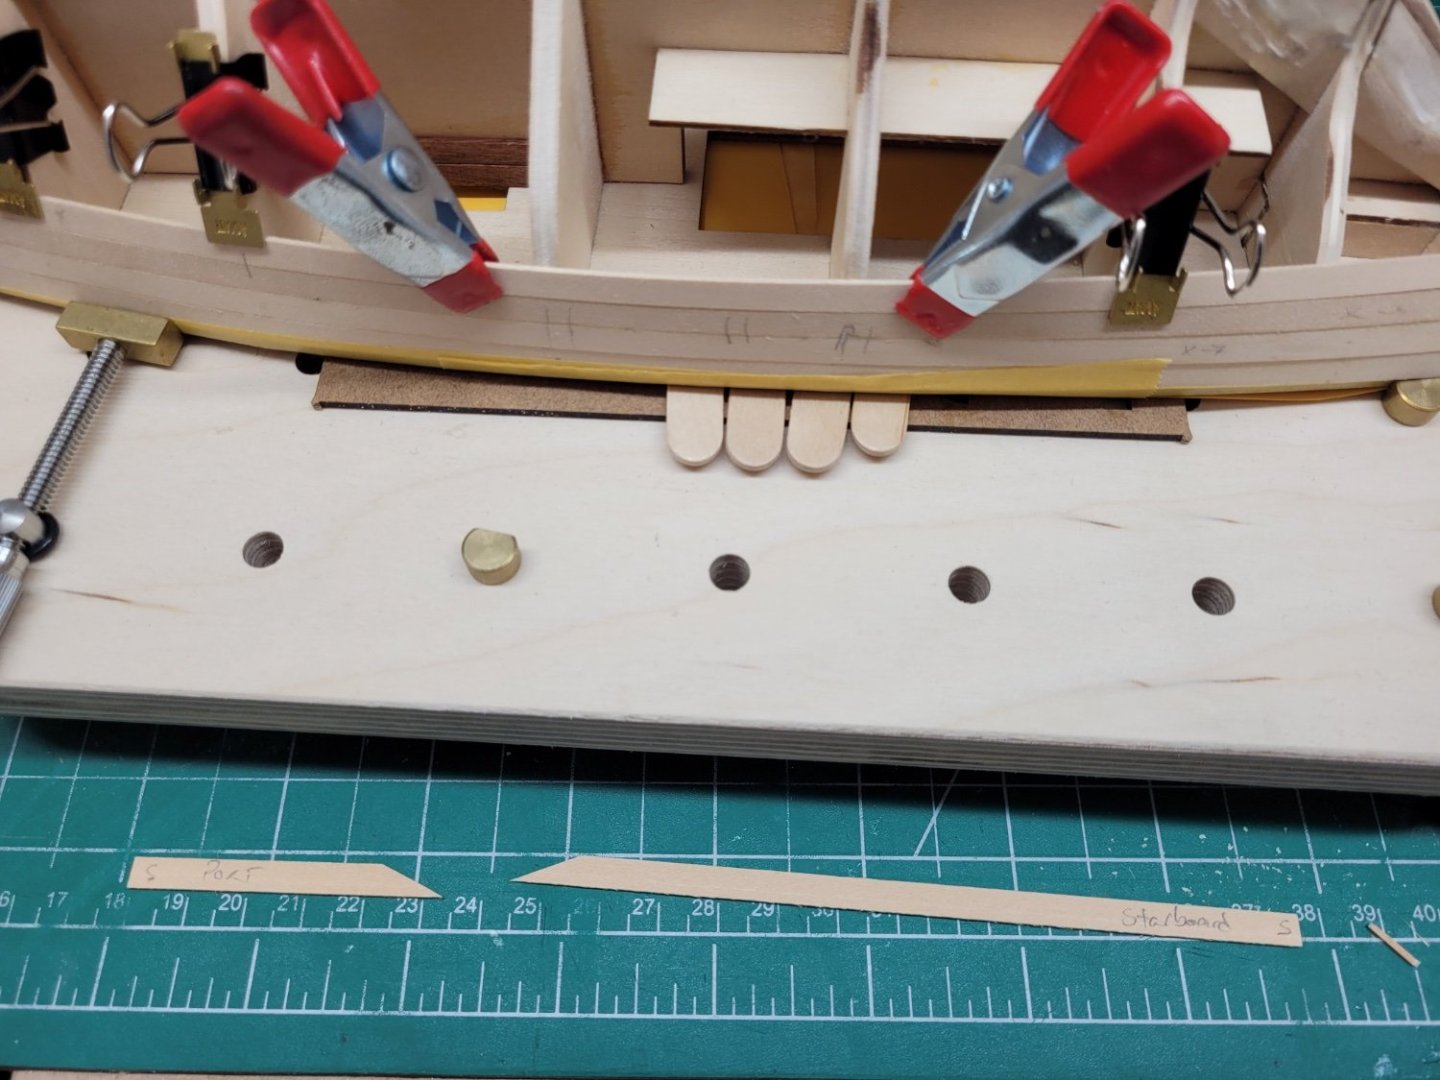
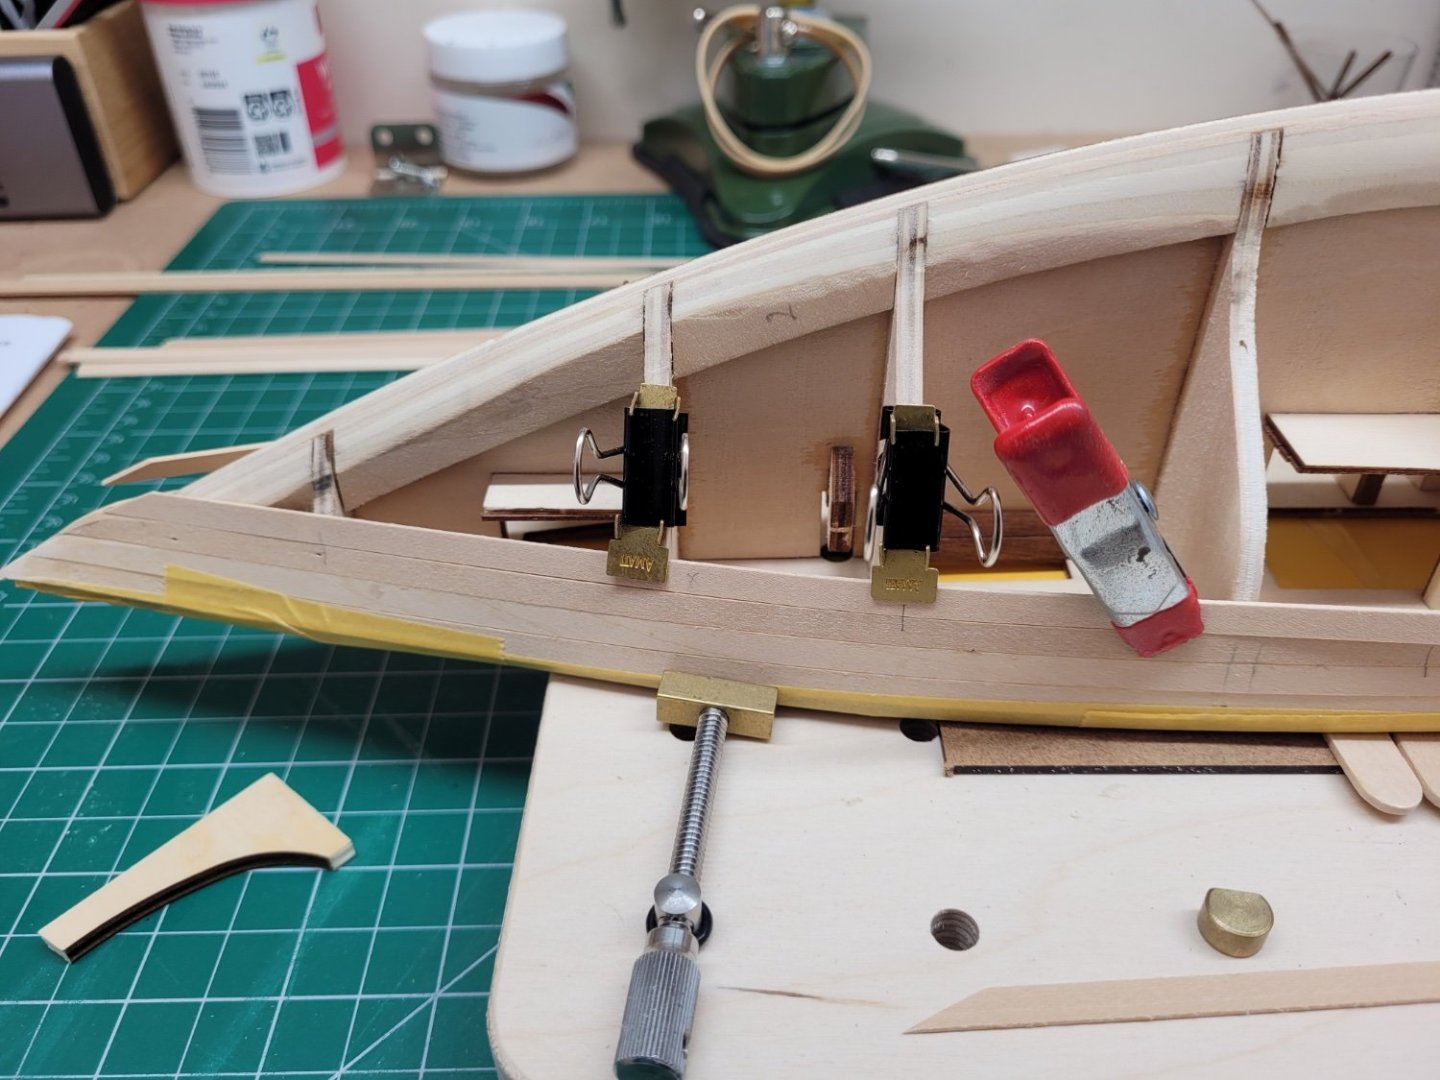
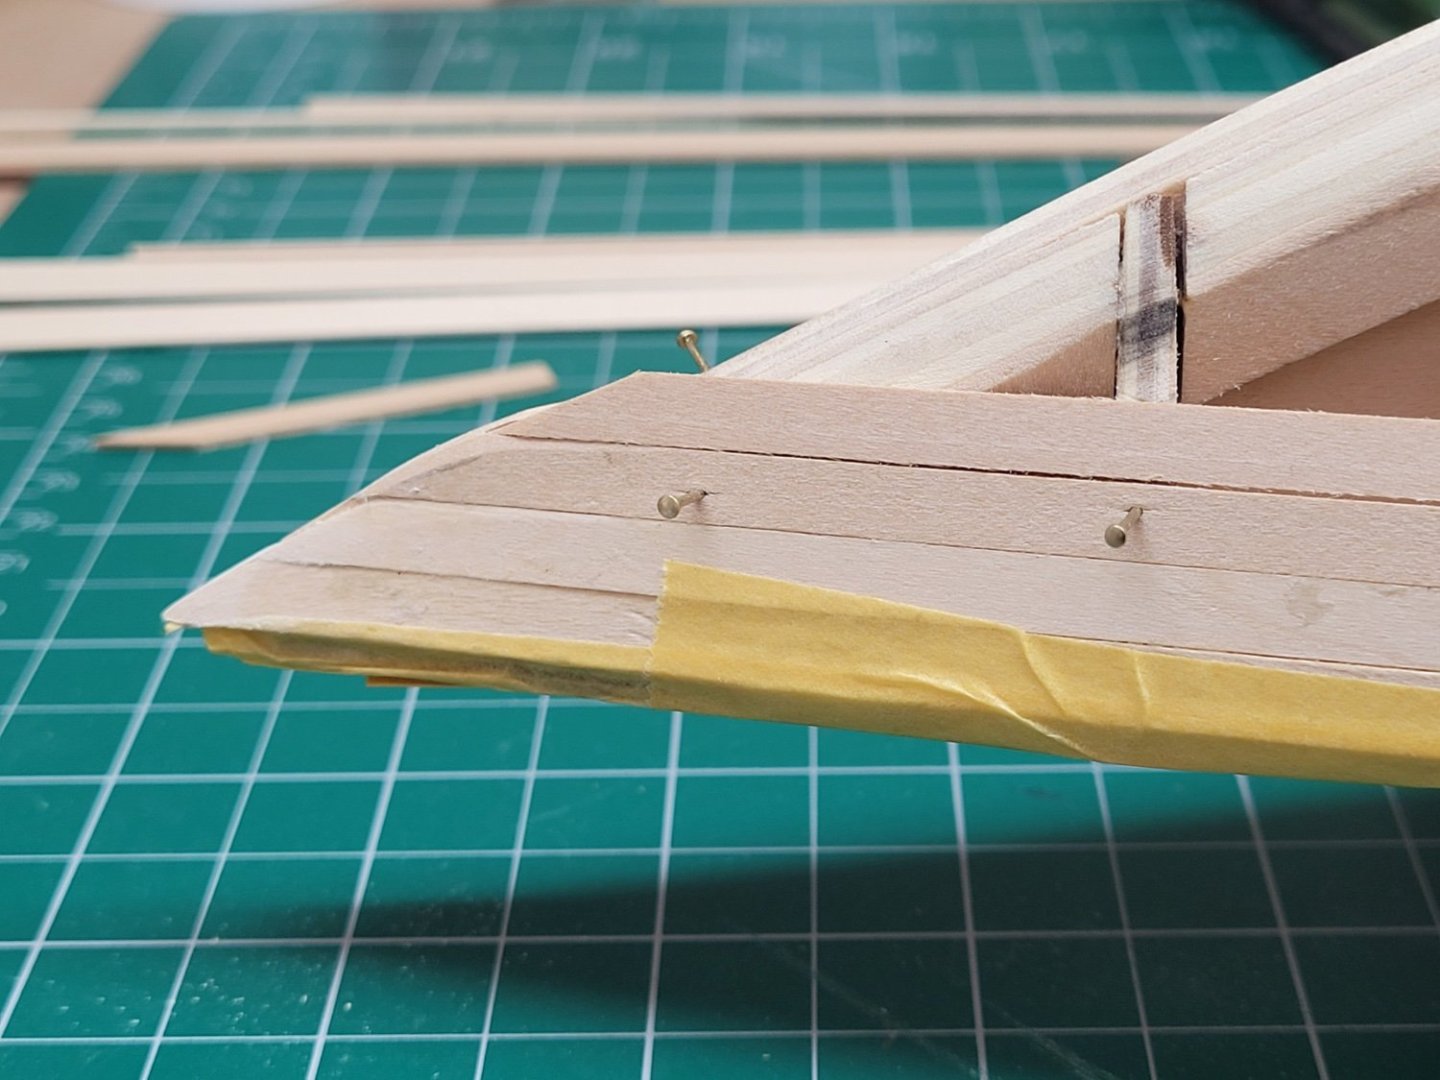
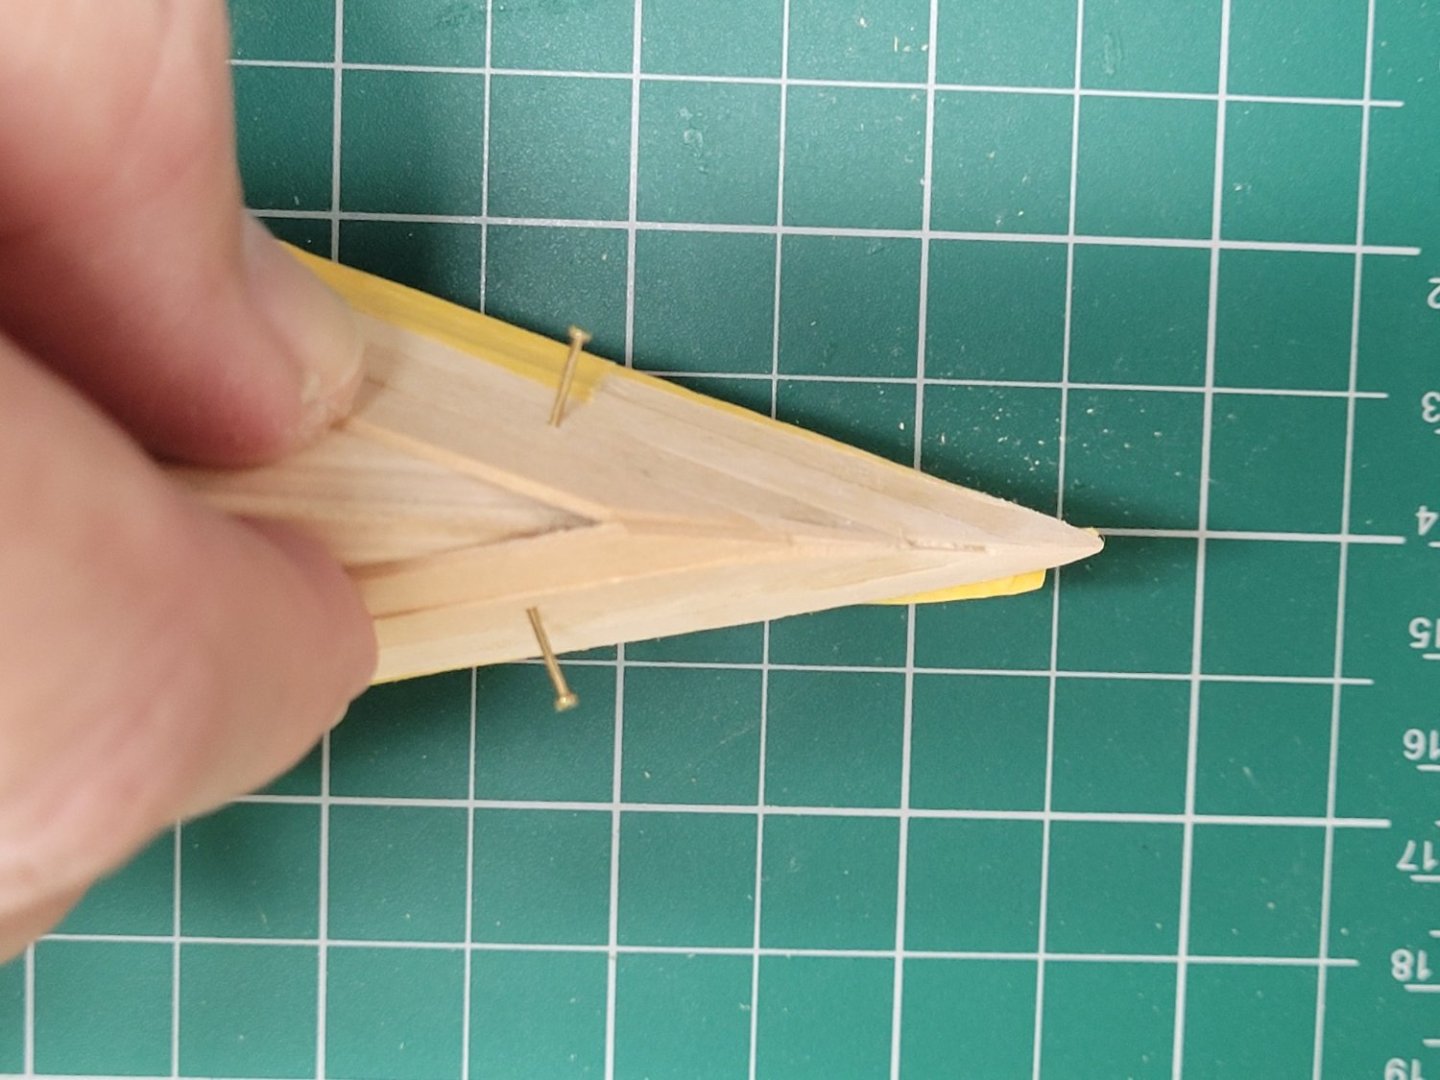
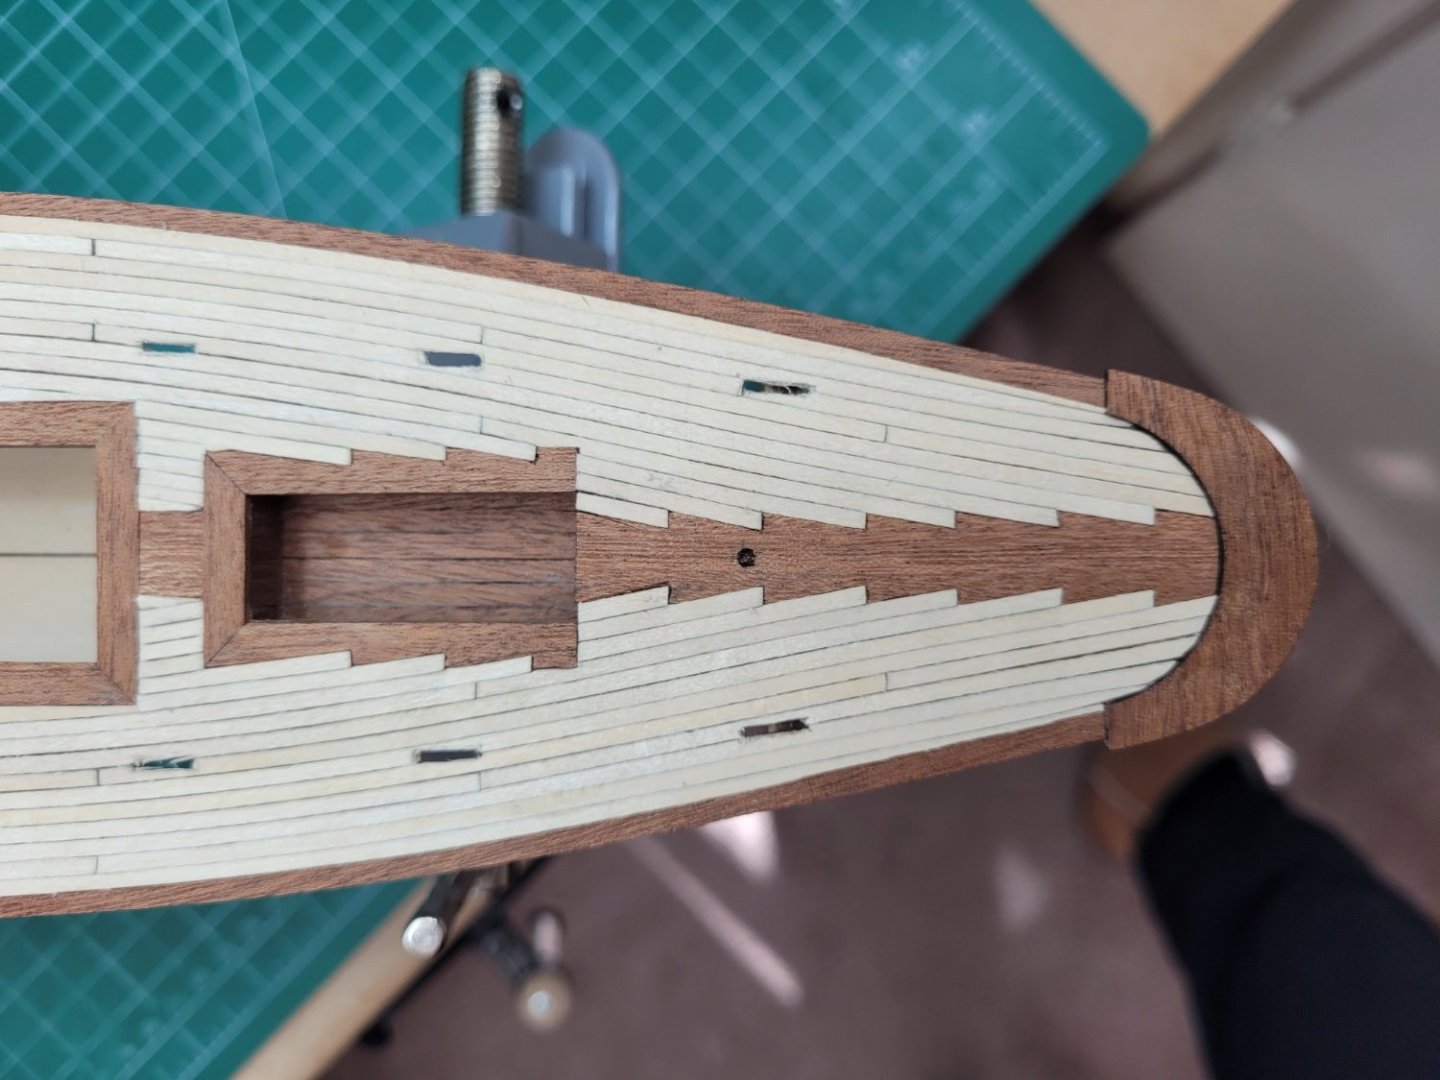
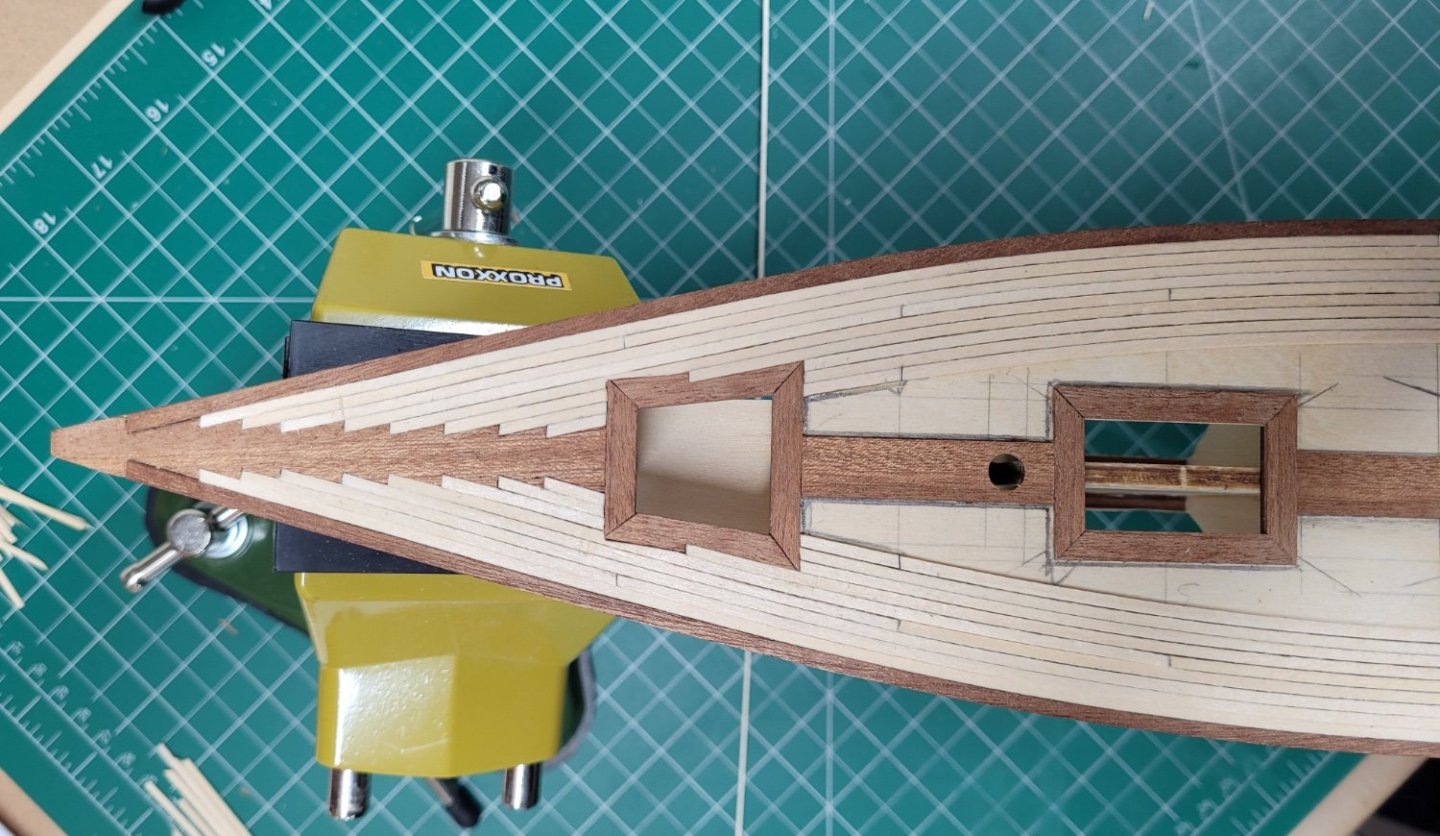
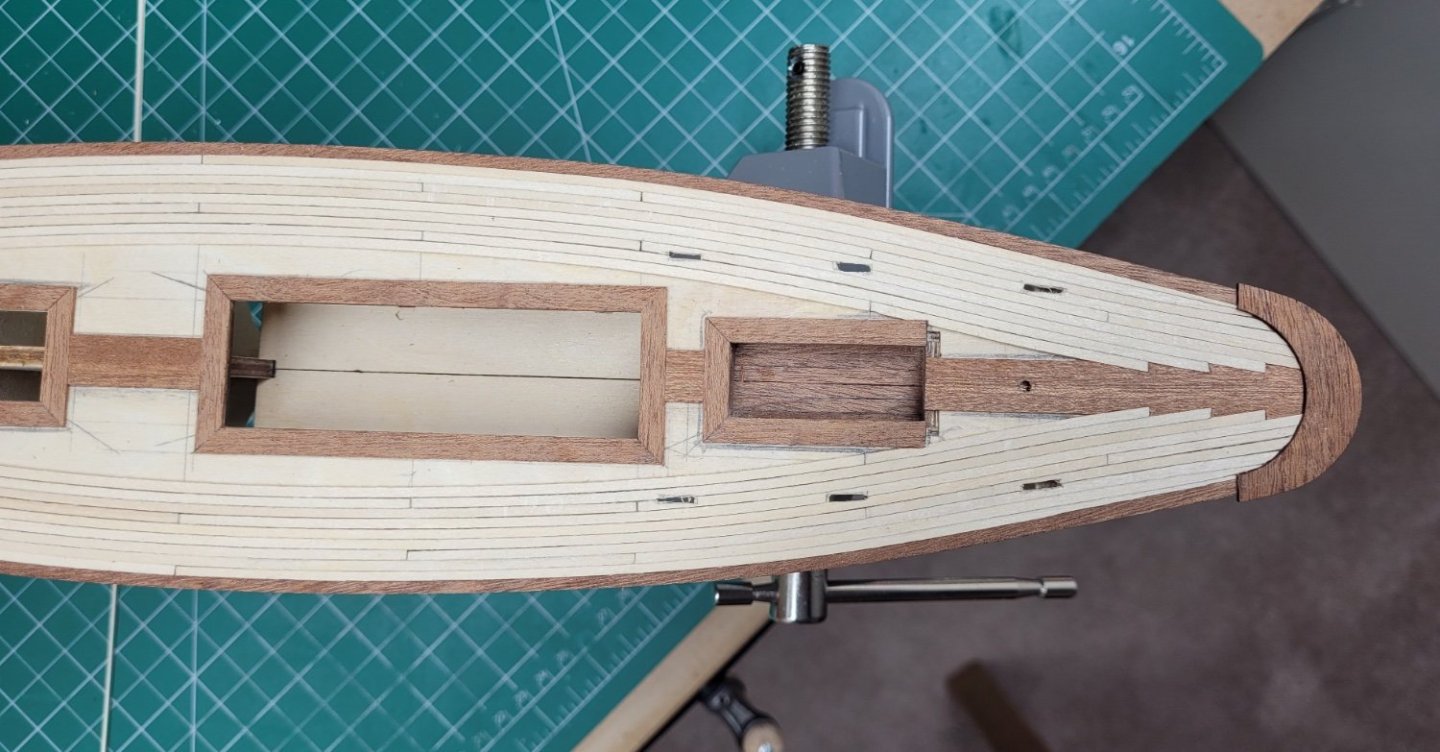
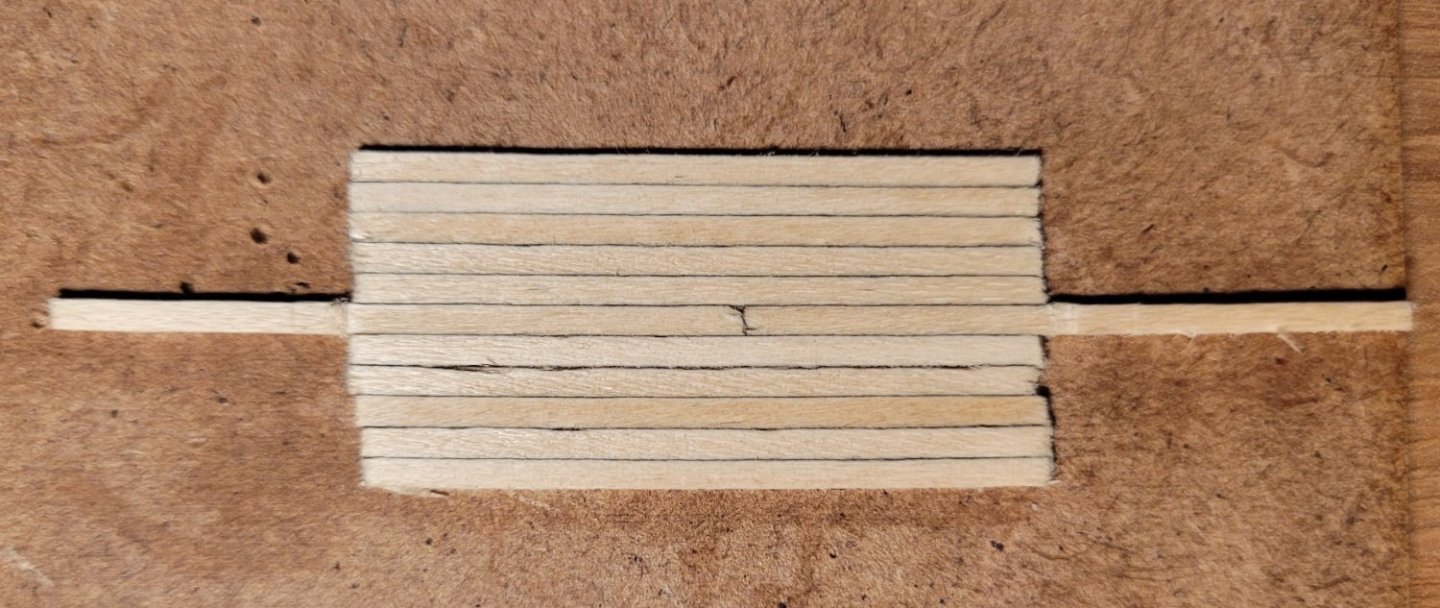
I haven't made much actual progress with the hull planking over the last few days but I was able to sit down and work out the best way to approach it. This is my first model yacht and so planking hulls previously has involved butting up to a stem post which gives you a fixed target at which the plank needs to finish. With yachts like the Pen Duick though the planks on either side of the hull come together and form a sharp v shape just in advance of the false keel. I have therefore been experimenting with whether it is better to put a bevel on the inside edge of each planks so that they sit together nicely at the required angle or whether the alternate approach of having one plank sit slightly forward of the other so the second plank butts against the side of the other and then trimming that forward plank to follow the keel line is easier. I have decided that this second option is actually easier in practice. Once the whole hull is planked there will be a lot of sanding (and filling !) required during which I can refine the sharp v shape which forms the leading edge of the keel. That may not have made sense in words but hopefully some pictures will help. I have certainly found it easier to have a couple of sacrificial pieces of planking which I use each time to accurately work out the angle that the front parts of the planks need to be to follow the false keel. The angle changes slightly as you more and more rows of planks are added so I just re-trim the ends each time and then use those pieces as templates for the cutting of the actual planks. I also make pencil marks across two rows of planks when adding the next layer as the plank which is currently being fixed needs to be repeated taken off the model for various tasks such as the sanding of the bevel along the edge where it butts against the previous row, determining its length and cutting the right angle into the end of the plank. The marks across the planking layers therefore help me ensure that I am refitting the plank back in exactly the same place each time. The planks are clamped to the frame (but no glues used) each time so that further adjustments to the fit can be made until it is as good as I think I am going to get. Finally the planks is glued and clamped into place with various types of clamps, elastic bands and other paraphernalia as required to ensure the planks lay properly against the frames and along the join with the previous plank layer.

- 122 replies
-
- 6
-
-
- Artesania Latina
- Pen Duick
- (and 1 more)
-
Some great advice from lots of people here. I would add that I find many uses for a variety of rubber bands in various thicknesses and lengths, especially when planking the hull. And the same goes for clamps, getting a variety of sizes and widths and reach etc is always helpful and you can never have too many!
-
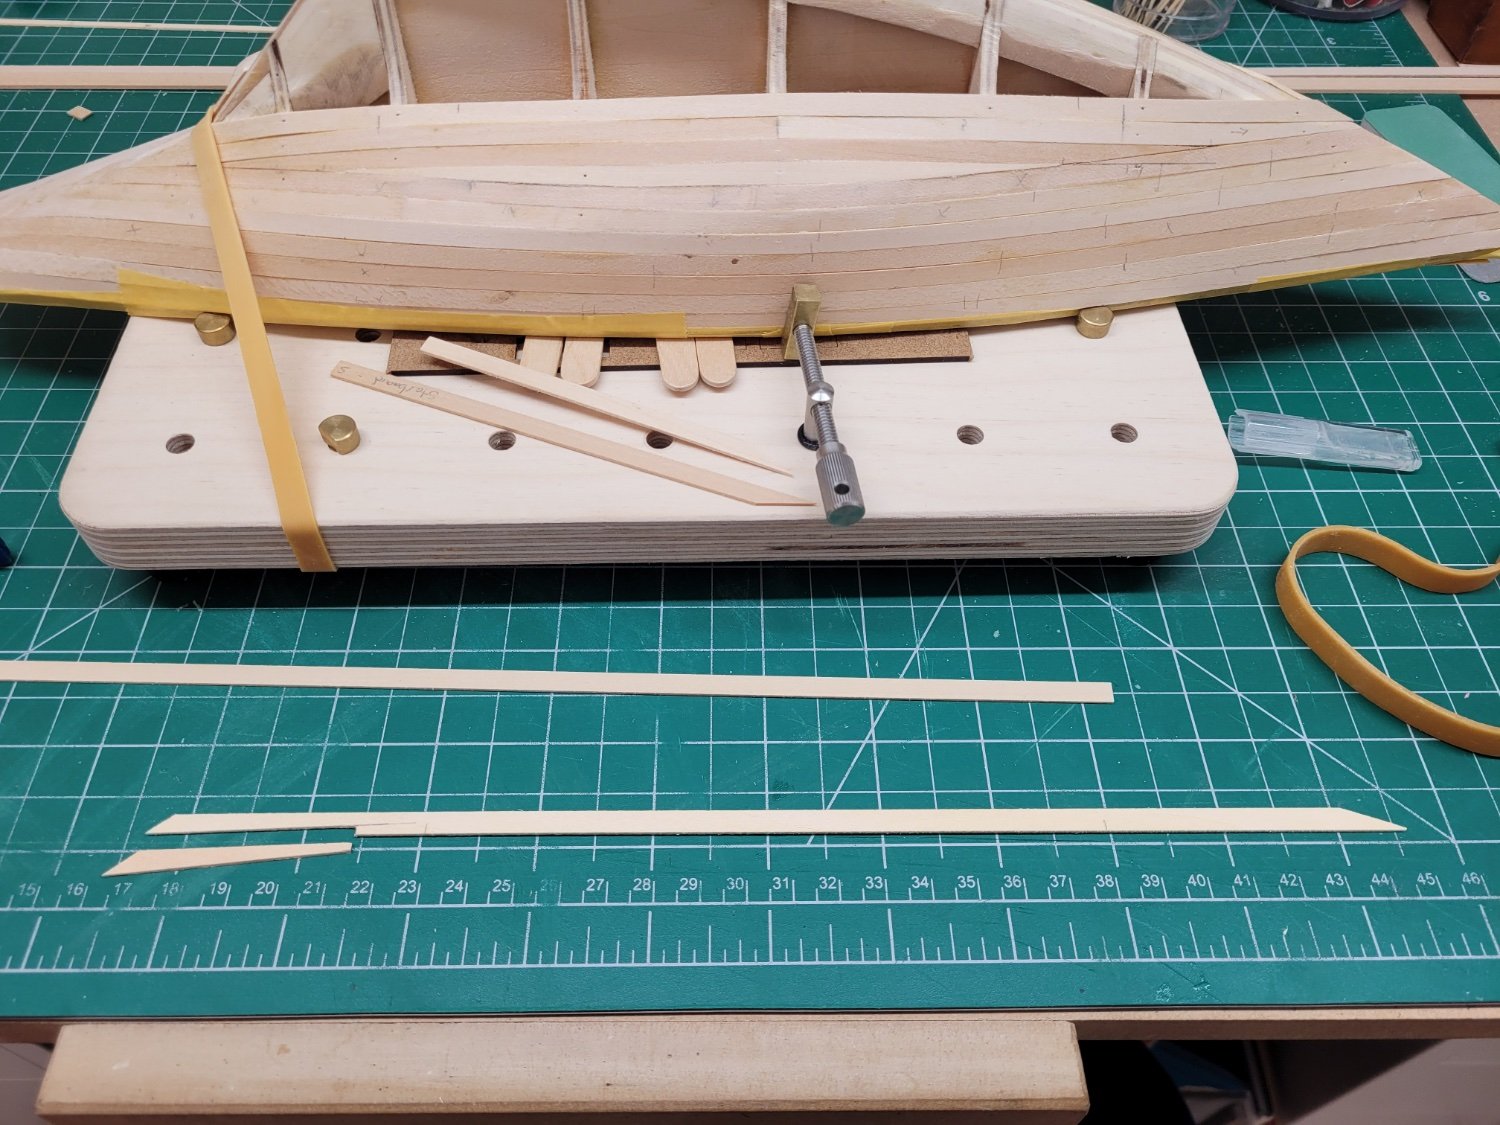
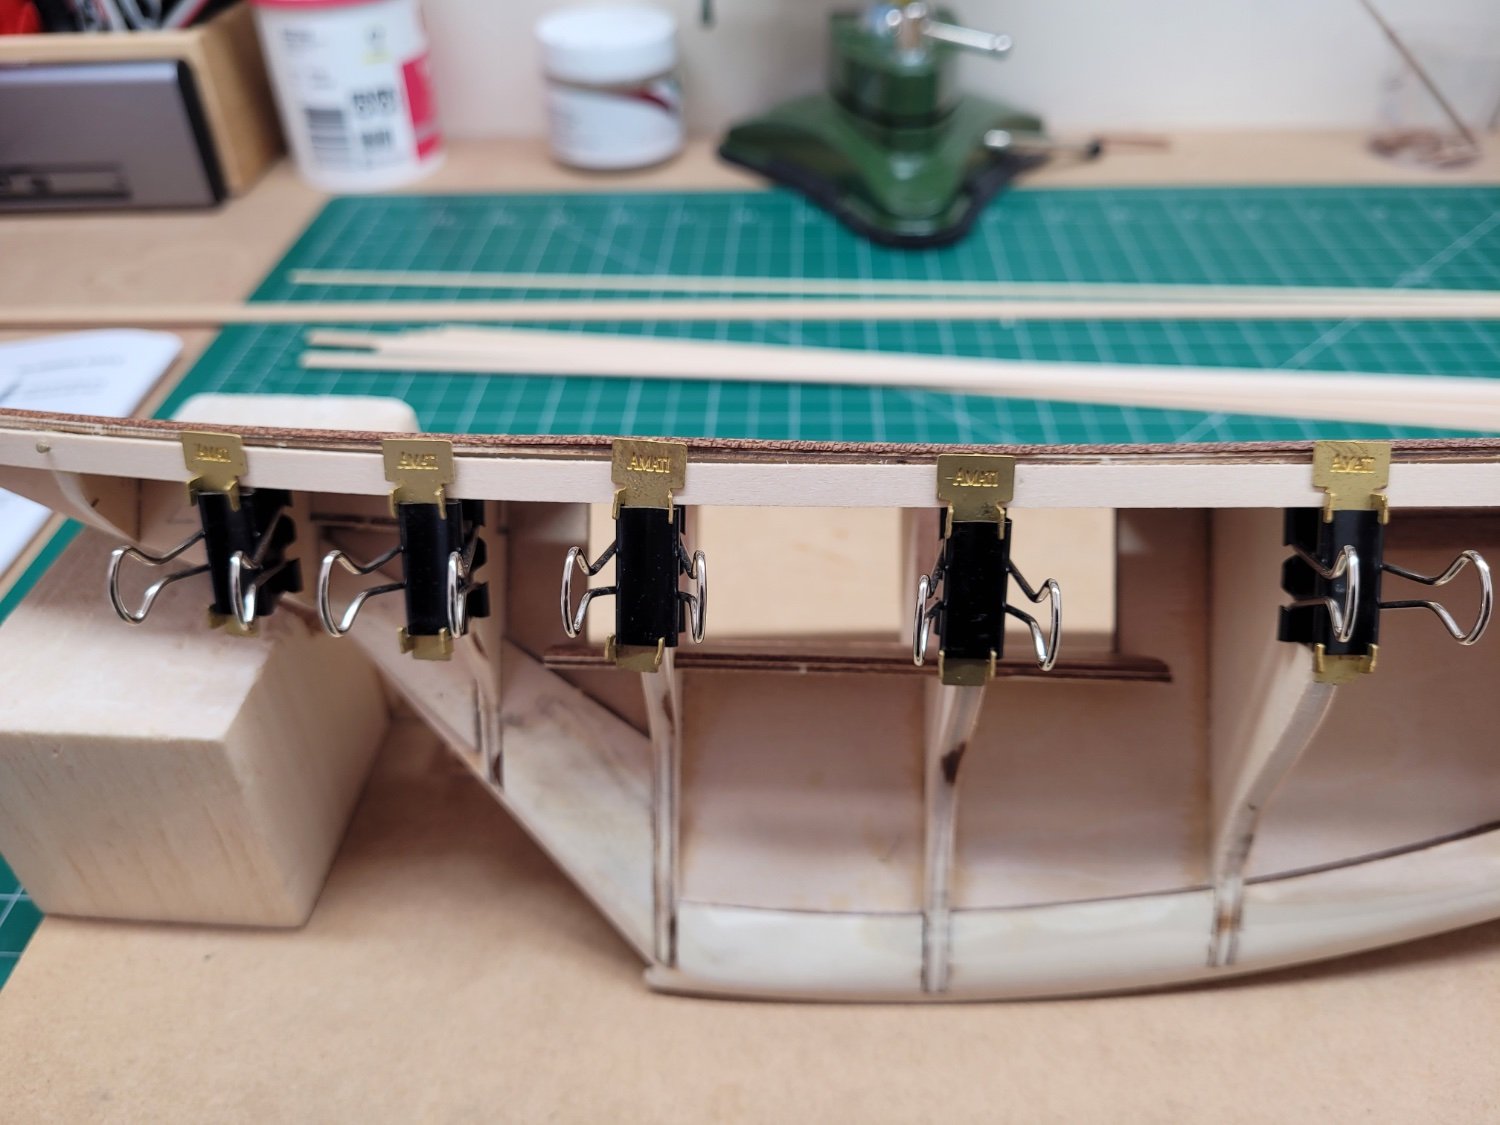
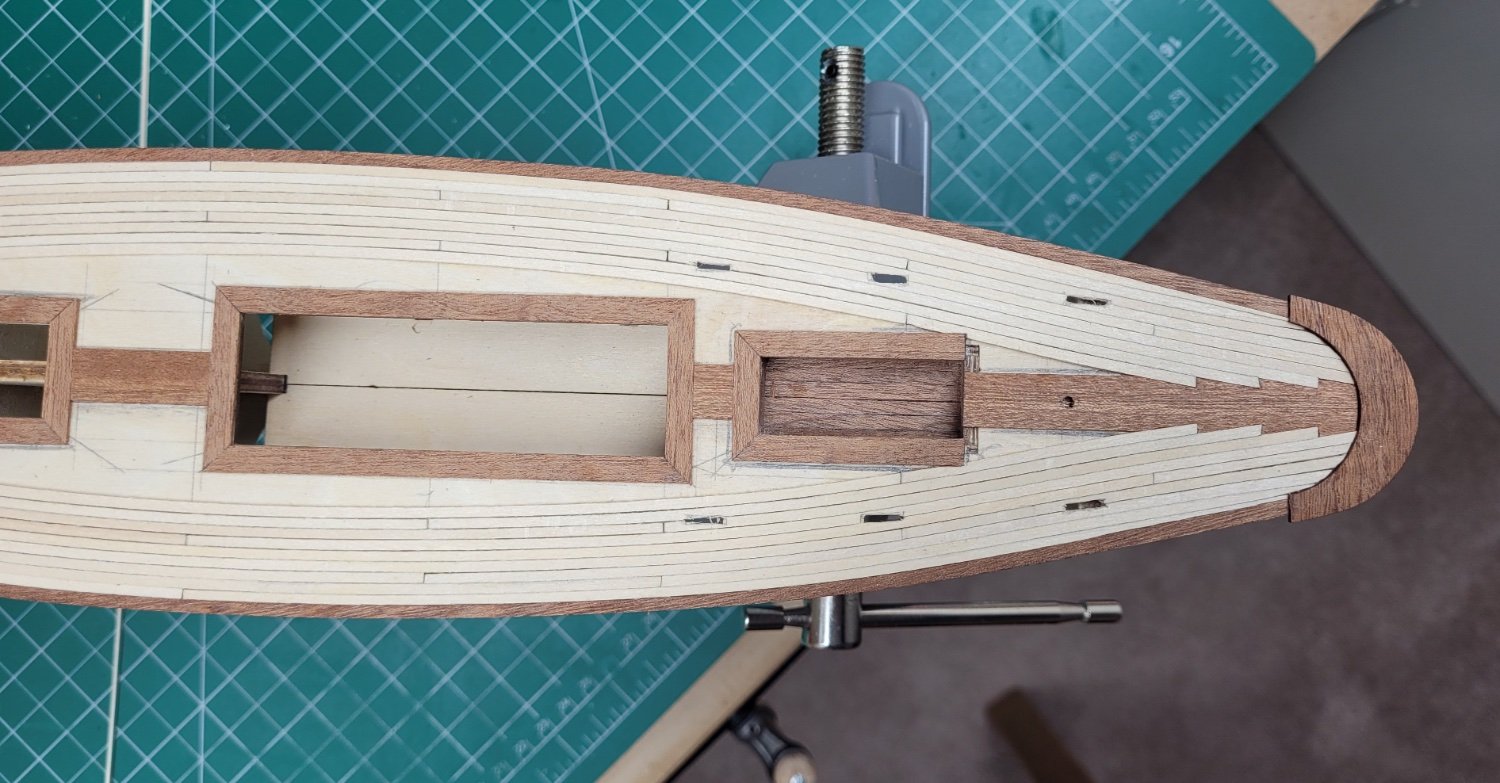
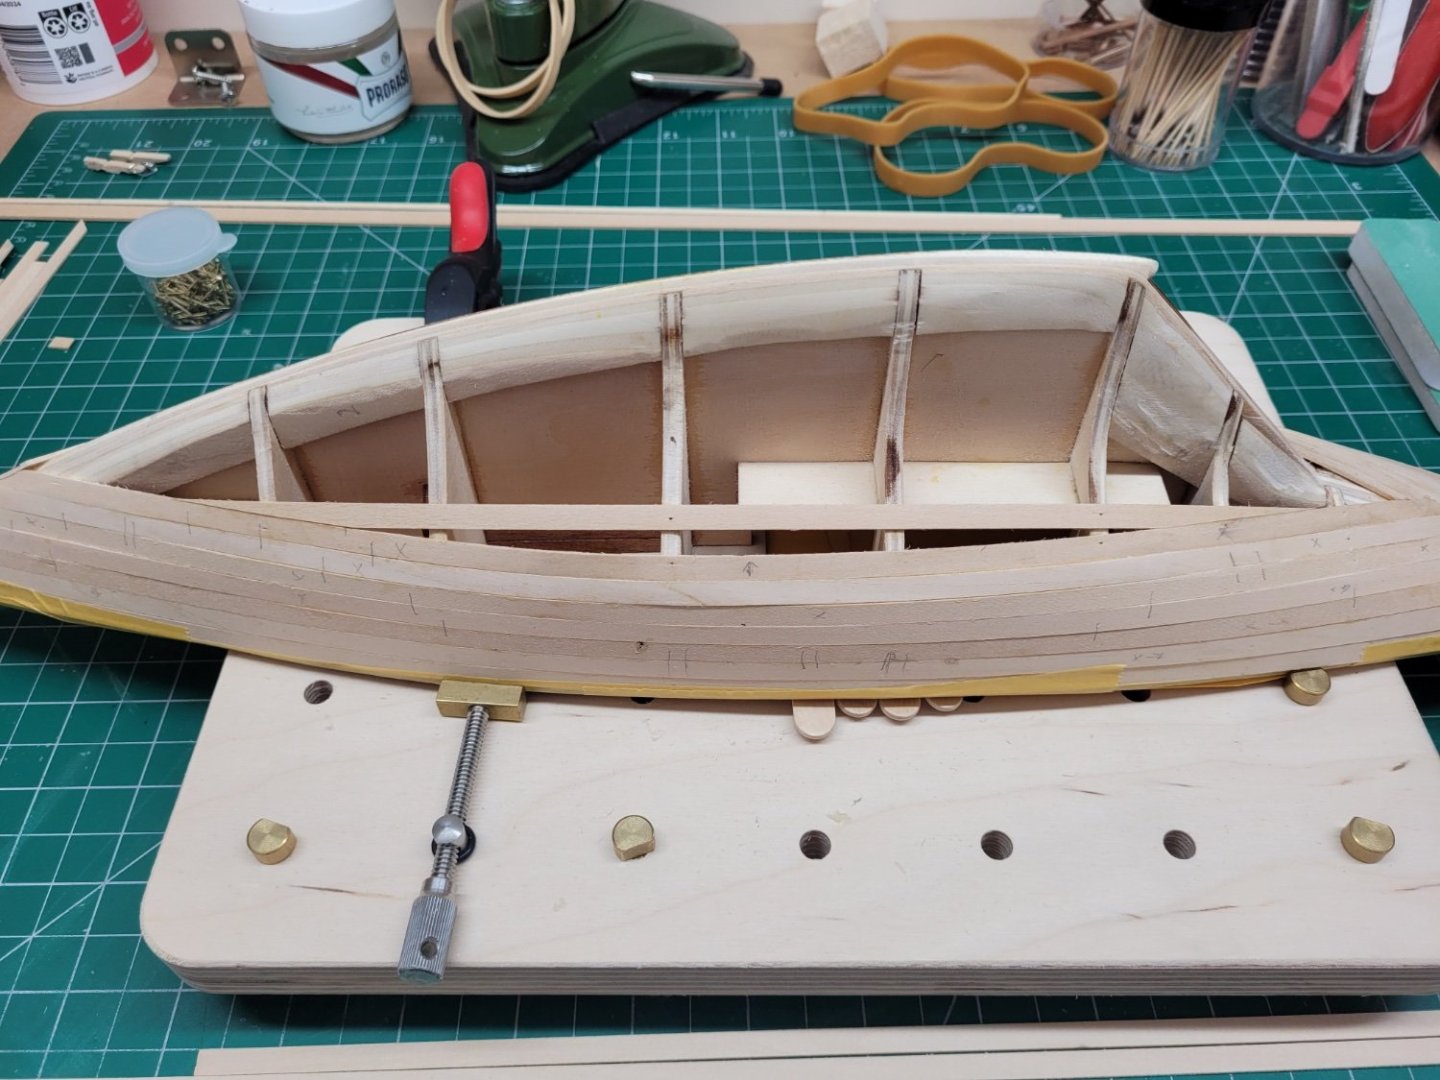
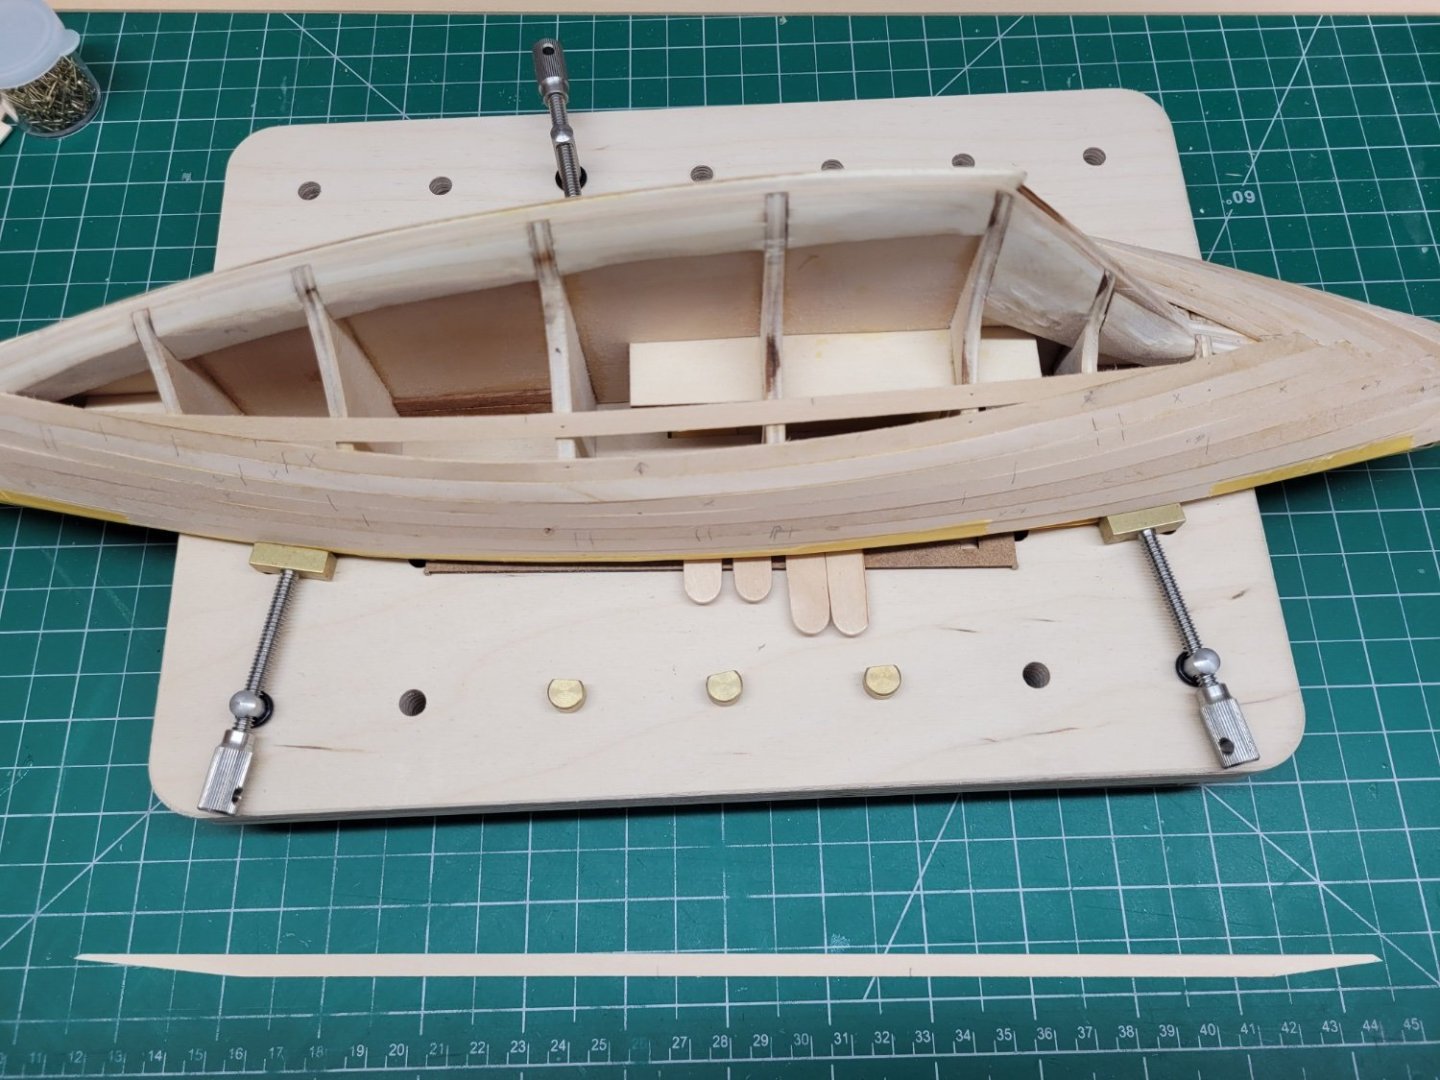
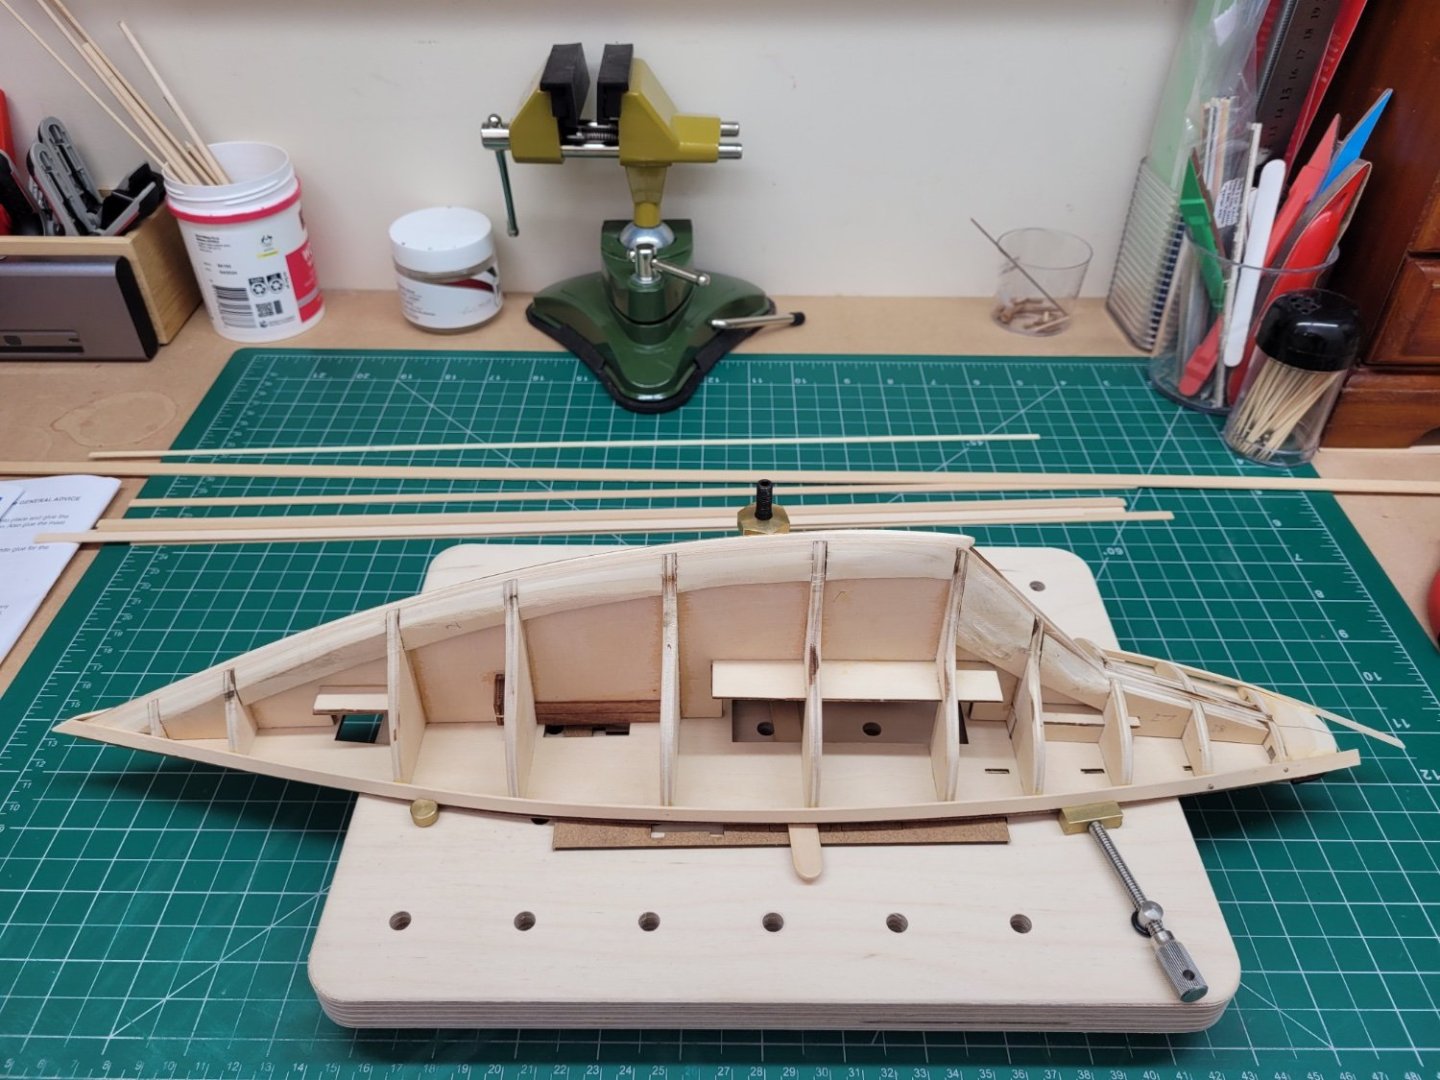
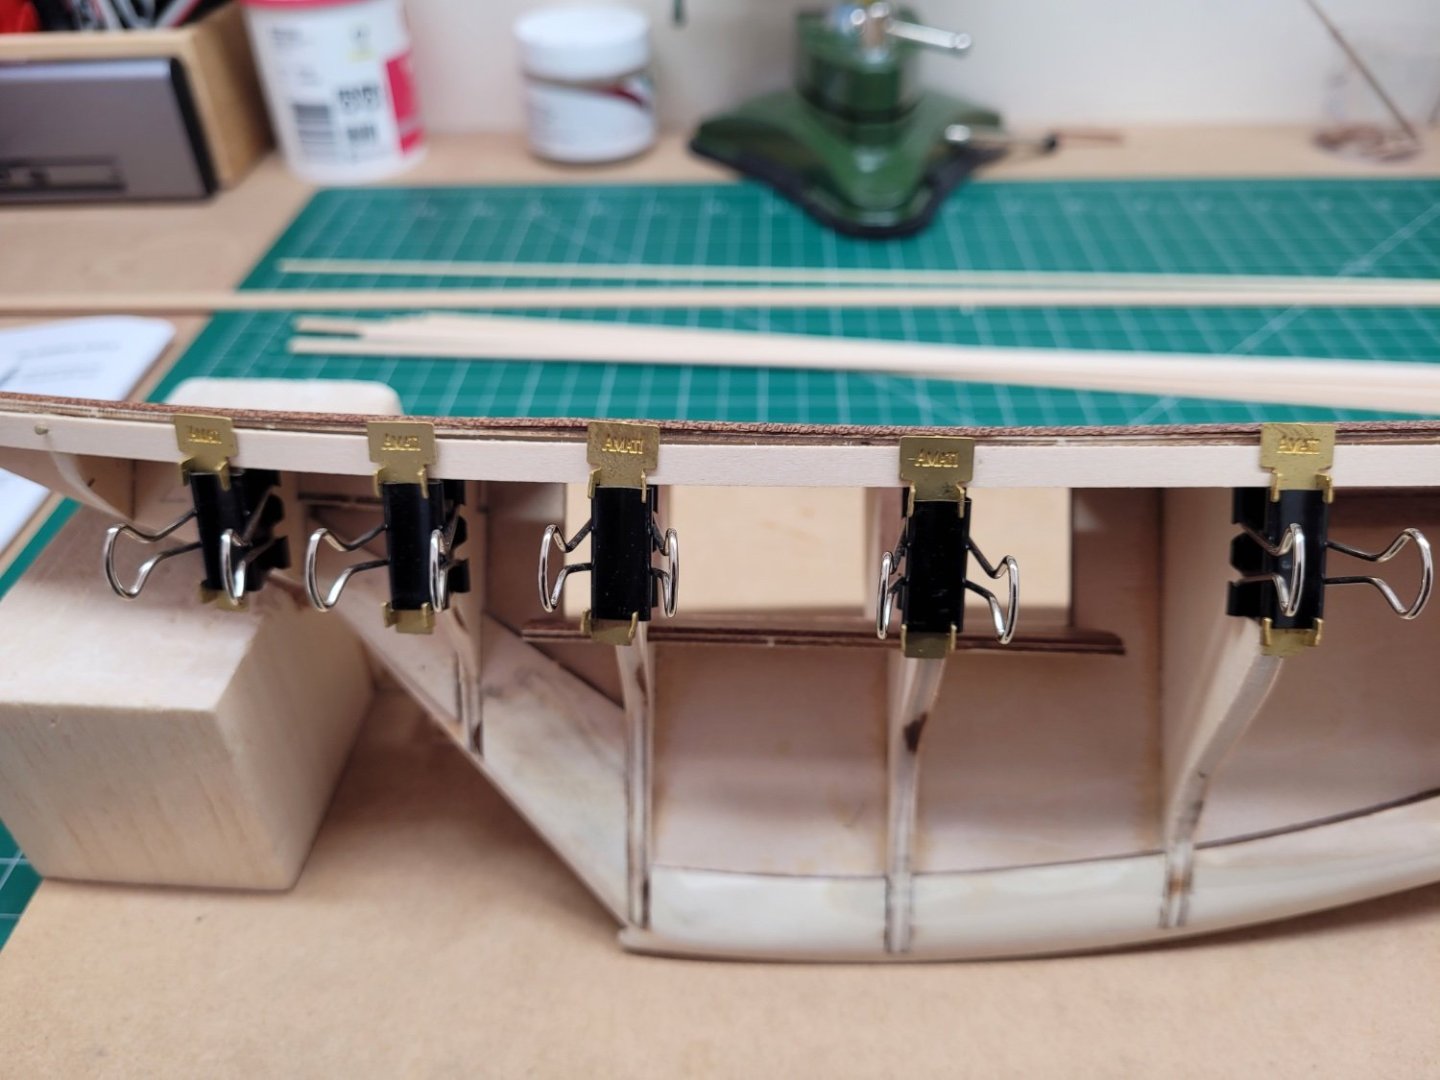
Many thanks for the kind comments 😃 As mentioned previously I decided to add some of the mahogany planking to the other sub decks and bulkhead under the deck hatches just to make sure that if anything was to be seen through the hatches it would be the darker planking rather than the lighter ply sub decks and bulkhead. This was quickly accomplished and so I was able to move onto to starting the hull planking - the kit instructions actually suggest you add the coaming ledges for the hatches before moving onto the deck planking, but as these stand a little proud of the deck I thought that it might be easy to catch and damage them whilst the hull is upside down during the hull planking. I have therefore omitted this step for the time being but will return to it after the hull is planked. The kit supplied planks are 5mm wide by 2mm thick which I think is a little overkill. The model is only single planked and I realise that you may need some 'meat' in the planking for when it comes to sanding later on but the 2mm thickness of the planks is going to make it difficult to bend and shape the various curves needed for the hull shape. I have therefore replaced these with 5mm wide by 1mm thick limewood planks. As far as the hull planking is concerned kit instructions suggest that the first step with this part of the build is to add the bulwark planks - this is 8mm wide and stands 5mm above the top of deck, leaving only the lower 3mm section to be glued to the deck sides and bulkheads. As @BobG indicated in his build this sounds a little tricky and it would again be easy to damage this whilst the other hull planking is ongoing. I therefore began my hull planking by attaching the first plank which sits immediately below the bulwark plank - ie 3mm down from the top of the deck. This plank, once in place, will also provide a much more stable edge to which the bulwark plank can also be glued when it is finally attached to the hull. I also needed to find some way to securely hold the inverted hull, as I find it easier to do the hull planking on an upside down hull. For previous builds I had made a suitably sized building board with balsa blocks to hold the hull in place but this time around I wondered whether I could utilise my mini workbench from Veritas. This has a multitude of small 17/64" holes in which fixings can be placed to hold the hull securely. As there is a slight sheer curve to the deck I needed to add some thin pieces of wood (lolly sticks 😃) under the centre part of the deck to support it there. As ever when it comes to planking the more clips and clamps, and the more variety of types of clips and clamps, you have is an advantage and so I used a selection of small clips to hold the plank securely to the bulkhead - for the first plank on each side I also used a couple of pins just to make sure it was securely held in place whilst the PVA glue and clamps were attached elsewhere. For the second plank on each side, and the subsequent ones to come, I will only use PVA glue to secure the plank in place. Two planks each side have been attached so far and I was able to bend these to the required shape at the stern just using the clamps - no water or heat was required - and no tapering of the planks was needed either. One point to look out for is that the planks need to meet at a tight v shape at the bow and so sanding a suitable chamfer into the tip of the plank is required. I am not a very quick hull planker so this part of the build will probably take me some time to complete, but I do find it one of the more interesting parts f the build.

- 122 replies
-
- 6
-
-
- Artesania Latina
- Pen Duick
- (and 1 more)
-
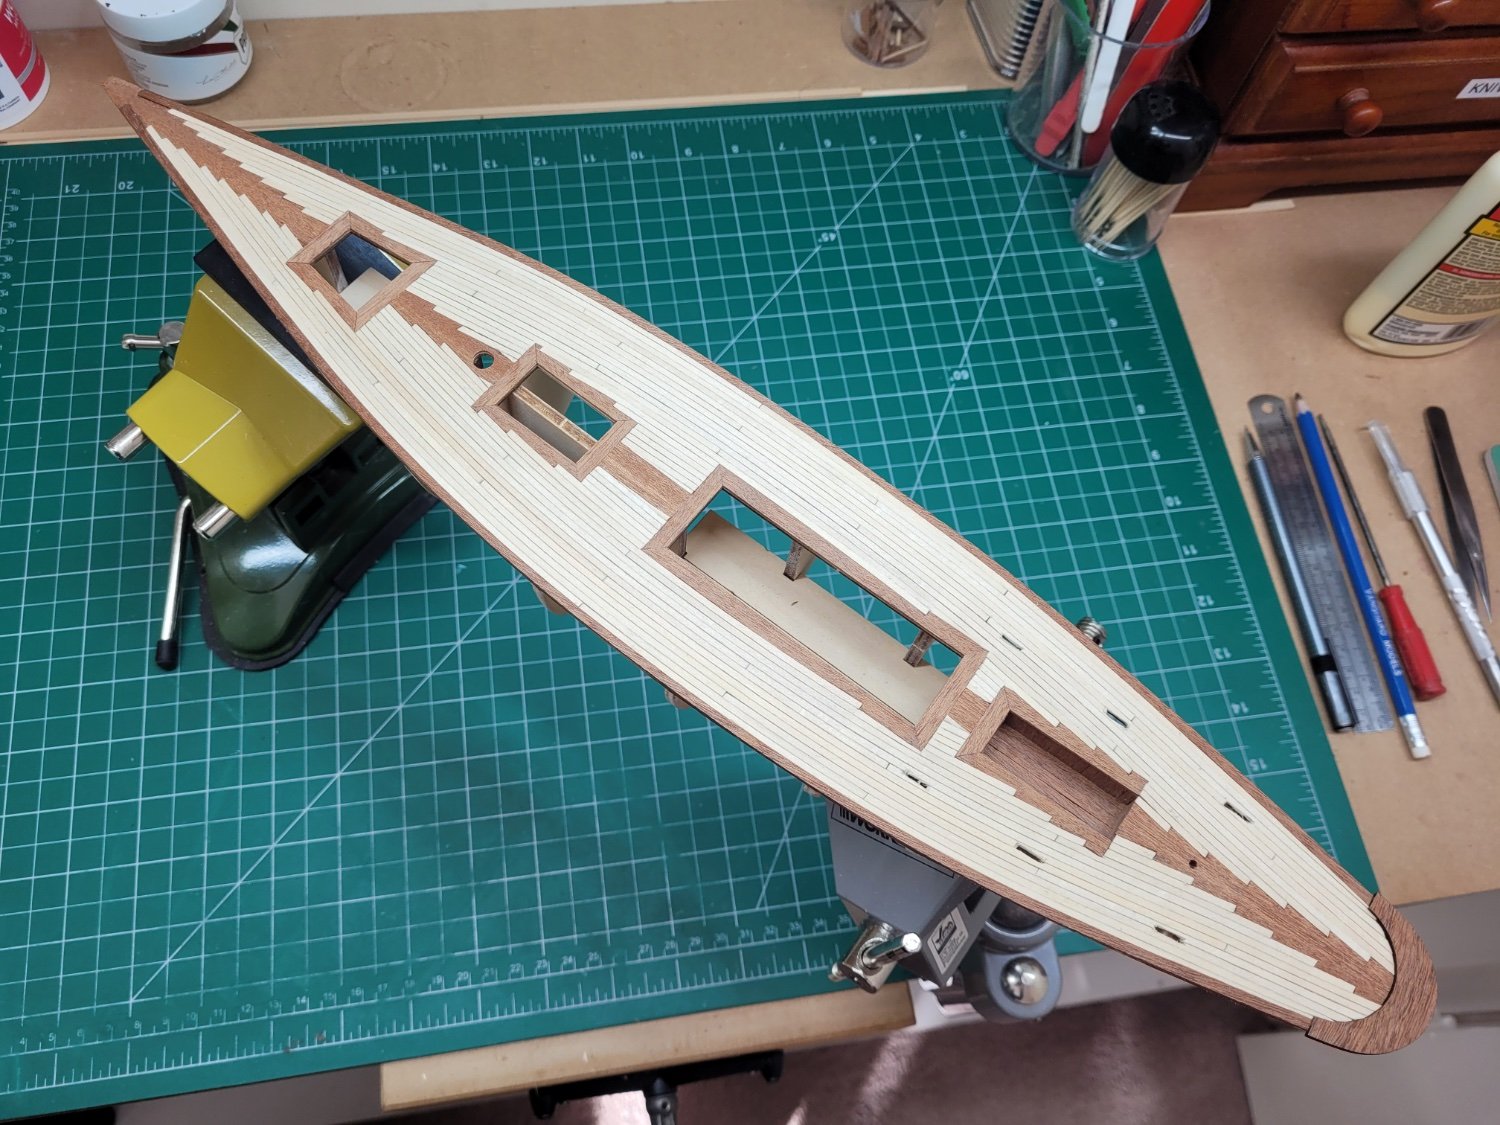
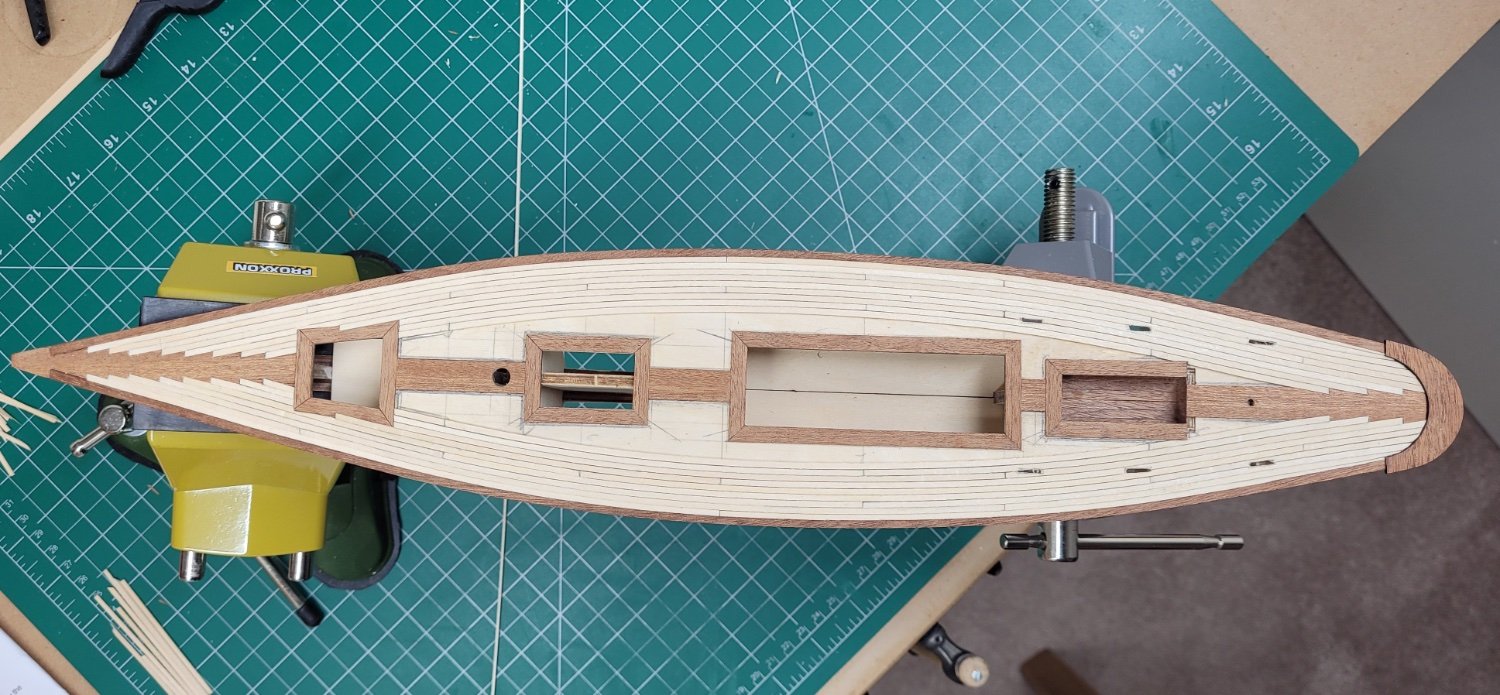
I have had a short break from the shipyard to have a little holiday but I am now back and was able to continue with the decking of the Pen Duick. I'm pleased to say that things continued well with cutting the joggles in the king plank and I was able to complete the decking earlier today. Of course, it didn't all turn out to be exactly symmetrical, as just a fraction of a millimetre difference in the plank widths or the positioning of the king plank can cause quite a cumulative error when transferred across the number of planks needed to cross the deck. I found that in the last section I worked on, in the midships forward of the main hatch, the gaps for the last planks either side of the king plank was slightly different on each side. The difference was only perhaps less than half a millimetre but when the planks are only 2mm wide it is a significant proportion of the full plank width. However, once those planks had been added I don't think it will be too noticeable, especially once all the deck furniture etc is added. I still have to scrape the deck clean and finish cutting the six holes near the stern for the tabs for the cockpit coamings but I think I will leave both of those tasks until after the hull planking has been done. Although the instructions don't call for it I think my next job will be to put some mahogany planking on the sub decks of the hatches to match what I did with the cockpit floor. I'm sure you probably can't see the ply subdecks once the hatch covers go on but it is an easy job just to plank them now why they are still a bit more accessible.

- 122 replies
-
- 8
-
-
- Artesania Latina
- Pen Duick
- (and 1 more)
-
Hello and welcome!
-
Congratulations - you have a great model there. I look forward to watching your future builds.
- 70 replies
-
- 1
-
-
- Alert
- Vanguard Models
- (and 1 more)
-
Great work!
-
Thanks for the comments Harry - coamings is indeed the word I wasn't able to think of. To be honest I haven't really looked at the deck fittings yet so I yet to see how closely I stick to the instructions or not. Thanks also for the video - amazing how much it is able to heel over, even just for what appears to be a leisurely cruise around the harbour!
- 122 replies
-
- 1
-
-
- Artesania Latina
- Pen Duick
- (and 1 more)
-
Planking the deck of the Pen Duick continues….. I have found that the key to making the cuts for the joggles is just to go very very slowly taking a small piece out at a time until you have removed the right amount of material. So far the mahogany king plank has been nice and co-operative with no wayward splits or shards breaking off. I did manage to scratch a couple of the planks near the bow with the point of the scalpel but I believe this will be able to be rectified when time comes to sand/scrape the deck once it has all been planked. There is one thing that I am now doing differently compared to when I began. Initially I was marking the entire edge of each plank with the pencil to simulate the caulking prior to it being glued and fixed to the deck. However, it soon became apparent that this method led to a few dirty graphite fingerprints on the nice deck and so I quicky changed to only adding the pencil marks to the edges of the planks after they had been glued to the deck – ie immediately before the next plank was just about to be stuck down. Running a pencil along the edge of each plank just gives a very thin pencil line right on the top edge of the plank which is ideal for the appearance of the caulking. There is then far less graphite to smudge and make a mess with, especially if I have been a bit too enthusiastic with the amount of glue used. So far I have only very roughly cut out the six deck slots near the stern into which the cockpit deck beams (not quite sure what those parts are actually called?) are fixed. I think it will be easier to get these to the required dimensions when that part of the cockpit framing is being installed. A few more sessions should hopefully see the deck completed.

- 122 replies
-
- 6
-
-
- Artesania Latina
- Pen Duick
- (and 1 more)
-
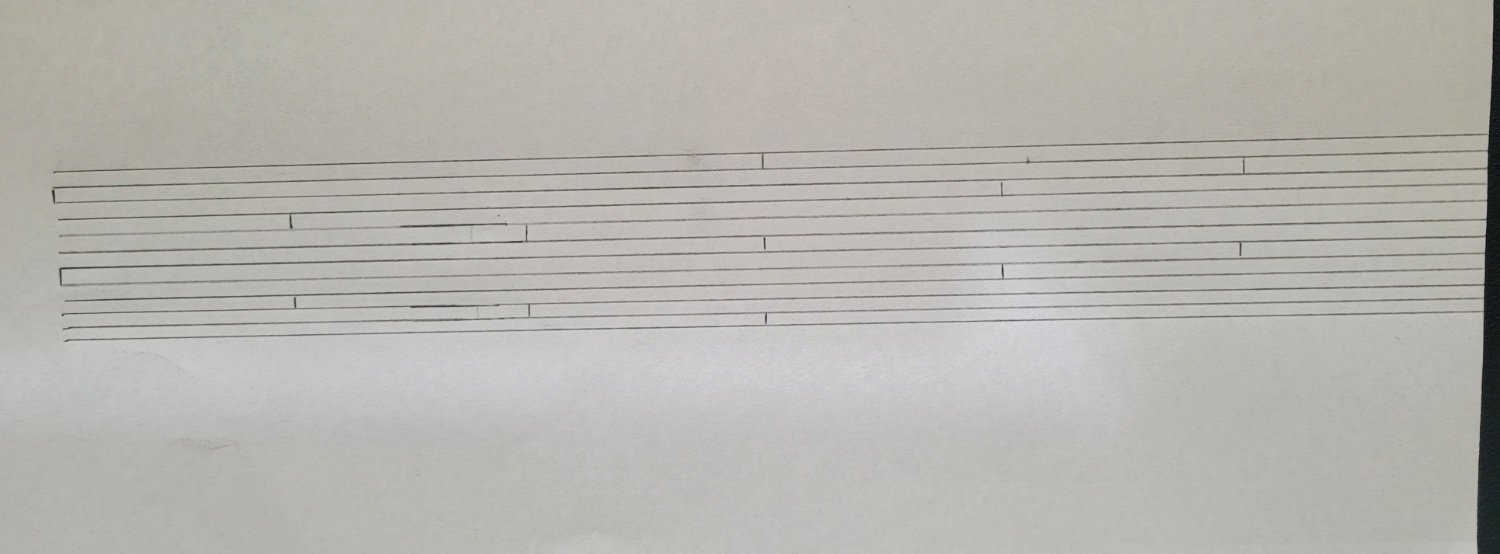
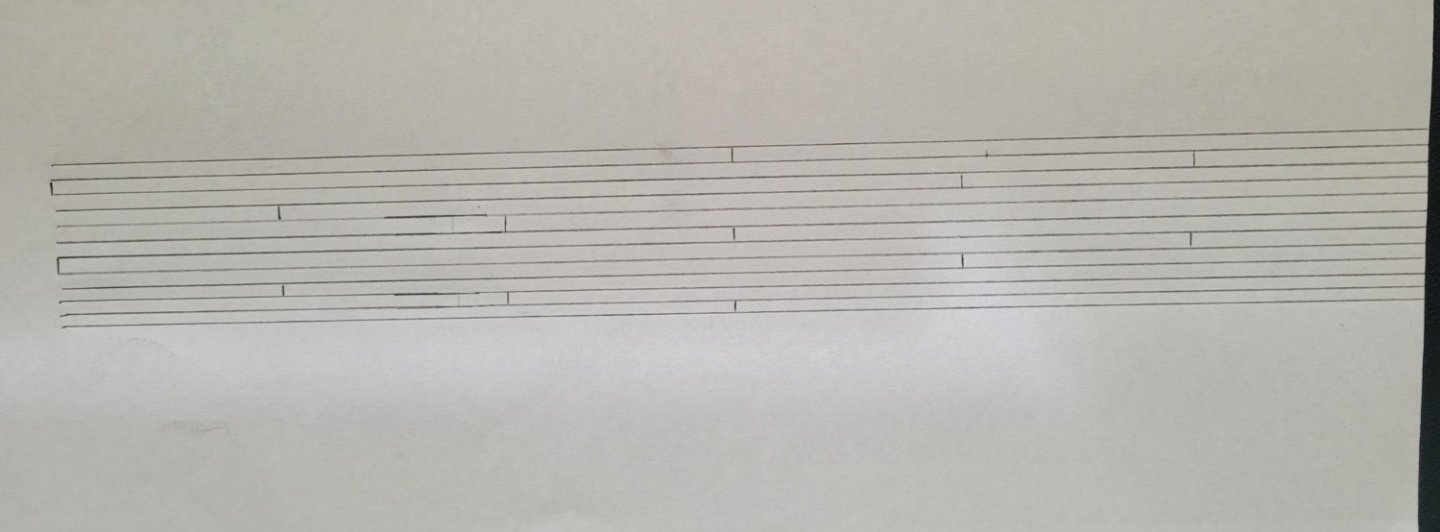
I started on the deck planking this week. I began with a quick trial of the 2mm wide planks with the caulking effect using a dark pencil. I put together a little bunch of planks and gave them a quick coating with some wipe on poly. I think the pencil mark comes through enough to be effective and is how I am going to proceed. The black paper would be overkill I think as it would be too thick at this scale - it is basically thin card and I couldn't find anywhere selling thin paper, or even tissue paper in small enough quantities. One side of some of the planks is a little darker than the other and so I'll make sure I sort them to try to get as consistent a colour as possible. A few also need a bit of a sand to tidy up the sides slightly. I also had to work out the butt shift pattern in the deck planking. Using the picture of the deck i included earlier in the log I was able to work out the pattern and replicate it in a small drawing to use as a planking guide. I think this is a 4 butt shift pattern (?) but it doesn't seem to be the usual one where the butt joints of adjacent planks move up (or down) the deck by one length each time. It was also difficult to see exactly how long the individuals planks are on the real deck so I had to estimate this somewhat. I decided on a length of of 4.5cm between butt shifts giving a full plank length of 22.5cm or about 21ft at full scale. One of the key things to get right with a deck like this is making sure everything is a symmetrical as possible on each side of the deck. I am using a small length of tape to mark where the perpendicular cuts need to be made in the king plank to form the front of the joggles - by making sure this is square and the same distance from the bow along each side of the hull I should be able to keep things as square as possible. So far I have installed three planks on each side of the deck - a small army of clamps helping with this immensely!

- 122 replies
-
- 6
-
-
- Artesania Latina
- Pen Duick
- (and 1 more)
-
I'm interested to follow your progress on this - it is on my list of 'maybe the next build' ......
-
It all comes together nicely at this stage and starts looking like a 'proper' ship. You have a great model there - well done!
- 70 replies
-
- 2
-
-
- Alert
- Vanguard Models
- (and 1 more)
-
Vincent Black Shadow by CDW - Revell - 1:12 Scale
jpalmer1970 replied to CDW's topic in Non-ship/categorised builds
You may already be aware of this video but there is a great animation of the assembly of this model here. -
Hello and welcome!
-
Thanks for this Reg, it is an interesting video to watch and he clearly explains the steps needed. Hopefully I can make it look that easy at a much smaller scale! I have been watching Leo from Sampson Boat Co. build/restore his yacht for the last few years - the videos are on youtube here and it is fascinating to see the work involved in making a full size ship.
- 122 replies
-
- 1
-
-
- Artesania Latina
- Pen Duick
- (and 1 more)
-
Hi Thukydides, the drill and press came from Amazon. You can see the details here. It wasn't cheap but I was lucky enough to get it as a Christmas present 😀 There are two different drill options and either can come with or without the press stand. I really like it because the rpm is so slow - only 550rpm compared to my Dremel lite of 5,000 rpm +. I find it much easier to drill accurate holes with the slower speed drill, which can be used either in the press or by hand. The drill is USB chargeable and the set comes with 10 drill bits from 0.5mm to 2.3mm. The shank size is 2.35mm (or 3/32") so it is easy to buy further bits if necessary but I haven't had any problems with the kit supplied ones so far. The footprint of the press stand is pretty small, only 10cm x 9cm so it is ideal for us in our small workspaces, and I think it is unlikely I would ever need to use it with anything too large to adequately fit in the stand 👍
- 122 replies
-
- 2
-
-
- Artesania Latina
- Pen Duick
- (and 1 more)
-
Thanks Harry - it is good to know it is possible. I was thinking that my small drill bits won't be long enough to go through the whole length of material but as you say I only need to start off with a small hole a centimetre or two deep to set the angle for the larger, longer drill bits to follow. I'll revisit this before I start hull planking and decide how to proceed from there.
- 122 replies
-
- 1
-
-
- Artesania Latina
- Pen Duick
- (and 1 more)
-
I bought the Proxxon lathe for my Alert build as well - it certainly makes mast and spar shaping much easier. Looking forward to seeing your future Vanguard builds!
- 70 replies
-
- 2
-
-
- Alert
- Vanguard Models
- (and 1 more)