iMustBeCrazy
-
Posts
975 -
Joined
-
Last visited
Content Type
Profiles
Forums
Gallery
Events
Everything posted by iMustBeCrazy
-
 It does. I think I'll enhance the drawing with a couple of other views and this version will be the standard one. I'll leave the complex version and may use it in a full PoF if I go there later.
 -
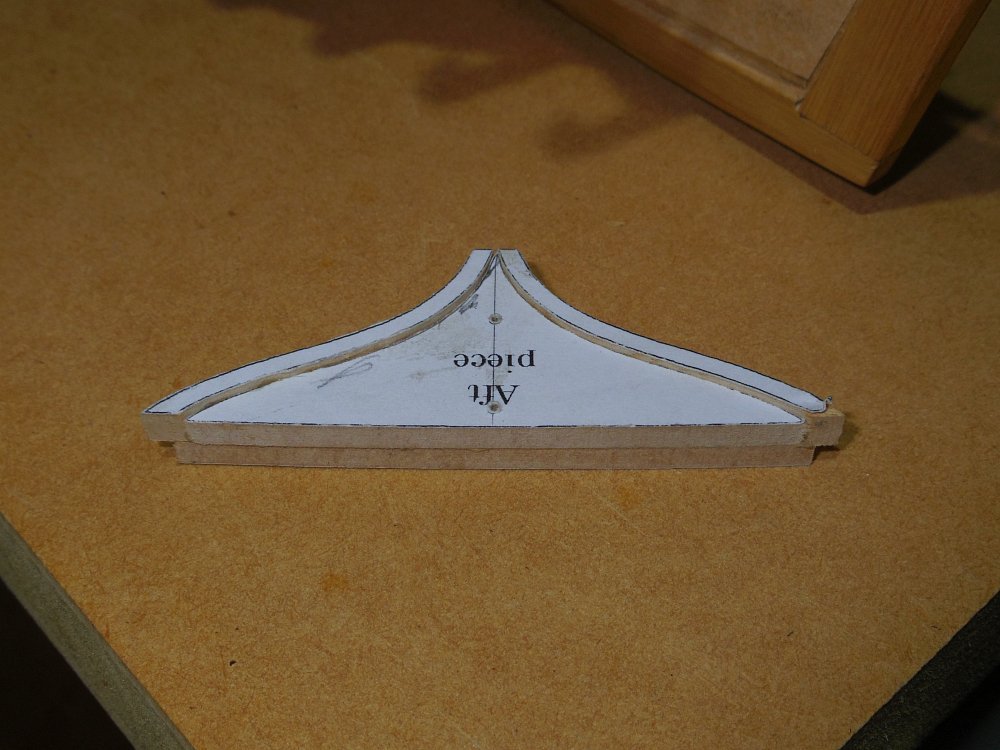
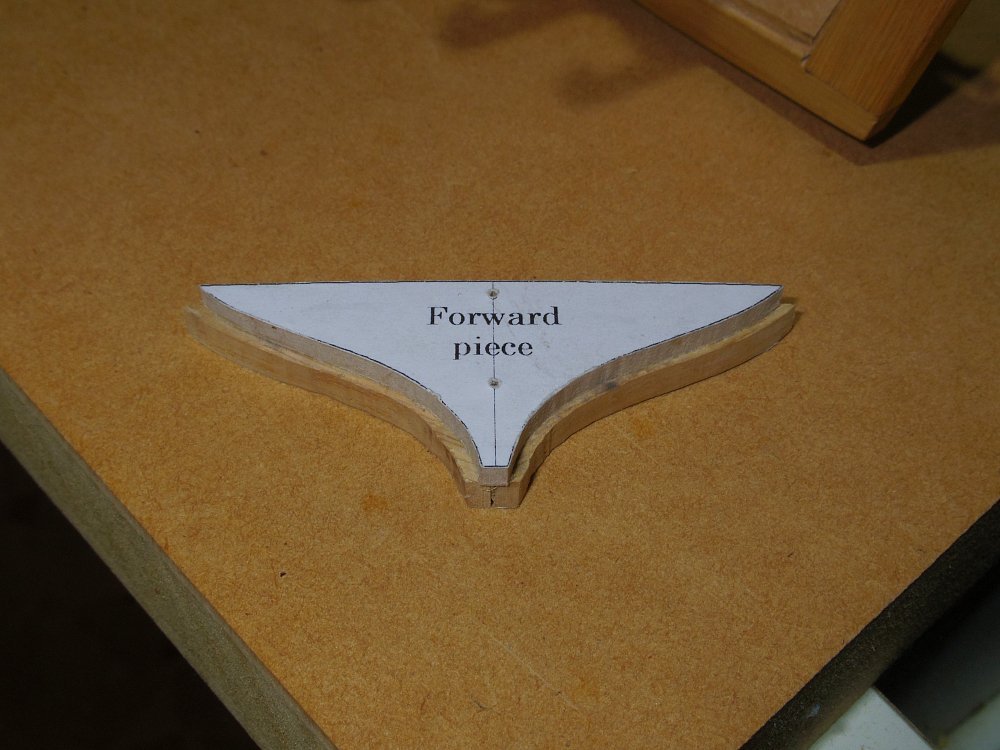
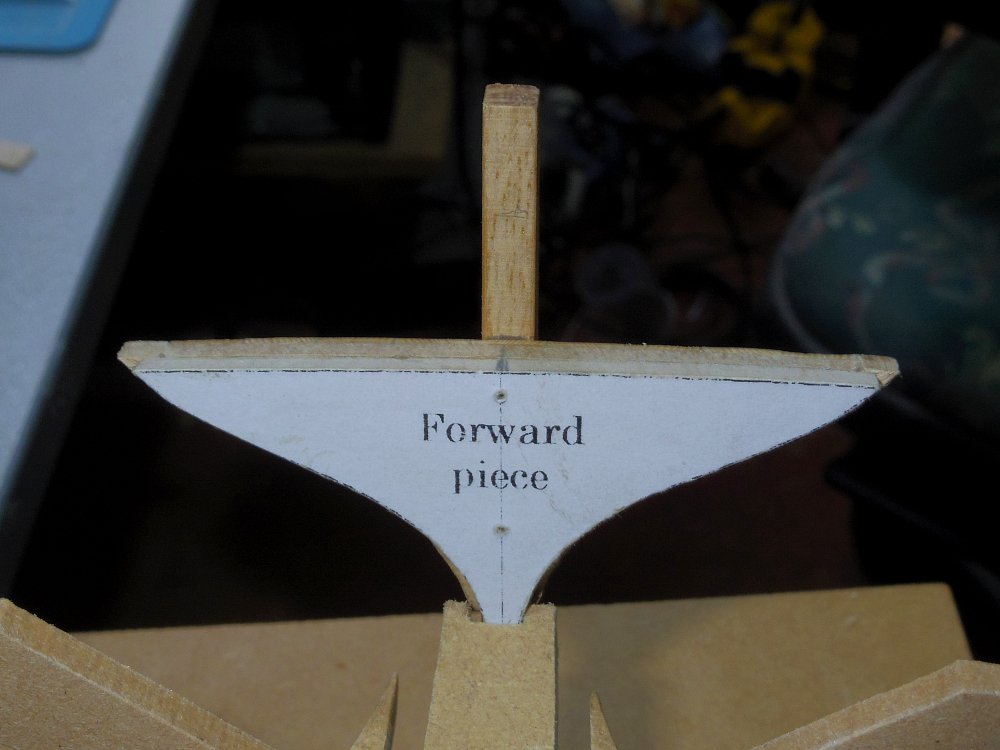
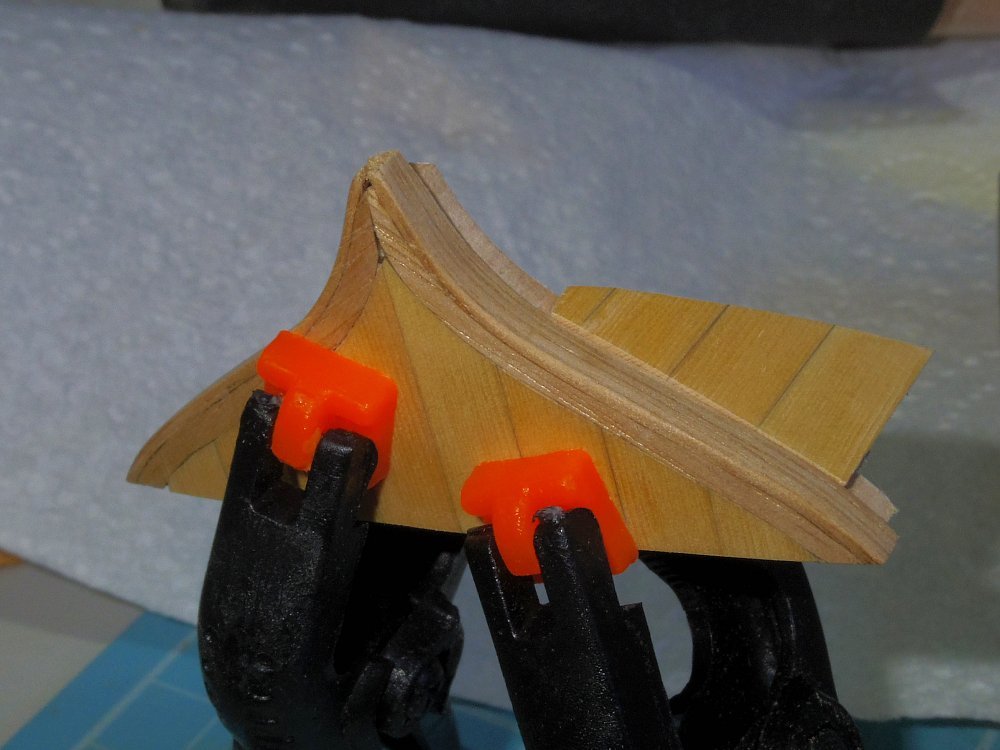
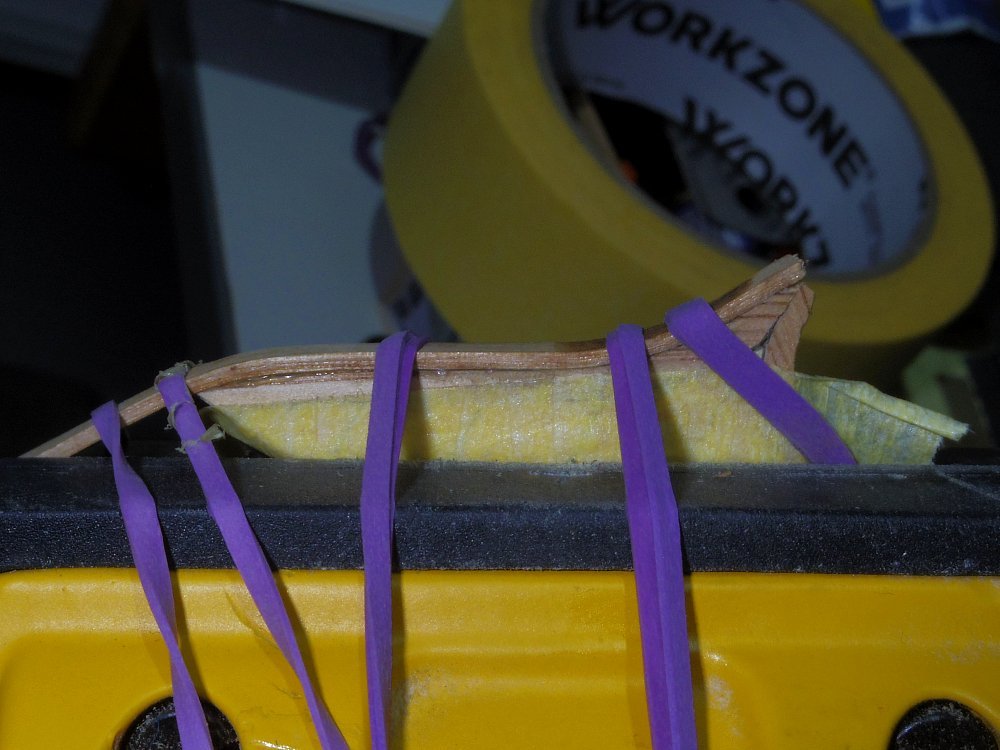
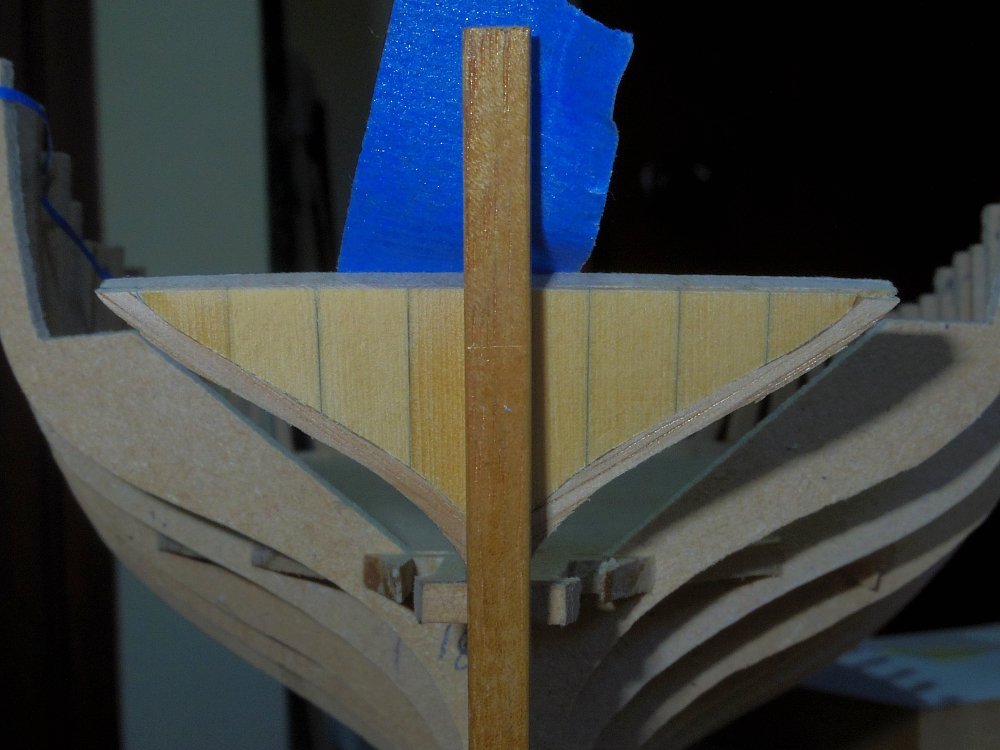
Done! Trims glued in place to the Aft piece then the Aft piece glued to the Forward piece. This provides the rabbets without having to cut them. Sitting in place. And it fits. (provided it mates up with the counter).
-
Required? Anyway, I re-drawn a simple outline an test fitted it, looks ok. I've also re-drawn the complex version and added a different simplified version.
-
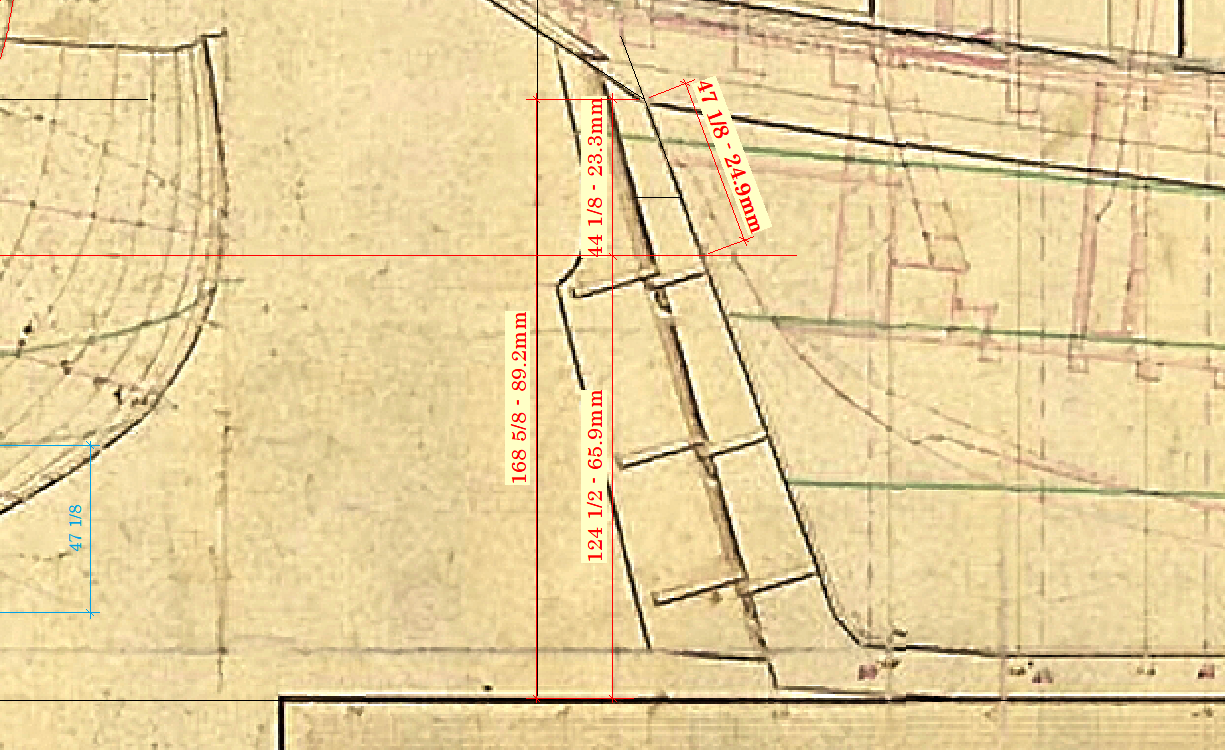
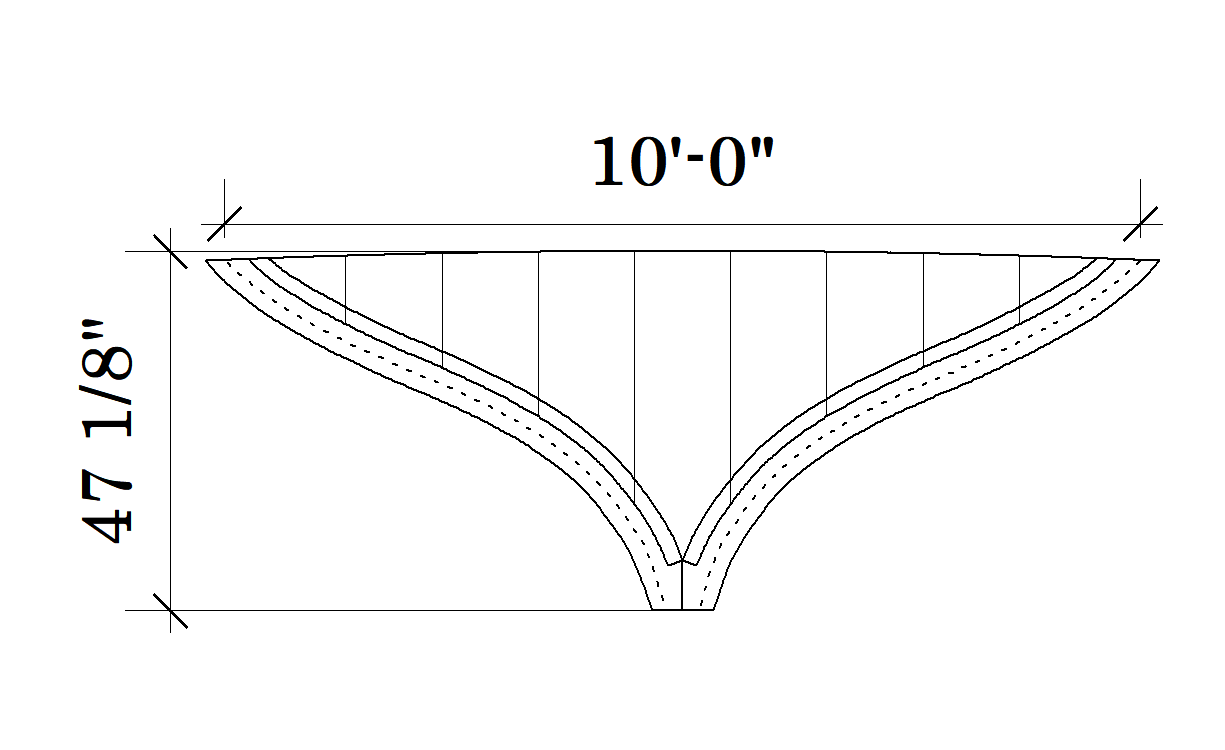
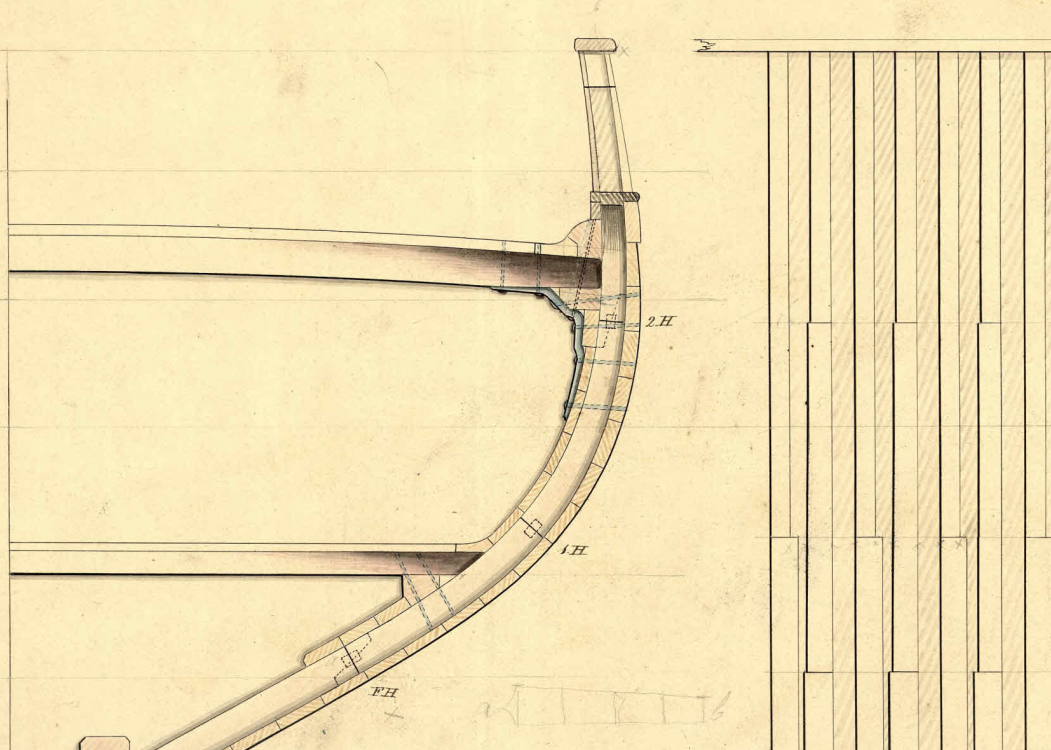
Well, hopefully third times the charm. Yep stuffed up again, the second one's too tall. So I've deleted all my transom drawings and have started agian. Measurements taken from the plans. These are in full scale inches and model scale millimetres and the two heights above keel have been transferred to the model. The other two measurements are the height of the transom, vertically as drawn and the actual height. So the drawing must be stretched vertically by the ratio 47 1/8 divided by 44 1/8 (or 24.9/23.3). The green dashed lines below represent the as drawn, the orange as stretched. Then I have to work out the trim pieces and the rabbets. As the orange line now represents the transom inside the hull planking I need a new line 2" outside the orange line. So with the aid of the small pink circles, we get the pink line (this ignores the fact that the hull widens as it goes forwards). This also gives the hull planking rabbet on the forward side of the trim pieces (between the pink and orange lines). To get the width of the trim (6 inches) I use the big circles giving the dark green line. And the small blue circles give the aft rabbet (light blue line) for the transom planking. Oh what fun.

-
Thanks Tim. New v old. You might check out Chucks Cheerful thread ( Page 5 ), first image shows a model cutter with a similar stern and over the next few pages Chuck shows how he did it on Cheerful.
-
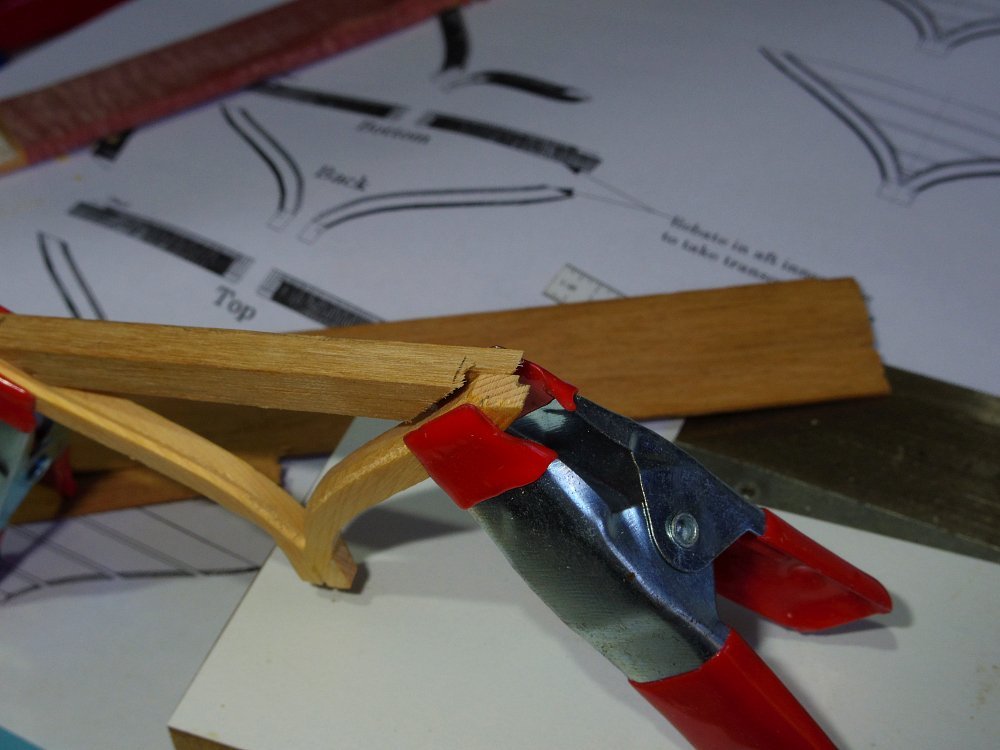
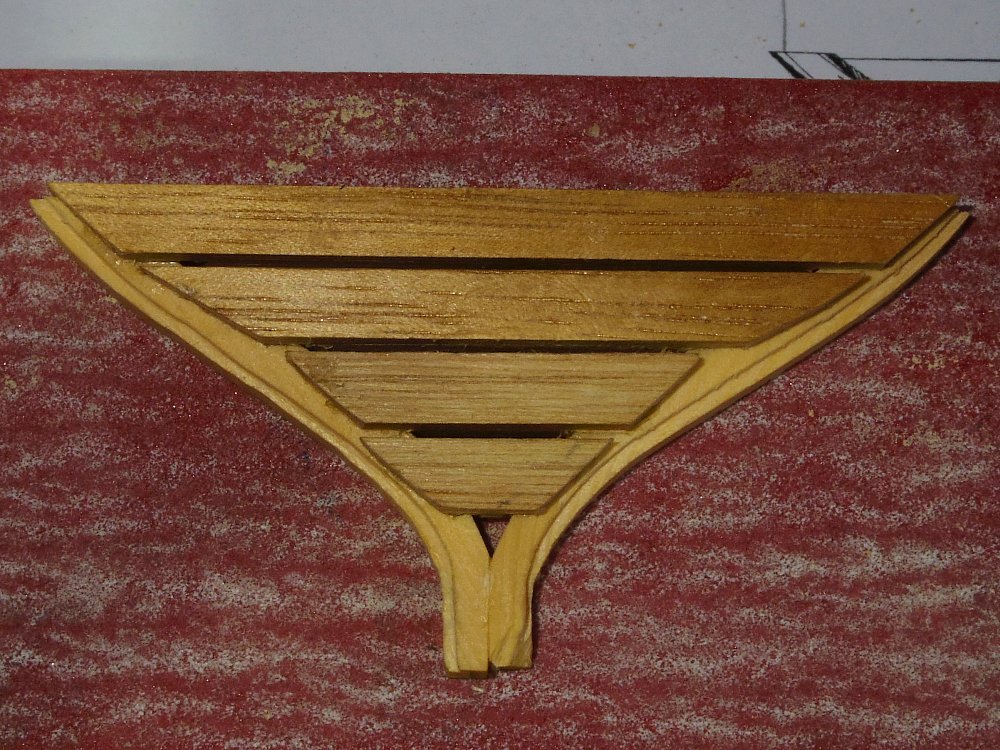
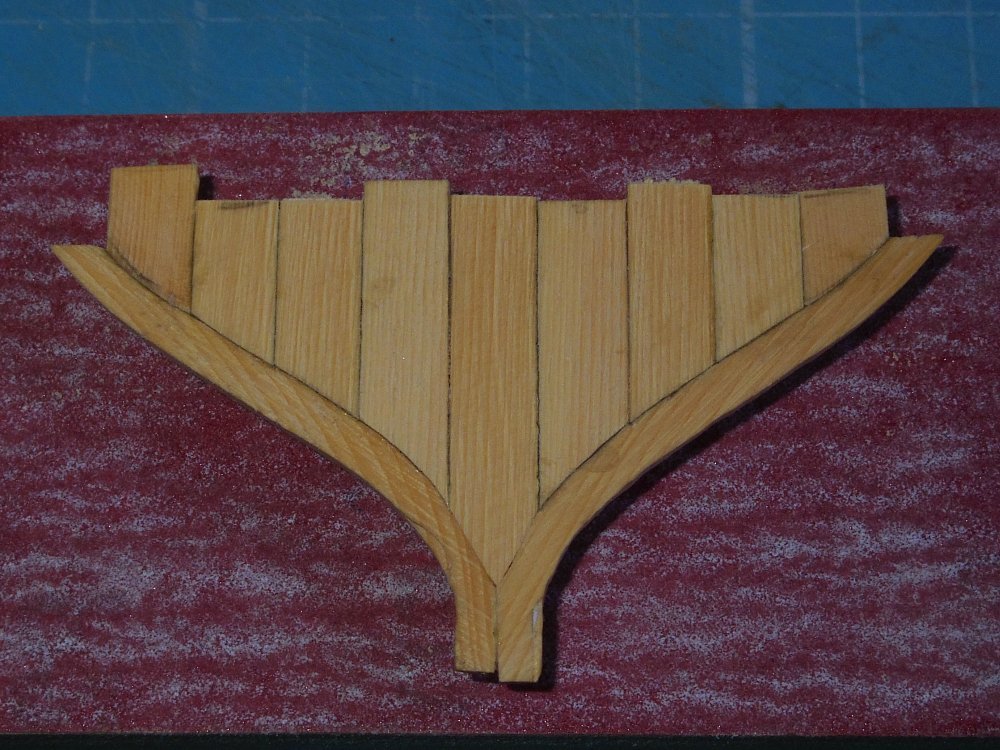
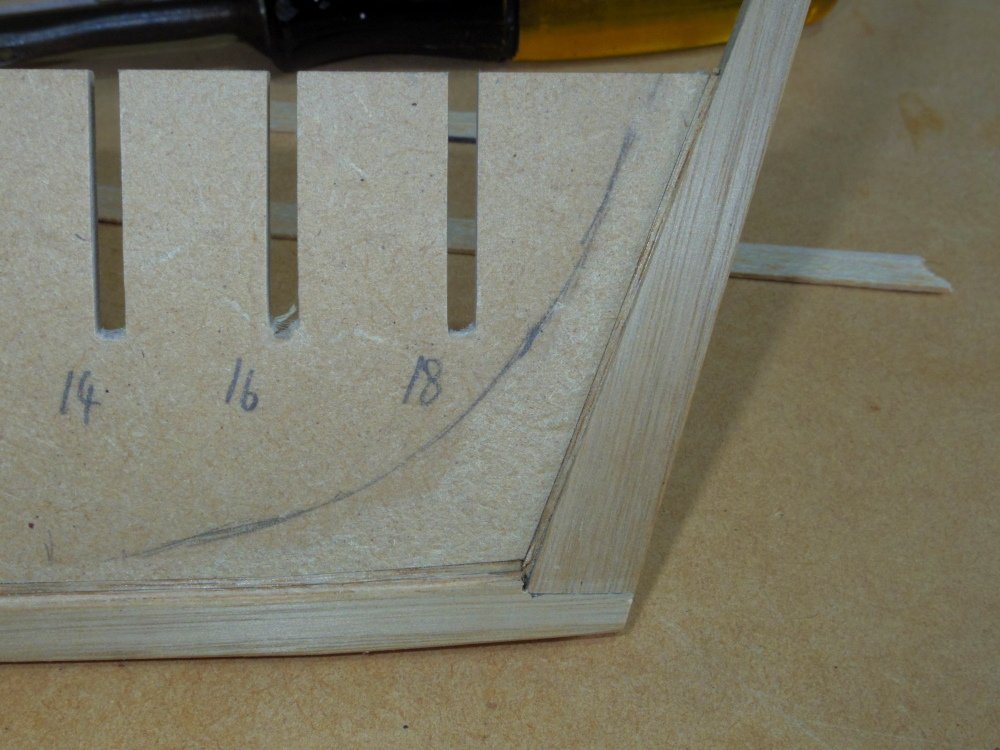
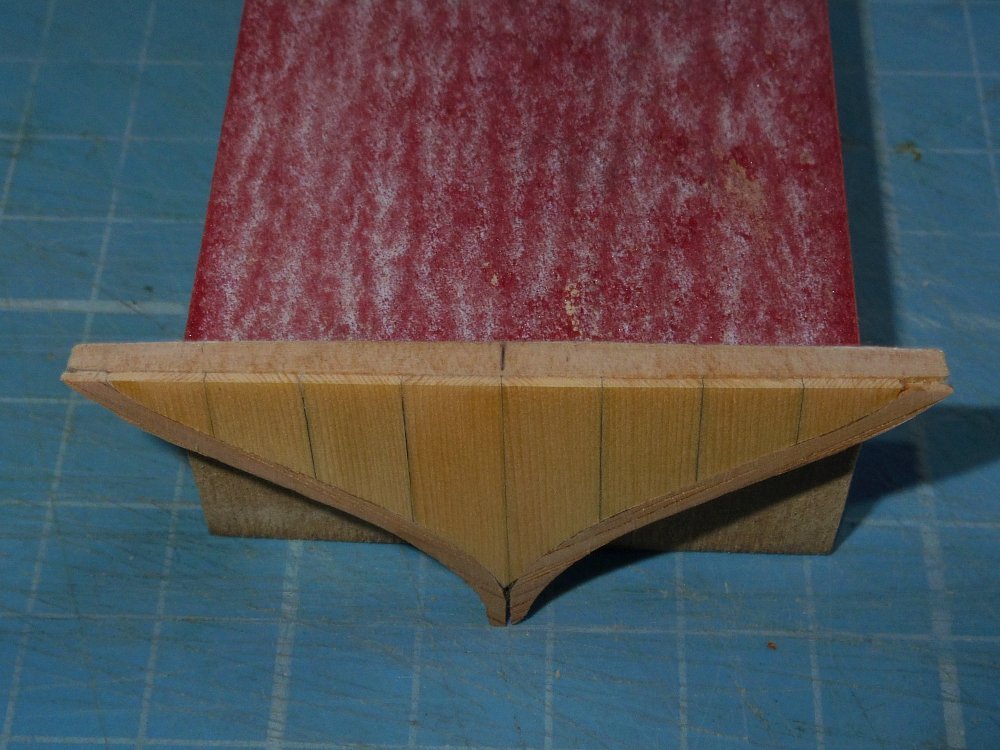
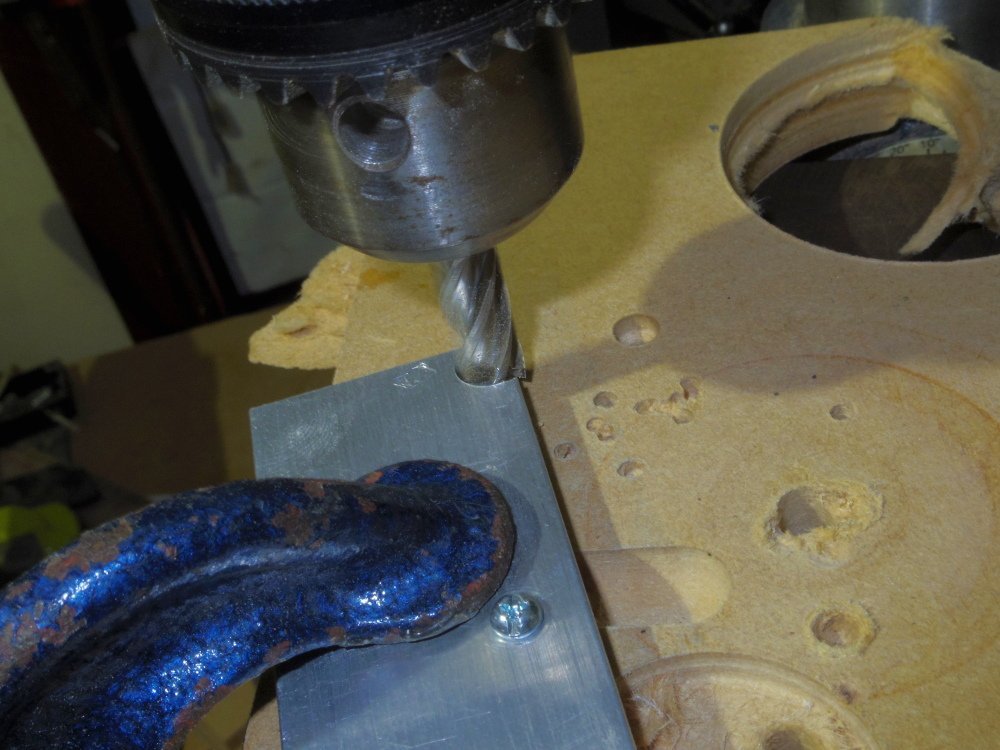
Six hours later While I wait for the glue to dry enough to sand it here's the other transom. I posted above that I had already cut the trim pieces for this version but I still had to mill the rabbets, this was a pain. First I started milling the wrong corner, just a touch before I noticed but it will have to be patched. Second the bit kept grabbing the grain. But I succeeded reasonably. I milled (saw mill not mill mill) some timber for the transoms and fitted them with 'big' rebates. The wing transom gets mounted a little high as it gets a slightly curved top. Rinse and repeat for the other three. A bit rough but they will be hidden and I've taken measurements for the drawings so future builders should do better. You can see the milled rabbets, on the forward side for the hull planking and on the aft side for the transom planking. Planked and awaiting sanding. Disaster delayed
-
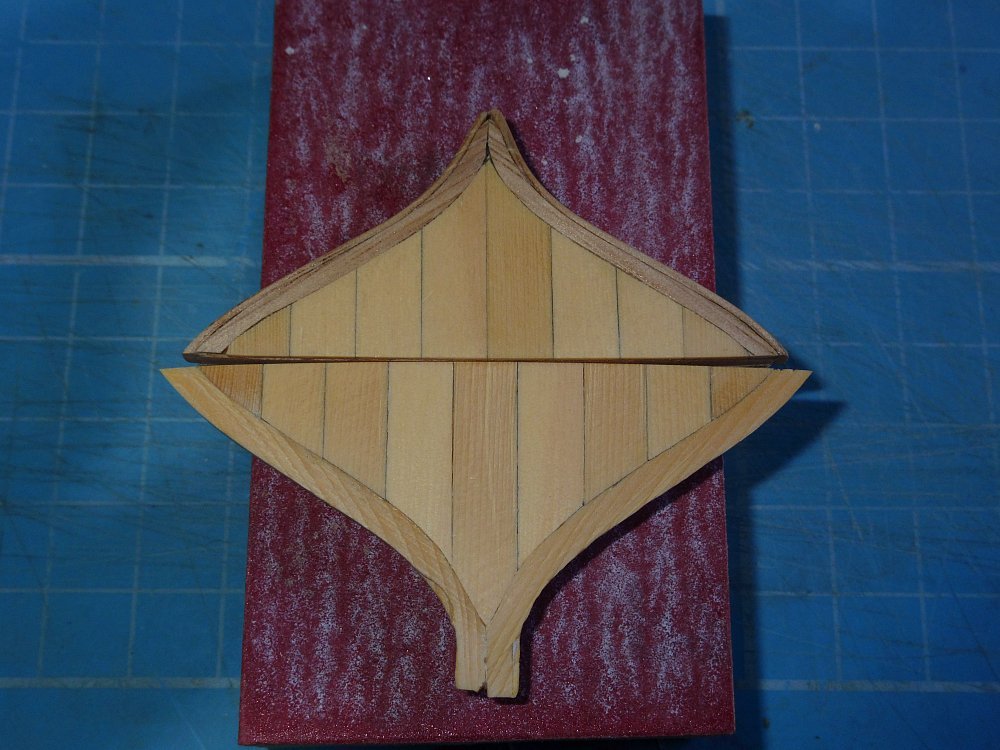
Here we go, a thing of beauty. Pity she's wrong Somewhere along the line I've done something not good. At the top where the transom meets the counter it should be 10ft wide (inside the planking) this one's 9ft 3inches. Oh well, I was going to build another anyway.
-
That I think might be a problem with things like the false deck, but I'll think about it.
-
I've been contemplating doing the centre section in real frames. While doing said contemplation I realised I've been over thinking the 'as built' transom. It will be far easier now.
-
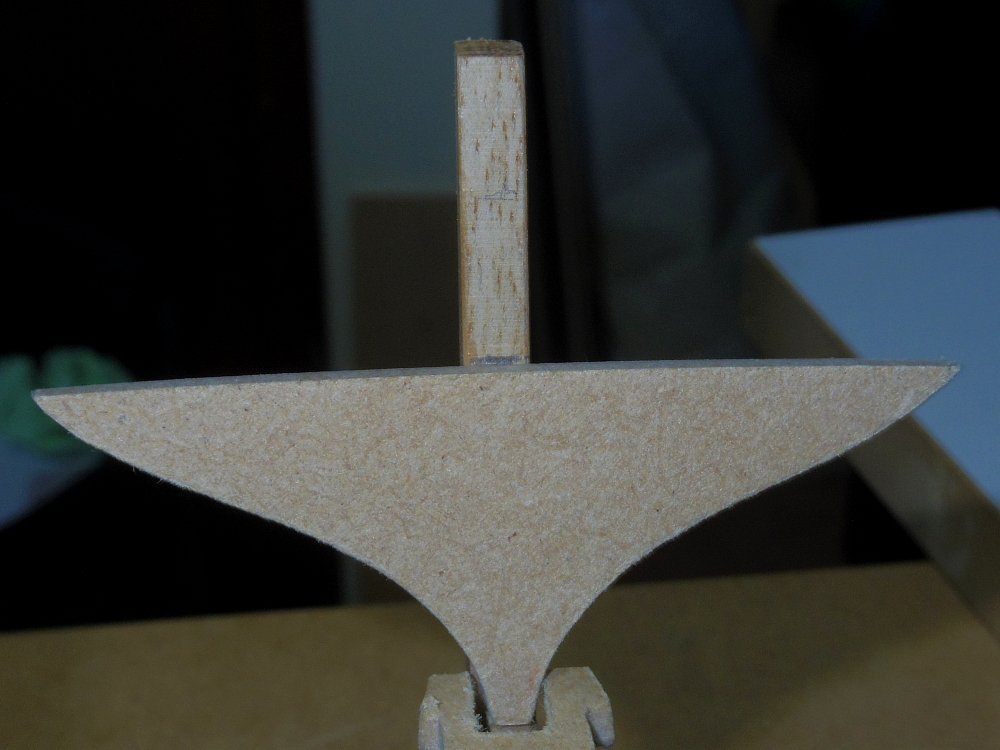
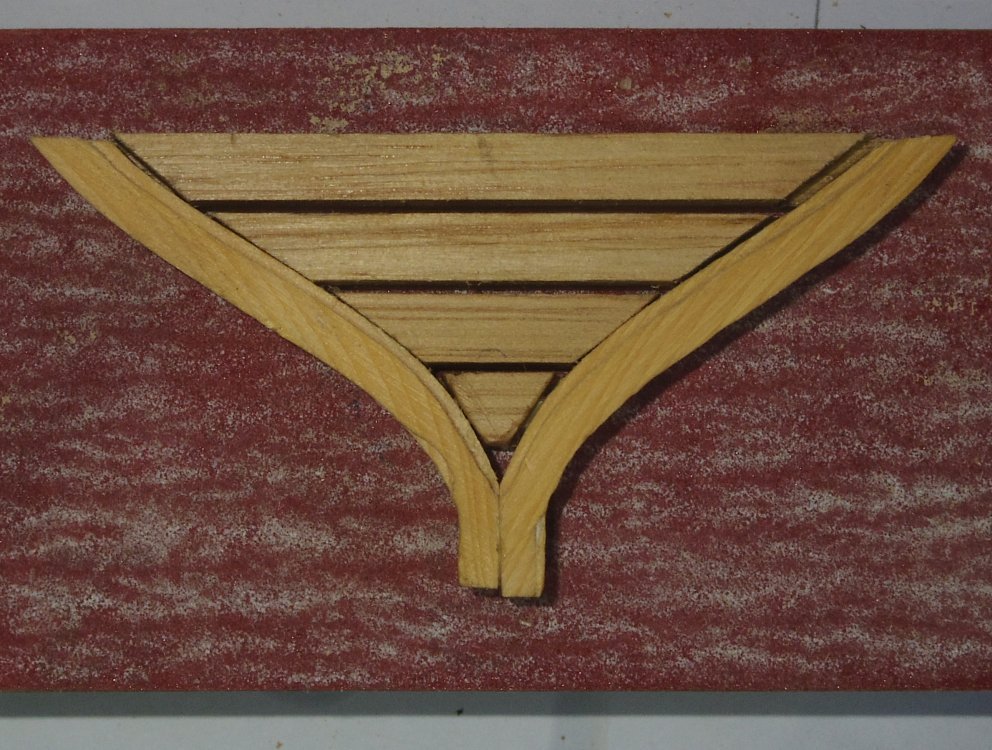
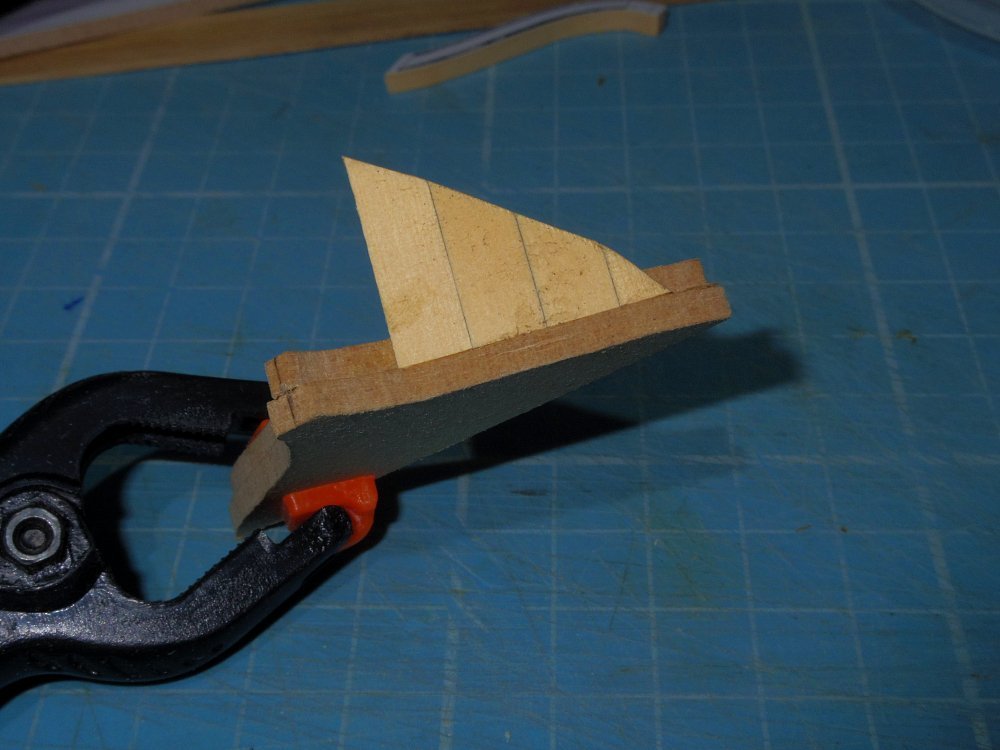
Thanks Tim. To finish off this transom a strip the thickness of the planking is glued to the edge of the transom. When both sides are done a second MDF transom the same size as the first will be glued inside the first creating a step (or rabbet) so that the plank ends will but against the trim as in this mock-up.
-
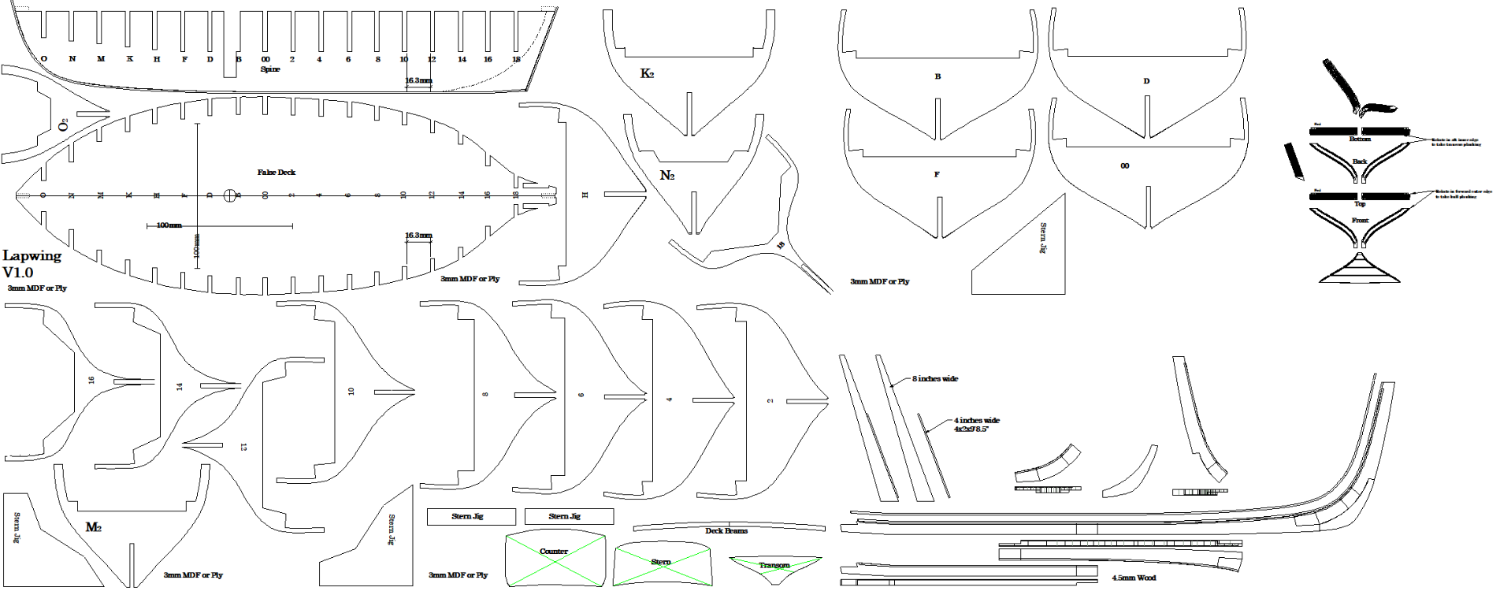
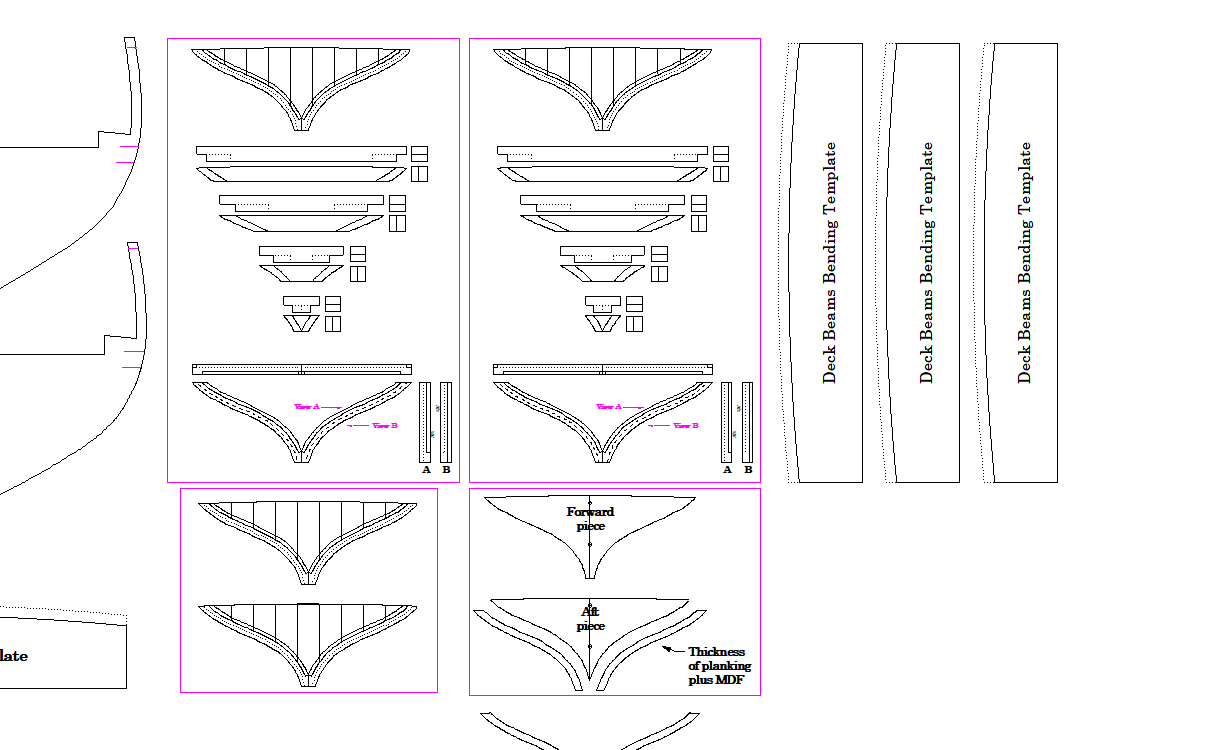
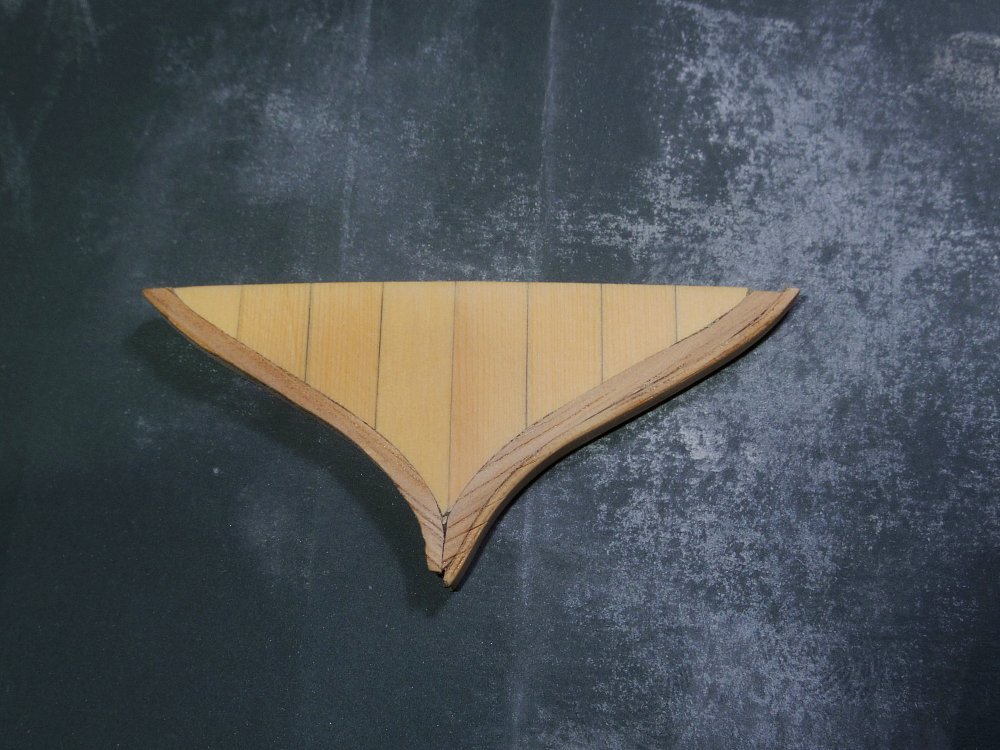
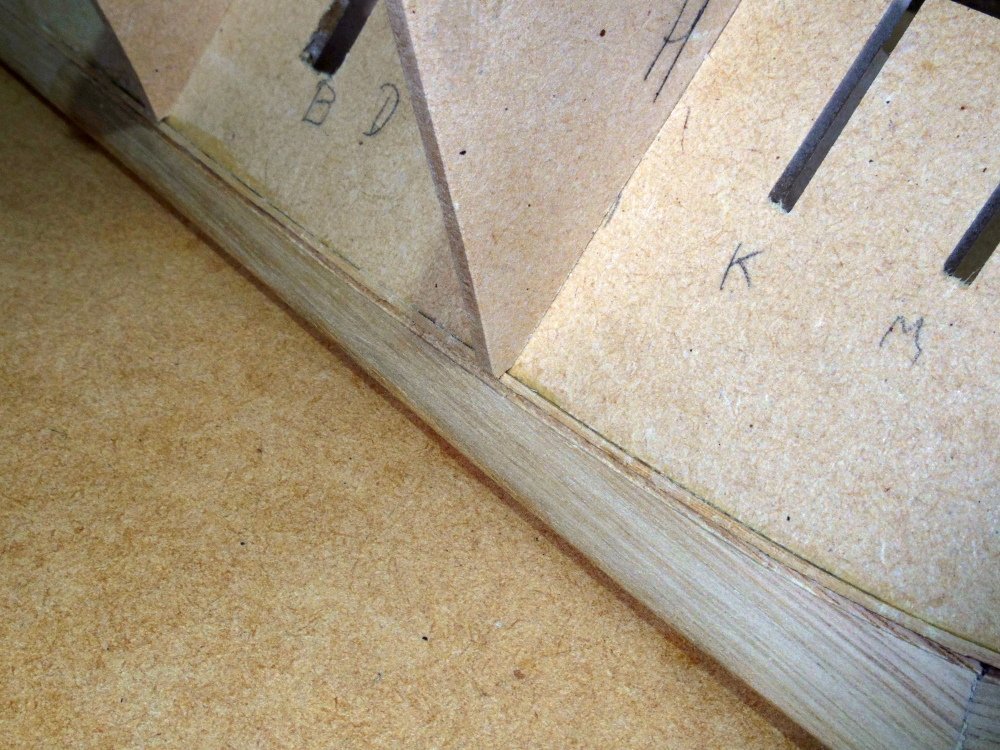
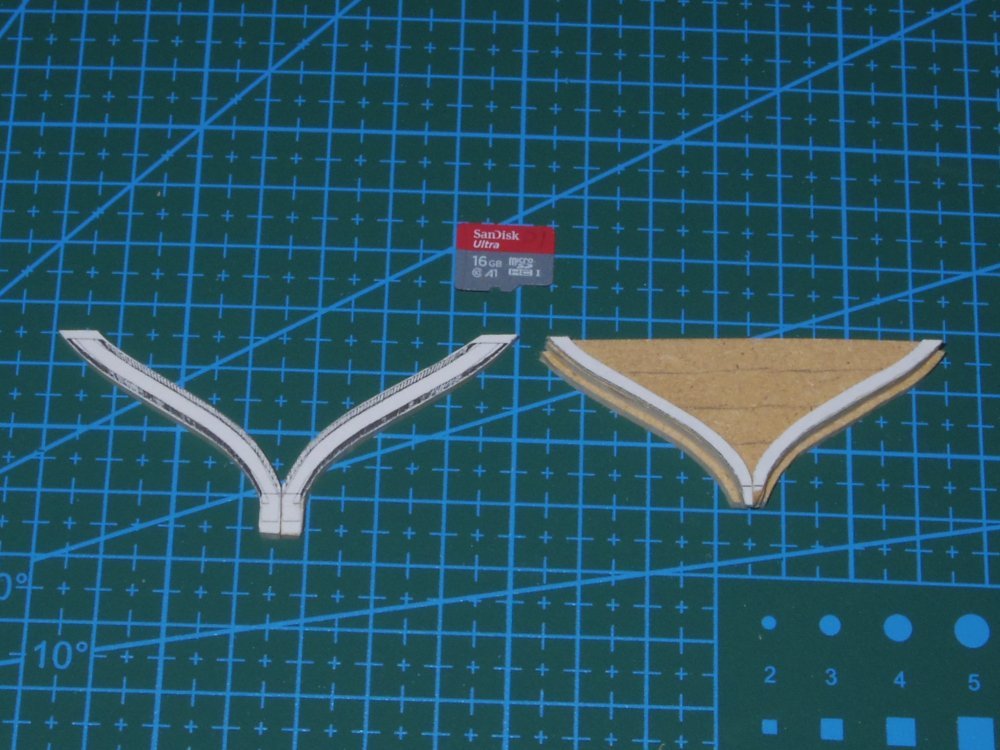
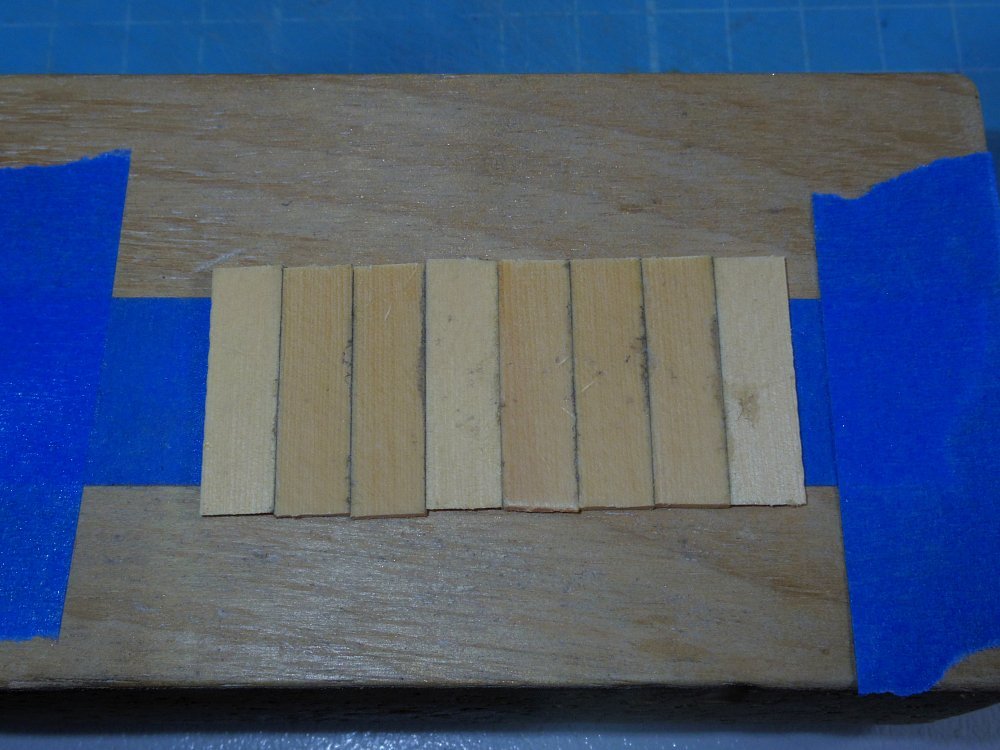
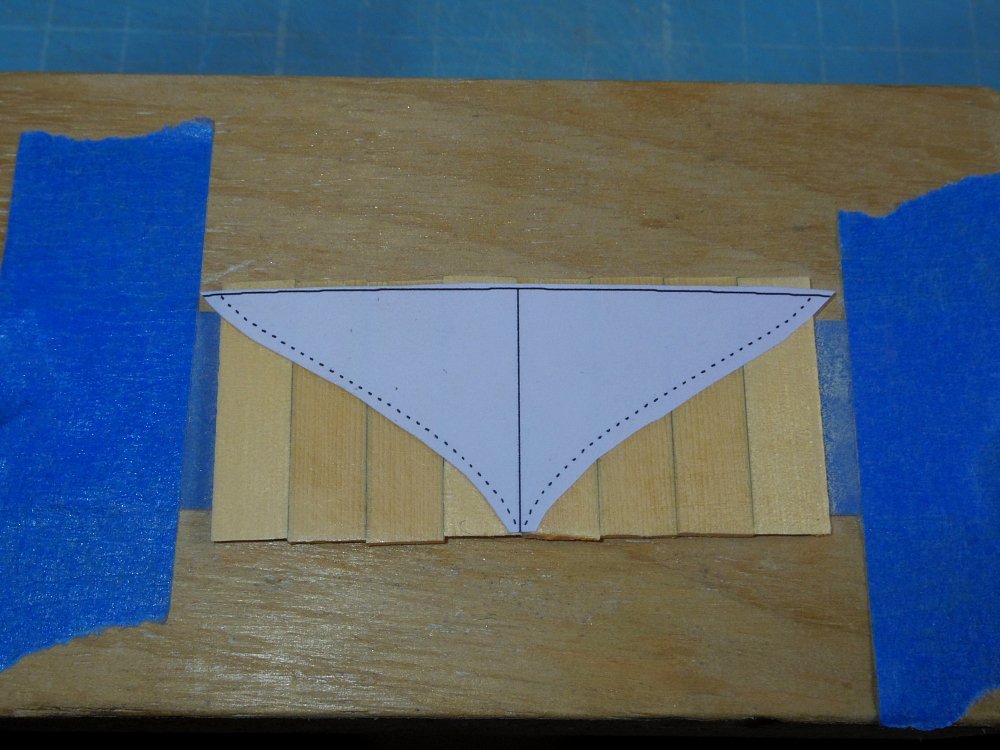
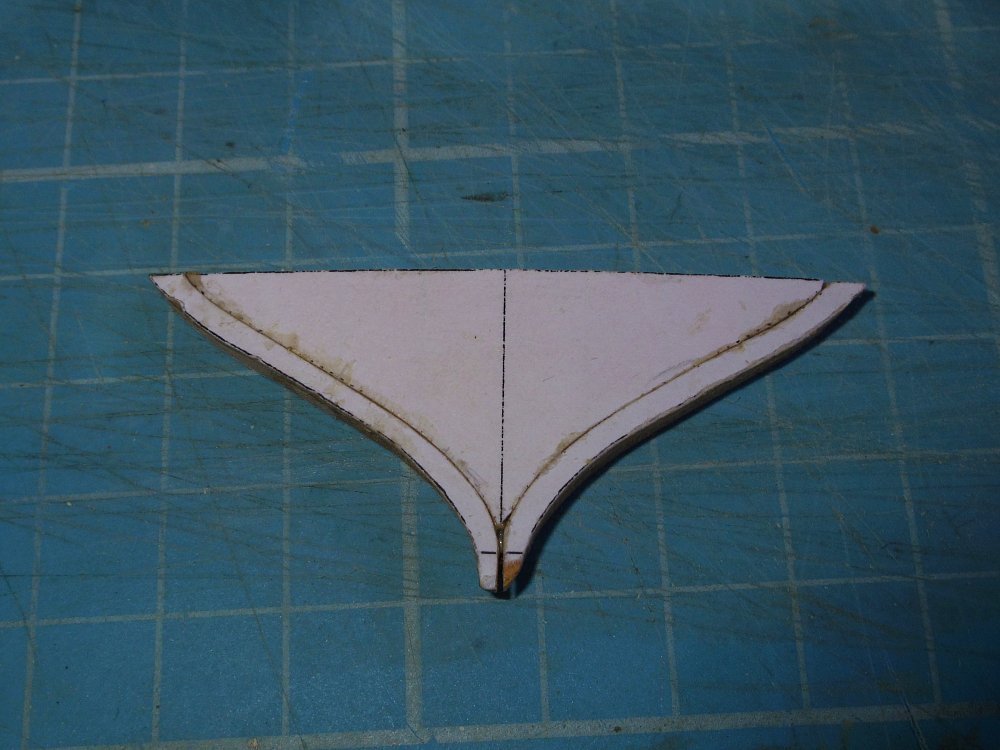
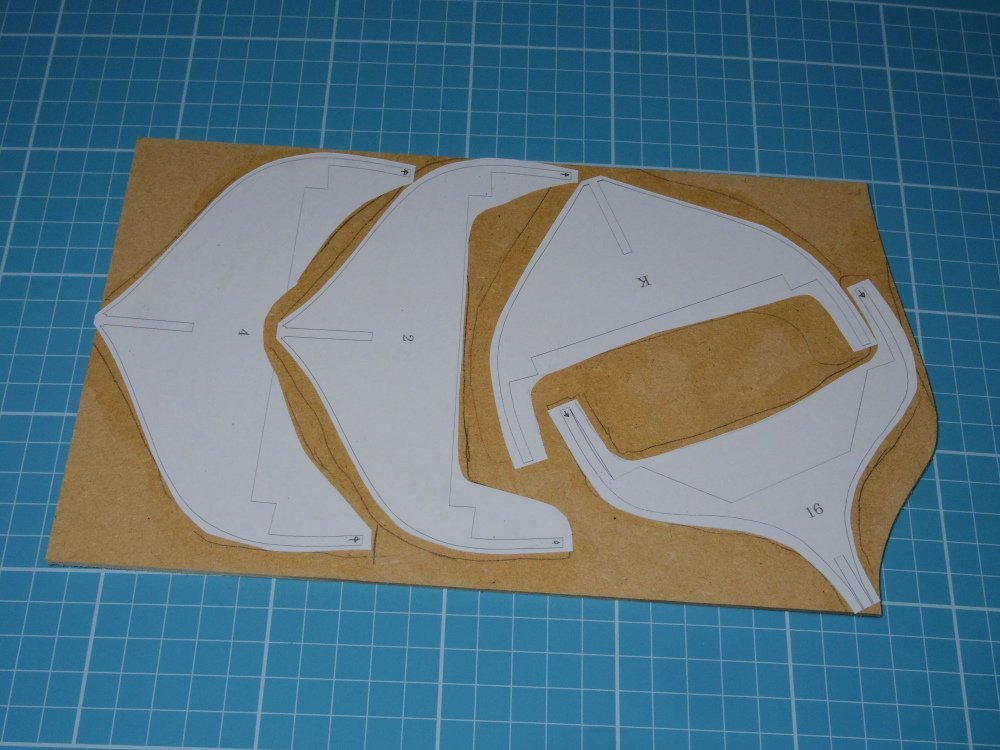
First, a couple of shots that I left out the other day. The rabbet. And tapering the spine, from zero at the bearding line to just under the thickness of the planking at the rabbets (keel and stern post). Yesterday my band saw died (it was only an Aldi cheapie). Luckily I had planned for that and had a spare (same but cheaper, bought on sale) but I still had a lot of setting up to do. The build restarted with the transom/s. I will be building two, as built and easier. Easier first: 1st I cut out 2 3mm MDF transoms. Like the one on the right, the other bits covered by paper are the trims for both methods. Next I made a 'raft' from 6.6mm x 1mm Huon Pine. Glued (rubber cement) on the template and cut it out. Glued the 'raft' and some trim I made earlier to one MDF transom. Cleaned it up a bit (look at that grain, perfect size). Ant took a gratuitous photo of the model. It's not finished yet, more to come. I've also done more work on the drawings, coming soon.
-
Thanks Tim. Speedy is looking nicer every day.
-
a thousand words, I wonder who first said that.
-
Just one of those learning things. With photos of curved surfaces it isn't easy to tell so it was just a caution. basically, the sill is the same distance above and parallel to the deck, the head is the same and the jams (sides) are perpendicular to the keel. This does often give trapezoidal ports. Do some tests and on the model, start lighter. You can darken it with another coat if needed.

-
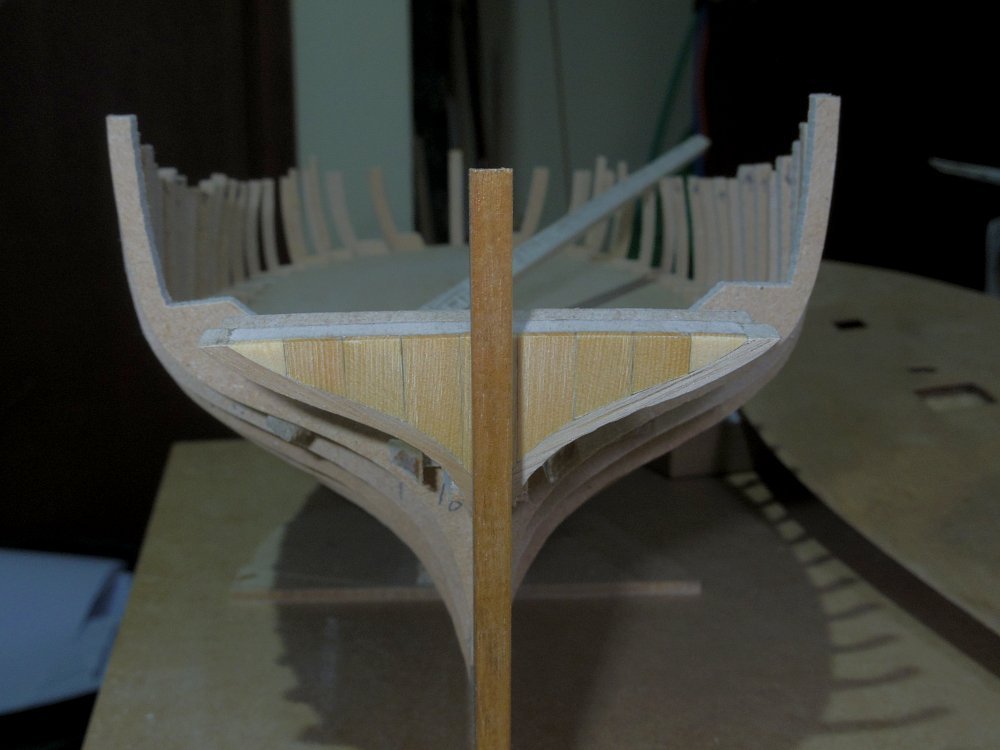
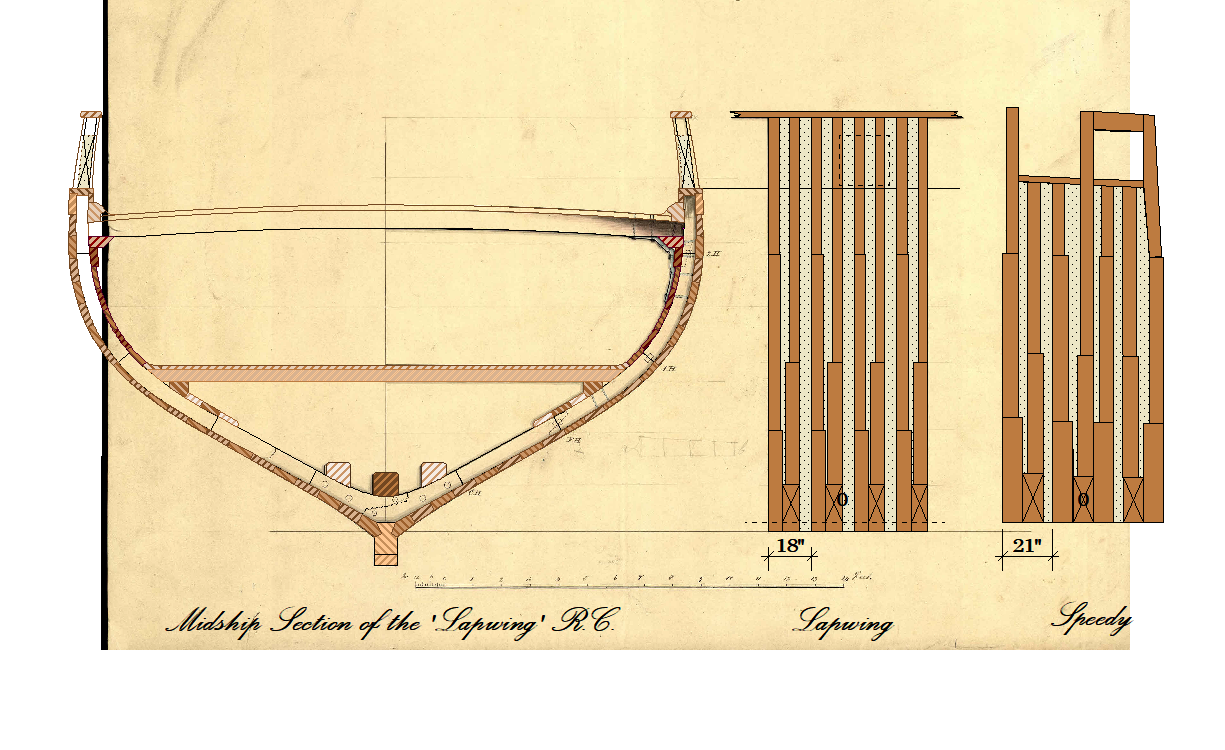
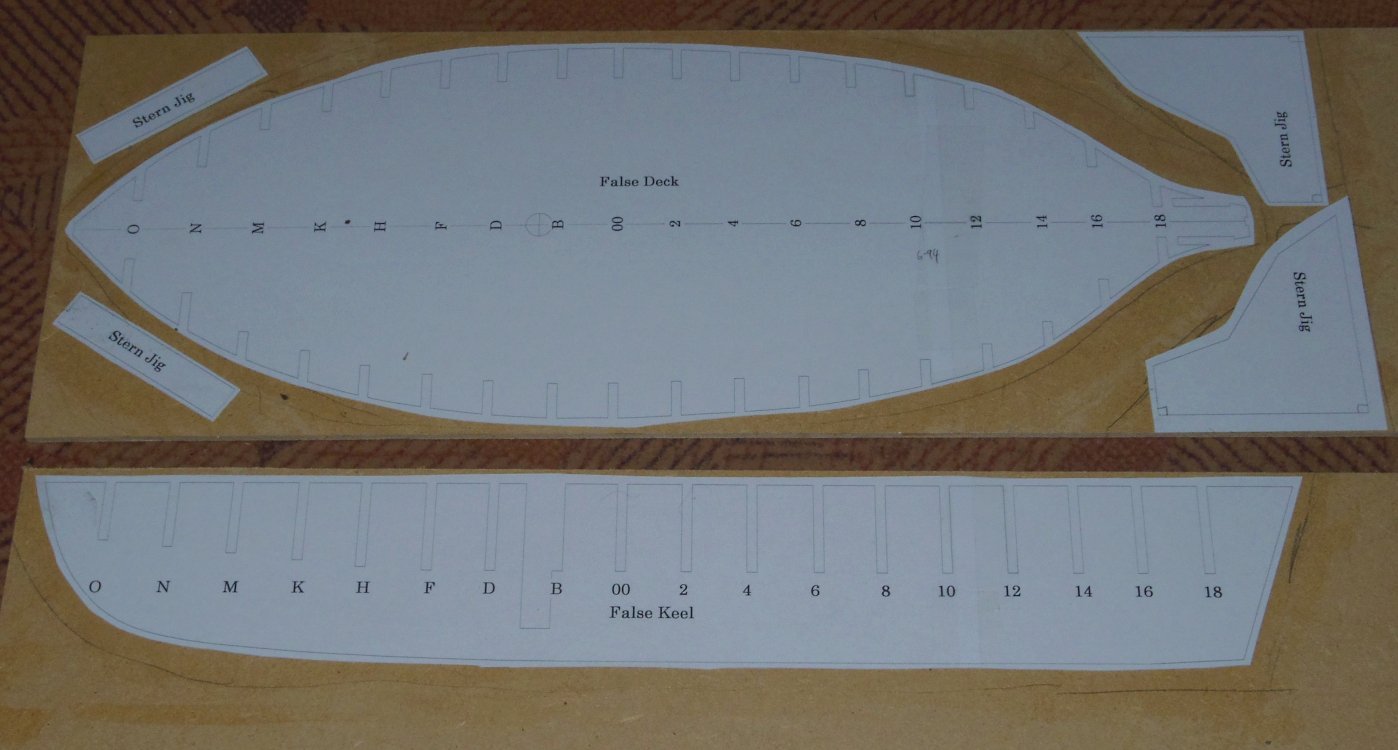
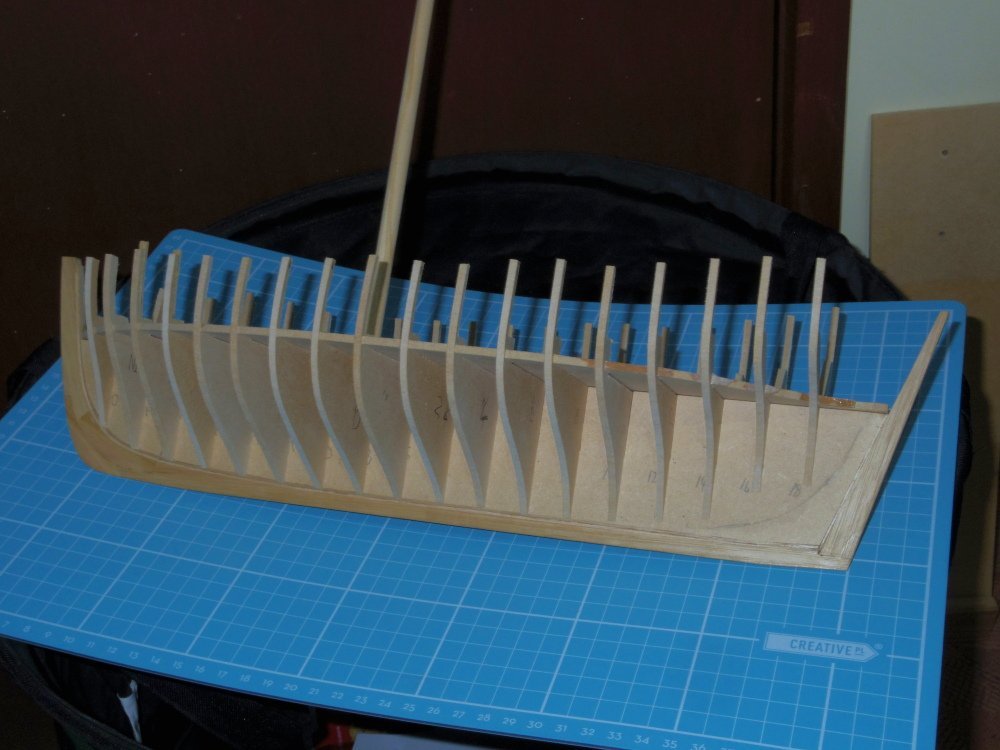
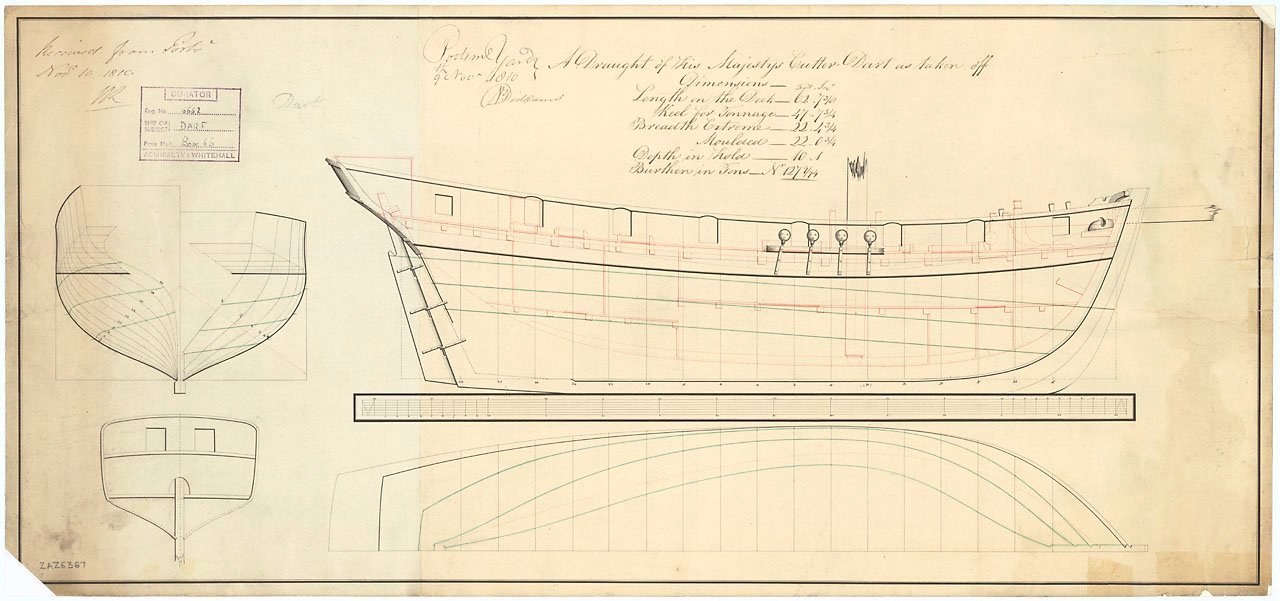
Well, it's been a long road getting here but I've laid the keel so to speak. My Great Grandfather sailed as crew to Adelaide Australia aboard Lapwing in 1850, hence the interest. I've been attempting to create drawings of her for some time https://modelshipworld.com/topic/23486-lapwing-1816-revenue-cutter/ and have reached the point where cutting wood helps me with the drawings and vice versa. So it's time for this log. I will attach a PDF of the drawings here and replace the attachment with newer versions as I go along. Lapwing Drawings V1.0.pdf Drawings, Version 1.0 incomplete but should make a hull minus the stern and counter. Please let me know of any issues. First issue, moulds 2 and 4 have the labels swapped, 2 should be 4 and 4 should be 2. Second issue, transom needs to be reworked Meanwhile: In the title I said 'PoB (mostly)', eventually there will probably be a PoF version and sometimes I will try that out in this build. I will also try a more simplified when I do something more complicated than needed for PoB. Such as the keel. I certainly overcomplicated the keel for this build, several pieces scarphed together, milled rabbet and a keelson that gets mostly cut away. There are easier ways, delete the keelson and add it to the spine (the drawings now show this) or cut the rabbet out from the keel completely and add it to the spine. Both of these methods require some bevelling on the spine. I will add drawings later. I could have sworn I took more photos of the keel construction but......... Cutting wood: Note: The 'False Keel' is now referred to as the Spine. And test fitting. End of first instalment. Thanks for visiting.


-
Probably too late but the sides of the ports are perpendicular to the keel and the top and bottom are parallel to the deck.
-
Lapwing 1816 Revenue Cutter
iMustBeCrazy replied to iMustBeCrazy's topic in CAD and 3D Modelling/Drafting Plans with Software
I think the transom/s done, starting to look good. Counter and counter timbers next.
-
Yes. Yes. It can. To minimise this you can change the shade of black, change the colour to make it look intensional, put a border to make it look like a sign. Lots of options. Check with the decal manufacturer.


-
You can do it in graphics software (Paint would do). Create the text you want. Then invert the colours. You can change the background colour to suit and trim to the size you need. Print to the white decal paper.


-
Lapwing 1816 Revenue Cutter
iMustBeCrazy replied to iMustBeCrazy's topic in CAD and 3D Modelling/Drafting Plans with Software
Nope. Maybe? Closer anyway. Please, somebody give me an adz and a lump of wood.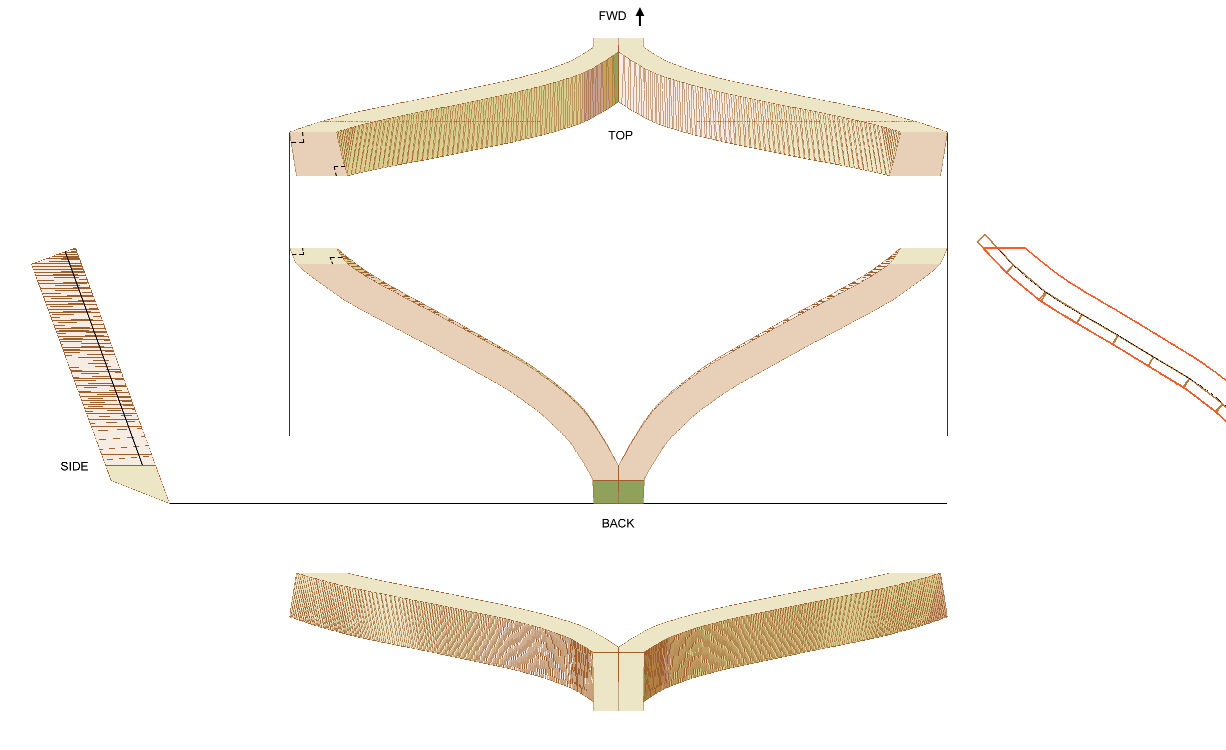
-
Found one. And the channel should follow the deck and or wale. That is, lower forward.
-
Lets just say the chainplate is metal, it can be a flat bar, a few flat bars, a chain, a really long chain link or a combination.
-
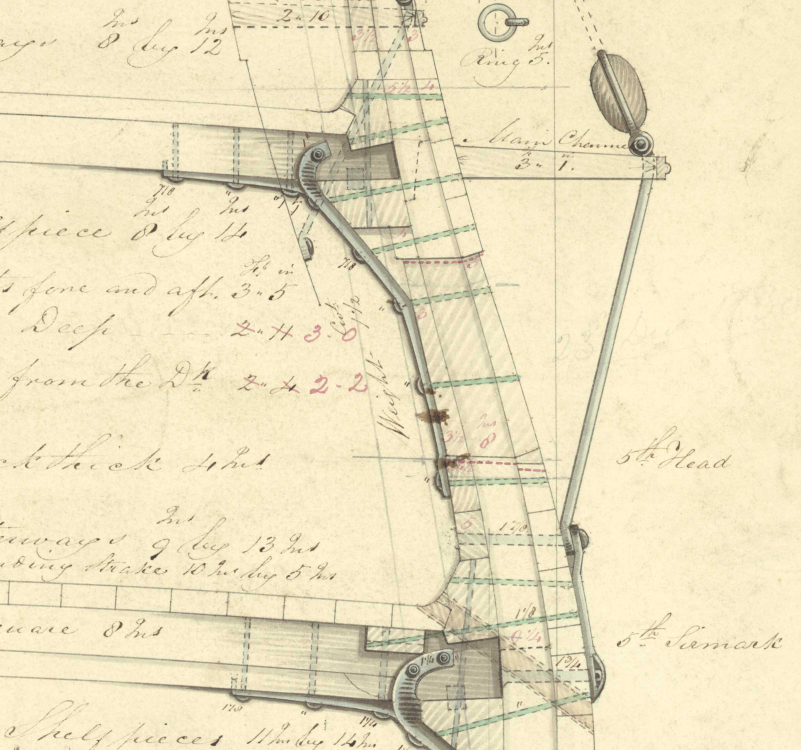
There will be exceptions! The channel is often notched for the chain plates and then a cover strip goes on the outside. This gives a fairly clear example:
-
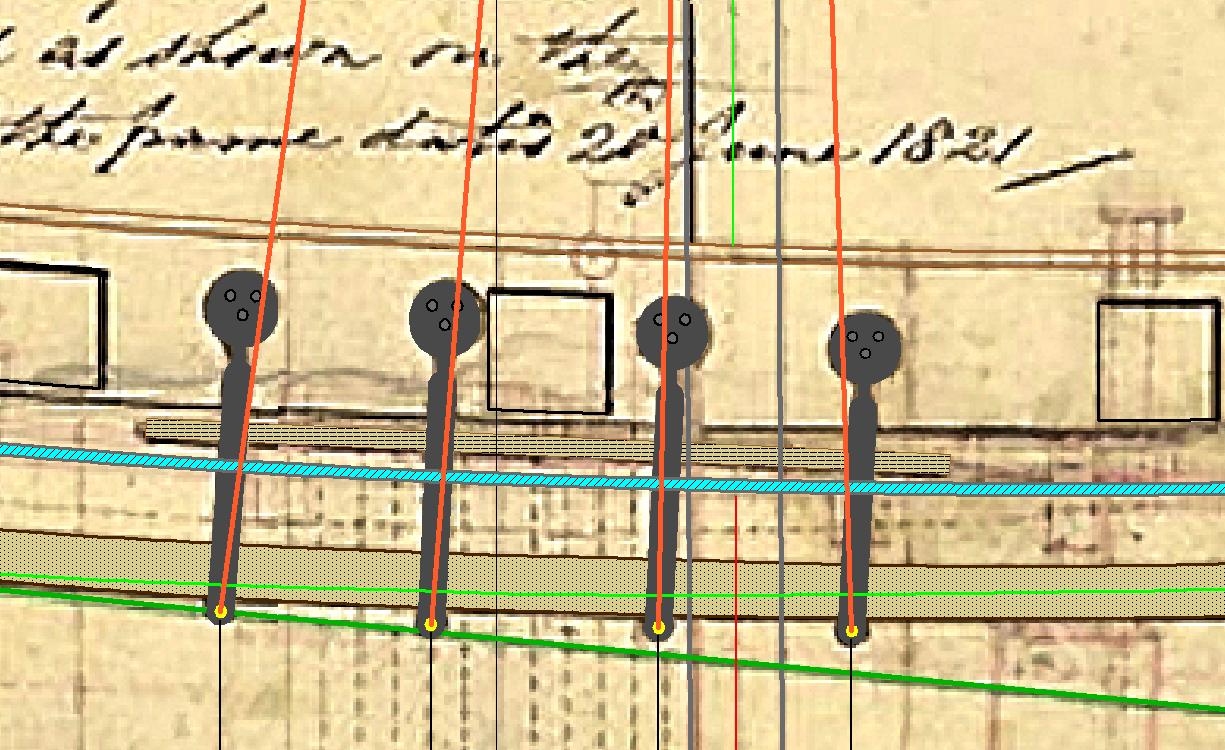
Looks fine to me but the straps will all be pointing to a spot up the mast about 54 feet above the deck. The Lapwing drawings are possibly wrong here except there were probably no clearly defined wales (other than by a coat of paint) just a thickening of the planking. (My Lapwing will have wales despite this). Add in that Speedy was built 10 years after Lapwing and some changes are certainly possible. This is one of the Vigilant class (enlarged Lapwings with 2 extra guns) showing the shrouds moved.
enlargedLapwingj8083abc.png.e42f4cca6d284c9b3a9a15bd9457b983.png)