


dunnock
-
Posts
529 -
Joined
-
Last visited
Content Type
Profiles
Forums
Gallery
Events
Everything posted by dunnock
-
Thanks Thukydides, I thought it was just me. I'll check after the first gun next time!
- 152 replies
-
- 4
-

-
- Vanguard Models
- Cutter
- (and 2 more)
-
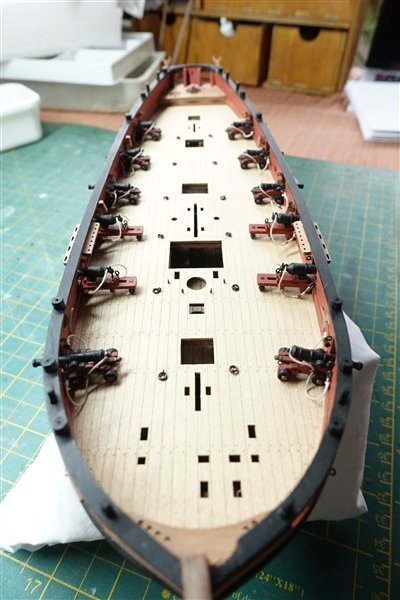
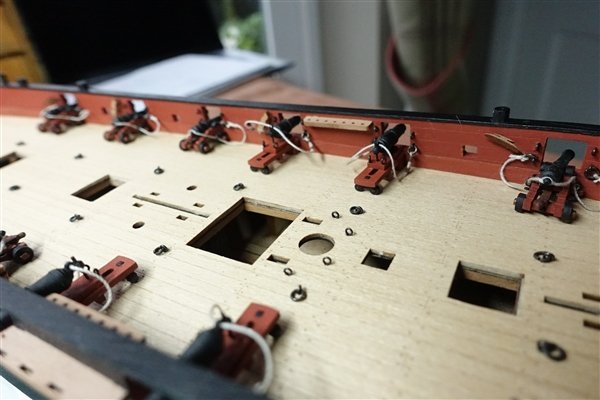
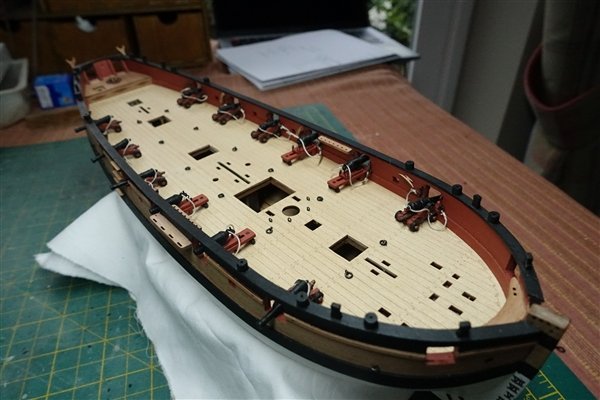
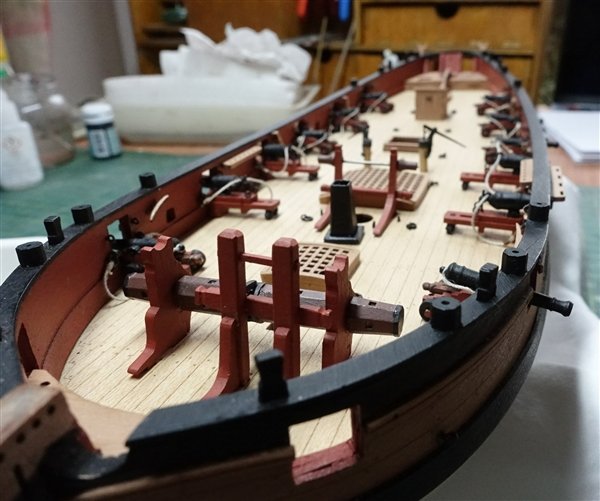
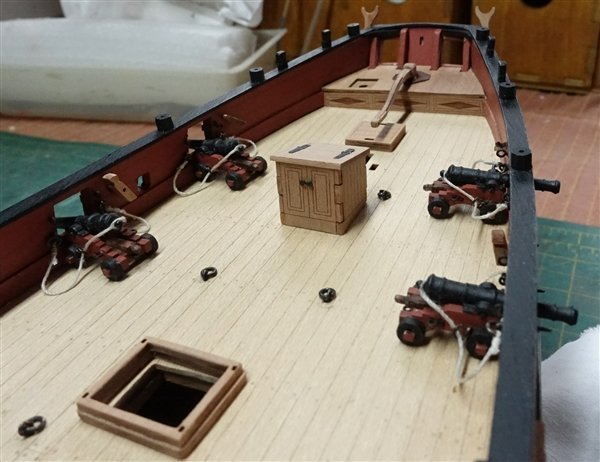
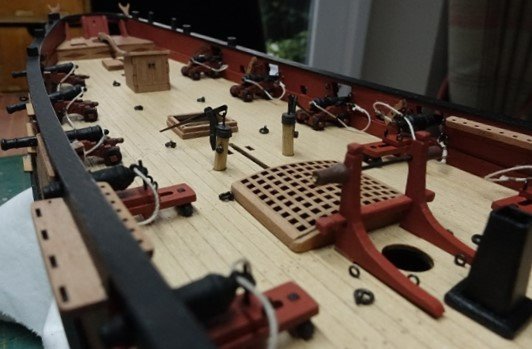
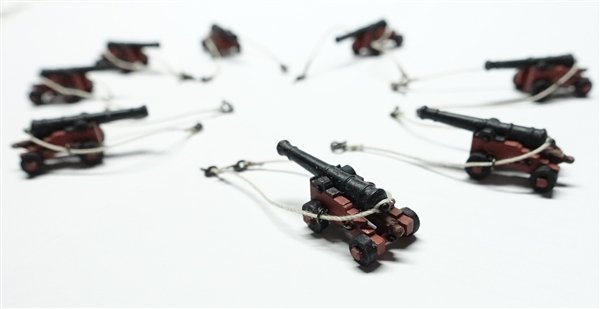
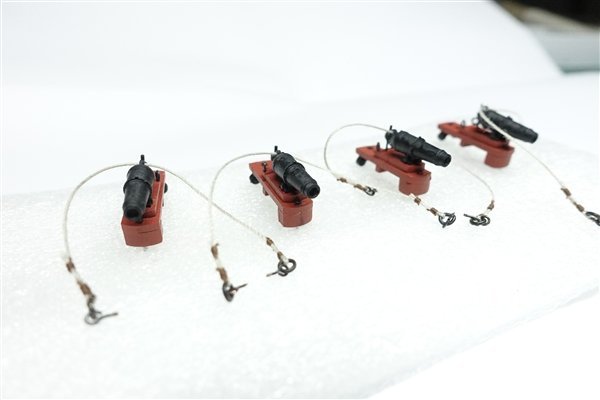
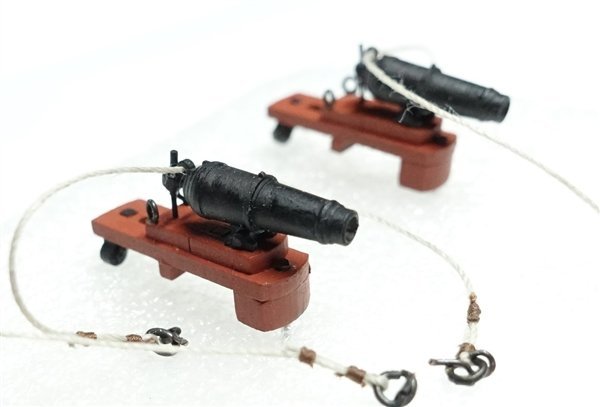
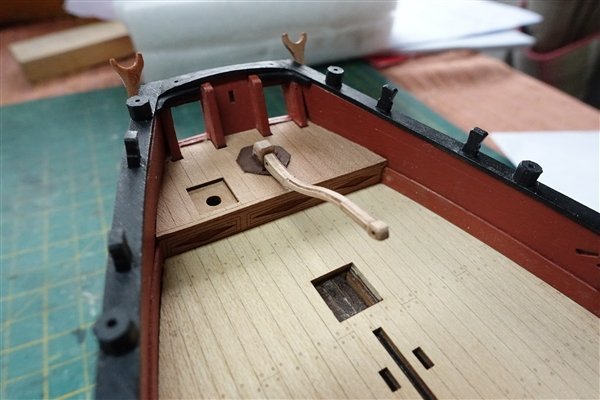
Dave, the jig makes sure that the sides taper in at the correct angle and it's easier to fit the axles and sides together. However in this case only a simplified jig is possible because the barrel is fitted during the make up of the carriage rather than as an addition. Also Dave, beware the rule of 3x barrel length for breechings. Perhaps I've interpreted the rule wrongly but it hasn't worked for me in this case. The guns and carronades have all been fitted, however when I offered up the first gun, I realised that the breechings on both guns and carronades were too long. I set them at 3 times the length of the barrel but at this length, they would all have been falling into the hatches when fired. (DaveB please note) I spent an unhappy few hours yesterday shortening and re-seizing them to the eyebolts. A slight flat was sanded on the trucks of the guns to provide a bigger surface for the pva. When making up the carronades, I used a blackened pin to connect the base to the truck and left it protruding by 2mm rather than cut it flush as directed. The pin is located into the deck and holds the carronade firmly in place. The ropes require some further manipulation to make them lie more naturally. I have also been making up most of the deck fittings over the last couple of weeks. Mostly they are made up as per the instructions but I have scratched the main and forward hatches using cut down 6x3mm pear strip. I prefer the look of hatches with a curved surface even if the plans and model of Trial in the RMG show them as flat. The laser-cut gratings make a curve easy to achieve wit ha short soak and drying around a suitable curved surface. Thanks for looking in and for the likes and comments. David
- 152 replies
-
- 18
-
-
- Vanguard Models
- Cutter
- (and 2 more)
-
I made most of the headworks from scratch. It took me a long time and several attempts but it's worth keeping at it. David
-
Lovely planking job Andrew. All that planning and marking has certainly paid dividends David
-
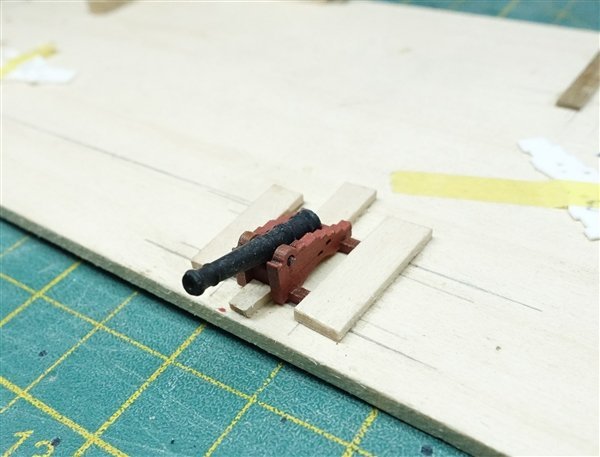
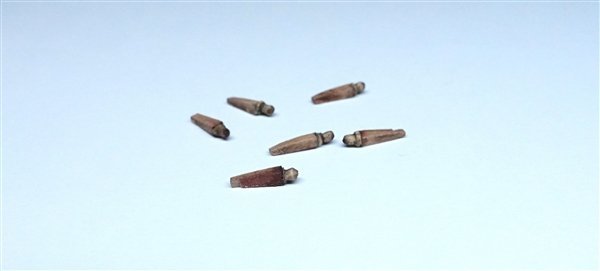
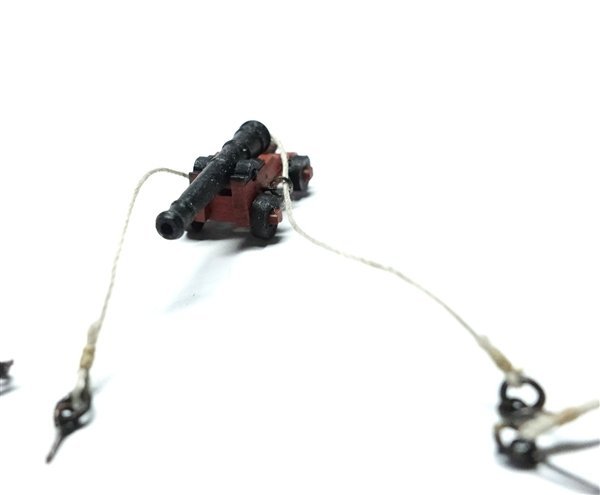
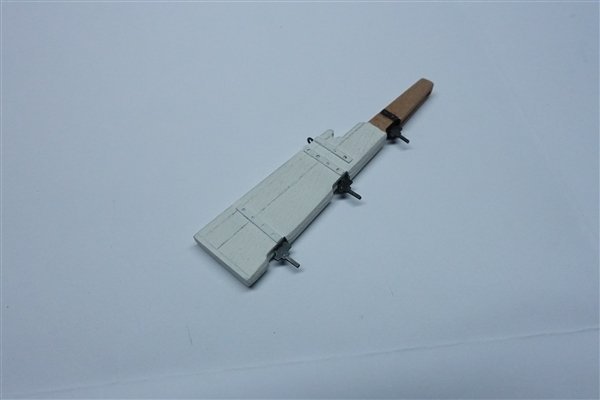
Guns and Carronades.. These 3 pounder guns and 18 pounder carronades are very small. I was thinking to partially rig them with breech rope and side tackles. Based on references in Lavery, the breech line is no more than 0.4mm and the tackles 0.25mm. I made a small jig to make up the gun carriages and keep them square. The guns are not mounted separately but fit in holes in the carriage sides. There is no hole for the breech line ringbolt in the carriage side so I made another jig as drill guide. I used the kit eyebolts which I had previously blackened. Ringbolts for breeching ropes were made up from the kit eyebolts and 2mm brass rings. I sanded the quoins to a wedge and added a handle made from a belay pin filed to a more appropriate dimension. The breechings were made using 0.5mm thread. The standard length for a breeching rope was 3 times the length of the barrel so 75mm at scale with a ringbolt seized to each end - remembering to thread the rope through the ringbolts on the carriage before adding the second one. I haven’t found any information on the sizes of blocks for these small guns but I’m assuming 2mm would be about right. If this is correct, my eyes and fingers are not capable of making up 16 sets of tackles without my going completely insane so I think I’ll leave well alone. Finally the trucks are added and the guns are complete. The carronades are made up according to the manual but 0.5mm breeching lines have again been added. Thanks for looking in and for all your likes and comments David
- 152 replies
-
- 11
-
-
- Vanguard Models
- Cutter
- (and 2 more)
-
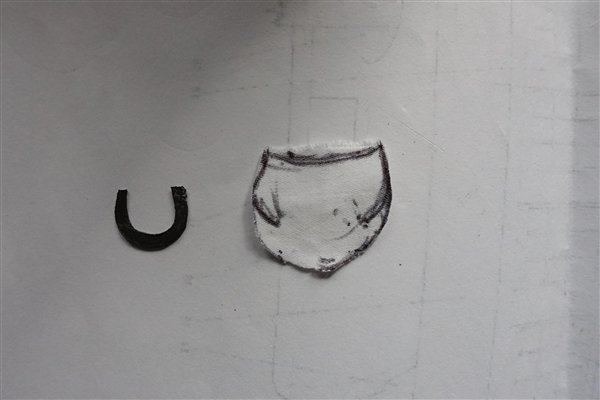
Many thanks Thukydides and BE for your kind comments. I have added a rudder coat now to all three ships that I have built (following your Pegasus log BE) and each time I forget what shape it should be. This time I've made a note for reference - and to help anyone who wants to copy. David
- 152 replies
-
- 3
-
-
- Vanguard Models
- Cutter
- (and 2 more)
-
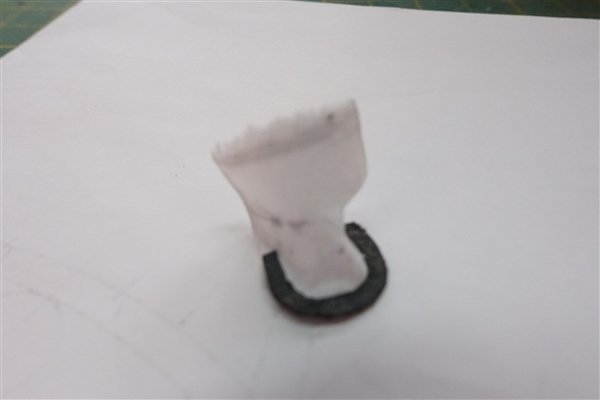
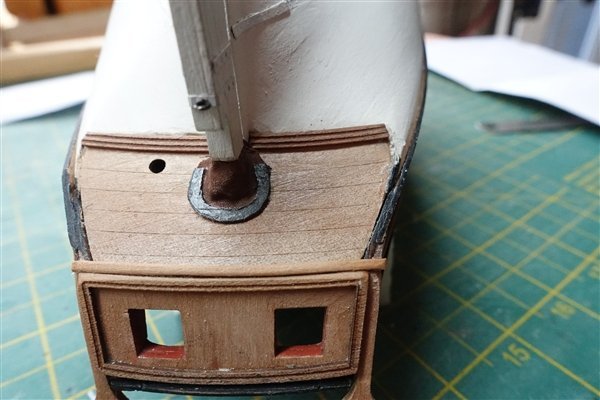
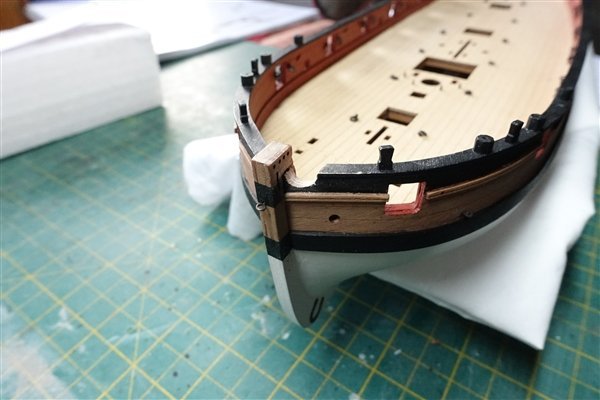
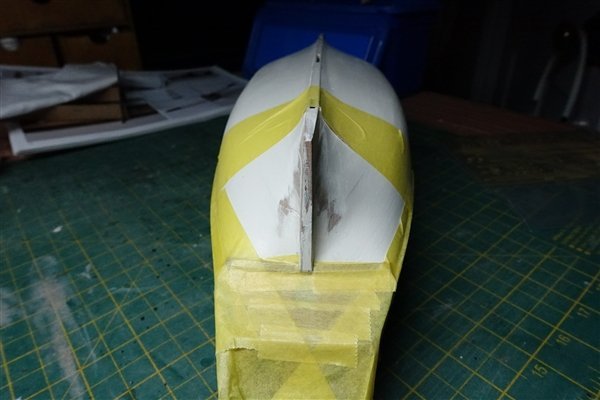
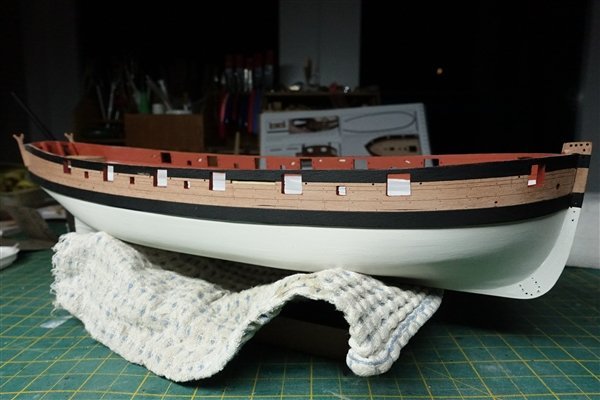
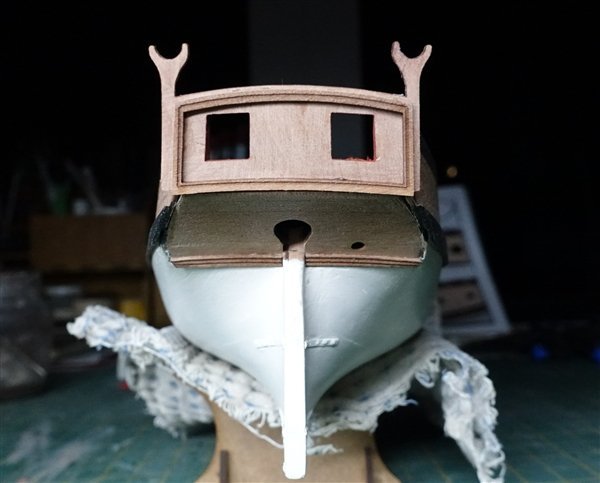
Thanks everyone for the likes and for following the log. As a further feature at the stern, I decided to add a rudder coat. After a lot of trial and error, I made the horseshoe band that holds the coat on the stern counter out of 0.5mm styrene painted iron grey. The coat was cut from an old cotton duvet cover, again getting the shape involved some trial and error but these are what I cam up with. The coat was cut oversized and trimmed to fit when glued to the horseshoe. Sorry the photo is out of focus Painted brown and glued to the counter and rudder I don’t know whether this is correct shape but it seemed sensible to also have a coat for the tiller opening and I cut it to match the hexagonal opening. The tiller is only dry fitted at this stage. The bow knee and stern knees required some shaping and chamfering to fit to the bulwarks. In order to set the height of the bow knee, it is necessary to prepare the cut-out for the bowsprit. Using a piece of scrap 6mm dowel and the brass pe bowsprit ring (PE5), the position is marked. I drilled 0.5mm holes around the circumference and then cut and finally filed the hole to shape. The Bowsprit knee can then be glued into position without fouling the bowsprit. All the eyebolts have been fitted. I used some 0.75mm ones that I had rather than the flat brass pe ones provided. The relieving tackles are made up as ring bolts. I have not added the breeching tackle ring bolts as I plan to partially rig the guns and fitting the breeching tackle ringbolts to the breeching ropes first makes it easier to fix them to the bulwarks. This marks the end of another stage of the build and it’s now time to move on to the guns and deck fittings. Thanks for looking in David
- 152 replies
-
- 14
-
-
- Vanguard Models
- Cutter
- (and 2 more)
-
Thanks Andrew. I wish I had thought before I had finished planking and painting the hull though! David
- 152 replies
-
- 3
-
-
- Vanguard Models
- Cutter
- (and 2 more)
-
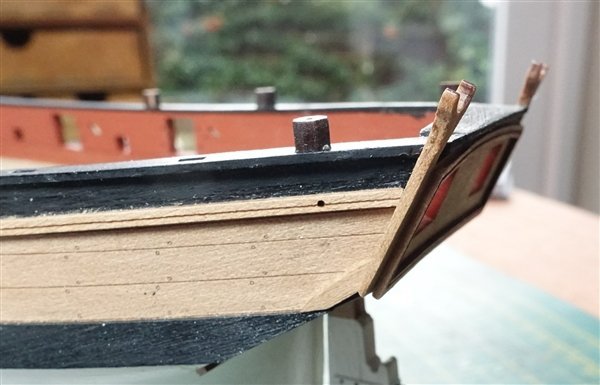
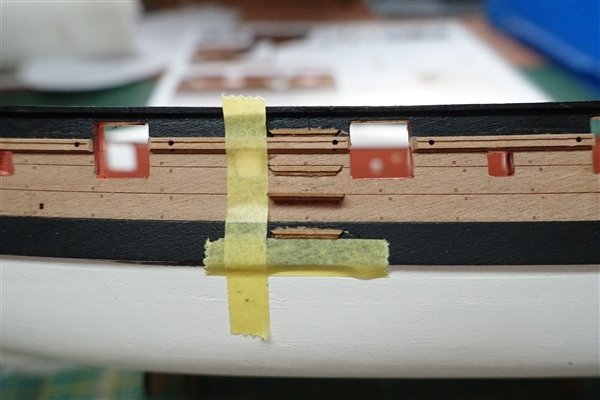
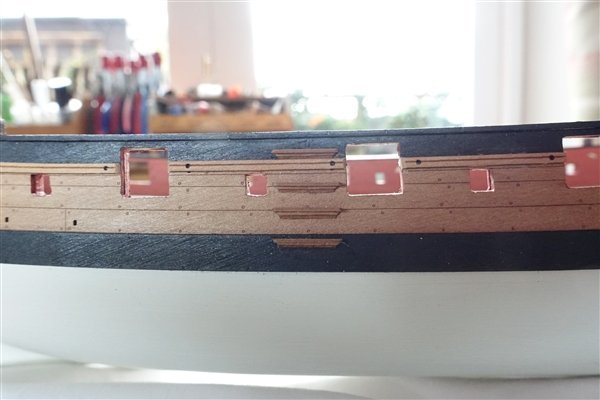
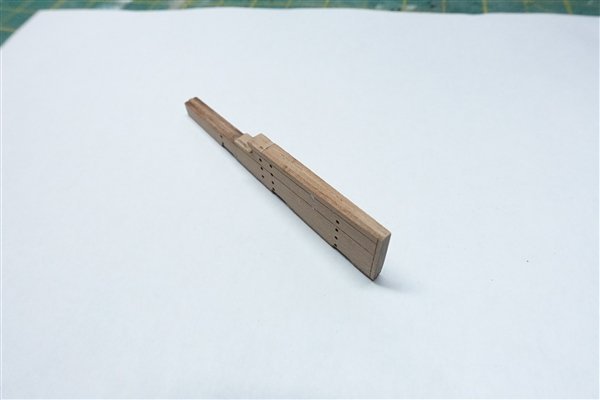
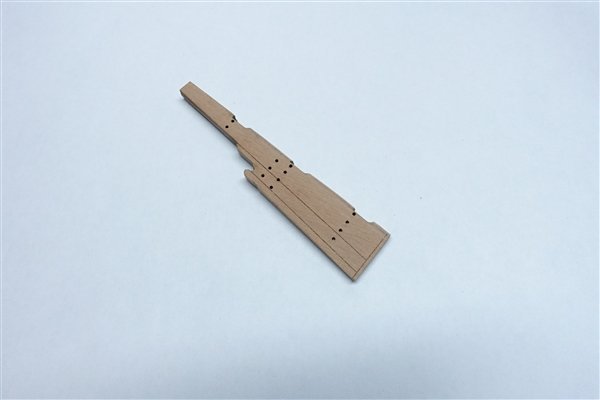
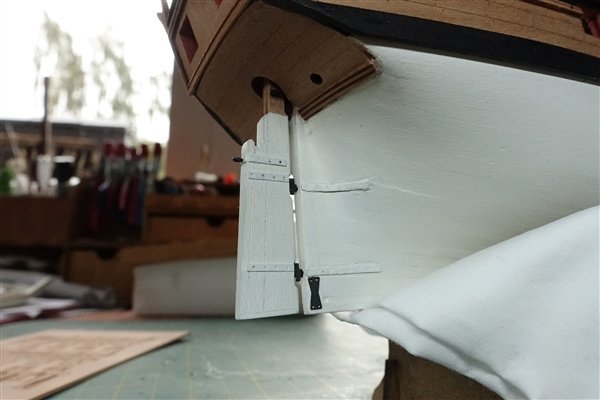
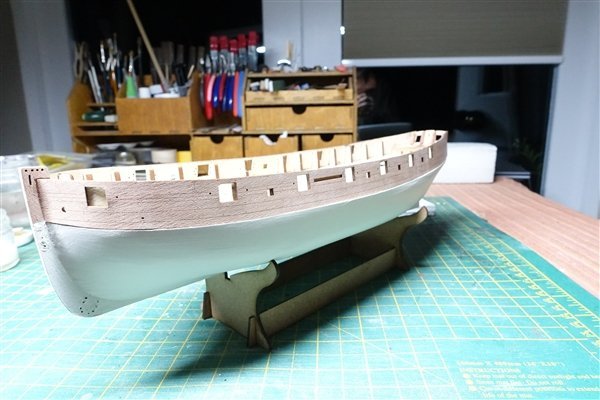
Thanks very much for all the likes comments and encouragement. I am enjoying building this little model which although quite simple on the face of it is throwing up enough challenges to make it interesting and worthwhile. Continuing with the fitting out of the basic hull adding the side counter timbers, steps and rudder. The side counter timbers require some sanding of the back to make them run smoothly against the main wales. There are four outer steps each side to be fitted. Three are positioned by the engravings on the outer bulwark patterns but the lowest is positioned just below the top of the main wale. I used tape to mark the left hand edge and the bottom edge of the lower part of the step. I also scraped back the paint on the wale to give better adhesion of the pva. Still the top step to add. The rudder is made up of a plain core and two outer engraved patterns which are glued together. I wanted to give a more authentic shape to the rudder which meant tapering it below the hanse to about 2mm on the lower edge. The core was thinned on both sides and the outer patterns on the inside. Bringing the lower edge to 2mm would have meant reducing the core to nearly zero at its lower edge which would have made it too delicate. I compromised on a final overall thickness of 2.3mm The forward edge (against the sternpost) is also chamfered to allow the rudder to move freely. The pintle straps are separate brass PE for each side. The hinge stems and strap above the waterline were blackened rather than painted. Although the hinge stems are flat PE brass, once glued in and the rudder is fixed, I thought they looked OK. Others may wish to scratch them from brass or styrene tube. Of course having shaped the rudder meant that I needed to go back and shape the stern and stern post to give it the same taper as the rudder. A few hours stripping the paint back, sanding the stern, refixing the brass straps and repainting and the job was done. I'm continuing work on the hull having added the swivel gun posts, which will be followed by the timberheads, tiller and catheads. David
- 152 replies
-
- 11
-
-
- Vanguard Models
- Cutter
- (and 2 more)
-
Thanks Theodosius but I think there's still some way to go yet David
- 152 replies
-
- 2
-
-
- Vanguard Models
- Cutter
- (and 2 more)
-
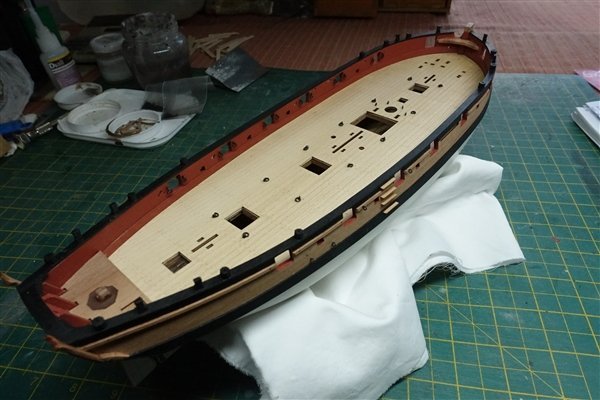
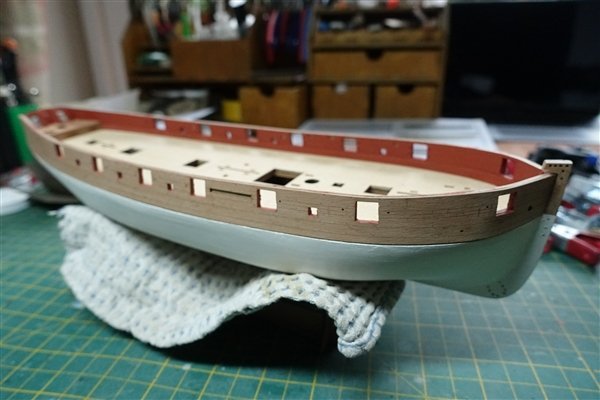
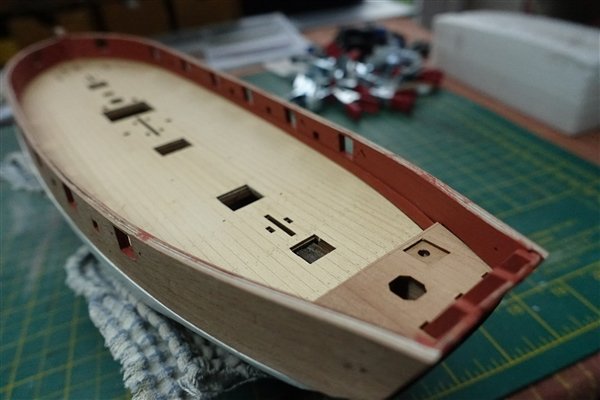
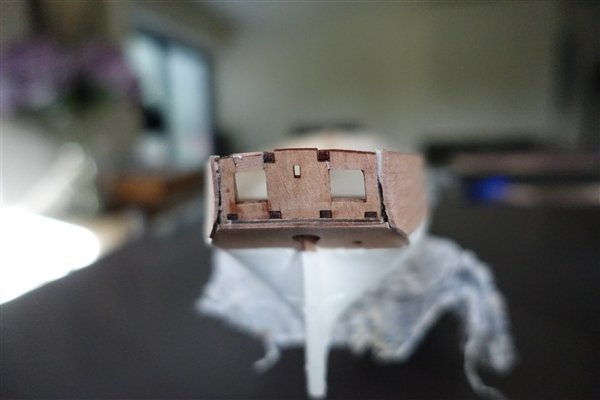
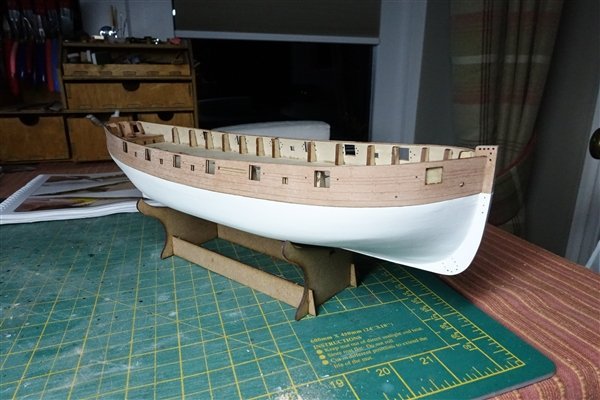
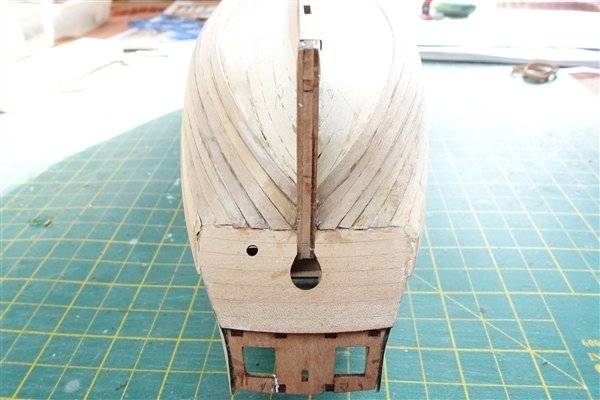
Thanks all for following and for the likes. The inner bulwark pieces were painted with Admiralty Red Ochre before gluing in position. Likewise with the spirketting. A bit of filing of the gun ports and sweep ports was required to get the edges smooth and level and then they were painted red. The top edges of the bulwarks were also sanded and then checked to make sure that they were level from side to side. The pre-painted spirketting was then fixed in place with pva. The stern panel fitted perfectly but the engraved platform panel needed a fair bit of sanding of the edges to get a snug fit. A couple of coats of dilute matt varnish were then applied. Next up the main wales. These were also painted first with Tamiya XF-1 matt black before fixing with ca gel. The engraved joints and tree nails are barely visible after painting even though I cut the joints a little deeper and wider before painting. But that’s probably as it should be. Next the engraved upper rail area was painted black after masking off the outer bulwark. The stern panels were next. I sanded the face of the transom (part 83) to give it more of a curved appearance and then chamfered the bottom edge to obtain a smooth fit with the edge of the counter. Be careful with the posts on the transom; they are quite delicate as I found out. The ports required only a small amount of work to make the edges flush. They were then painted red ochre. Finally the lower counter rails and transom framing were added. The rails needed some trimming and I also wet them out and curved them at the extreme ends to make a better fit against the hull . Frame and rails were fixed in place with pva. A couple of coats of matt varnish are yet to be added. I had to check but the transom frame is centrally placed even if the angle the photo was taken makes it look otherwise. There is still a lot more detail to be added before the outer hull is completed with the gunwales to be added next. Thanks for looking in David
- 152 replies
-
- 16
-
-

-
- Vanguard Models
- Cutter
- (and 2 more)
-
Thanks to Dave and Andrew for your kind compliments. Yes it's beginning to take shape and I'm quite pleased with how it is turning out. Apart from planking a portion of the lower deck, so far I'm just following Chris's instructions which are comprehensive and easy to follow. I will be using Steel and Lees as further references for the masting and rigging as I have with previous builds. David
- 152 replies
-
- 2
-
-
- Vanguard Models
- Cutter
- (and 2 more)
-
Good start on the planking Andrew. Splitting the hull into three bands is something I wish that I had done. David
-
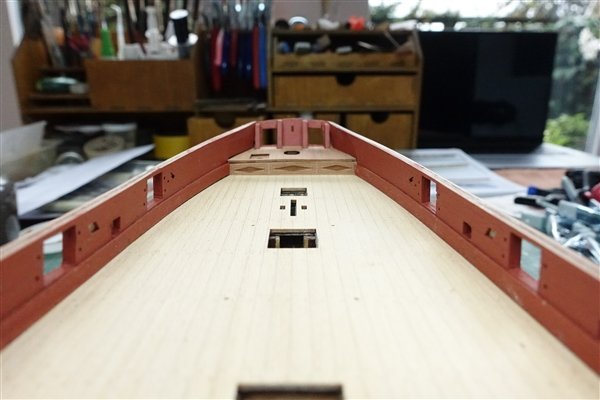
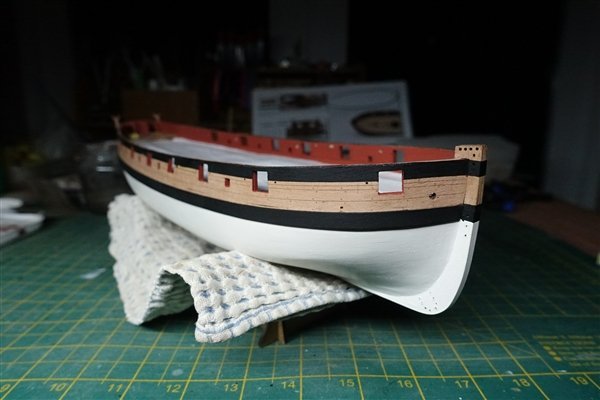
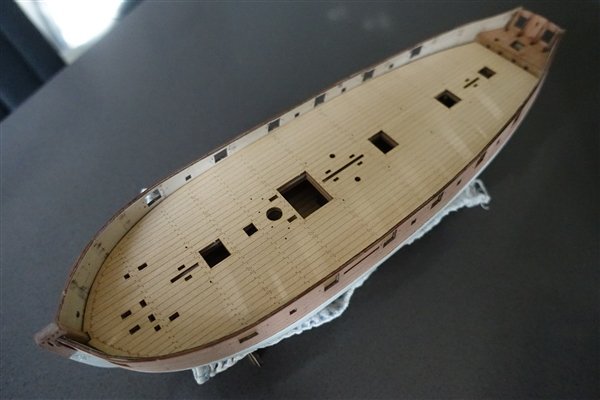
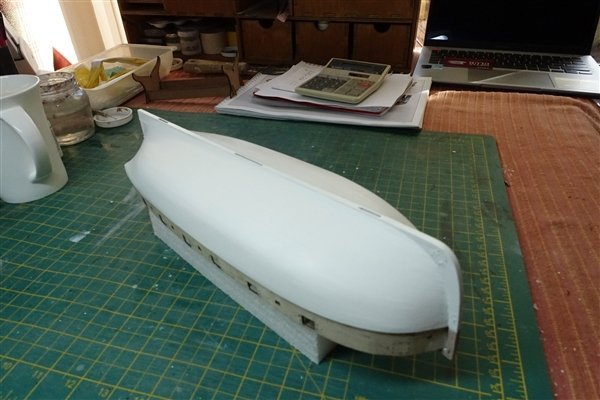
Thanks for all the likes. It has taken a few days of sanding, filling and painting the hull with Valejo Off-White to obtain a finish I was happy with. Most work was needed on the stern to obtain a smooth transition from planking to sternpost. The stern board has been repaired and new pieces cut where required. The outer bulwark pieces are glued in place. I gave these and the stern counter a single coat of diluted matt varnish followed by sanding with a 600 grit sanding stick to provide some sealing and protection. Further coats will be applied after the wales and rails are added. The laser-engraved deck needed only a little fettling with sandpaper on the starboard edge to get a neat fit. The photo shows it resting in place. Sanding of the surface and around the hatches is needed before it is glued in place. I briefly contemplated planking the deck from scratch but quickly dismissed the idea. I could never make such a good looking deck. I noticed that at this point in the build manual, the photo at stage 63 shows that forward most ports in the ply bulwark patterns have been removed. Although present in the photo at stage 61, there is no mention in the instructions of removing them. It is a simple matter to cut them out. David
- 152 replies
-
- 11
-
-
- Vanguard Models
- Cutter
- (and 2 more)
-
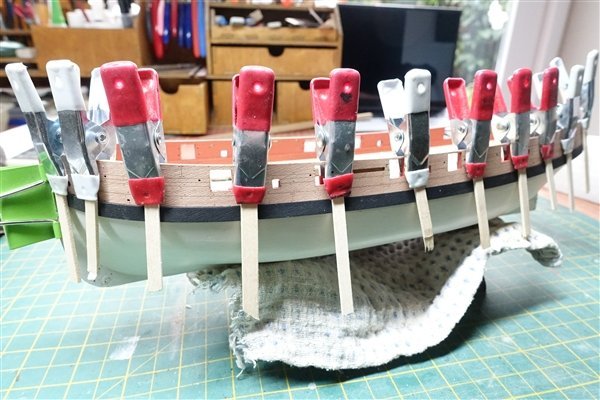
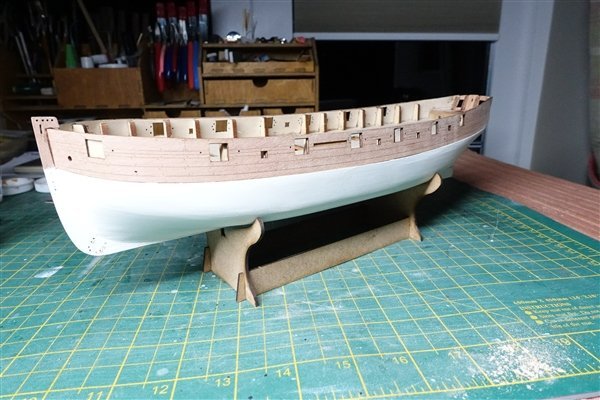
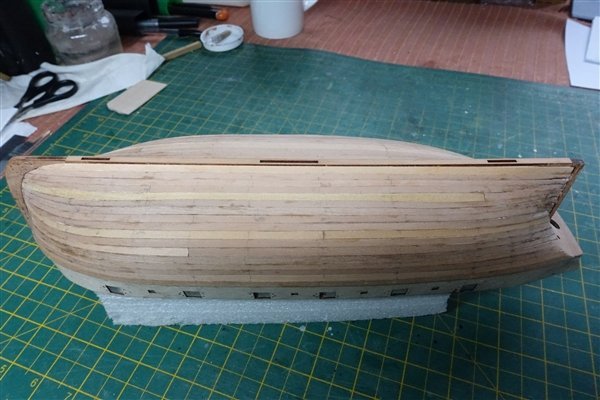
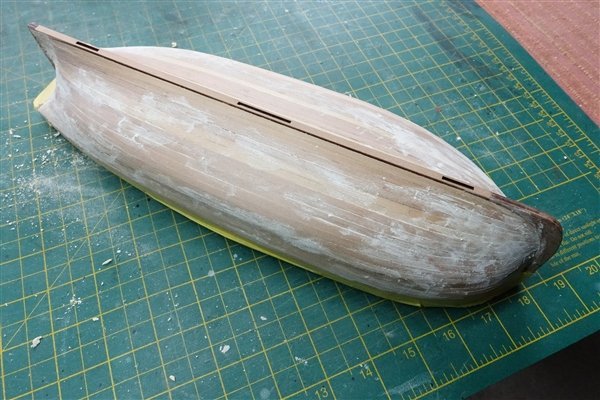
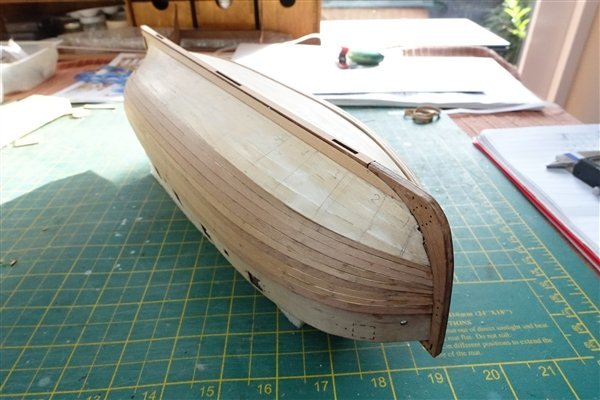
Thanks for your likes and comments which are always welcome. The second layer of planking is finished. Overall I’m pretty happy with the way it went. With four strakes left on each side, I completed the planking by working down from the keel. There was a slight difference between the two sides in the final strake. I needed a slightly wider plank to finish the starboard side where it got a bit out of line towards the stern and which I cut from an 8mm strip of boxwood. The stern inner bulkhead is a very delicate structure. I have already repaired it once but broke it again while sanding the hull. I’ve decided to leave off the repair until I’ve finished sanding and painting, so for now it is covered with masking tape. The photo below shows the hull after first sanding and filling with Ronseal wood filler; So now it's sand fill and sand again. David
- 152 replies
-
- 10
-
-
- Vanguard Models
- Cutter
- (and 2 more)
-
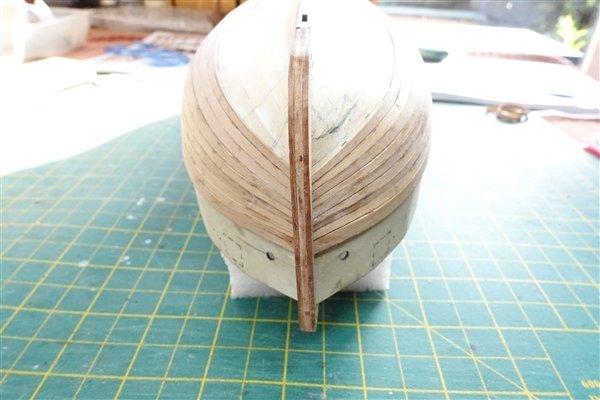
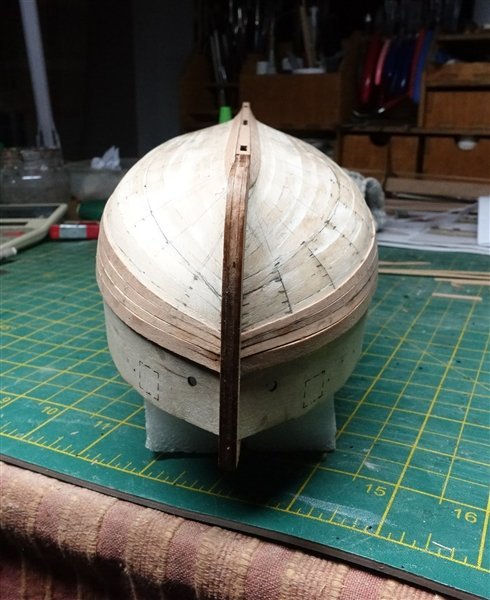
Thanks for your thoughts Thukydides. I noticed the same thing when I looked at the photo and checked the line looking end on. It did seem to be straight so I guess that it's the camera angle. There is some small difference between strakes meeting at the stem which I will correct as I go along. David
- 152 replies
-
- 3
-
-
- Vanguard Models
- Cutter
- (and 2 more)
-
Thanks to everyone for the likes and to Andrew and mugje for the encouragement. I'm slowly continuing with second planking and up to 8 strakes per side now. I find it easier and more accurate to measure the width of plank at each bulkhead using a micrometer rather than marking off onto a piece of scrap and then using that to mark the plank. I’m checking and rechecking the remaining space after every couple of strakes to keep things even but generally it’s going better than the first layer of planking. Onwards and upwards... David
- 152 replies
-
- 7
-
-
- Vanguard Models
- Cutter
- (and 2 more)
-
Great that you are taking the time to serve ropes. It will add a lot of authenticity to your build. David
-
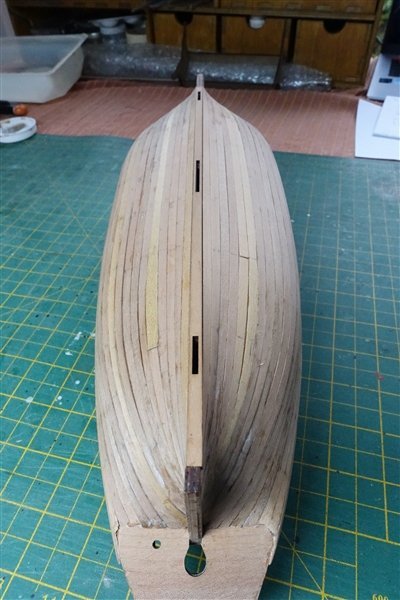
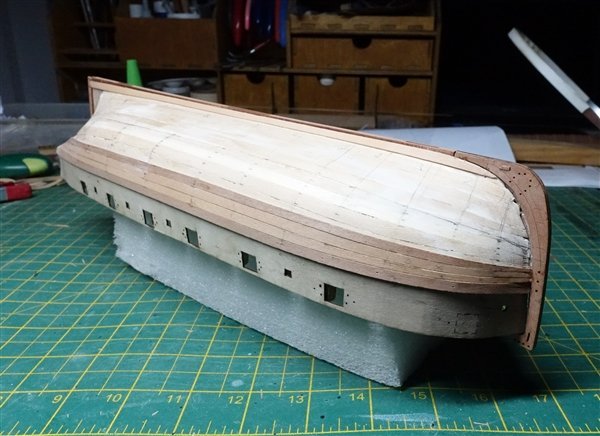
I’ve been slowly working on the second planking trying to follow David Antscherl’s Practicum. Even if it is probably overkill on a model like Trial, it's good practice which I certainly need. I pinned the first plank below the bulwarks as per the instructions and then fixed the garboard plank. I divided the space between these planks into two bands of 8 and 7 strakes. As planking has continued, I think it may have been better to split the hull into three bands of 5 planks. I have laid three planks per side so this is still a possibility. I'm using CA gel to fix the planks with a dot at each bulkhead position and a dot on the preceding plank between bulkheads. I removed the bulkhead patterns because I found that trying to work around brass pins in the first plank and clamps holding on the bulwarks very awkward. I marked the line of the bottom edge of the bulwarks, removed them and glued the first plank in place and then rechecked that the bulwarks still fitted correctly. David David
- 152 replies
-
- 6
-
-
- Vanguard Models
- Cutter
- (and 2 more)
-
Welcome back Andrew. Happy to hear that you are able to get back to Trial. I'm hoping that you will soon catch me up and show me the way 😄 David
-
Rob, I had the same dilemma over a case for Diana. I was going to make one myself from acrylic sheet but at the time, my daughter was looking for a larger aquarium for her fish and since a case is just an inverted aquarium, I asked if they could make one for me and they agreed. The price was not much more than the price of the acrylic sheet. I'm waiting for delivery but if I'm happy with it, I will log the details. David
-
Hi Sizzolo and welcome to MSW. That's a great start to Diana. I love the attention to detail and I'm going to be following your build with interest. The accompanying pint of beer always helps with these repetitive tasks David
-
She is a lovely ship Rob and an beautifully built model David
-
Thanks very much Theodosius for your confidence in my abilities but I think that it's mostly just me muddling through! I've done some planking revision while away. A little more reading and watching Chuck's videos and I'll make a start on the second layer of planking over the weekend. David
- 152 replies
-
- 4
-
-
- Vanguard Models
- Cutter
- (and 2 more)
