Cleat
-
Posts
207 -
Joined
-
Last visited
Content Type
Profiles
Forums
Gallery
Events
Everything posted by Cleat
-
I've been practicing the techniques presented in this thread and they work. But my skill working with thread and the kit rope is lacking. I need more practice making the knots. Chuck's PDF procedure that Dziadeczek presented is very helpful.
-
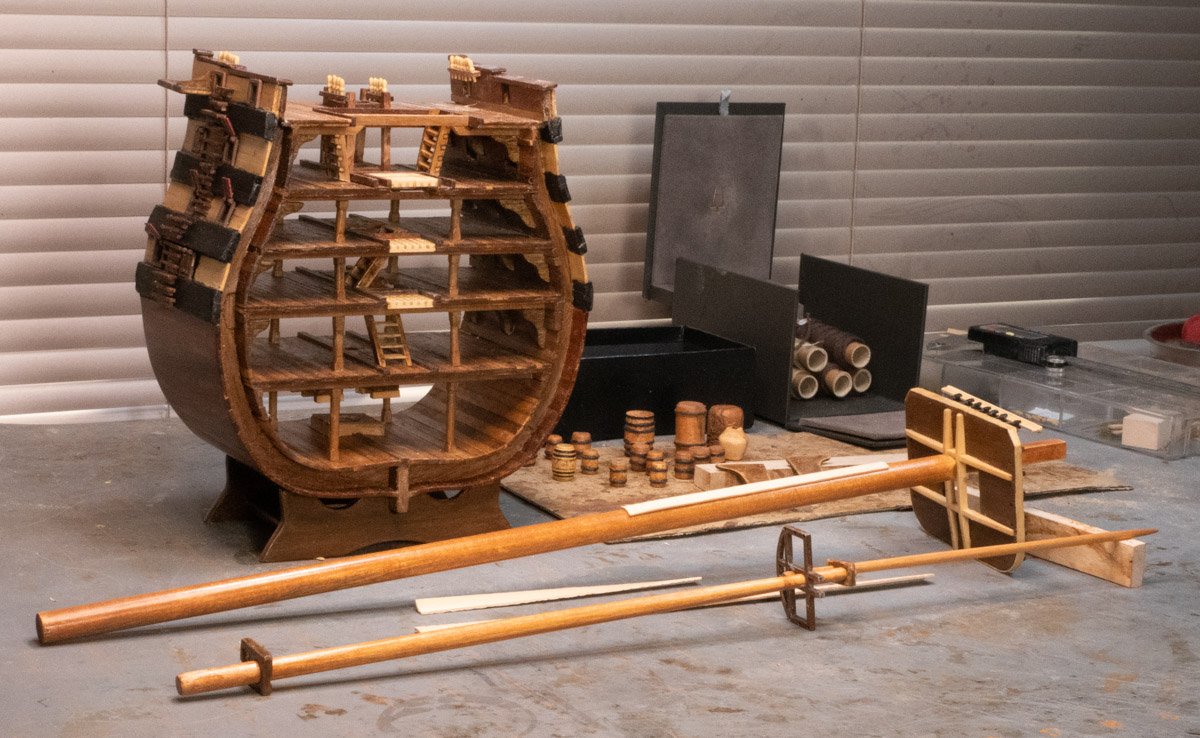
 I wondered how to square the end of the round main mast. After rejecting several ideas, I realized my newest tool could do the job. I recently got the Ultimation Sander, it is a high-quality tool and it is my new favorite tool. It worked well and removed material fairly quick. The hand operated disk gave me control to zero in on the correct dimensions. I’ve been hand sanding the mid and top masts to shape them to fit the connectors – it is a long process. I test fit the mast connections. I want to add the various blocks and tackle before I assembly the components. I processed the barrels. I stained them fruitwood and applied a coat of finish because I knew my hand painting skills are sub-par, I wanted a chance to wipe paint mistakes off (I ended up using a tool to scrap excess paint off but that process added a distressed look). I made several barrels about the size of the small barrels on my Vanda Lay micro lathe but they didn’t turn out as I had hoped but they might become background fodder. I tried turning some barrels on my Jet mini lathe but the material kept breaking when the material got small (I made a large barrel and a vase).
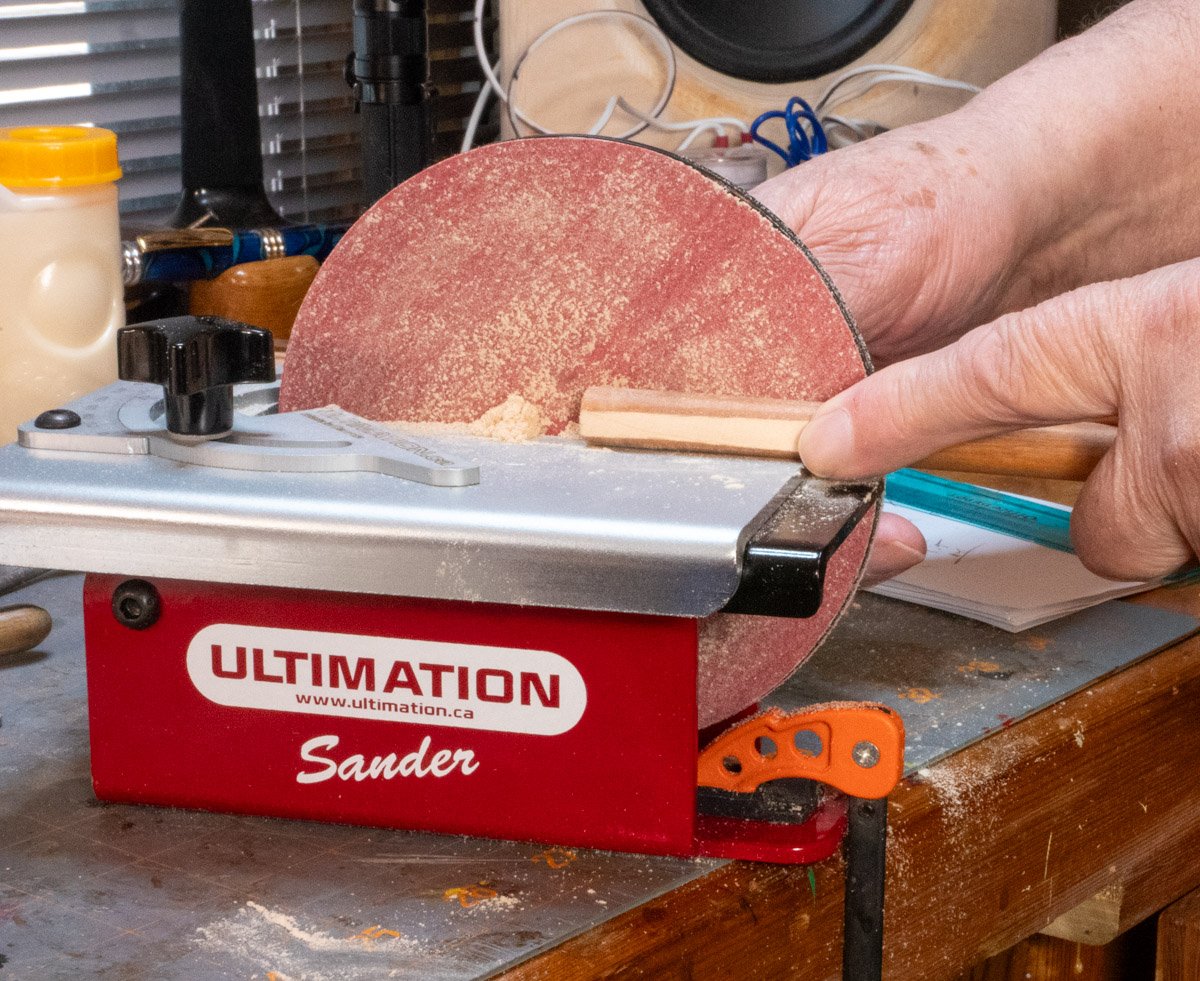
-
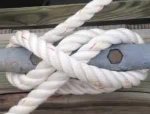
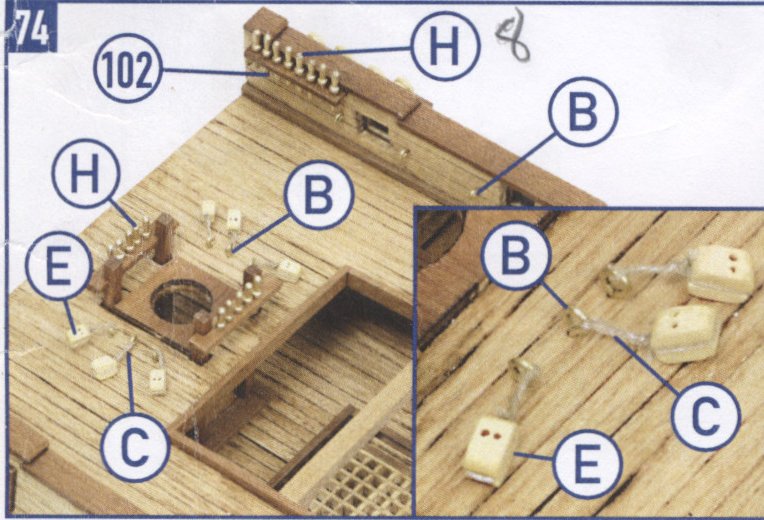
I've reached a point in my build where I need to make a lot of slings to connect blocks & pulleys. I don't know how to make a sling. The picture in my document isn't clear enough to determine how to tie a sling (item C in the picture). I would also like to know what knots I need to learn for rigging in general.
-
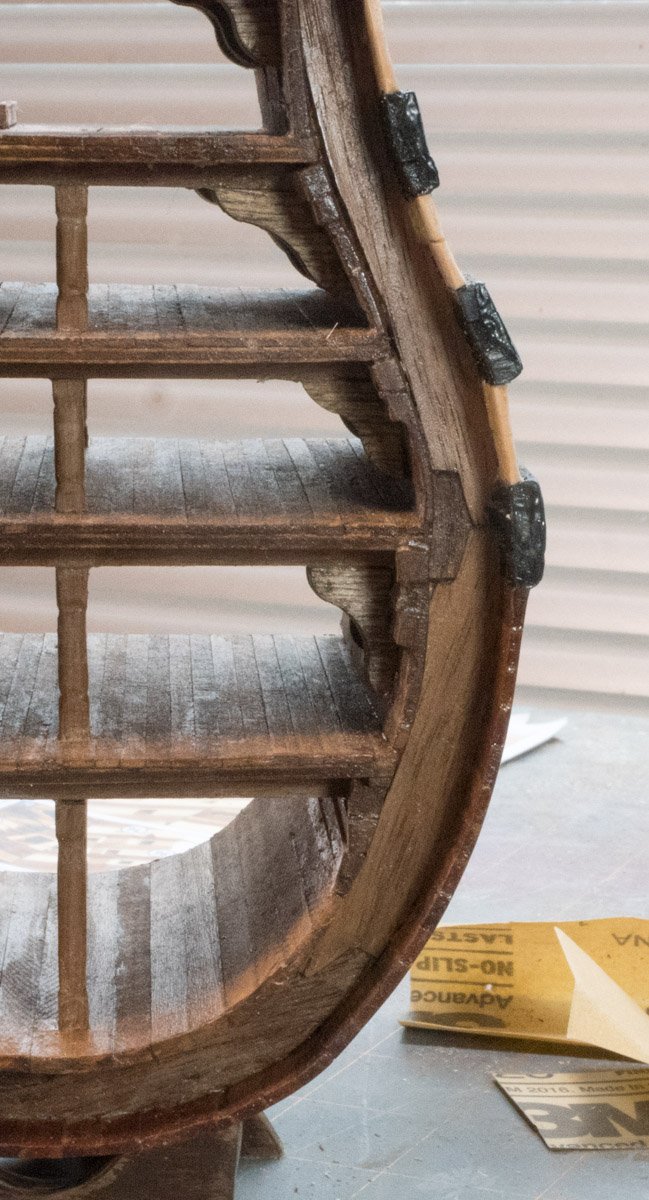
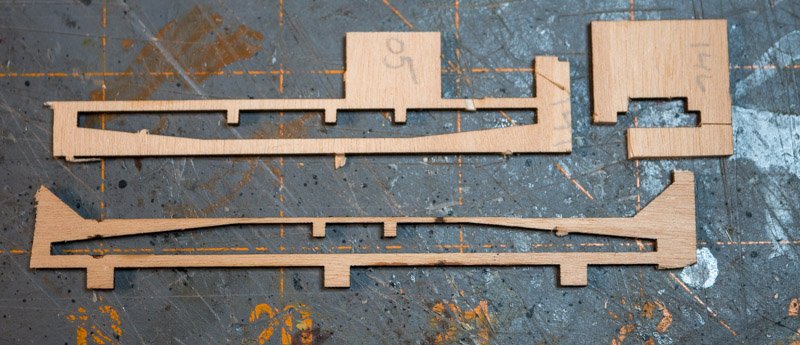
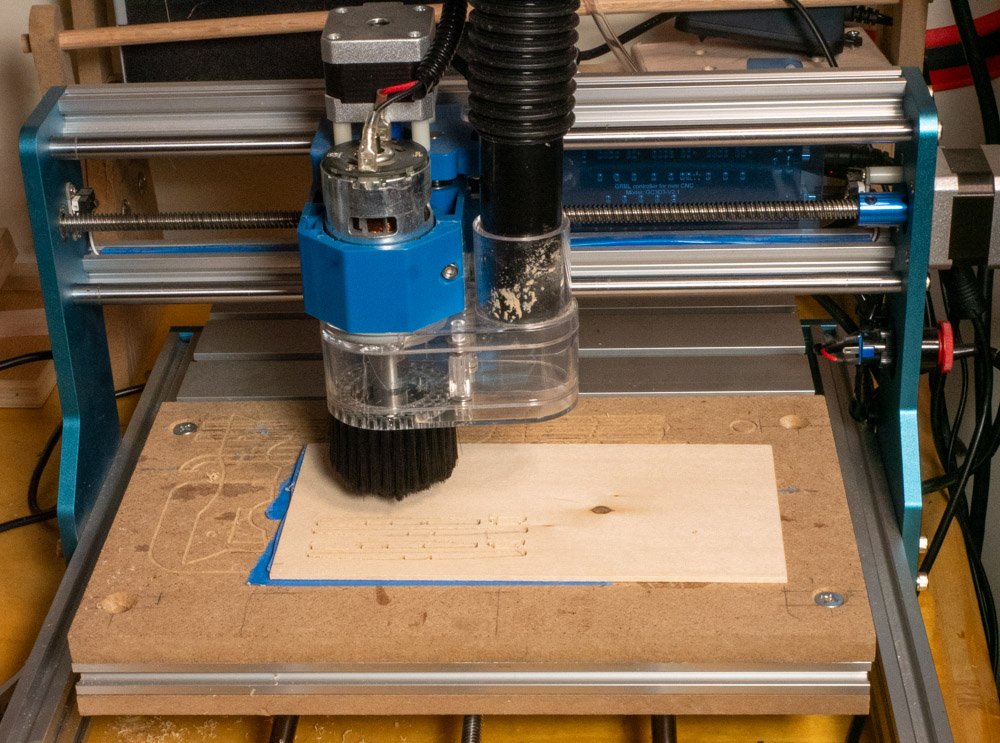
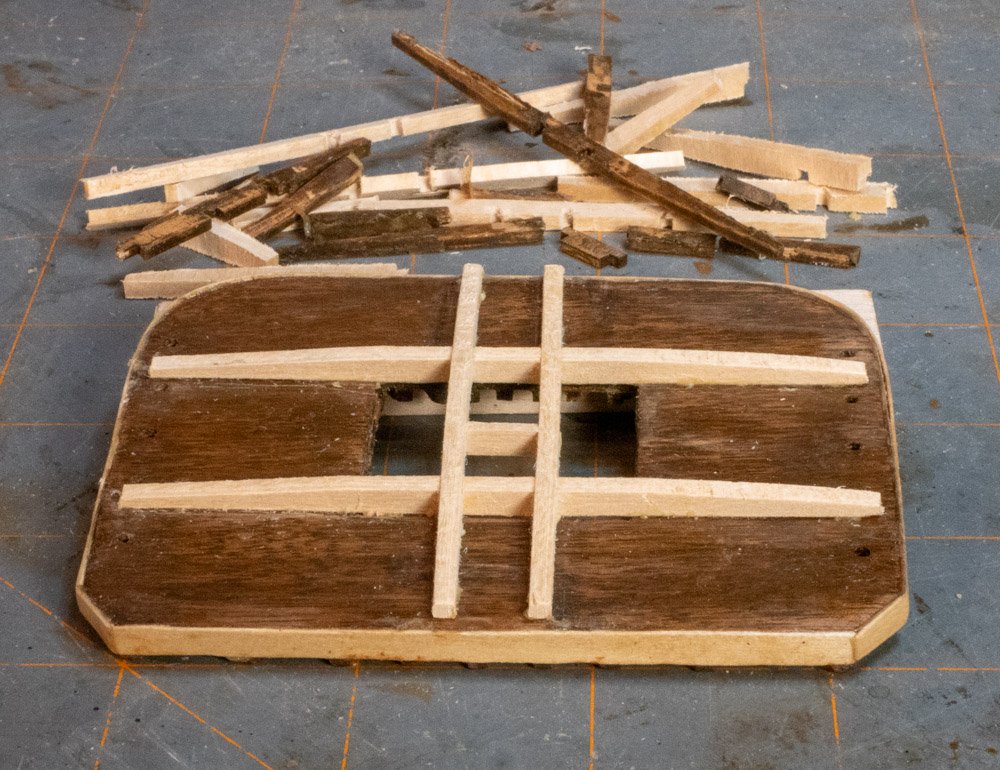
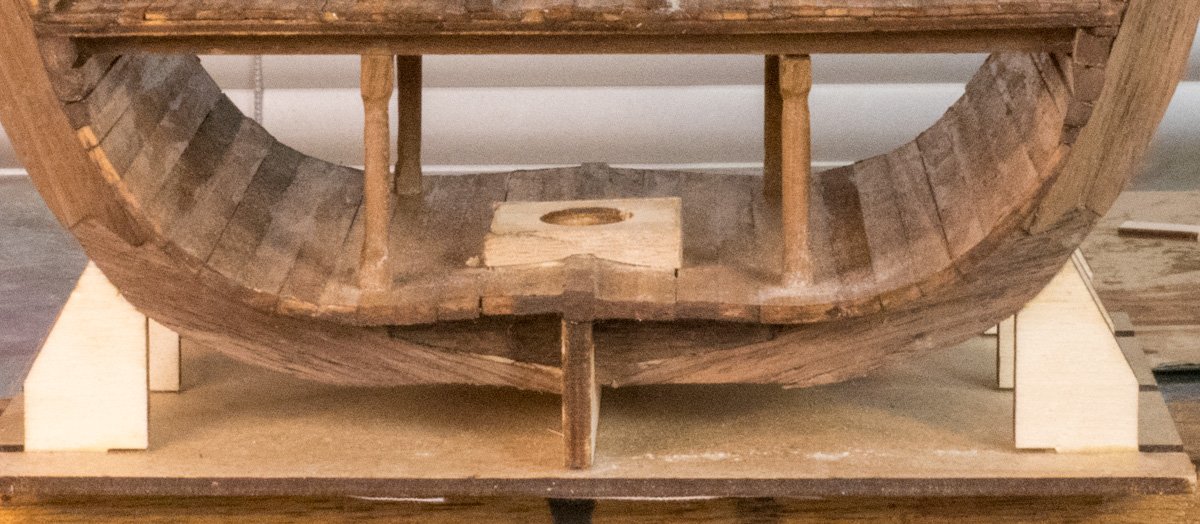
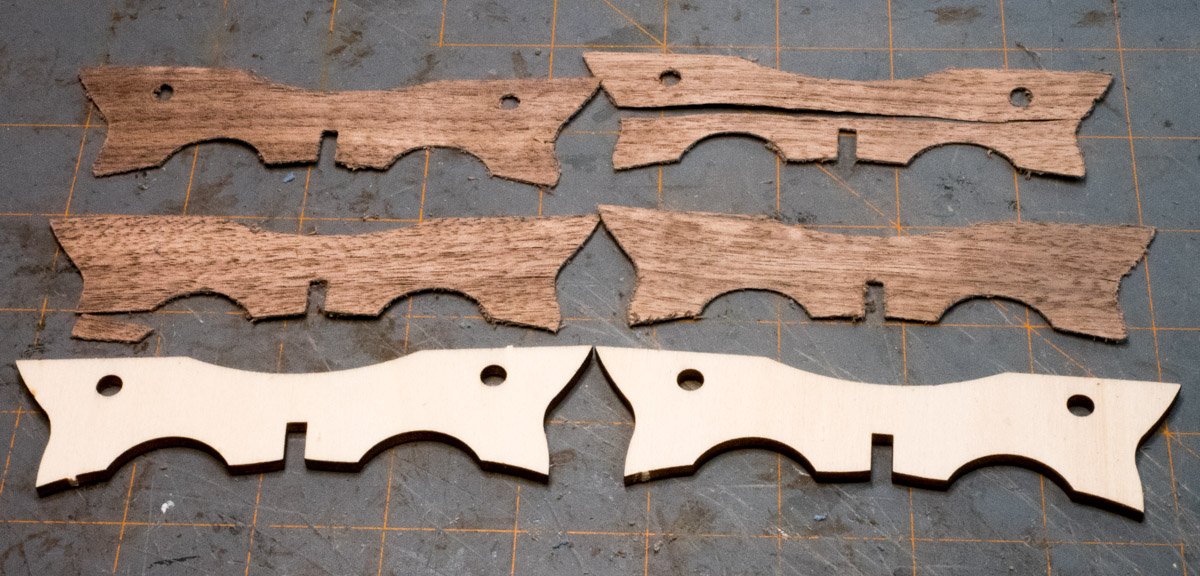
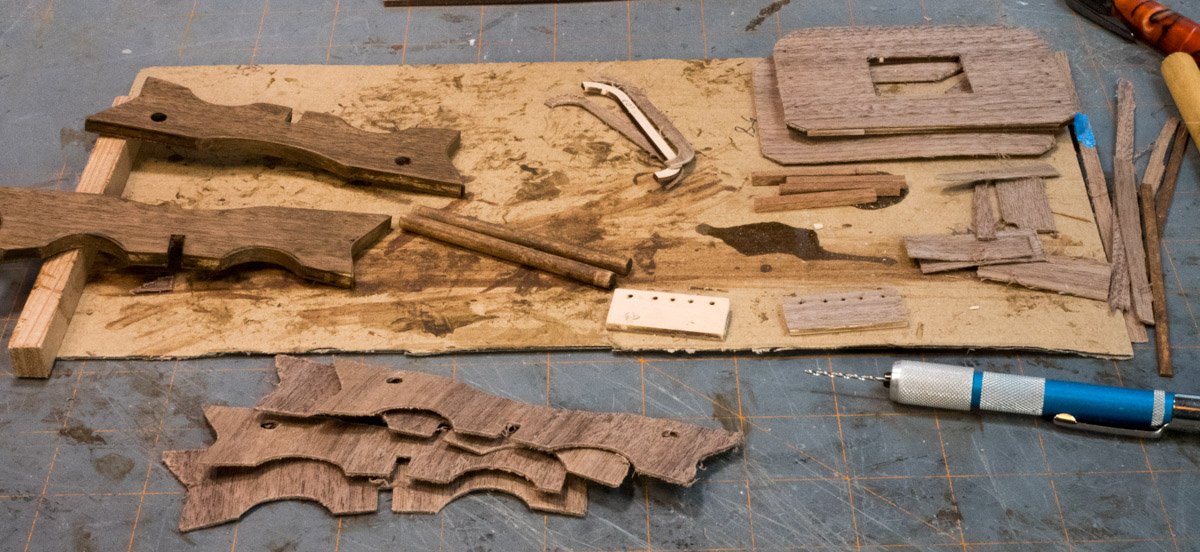
I had trouble with the bracing under the mast platform. I broke one piece while handling it after I cut it from the laser cut plywood parts. I broke another piece while assembling the structure. I kludged the pieces together glueing them to the platform, then I discovered and had installed it backward. I dissolved the glue and removed the structure. While disassembling the structure I broke a third piece (leaving 1 piece I didn’t break). I had to make replacement parts. I removed the original cutouts from the plywood skeleton to make measurements, then I scanned the originals to create a file to cut the parts on my CNC spindle machine. The first set or pieces I cut matched the originals exactly, unfortunately the material I used was a different thickness so I had to modify the notch dimensions for my material. (I made a pile of mistakes). Now I have to figure out how to shape the mast from round to a square end. Now I have to figure out how to shape the mast from round to a square end.
-
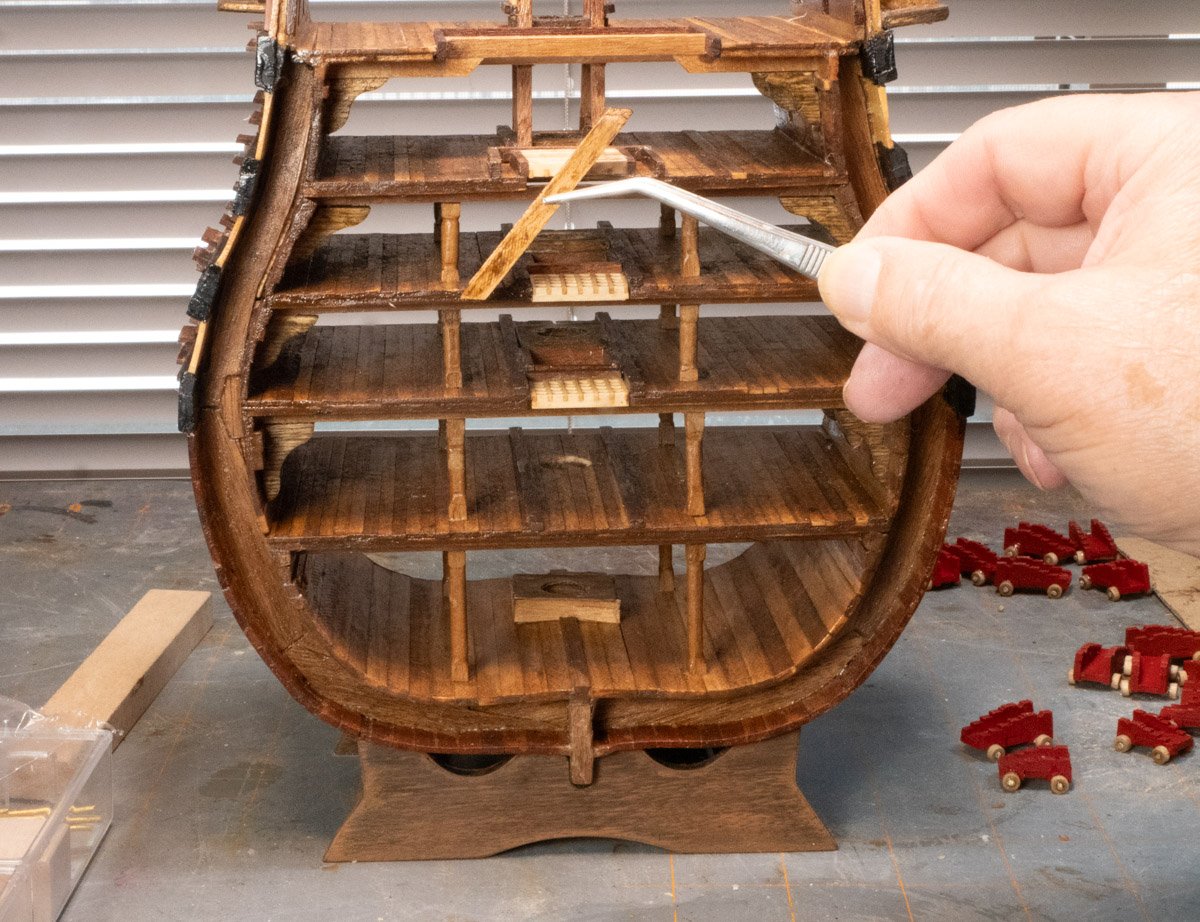
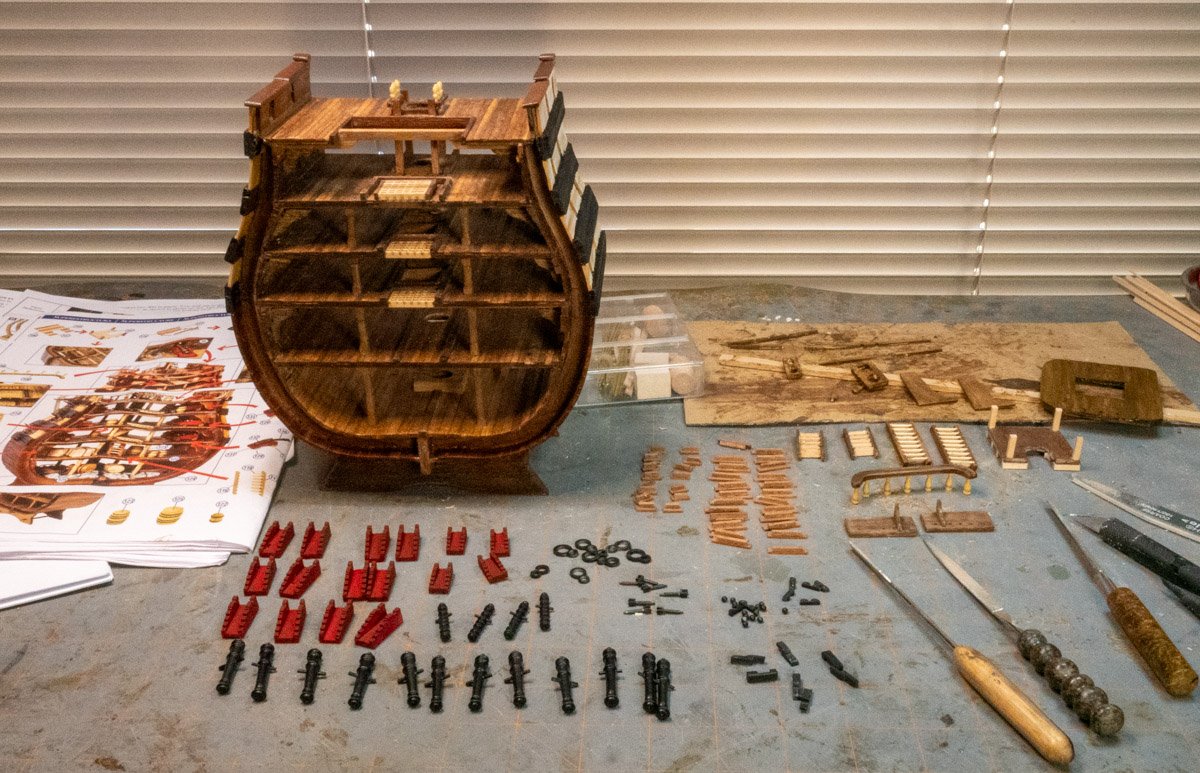
The lower deck stairs were longer than they need to be because the height of the two decks is different. The instructions call out 1x4 mm stock for the treads but I didn’t have any, the stringer slots measured 5 mm. I glued 2 pieces of 0.4 x 5 mm planking from a previous kit together, cut the treads and they slide smoothly into the slots. I cut the completed stairs to size. I made the canons. I use an airbrush like a can of spray paint, mine has a pistol grip and a pull trigger. With a fan nozzle it covers a good area. I painted the canon black and put a coat of matte clear coat on it because I was going to try and use a brush to apply a bronze color to the rings and if it didn’t work it might be easier to remove. It turned out OK but I had to touch up with black to cover errors with the bronze brush. I used CA glue to attach the wire axles; when dry, I attached the wheels with CA glue, then I clipped axle wire as needed. I added the exterior steps and installed the gun ports. I continue to process various parts. I’m reaching the end of the picture steps. I’m scoping out the mast drawings to determine a procedure.

-
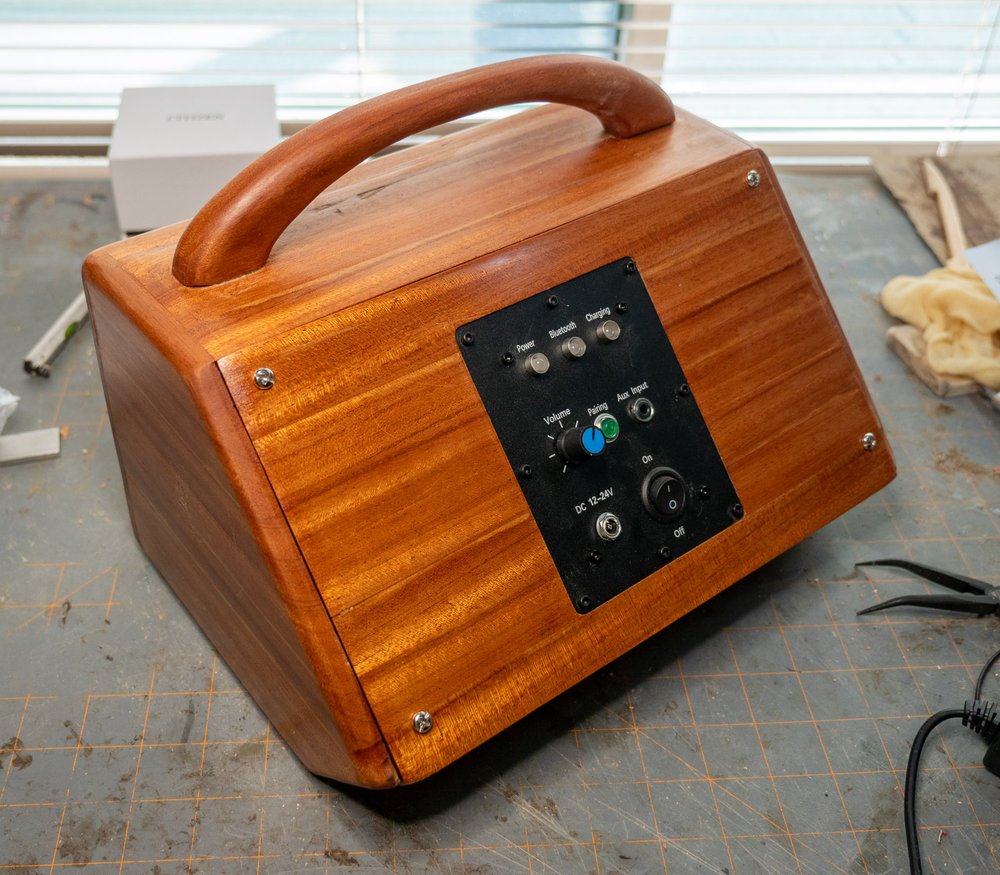
I made a Bluetooth speaker during my summer hiatus.

-
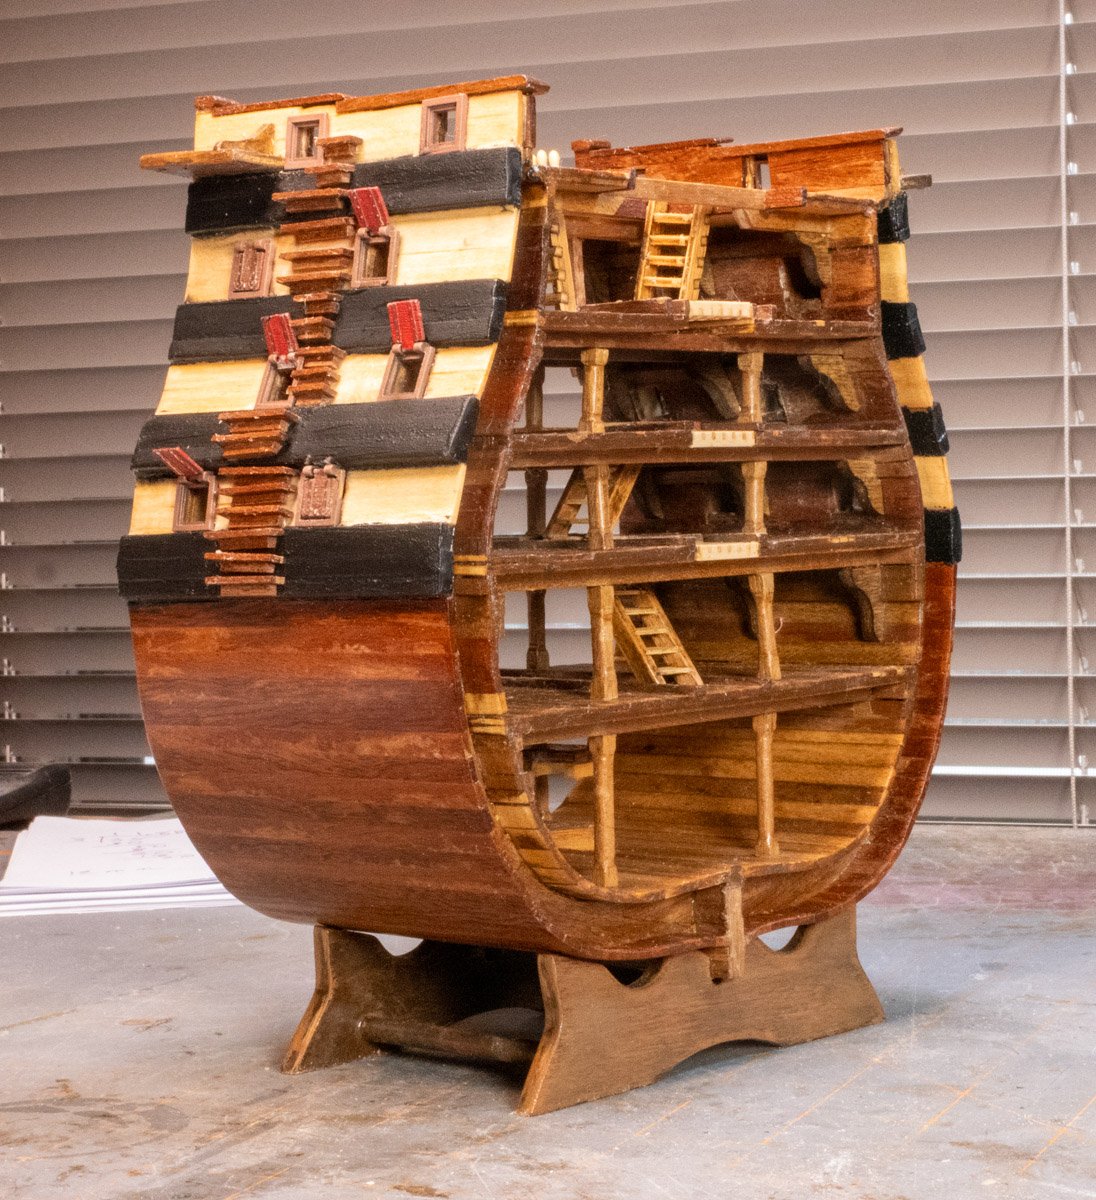
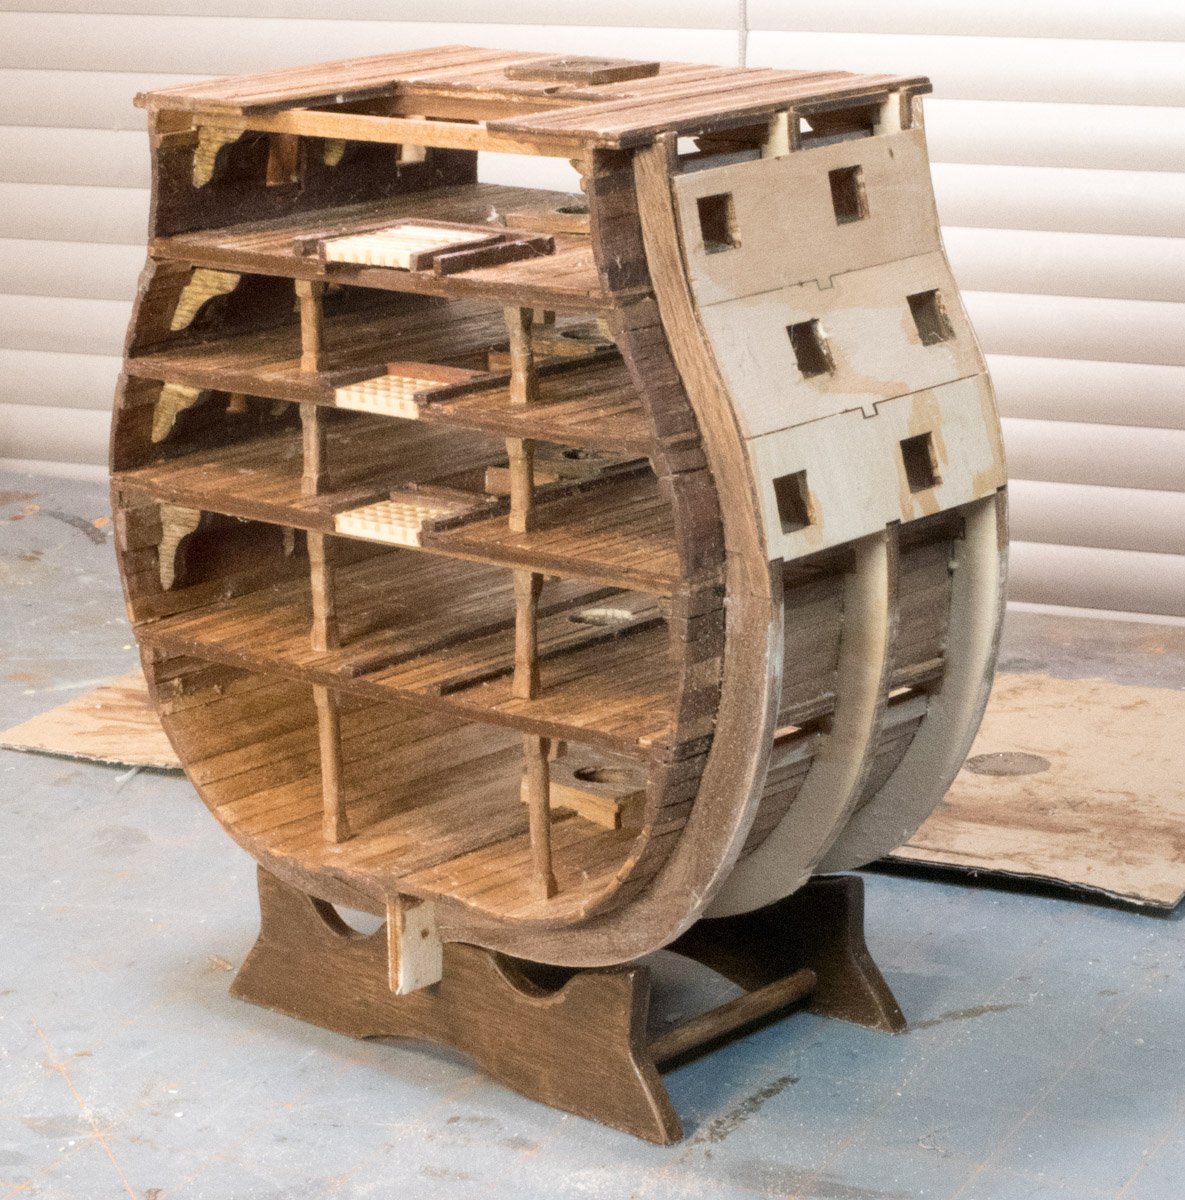
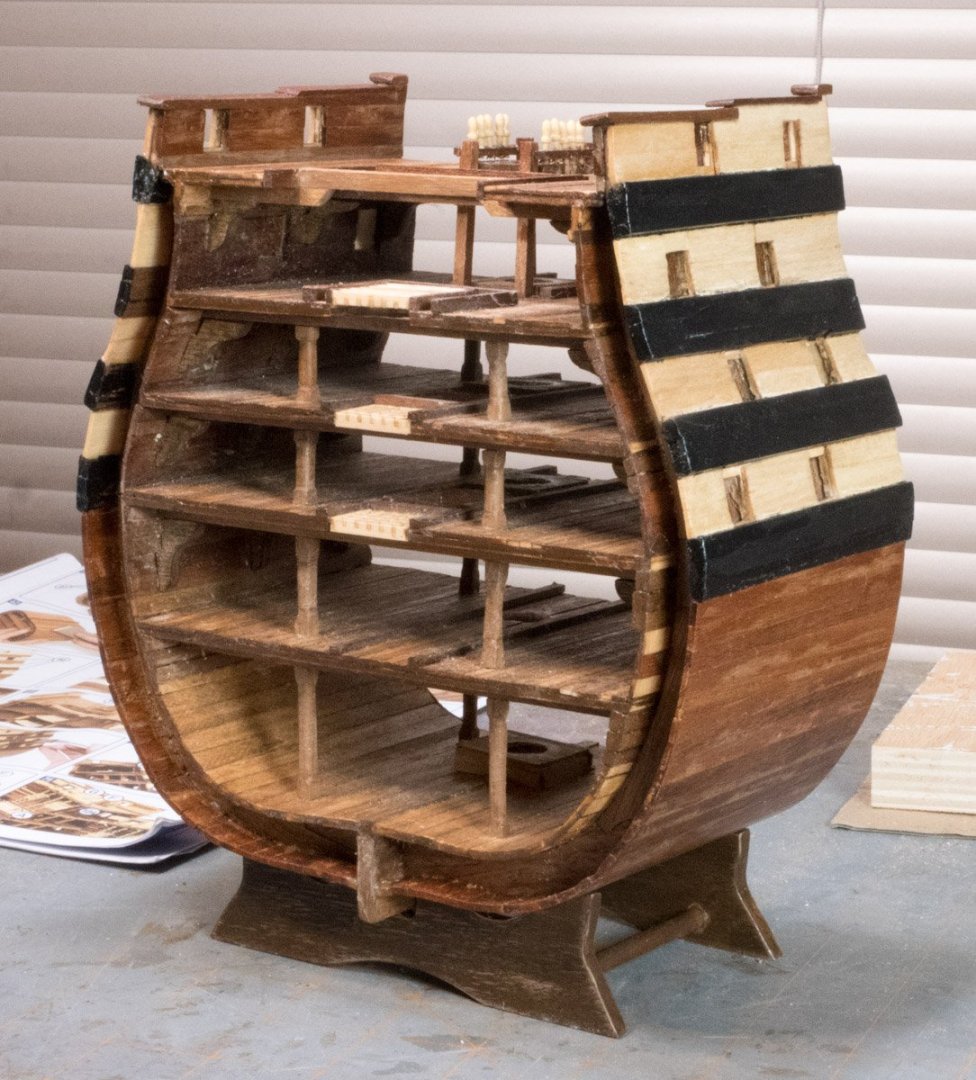
I’ve transitioned from my garage shop to my indoor hobby shop. I evaluated the work I did last winter and the interior turned out darker than I wanted. The stain applied on the bottom of the hull turned out how I wanted but when I applied stain to the other levels, the wood turned out darker because the wood absorbed the stain differently from the stock used in the bottom. I’ve been looking at other build logs and I might add some lights to the interior (I had drilled pilet holes for lighting during construction). To ease back into the project, I’ve been working on processing various smaller pieces. I’ve been doing some painting, staining, and assembling sub-assemblies.
-
I got my hobby machine from Sainsmart a few years ago, they have a variety of products of good quality. My experience with their support has been good. Based on what I learned from my hobby machine I got a Onefinity Machinist model (with a router) for the garage.
-
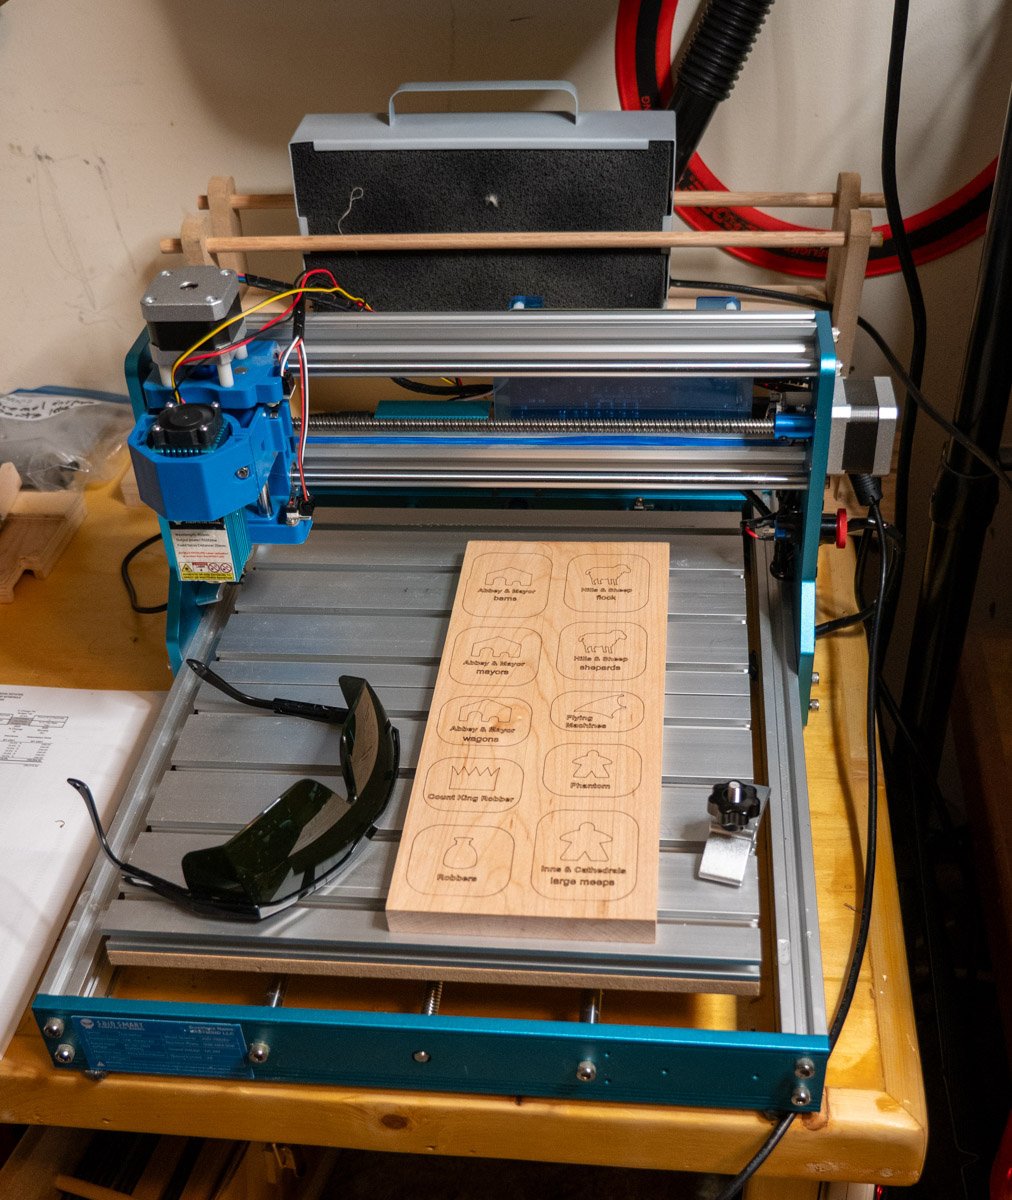
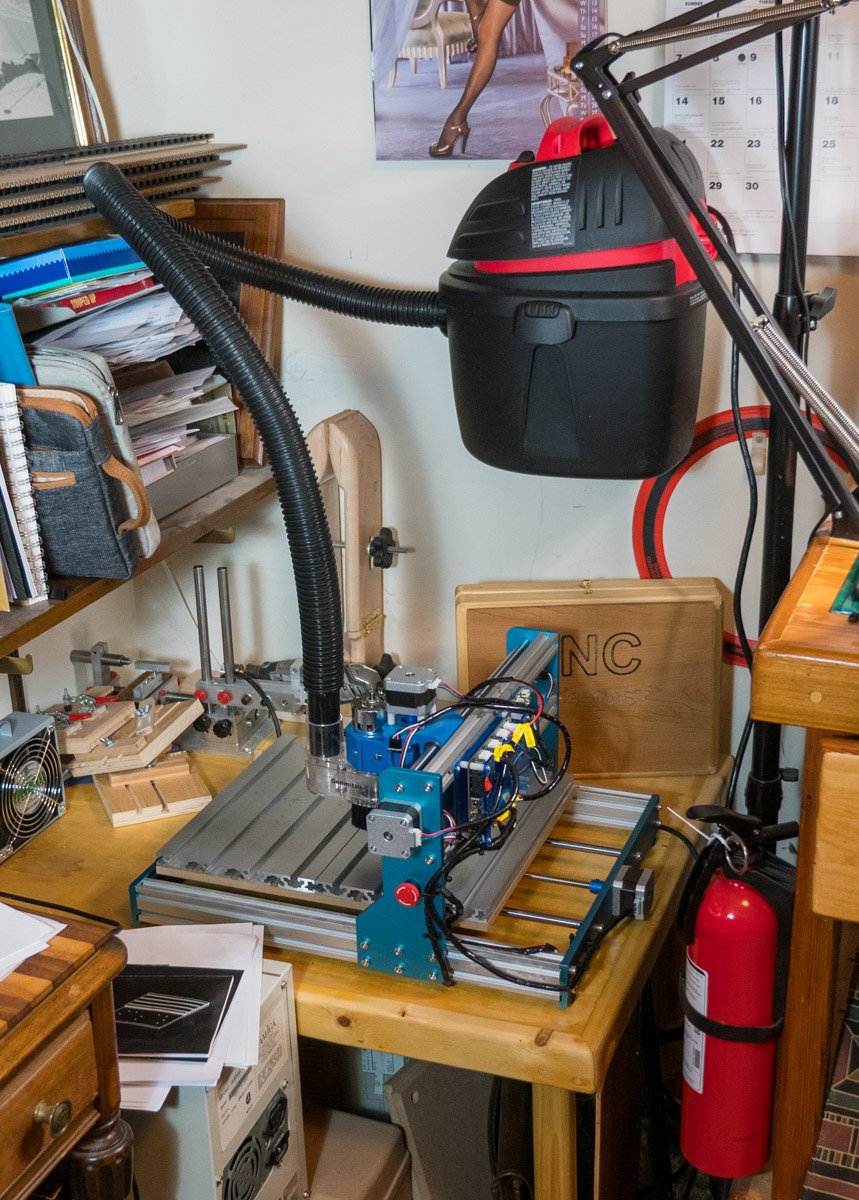
I use a 5.5 W laser for etching, it won't cut much. I use a device with 2 computer fans with a charcoal filter and it does a pretty good job, a smoke detector is 12 feet away and I haven't tripped it yet. My hobby machine lets me change the laser to a spindle and I've cut parts and routed jigs with that configuration.
-
I got the Vande-Lay drill press configured with an adjustable X-axis (Acra Mill Plus). The micro lathe is very light duty. It takes a little time to switch configurations (about a half hour). Vanda Lay web site
-
I bought a Genmistu 3018 PROVer several years ago. It can be configured to use a laser or a spindle motor; I bought a package that included both. I had a project that could use the laser to burn graphics in wood (a fancy wood burner). I upgraded my machine with an expansion kit to increase the work envelope of the machine. The Genmistu is a good learning machine and they also have good support. I discovered the spindle configuration is helpful in model ship building. The first thing I made was stairway sections to replace broken pieces. I took measurements, drew it up in CAD software, converted the file using CAM software, and ran the G-code file using controller software to operate the machine; I was able to duplicate the original parts. I made a jig by routing a shape for railings, I used the jig to bend brass wire and made railings that all turned out the same. I scanned a plywood piece and created pieces to cover the plywood by cutting walnut veneer with the spindle. Learning a hobby CNC machine requires that you learn a variety of software. I found the laser configurations with Lighburn software was easy to learn, Lightburn is probably the preferred laser/machine control software; it can be used to design and control your machine. For the spindle configuration I used free software but you need to know how to troubleshoot different software working with each other (I experienced frustration until I figured it out). Based on my experience with the Genmistu I bought a Onefinity CNC router for my garage, a bigger, more powerful machine. I also got VCarve software to produce G-code files for my Onefinity. it is a complete product like Lightburn except it is for routers (I can use it for both of my machines). VCarve can also produce carvings using clipart. I wrote manuals to operate and service industrial CNC machines so I have the basic knowledge of how G-code works and how CNC machines work. This is useful knowledge but it isn't necessary if you have good software like Lightroom or VCarve. I bought my first hobby machine to perform a specific project but I knew there is potential for other uses. I considered the cost to be tuition to learn CNC software and processes. Manufactures often have forums that I've used to help solve problems. I use my garage CNC router more often than my bandsaw now.


-
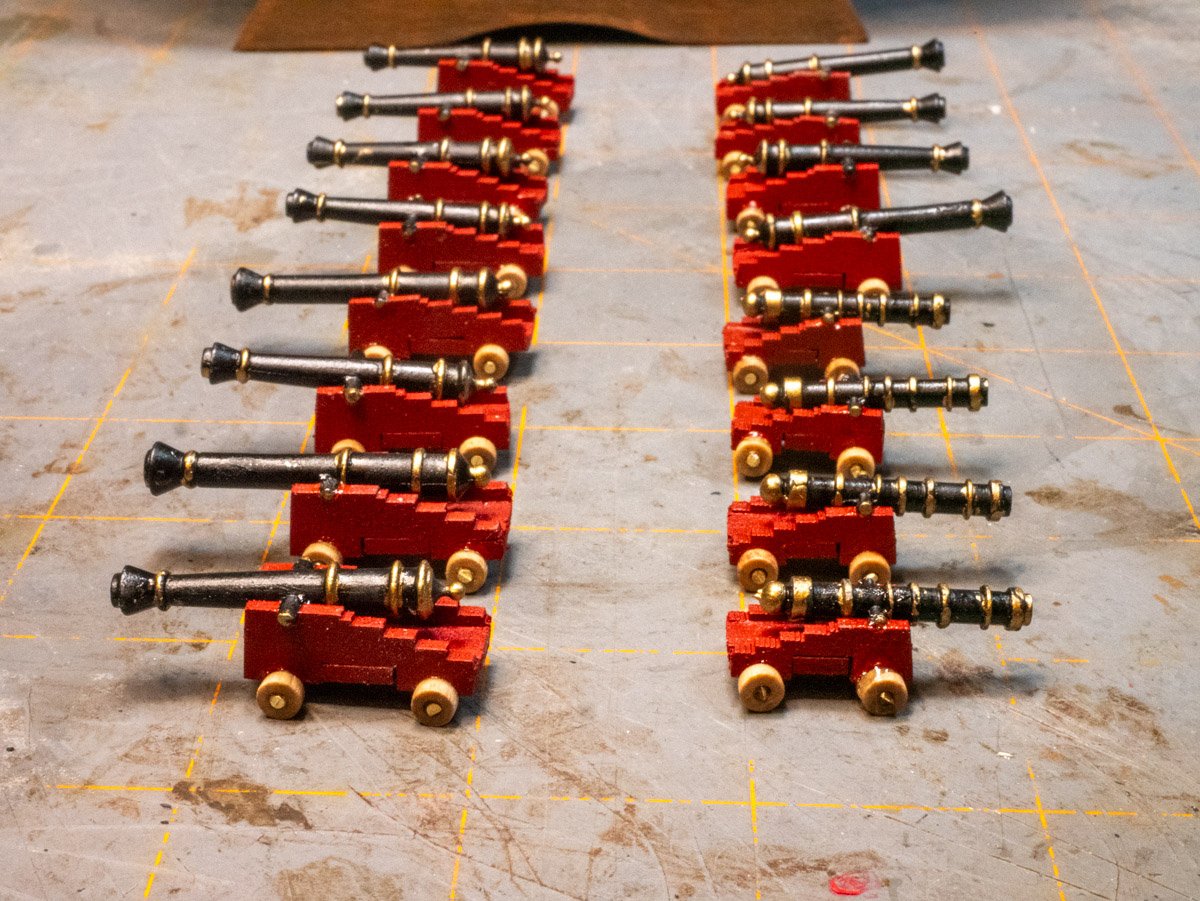
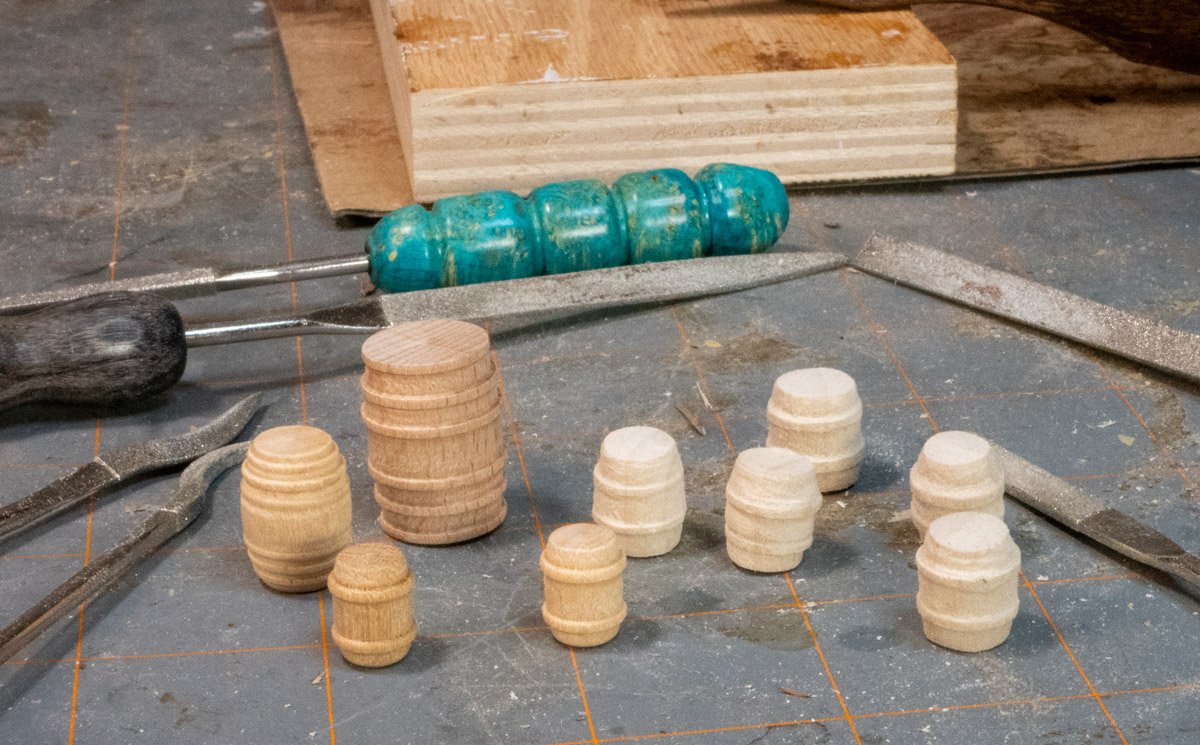
My model ship building is my winter hobby and I've transitioned to other hobbies. I found time to process the barrels I made with the Vanda-Lay Micro Lathe with needle files. The four barrels on the left are from the kit, mine are on the right, they turned out so-so. I'll probably try again next fall after I sharpen the turning tools and prepare a hardwood spindle.
-
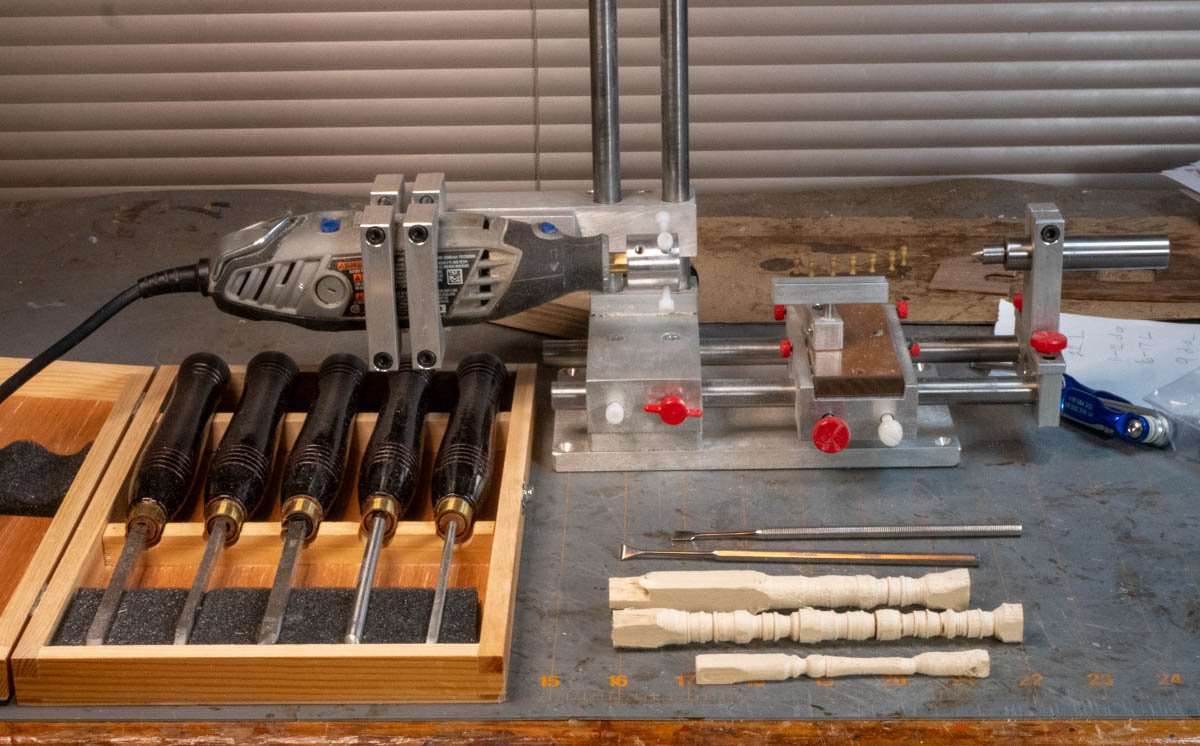
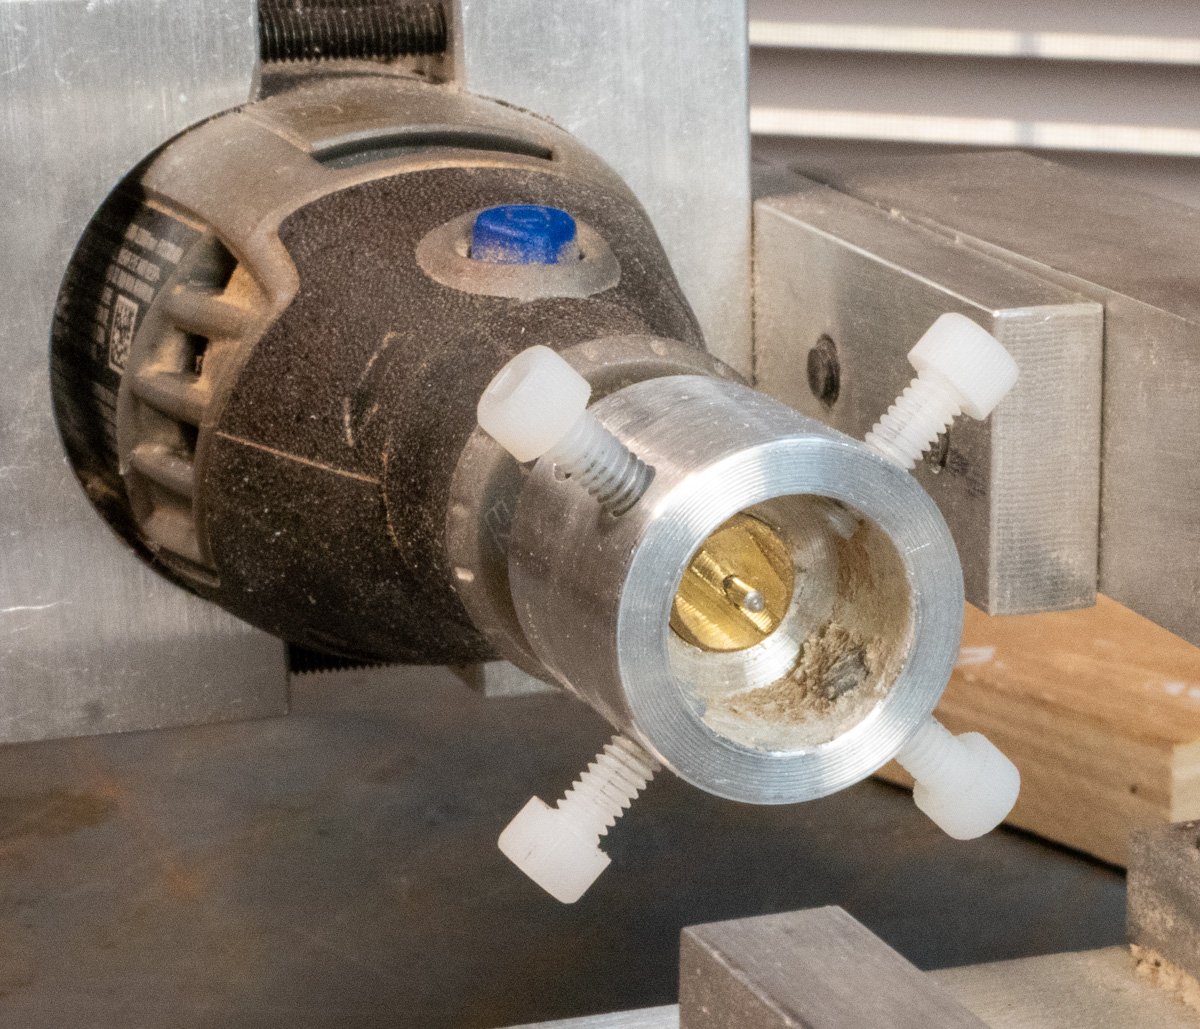
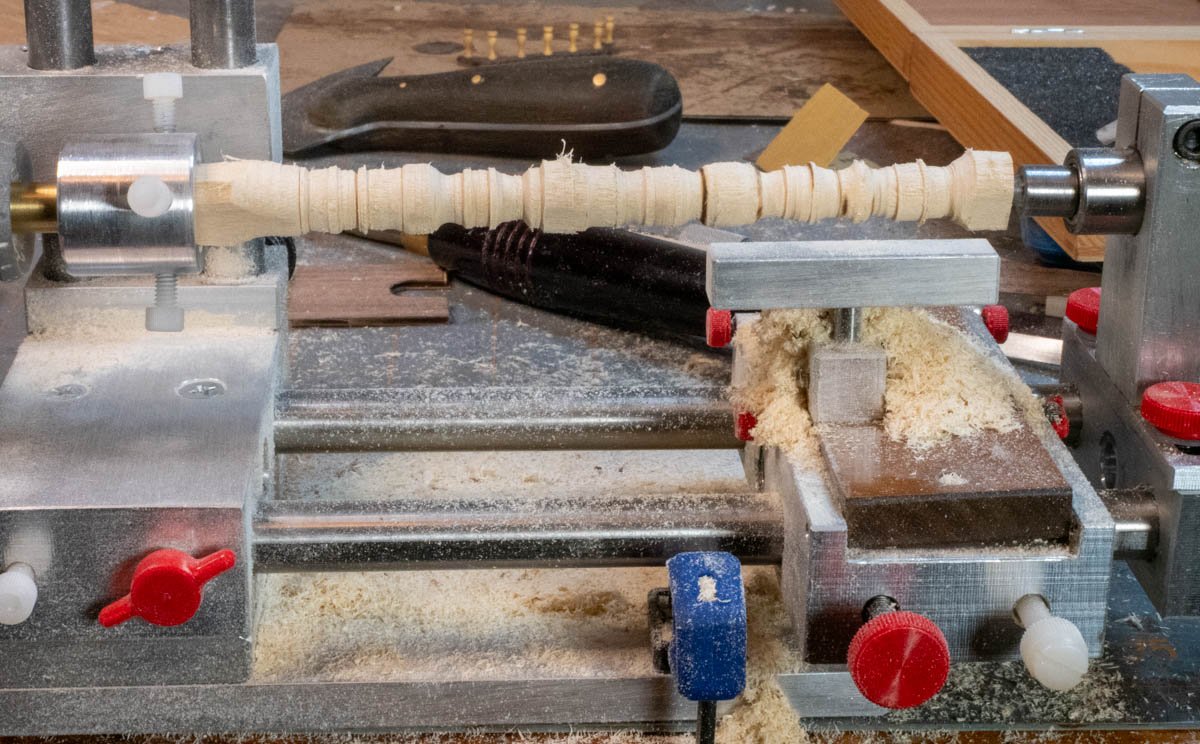
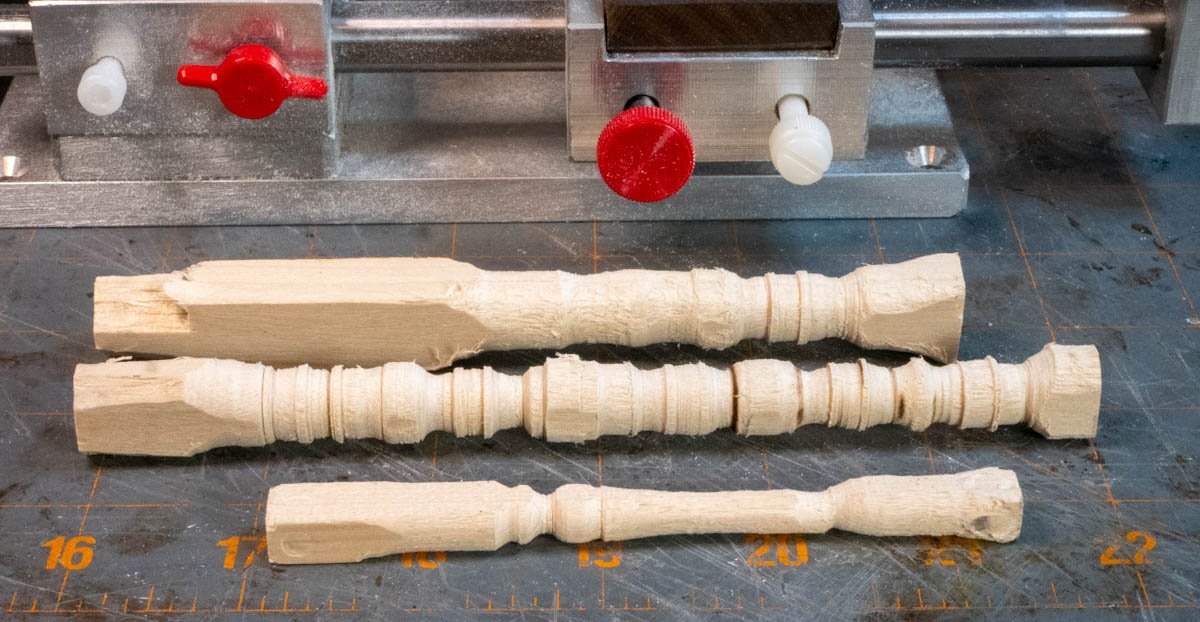
I have the Landa-Lay micro lathe attachment. I’m proficient with my 1221 mini lathe and thought the micro lathe might be something I might use. I configured my Vanda-Lay drill press with the micro lathe attachment, it is not difficult but it takes some time. I’ve used it a few times and it is a very light duty lathe. I picked up a cheap set of small lathe tools (I can always use them with my mini lathe) and I used a couple Micromark chisels. The chuck has a 1/16 inch pin to help align the spindle stock, you need to drill a hole in the stock to be able to slide the stock into the chuck. The chuck has four nylon thumbscrews to hold the stock in place. I also drilled a 1/16 inch hole to align the stock with the live center. The live center fits into a bearing in the tail stock. I had a couple pieces of ½ inch pine spindles to try, I had to knock off the corners to make the spindle fit in the chuck. The pieces I used were probably as large as the lathe can handle. My goal was to see how the system worked and see how the small lathe tools worked, I also tried to make some barrels for a current build (I got a couple that might work with further processing). I used the Micromark chisels as turning tools for the smaller piece. It makes a mess: I used the micro lathe to make some beam supports. The 31 mm supports were as small as the lathe could handle; I turned one half of each support, removed and reverse the stock to turn the other half. The turning tools weren’t very sharp, the chisels I tried were sharp and they worked better (made a smooth bead). I had to run the Dremel at a high speed because when you are too aggressive with a turning tool it will slow the rotation speed down (you could stop the Dremel). With a light touch the system works. If you don’t mount the stock properly, it will fly off (happened to me twice). I'll be returning it to the Acra mill drill press configuration which has more uses for me.
-
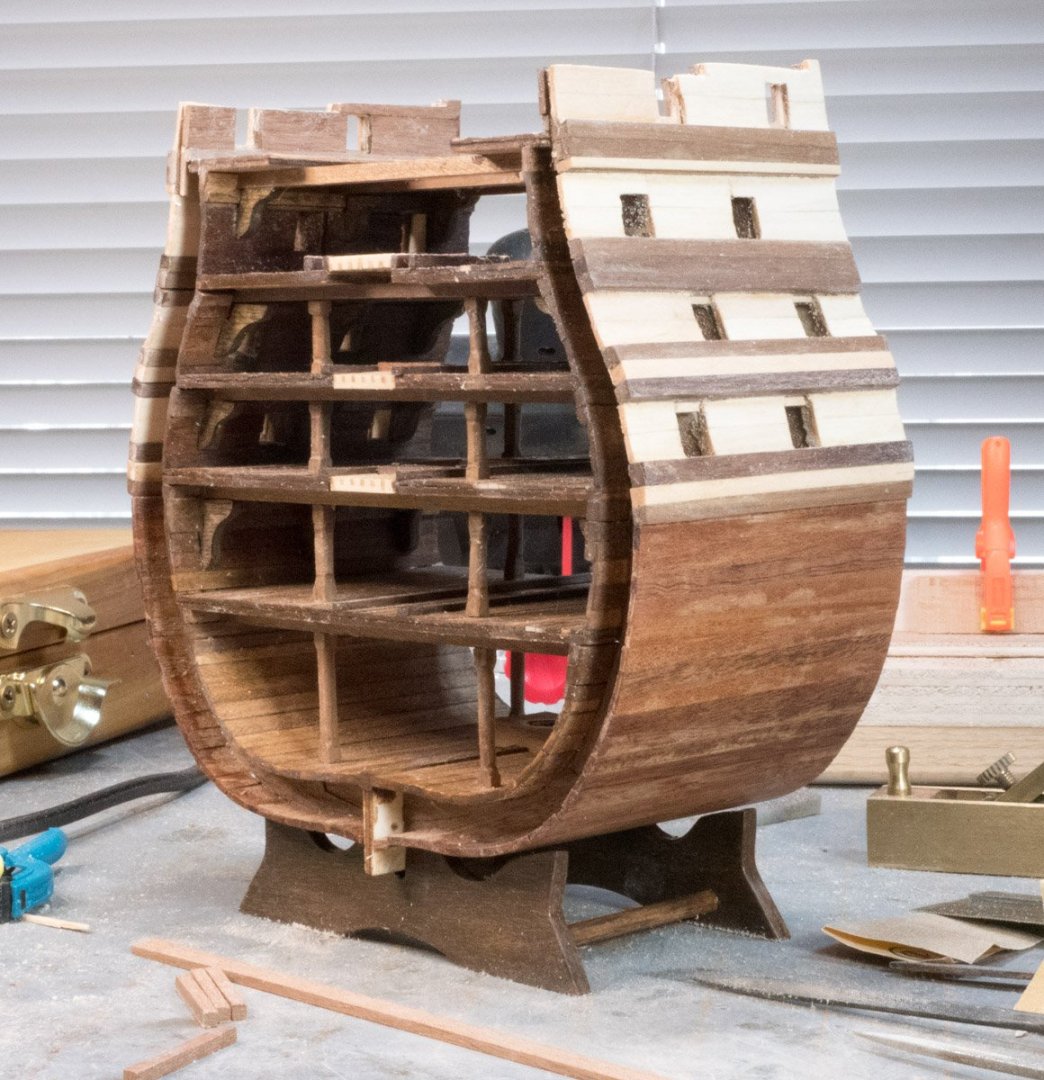
I've been making progress. I figured the lower decks would be dark places but I think my staining turned out darker than I intended. Before I installed the exterior planking I drilled pilot holes in line with the rear cross beams in case I want to add lighting in the future (I have not looked into lighting). I'm trying to decide about painting the canon doors. My fancy frame covering will probably not be noticed but I know it is there - I had fun making it.

-
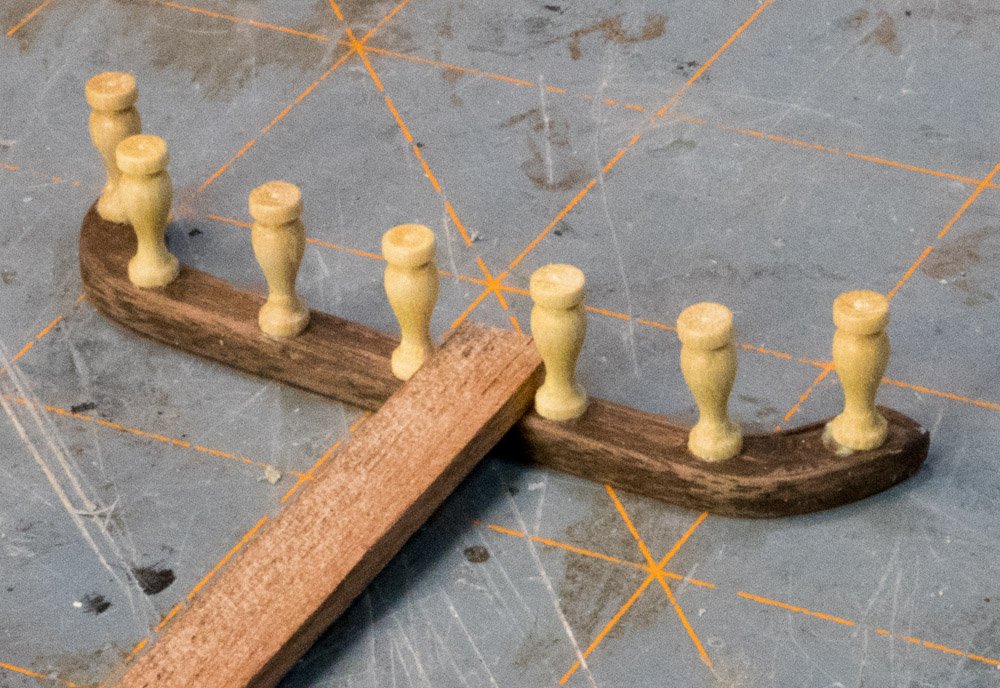
I used a thread to measure the center of the curved railing, is was 75 mm. I measured the width of the supports (3.5 mm) and I made some calculations to determine the spacing of the supports. I determined a 7 mm wide piece would work.
-
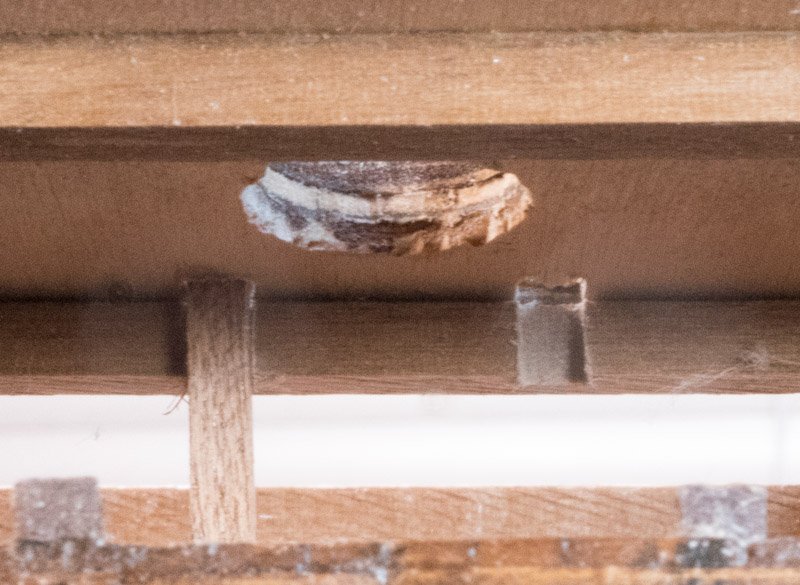
Two of the four square holes in the top deck were located above a cross beam. I wasn't expecting to file through a cross beam.
-
OHOH I discovered two mistakes I made earlier in my build and some wood shortages in my kit. When I was cutting the 4x4 mm stock for the black planks I came up short 8 pieces. When I made the deck supports, I noticed they were light colored wood (limewood) and I used the walnut; I figured the kit may have changed – I was wrong. I found the 4x4 mm limewood while looking for more walnut and used it for the black planks but I was still 4 planks short (I found a piece from a previous build that worked). I installed the plywood gun ports backward. I knew the ports were offset on each deck but after I installed them, I realized the gun ports in top piece were aligned with the gun ports of the lower deck. I had to cut the tops off and glue them on the other end of the pieces. I discovered that my kit had no 2x5 mm limewood stock for the light-colored planks. I used basswood instead. I also discovered that the 2x7 mm sapelli wood (item 91) included in my kit is too short for the gunwales (a new chellenge). I’m making progress. I applied some finish to the planks before I paint the planks black to help prevent the paint from wicking to the light wood.
-
Congratulations. I like how it turned out, well done.
- 21 replies
-
- 1
-

-
- Santisima Trinidad
- OcCre
- (and 2 more)
-
CNC-Model Making
Cleat replied to Jefta's topic in CAD and 3D Modelling/Drafting Plans with Software
I made a lake contour map with VCarve Desktop. I created a toolpath for each depth. The compass is created from clipart. They have a product called PhotoVCarve that converts a picture into a carving but I don't know much about it.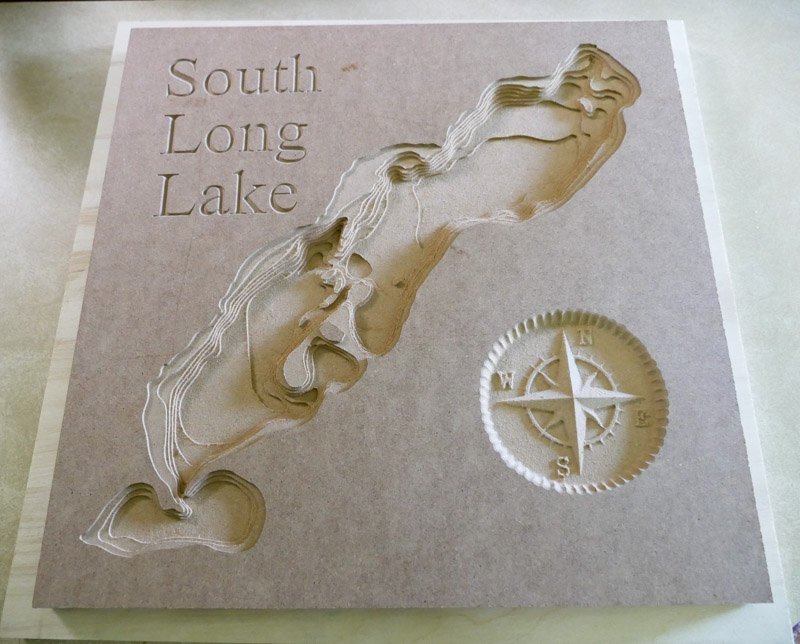
-
CNC-Model Making
Cleat replied to Jefta's topic in CAD and 3D Modelling/Drafting Plans with Software
I don't recall all the programs I checked out; some have subscriptions, some don't, and some are very expensive. Mesh Cam looks similar to VCarve, I think VCarve might have more features. I noticed VCarve is favored with many CNC users. You buy VCarve once and can use it without a subscription. You have the option to buy a low cost fee for a year of free updates. One feature you really need is a CAM module/program (CAM converts a drawing into G-code); VCarve does that and it looks like Mesh Cam does it too. Before I bought VCarve I used QCad ($40) and bought their CAM software ($70) but you need to know how g-codes work to troubleshoot problems (it outputs generic code). VCarve can output g-code for a variety of CNC machines and it looks like Mech Cam does that too. -
CNC-Model Making
Cleat replied to Jefta's topic in CAD and 3D Modelling/Drafting Plans with Software
I import .DWG and .SVG files. I bought Qcad ($40) to learn CAD software, I now use it for designing my wood working projects. I also used it to design a jig to help bend wire to bend several stair railings, the jig was a simple shape cut into a piece of wood where I could place the brass wire to shape the bends.. I also use a vector based program like Inkscape which produces .SVG files. Inkscape is free and easier to use than CAD software but CAD software is more accurate. -
CNC-Model Making
Cleat replied to Jefta's topic in CAD and 3D Modelling/Drafting Plans with Software
I bought a Sainsmart 3018 Prover a few years ago. I bought it primarily for laser etching; I got a package that included a spindle plus some accessories. For model shipbuilding, I used the spindle to cut a jig that helped me bend brass wire for stairway railings. I used it to create stairway runners that I had broken. I used it to cut walnut veneer to cover some plywood pieces for my current built. I consider it a good learning tool and Sainsmart has very good support. I learned enough that I decided to buy a bigger CNC router machine for my garage (I made a lake contour map in wood). I’ve used a variety of free and inexpensive software. When I bought the machine for my garage I bought VCarve which is worth the price; it has tools to design (you can import drawings), it has a variety of tools to create and troubleshoot toolpaths, and it creates G-code to operate a CNC machine (they support a variety of CNC manufacturers). I’ve been writing myself a manual for CNC processes because I don’t use it often enough to remember everything. It is helpful the learn what G codes are. The CNC learning process is steep but VCarve helps reduce the learning process.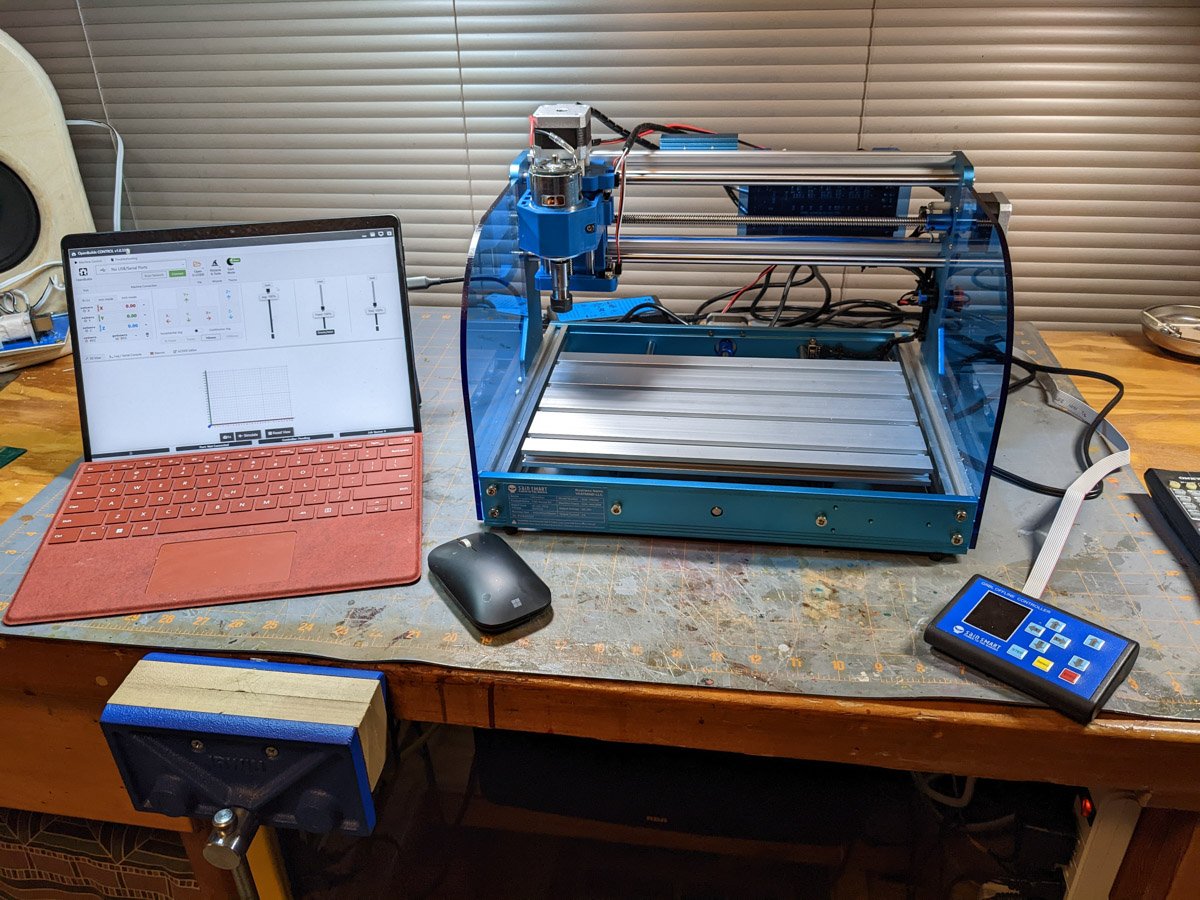
-
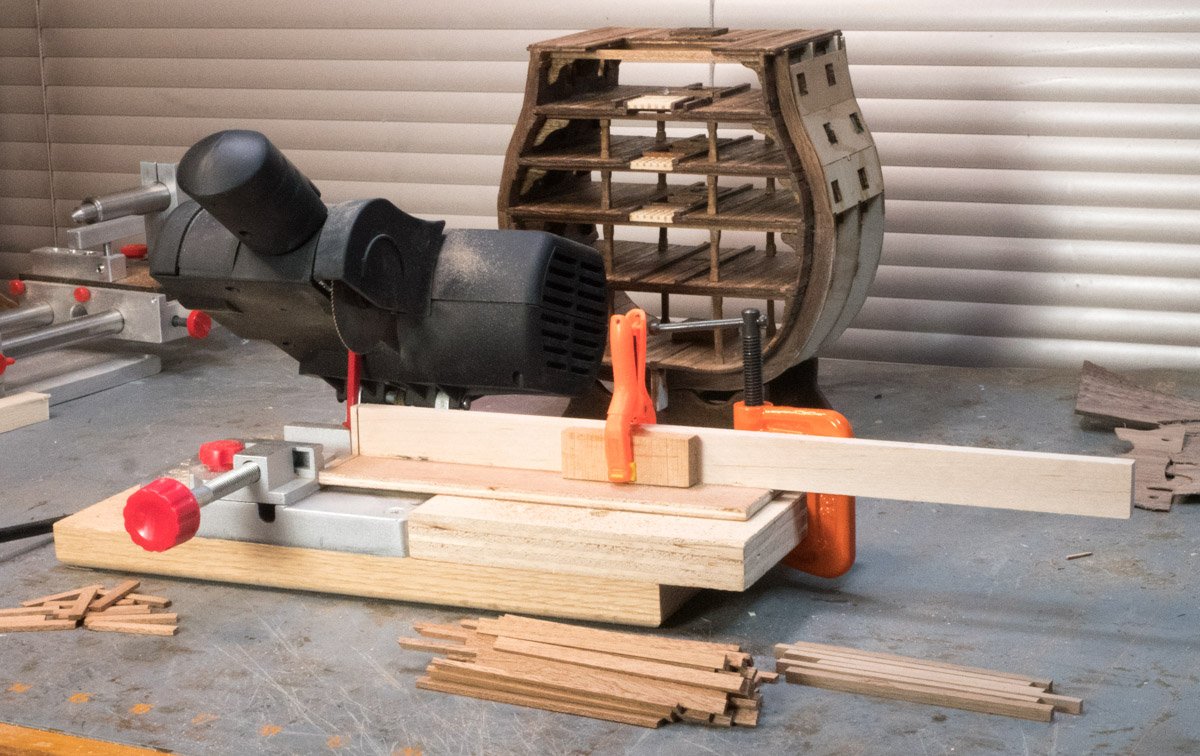
Time to cut some lumber for the planking. I have a 2-inch chop saw that I used to cut dowls for a woodworking project. I made a fence for it to make it useful for model ship building. I’ll leave the 2x5 mm stock for the bottom natural. I’ll be testing dark stains on 4x4 mm scrap pieces to see what it looks like, I can always paint those pieces black.
-
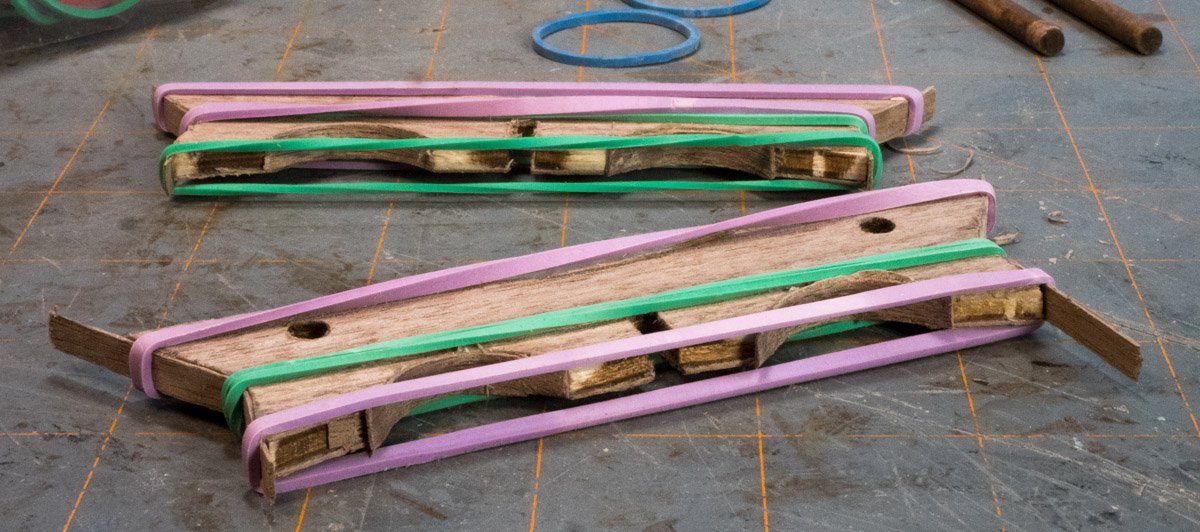
I cut walnut veneer to cover the plywood stand. I had some breakage but it glued up OK. Rubber bands make nice clamps. I cut walnut veneer for several parts. I didn’t consider the wood grain when I created the file to cut the veneer for the stand. (I used a CNC machine) It turned out OK, I wasn’t sure how the stain would look. I tried to make it look worn but it took a few applications to cover results I didn’t like.

-
Wipe On Poly Techniques
Cleat replied to Freebird's topic in Painting, finishing and weathering products and techniques
I like to use thinned polyurethane for garage projects and Minwax Wipe On Ploy for my indoor hobby projects. A can of Minwax is more convenient for my small indoor projects. I've also used water based poly indoors too.