


Mahuna
-
Posts
1,500 -
Joined
-
Last visited
Content Type
Profiles
Forums
Gallery
Events
Posts posted by Mahuna
-
-
-
Nice work, Brian. I had trouble with my first draw plate - from a jewelers supply house, I think. I purchased the Byrnes draw plate and it made a world of difference. If you plan to do a lot of treenails I highly recommend it.
Frank
-
Nice start! I'm going to follow along.
-
Have a great time Rich. By the time you get back we'll be on our trip to New Zealand.
Frank
- HIPEXEC and captainbob
-
 2
2
-
Hi Brian
I'll be following along.
As I mentioned yesterday, I used acrylic ink to stain a piece of wood to resemble ebony. I did this before installing the wale, then used a felt-tip pen to touch up any areas that got scratched in the installation. I used a hardwood called chimpkin, which didn't soak up the ink as much as a soft wood like basswood does.
Frank
-
Hi Ken
I've been using that app and it's really good. I also use iConvert, which lets you convert from one system to another, eg inches to mm.
Frank
-
Thanks Ed. The reason I asked is that I had already tried the same thing with African pear, and the wood disintegrated before I could get it down to a reasonable size. It must be the wood - it seems to splinter a lot.
-
-
If you let accidentally let go of the wood while it's still running through the thickness sander it will shoot back out the front, and if your hand is in the way you could get a ding or a bruise. I always wear a work glove on the hand I'm using to push the wood (in addition to safety glasses, of course). If the wood being sanded is short (less than 3-4 inches) I'll also use a flat piece of wood as a push stick.
Frank
-
Hi Stefon:
I don't have any videos of the Byrnes Thickness Sander in action, but I can assure you it's a quality piece of equipment. I've used it to get a consistent thickness of .030 inches on planks I've made (less than 1/32). I only use it on hardwoods, and I'm not sure if it will produce the same level of consistency on a soft wood like basswood - not saying it won't,I just don't know.
The machine has two different strips of sandpaper - a coarse one for quick material removal, and a fine one for a nice finish. Depending on the wood used, the fine finish is really nice.
Frank
-
Beautiful work Ed. I like the detail on the tank.
Frank
-
Thanks Kurt.
I'm not able to attend the show this year, so I hope someone will post info about John's new tools. I find his site and the types of tools he sells very interesting.
Frank
-
JAX Chemical company sells a blackener called Pewter Black that works real well on brass, copper, and solder. I apply it with a paint brush, and when the metal is dark enough I rinse the part with tap water. It doesn't seem to get a scale like blacken-it does. I've tried painting it onto wood and then rinsing it off with water, and there is no residual stain. This means you can use it to blacken (or touch up) a metal part that is already in place without staining the surrounding wood. It's what I'll be using from now on. It even blackened the stainless ferrule on the paintbrush!
http://www.jaxchemical.com/jaxshop/shopexd.asp?id=61
Frank
- WackoWolf and lamarvalley
-
2
-
-
Hi Dave
That helps. What I've been doing is shaping a strip of wood using shaped scrapers - my larger deadeyes will be from 1/8 x 3/16 stock. The bottom of the deadeye will be a 1/8 diameter semicircle, and the top will be 1/16 semicircle. The two semi-circles will be joined by tangential lines. This is all based on pictures I found in 'Historic Ship Models' by Wolfram zu Mondfeld. I enlarged the pictures from the book, took some measurements, and then scaled them to fit the deadeyes in Chuck's plans. I'm not even sure if I'll try to make smaller deadeyes or keep them all the same size - I'm a long way from rigging or even installing the channels, and just started playing with the deadeyes because I've been thinking of them a lot.
I think the biggest problem I'm having is that the wood I'm using splinters a lot - I think I'll need to change the wood I'm using. I'm trying to use African Pear, since it's fairly dark, but splintering is an ongoing issue with that species. I'll probably switch to castello and stain it darker.
Keep up the good work! You're giving me lots of ideas and incentive.
Frank
-
Hi Dave
Deadeyes are looking real good. I've been wrestling with making mine, and think I've been over-complicating the process for making triangular deadeyes. Would you share your process with us?
Thanks
Frank
-
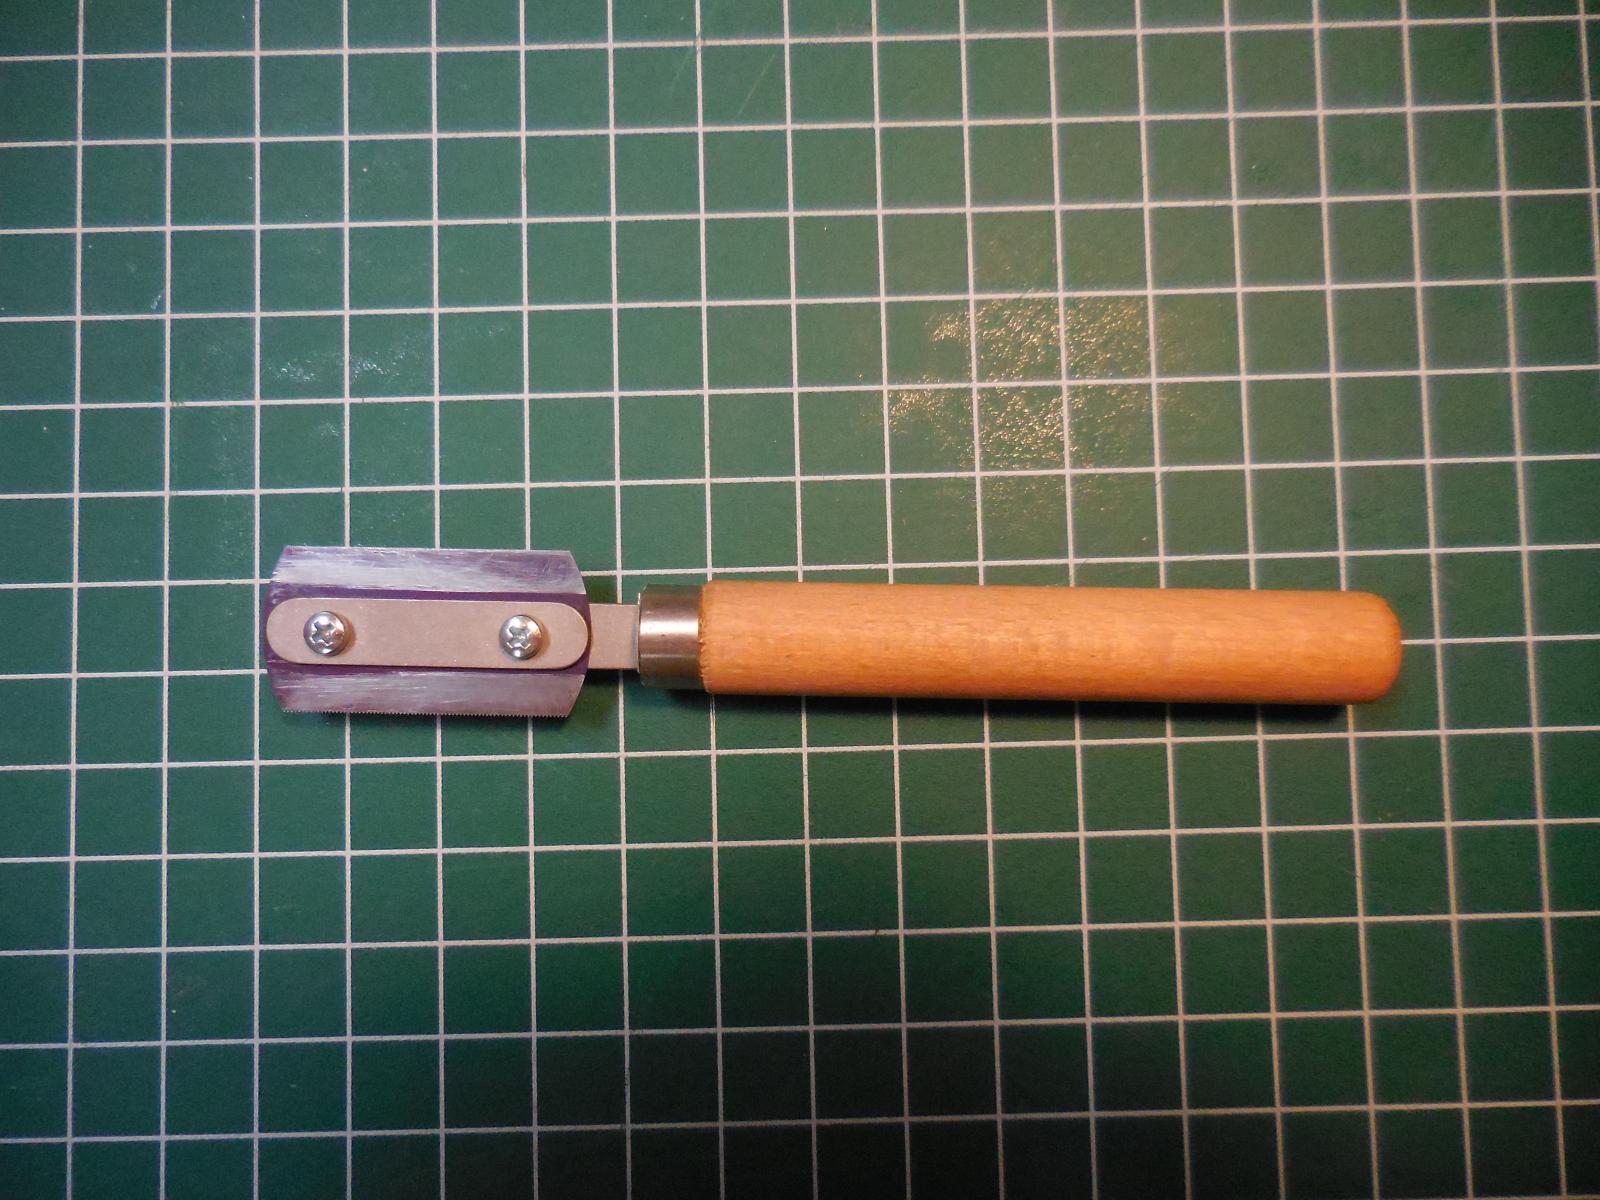
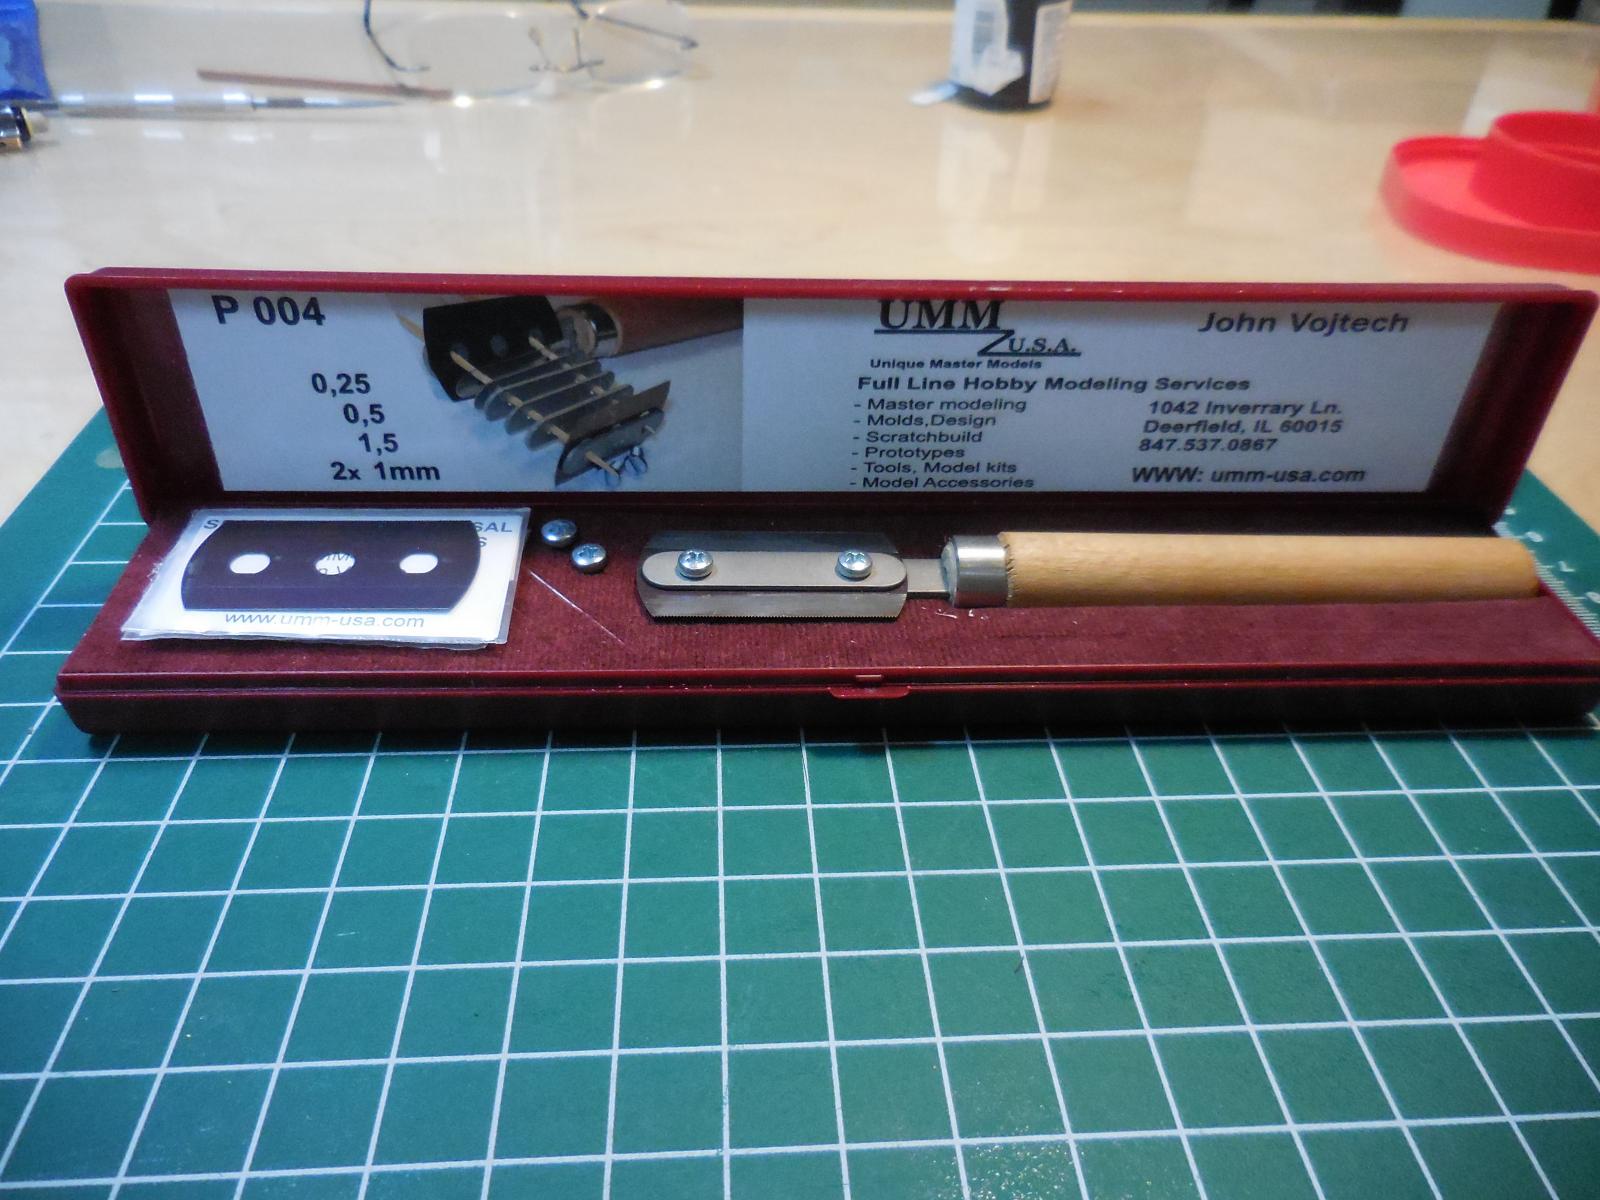
In the Spring 2014 issue of the Nautical Research Journal I read a brief review by Kurt Van Dahm (page 69, Vol 59 No 1) of a new tool called a Micro Combo Saw by Unique Master Models of Deerfield Illinois. It seemed to be exactly what I was looking for in order to make very fine cuts, so I ordered the saw and the Micro Miter Box that was designed for it. I couldn't be happier with it. I've shown it to a few other ship modelers, and everyone who has seen it has wanted one, so I thought I'd share it on MSW (I haven't seen any other references to it).
The saw itself has a plain wooden handle, and the blades are very similar to 2-edged razor blades.
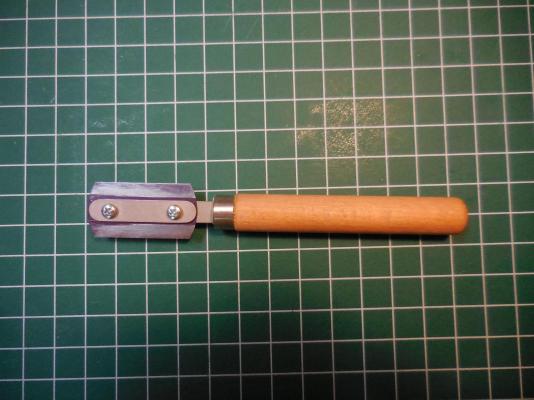
The blades are .005 inch thick, and have a 'coarse' side and a 'fine' side. The 'coarse' side is finer than any razor saw I've found. There are also some spacers included in the kit so you can mount two blades in the handle for parallel cuts.

Everything comes in a nice storage box.

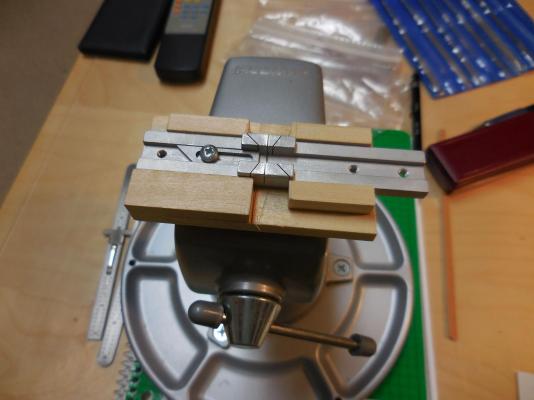
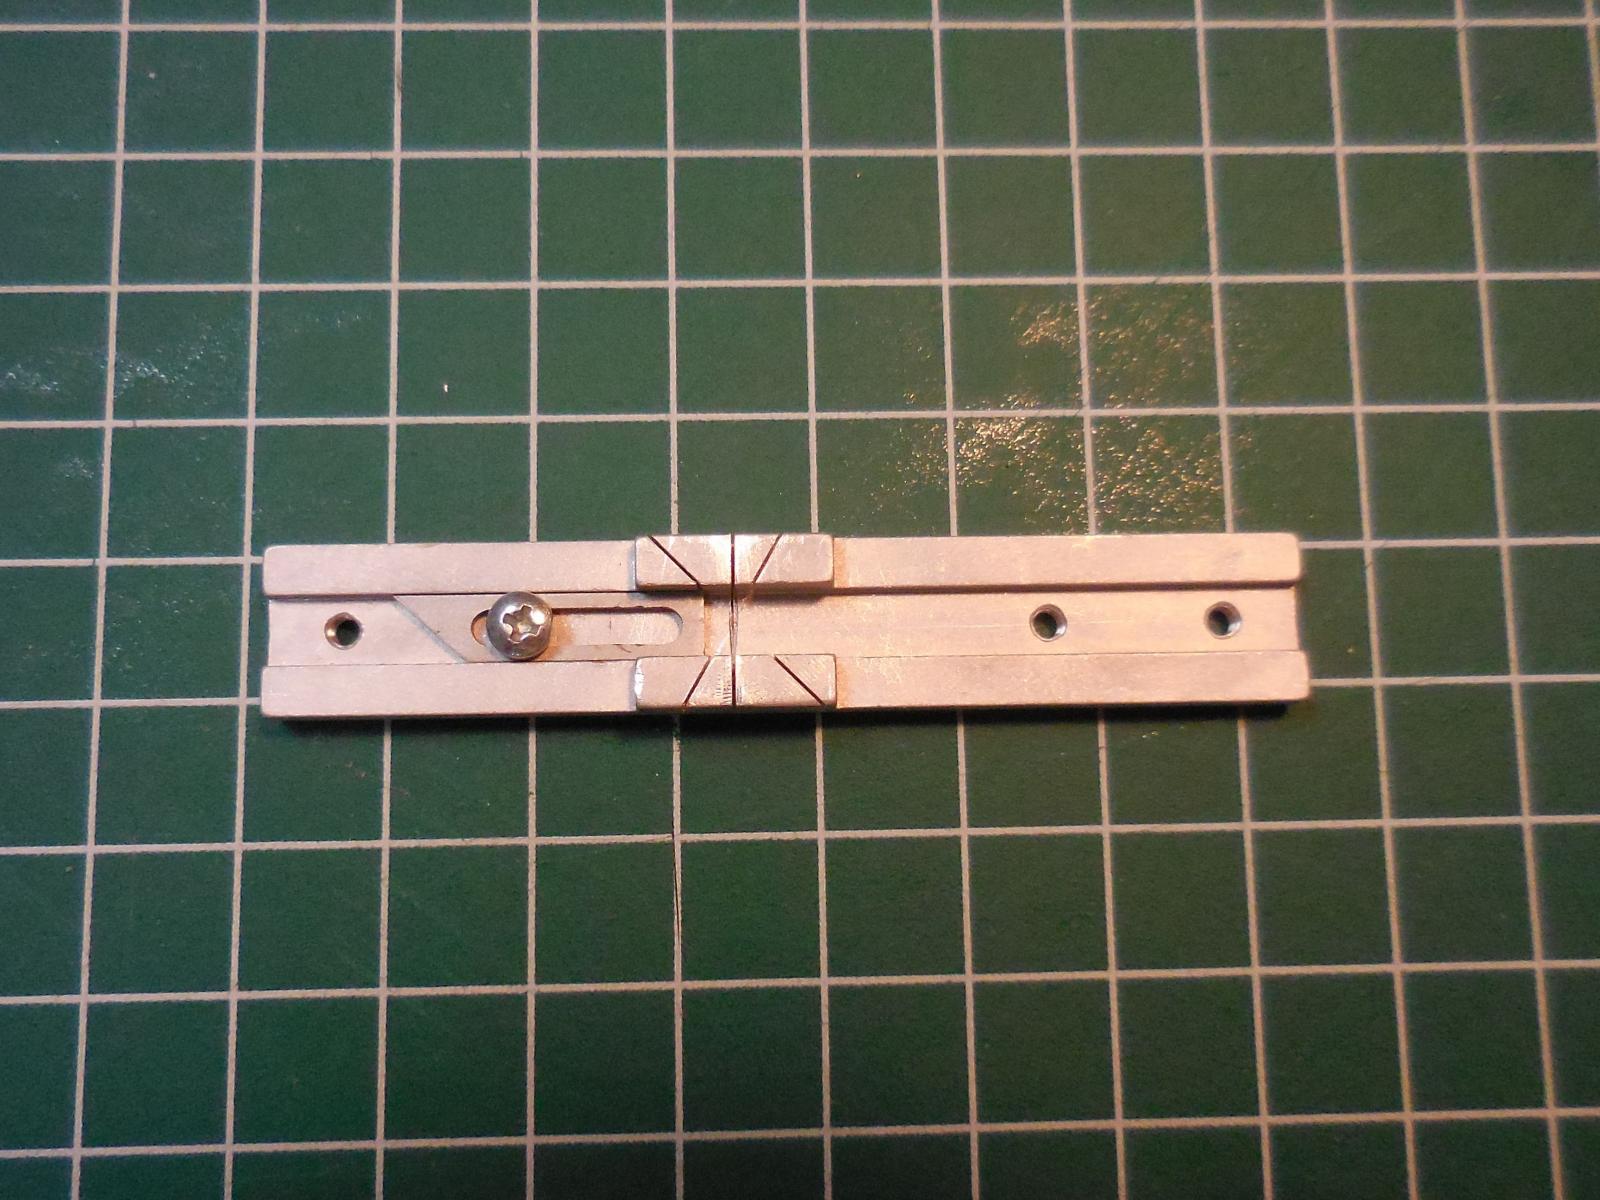
The Micro Miter Box has positions for 45, 60 , and 90 degree cuts.

Since the Micro Miter Box is very small, I made a small holding jig so that I could hold it securely in my vise. This keeps the miter box from slipping out of my fingers.
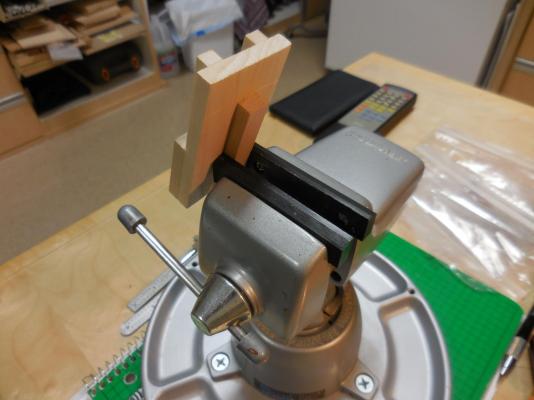
The next picture shows the underside of the jig.
The saw and miter box are very economically priced, and I recommend them for anyone looking to make fine cross-cuts on small stock. You can find them on the Unique Master Models website at www.umm-usa.com
Frank
-
-
Hi Chuck:
I look forward to following your build. What differences do you experience between boxwood and pau marfim? I have some castello and pau marfim and haven't discovered a major difference between them.
Frank
-
Hi Dave:
I agree on Chuck's Mayflower plans. I'm also using them for a scratch build (my first) and they're excellent. I'm also using his instructions as a guide. I'm not painting my Mayflower, but instead am using various woods to get color variation. There will be a lot of 'poetic license' in the build, since I'm using the Mayflower as a basis for an imaginary ship from a book series. I haven't started a build log on it, but I'm considering doing so.
You're several steps ahead of me, and following your build has been very useful and instructive - thanks!
Frank
-
Hi Jack
Very nice work - very neat.
Frank
-
Hi Bob:
You're doing a great job on the rigging. I feel another trip to your area coming up so I can see it in person. I'll send you a PM when I know a good day - possibly next week.
Frank
-
-
Thanks Dave!
Frank


Armed Virginia Sloop by GuntherMT - FINISHED - Model Shipways - scale 1:48
in - Kit build logs for subjects built from 1751 - 1800
Posted
Hi Brian
Sometimes lessons learned are painful, but they help improve technique and process. You're doing very nice work.
Frank